How to Set Up Typeform with WordPress (Step-by-Step Guide)
Table of Contents
- Introduction
- What Typeform Is and Why Many WordPress Users Prefer It
- Things You Need Before You Start Setting Up Typeform with WordPress
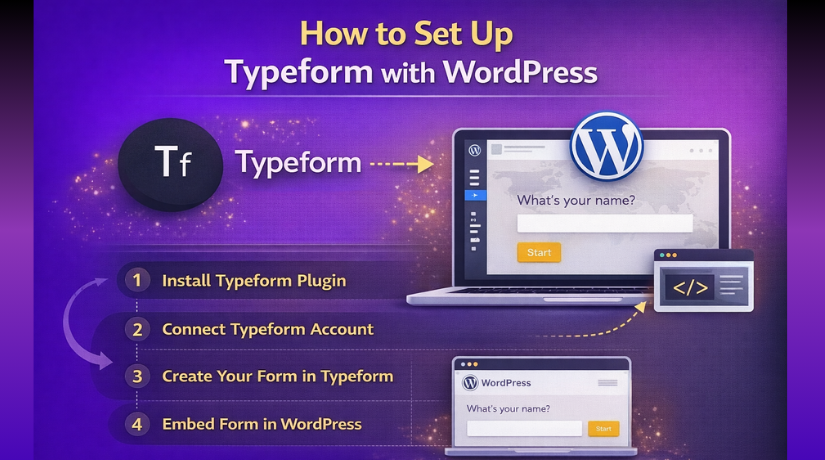
- How to Set Up Typeform with WordPress Using Plugin (Step By Step)
- Common Problems When Adding Typeform to WordPress and How to Fix Them
- Best Practices for Using Typeform with WordPress
- Conclusion
Introduction
Creating forms on a website should feel simple for both users and site owners. That is why many people choose Typeform with WordPress today. Typeform gives forms a modern and interactive look. It feels more like a conversation than a basic form. This makes the user experience better and more engaging. Many website owners want forms that look clean and work smoothly.
They also want visitors to complete more forms without leaving the page. That is where Typeform becomes useful. It helps collect leads, feedback, bookings, and survey answers in a better way. WordPress users often compare different options before choosing one. Some look at WPForms vs Typeform vs contact forms to find the right fit. Others do a full WPForms vs Typeform comparison before building forms on their site.
This guide focuses on Typeform and its WordPress use. It explains what Typeform is and why people like it. It also shows who should consider using it on WordPress. If you want a smooth and stylish form experience, this guide will help you understand the basics first.
What Typeform Is and Why Many WordPress Users Prefer It
Typeform is an online form builder with a more interactive design. Unlike many regular forms, it shows questions in a clean flow. Instead of showing many fields at once, it often displays one question at a time. This makes the form easier to follow and less stressful. The layout feels modern, simple, and friendly for visitors. That is one reason many businesses and bloggers like it. They want users to stay focused while filling out a form. A standard form can work well for simple needs. Still, some websites need a better user experience. That is why Typeform is often seen among strong Typeform alternatives for WordPress discussions. People want forms that look better and get more responses. When used well, Typeform can do both.
Typeform is made for creating online forms with a conversational style. You can use it for contact forms, surveys, quizzes, booking forms, and feedback forms. It lets you ask questions in a simple order. This guided flow keeps visitors moving from one step to another. The design also helps reduce confusion during form submission. Many site owners like how easy it looks on desktop and mobile devices. Typeform also supports custom designs, logic, and response collection. That means you can build forms based on your business needs. A company may use it for lead generation. A blogger may use it for reader feedback. A service business may use it for inquiry forms.
Things You Need Before You Start Setting Up Typeform with WordPress
Before you start the setup, you should keep a few basic things ready. This will make the process smooth and save time later. Many users rush into plugin setup without checking the basics first. That often leads to errors, missing forms, or connection problems. A simple checklist helps you avoid these issues. It also makes the full setup easier to understand. If you have already reviewed WPForms vs Typeform vs contact forms, you may know each tool works differently. Typeform needs a few things in place before it works well on WordPress. Once these are ready, the next setup steps become much easier.
Working WordPress Website with Proper Admin Access
The first thing you need is a working WordPress website. Your site should load properly and give you access to the dashboard. You also need admin access or a role with plugin rights. Without the right permissions, you may not install or activate plugins. You may also be unable to edit pages or posts. Since this guide focuses on plugin-based setup, dashboard access is very important. If your role is limited, ask the site owner to grant access first. This small step prevents confusion later. Many users searching for the best contact form plugin WordPress options forget this basic requirement. Even the best plugin will not help without proper access.
Typeform Account That Is Ready to Use
The next thing you need is a Typeform account. You can create one on Typeform before opening WordPress. Both free and paid plans are available for different needs. A simple website may start with a free plan. A business site may need more features later. Your account should be active and ready before you begin plugin setup. This matters because the plugin may need to connect to your Typeform account. If the account is not ready, the connection step may fail. Some site owners also compare WPForms features and pricing before picking the right form tool. That is useful for planning. Still, if you want the interactive feel of Typeform, your account is the first step.
Published Typeform That You Want to Show on Your Website
You should also create the form before adding it to WordPress. The plugin setup becomes easier when the form is already finished. Start by choosing a template or building a form from scratch. Add your questions, change the style, and check the final flow. Make sure the form matches the page goal. For example, a contact form needs different fields than a survey. A booking form needs different steps than a feedback form. Once the form is complete, publish it inside Typeform. An unpublished form may not appear correctly during setup. This is one of the most common beginner mistakes. It is also why many people start looking at Typeform alternatives for WordPress when the real issue is just an unpublished form.
Plugin Access in WordPress Is Also Important Before Setup
You must also make sure plugin installation is allowed on your website. On self-hosted WordPress sites, this is usually simple. On restricted setups, plugin controls may be limited. Go to the Plugins area in the dashboard and confirm access. If you can install and activate plugins, you are ready for the next step. If not, you may need help from your developer or website manager. This step sounds basic, but it matters a lot. Without plugin access, this setup method will not work. Users often ask for a WPForms vs Typeform comparison when they face setup blocks like this. In many cases, the problem is not the tool. The real issue is missing permissions inside WordPress.
Basic Knowledge of Editing Pages or Posts Helps a Lot
You do not need advanced coding skills for this setup. Still, you should know how to open a page or post. You should also know where you want the form to appear. Some users place Typeform on a contact page. Others use it on a service page or landing page. Choosing the right location before setup saves time later. It also helps you test the layout faster. If you know how to use blocks, shortcodes, or plugin options, the process becomes easier. This simple skill is enough for most users. That is one reason Typeform is popular with beginners and business owners alike. The setup is simple when the basics are clear.
How to Set Up Typeform with WordPress Using Plugin (Step By Step)
Typeform’s official help center says WordPress users can add forms by using either the WordPress plugin or the embed code. The WordPress.org support area for the plugin identifies it as “Typeform | Build, embed, and manage beautiful forms right in WordPress.” The important detail is that Typeform’s current official step list mainly documents the embed-code route, so the safest setup is: try the plugin first, and use the official embed method if the plugin button does not appear in your editor.
Step 1: Create your Typeform first
- Log in to your Typeform account.
- Open the form you want to use on WordPress.
- Create a new form if your form is not ready yet.
- Add all needed questions carefully.
- Check the form flow from start to end.
- Review the design and layout of the form.
- Make sure the welcome screen looks correct.
- Check the thank you screen before publishing.
- Publish the form so it is ready for use.
- Do not leave the form in draft mode.
Step 2: Install and activate the Typeform plugin in WordPress
- Log in to your WordPress dashboard.
- Go to the Plugins section.
- Click Add New.
- Search for the Typeform plugin.
- Find the correct plugin from the search results.
- Click Install Now.
- Wait for the installation to finish.
- Click Activate after installation.
- Make sure the plugin is active in your plugin list.
Step 3: Open the page or post where you want the form
- Go to Pages or Posts in WordPress.
- Open the page where you want to show the form.
- You can also create a new page if needed.
- Check the editor area before adding the form.
- Look for any Typeform button, block, or insert option.
- If the plugin gives you a form insert option, use it first.
- Choose the area where the form should appear.
- Save your page draft before moving forward.
Step 4: If the plugin button is missing, use the official fallback method
- Go back to your Typeform account.
- Open the form you want to embed.
- Click the Share option.
- Choose Embed in a web page.
- Copy the embed code from Typeform.
- Return to your WordPress page editor.
- Add a Custom HTML block to the page.
- Paste the copied embed code into that block.
- Make sure the code is pasted fully and correctly.
- Save the page after pasting the code.
Step 5: Choose how the form should appear on the page
- Decide how you want the form to display.
- Choose an inline form if you want it inside the page content.
- Choose a full page form for a separate clean view.
- Choose a popup form if you want it to open on action.
- Choose a slider form if you want side entry style.
- Choose a popover if you want a button-triggered form.
- Choose a side tab if you want a floating form option.
- Check the form style before final use.
- Pick the format that matches your page goal.
Step 6: Preview the form inside WordPress
- Open the page preview in WordPress.
- Check if the form loads correctly.
- Make sure the form appears in the right place.
- Review the spacing around the form.
- Check if the width looks clean.
- Make sure the form does not break the layout.
- Test the page in preview mode first.
- Publish or update the page after checking everything.
Step 7: Test the form on desktop and mobile
- Open the live page on the desktop first.
- Check if the form opens and works properly.
- Submit one test entry through the form.
- Confirm that the questions display correctly.
- Check the form on a mobile phone.
- Make sure the layout fits smaller screens.
- Test the buttons and input fields on mobile.
- See if the form feels smooth on both devices.
- Fix layout issues before using the form publicly.
Step 8: Update the form later without embedding again


- Open the same form in Typeform later if needed.
- Make your changes inside the Typeform editor.
- Edit questions, colors, or screens as required.
- Save the changes carefully.
- Publish the new edits in Typeform.
- Check the form again on your WordPress page.
- In most cases, you do not need to embed it again.
- The updated form should appear on the same page.
- Test it once more after every major change.
Create and publish the Typeform, install and activate the plugin, open your page, and try the plugin insert option first. If that option is not visible, copy the embed code from Typeform’s Share panel and paste it into a Custom HTML block in WordPress. Publish the page, test the form, and keep your site on HTTPS.
Common Problems When Adding Typeform to WordPress and How to Fix Them
WordPress Cache or CDN Prevents New Typeform Changes from Showing
Sometimes your Typeform looks updated in the Typeform dashboard, but the same changes do not appear on your WordPress page. This usually happens because the page is still loading an old cached version. Typeform says that later form changes appear on your site after you publish the edits, but your WordPress cache, server cache, or CDN may still hold the older page version. Clear your WordPress cache first. Then clear your hosting cache and CDN cache if they are active. After that, refresh the page in a private browser window and test again. This simple check solves many update problems.
Typeform Form Submission Is Not Being Received Properly
Sometimes the form loads well, but the responses do not appear where you expect. Start by sending one full test entry from the live page. Then check whether the response reached your Typeform account. If the entry is there, the form is working, and the issue is likely related to notifications, integrations, or where you expected the submission to go. If the entry is not there, review the form setup again and make sure you are using the correct published form on the page. It is also smart to test the form on both desktop and mobile before making the page live for visitors. Typeform’s official guidance also supports retesting after edits and then publishing changes again.
Another Plugin or JavaScript Error Causes Typeform Problems
A Typeform can also break because of a theme conflict, a JavaScript issue, or another plugin on the page. This problem often appears when the form area stays blank, the popup does not open, or the layout overlaps with other elements. Typeform’s troubleshooting guide specifically notes that embedded forms can overlap with page elements because of z-index conflicts, especially in popup or drawer-style displays. Start by testing the form on a simple page with fewer widgets. Then disable other plugins one by one if needed. If the problem goes away, you have found the conflict area. You should also check whether your site uses HTTPS, because Typeform says embedded forms only load on secure HTTPS domains.
Best Practices for Using Typeform with WordPress
Keep Your Typeform Short, Focused, and Easy for Visitors to Complete
A shorter form usually performs better than a long one. Visitors do not want to answer too many questions without a clear reason. Keep only the fields that support your goal. Remove extra questions that slow people down. If you need more details, collect the first lead first and ask later. A clean form feels easier to complete and gives users less reason to leave the page. This approach also makes your website look more organized and user-friendly.
Place the Typeform on the Most Relevant Page of Your Website
The page location matters almost as much as the form itself. Put a contact form on the contact page. Put a lead form on a service page or landing page. Put a feedback form where readers or customers can easily find it. A form should match the purpose of the page. This makes the user journey feel natural. It also improves the chance of getting real responses. If the form appears on the wrong page, visitors may ignore it even if the design looks good.
Match the Typeform Design with Your Website Branding and Layout
Your form should not feel disconnected from the rest of the website. Keep the colors, tone, and general style close to your site design. A matching design builds trust and makes the page feel complete. Typeform also offers several display modes, including standard embed, popup, slider, popover, and side tab, so you can choose a format that fits your layout better. Pick the display style that supports the page goal instead of using every effect just because it looks modern.
Test the Typeform Regularly on Desktop, Mobile, and After Site Changes
A form that worked last month may not work after a plugin update, theme change, or caching adjustment. That is why regular testing matters. Open the live page on desktop and mobile. Submit a sample response. Check the spacing, buttons, and form flow. Typeform’s official troubleshooting notes also explain that embedded forms behave differently in some modal views and on mobile, so testing across screens is very important. Frequent testing helps you catch problems before your visitors do.
Use Typeform for the Right Purpose Instead of Every Form Need
Typeform is a strong choice when you want an interactive and guided form experience. It works well for lead forms, surveys, intake forms, booking requests, and feedback collection. It may not always be the best fit for every small form on every page. Sometimes a very simple contact form works better for a fast support request. Use Typeform where experience and presentation matter most. This keeps your website practical and improves the value of the tool.
Avoid Overloading the Page Around the Typeform Area
A page with too many banners, popups, sliders, and moving elements can weaken form performance. Visitors need a clear path to the form. Keep the section around it clean. Use enough spacing and avoid visual clutter. If you use popup or drawer formats, make sure other floating elements do not interfere with them. Typeform’s troubleshooting guide highlights overlap issues with other page elements, so a cleaner page structure can prevent many display problems before they start.
Track Performance and Improve the Form Based on Real User Behavior
Do not treat the first version of your form as the final version. Watch how visitors respond. Notice whether people stop at a certain question or leave the page before finishing. Improve the wording, shorten the flow, or move the form to a better page if needed. If you update the form later, Typeform says you can publish edits and keep using the same embed on your site. That makes testing and improving the form much easier over time.
Conclusion
Setting up Typeform with WordPress is a smart choice for websites that want a cleaner and more interactive form experience. The process is simple when you create the form first, connect it correctly, place it on the right page, and test it after publishing. If any issue appears, common fixes like clearing cache, checking HTTPS, and reviewing plugin conflicts usually solve the problem. When used carefully, Typeform can help improve engagement, collect better responses, and make your WordPress site feel more modern. Typeform’s current help documentation also confirms that WordPress users can use either the plugin route or the embed-code method, which gives site owners flexibility during setup.
If you need help setting up Typeform on WordPress, fixing display issues, or solving plugin conflicts, WooHelpDesk can help. Our team can assist with Typeform setup, WordPress plugin troubleshooting, page builder support, layout fixes, mobile testing, cache issues, and form placement improvements. If your form is not loading, not showing updates, or not working as expected, contact WooHelpDesk for professional WordPress support.


