How to Add Region in WooCommerce (Step-by-Step Guide)
Table of Contents
- Introduction
- What Does Region Mean in WooCommerce?
- When Do You Need to Add a Region in WooCommerce?
- Things to Check Before Adding a Region In WooCommerce
- Step-by-Step Process to Add Region in WooCommerce For Beginners
- Common Problems When Adding Region in WooCommerce
- Conclusion
Introduction
If you run an online store, shipping setup matters a lot. Customers expect clear delivery options before placing an order. That is why location settings need proper attention from the start. This guide explains how to Add regions in WooCommerce correctly. It also helps you understand how location rules affect shipping. Many store owners feel confused during WooCommerce region setup. They often see terms like zones, regions, states, and postcodes. These terms look similar, but they work in different ways. If you do not understand them, shipping can break easily. Orders may show wrong rates or no rates at checkout. This guide starts with the basic meaning of region settings. It helps you prepare before making any shipping changes. You will also understand how WooCommerce shipping regions work inside store settings. Once the basics are clear, the full setup becomes easier. A strong start helps avoid mistakes later in the process.
What Does Region Mean in WooCommerce?
In simple words, a region means a delivery area in your store. It can be a country, a state, or postcode range. It tells WooCommerce where certain shipping rules should apply. This is the basic idea behind WooCommerce shipping regions. WooCommerce uses location details to decide available shipping methods. When a customer enters their address, WooCommerce checks that location. Then it matches the address with your shipping rules. If the location fits your setup, the right shipping option appears. If not, the customer may see no valid shipping method.
That is why region settings must be planned carefully. Many users think the region is a separate default WooCommerce field. In practice, regions usually work through WooCommerce shipping zones. A shipping zone is a group of locations with shipping methods. Inside that zone, you define the areas you want covered. So, when people say they want to add a region in WooCommerce, they often mean creating or editing a shipping zone. This is how most location-based shipping rules are handled. Understanding this simple idea makes the full setup much easier.
When Do You Need to Add a Region in WooCommerce?
You Want to Deliver Only in Selected Areas of Your Market
Not every store wants to ship to every place. Some businesses serve only local buyers or nearby cities. Some stores ship within one state or one country. In such cases, you need proper location control. This is where you must add regions in WooCommerce carefully. It helps you define where your store will deliver products. It also helps block orders from unsupported locations. This makes your shipping process more clear and reliable. Many local businesses use this setup for same-day delivery. Some use it for store pickup in selected places. Others use it to manage limited service coverage. With proper WooCommerce shipping regions, you can match business reach with real delivery ability. This protects your store from wrong orders and unhappy customers. It also keeps your checkout process simple and honest. When customers see valid options only, they trust the store more. A good WooCommerce region setup supports this from the beginning.
Shipping Charges Are Different for Different Customer Locations
Shipping cost does not stay the same for every location. Nearby places often cost less to deliver. Remote places may need higher charges and extra time. Some stores also offer free shipping in selected locations. That means one shipping rule cannot handle every order. You need separate rules for separate delivery areas. This is another strong reason to add a region in WooCommerce. It helps you connect each area with the correct rate. This keeps your shipping charges fair and accurate. Customers also understand delivery cost more easily at checkout. For example, one city may get local delivery at low cost. Another state may get flat rate shipping with a longer time. Remote postcodes may need extra charges for courier service. These rules work better through WooCommerce shipping zones. Each zone can hold its own shipping method and price. This makes location-based pricing much easier to manage. A clean WooCommerce region setup also prevents wrong shipping totals. That helps reduce cart abandonment and customer complaints.
You Want Better Control Over Shipping Rules and Checkout Behavior
Some store owners do not want open shipping everywhere. They want tighter control over delivery options and checkout flow. This is common in food, medicine, flowers, and local service stores. It is also useful for fragile or heavy products. In such cases, shipping rules must stay more specific. You cannot depend on broad settings for complex delivery needs. You need clear location control inside your WooCommerce store settings. When you add a region in WooCommerce, you gain better shipping control. You can choose where the flat rate should appear. You can choose where free shipping should stay hidden. You can also limit pickup to selected customer areas. This creates a smarter checkout experience for every buyer. It also helps your team handle orders with fewer mistakes. Good location control reduces confusion during order review and delivery planning. It also keeps your shipping process easier to update later. Strong WooCommerce shipping regions help store owners manage these decisions with confidence.
Your Business Is Growing and You Need More Delivery Areas
A store may begin with one small delivery area. Later, it may grow into many cities or states. Some stores start local and then ship nationwide. Others move from domestic orders to international sales. When that happens, your shipping setup must also grow. Old rules may no longer fit your store operations. You need a better structure for location-based shipping decisions. That is the right time to improve WooCommerce region setup. You may need new zones for new countries or states. You may also need special rules for high-demand locations. A growing business needs clean and organized shipping logic. Without that, store settings become messy very quickly. Orders may show wrong methods or missing delivery options. That creates confusion for both buyers and your support team. Proper WooCommerce shipping zones help you scale your store in a cleaner way. They let you add more areas without breaking older rules. This is why growth often creates the need for new region settings.
Things to Check Before Adding a Region In WooCommerce
Check Your WooCommerce Shipping Settings Before Making Any New Changes
Before you start adding any new region, review your shipping setup first. This simple check can prevent many future problems. Go through your current WooCommerce store settings with care. Confirm that shipping is enabled in your store. Check that the shipping tab is active and working correctly. Review your existing zones and shipping methods one by one. Make sure the current setup matches your business rules. Sometimes store owners already have zones but forget them later. Then they add more settings and create overlap by mistake. This can cause wrong rates or missing shipping methods. A quick review saves time and avoids confusion. It also helps you see what still needs improvement. If the base settings are already clean, the next steps become easier. Good preparation always supports better WooCommerce region setup.
Review Your Store Address and Allowed Selling and Shipping Locations
Your store address affects many shipping and tax decisions. That is why it should be correct before any update. Start by checking your business address in WooCommerce settings. Then review the countries where you sell products. After that, check the countries where you allow shipping. These location settings should match your business plan clearly. If they do not match, shipping may behave in strange ways. For example, you may create a region for one country. But your selling settings may block that country completely. In that case, the new region will not help much. This is why address and location review matters early. It helps your WooCommerce shipping regions work as expected later. It also prevents hidden setup mistakes during checkout testing. A strong location base always improves store accuracy and stability.
Understand Whether You Need a Country, State, or Postcode-Based Region
Before you create anything, know what kind of area you need. This step is often missed by store owners. Some businesses need full country-based shipping coverage. Others need only one state or province. Some stores deliver only in selected postcode ranges. Each option serves a different business need. That is why planning matters before you Add region in WooCommerce. If you choose the wrong location type, shipping may not work properly. For example, a city delivery store may not need full country coverage. A national store may not need postcode-based setup at first. A custom area should match your real delivery method. This is where smart WooCommerce region setup begins. You should decide the area size before creating shipping rules. That helps keep WooCommerce shipping zones more clear and useful. It also makes future changes easier to manage.
Plan the Shipping Method You Want to Use for That Region
A region alone is not enough for working checkout. You must also assign the correct shipping method to it. That is why method planning comes before full setup. Think about how you want to serve that location. Some regions may need flat rate shipping. Some may qualify for free shipping above a set amount. Some local areas may only use pickup or local delivery. Each region should have a clear shipping purpose. This helps your WooCommerce shipping regions stay simple and effective. It also prevents random methods from appearing during checkout. Store owners should connect location and shipping logic together. This makes the setup easier for both staff and customers. When your method plan is clear, creating WooCommerce shipping zones becomes easier. It also helps you test the setup more accurately later.
Check for Old Shipping Zones, Extra Plugins, and Duplicate Rules
Many stores already have old shipping settings in place. Some also use extra shipping plugins for special features. These old rules can affect your new region setup badly. They may override default methods or create overlapping location coverage. This can confuse WooCommerce during address matching. Before you add anything new, review all existing shipping tools. Check whether you already have old zones for the same locations. Check whether any plugin changes shipping rates or zone logic. Also check for hidden duplicate rules left from past testing. A clean setup is always easier to manage. It also gives more accurate results during checkout. If you skip this step, the new setup may look correct. But it may still fail when customers place orders. That is why cleanup is part of a good WooCommerce region setup. Strong WooCommerce store settings always depend on clear and organized shipping rules.
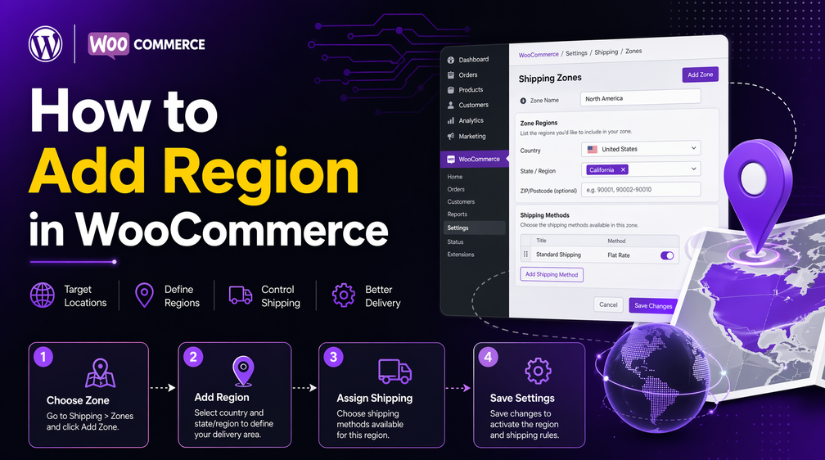
Step-by-Step Process to Add Region in WooCommerce For Beginners
Step 1: Open the Shipping Settings Area in Your WooCommerce Dashboard
- First, log in to your WordPress admin panel.
- After that, go to WooCommerce > Settings > Shipping > Shipping zones.
- This is the main area where WooCommerce shipping zones are created and managed.
- It is also the correct place to begin WooCommerce region setup for your store.
Step 2: Click Add Zone and Enter a Clear Zone Name
- Now click Add zone at the top of the page.
- Enter a simple and clear zone name.
- You can use names like Local Delivery, India Shipping, or Delhi Region.
- A clear name helps you manage WooCommerce shipping regions more easily later.
- This is the first real action when you want to Add region in WooCommerce.
Step 3: Select the Region You Want to Use for Shipping


- Next, choose the Zone regions that match your delivery area.
- WooCommerce lets you use countries, states or provinces, and even continents.
- You can also narrow the zone further with specific zip or postcode entries.
- This makes WooCommerce region setup flexible for local, national, and wider shipping needs.
- Choose only the areas your store can actually serve.
Step 4: Add a Shipping Method for That New Region
- After saving the zone, open that zone and click Add shipping method.
- WooCommerce includes three core shipping methods: Flat Rate, Free Shipping, and Local Pickup.
- Pick the method that fits that region best, then configure its price or rule.
- Without at least one method, customers in that area will not see shipping options at checkout.
Step 5: Arrange Your Shipping Zones from Smaller Areas to Larger Areas
- After creating the zone, check the order of all your zones.
- WooCommerce recommends sorting zones from the smallest area to the largest area.
- For example, city zones should stay above state zones, and state zones should stay above country zones.
- This helps the correct zone match the customer address.
- If the order is wrong, the wrong shipping method may appear.
Step 6: Test the New Region on the Cart and Checkout Pages
- Now test the new setup with a real address.
- Add a product to the cart, then enter an address from the new region.
- Check whether the correct shipping method appears on the cart or checkout page.
- If the customer address does not match a shipping zone, or no enabled method exists in that zone, WooCommerce will not show shipping options.
- This final test helps confirm your WooCommerce store settings are working correctly.
Common Problems When Adding Region in WooCommerce
Why the Shipping Method Does Not Show After You Add a Region in WooCommerce
One common problem appears when the shipping method does not show at checkout. This usually happens when the zone has no active shipping method, the method was not configured fully, or the store uses a third-party shipping method that is not set up correctly inside the zone. In many cases, store owners complete the WooCommerce region setup but forget to check whether the method is active and saved inside that zone. WooCommerce also notes that non-core shipping methods may need plugin-specific setup before they appear correctly.
Why the Region Does Not Match the Customer Address Correctly
Another common issue appears when the customer enters an address, but the new region does not match it. This can happen when the selected state, country, or postcode range is incomplete, wrong, or written in a format that does not match the actual customer address. WooCommerce troubleshooting guidance also points to zip or postcode range problems, including overlap, missing coverage, and spacing or wildcard mistakes. That is why WooCommerce shipping regions must be entered very carefully during setup.
How Overlapping Shipping Zones Can Cause Wrong Region Results
Overlapping zones can create confusing checkout results. WooCommerce checks zones in order and uses the first matching zone for the customer address. This means a broad zone can catch the order before a more specific zone gets a chance to apply. For example, a country-wide zone placed above a postcode-based zone may show the wrong shipping option. This is why WooCommerce shipping zones should be arranged from smaller and more specific areas to larger and more general areas.
Why Shipping Rates Can Be Wrong Even After the Region Is Added
Sometimes the region is added correctly, but the shipping rate still looks wrong. This often happens when the shipping method settings are incomplete, tax status is not set as intended, shipping class costs are missing, or product shipping details do not match the configured rule. WooCommerce also advises checking whether the product is marked as virtual and whether weight, dimensions, and shipping classes are set correctly when those conditions affect the rate. So, even if you Add region in WooCommerce correctly, the pricing may still fail if the method or product settings are incomplete.
Why the New Region Changes May Not Show on the Frontend Right Away
Some store owners save new settings but do not see changes on the cart or checkout page. This can happen because of cached pages, saved cart sessions, or old customer address data still being used during testing. It can also happen when free shipping behavior or other shipping display settings are configured differently from what the store owner expects. WooCommerce troubleshooting guidance recommends reviewing shipping options and checking active settings carefully when checkout behavior does not match the recent changes.
Simple Tips to Fix Most WooCommerce Region Setup Problems
The safest way to fix most WooCommerce region setup problems is to review the zone, review the region details, review the shipping method, and then test with a real customer address. Check that the zone contains the exact country, state, or postcode coverage you need. Make sure the shipping method is active inside that zone. Place smaller zones above broader ones. Review product shipping details if your rate depends on them. WooCommerce also recommends enabling shipping debug mode because it can show helpful messages while you test the setup. These checks solve many common WooCommerce store settings issues without extra code.
Conclusion
If you want to manage delivery areas better, you need a clean location setup. In most stores, adding a region means creating the right zone, assigning the correct area, adding the correct shipping method, and testing everything at checkout. Once you understand how WooCommerce shipping regions work, the full process becomes easier to manage. A proper WooCommerce region setup helps show the correct shipping options to the right customers and keeps checkout more accurate.
Before you make the setup live, always test with real addresses from the target area. Keep your zone names clear. Keep your zone order organized. Avoid overlap when possible. Review shipping methods after every major update. If your store is growing, update your WooCommerce shipping zones in a planned way instead of adding random rules later. A clean setup today saves support time tomorrow and gives customers a smoother checkout experience.
If you are still facing problems with the Add region in WooCommerce, missing rates, wrong zone matching, or checkout shipping errors, expert help can save time. WooHelpDesk can help you review WooCommerce store settings, fix shipping zone issues, correct rate problems, and improve your checkout flow. If your shipping setup feels confusing or your store is not showing the right methods, WooHelpDesk can help you build a cleaner and more reliable WooCommerce shipping system.


