Introduction
Website security is essential for protecting your WordPress site from malware, hacking attempts, data breaches, and unauthorized access. Hostinger provides a reliable hosting environment, but additional protection using security plugins helps strengthen your website’s defense. In this guide, you will learn how to secure your Hostinger WordPress website by installing and configuring the All In One Security plugin to enable firewall protection, malware prevention, login security, and file protection.
1. Hostinger Dashboard
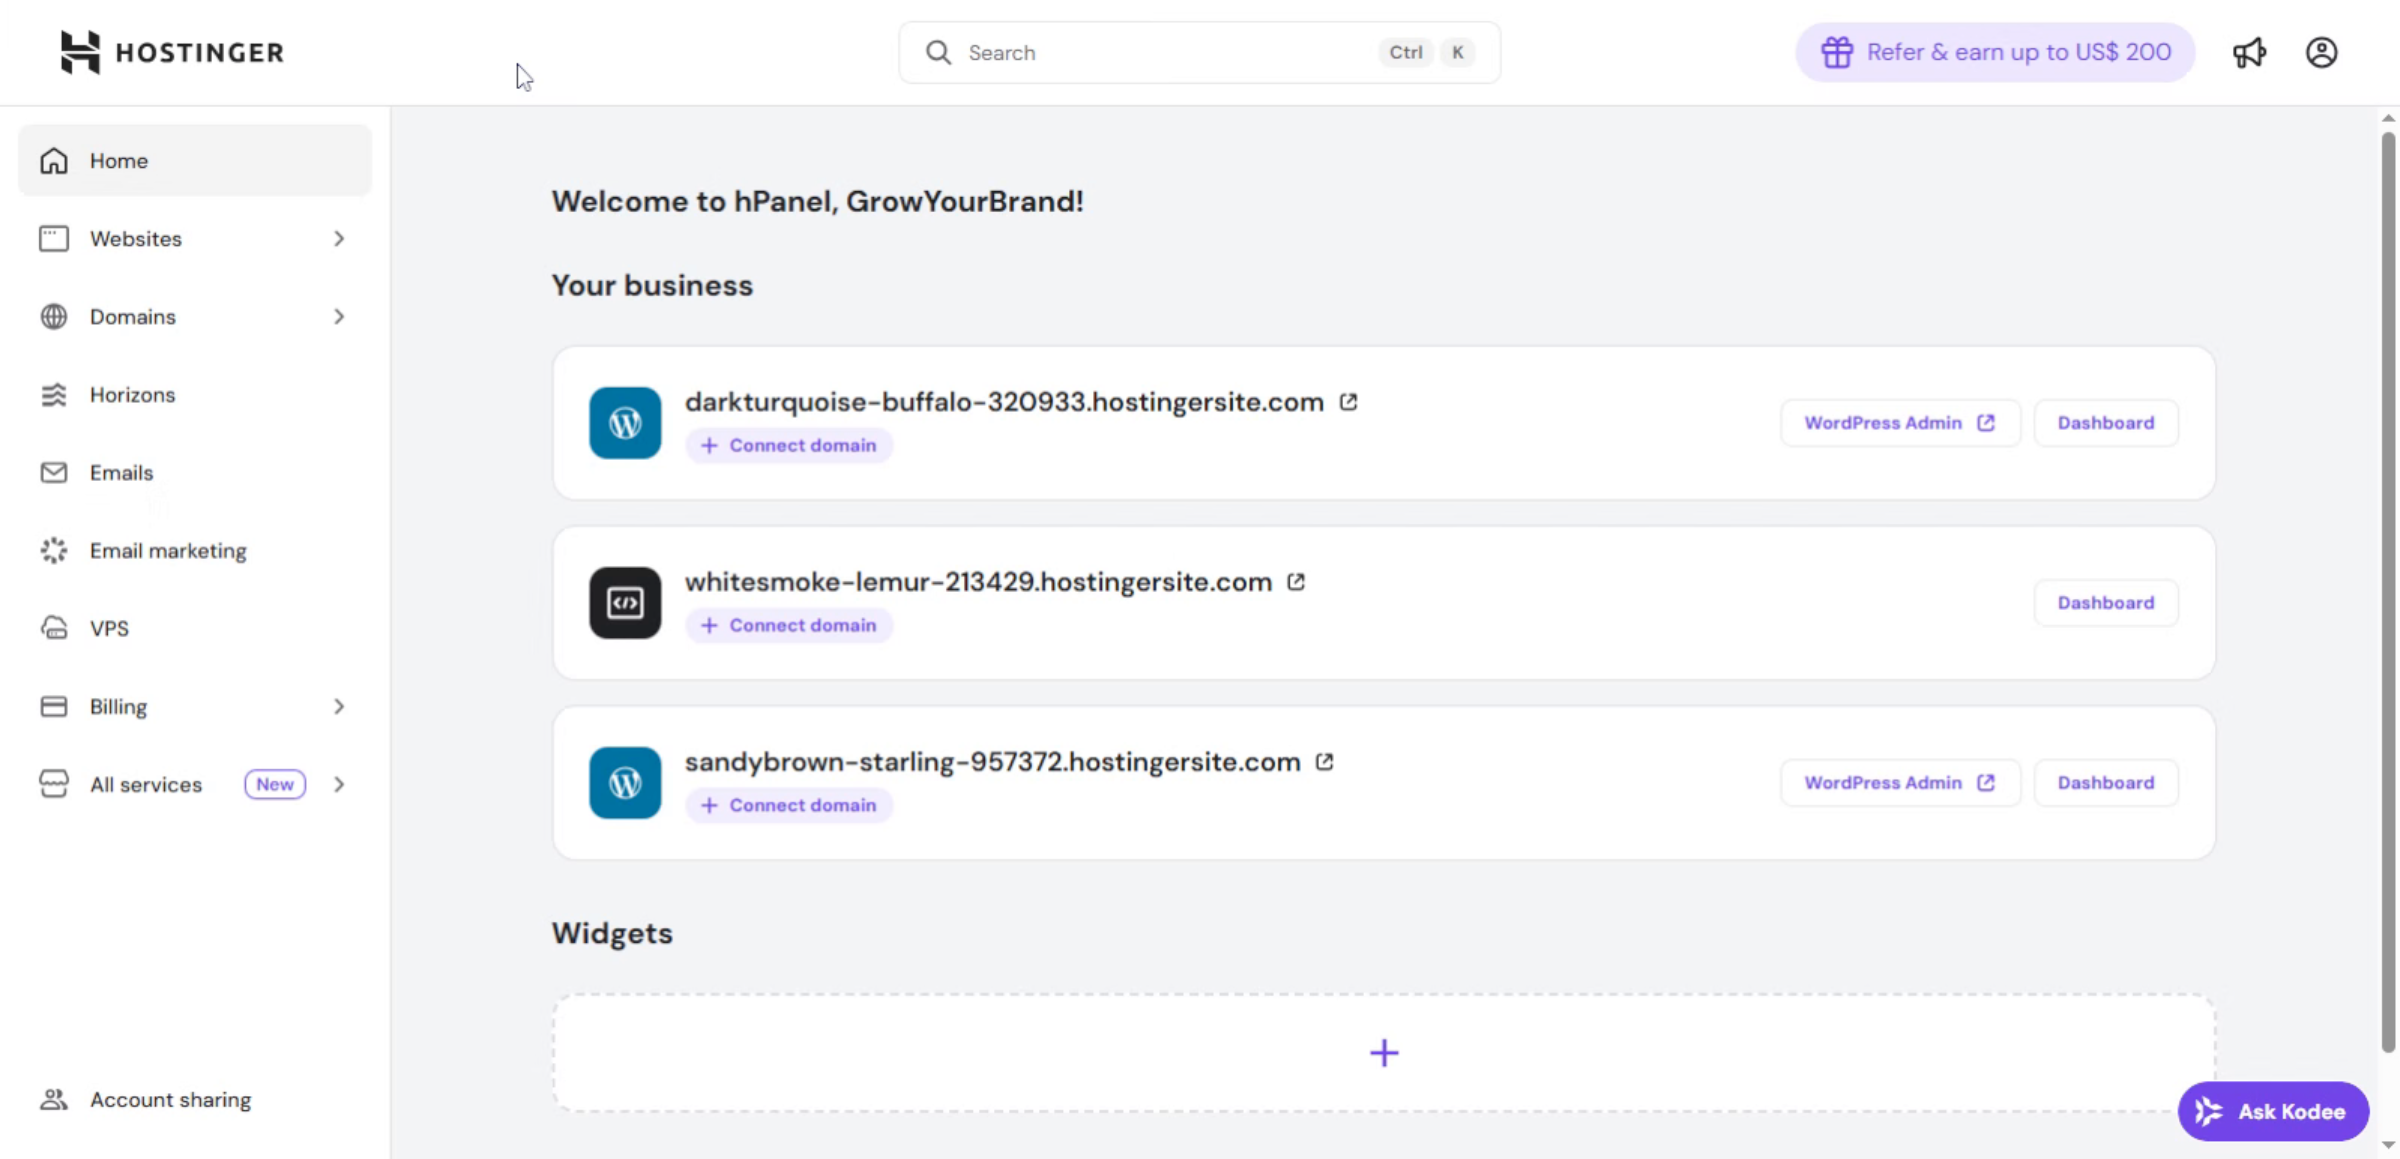
This section of the Hostinger dashboard is used to enable malware scanning and firewall protection, helping secure the website from threats, viruses, and unauthorized access.
2. Navigate to Websites Section
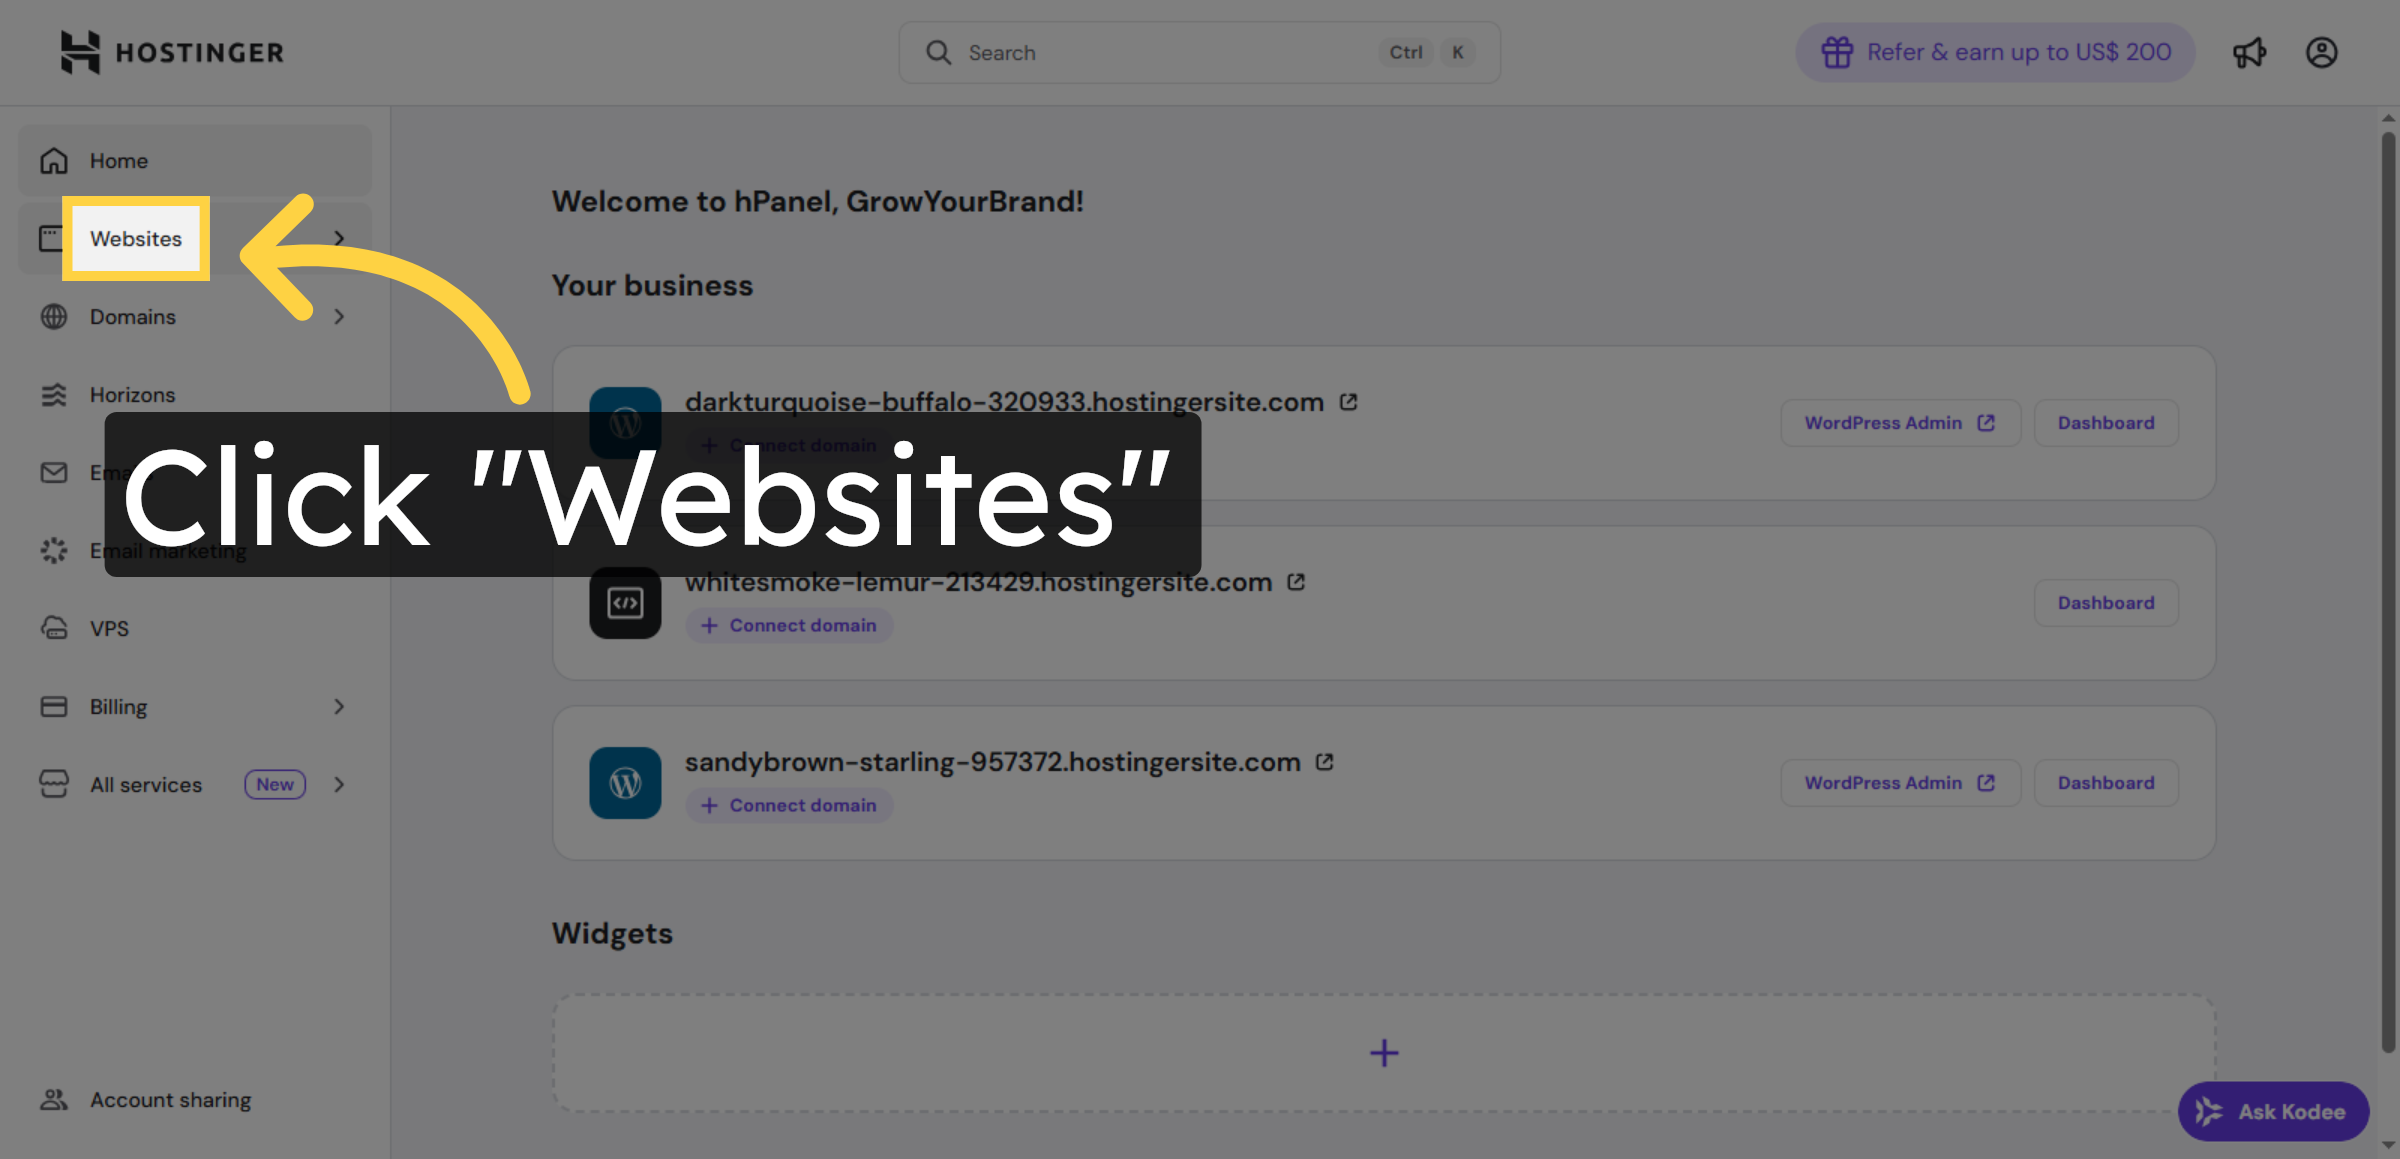
Click the Websites section in your Hostinger dashboard to access your site management options.
3. Open WordPress Admin Panel
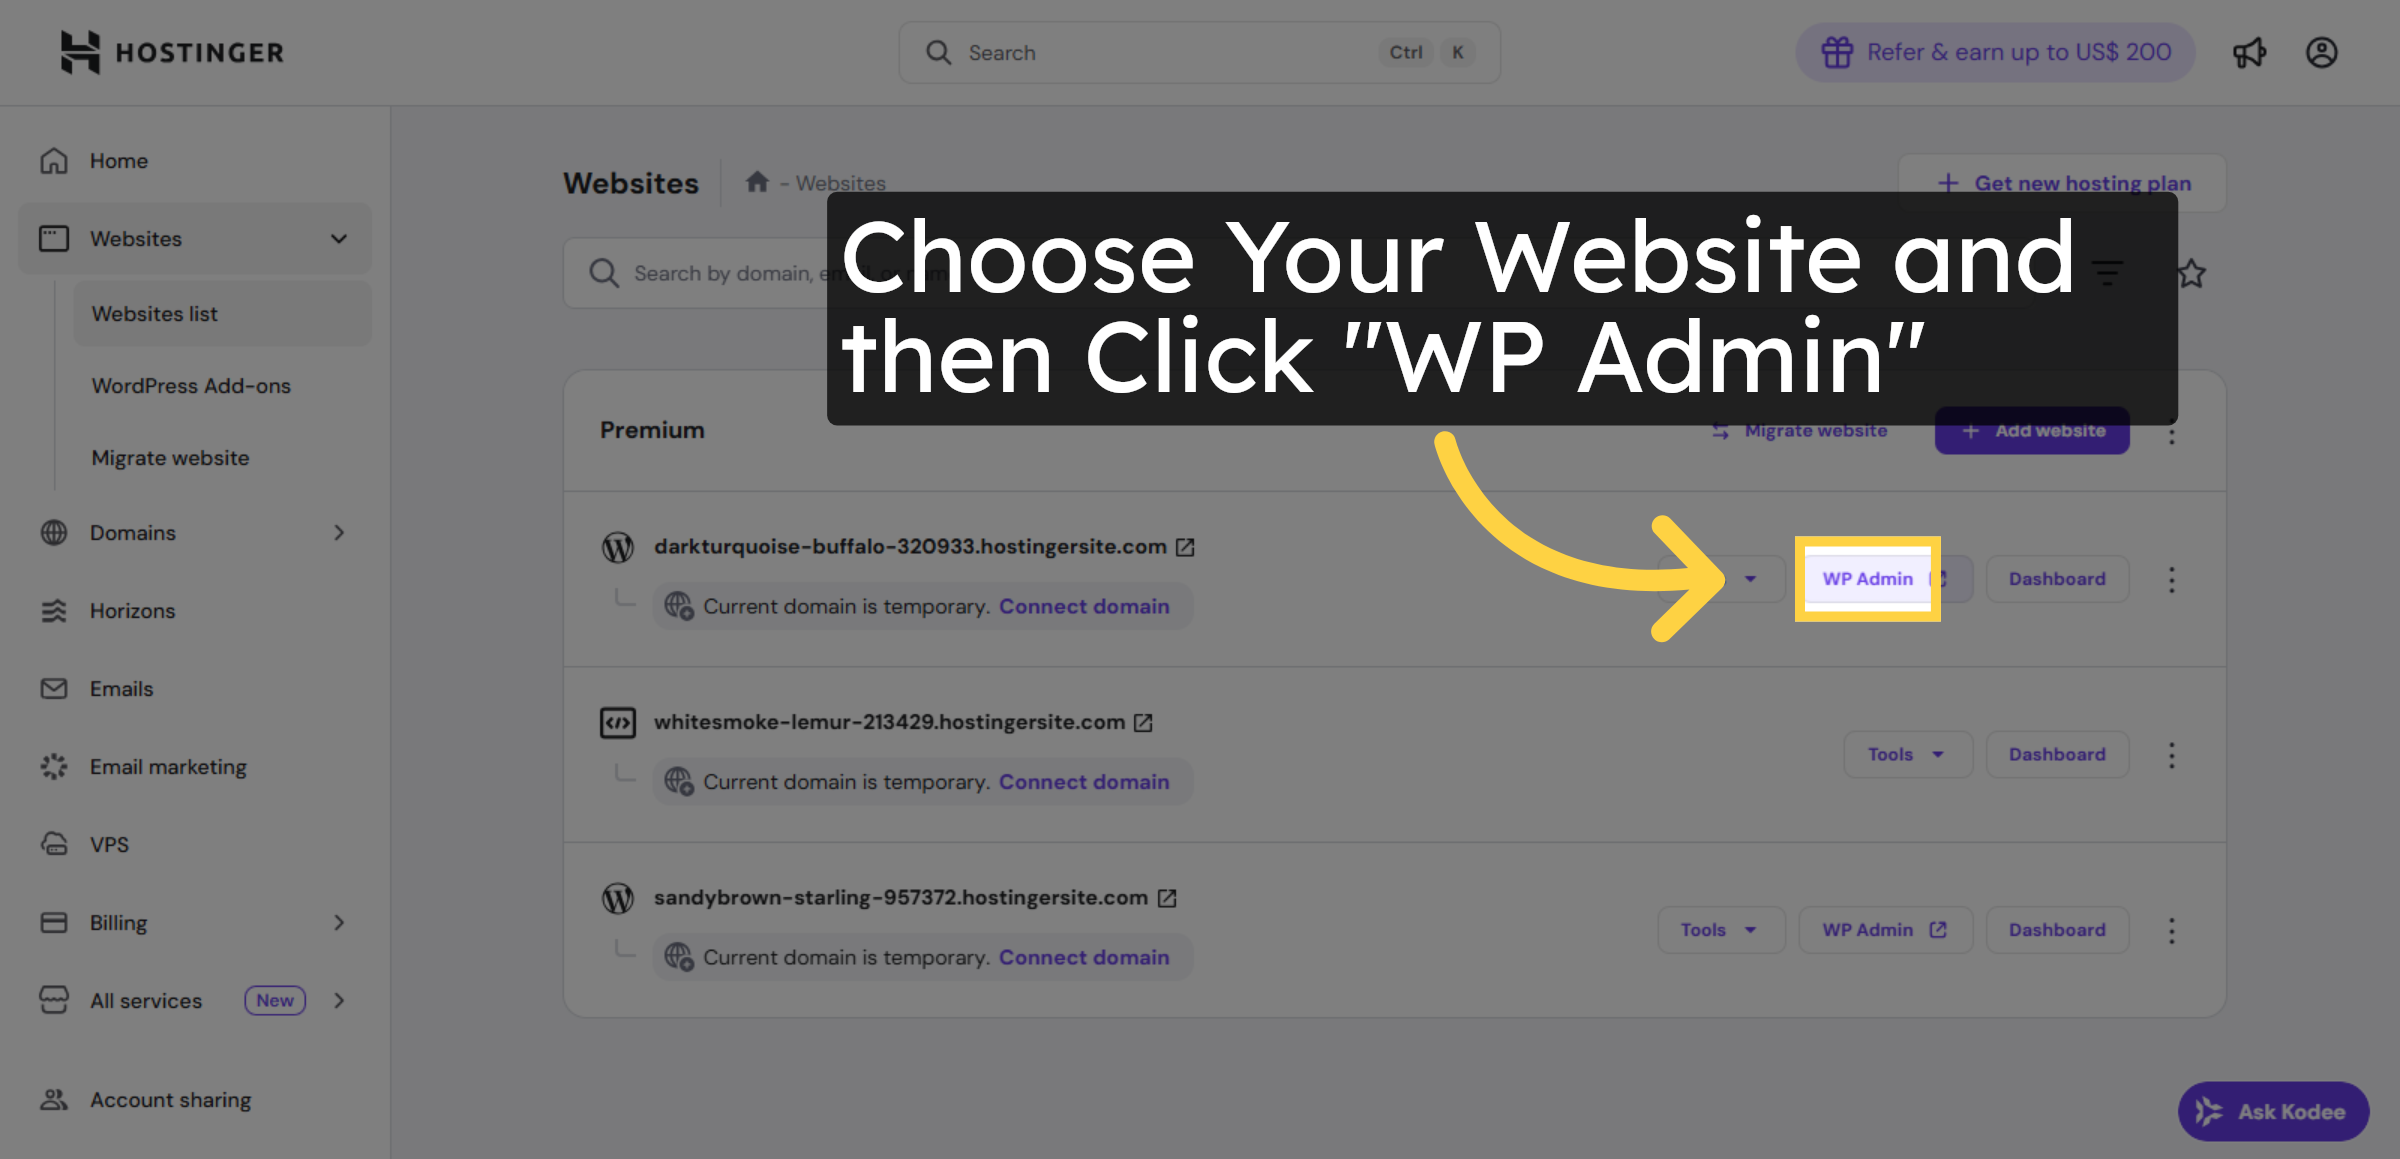
Click WP Admin to open the WordPress administration panel for your website.
4. Switch to Target Website
Switch to the website darkturquoise-buffalo-320933.hostingersite.com to manage its settings.
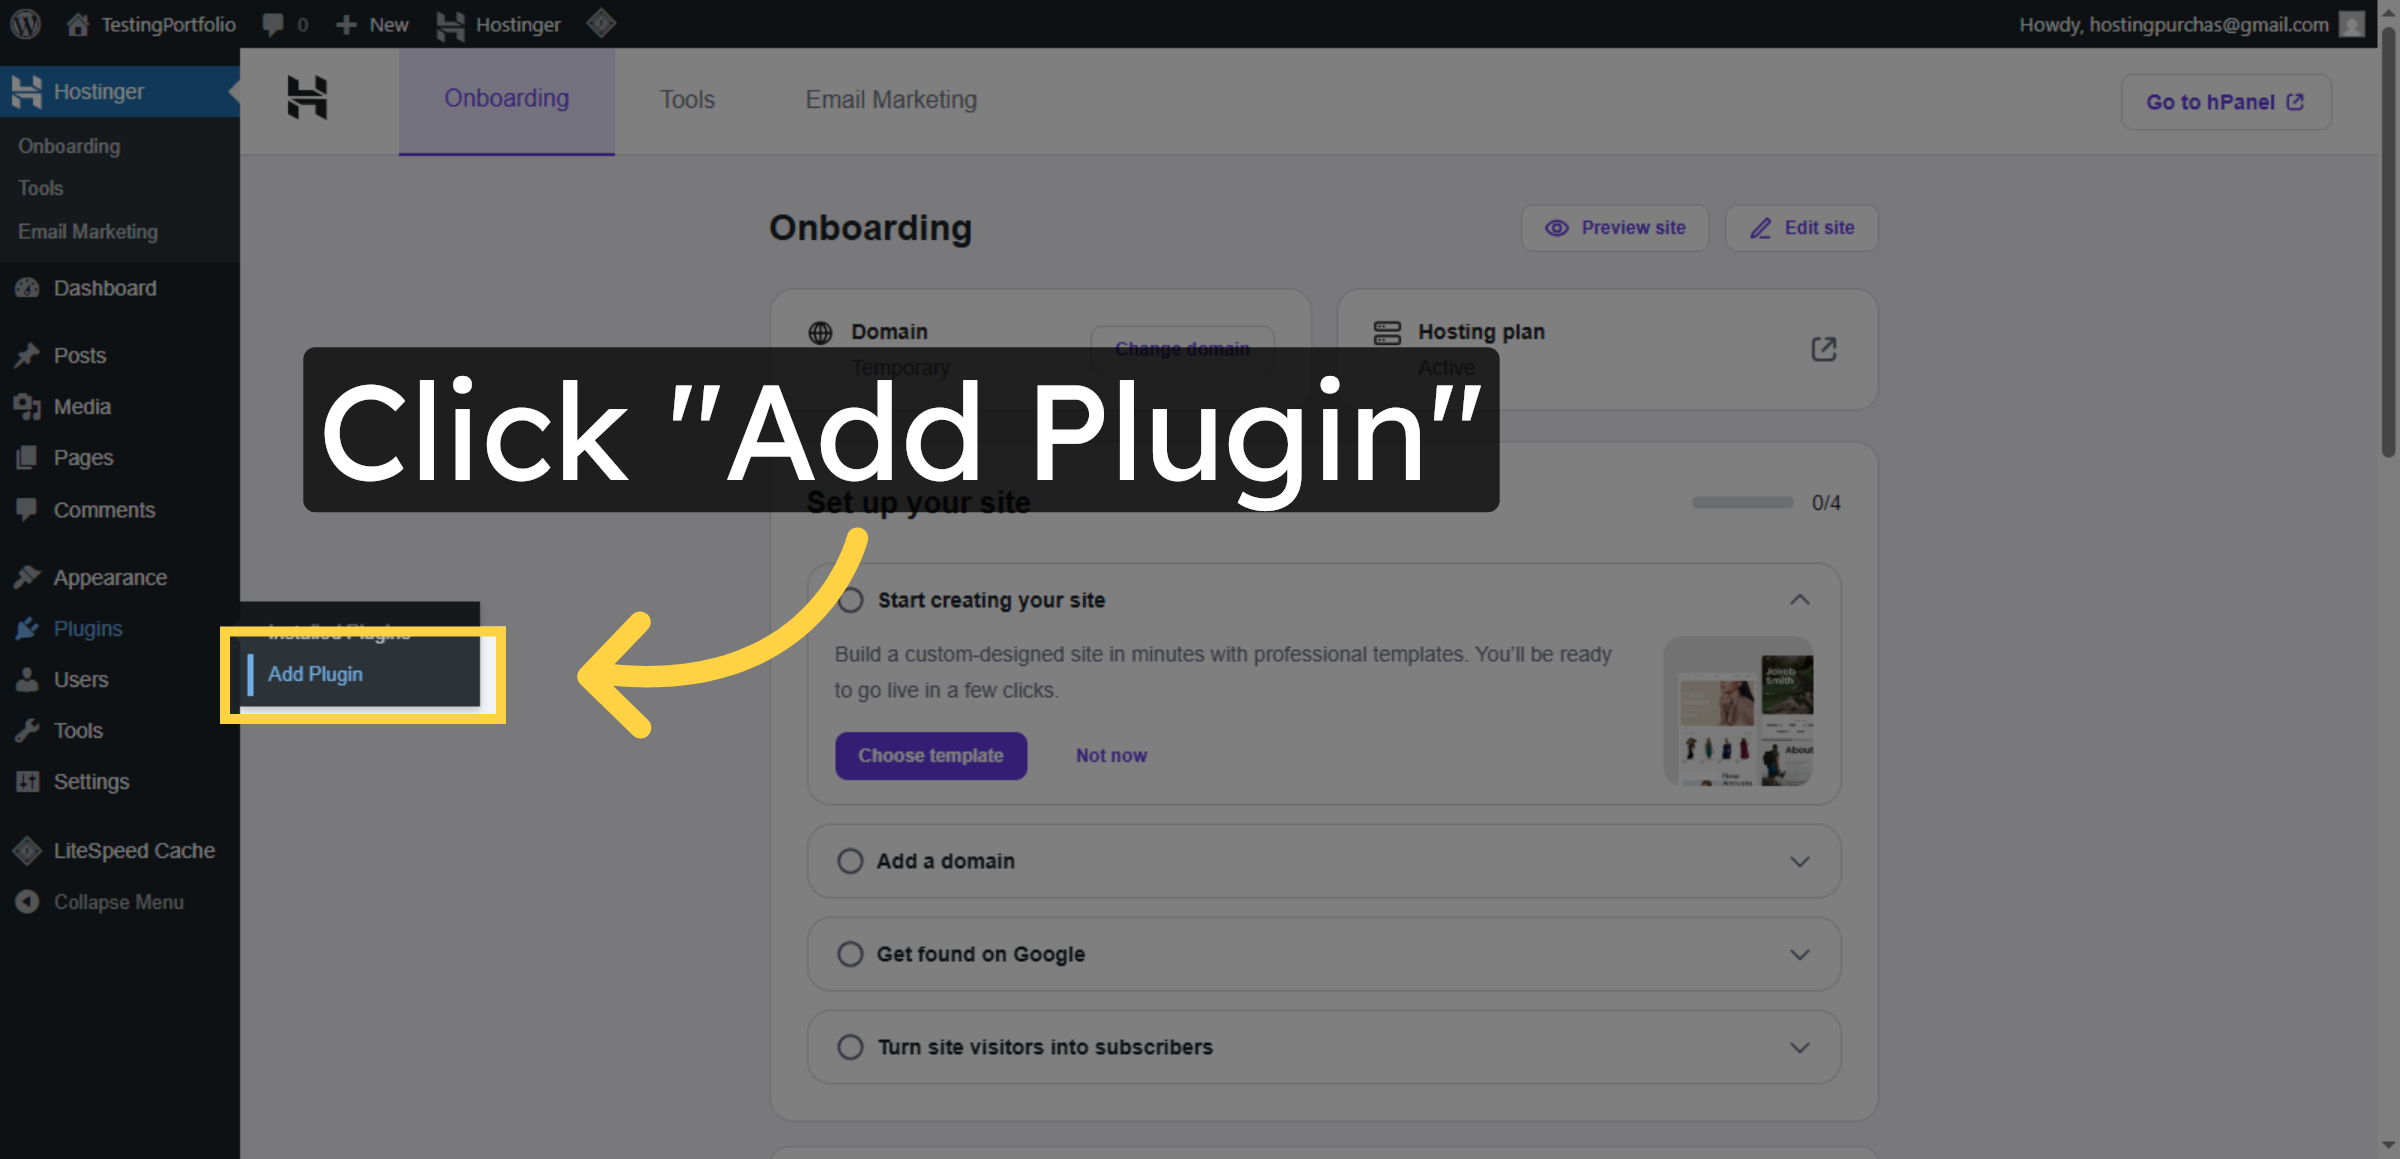
5. Access Plugin Installation
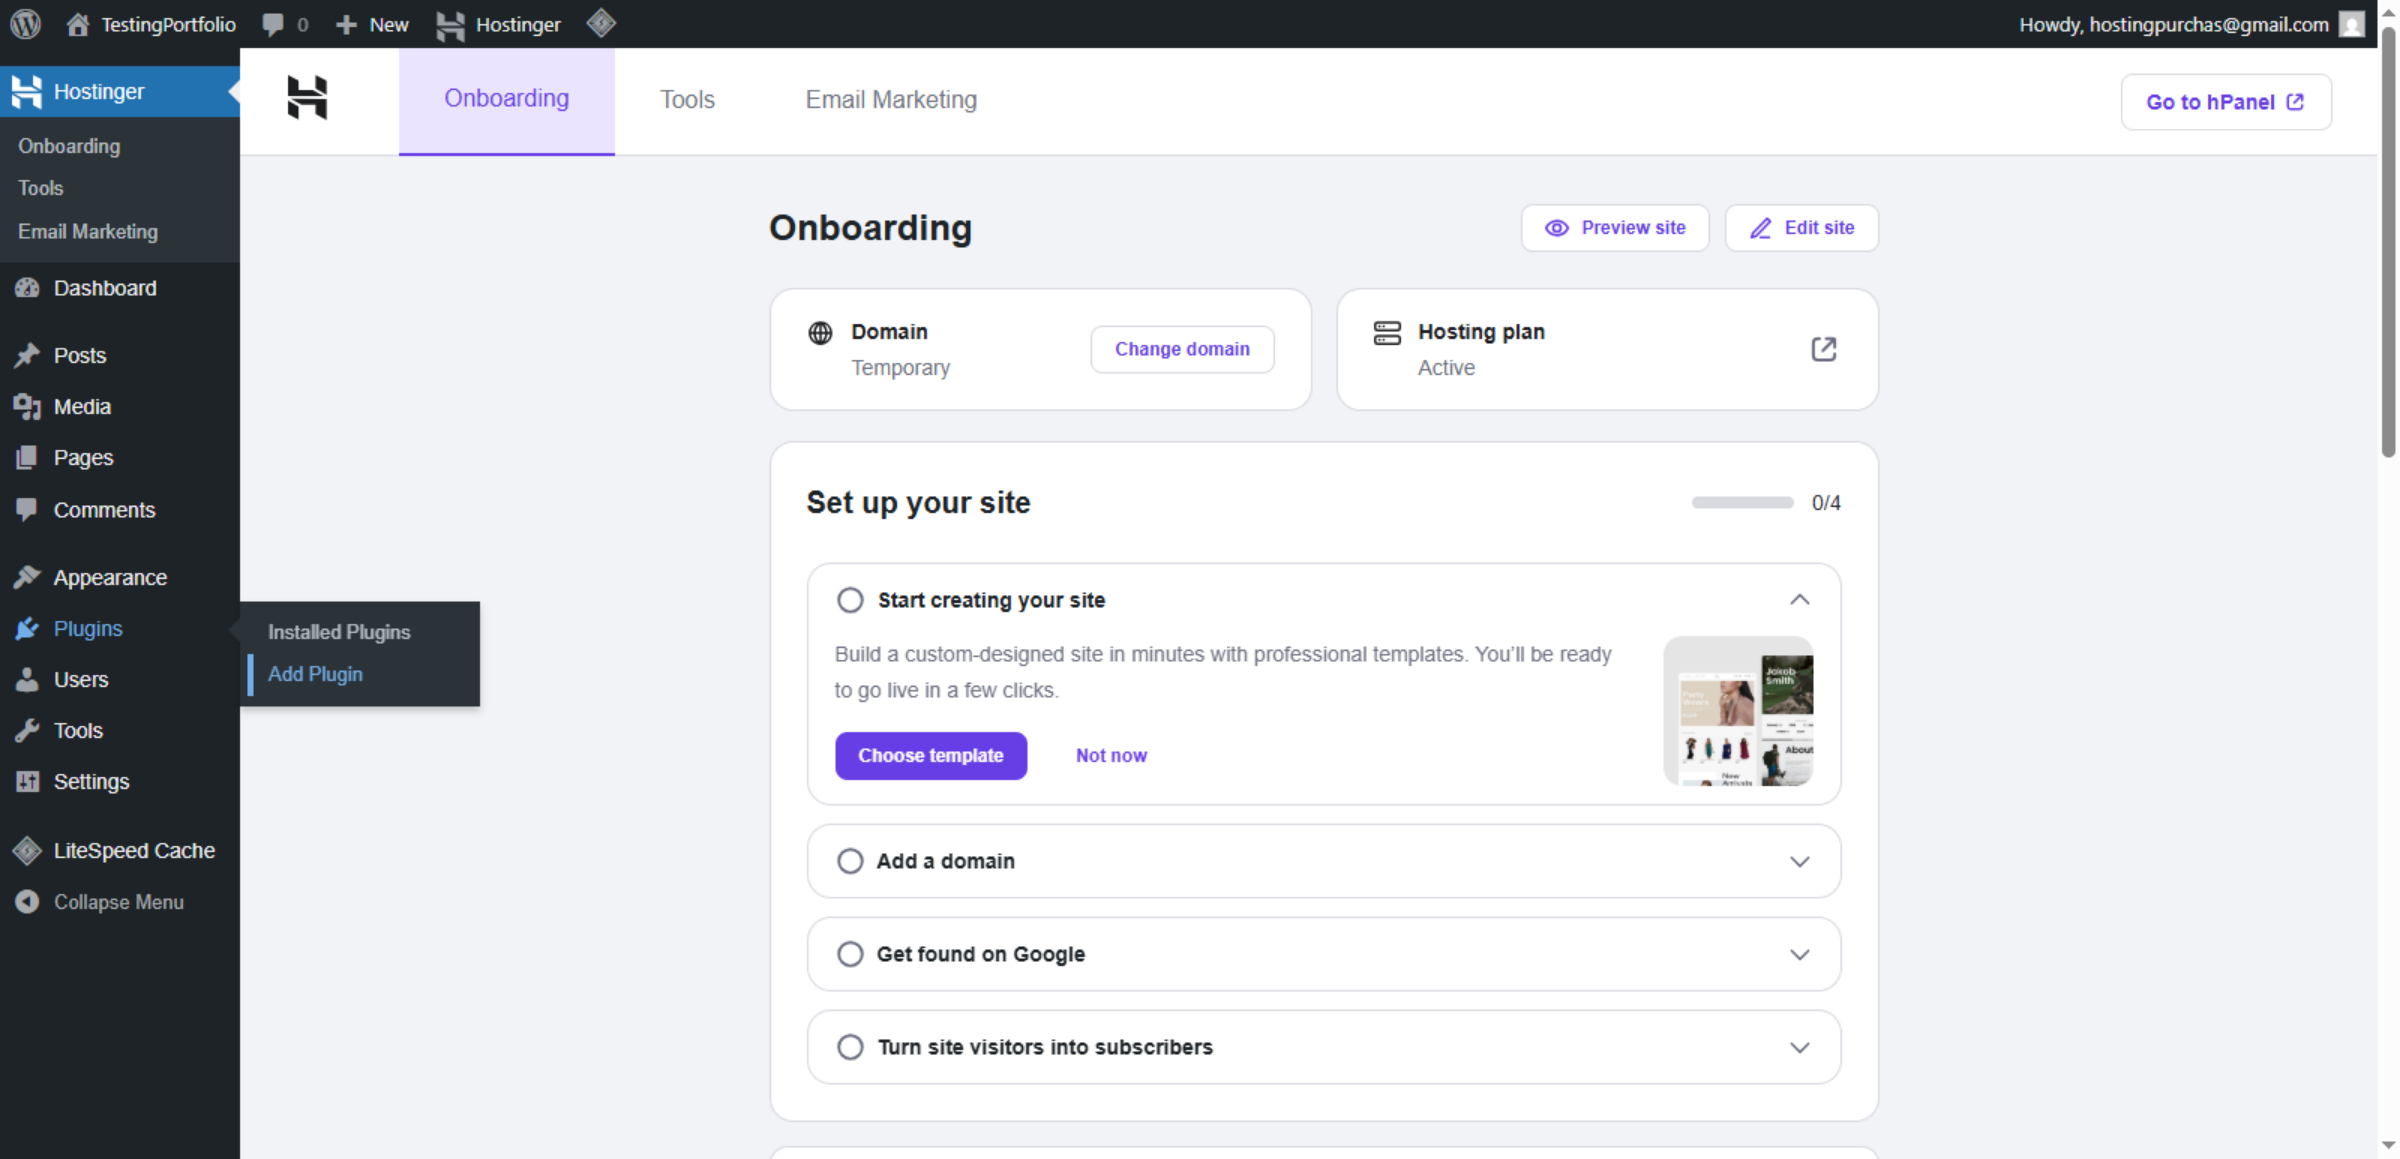
Click Add Plugin to begin installing new plugins for your WordPress site.
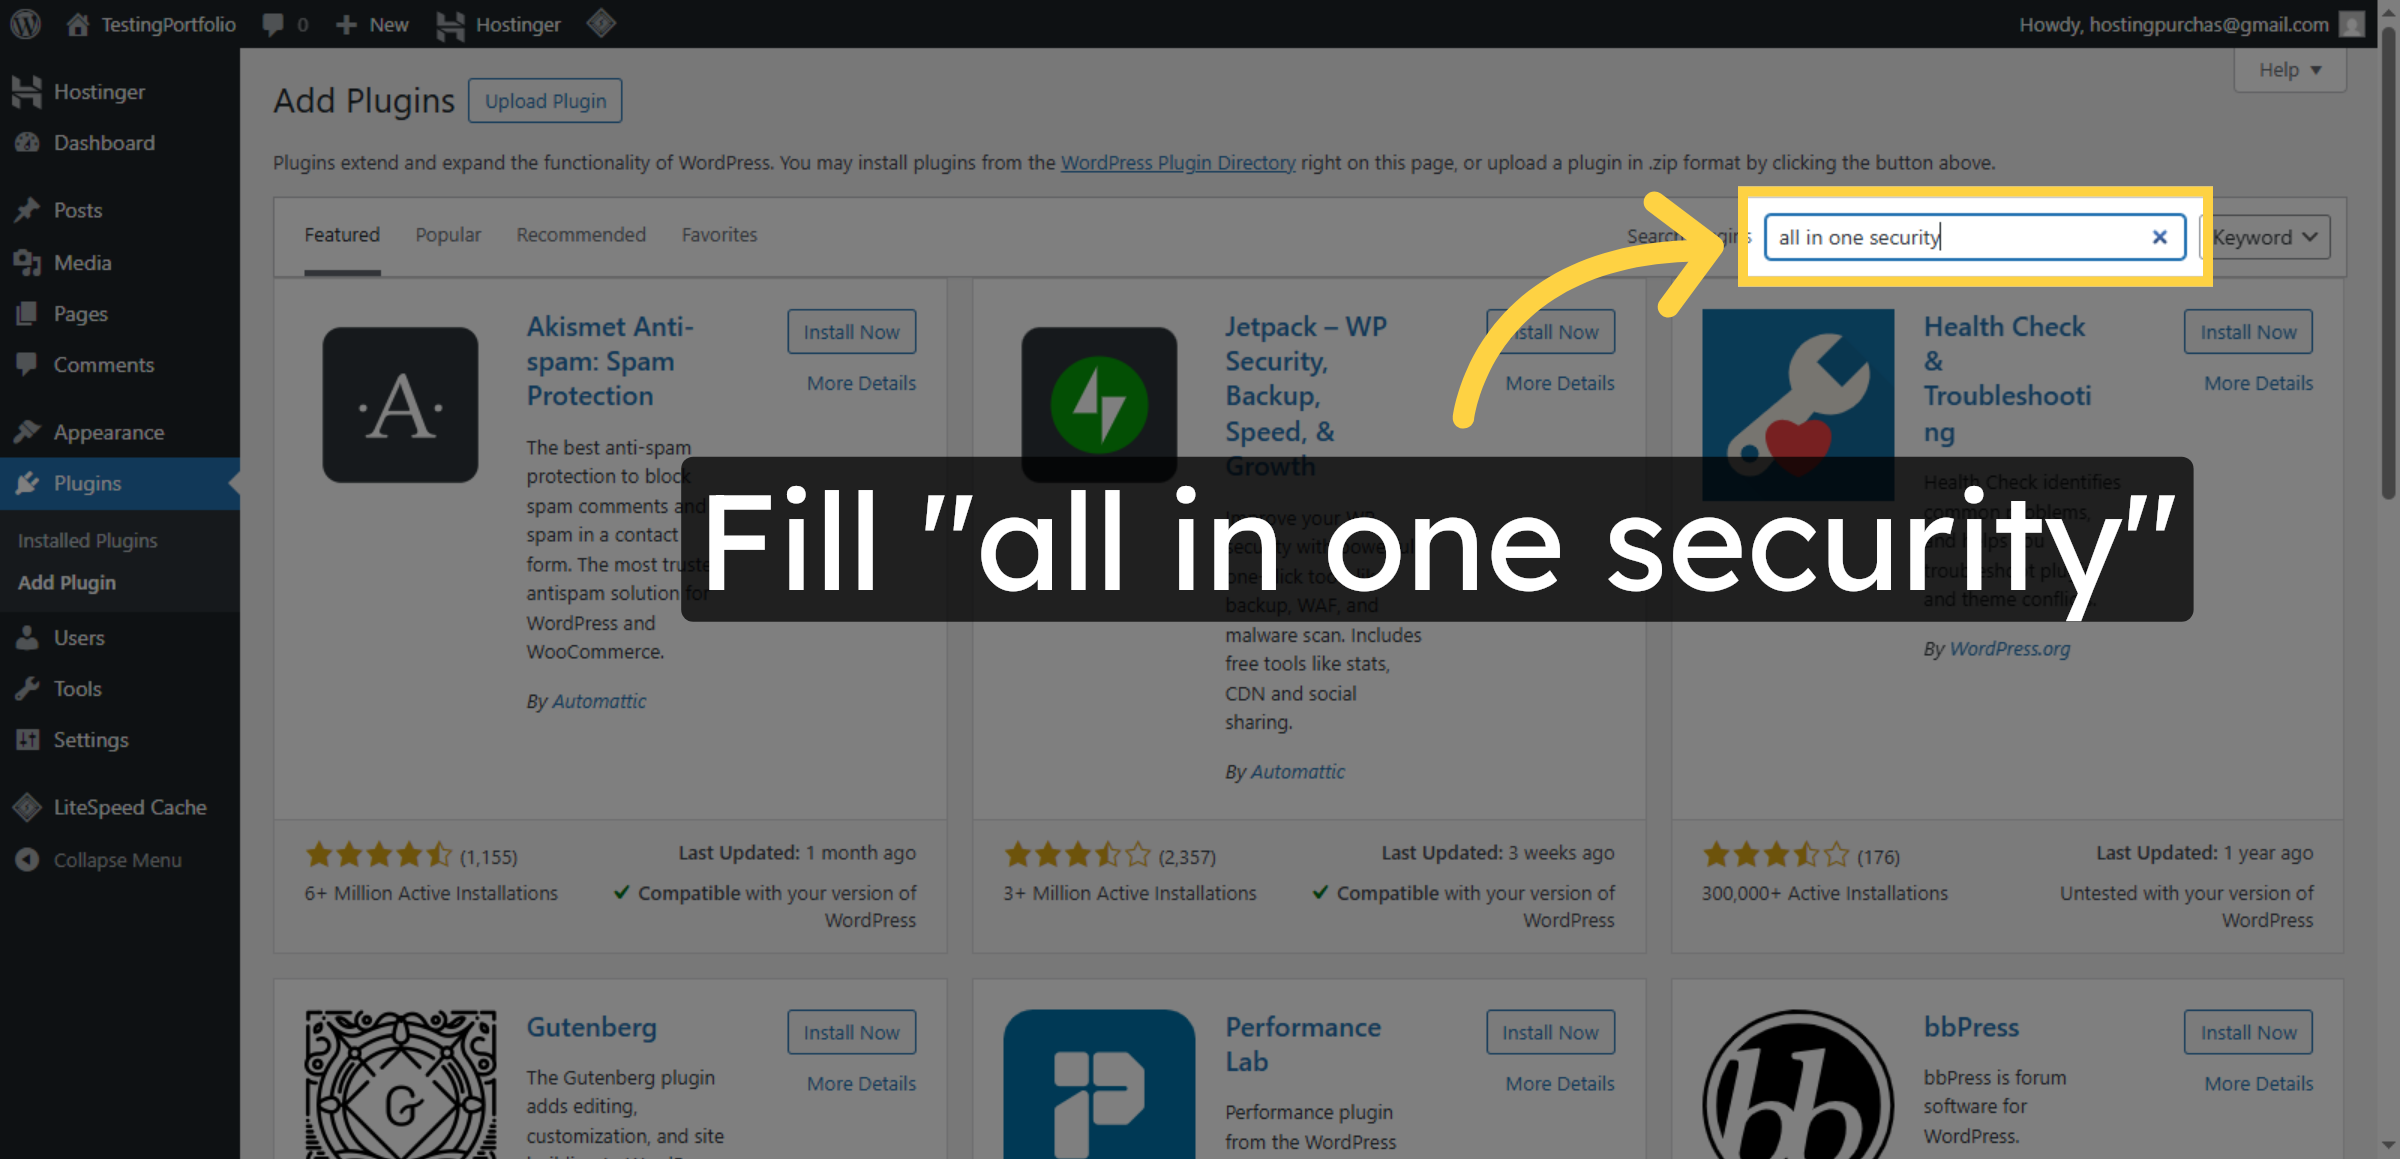
6. Search All In One Security Plugin
Enter all in one security in the search field to locate the All In One Security plugin.
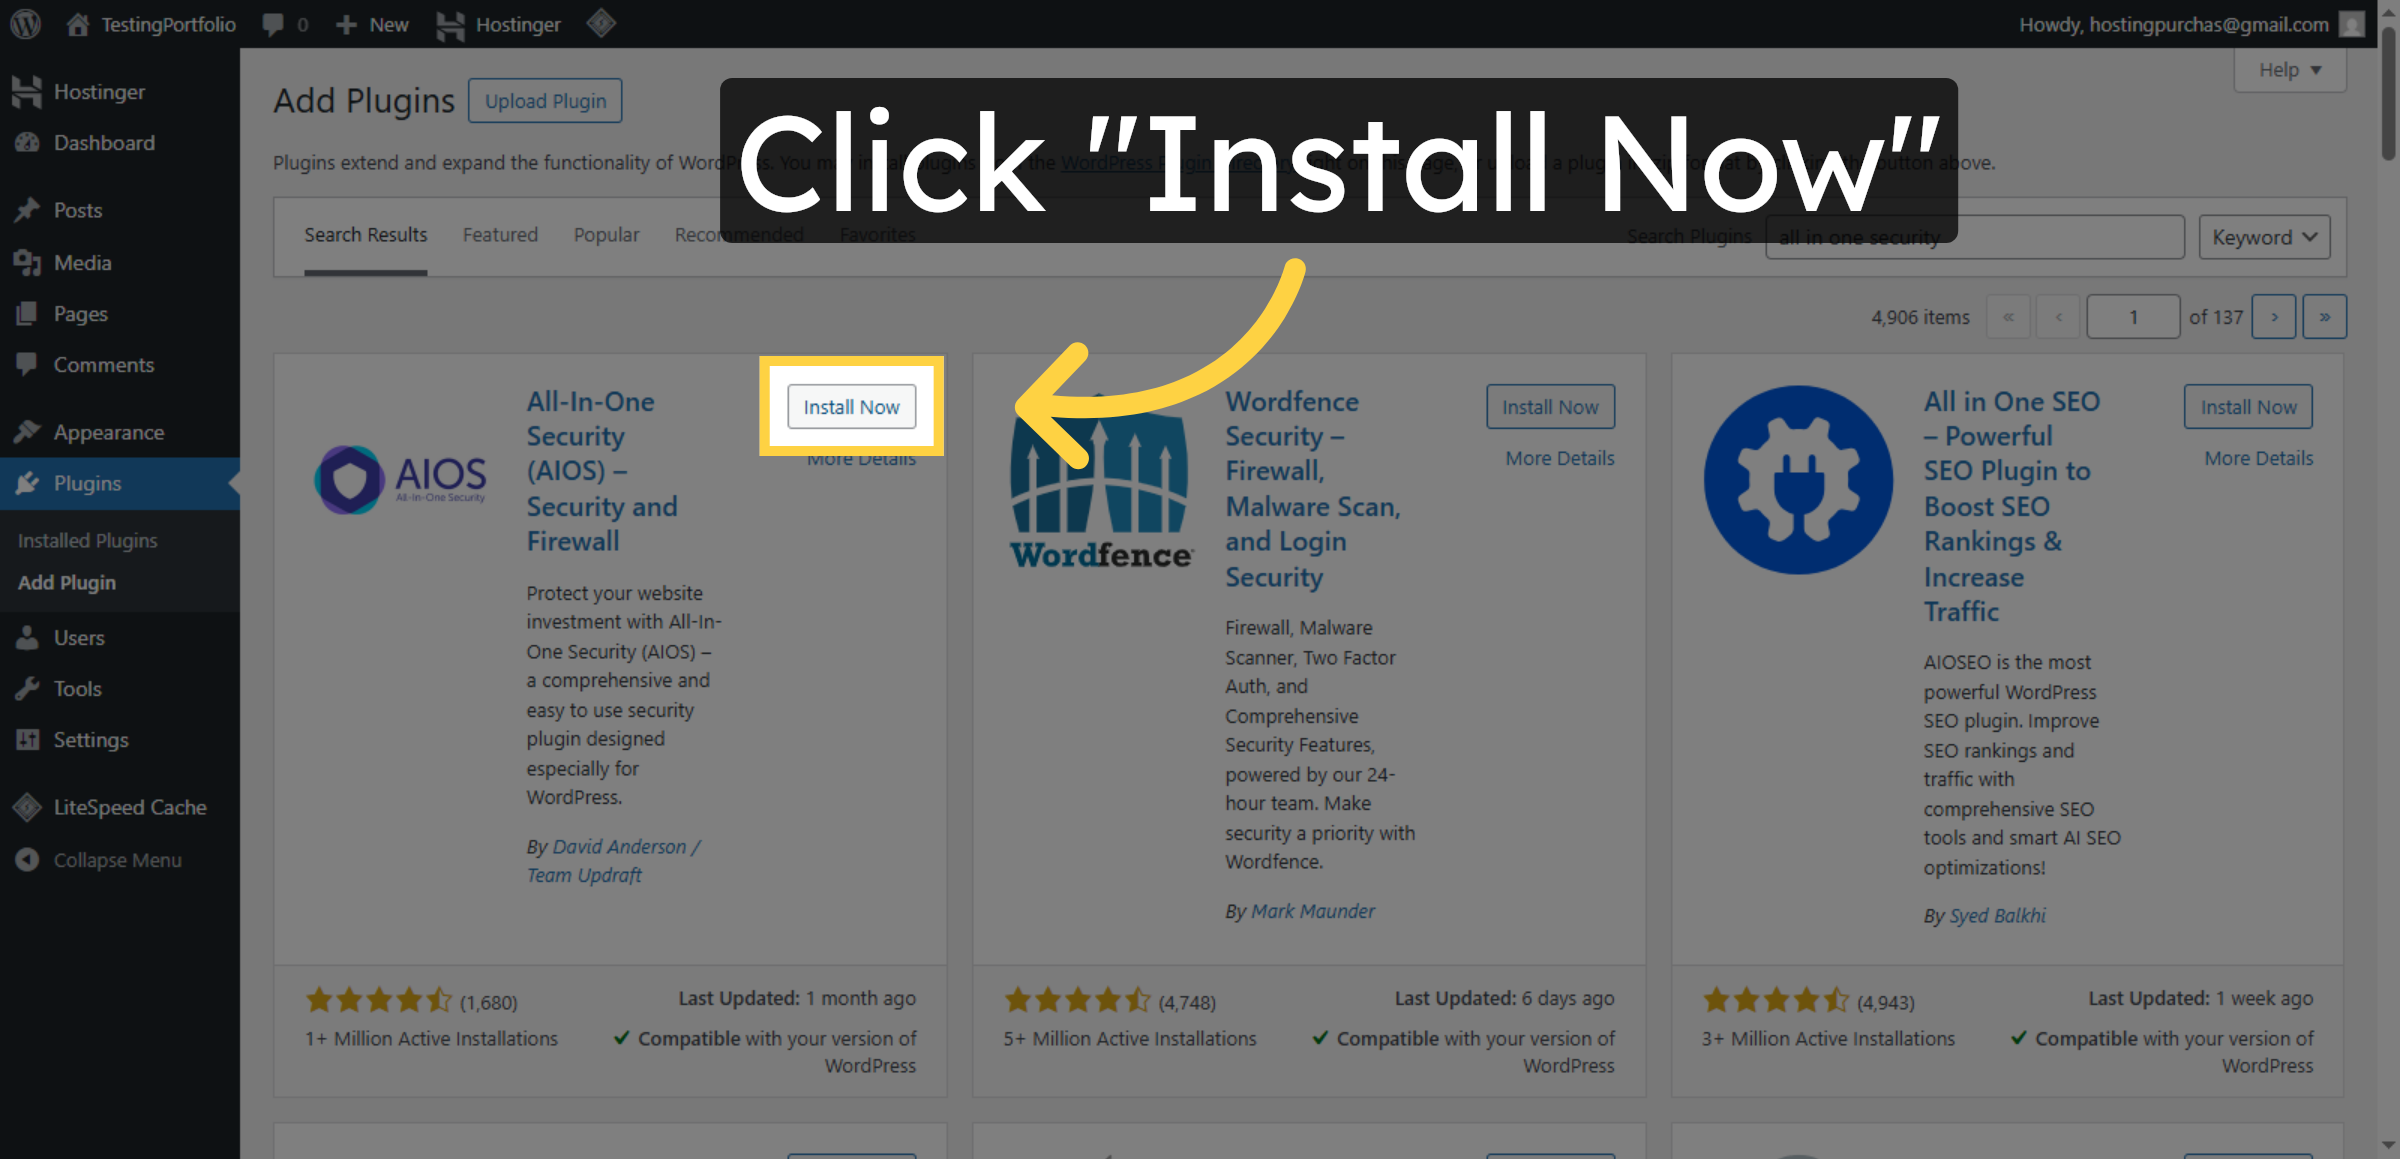
7. Install Security Plugin
Click Install Now to download and install the All In One Security plugin on your website.
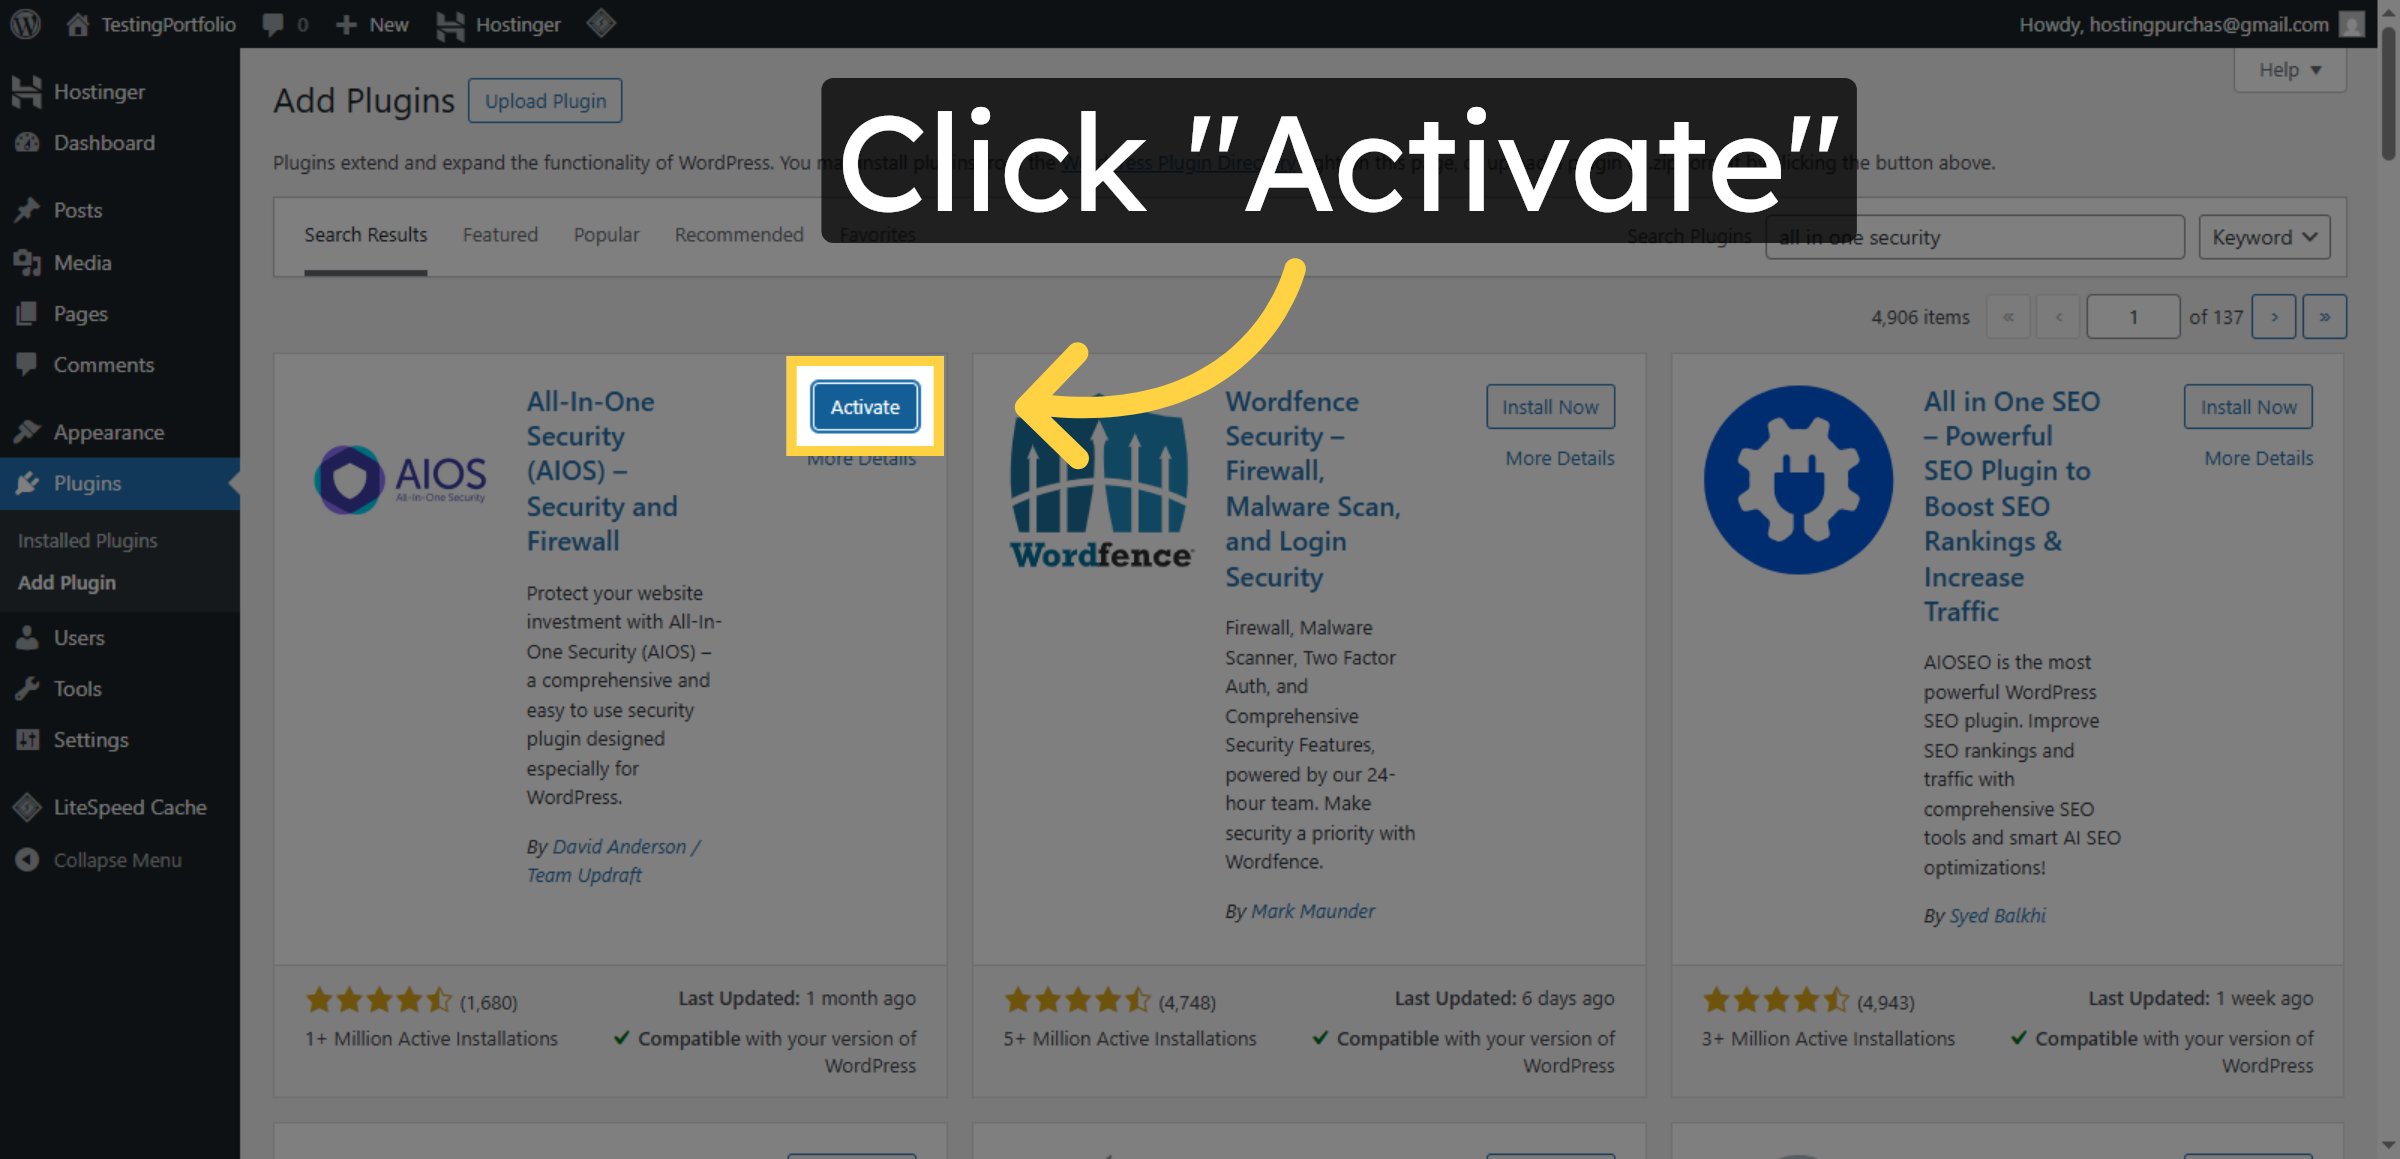
8. Activate Installed Plugin
Click Activate to enable the All In One Security plugin and start configuring security features.
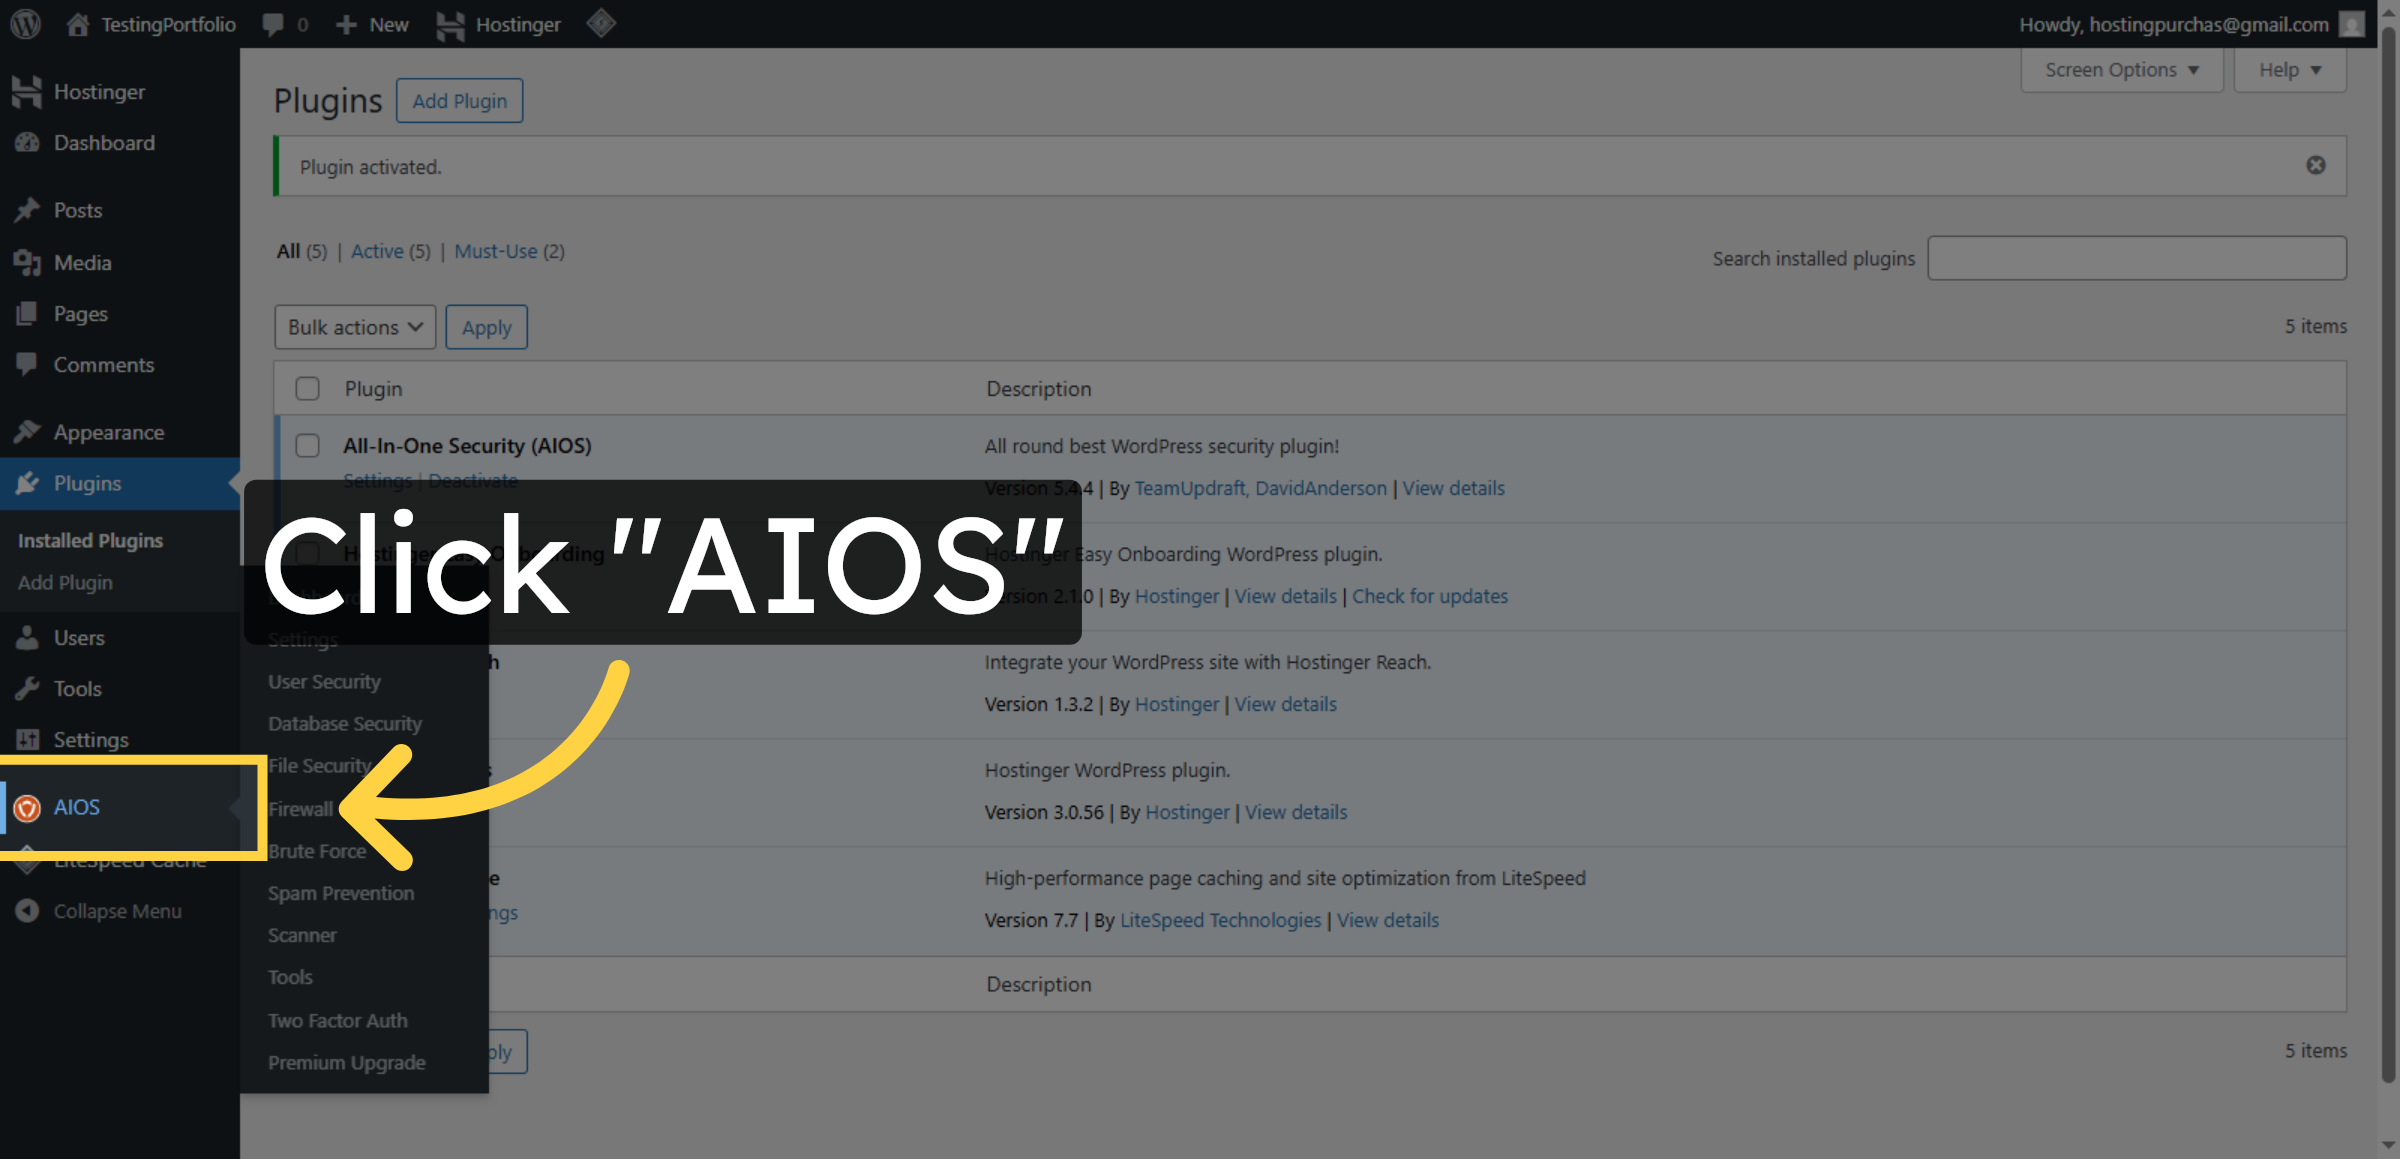
9. Open AIOS Plugin Dashboard
Click AIOS to open the All In One Security plugin dashboard for managing security settings.
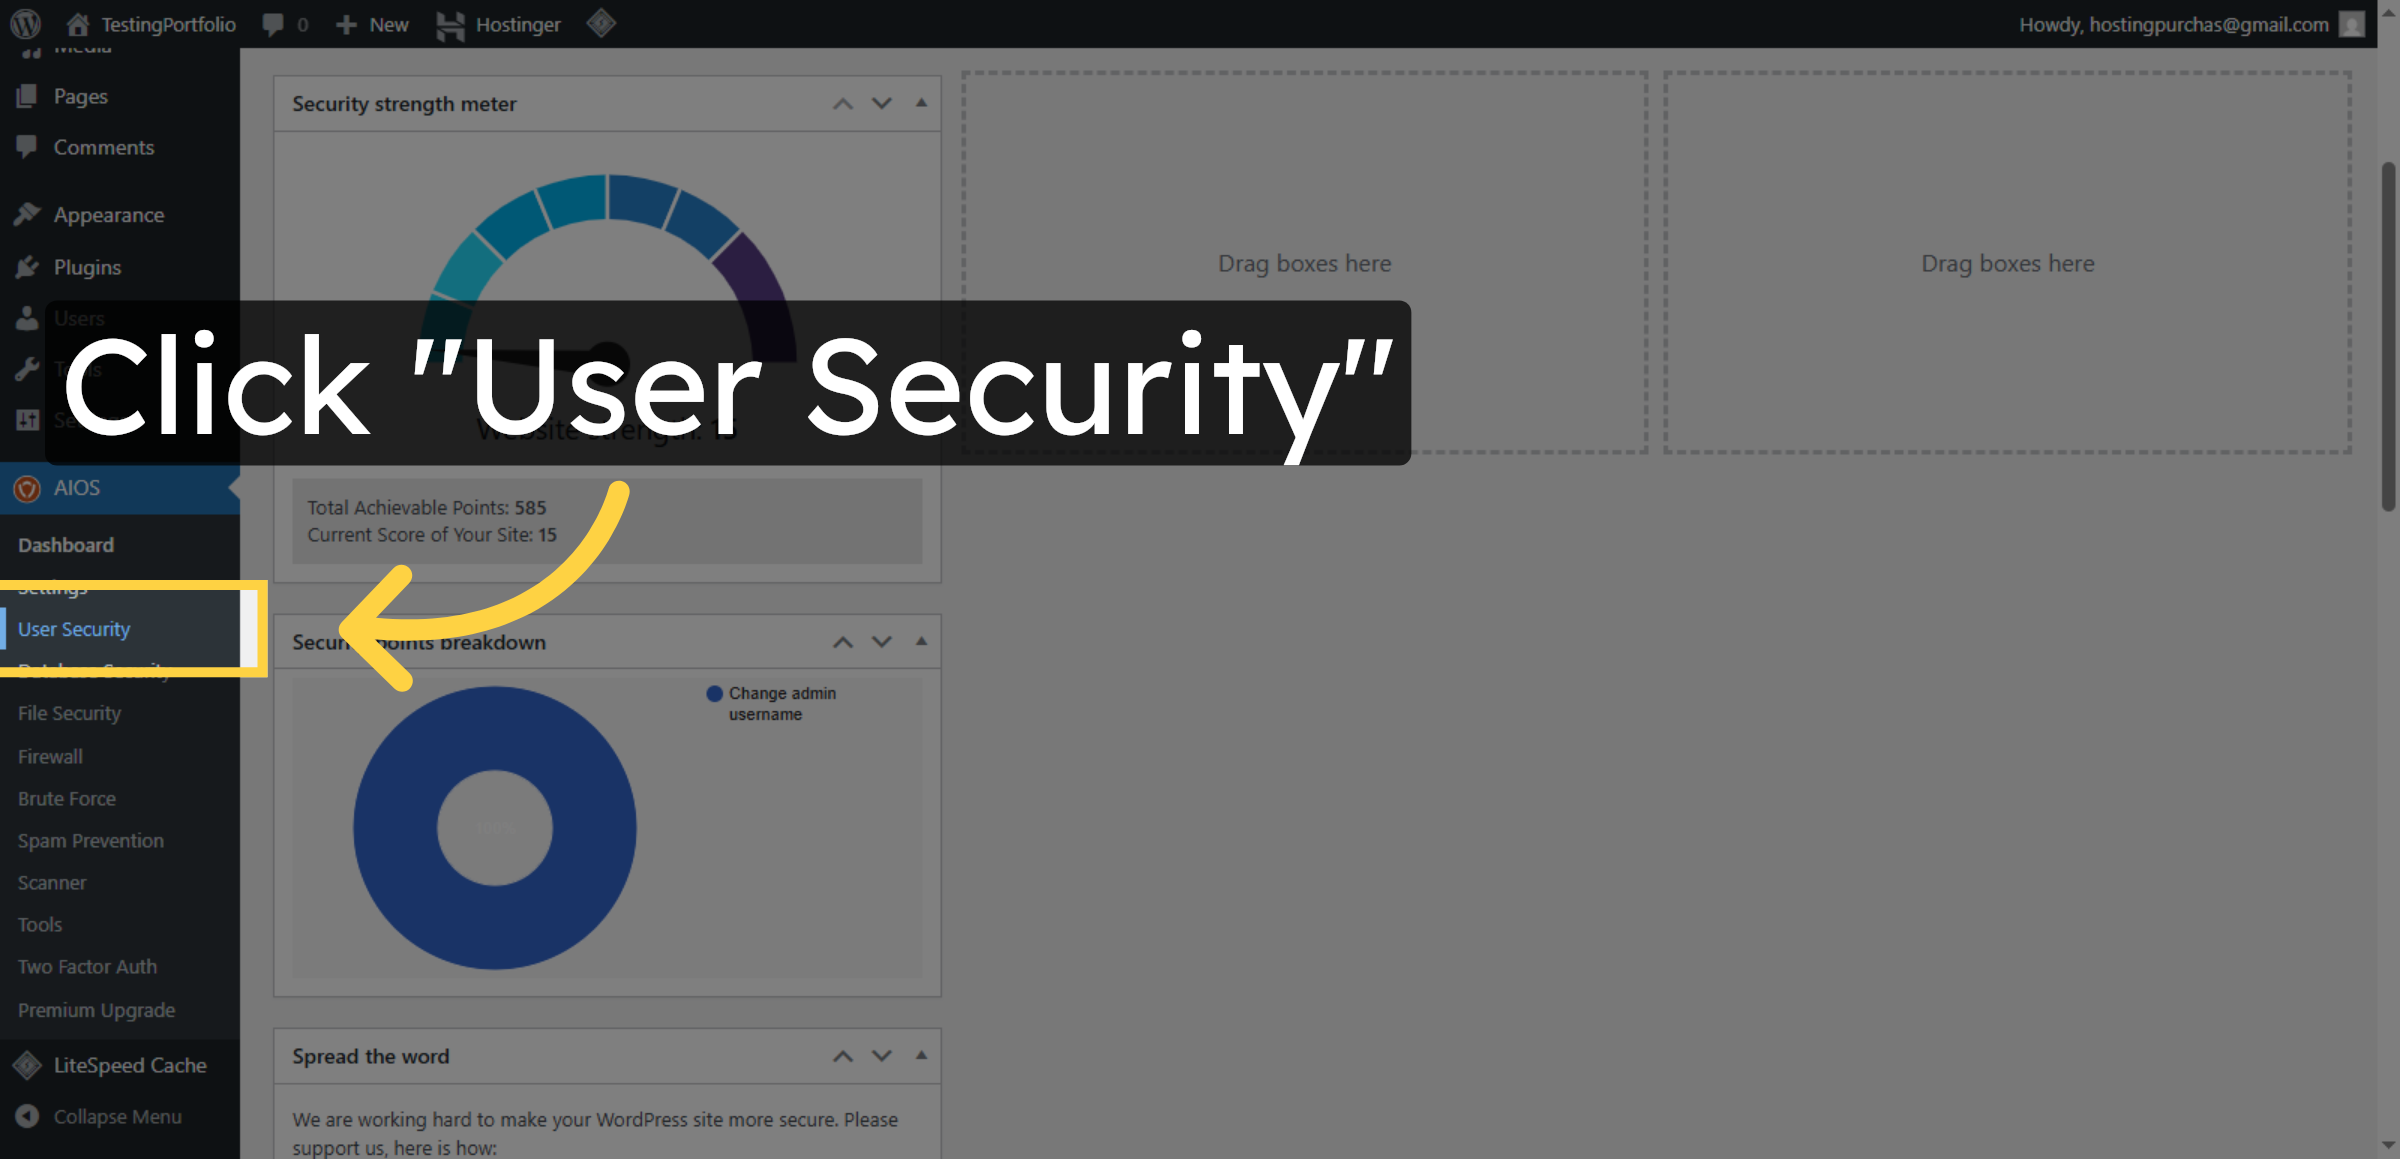
10. Access User Security Settings
Click User Security to configure user-related security options within the plugin.
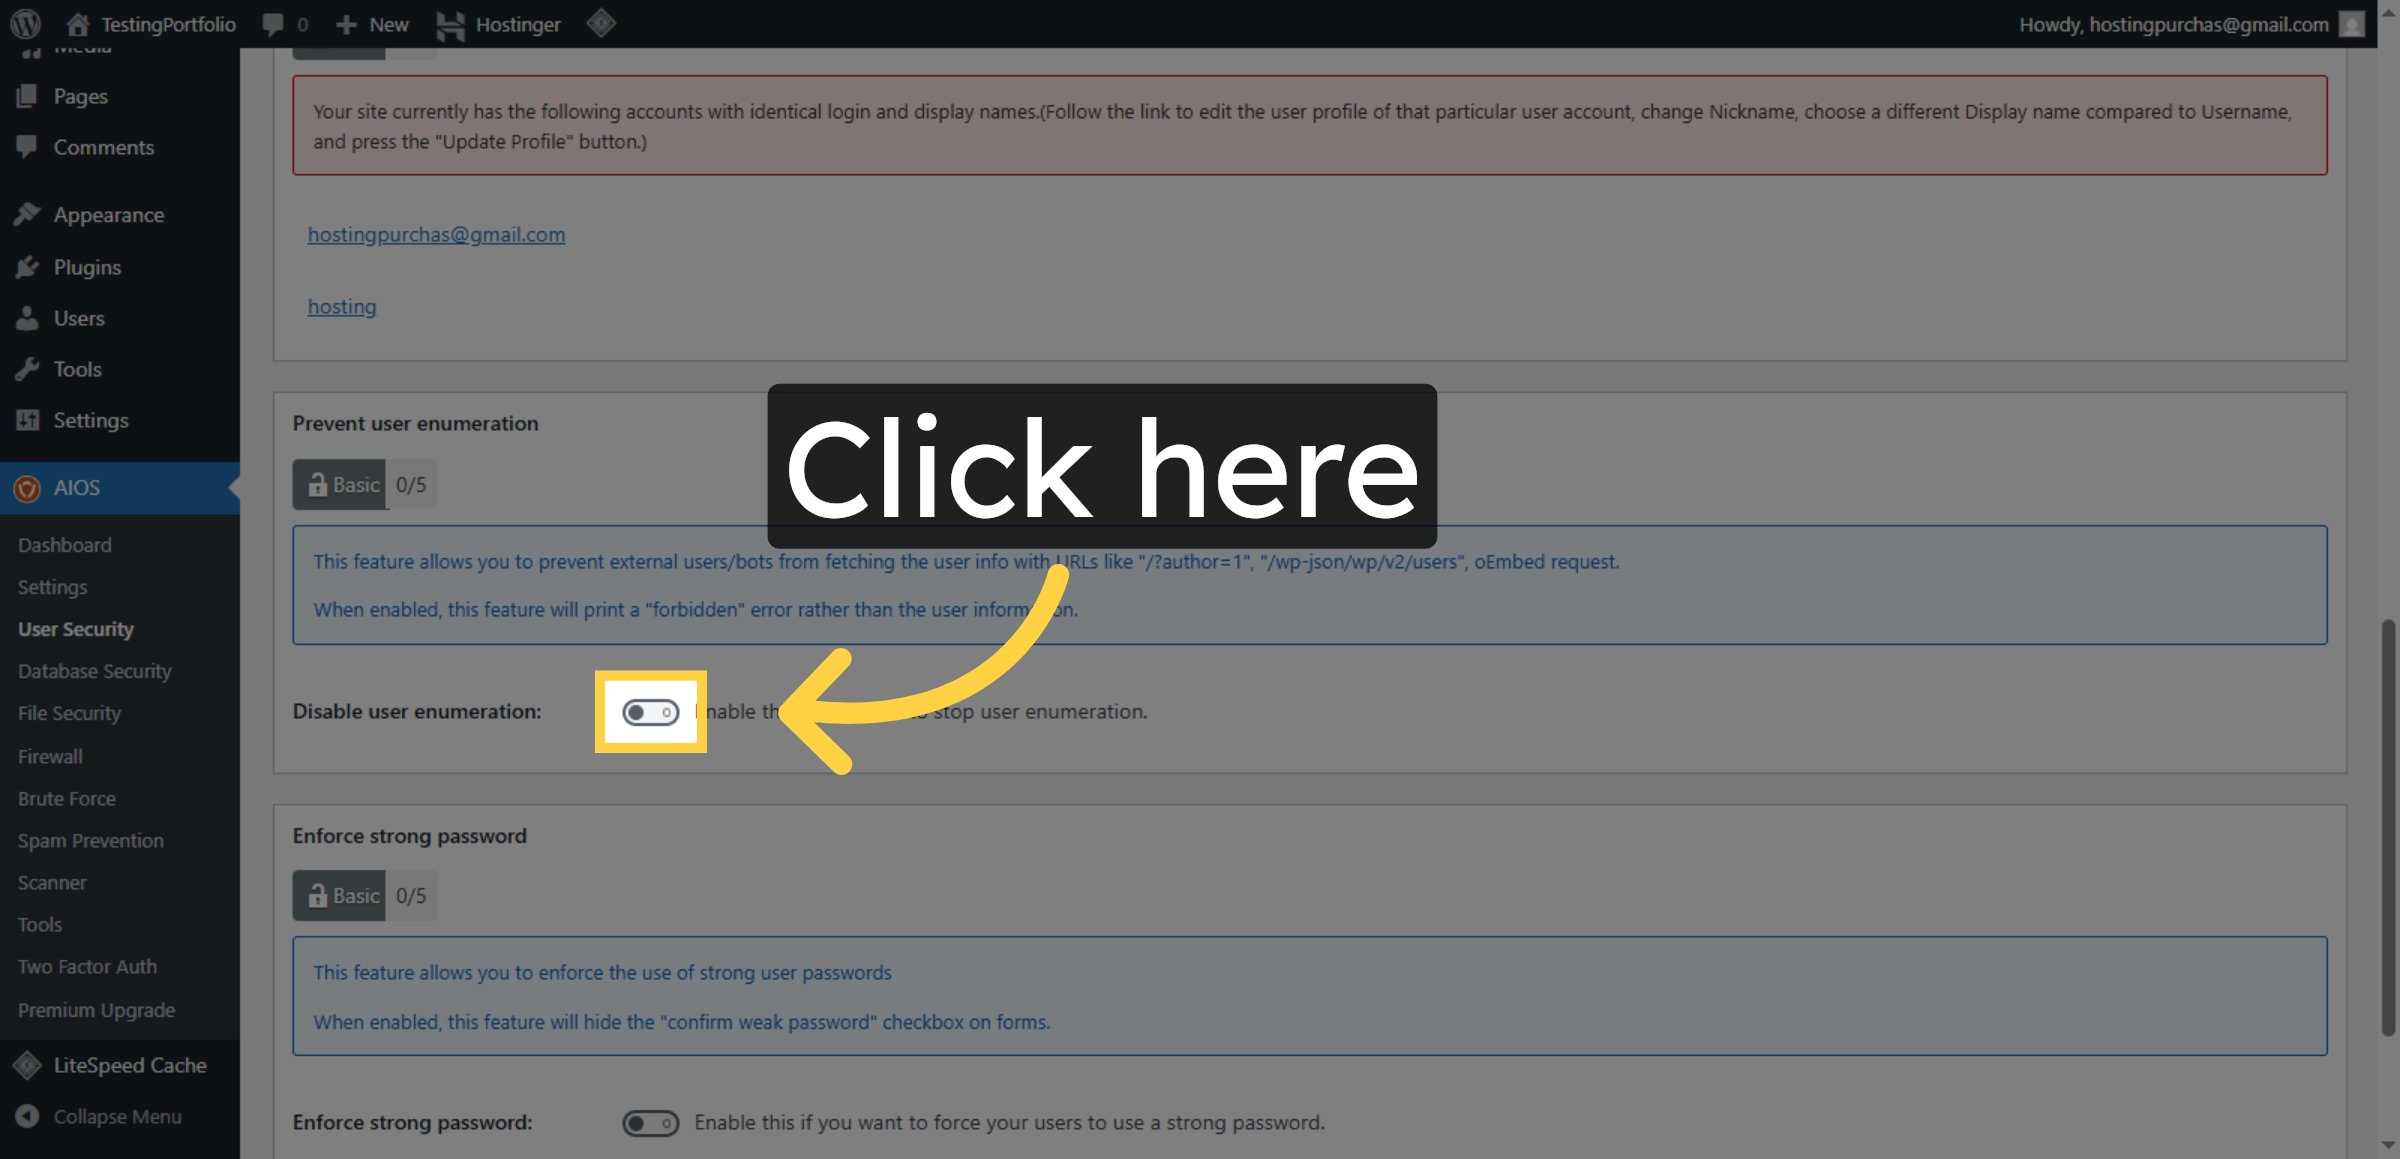
11. Enable Login Lockdown
Click here to enable the login lockdown feature that protects against brute force attacks.
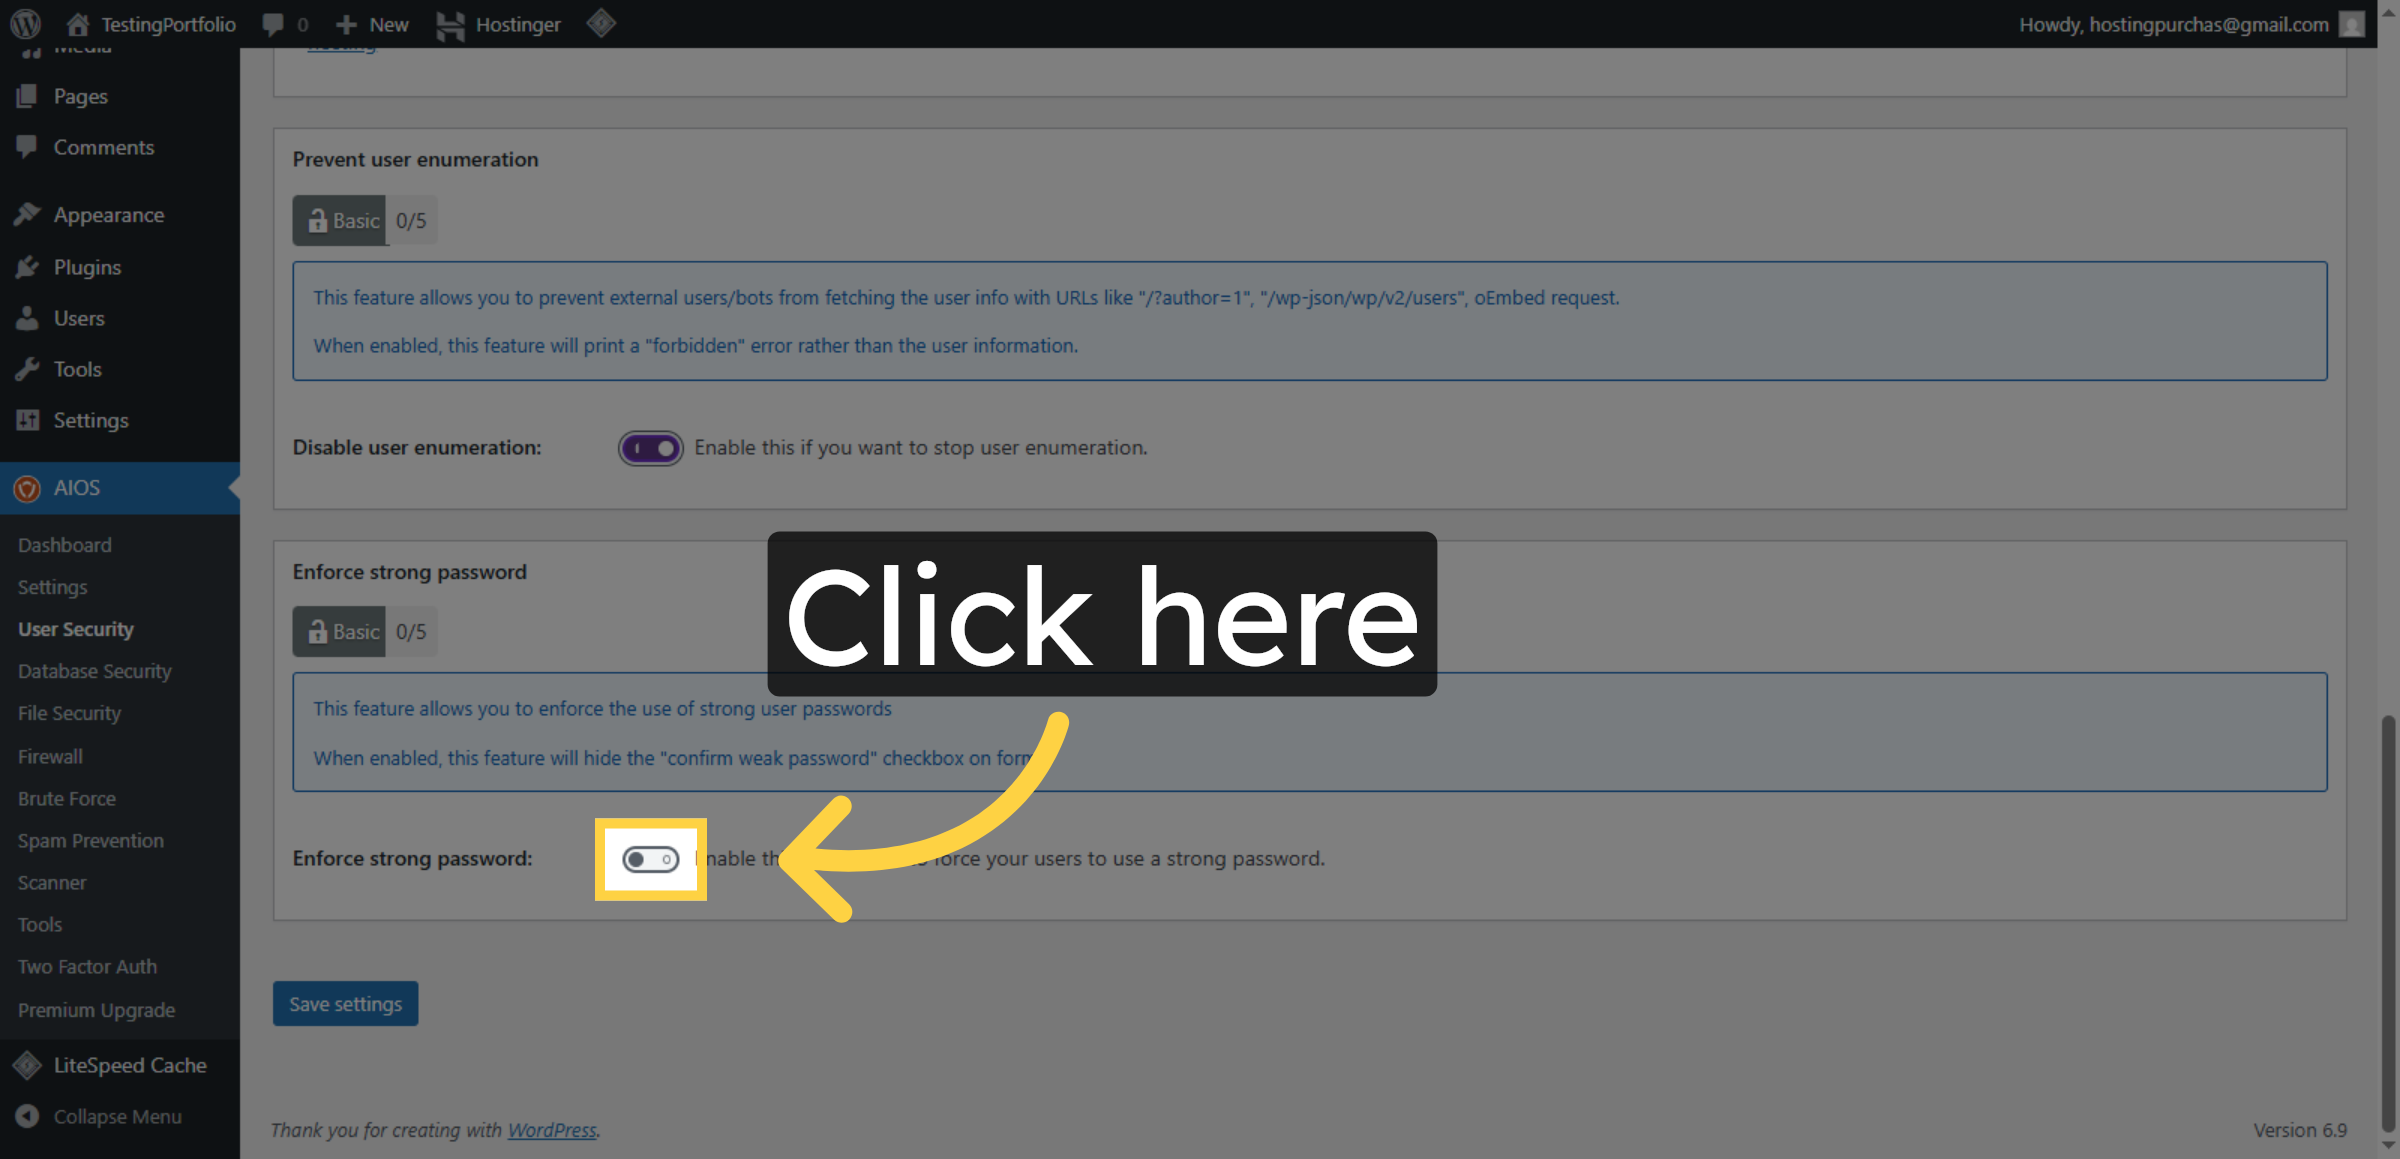
12. Enable Login Notification
Click here to activate login notifications for monitoring user access.
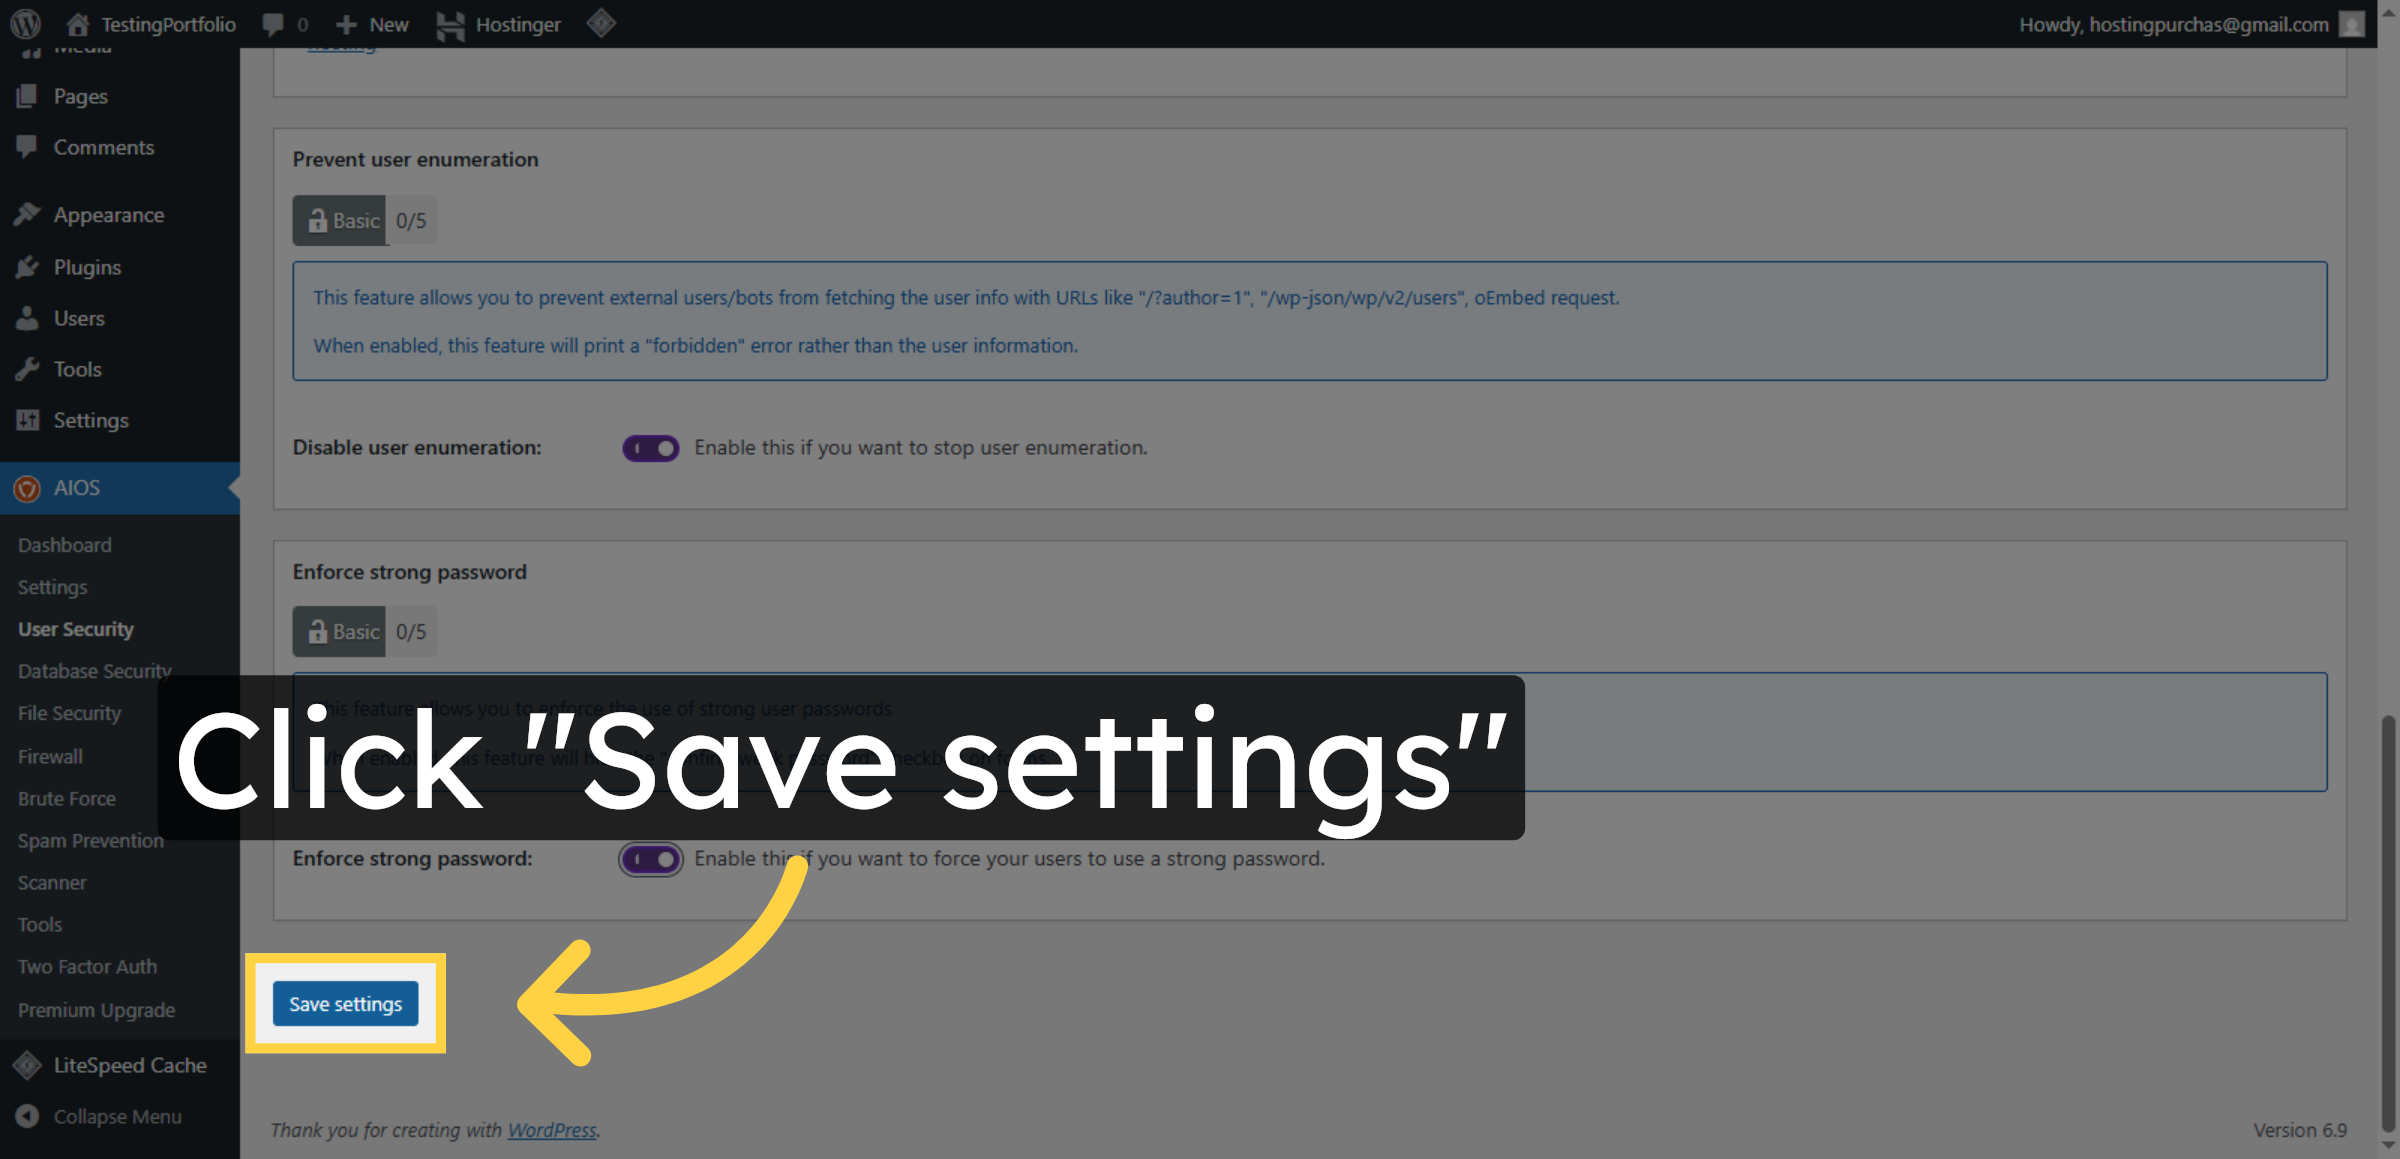
13. Save User Security Settings
Click Save settings to apply the changes made in the User Security section.
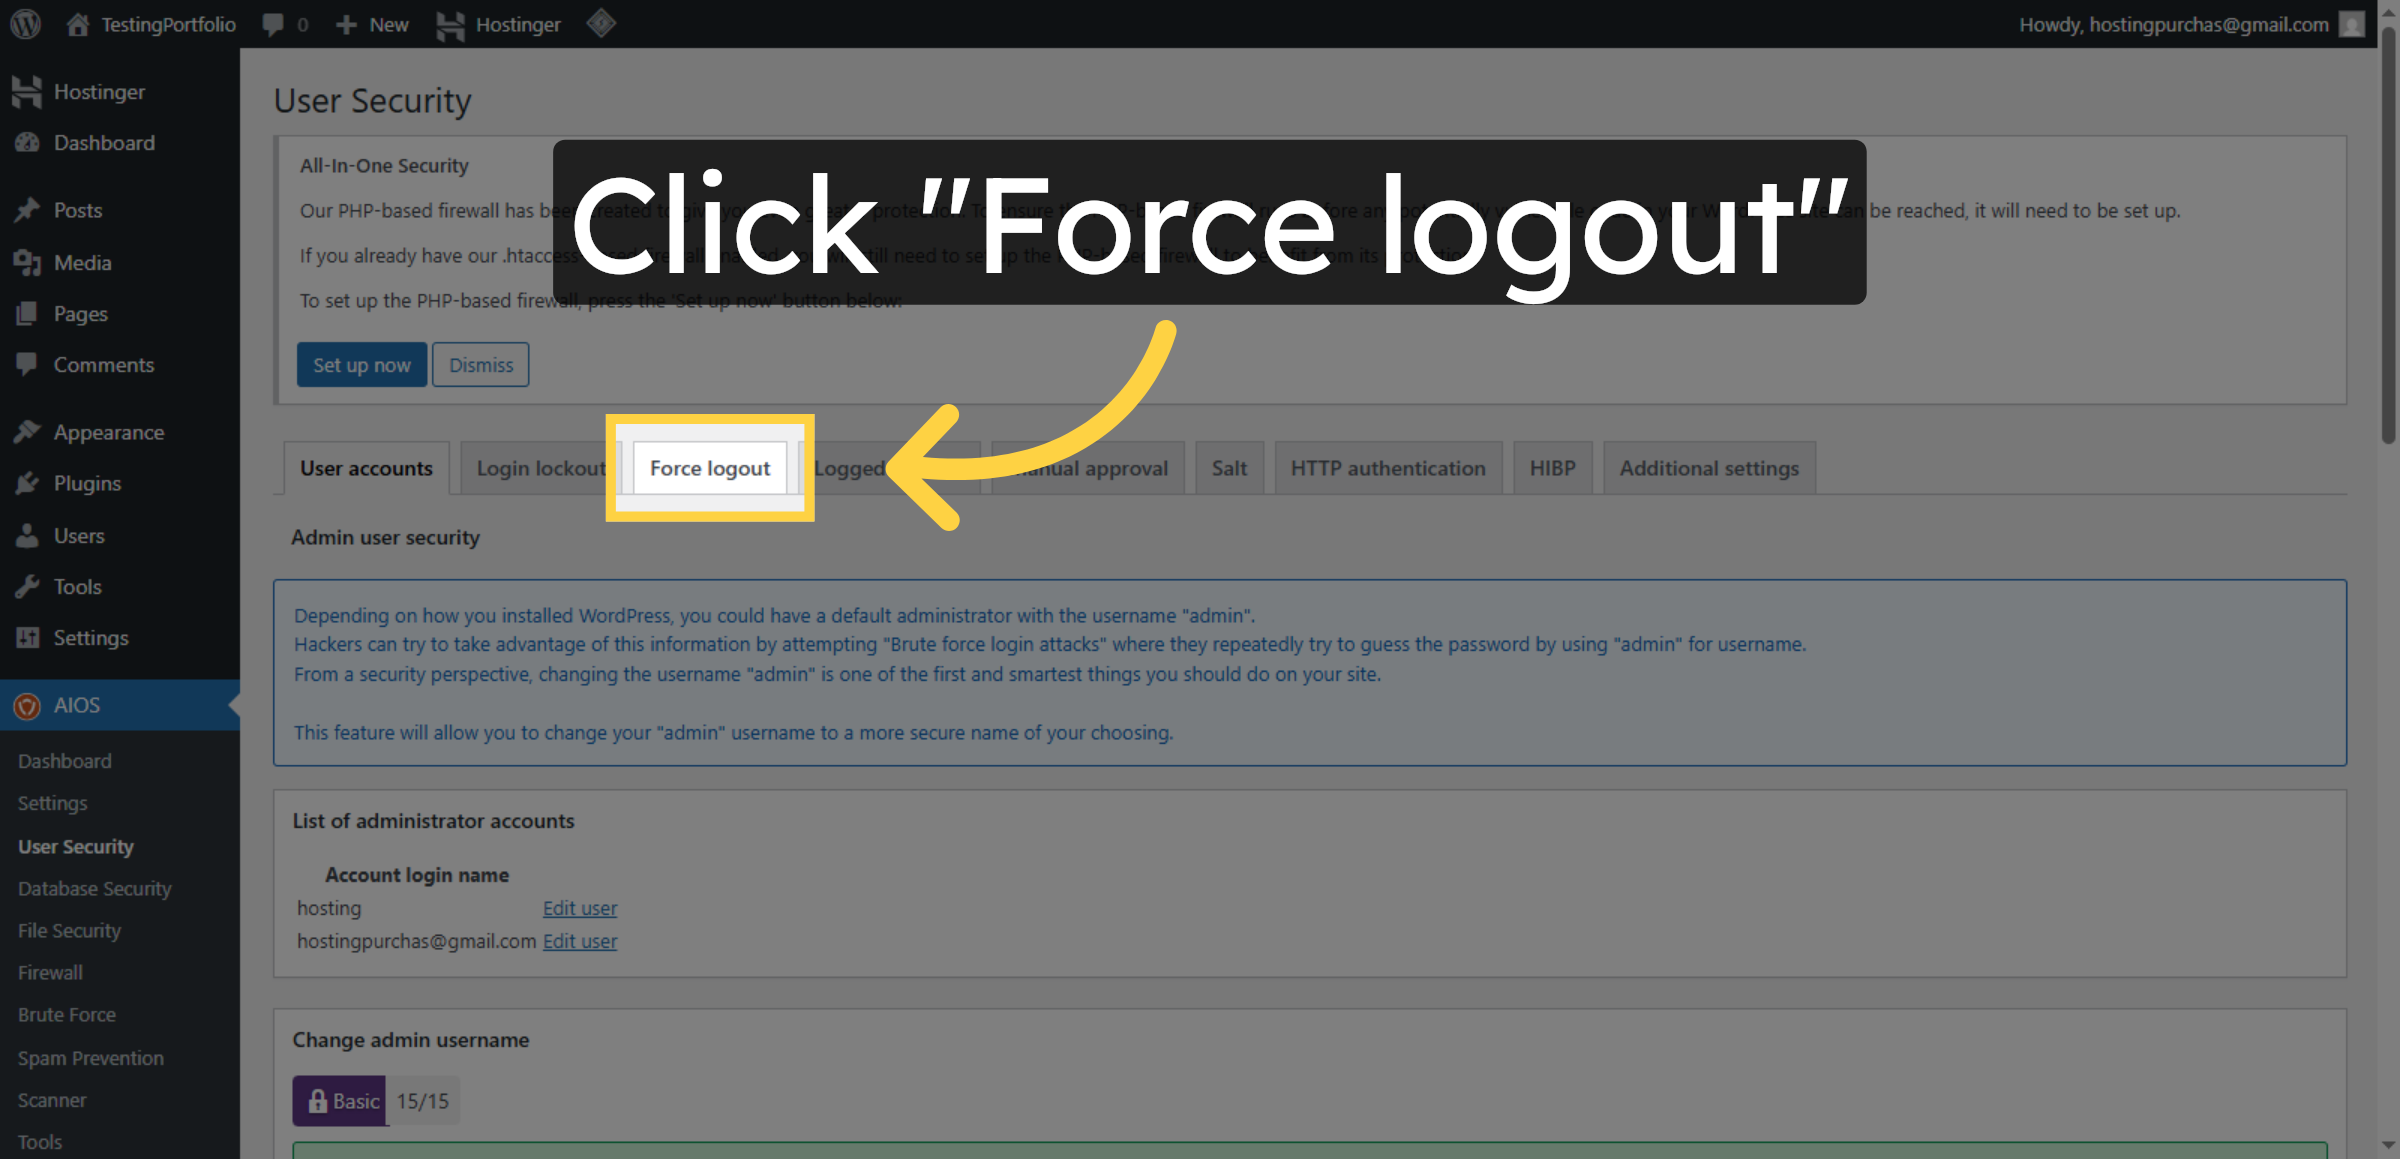
14. Force User Logout
Click Force logout to immediately log out all users for security purposes.
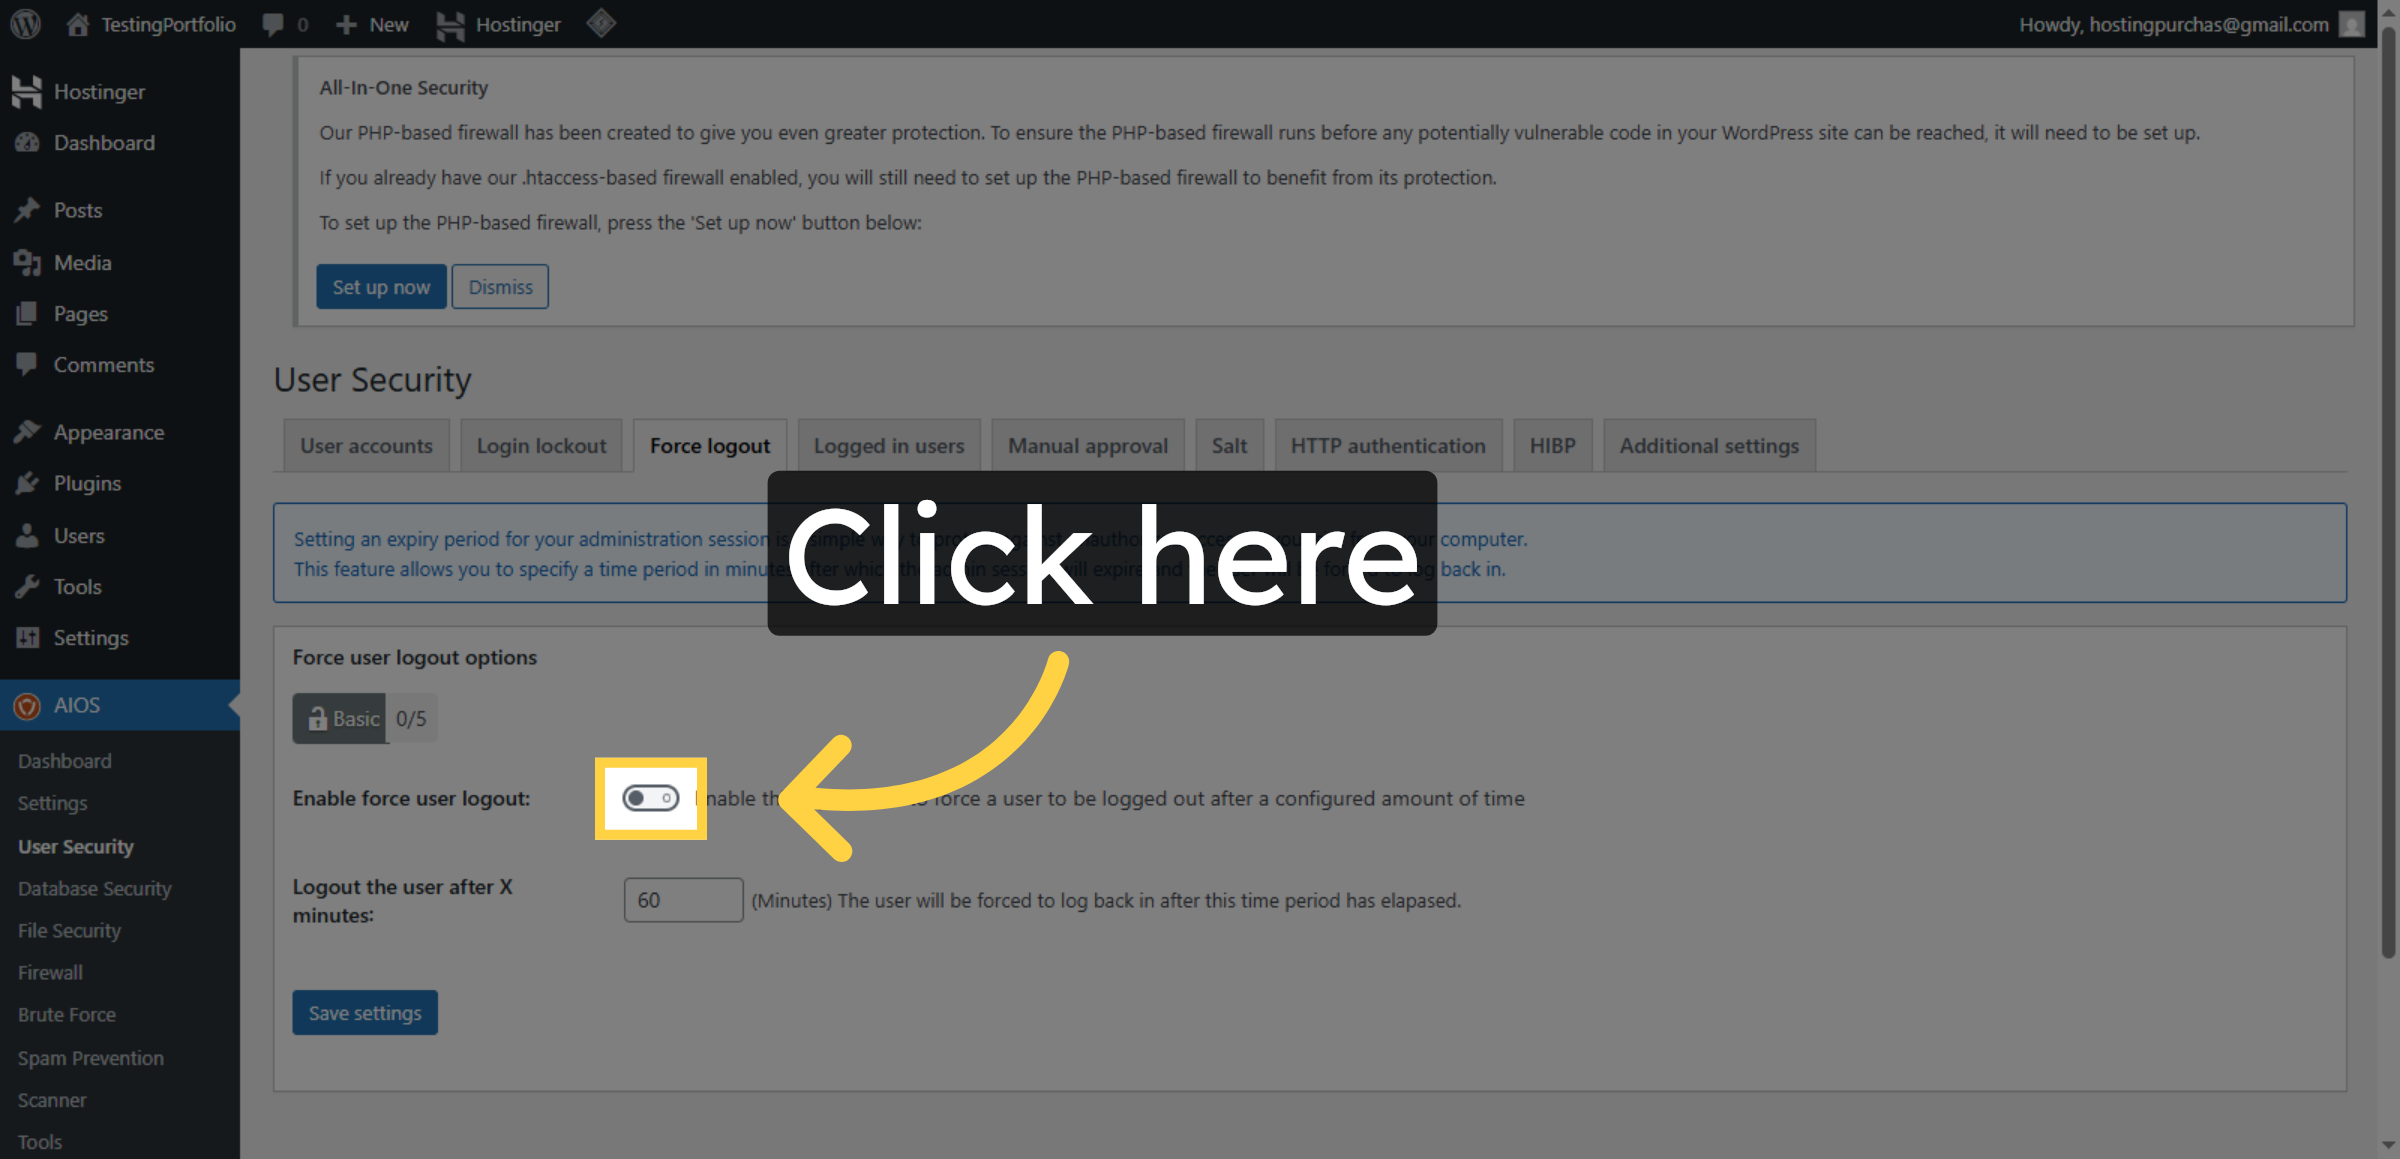
15. Enable Force Logout Feature
Click here to activate the force logout functionality within the plugin.
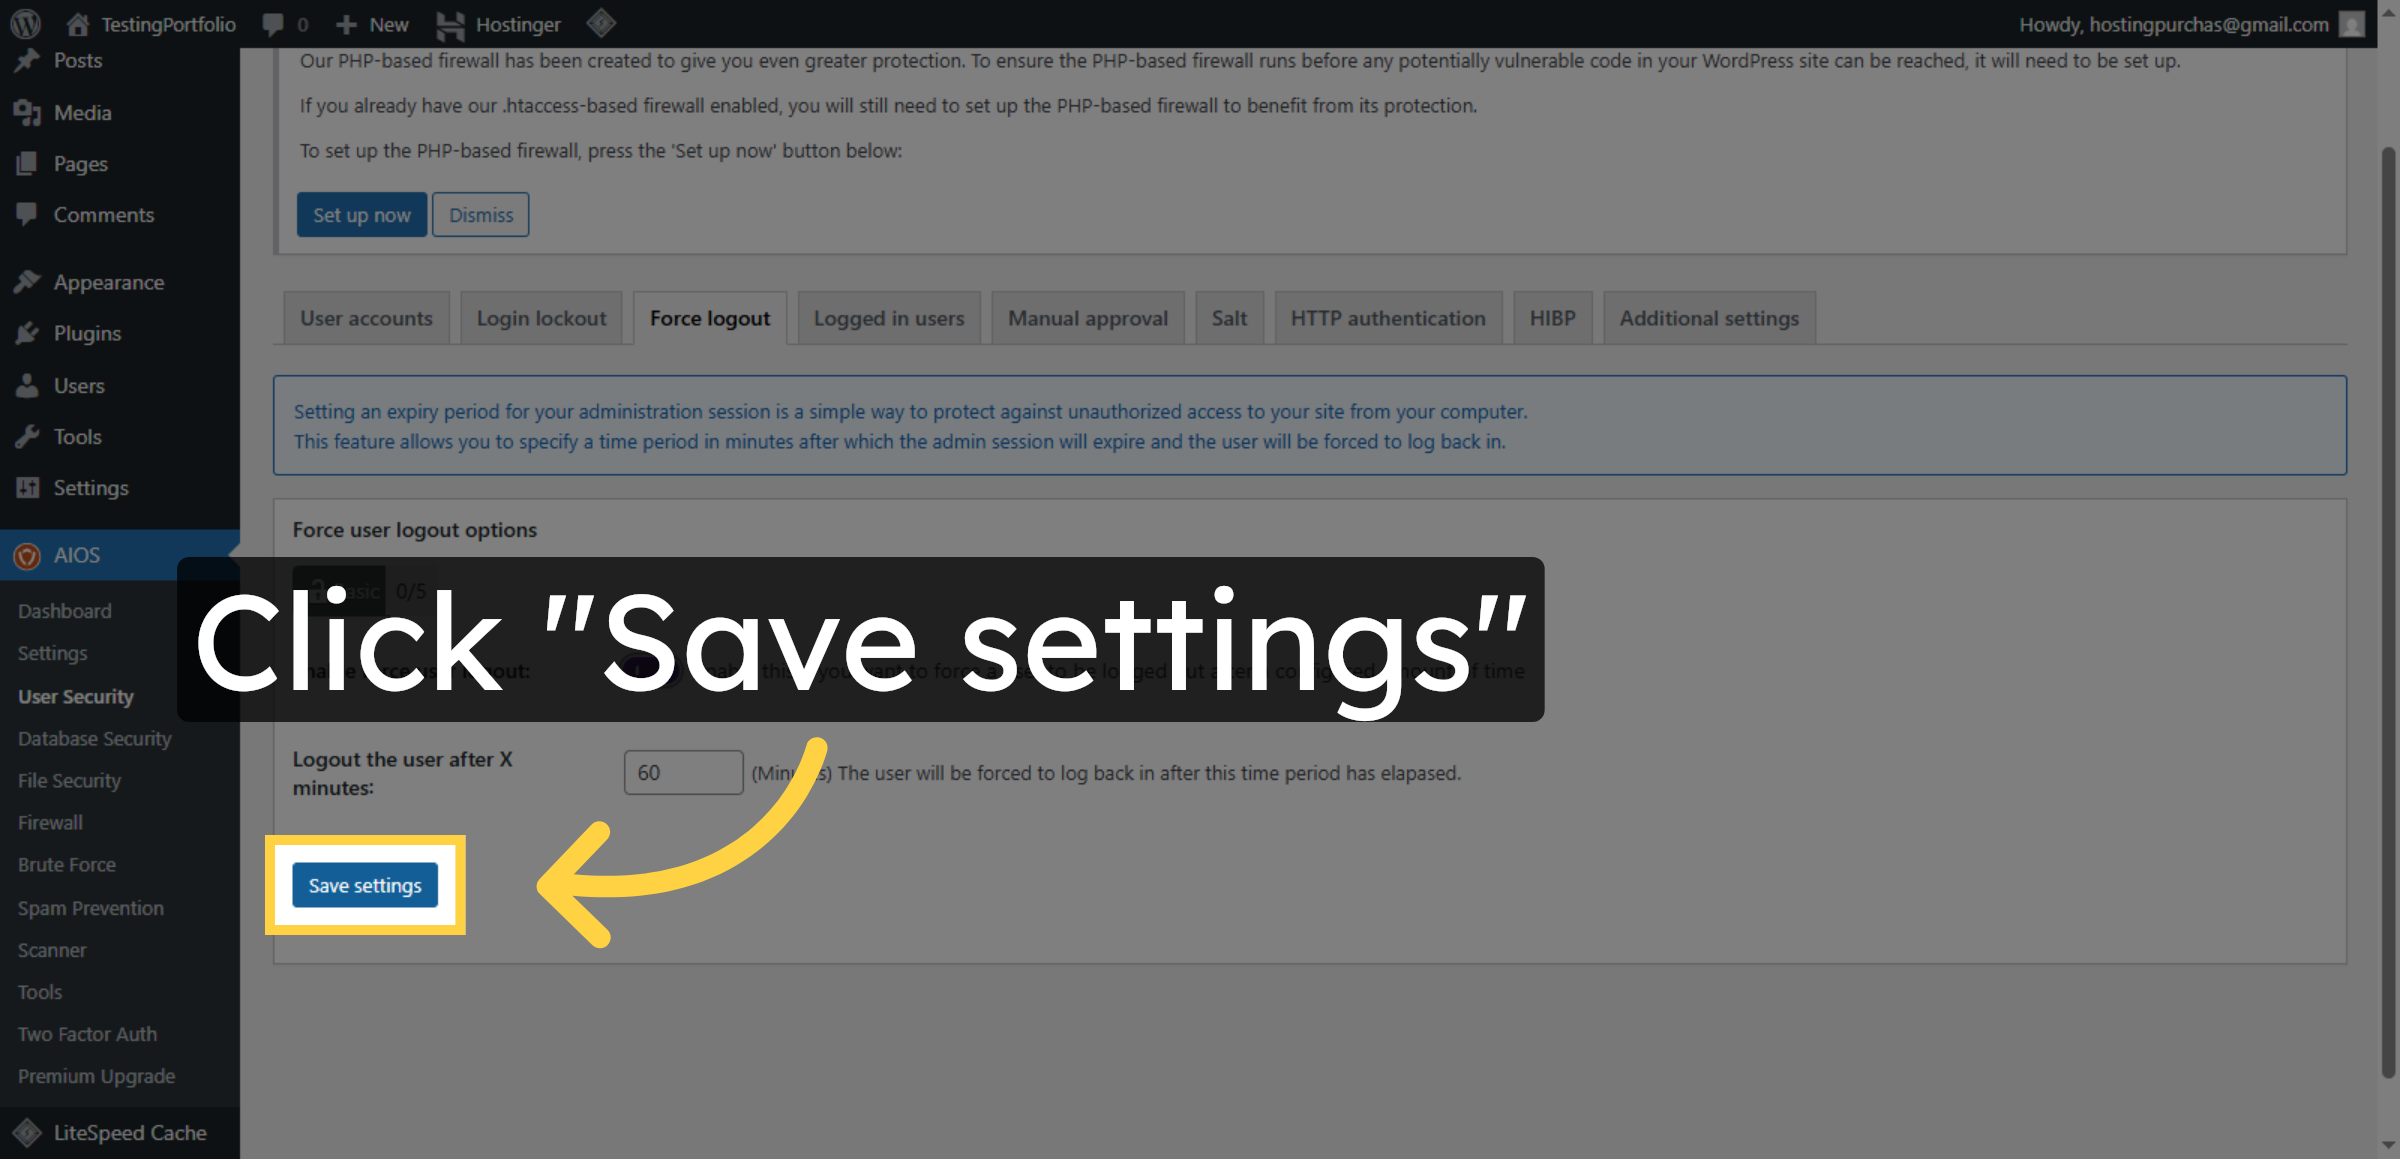
16. Save Force Logout Settings
Click Save settings to confirm and save the force logout configuration.
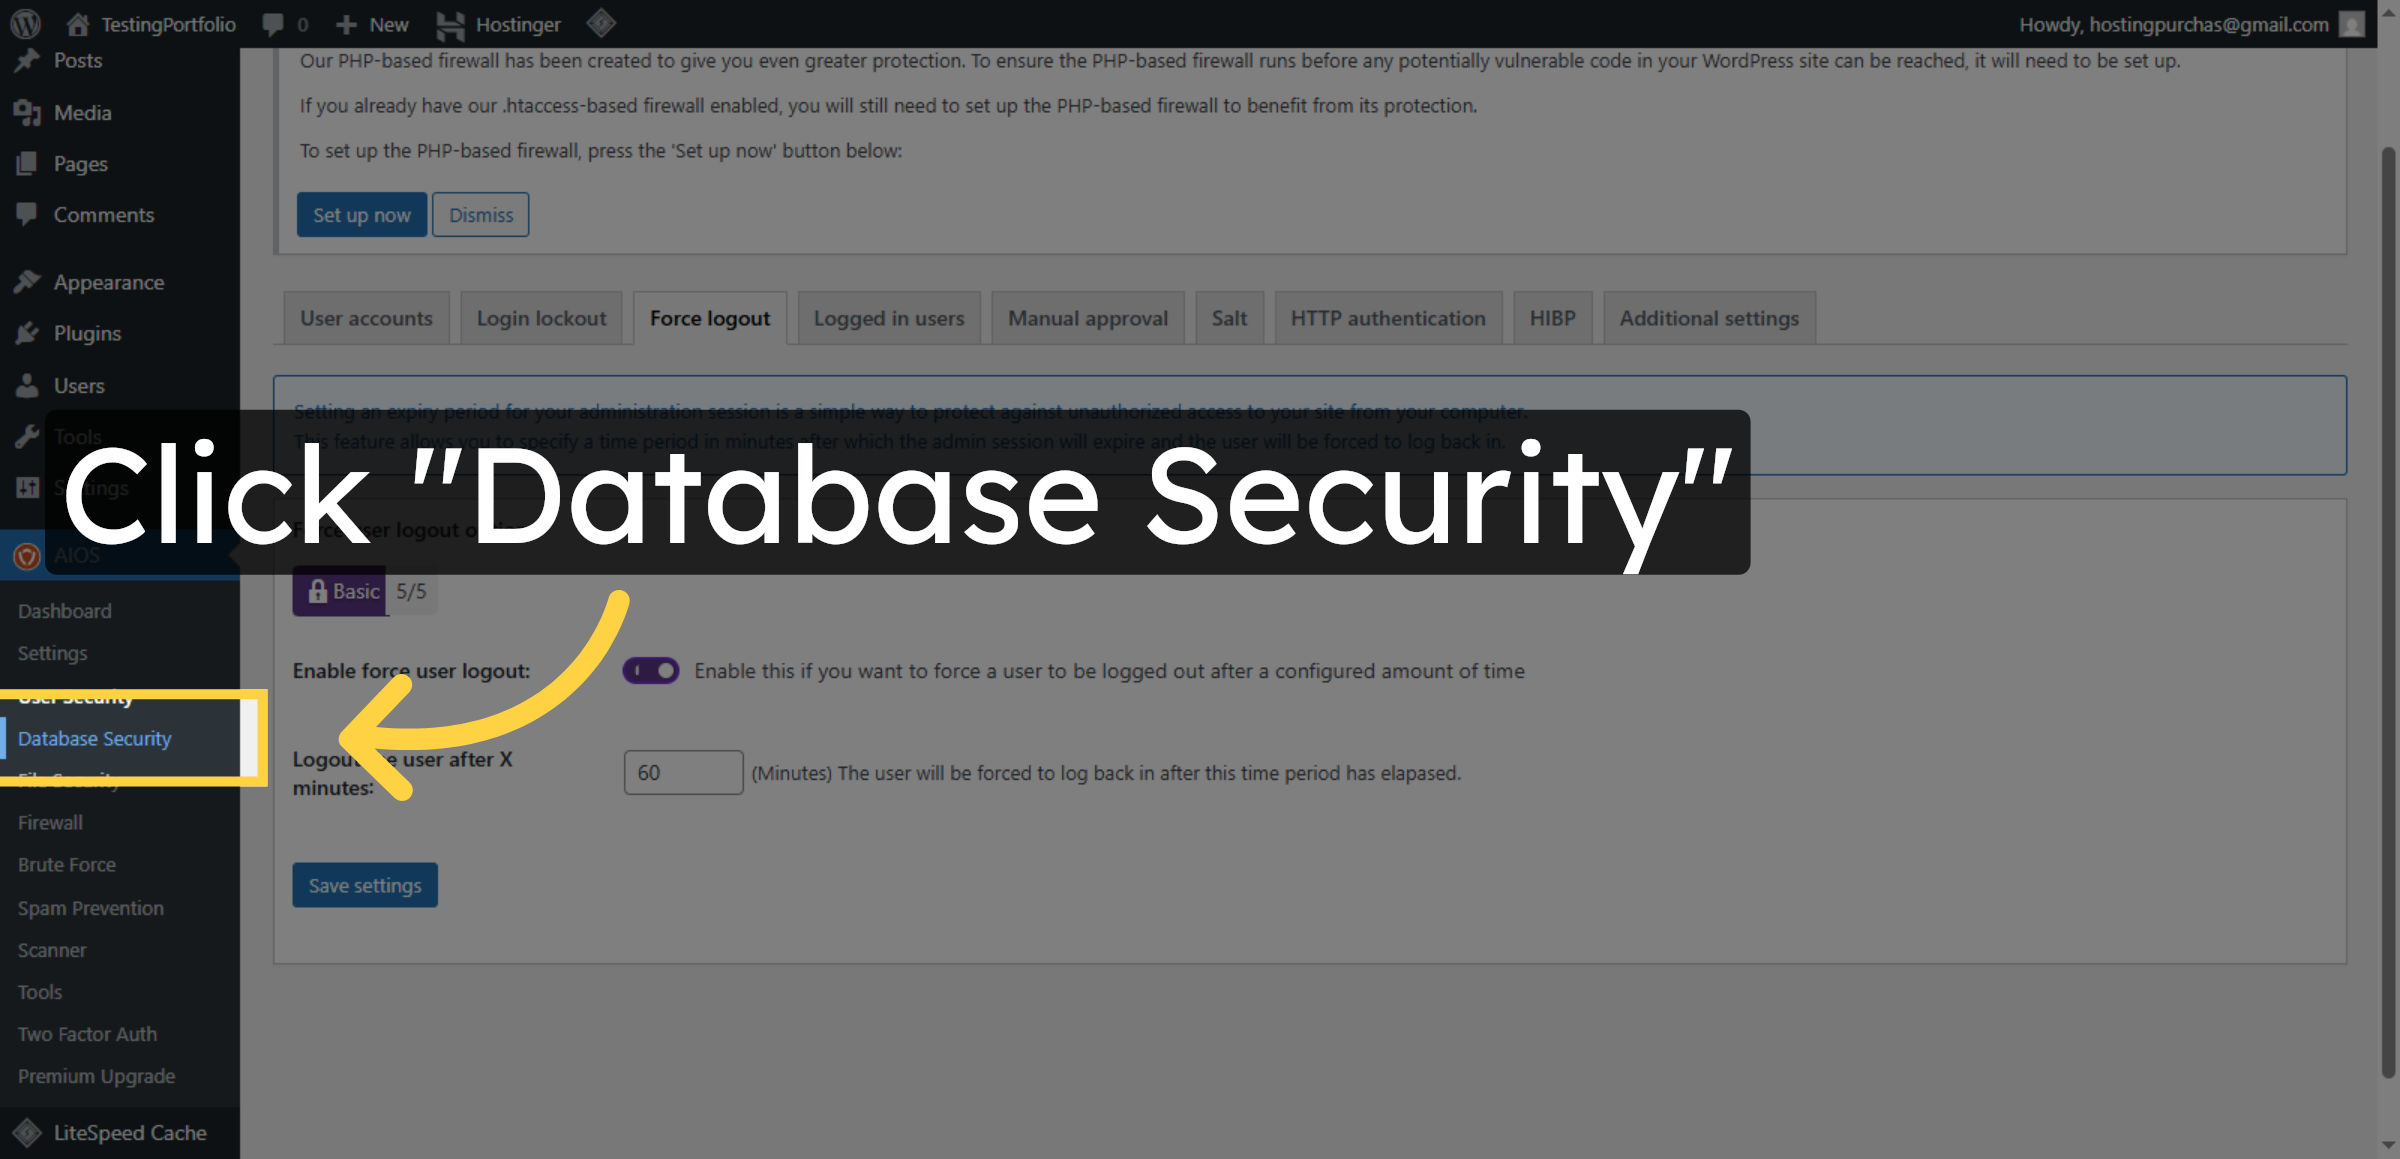
17. Open Database Security Settings
Click Database Security to access options for securing your website’s database.
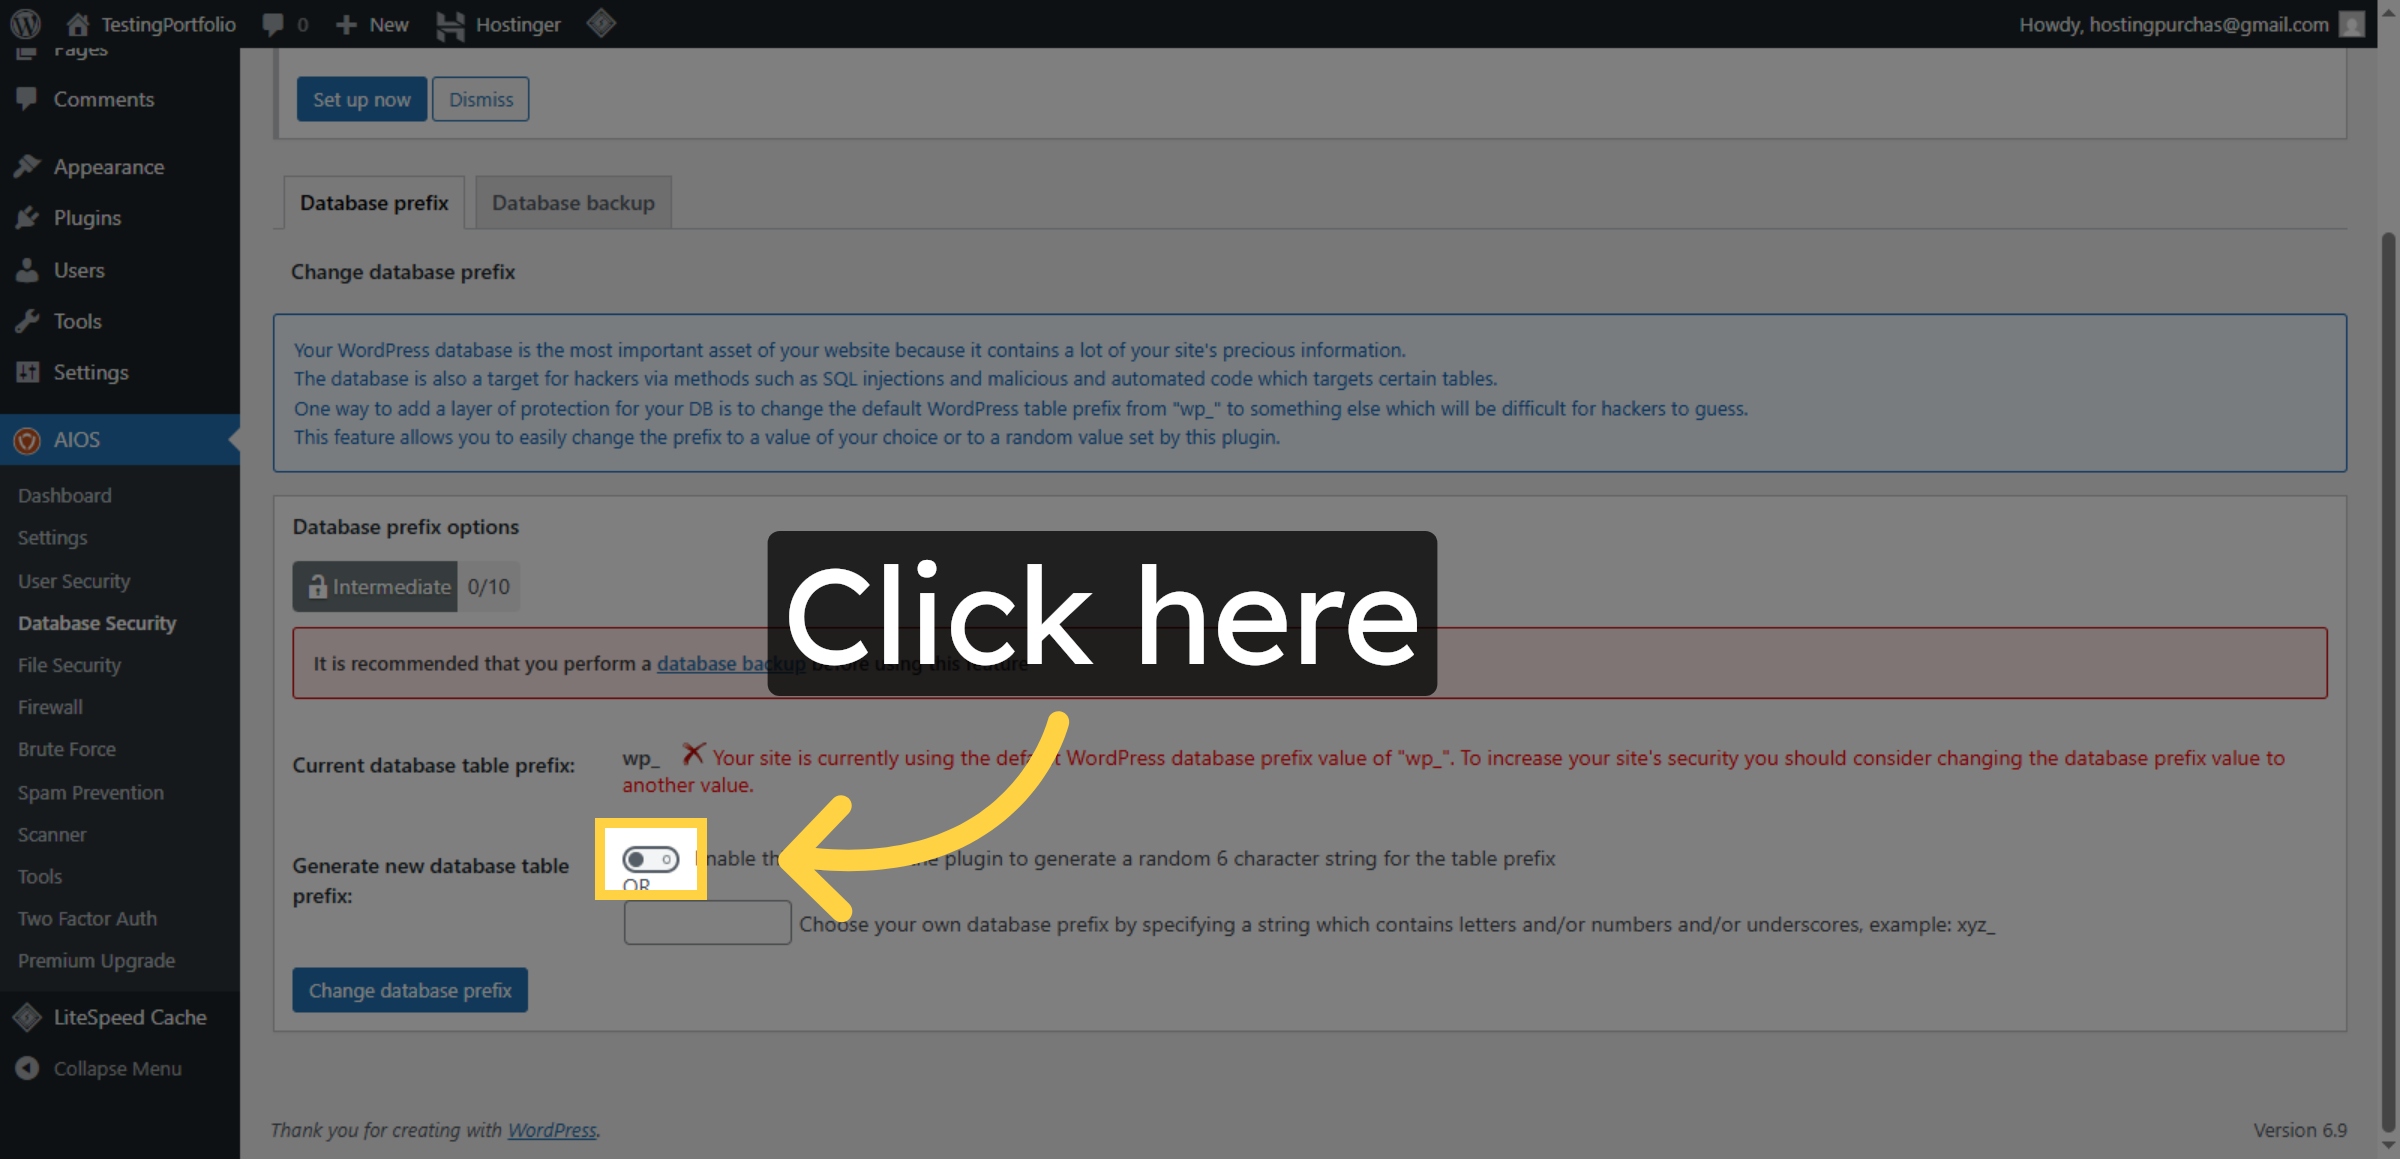
18. Enable Database Prefix Change
Click here to enable changing the database prefix to enhance security.
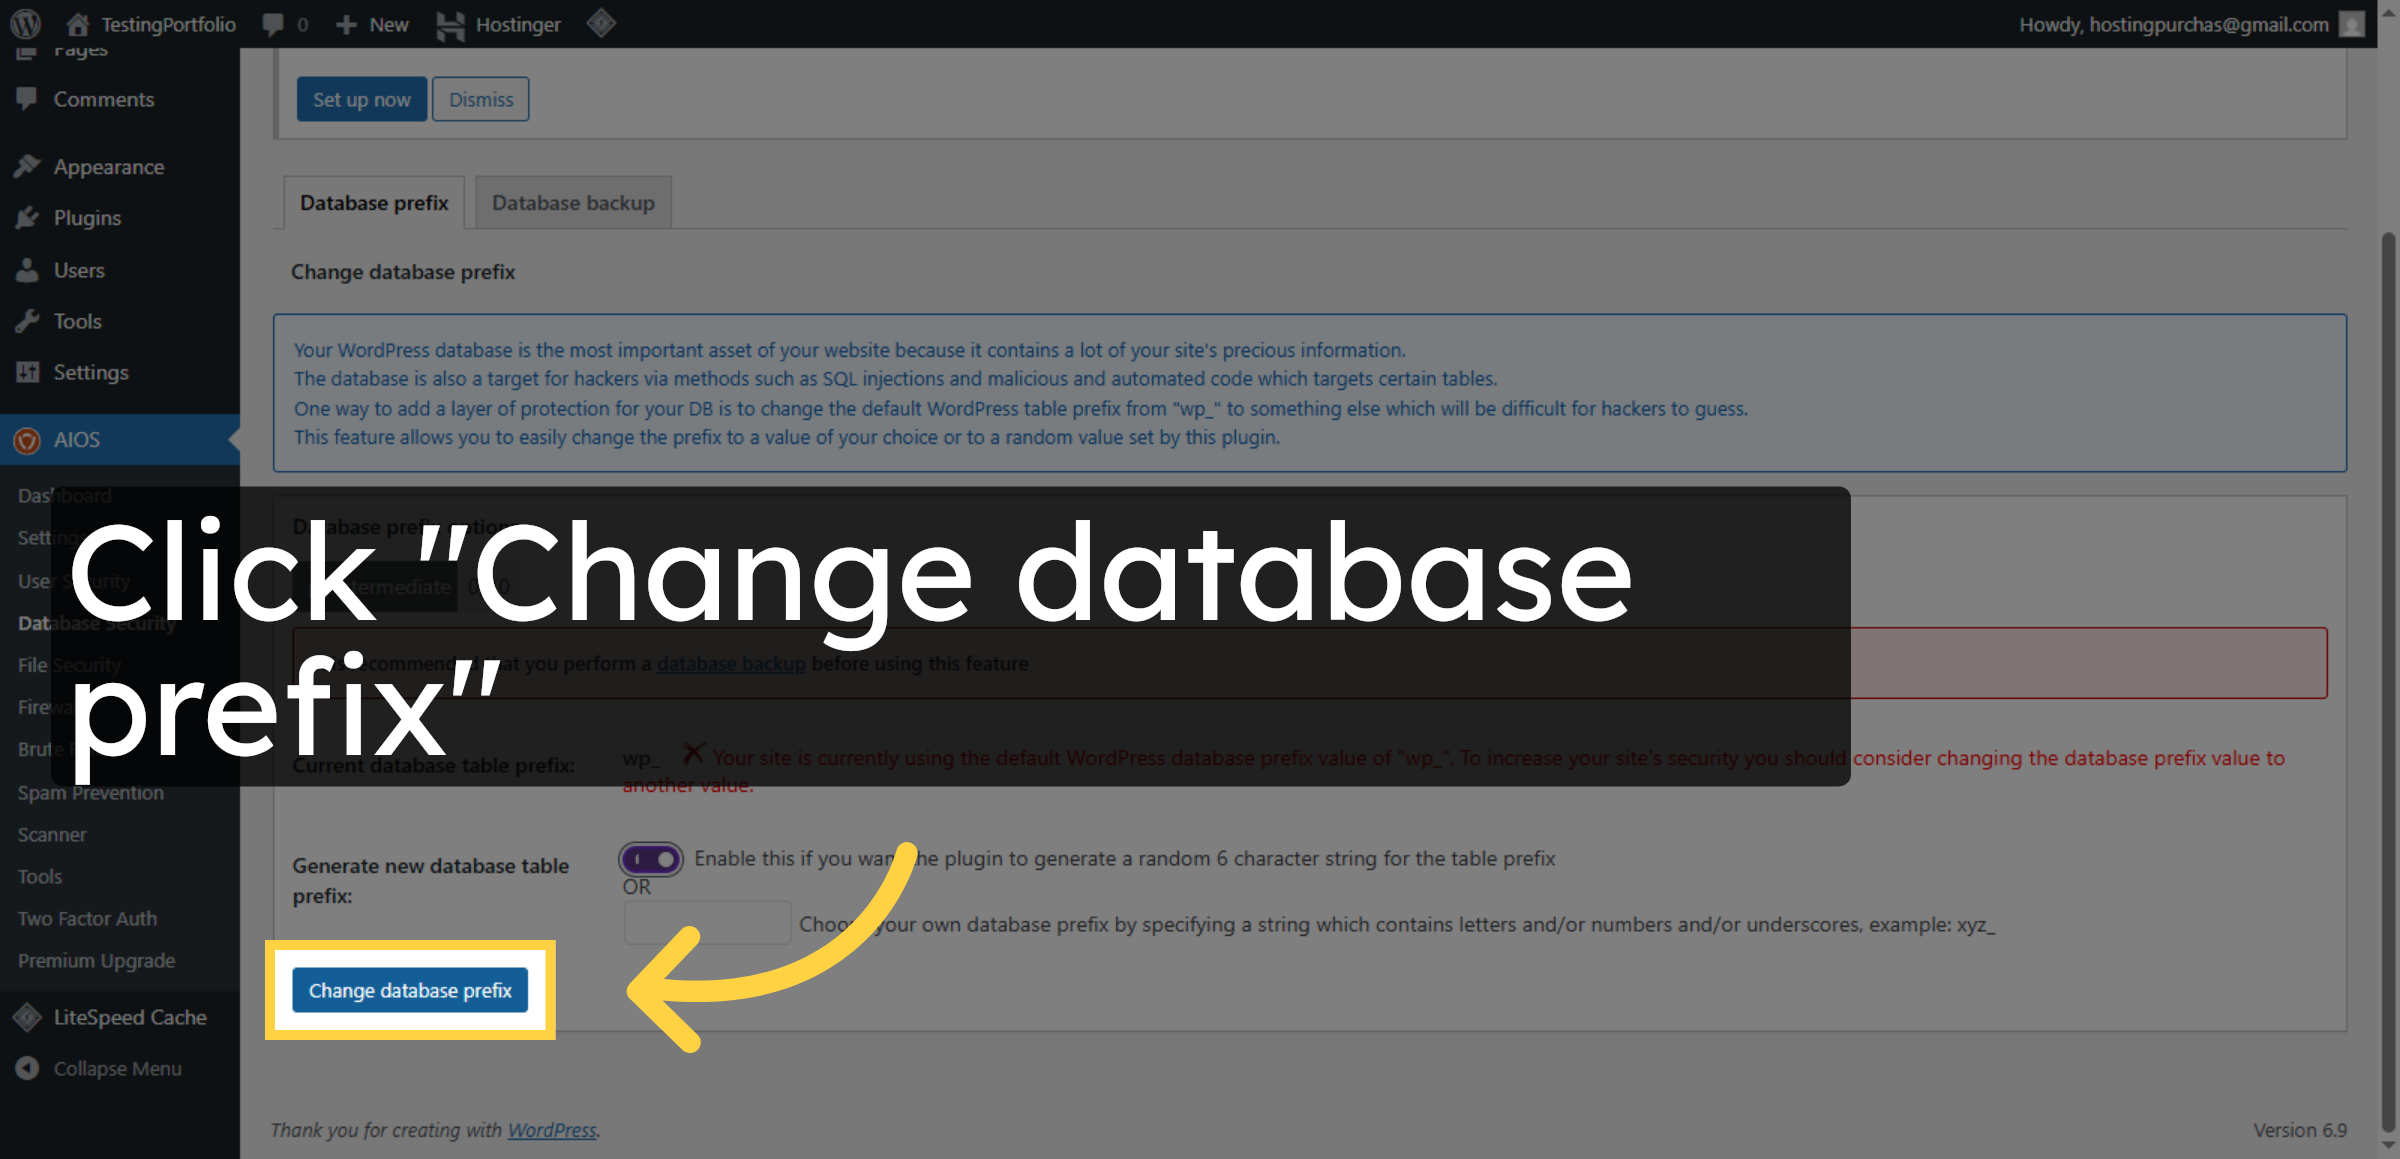
19. Apply Database Prefix Change
Click Change database prefix to update the database table prefixes for security.
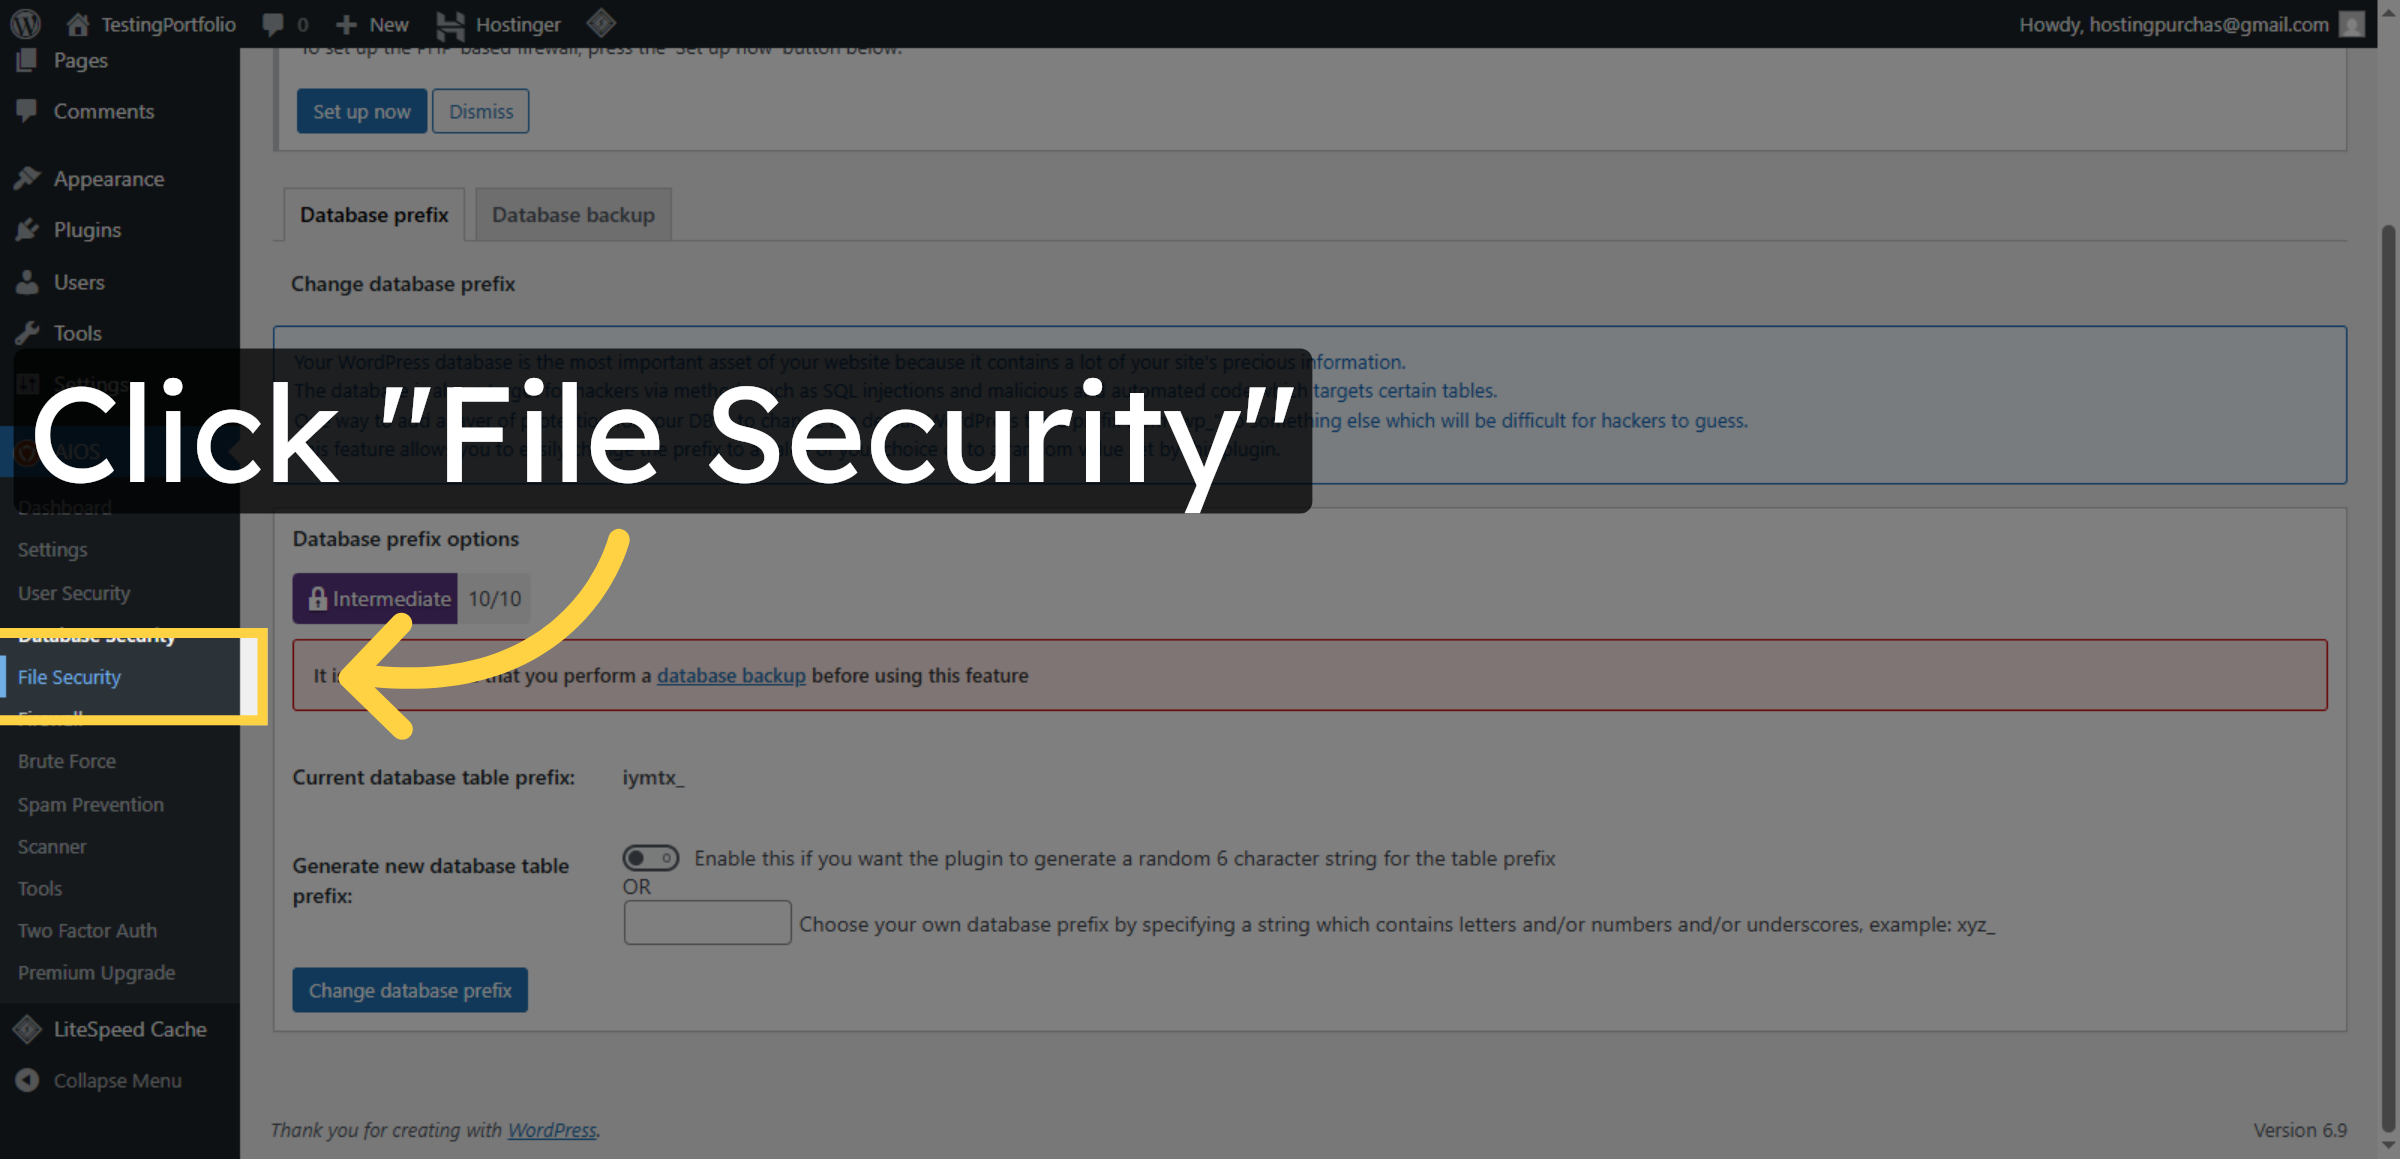
20. Access File Security Settings
Click File Security to manage file permission and protection settings.
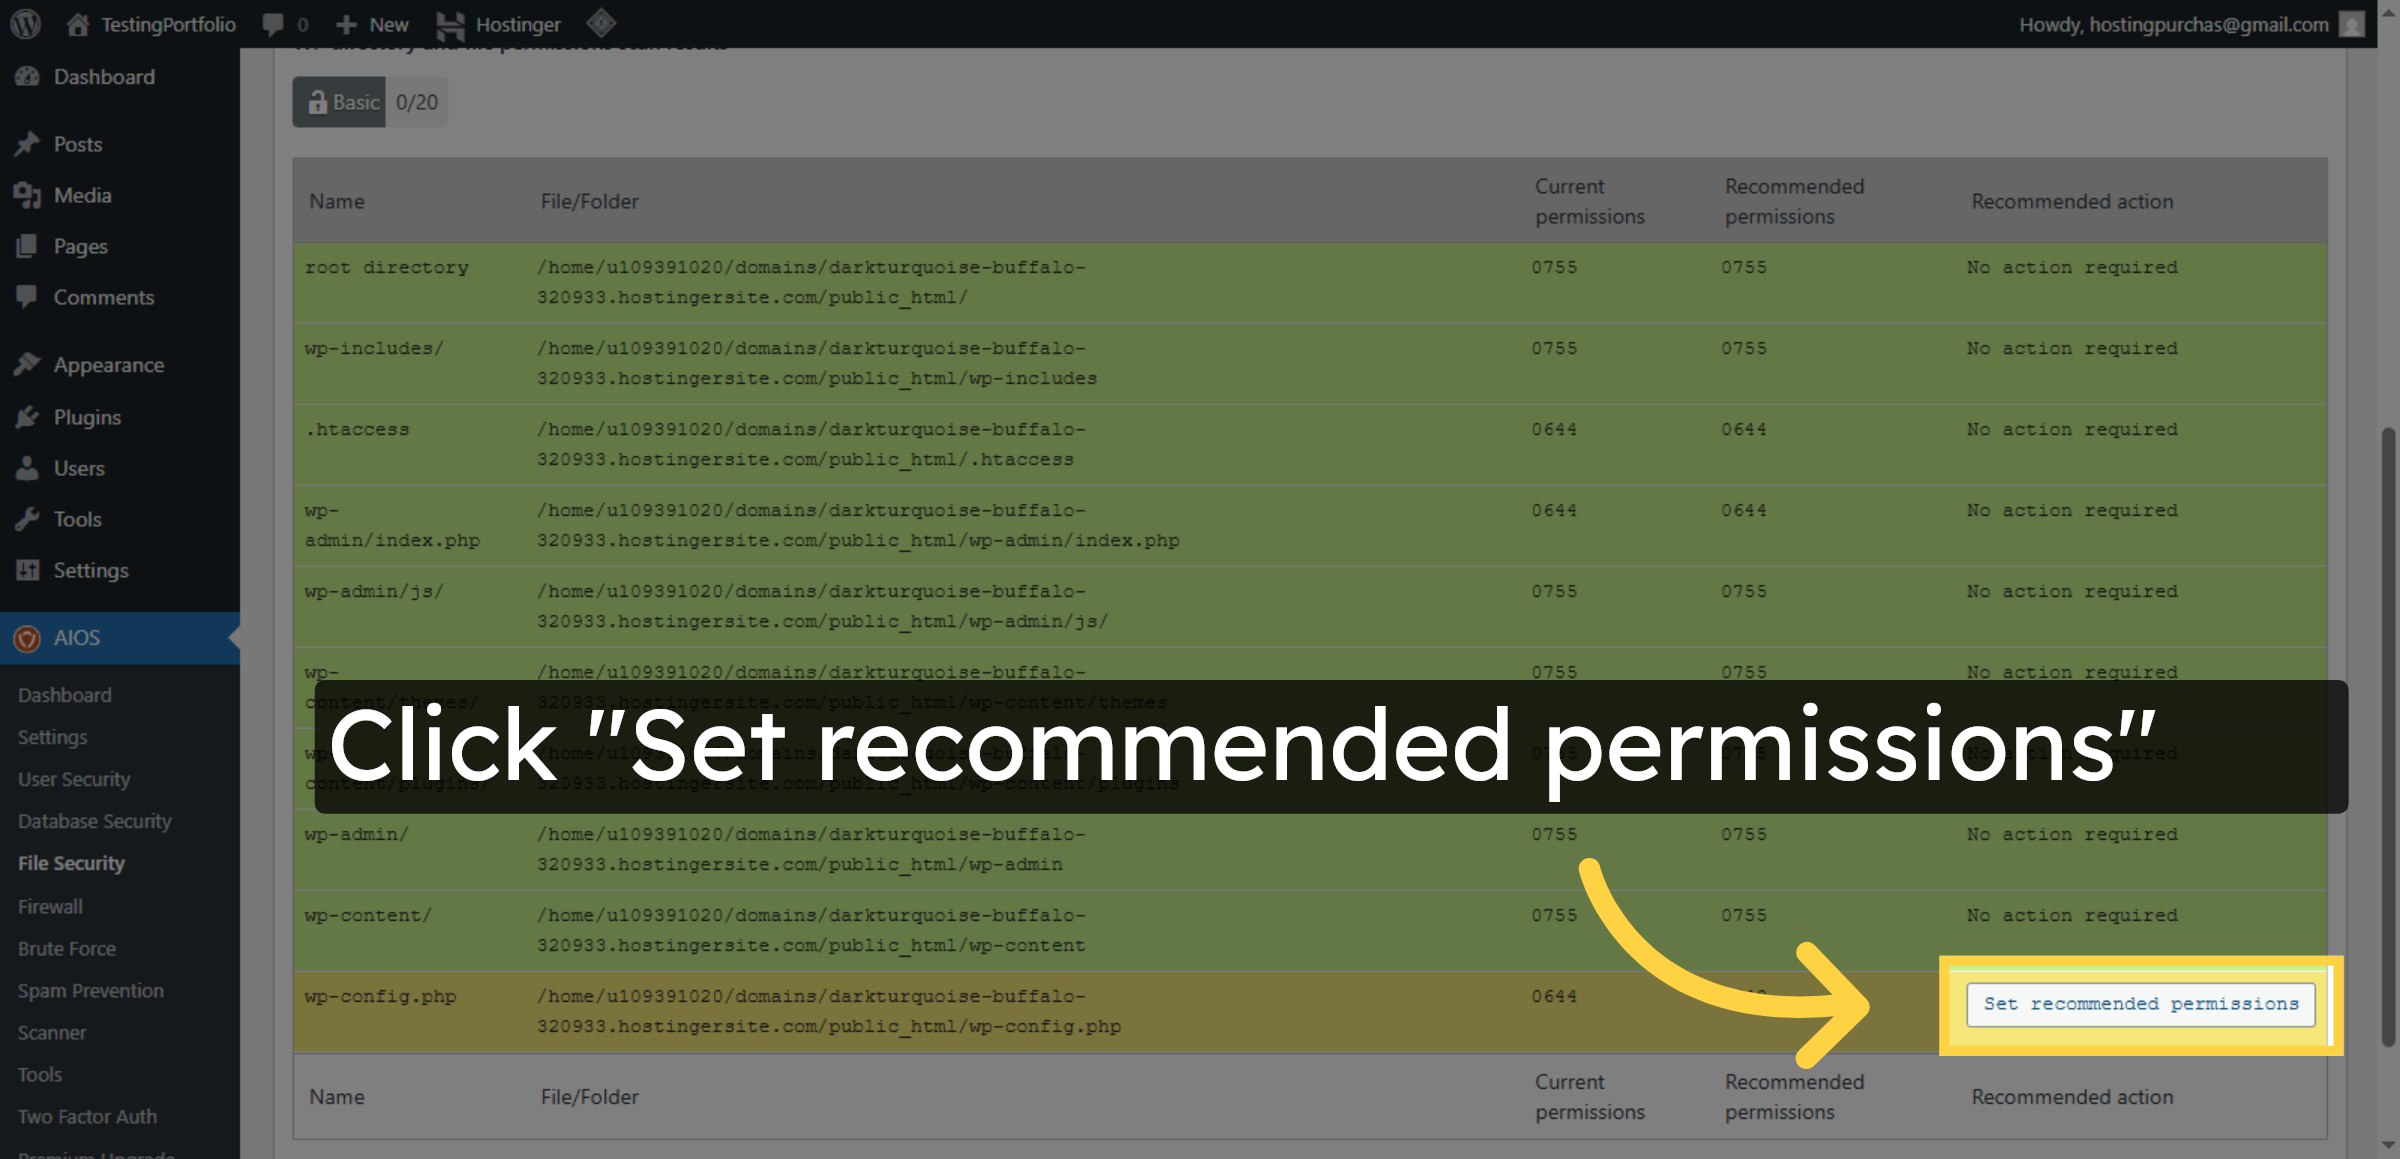
21. Set Recommended File Permissions
Click Set recommended permissions to apply secure default permissions to your files.
22. Open File Protection Options
Click File protection to configure additional file security measures.

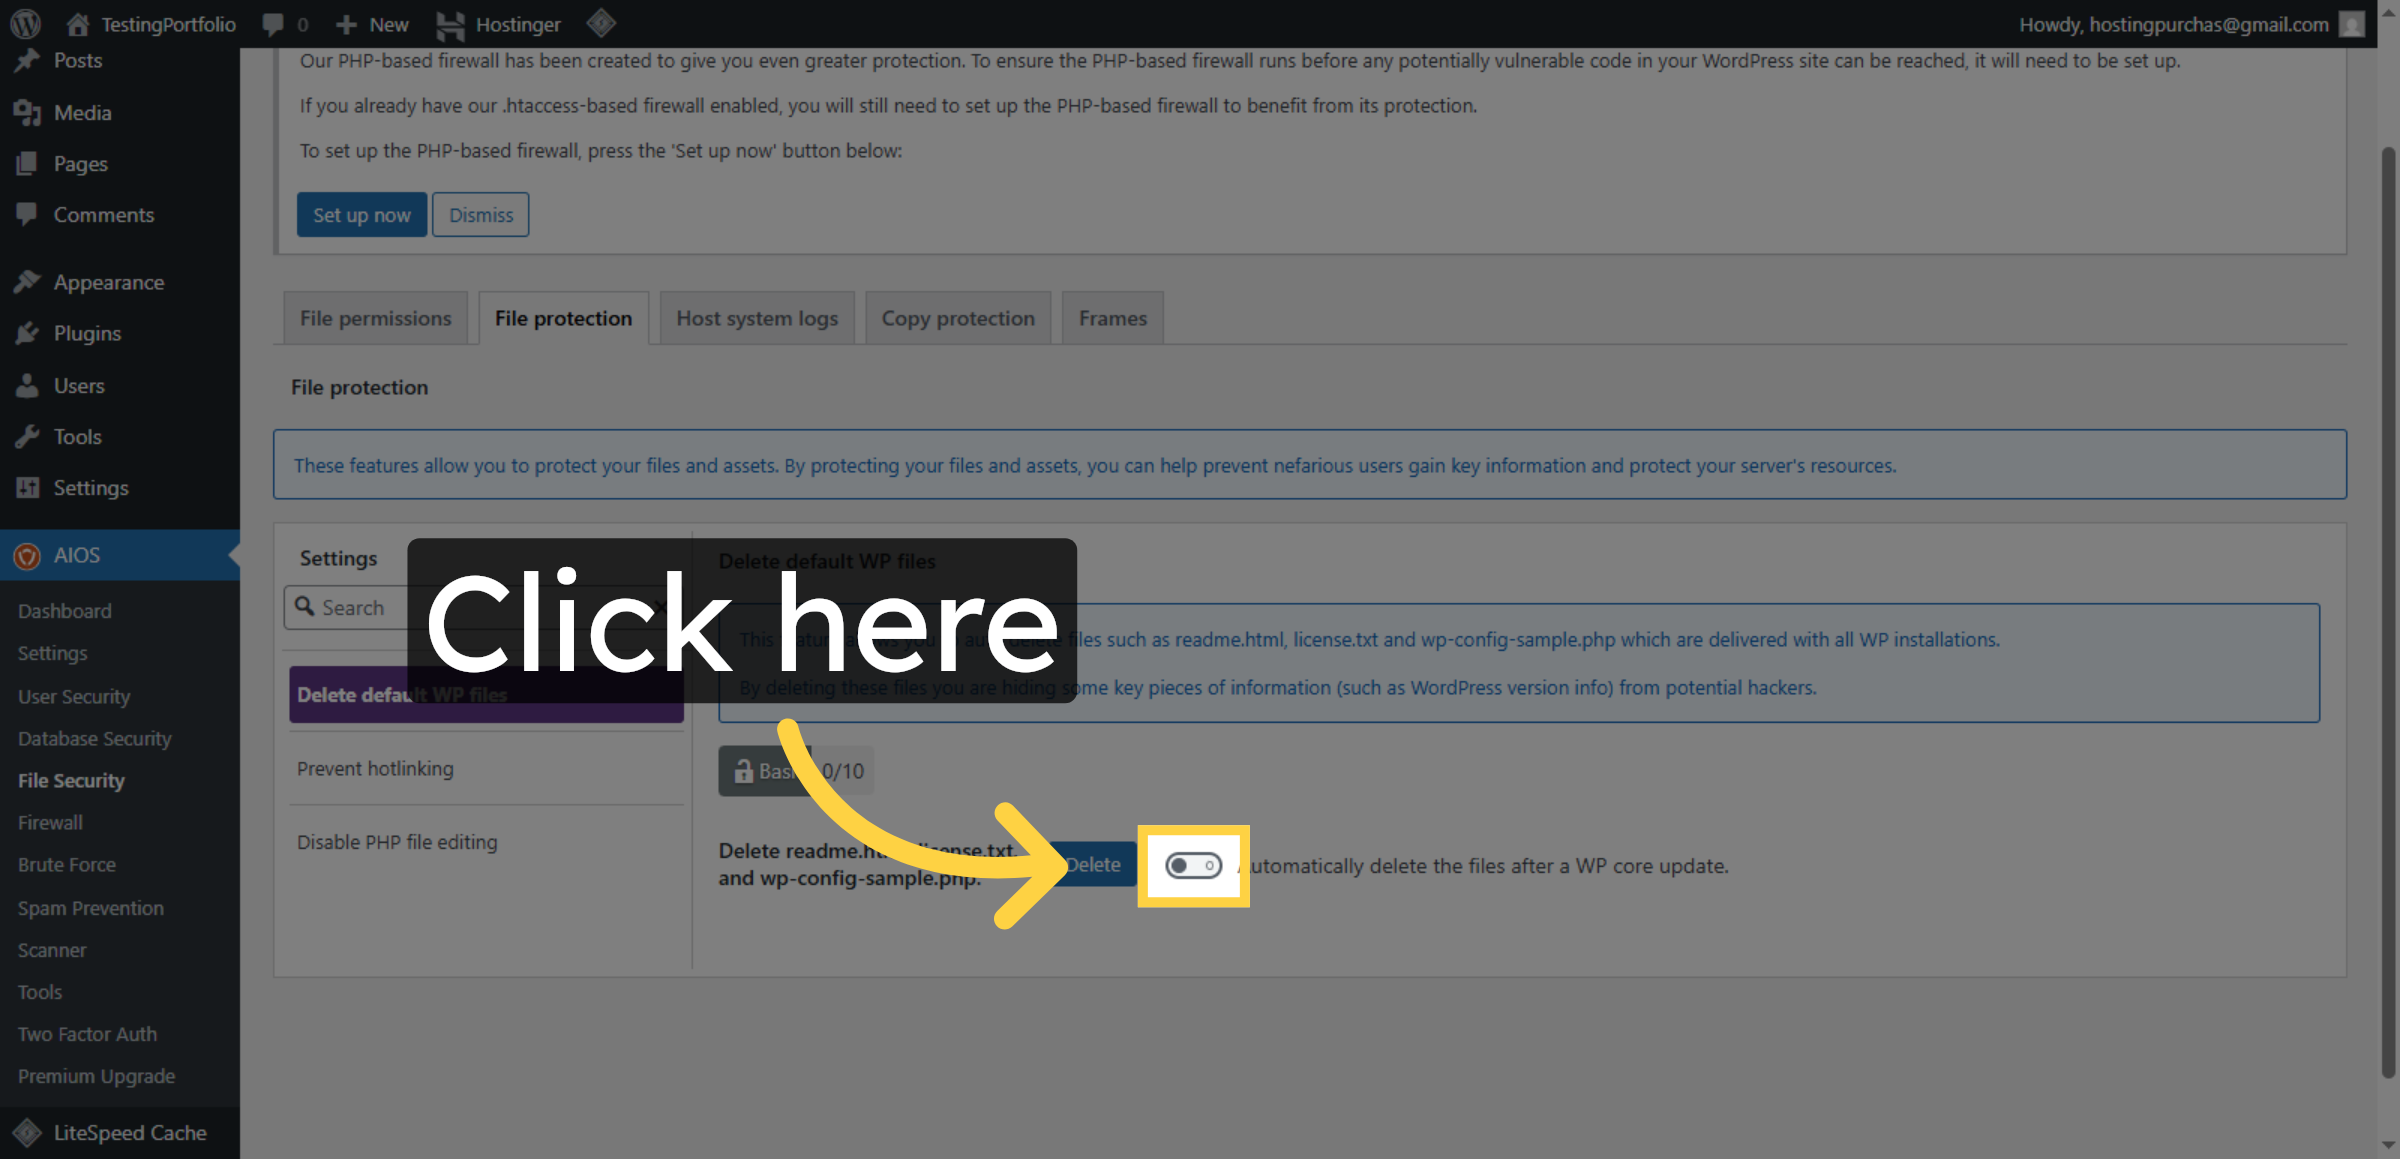
23. Enable File Protection
Click here to activate file protection features within the plugin.
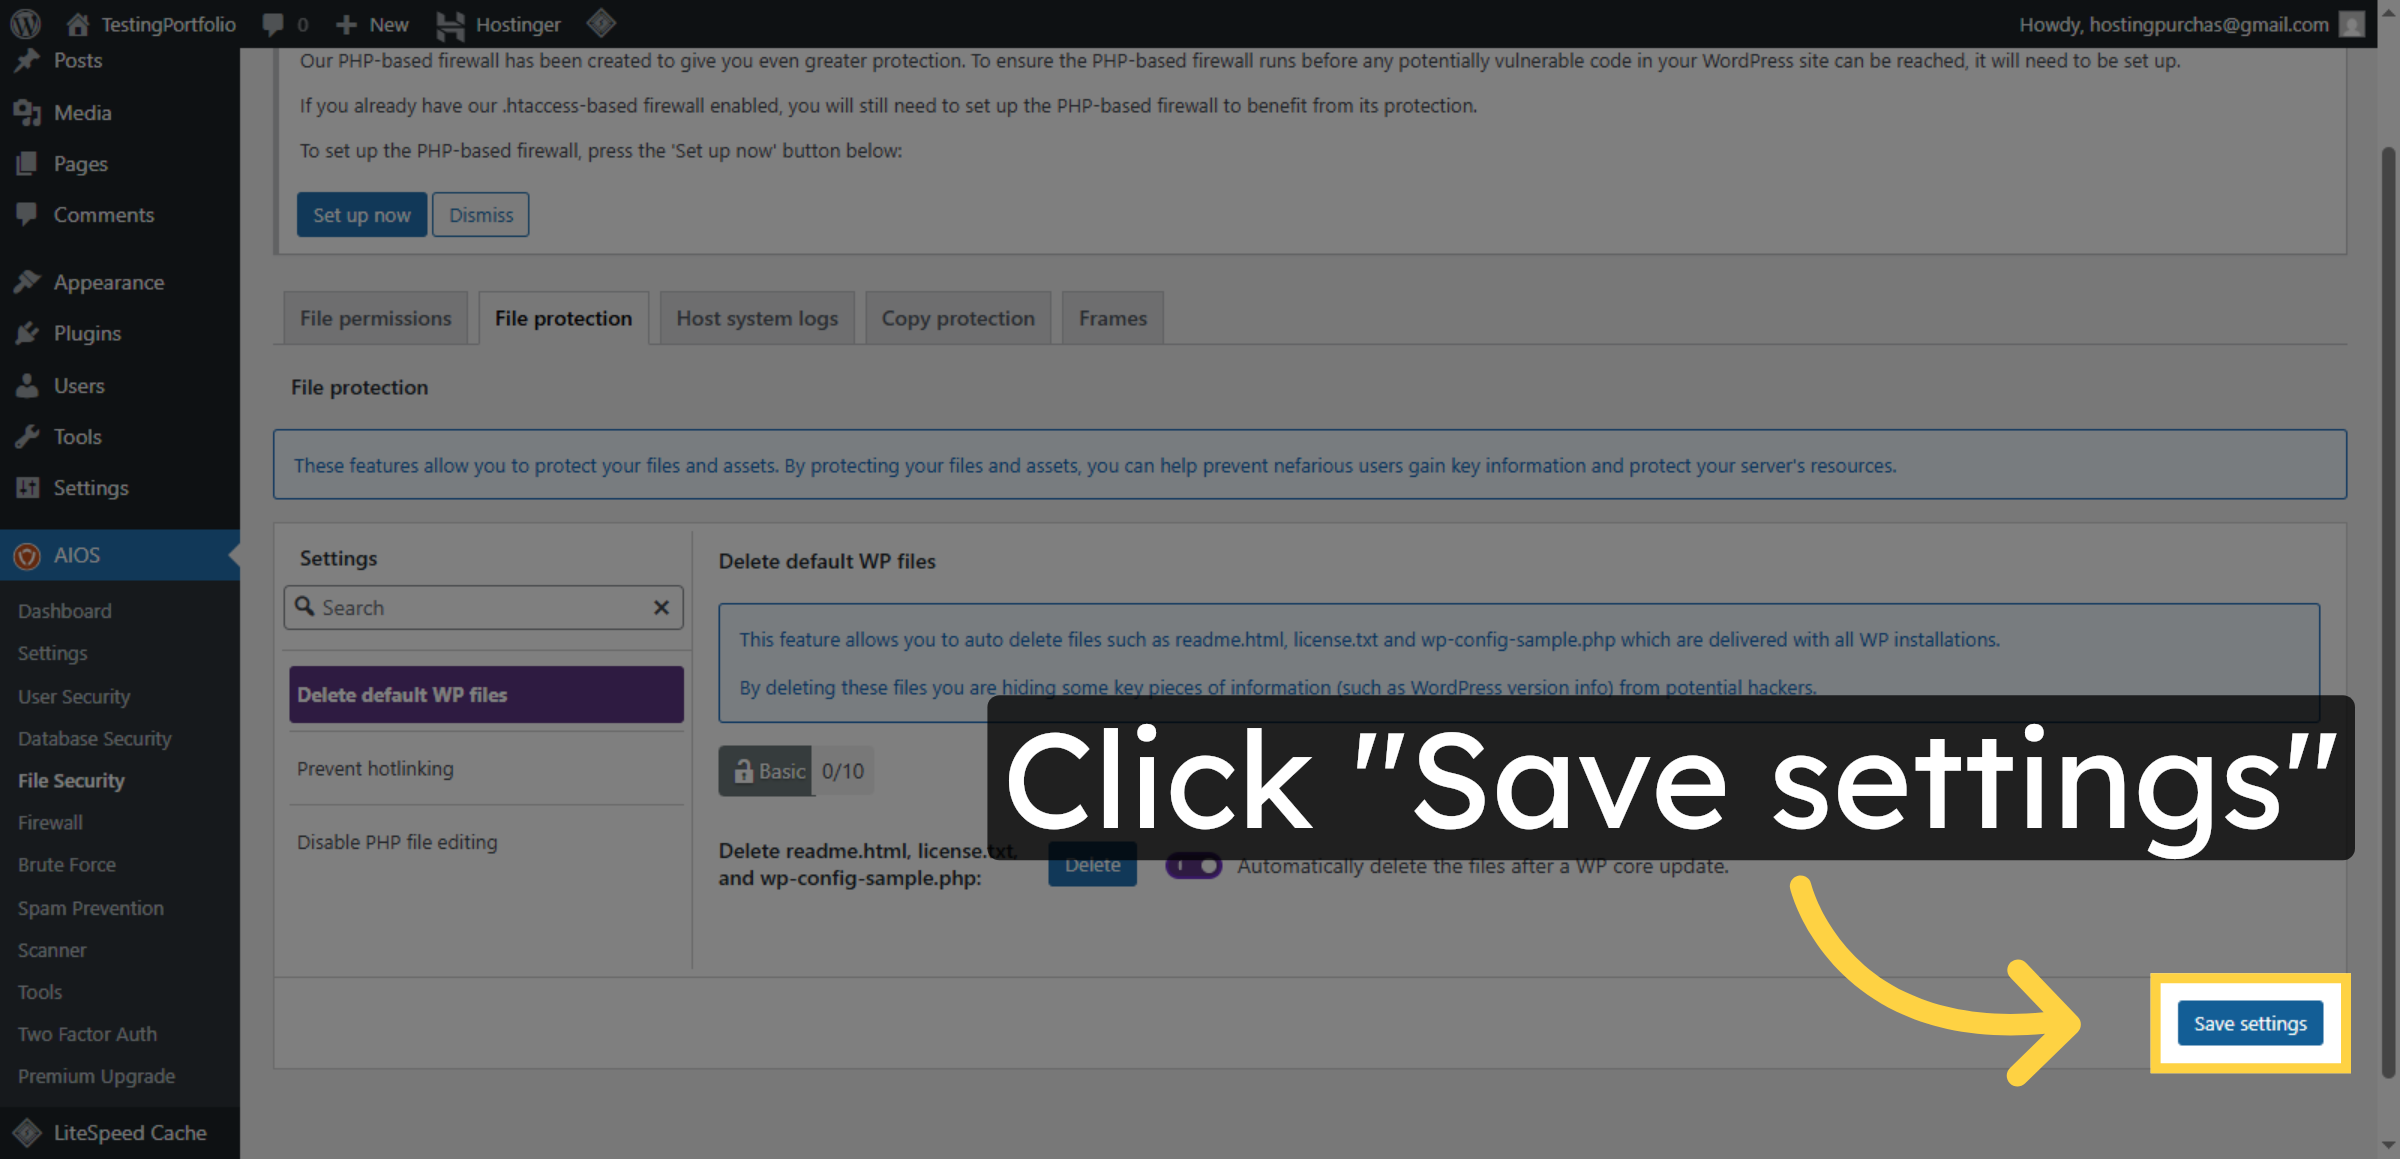
24. Save File Security Settings
Click Save settings to apply all changes made in the File Security section.
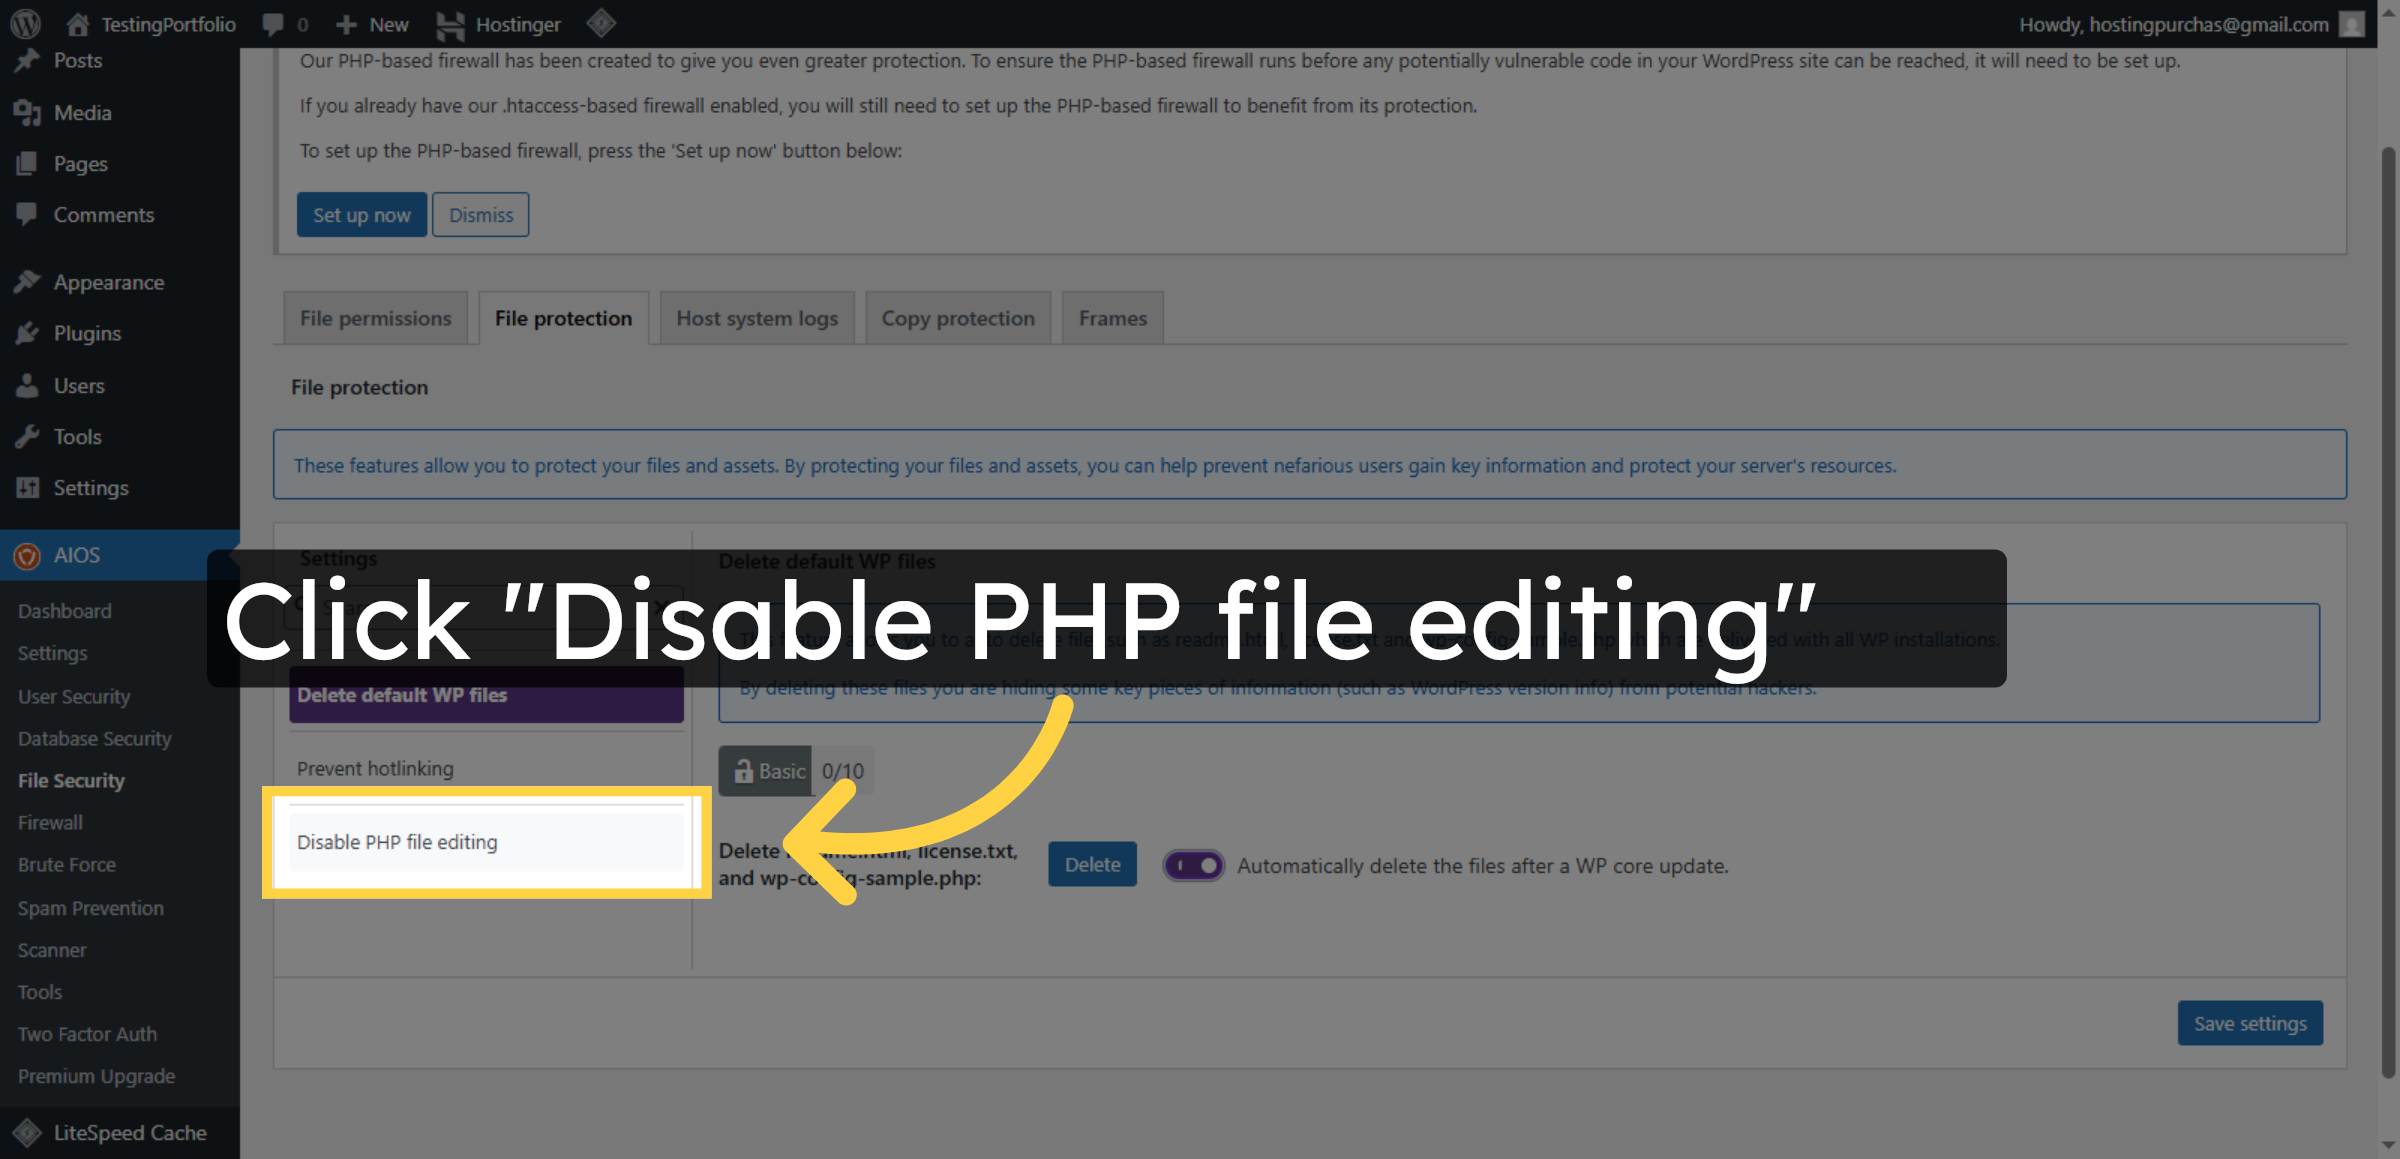
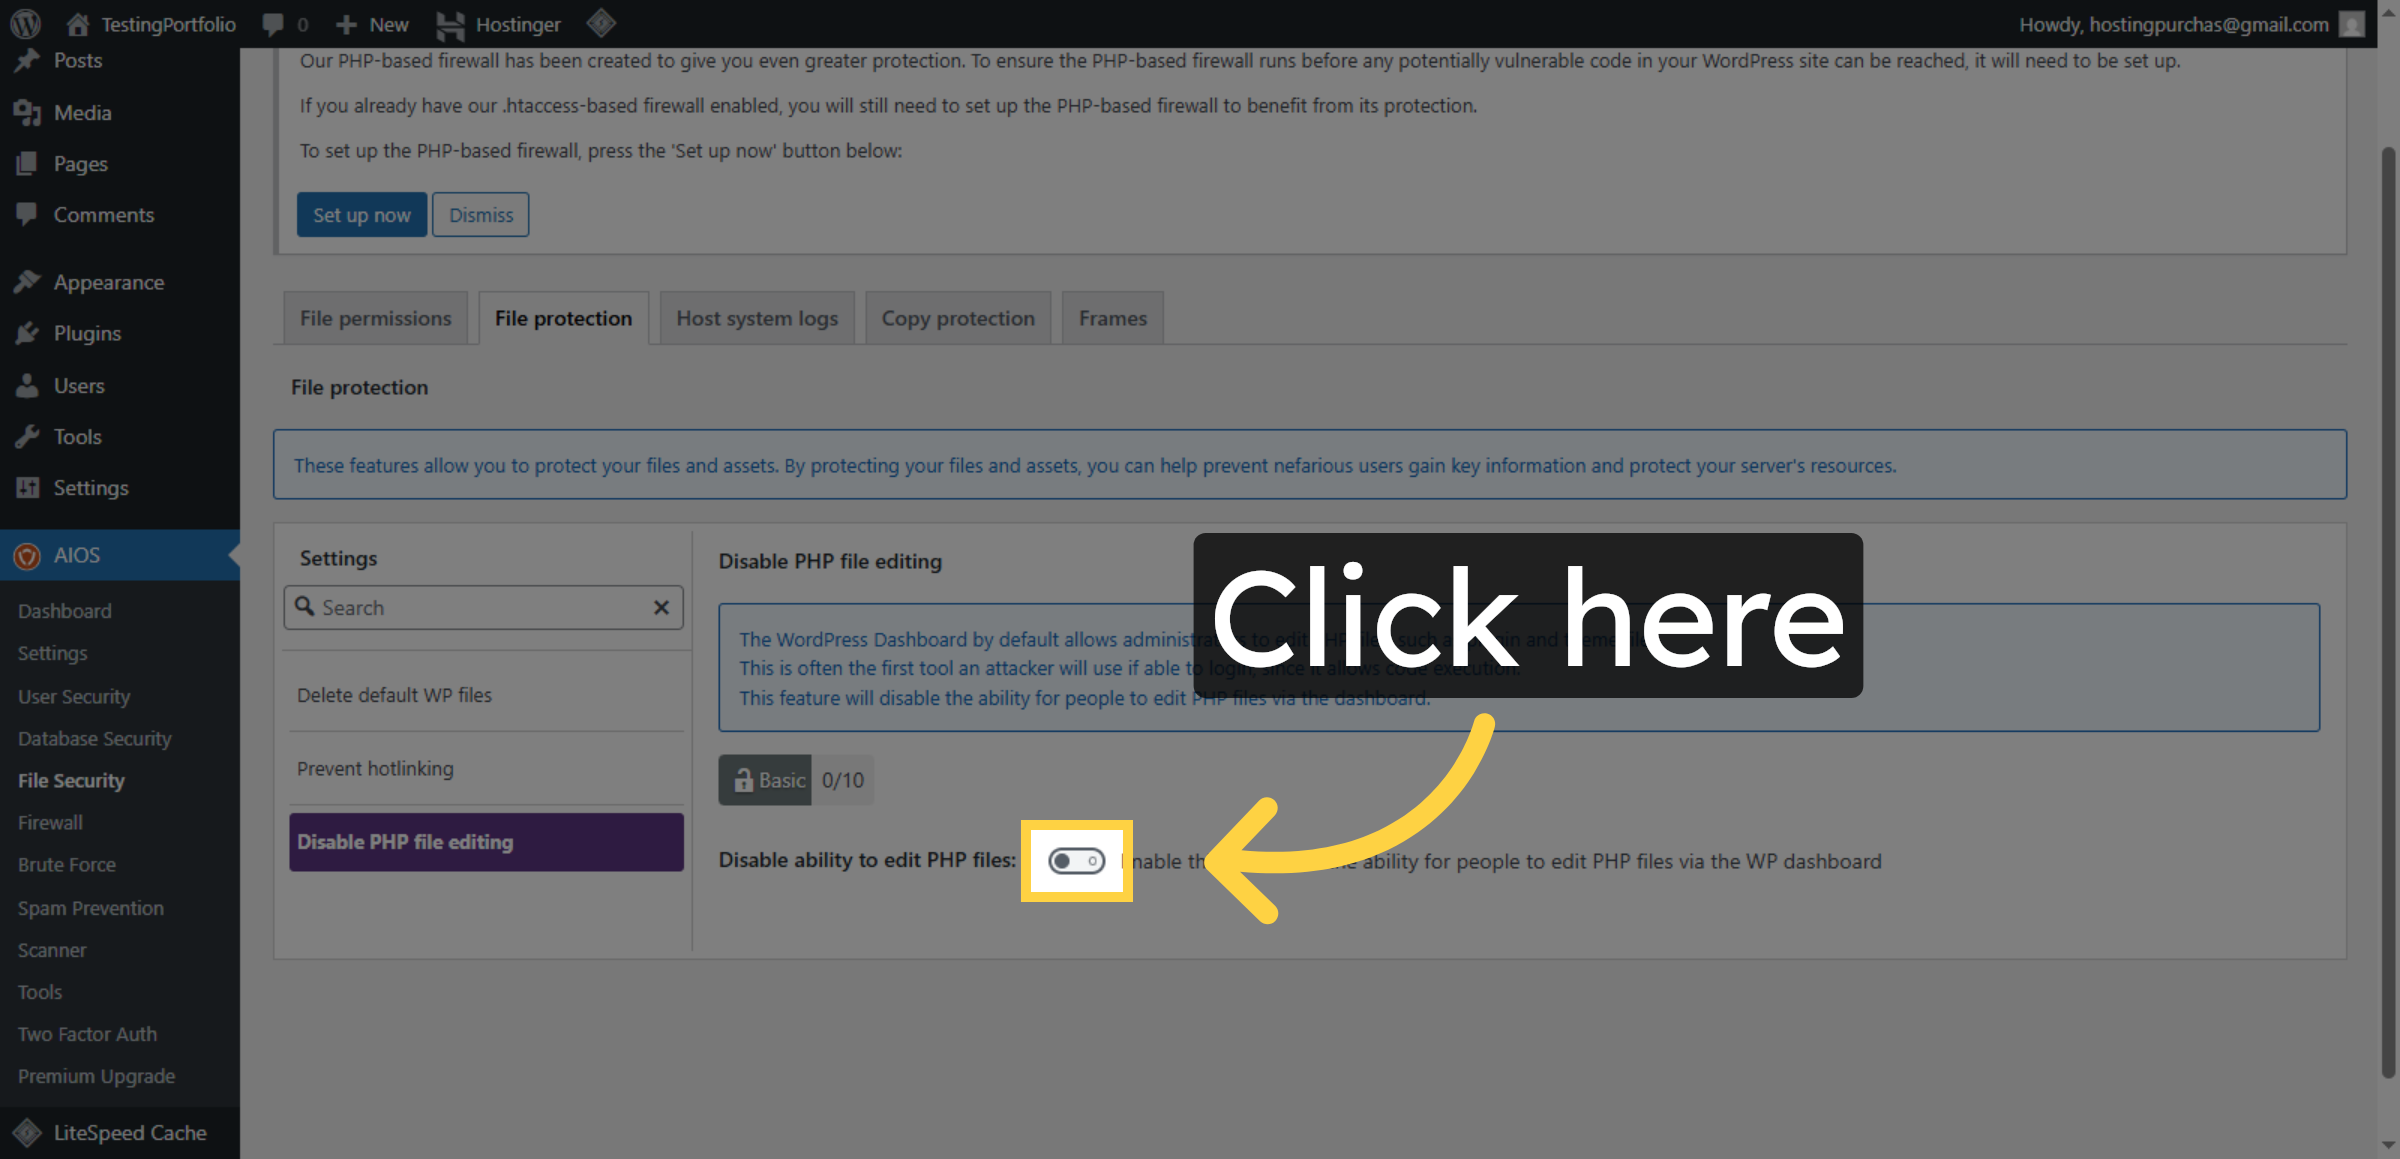
25. Disable PHP File Editing
Click Disable PHP file editing to prevent unauthorized changes to PHP files.
26. Enable Additional File Protection
Click here to further enhance file protection settings.
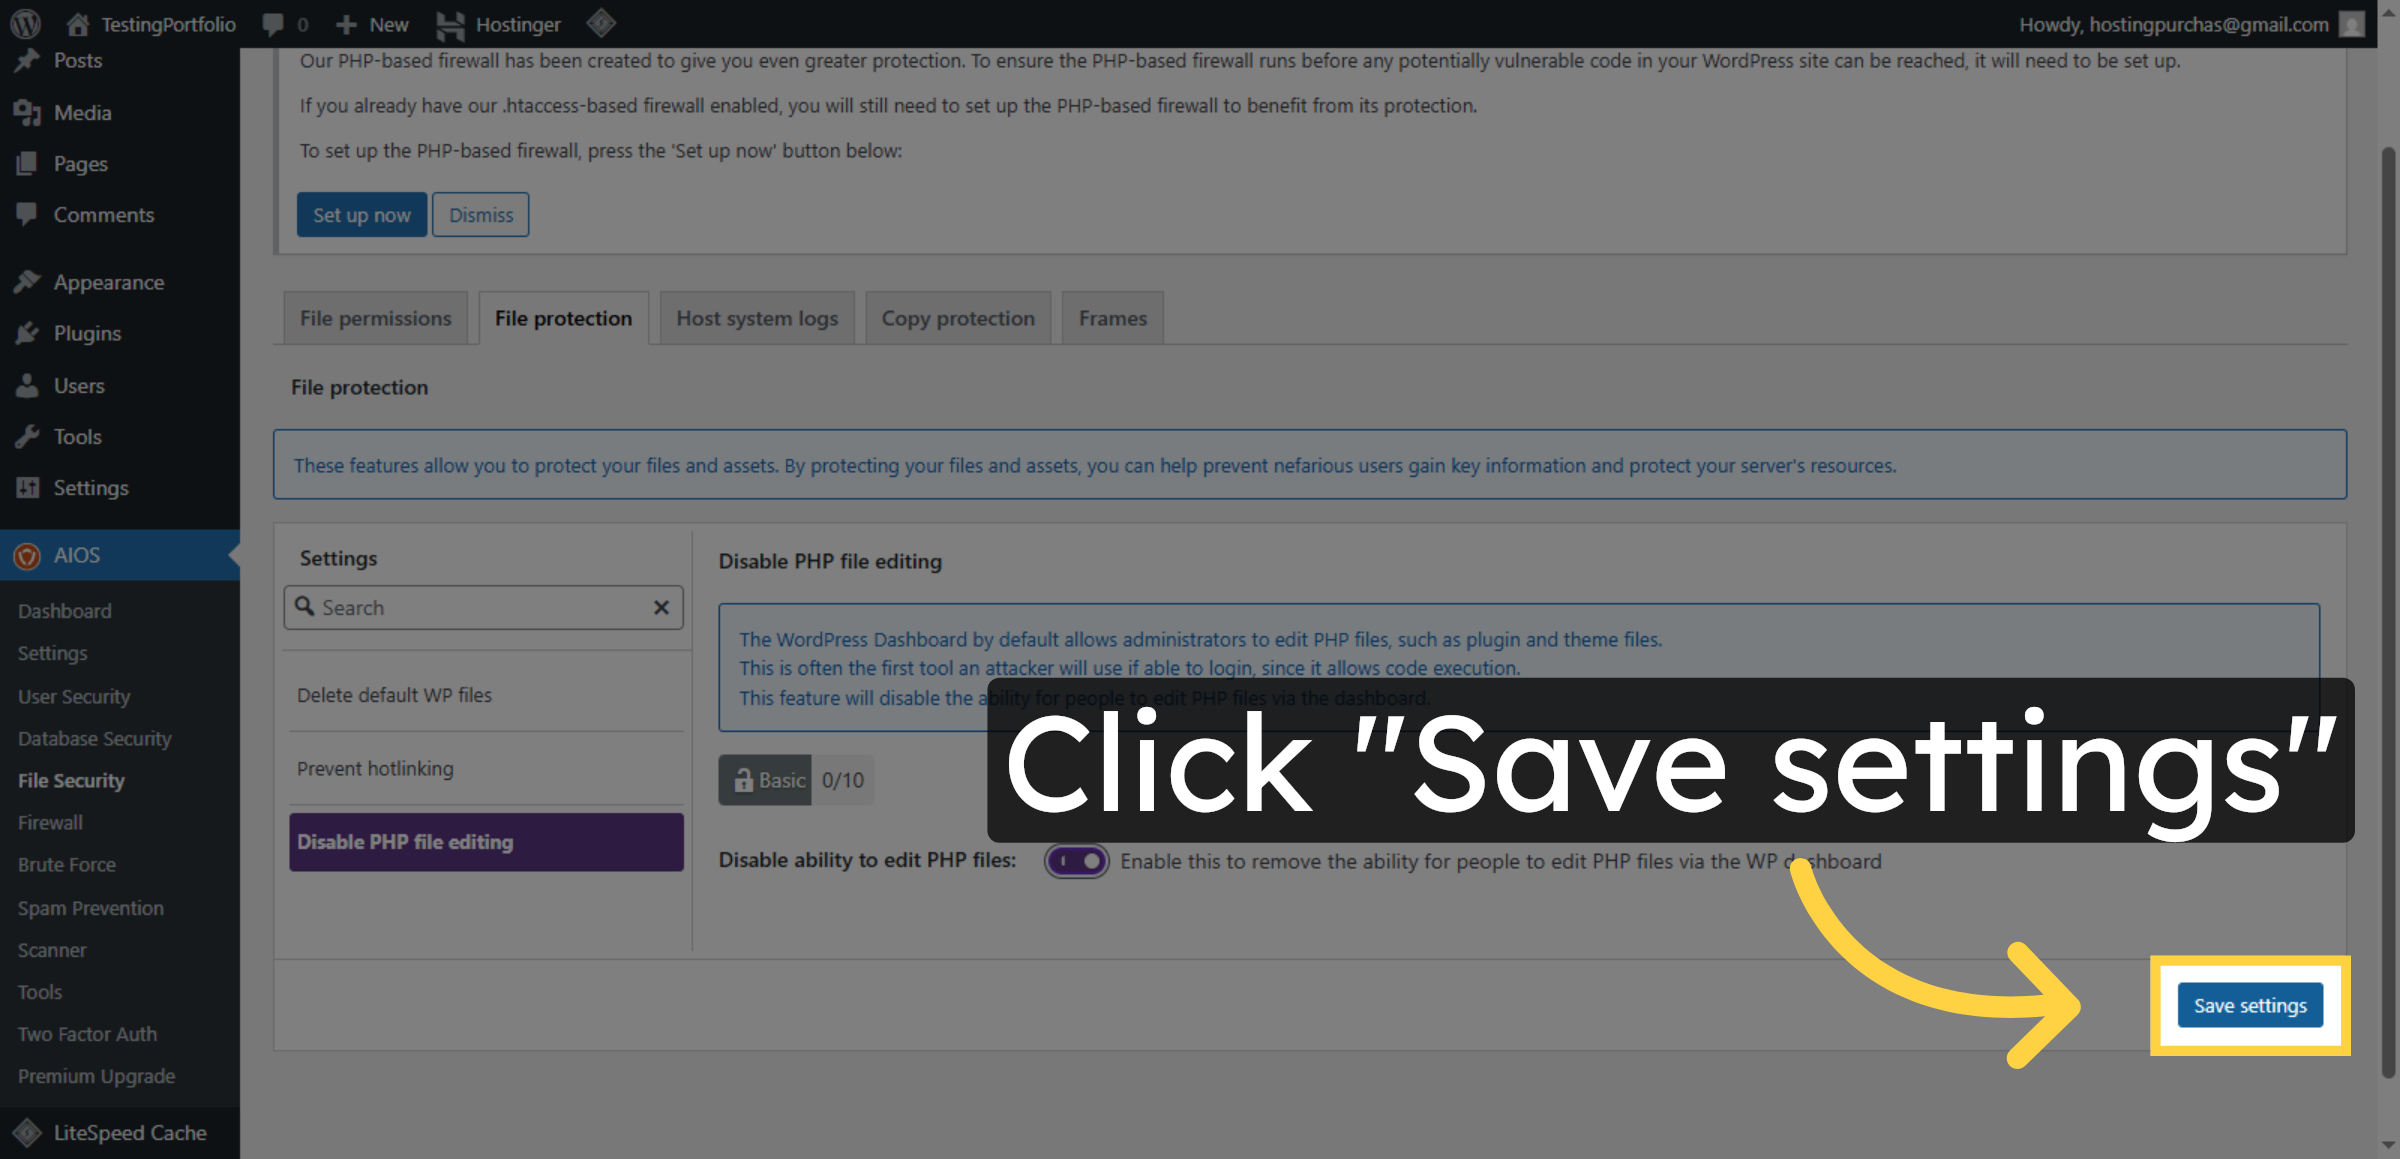
27. Save Additional File Protection
Click Save settings to confirm the additional file protection configuration.
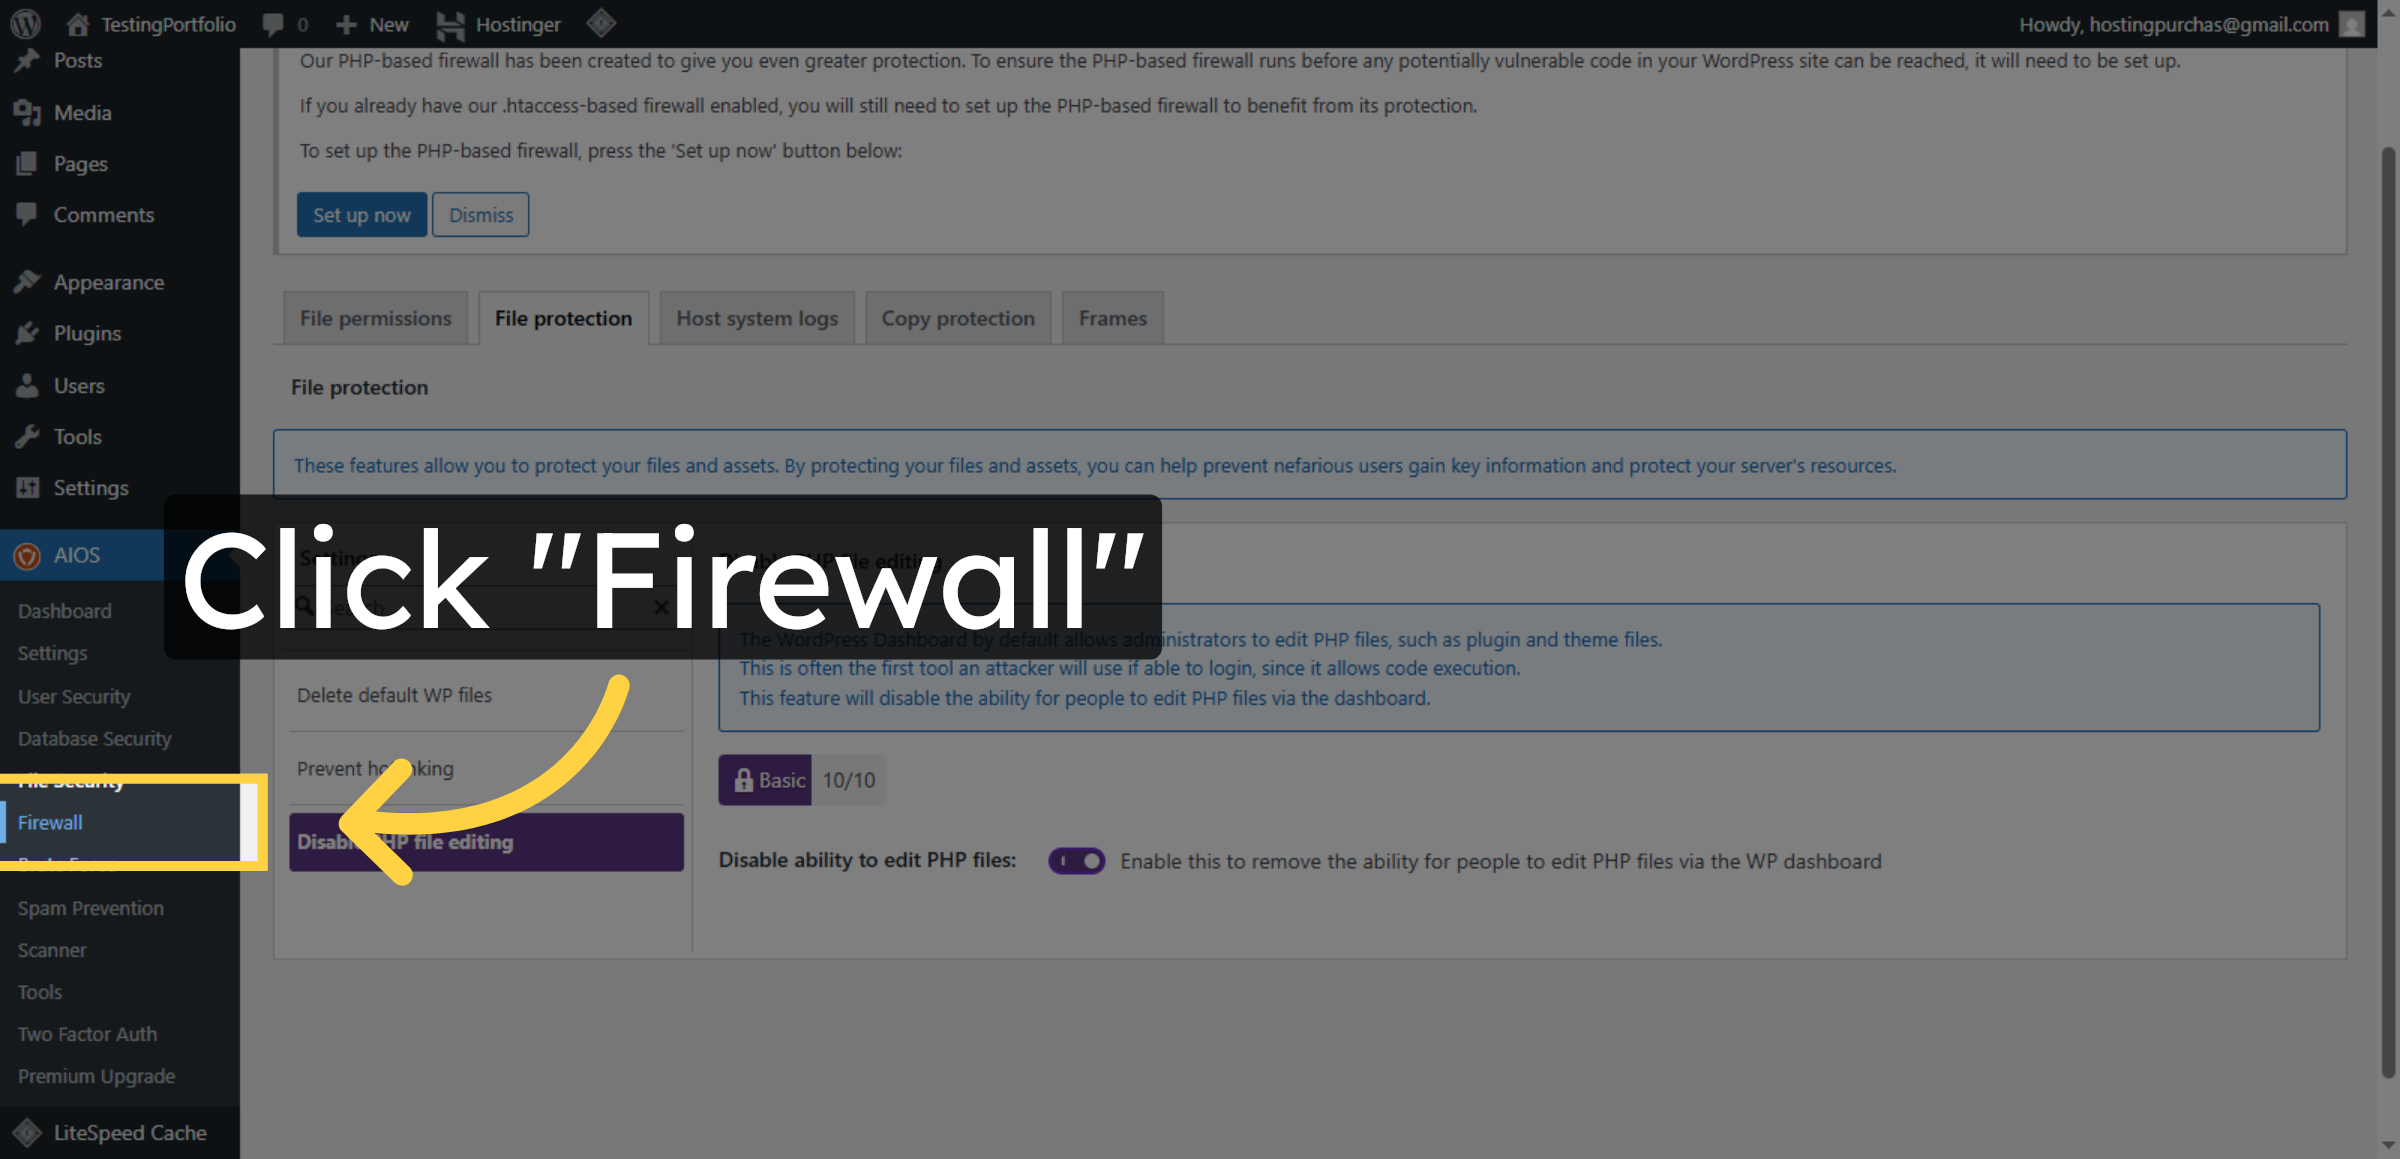
28. Open Firewall Settings
Click Firewall to access the firewall configuration options in the security plugin.
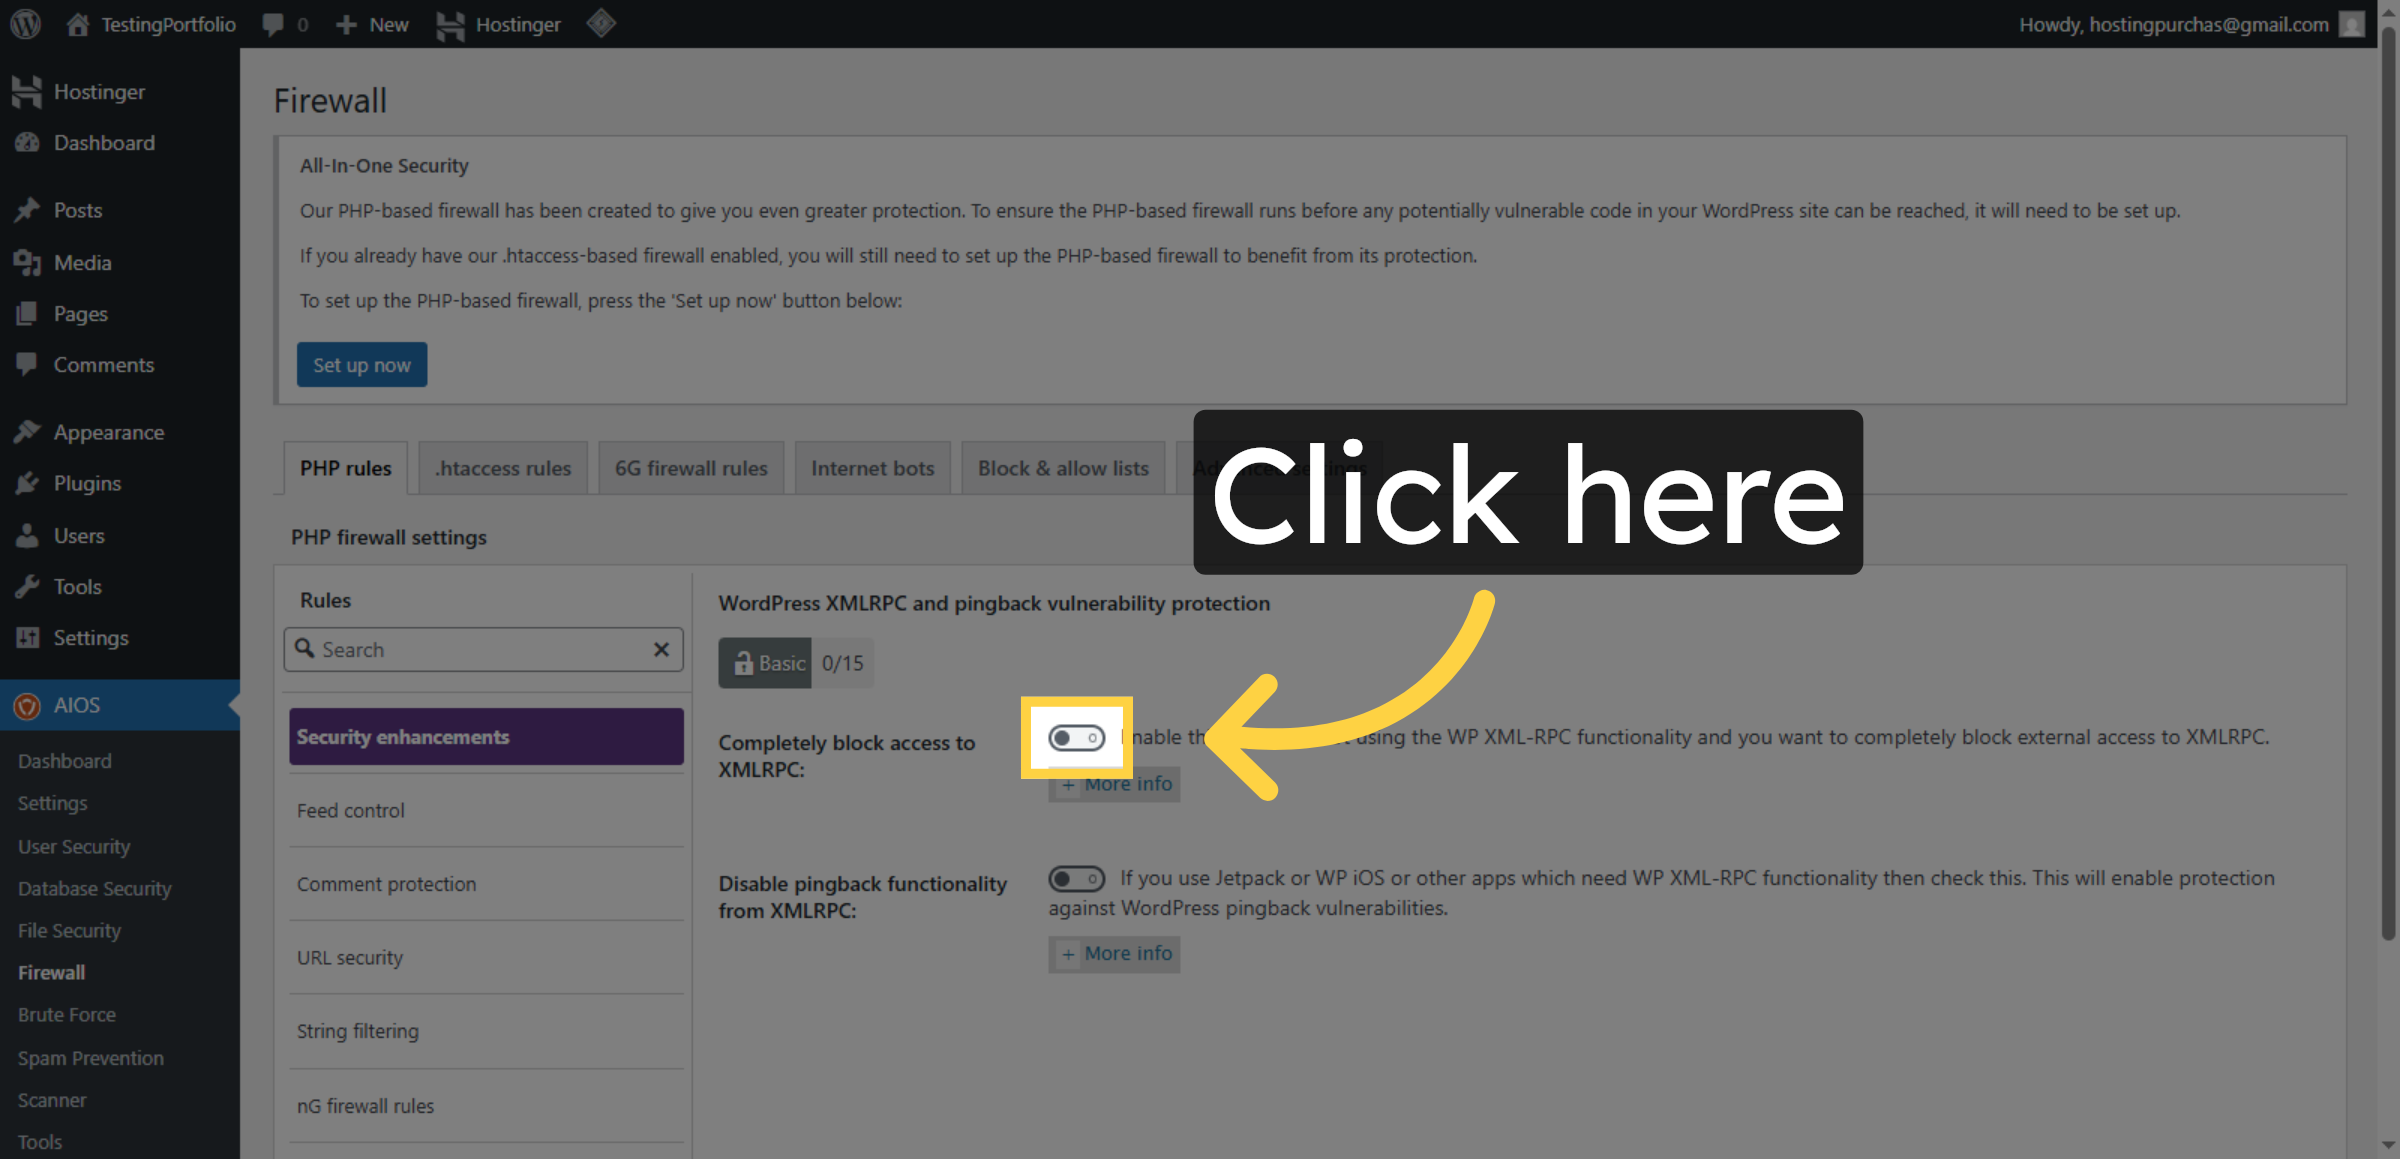
29. Enable PHP Firewall
Click here to activate the PHP firewall to protect your website from malicious scripts.
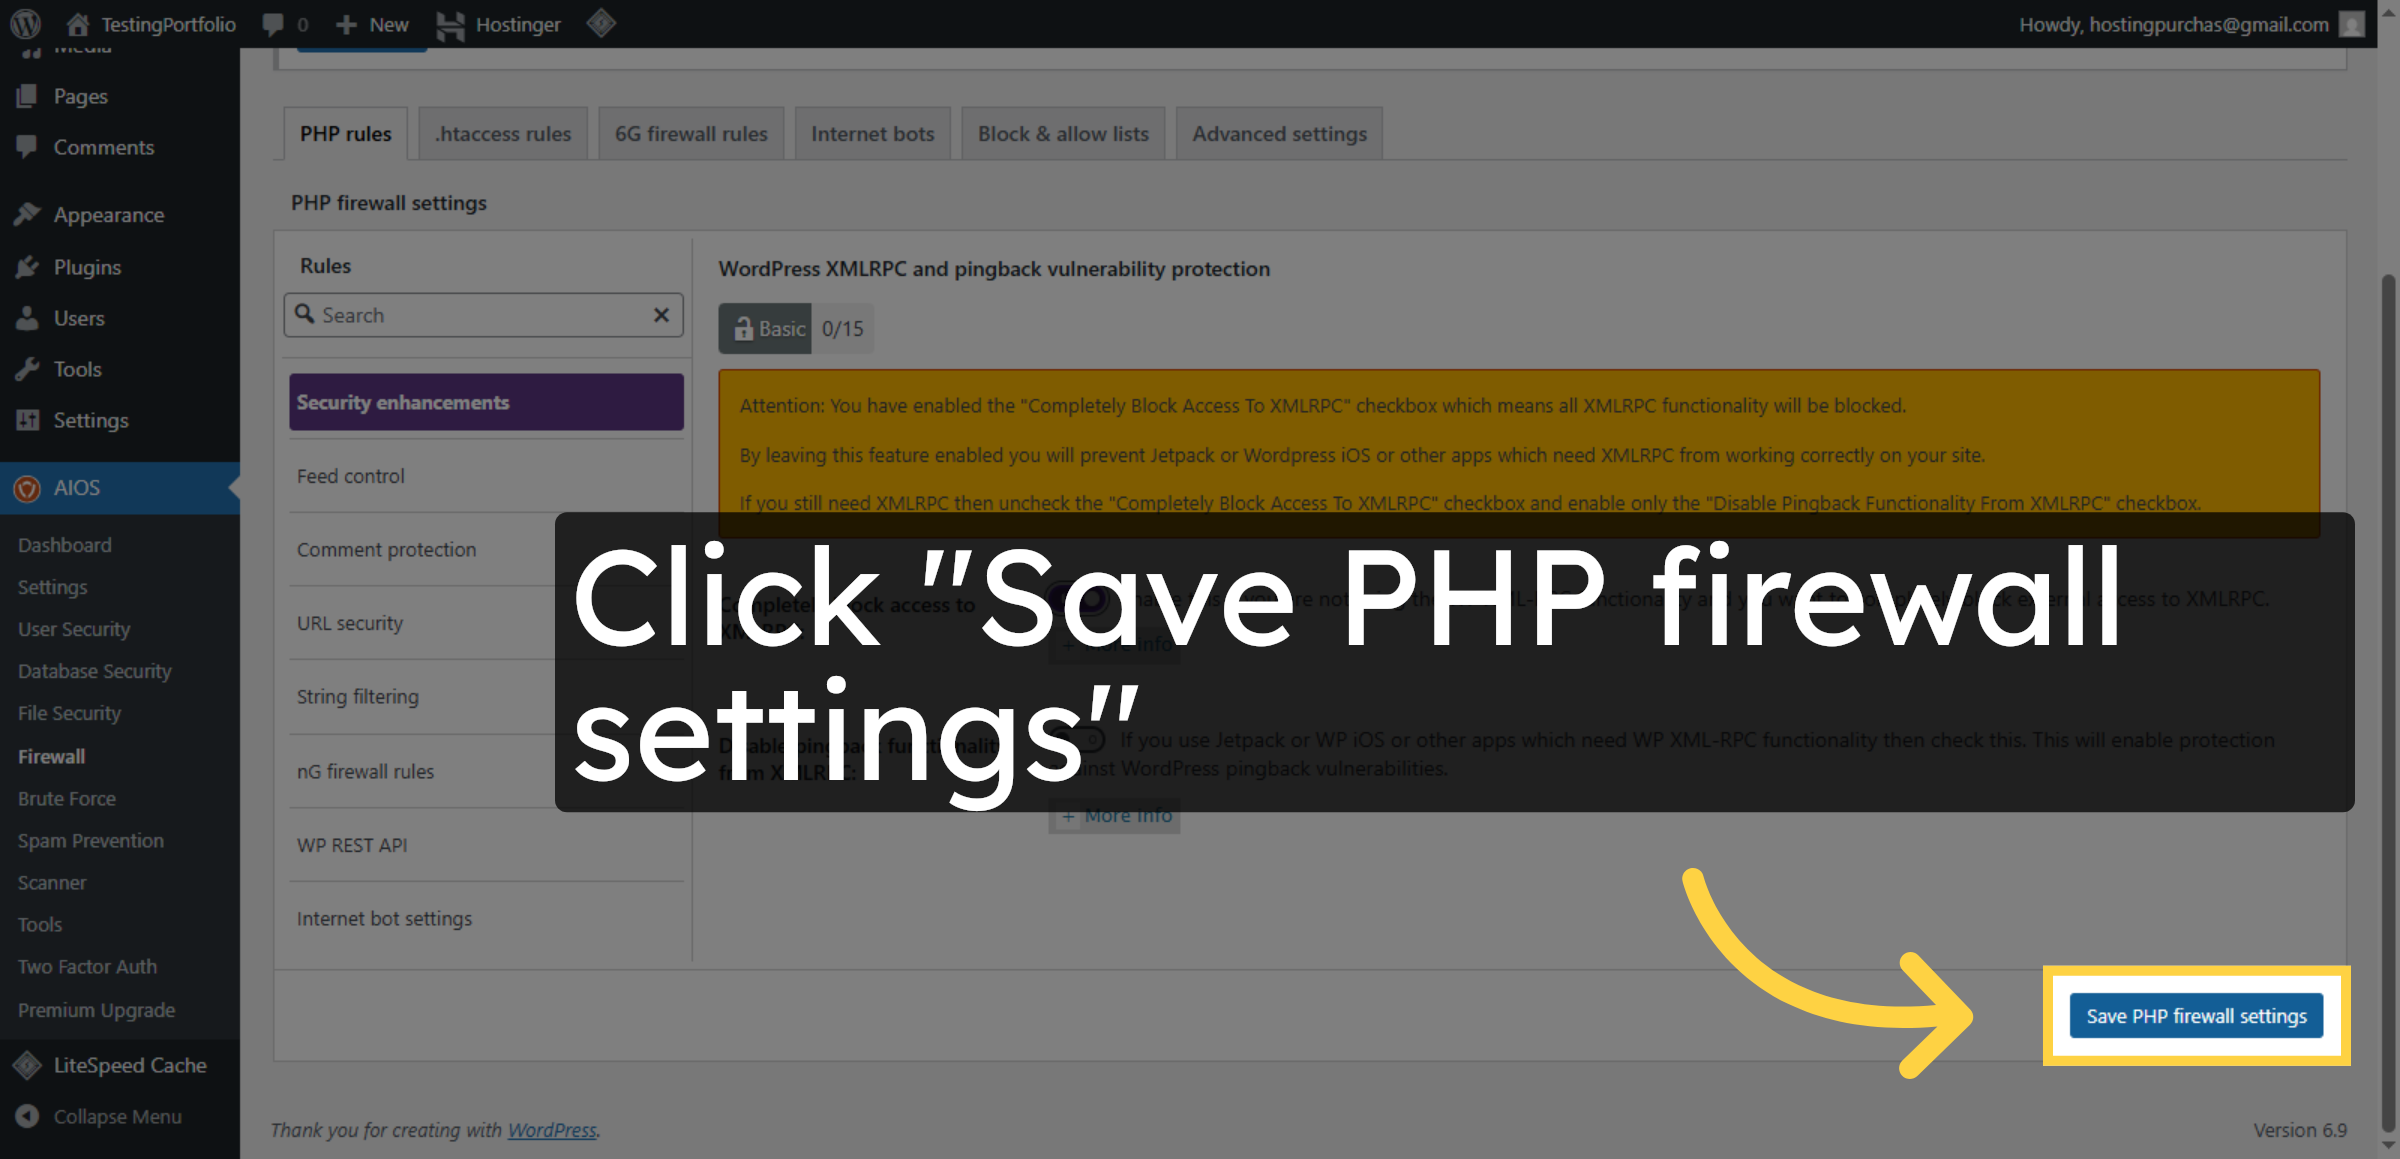
30. Save PHP Firewall Settings
Click Save PHP firewall settings to apply the firewall configuration changes.
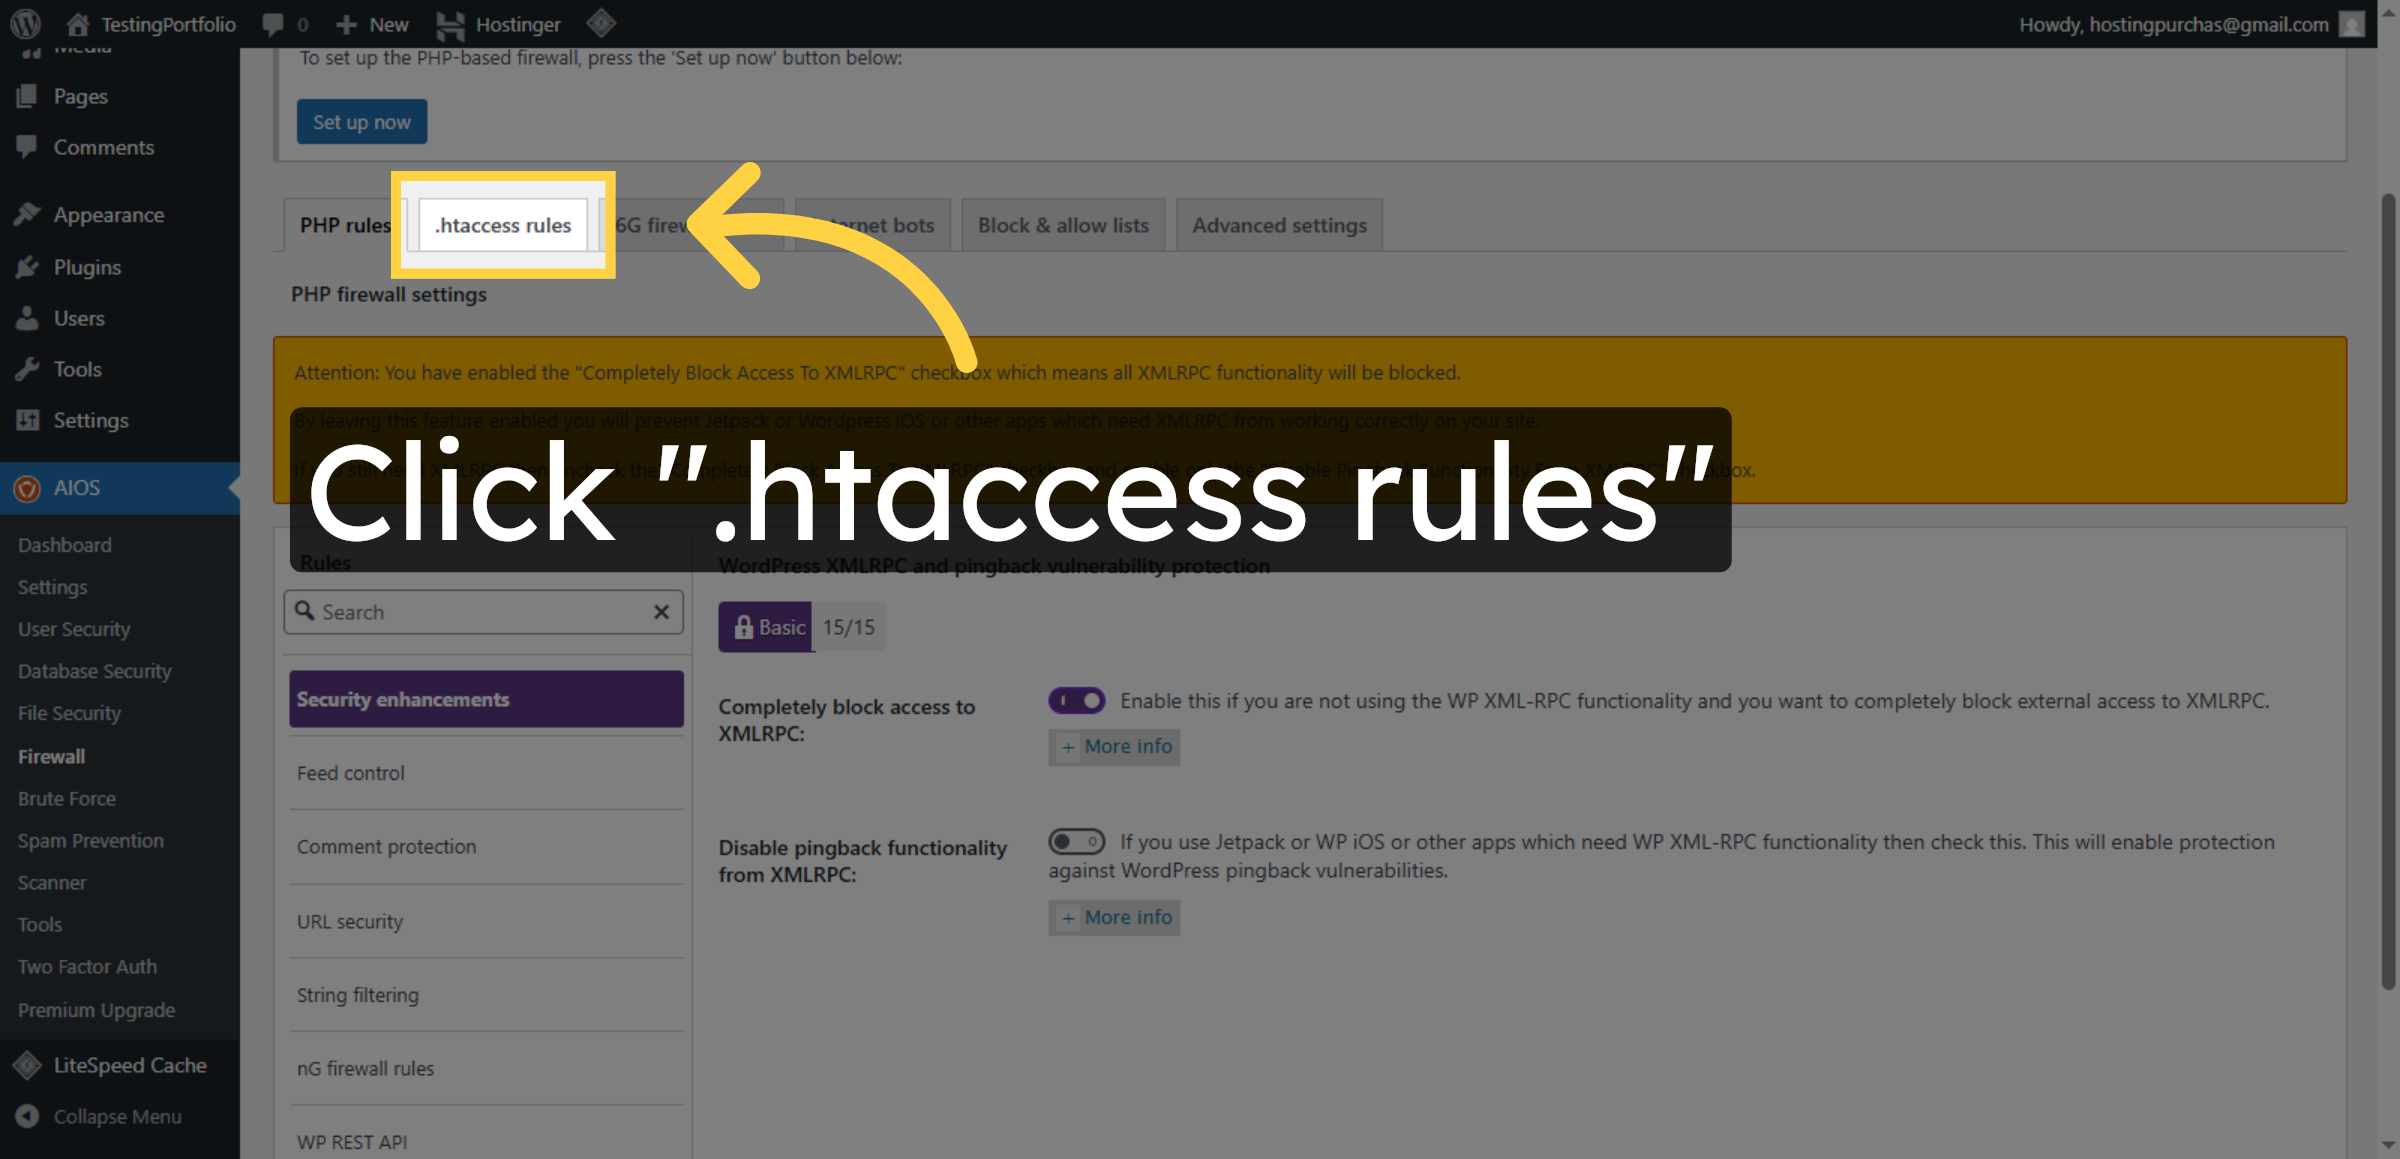
31. Access .htaccess Rules
Click .htaccess rules to manage firewall rules applied via the .htaccess file.
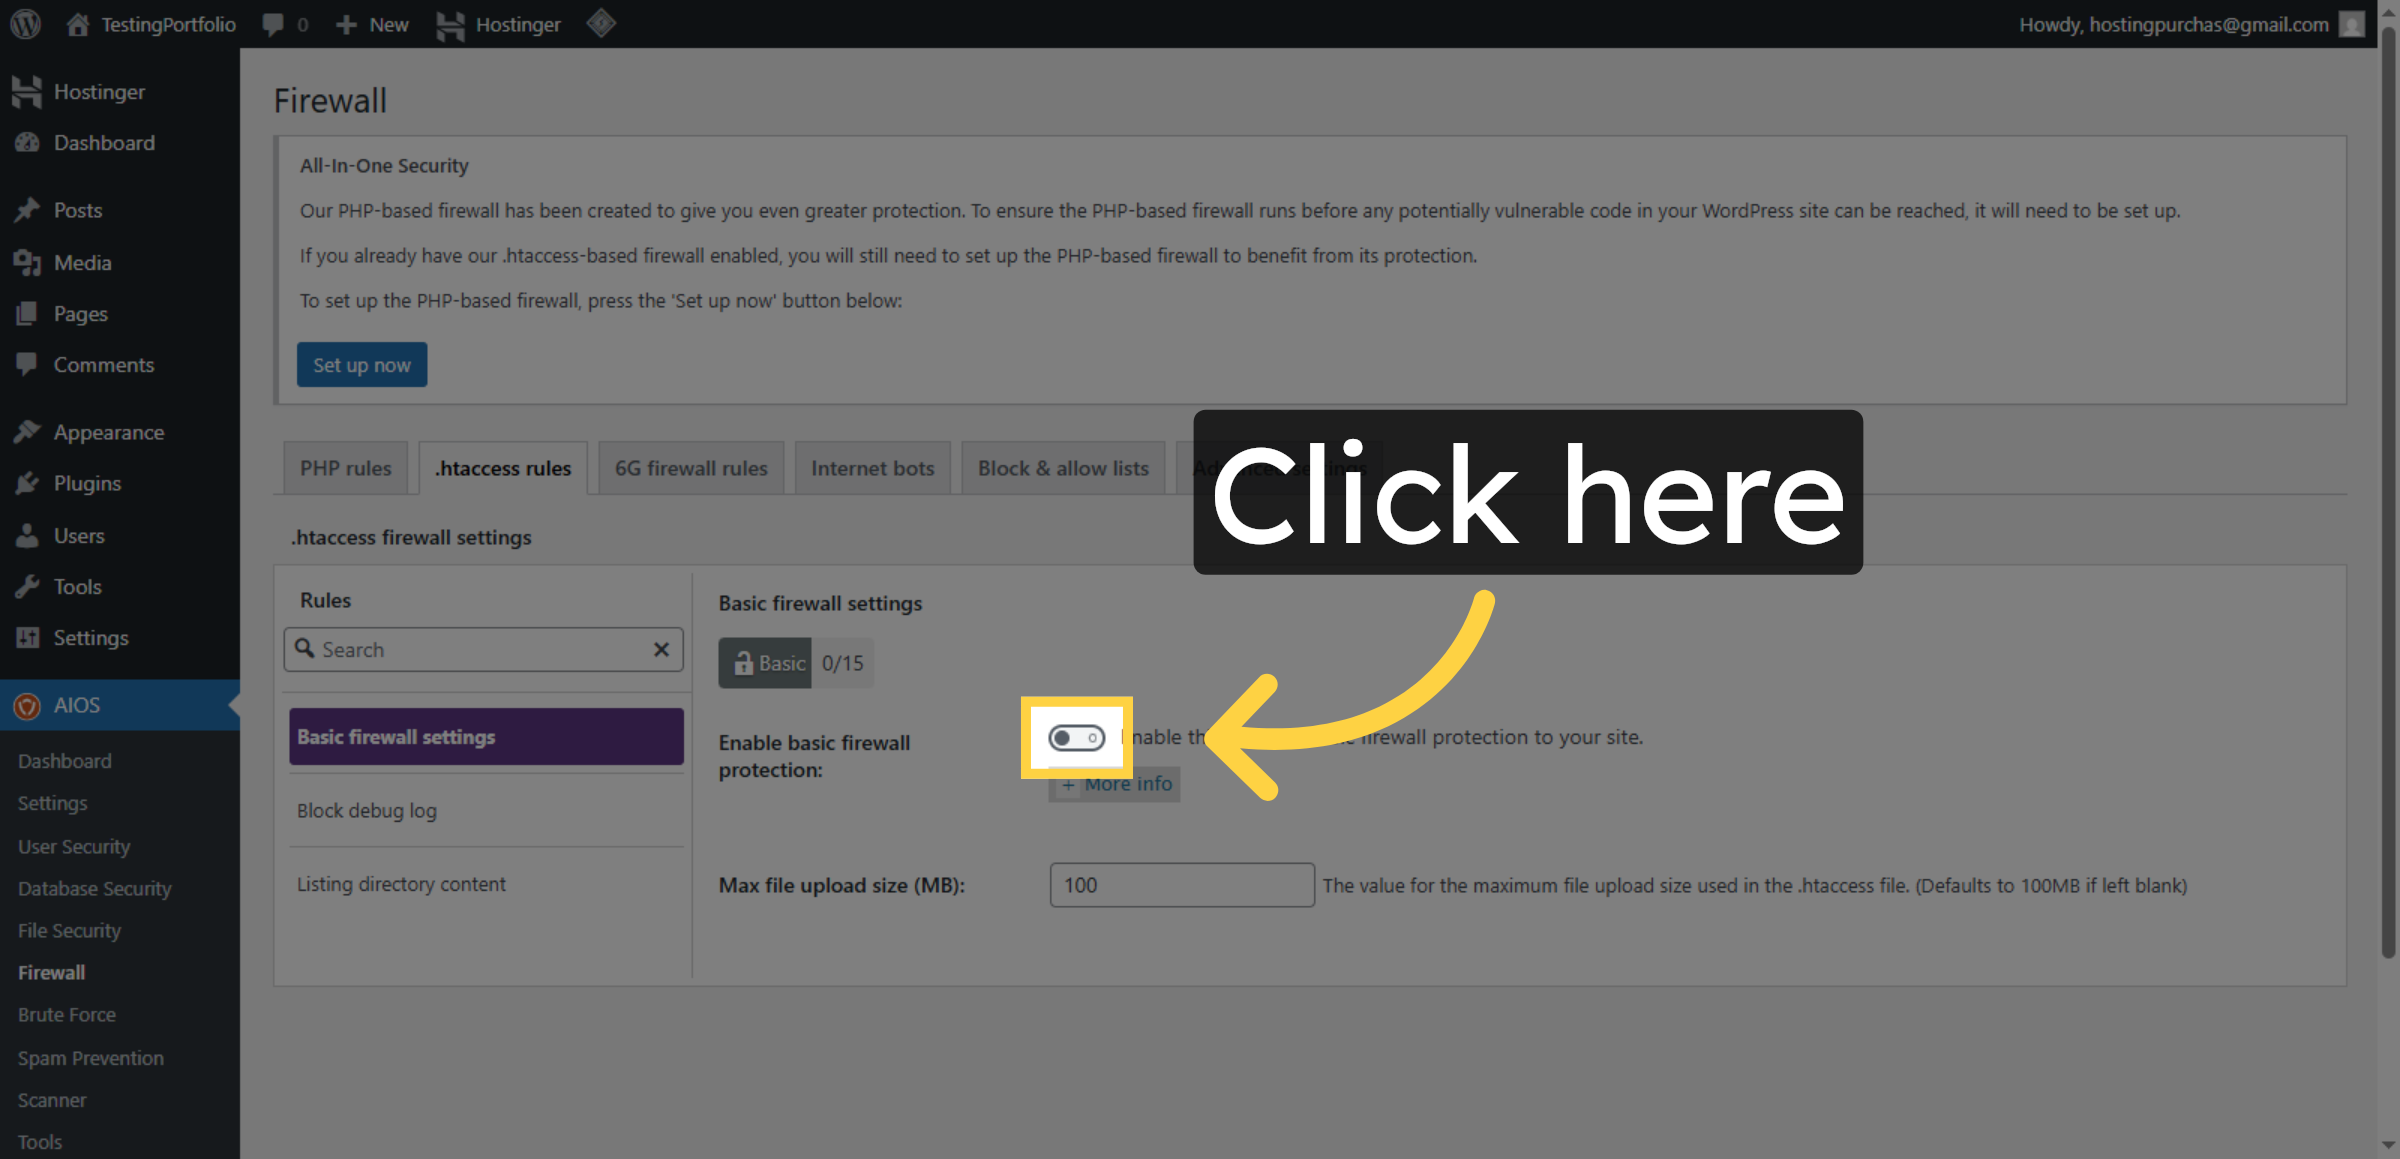
32. Enable .htaccess Firewall
Click here to activate the .htaccess firewall rules for enhanced protection.
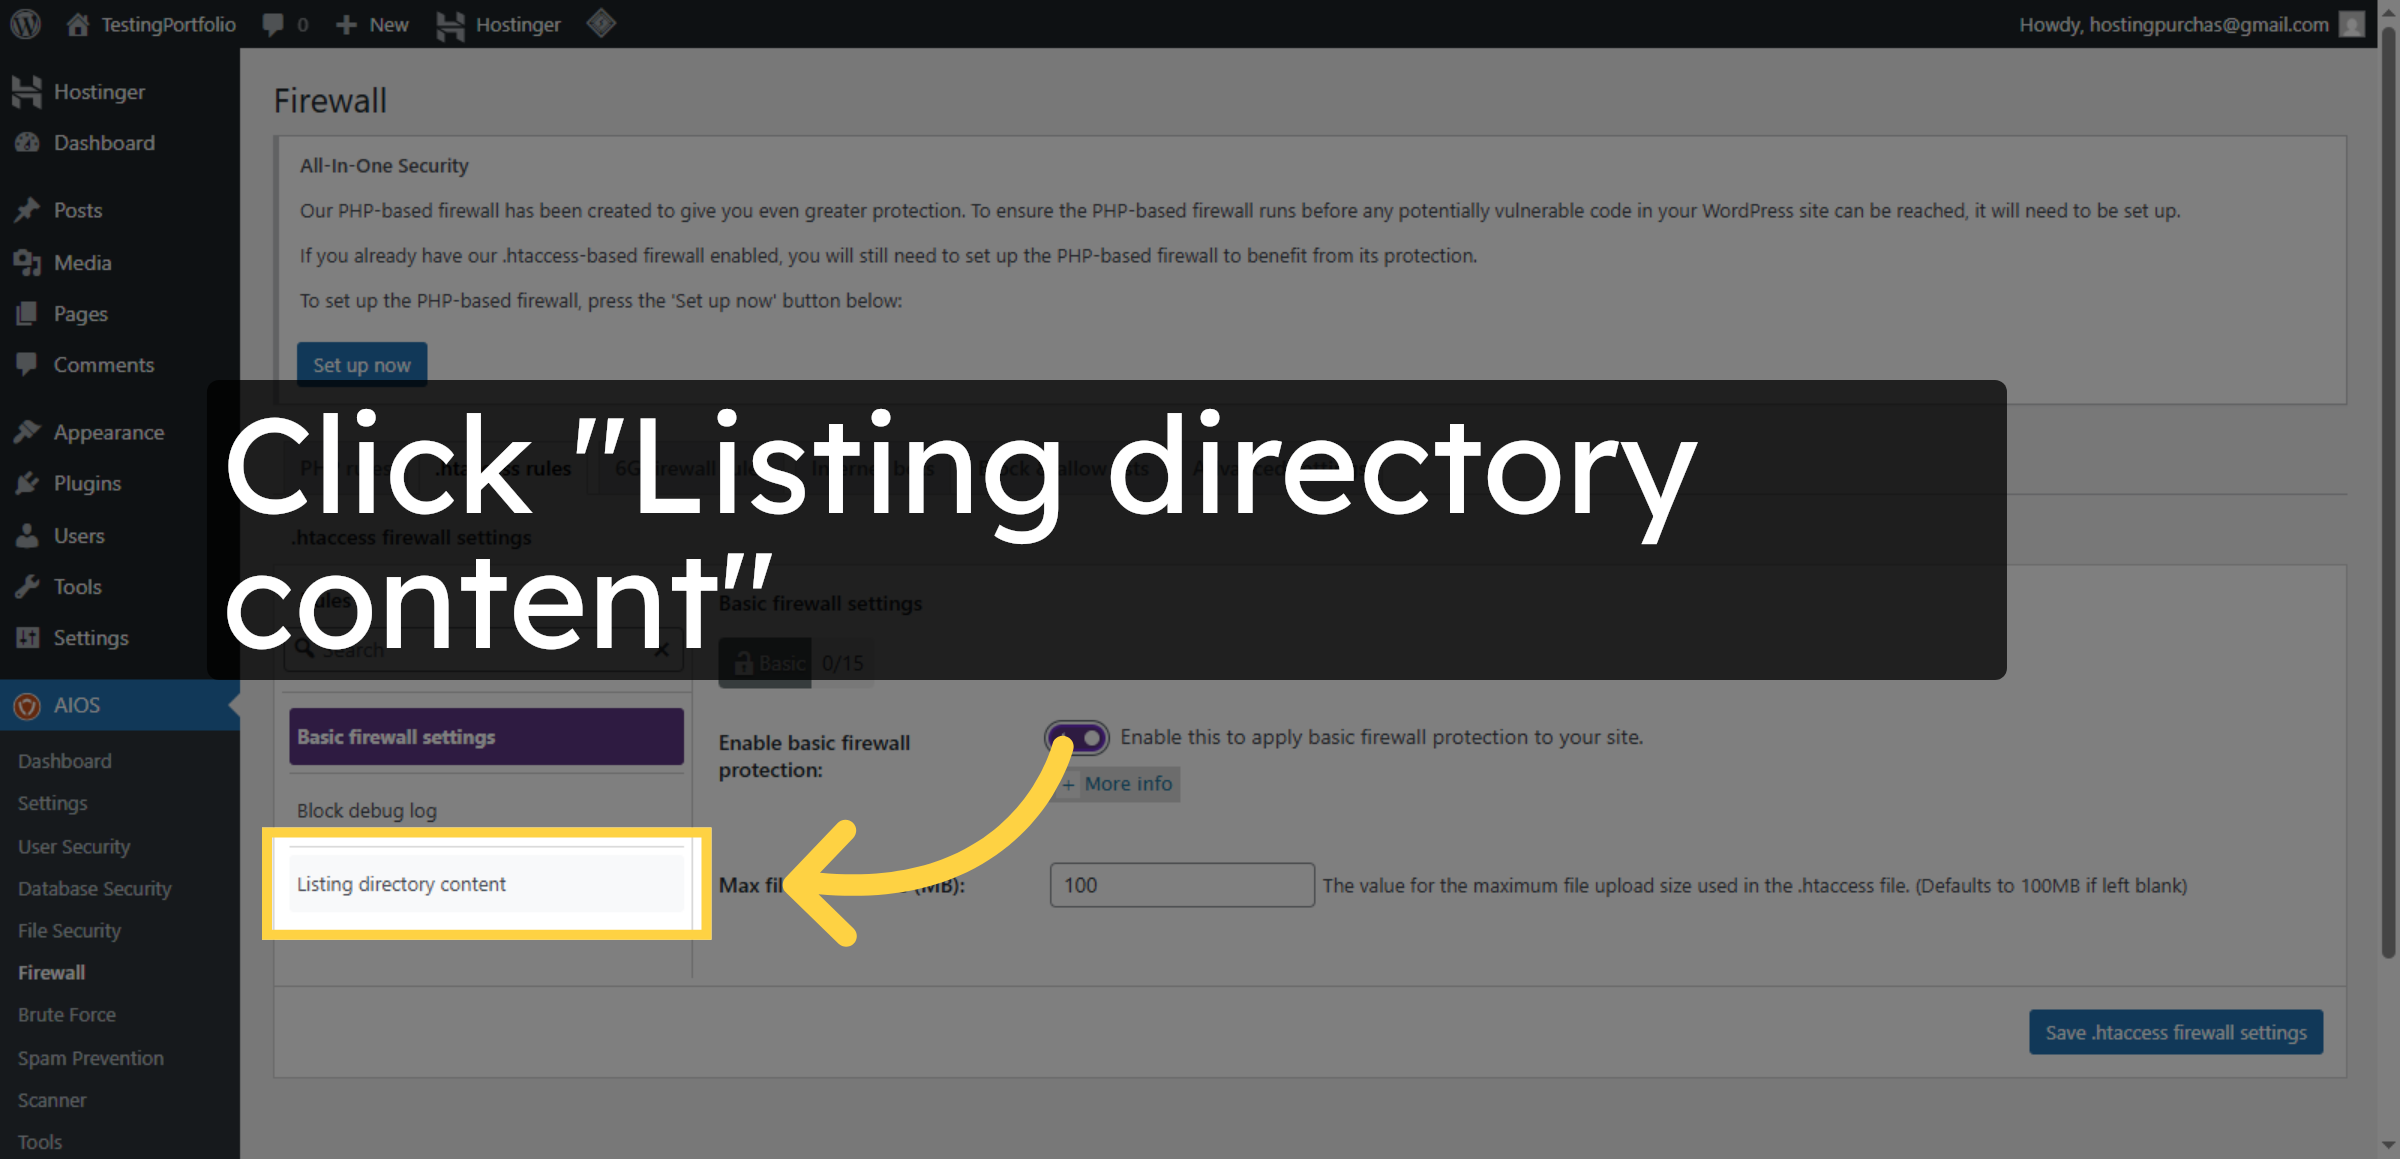
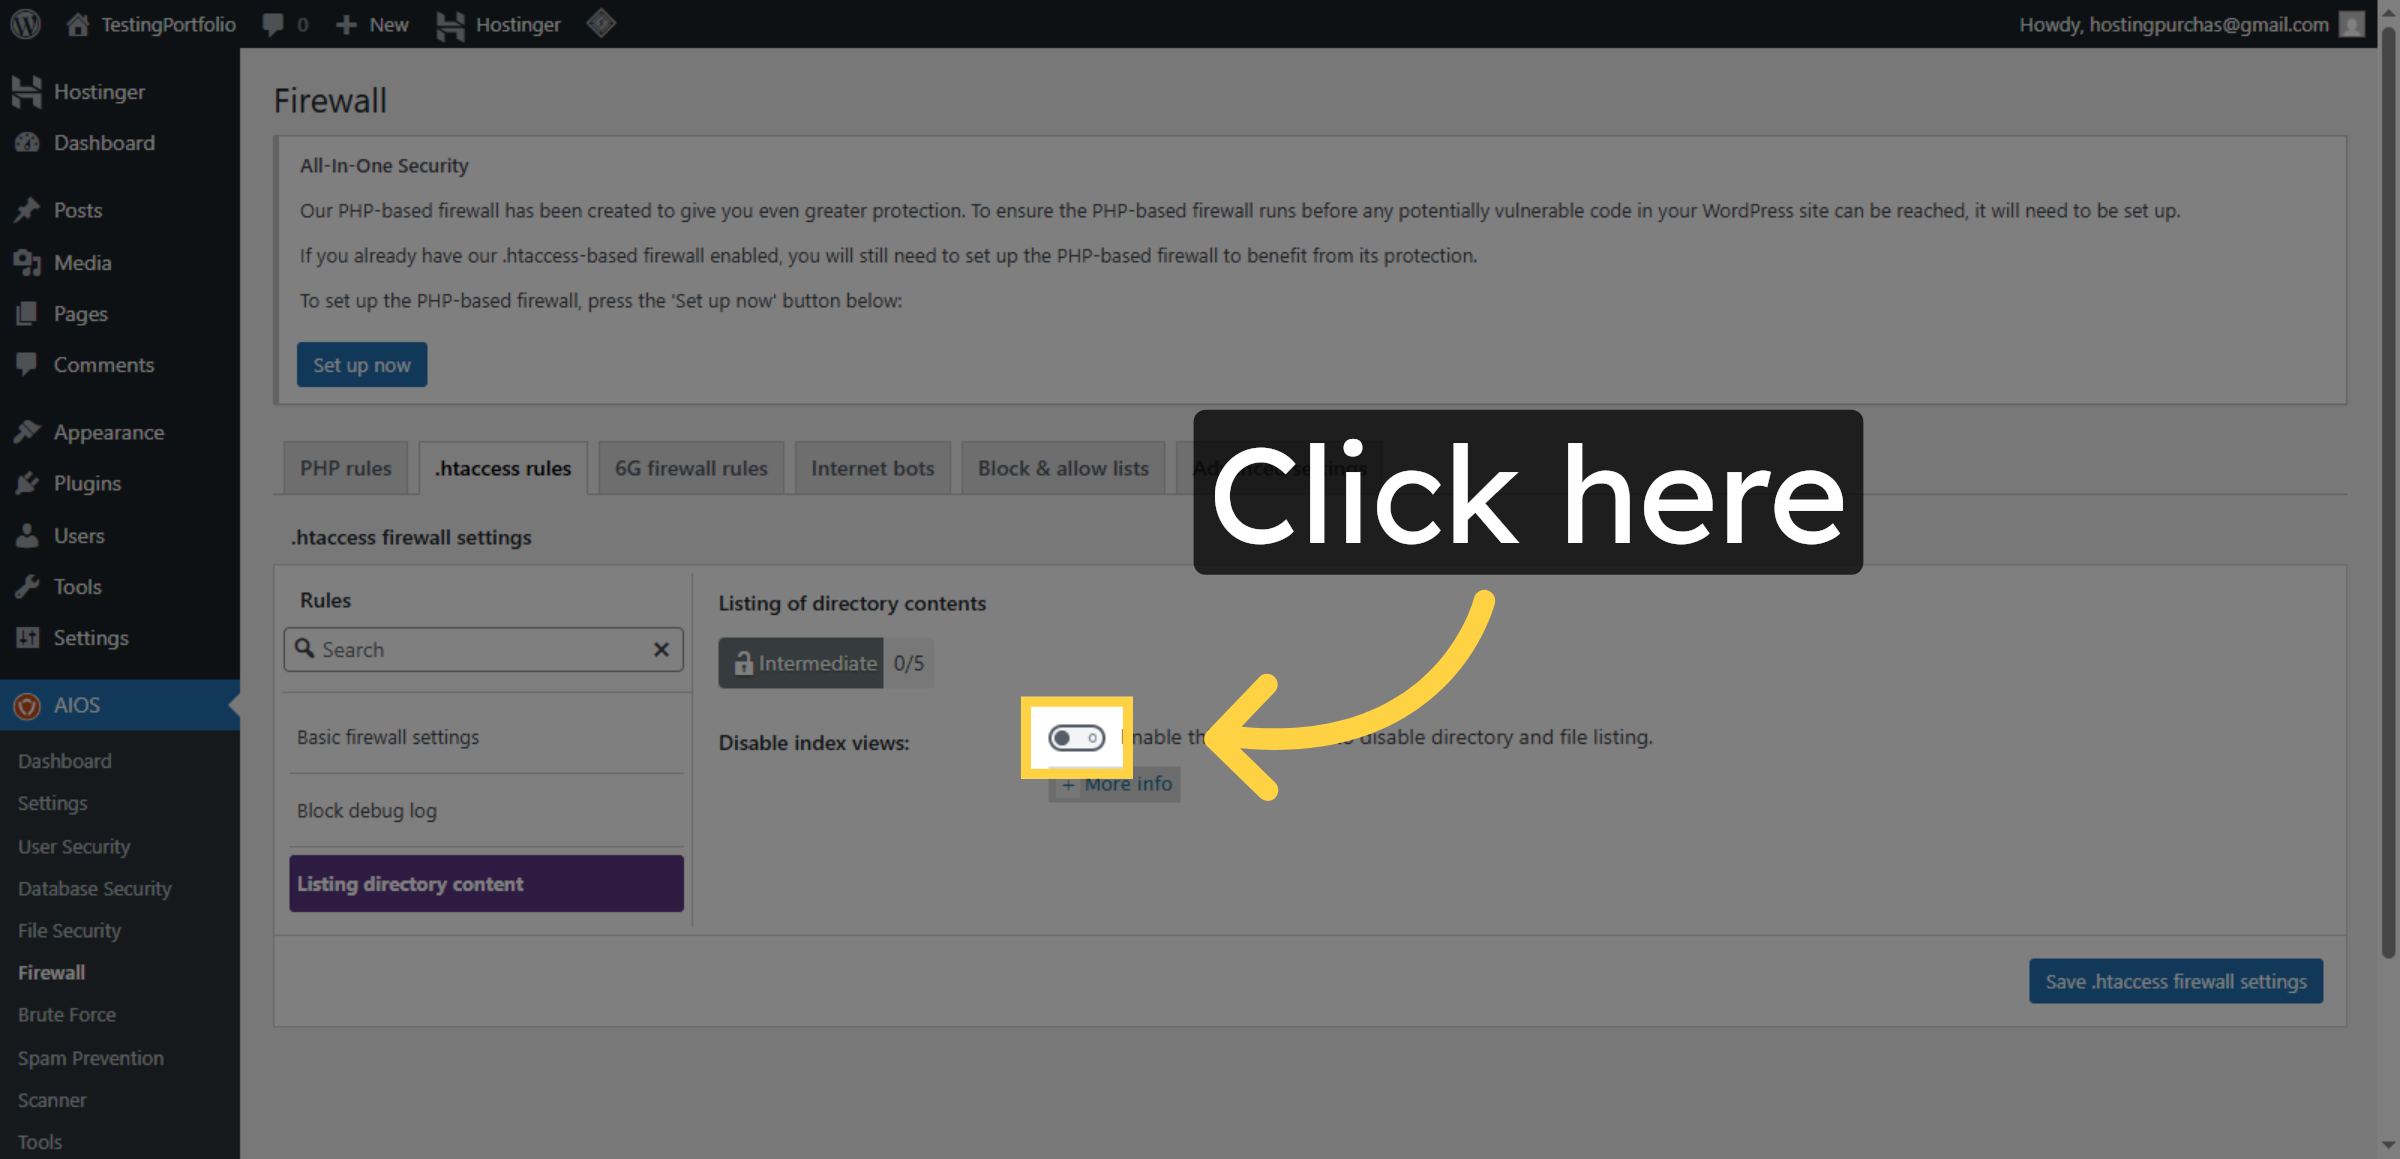
33. Manage Directory Listing
Click Listing directory content to control directory listing visibility on your website.
34. Enable Directory Listing Protection
Click here to activate protection against directory listing.
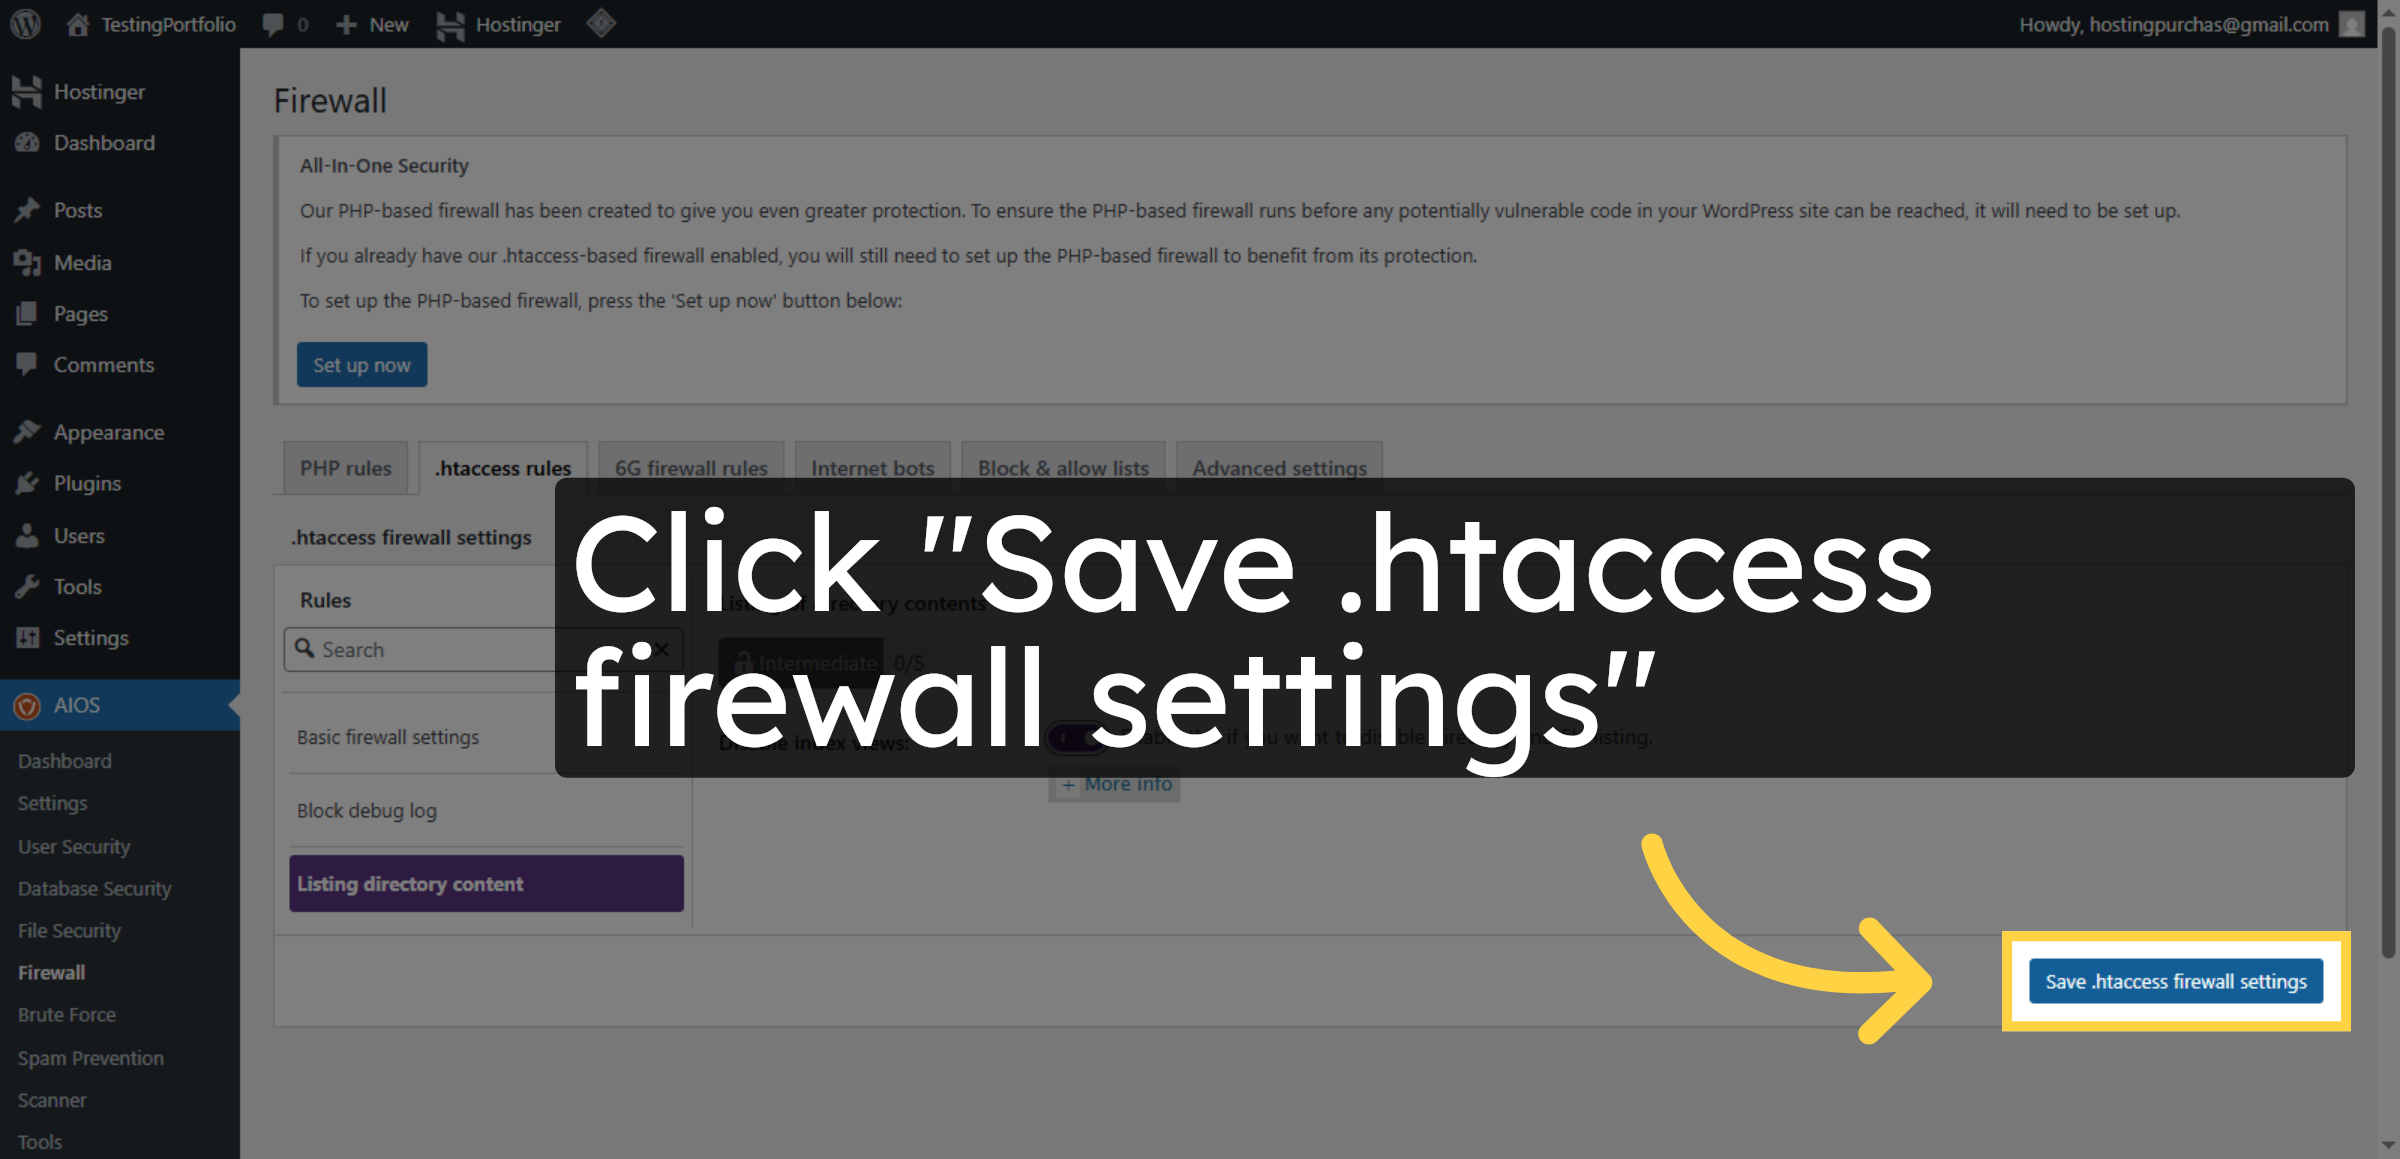
35. Save .htaccess Firewall Settings
Click Save .htaccess firewall settings to apply all changes to the .htaccess firewall.
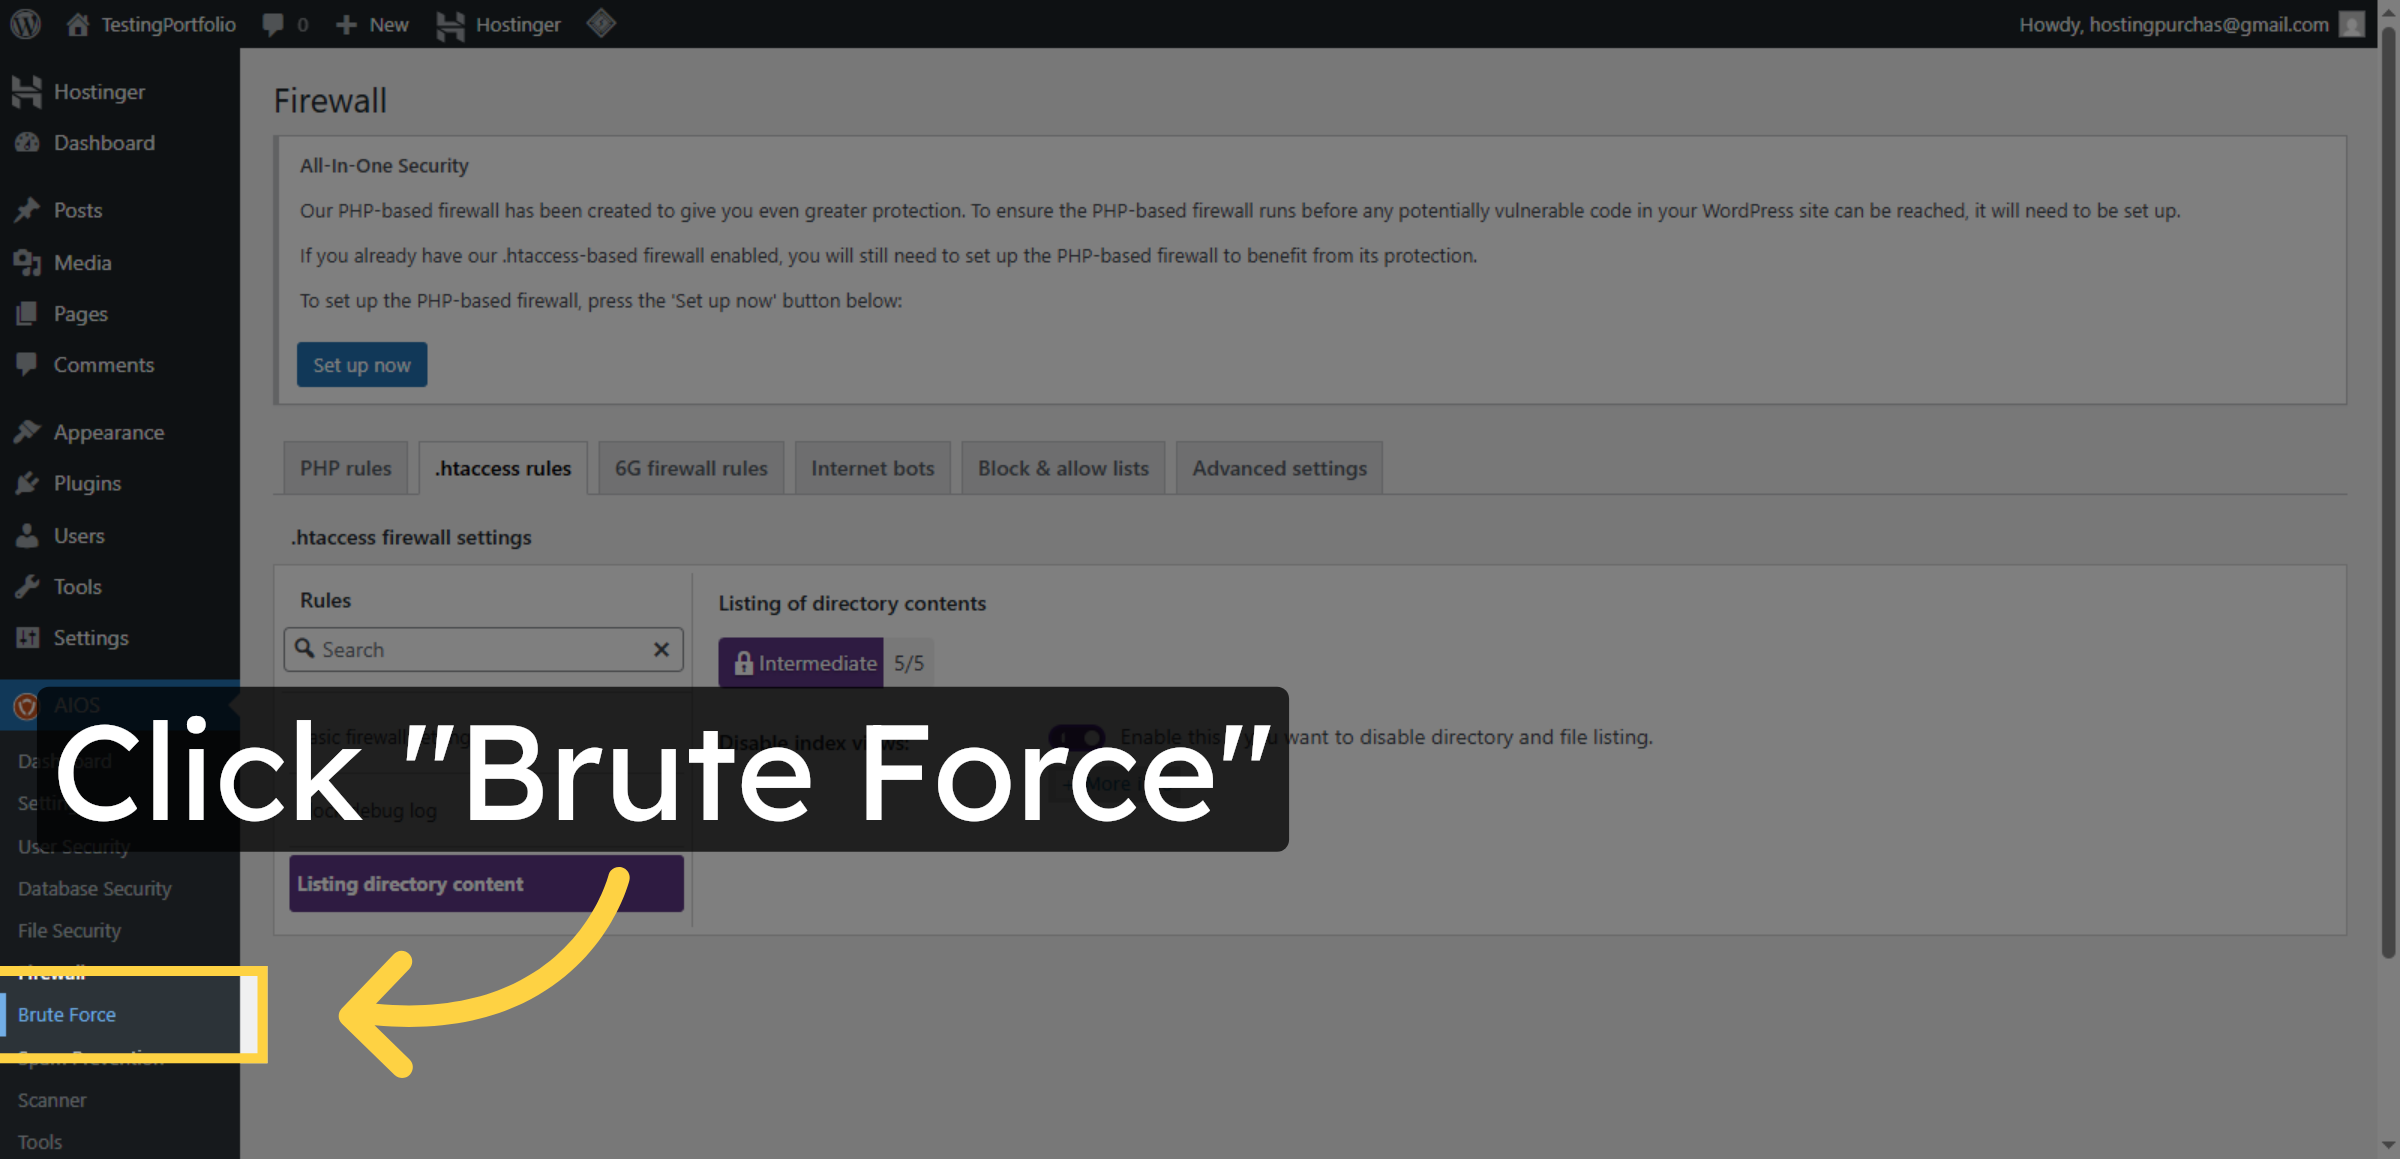
36. Open Brute Force Protection
Click Brute Force to configure settings that protect against brute force login attempts.
37. Enable Brute Force Protection
Click here to activate brute force protection features.
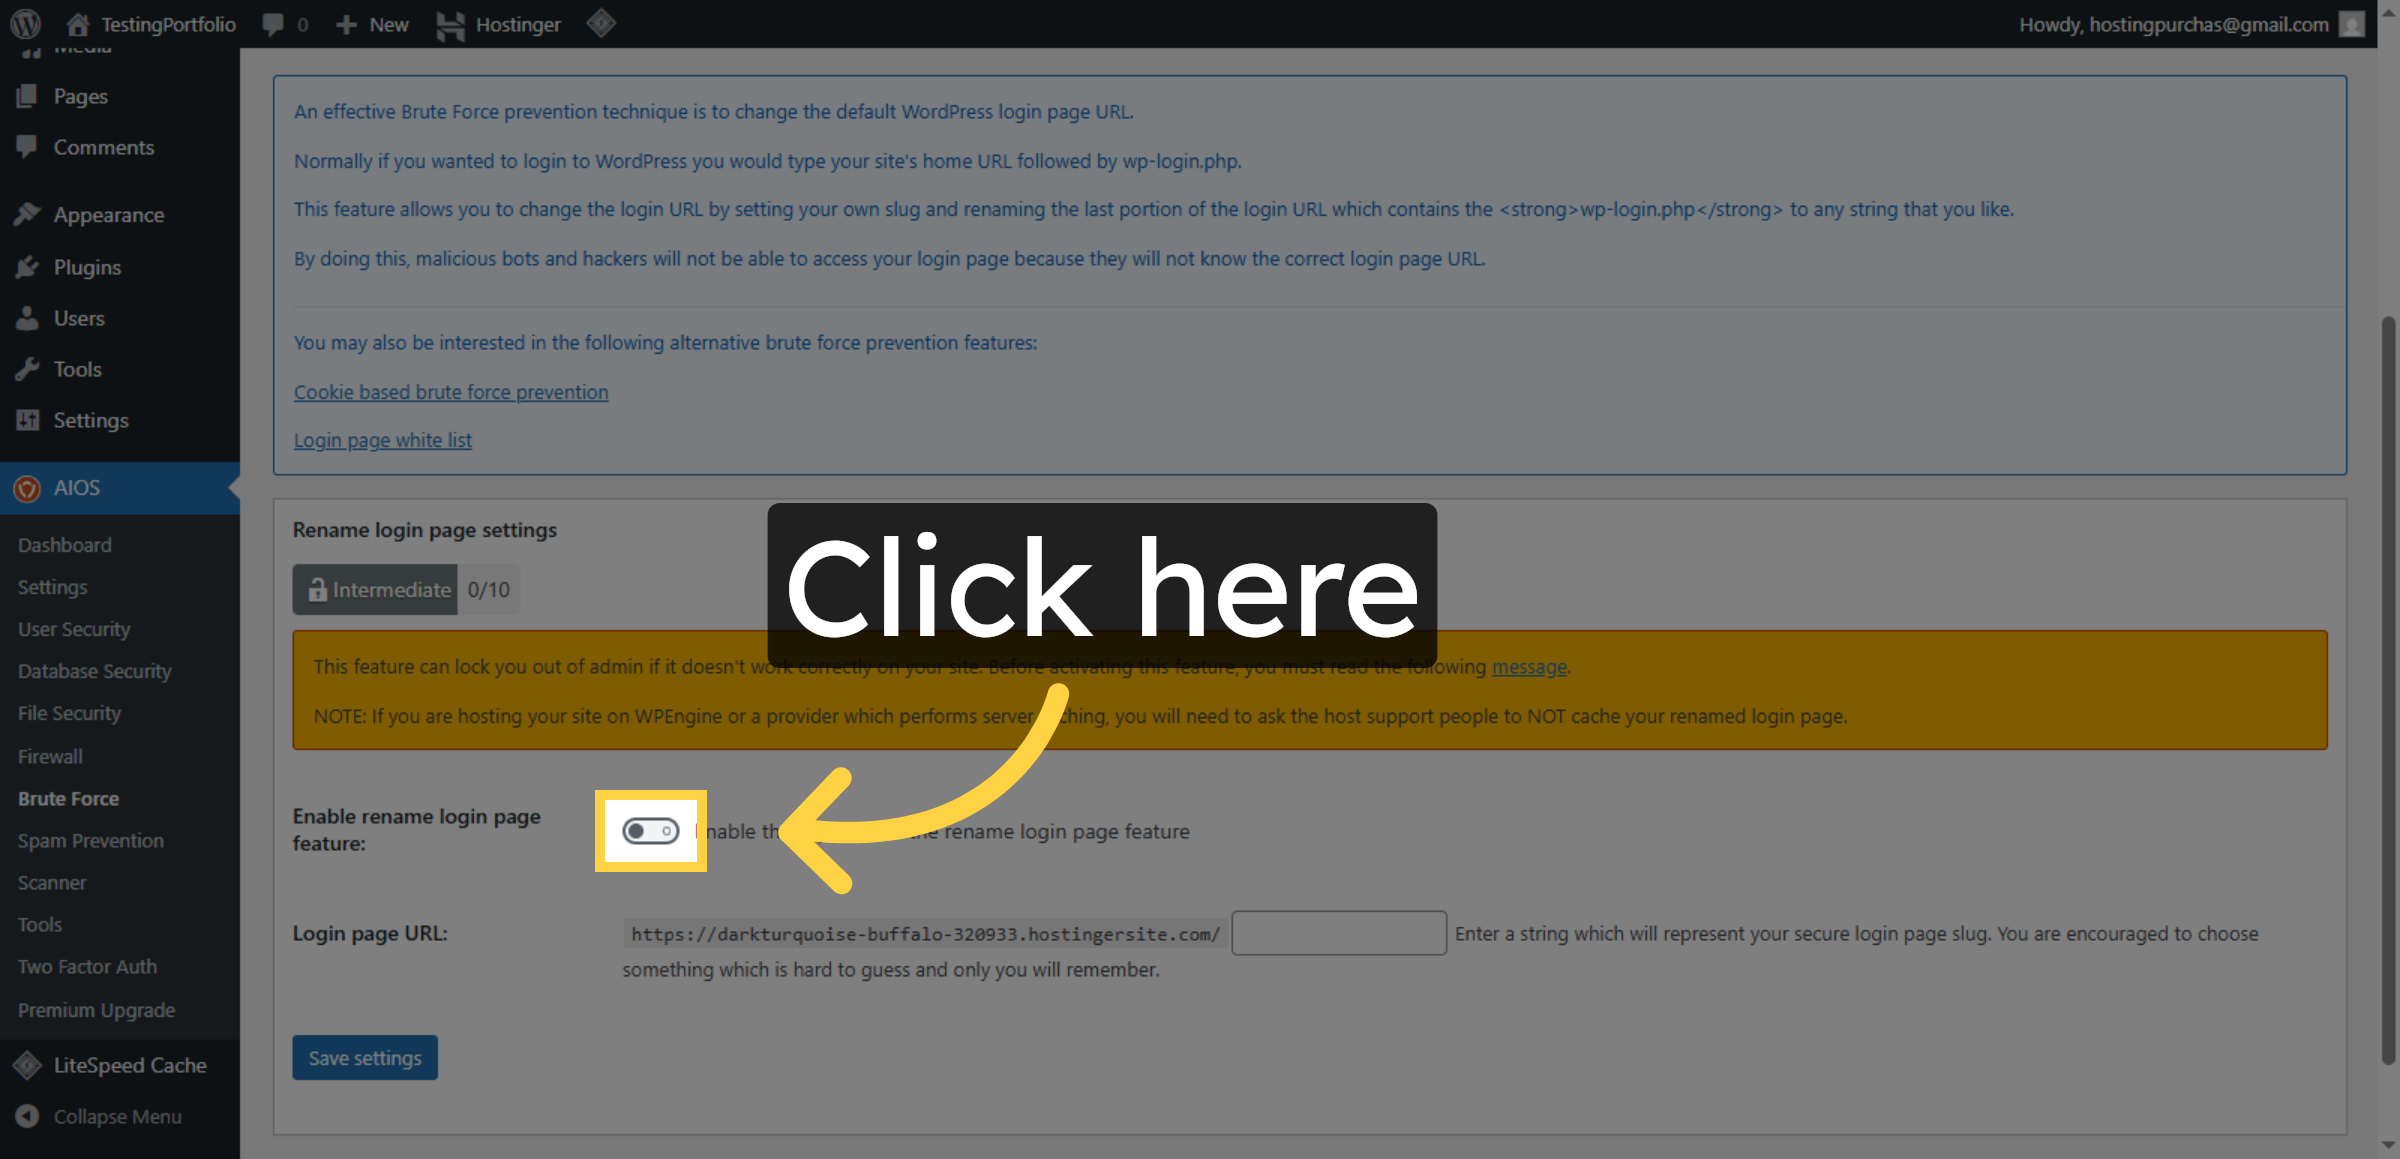
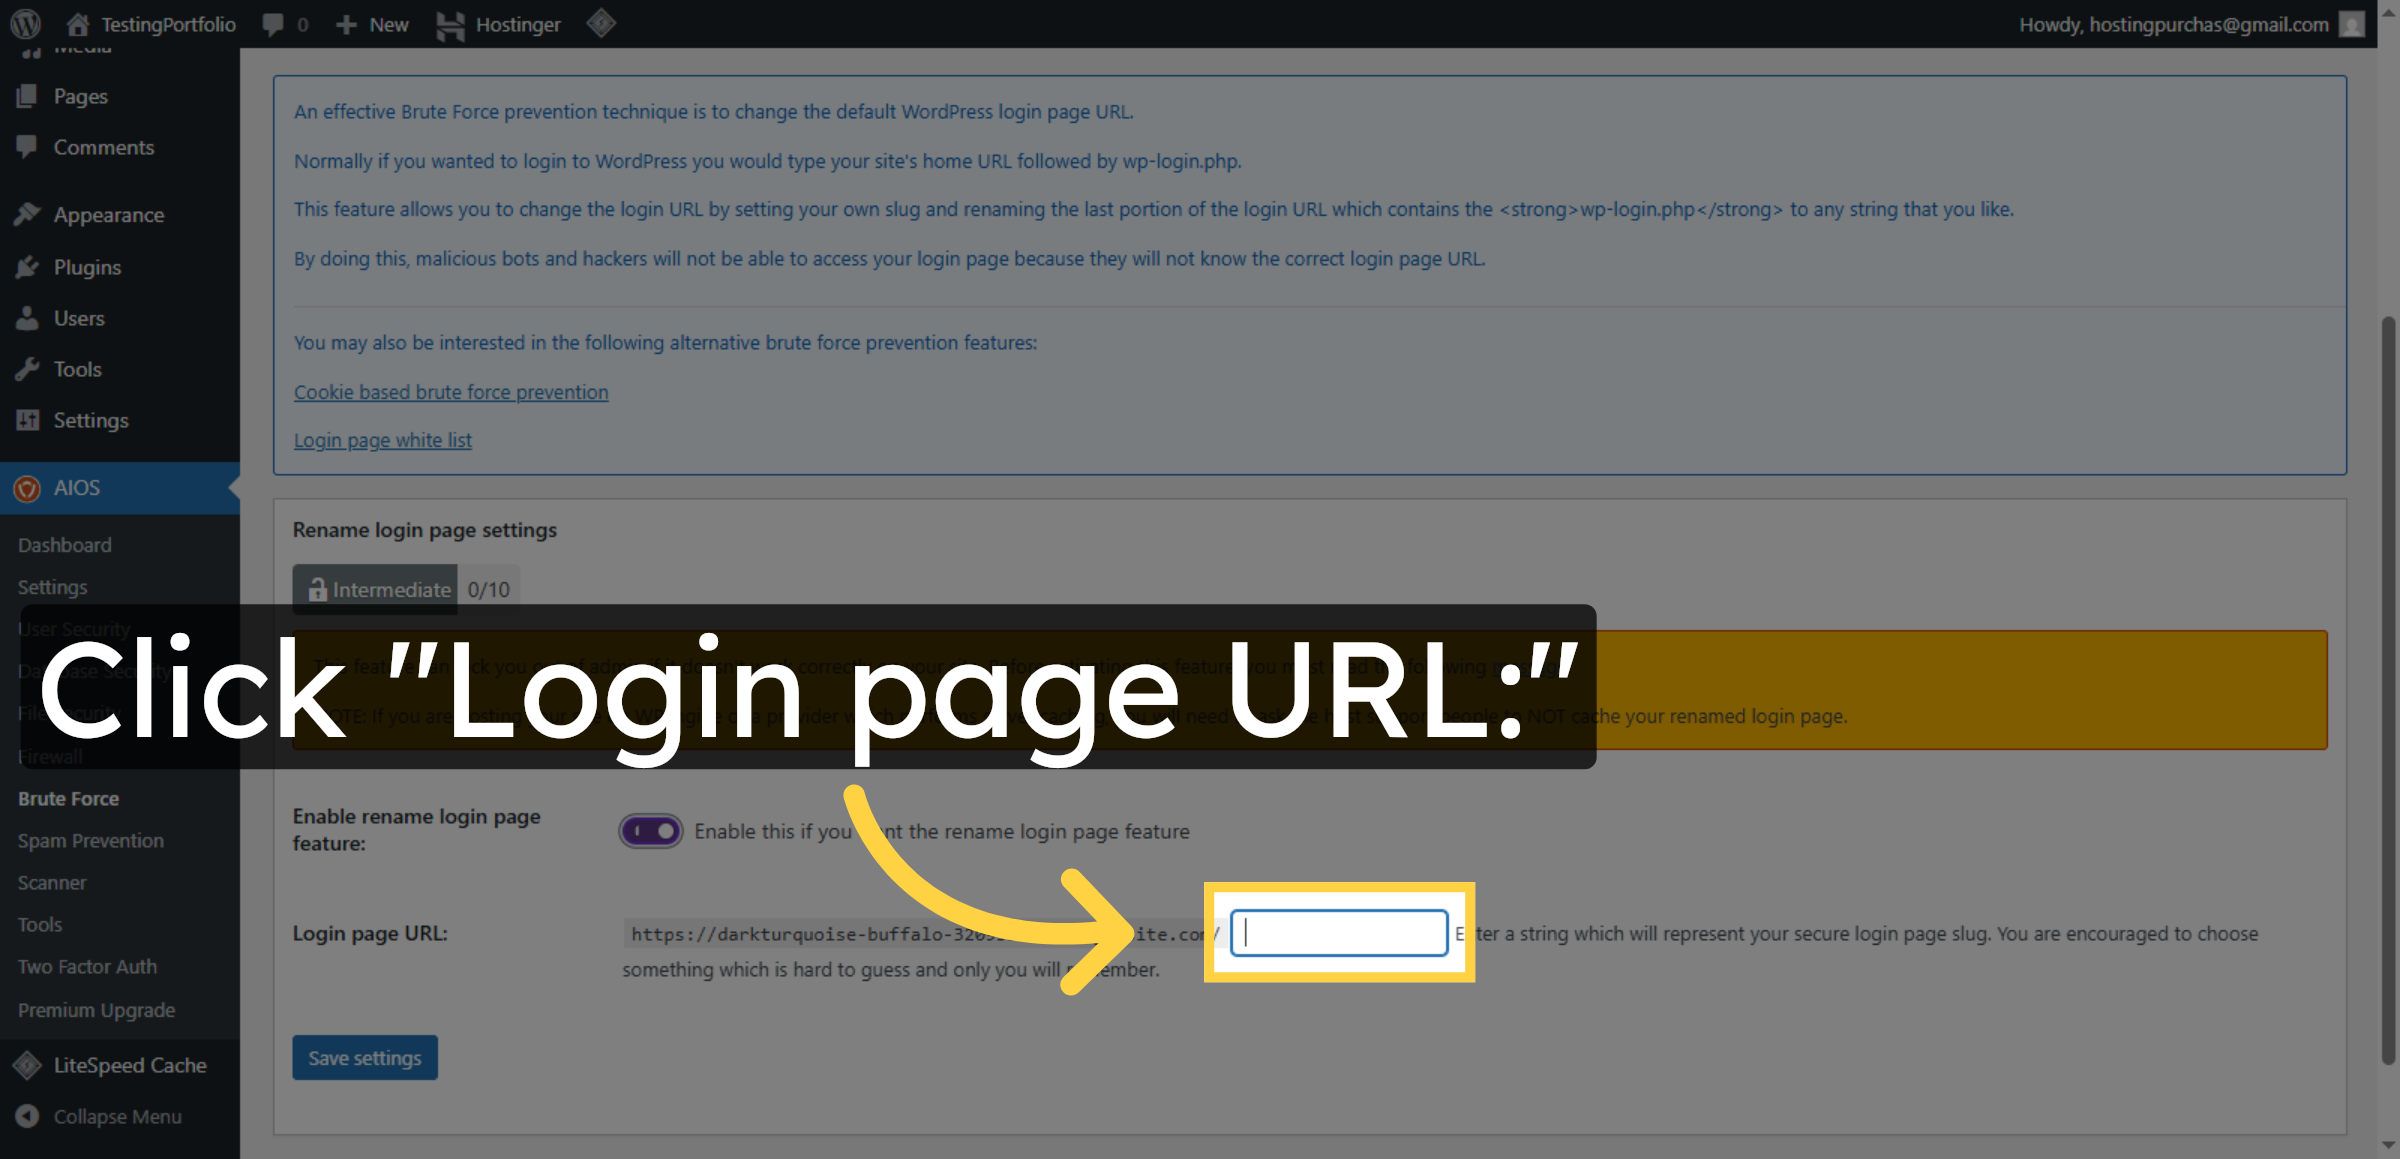
38. Change Login Page URL
Click Login page URL to customize the URL for your WordPress login page.
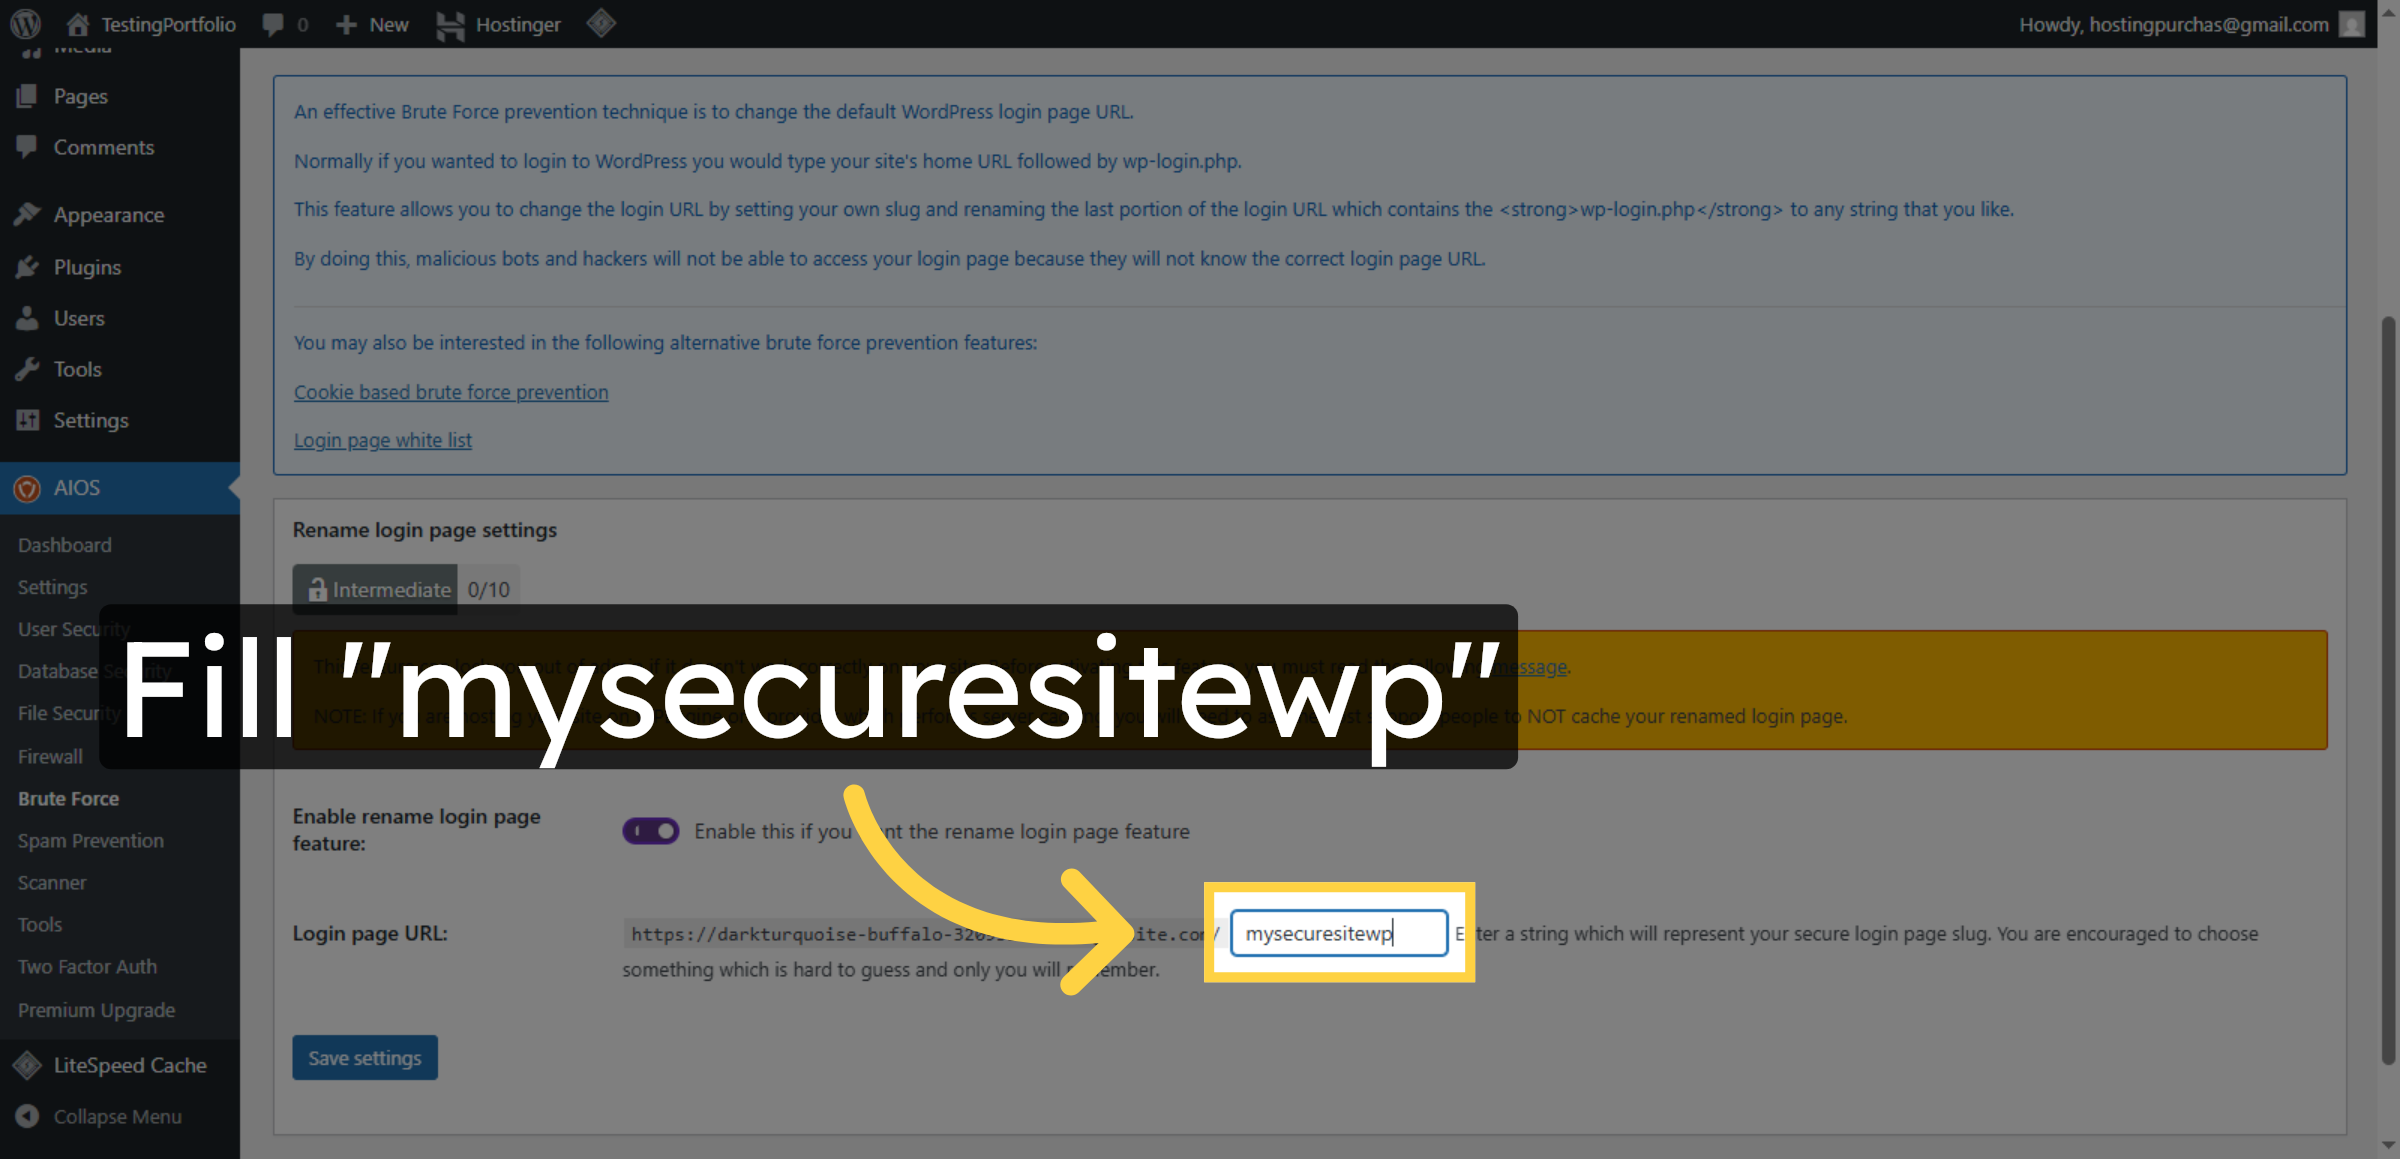
39. Enter Custom Login URL
Enter mysecuresitewp as the new login page URL to enhance security.
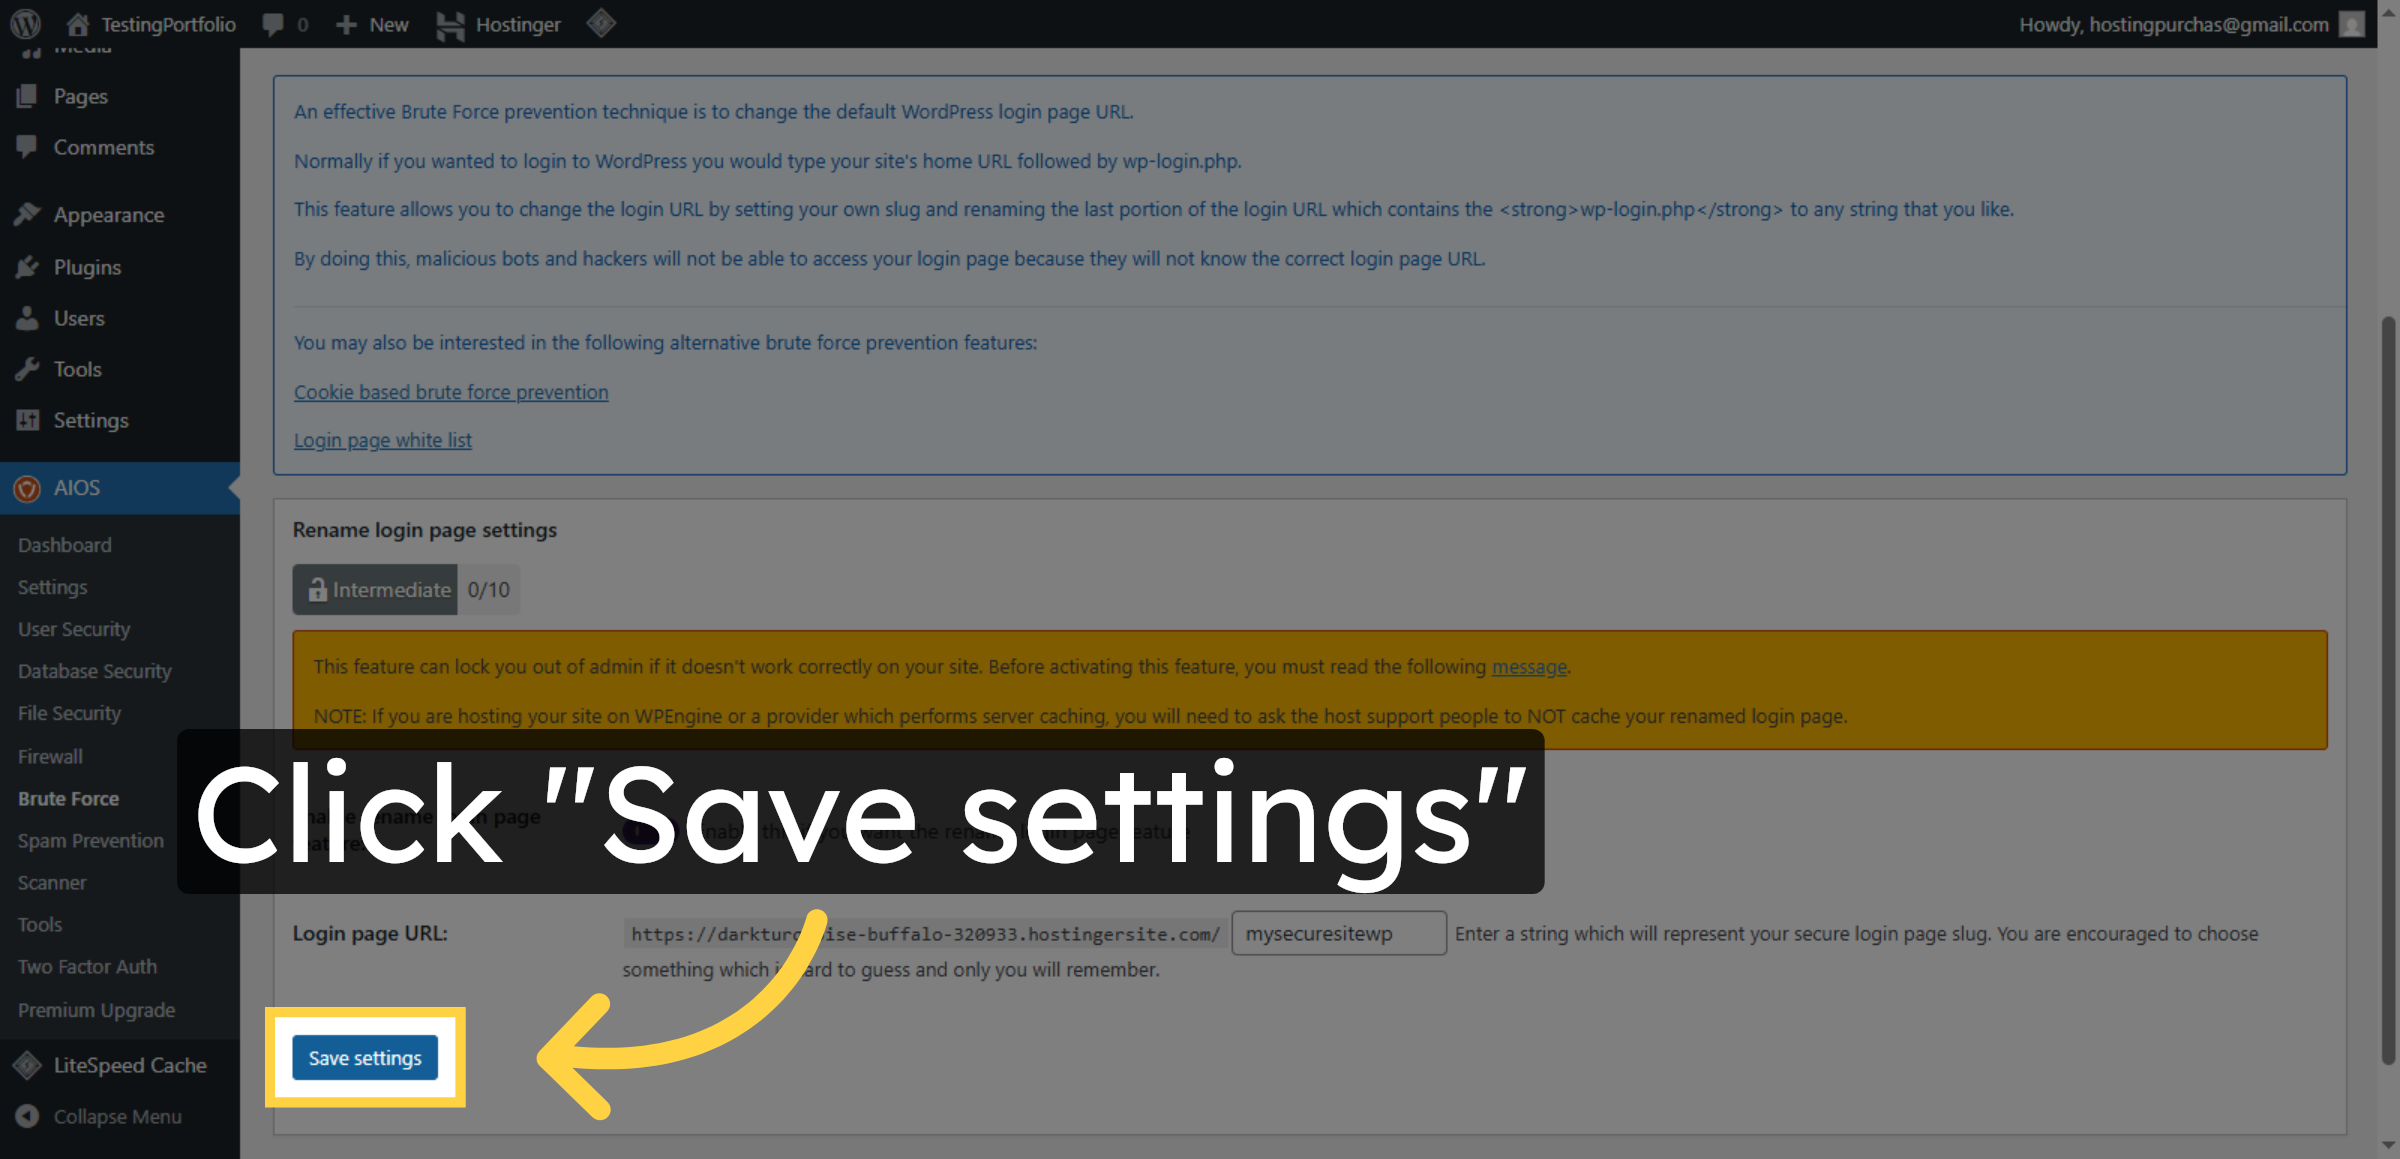
40. Save Brute Force Settings
Click Save settings to apply all brute force protection configurations.
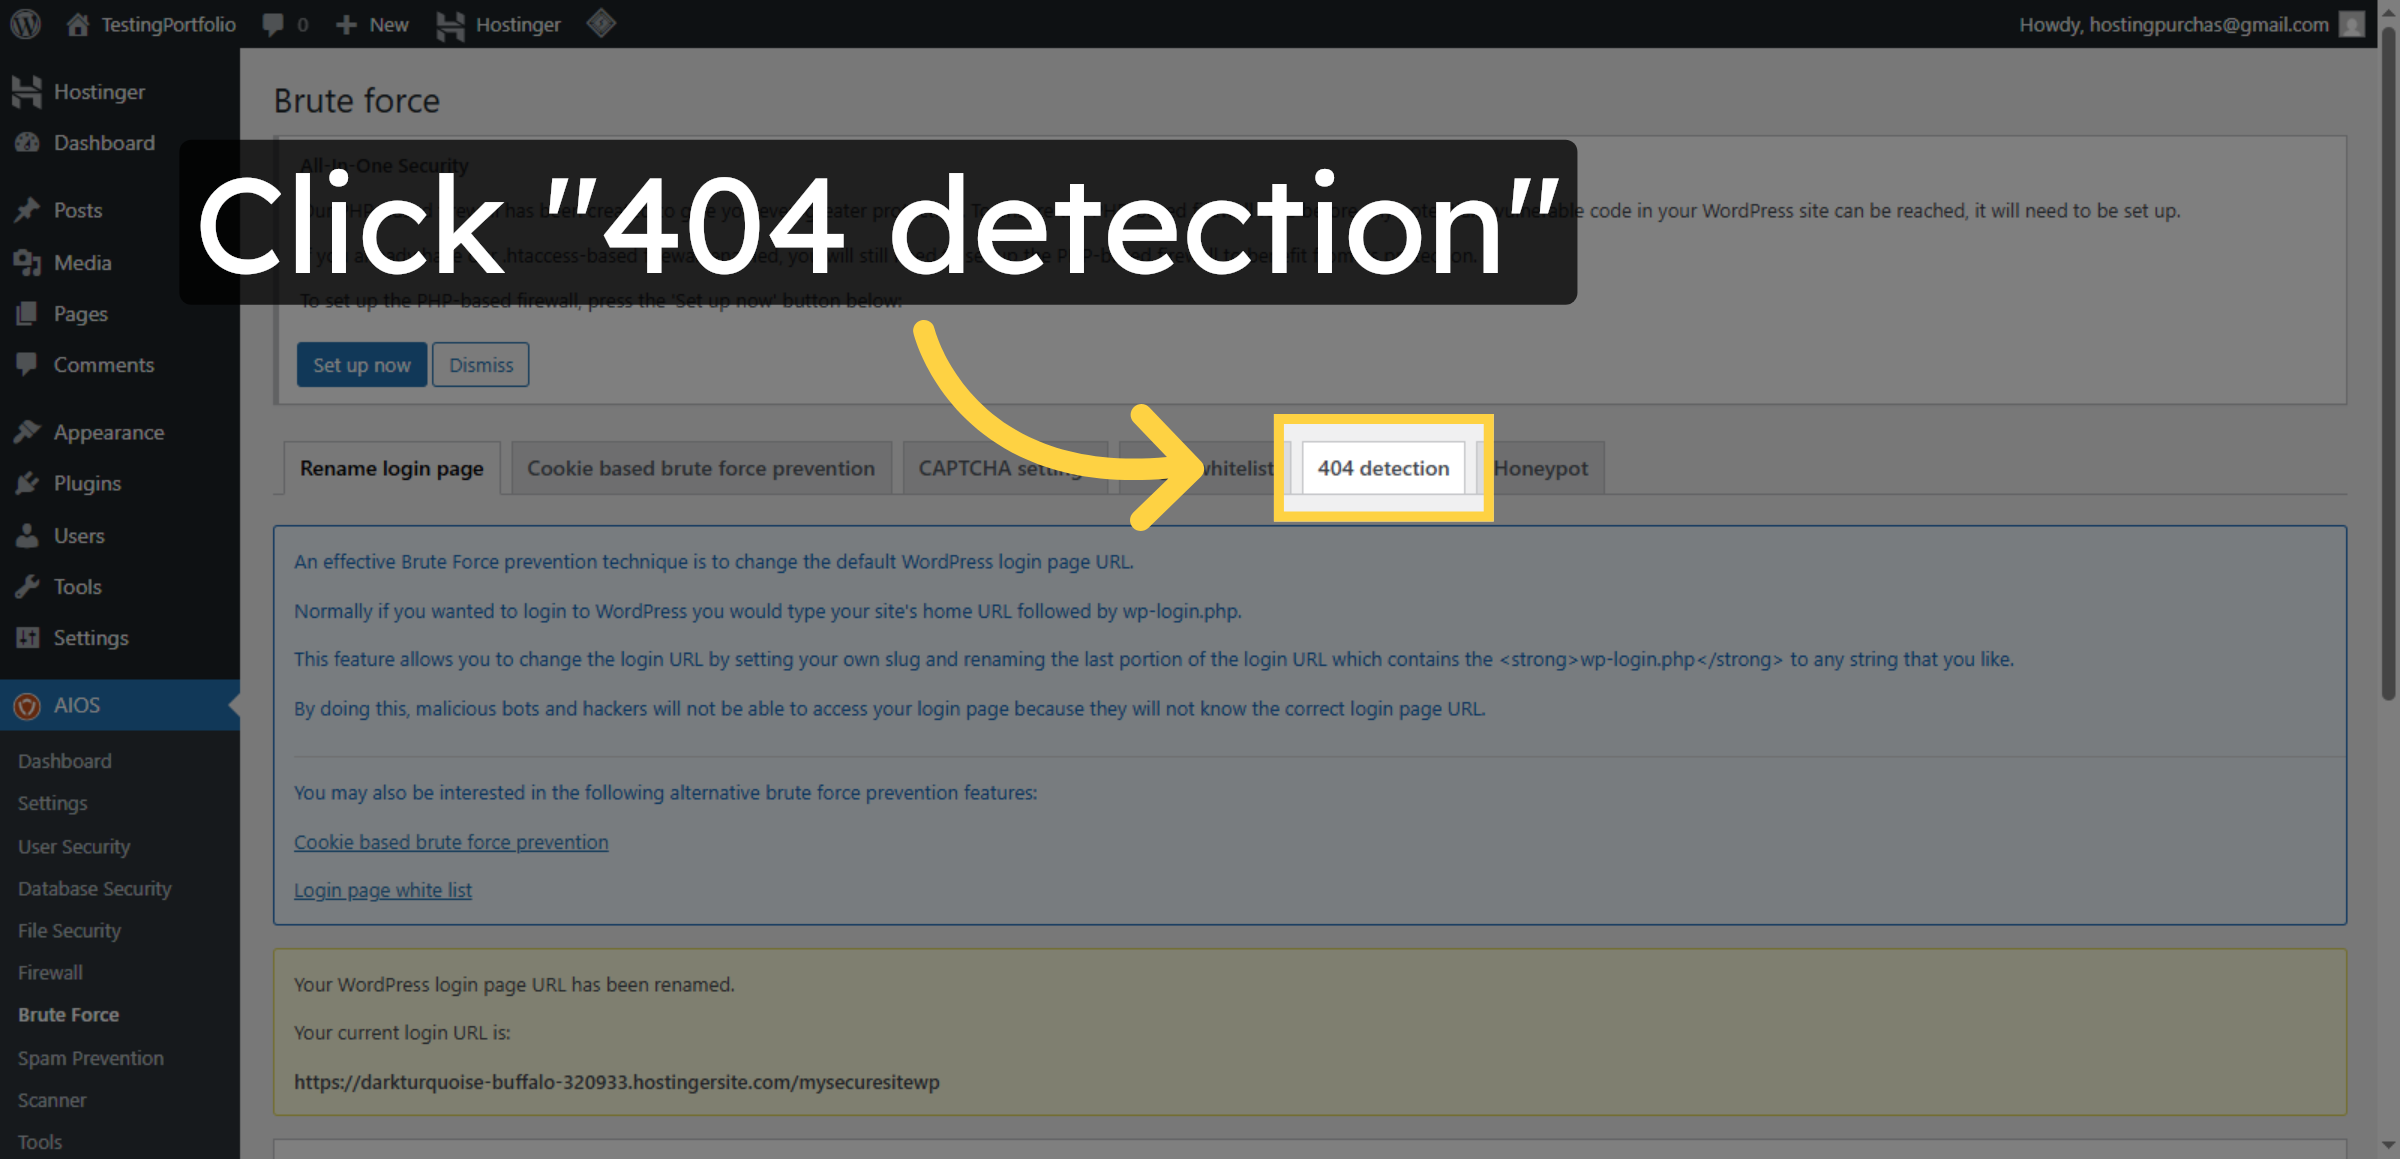
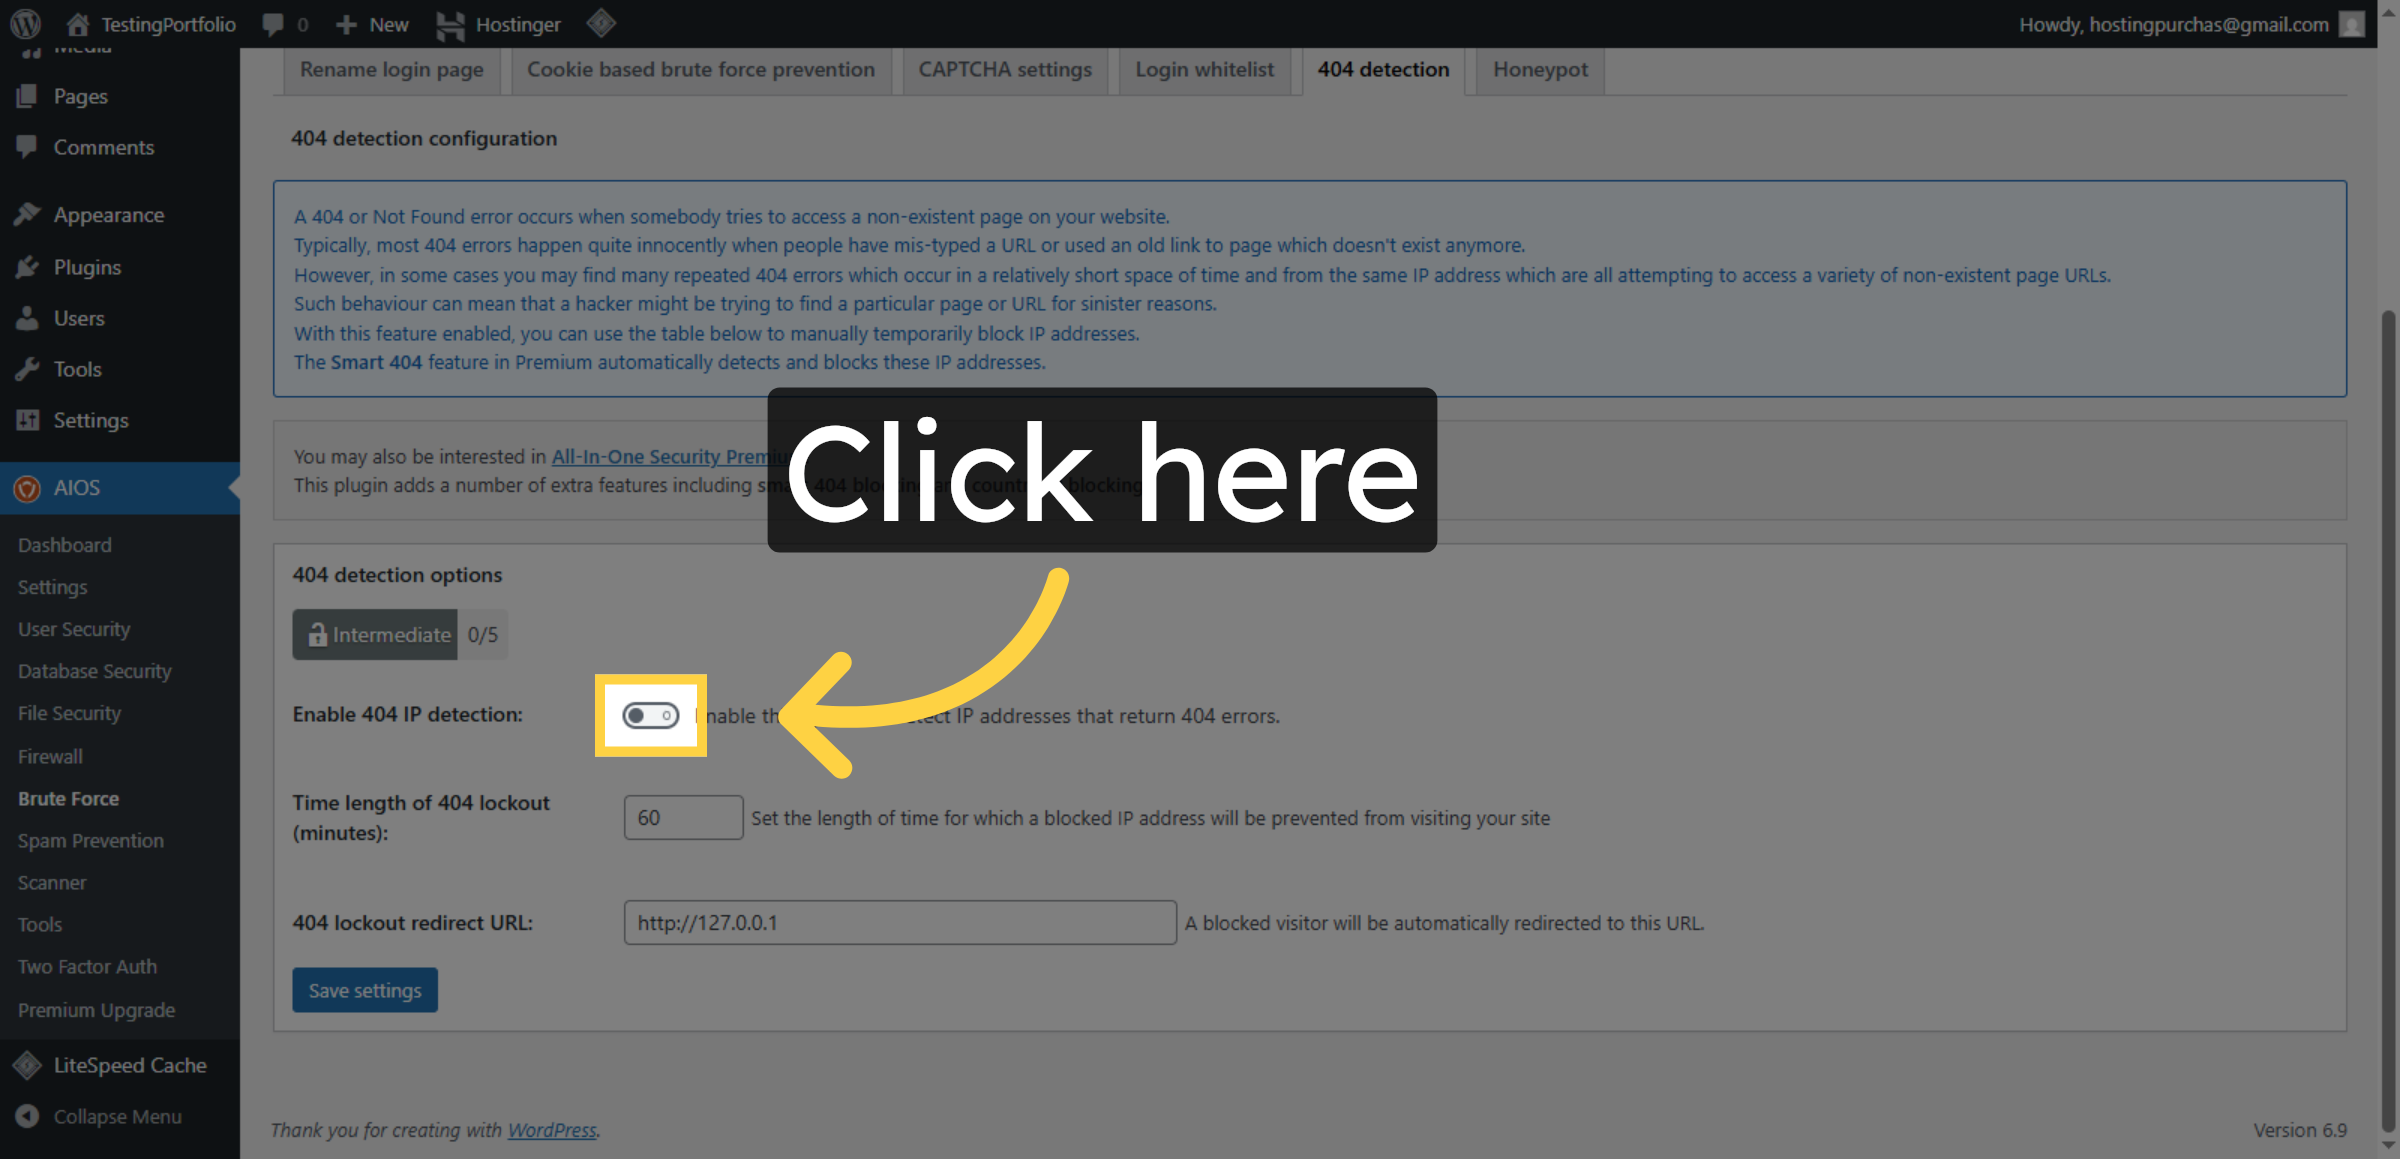
41. Open 404 Detection Settings
Click 404 detection to manage settings that monitor and protect against suspicious 404 errors.
42. Enable 404 Detection
Click here to activate 404 detection features.
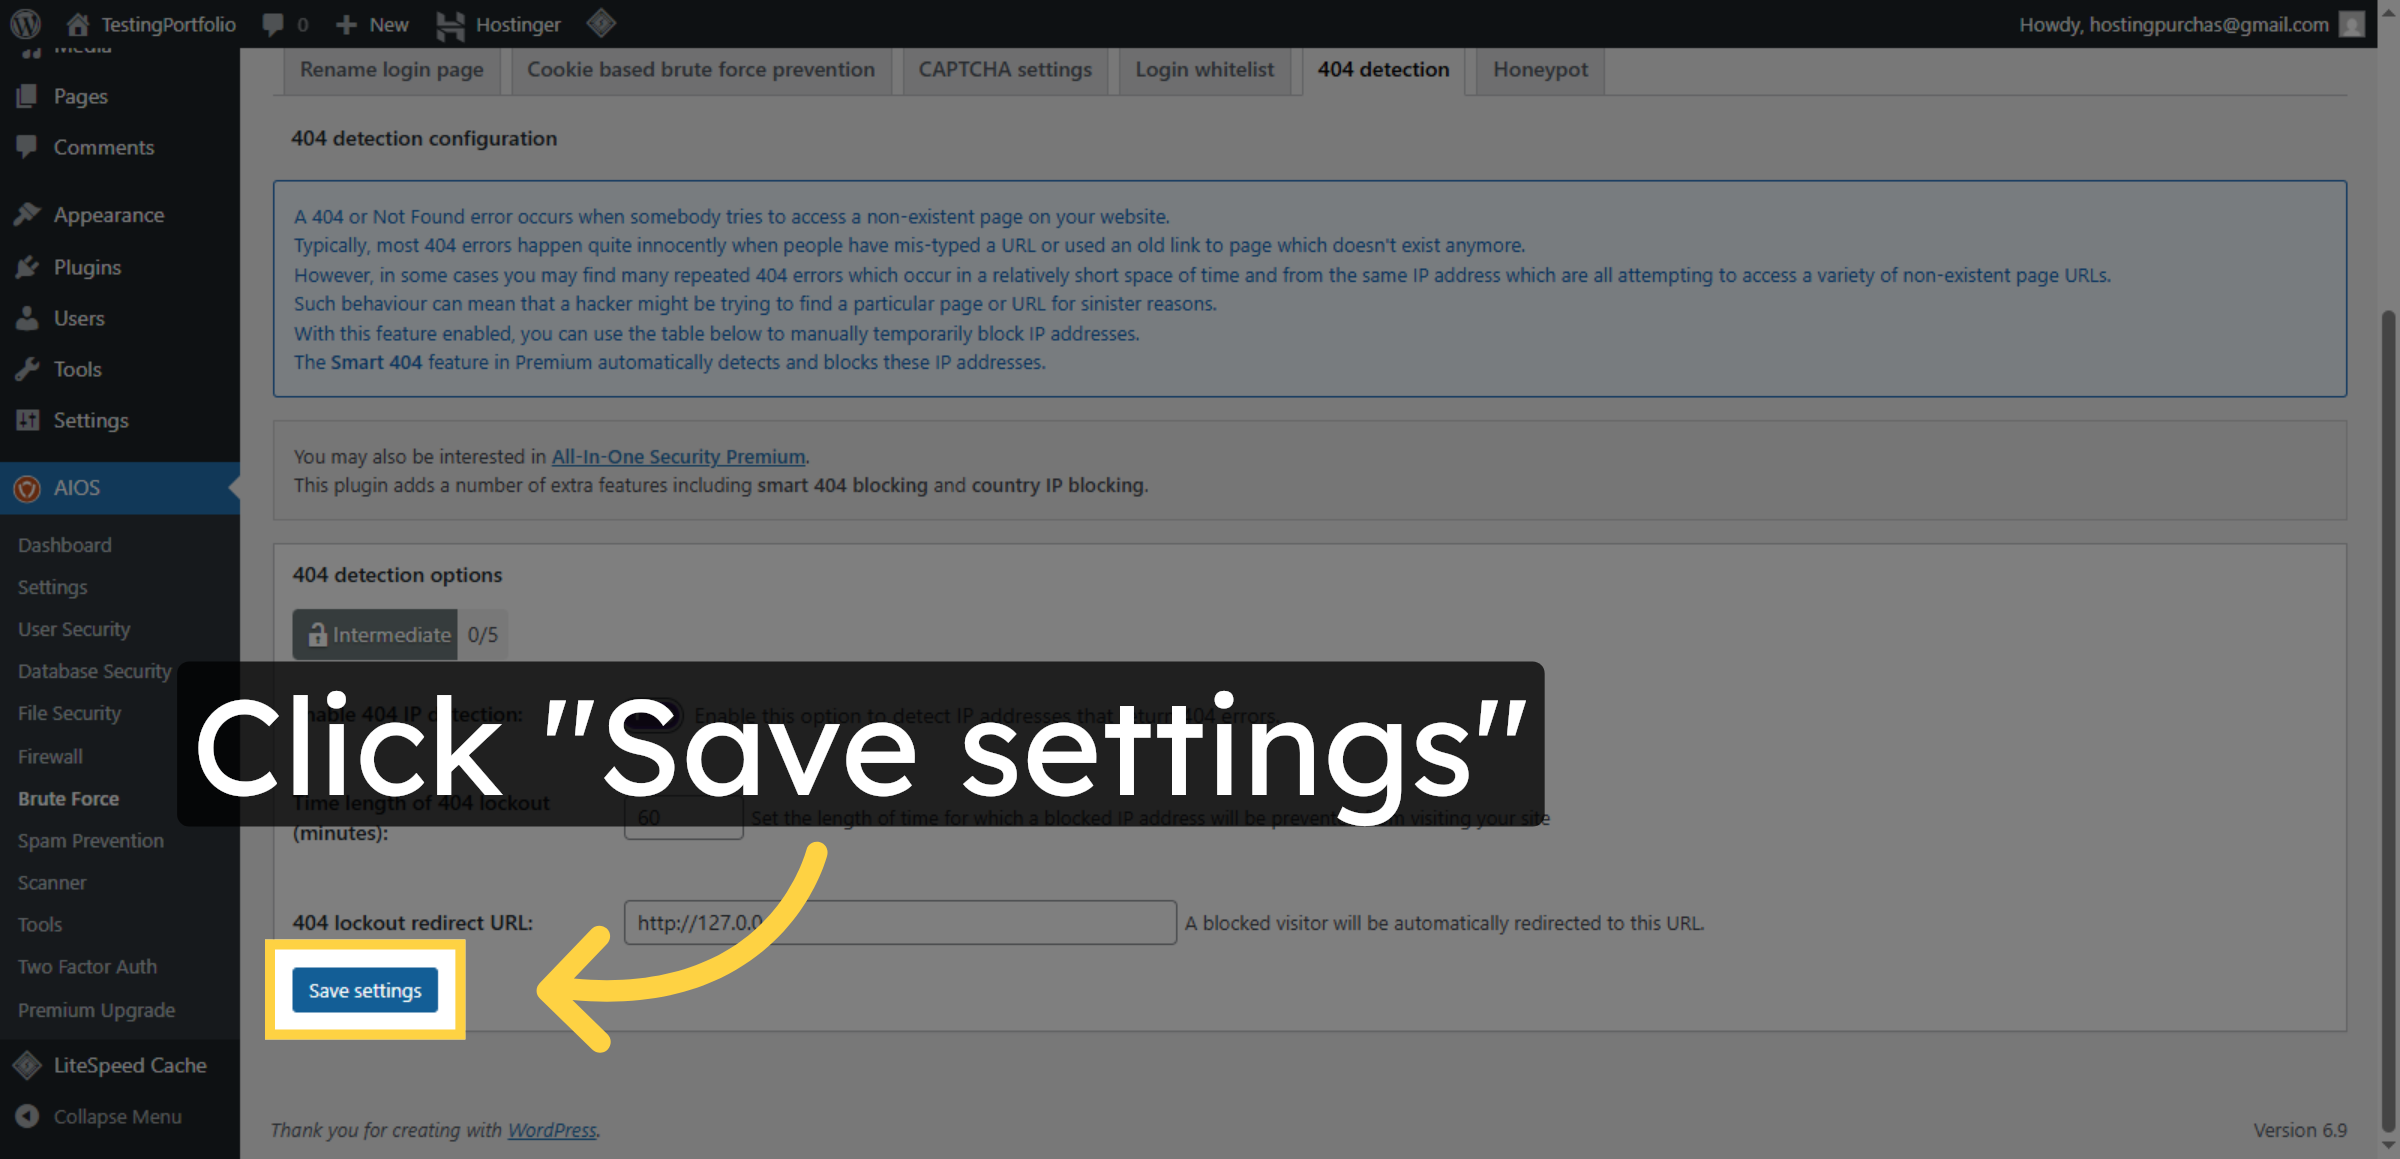
43. Save 404 Detection Settings
Click Save settings to confirm and save all 404 detection configurations.
Conclusion
By following this guide, you have successfully enabled advanced security features on your Hostinger WordPress website. You configured login protection, database security, file permissions, firewall rules, brute force prevention, and 404 detection using the All In One Security plugin. These security measures significantly reduce the risk of cyber attacks, unauthorized access, and malicious activities. Regularly updating your plugins and reviewing security logs will help maintain long-term website protection.
WooHelpDesk Support
Need professional assistance with WordPress security, firewall setup, or malware protection?
Visit: https://www.woohelpdesk.com
Call Us Toll-Free: +1 888 602 0119 (US & Canada)
Our experts are ready to help you keep your website secure, optimized, and running smoothly.


