How to Recover Deleted Files And Databases On HostGator WP Hosting
5 mins read

How to Recover Deleted Files And Databases On HostGator WP Hosting

Introduction

Accidental deletion of website files or databases can cause serious disruptions, including website downtime, data loss, and accessibility errors. Such incidents may occur due to incorrect file handling, system failures, or unauthorized modifications. For WordPress websites hosted on platforms like HostGator, having reliable recovery methods is essential to restore normal operations quickly and minimize business impact.

This guidde explains how to recover deleted files and databases on HostGator WordPress hosting using two effective methods: restoring files from the File Manager’s Trash folder and recovering data through backup plugins. It provides step-by-step instructions for accessing hosting tools, locating deleted files, restoring website directories, importing backup data, and reconfiguring site settings. By following this guide, users can efficiently recover lost content and restore website functionality with minimal downtime.


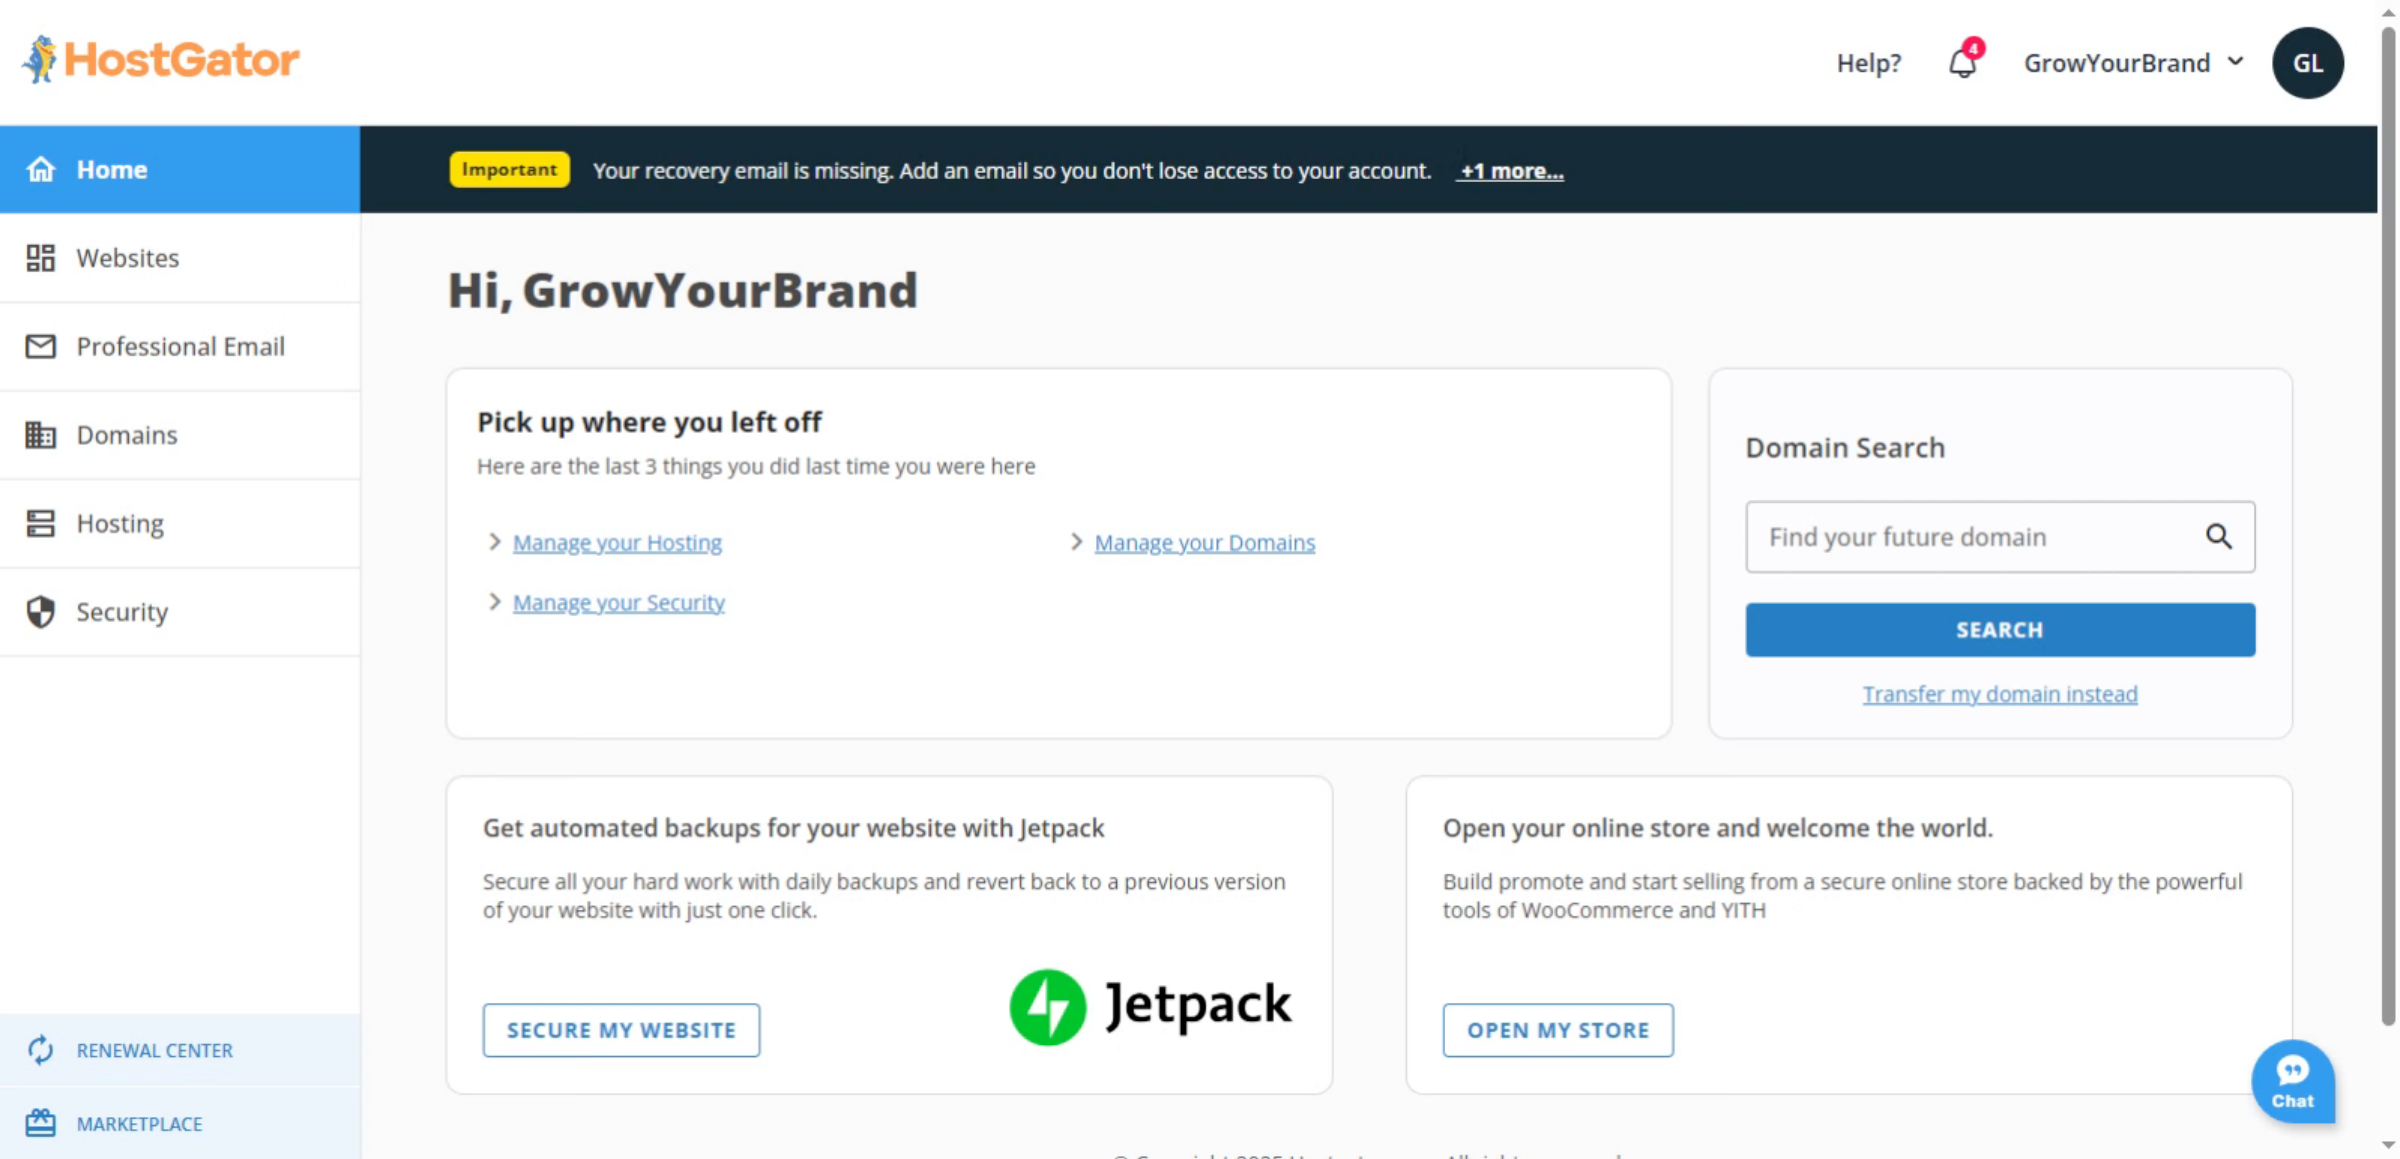
1. HostGator Dashboard

Use this dashboard to access Hosting, cPanel, backups, and security tools for recovering deleted files and databases.

HostGator Dashboard

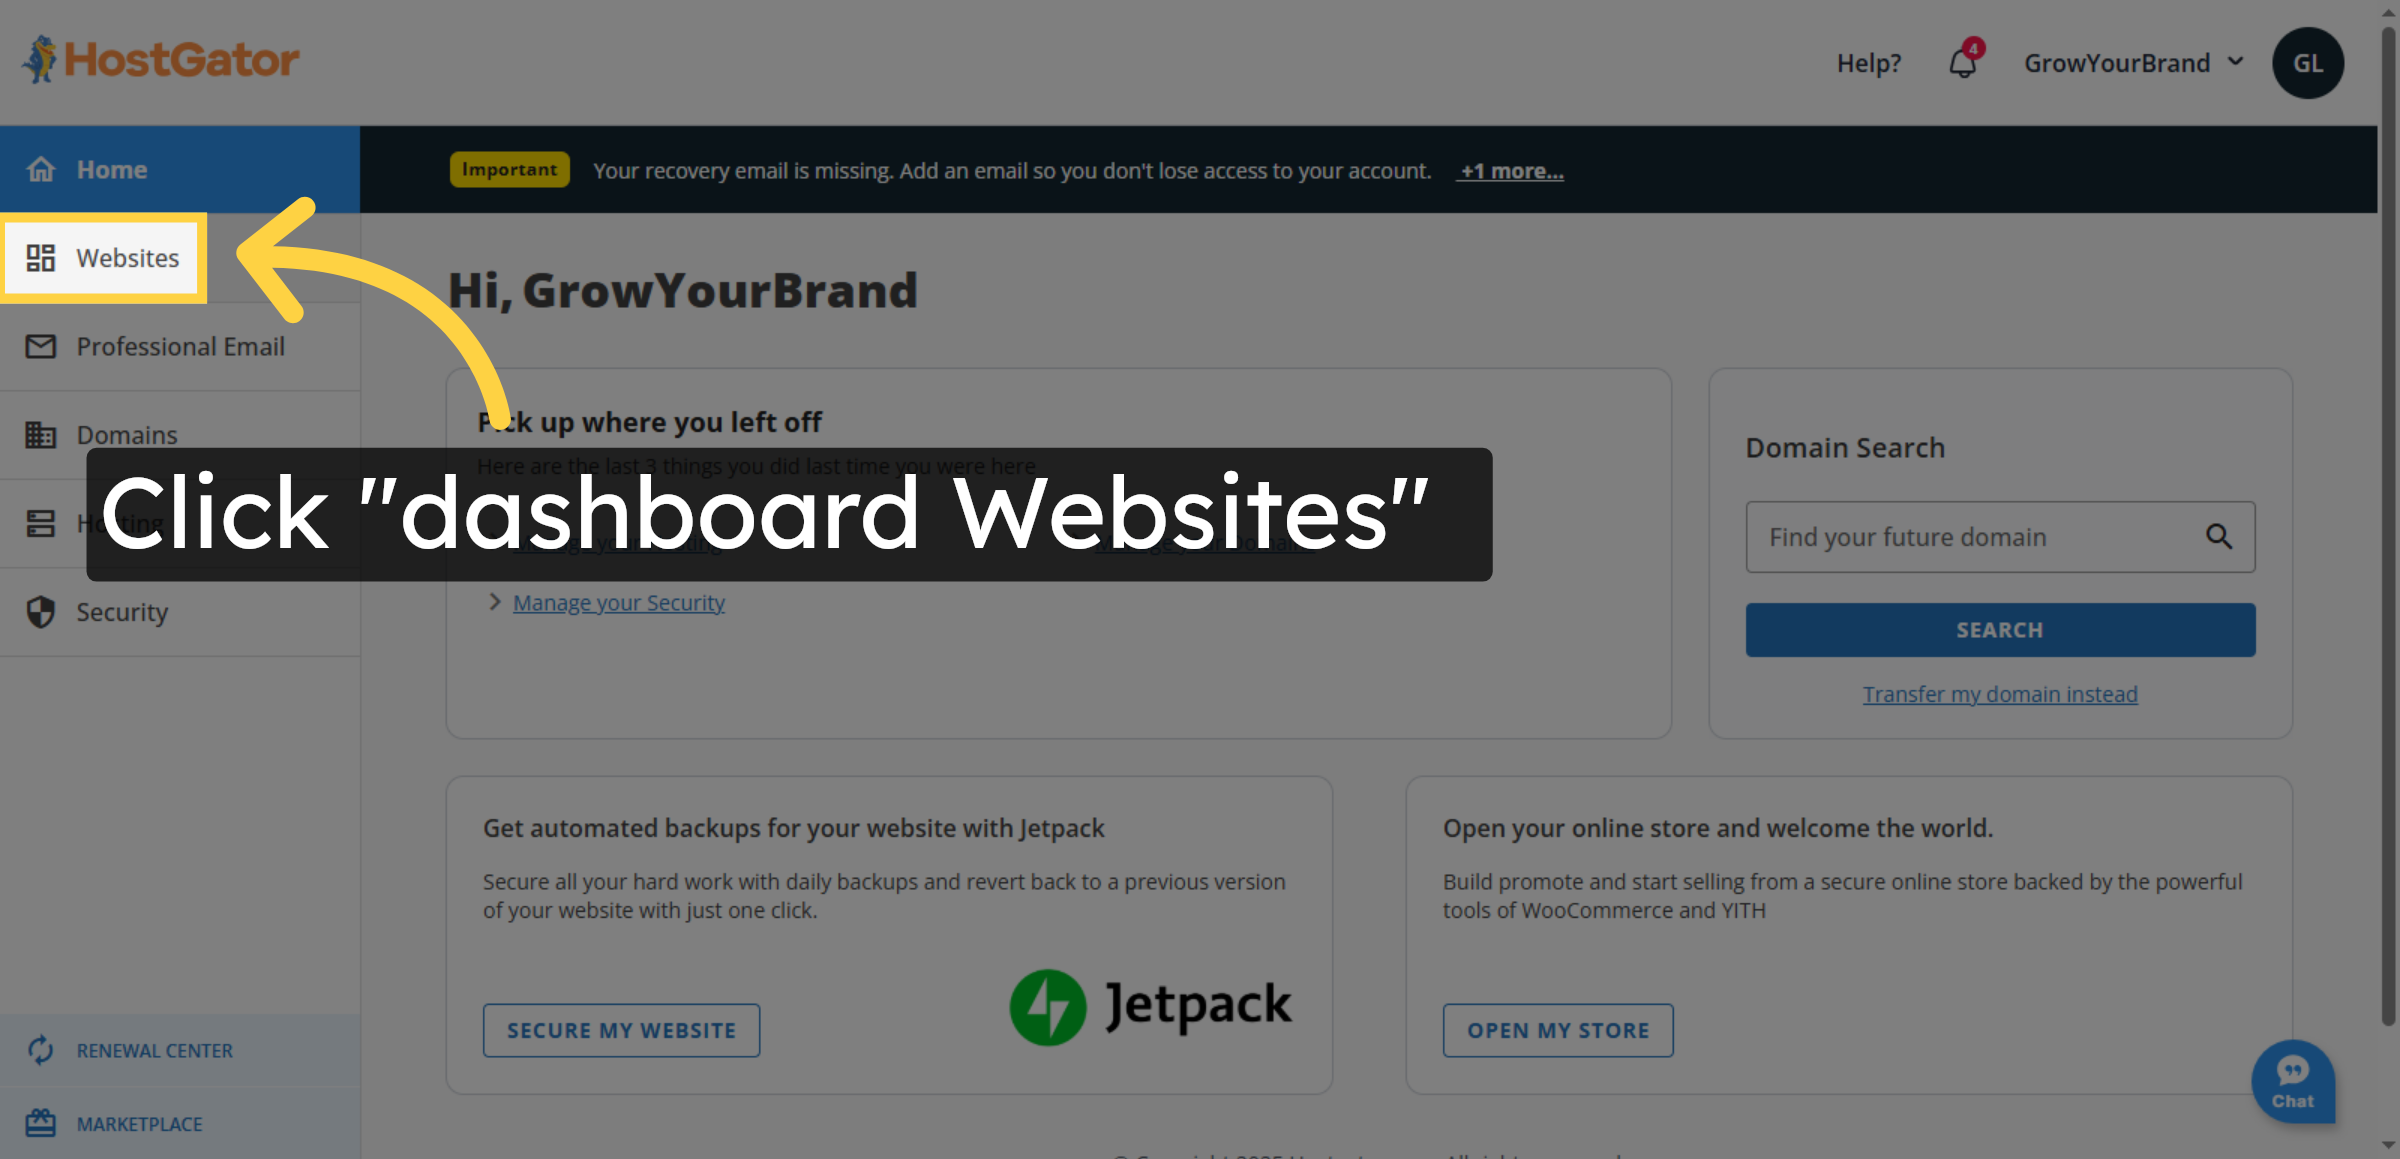
2. Access Dashboard Websites

Click “dashboard Websites” to open the list of your hosted websites in HostGator’s control panel.

Access Dashboard Websites

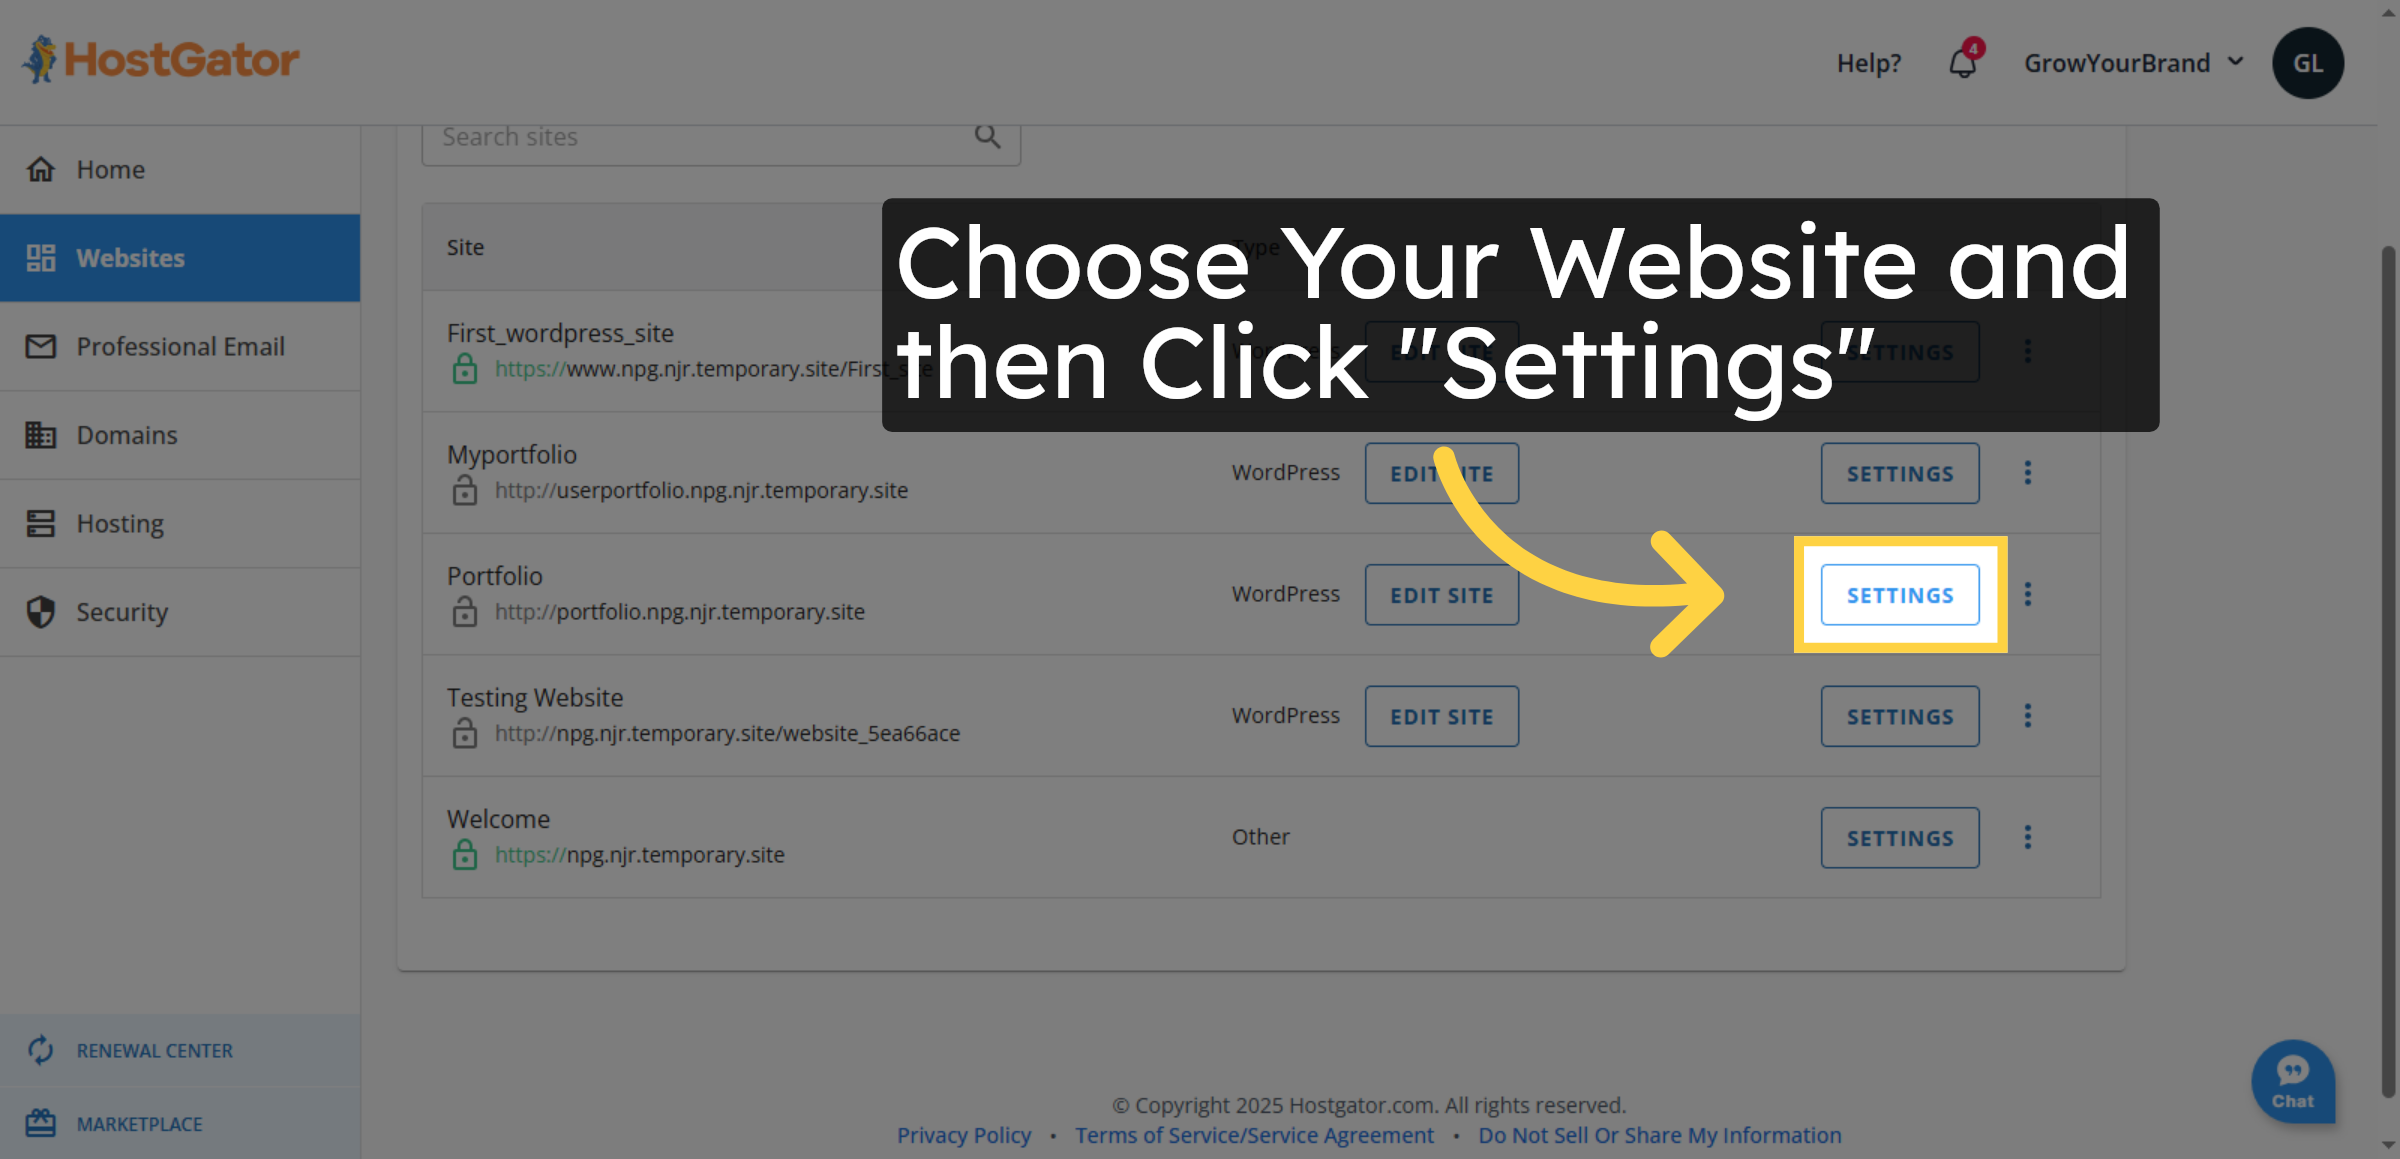
3. Open Website Settings

Click “Settings” to access configuration options for your selected website.

Open Website Settings

4. Select Website URL

Click the website URL “http://portfolio.npg.njr.temporary.site” to manage that specific site.

Select Website URL

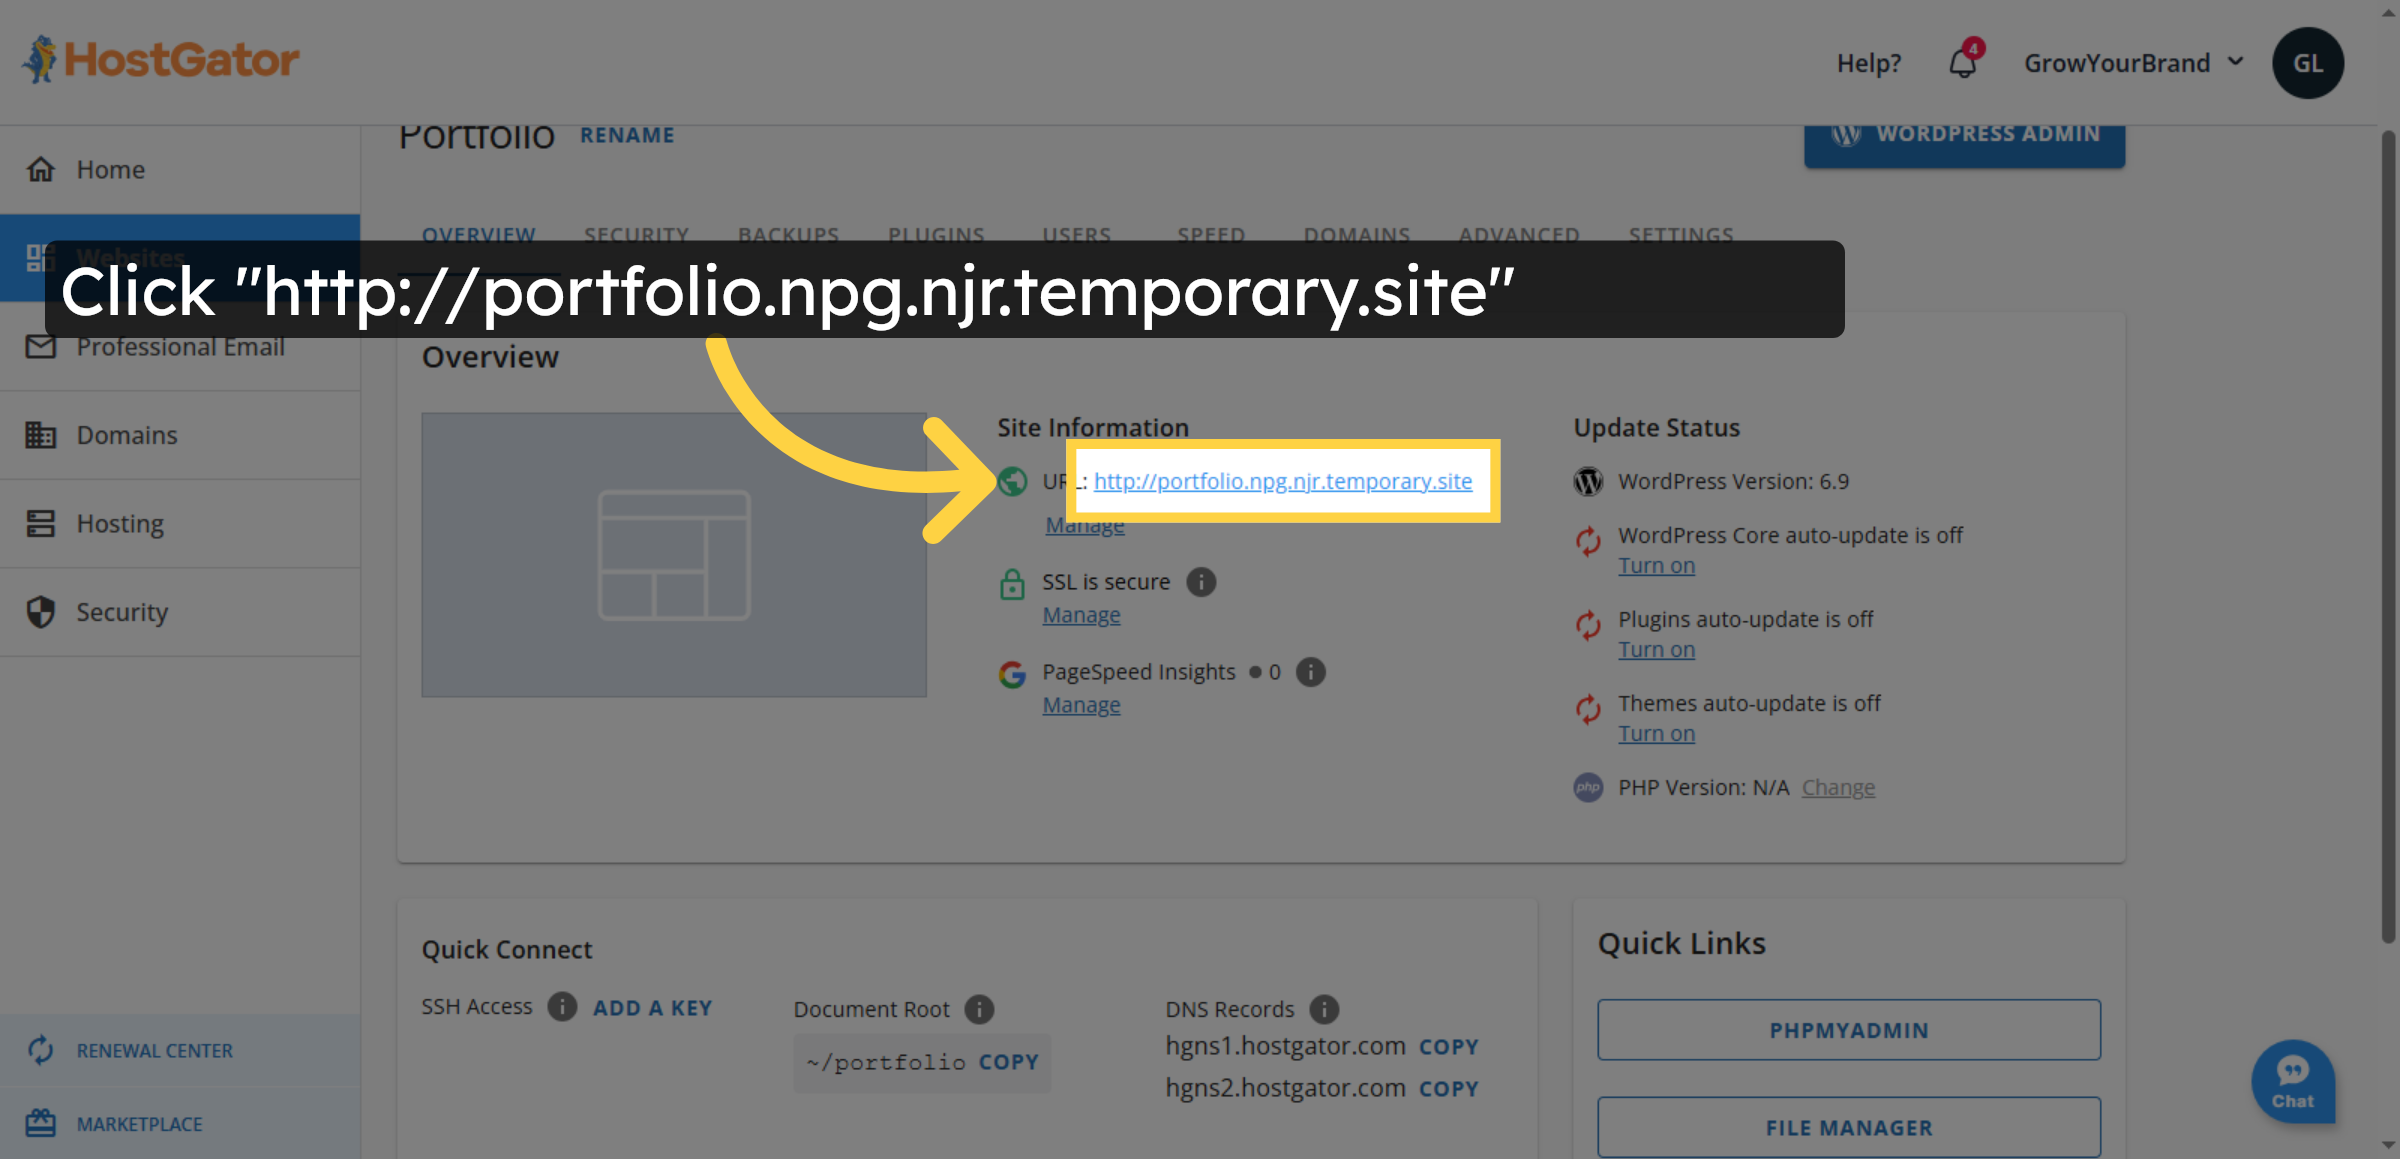
5. Switch To Website Tab

When required files are missing, the server cannot verify access properly, so it returns a 403 Forbidden error instead of loading the website.

Switch To Website Tab

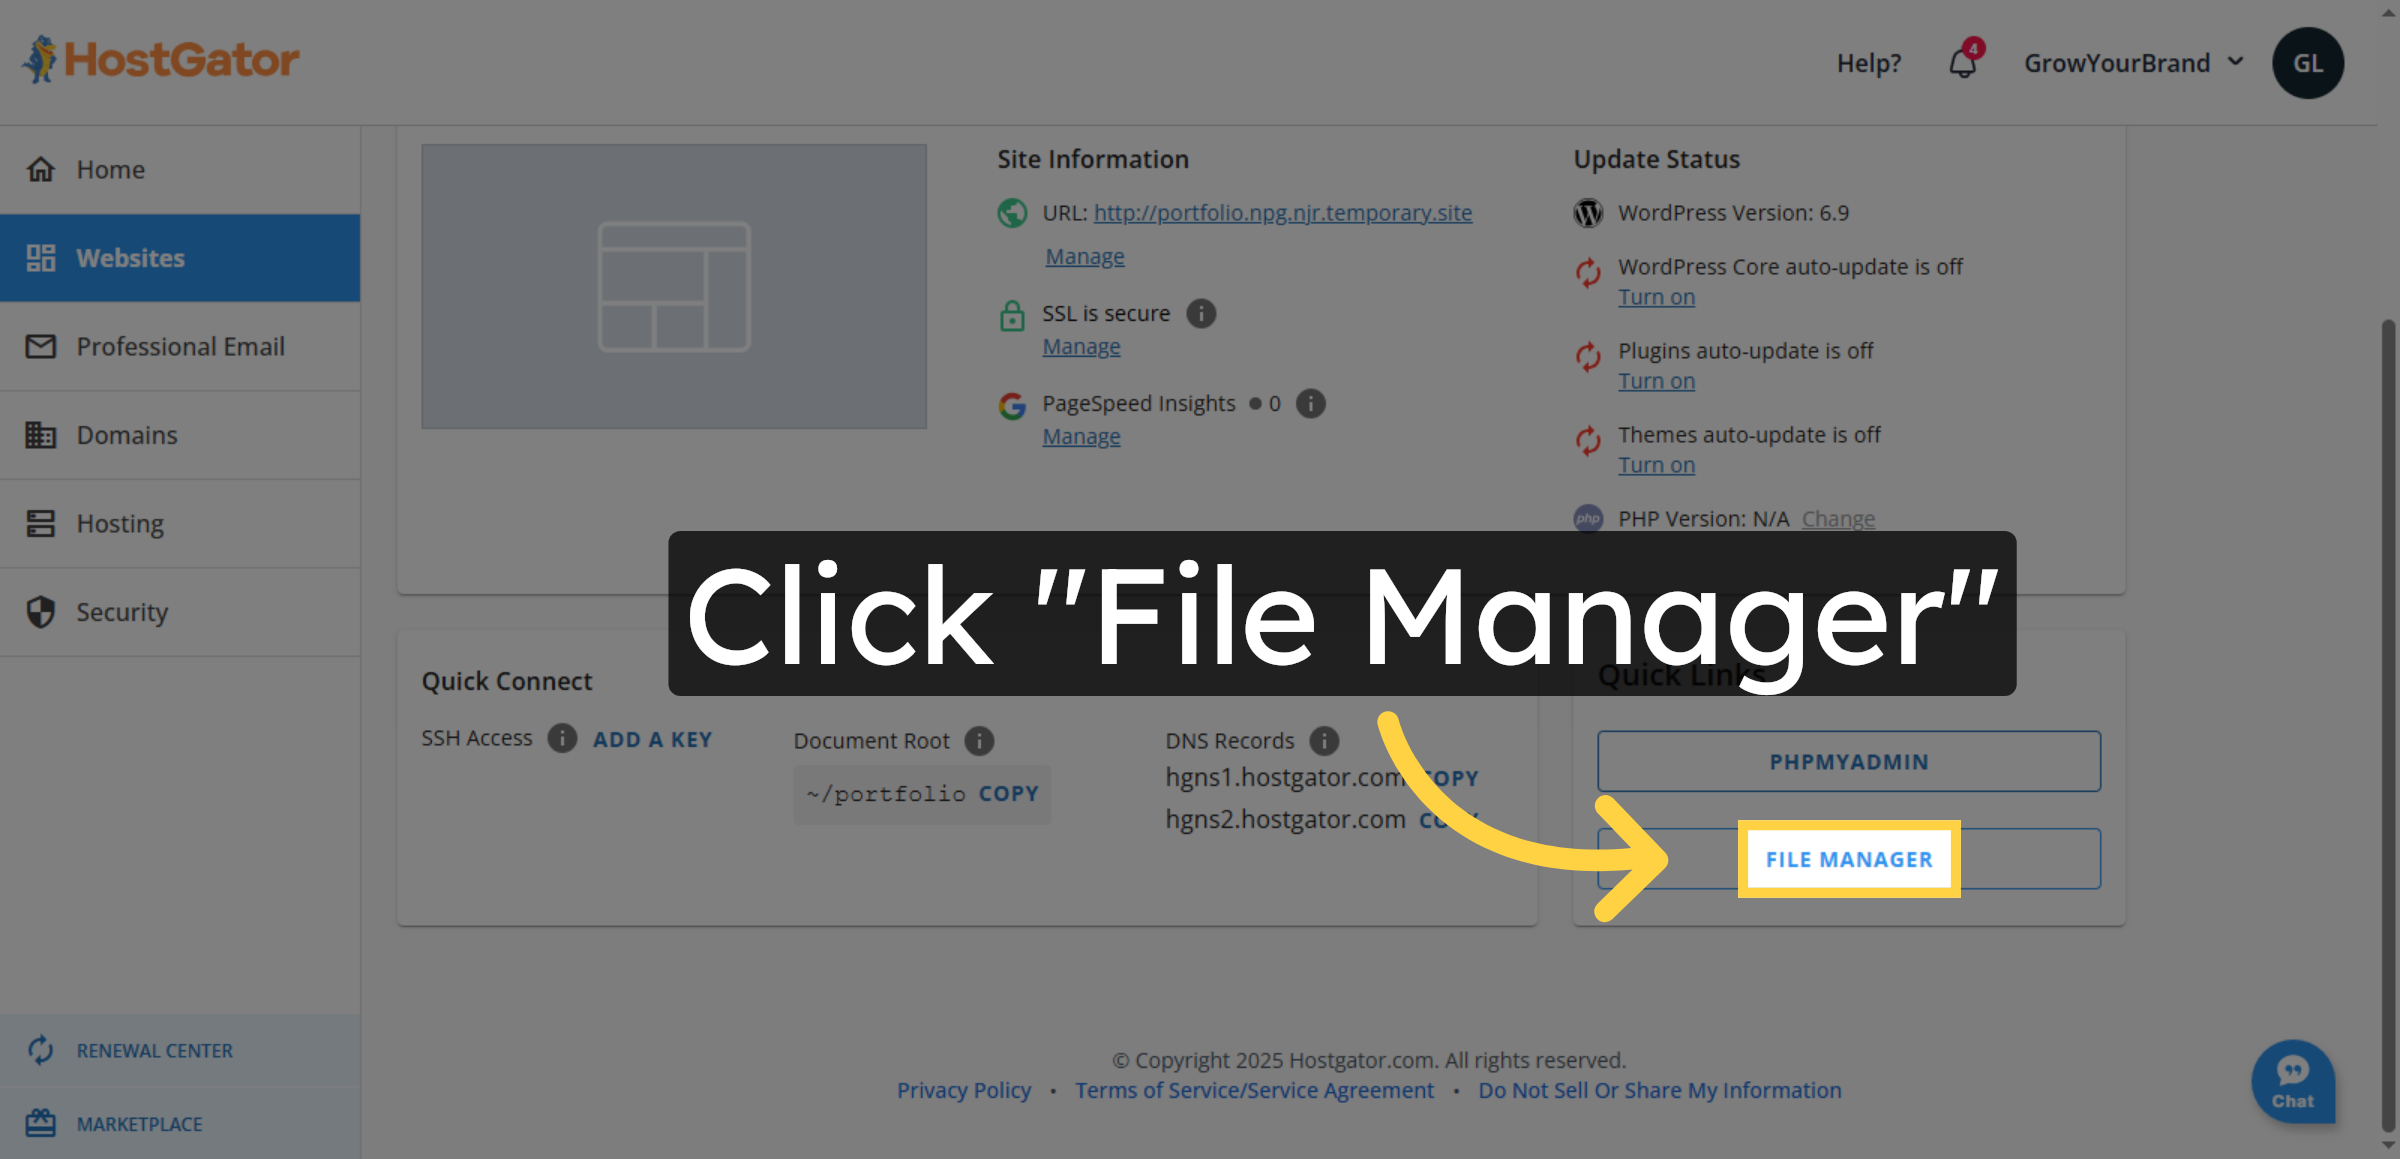
6. Open File Manager

Click “File Manager” to browse and manage your website files on the server.

Open File Manager

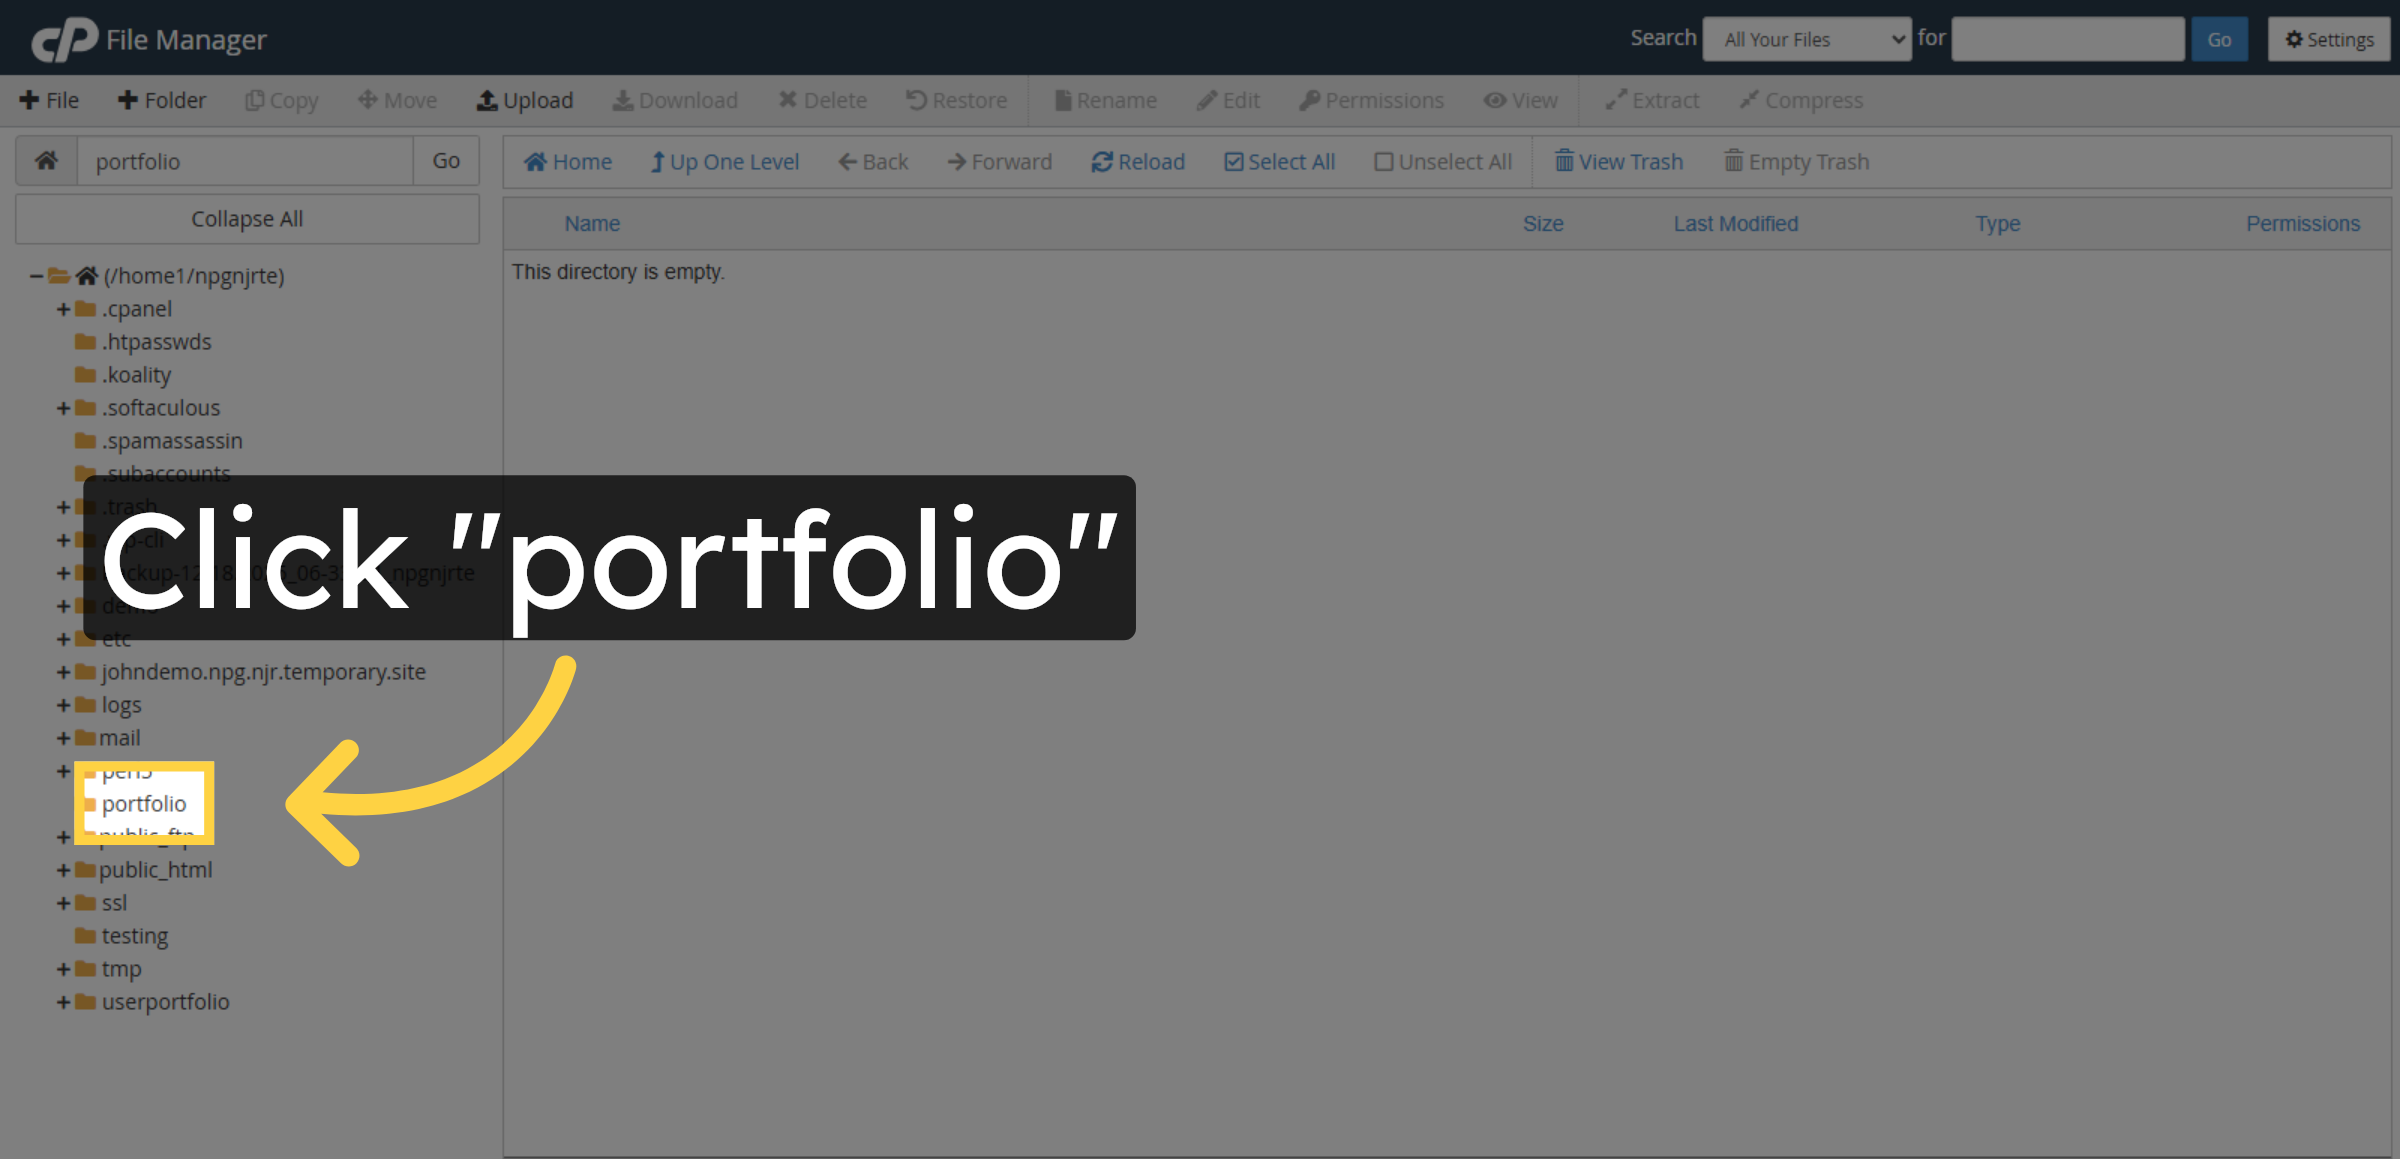
7. Open Website Directory

Click the “portfolio” directory to view the files associated with your website.

Open Website Directory

8. Check Directory Contents

Click the message “This directory is empty.” to verify that no files currently exist in the website folder.

Check Directory Contents

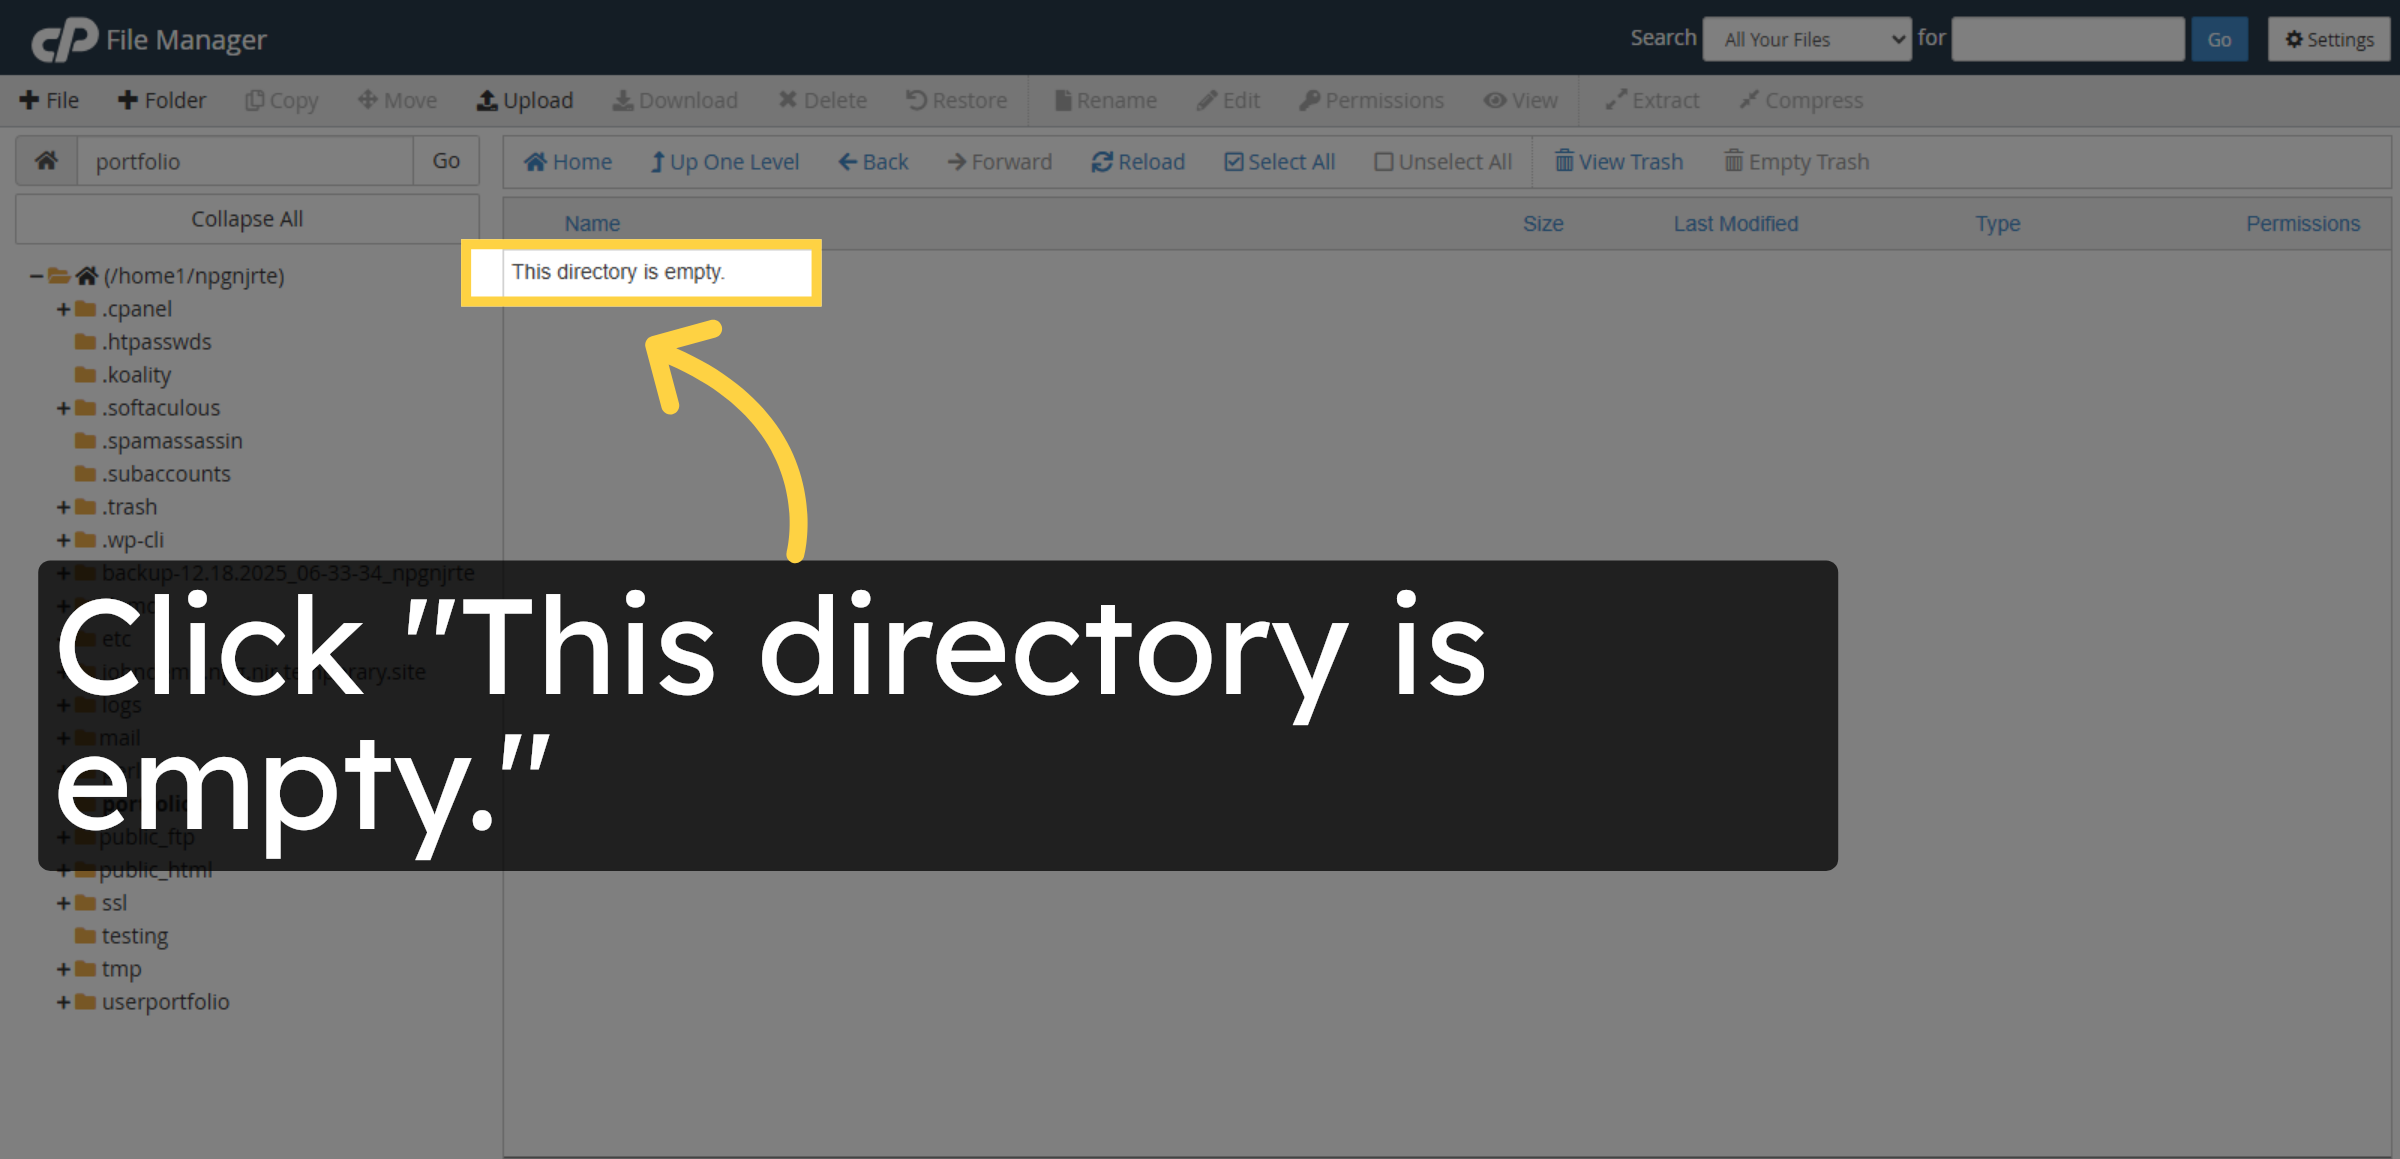
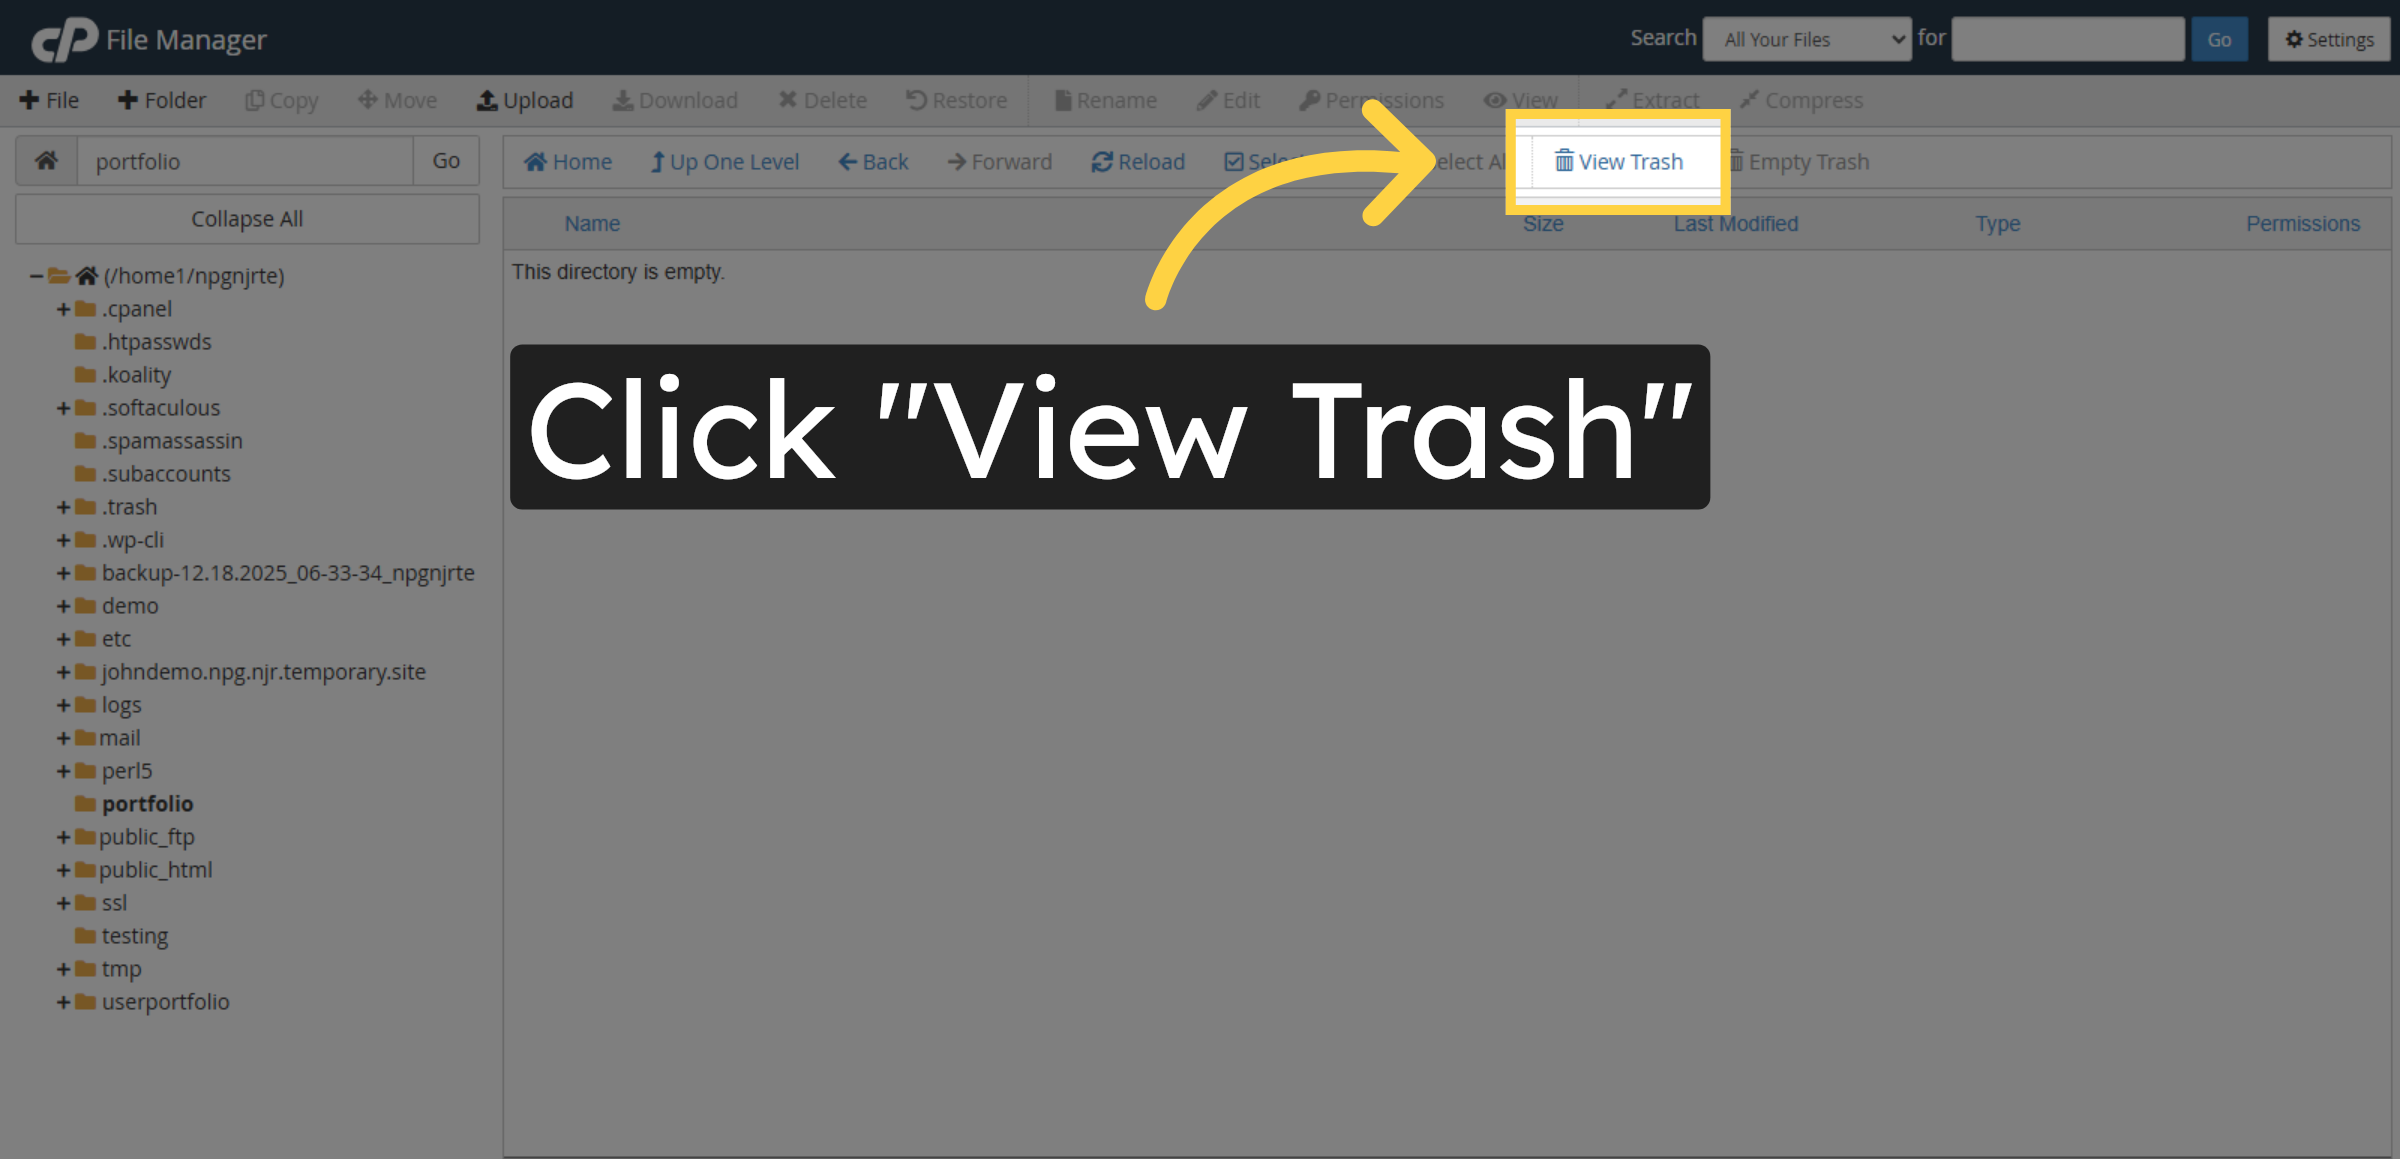
9. Open Trash Folder

Click “View Trash” to access deleted files that can be restored.

Open Trash Folder

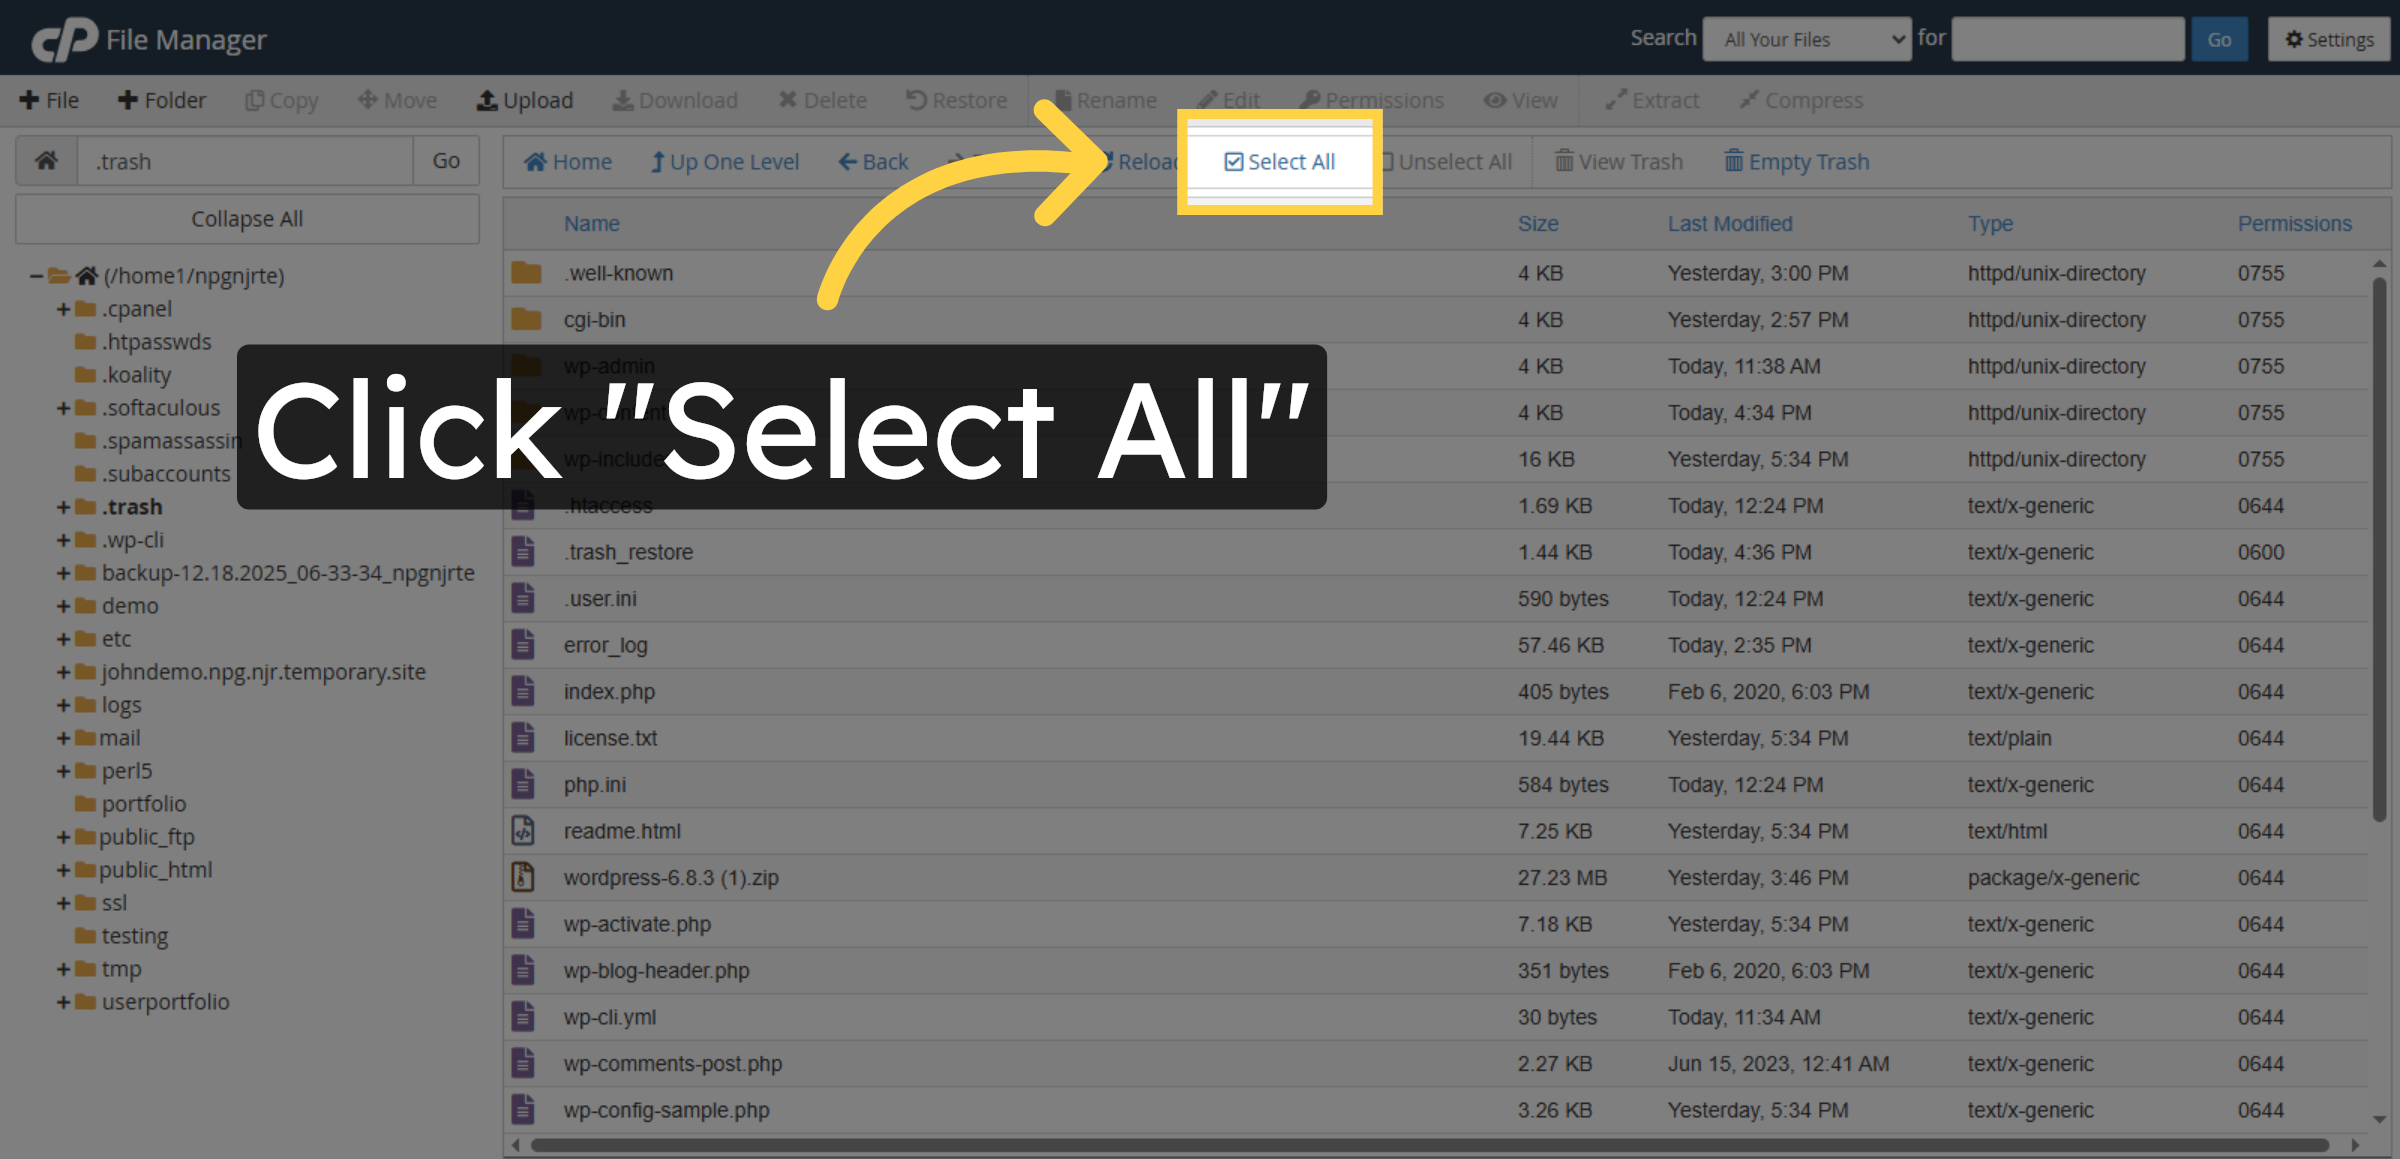
10. Select All Deleted Files

Click “Select All” to highlight all files available in the Trash for restoration.

Select All Deleted Files

11. Initiate File Restore

Click “Restore” to begin recovering the selected deleted files back to their original locations.

Initiate File Restore

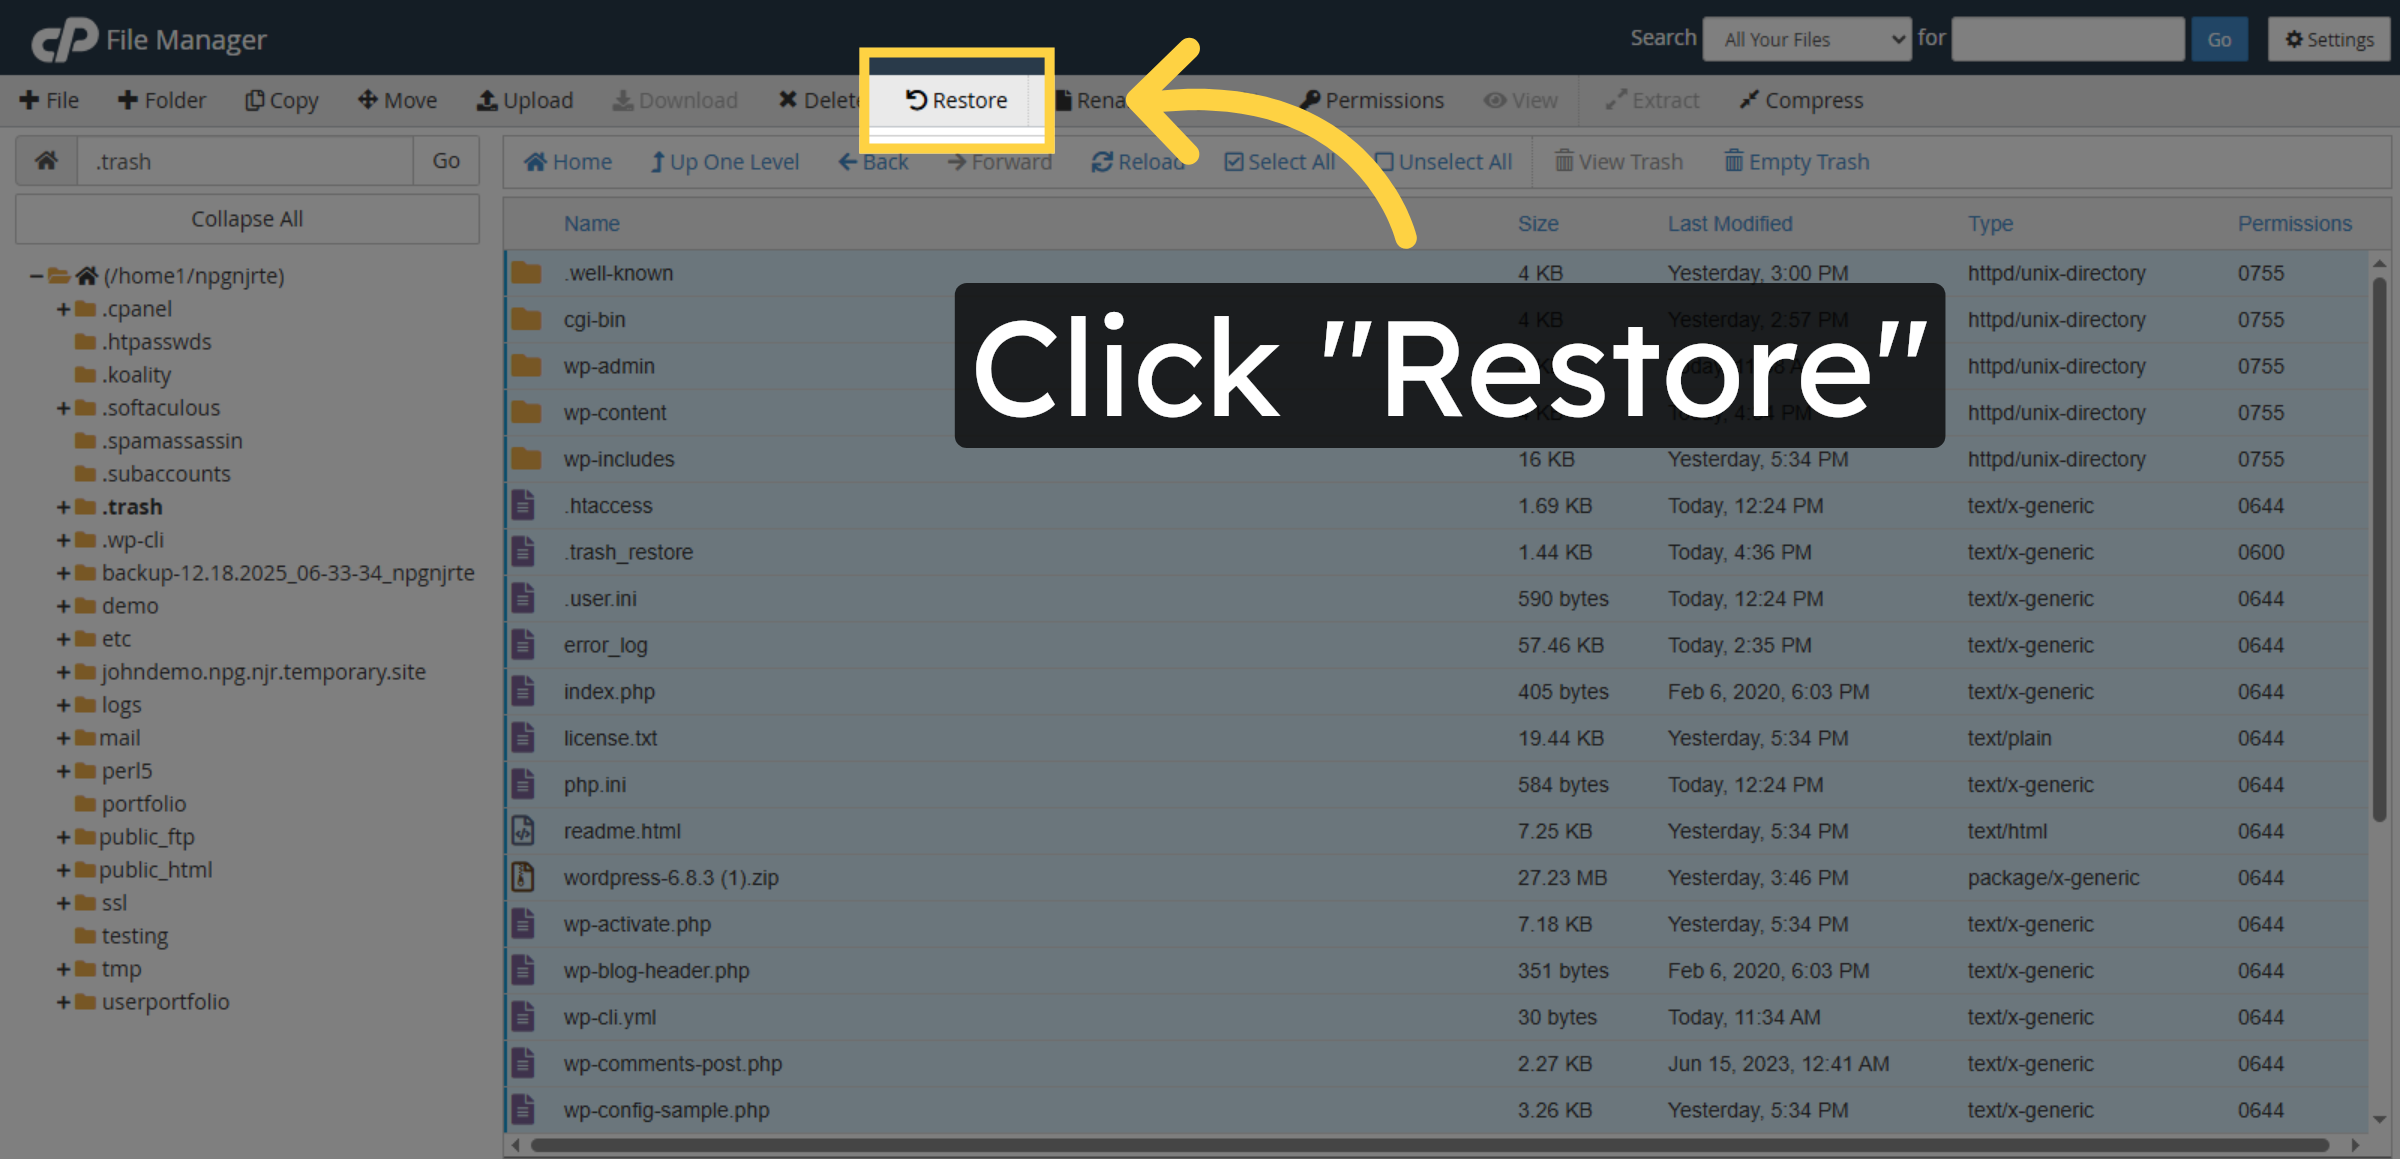
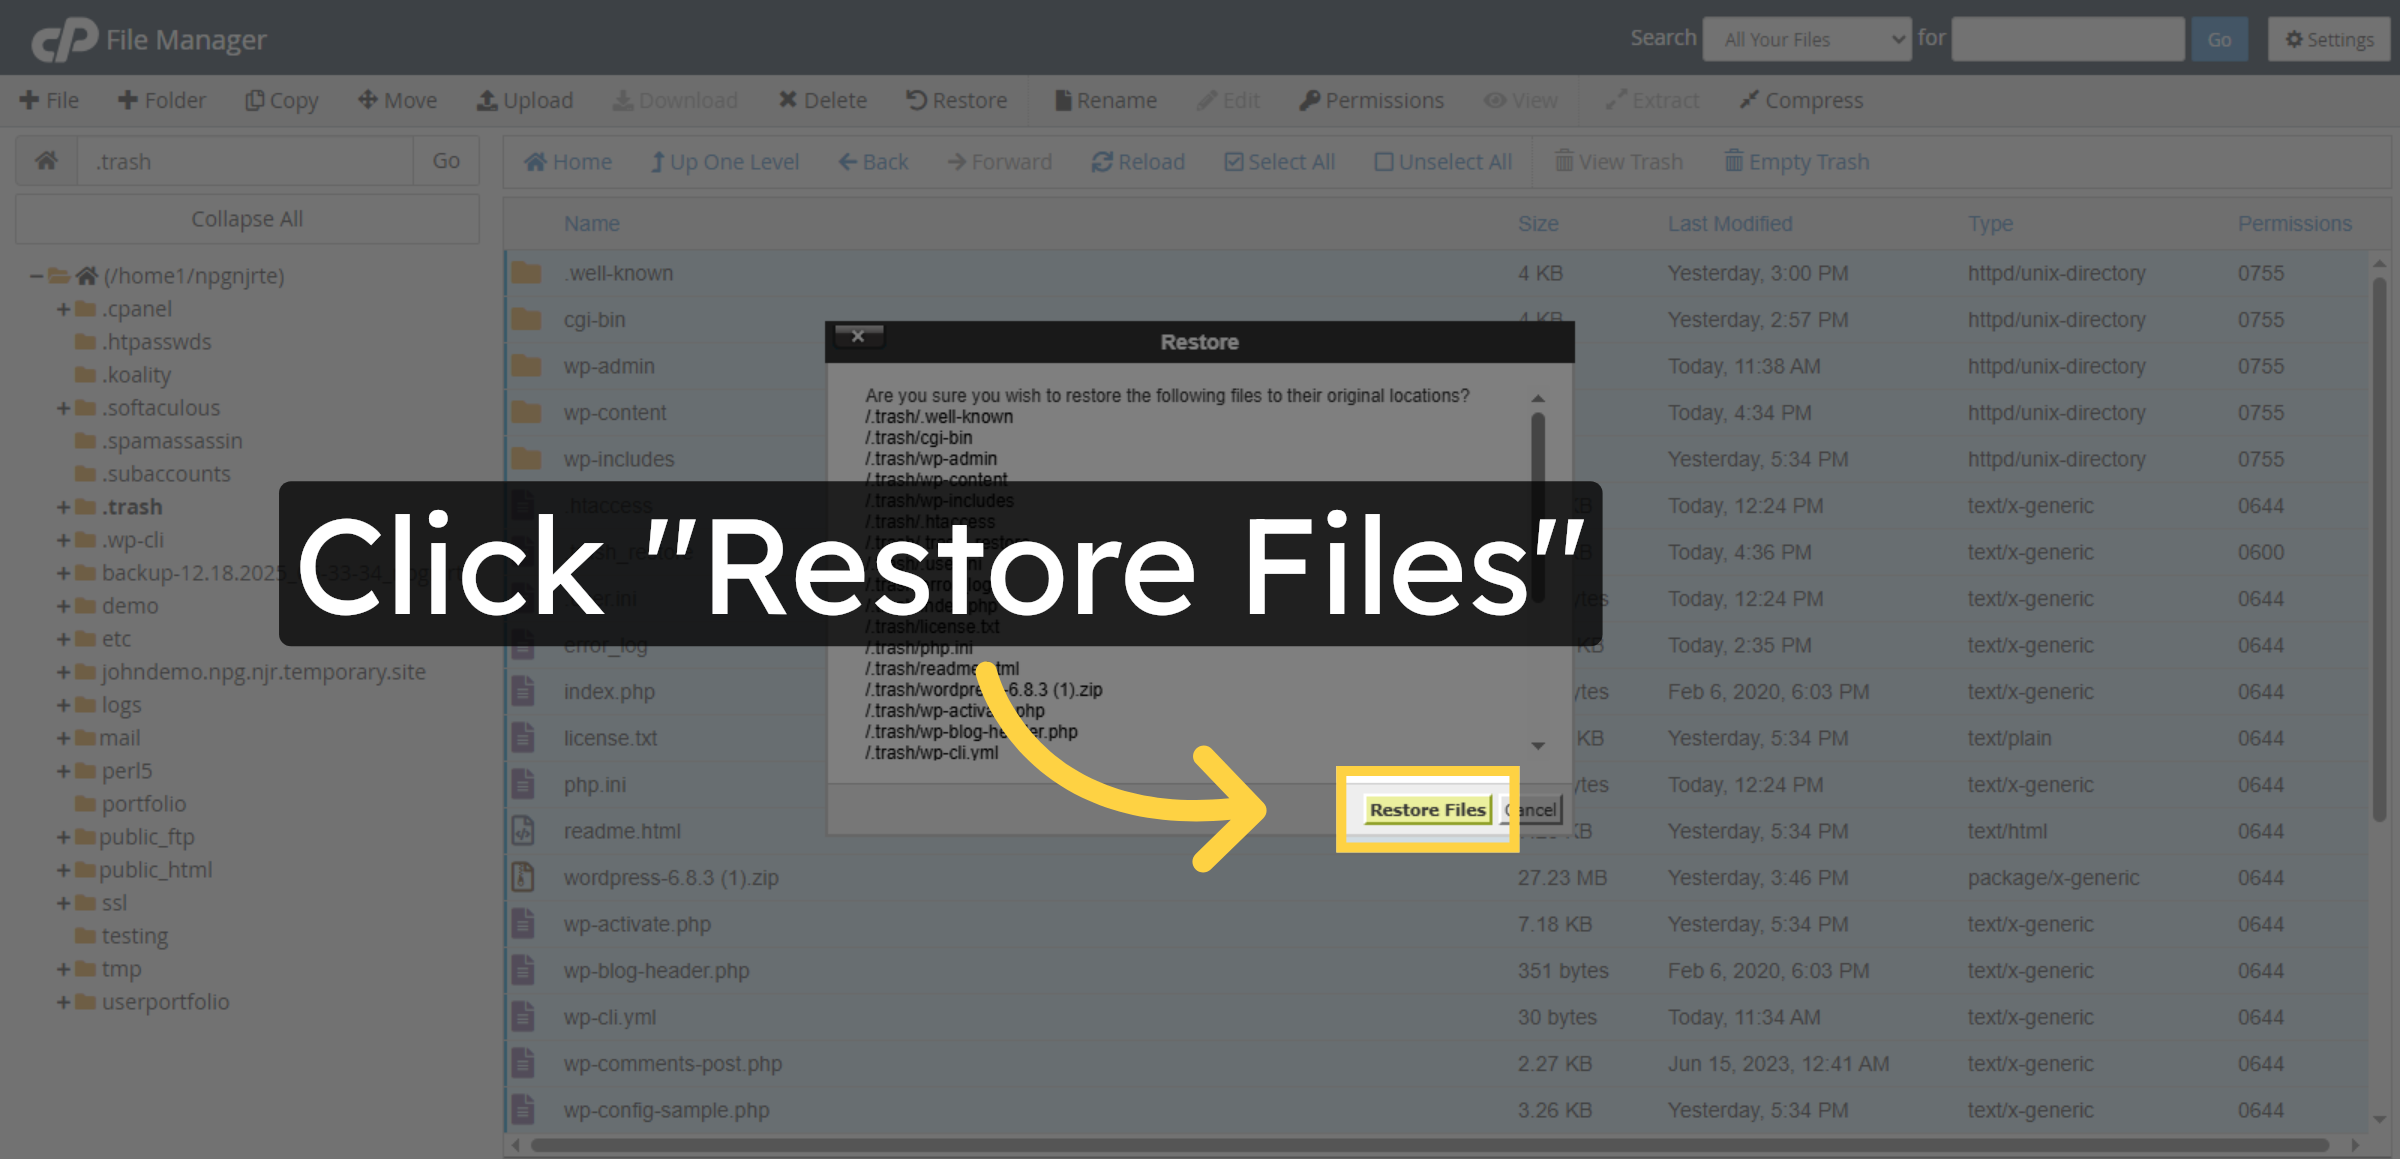
12. Confirm Restore Action

Click “Restore Files” to confirm and complete the restoration process of your deleted files.

Confirm Restore Action

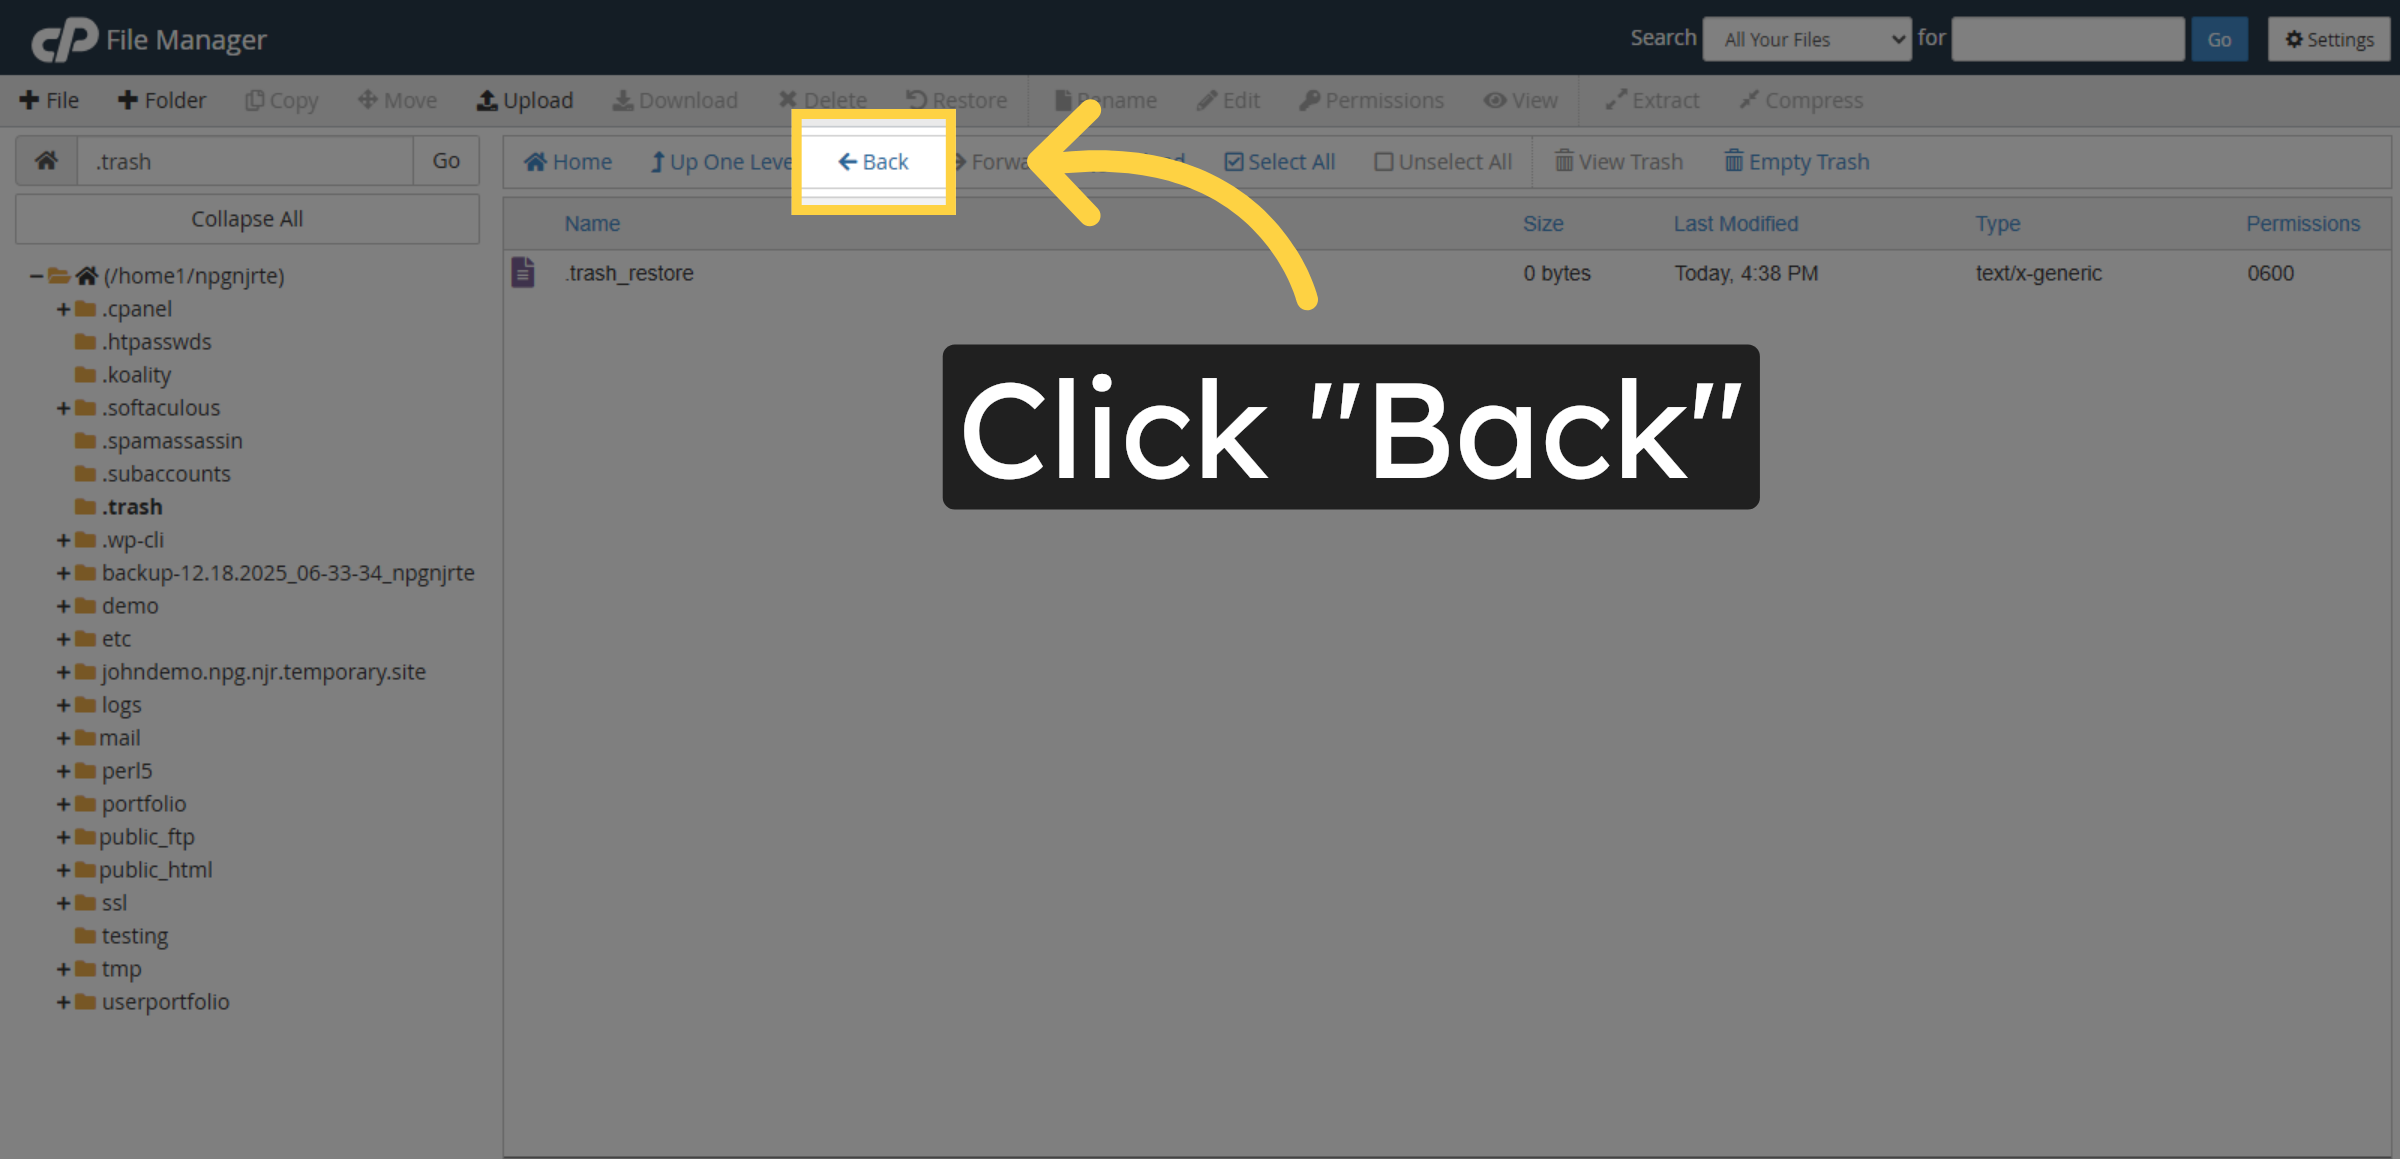
13. Return To Previous View

Click “Back” to return to the main file manager view after restoring files.

Return To Previous View

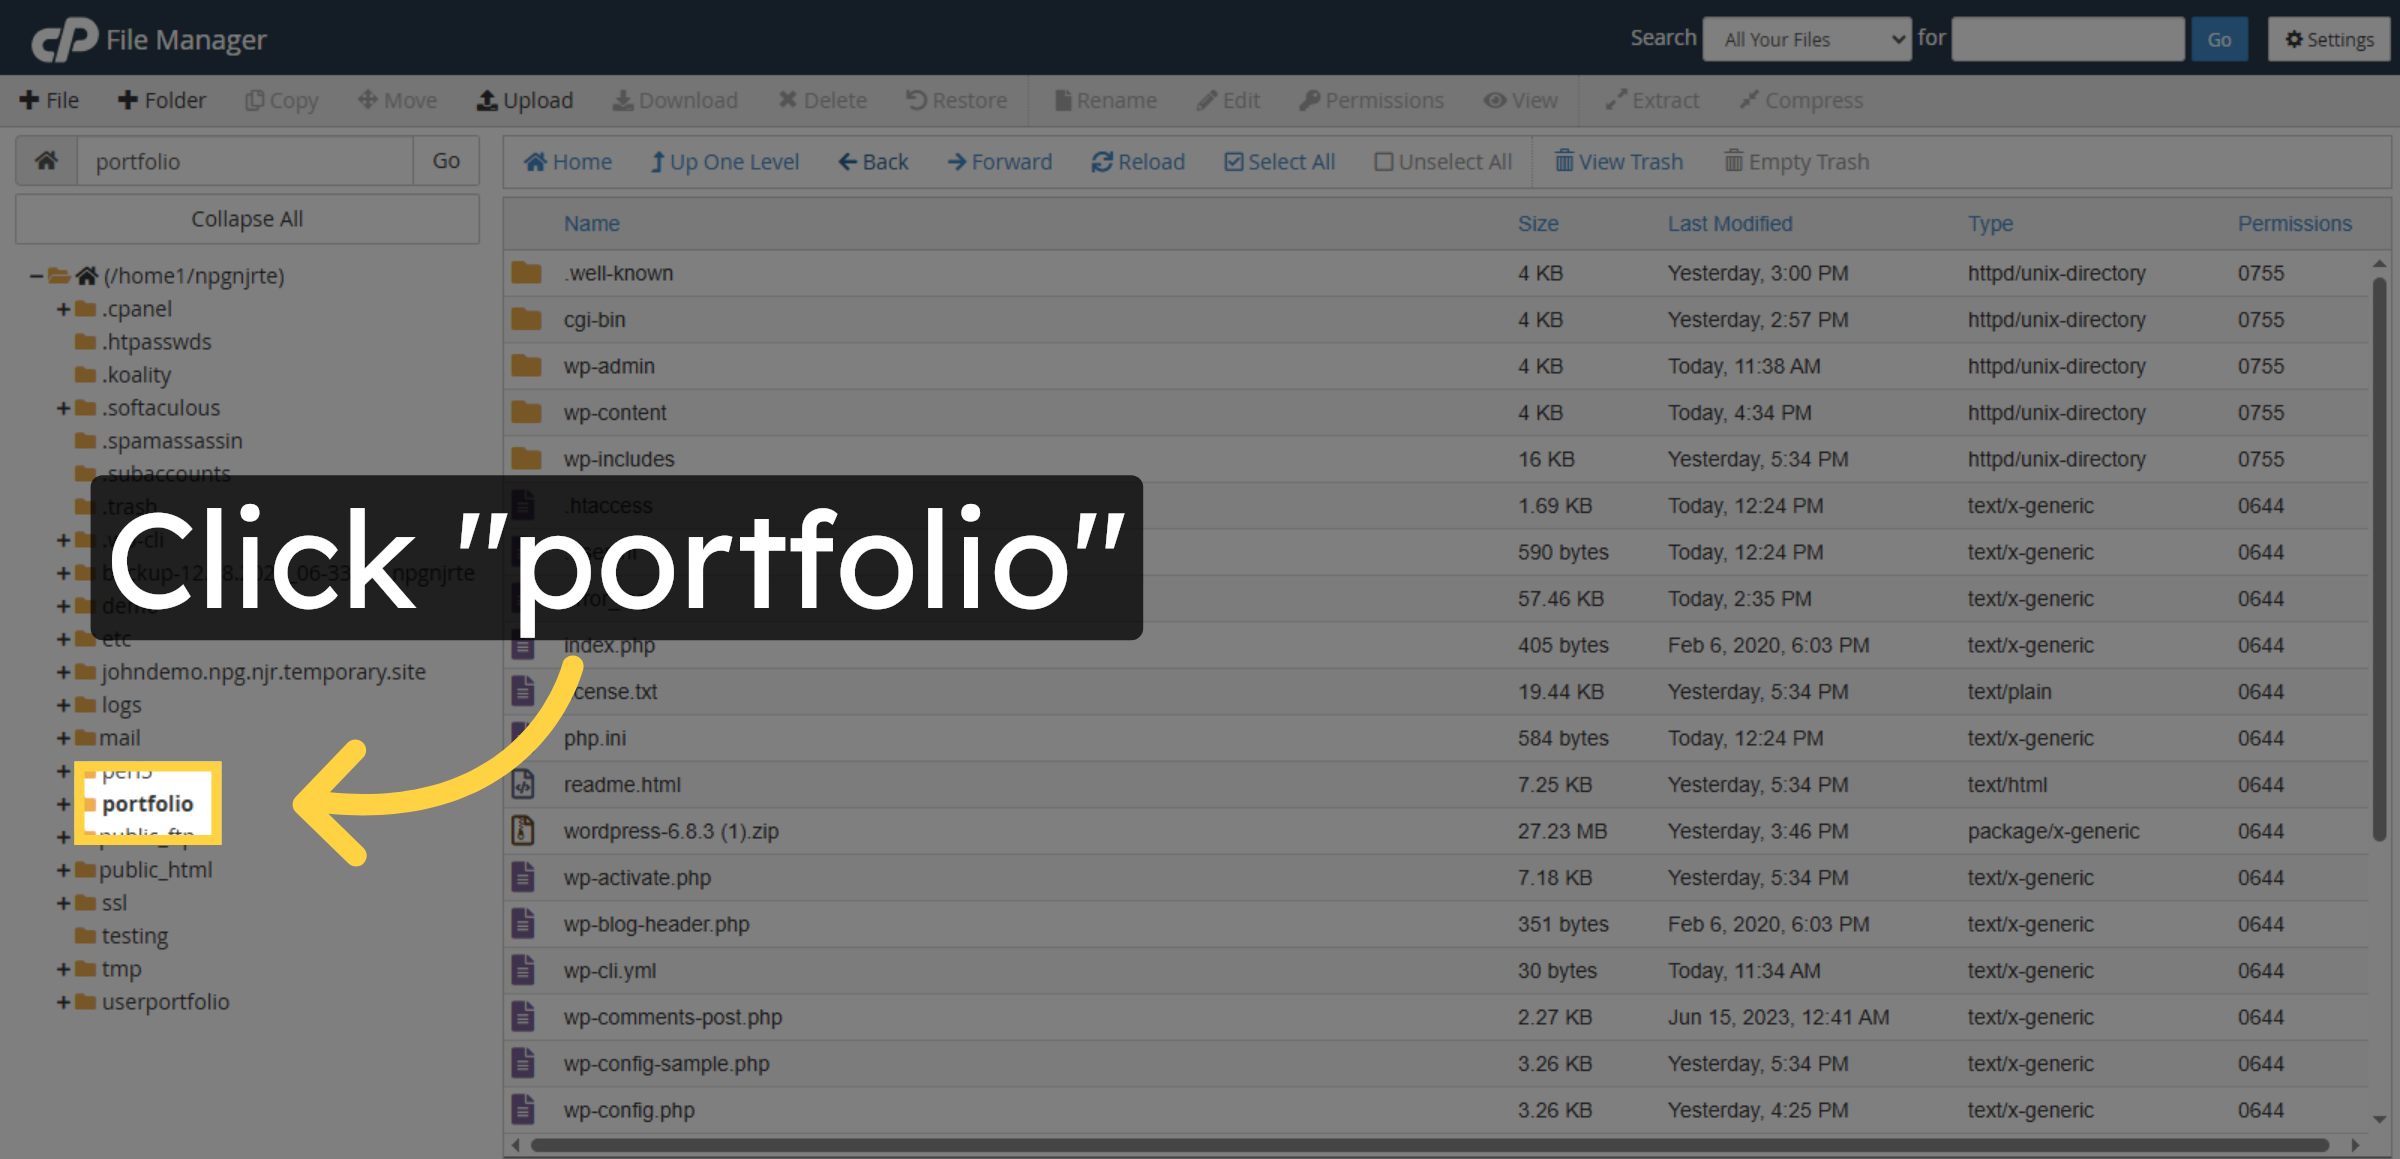
14. Select Portfolio Section

Click the portfolio option to open and view your portfolio within Hostgator.

Select Portfolio Section

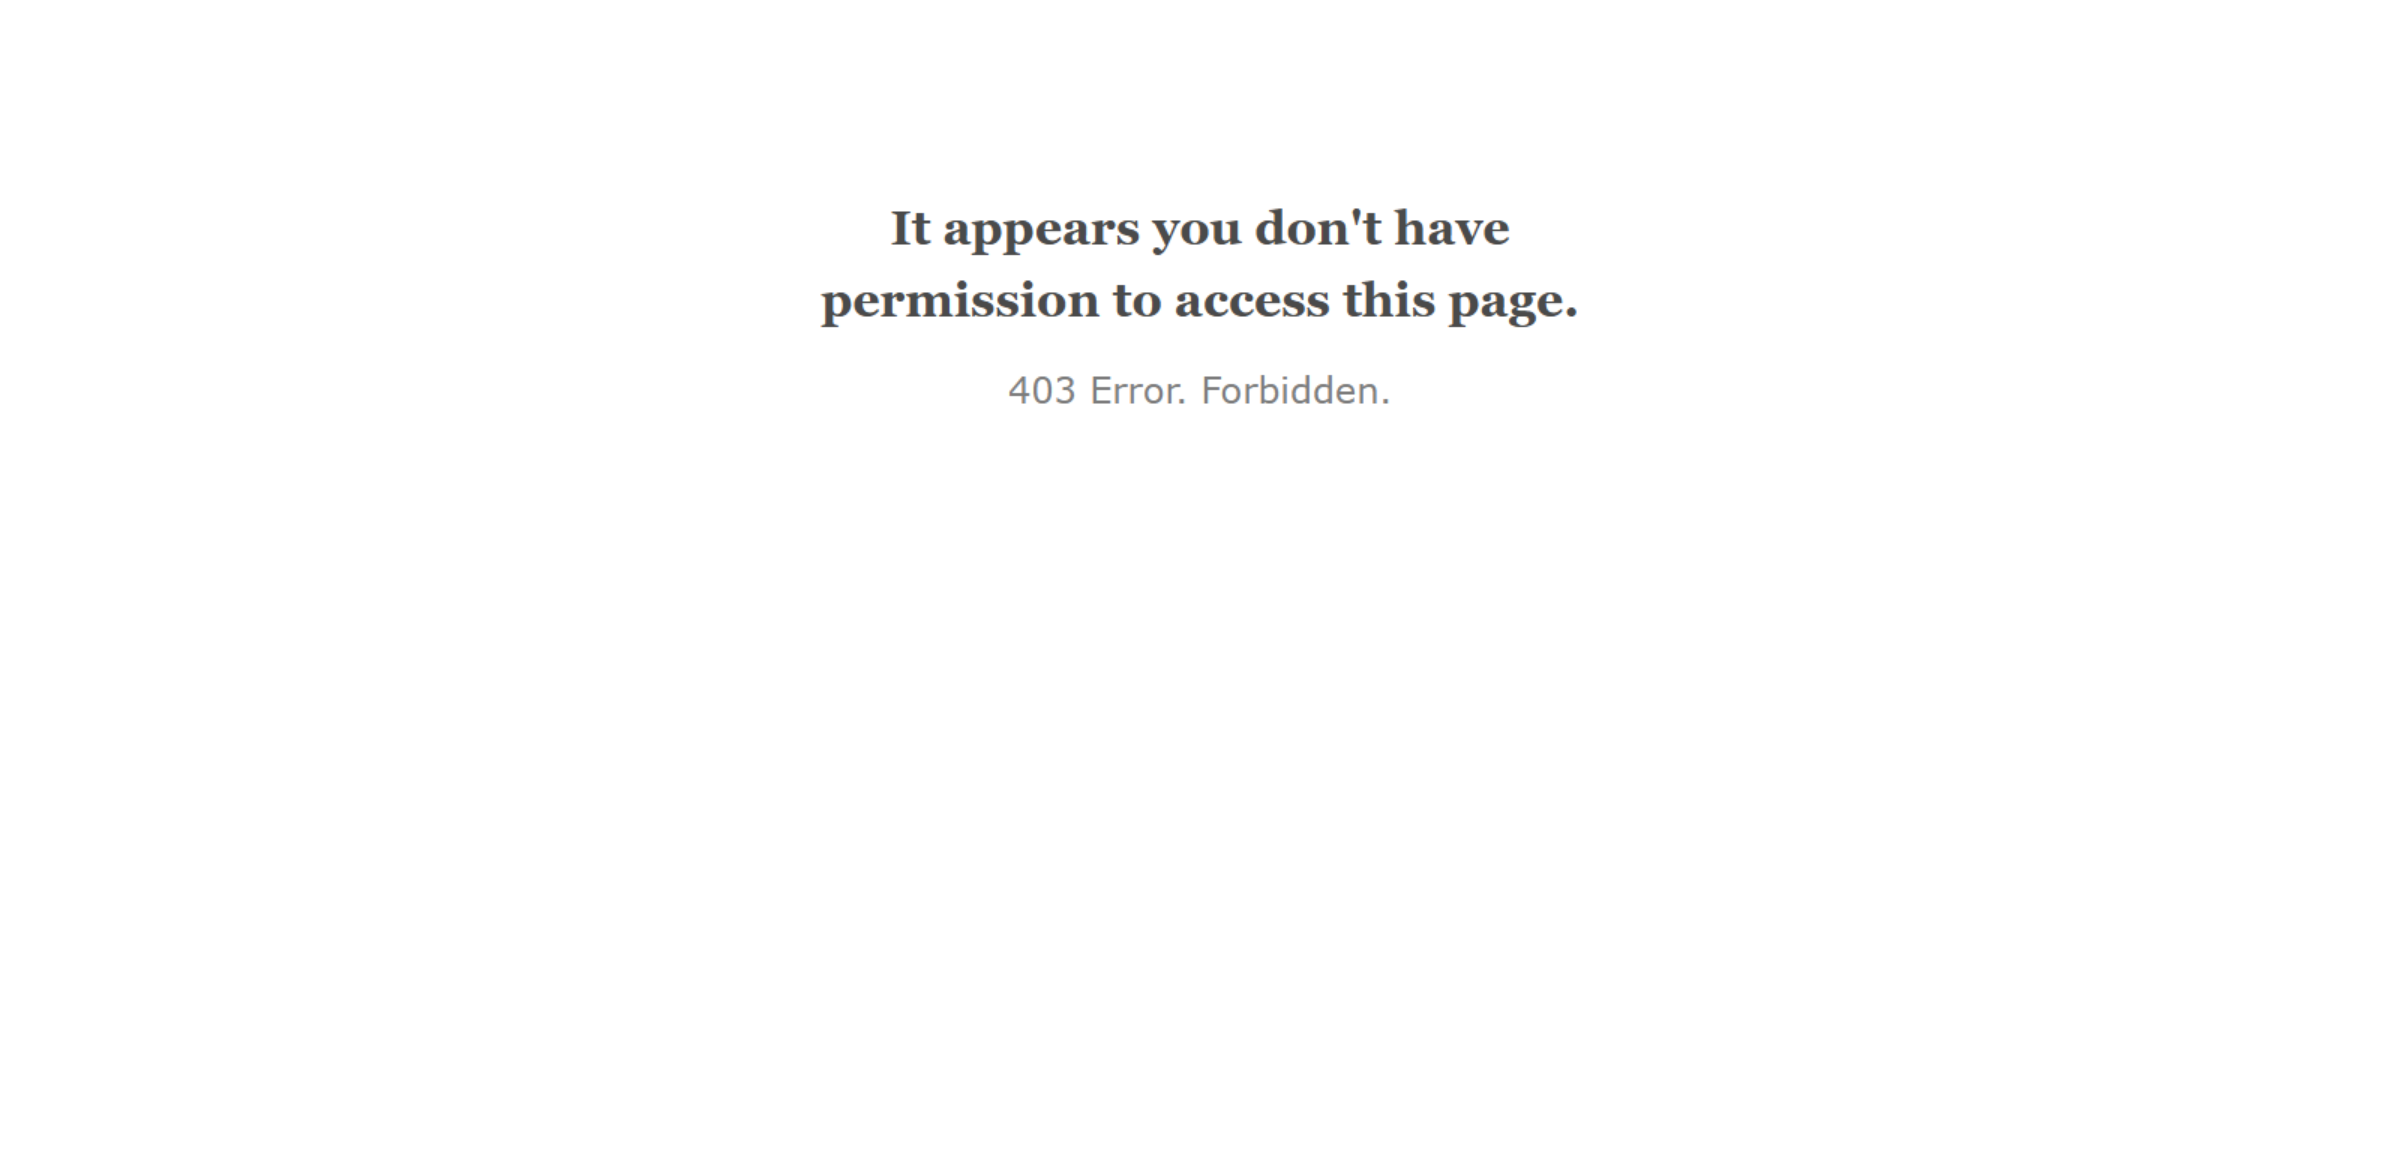
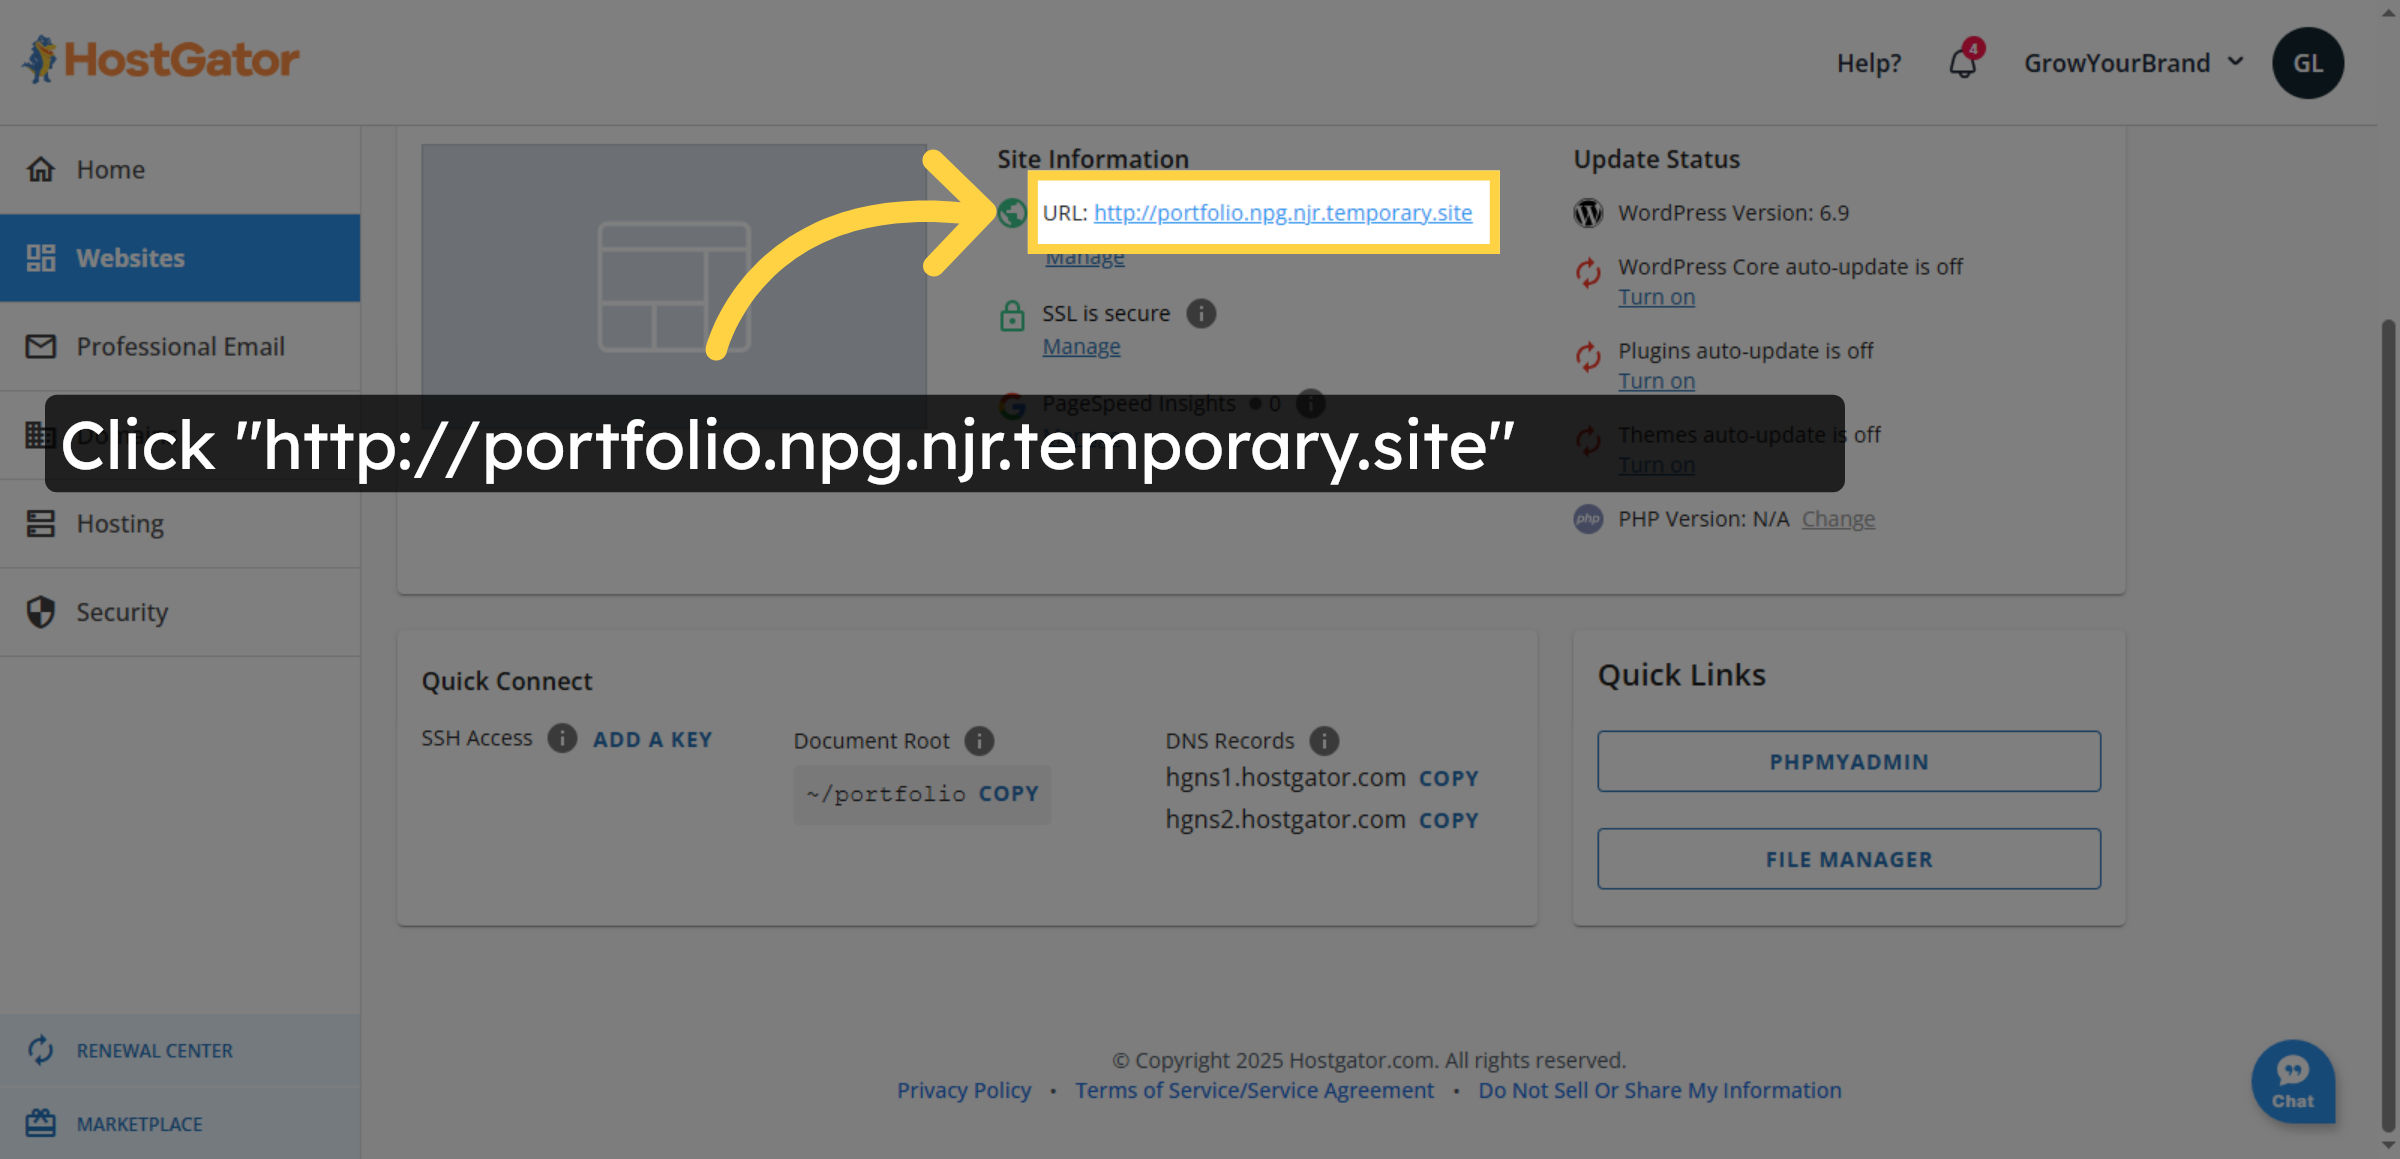
15. Reopen Website URL

Click the website URL “http://portfolio.npg.njr.temporary.site” to verify the site is accessible again.

Reopen Website URL

16. Switch To Website Tab

Switch to the browser tab for “portfolio.npg.njr.temporary.site” to view the restored website content.

Switch To Website Tab

17. Method – 02

Method - 02

18. Open Plugins Section
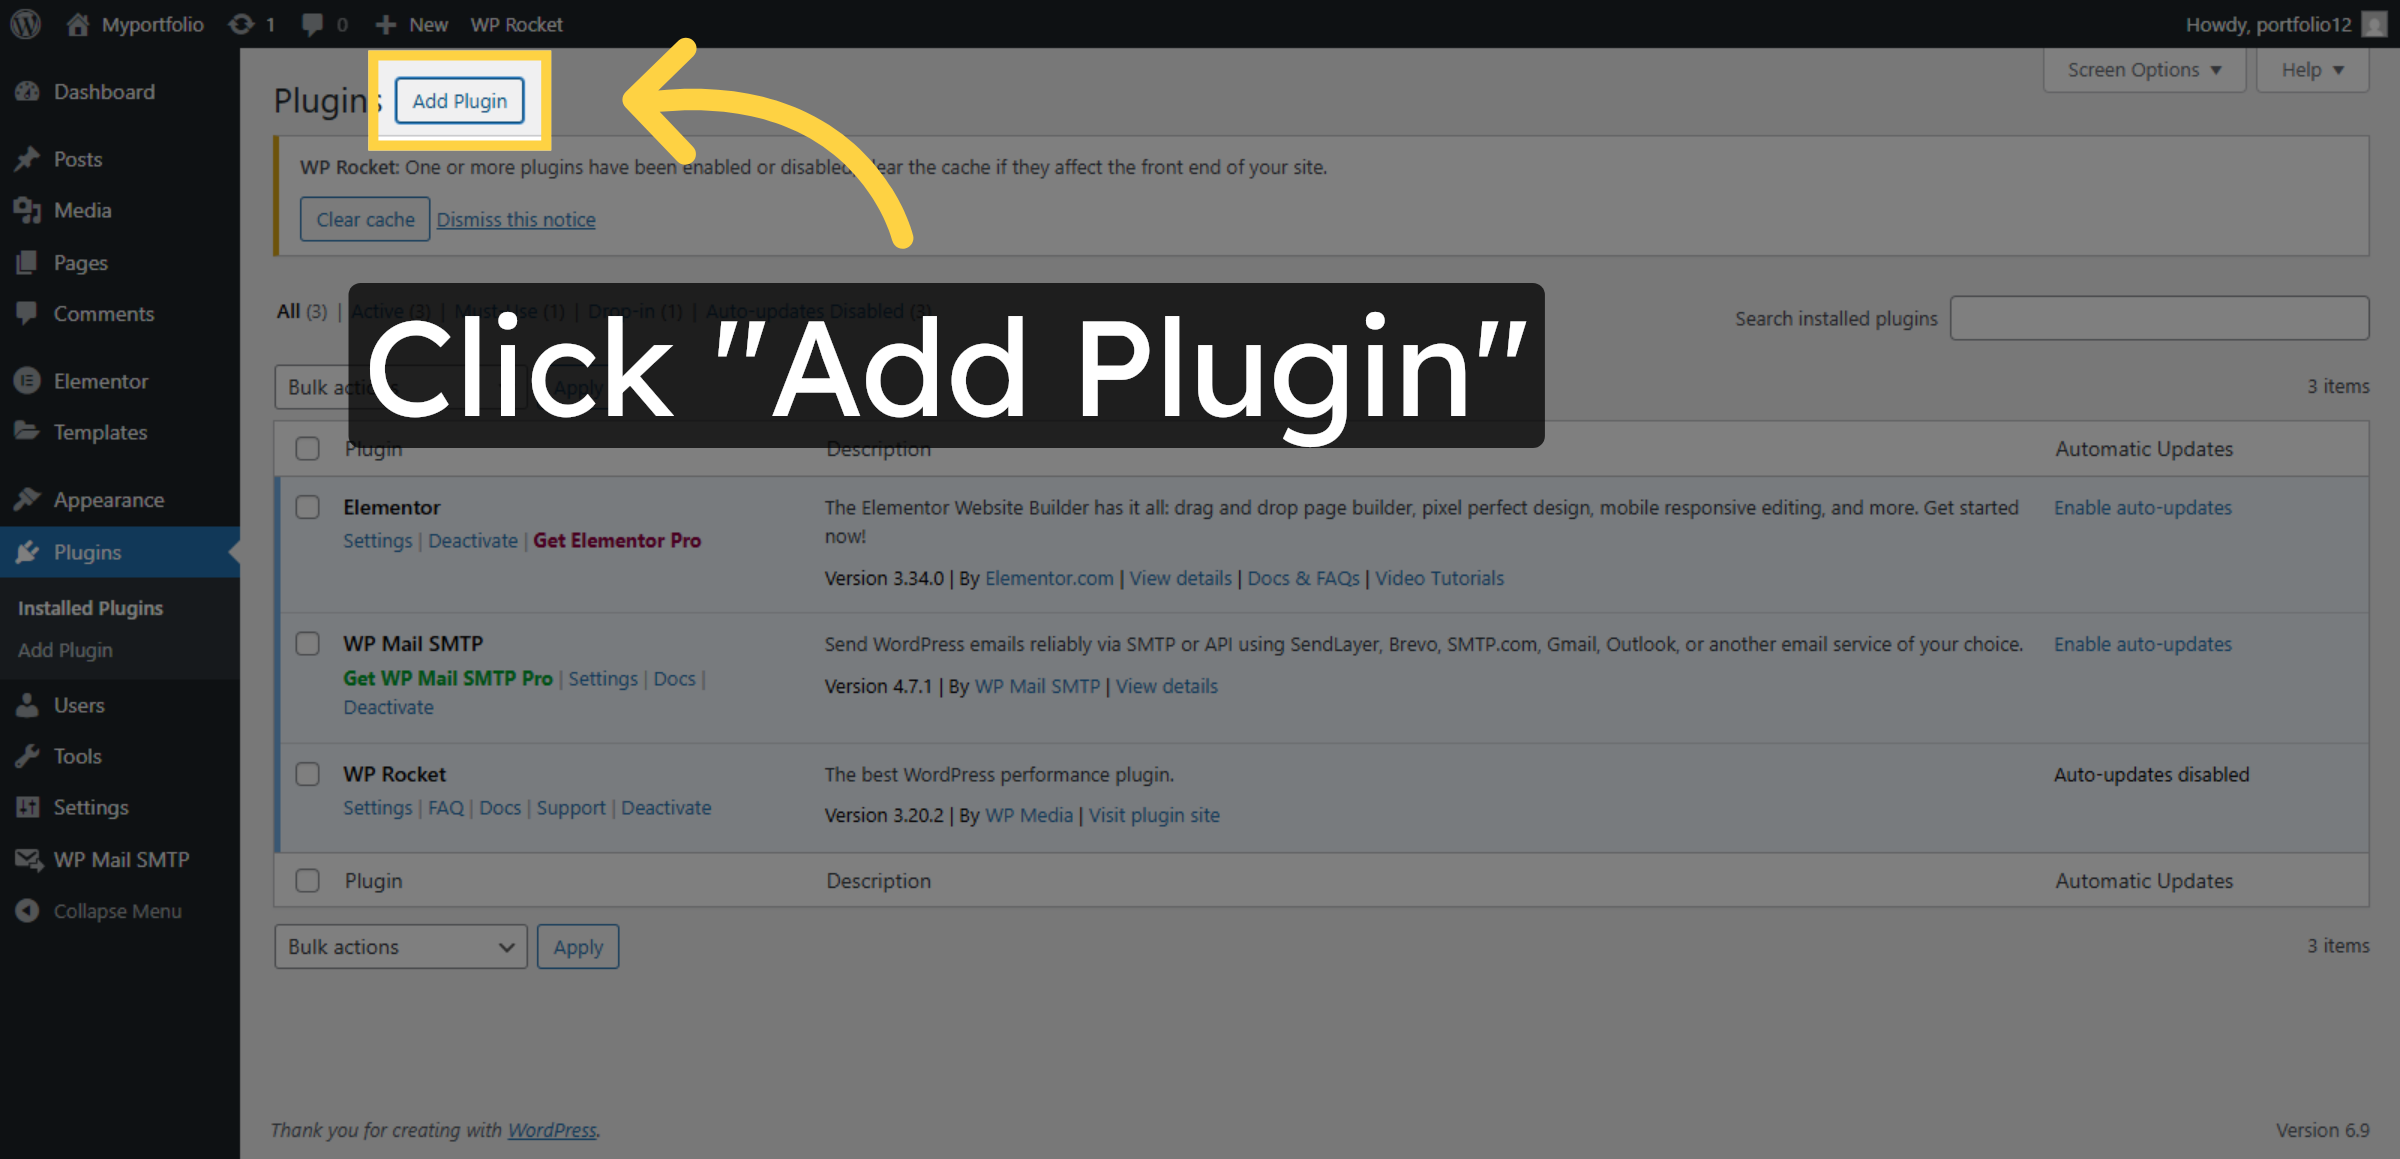
Click Plugins to manage and restore backup plugins for file and database recovery.

Open Plugins Section

19. Add New Plugin

Click Add Plugin to install a backup or recovery plugin for restoring deleted files and databases.

Add New Plugin

20. Access Plugin Search

Use the Search Plugins box to find a backup or recovery plugin for restoring deleted files and databases.

Access Plugin Search

Ad Banner

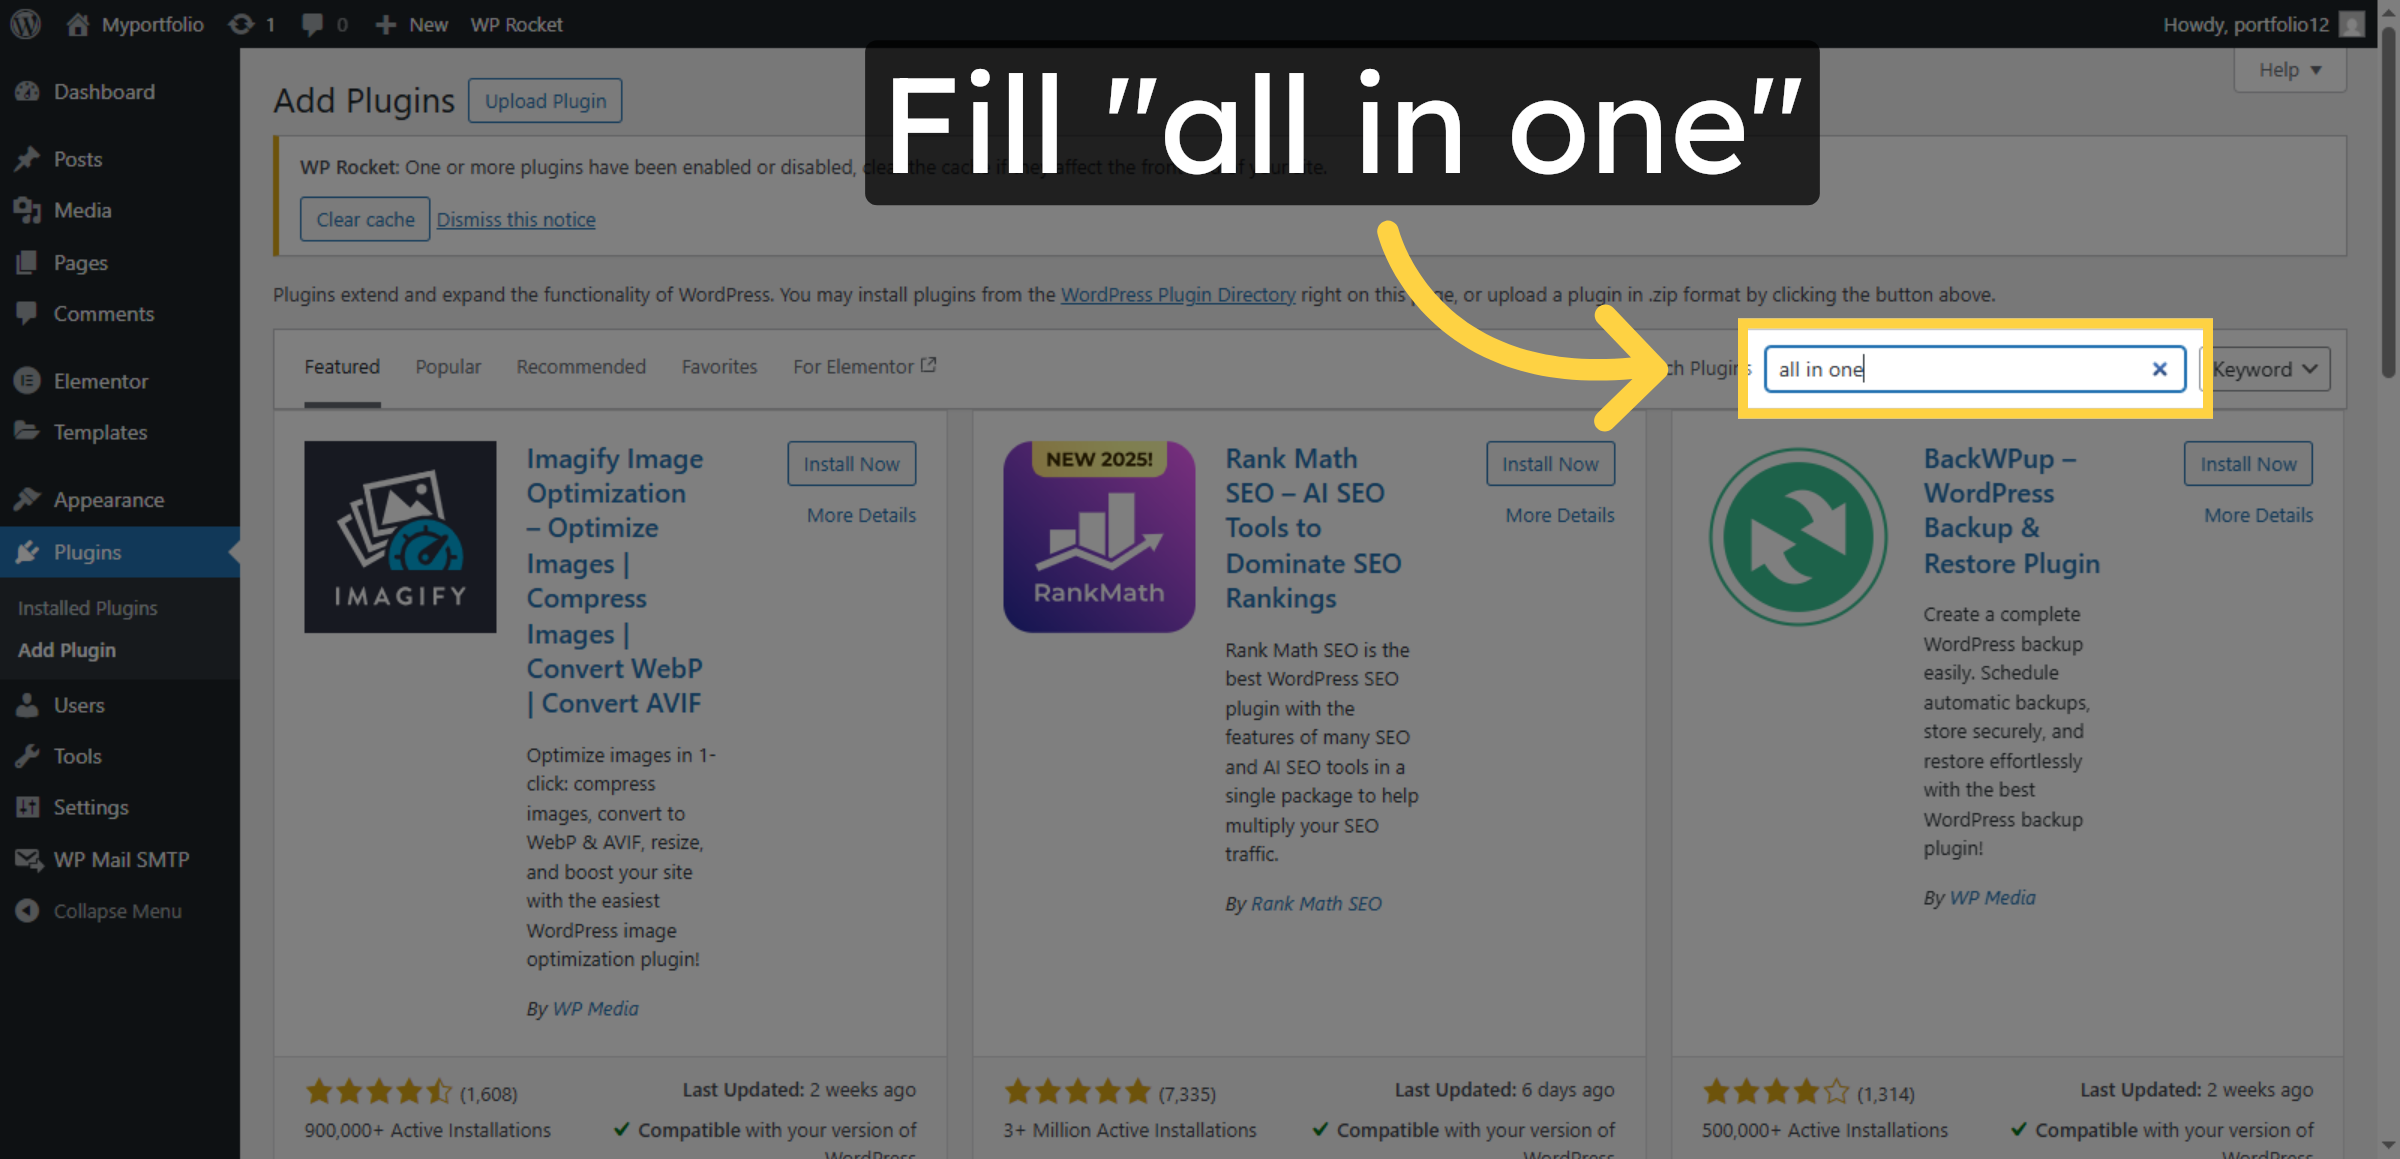
21. Search Backup Plugin

Use the Search Plugins box to find a backup or recovery plugin for restoring deleted files and databases.

Search Backup Plugin

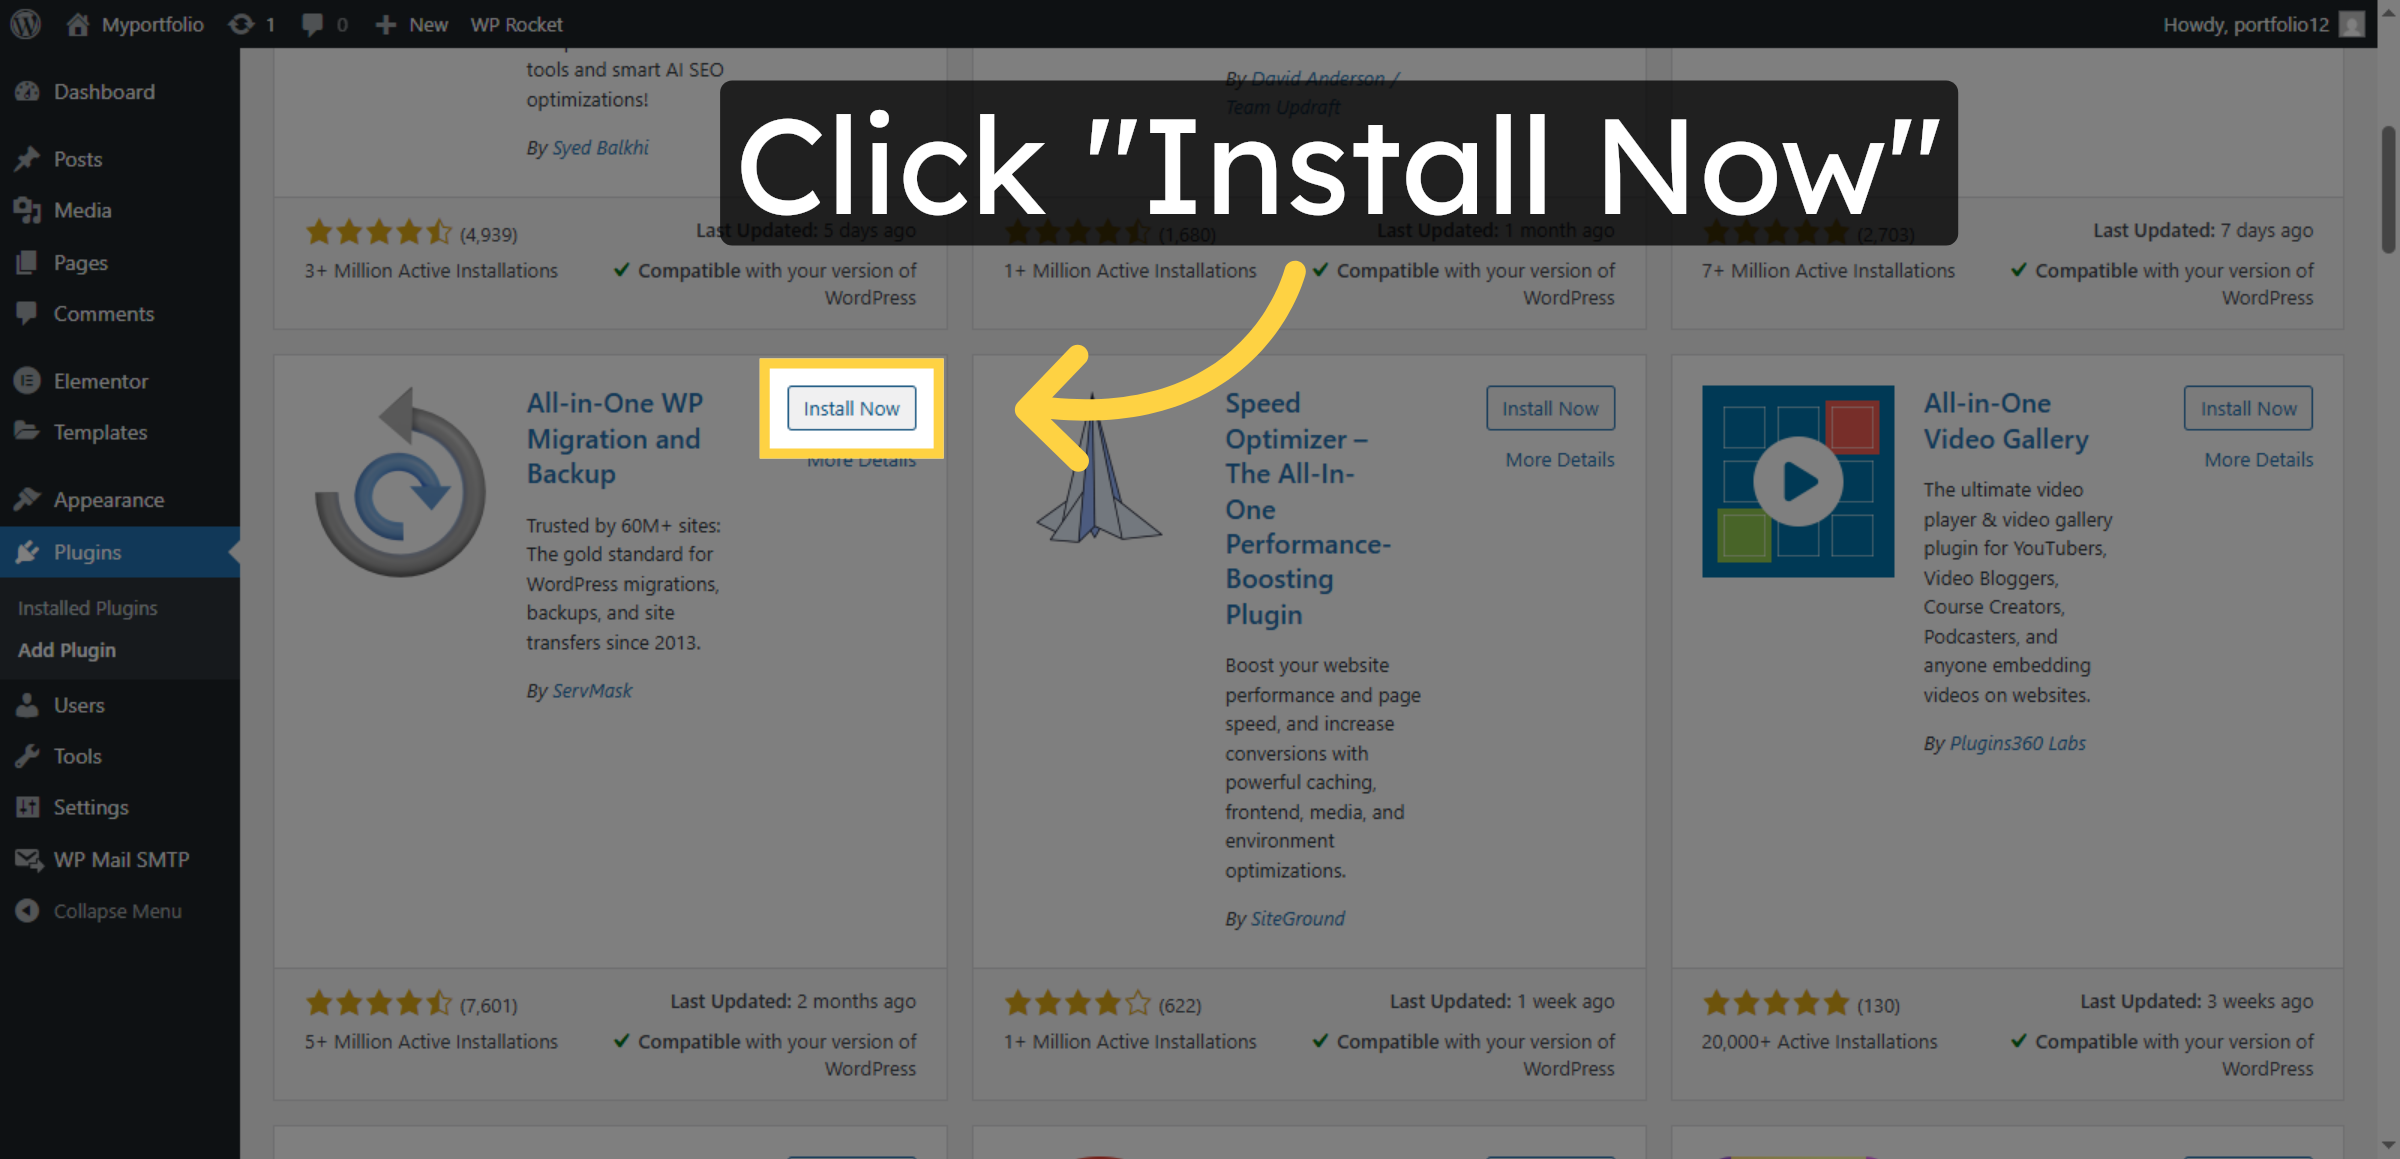
22. Install Backup Plugin

Click Install Now to download and install the selected backup or recovery plugin on your WordPress website.

Install Backup Plugin

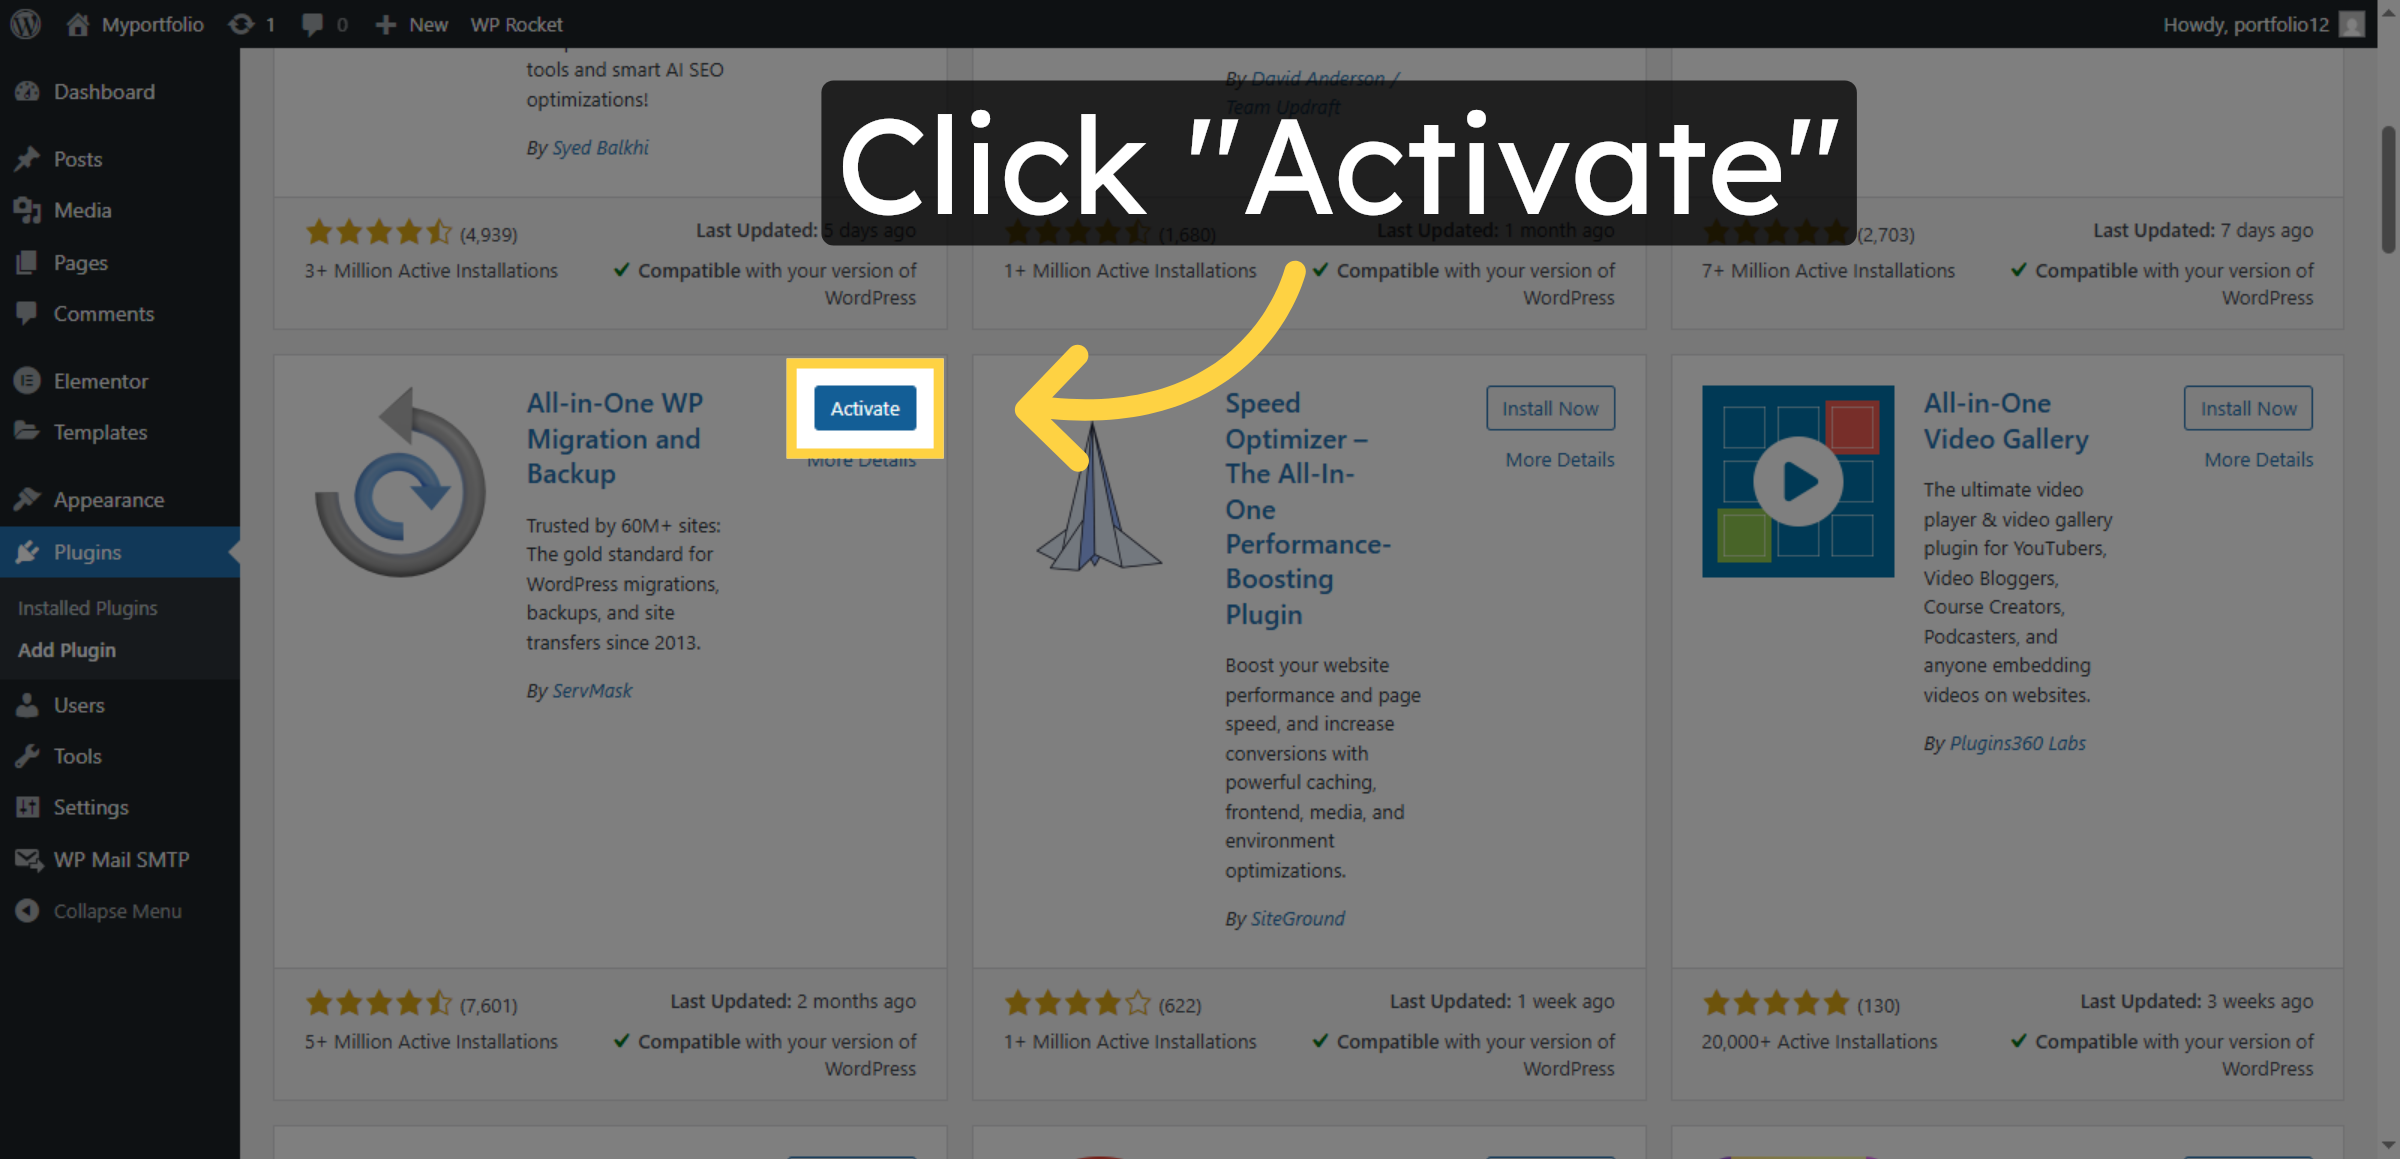
23. Activate Backup Plugin

Click Activate to enable the installed plugin and start using it for backup and recovery on your WordPress site.

Activate Backup Plugin

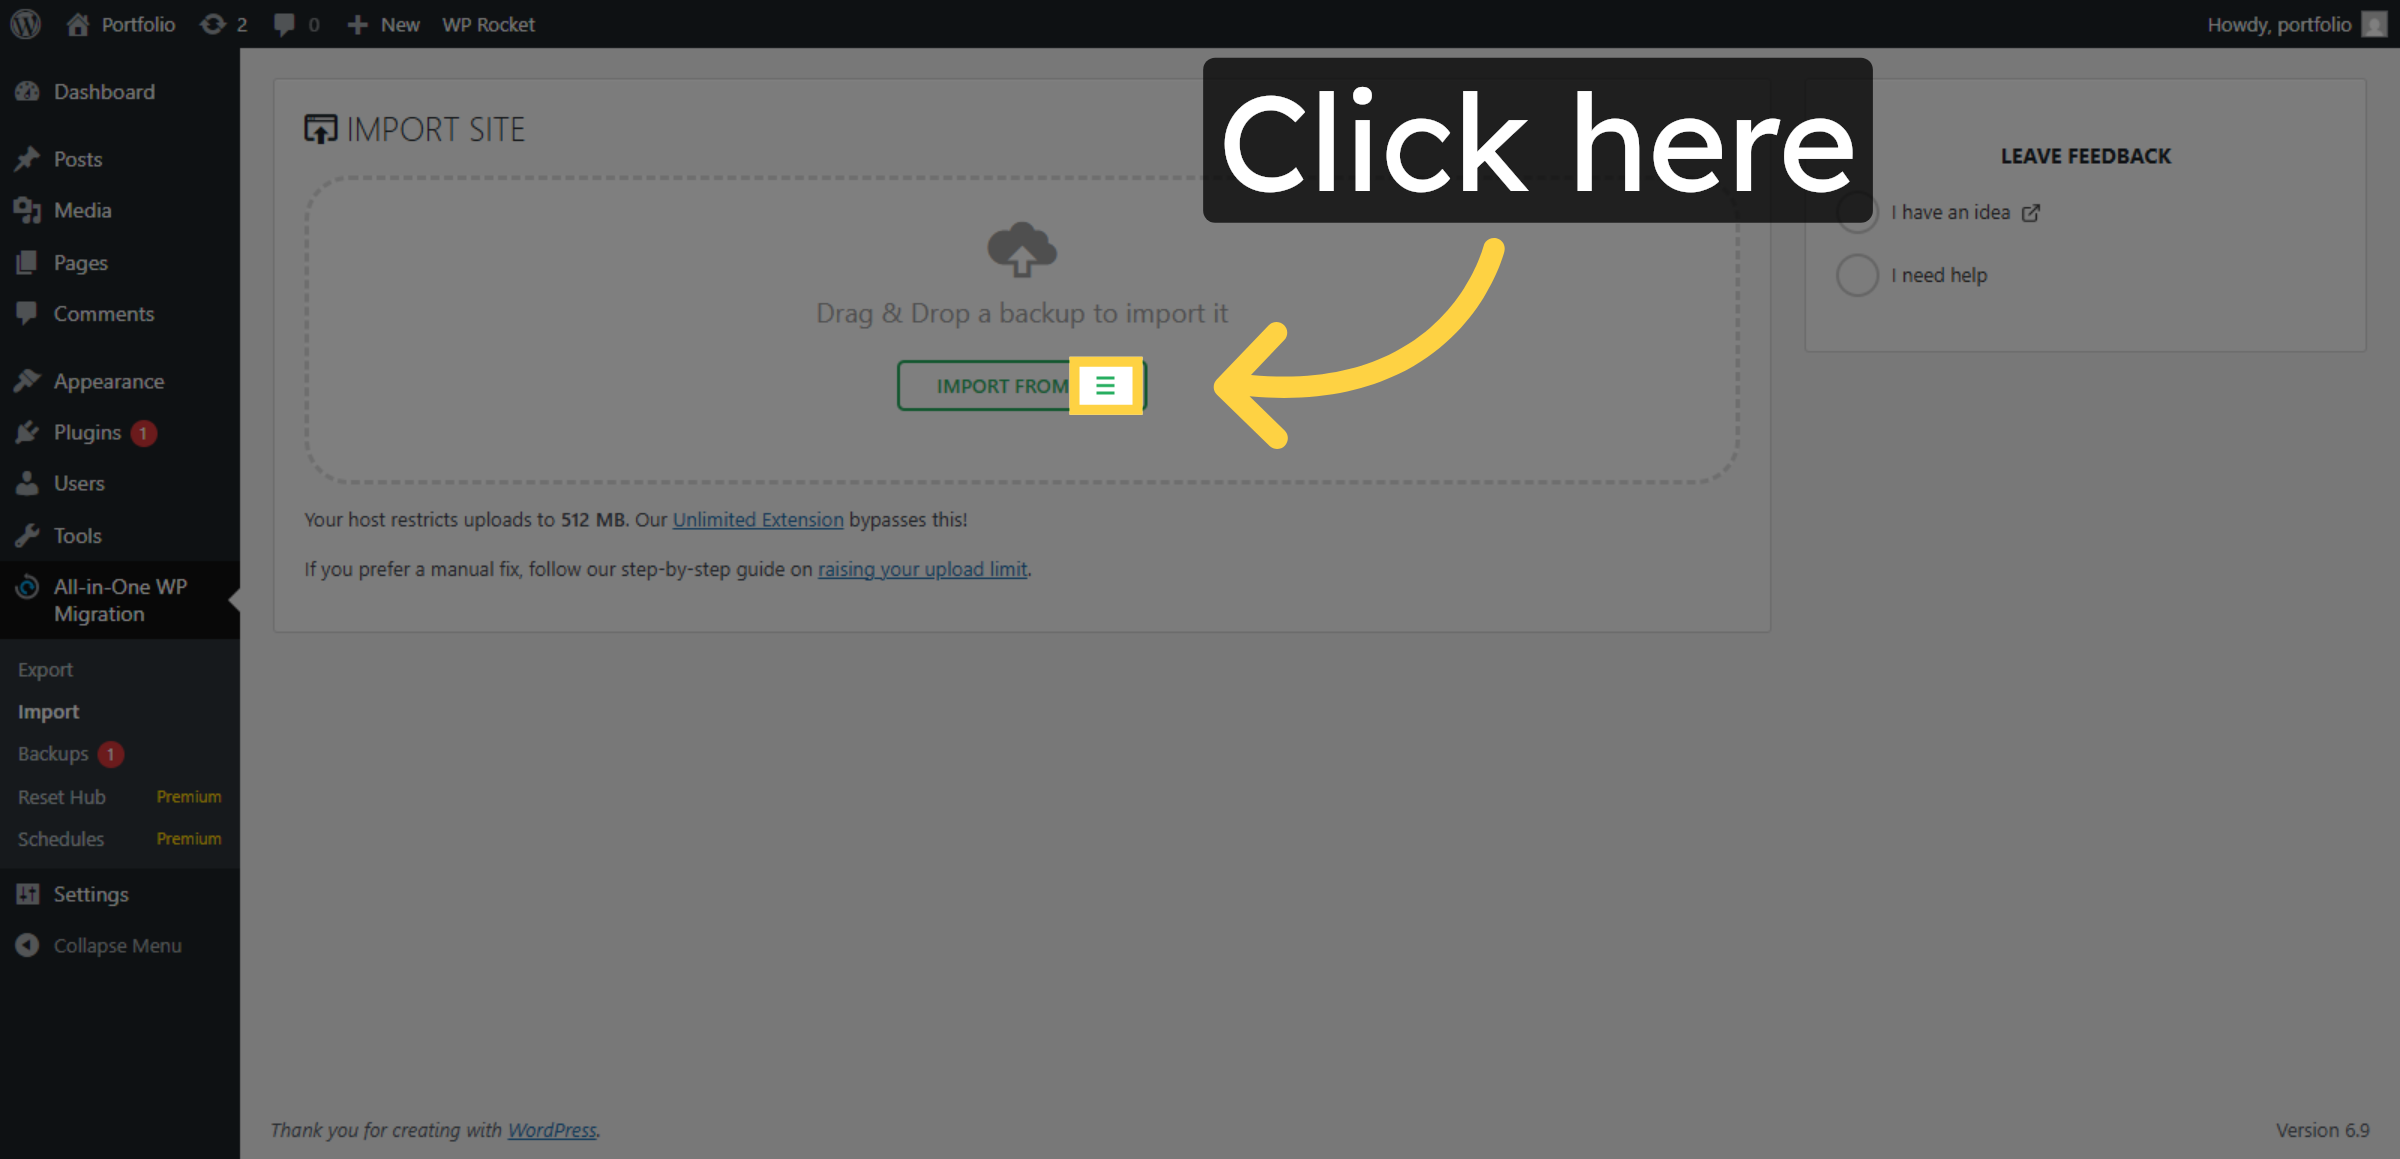
24. Click Import Button

Click Import to upload and restore your website files and database from a backup.

Click Import Button

25. Open Import Options

Click here to upload and import your backup file to restore your website.

Open Import Options

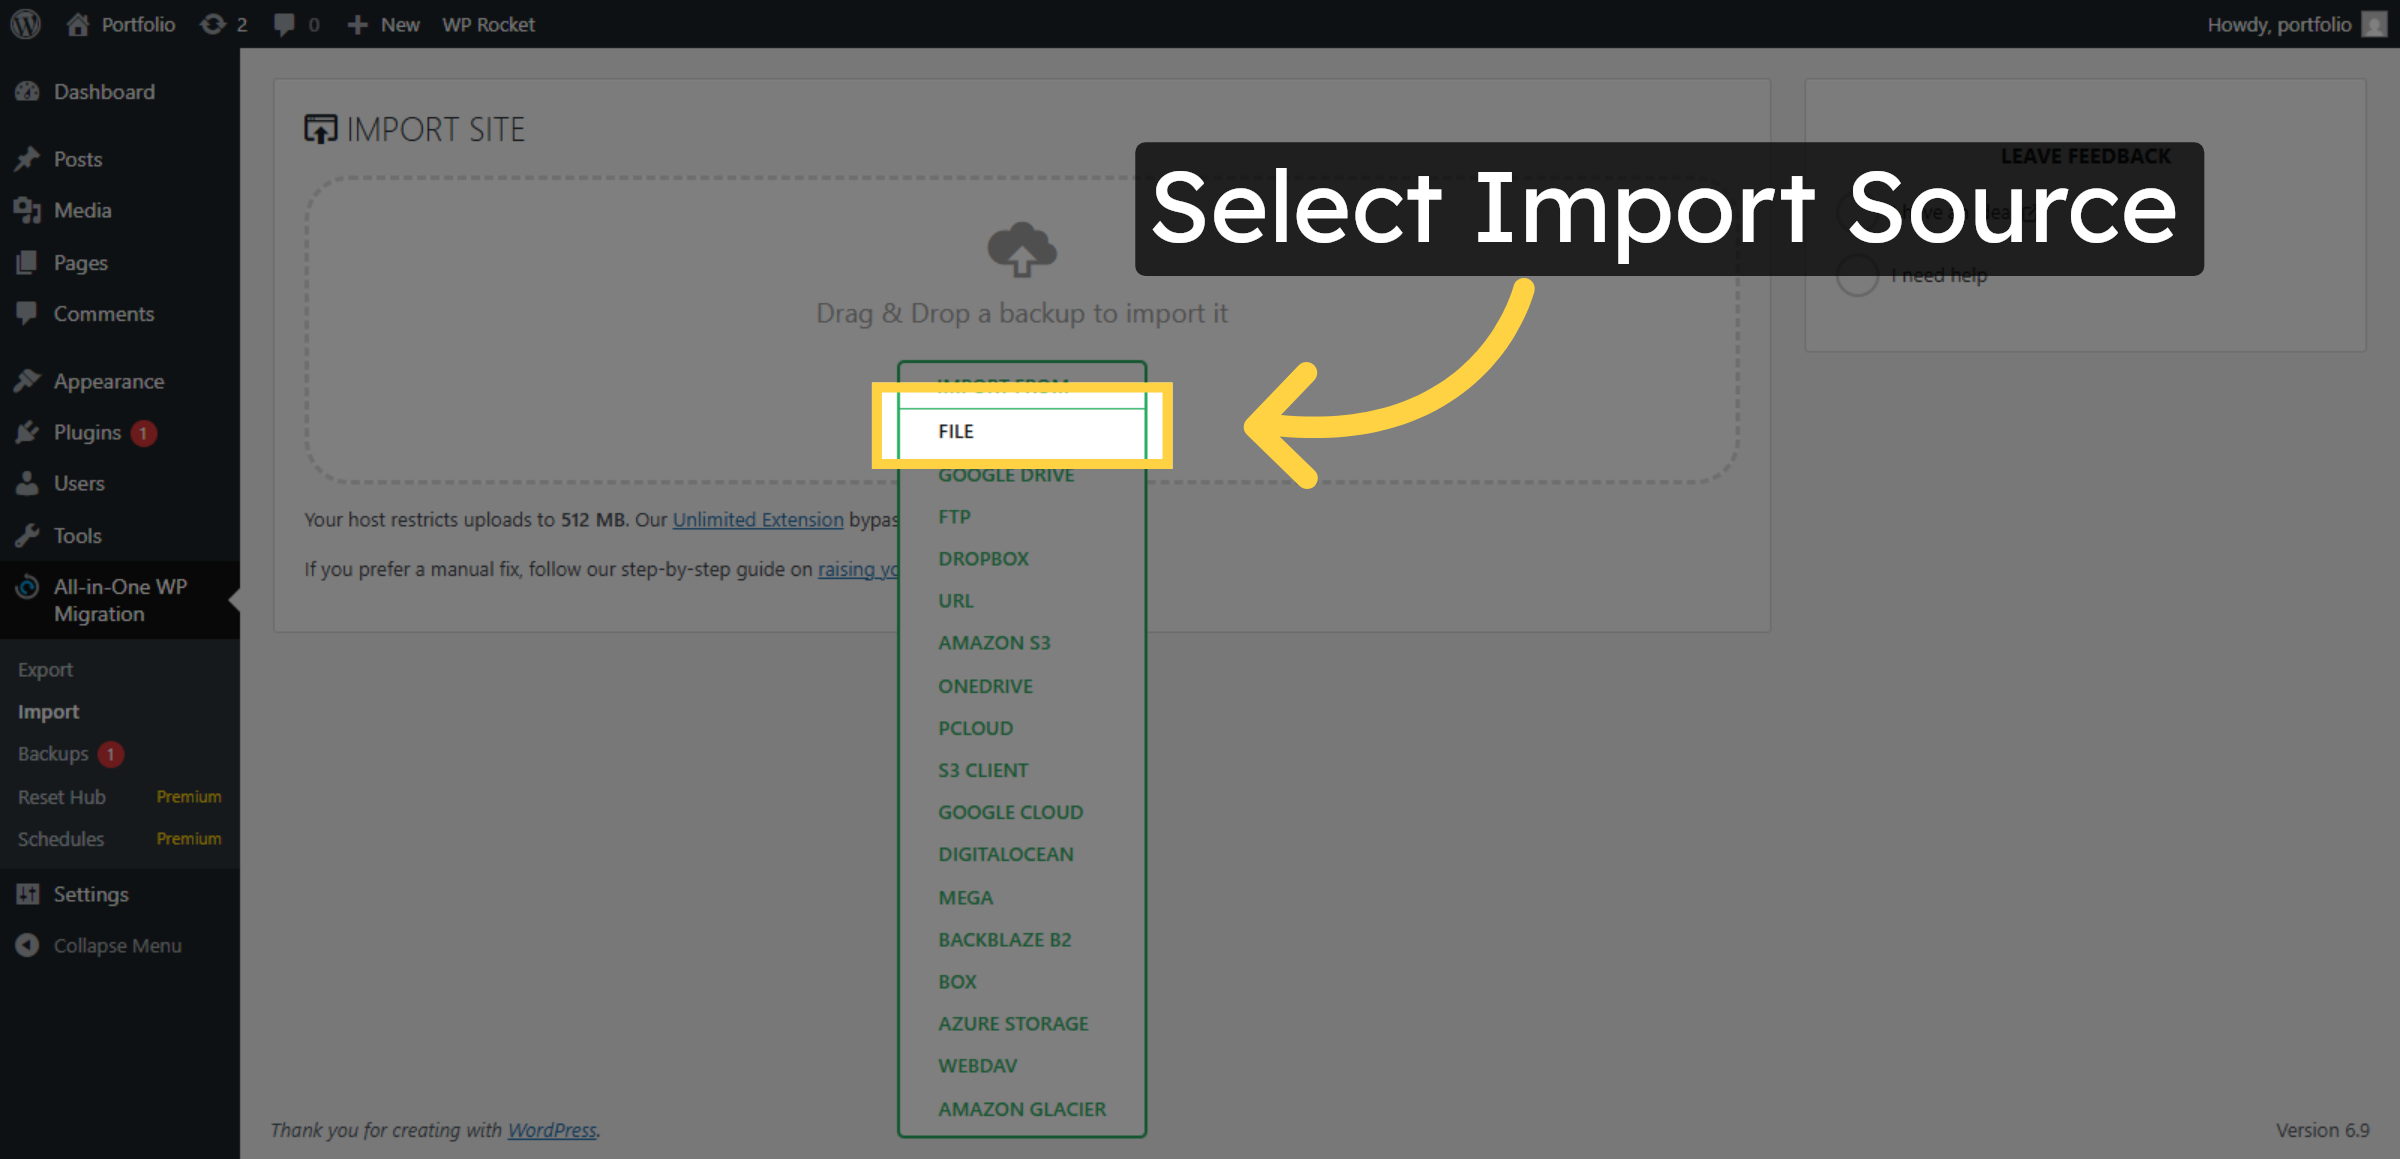
26. Select Import Source

Click here to choose the source for your import.

Select Import Source

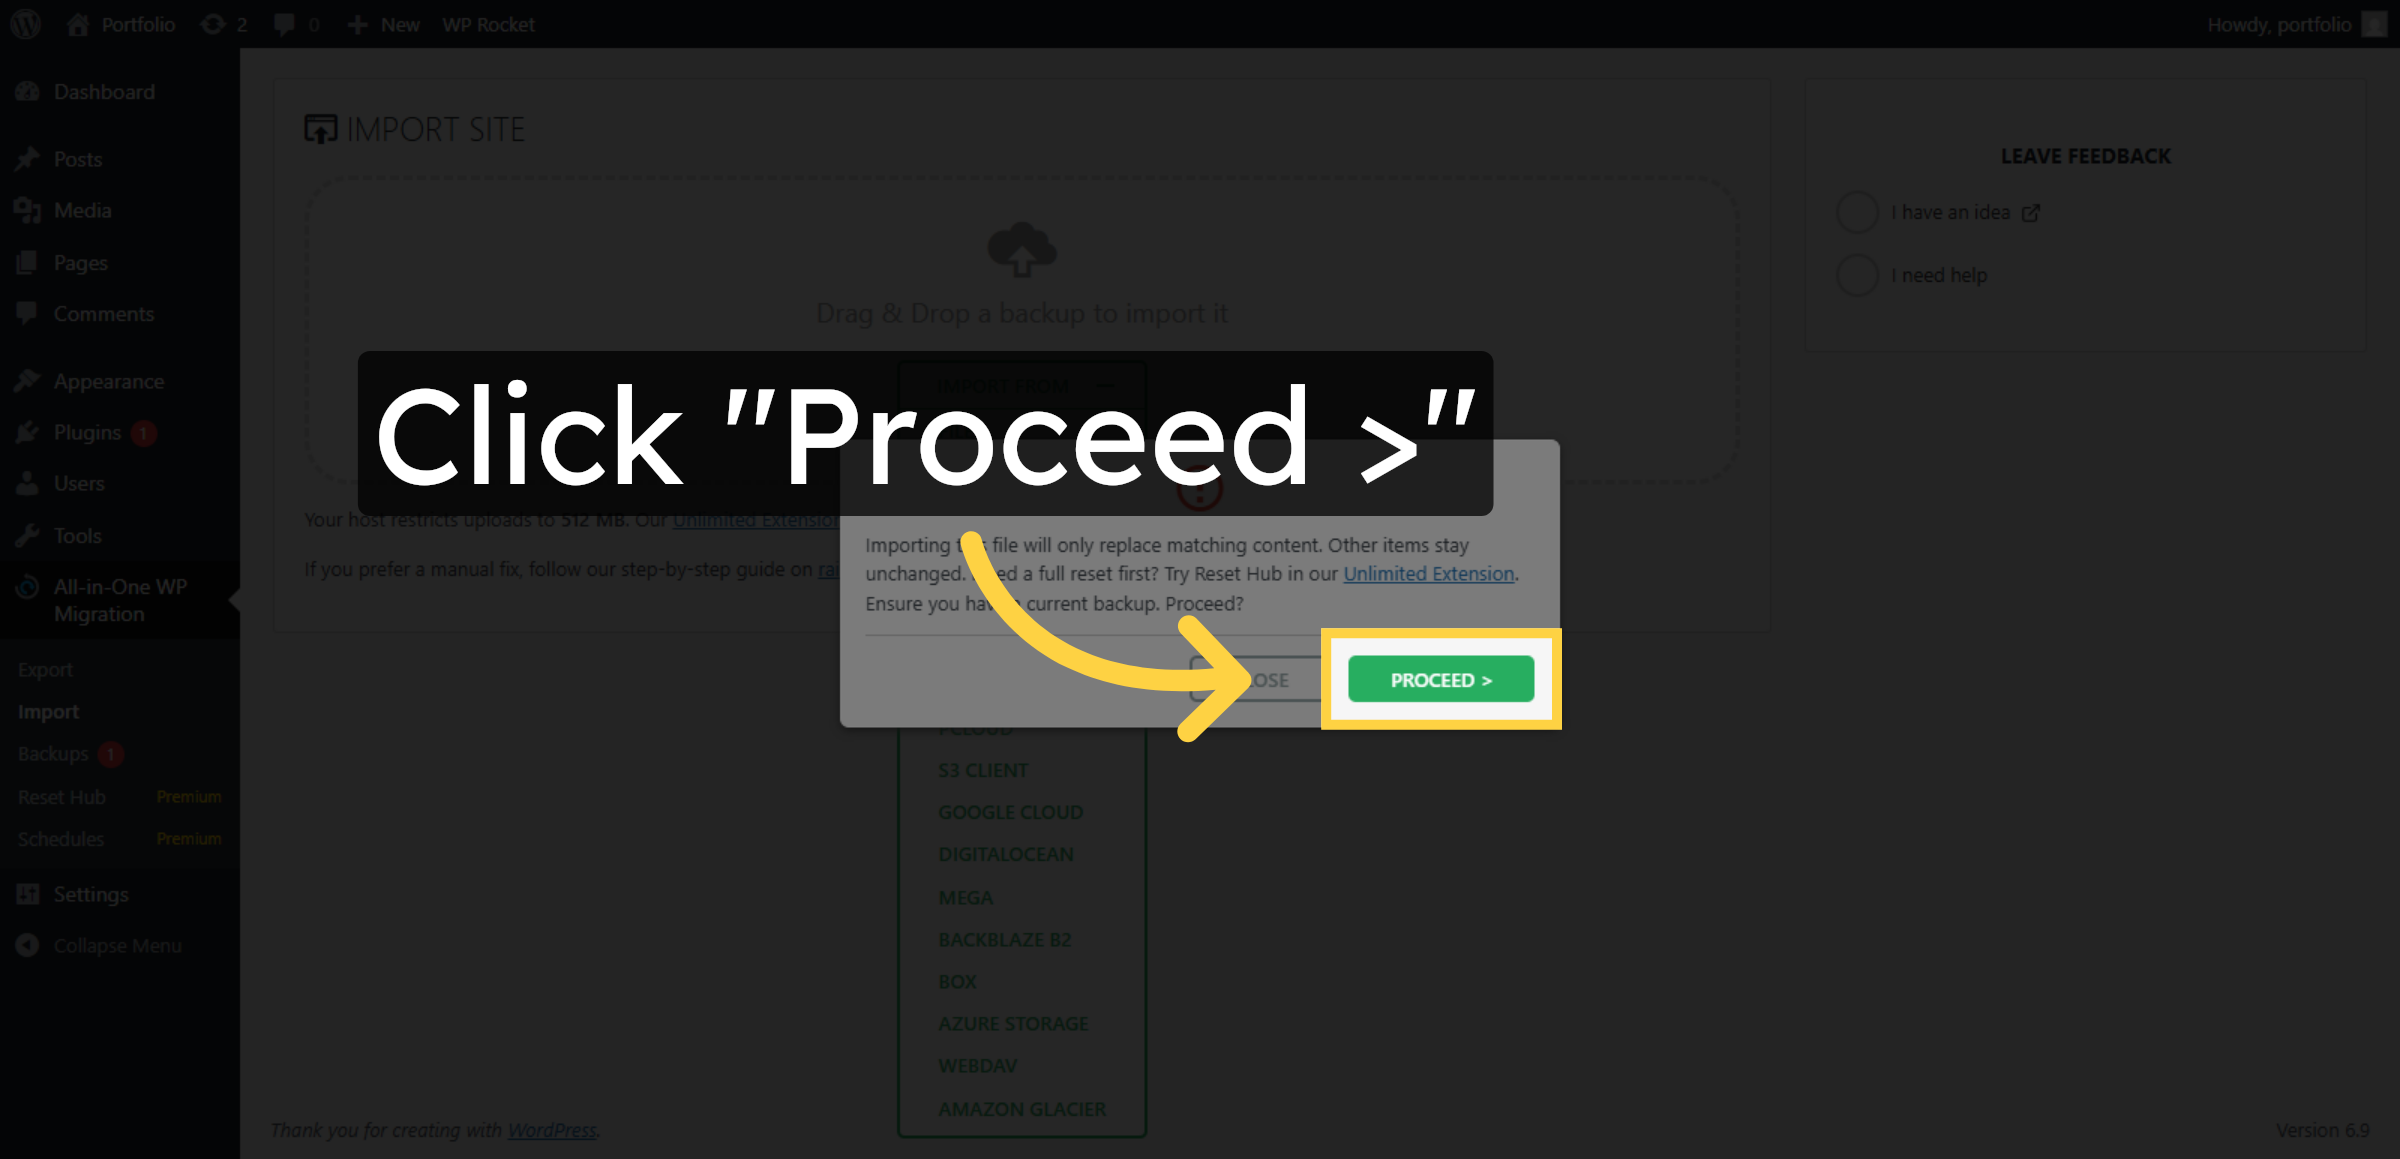
27. Click Proceed Button

Click the Proceed > button to continue with the import process.

Click Proceed Button

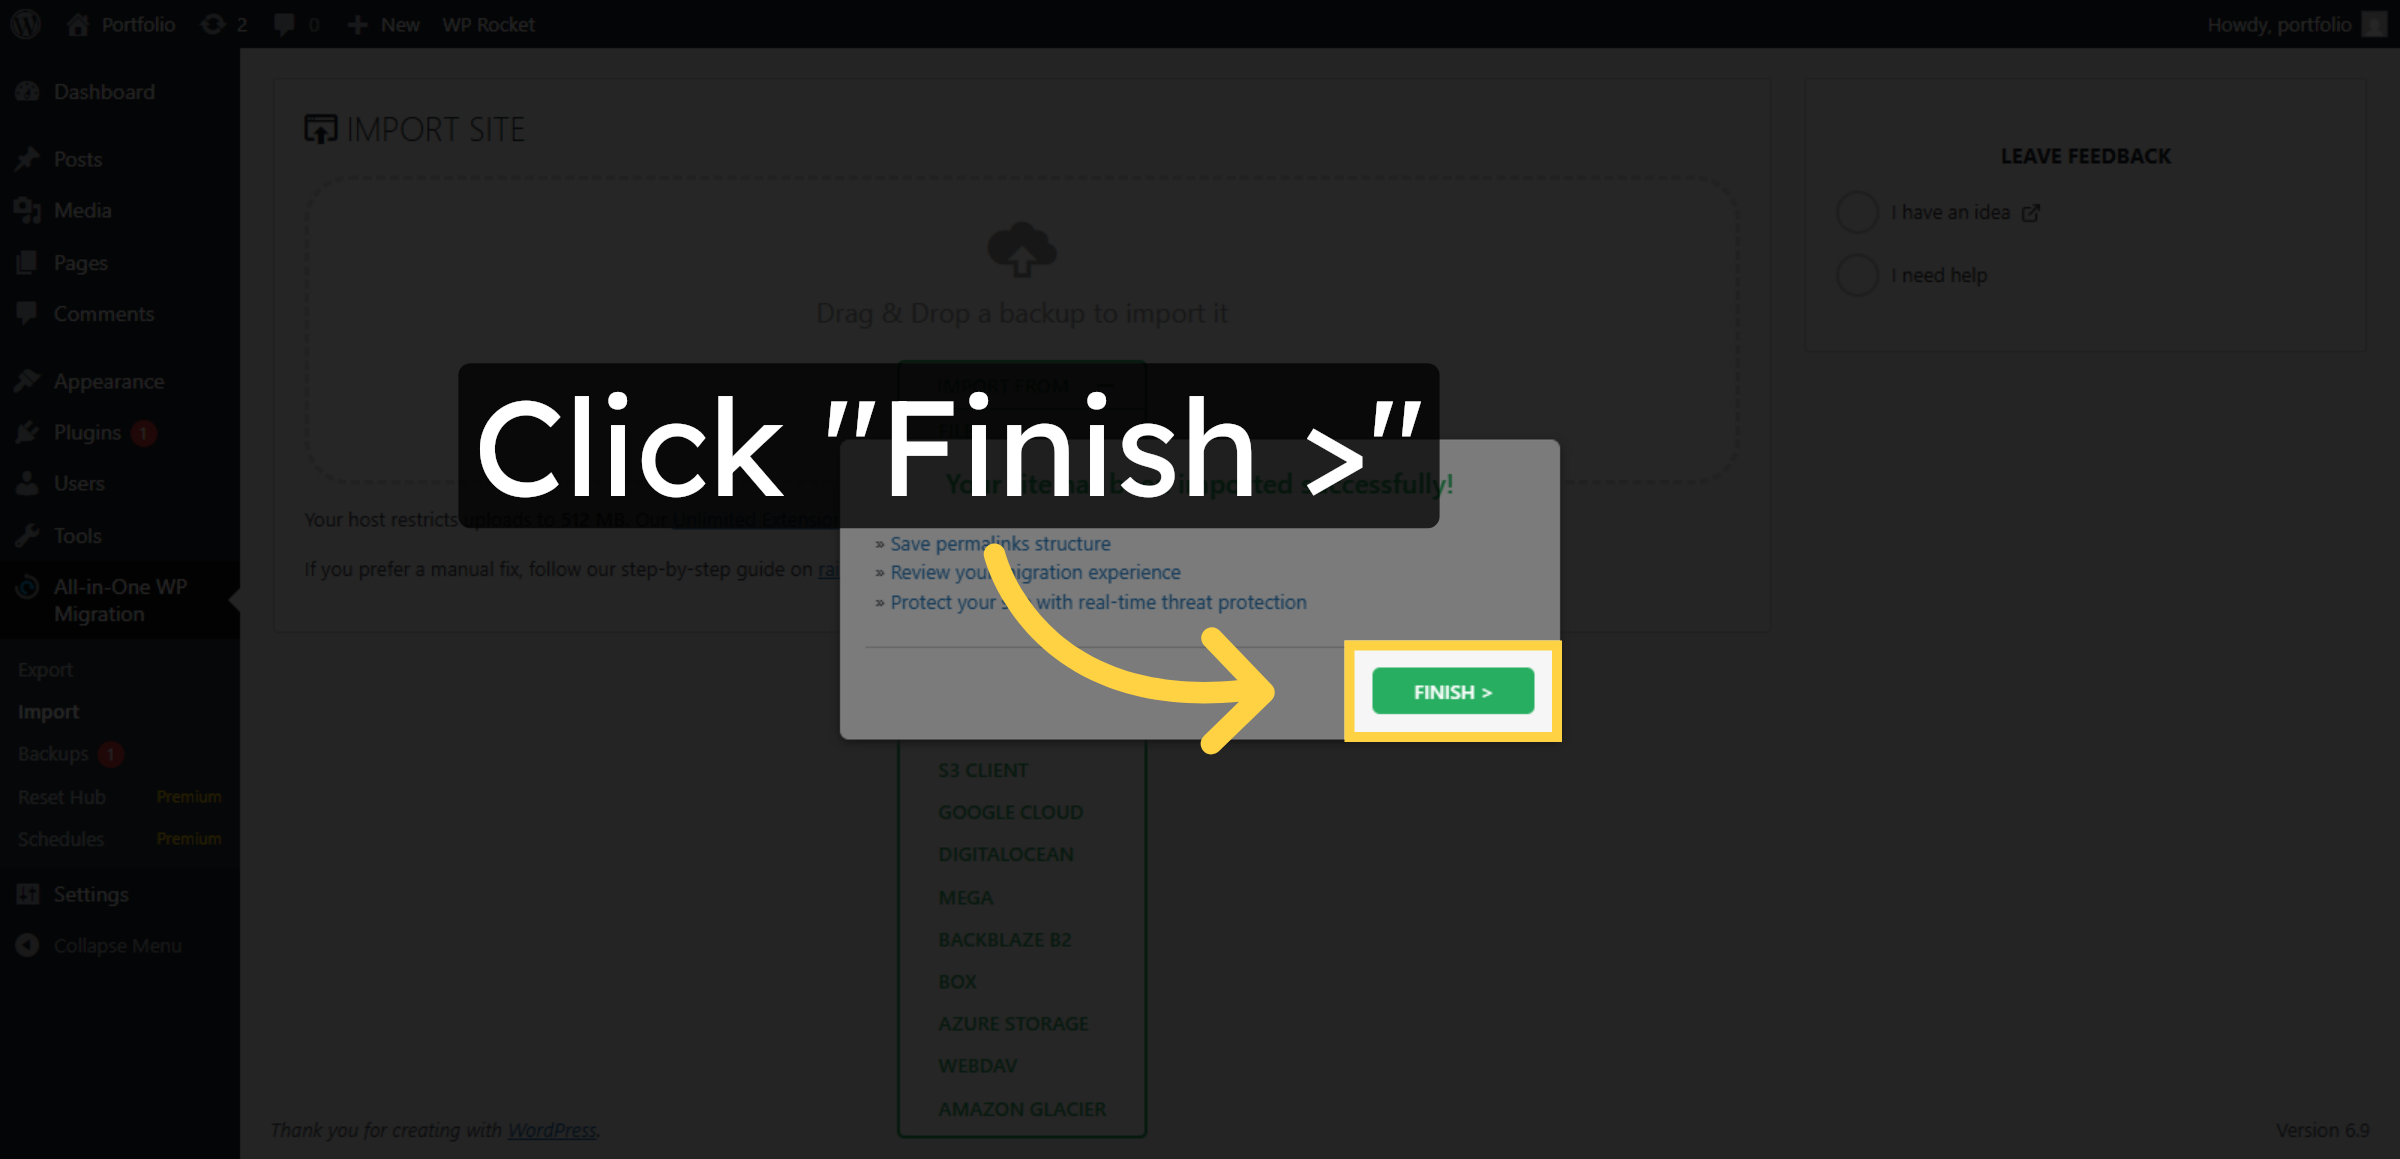
28. Click Finish Button

Click the Finish > button to complete the import setup.

Click Finish Button

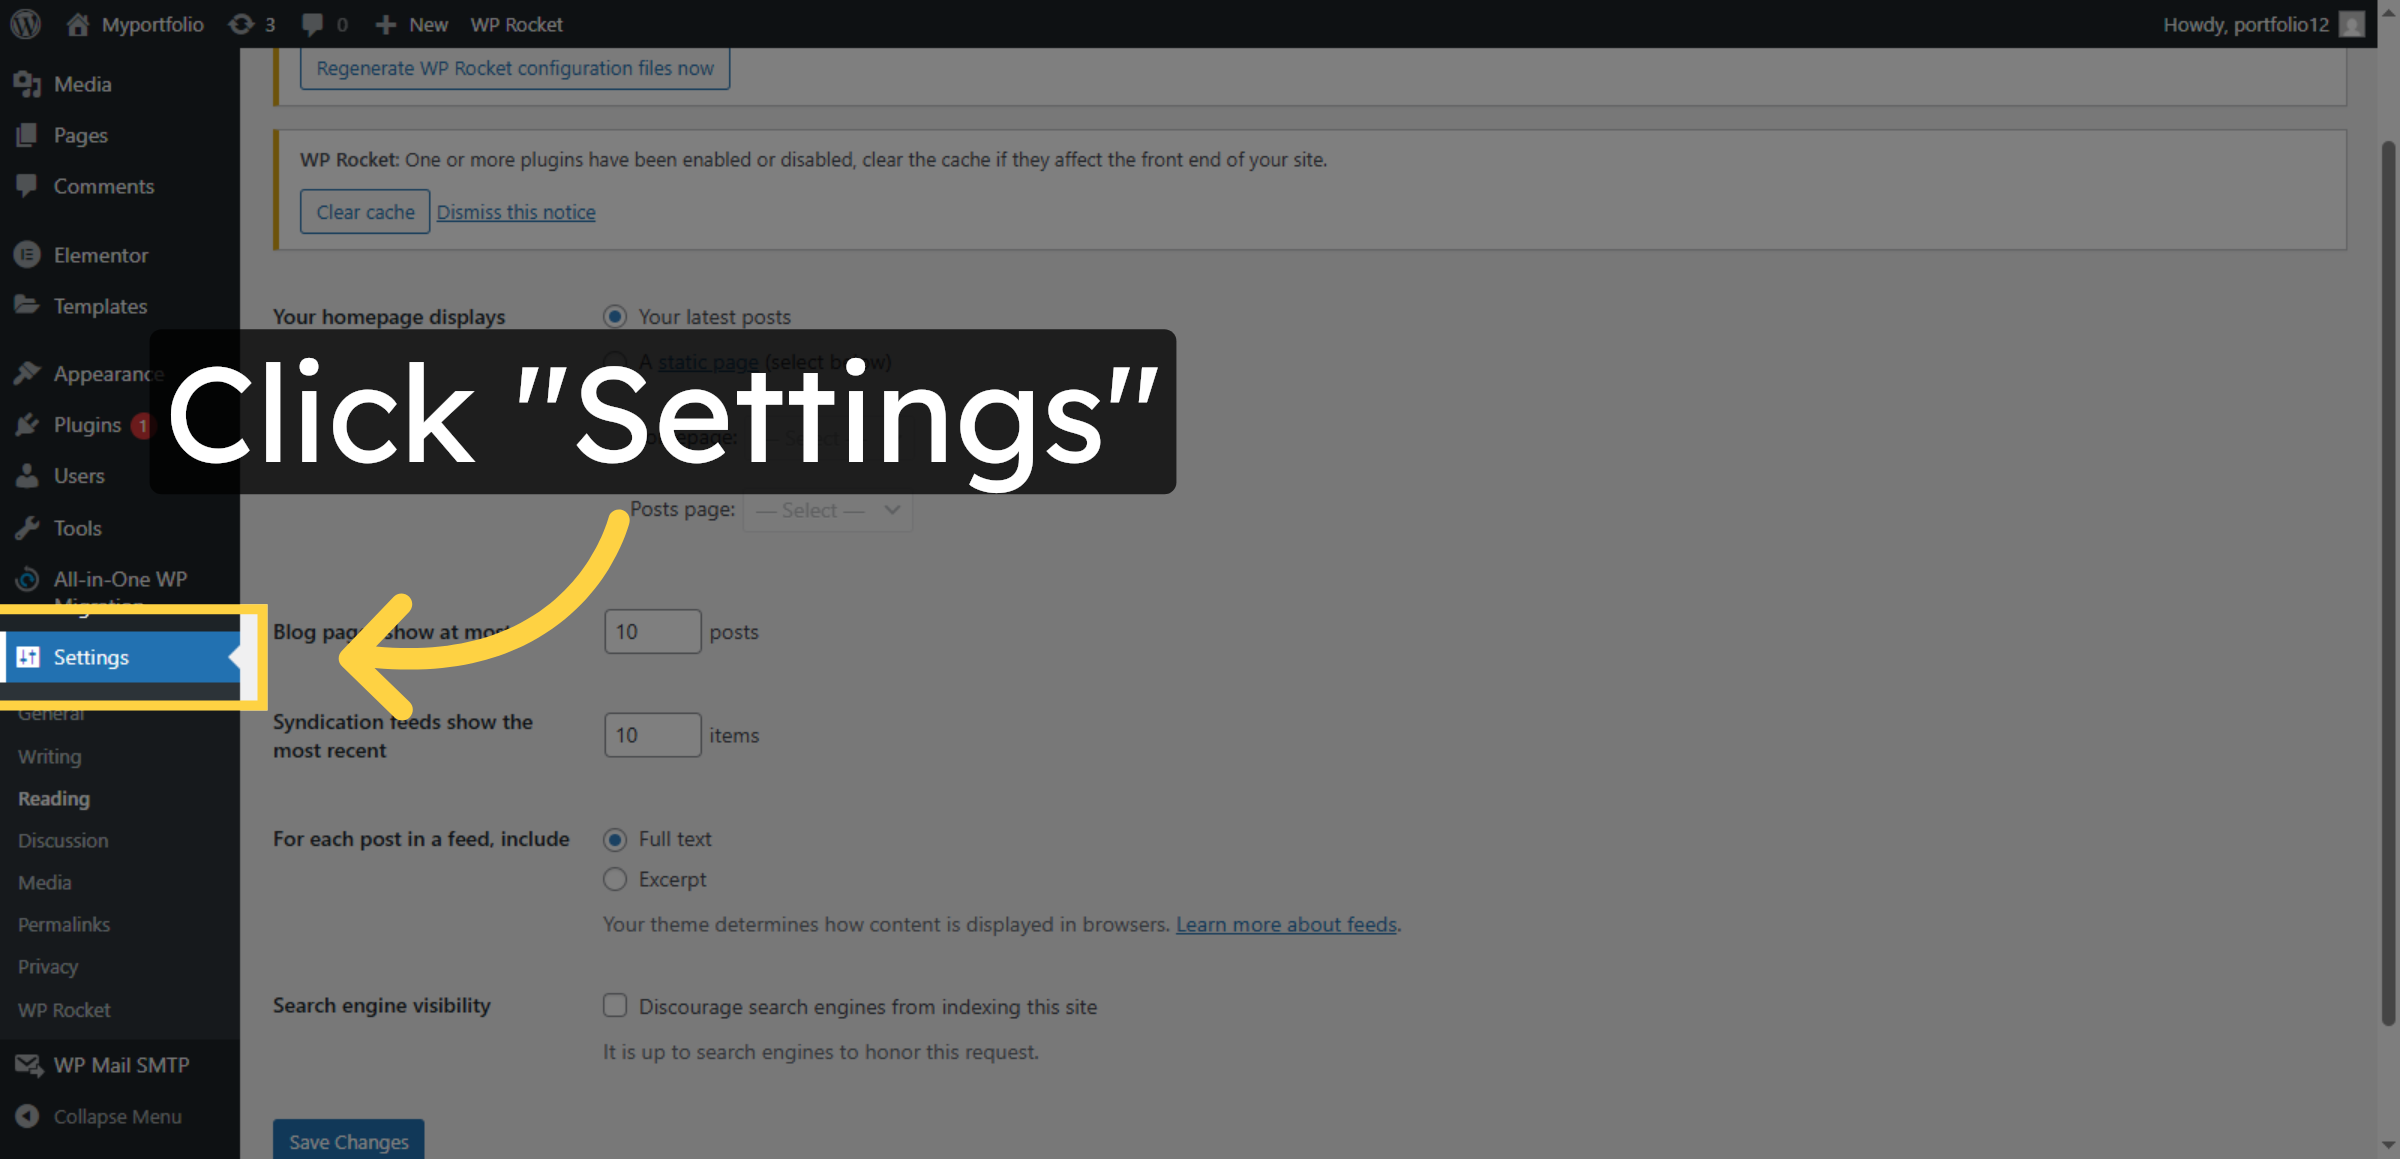
29. Navigate to Settings

Click Settings to continue adjusting your site preferences.

Navigate to Settings

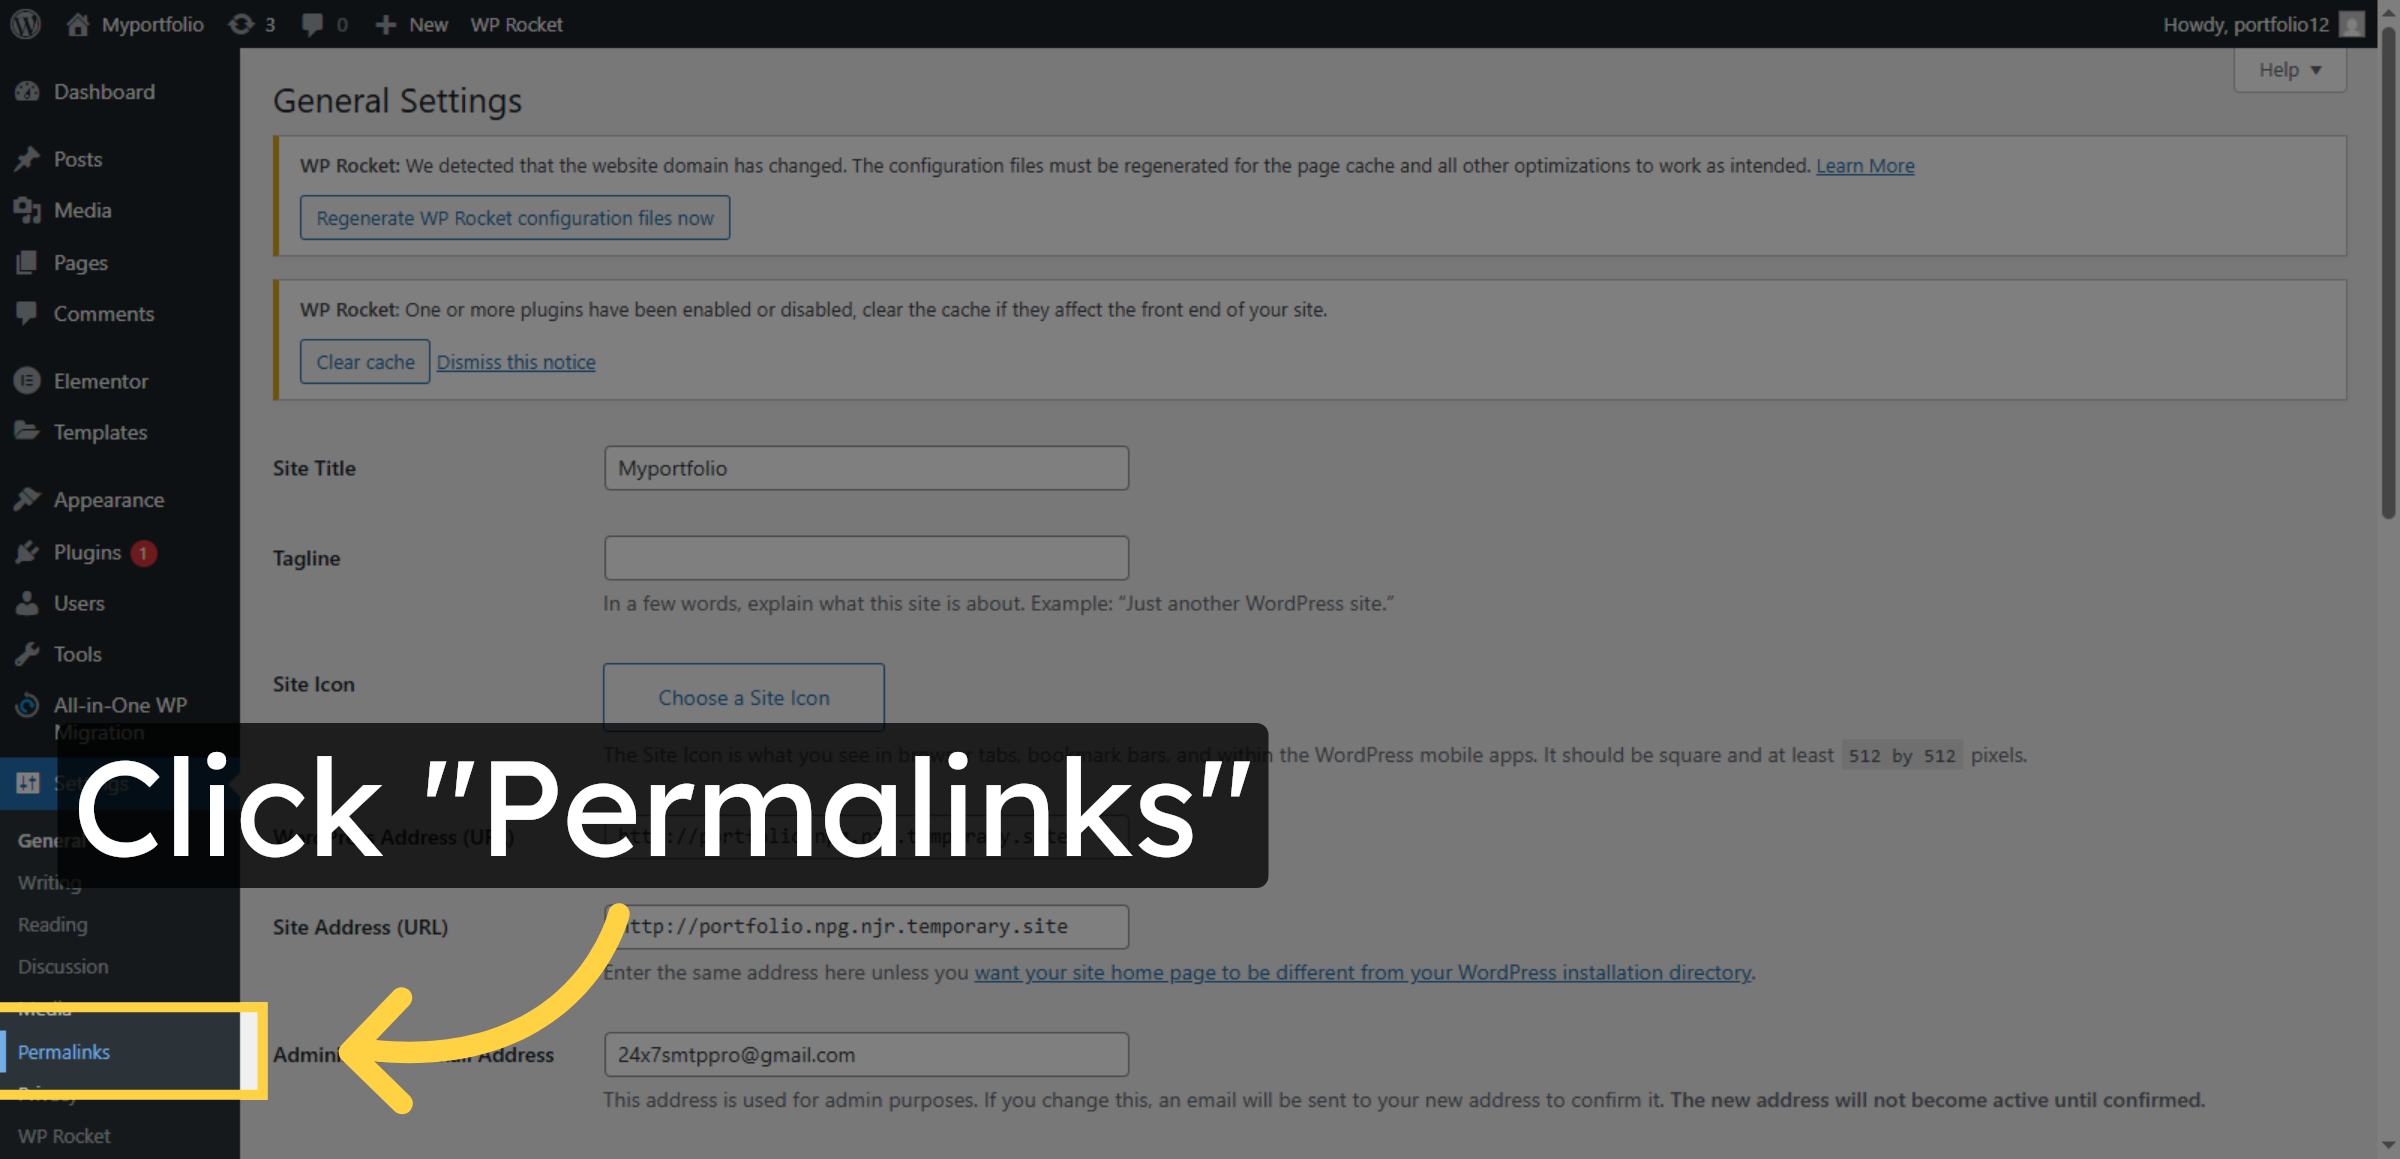
30. Select Permalinks Section

Click Permalinks to modify the URL structure settings for your site.

Select Permalinks Section

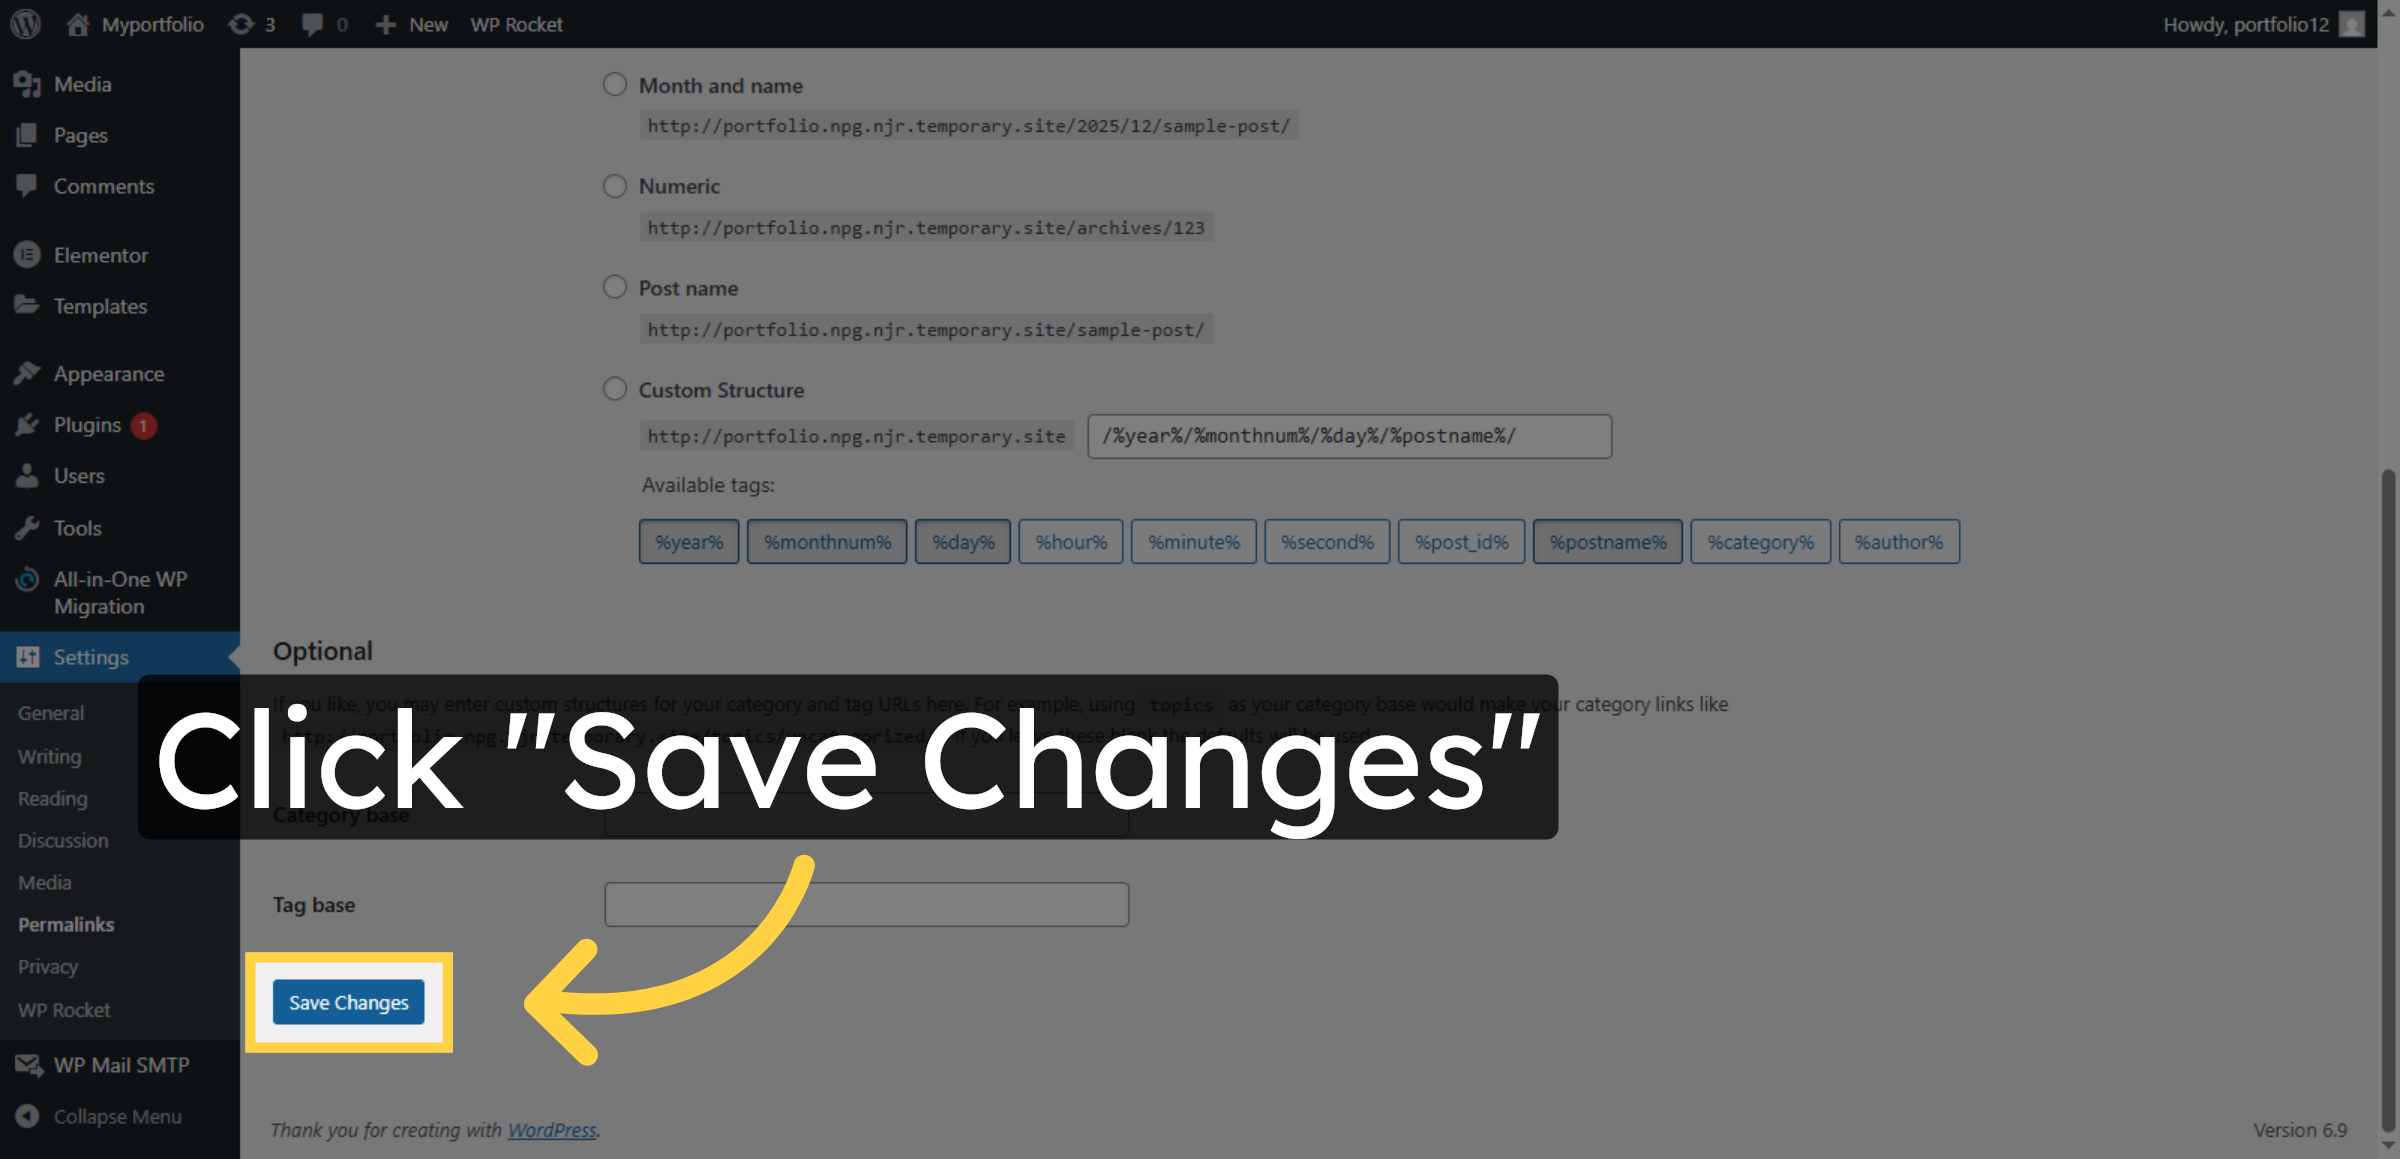
31. Save Permalink Changes
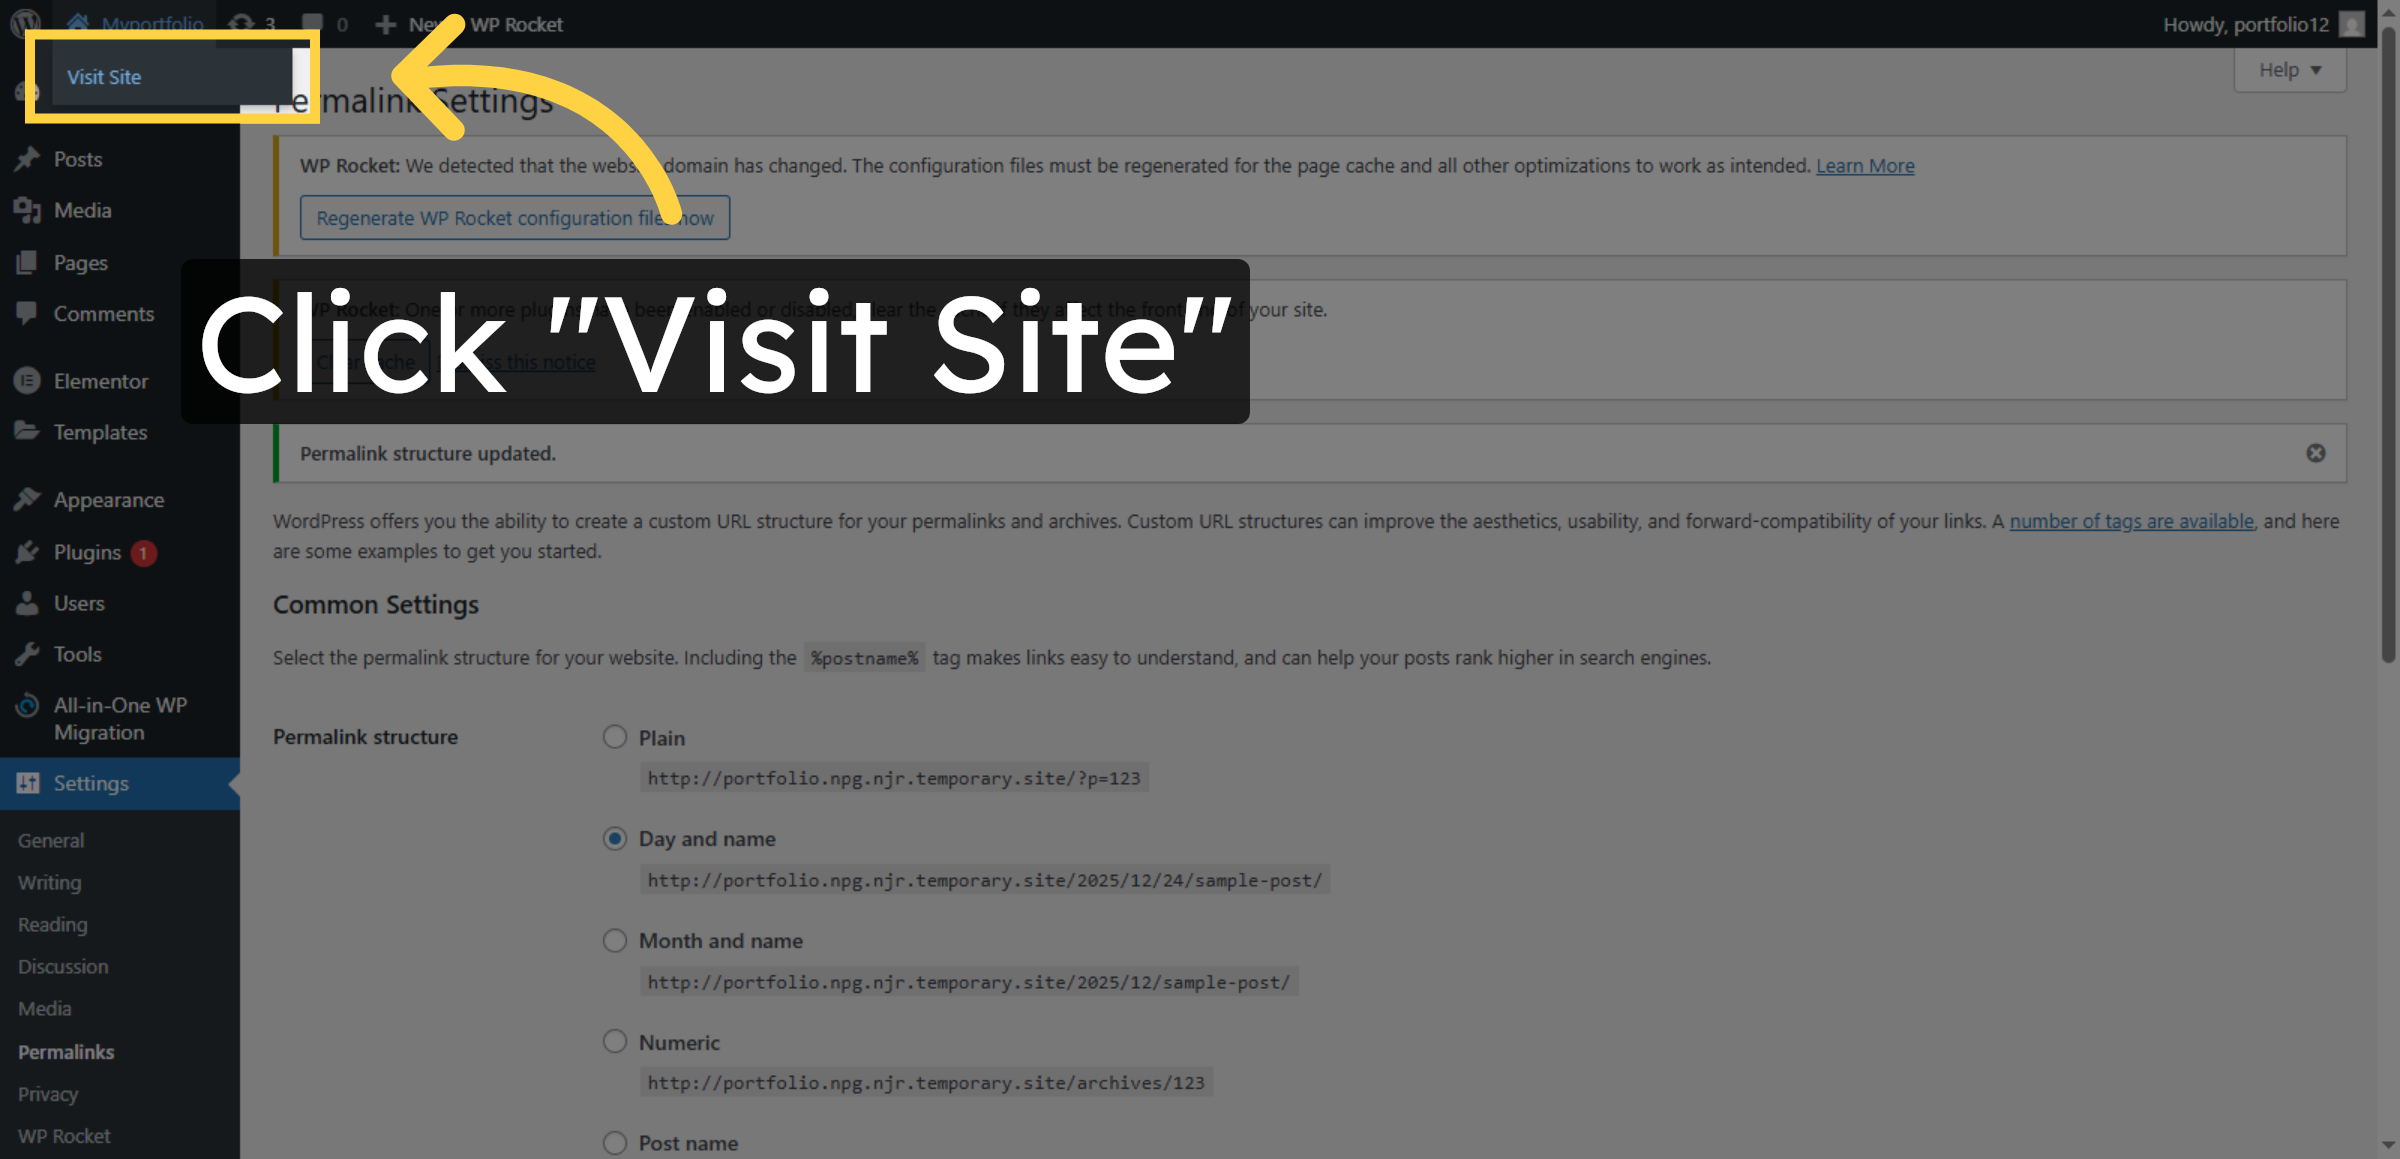
Click Save Changes to apply the new permalink settings.

Save Permalink Changes

32. Visit Your Site

Click Visit Site to view your site with the imported content and new settings.

Visit Your Site

33. Open Myportfolio Section

Click Myportfolio to access your portfolio section within the site.

Open Myportfolio Section

Conclusion

File and database recovery is a critical skill for maintaining website stability and operational continuity. By following the procedures outlined in this guide, you have successfully restored deleted website files and database records using HostGator’s File Manager and backup restoration tools. These recovery methods help resolve access errors, reinstate missing content, and restore full website functionality.

To reduce the risk of future data loss, it is recommended to implement regular automated backups, monitor file changes, and restrict unauthorized access. Periodic testing of recovery procedures also ensures faster response during emergencies. With proactive recovery planning and consistent data protection practices, your website remains resilient, secure, and prepared for unexpected technical challenges.

WooHelpDesk Support

Need professional assistance with file recovery, database restoration, backup management, or emergency website repair? WooHelpDesk provides expert technical support to help you restore your website quickly and securely.

 Visit: https://www.woohelpdesk.com

Call Us Toll-Free: +1 888 602 0119 (US & Canada)
Fast Recovery | Secure Restoration | Trusted Support

Contact WooHelpDesk today for reliable WordPress and hosting recovery solutions.


Leave a Reply

Your email address will not be published. Required fields are marked *

Leave a Reply

Your email address will not be published. Required fields are marked *