How to Add Audio or Music to WordPress (Step-by-Step Guide)
Table of Contents
- Introduction
- Why Add Audio or Music to a WordPress Website
- Important Things You Should Know Before You Upload Audio to Your WordPress Website
- How to Add Audio or Music to WordPress Using the Block Editor (Complete Process)
- Best Practices You Should Follow When Adding Audio or Music to WordPress
- Common Problems You May Face When Adding Audio or Music to a WordPress Website
- Conclusion
Introduction
Audio can make a website feel more useful and more alive. It gives visitors another way to enjoy your content. Instead of only reading, they can listen while they browse your pages. This is why many site owners now want to add audio to WordPress in simple ways. WordPress already gives you helpful tools for this work. You do not need advanced coding skills to get started. In many cases, the process takes only a few minutes. You can place audio inside posts, pages, lessons, and product sections with ease.
Many website owners use audio for different types of content. Podcasters share full episodes on their blog or show page. Teachers add lesson recordings for students and members. Business owners add voice guides, product demos, or welcome messages. Musicians share tracks, previews, or full songs on their websites. Some bloggers even use short audio clips for personal storytelling. Because of this, many users search how to add music to WordPress when building a new site.
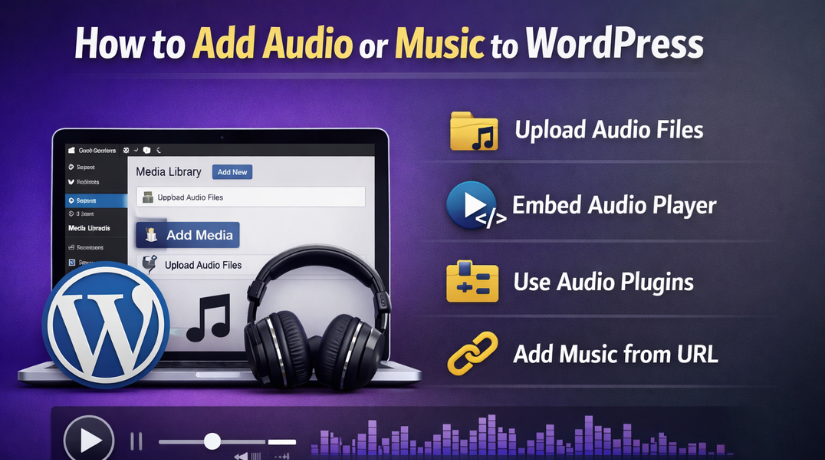
WordPress makes this process beginner-friendly from the start. You can upload a file directly into your Media Library. You can also embed audio in WordPress using simple blocks and links. If you want more design control, you can later use a WordPress audio player plugin. That gives you extra features for style and playback. Some website owners also use a WordPress music player for albums, playlists, or song previews. Others just want a clean audio bar inside one blog post.
Audio works well for many file types and content goals. For example, you may want to upload audio to WordPress site pages for support guides. You may also want to share a recorded interview with your audience. In other cases, you may need a simple WordPress add MP3 file method for one lesson or update. No matter the reason, WordPress gives flexible options for beginners. This makes audio one of the easiest media types to use online.
Why Add Audio or Music to a WordPress Website
Audio can keep visitors more engaged with your website content
Good content should hold attention for a longer time. Audio helps do this in a natural and easy way. Visitors often stay longer when they can hear useful information. A spoken message can feel more direct than plain text. Music clips can also create a more interesting page experience. This extra engagement can make your website feel more active. It can also help users connect better with your brand.
Audio can make your website content more interactive and useful
A page with audio feels more dynamic than a page with only text. Users can click, listen, pause, and continue at their own speed. This gives them more control over how they consume your content. It also helps break the monotony of long text sections. If you share lessons, guides, or stories, audio adds another useful layer. That makes your pages feel more complete and easier to use.
Audio helps people listen instead of reading every part
Not every visitor wants to read long paragraphs on a screen. Some people prefer listening because it saves time and effort. Others may be working, traveling, or multitasking during the visit. Audio helps them still receive the same message in a simple format. This improves comfort and supports different user habits. It also makes your content more flexible for a wider audience. That is a strong reason many website owners choose audio today.
Audio works well for podcasters, teachers, musicians, and businesses
Different website owners can benefit from audio in different ways. Podcasters use it to publish episodes and build regular listeners. Teachers use it for lessons, explanations, and spoken learning support. Musicians use it to share songs, previews, and creative work online. Businesses use audio for product demos, welcome messages, and help guides. This wide use makes audio a practical feature for many industries. It is not limited to one type of website or audience.
Audio supports many content formats on one WordPress website
A modern website often needs more than written blog posts. You may want text, images, video, and audio on the same site. WordPress supports this mix in a smooth and simple way. Audio lets you create richer content without making pages too complex. You can post interviews, music clips, testimonials, tutorials, or spoken tips. This gives your site more variety and more value for visitors. It also helps you present information in a more flexible format.
Important Things You Should Know Before You Upload Audio to Your WordPress Website
Before you upload audio to a website, you should know a few basics. This step helps you avoid many common problems later. It also makes the process faster and easier to manage. Many beginners try to add files without checking format or size. That often causes upload errors or playback issues on pages. If you want to add audio to WordPress smoothly, start with the right setup.
Supported Audio File Formats You Can Safely Use in WordPress
WordPress supports several audio file types for normal website use. The most common format is MP3 because it works almost everywhere. It is small, easy to upload, and plays well online. This is why many users choose the WordPress add MP3 file method first. It is simple for blog posts, lessons, and product pages. WordPress also supports formats like OGG, WAV, and M4A. These can work well, but not all devices handle them equally. MP3 remains the safest choice for most websites today.
Why File Size and Compression Matter Before You Add Audio
Audio files can become very large if you do not compress them. Large files take longer to upload and slower to load online. That can create a poor experience for people visiting your page. A slow page often makes users leave before the audio starts. It can also affect your site performance in search results. So before you add audio to WordPress, always check file size first. A lighter file is easier to manage and easier to play. It also puts less load on your hosting server.
Compression helps reduce file size without harming sound too much. This is important for podcasts, music clips, and voice recordings. You do not always need studio-level sound for normal website use. In many cases, clear and balanced sound is enough. If the file sounds good and loads fast, that is better. Many website owners focus only on quality and forget speed. But both should stay balanced for a good visitor experience. Smart compression helps you keep that balance on every page.
Why Audio Optimization Is Important for Website Speed and User Experience
Website speed matters for every type of online content today. Visitors want pages to open quickly without delay or lag. If your audio is too heavy, the page may feel slow. This affects both desktop users and mobile users on weaker networks. A slow website can reduce engagement and hurt page performance. That is why audio optimization should never be ignored. It is one of the most important steps before publishing sound files.
Optimization means preparing your audio for online playback in a smart way. You choose the right format, reduce size, and test loading speed. This helps your file open faster on different screen sizes. It also keeps the page design clean and easy to use. Whether you embed audio in WordPress or upload it directly, speed still matters. Visitors should not wait too long to hear one short recording.
Why Copyright and Legal Music Usage Must Be Checked First
You should never upload music without checking legal rights first. Just because a song is online does not mean it is free. Many tracks are protected by copyright and need permission. Using them without permission can create legal trouble for your website. It can also lead to complaints, content removal, or platform issues. This is a serious point when learning how to add music to WordPress. Always make sure the audio belongs to you or is licensed. Safe content keeps your website protected and professional.
If you created the audio yourself, you usually have more control. That includes your voice recordings, interviews, and original music clips. If another person made the file, ask for clear permission first. Some websites offer royalty-free music for public or business use. Even then, you should still read the license terms carefully. Some tracks allow website use but not resale or editing.
Why Mobile-Friendly Audio Playback Is Important for Every WordPress Website
Many visitors now browse websites from mobile phones every day. That means your audio should work well on small screens too. A file that works on desktop may still fail on mobile. Sometimes the player looks broken or the controls feel hard to use. In other cases, autoplay or large files cause poor performance. This is why mobile testing is a key part of audio setup. A good listening experience should work on every screen size.
Before you publish, test the file on a phone and tablet. Check if the player loads fast and stays easy to use. Make sure buttons are clear and audio starts without errors. Also see if the file plays on different browsers properly. Mobile users expect quick access and smooth playback from the start.
How to Add Audio or Music to WordPress Using the Block Editor (Complete Process)
Adding audio in WordPress is simple with the block editor. You do not need coding for this method. It works well for songs, podcasts, voice clips, and lessons. If you want to add audio to WordPress, this is the easiest way to start. The editor already includes a built-in Audio block for this task. You only need your file ready before opening the page. Once added, visitors can play the audio from your post. This method is clean, quick, and beginner-friendly for most websites.
Step 1: Log In to WordPress and Open the Right Page or Post
- Sign in to your WordPress dashboard.
- Open the post or page where you want the audio.
- You can also create a new post or page.
- Choose the exact place where the audio should appear.
- Try to place the audio where it feels useful.
- Many users place it after a short introduction.
- Good placement improves the reading and listening experience.
Step 2: Click the Plus Icon to Add a New Block
- Move your cursor to the place where audio is needed.
- Click the plus icon inside the editor.
- This opens the list of available blocks.
- You can scroll through the list if needed.
- You can also use the search box for faster results.
- This step helps you insert the correct media block.
Step 3: Search for the Audio Block and Select It
- Type Audio in the block search field.
- Find the Audio block from the results.
- Click the block to insert it into the editor.
- The block will appear where your cursor was placed.
- This block helps you embed audio in WordPress
- It is useful for beginners because the setup is simple.
- You do not need a WordPress audio player plugin for basic use.
Step 4: Upload a New Audio File or Choose One From Media Library
- After adding the block, you will see two options.
- Choose Upload if the file is on your computer.
- Choose Media Library if the file is already uploaded.
- Select the audio file you want to use.
- MP3 is usually the safest format for WordPress.
- That is why many users prefer the WordPress add MP3 file
- This is also a common way to upload audio to WordPress site
- Wait until the upload is fully complete.
Step 5: Let WordPress Insert the Audio Player Automatically
- Once the file is selected, WordPress adds the player.
- The audio player will appear inside the editor.
- It usually includes play and pause controls.
- It may also show a timeline bar for playback.
- This player is clean and simple for normal use.
- It works well for blog posts and standard pages.
- Many users choose this method when learning how to add music to WordPress.
Step 6: Check the Block Settings on the Right Side
- Look at the settings panel on the right side.
- Review how the audio block appears on the page.
- Check spacing and placement around nearby content.
- Make sure the player fits well in the section.
- Keep the design neat and easy to follow.
- Avoid placing the player in a crowded area.
- A clean layout improves user experience.
Step 7: Add a Helpful Intro Above the Audio Player
- Write a short line above the player.
- Explain what the audio contains.
- Tell visitors why the audio is useful.
- Keep the text short and clear.
- This helps users know what they will hear.
- It also makes the page feel more professional.
- A short intro works well for lessons, songs, or podcasts.
Step 8: Preview the Page Before Publishing It Live
- Click the Preview button before publishing.
- Open the page and test the audio player.
- Press play and listen to the first few seconds.
- Check if the audio loads properly.
- Move the timeline and test another part.
- Also test the page on mobile if possible.
- This step helps you catch playback issues early.
Step 9: Publish or Update the Page After Final Testing
- If everything works well, click Publish or Update.
- Your audio will now appear live on the page.
- Visitors can play the file directly from the website.
- This is the full process to add audio to WordPress using the block editor.
- It is simple and useful for most beginners.
- You can repeat the same process on other pages.
- Later, you can try a WordPress music player if needed.
Use clear and optimized audio files. Avoid very large files when possible. MP3 is usually the best choice for most websites. Keep the player easy to find and easy to use. Always test every file before publishing.
Best Practices You Should Follow When Adding Audio or Music to WordPress
Adding sound is simple, but good setup still matters a lot. A few smart habits can improve speed, design, and user experience. They also help your audio work better on more devices. If you want lasting results, follow clear best practices from the start. This keeps your site easier to manage over time. It also helps visitors enjoy the content without technical problems. Good audio should feel smooth, useful, and easy to control. That is the goal of every strong WordPress audio setup.
Use Compressed and Optimized Audio Files for Faster Loading
Always try to use audio files with a reasonable size. Heavy files can slow the page and annoy visitors quickly. Compressed files are easier for websites to handle every day. They upload faster and load better on weaker internet connections. This matters whether you use built-in blocks or another method. Even the best WordPress music player performs better with optimized files. Small improvements in file size can make a big speed difference. Faster playback creates a more pleasant visitor experience on all devices.
Avoid Uploading Very Large Audio Files Without a Clear Need
Large files can use more server space and increase loading time. They may also affect backup size and hosting performance later. This becomes a bigger issue on sites with many audio files. If one file is too large, the whole page may feel heavy. Visitors may leave before they even press the play button. Try to keep the file only as large as needed. Good balance matters more than extreme sound quality online. Smart size control supports better performance across your full website.


Make Sure the Audio Player Works Well on All Devices
Your audio should play well on desktop, tablet, and mobile phones. A player that works on one screen may fail on another. So always test the page before you publish it fully. Check that the buttons are easy to tap and understand. Also make sure the file loads without delay or strange behavior. This matters even more when using a WordPress audio player plugin. Some plugins look good but may need extra mobile testing. A fully responsive player makes the site feel more professional and reliable.
Avoid Autoplay Unless It Is Truly Needed for the Page
Autoplay can interrupt visitors and create a poor first impression. Many users do not want music to start without warning. It can feel distracting, especially on work or learning pages. Some browsers also block autoplay by default for this reason. It is usually better to let users press play themselves. That gives them more control and keeps the page comfortable. If audio is important, place it clearly and let users choose. User control often leads to a better overall website experience.
Keep the Listening Experience Clean and Easy for Every Visitor
Do not overload the page with too many sound elements at once. One clear player often works better than many players together. Try to keep the layout simple and easy to understand. Place audio where it supports the text and page goal. Good design helps users focus on the right content quickly. Clean structure also makes the page look more trustworthy and polished. Whether you embed audio in WordPress or upload directly, clarity matters. A simple listening experience often works best for most visitors.
Test Playback Carefully Before You Publish or Update the Page
Never assume the file works just because it was uploaded successfully. Always test the sound before making the page live. Listen for missing parts, weak volume, or slow loading issues. Also check if the player appears correctly on the page. A quick preview can catch small mistakes before users notice them. This simple step protects the quality of your content. It also saves time later when someone reports a problem. Careful testing is one of the easiest ways to avoid support issues.
Use Only Legal and Properly Licensed Music on Your Website
Music rights should always be checked before publishing audio online. Do not use random songs without permission from the owner. This can lead to legal trouble or content complaints later. Always use your own audio or properly licensed sound files. That includes tracks used in demos, blogs, and landing pages. Safe use matters whether you upload files or use a plugin. It also matters if you later switch to a custom WordPress music player design. Legal content protects your site and keeps your brand trustworthy.
Common Problems You May Face When Adding Audio or Music to a WordPress Website
Adding sound to a website looks simple at first. Still, small issues can appear during setup or after publishing. These problems can affect uploads, playback, speed, and design. The good part is that most issues are easy to understand. Once you know the cause, the fix becomes much easier. If you want to add audio to WordPress without stress, it helps to know these common issues first.
Audio File Not Uploading to the WordPress Media Library Properly
Sometimes the audio file does not upload at all. The upload may stop halfway or show an error. This often happens because the file is too large. It can also happen because of server upload limits. In some cases, a weak internet connection causes the problem. This issue becomes common when users try to upload audio to WordPress site pages without checking file size first. A smaller and cleaner file usually works better.
Another reason can be low hosting resources on the website. If the server has strict limits, uploads may fail often. Some security settings can also block media uploads by mistake. That is why it is always smart to test the file first. Use a lighter version if the original file feels too heavy. A smooth upload process starts with a properly prepared file.
Unsupported Audio File Format Can Stop the File From Working
WordPress supports several audio formats, but not every format works well. If the file type is uncommon, the upload may fail. In some cases, the file uploads but does not play later. This confuses many beginners during their first audio setup. That is why the WordPress add MP3 file method remains a safer choice. MP3 files are widely supported and easier for browsers to handle.
Some users try advanced audio formats without checking compatibility first. That can create playback issues on mobile or older browsers. A file that works on one device may fail on another. This makes the website feel broken or unfinished to visitors. To avoid that, always use a supported and tested format. A simple format choice can prevent many future problems.
The Audio Player May Not Show Correctly on the Page
Sometimes the file uploads, but the player does not appear. The space may look blank or broken on the page. This can happen because of editor issues or theme conflicts. In some cases, the block loads, but the design hides it. This problem may also appear after copying content from another page. Even when you embed audio in WordPress, layout issues can still happen. A clean page structure helps reduce these display problems.
Plugin conflicts can also affect how the player appears. A caching plugin or design plugin may change the layout. Some themes also style media elements in unexpected ways. That can make the player look too small or disappear. If the player is missing, check the page with a default theme. This helps you understand whether the issue comes from theme styling. A visible and clean player is important for user trust.
Audio May Not Play Properly After It Is Added
Sometimes the player appears, but the sound does not start. Users click play, but nothing happens on the page. This may happen because the file is damaged or incomplete. It can also happen if the upload did not finish correctly. In some cases, the browser blocks playback for technical reasons. People often face this while learning how to add music to WordPress for the first time. That is why testing is always an important final step.
Playback issues can also come from browser cache or script errors. If another plugin loads broken code, the player may fail. Mobile browsers may also respond differently than desktop browsers. This creates confusion when the file works in one place only. A good test should include both desktop and mobile devices. Reliable playback matters more than a fancy design. Visitors care most about whether the audio actually works.
Large Audio Files Can Make the Page Slow to Load
Audio can affect speed when the file is too large. A heavy file takes more time to load online. This slows the page and weakens the visitor experience. Slow pages often lose users before the content even starts. This becomes a bigger issue on mobile internet connections. Even a good WordPress music player cannot fix a heavy audio file alone. Speed depends on file quality, compression, and smart setup together.
A slow page can also affect user trust and content performance. Visitors may think the site is poorly built or outdated. Search engines also prefer pages that load more smoothly. That is why audio should be optimized before publishing it. Smaller files make the page faster and easier to use. Good speed supports both user comfort and better website quality. Audio should add value, not create delay.
Browser or Mobile Playback Issues Can Affect User Experience
An audio file may work on desktop but fail on mobile. Sometimes the player loads, but the controls feel broken. In other cases, the sound starts late or stops suddenly. This often happens because devices handle media in different ways. Mobile browsers can block autoplay or limit background playback. That is why testing on only one device is never enough. A strong audio setup should work well across phones, tablets, and computers.
This issue can also come from poor plugin behavior on smaller screens. Some players look fine on desktop but break on mobile layouts. If you use a WordPress audio player plugin, always test it carefully. Good design should stay clear and simple on every screen. Mobile users now make up a large part of website traffic. So mobile playback should never be treated as optional. It is a basic part of a good user experience.
Theme or Plugin Conflicts Can Break the Audio Setup
WordPress websites often use many plugins and custom themes together. This is useful, but it can also create conflicts. One tool may affect how another tool behaves on the page. Audio players may stop working after a plugin update. A custom theme may also change the player style badly. This problem becomes more common when users install extra media features too quickly. A careful and simple setup usually works better.
Conflicts often appear after a new plugin is activated. The player may stop loading or the page may break. Some script-heavy plugins can also slow media functions badly. If this happens, disable recent plugins one by one. Then test the audio again after each change. This helps you find the actual cause without confusion. WordPress works best when each feature is tested carefully. Stable audio depends on clean website management.
Conclusion
Adding audio or music to WordPress is easier than many beginners expect. WordPress gives you a simple way to upload audio, place it inside posts or pages, and let visitors play it without extra effort. If you use the right file format, keep the file size light, and test the player before publishing, the process stays smooth and user-friendly. This makes audio a useful option for blogs, online courses, podcasts, music pages, product demos, and support content. A well-placed audio file can improve engagement and make your content more helpful for different types of visitors. The key is to keep the setup clean, the playback simple, and the listening experience comfortable on every device. Once you follow the right method, adding audio in WordPress becomes a practical and valuable part of your website content strategy.
If you want expert help with WordPress audio setup, media issues, plugin support, or website fixes, WooHelpDesk is here to help. Our team can assist you with adding audio, fixing playback problems, improving media performance, and making sure your WordPress website works smoothly. Visit WooHelpDesk to get professional WordPress support when you need it.


