How to Set Up WPML in WordPress Easily for Beginners (Step-by-Step Guide)
Table of Contents
- Introduction
- What Is WPML in WordPress and Why Many Site Owners Use It
- What Are the Main Pros and Cons of Using WPML in WordPress?
- Is WPML Free or Do You Need a Paid Plan to Use It
- What You Need to Prepare Before You Start Setting Up WPML in Your WordPress
- How to Set Up WPML in WordPress with a Clear and Easy Guide
- Common WPML Setup Mistakes to Avoid When Setting Up WPML in WordPress
- Best Practices for WPML in WordPress That Help You Get Better Results
- Conclusion
Introduction
If you want to reach people in more than one language, WPML can help. It lets you turn one WordPress install into a multilingual WordPress website. That makes content easier to manage from one dashboard. This guide is for site owners, bloggers, and store managers. It is also useful for anyone learning how to create a multilingual website in WordPress without making the process feel confusing. In this WPML setup guide, you will first understand the plugin, then learn its strengths, limits, and pricing before moving into the full setup steps.
A multilingual site can help visitors read pages in their preferred language. That often improves trust, usability, and content reach. WPML is built for this exact job. WPML says its plugin helps users build and run multilingual WordPress sites, and its setup flow includes choosing a default language, adding more languages, and placing a language switcher where visitors can use it easily.
What Is WPML in WordPress and Why Many Site Owners Use It
WPML stands for WordPress Multilingual Plugin. It is a premium plugin made to translate and manage content in multiple languages. You can use it for pages, posts, menus, and other important site text. WPML also supports translation methods for different needs, so beginners and larger businesses can both use it. If your goal is to translate WordPress site WPML gives you a structured way to manage that work inside WordPress. Many site owners choose WPML because it keeps multilingual work inside one website. You do not need separate WordPress installs for every language.
WPML also supports many languages and custom language options. Its official material says you can build a multilingual site on one install and work with many language pairs. That makes the WPML WordPress plugin a strong option for blogs, business sites, and growing WooCommerce stores.
What Are the Main Pros and Cons of Using WPML in WordPress?
Pros of Using WPML in WordPress
- Manage many languages from one dashboard: WPML helps you control all languages in one place. You do not need separate websites for each language.
- Supports important WordPress content types: You can translate pages, posts, menus, categories, tags, and more. This makes site management easier.
- Good option for a multilingual WordPress website: It helps you build a clean language structure. That is useful when learning how to create a multilingual website in WordPress.
- Offers manual and automatic translation options: You can translate content yourself or use translation tools. This gives more flexibility during WPML configuration step by step.
- Works well for blogs, business sites, and stores: WPML is useful for many website types. It can support content-heavy and service-based websites well.
- Helps keep your language switcher and translation flow organized: This makes it easier for visitors to move between languages. It also improves the user experience.
Cons of Using WPML in WordPress
- WPML is not free: You need a paid plan to use it. That can be a drawback for small websites.
- The first setup can feel lengthy for beginners: The WPML WordPress plugin setup includes many settings. New users may need extra time to understand them.
- You need to plan your languages carefully: Wrong settings at the start can create confusion later. That is why the WPML setup guide should be followed properly.
- Some websites may need extra setup work: Certain themes or plugins may need additional checks. This can add more work during setup.
- Translated content still needs manual review: Automatic translation can save time, but it may not always sound perfect. You still need to review the final content.
- Testing is important after setup: You must check menus, pages, links, and language switchers. This is necessary when you translate WordPress site WPML style.
Is WPML Free or Do You Need a Paid Plan to Use It
WPML is not free. The plugin is sold as a paid product, and WPML’s pricing page lists paid account plans with support and updates included for one year. WPML also says it does not offer a free trial or demo version.
So, if you are searching for how to set up WPML in WordPress, you should know from the start that this is a premium tool, not a free plugin from the WordPress plugin library. That said, WPML does offer a 30-day money-back guarantee. This gives users a safer way to test whether the plugin fits their site. WPML also offers automatic translation that starts free for many sites, but that does not change the fact that the core WPML plugin itself is paid.
So the simple answer is clear: WPML is a premium solution for building a multilingual WordPress website, and you should budget for it before starting the full setup process.
What You Need to Prepare Before You Start Setting Up WPML in Your WordPress
Make Sure Your WordPress Website Is Working Properly Before Setup
Before you start, your website should already be running well. Check that the pages open correctly and the dashboard works fine. Do not begin the WPML WordPress plugin setup on a broken site. Existing errors can create more problems during translation setup. A stable website gives you a better base for the full process.
Keep Full Admin Access Ready for Smooth WPML Configuration Step by Step
You need full admin access before starting this work. WPML settings, plugin installation, and language options all need admin control. Without proper access, you may get stuck during setup. This is one of the first things to check when learning How to Set Up WPML in WordPress the right way.
Buy WPML and Keep the Plugin Files Ready Before You Begin
WPML is a paid plugin, so you need an active account. You also need the plugin files ready for upload. This includes the main plugin and any needed add-ons. Without these files, the setup cannot begin. A proper WPML setup guide always starts with having the right tools ready.
Take a Full Website Backup Before Making Any Language Changes
A full backup is very important before starting WPML. Back up your files, database, themes, and plugins first. If something goes wrong, you can restore the site quickly. This step protects your content and design. It is a smart habit for any multilingual WordPress website project.
Decide Your Main and Secondary Languages Before the Setup Starts
You should know your site languages before opening WPML settings. Pick the main site language first. Then choose the extra languages you want to add. This keeps the structure clear from the start. It also helps if you are learning how to create a multilingual website in WordPress without confusion.
Check Theme and Plugin Compatibility Before You Translate WordPress Site WPML Style
Some themes and plugins need extra testing with WPML. If your site uses custom functions, review them first. This can prevent layout issues and translation gaps later. Compatibility checks save time during setup. They also help when you want to translate WordPress site WPML across many pages and features.
Choose the Most Important Pages You Want to Translate First
Do not try to translate the whole site at once. Start with pages like Home, About, Contact, and Services. These pages matter most for visitors. This approach keeps the work simple and organized. It also makes your WPML configuration step by step easier to manage.
Update WordPress Core Theme and Plugins Before Starting the Setup Process
Before installing WPML, update WordPress and active plugins first. Also update your theme to the latest stable version. Old files can cause setup problems or compatibility issues. Updated websites usually run more smoothly. This final check makes the full setup cleaner and easier.
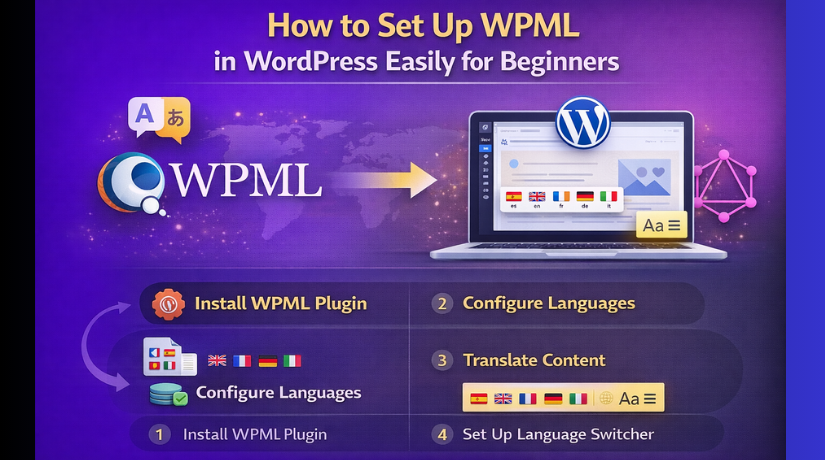
How to Set Up WPML in WordPress with a Clear and Easy Guide
This part explains the full setup process in a simple way. Follow each step in the same order. This method makes the WPML setup guide easier to understand. It also helps you build a clean multilingual WordPress website without confusion.
Step 1: Download and Install the WPML Plugin and Required Components First
- Log in to your WPML account first.
- Download the main WPML plugin file.
- Go to your WordPress dashboard.
- Open Plugins > Add New > Upload Plugin.
- Upload the WPML plugin zip file.
- Click Install Now.
- Activate the plugin after installation.
- Install the required WPML add-ons too.
- Keep all needed WPML tools ready from the start.
Step 2: Register WPML on Your Website with the Correct Site Key
- After activation, open the WPML settings area.
- Go to the registration section.
- Log in to your WPML account again.
- Generate a site key for your website.
- Copy that site key carefully.
- Paste it into your WordPress registration box.
- Complete the registration process.
- This step helps you get updates and support.
Step 3: Choose the Current Language of Your Existing WordPress Website Carefully
- Start the WPML setup wizard.
- Look for the default language option.
- Select the current language of your website.
- Choose this very carefully from the start.
- WPML will treat old content in this language.
- A wrong choice can create issues later.
- Check your selection before moving ahead.
Step 4: Add the Extra Languages You Want Your Site to Support
- After choosing the default language, add more languages.
- Select only the languages your visitors need.
- Do not add too many languages without planning.
- Keep the setup simple at the beginning.
- You can expand later if needed.
- This makes the process easier to manage.
Step 5: Select a Language URL Structure That Fits Your Website Properly
- Next, choose how language URLs will appear.
- Pick one clean format for all language pages.
- Keep the structure simple and easy to follow.
- Make sure it matches your site style.
- Do not change this again without planning.
- A clean URL setup keeps your site organized.
Step 6: Add a Language Switcher Where Visitors Can Find It Easily
- Now add the language switcher to your website.
- Place it where visitors can notice it easily.
- Good places include the menu, header, or footer.
- Do not hide it in a hard area.
- Keep the switcher simple and clear.
- This helps visitors change languages quickly.
Step 7: Choose Whether You Want Manual Translation or Automatic Translation
- Now decide how you want to translate content.
- You can choose manual translation.
- You can also choose automatic translation.
- Manual translation gives more control over wording.
- Automatic translation saves time on large websites.
- Pick the option that fits your needs best.
- Review important content even after auto translation.
Step 8: Translate Your Important WordPress Content in a Planned Order
- Start with your most important pages first.
- Translate the homepage before other pages.
- Then work on About and Contact pages.
- Translate service pages and key blog posts next.
- After that, translate menus and categories.
- Also check buttons and small text areas.
- This order keeps the work simple and organized.
Step 9: Review Each Translation Before You Publish It for Visitors


- Open every translated page one by one.
- Read the heading and body text carefully.
- Check menus, buttons, and links too.
- Make sure the page still looks correct.
- Review form text and important calls to action.
- Fix anything that sounds wrong or looks broken.
- Never publish without a final check.
Step 10: Test the Full Multilingual Website on the Front End After Setup
- Visit your website like a normal user.
- Switch between languages on the front end.
- Check if the switcher works correctly.
- Open important pages in each language.
- Test menus, forms, and buttons carefully.
- Check mobile and desktop views too.
- Fix missing content or broken layout areas.
- Do one final test before calling setup complete.
Common WPML Setup Mistakes to Avoid When Setting Up WPML in WordPress
Choosing the Wrong Default Language at the Beginning of the Setup
This is one of the biggest setup mistakes. WPML treats your existing content as the main language content. If you choose the wrong default language, your whole structure can become confusing. Fixing it later can take extra time and effort. When following How to Set Up WPML in WordPress, always check the default language carefully before moving ahead.
Skipping WPML Registration After Installing the Plugin
Some users install the plugin and stop there. That is not enough for a complete WPML WordPress plugin setup. Registration helps you receive updates, support, and important plugin features. If you skip this step, your setup may stay incomplete. A proper WPML setup guide always includes registration as an important early step.
Adding Too Many Languages Without a Clear Content Plan
It may look good to offer many languages at once. But this can create extra work very quickly. Every new language adds more pages, menus, and review tasks. Start with the languages that truly matter for your audience. This makes your multilingual WordPress website easier to manage and grow.
Forgetting to Translate Menus Categories and Small Site Text
Many users only translate pages and posts first. Then they forget menus, categories, buttons, or widget text. This creates a broken visitor experience on the live site. A good setup should feel complete in every language. When you translate WordPress site WPML style, always check both large and small content areas.
Publishing Translated Pages Without Reviewing Them Properly
Automatic translation can save time, but it still needs checking. Some sentences may sound odd or unclear. Some buttons or short labels may also need manual changes. Always open translated pages before publishing them. Good review is a major part of WPML configuration step by step.
Ignoring Theme and Plugin Compatibility Before Going Live
Your website may use custom themes or extra plugins. Some of them may need testing with WPML first. If you ignore compatibility, layout or translation issues may appear later. It is always better to test early. This is very important when learning how to create a multilingual website in WordPress in a stable way.
Not Testing the Full Website After the Setup Is Complete
Some users finish setup and never test the front end. That can lead to missing text, broken links, or wrong switcher behavior. Always test the site like a real visitor. Open pages in each language and check menus, forms, and buttons. Final testing helps you complete the setup with confidence.
Best Practices for WPML in WordPress That Help You Get Better Results
Start with Your Most Important Pages Before Translating Everything Else
Do not try to translate the full website in one go. Start with pages that matter most to visitors. Good examples are Home, About, Contact, Services, and top landing pages. This keeps your work focused and easier to manage. It also makes your WPML setup guide more practical and less stressful.
Keep the Same Structure and Navigation in Every Language Version
Visitors should get a similar experience in every language. Keep your menus, page order, and important links consistent. This makes the site easier to use and easier to trust. A clear structure is very important for a strong multilingual WordPress website. It also helps reduce confusion during future updates.
Use a Clear and Easy-to-Find Language Switcher on the Website
The language switcher should be simple and visible. Good places include the header, menu, or footer. Visitors should not struggle to find it. A hidden switcher can hurt the user experience. A clear switcher supports a better WPML WordPress plugin setup from the visitor side too.
Review Automatic Translations Before Publishing Important Business Pages
Automatic translation is helpful, but it should not be trusted blindly. Sales pages, service pages, and contact pages need extra attention. These pages affect trust and conversions. Read them carefully before making them live. This is one of the smartest steps in WPML configuration step by step.
Keep Your WordPress Theme Plugins and WPML Updated Regularly
An outdated website can create setup and translation issues. Updates improve stability, security, and compatibility. They also reduce the chance of strange language problems later. Always update carefully and after backup. This is a simple but strong best practice for anyone learning How to Set Up WPML in WordPress.
Back Up the Website Before Major Translation or Language Changes
A backup gives you safety before big changes. If something breaks, you can restore the website quickly. This is useful when adding languages, changing structure, or editing translated content. Backups protect your time and your website data. Every serious WPML setup guide should include this step.
Test the Website on Mobile and Desktop After Every Major Update
A page may look fine on desktop but break on mobile. That is why testing on both screen types matters. Check translated menus, buttons, forms, and page spacing. This helps you keep the site clean across devices. It also supports a better experience when you translate WordPress site WPML across many pages.
Conclusion
Setting up WPML may look difficult at first, but the process is manageable when you follow each step in the right order. You need to start with the basics, prepare your website, choose the correct default language, add the right secondary languages, and review every setting carefully. That simple approach helps you avoid confusion later. A good WPML setup is not only about installing a plugin. It is about building a clean and usable multilingual WordPress website that works well for real visitors.
When you plan the setup properly, translating pages, posts, menus, and important site text becomes much easier. You also get better control over language switching, page structure, and user experience. The key is to move step by step, test everything after setup, and fix small issues before they grow into bigger problems. This is the smartest way to handle How to Set Up WPML in WordPress without stress.
If you do not have time to manage the full WPML WordPress plugin setup yourself, expert help can save a lot of effort. WooHelpDesk can help you with WPML installation, language setup, translation issues, switcher placement, plugin compatibility checks, and multilingual website fixes. Their team understands WordPress deeply and can help you build or repair a multilingual site the right way. If you want a faster, cleaner, and more reliable WPML setup, visit WooHelpDesk and get professional support for your WordPress website today.


