How to Move a WordPress Site from Localhost to Hostinger WordPress Hosting
5 mins read

How to Move a WordPress Site from Localhost to Hostinger WordPress Hosting

Introduction

Migrating a WordPress website from a localhost environment to Hostinger WordPress Hosting is an essential step to make your website accessible online. Instead of using complex manual file and database transfers, this guide follows a simple and reliable plugin-based migration method.

In this article, you will learn how to export your localhost website using the All-in-One WP Migration plugin, create a new WordPress installation on Hostinger, and import your website data into the new hosting environment. This approach ensures that all pages, media files, plugins, themes, and settings are transferred safely without technical complications.


1. NOTE

NOTE

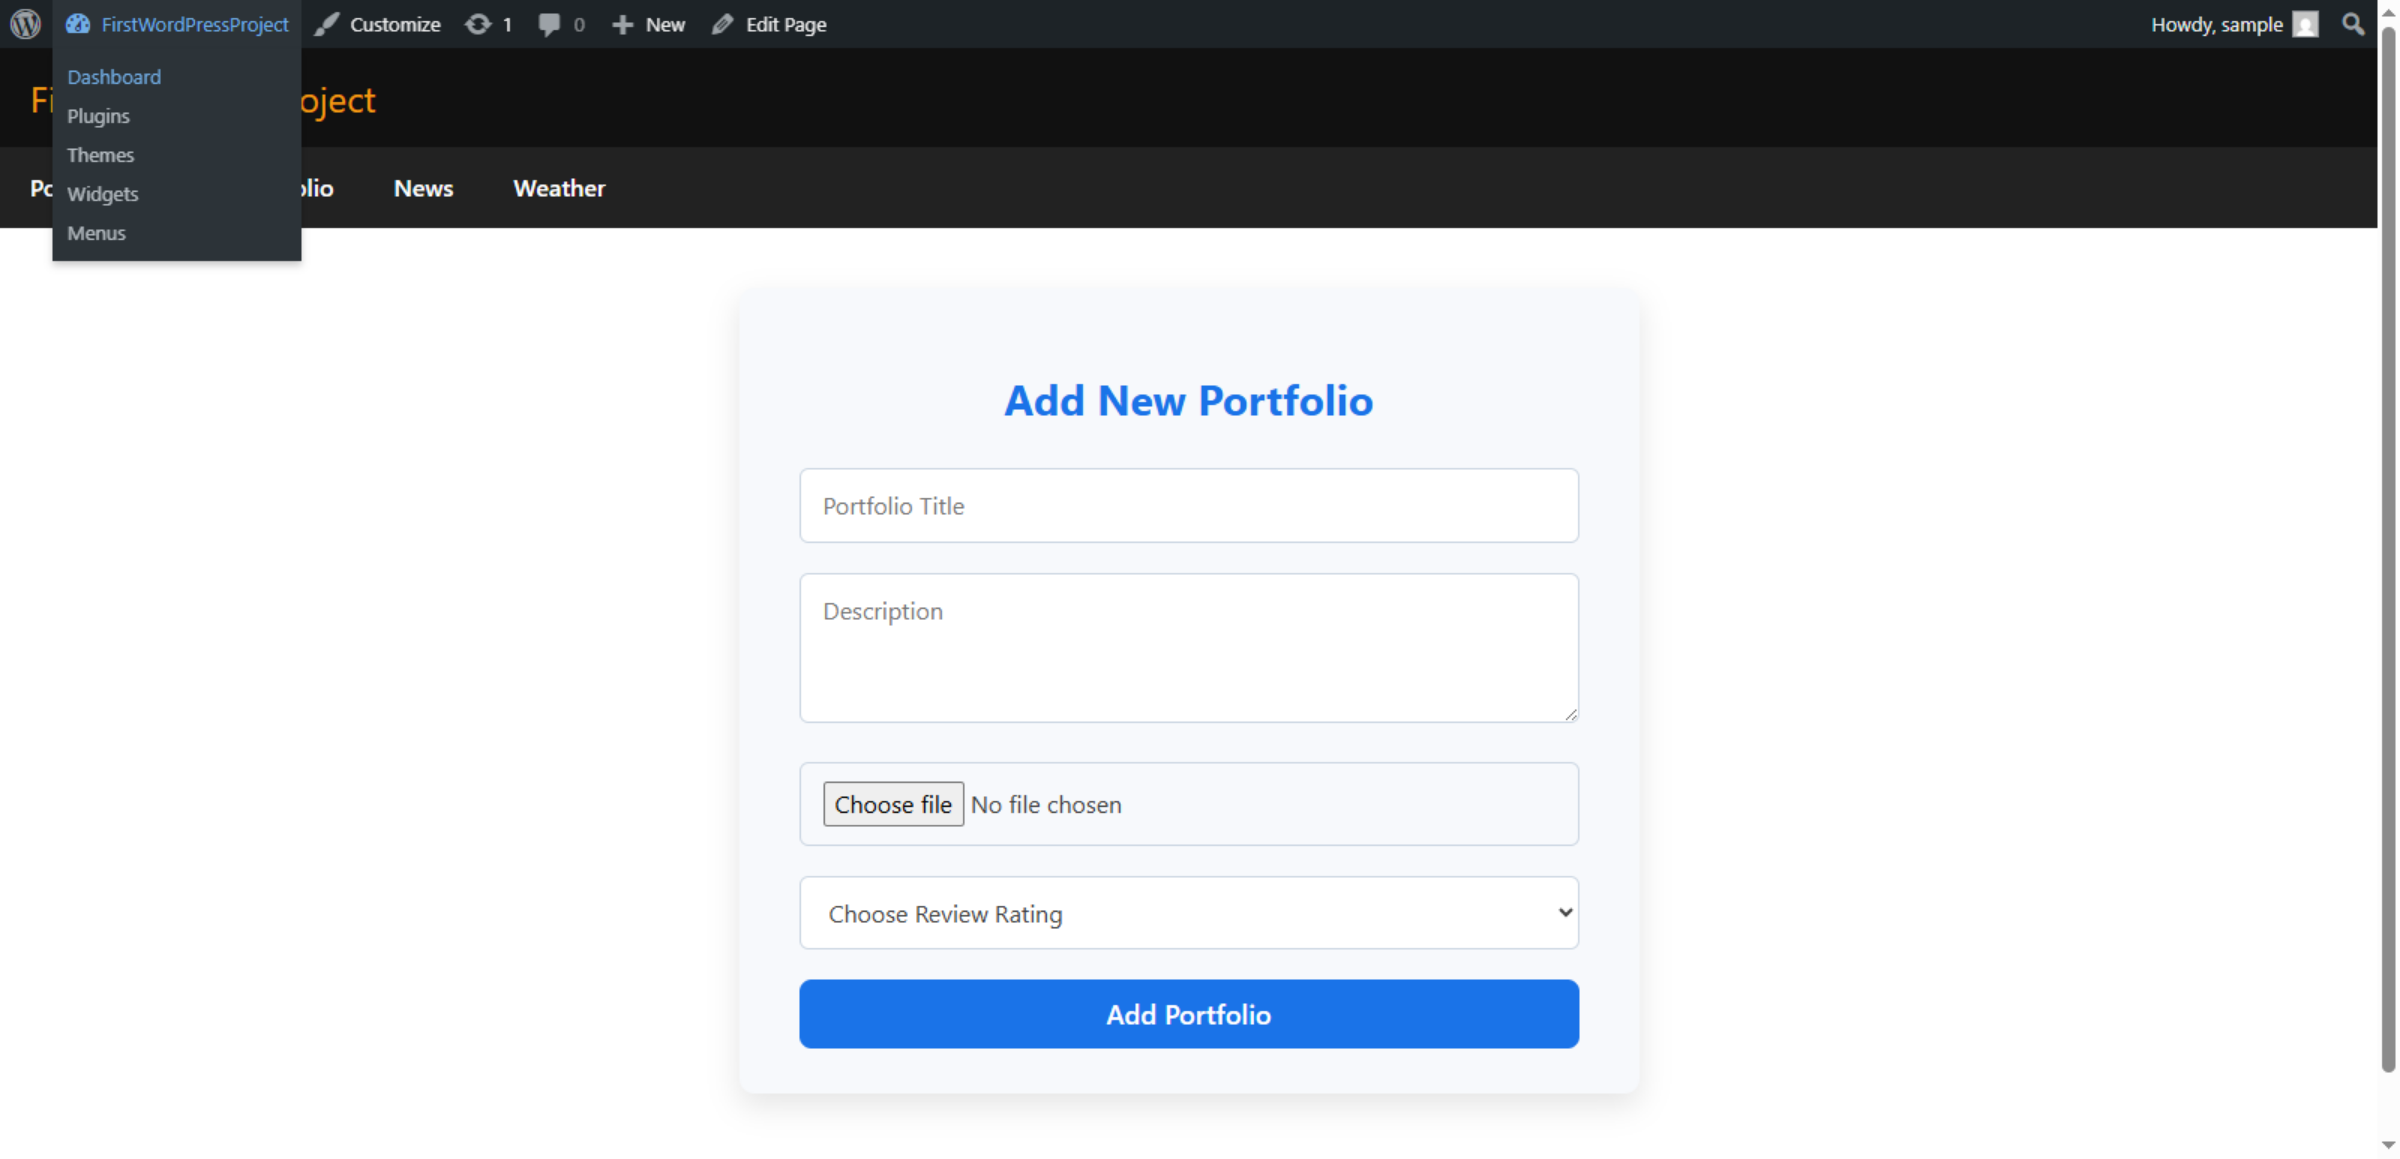
2. Localhost Website

This screen shows the WordPress website running on a local system. It will be manually moved to Hostinger hosting to make the site live online.

Localhost Website

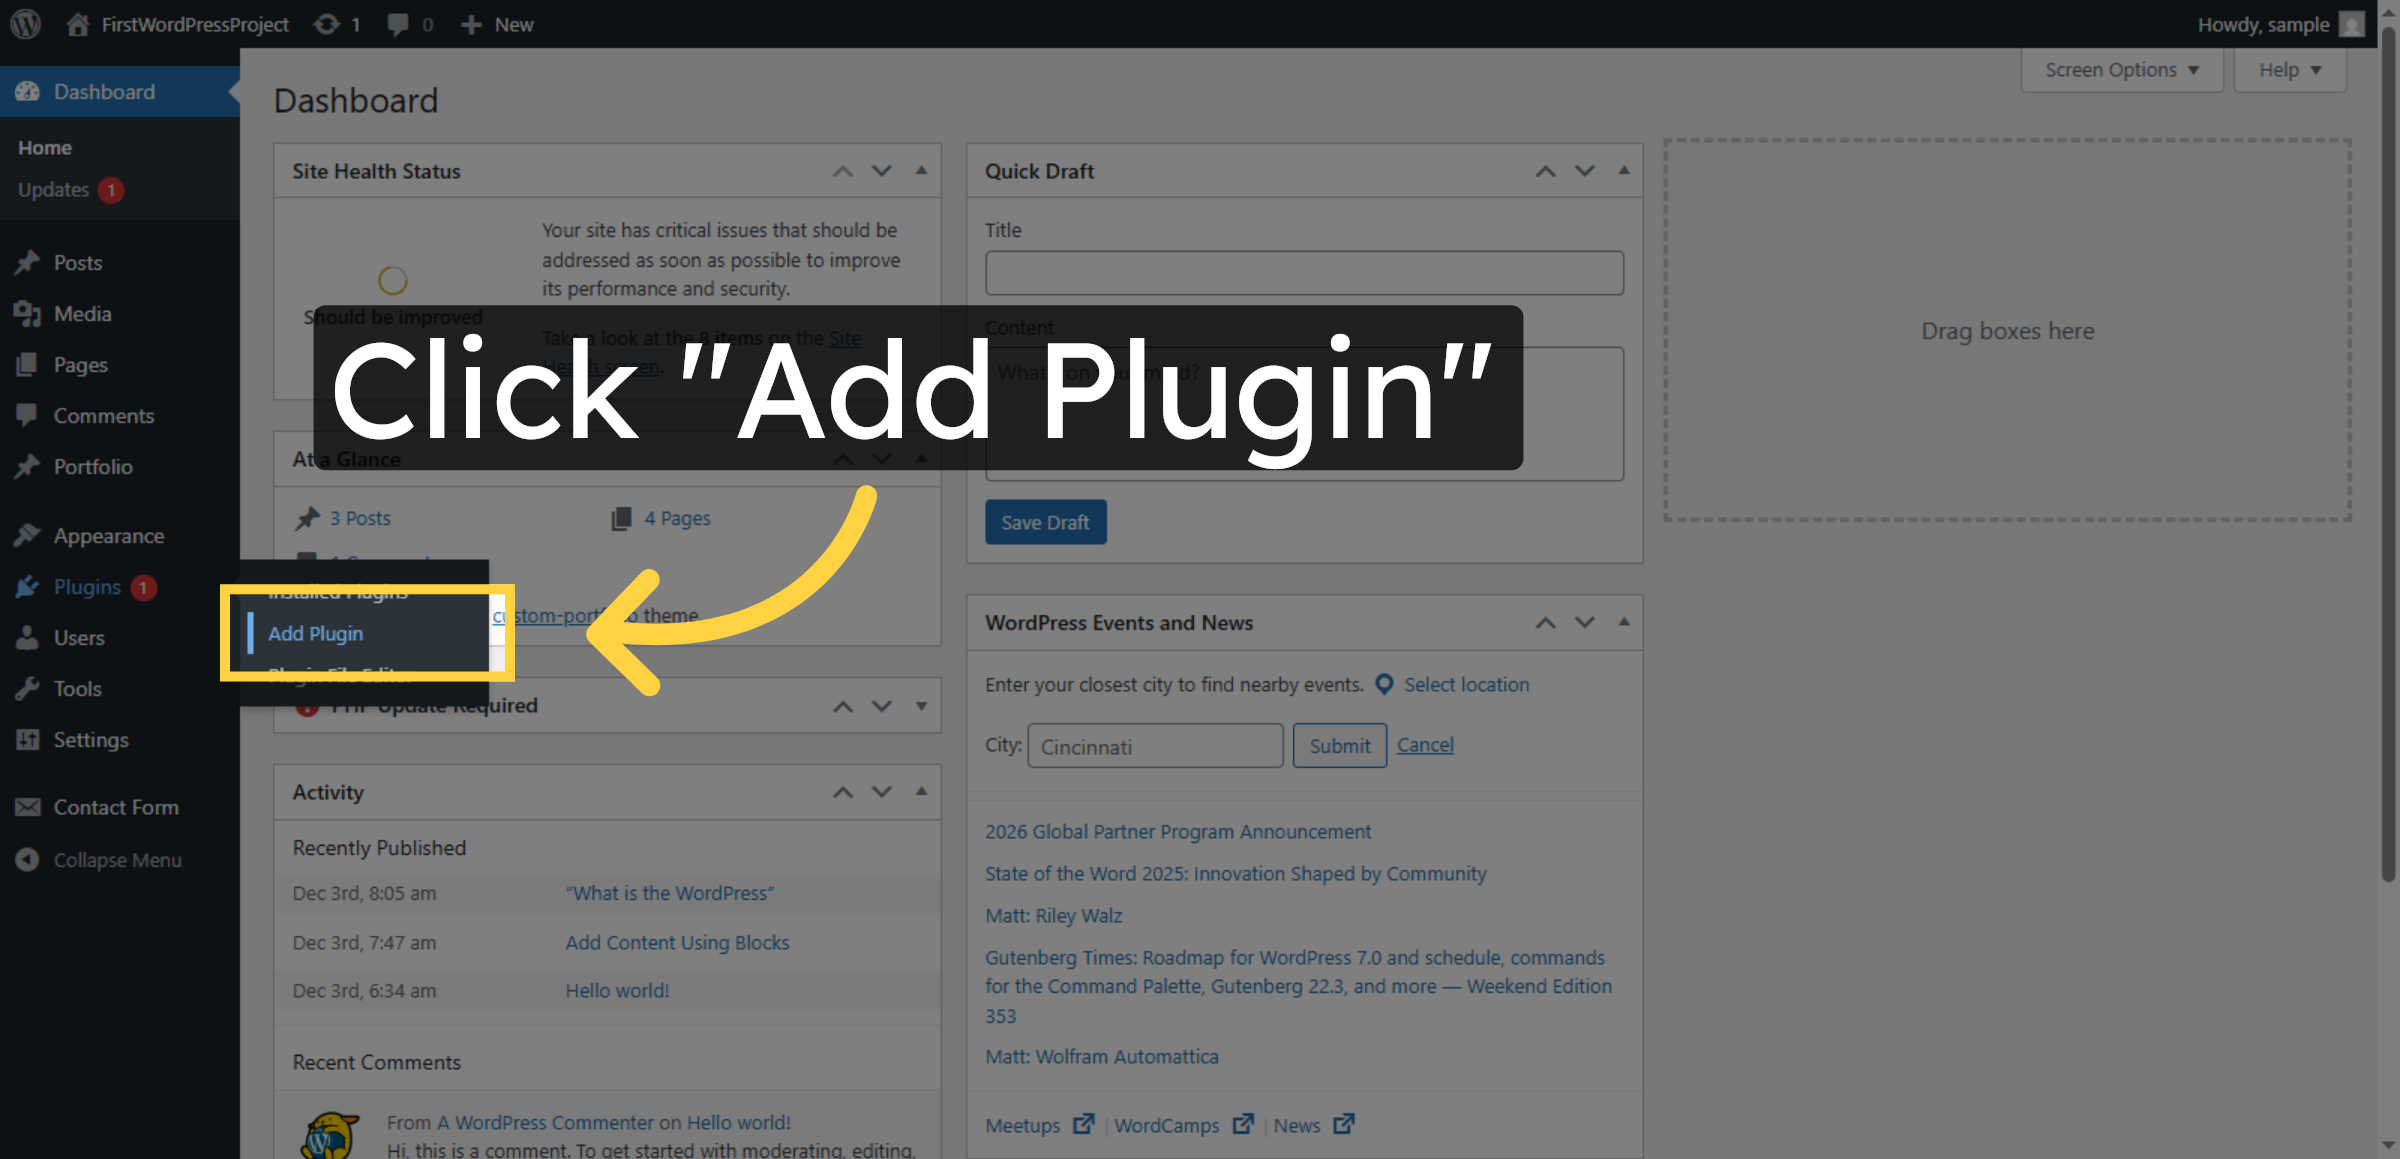
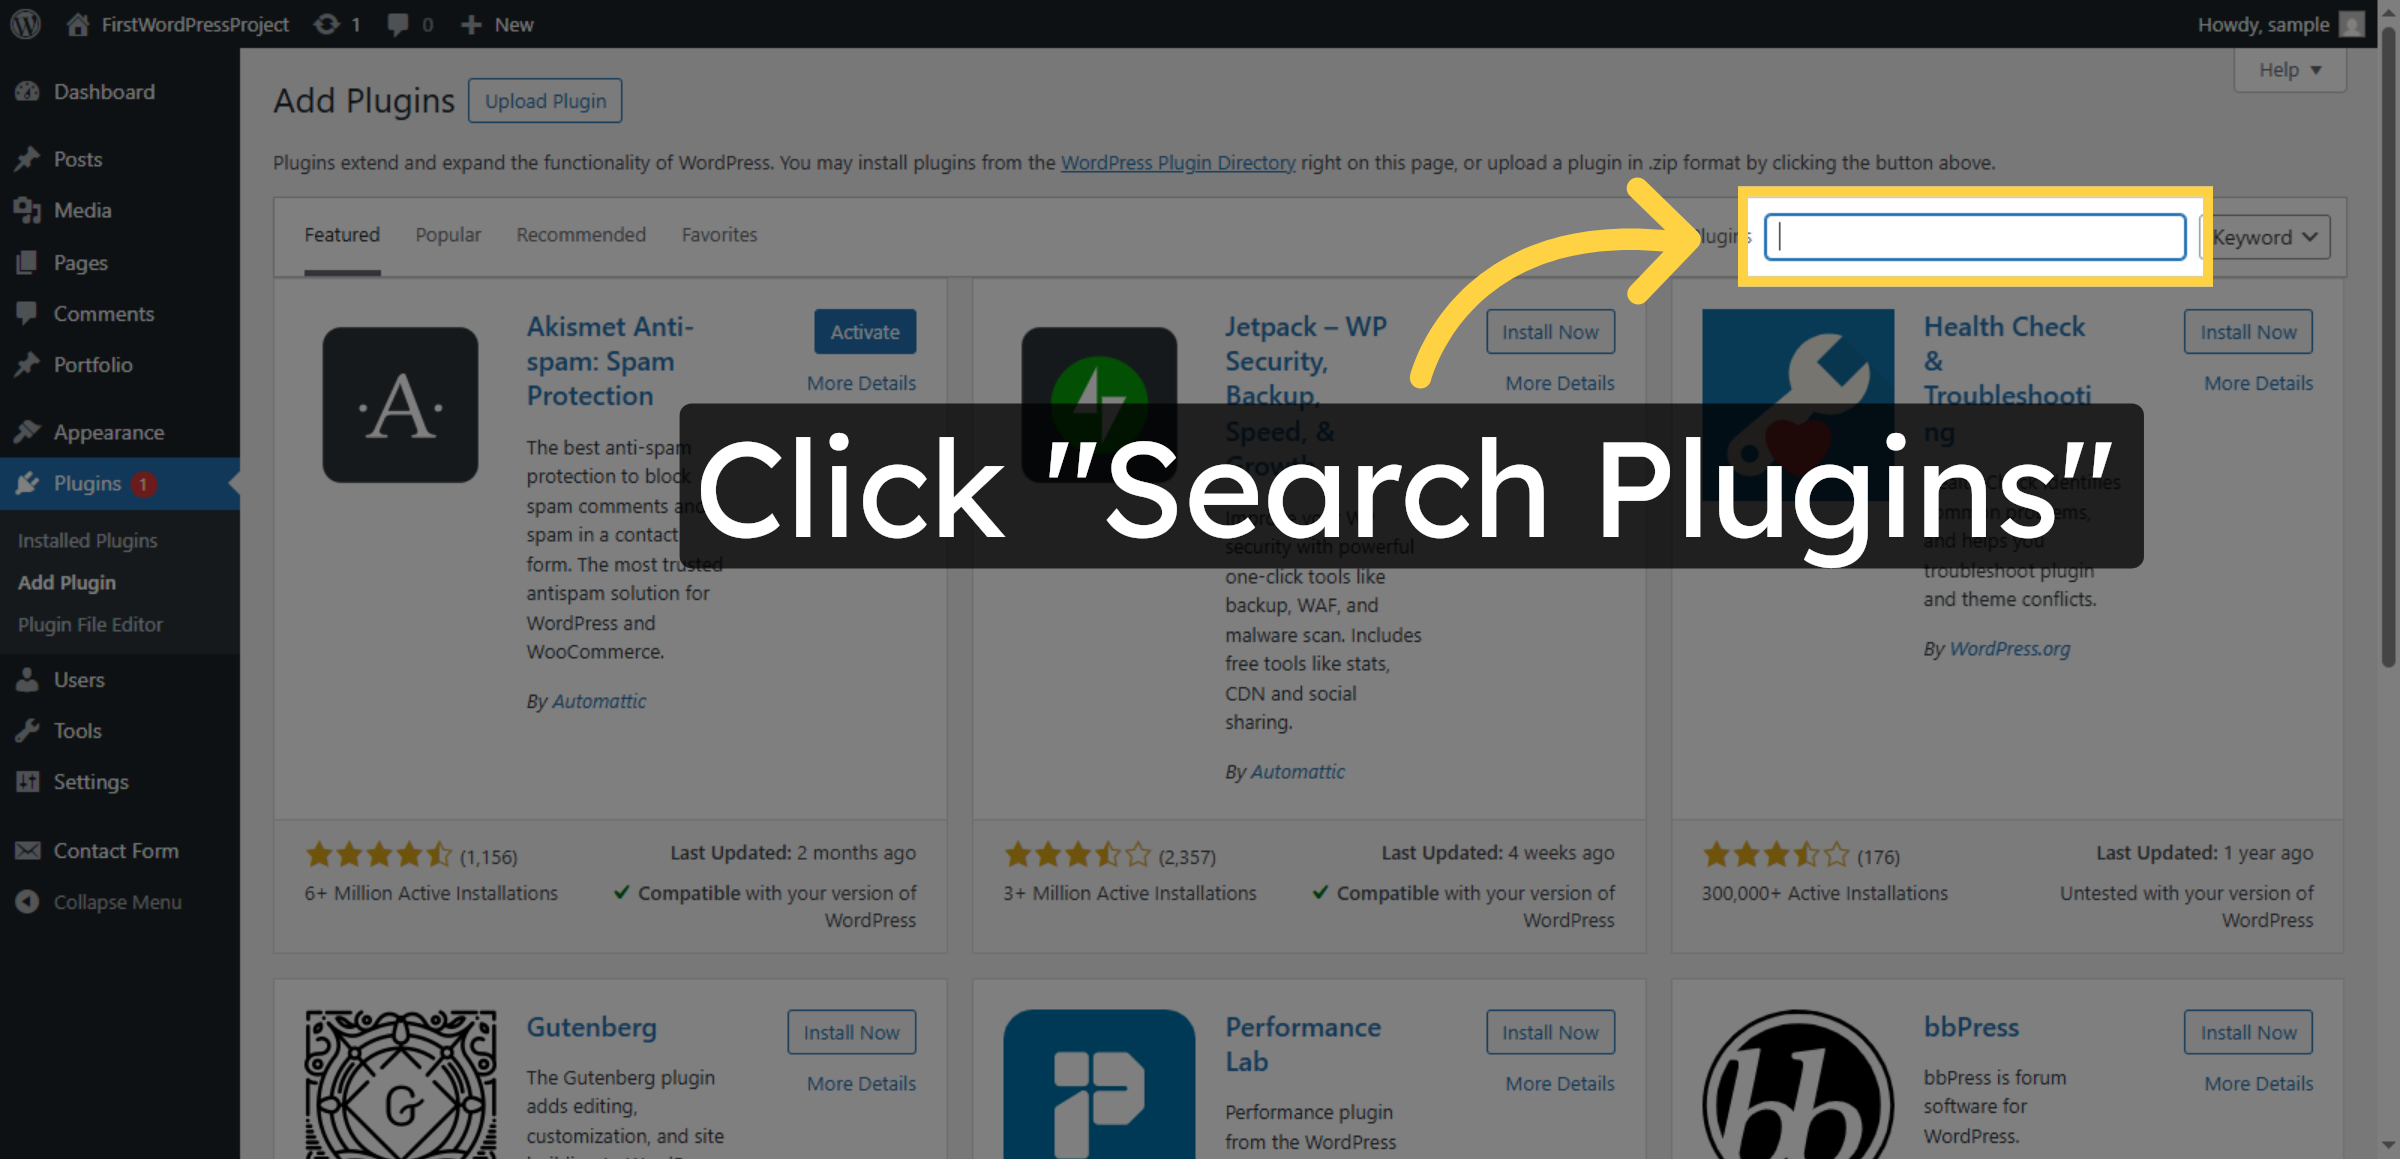
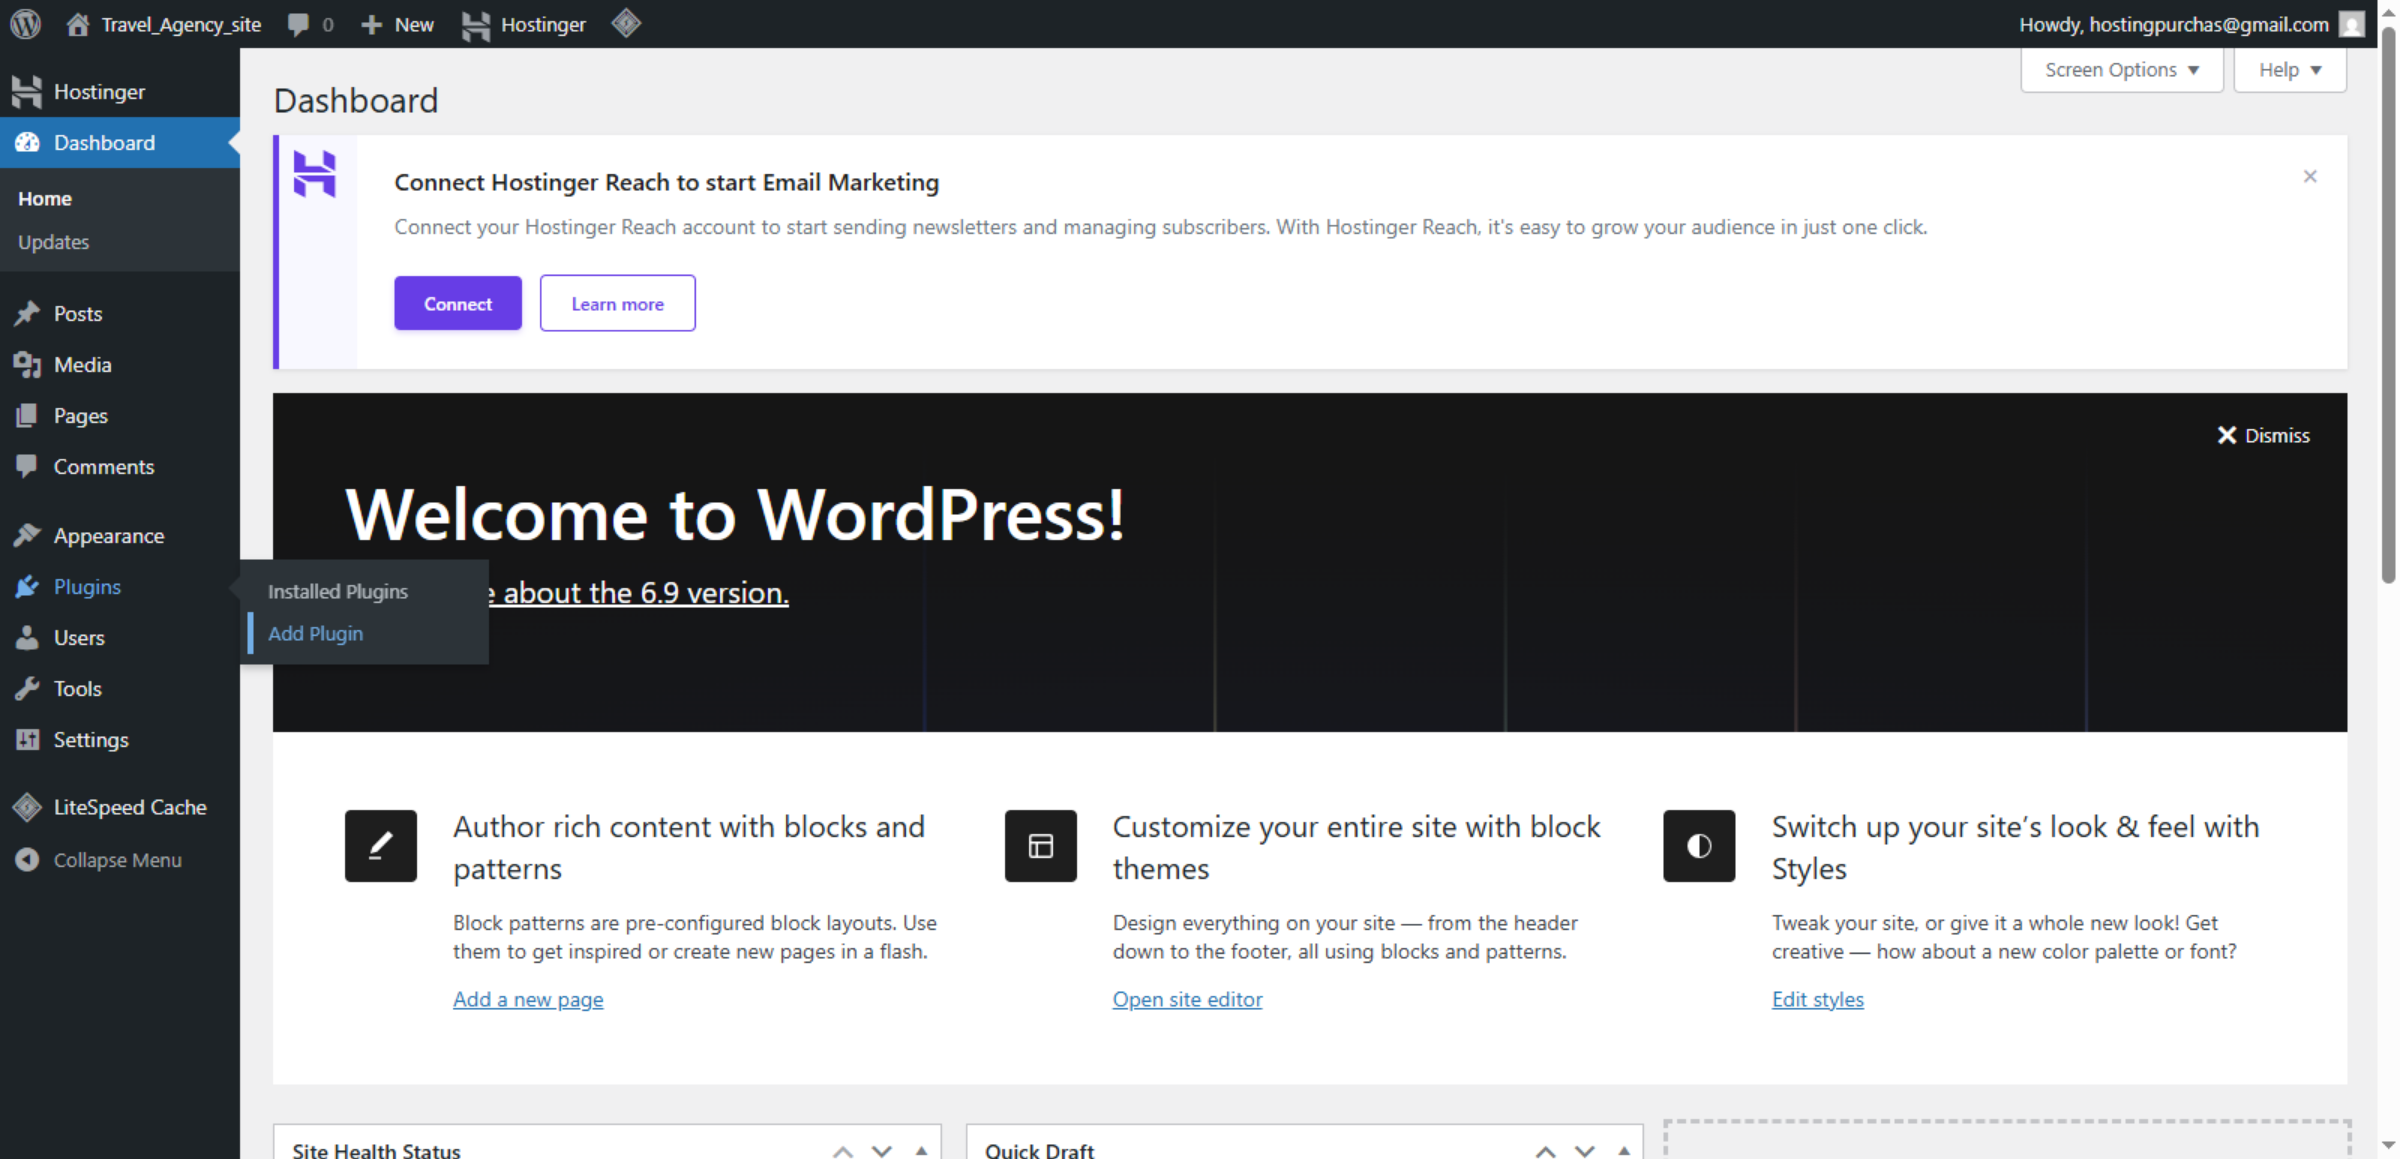
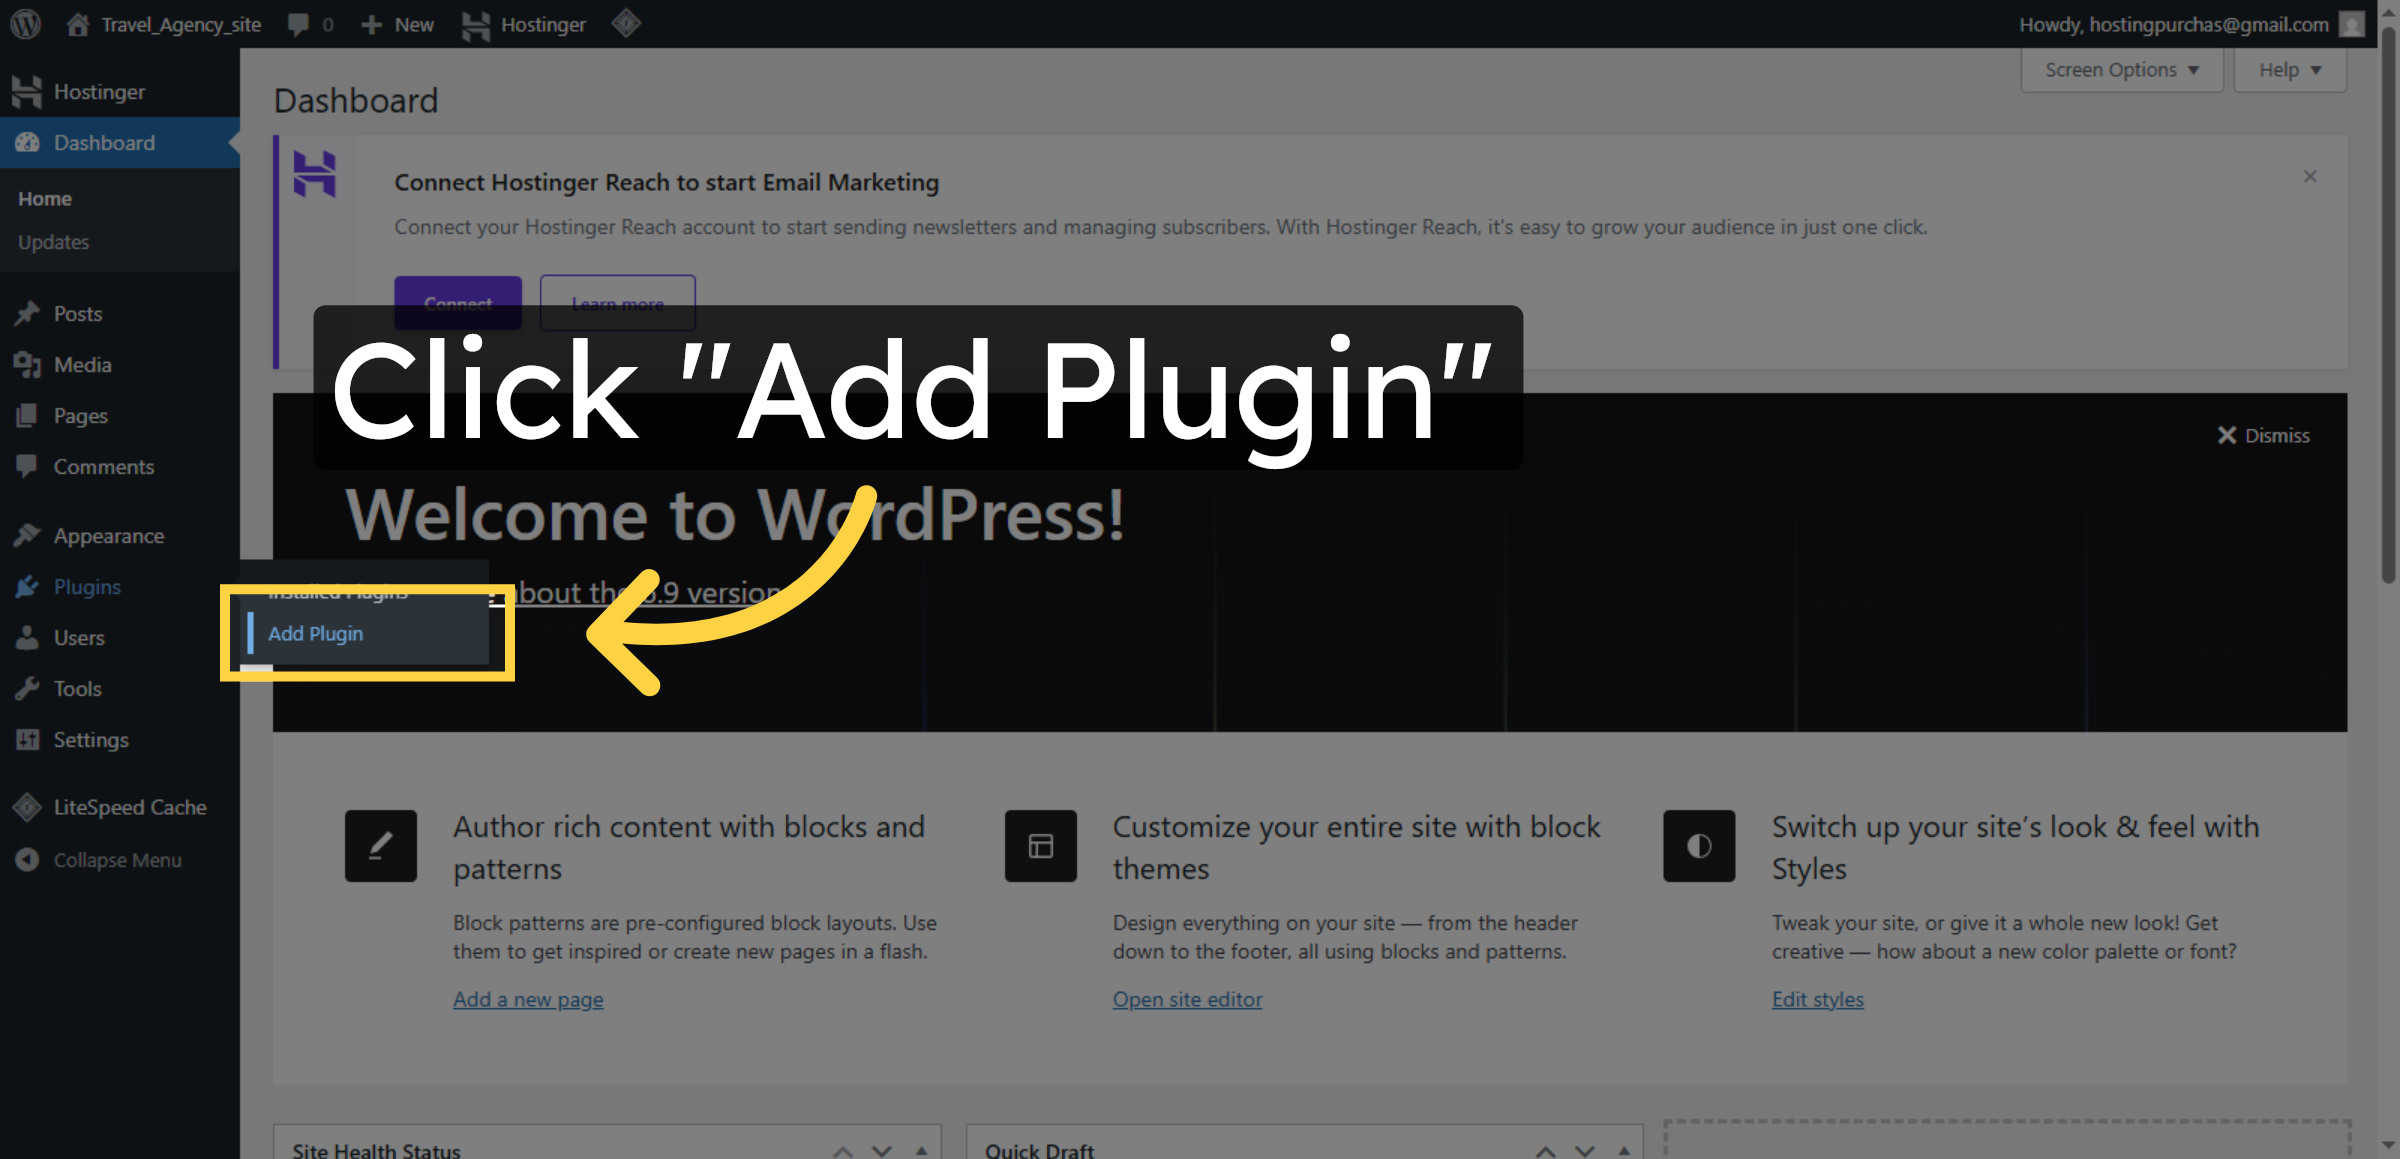
3. Open Add Plugin Page

This screen shows the WordPress admin dashboard where you can install new plugins. By clicking Plugins → Add New, you can search, install, and activate plugins to add new features and functionality to the website.

Open Add Plugin Page

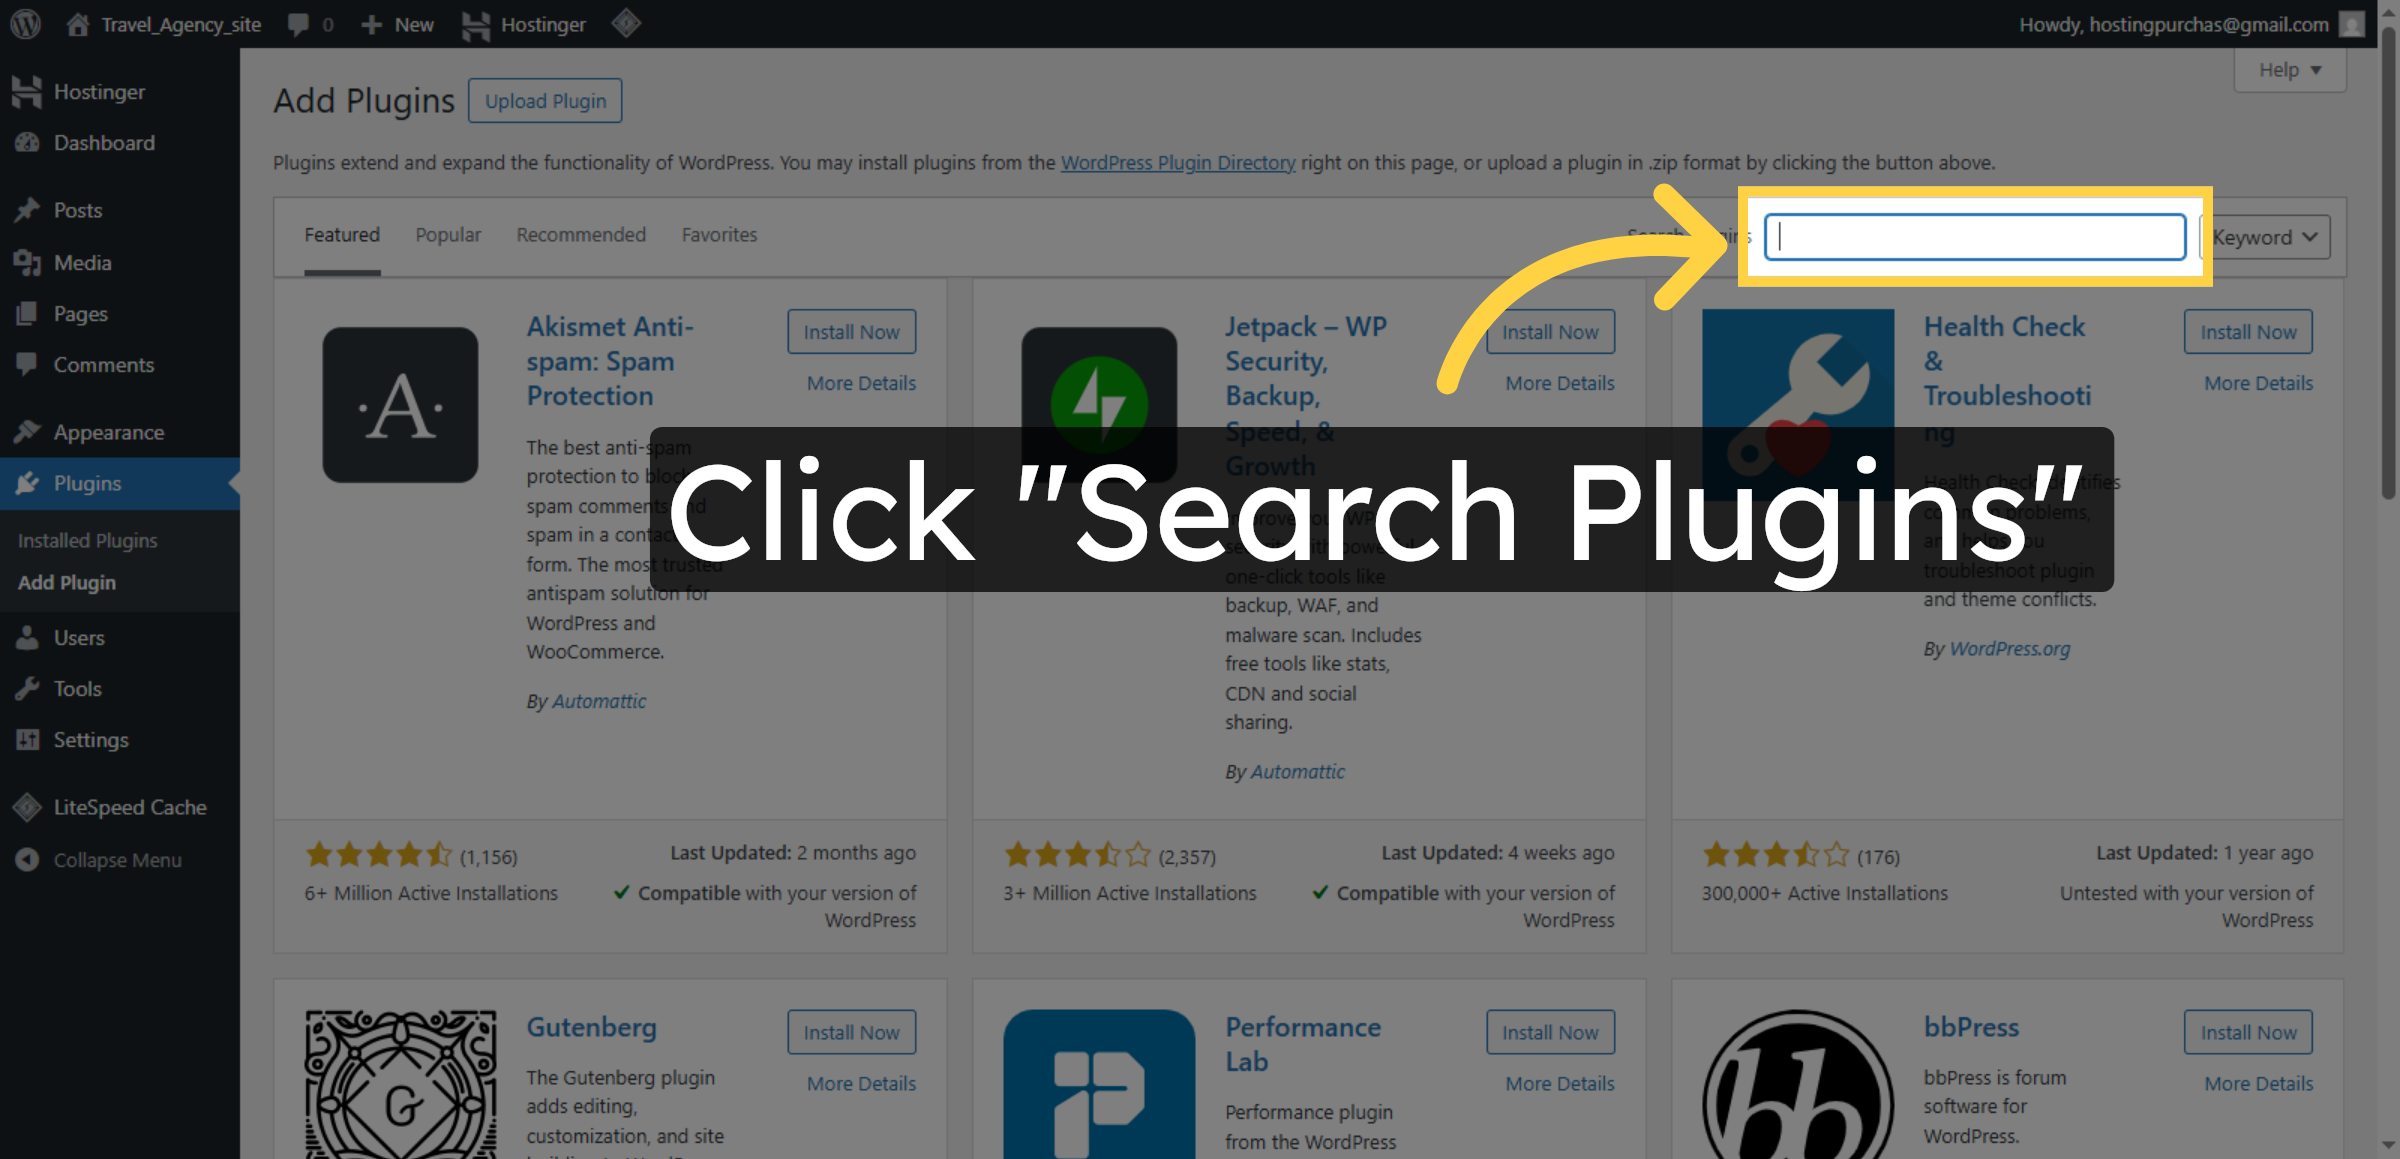
4. Access Plugin Search

Click Search Plugins to find the migration plugin needed for export.

Access Plugin Search

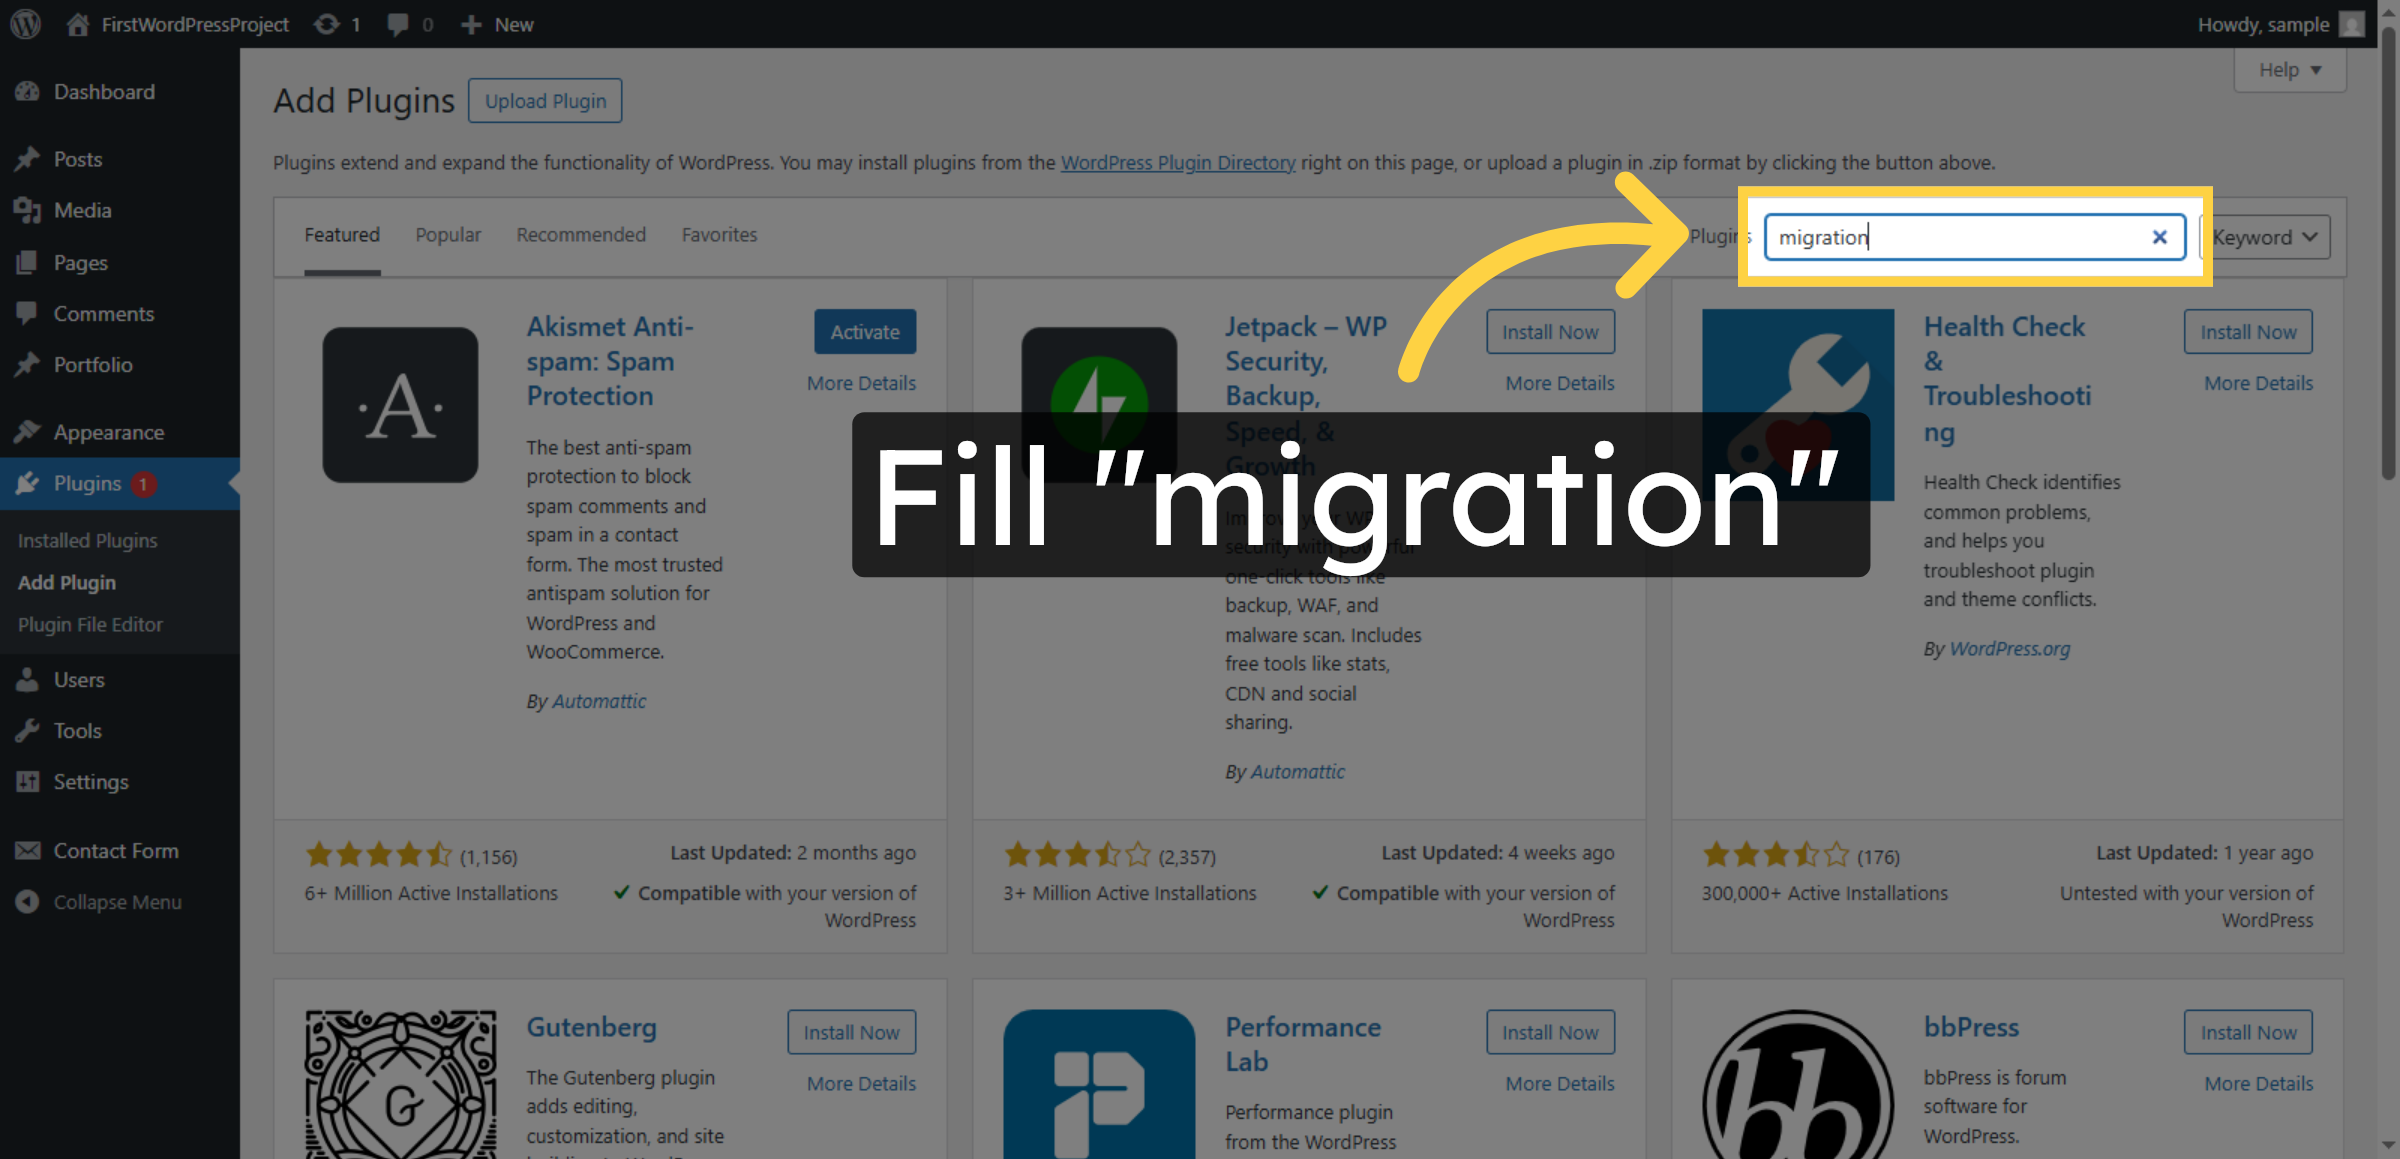
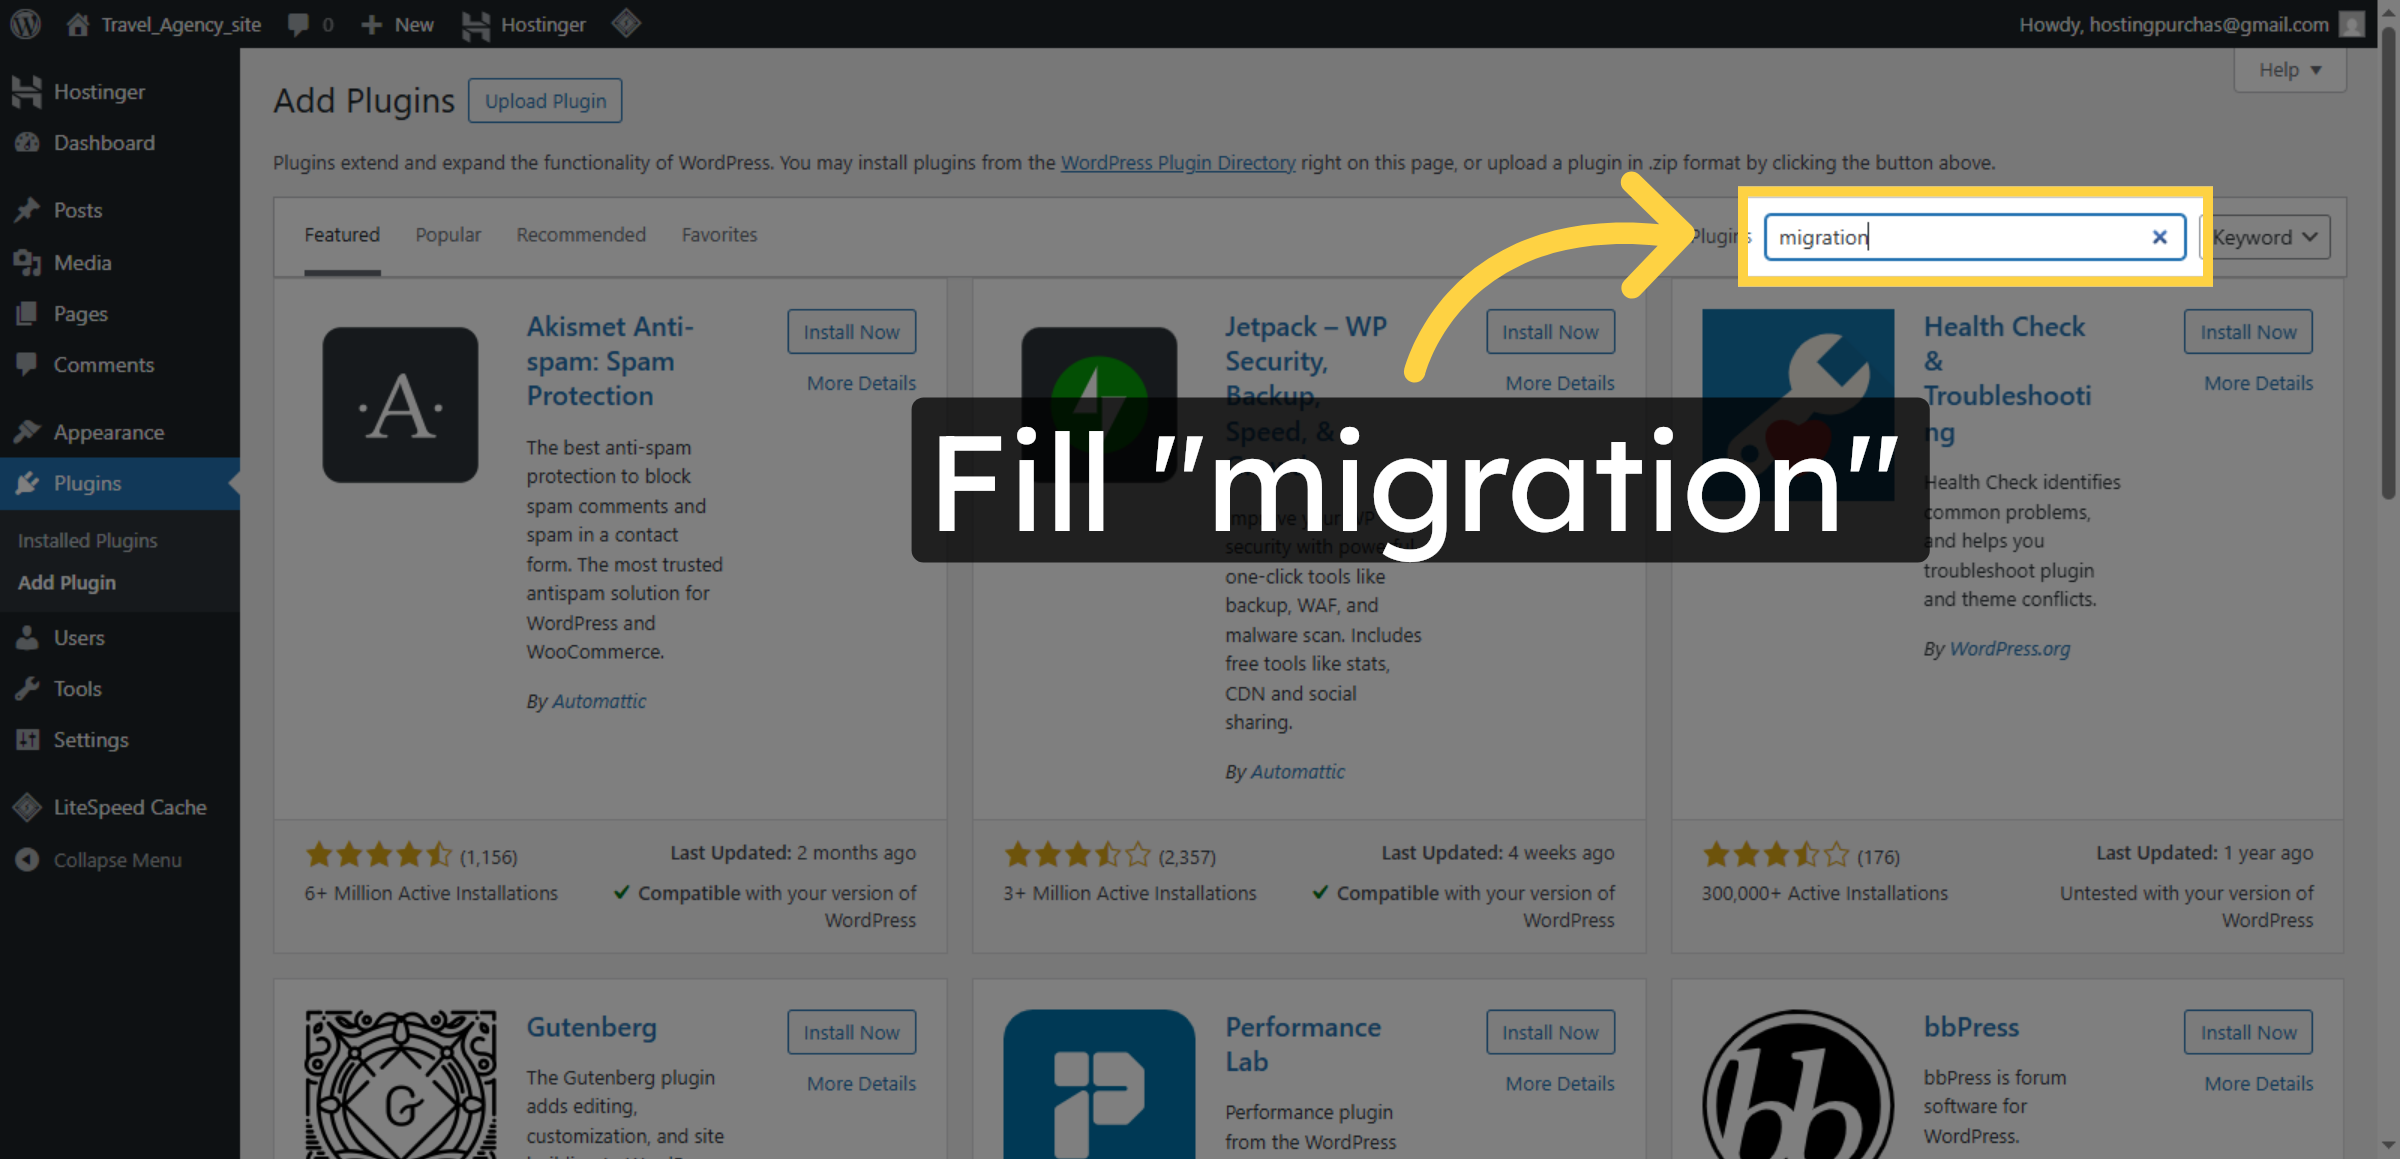
5. Enter Migration Keyword

Enter the keyword migration in the search field to locate the All-in-One WP Migration plugin.

Enter Migration Keyword

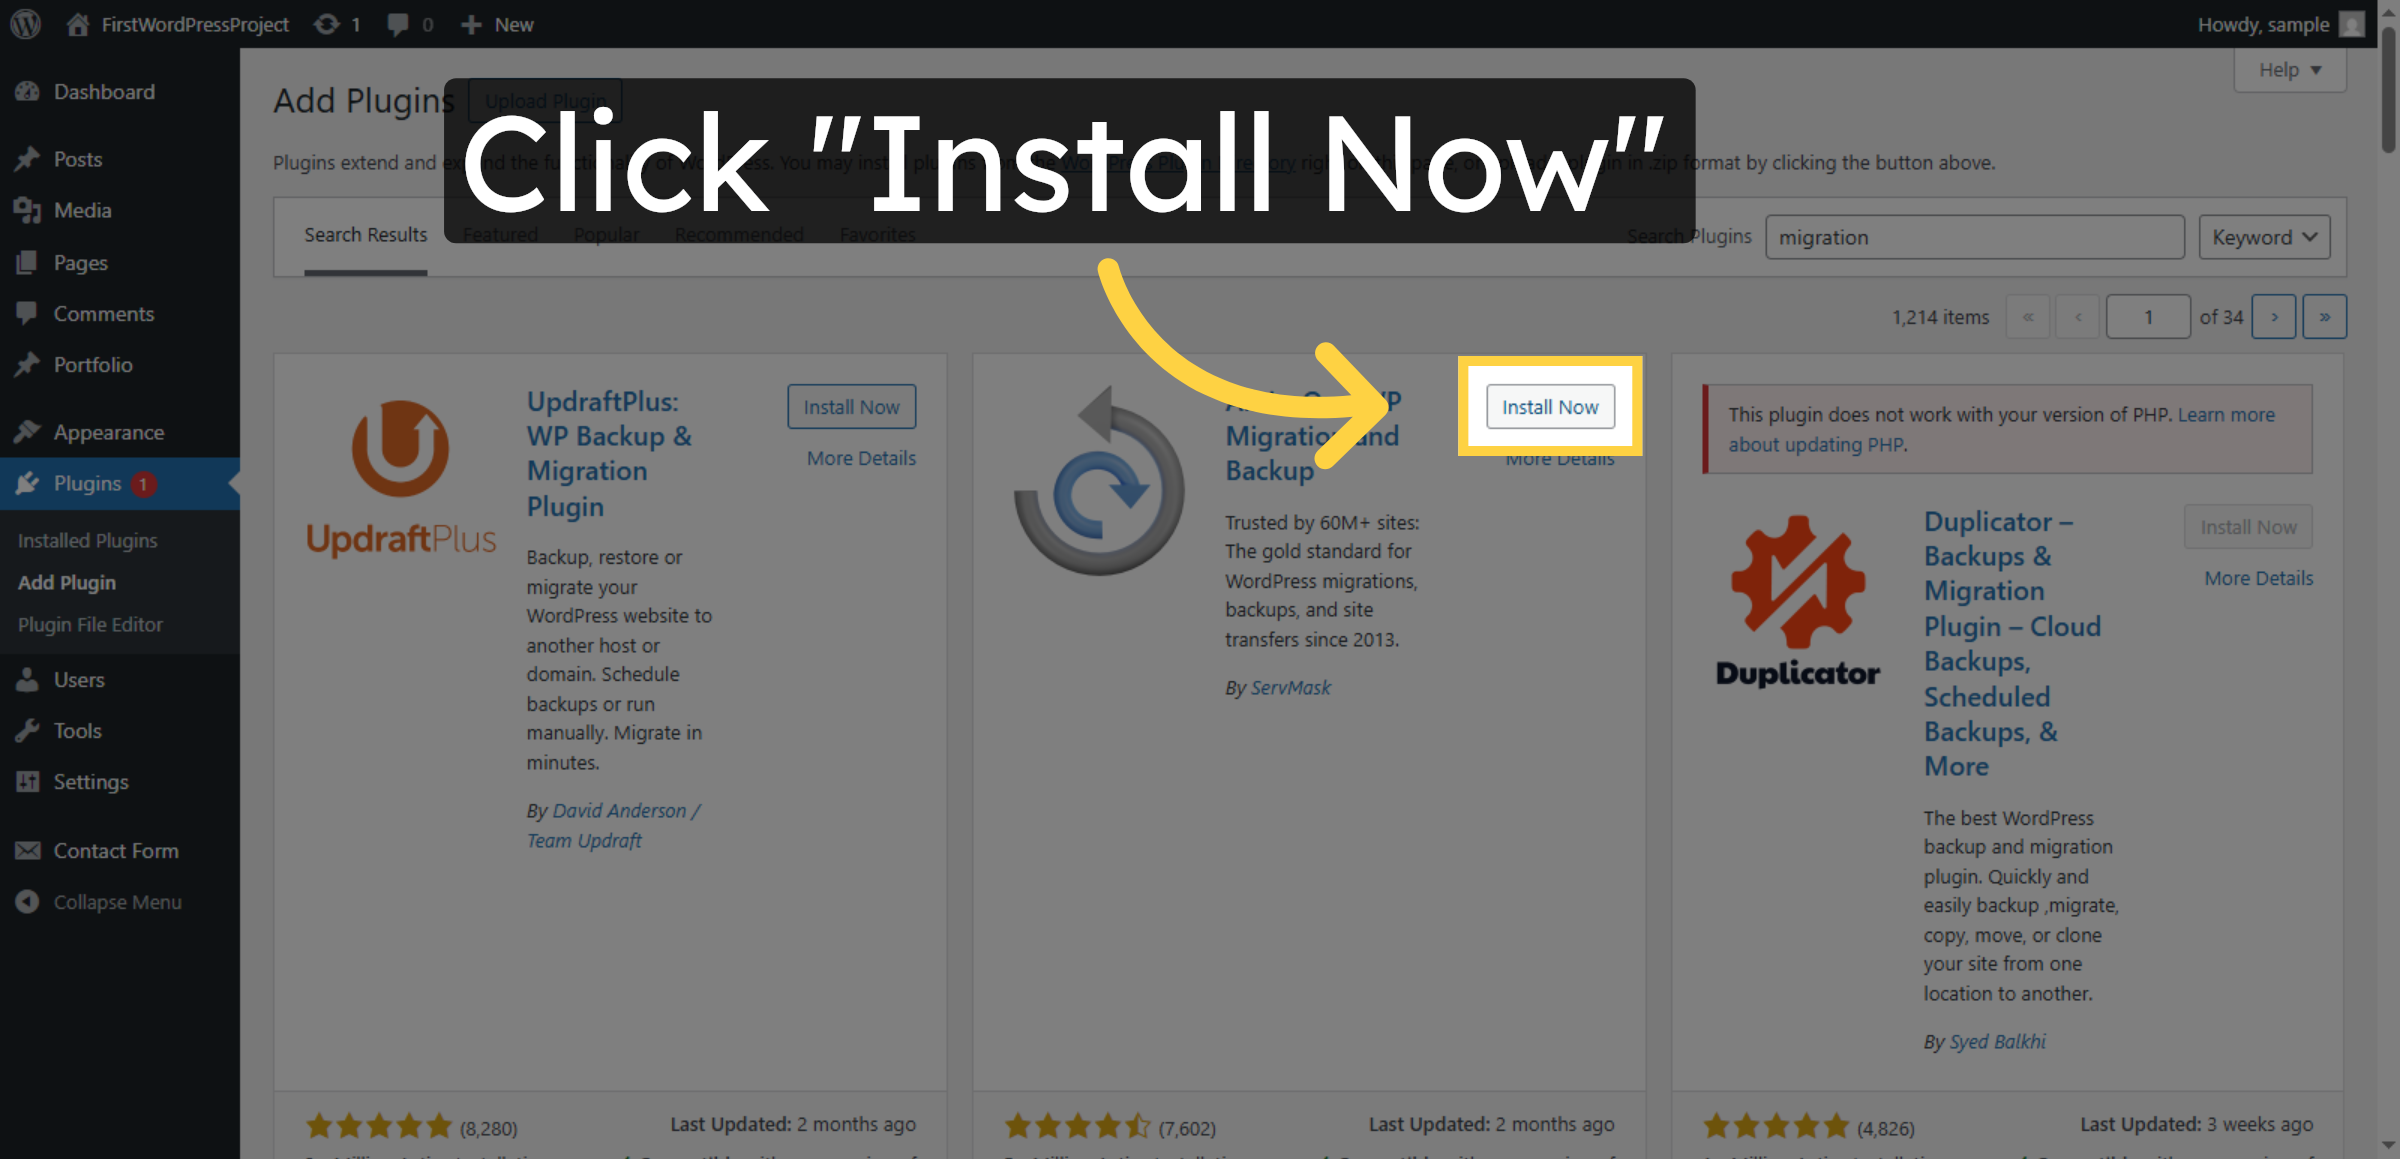
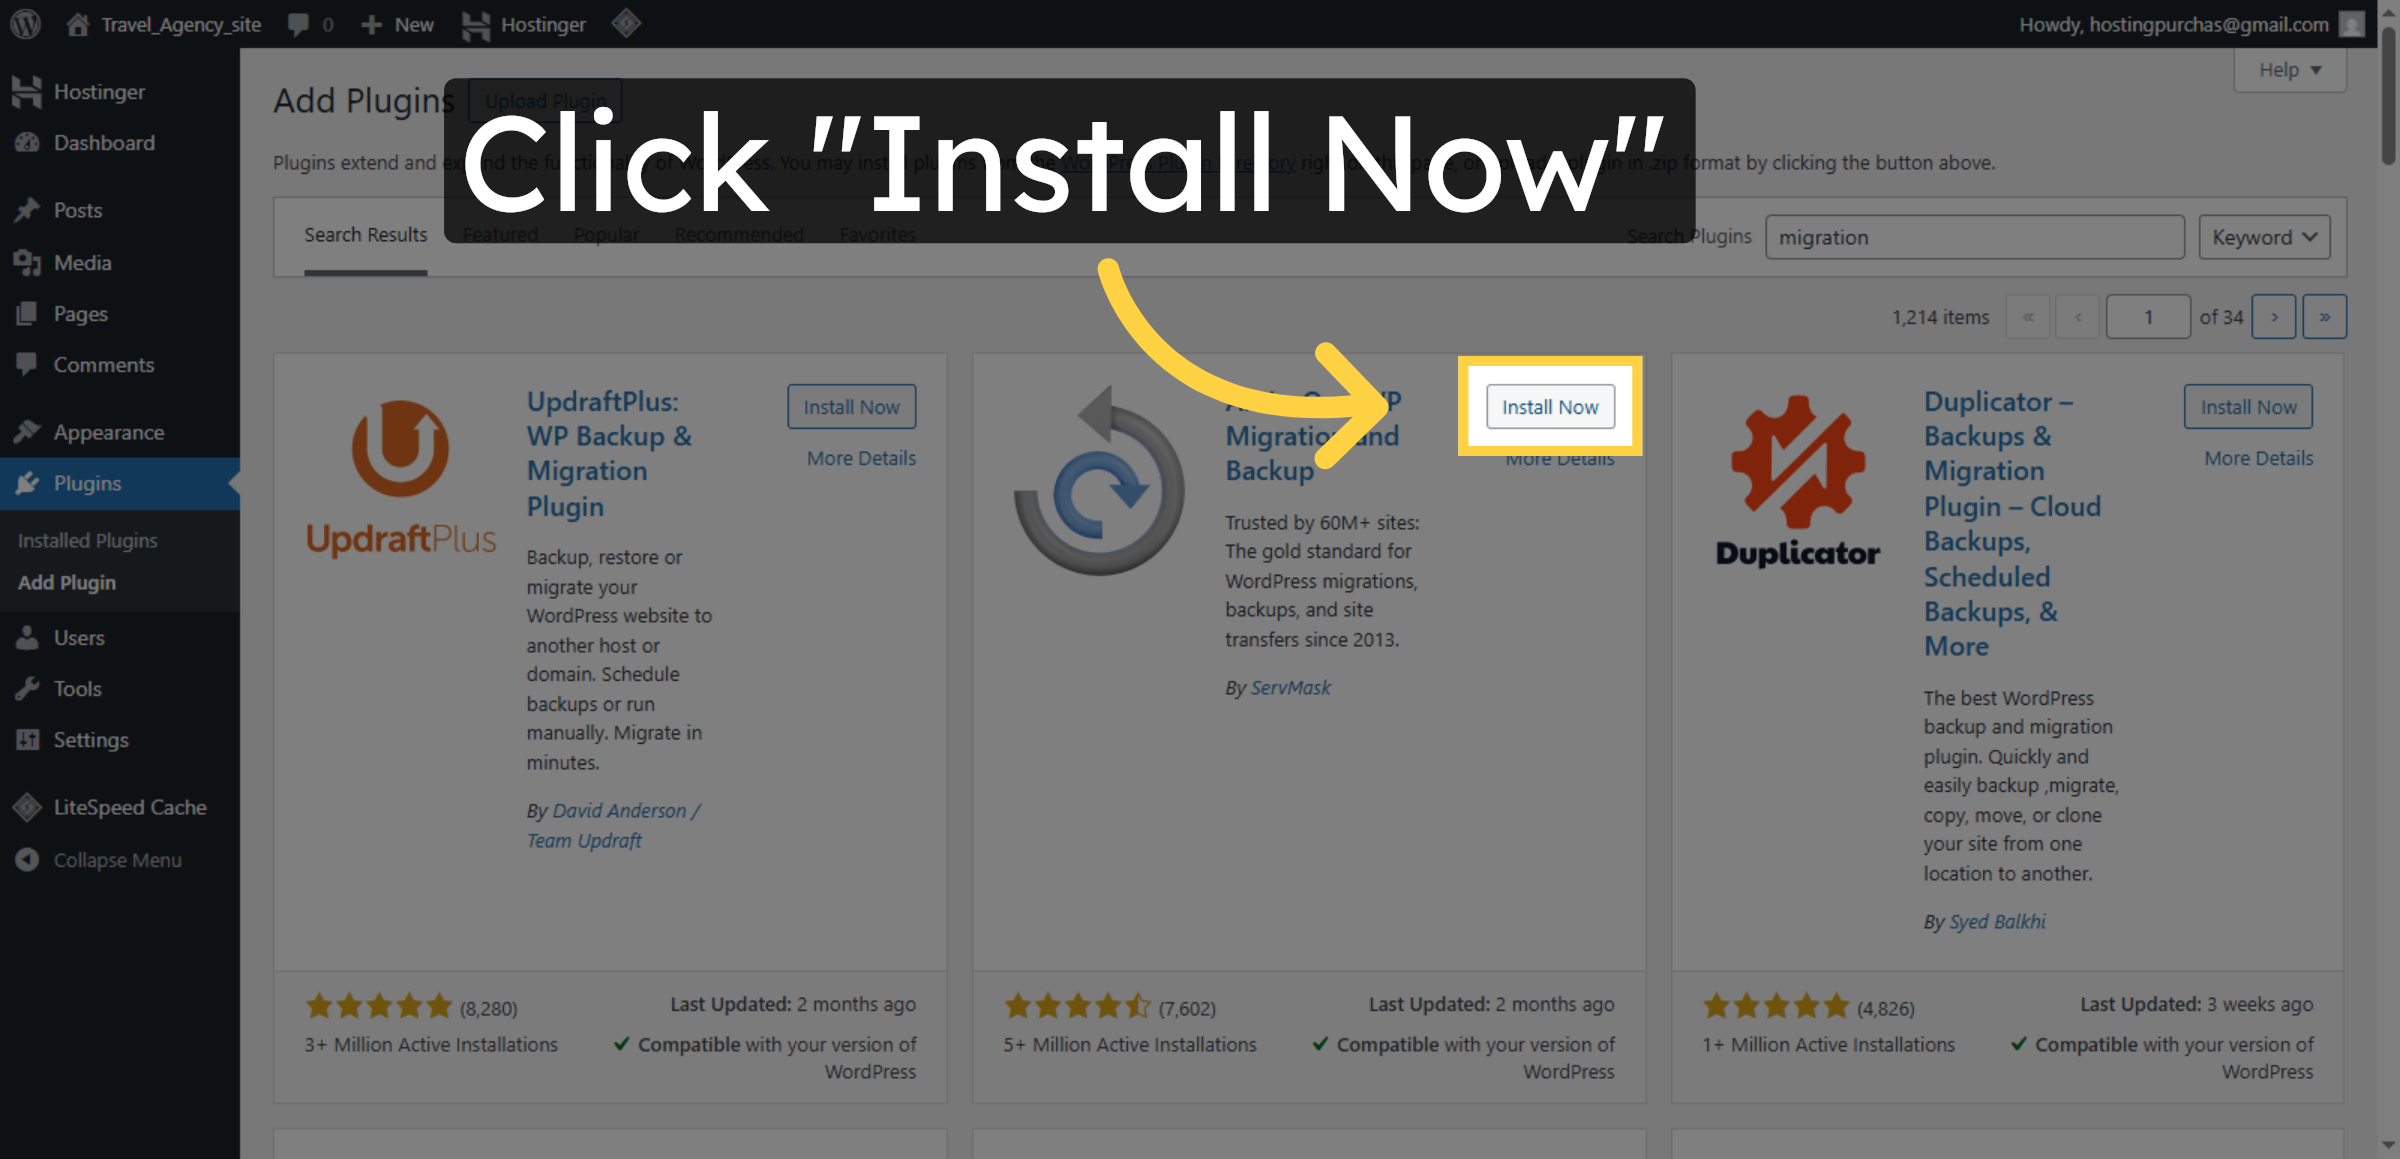
6. Install Migration Plugin

Click Install Now to add the All-in-One WP Migration plugin to your WordPress site.

Install Migration Plugin

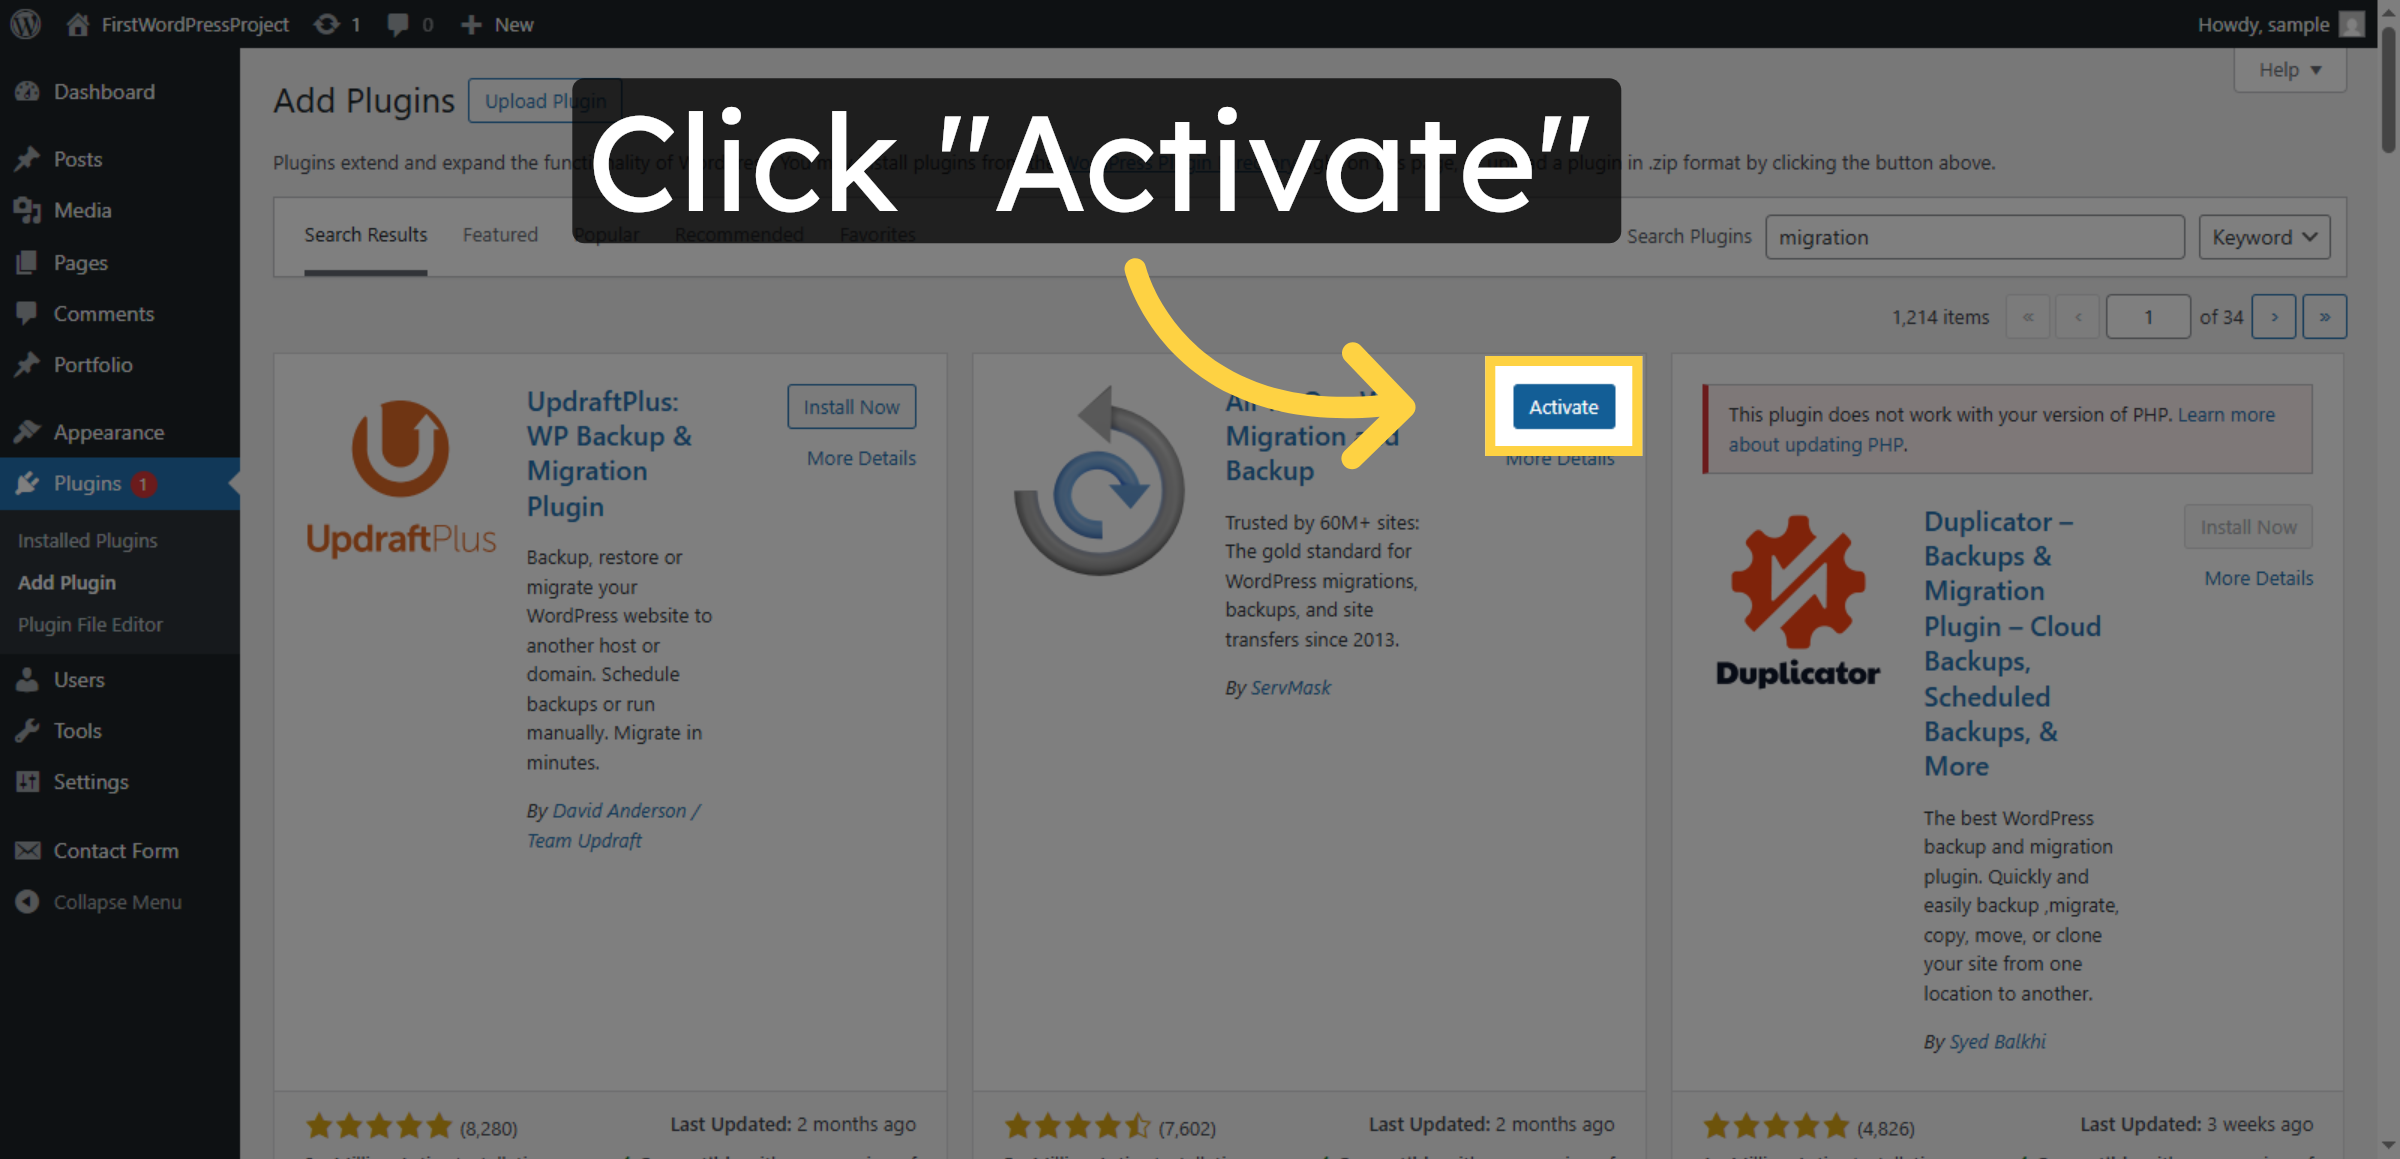
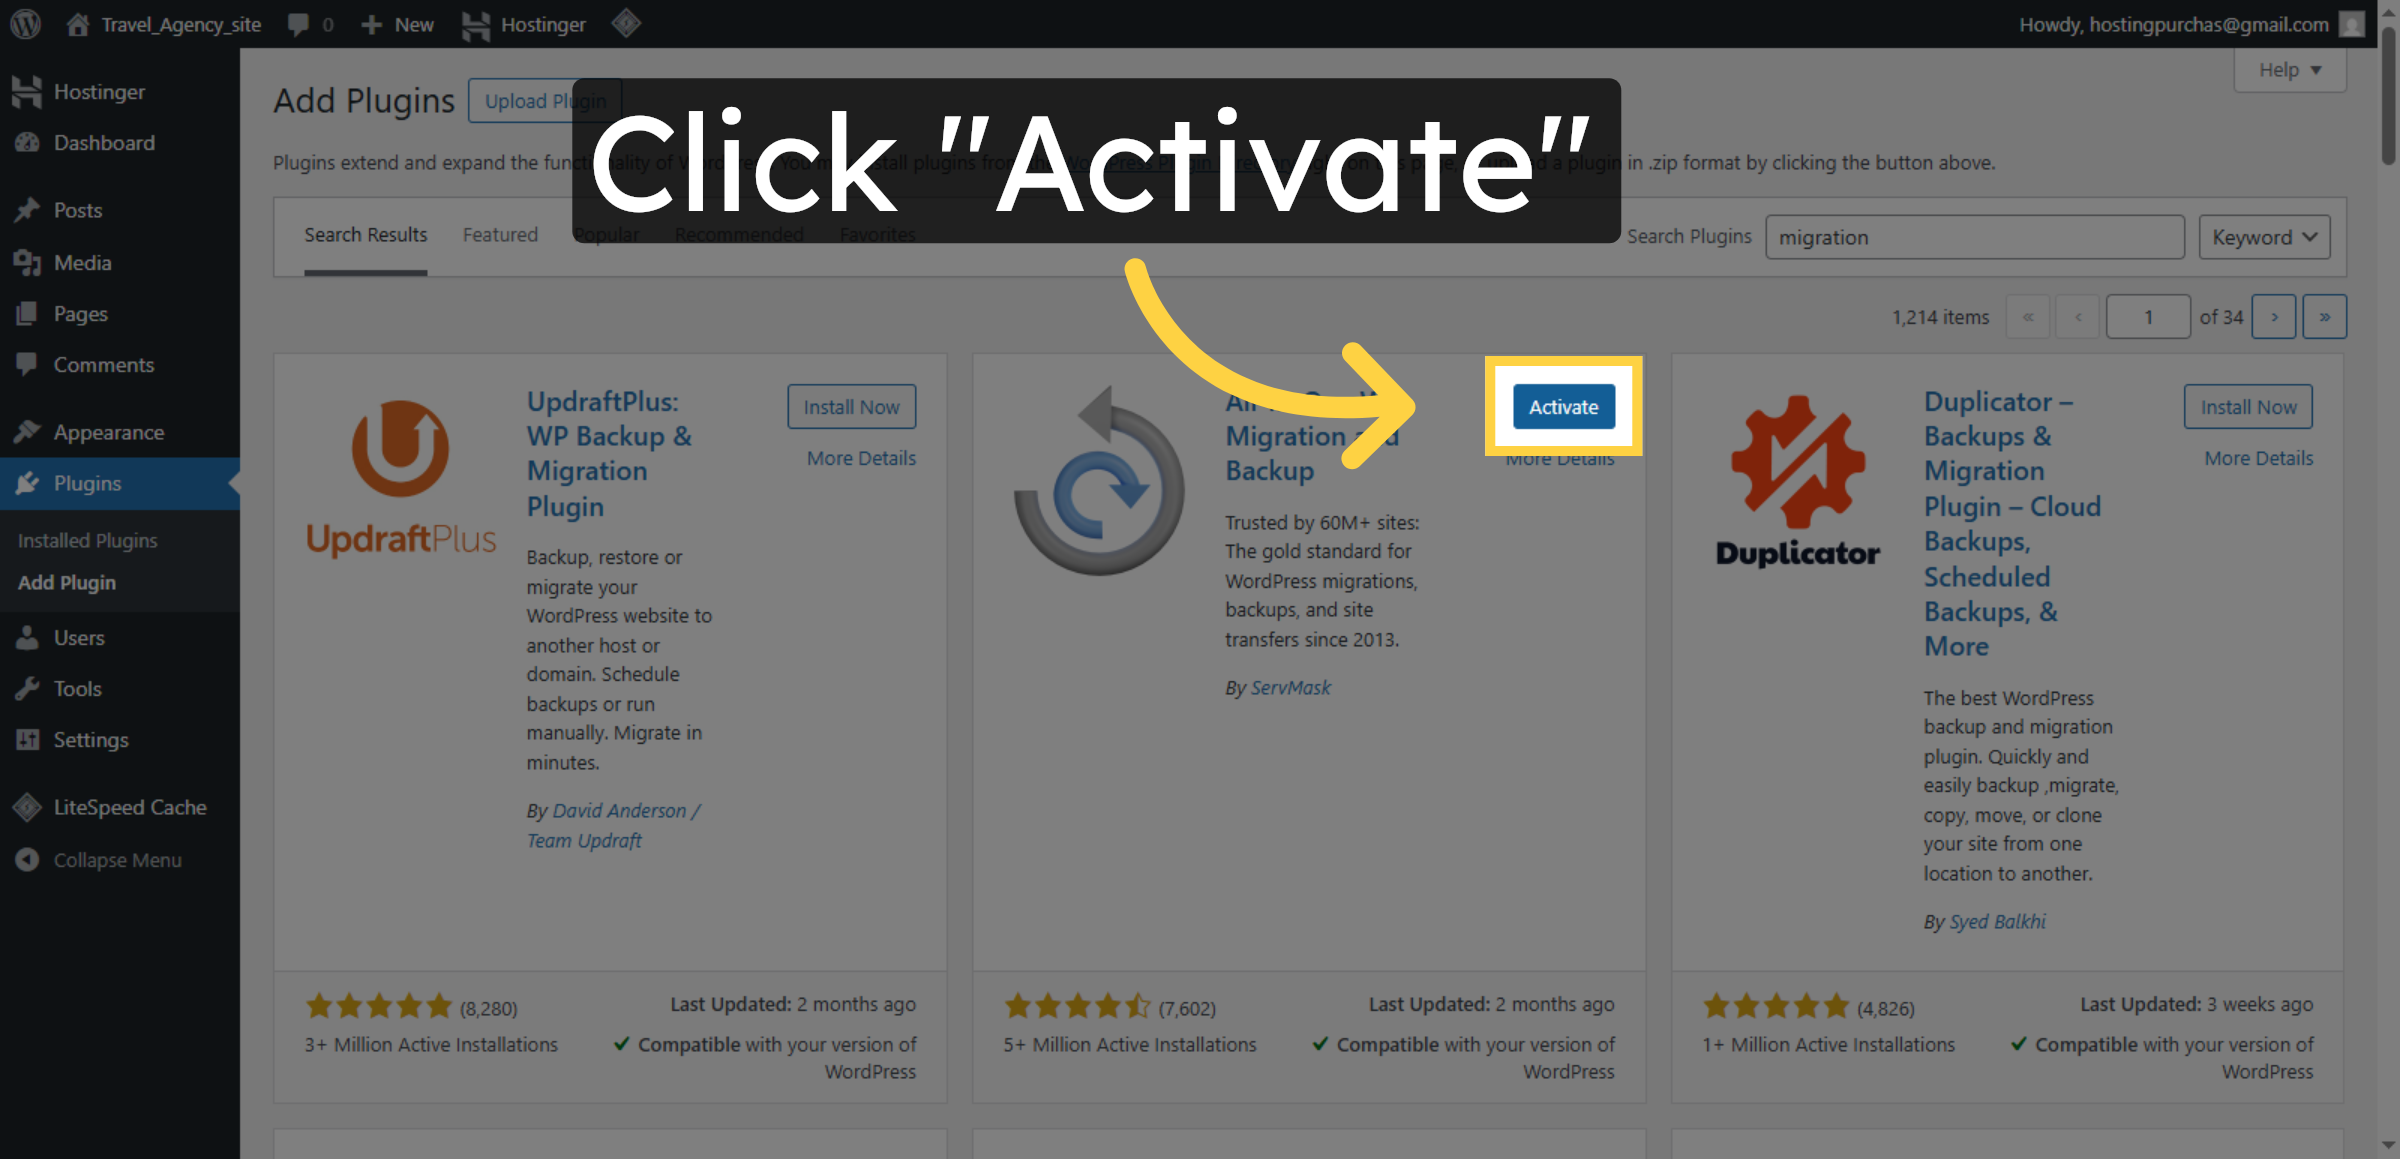
7. Activate Migration Plugin

Click Activate to enable the All-in-One WP Migration plugin for use.

Activate Migration Plugin

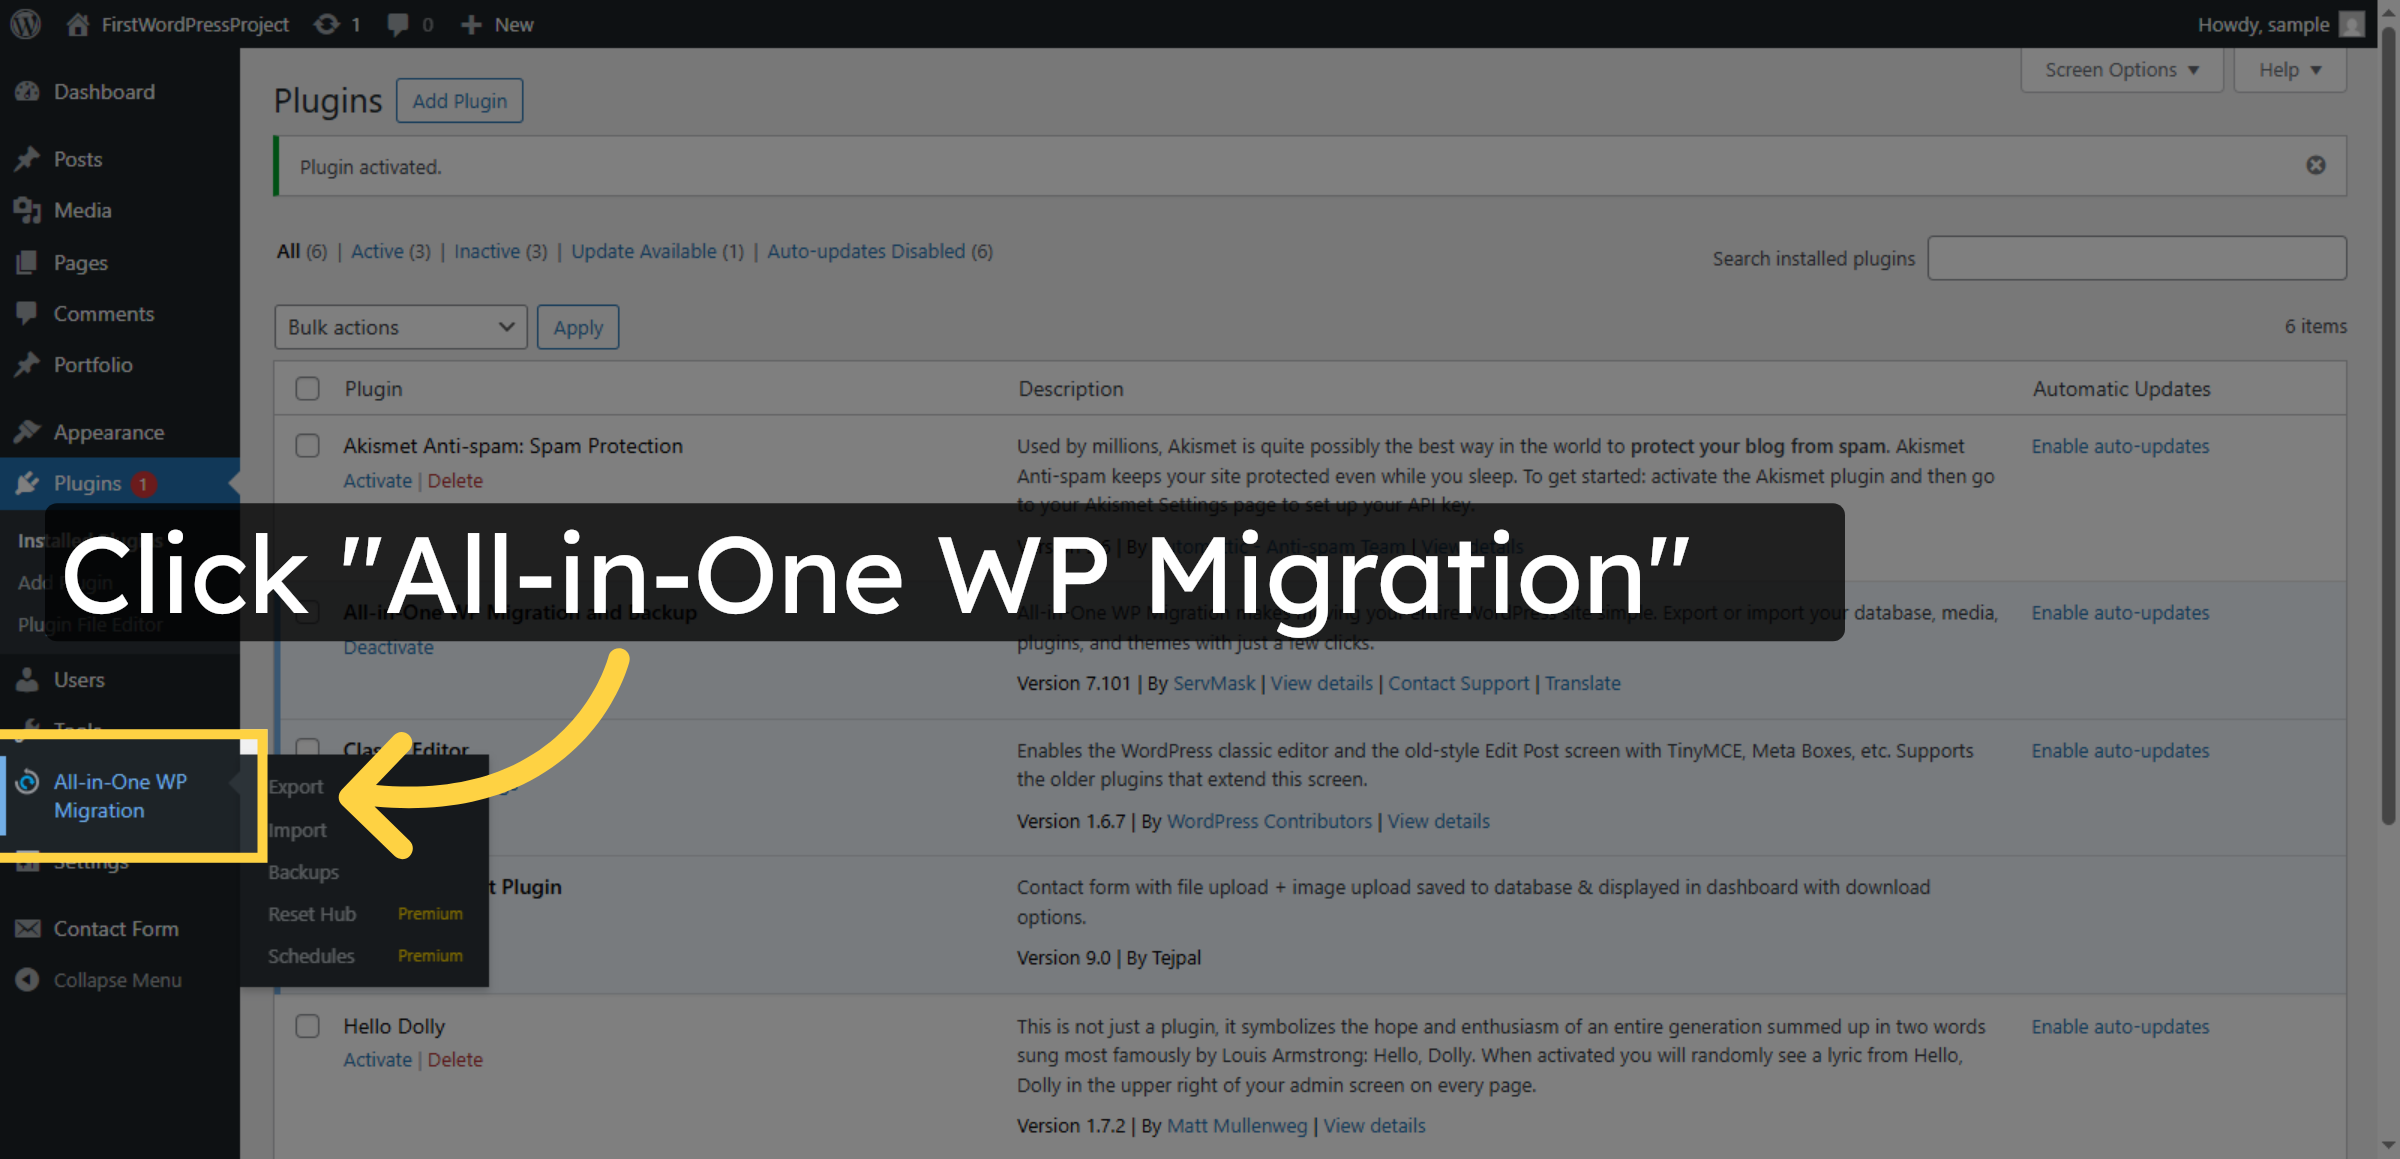
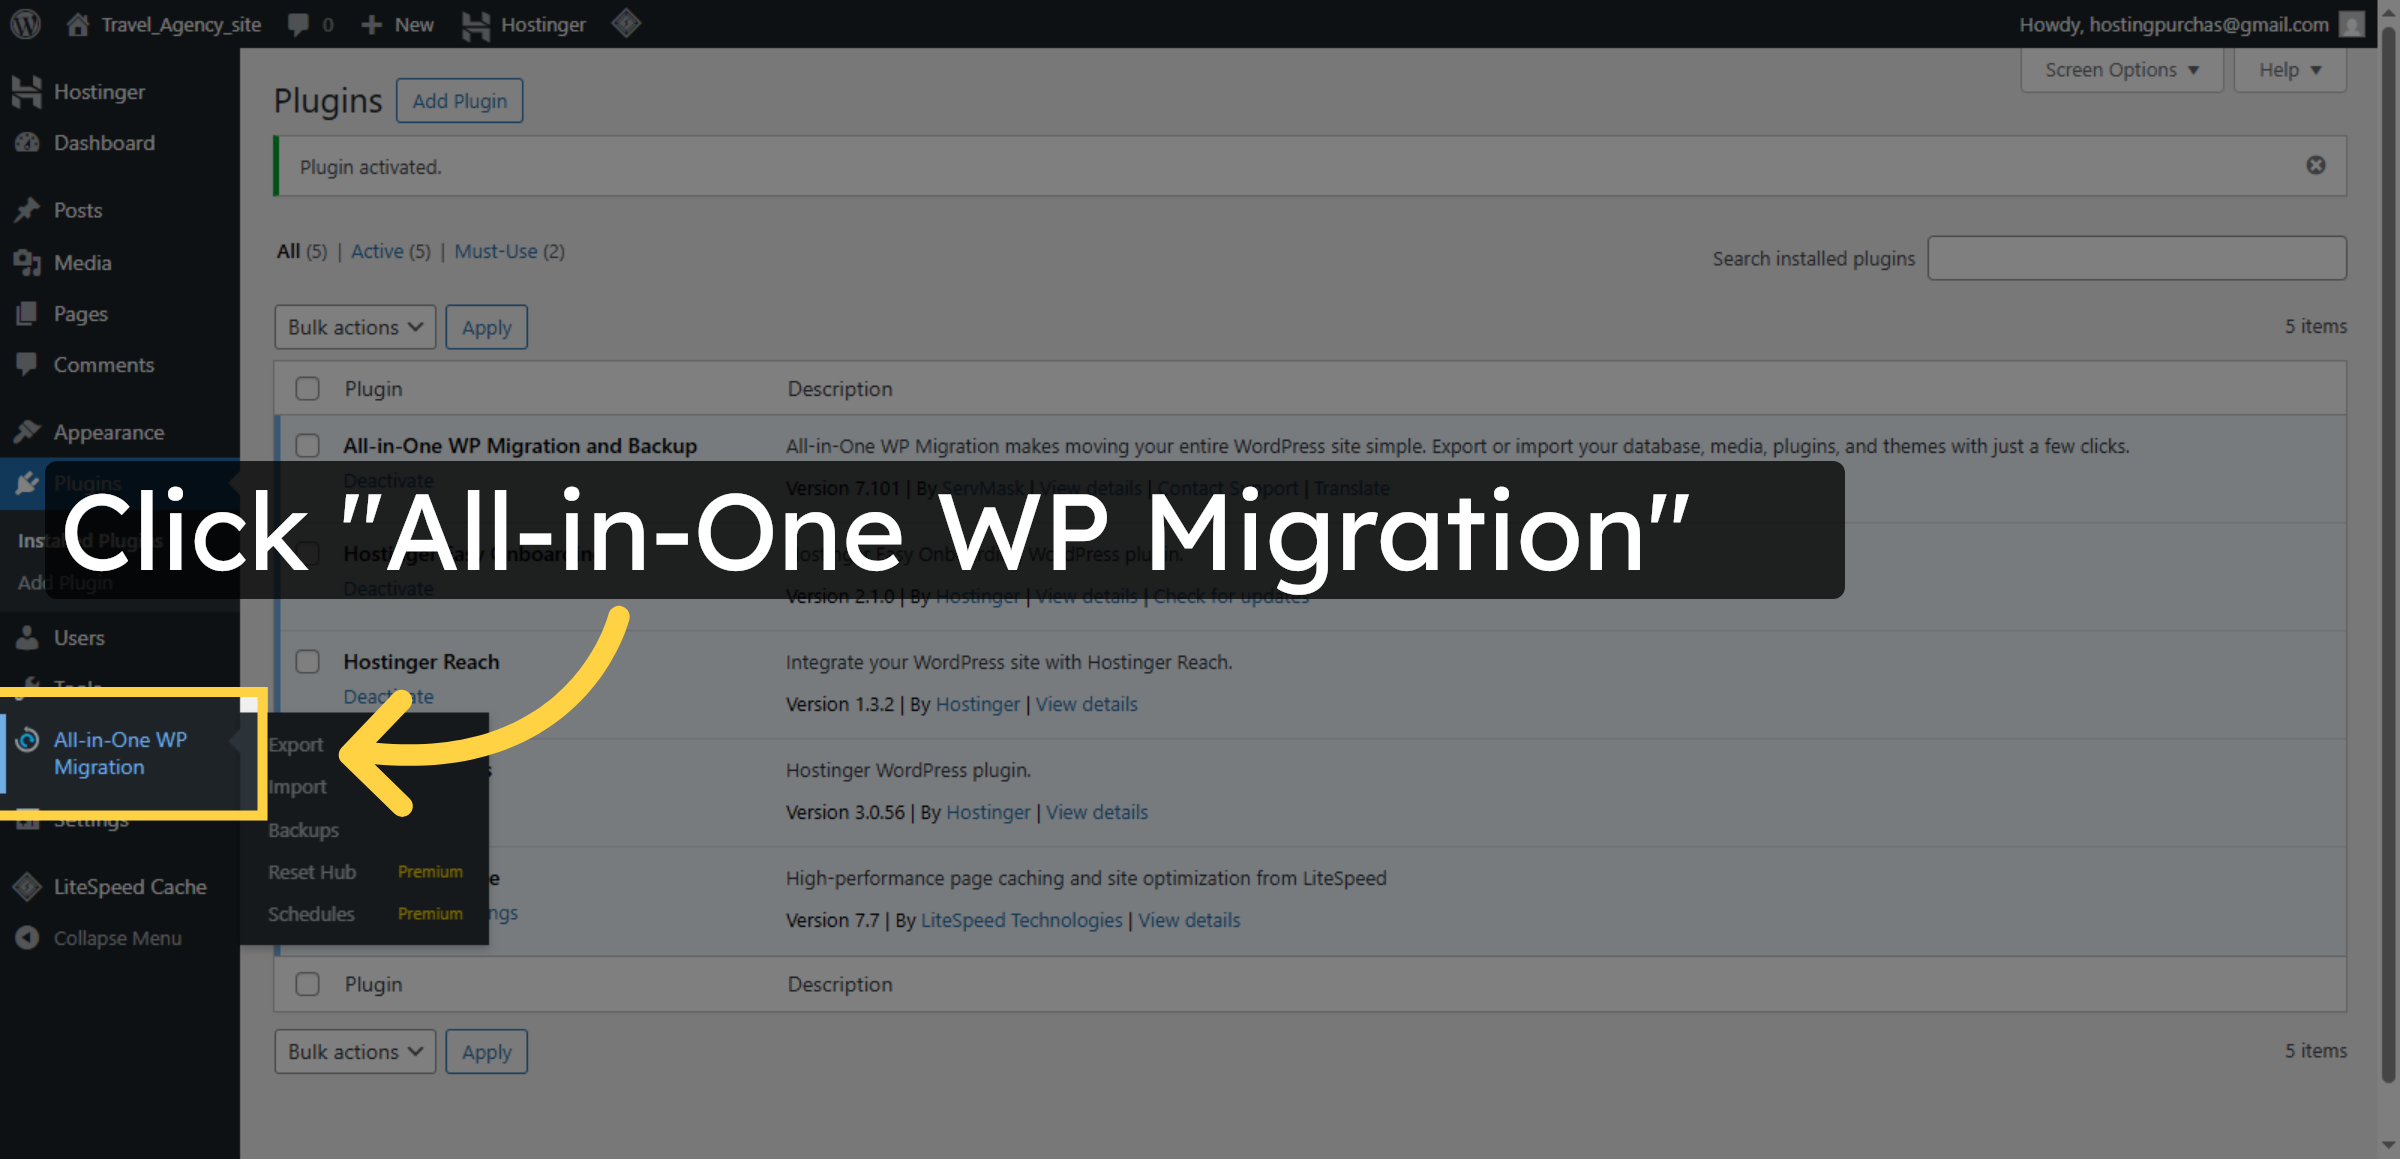
8. Open Migration Plugin

Click All-in-One WP Migration in the WordPress menu to access its features.

Open Migration Plugin

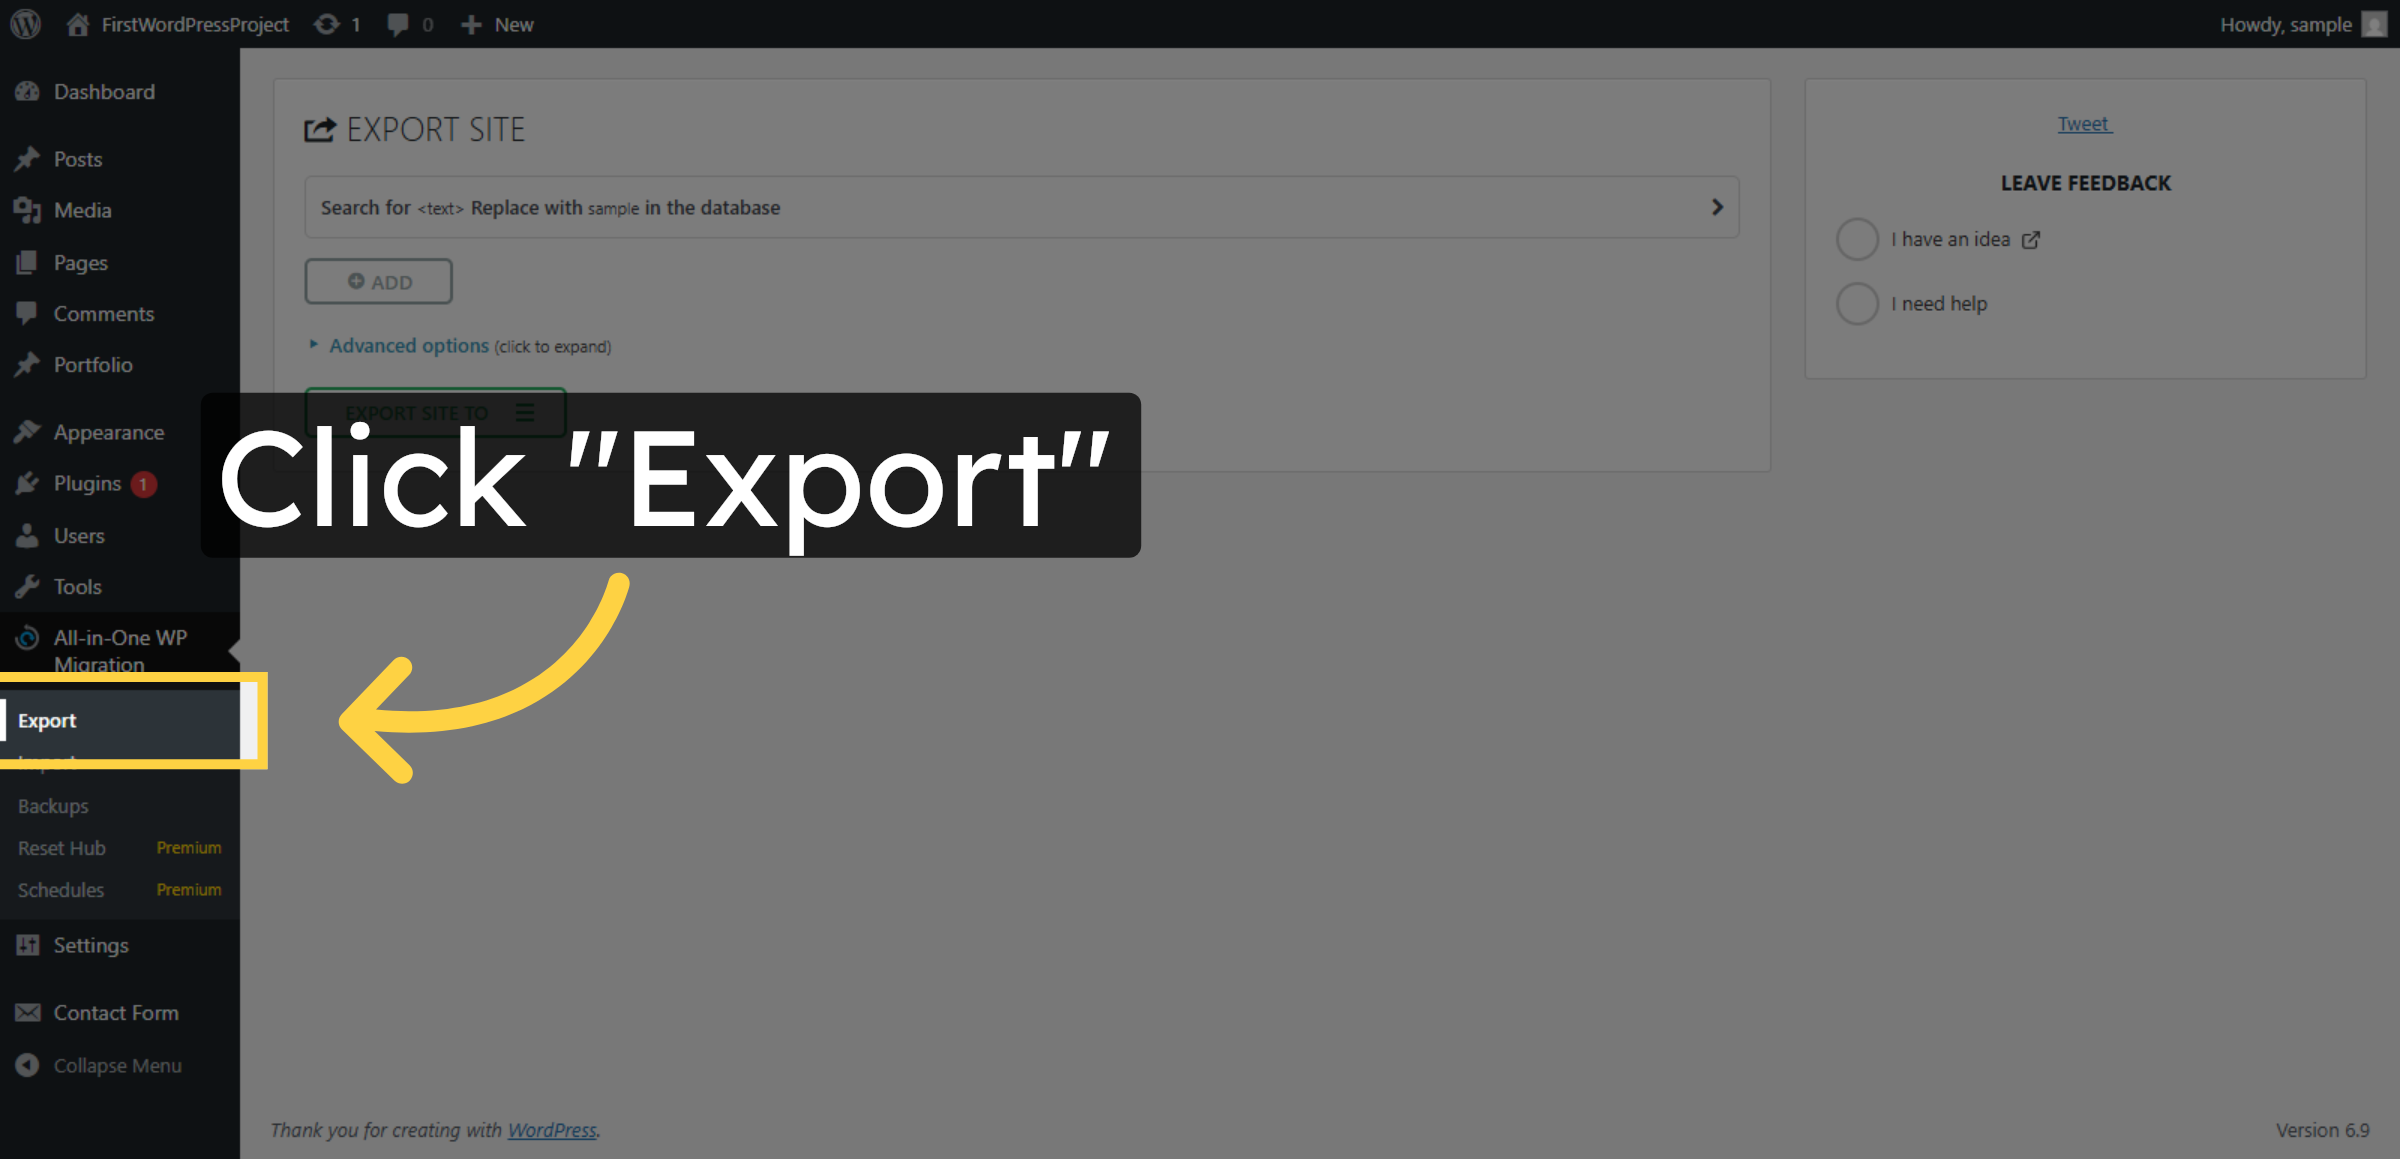
9. Select Export Option

Click Export to prepare your site data for transfer.

Select Export Option

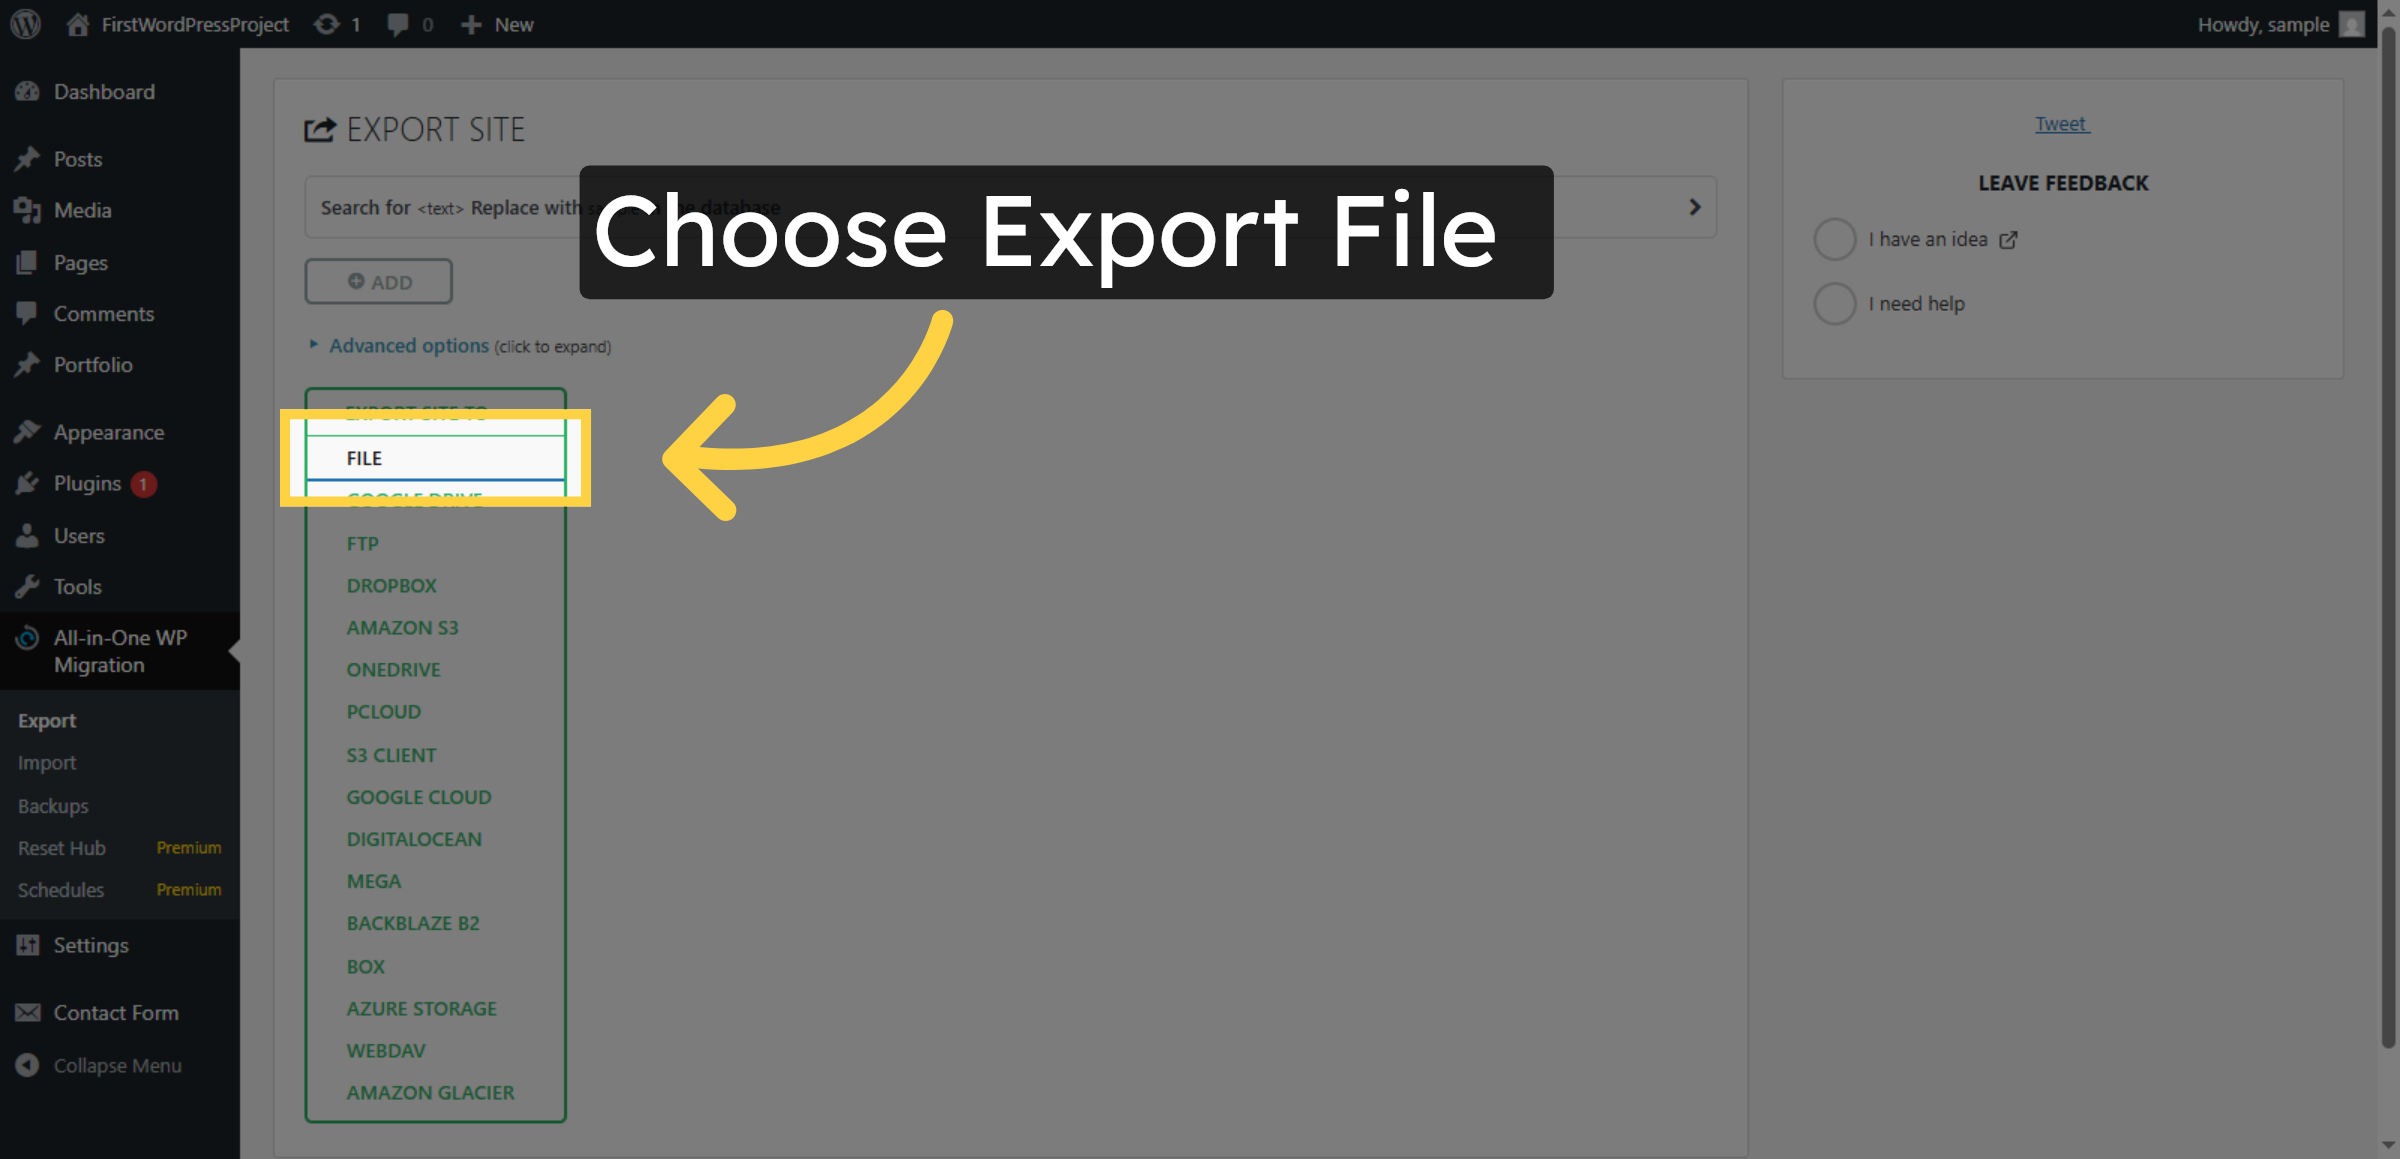
10. Choose Export File

Click File to select the export format for your site backup.

Choose Export File

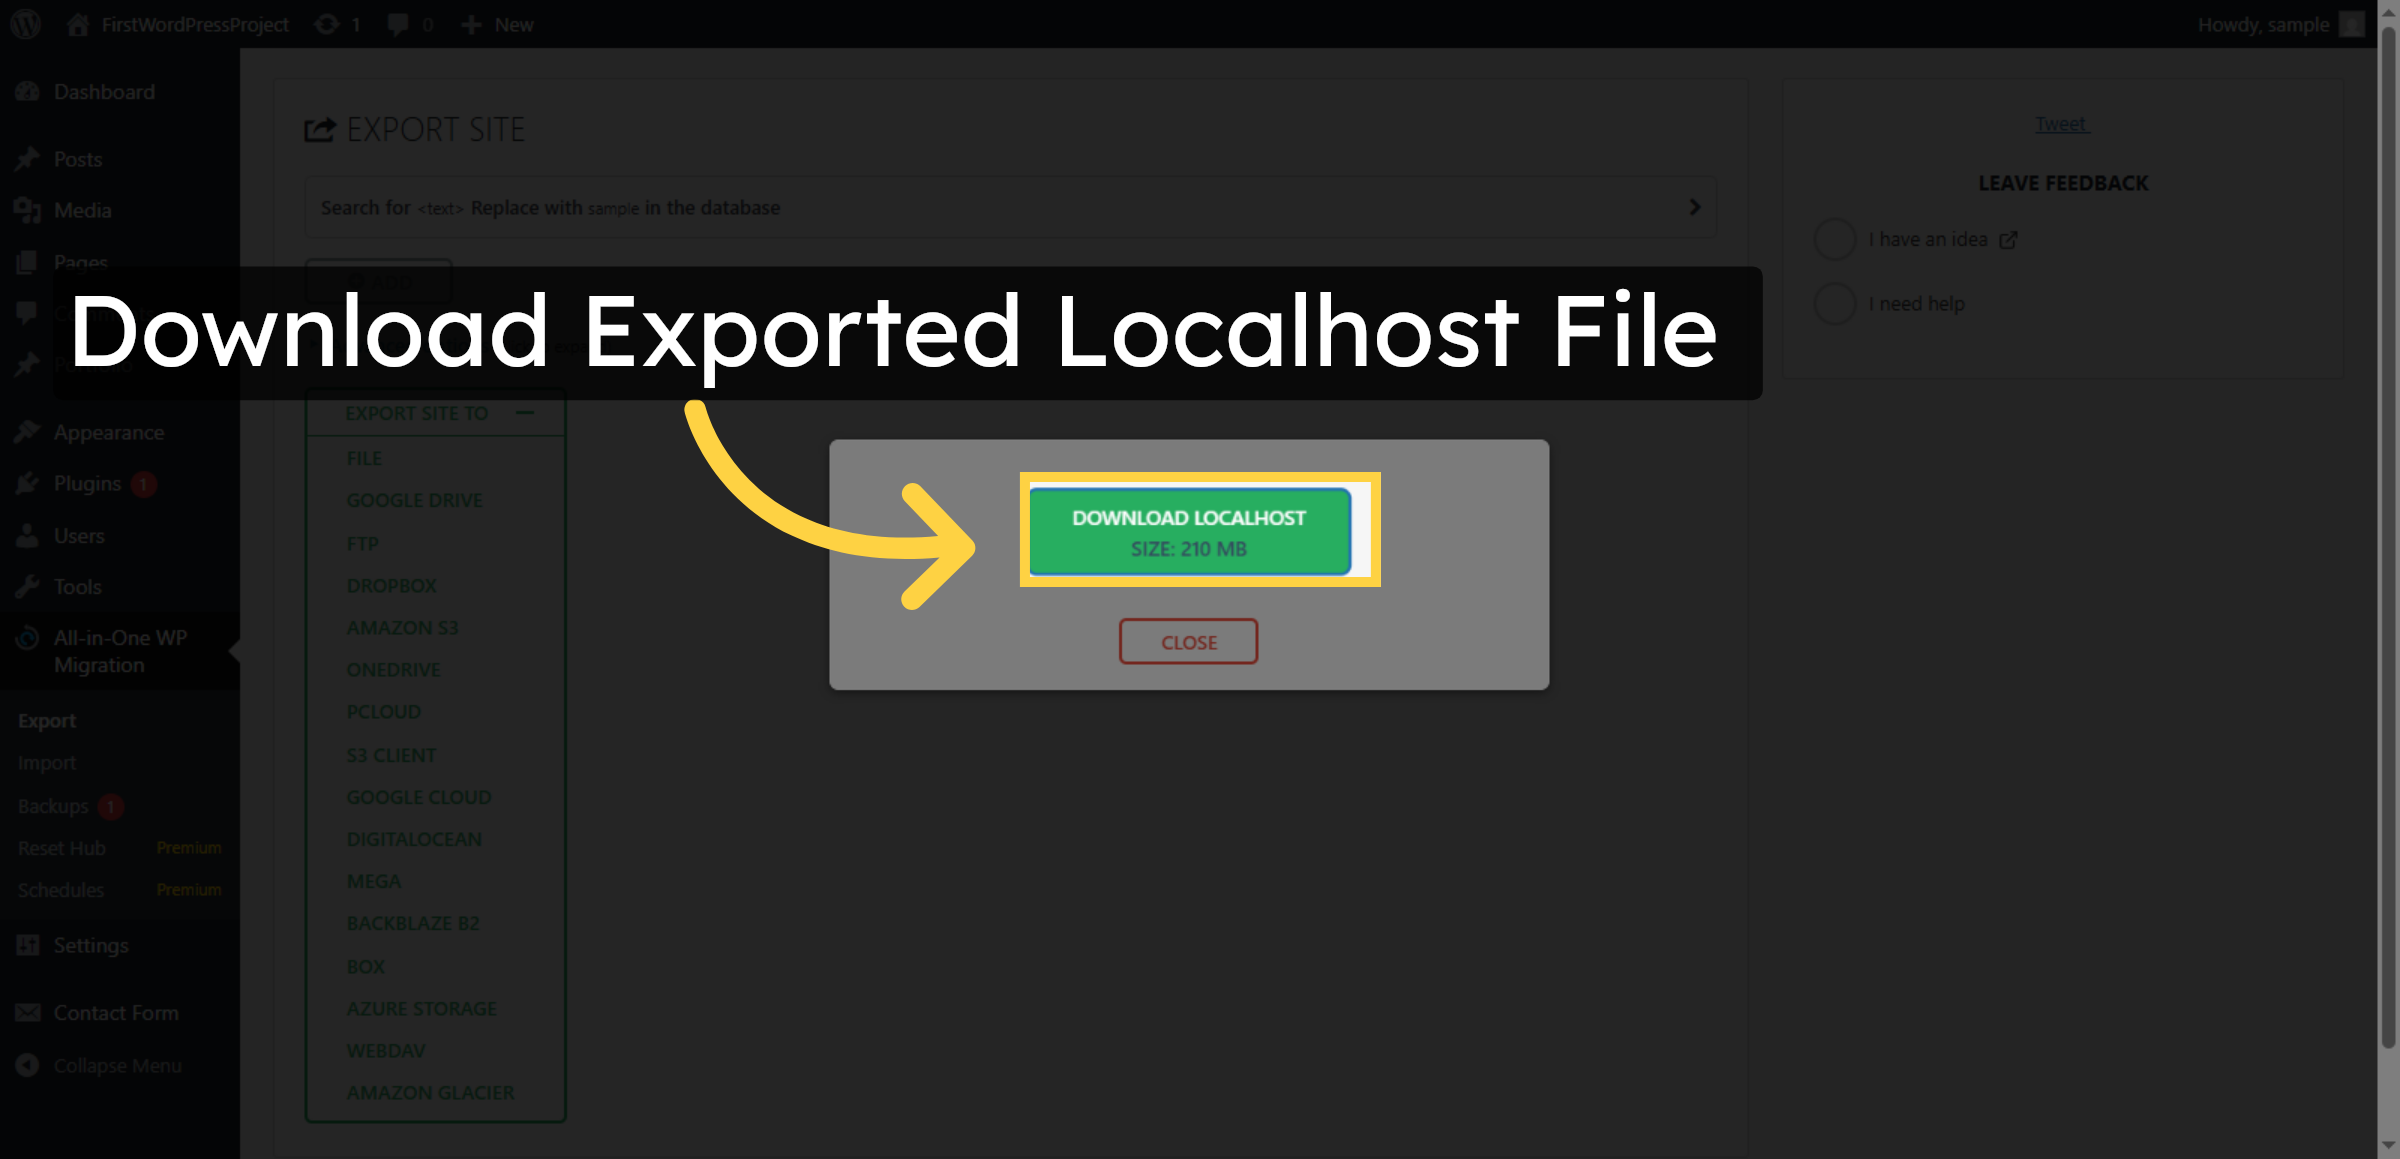
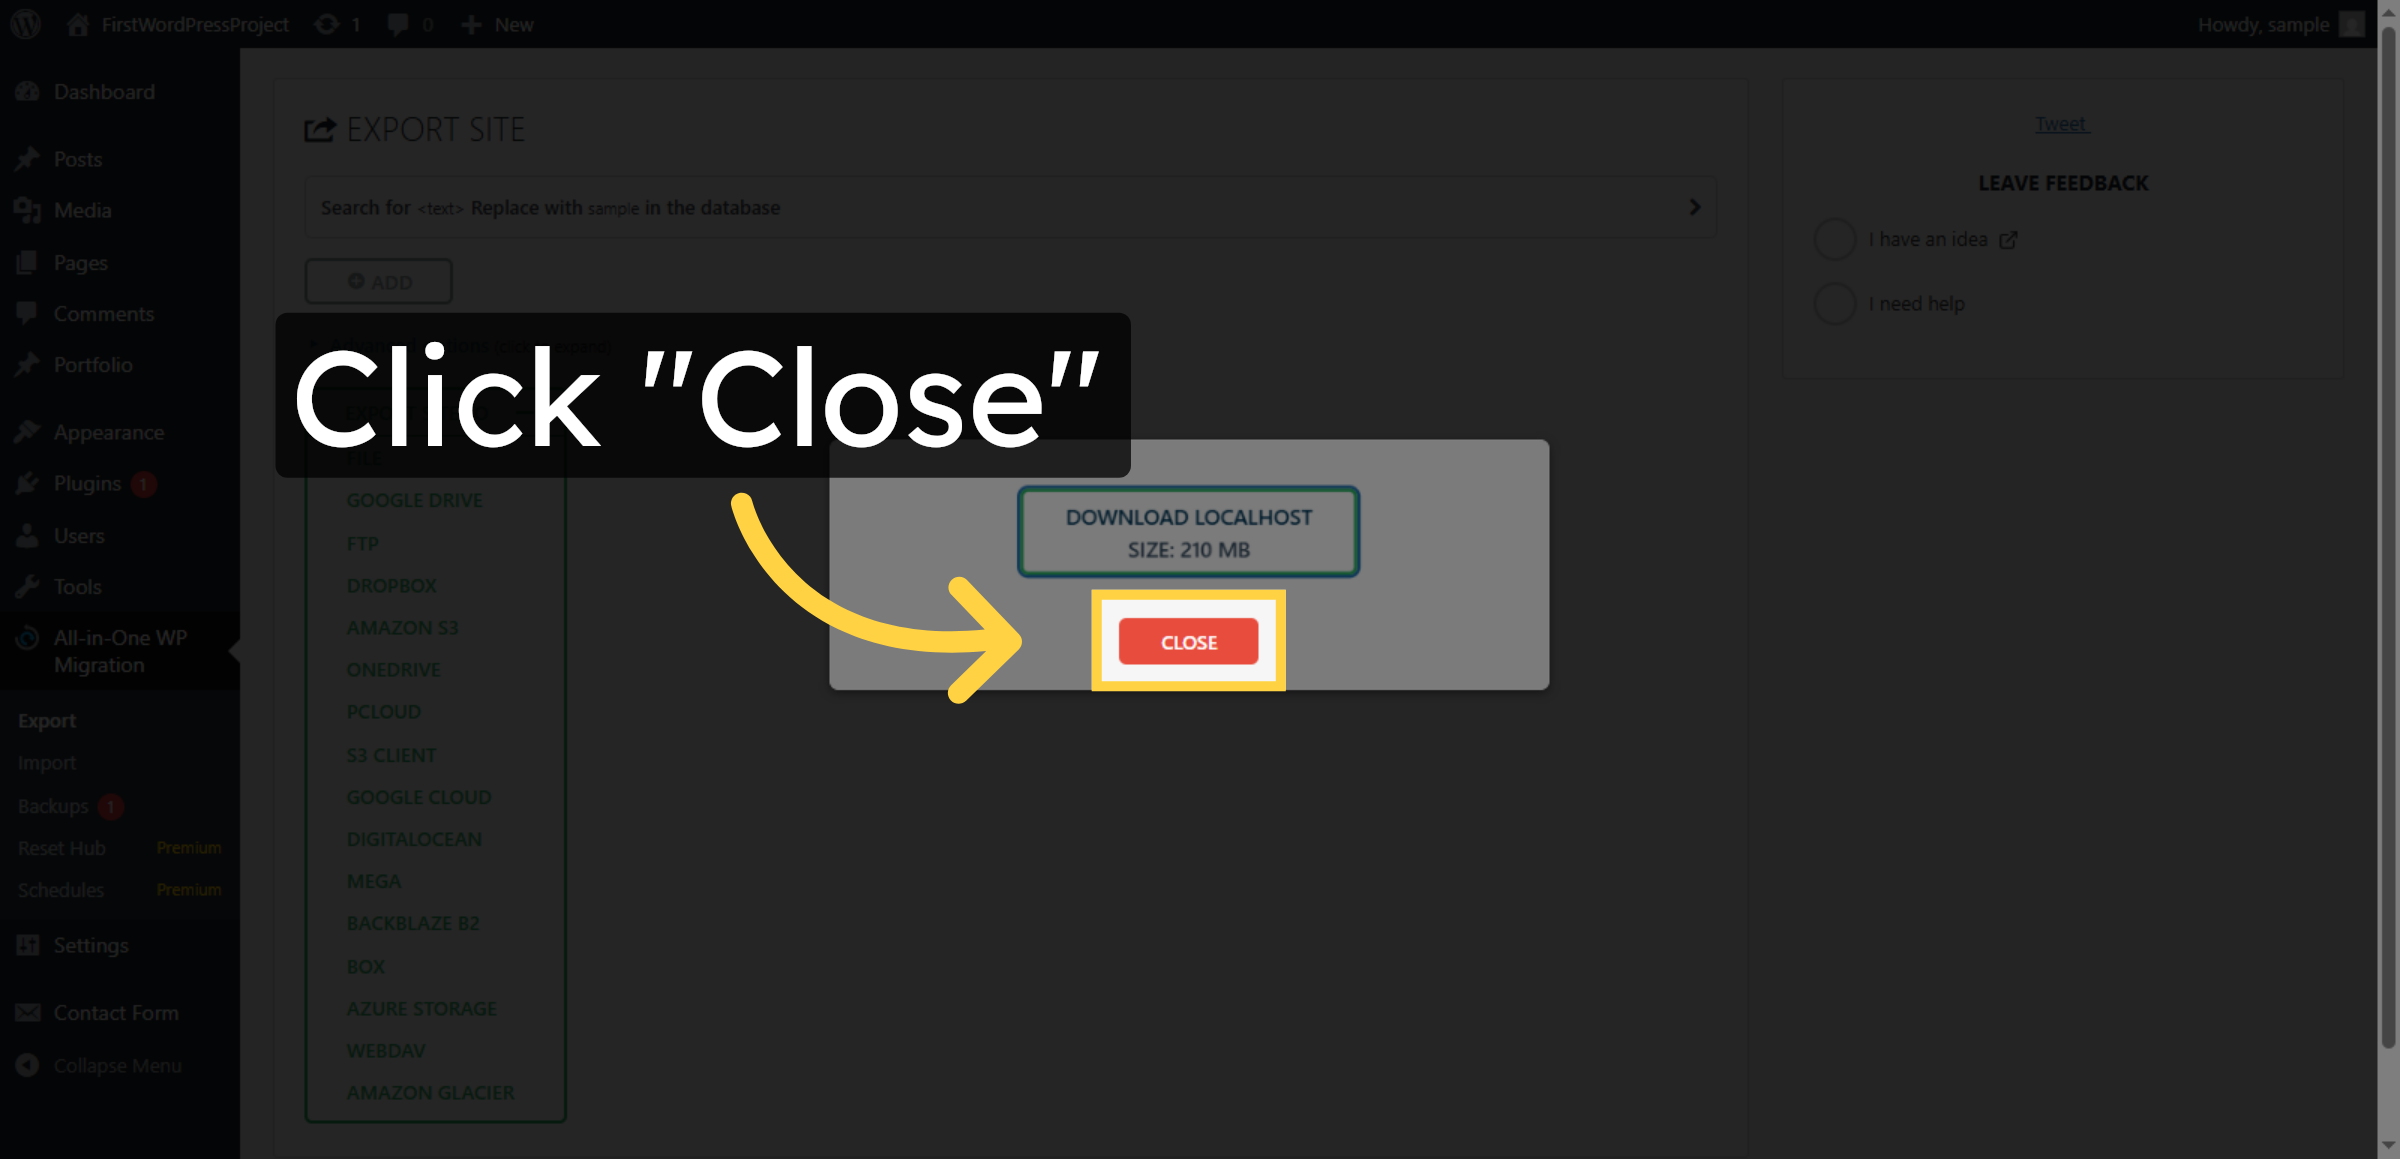
11. Download Exported Localhost File

Click the displayed file size to view details about the exported site file.

Download Exported Localhost File

12. Close Export Window

Click Close to exit the export interface after the file is ready.

Close Export Window

13. Access Hostinger Panel

Switch to the Hostinger control panel at hpanel.hostinger.com to begin hosting setup.

Access Hostinger Panel

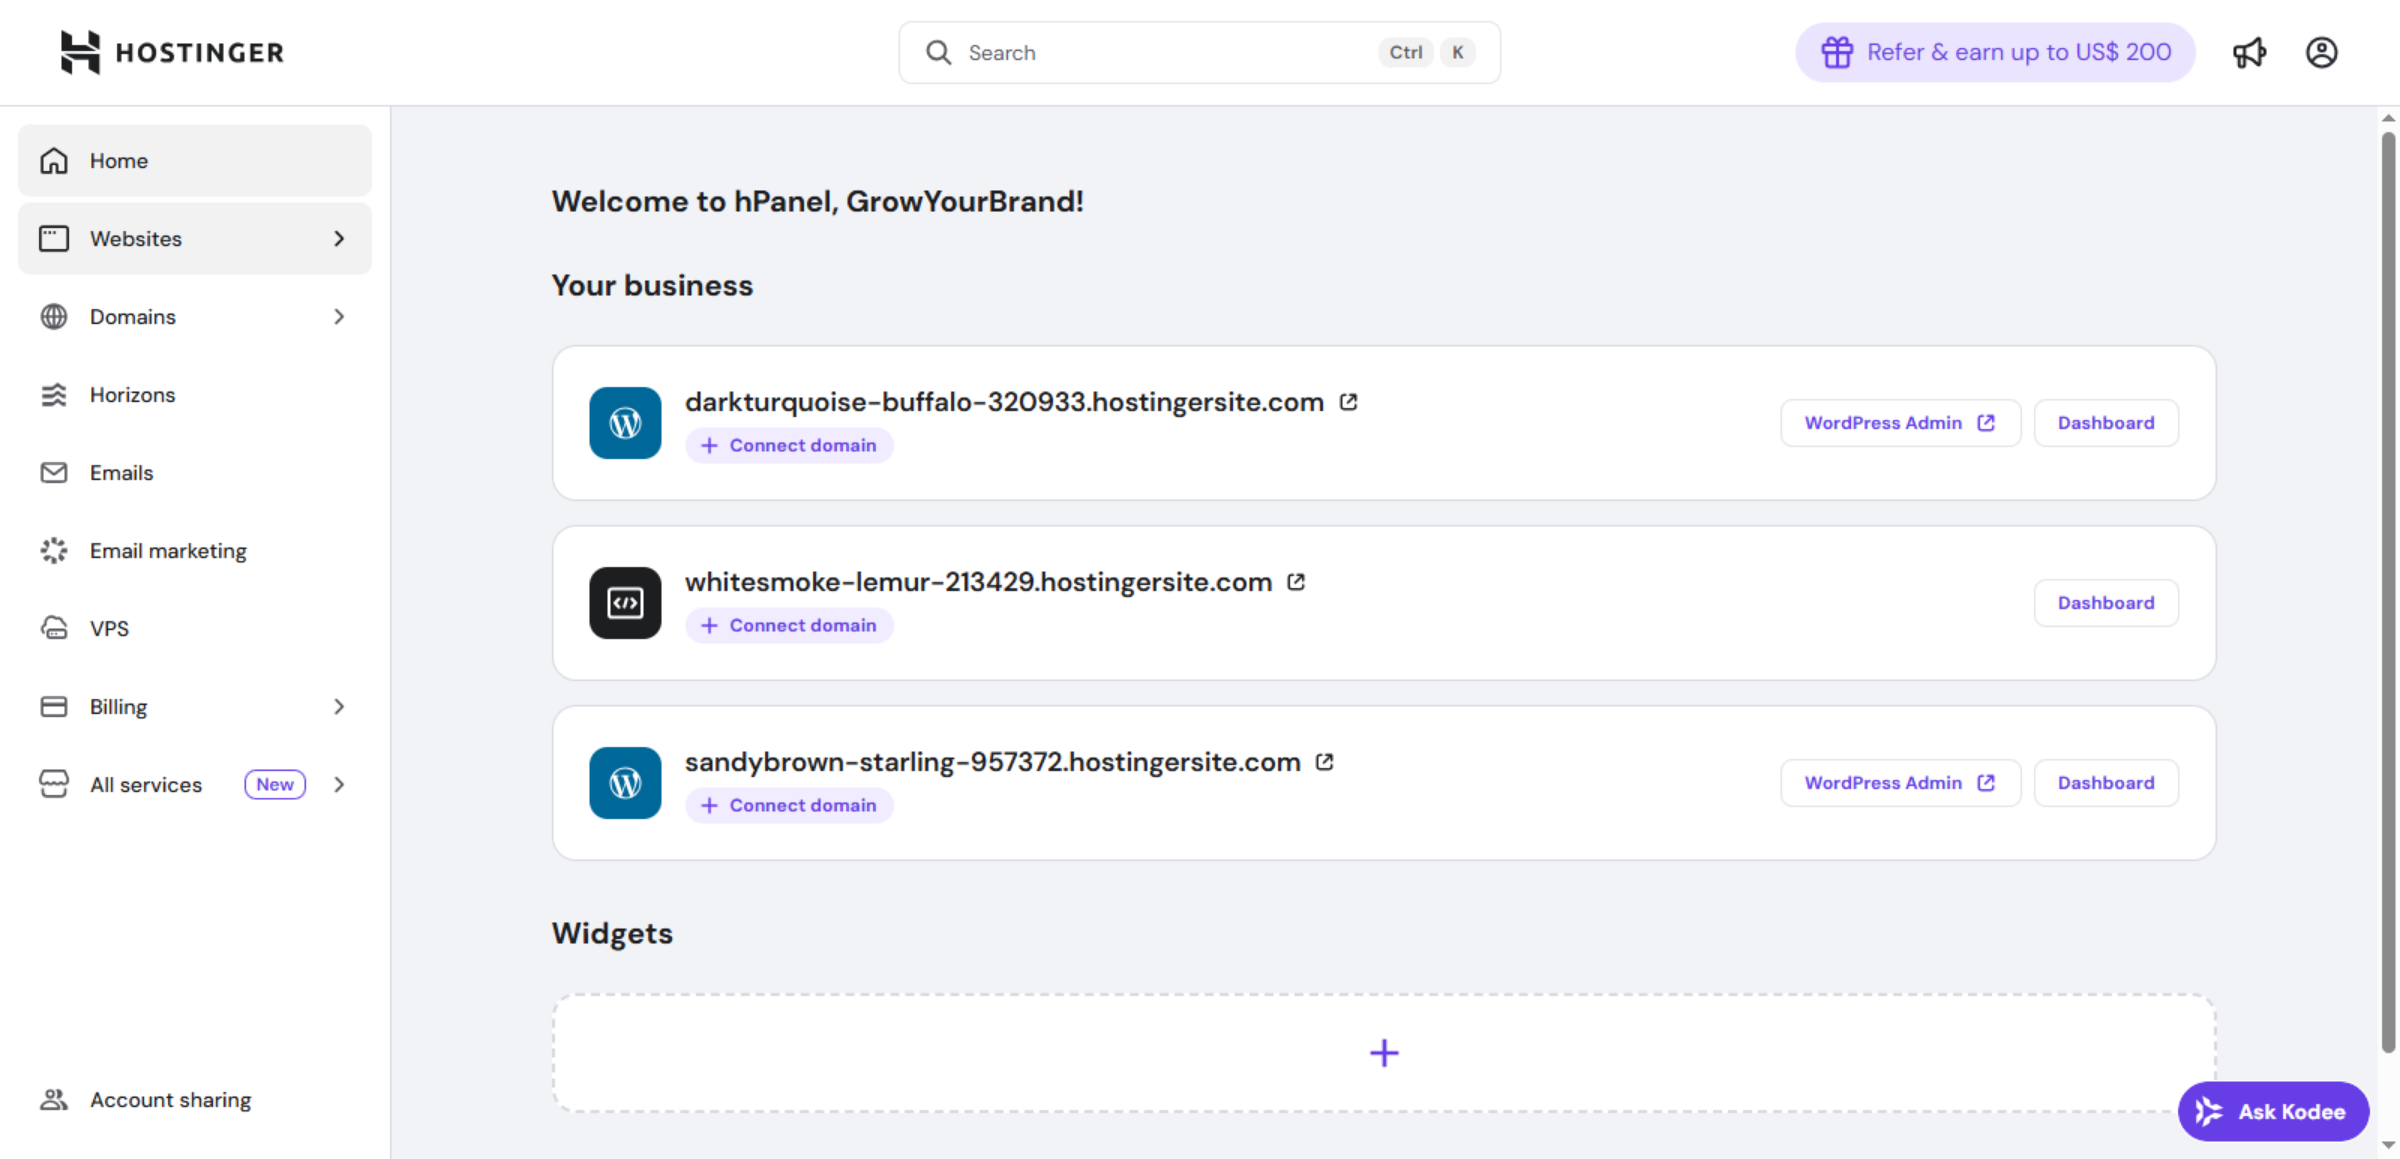
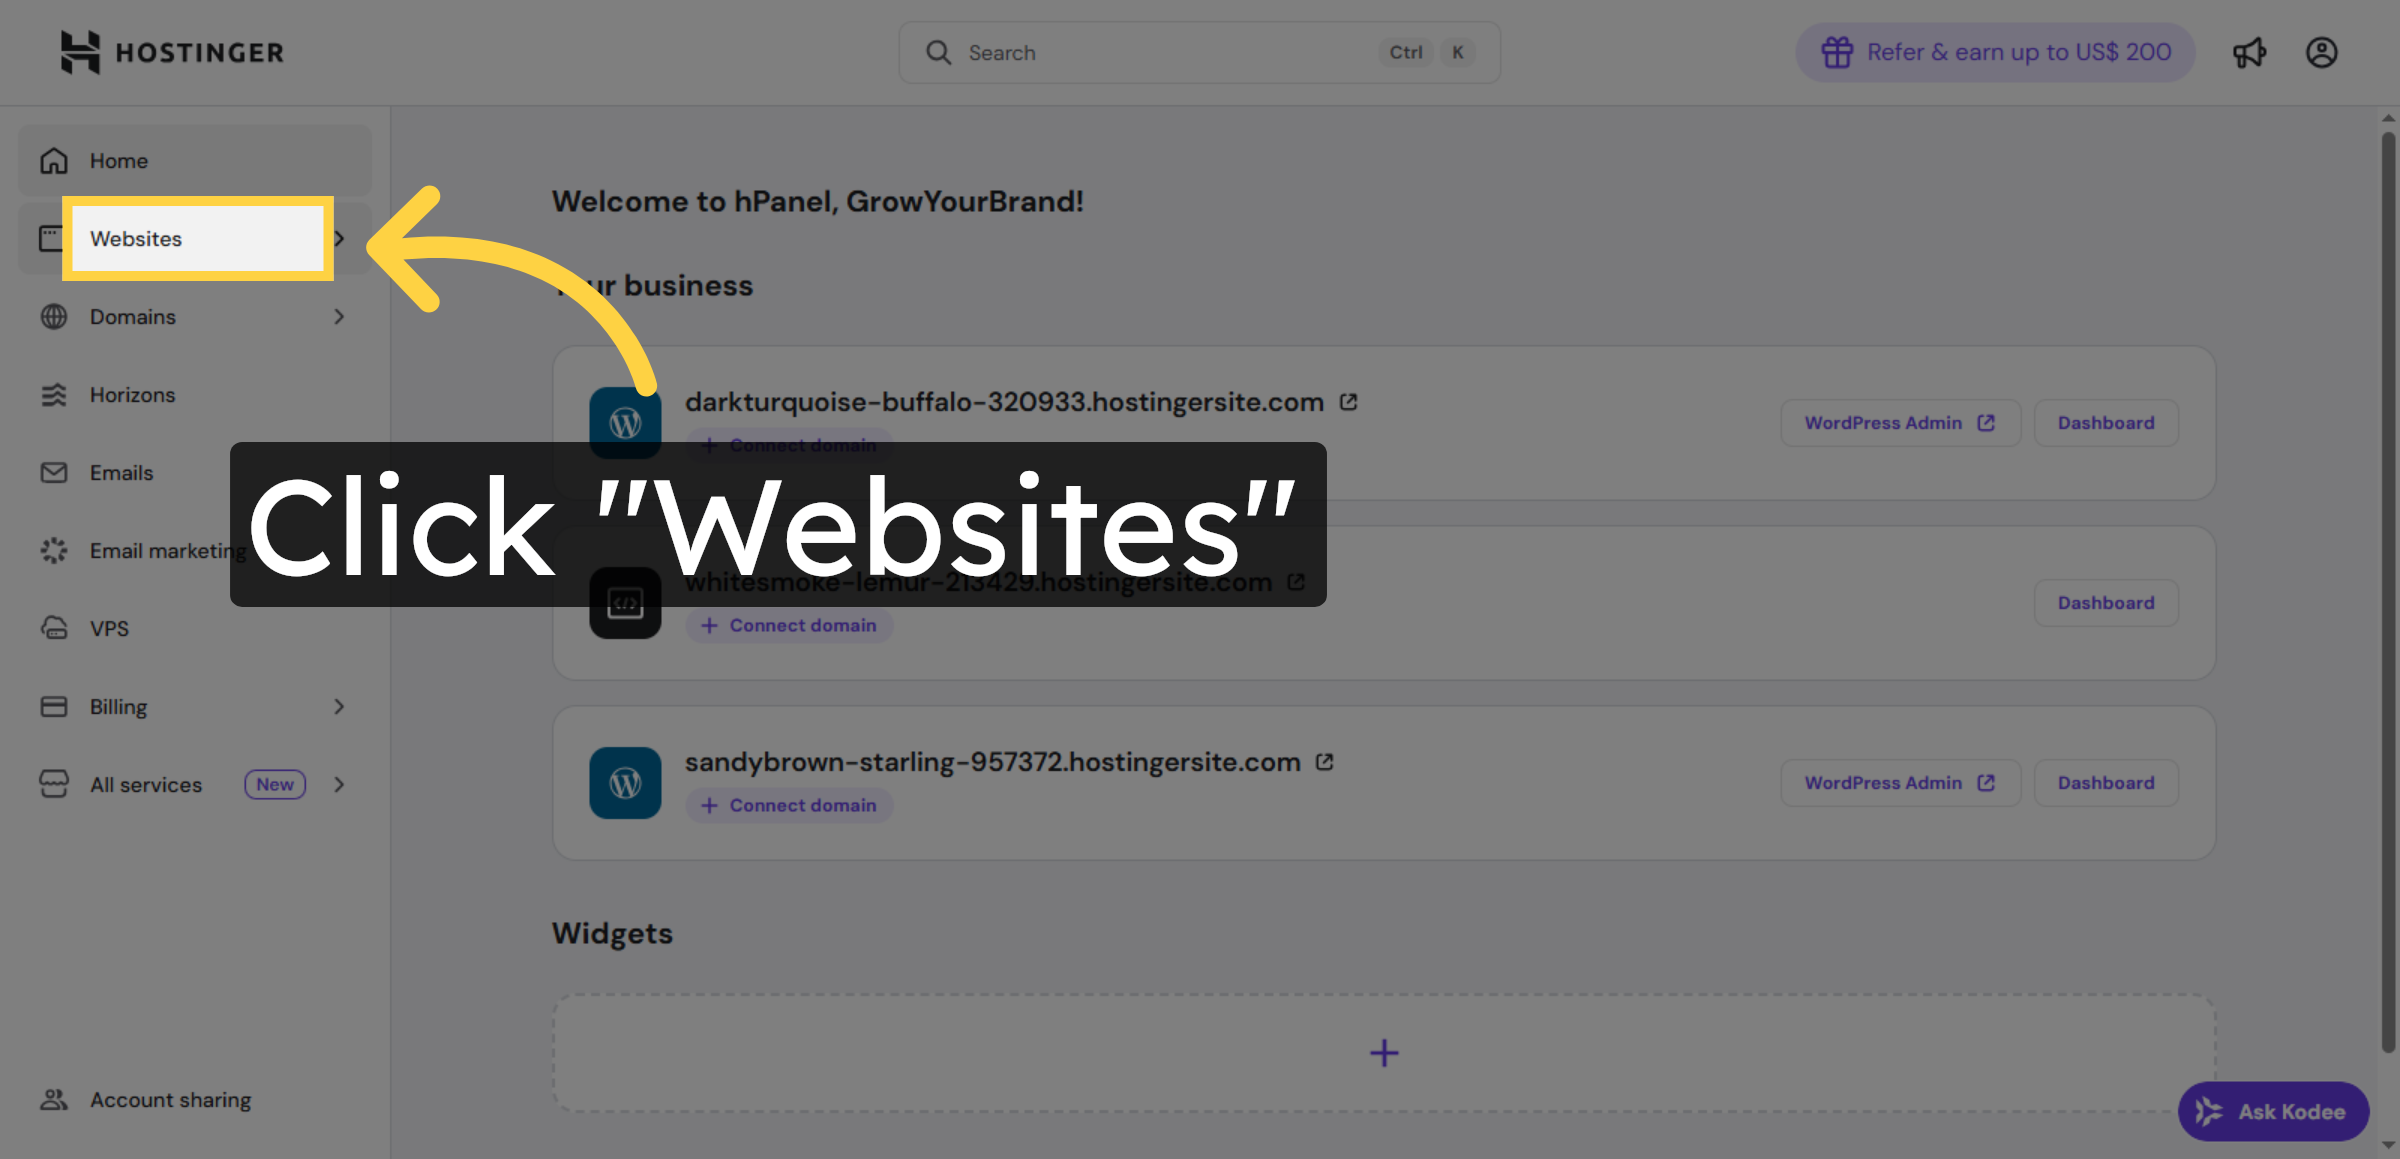
14. Open Websites Section

Click Websites in Hostinger to manage your hosted sites.

Open Websites Section

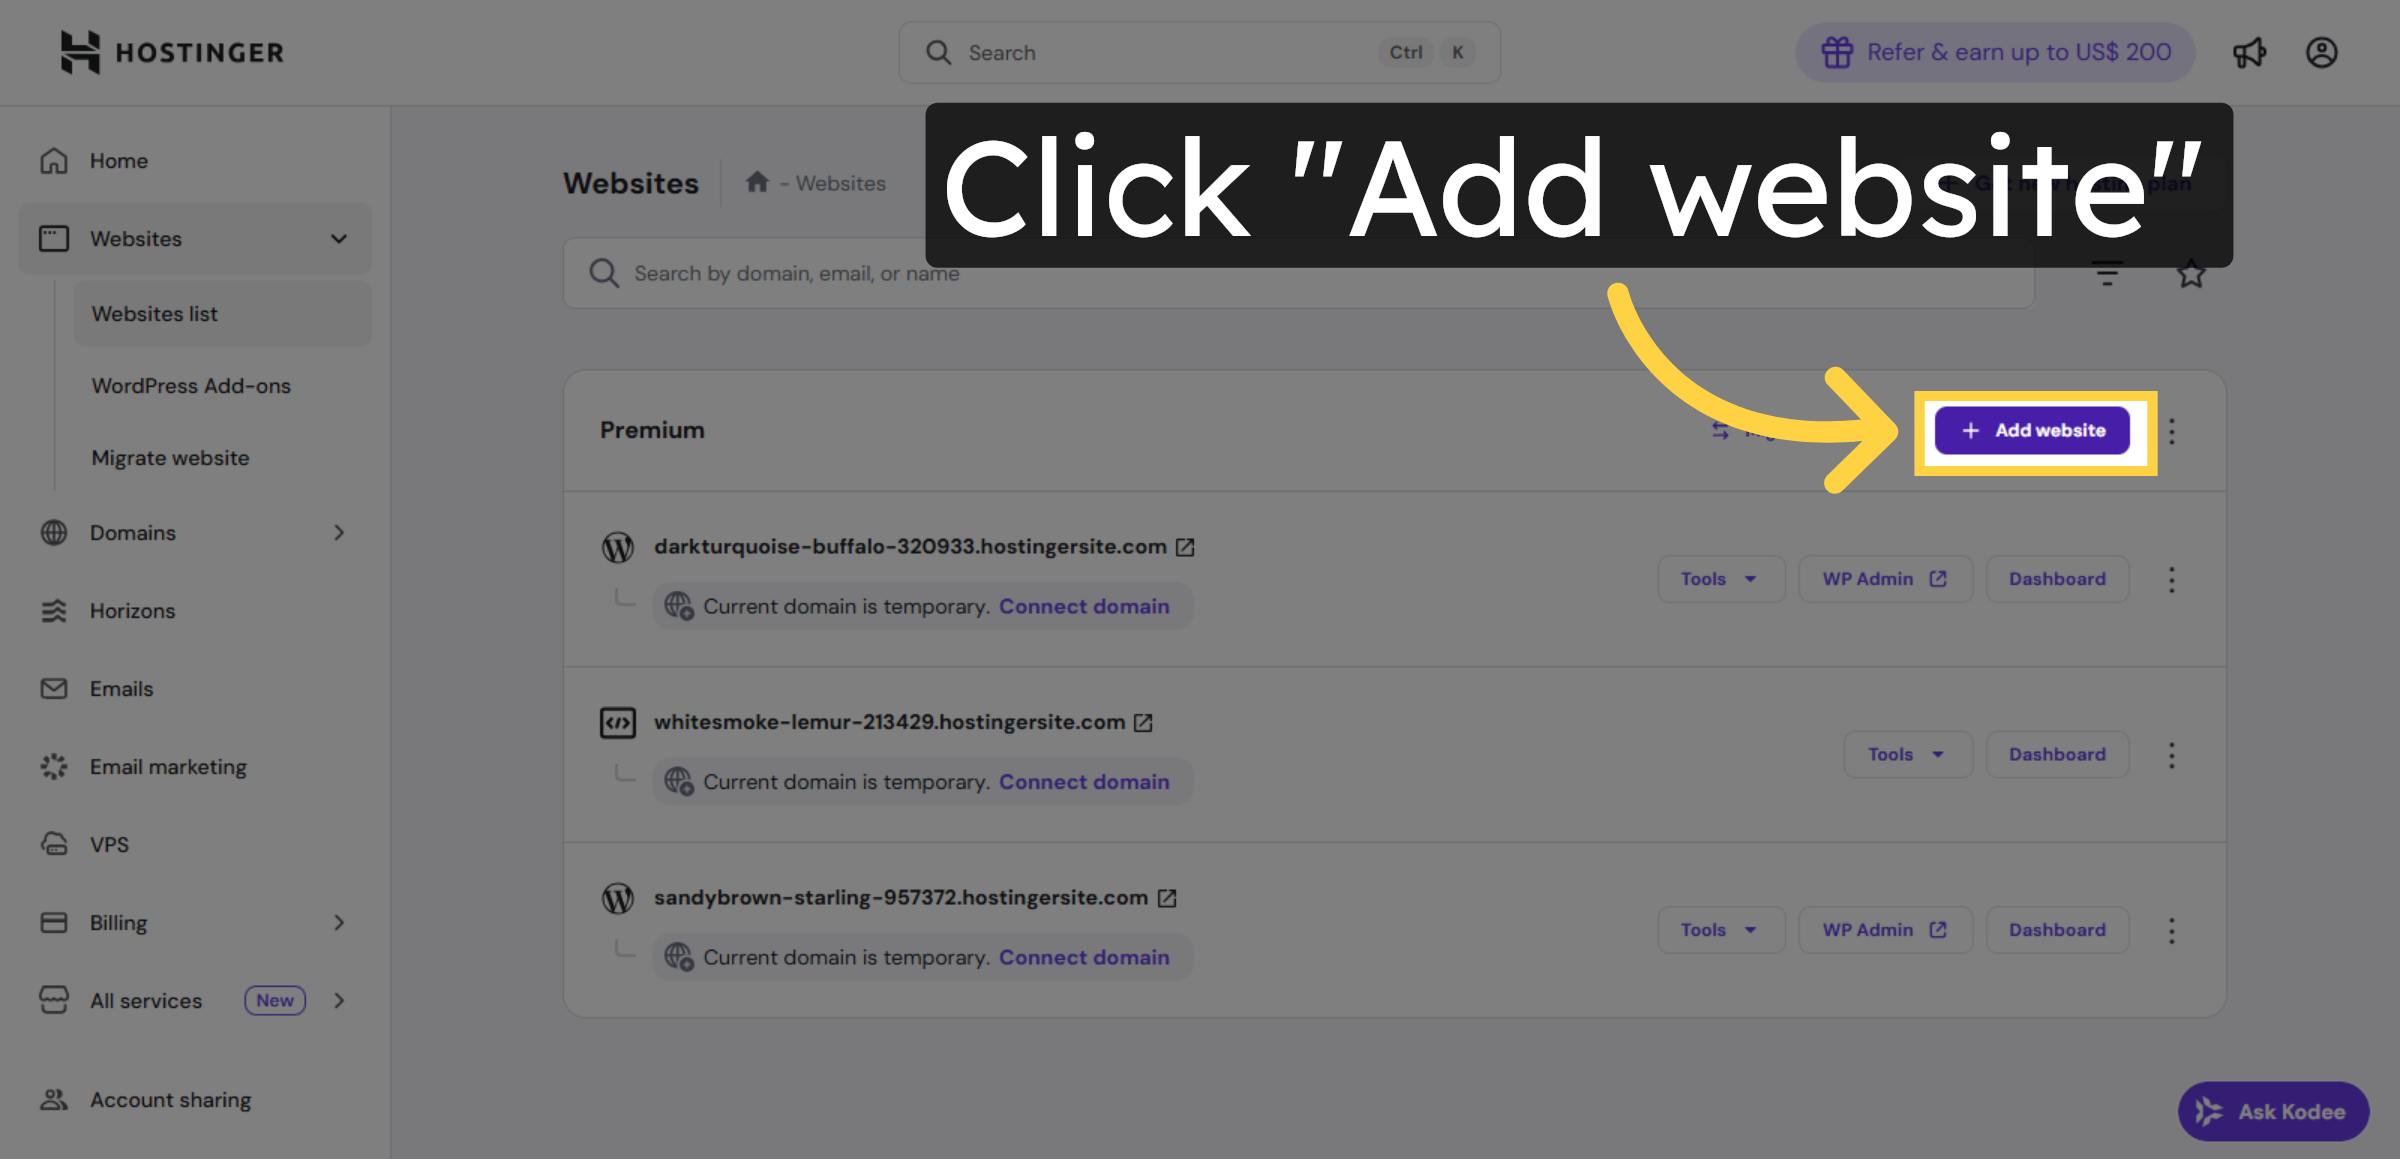
15. Add Another Website

Click Add website to create an additional WordPress site if needed.

Add Another Website

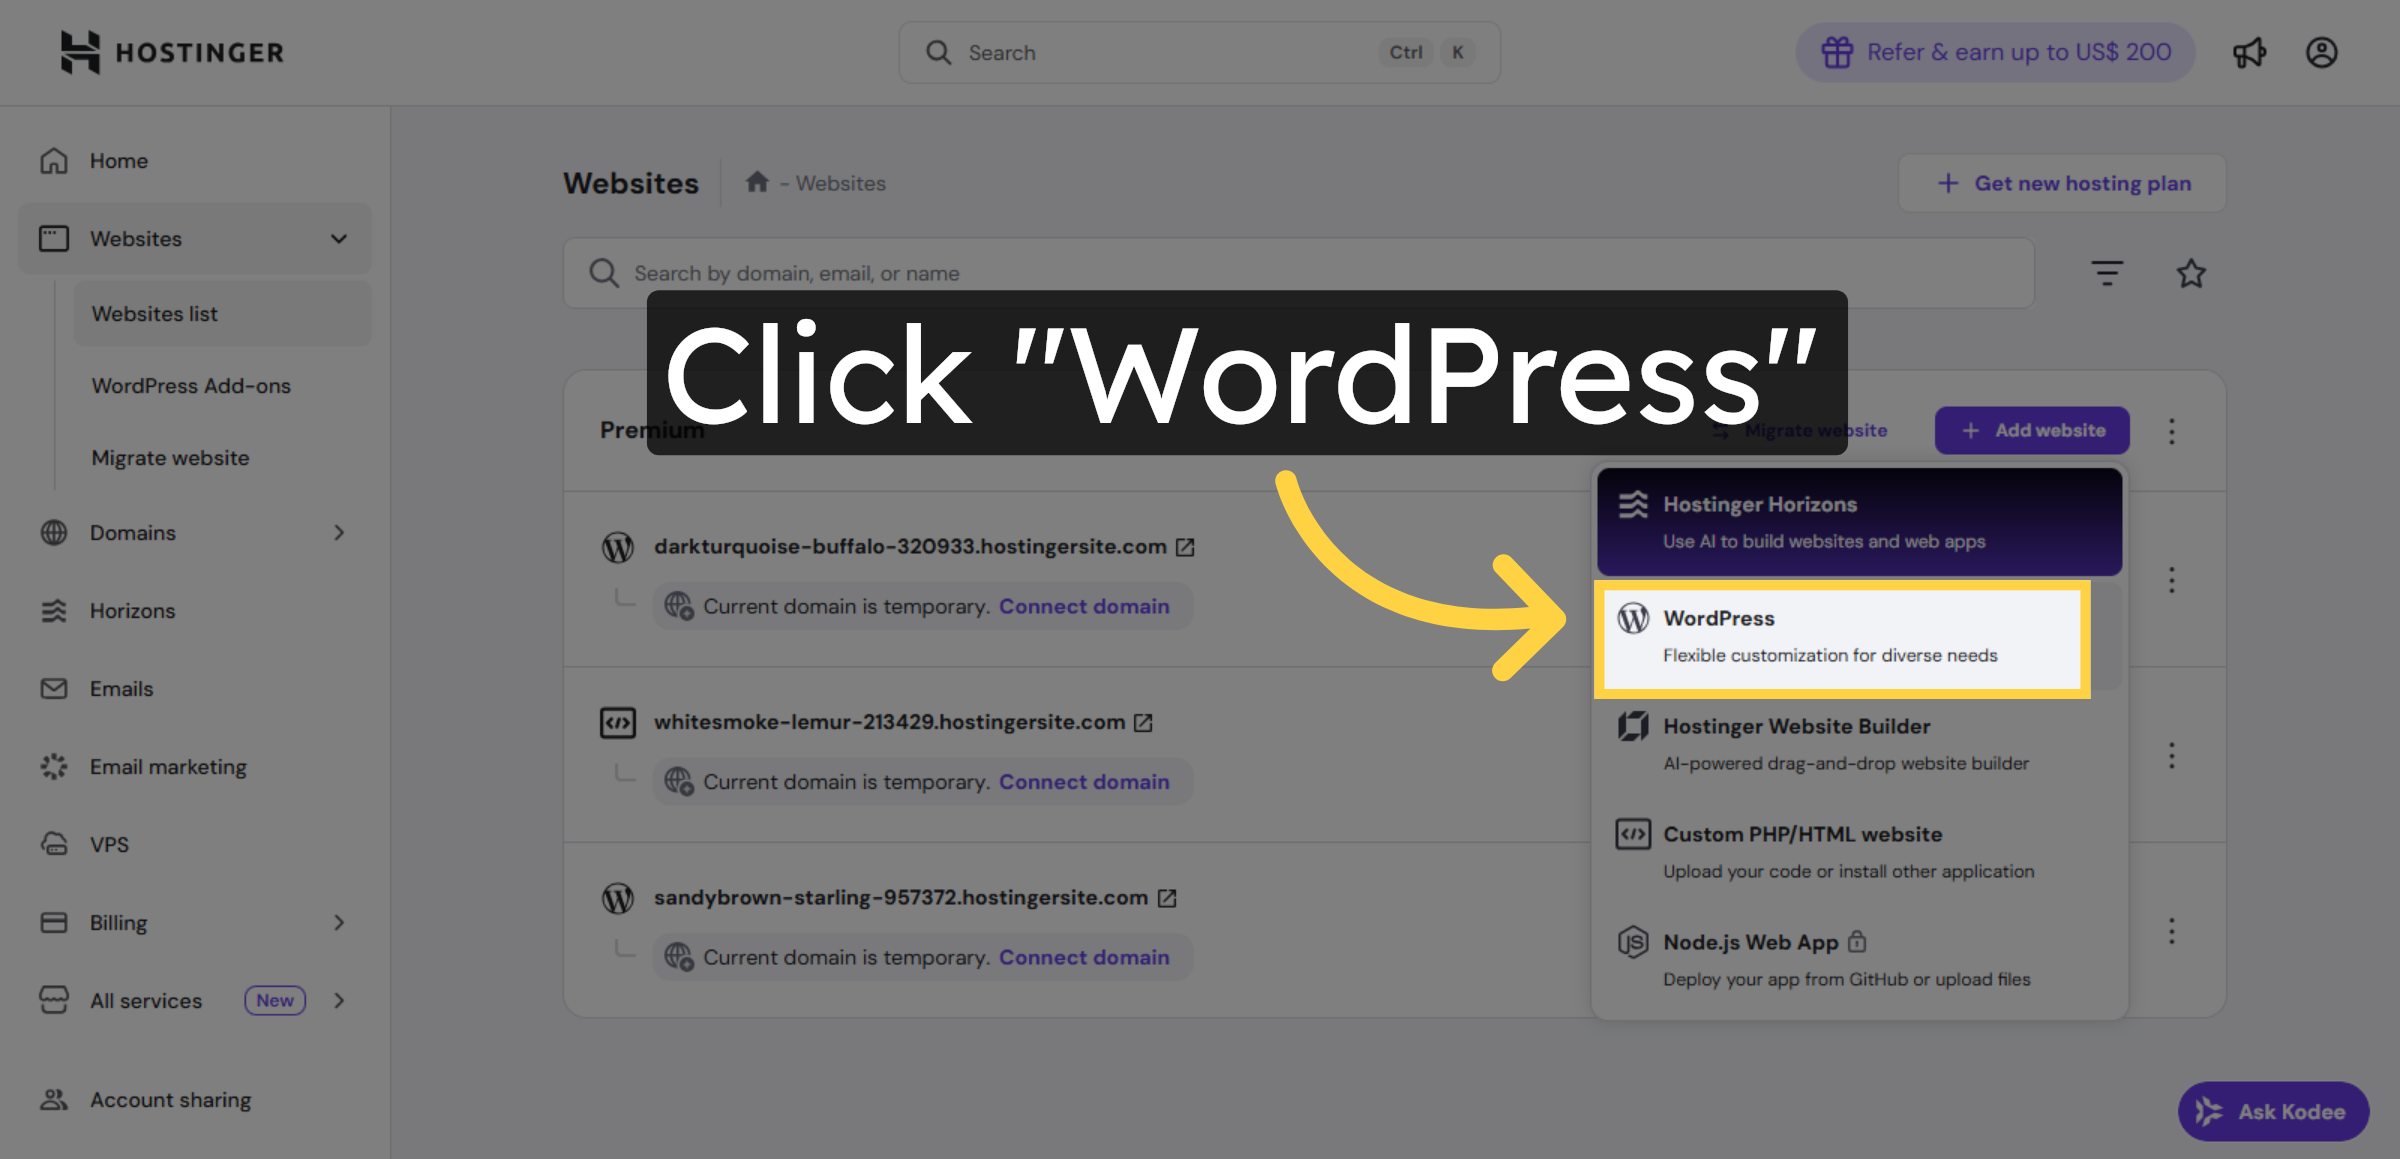
16. Choose WordPress Option
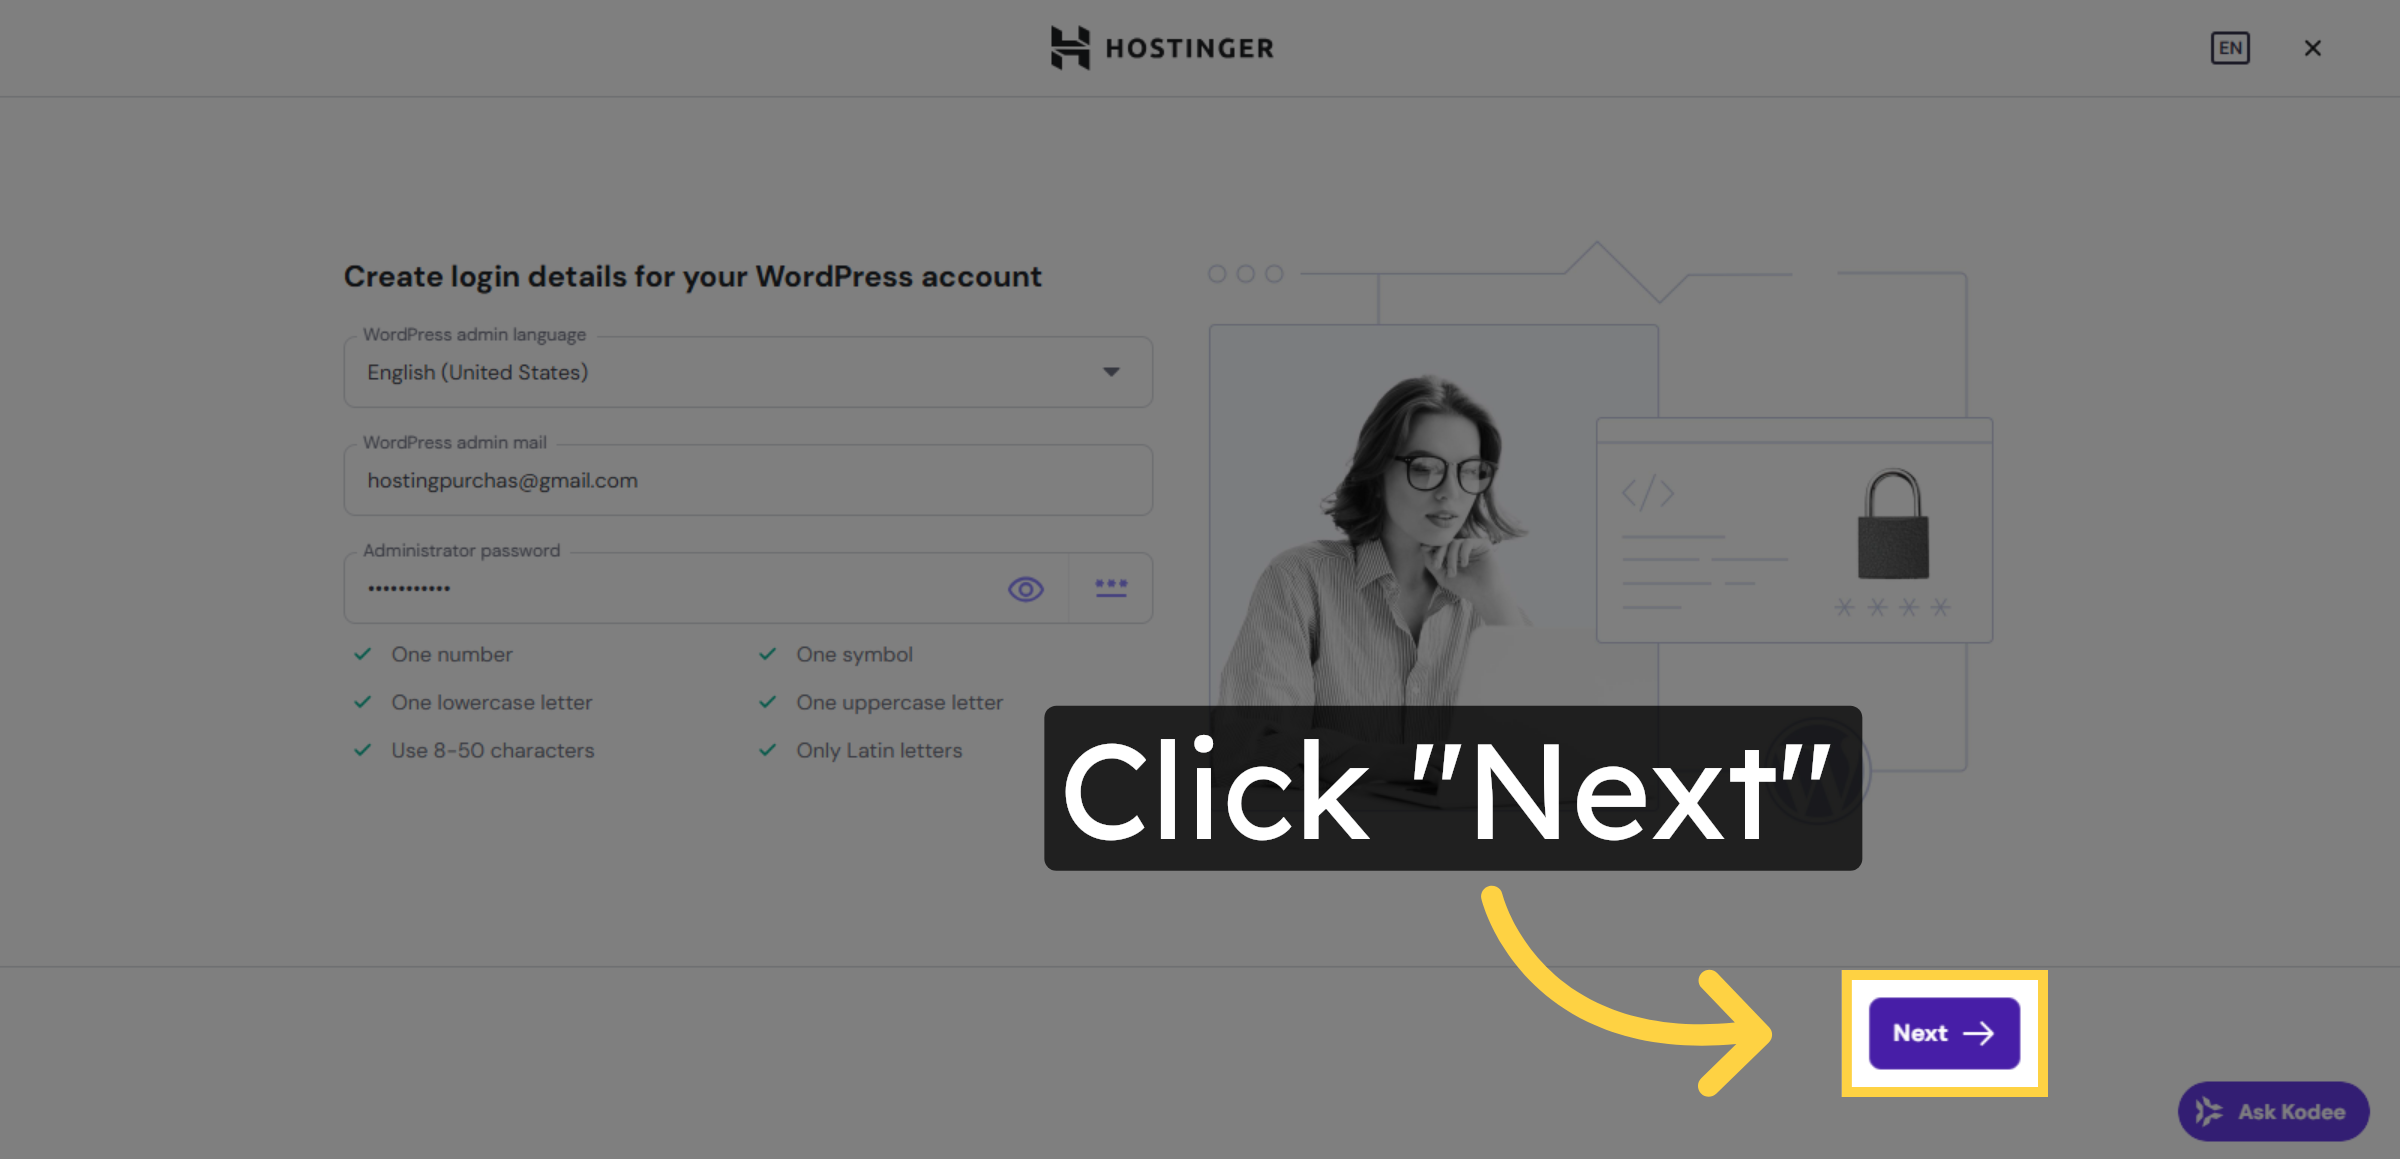
Click WordPress to select the WordPress platform for the new site.

Choose WordPress Option

17. Continue Setup

Click Next to proceed with the WordPress installation steps.

Continue Setup

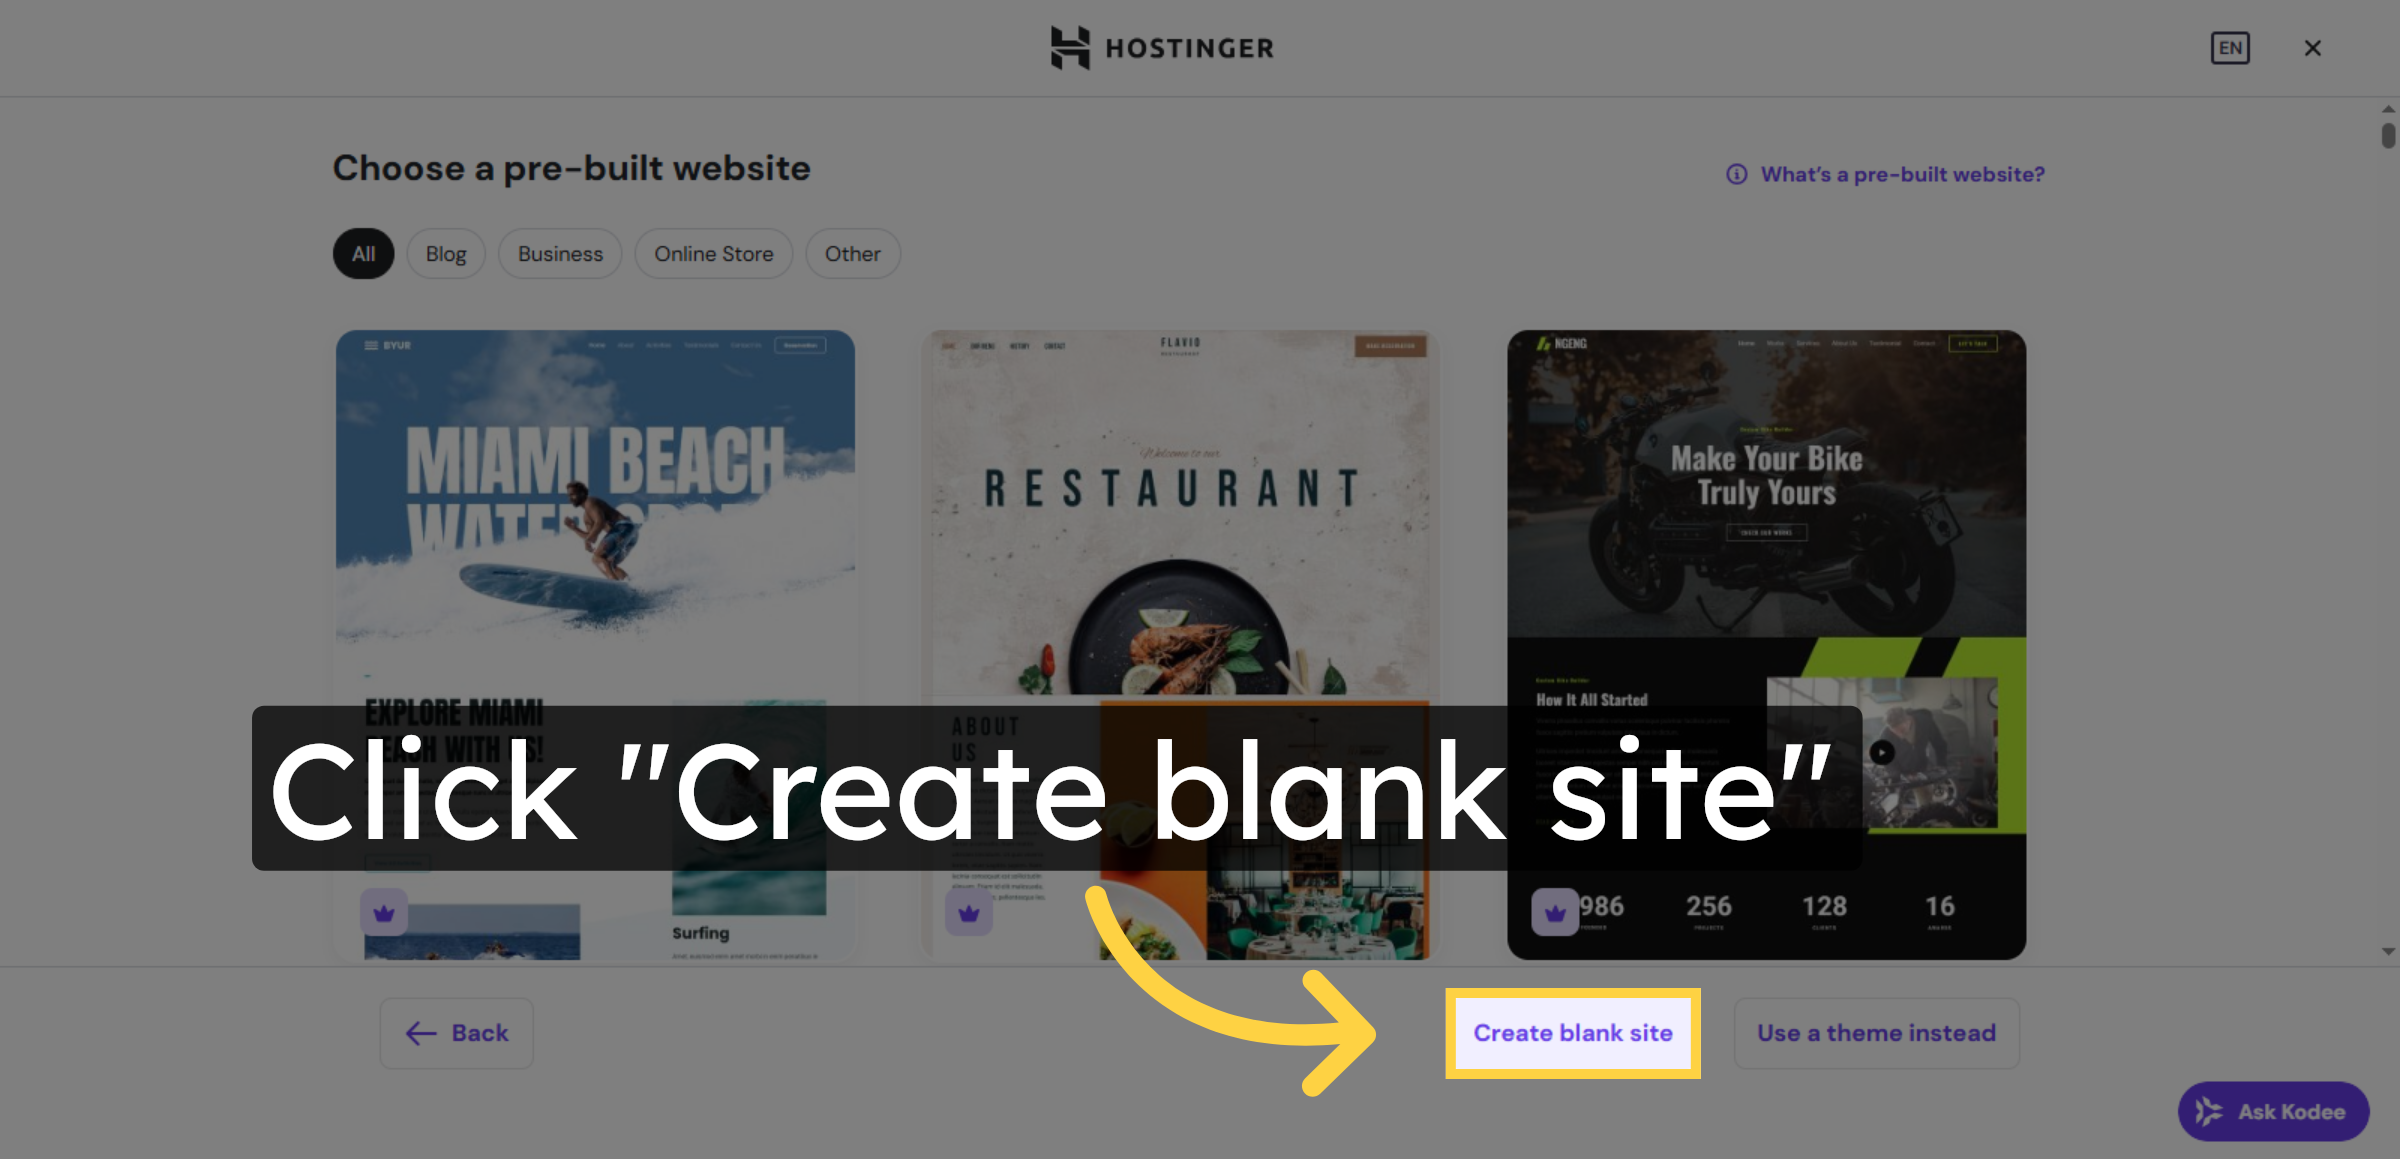
18. Create Another Blank Site

Click Create blank site to set up a fresh WordPress installation.

Create Another Blank Site

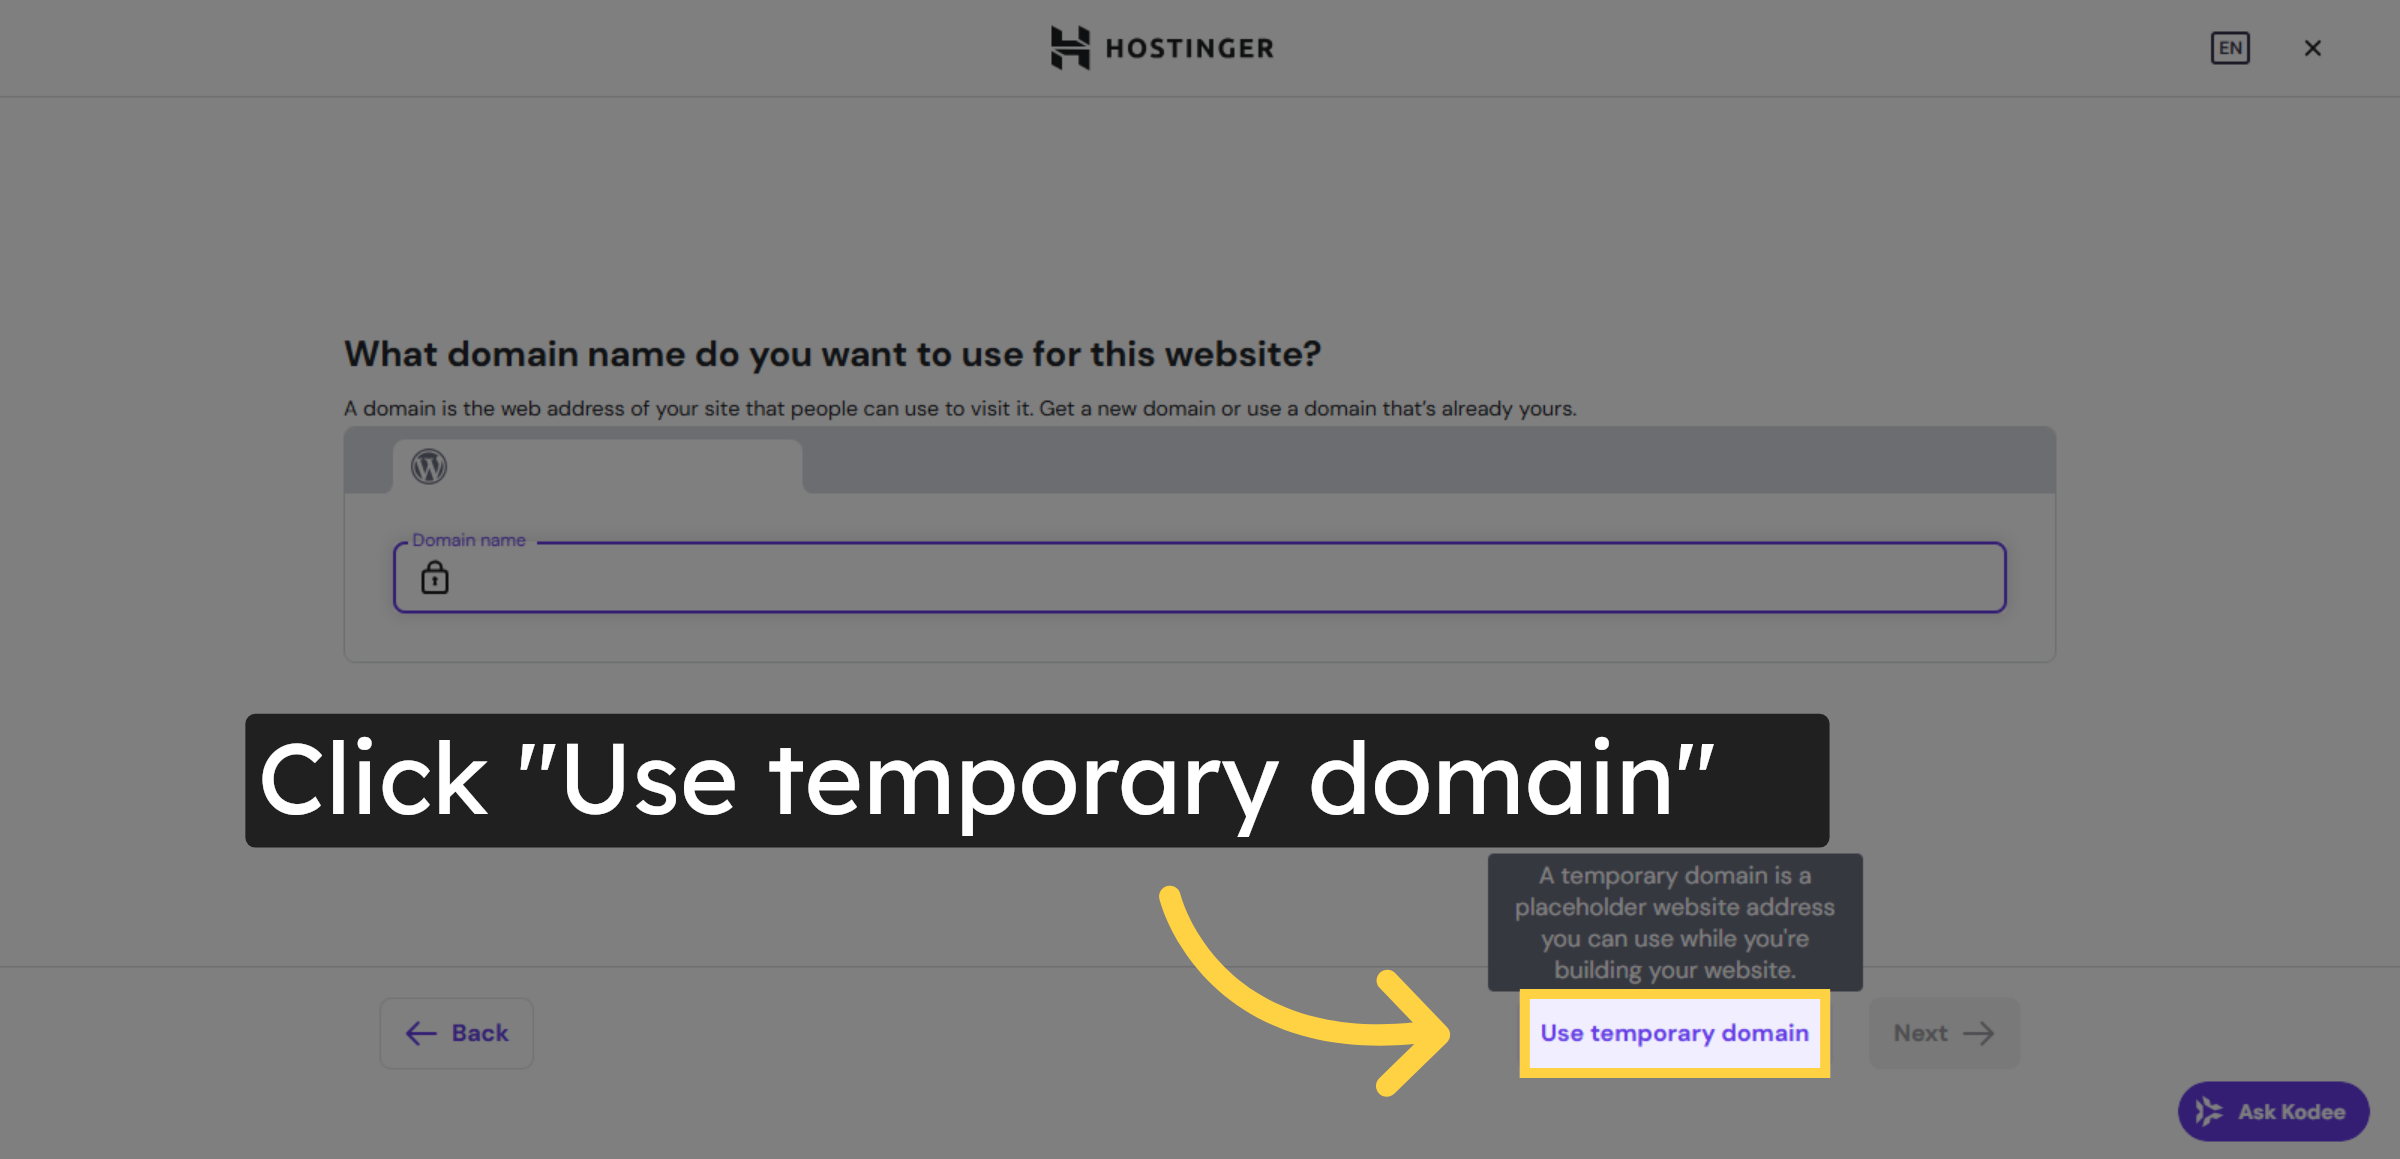
19. Select Temporary Domain Again

Click Use temporary domain to assign a temporary URL for this new site.

Select Temporary Domain Again

Ad Banner

20. Switch to New WordPress Site

Switch to the WordPress dashboard of your new Hostinger site using the temporary domain URL.

Switch to New WordPress Site

21. Open Plugin Installation

Click Add Plugin in the new WordPress dashboard to install necessary plugins.

Open Plugin Installation

22. Search for Migration Plugin

Click Search Plugins to find the migration plugin for importing your site.

Search for Migration Plugin

23. Enter Migration in Search

Enter migration in the search box to locate the All-in-One WP Migration plugin.

Enter Migration in Search

24. Install Migration Plugin

Click Install Now to add the migration plugin to your new WordPress site.

Install Migration Plugin

25. Activate Migration Plugin

Click Activate to enable the migration plugin for importing your site data.

Activate Migration Plugin

26. Open Migration Plugin Menu

Click All-in-One WP Migration to access the plugin’s import features.

Open Migration Plugin Menu

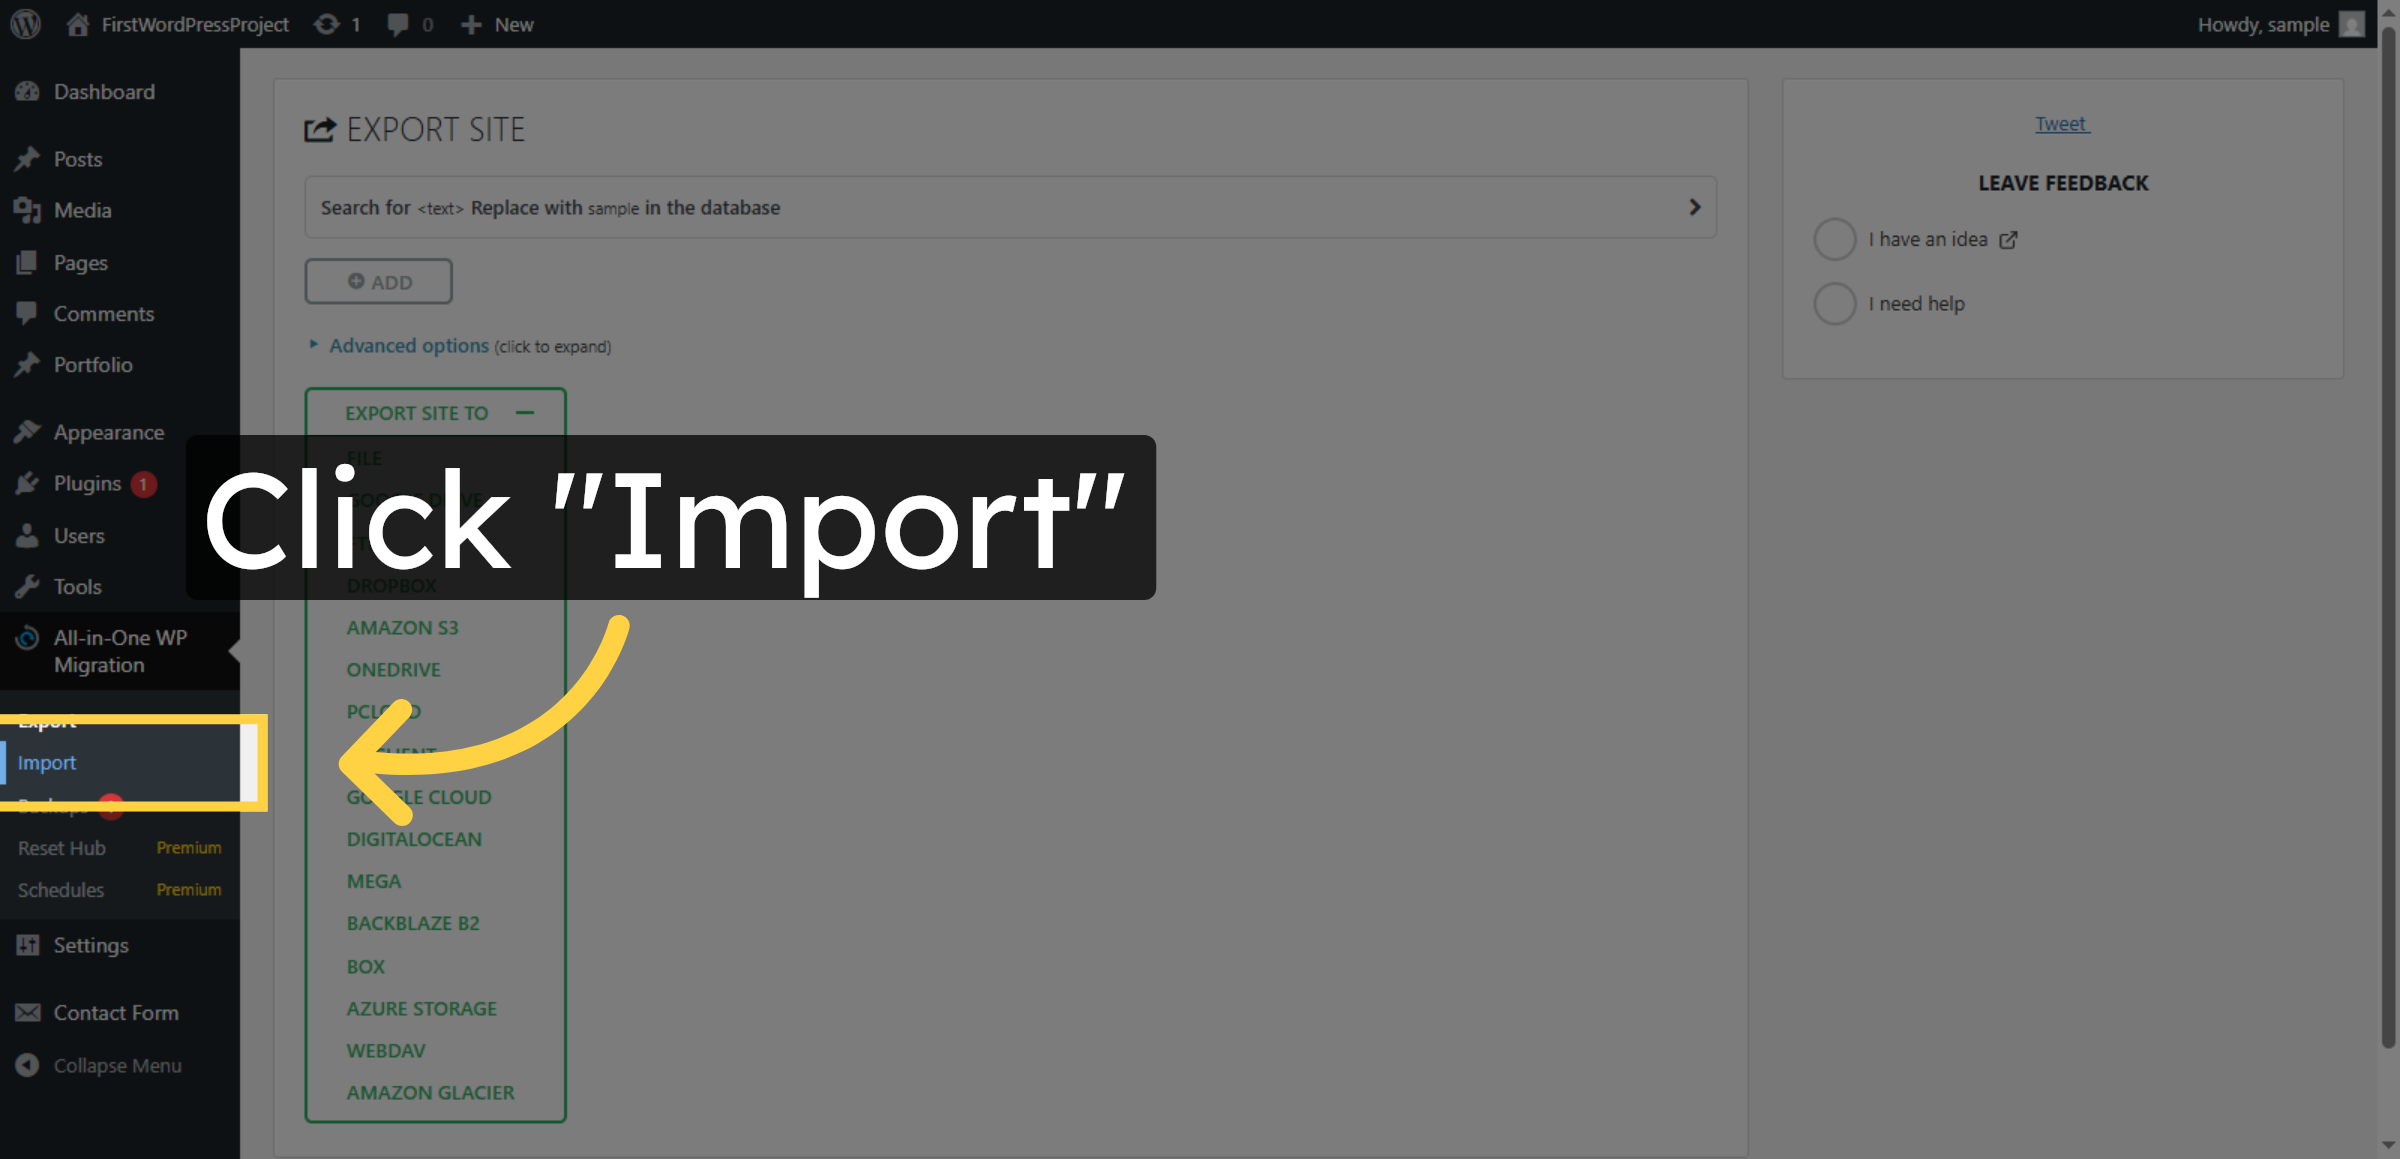
27. Select Import Option

Click Import to begin importing your site data into the new host.

Select Import Option

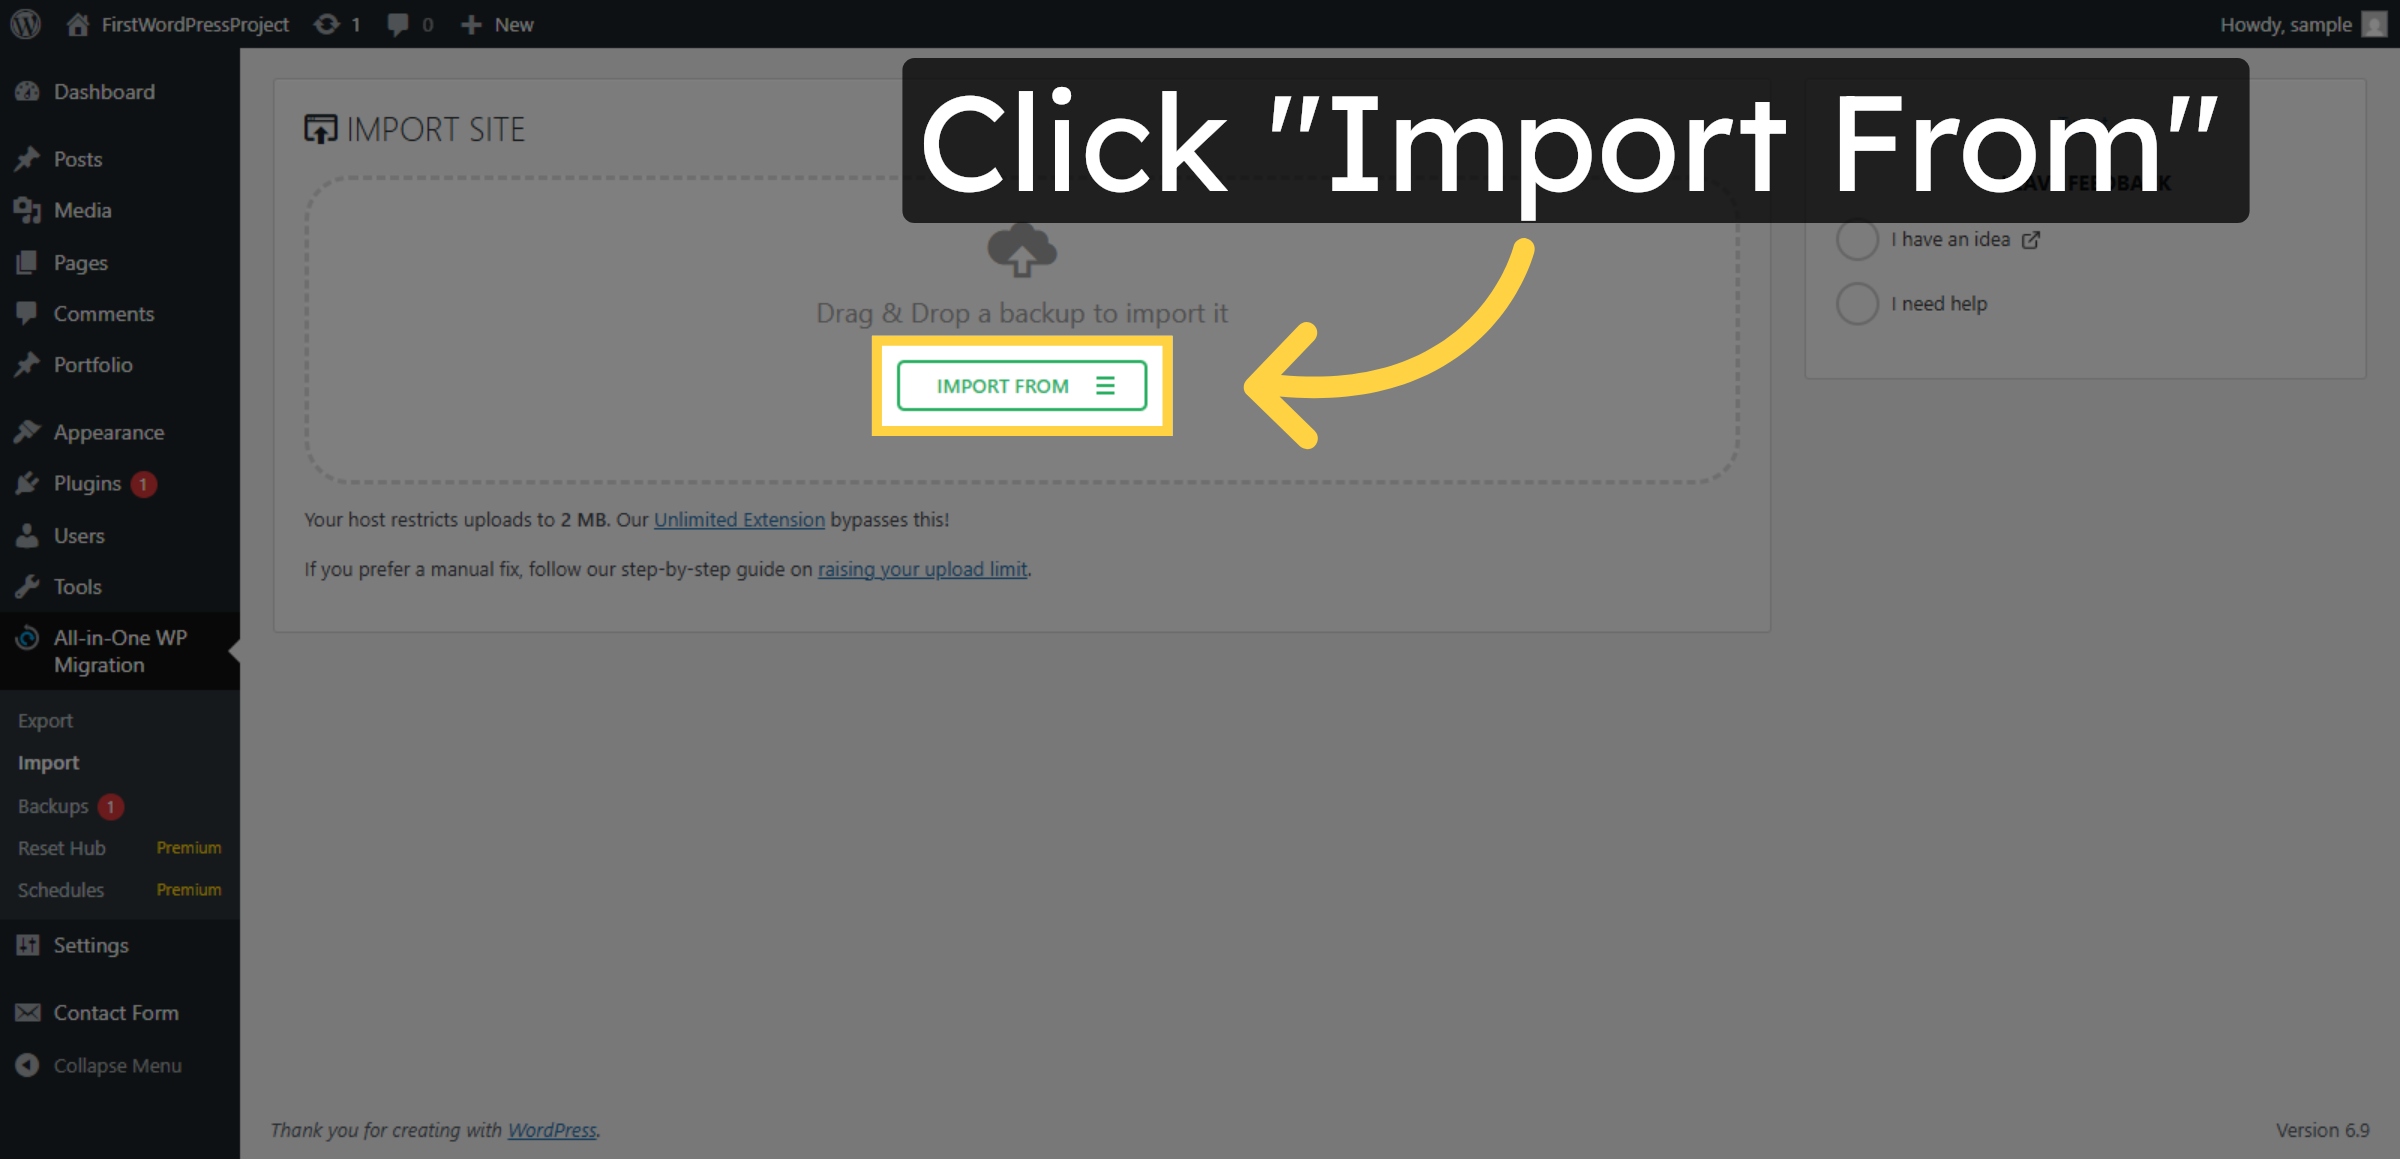
28. Open Import From Menu

Click Import From to choose the source of your site backup file.

Open Import From Menu

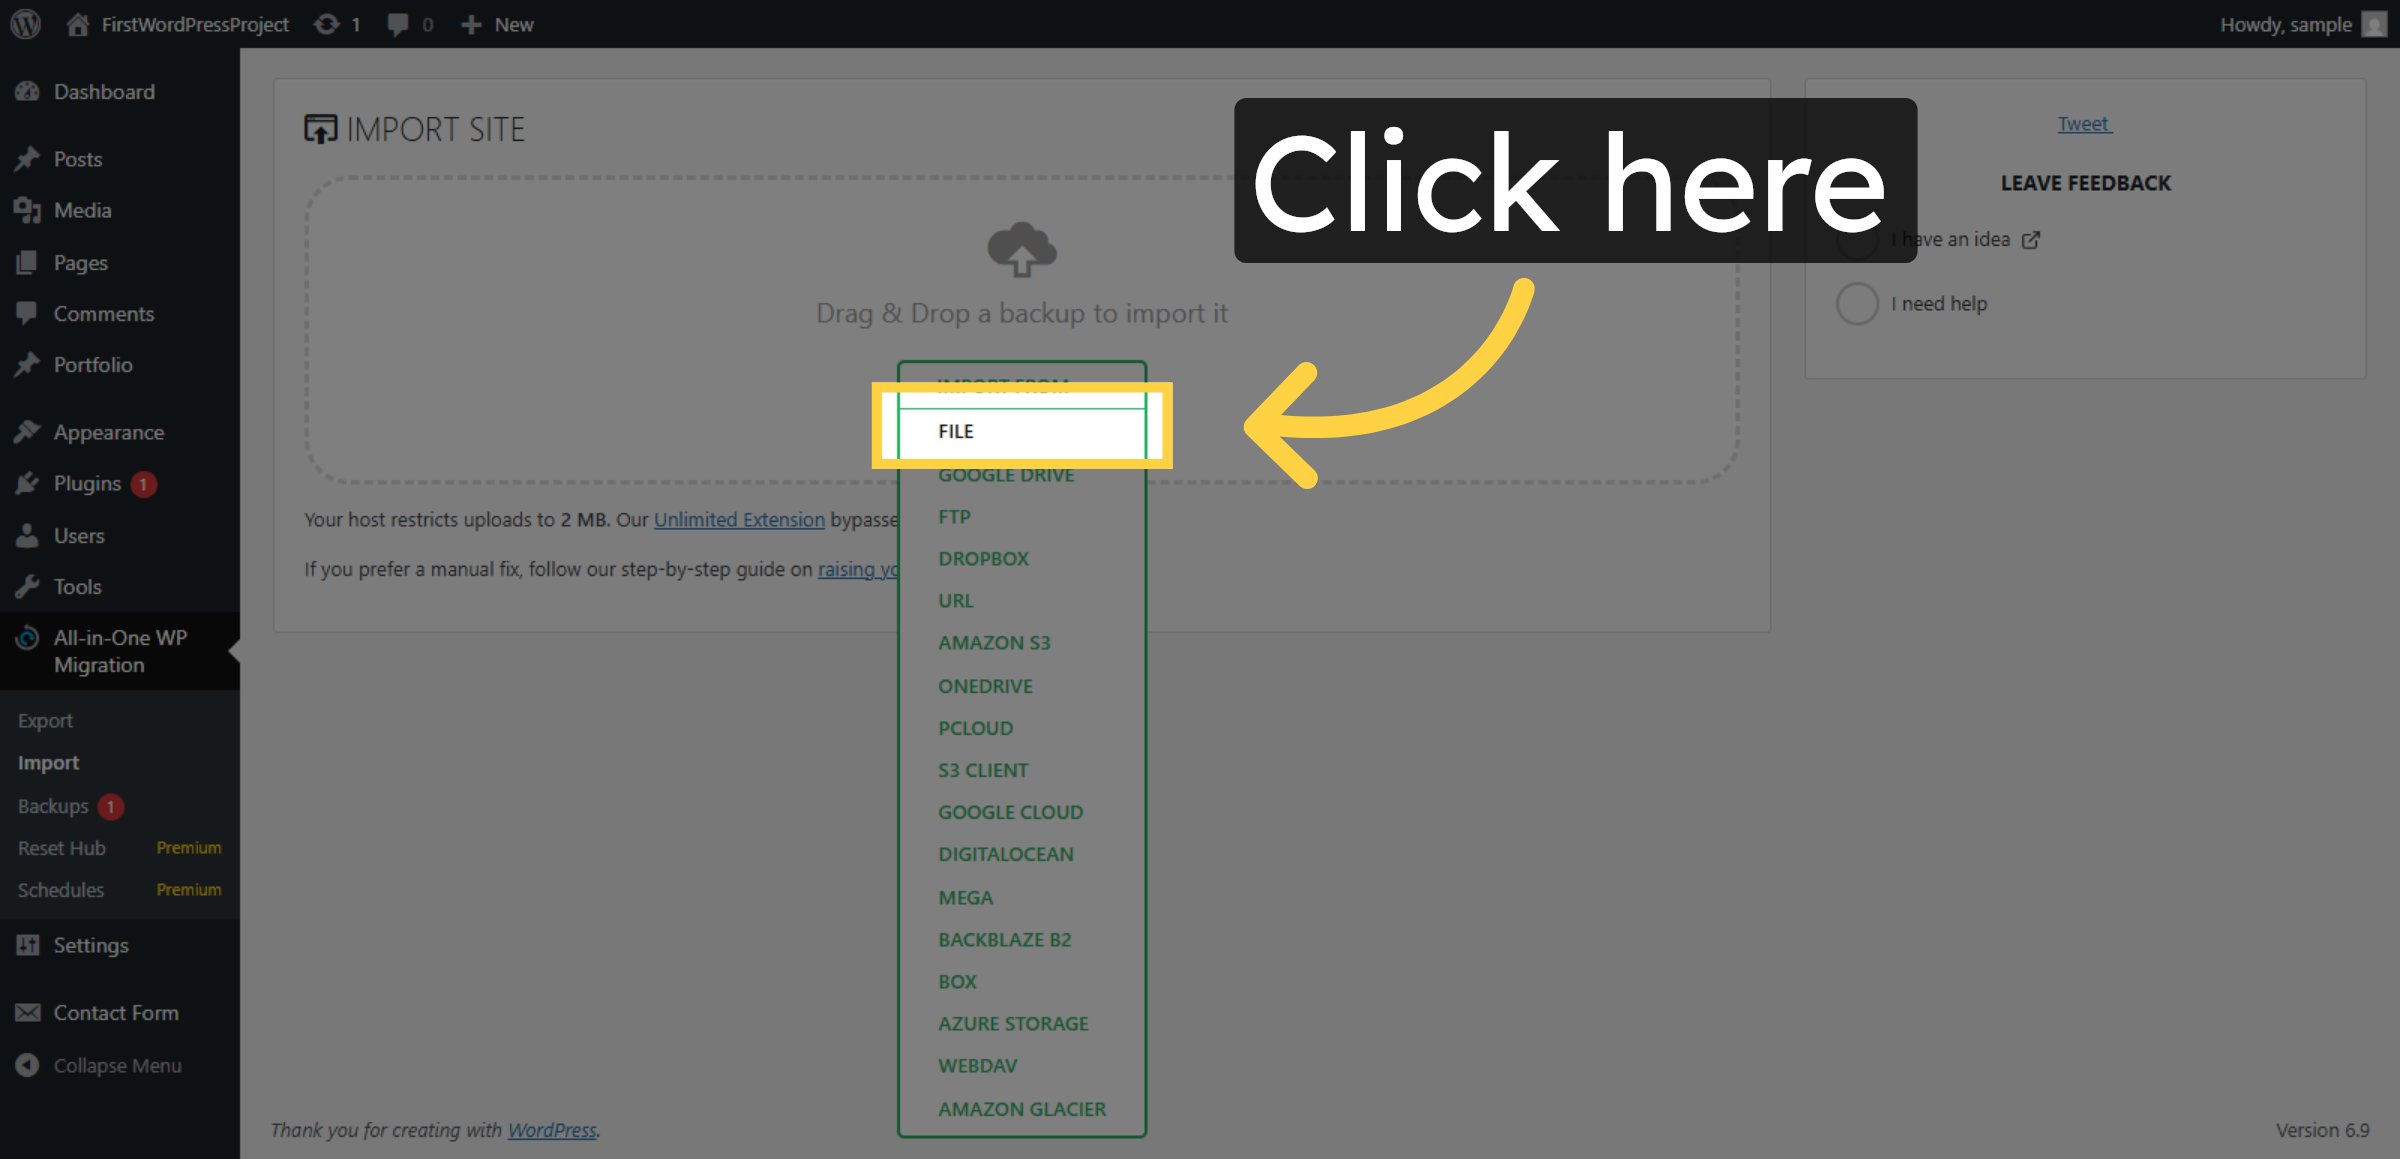
29. Choose Import Source

Click the appropriate area to select the file import source.

Choose Import Source

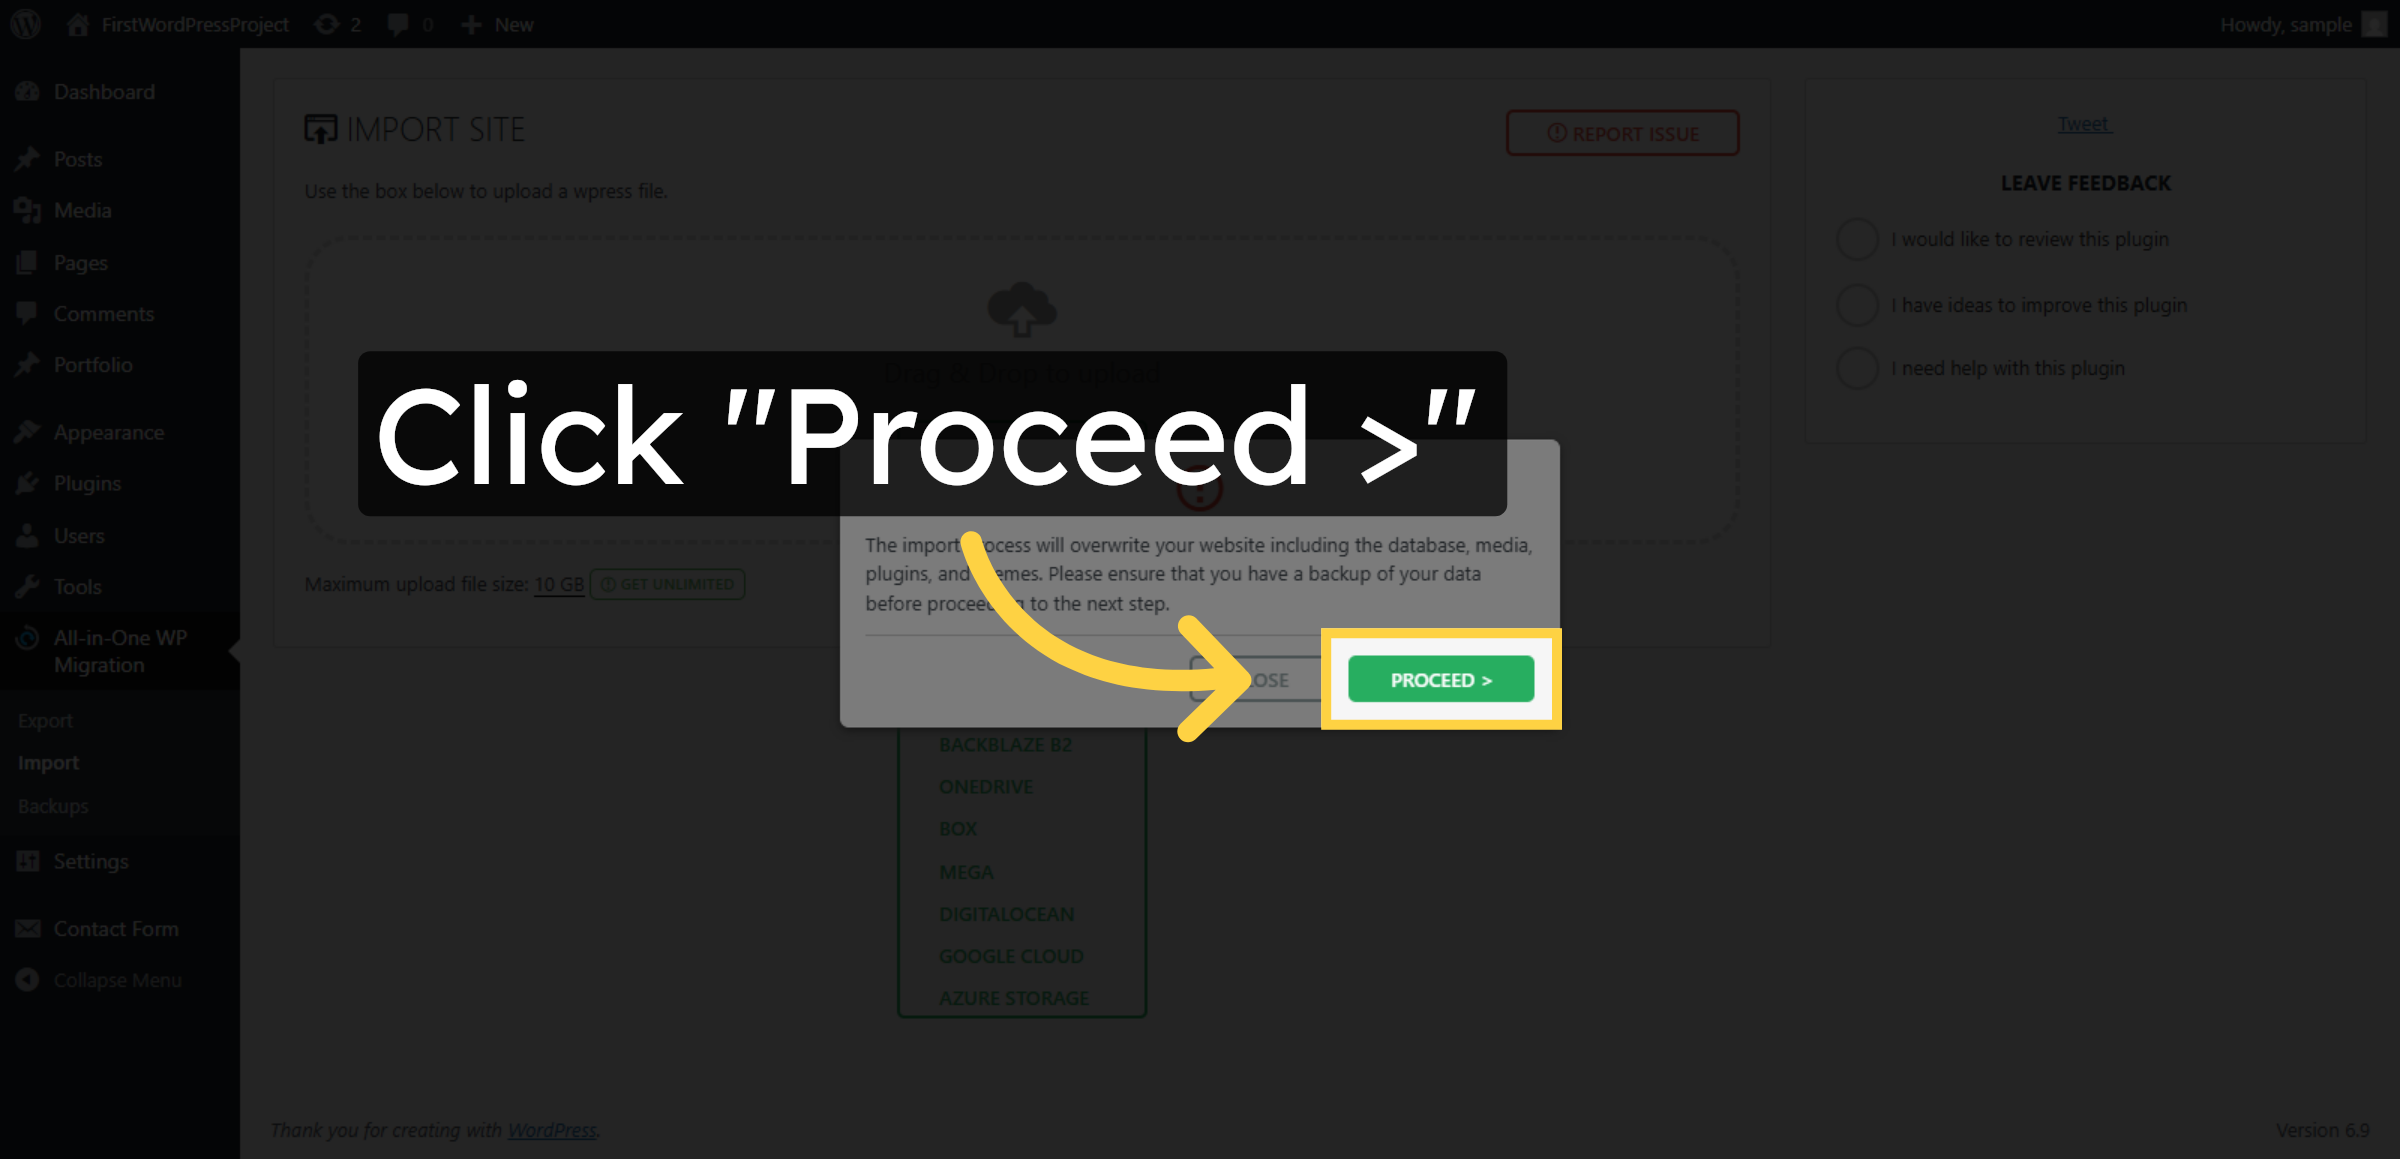
30. Click Proceed Button

Click Proceed > to finalize the migration and apply changes.

Click Proceed Button

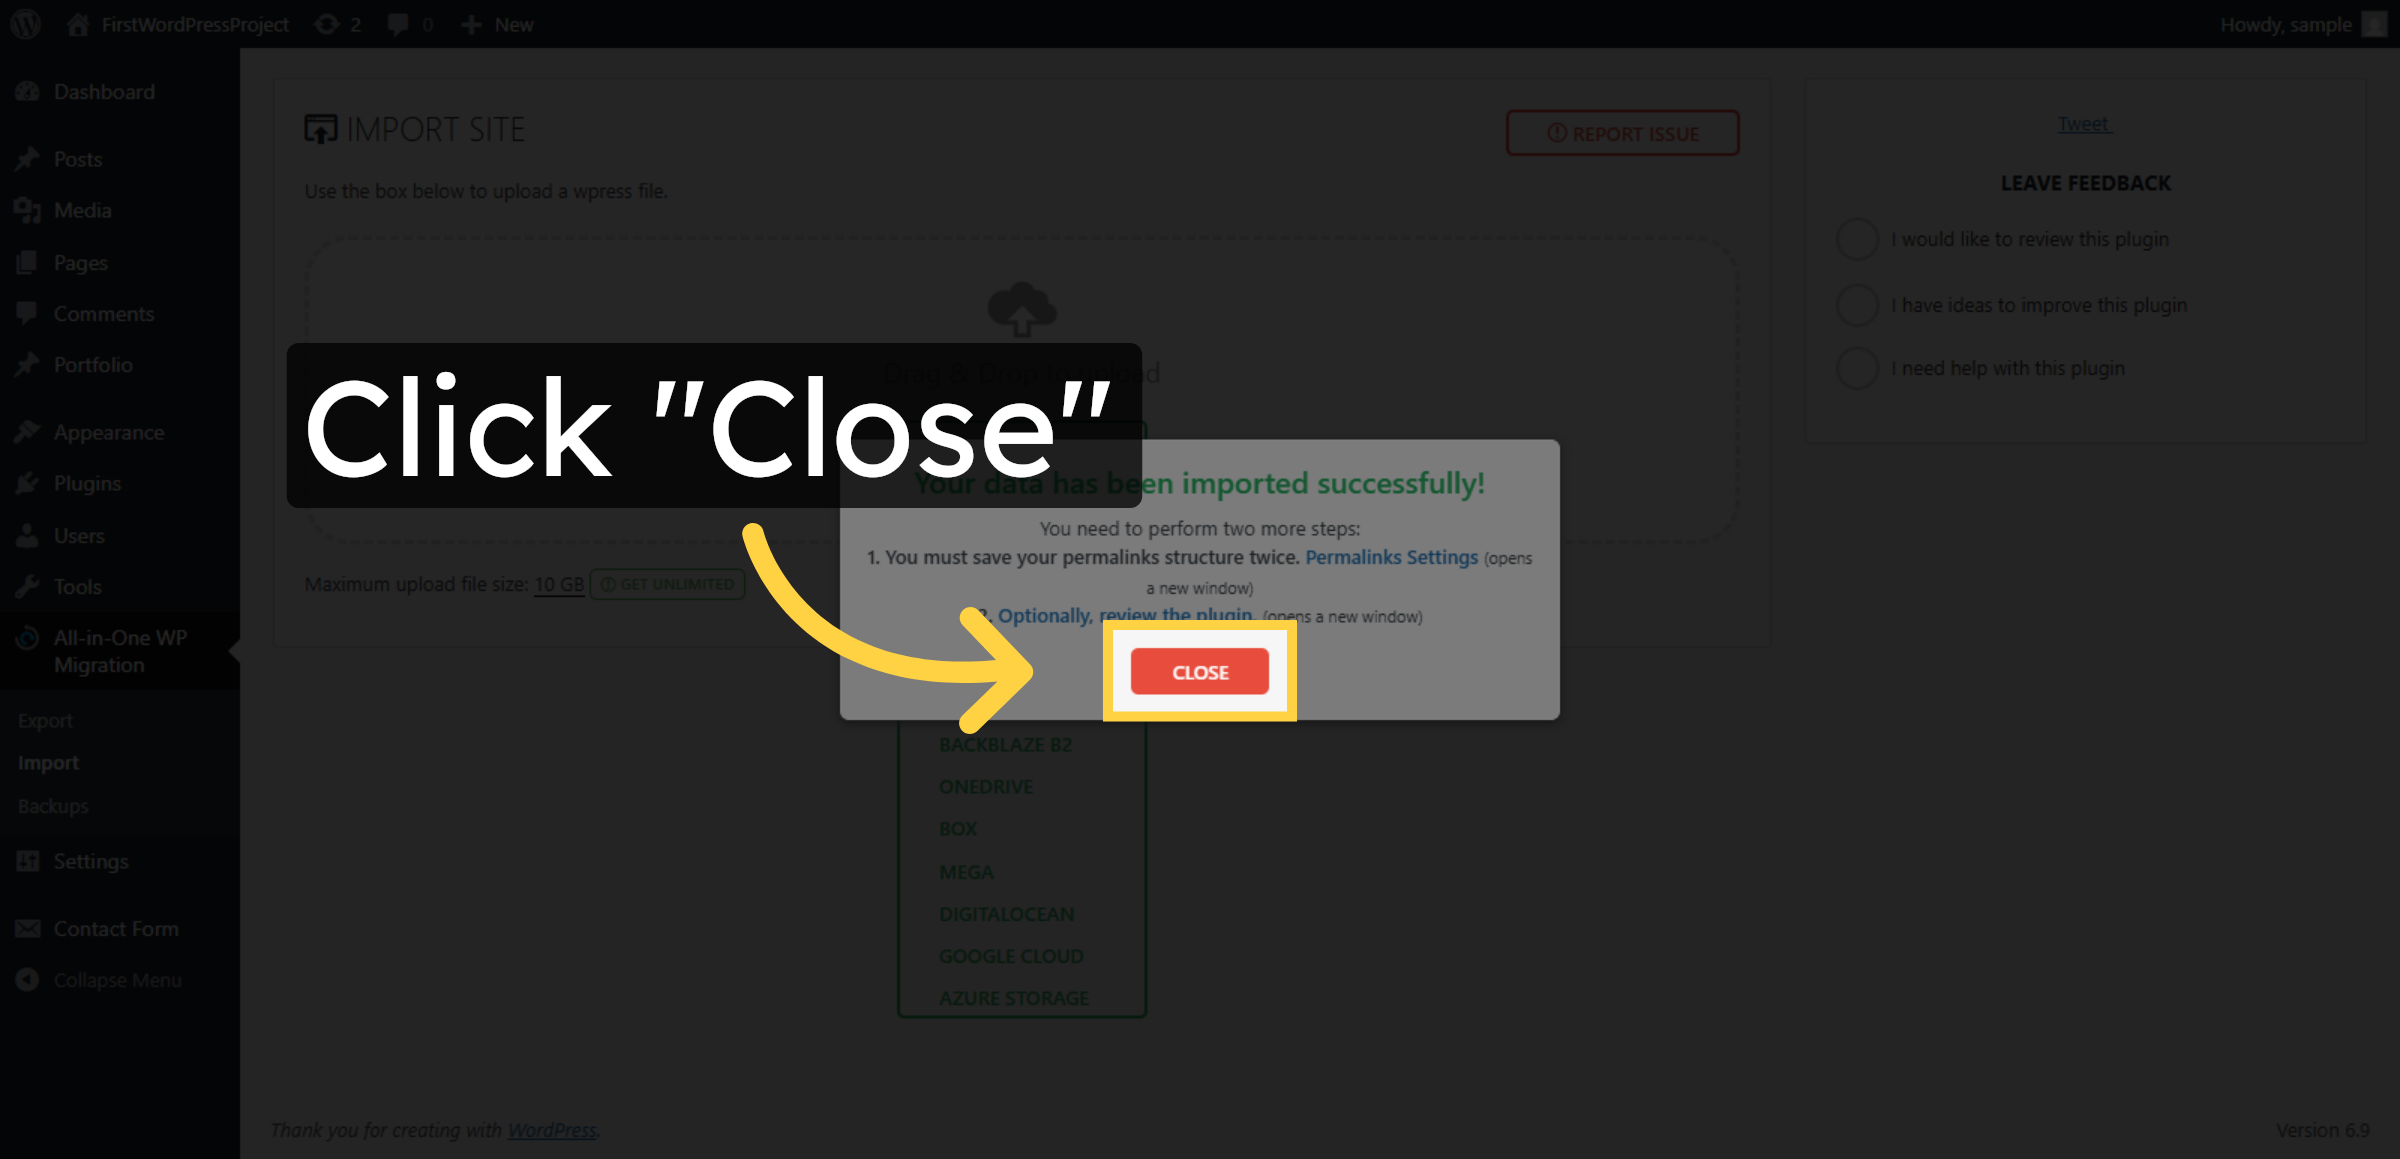
31. Close Completion Window

Click Close to exit the import completion interface.

Close Completion Window

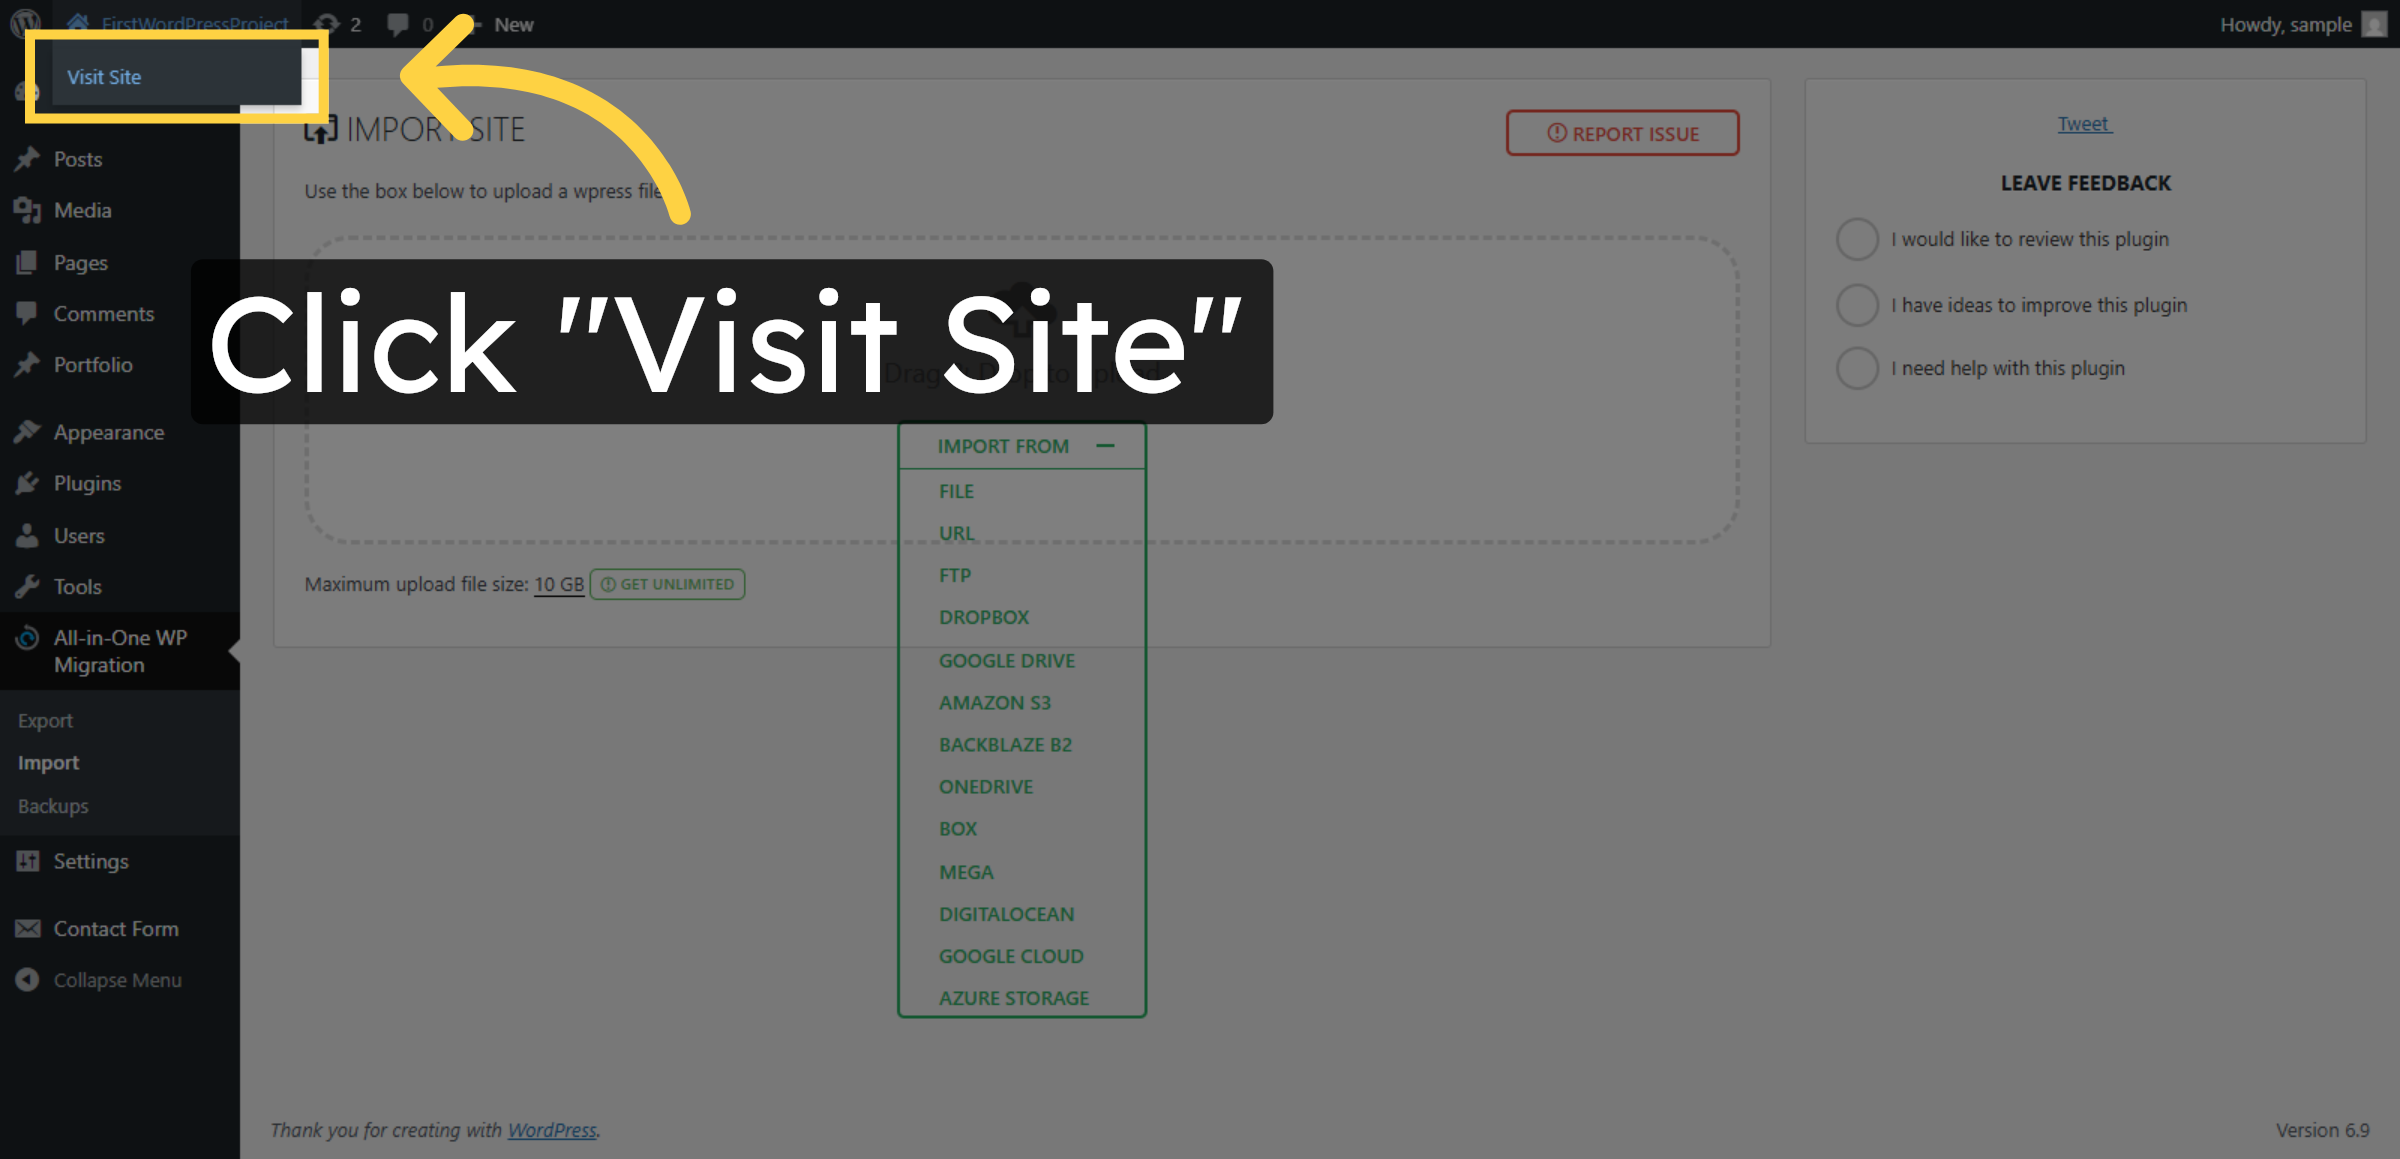
32. Visit Migrated Site

Click Visit Site to view your WordPress site now hosted on HostGator.

Visit Migrated Site

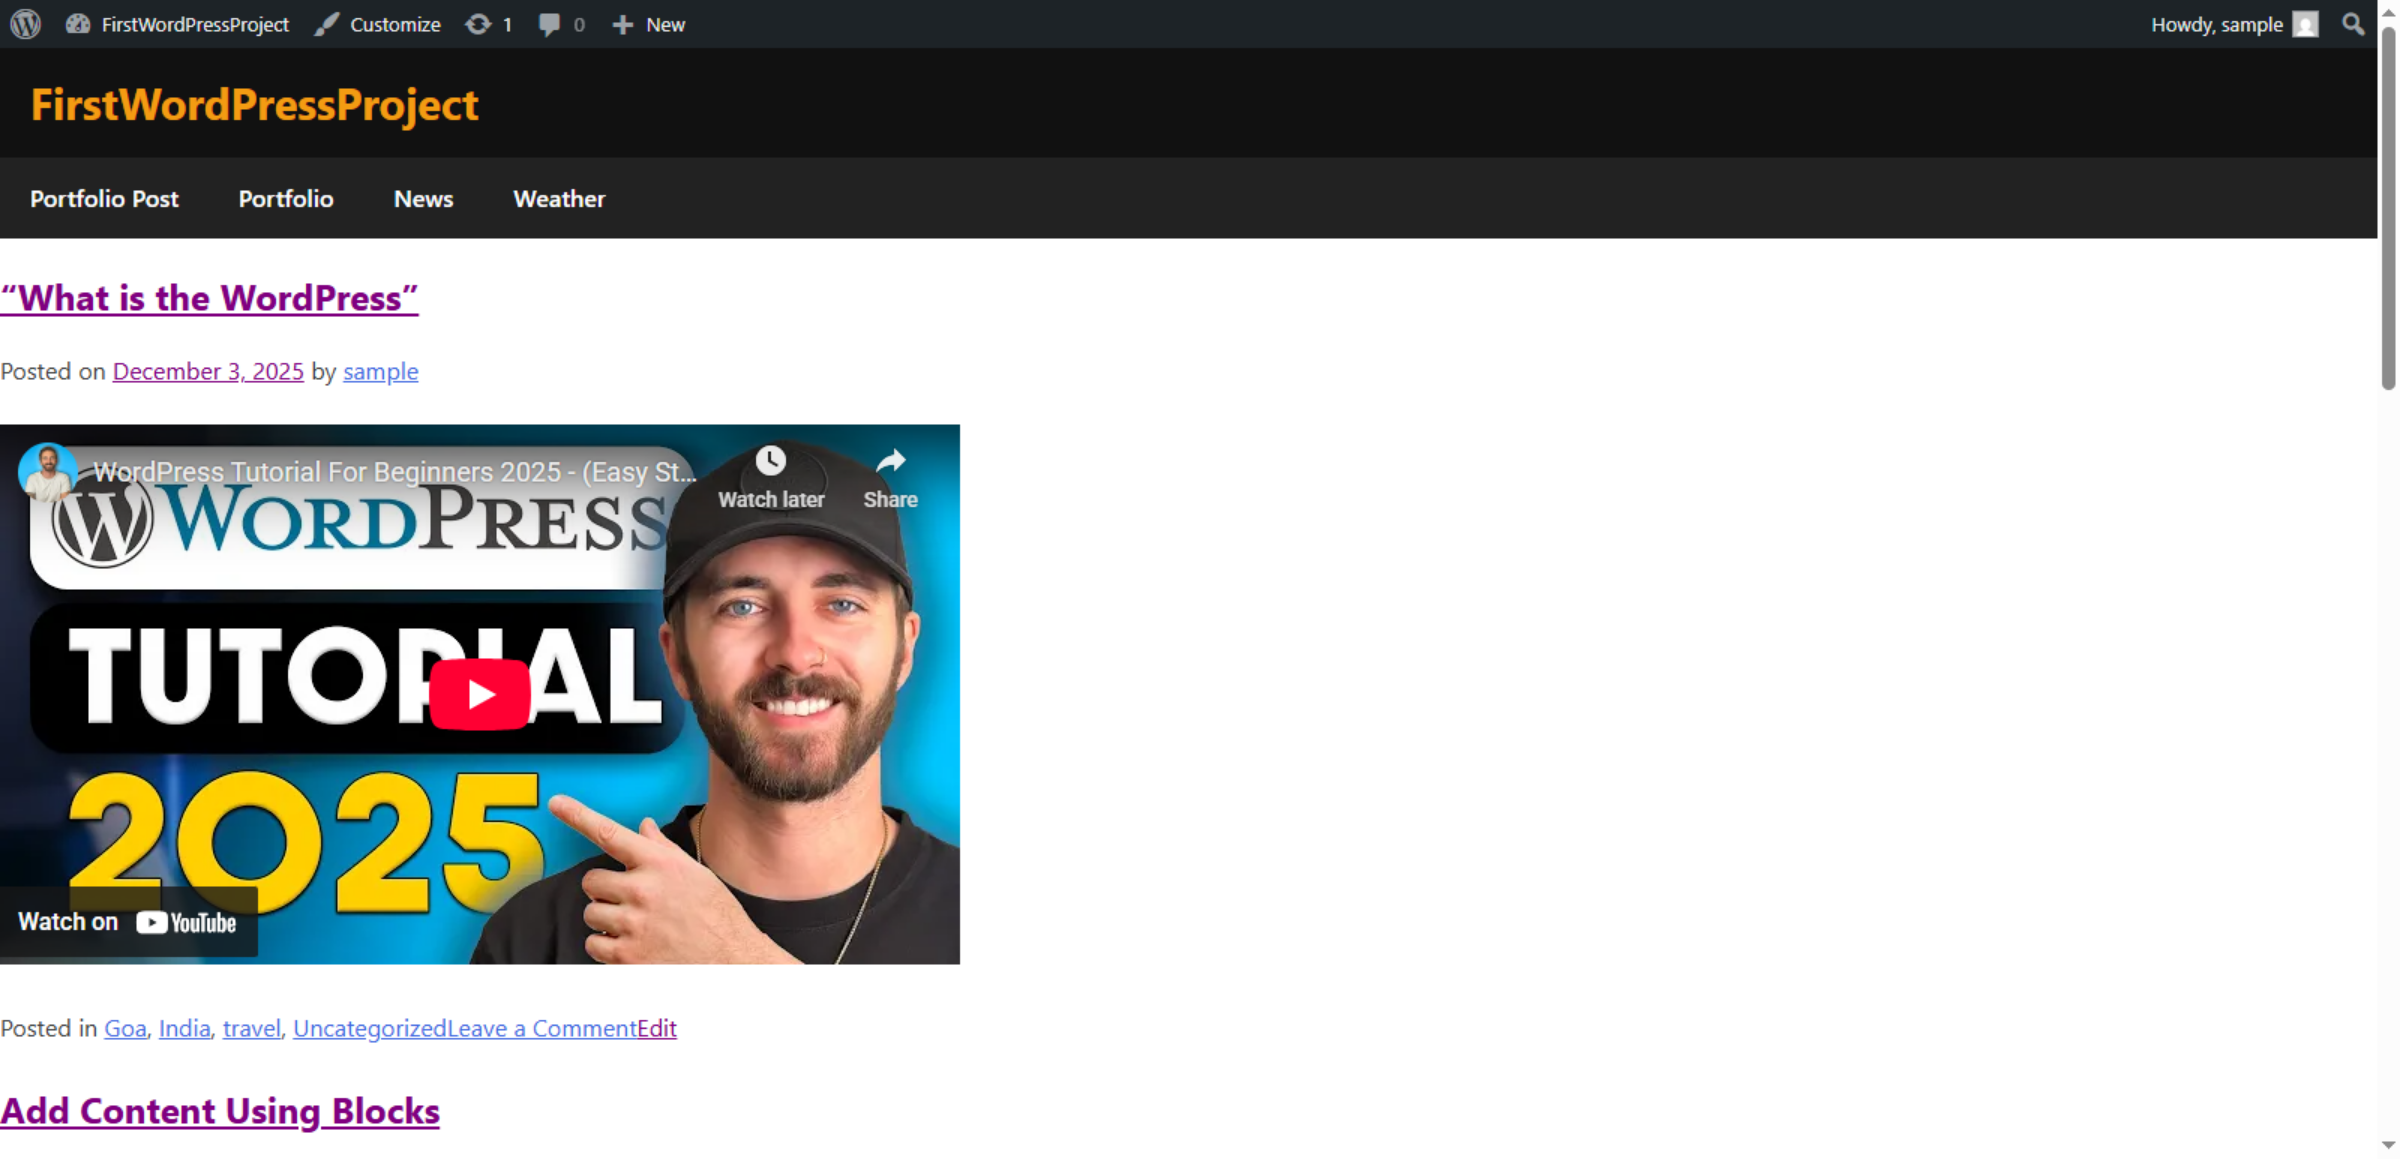
33. Access WordPress Info Page

Click What is the WordPress to learn more about your new WordPress installation.

Access WordPress Info Page

Conclusion

By completing the steps in this guide, you have successfully moved your WordPress website from localhost to Hostinger WordPress Hosting. Your website files, database, themes, plugins, and configurations have been properly transferred and integrated into the new hosting environment.

After migration, it is recommended to test all website features, verify page links, check forms, and update permalink settings to ensure smooth performance. Once everything is working correctly, you can connect your custom domain and enable search engine indexing for better visibility.

Regular backups, security updates, and performance monitoring will help maintain your website’s stability and long-term reliability.

WooHelpDesk Support

Need professional help with WordPress migration, hosting setup, or technical configuration? WooHelpDesk provides expert support to ensure your website runs smoothly and securely.

Visit: https://www.woohelpdesk.com
Call Us Toll-Free: +1 888 602 0119 (US & Canada)
Expert Support | Secure Migration | Reliable Hosting Solutions


Leave a Reply

Your email address will not be published. Required fields are marked *

Leave a Reply

Your email address will not be published. Required fields are marked *