Introduction
Installing WordPress manually provides greater control over website configuration, database setup, and file management. This method is especially useful for users who want customized installations or need to troubleshoot automated setup issues. Hostinger’s hosting platform offers powerful tools such as hPanel, File Manager, and database management features that support manual WordPress installation.
This guidde explains how to manually install WordPress on Hostinger WordPress hosting. It covers creating a database, downloading WordPress files, uploading and extracting them, configuring the wp-config.php file, completing the installation wizard, and accessing the WordPress dashboard. By following this guide, users can set up their websites with full control and flexibility.
1. Introduction
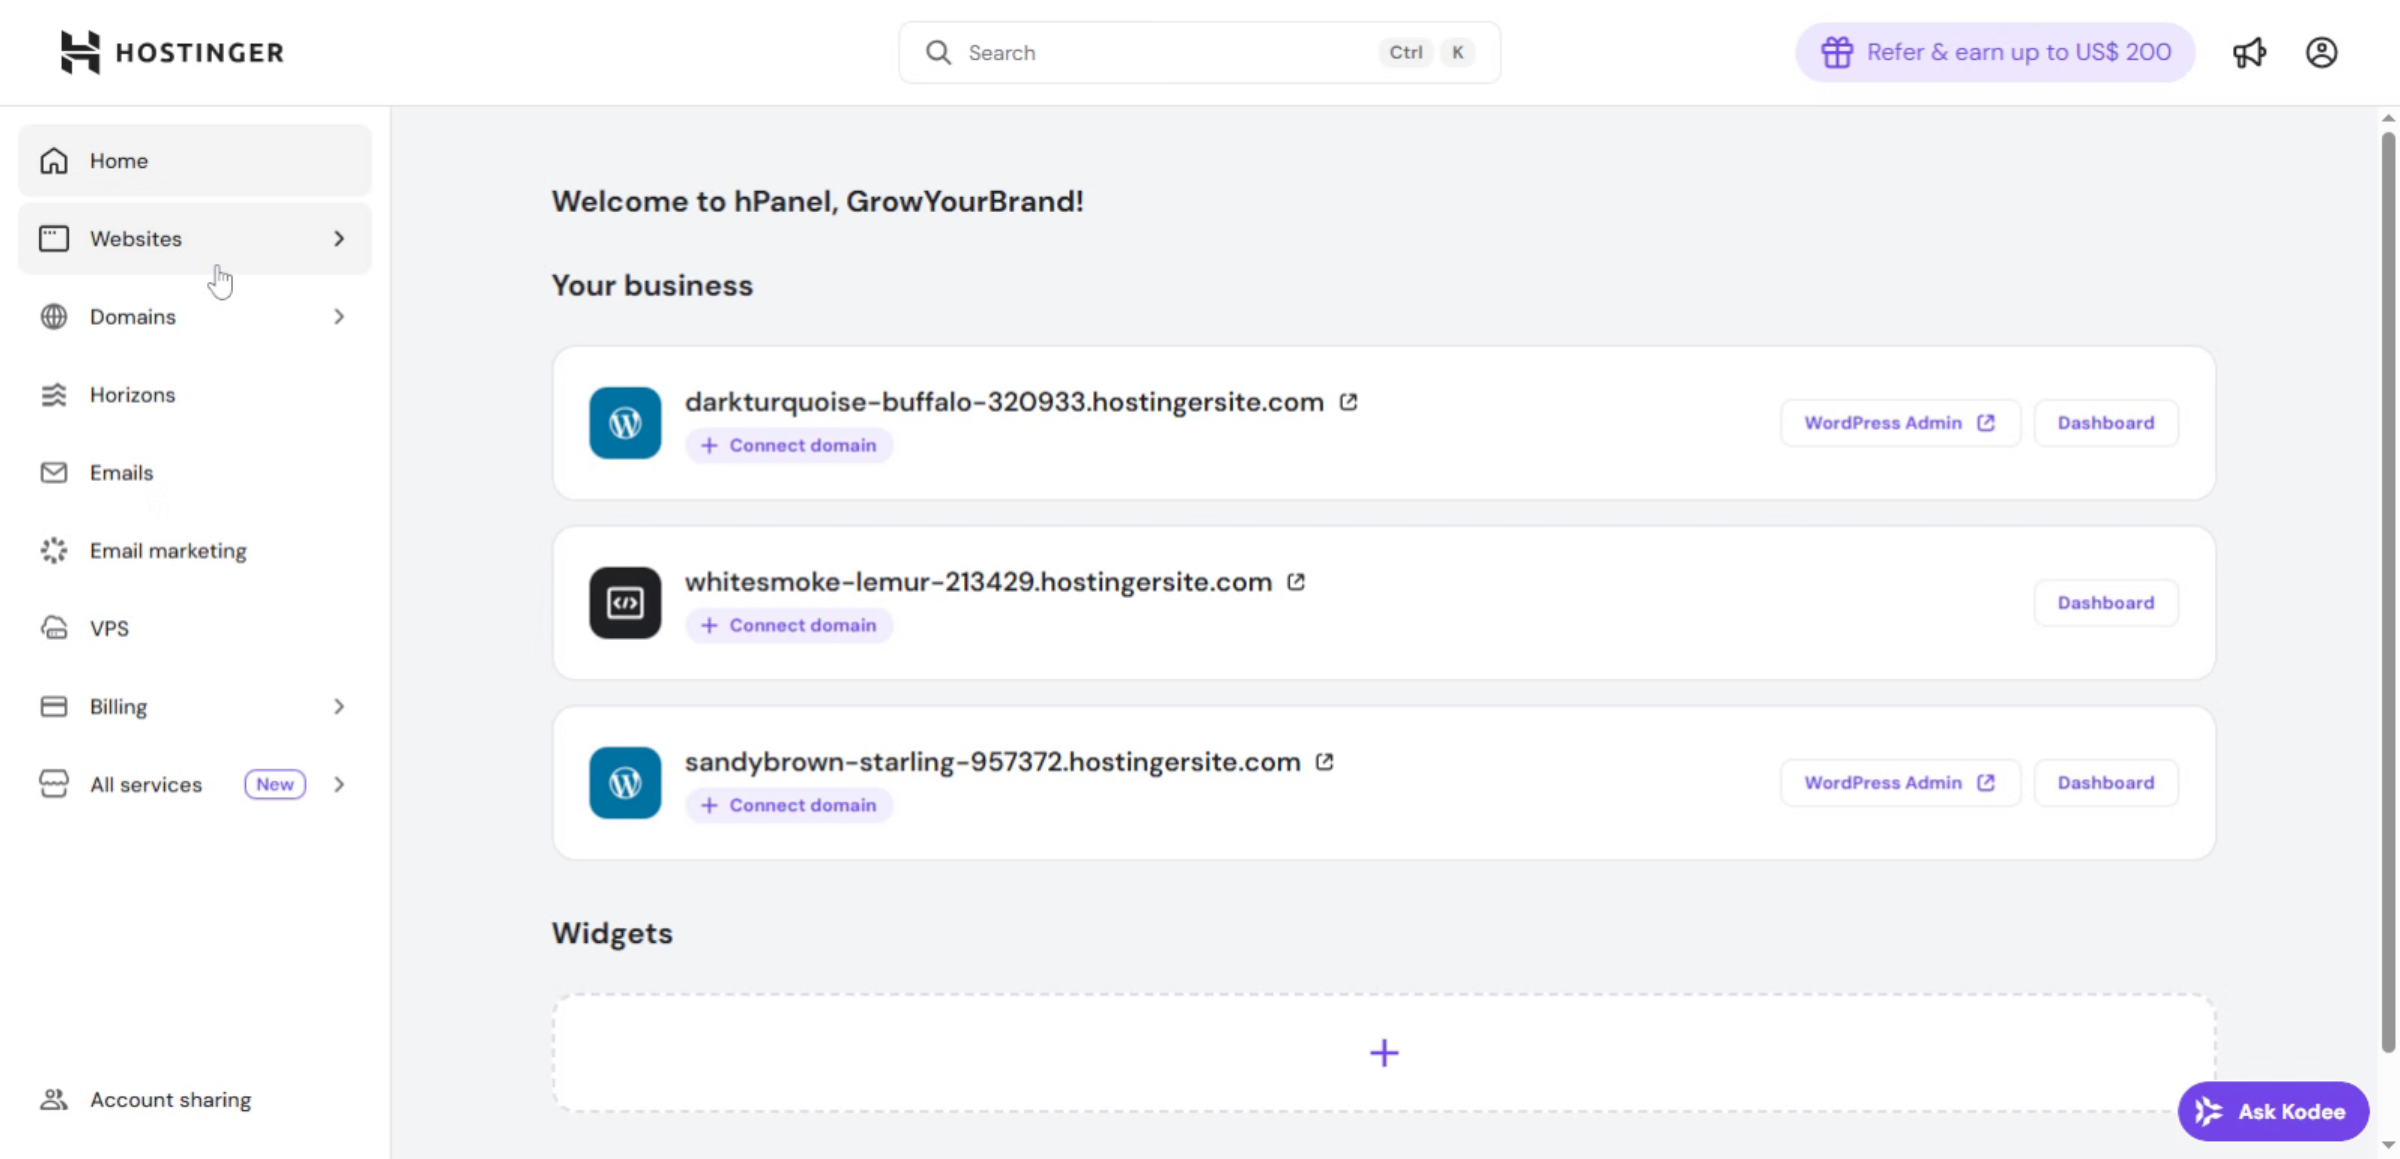
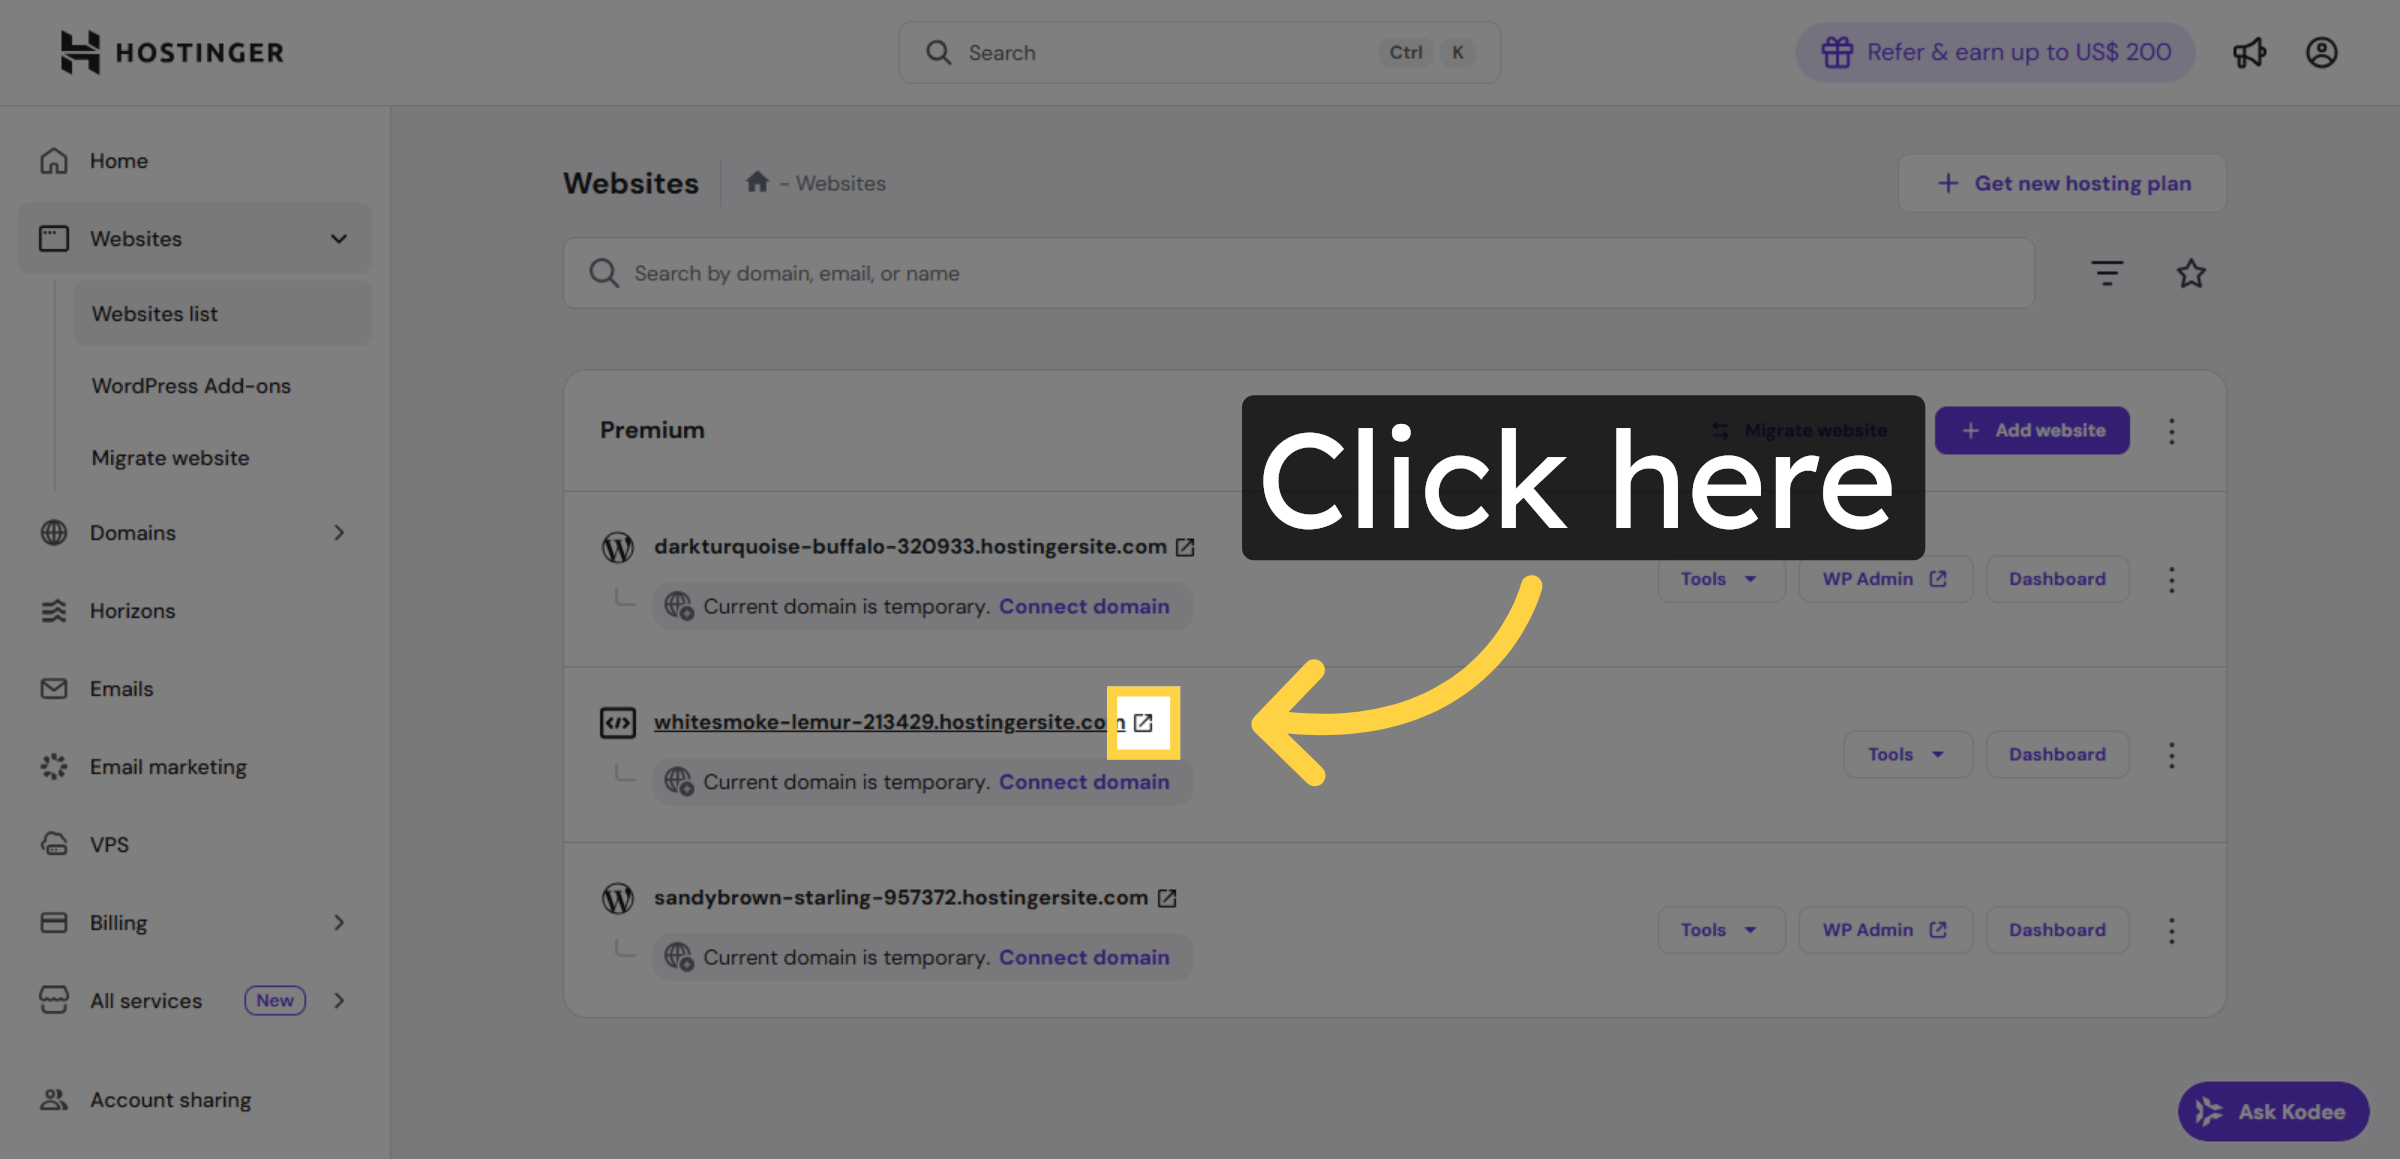
This screen shows the Hostinger dashboard, where you can access your websites and begin the manual WordPress installation by opening the website’s control panel (hPanel).
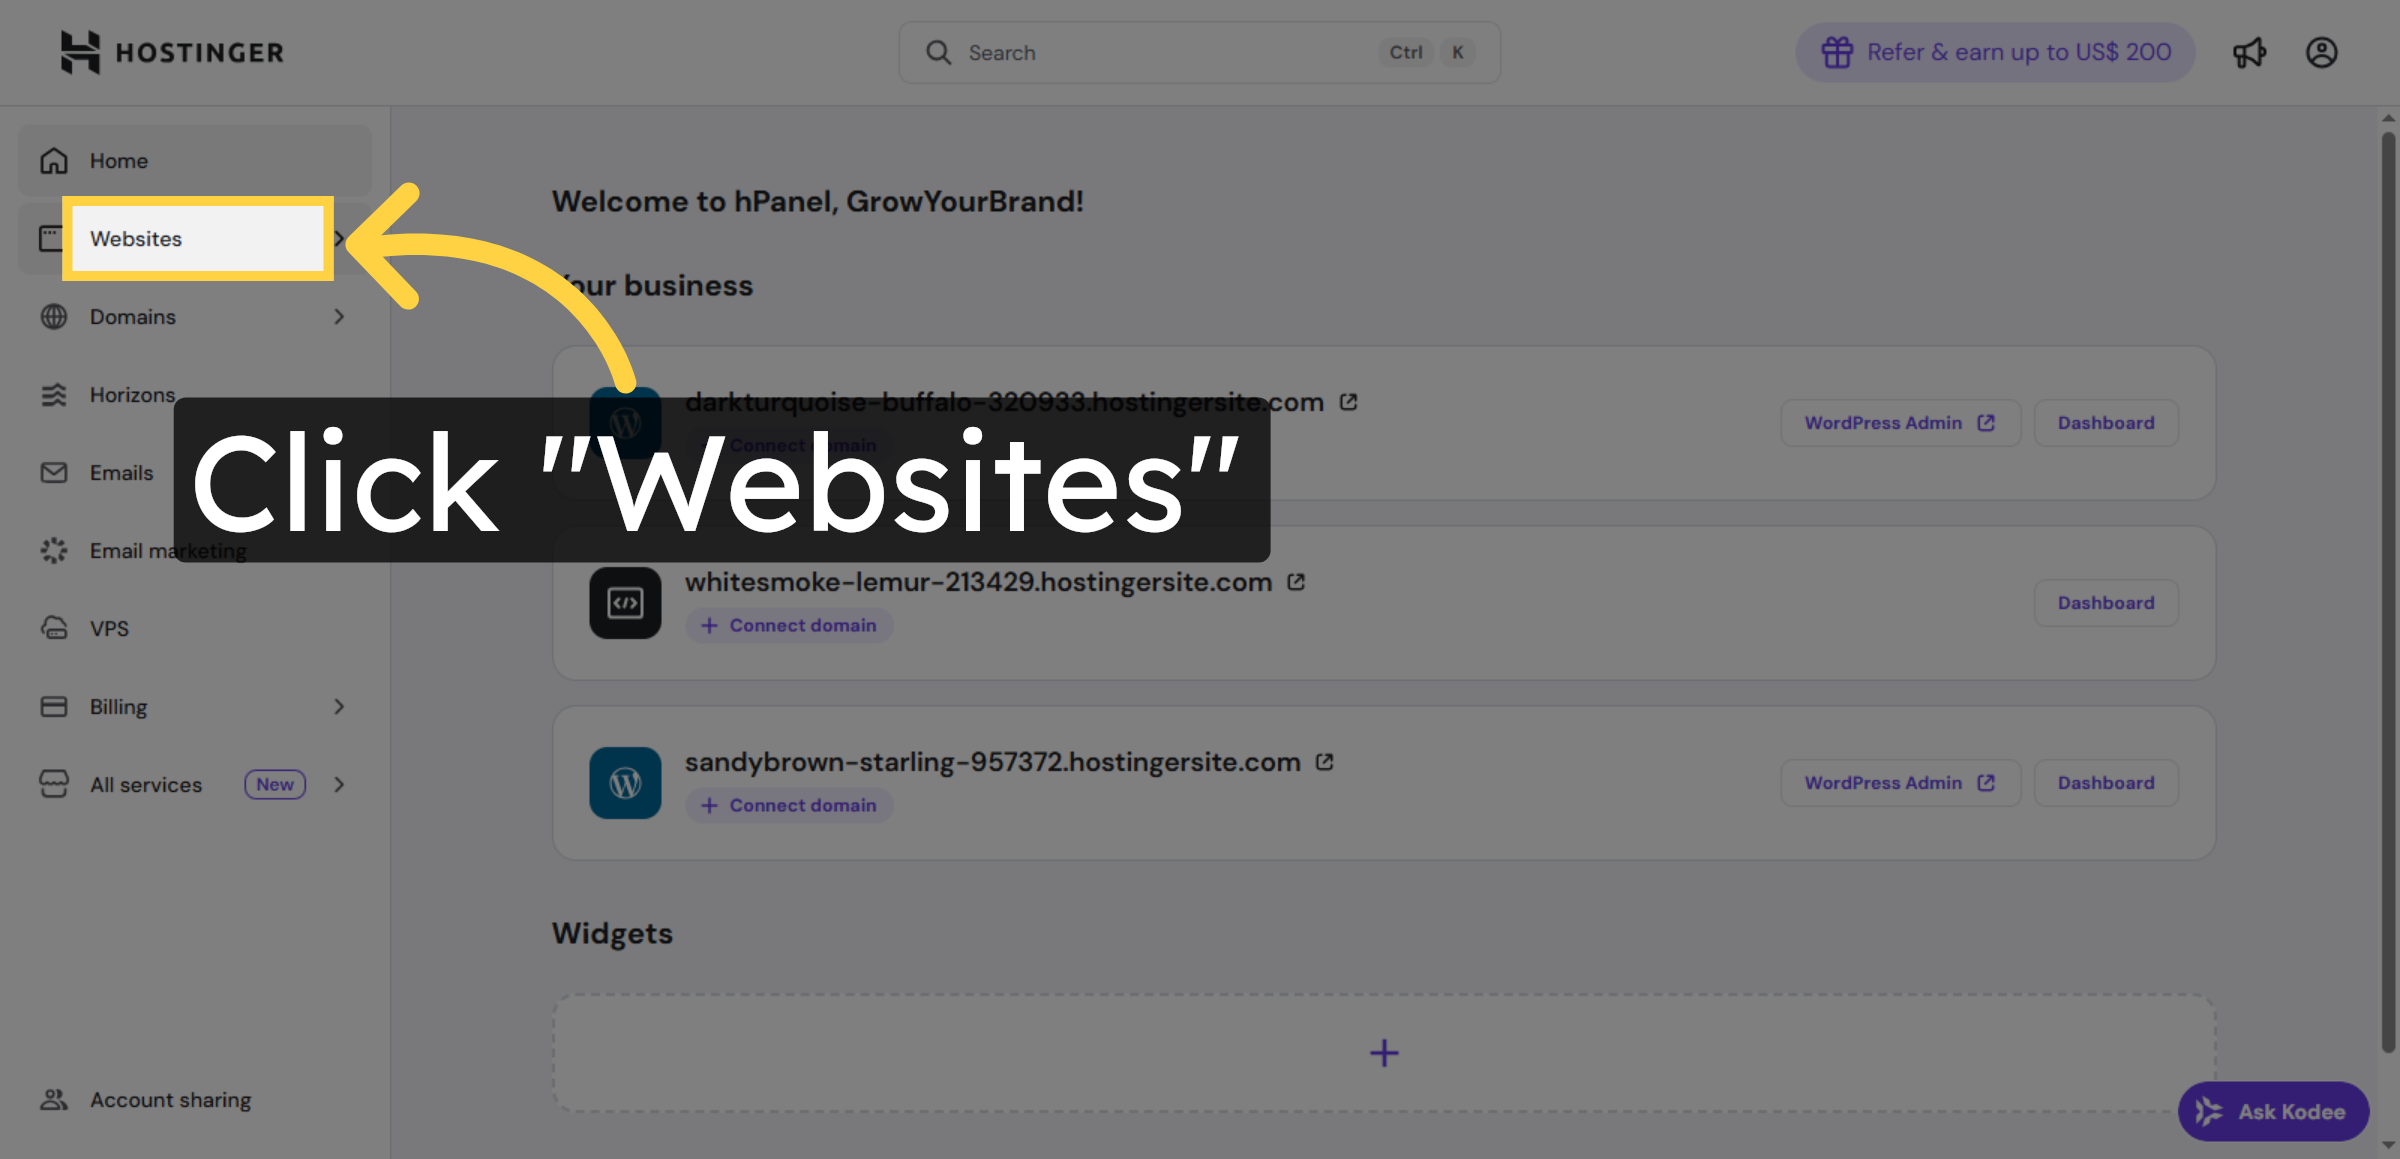
2. Navigate to Websites Section
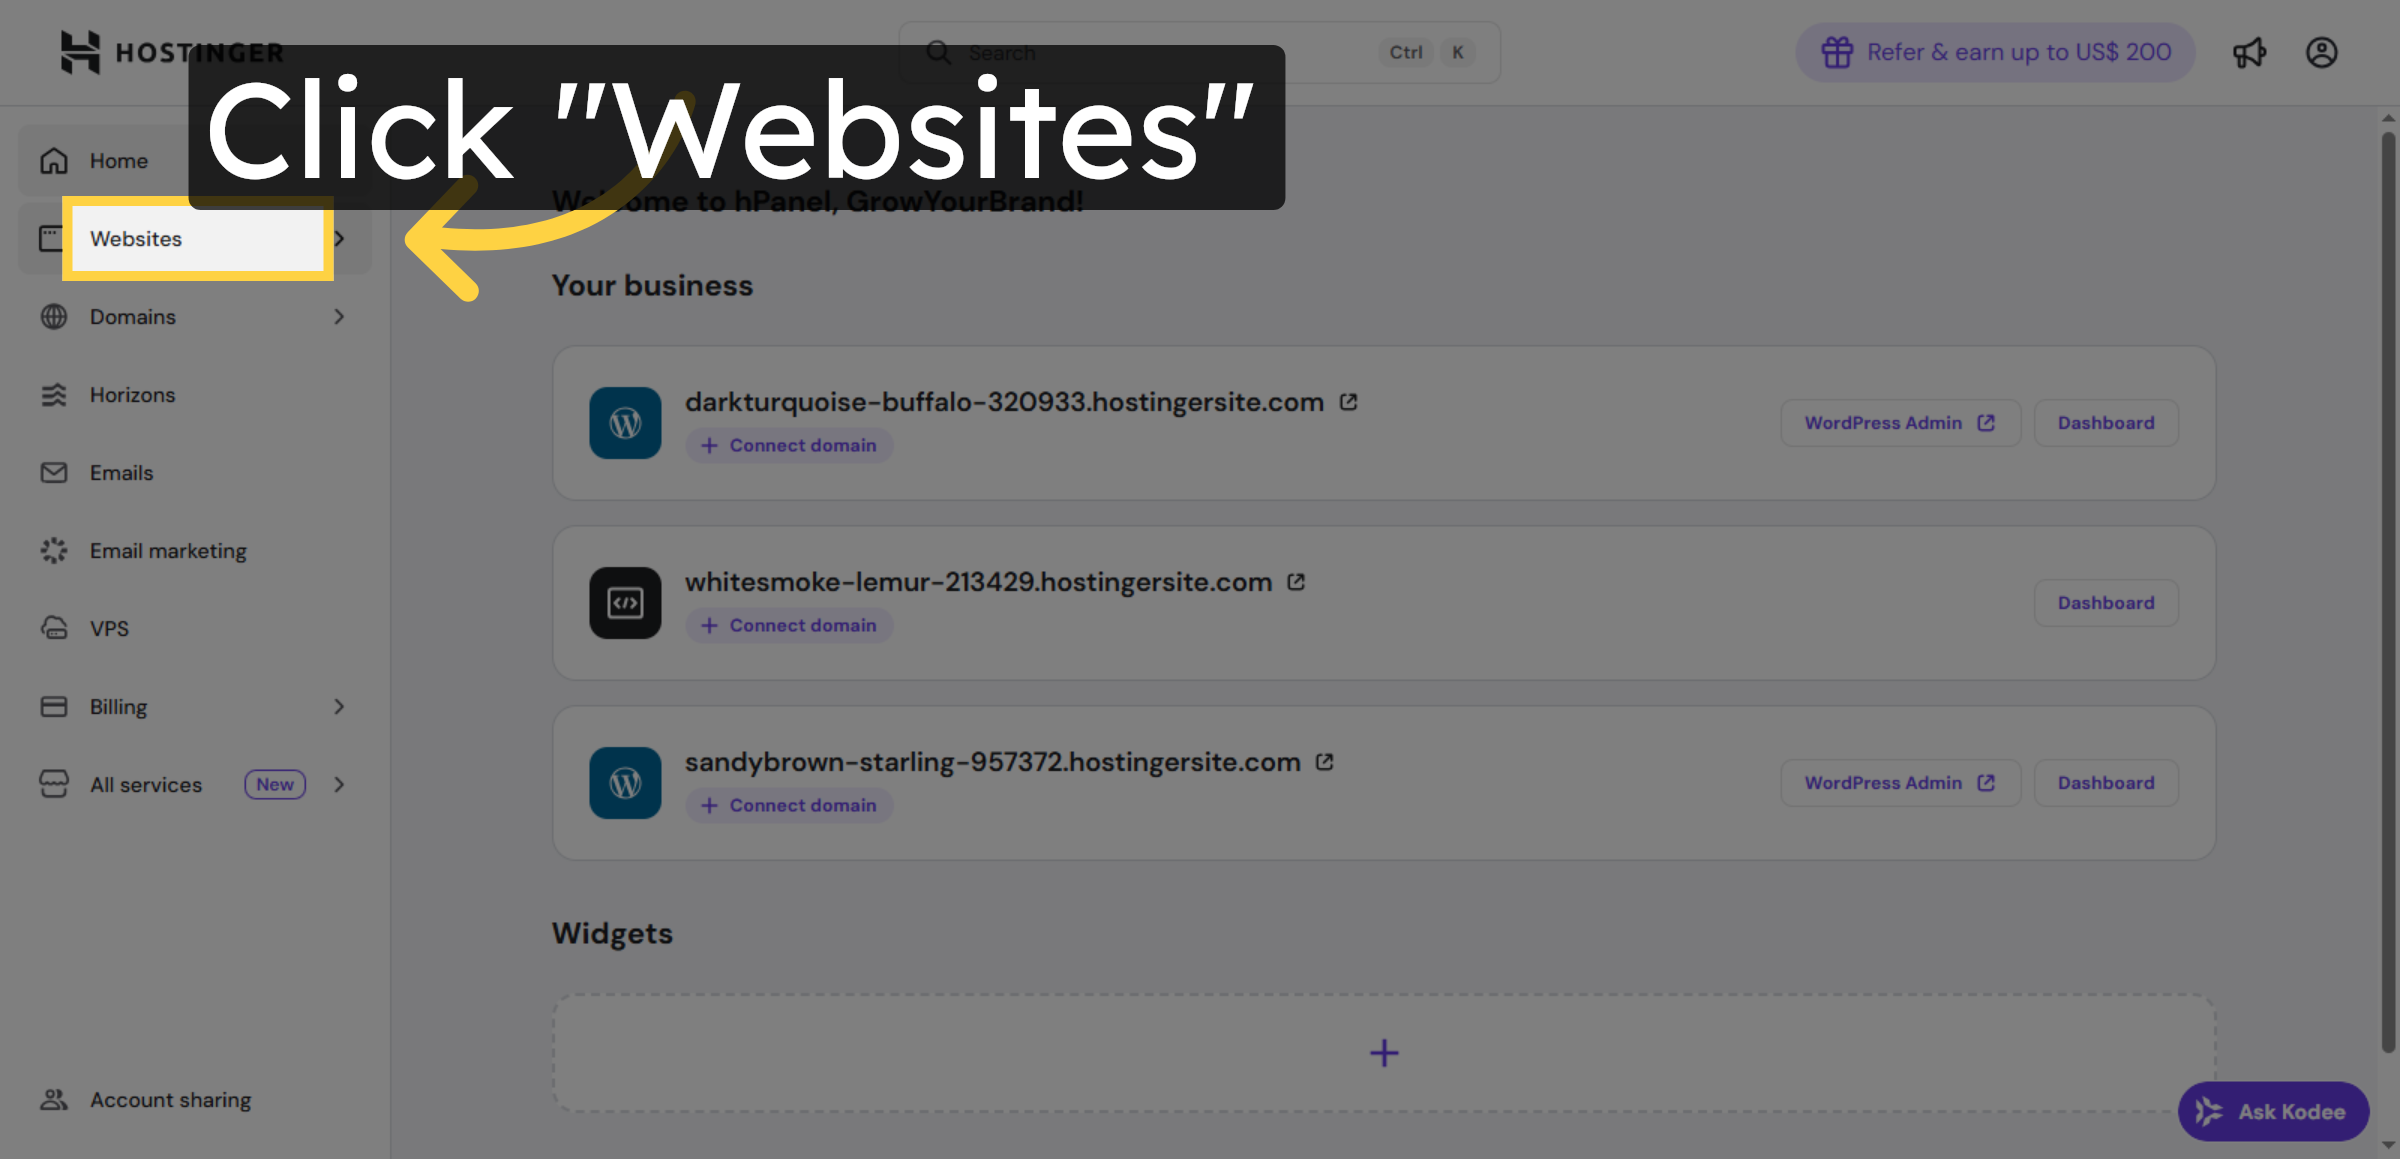
Click the Websites section in your Hostinger control panel to begin managing your sites.
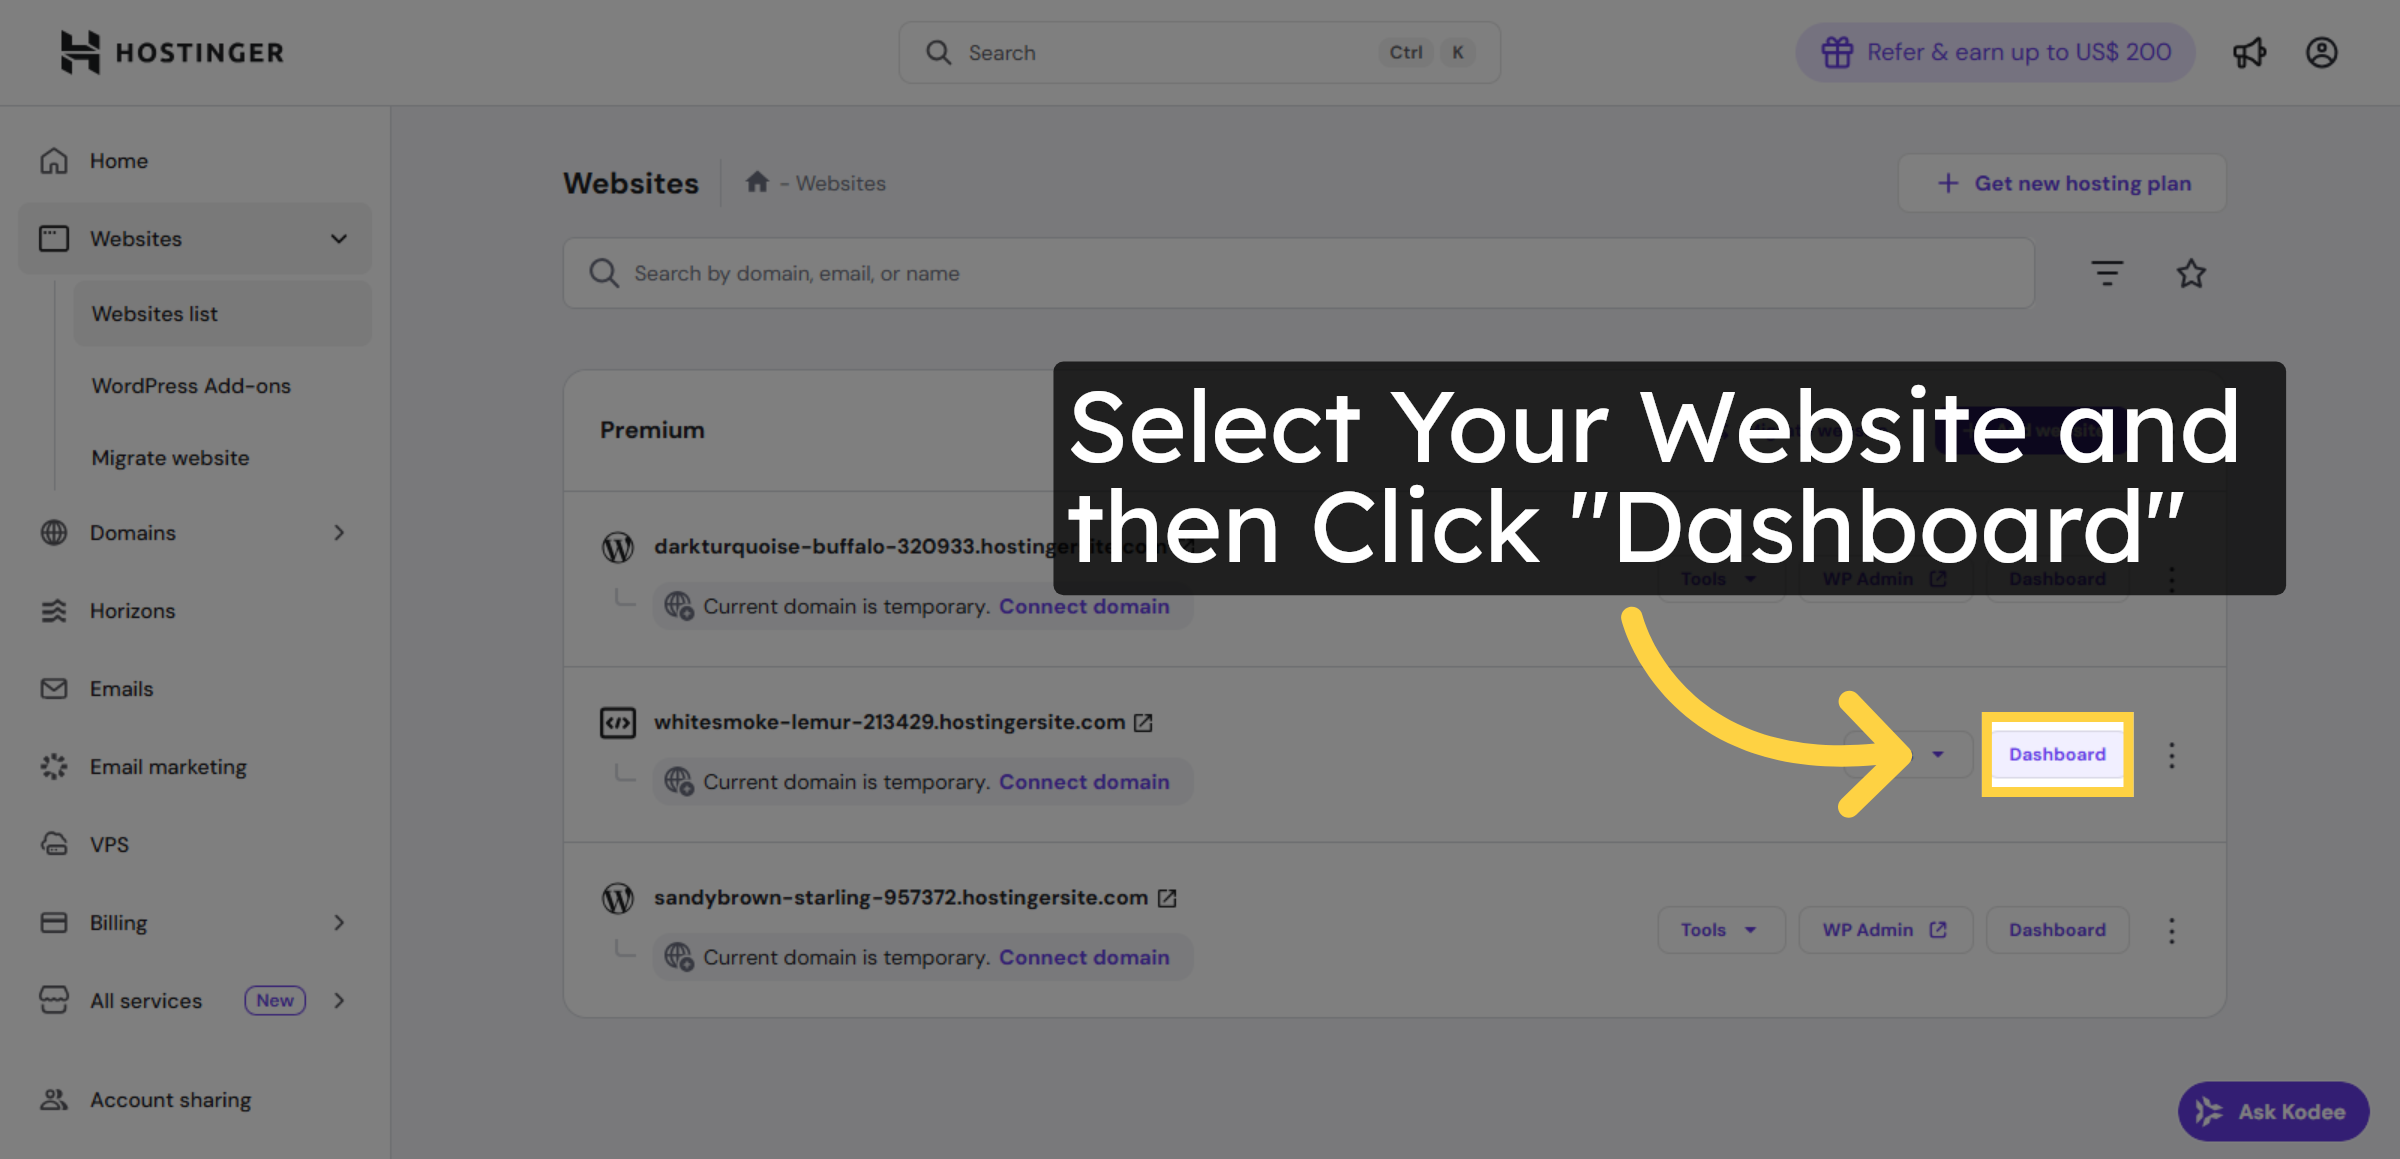
3. Open Website Dashboard
Click Dashboard to access the management area for your selected website.
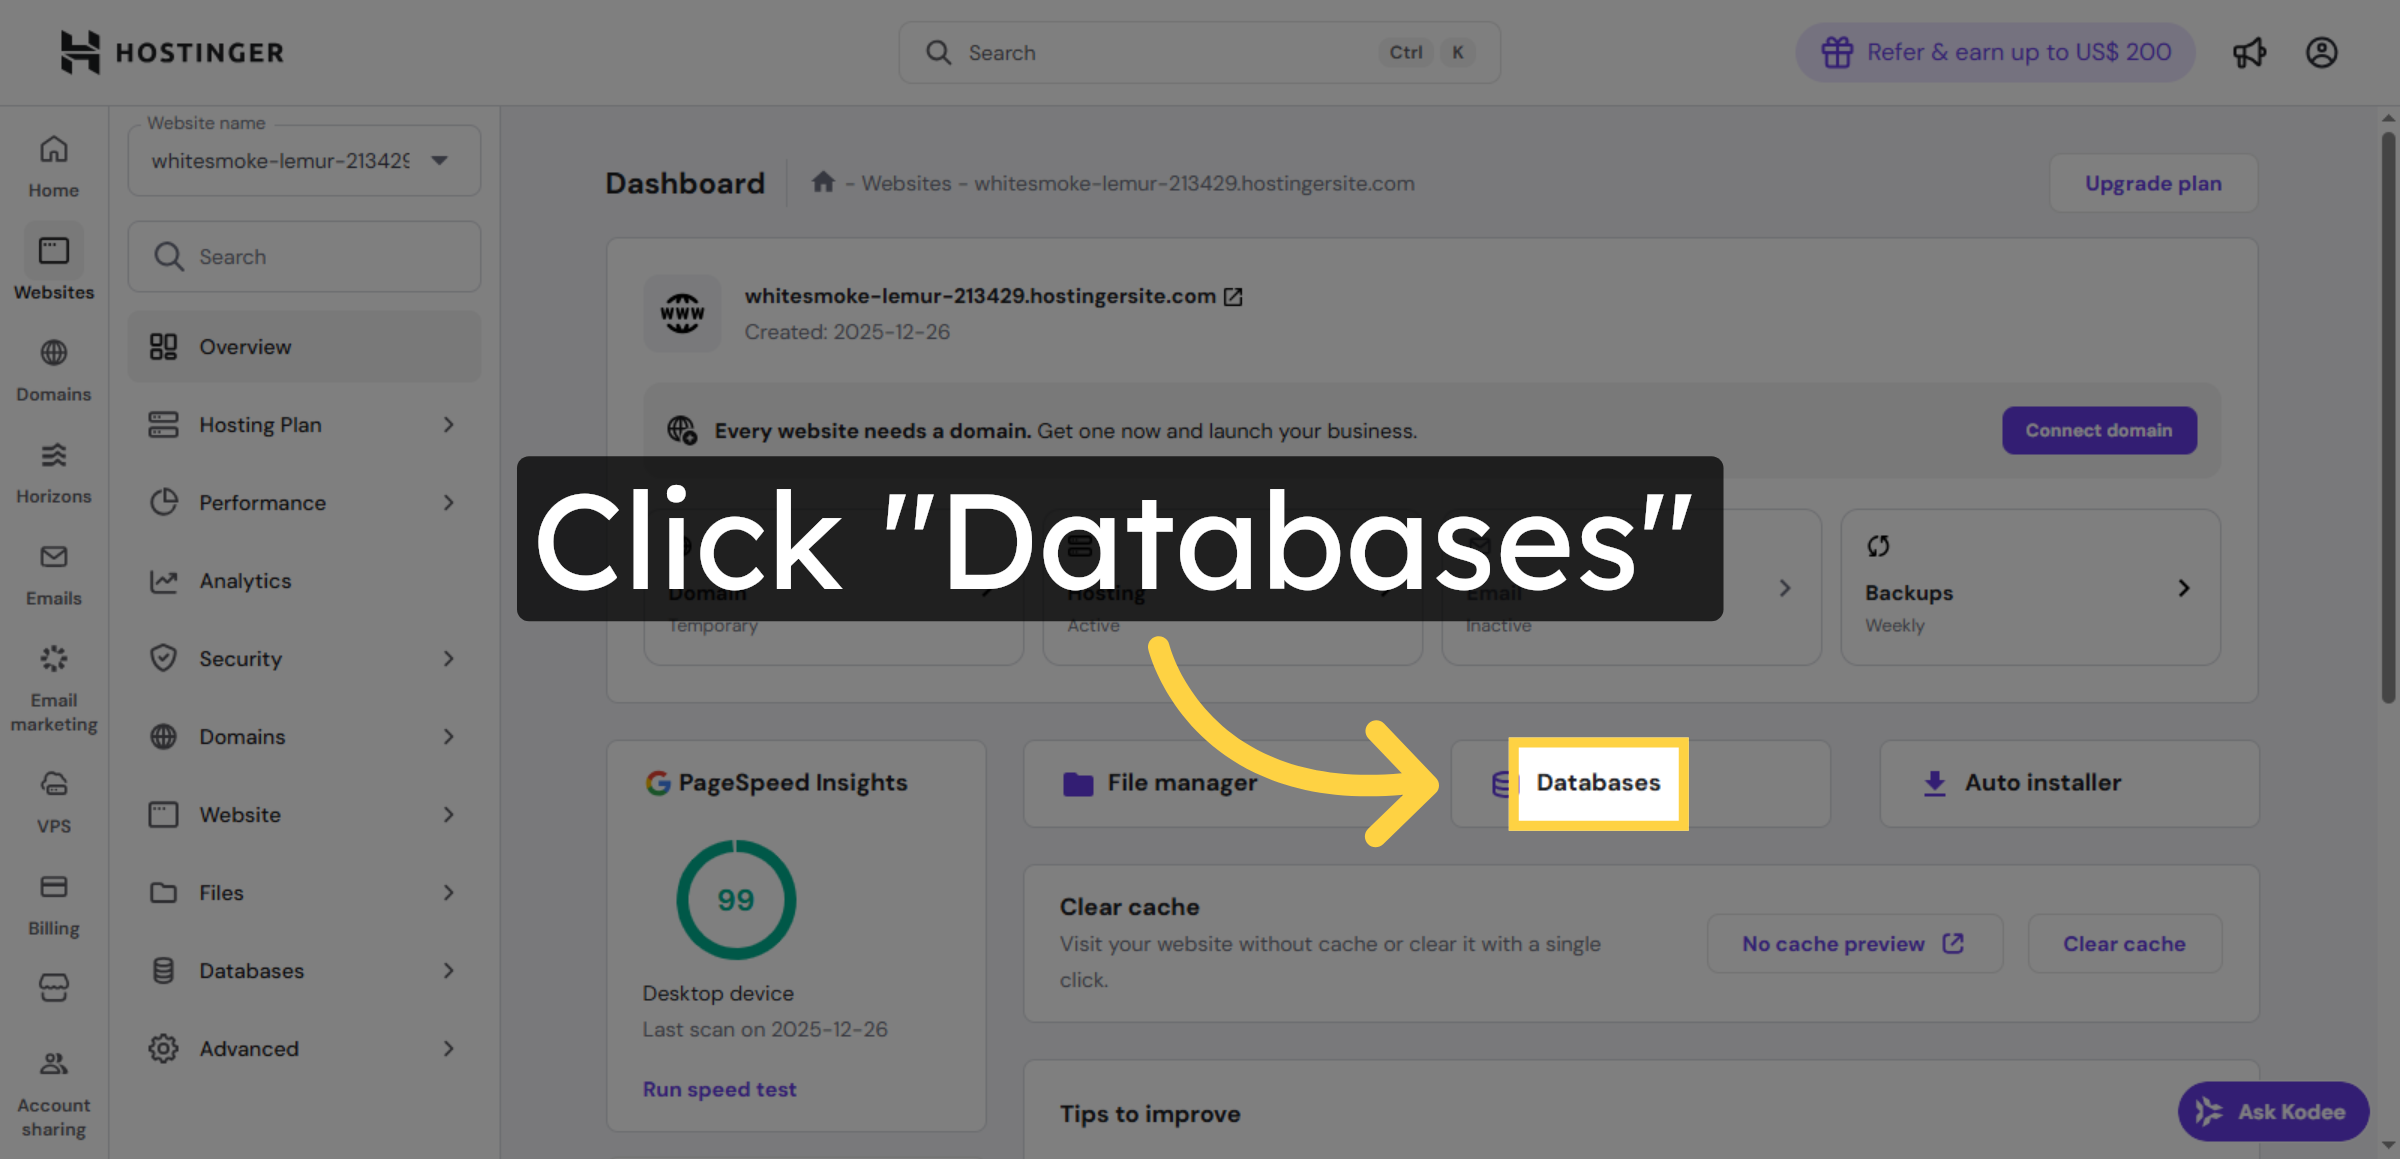
4. Access Databases Menu
Click Databases to manage your MySQL databases for WordPress installation.
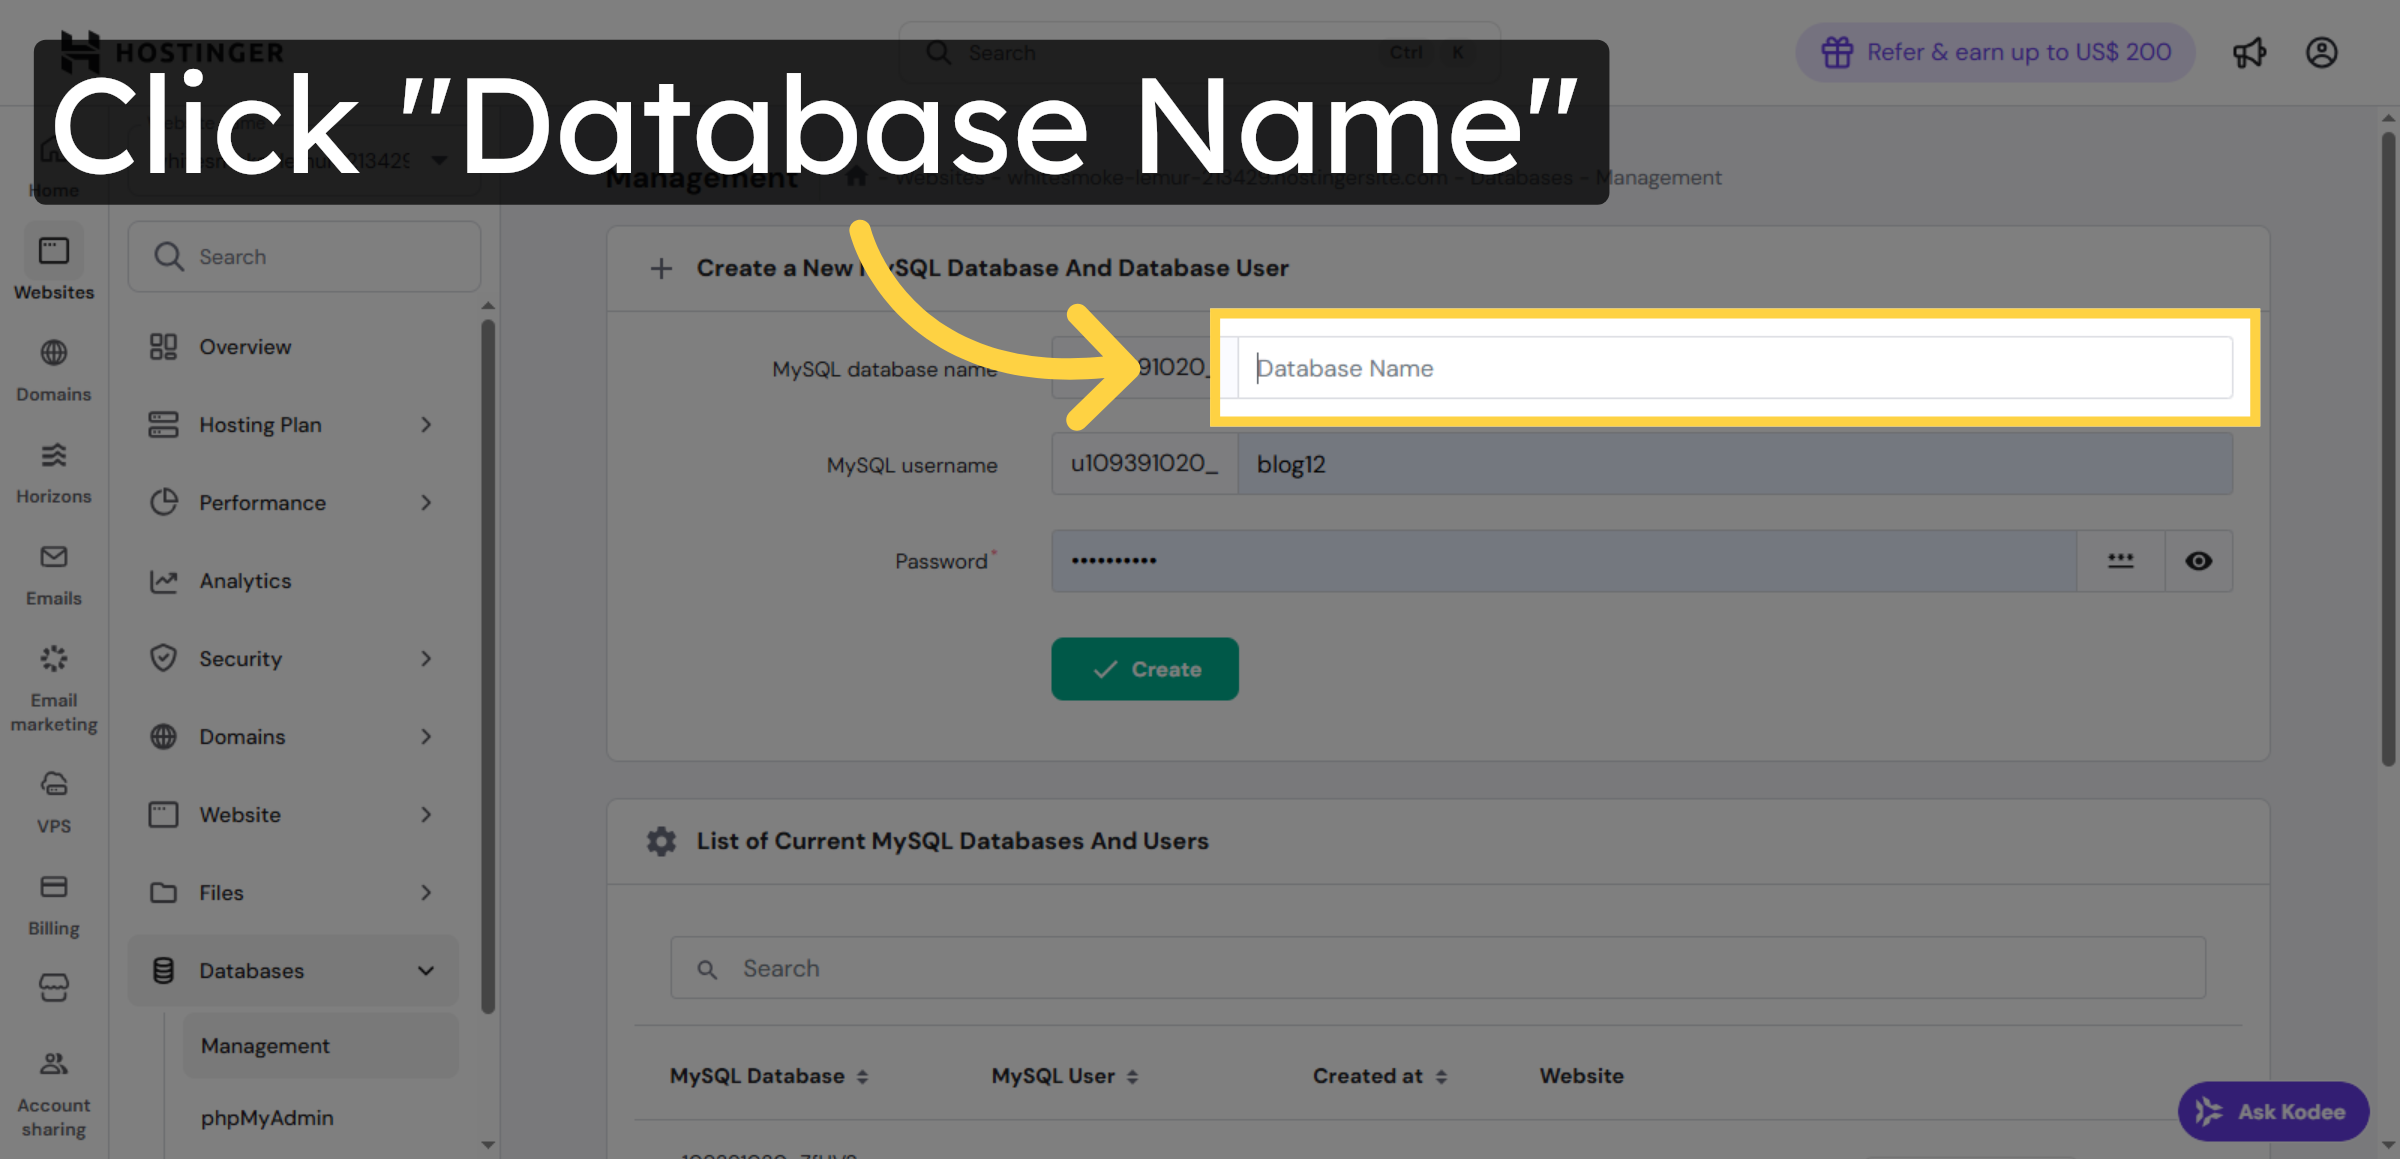
5. Choose Database Name
Click the database name to confirm the database you will use for WordPress.
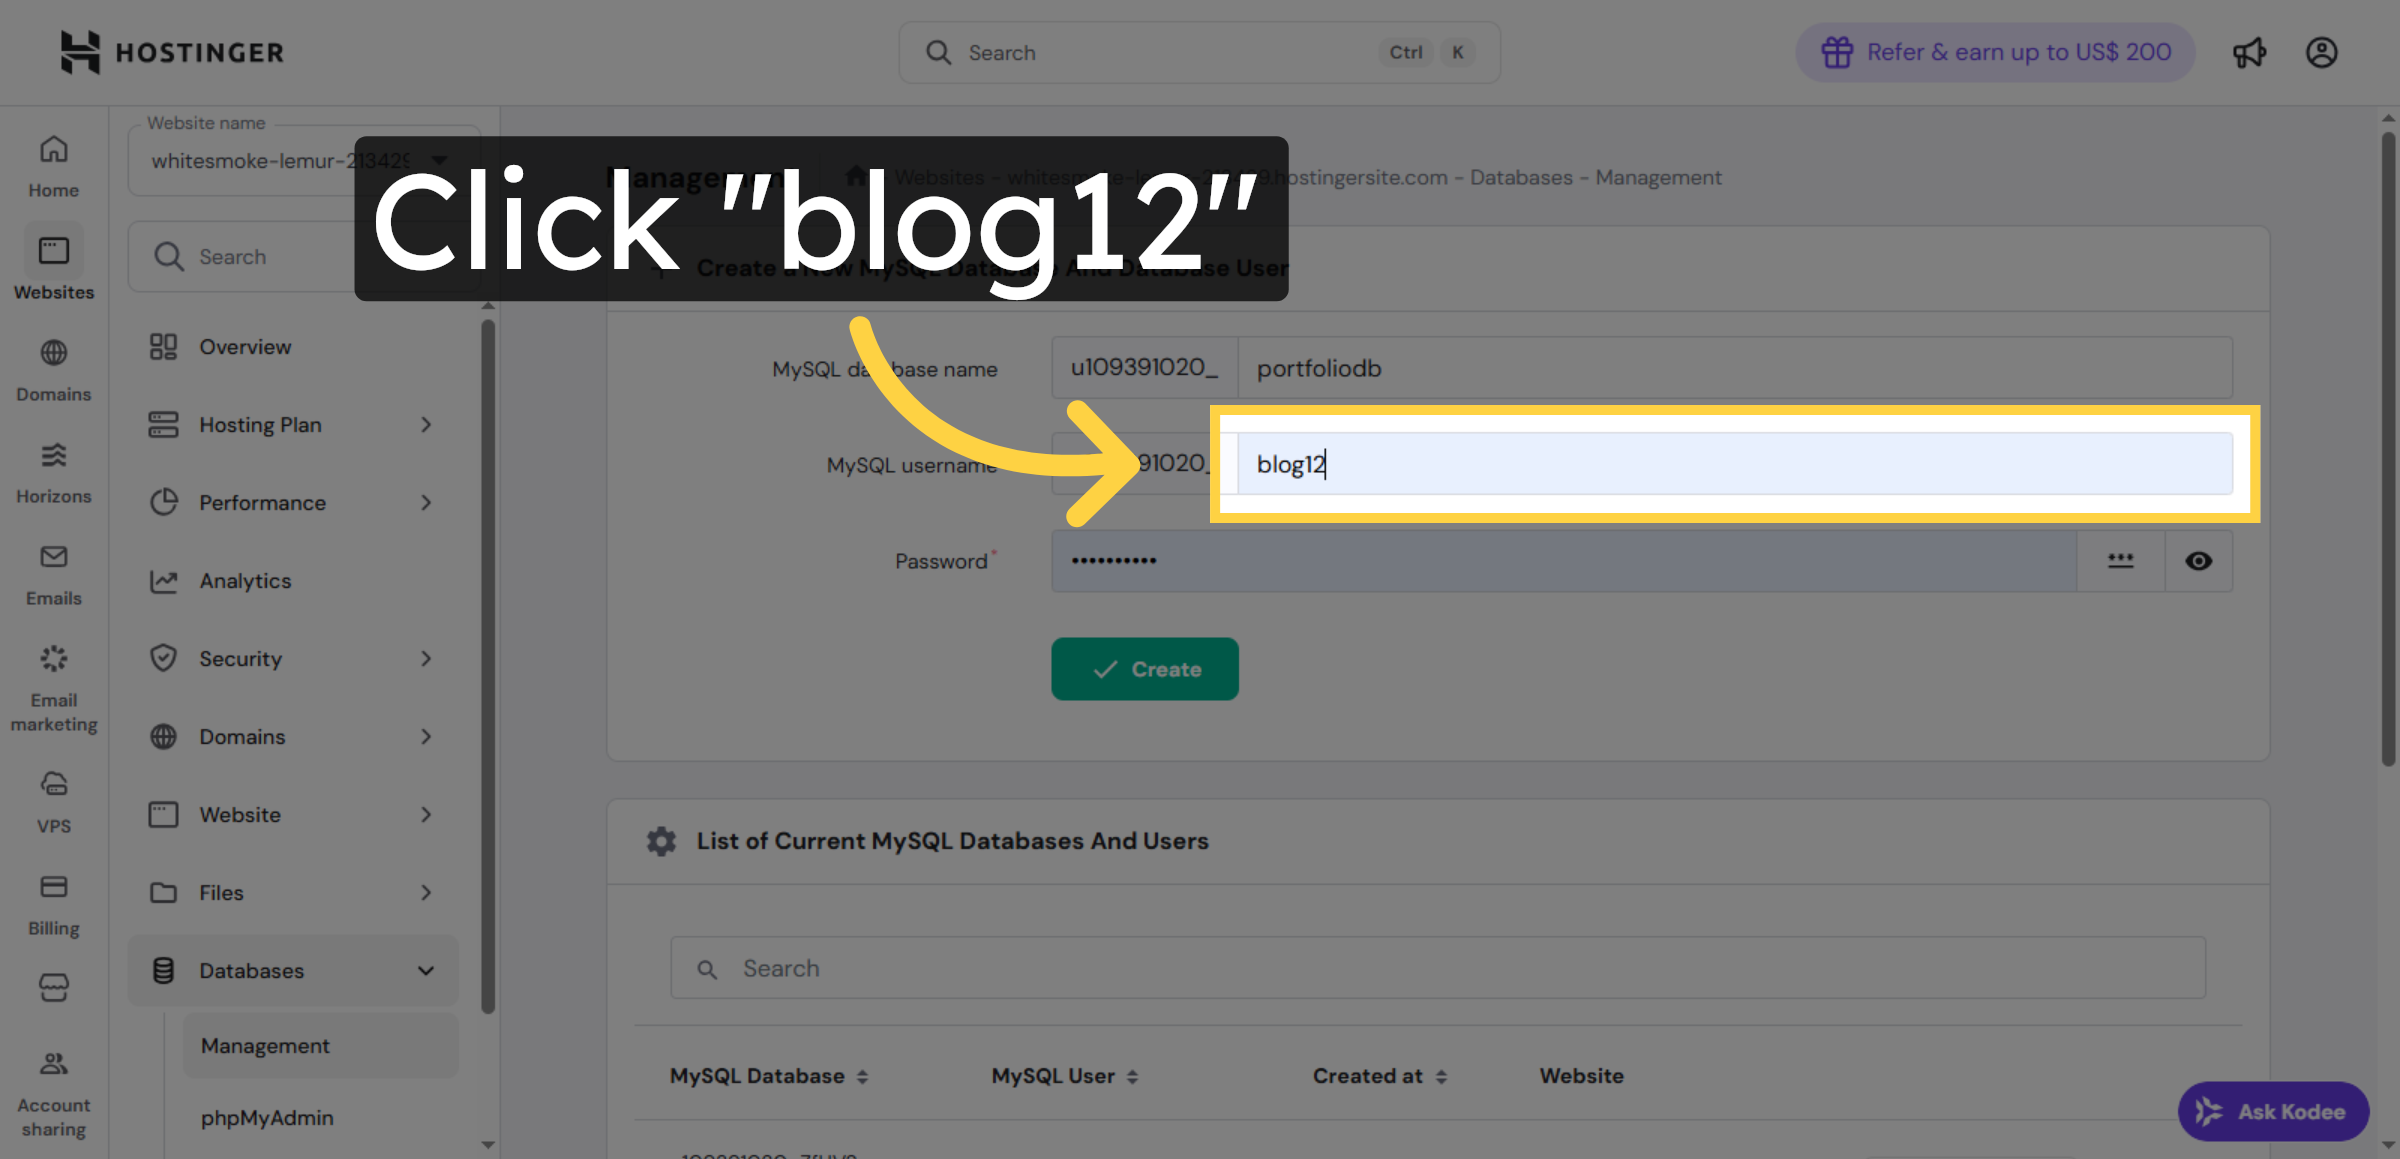
6. Select Database User
Click the database user to assign permissions for WordPress access.
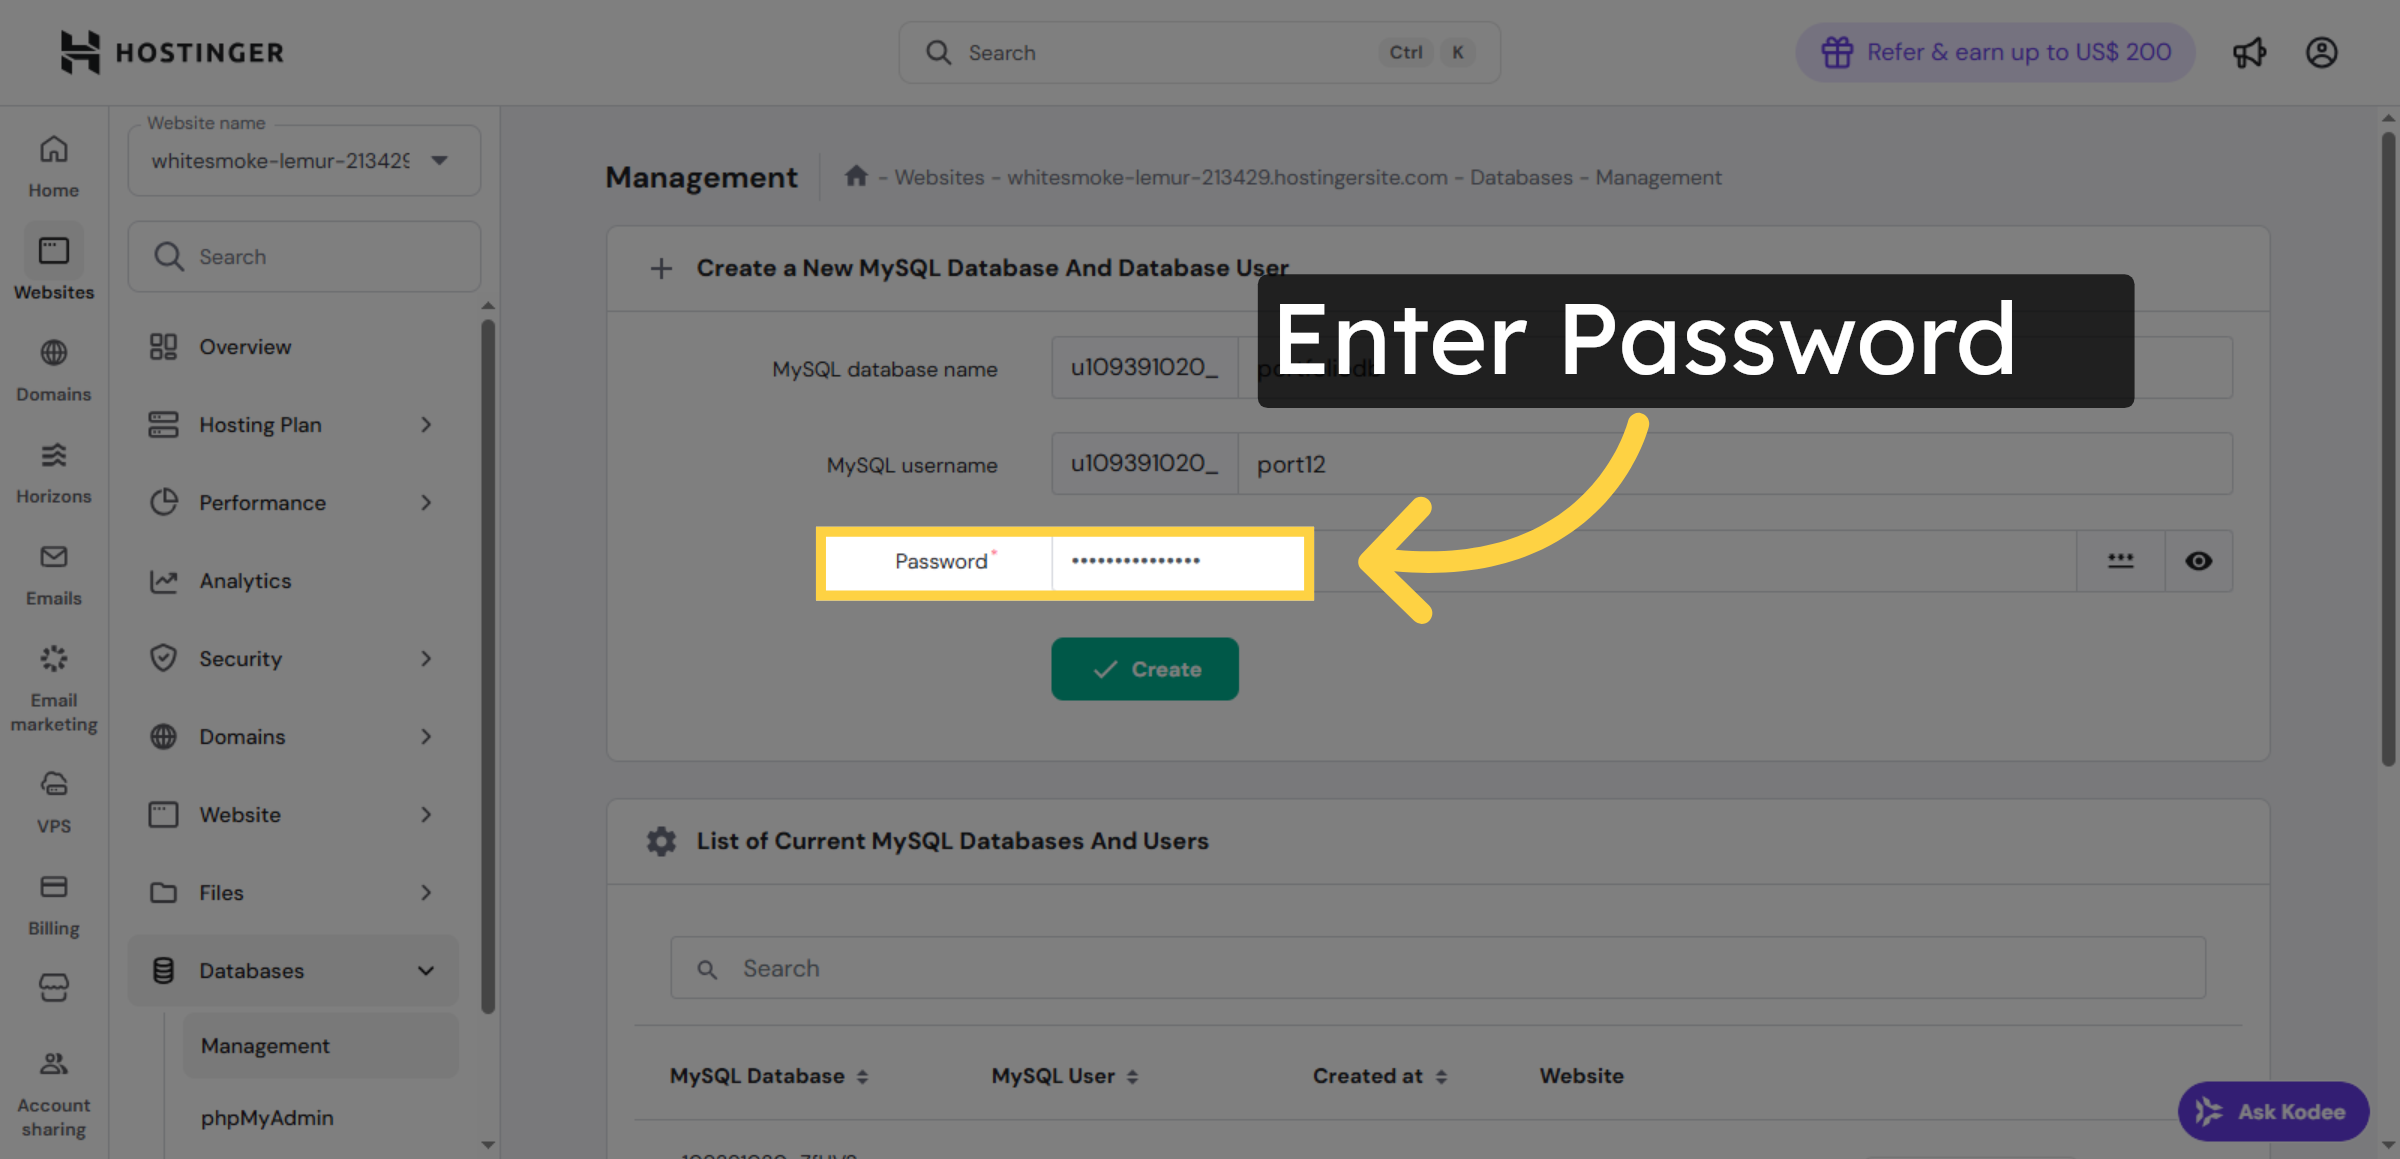
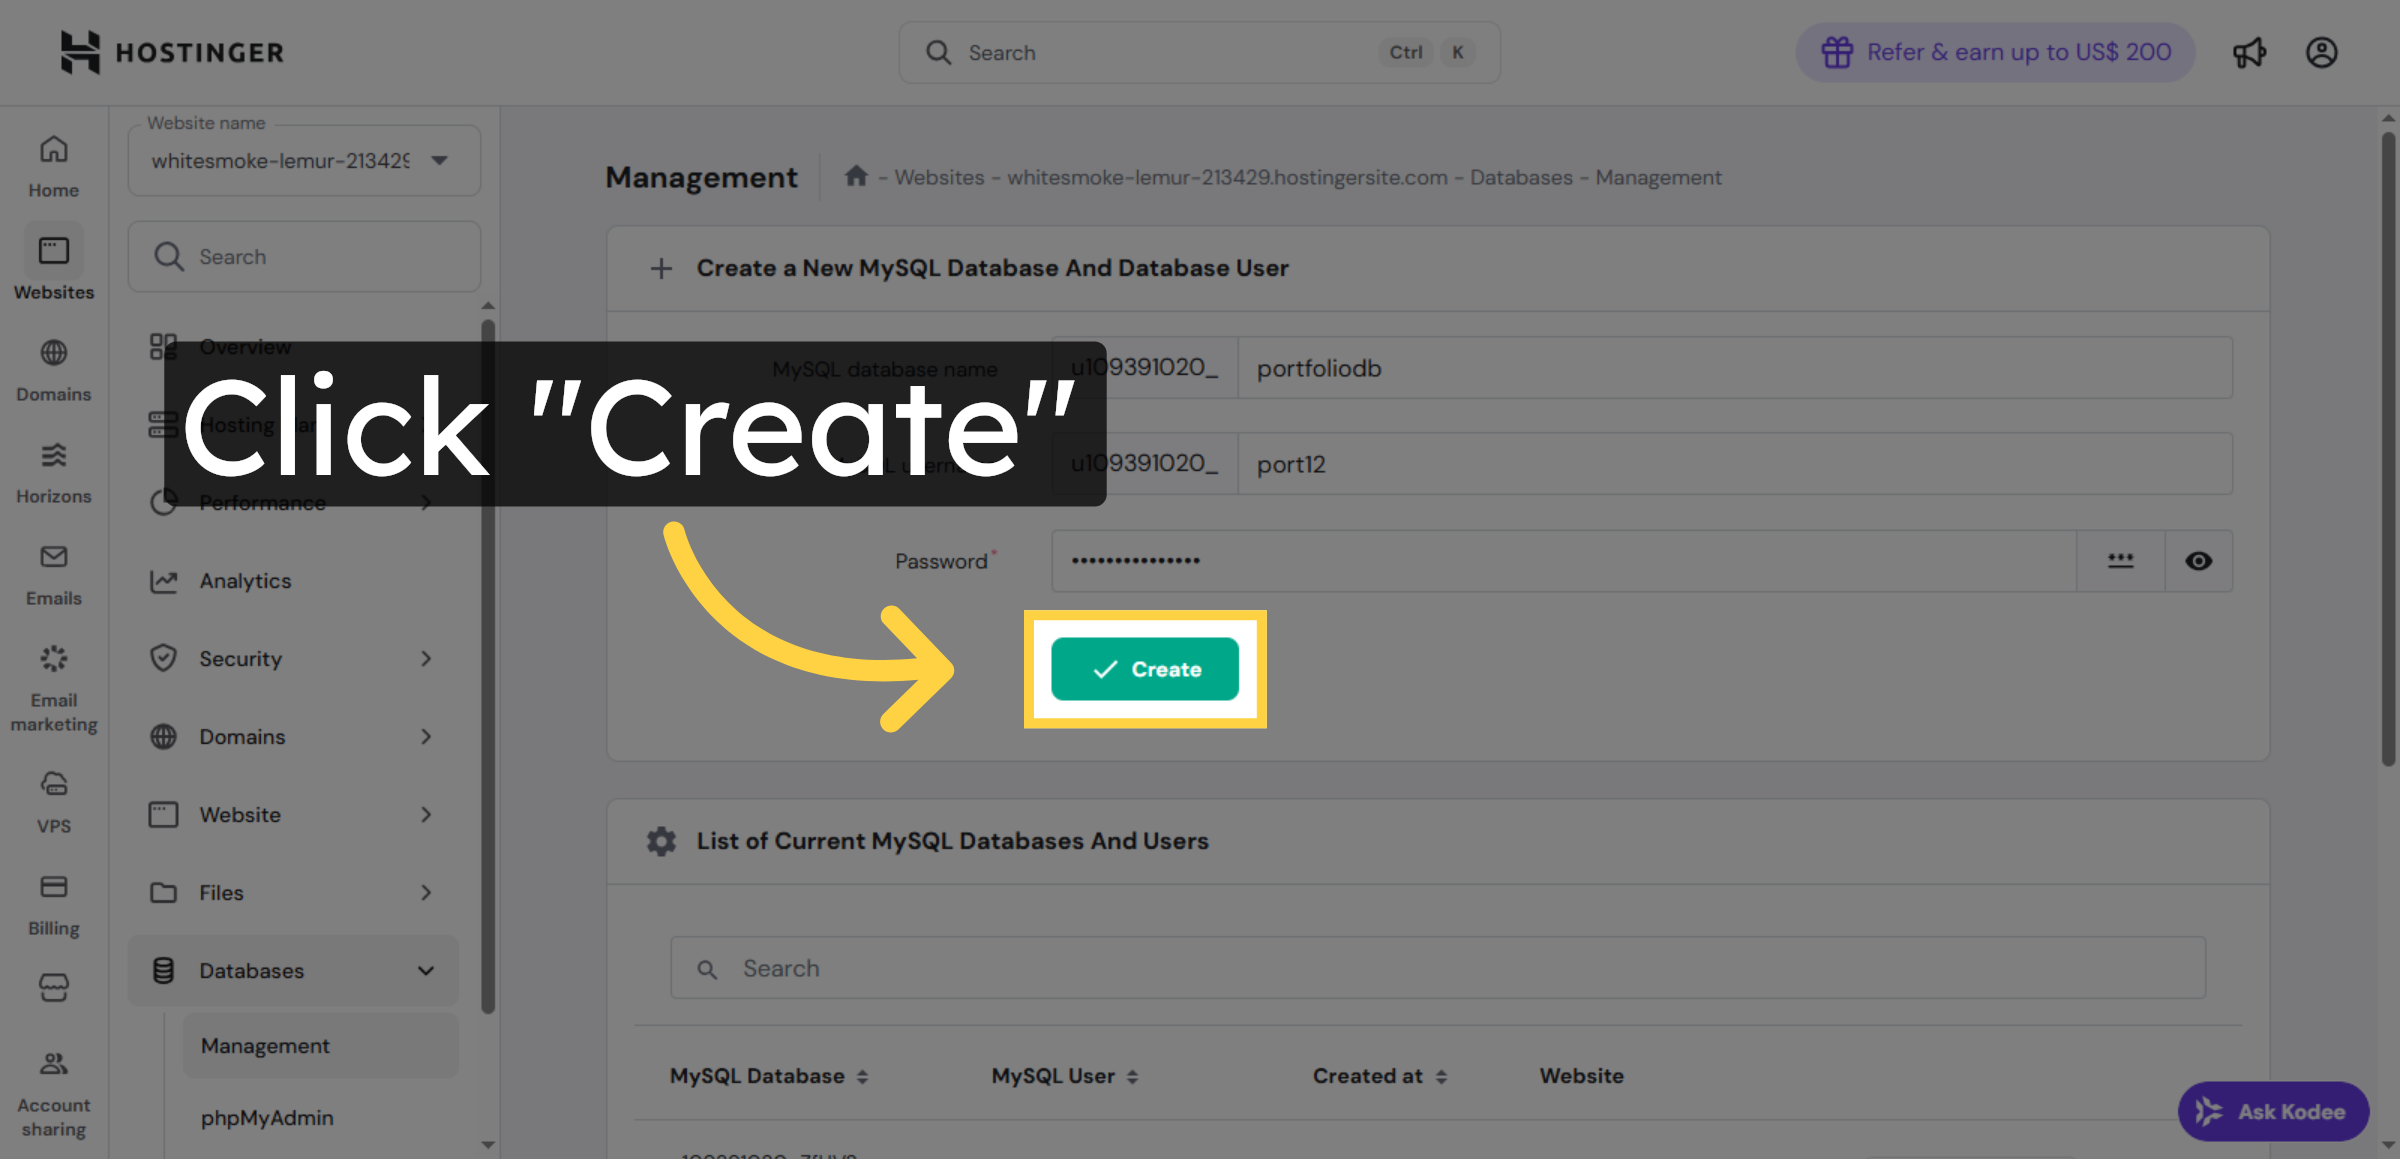
7. Choose Password
Enter the password in the password field.
8. Create Database User
Click Create to finalize the database user setup for WordPress.
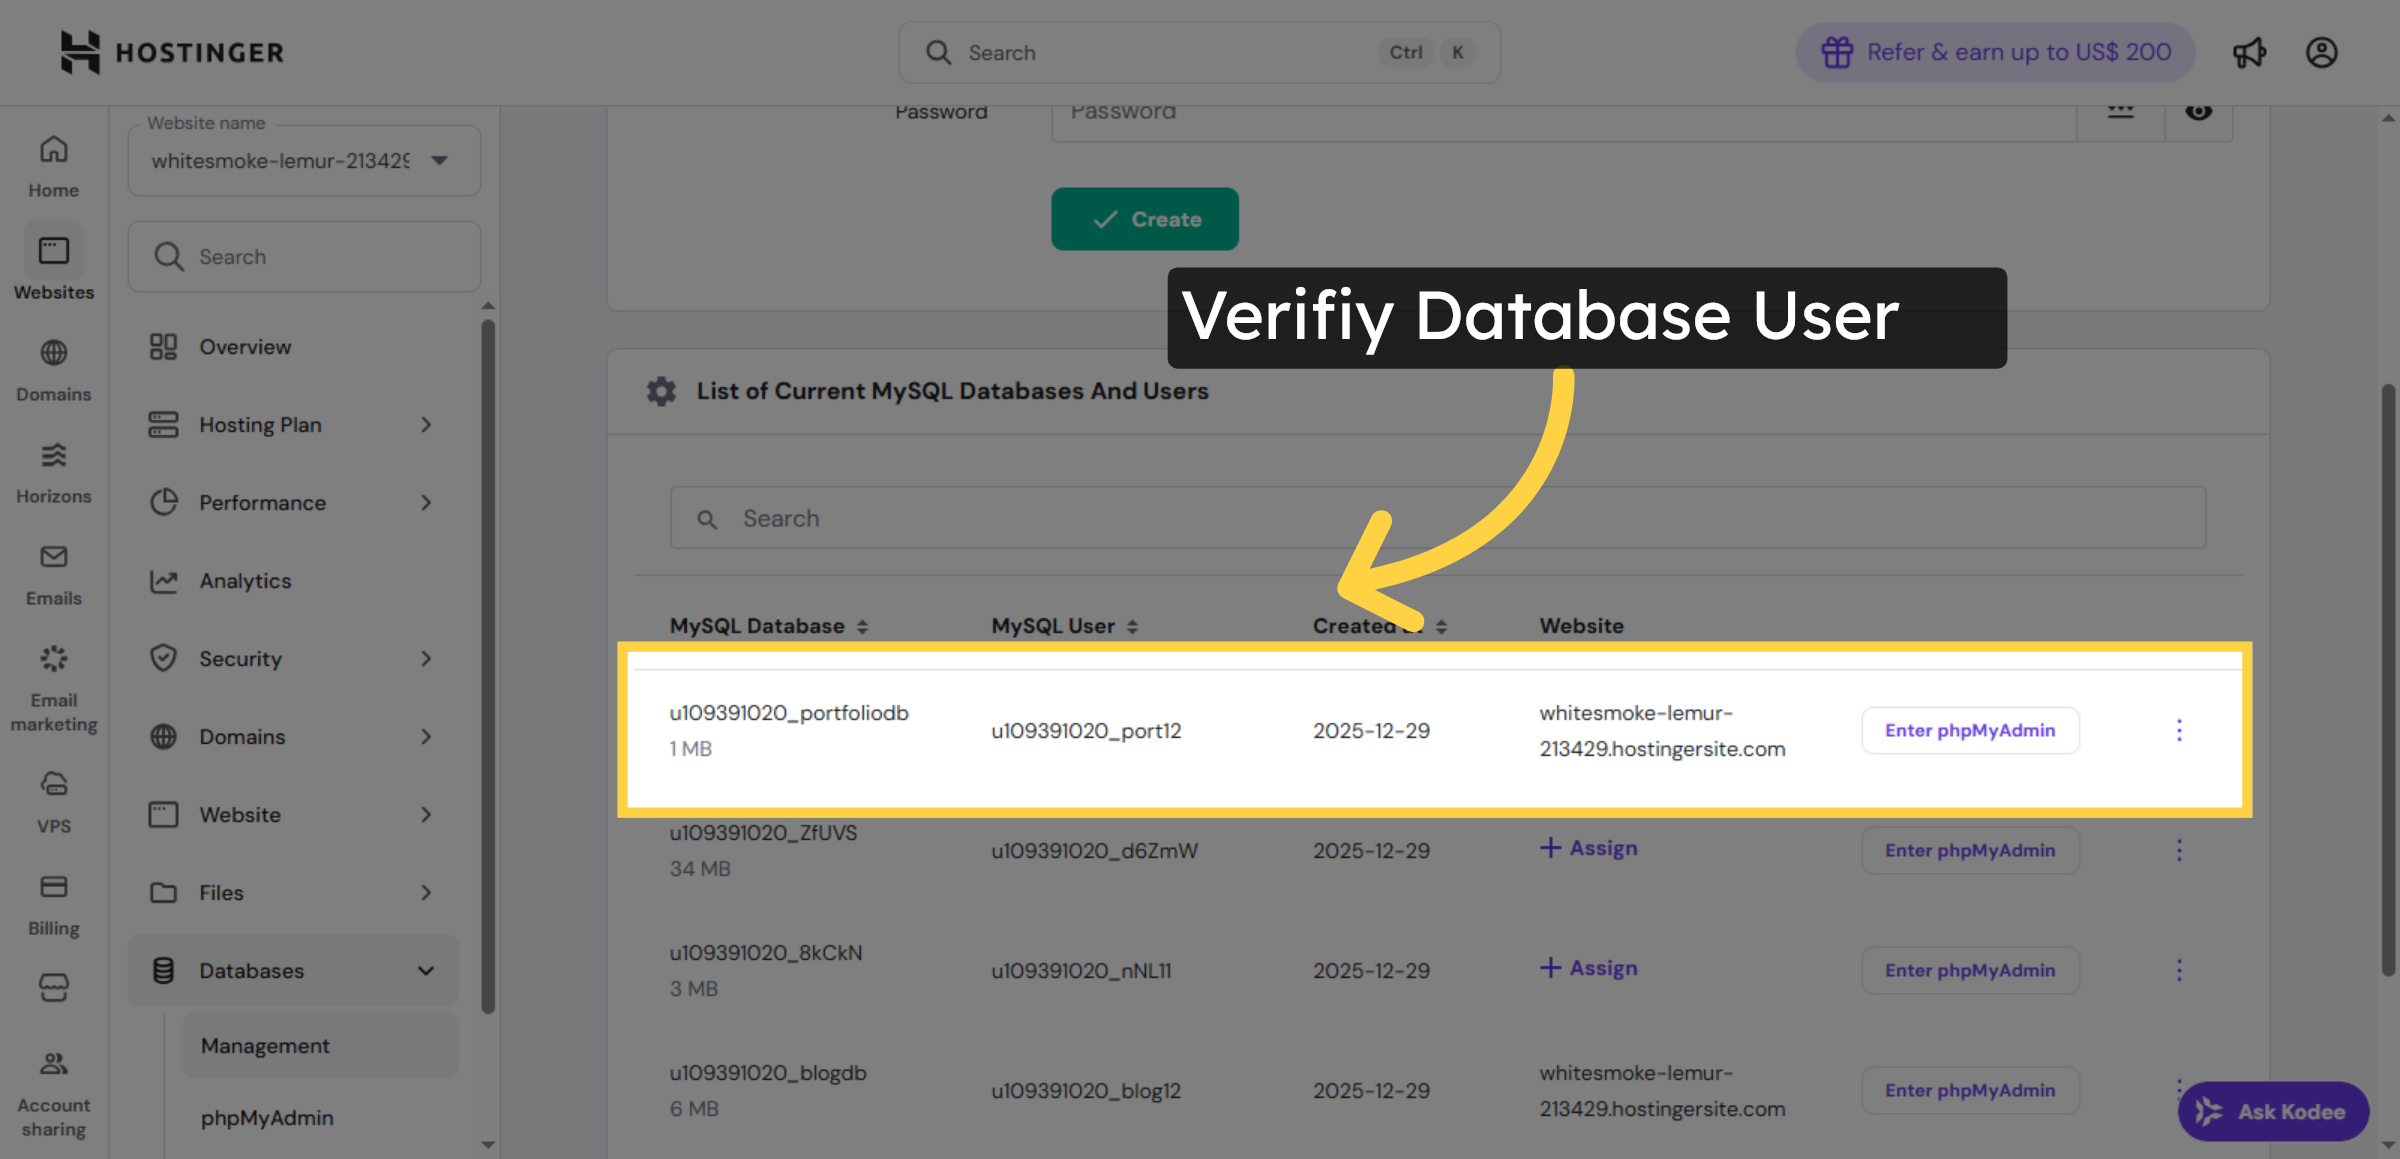
9. Verify Database Entries
Click the database entry to view or manage its settings.
10. NOTE
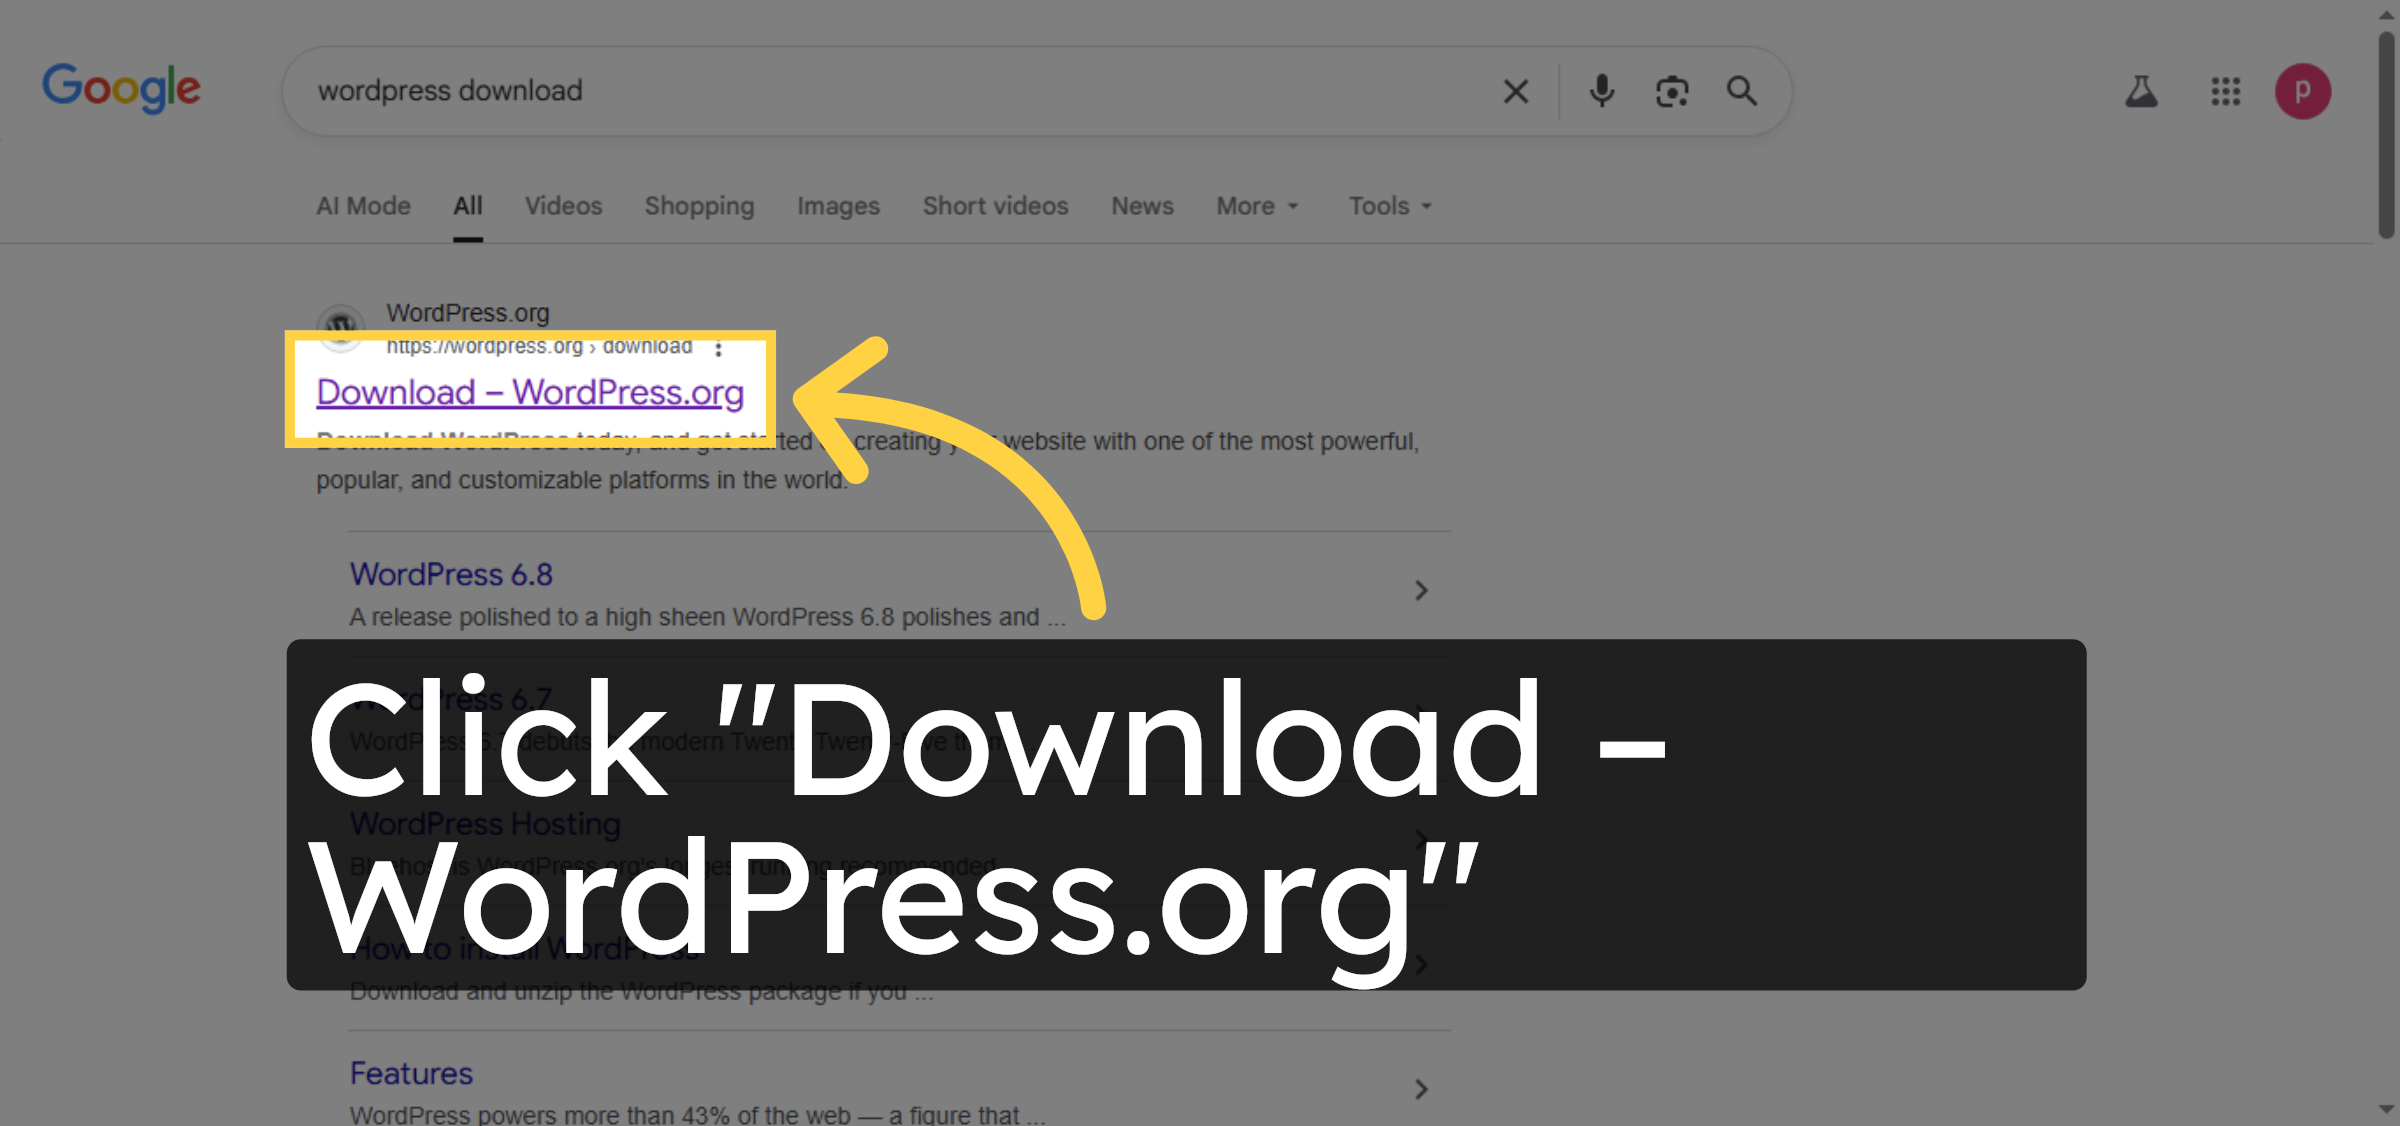
11. Open Google Website

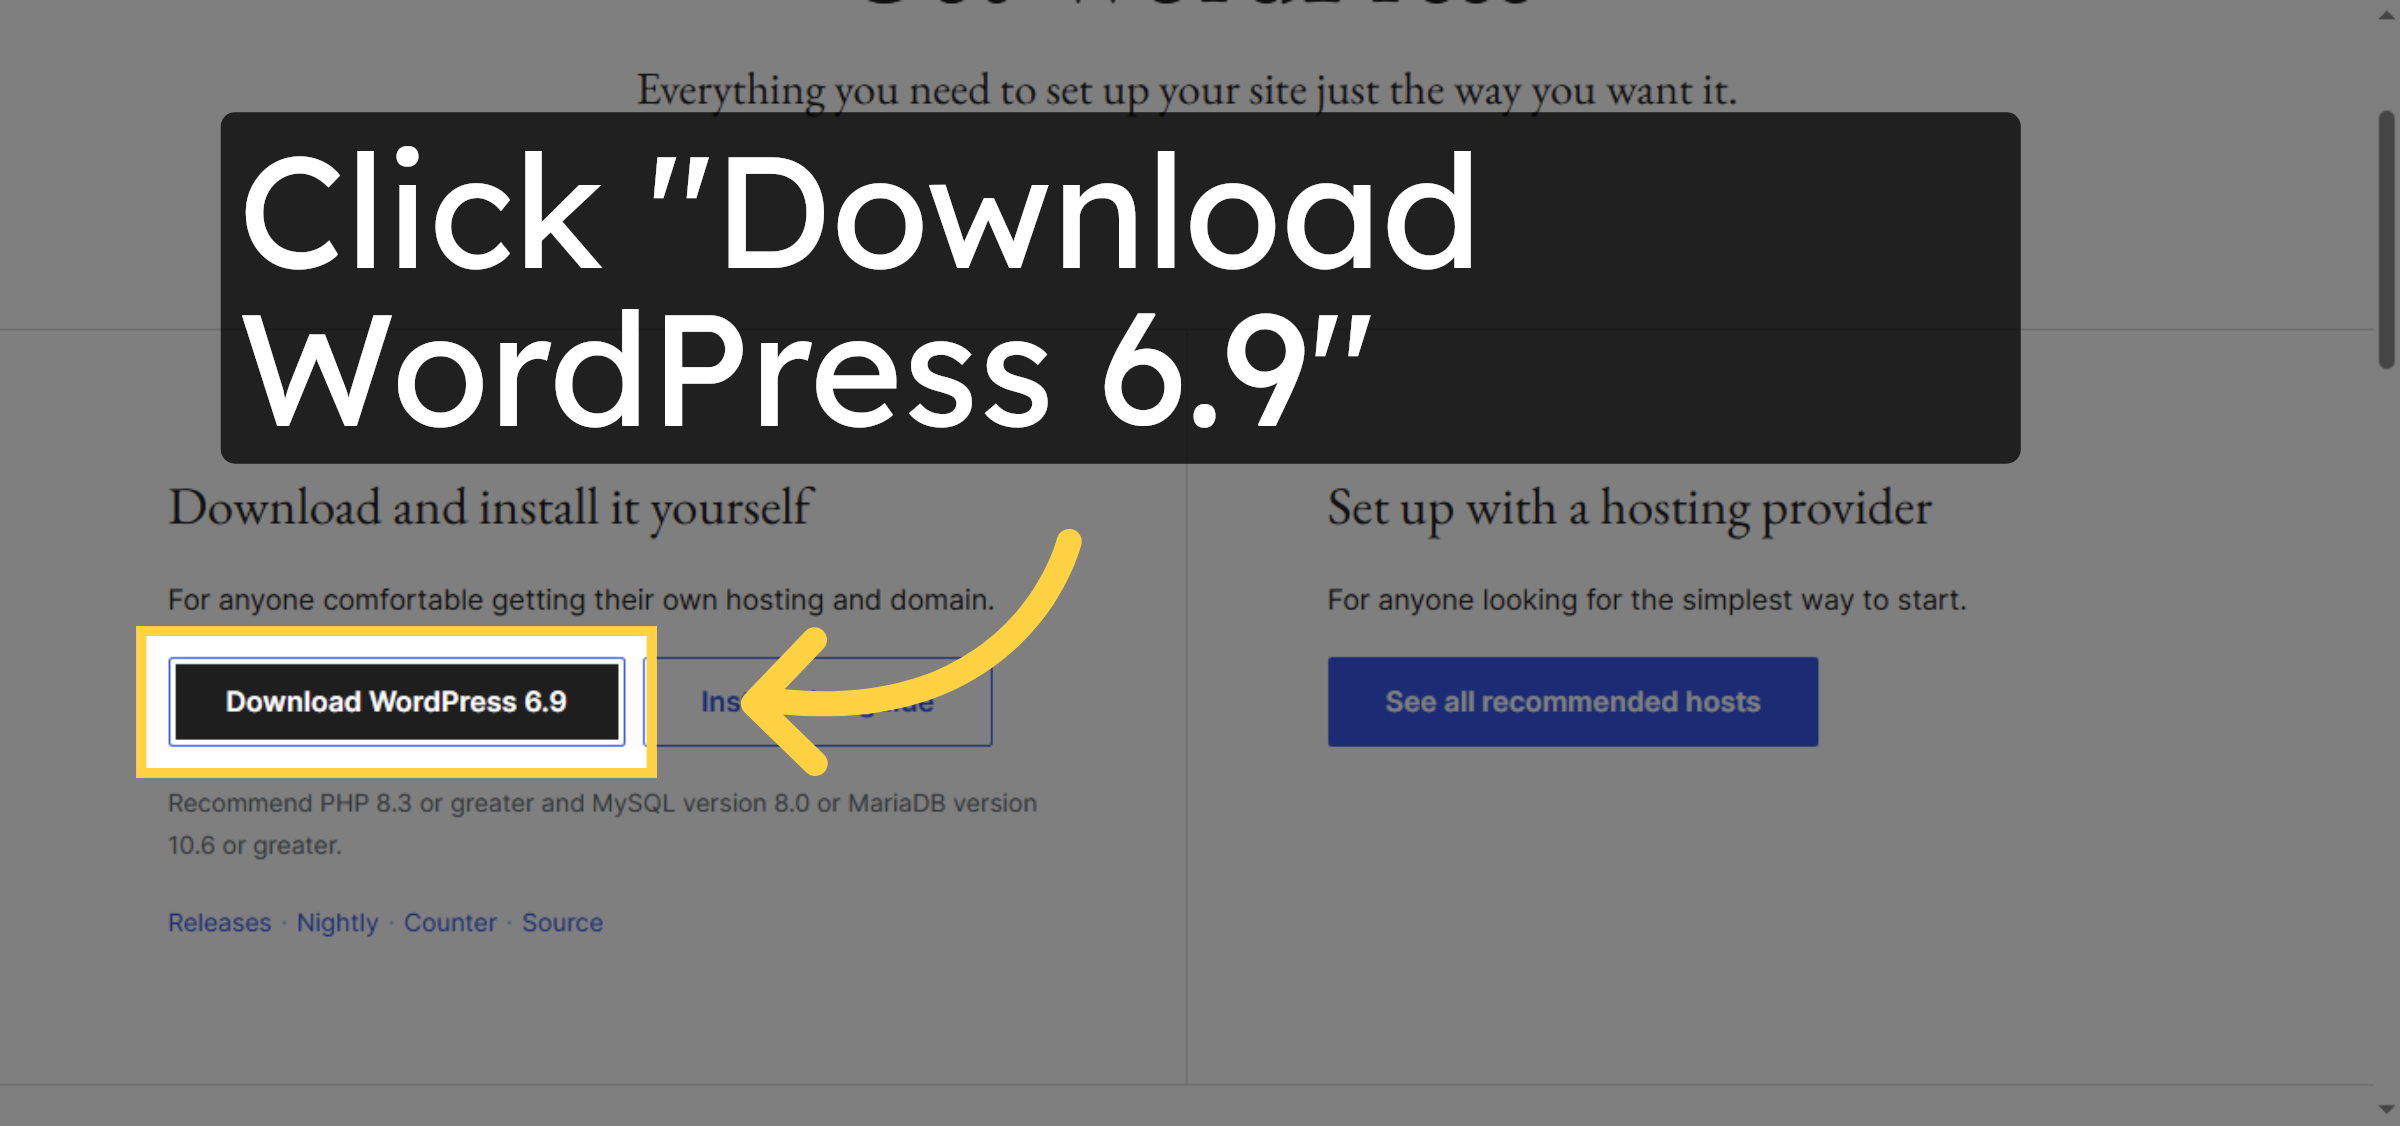
12. Access WordPress Download
13. Download WordPress
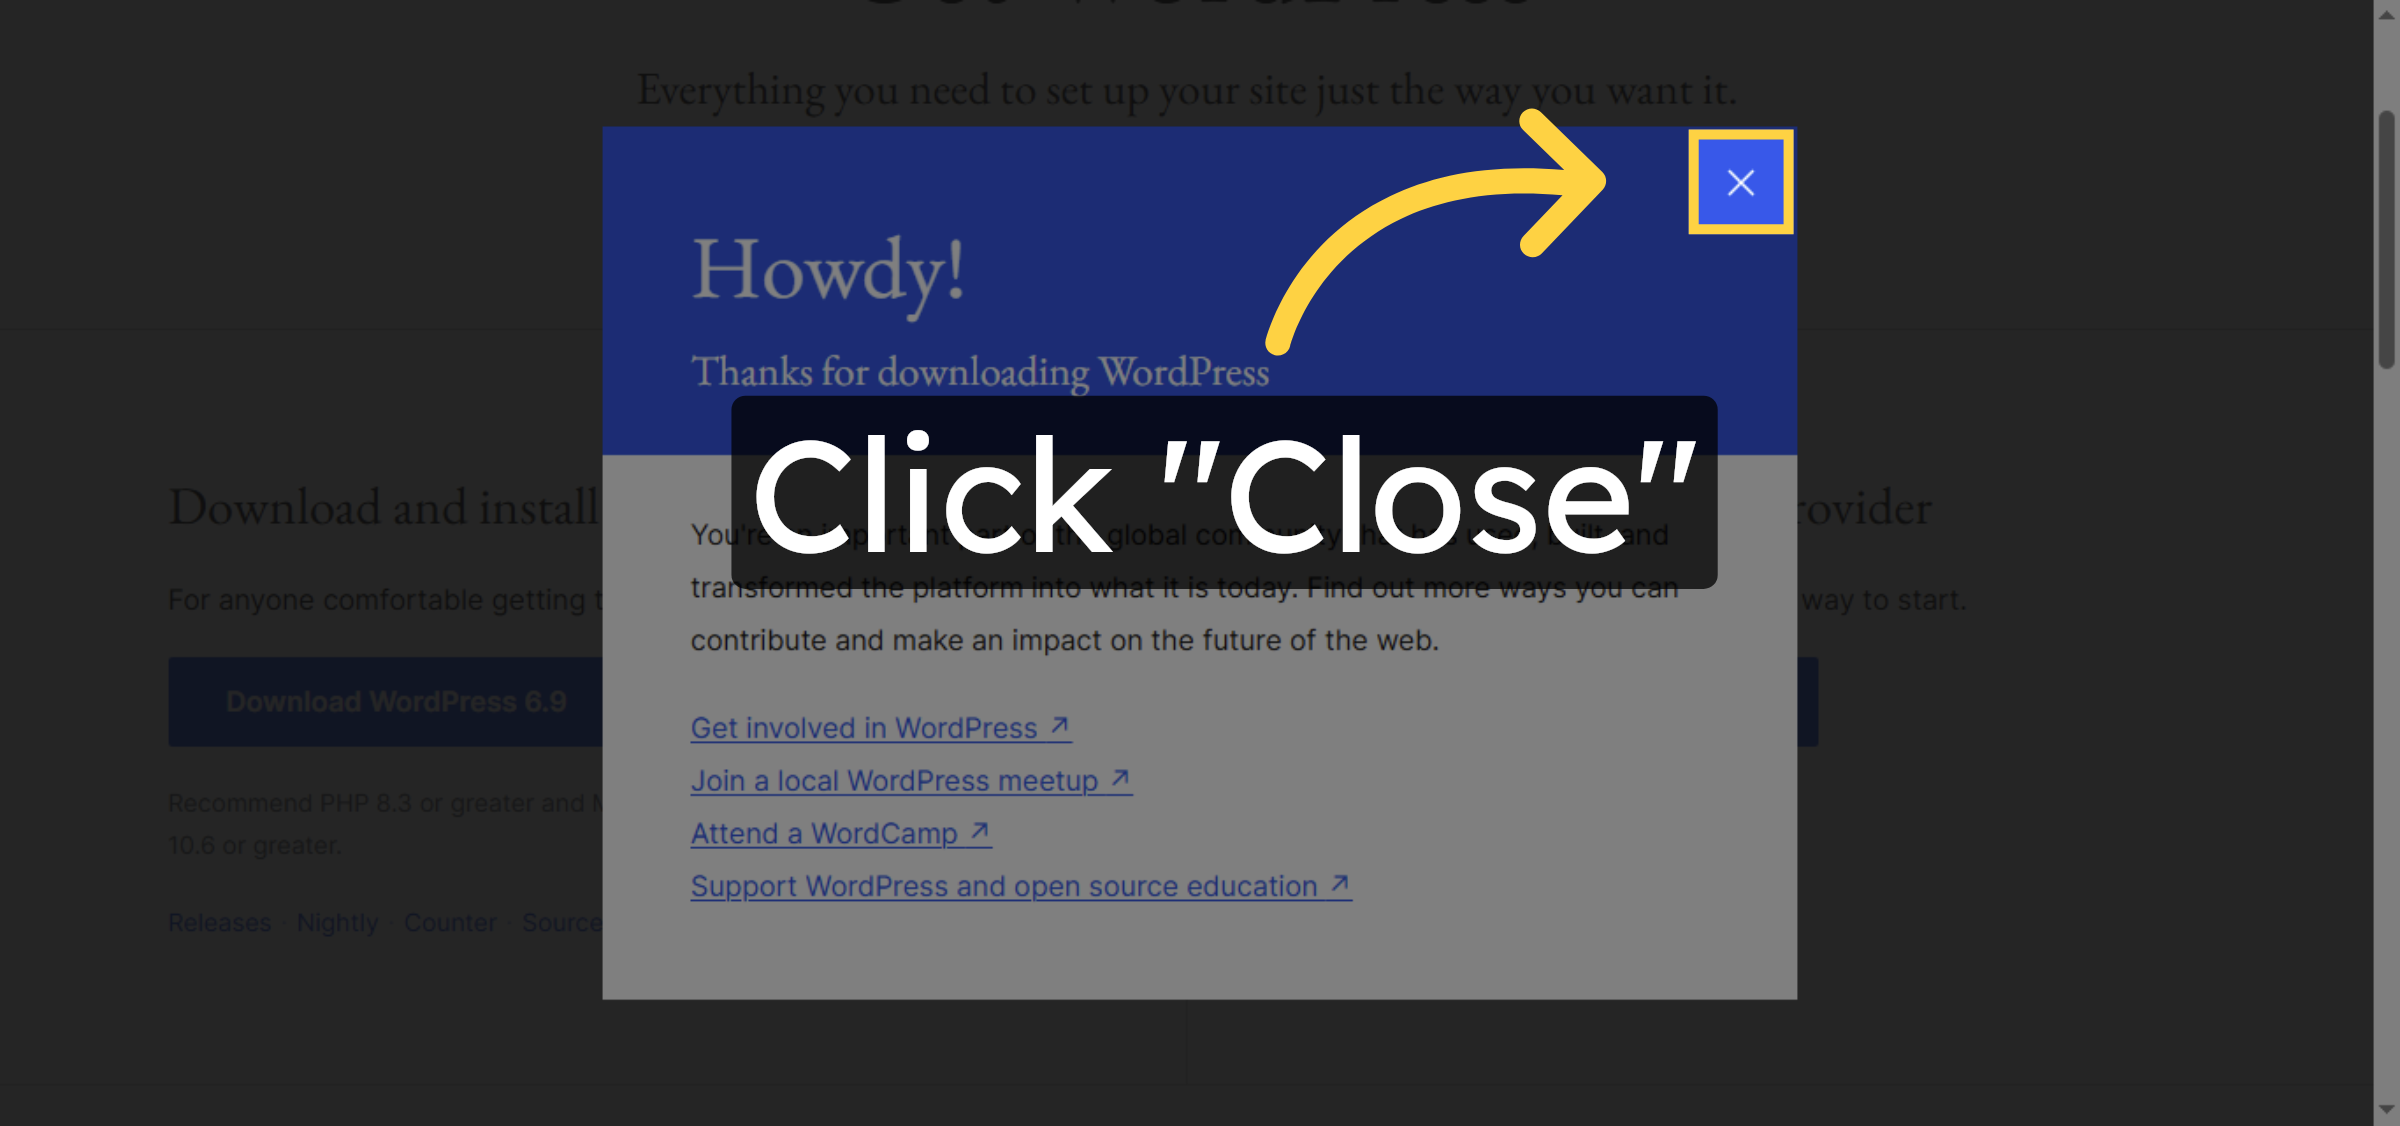
14. Close Download Popup
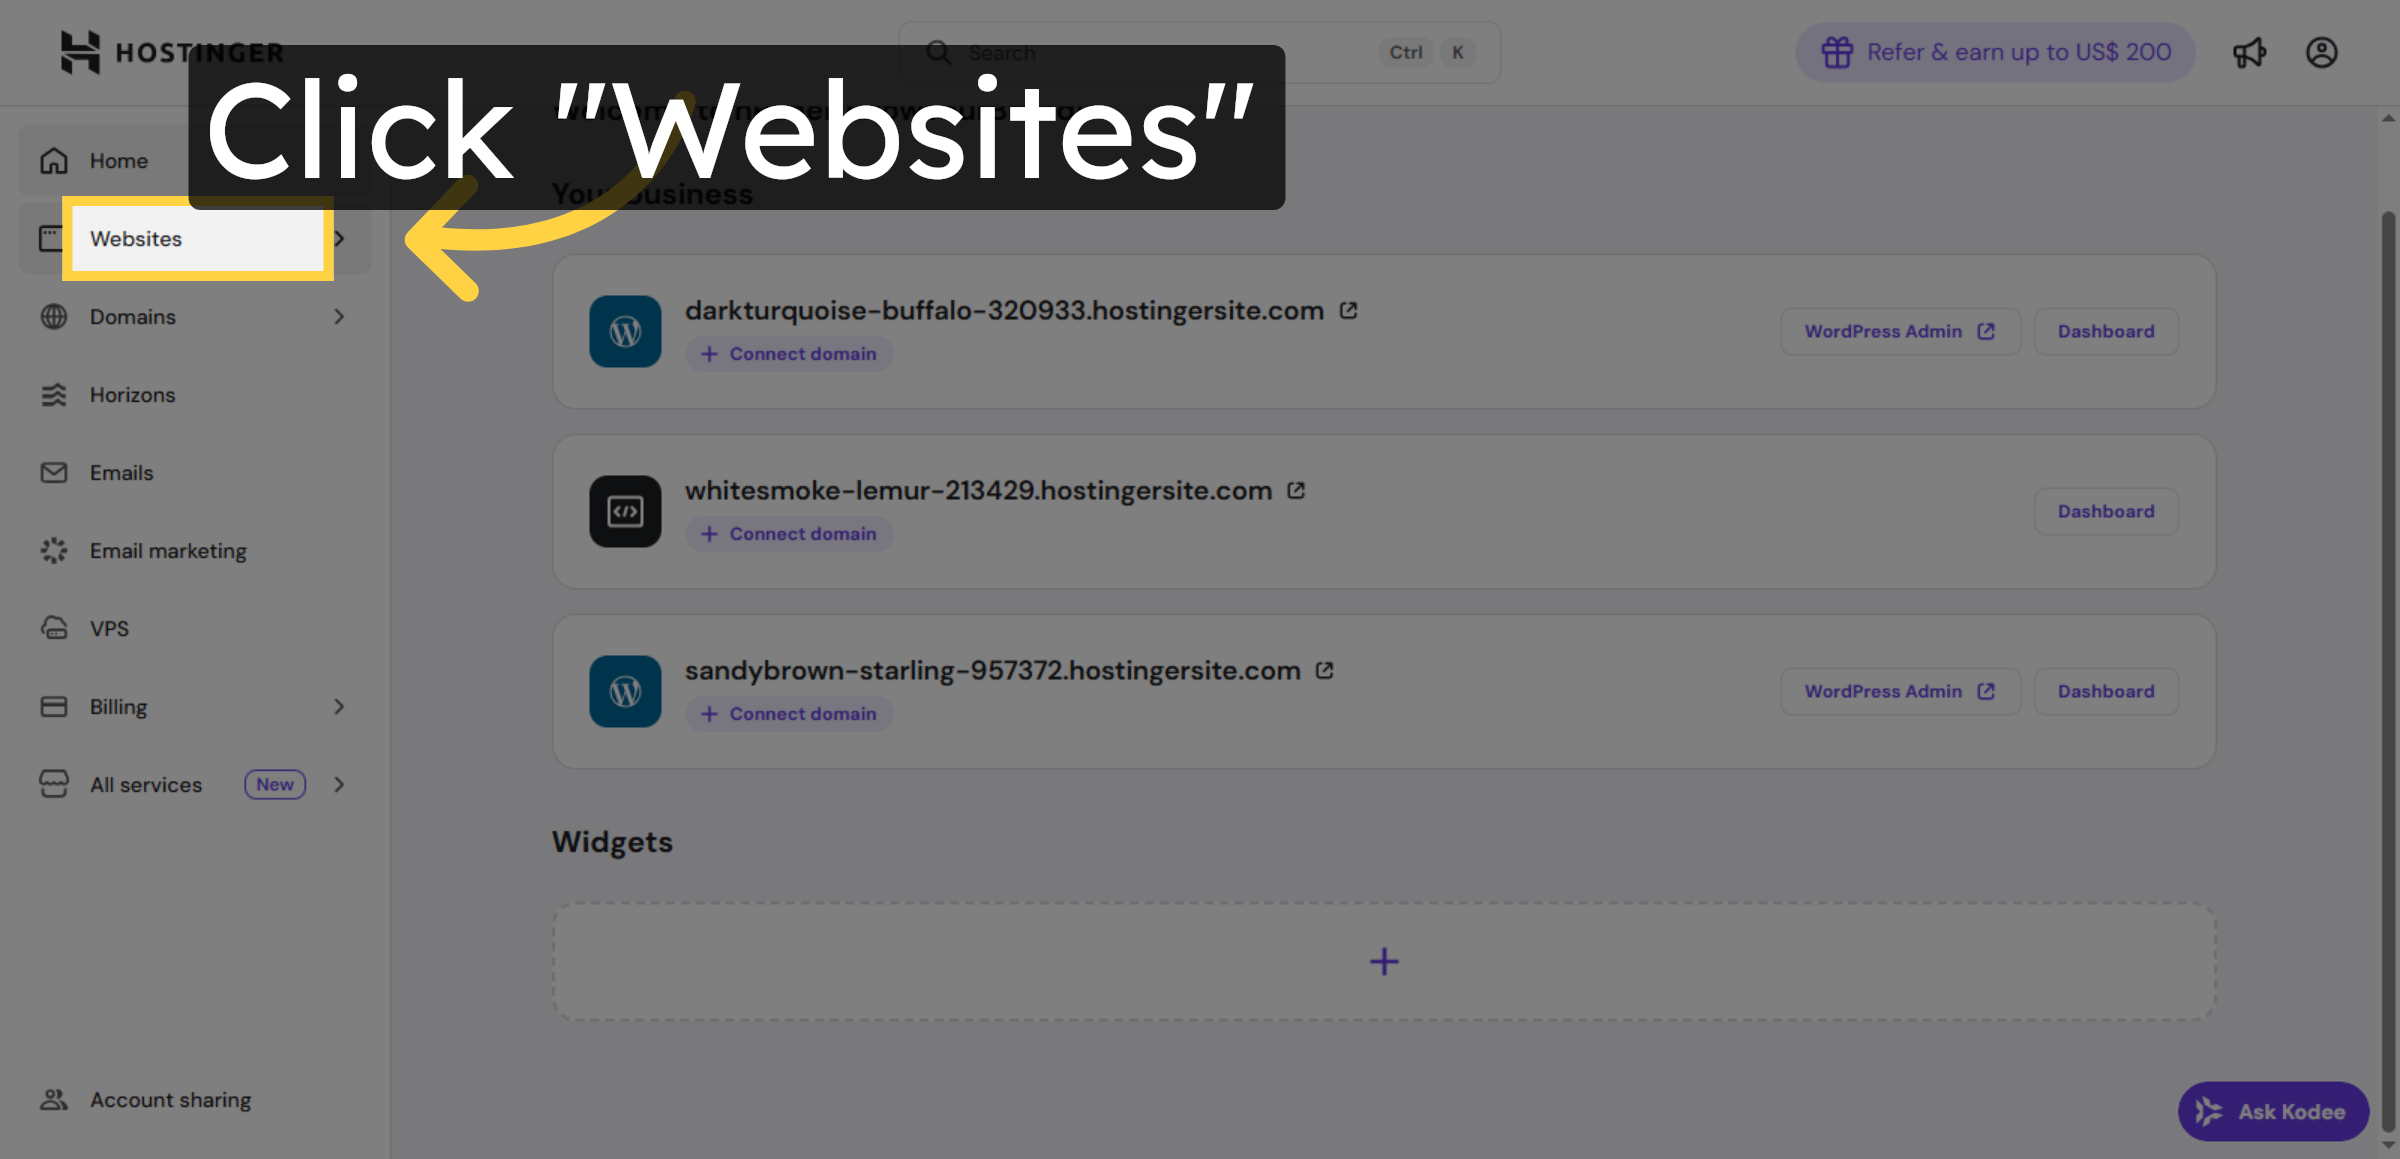
15. Return to Websites Section
Click Websites to navigate back to your list of managed sites.
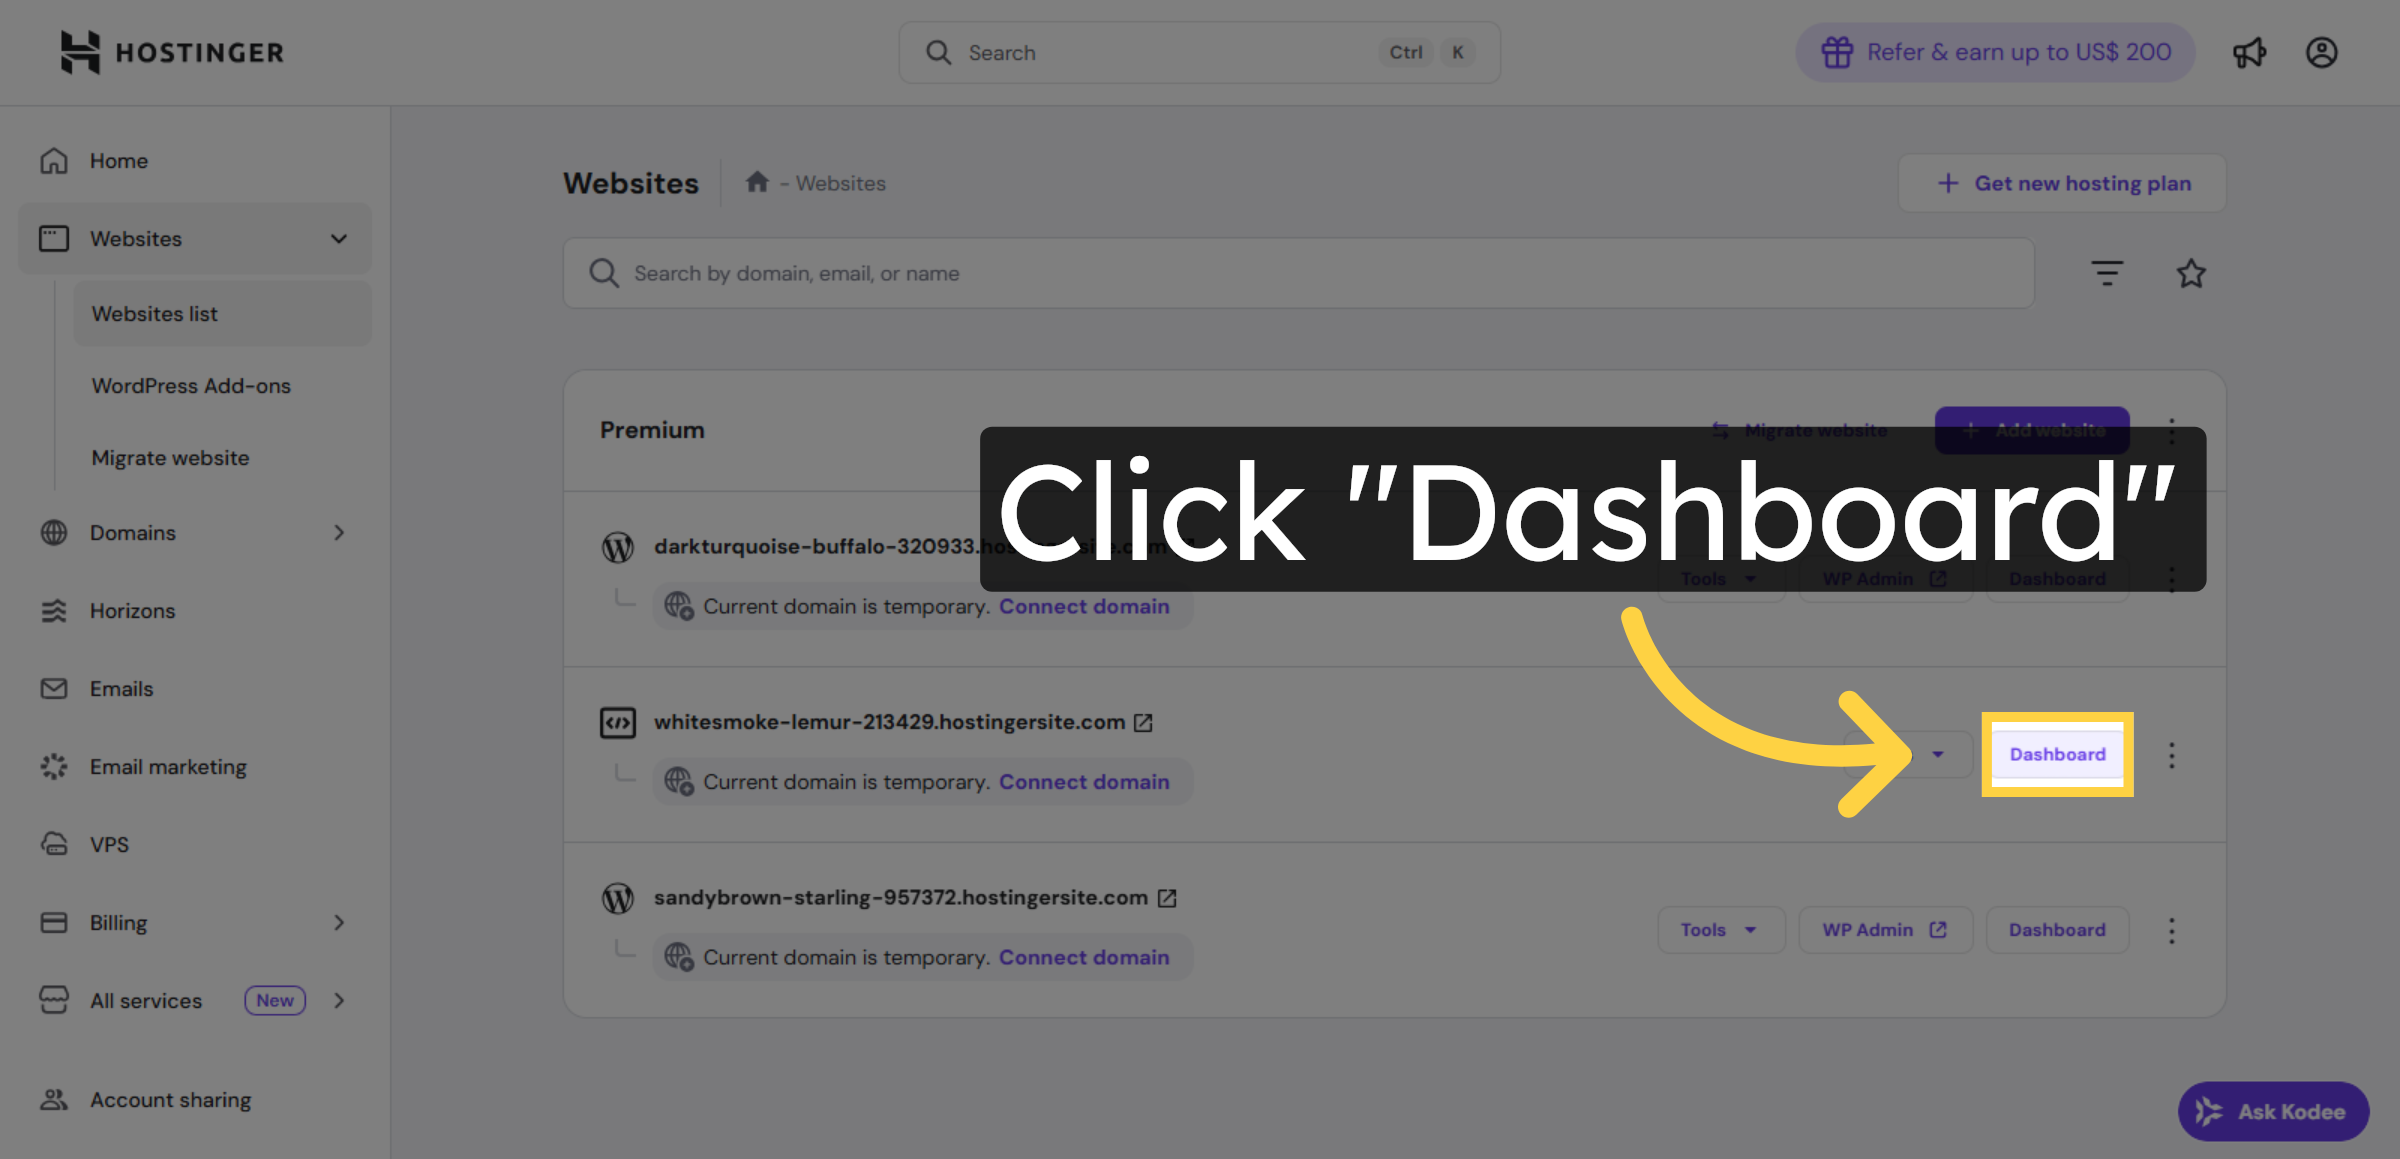
16. Open Website Dashboard Again
Click Dashboard to access your website’s control panel.
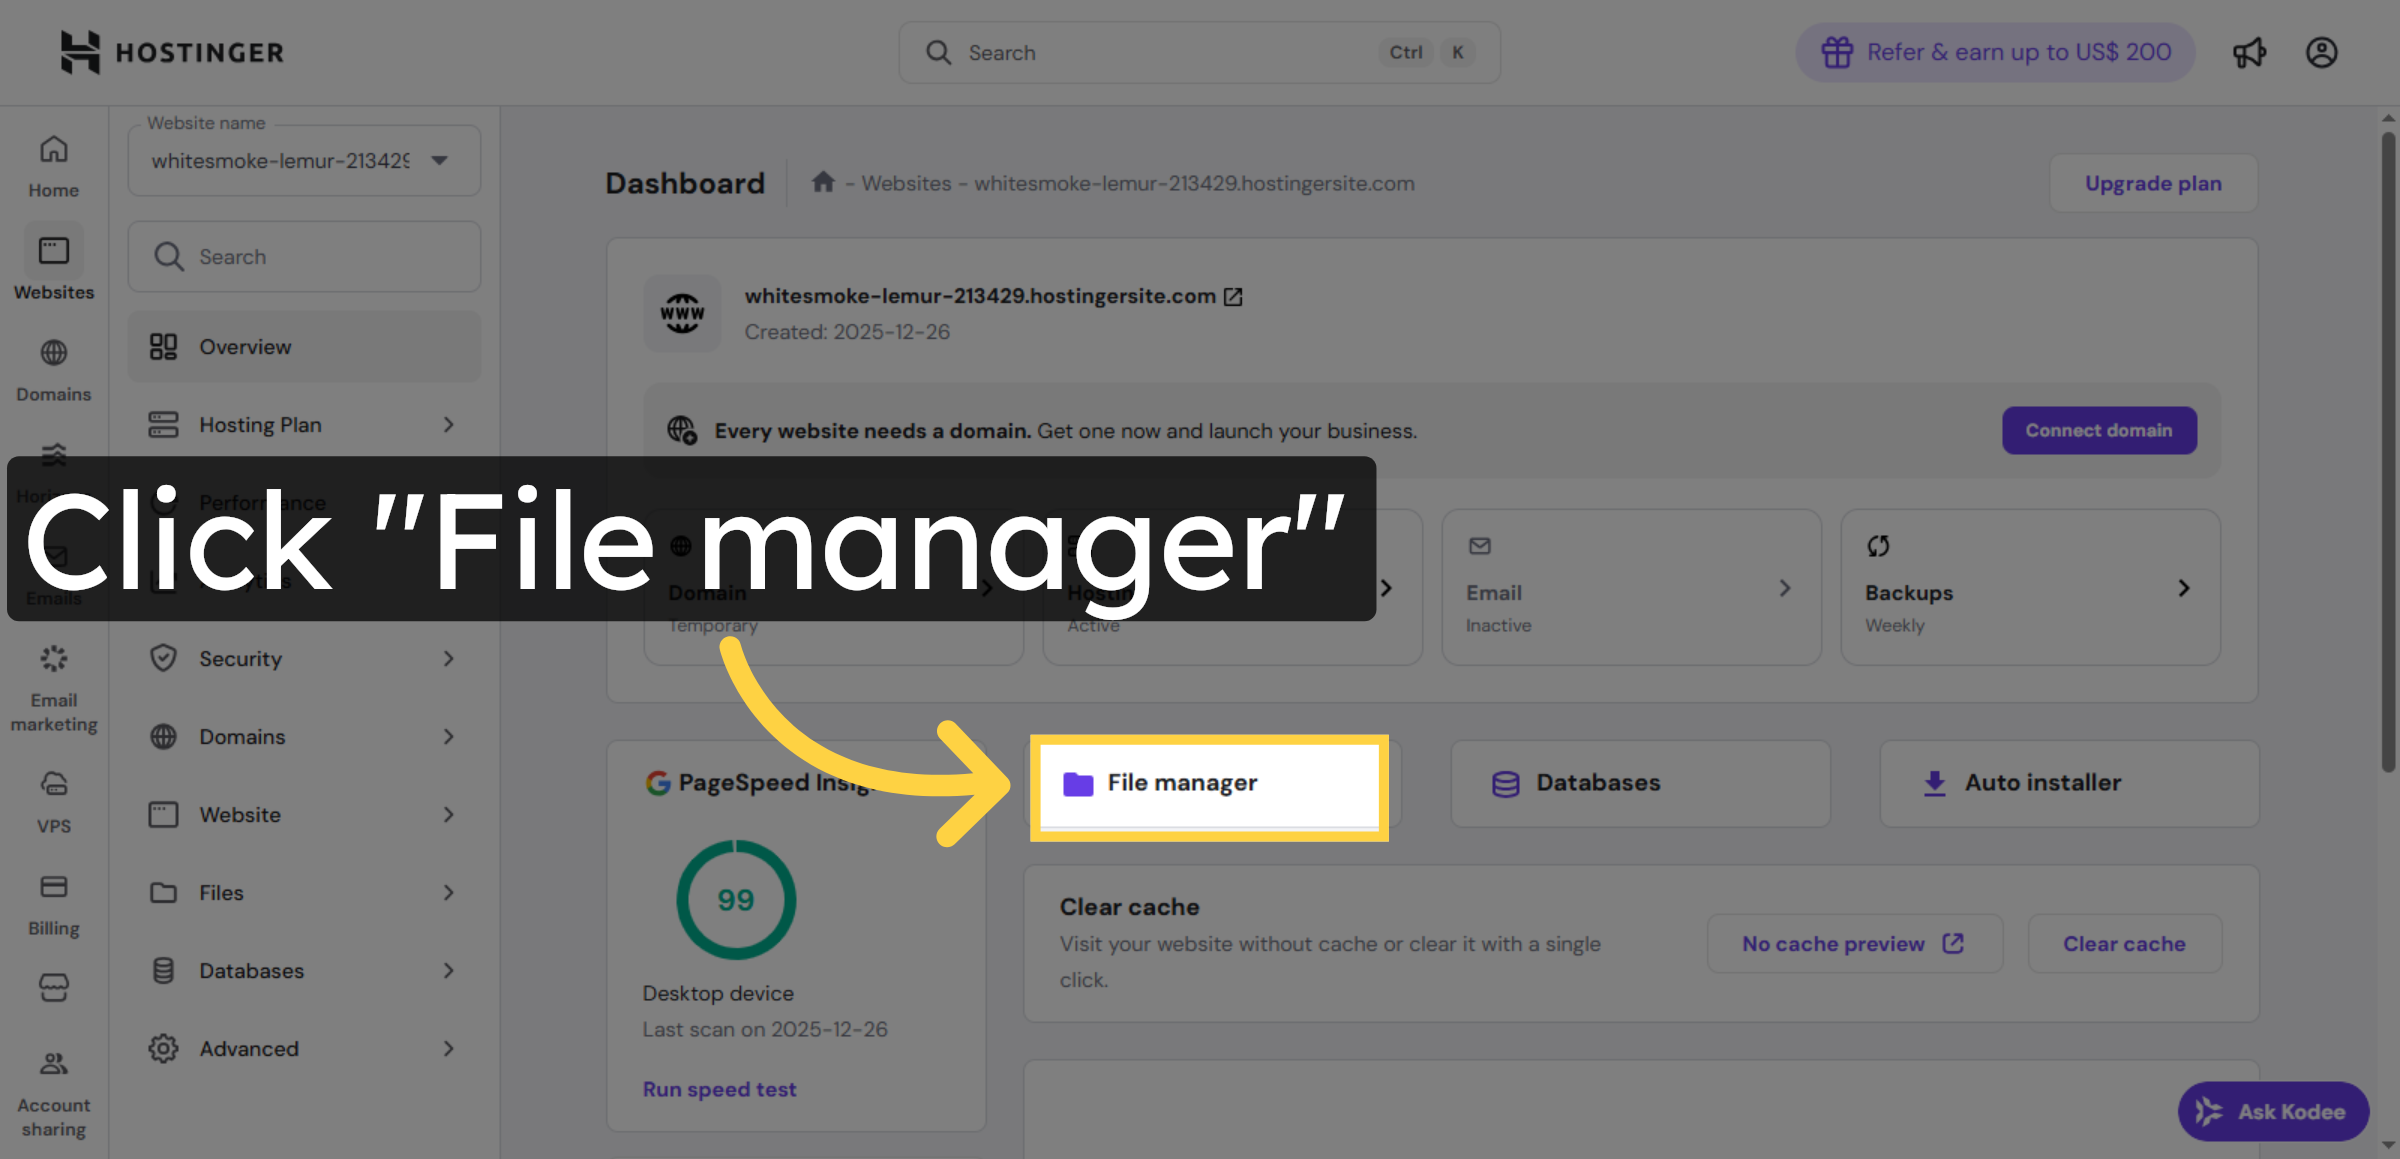
17. Access File Manager
Click File Manager to manage your website files directly.
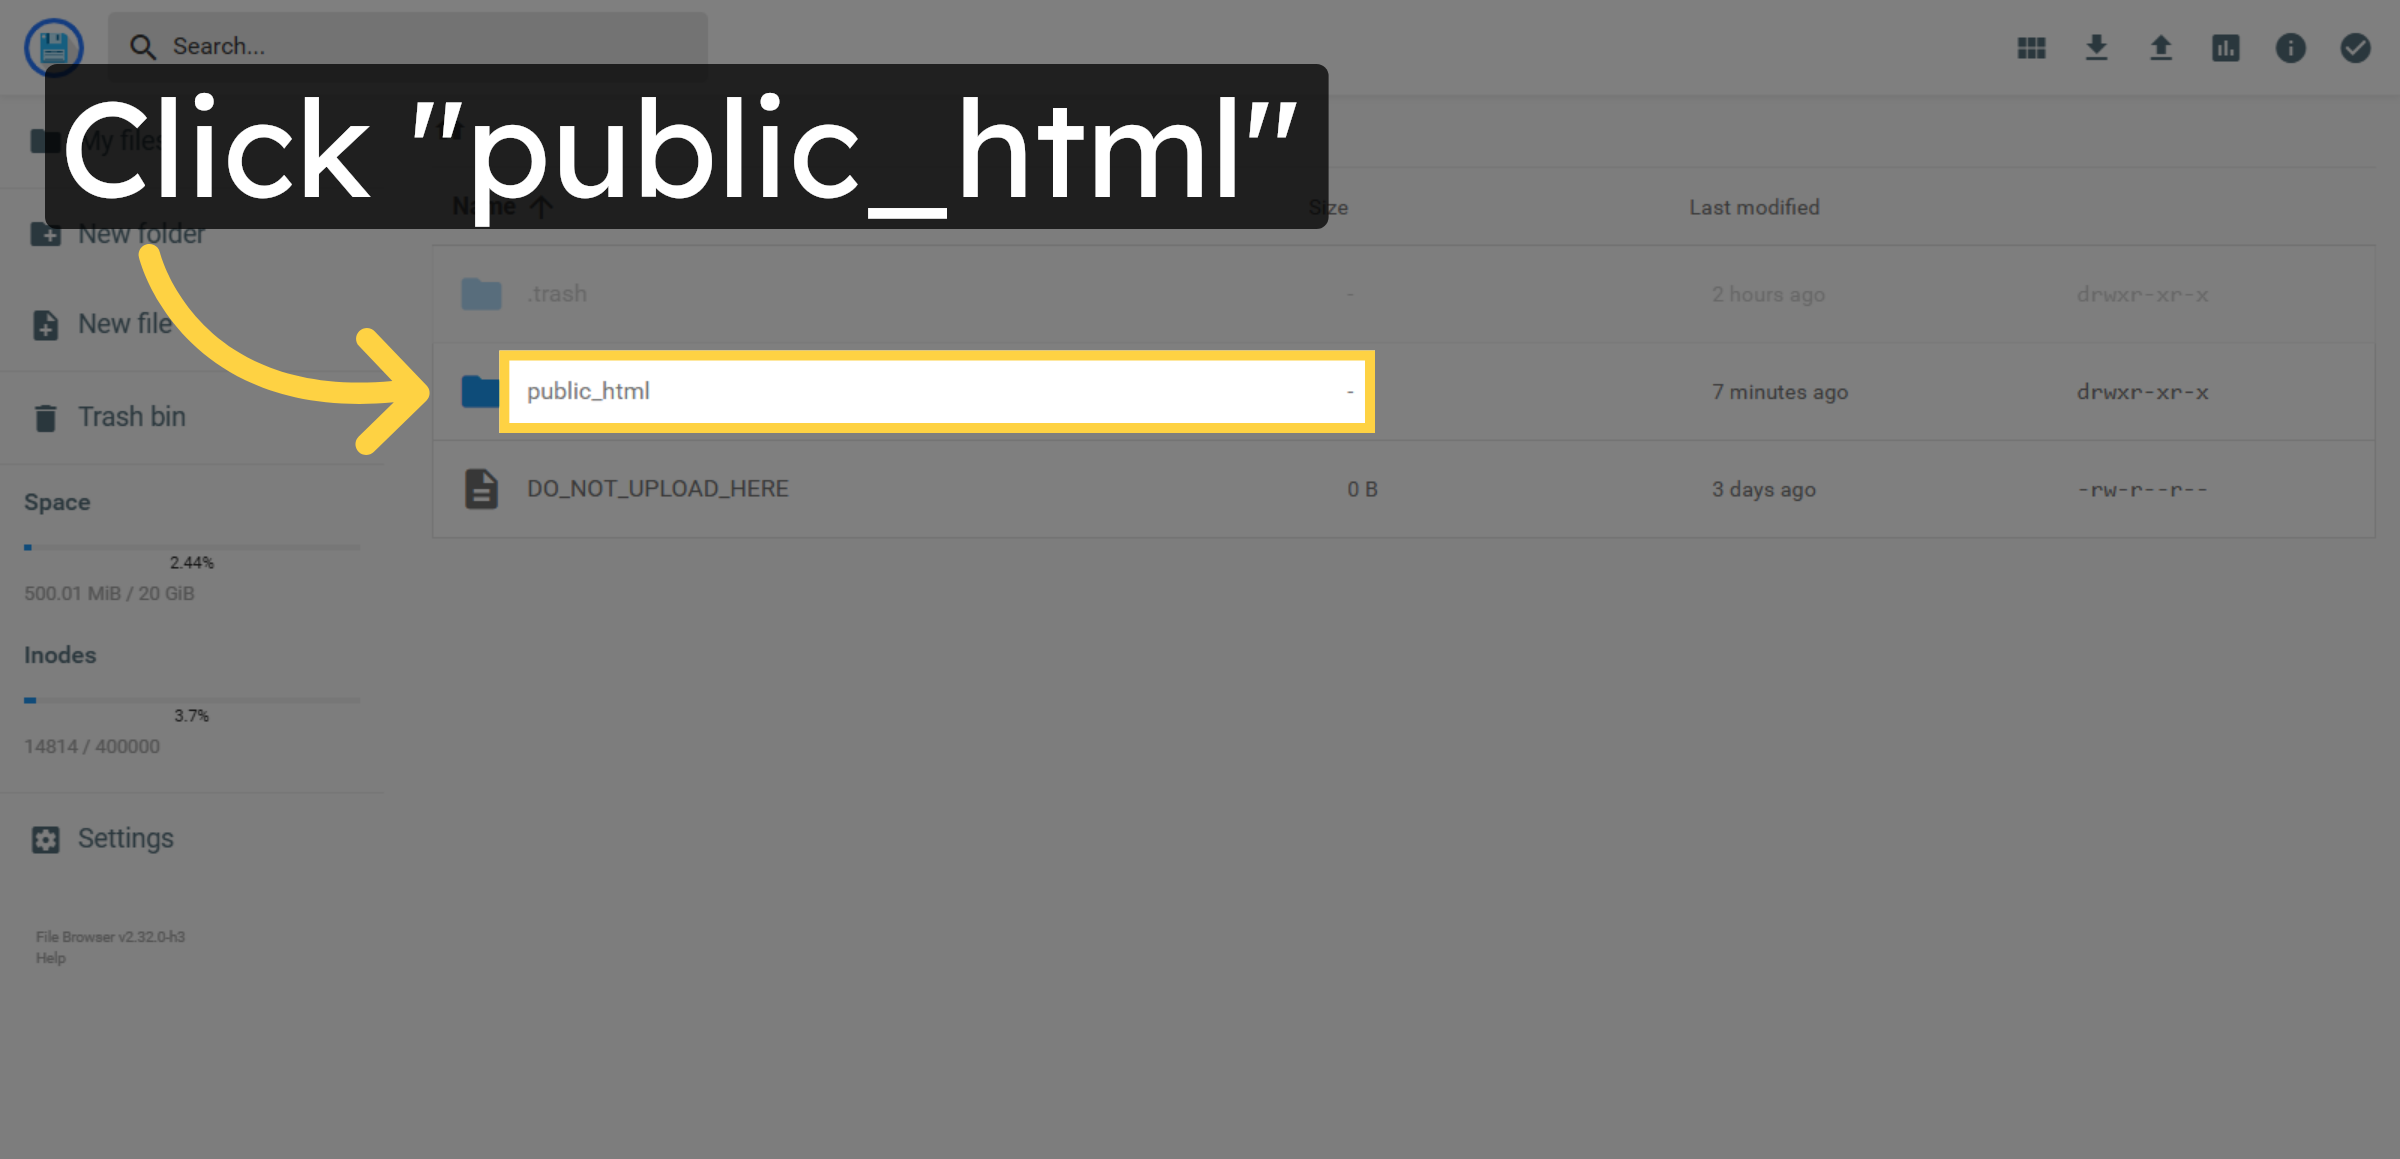
18. Open Public HTML Folder
Click public_html to view the root directory of your website files.
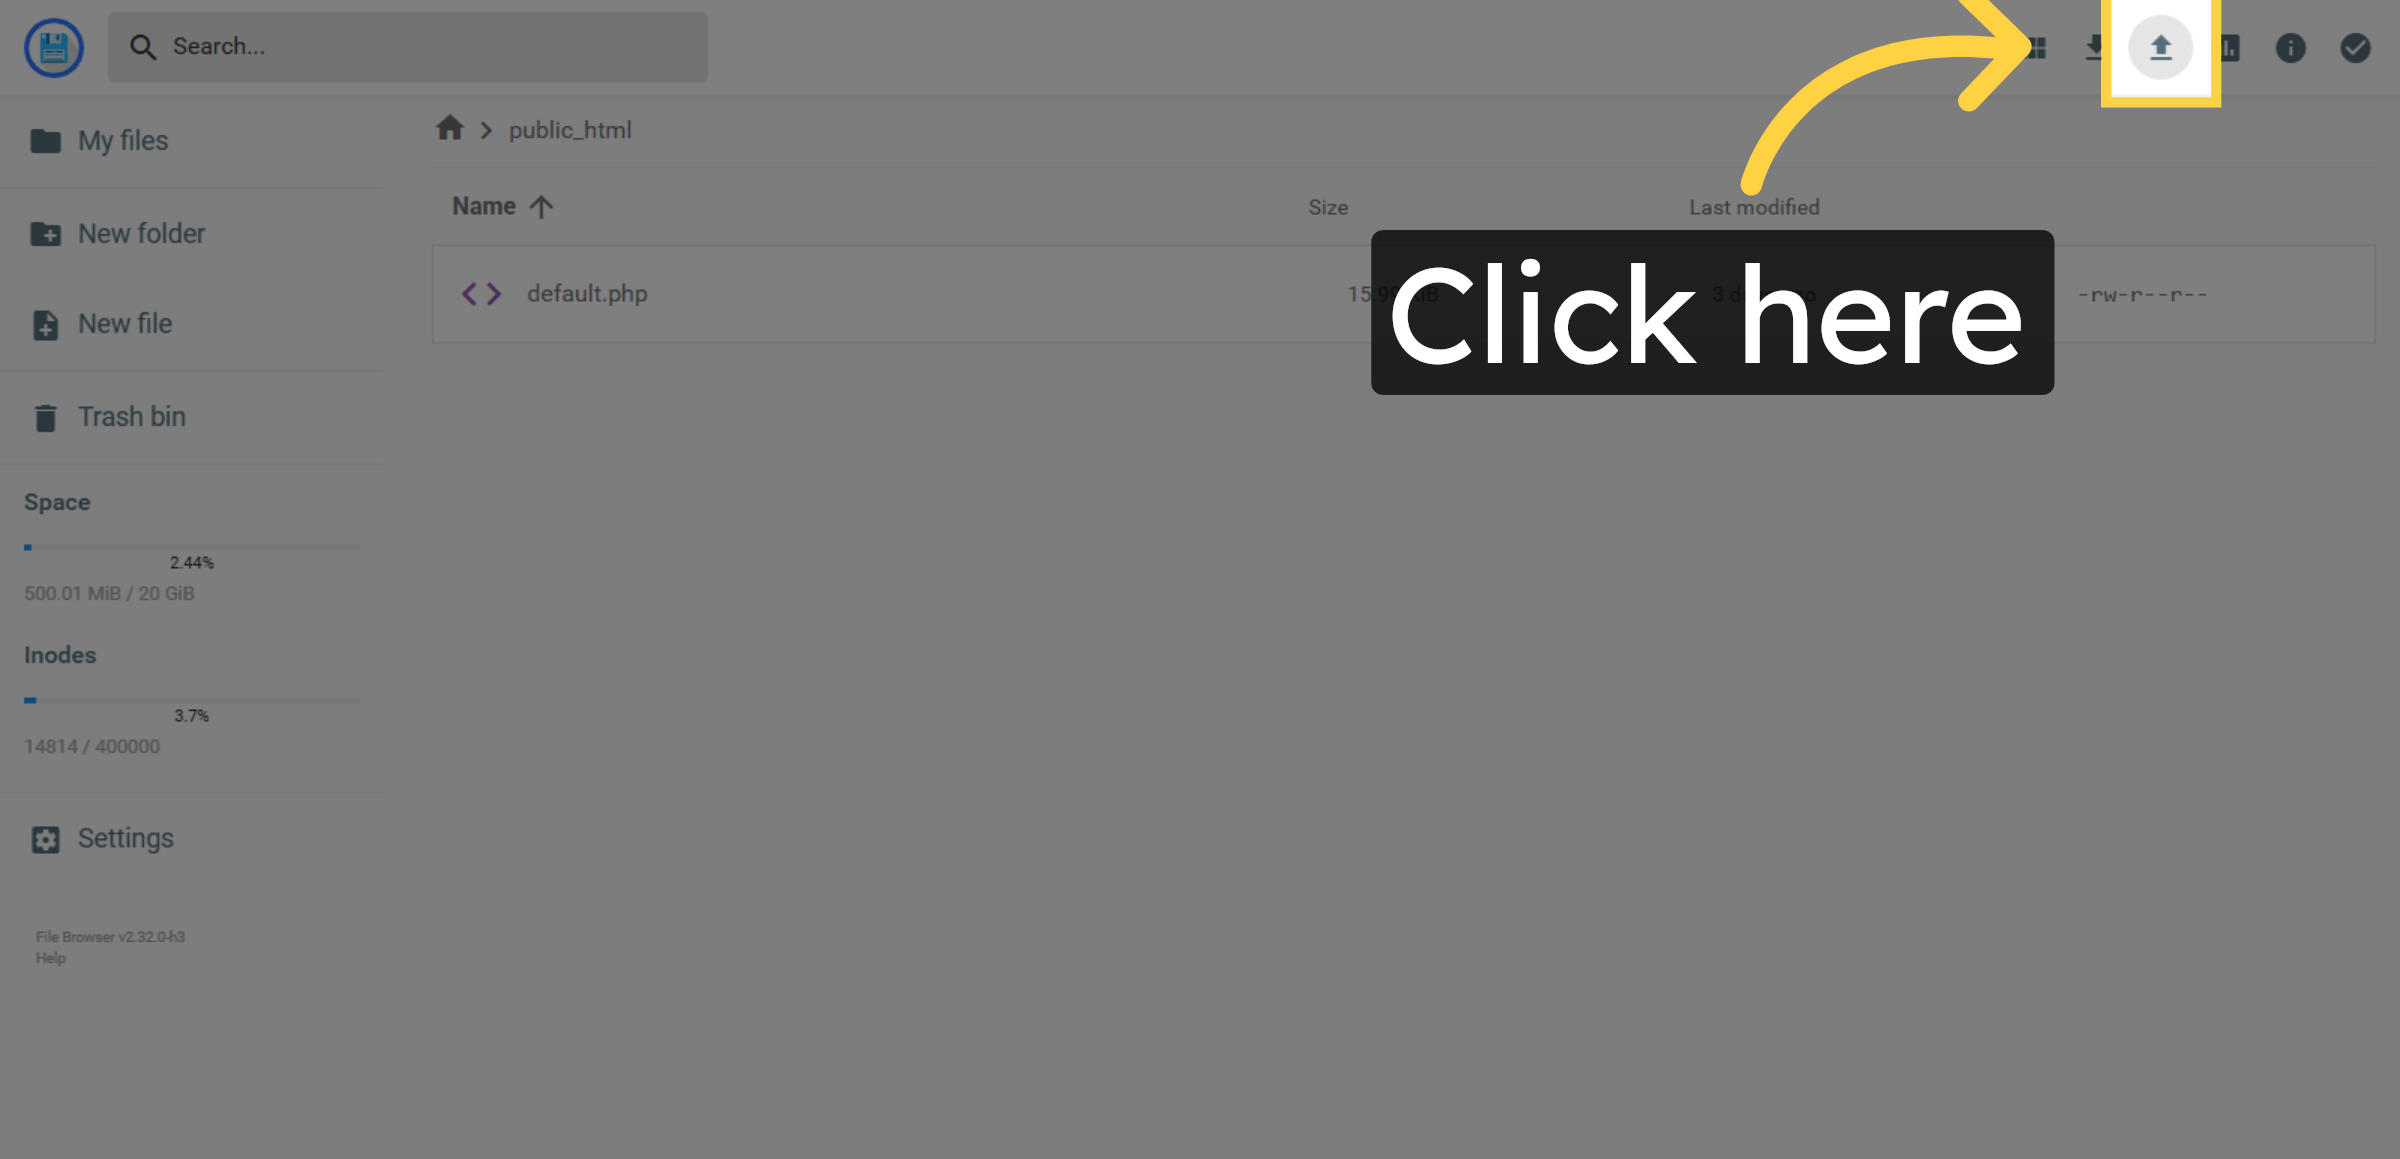
19. Upload New File
Click here to create or upload new files in the public_html directory.
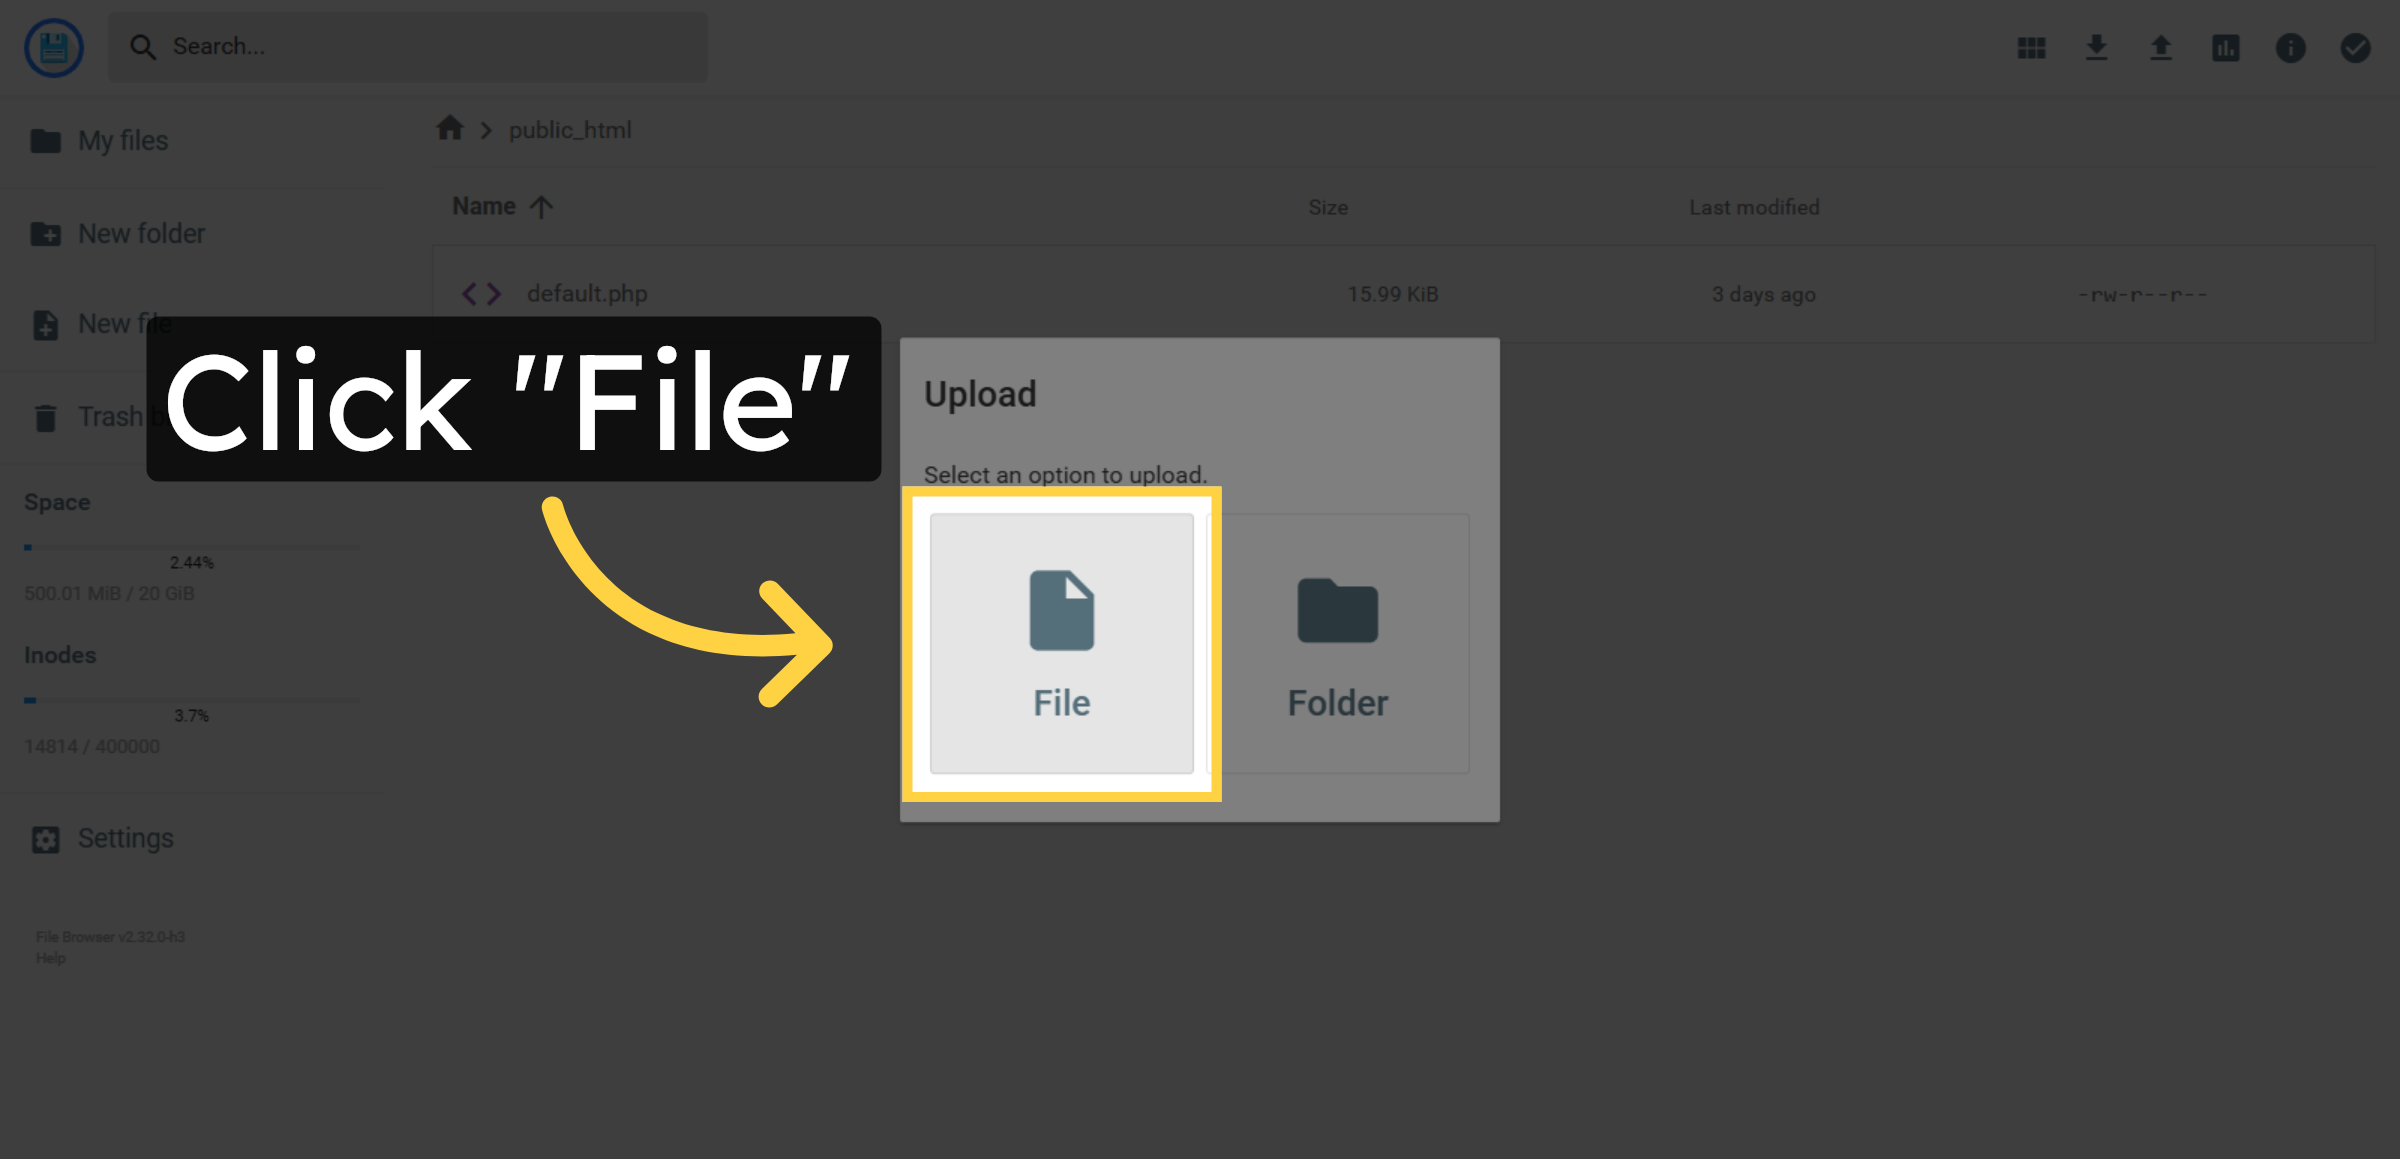
20. Select File Menu
Click File to open file-related options such as upload or create.
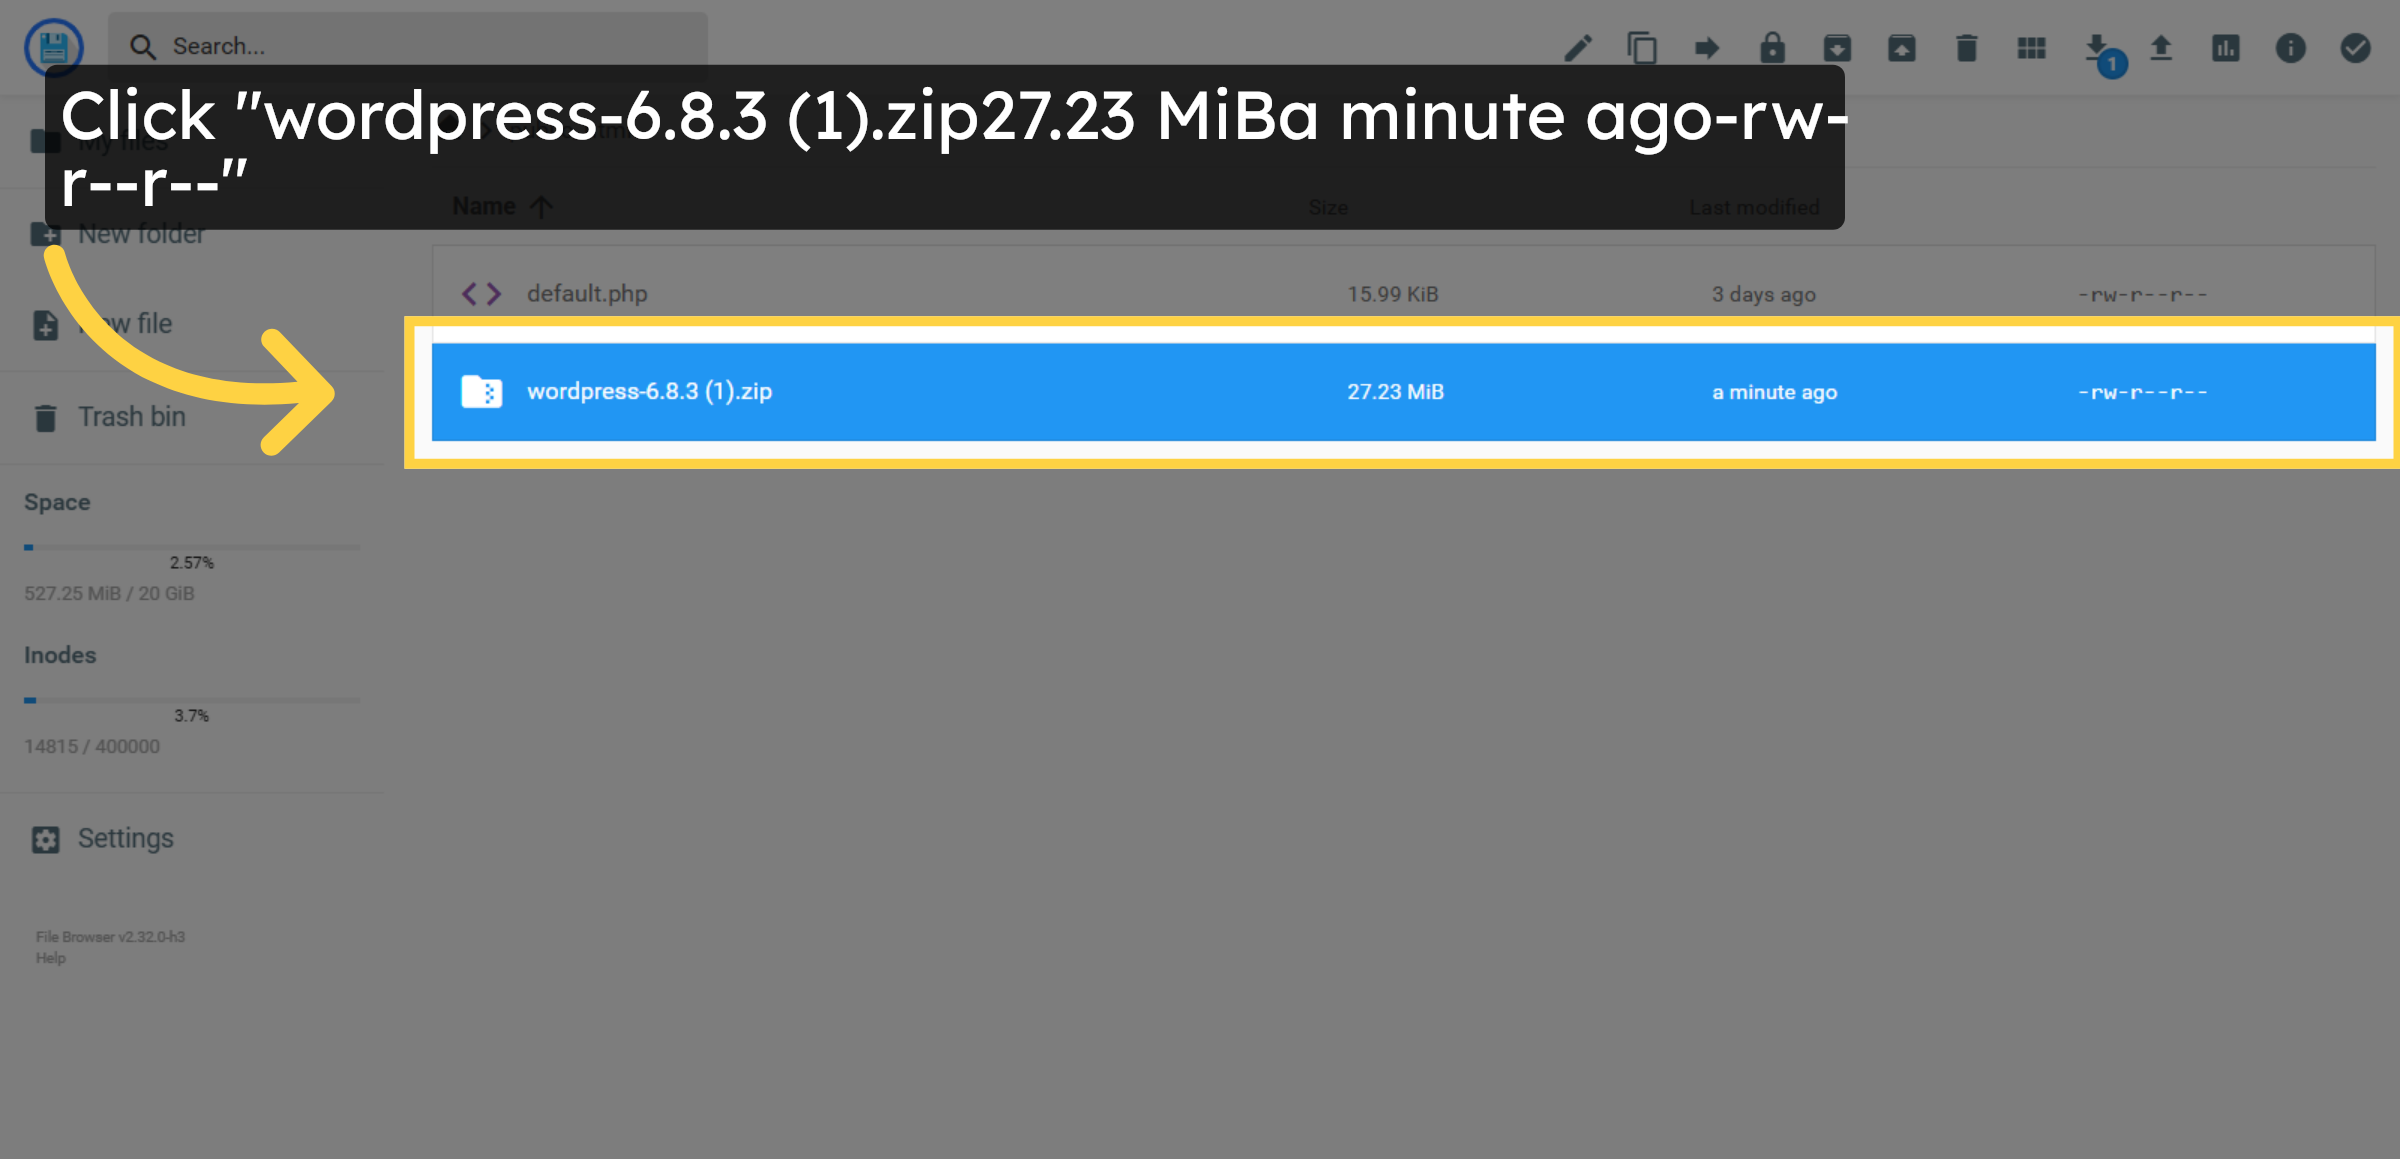
21. Select WordPress Zip File Again
Click the WordPress zip file again to confirm your selection.
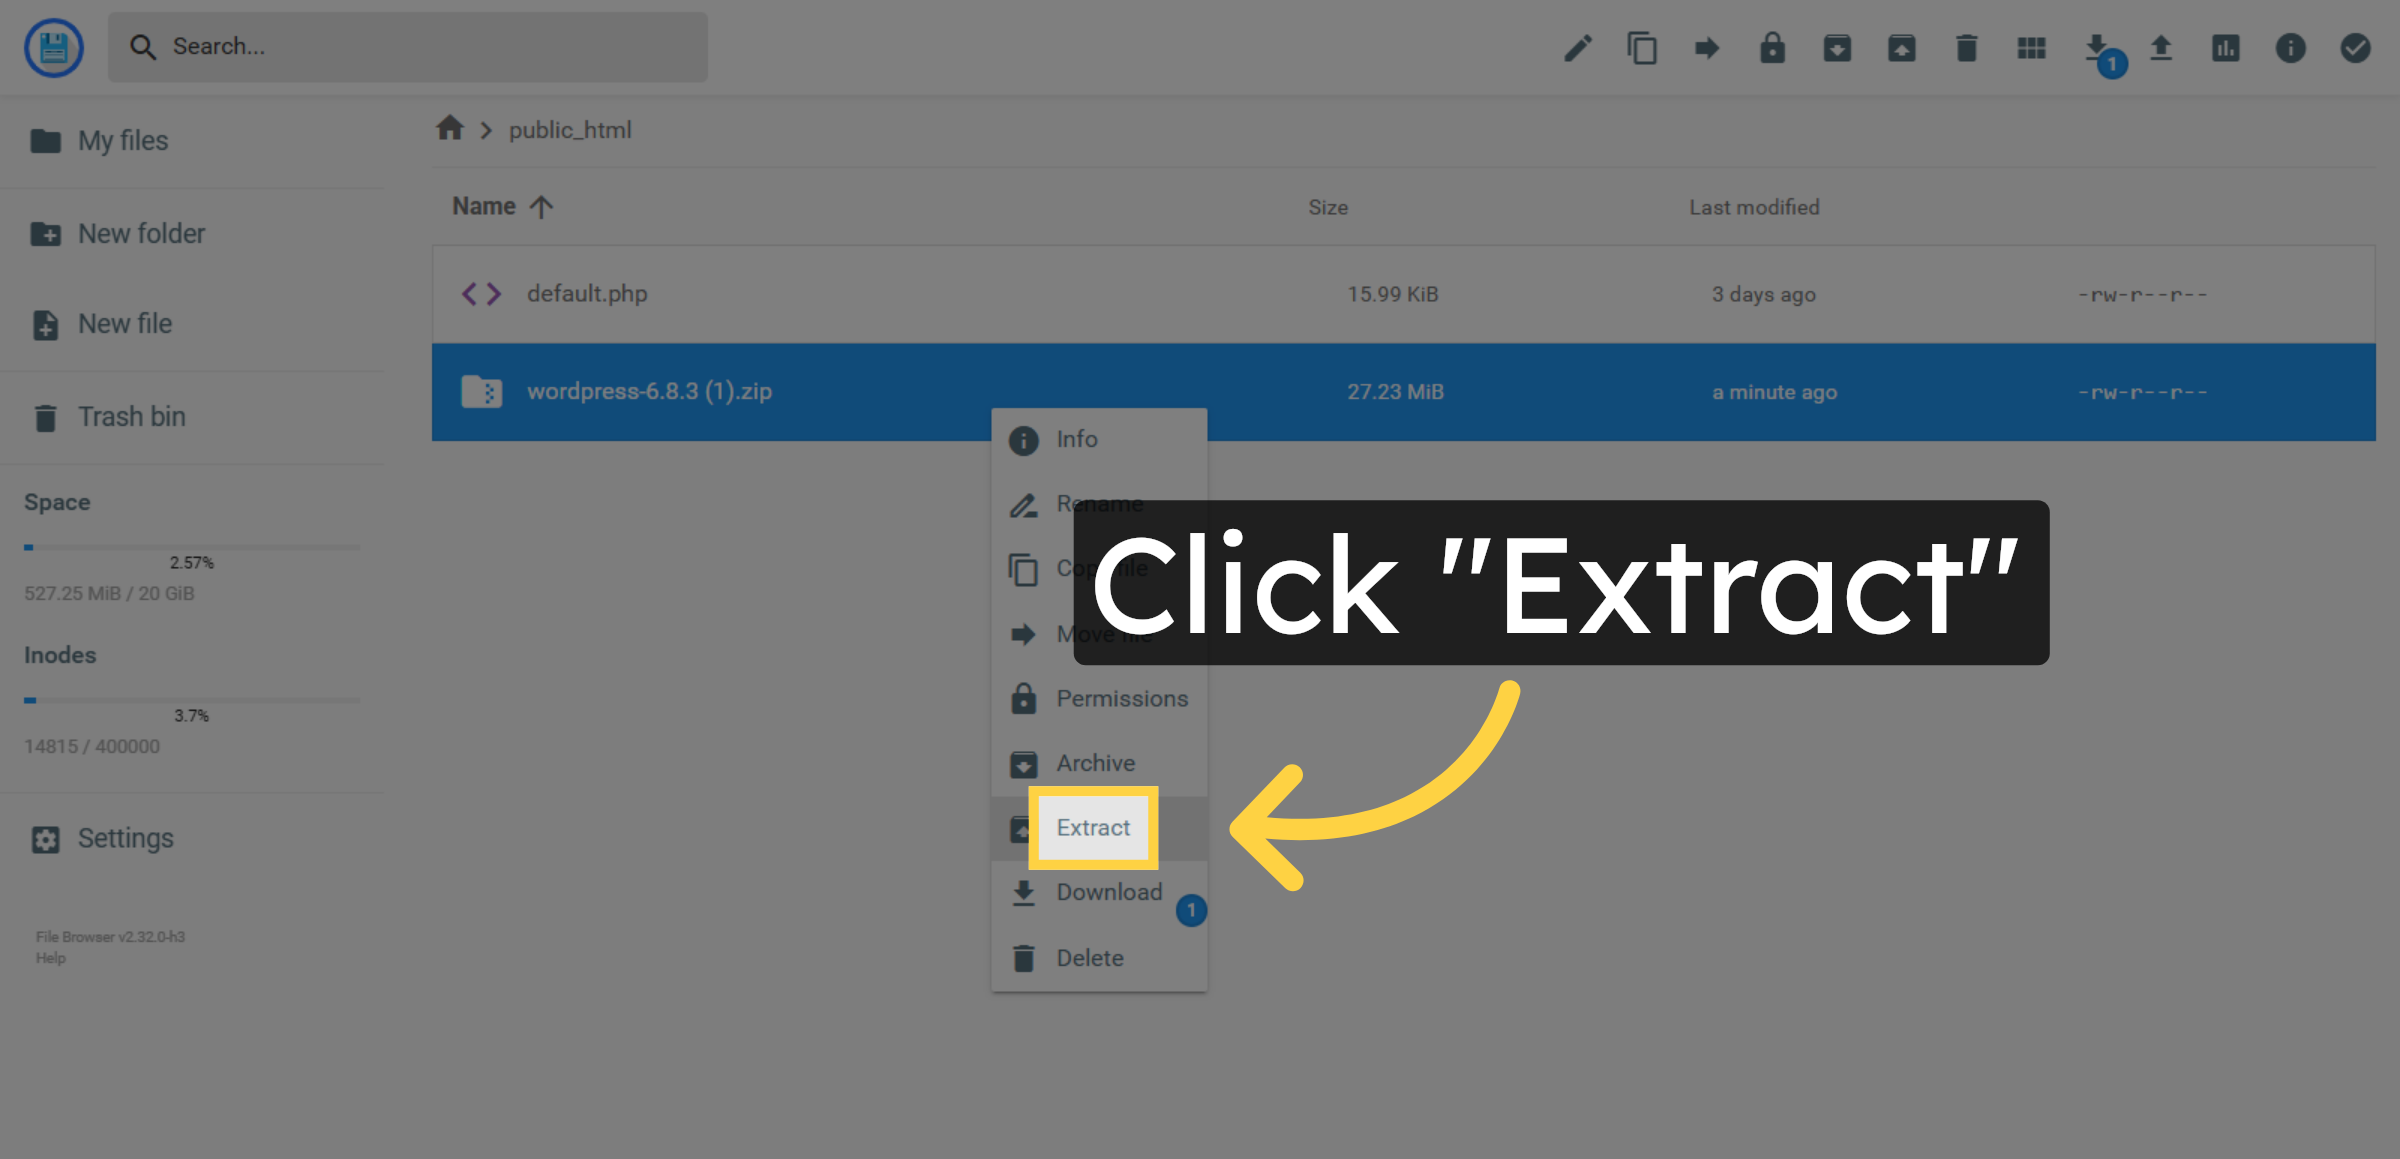
22. Extract WordPress Files
Click Extract to unzip the WordPress installation files into your directory.
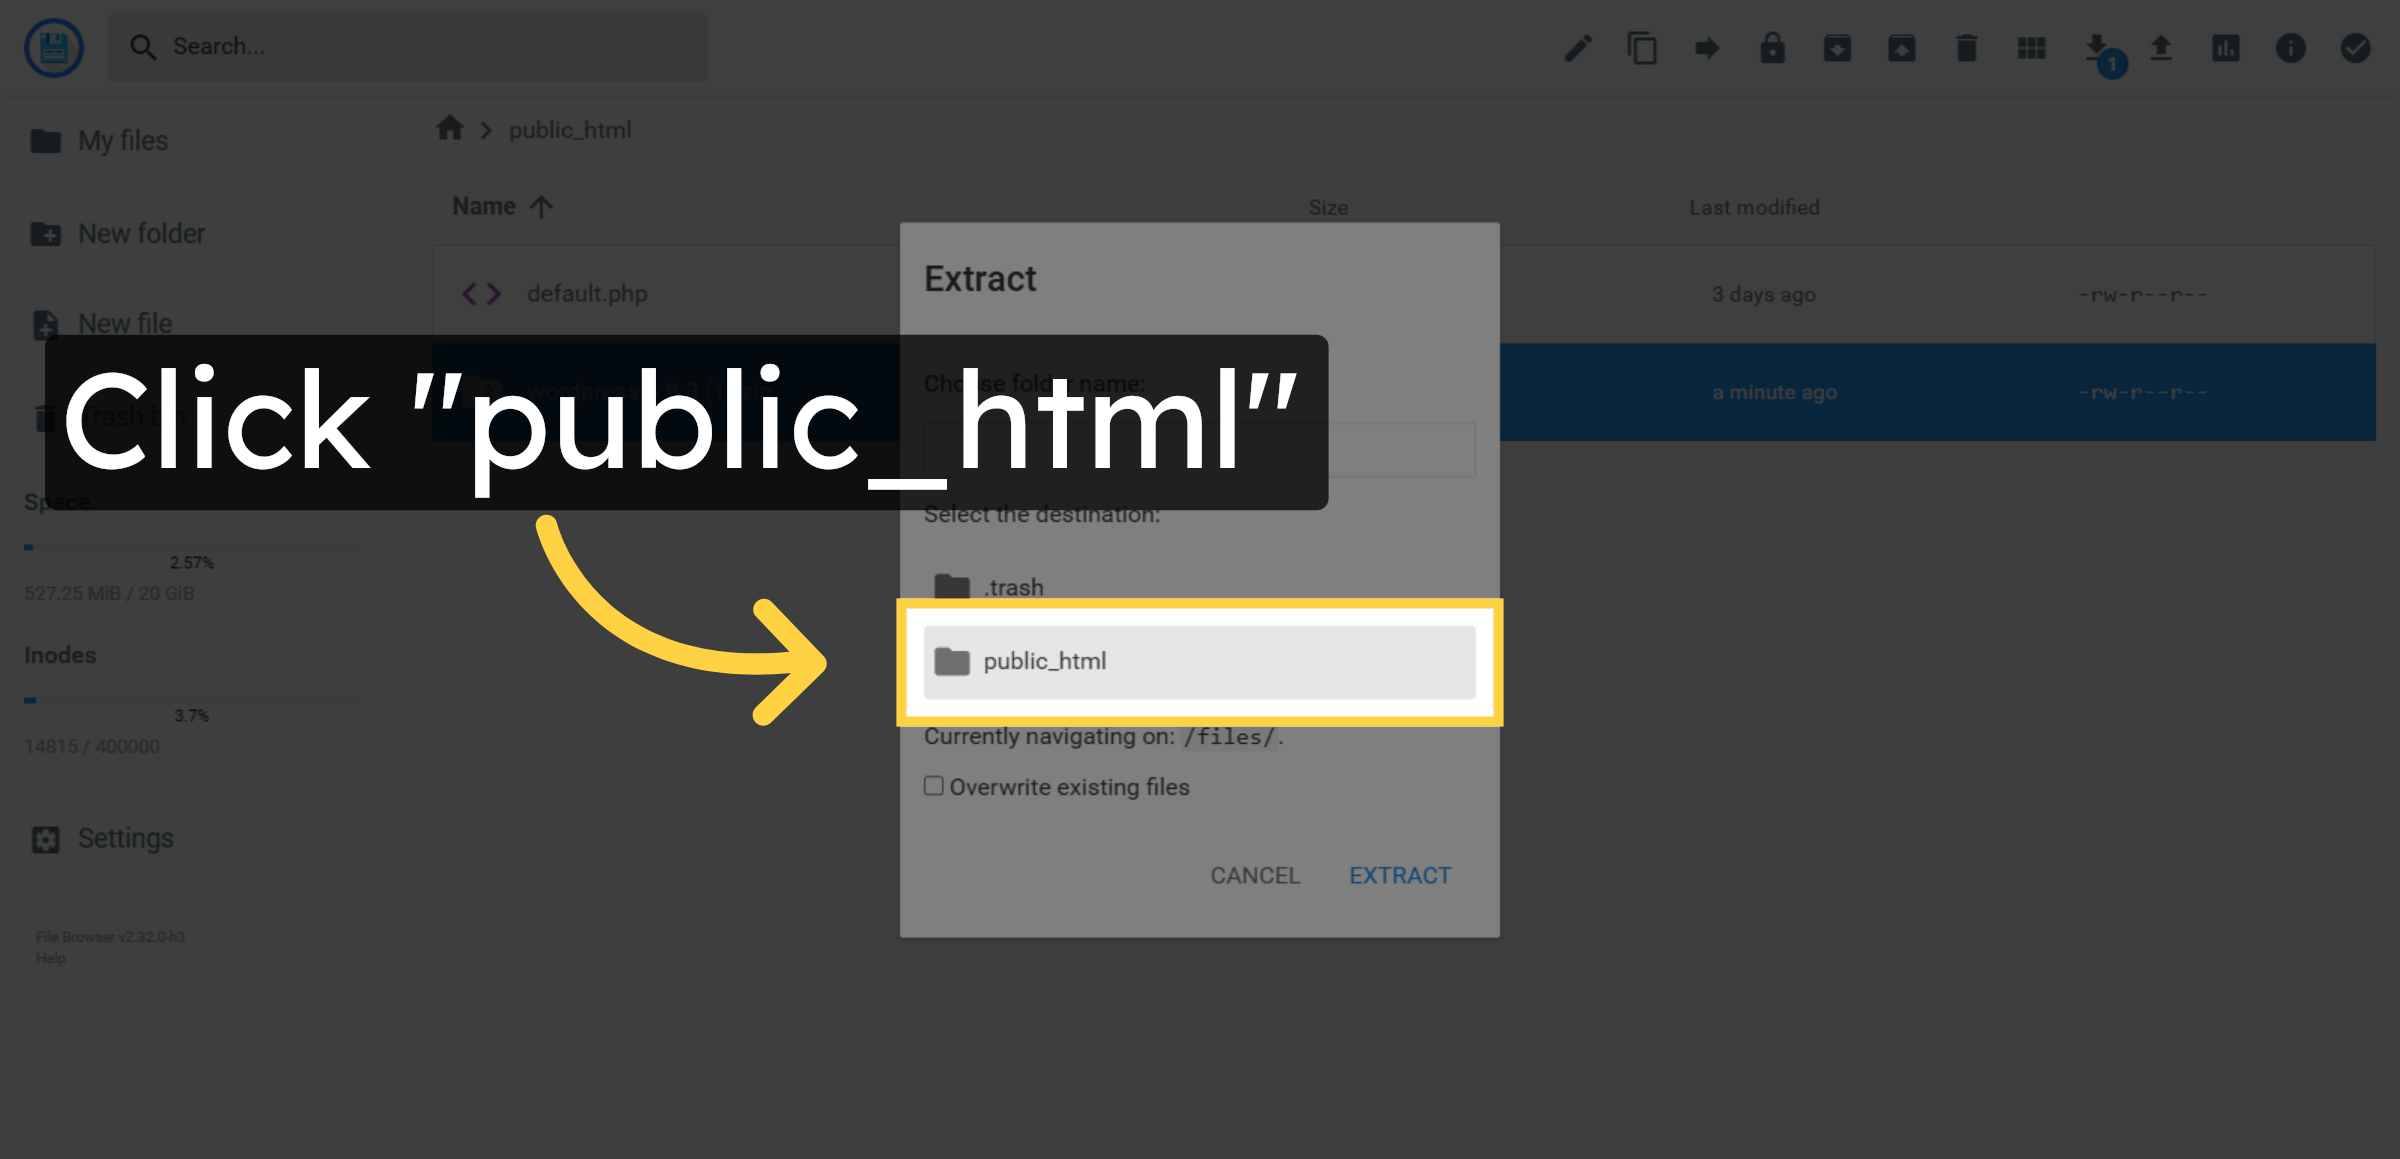
23. Extract WordPress Directly into public_html
Make sure WordPress files are extracted directly inside the public_html folder, not into an extra folder like public_html/wordpress. Use a subfolder only if you intentionally want to install WordPress in a subdirectory.
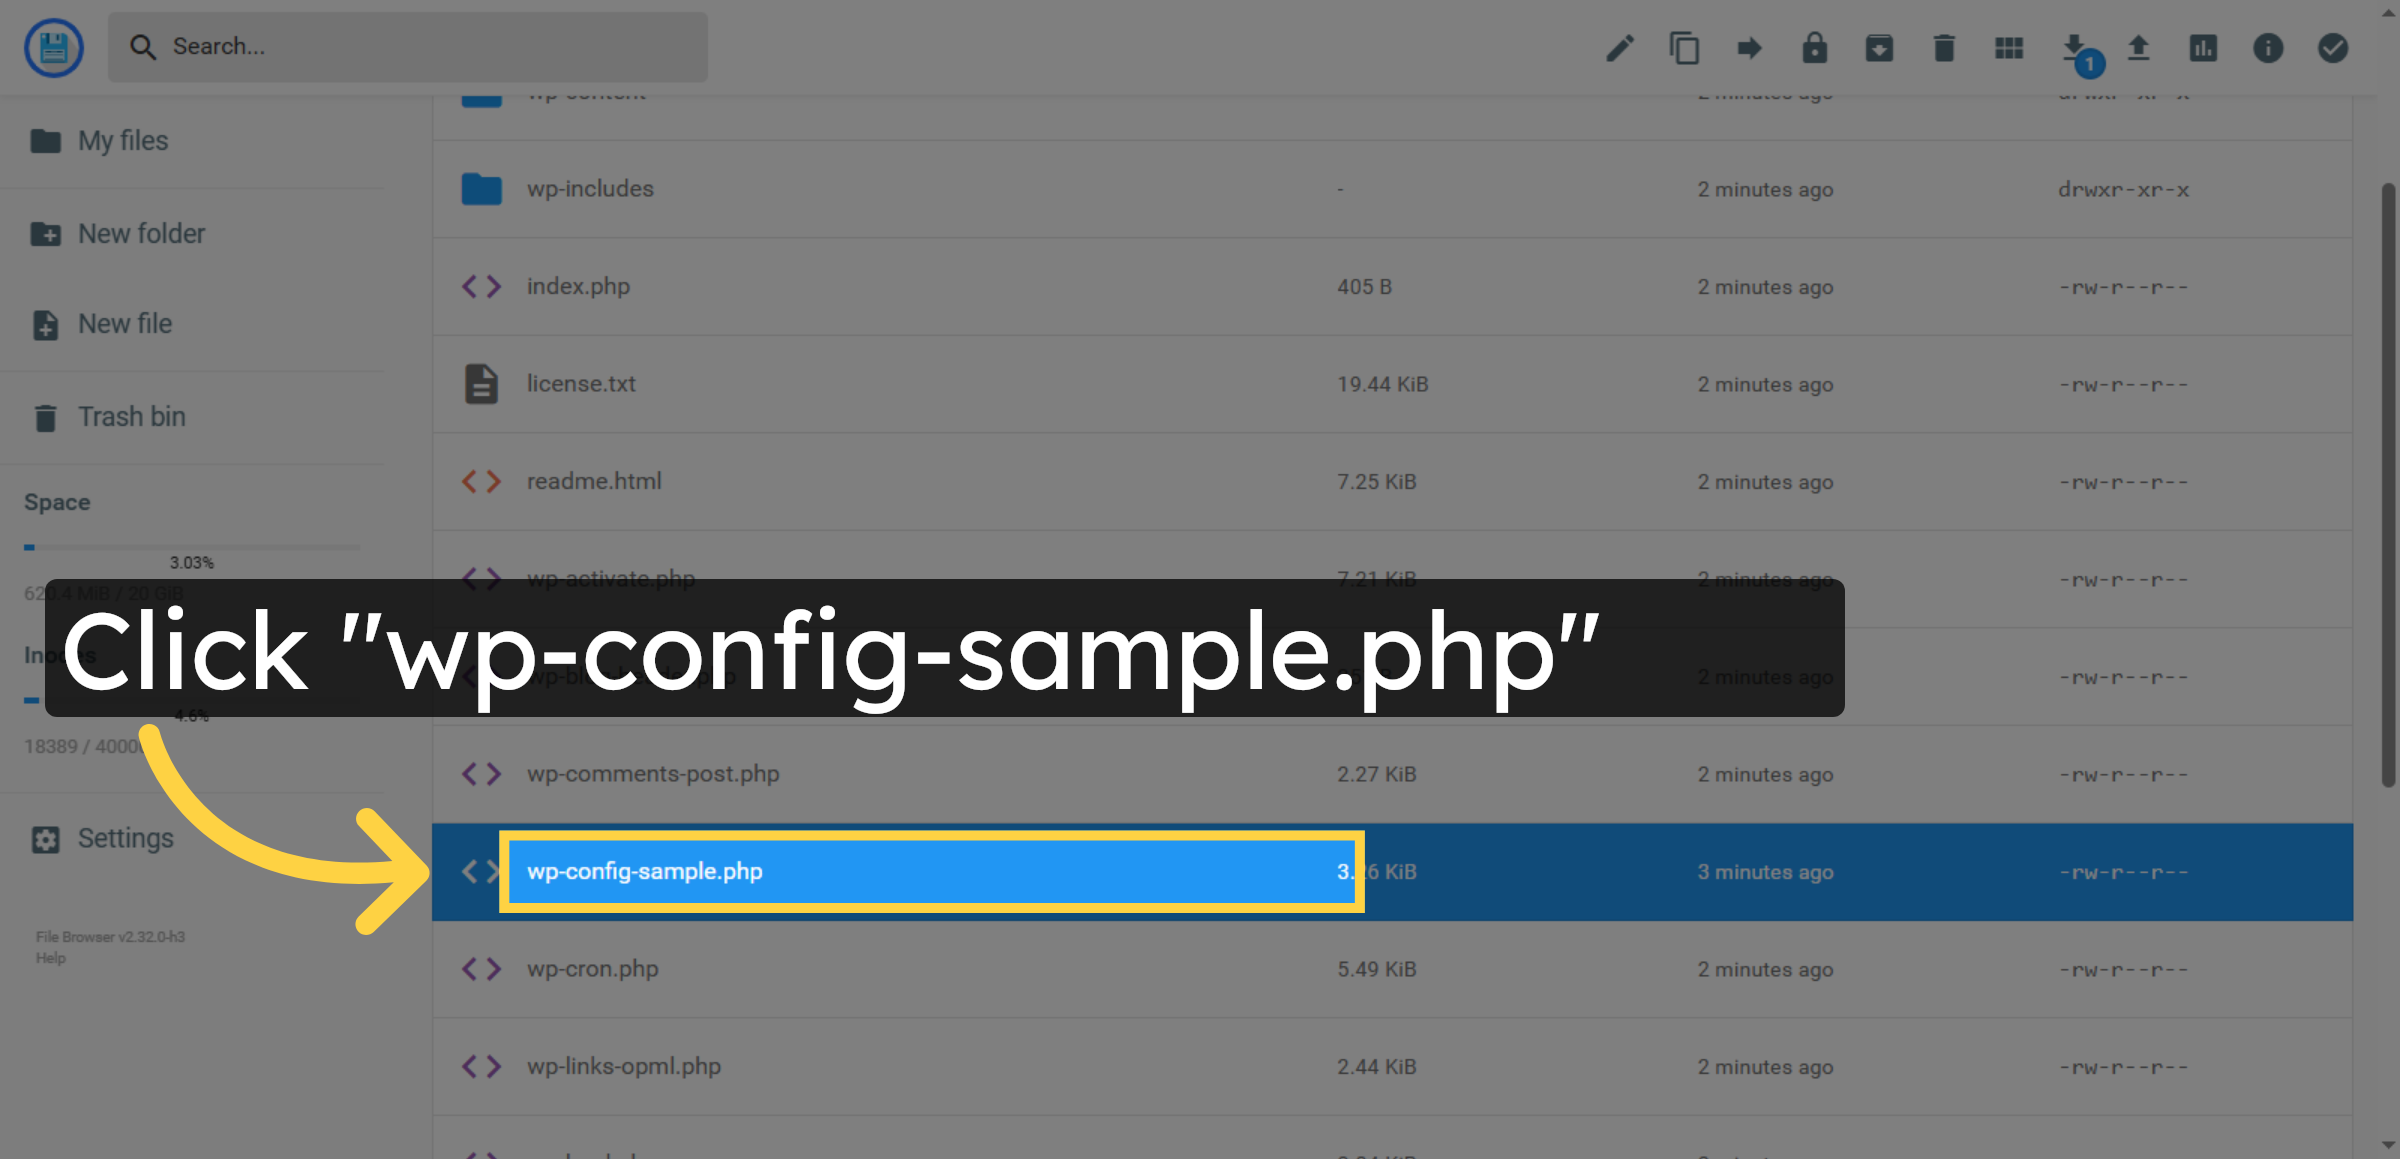
24. Select wp-config Sample File
Click wp-config-sample.php again to open the file editor.
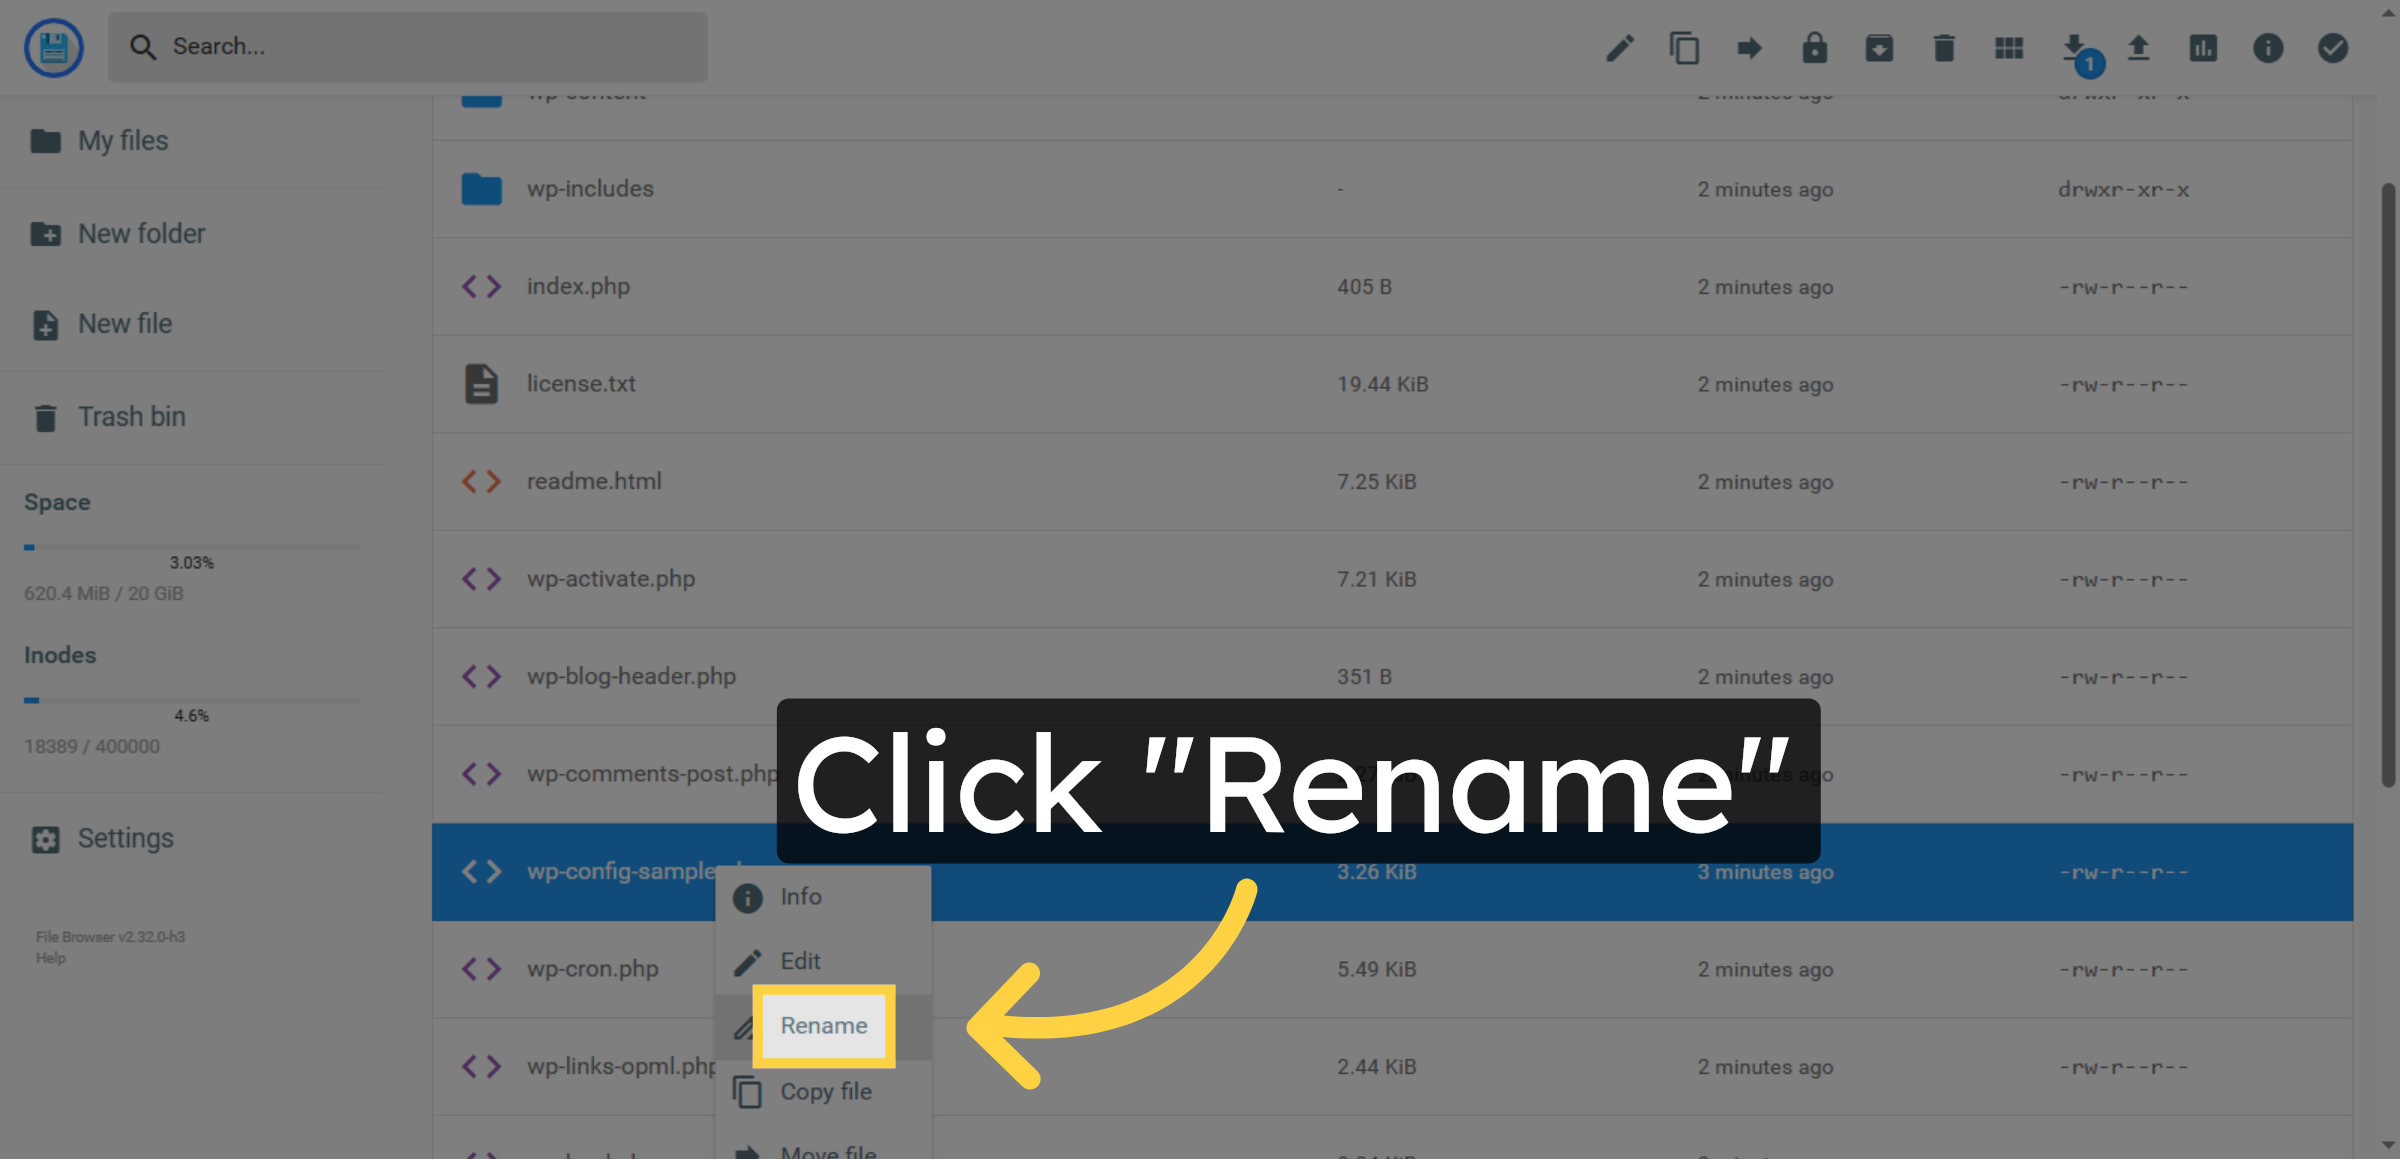
25. Choose Rename Option
Click Rename to change the file name for configuration.
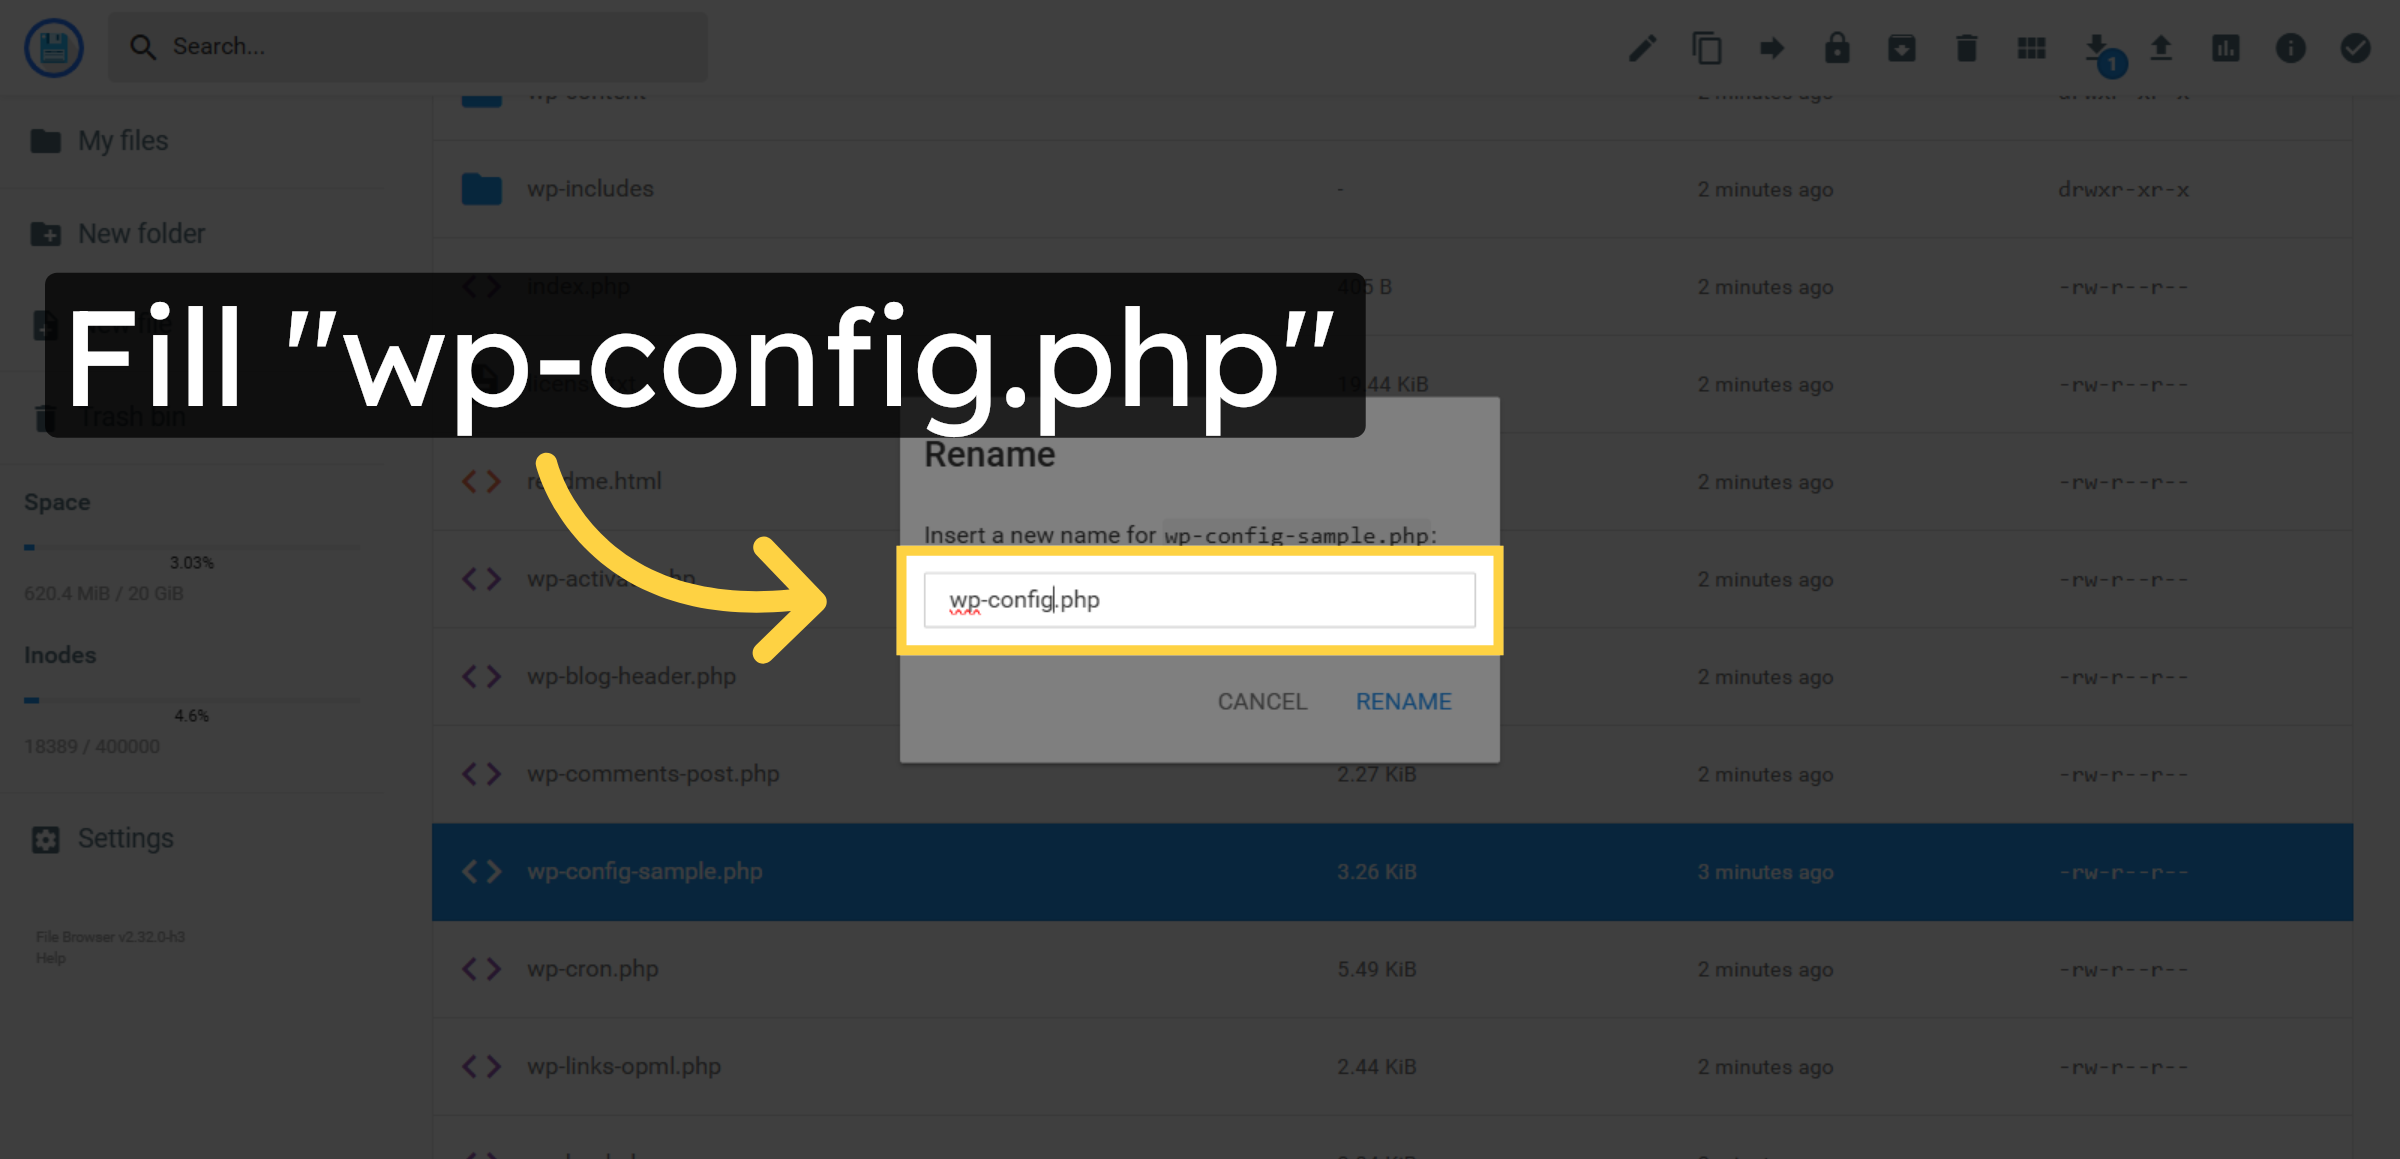
26. Rename Configuration File
Enter wp-config.php as the new file name to enable WordPress configuration.
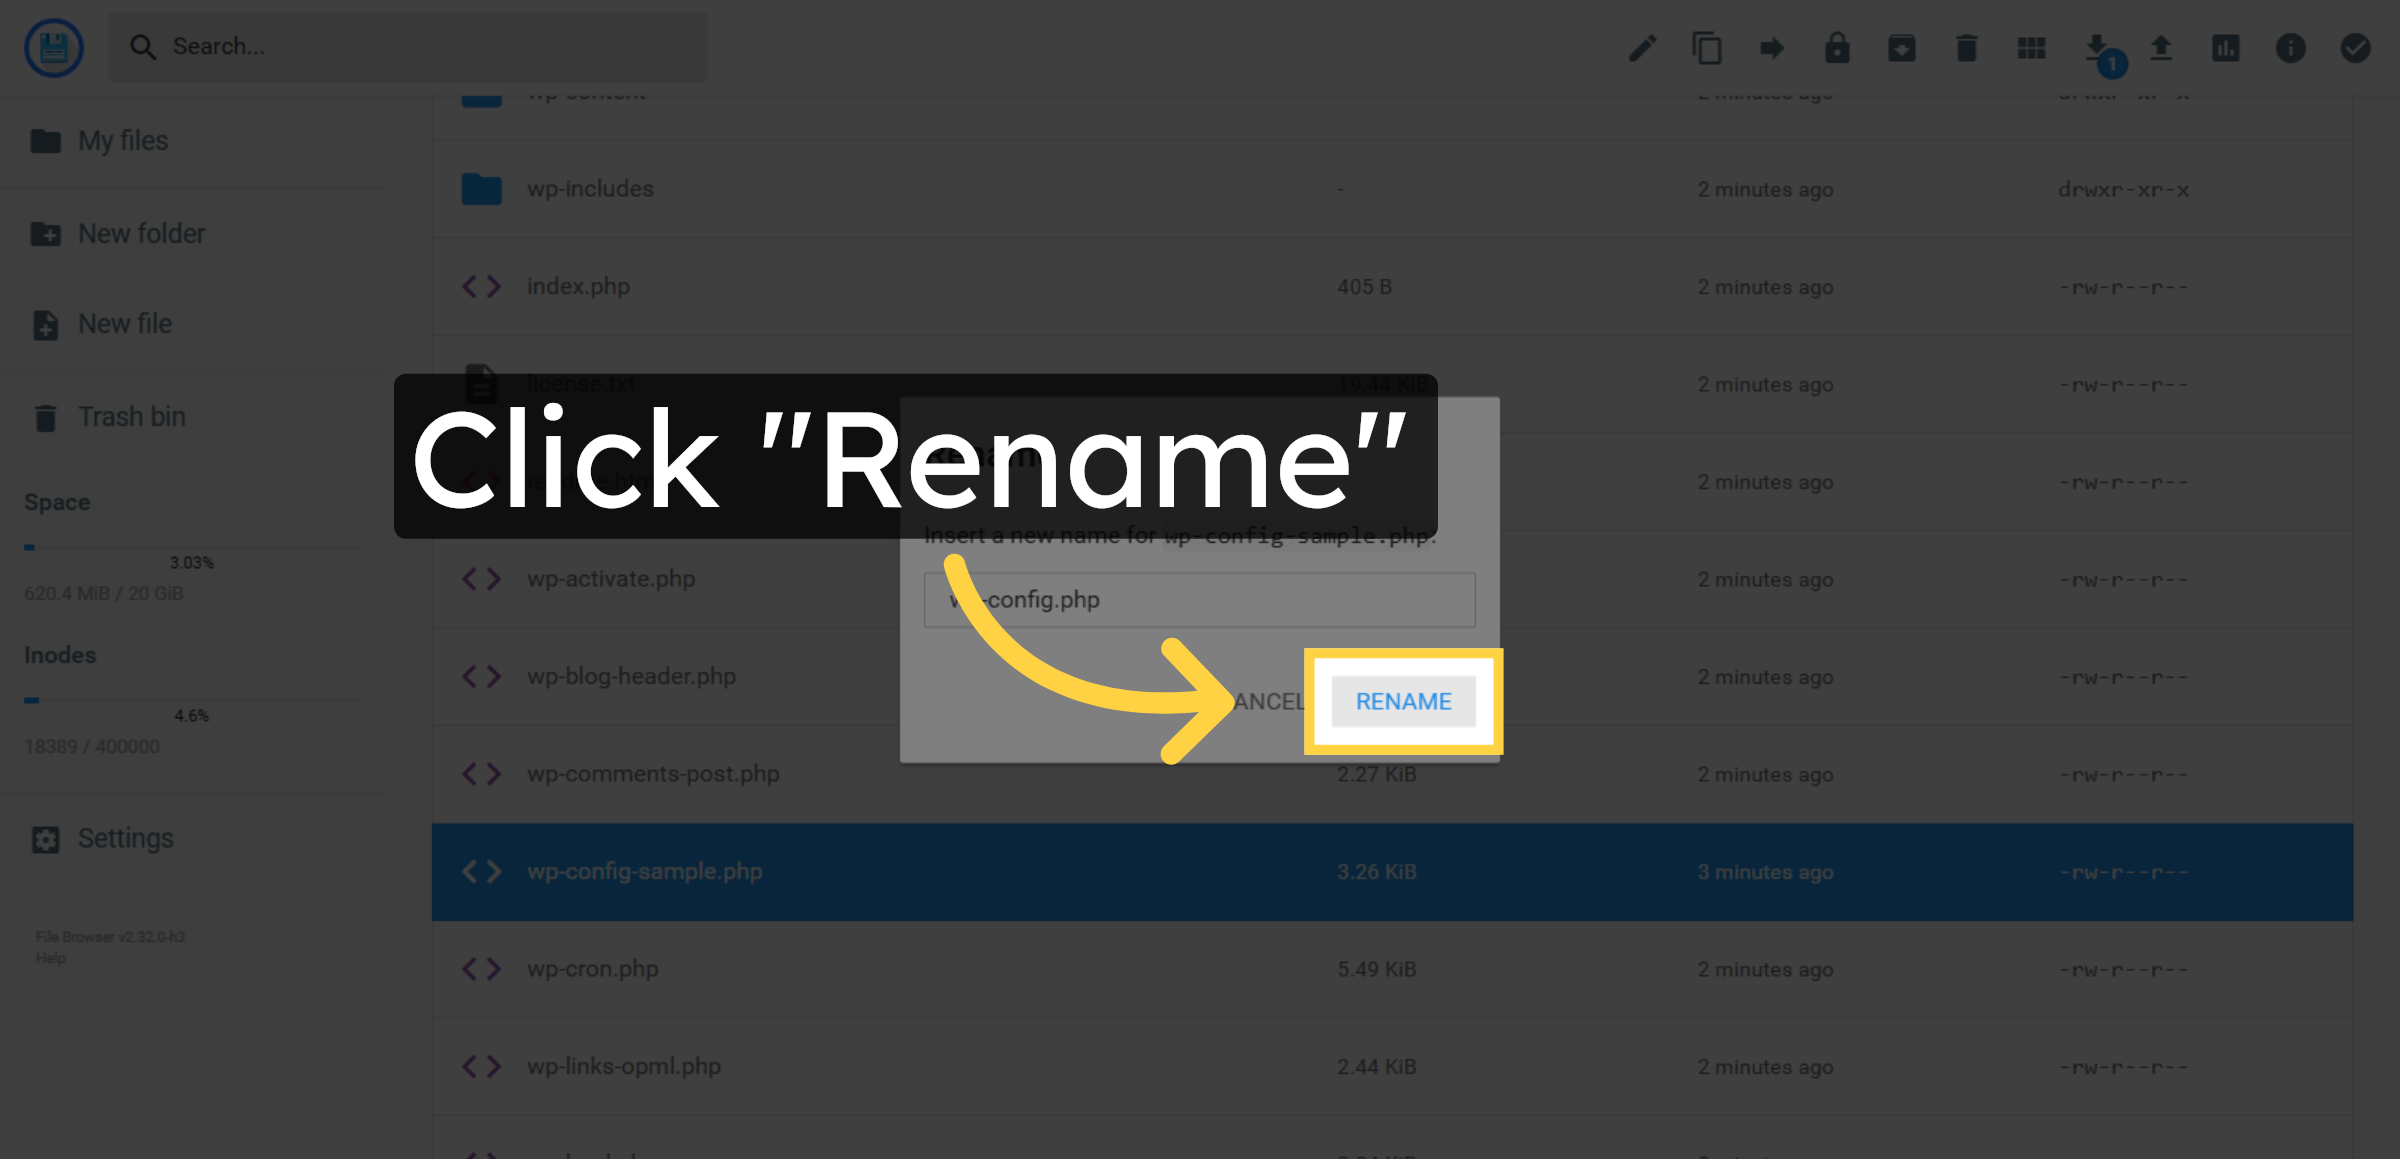
27. Confirm Rename Action
Click Rename to save the new file name.
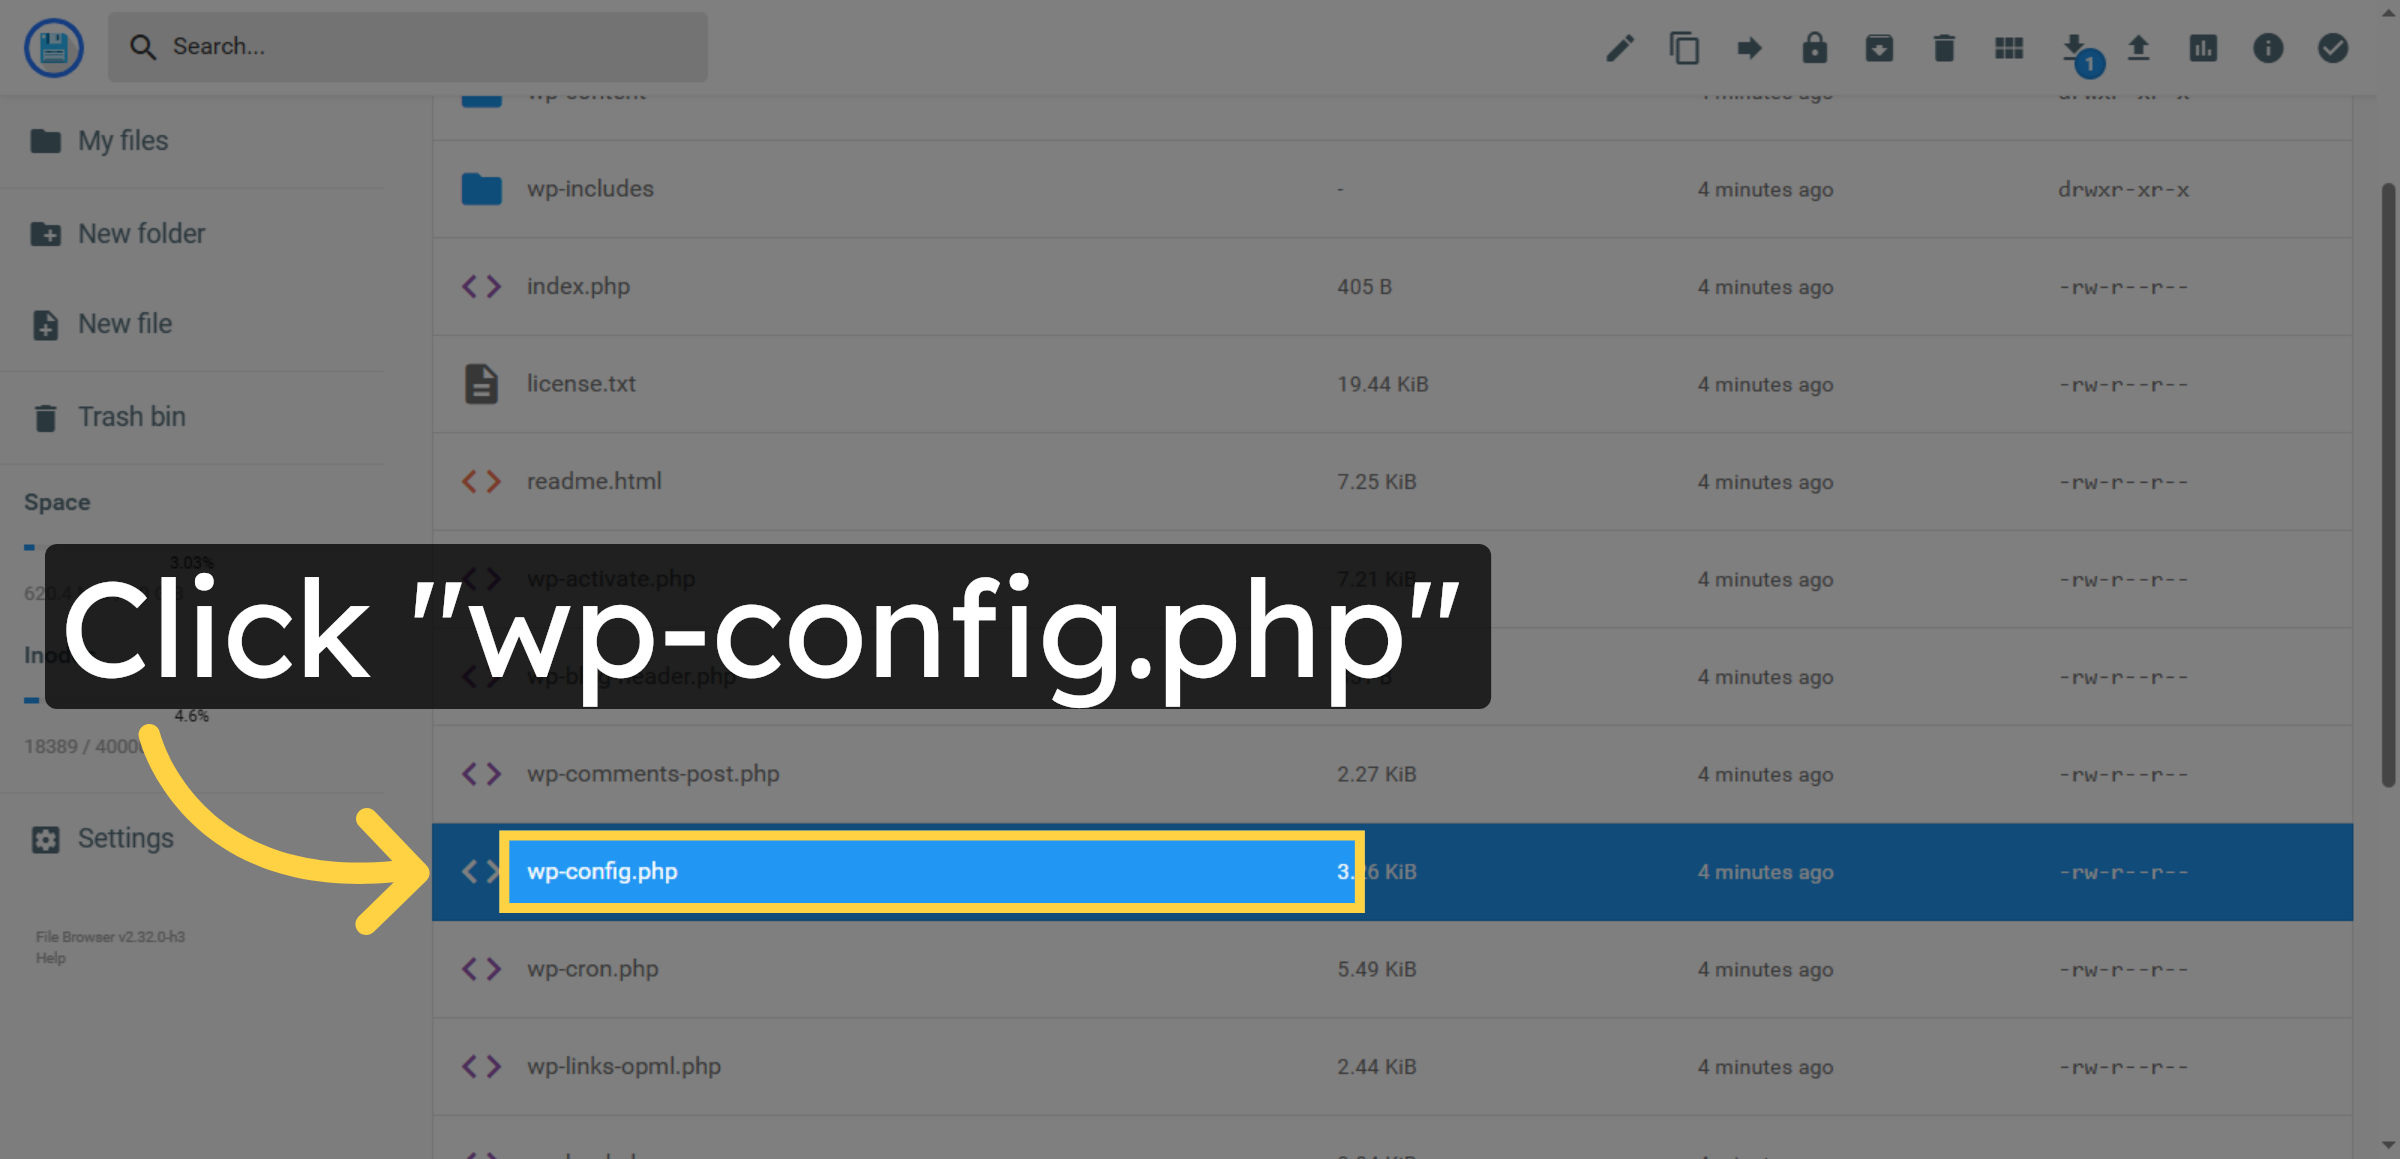
28. Select wp-config.php File
Click wp-config.php again to ensure the file is open for editing.
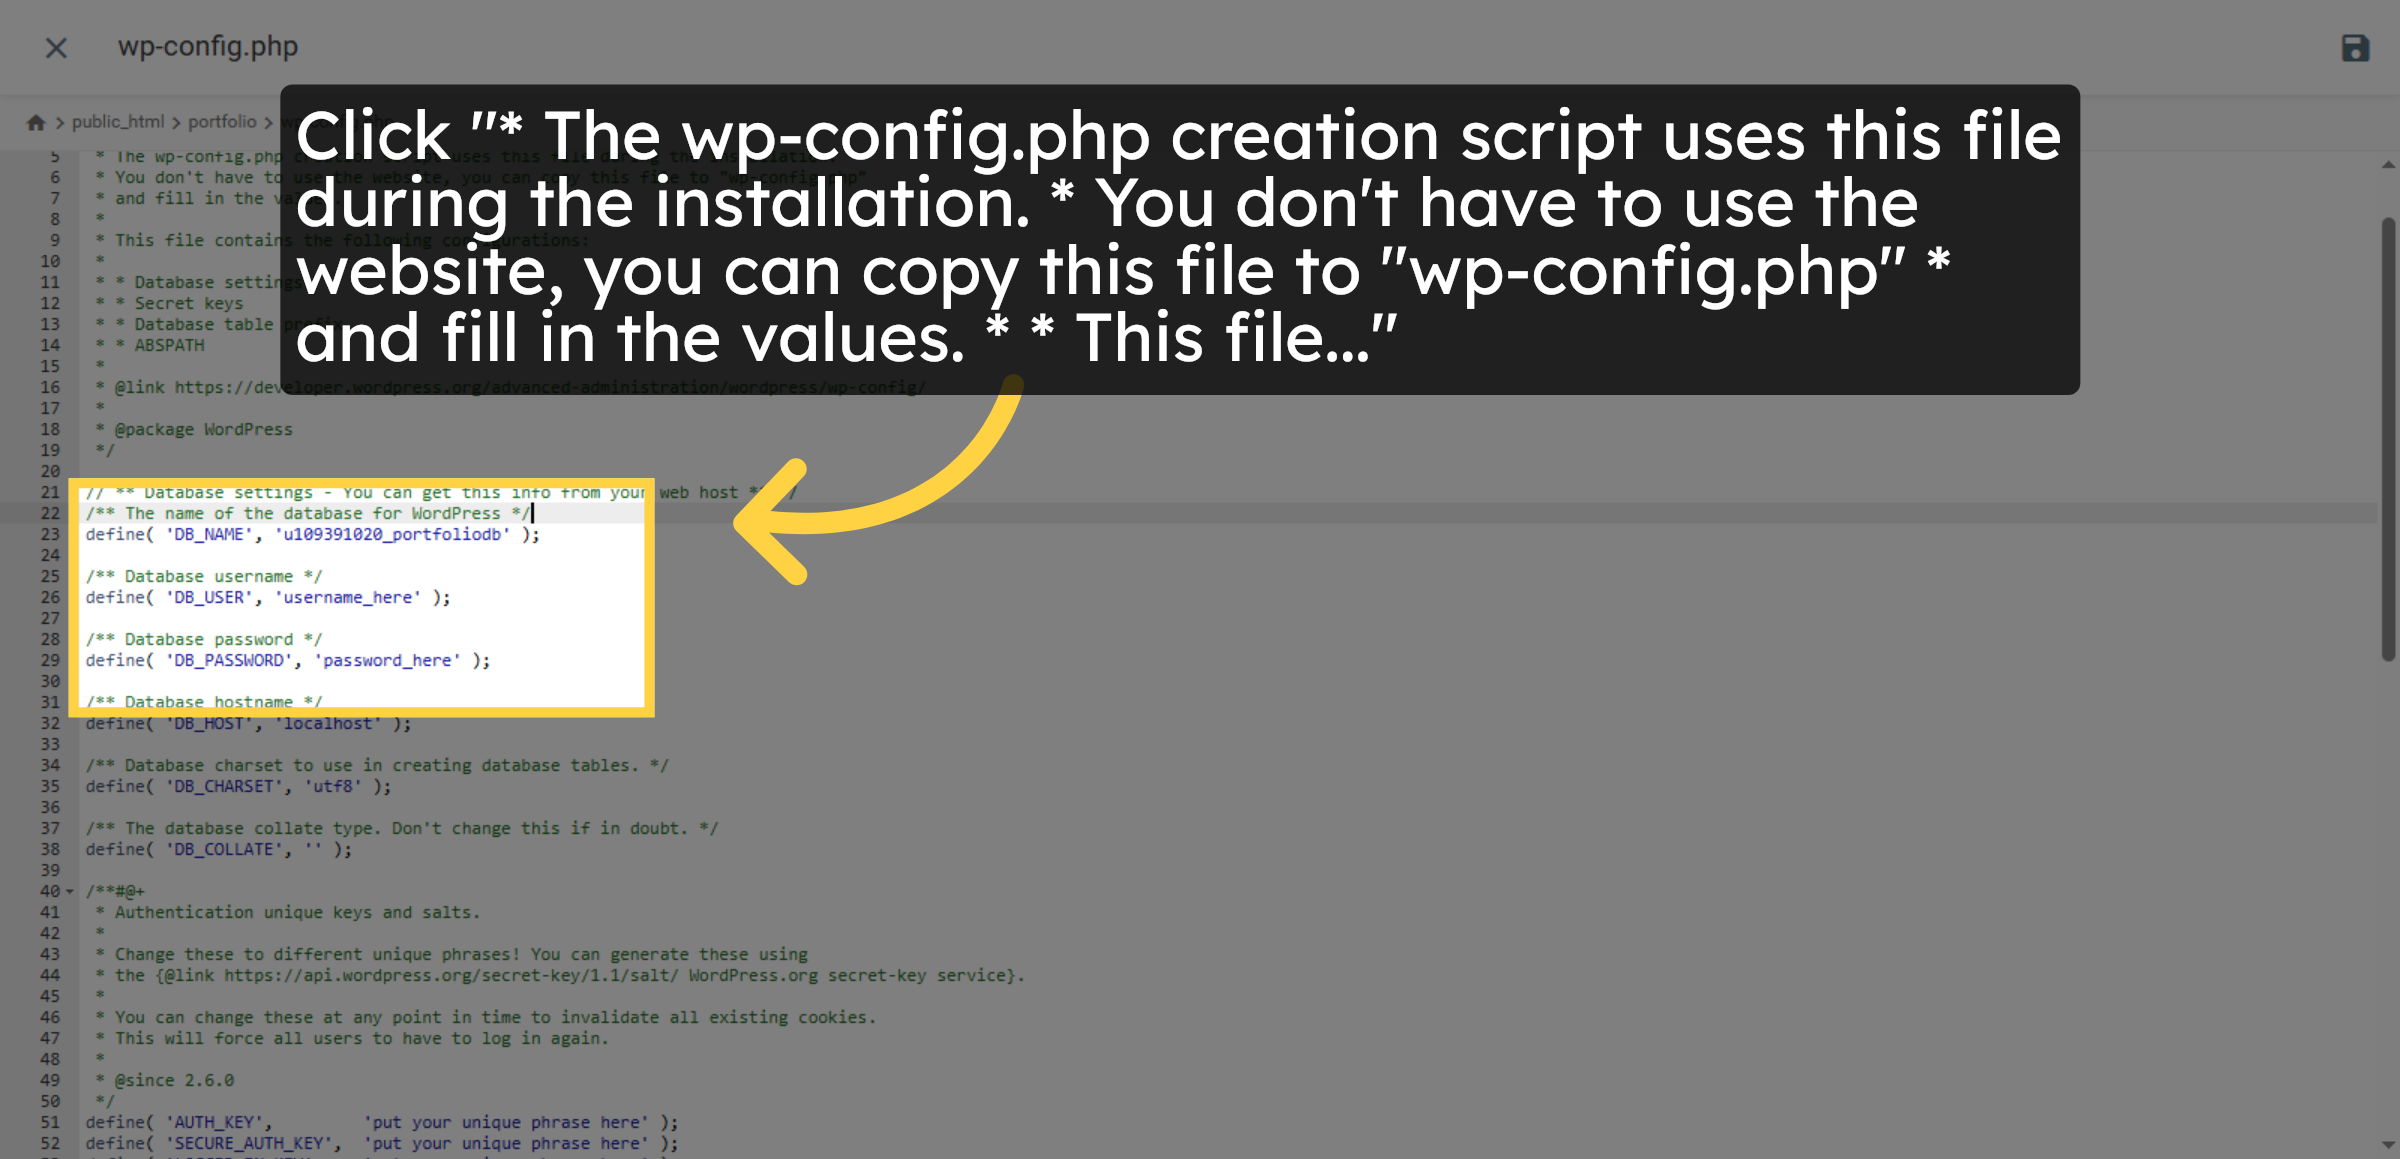
29. Review Configuration File Details
Review the wp-config.php file instructions and comments for setup guidance.
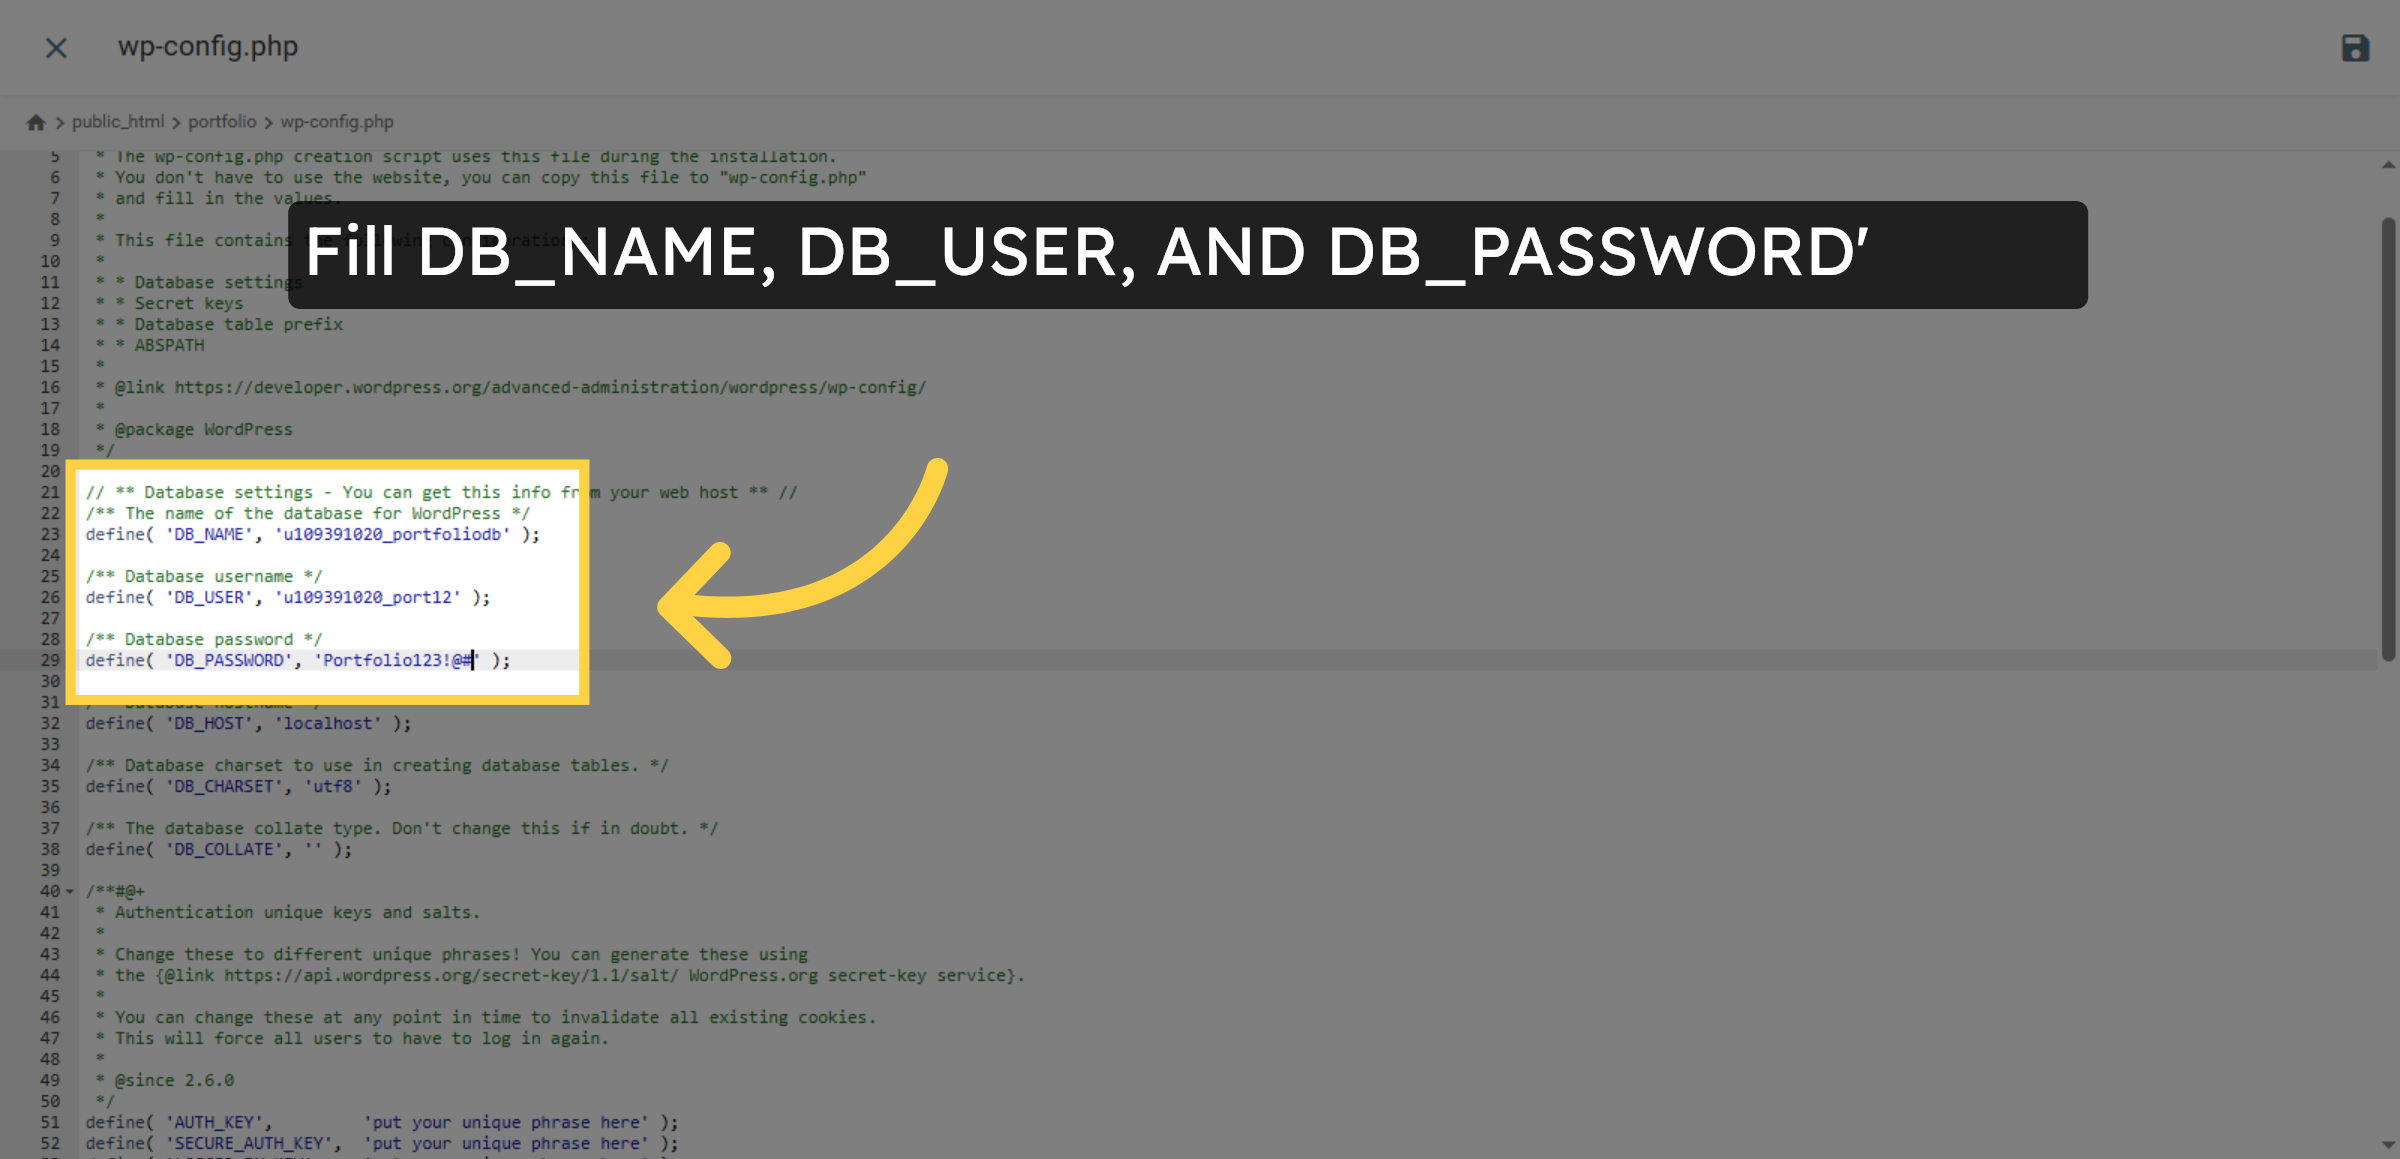
30. Enter Essentials in Config
Enter your database name ,database user and database password in the wp-config.php file to enable connection.
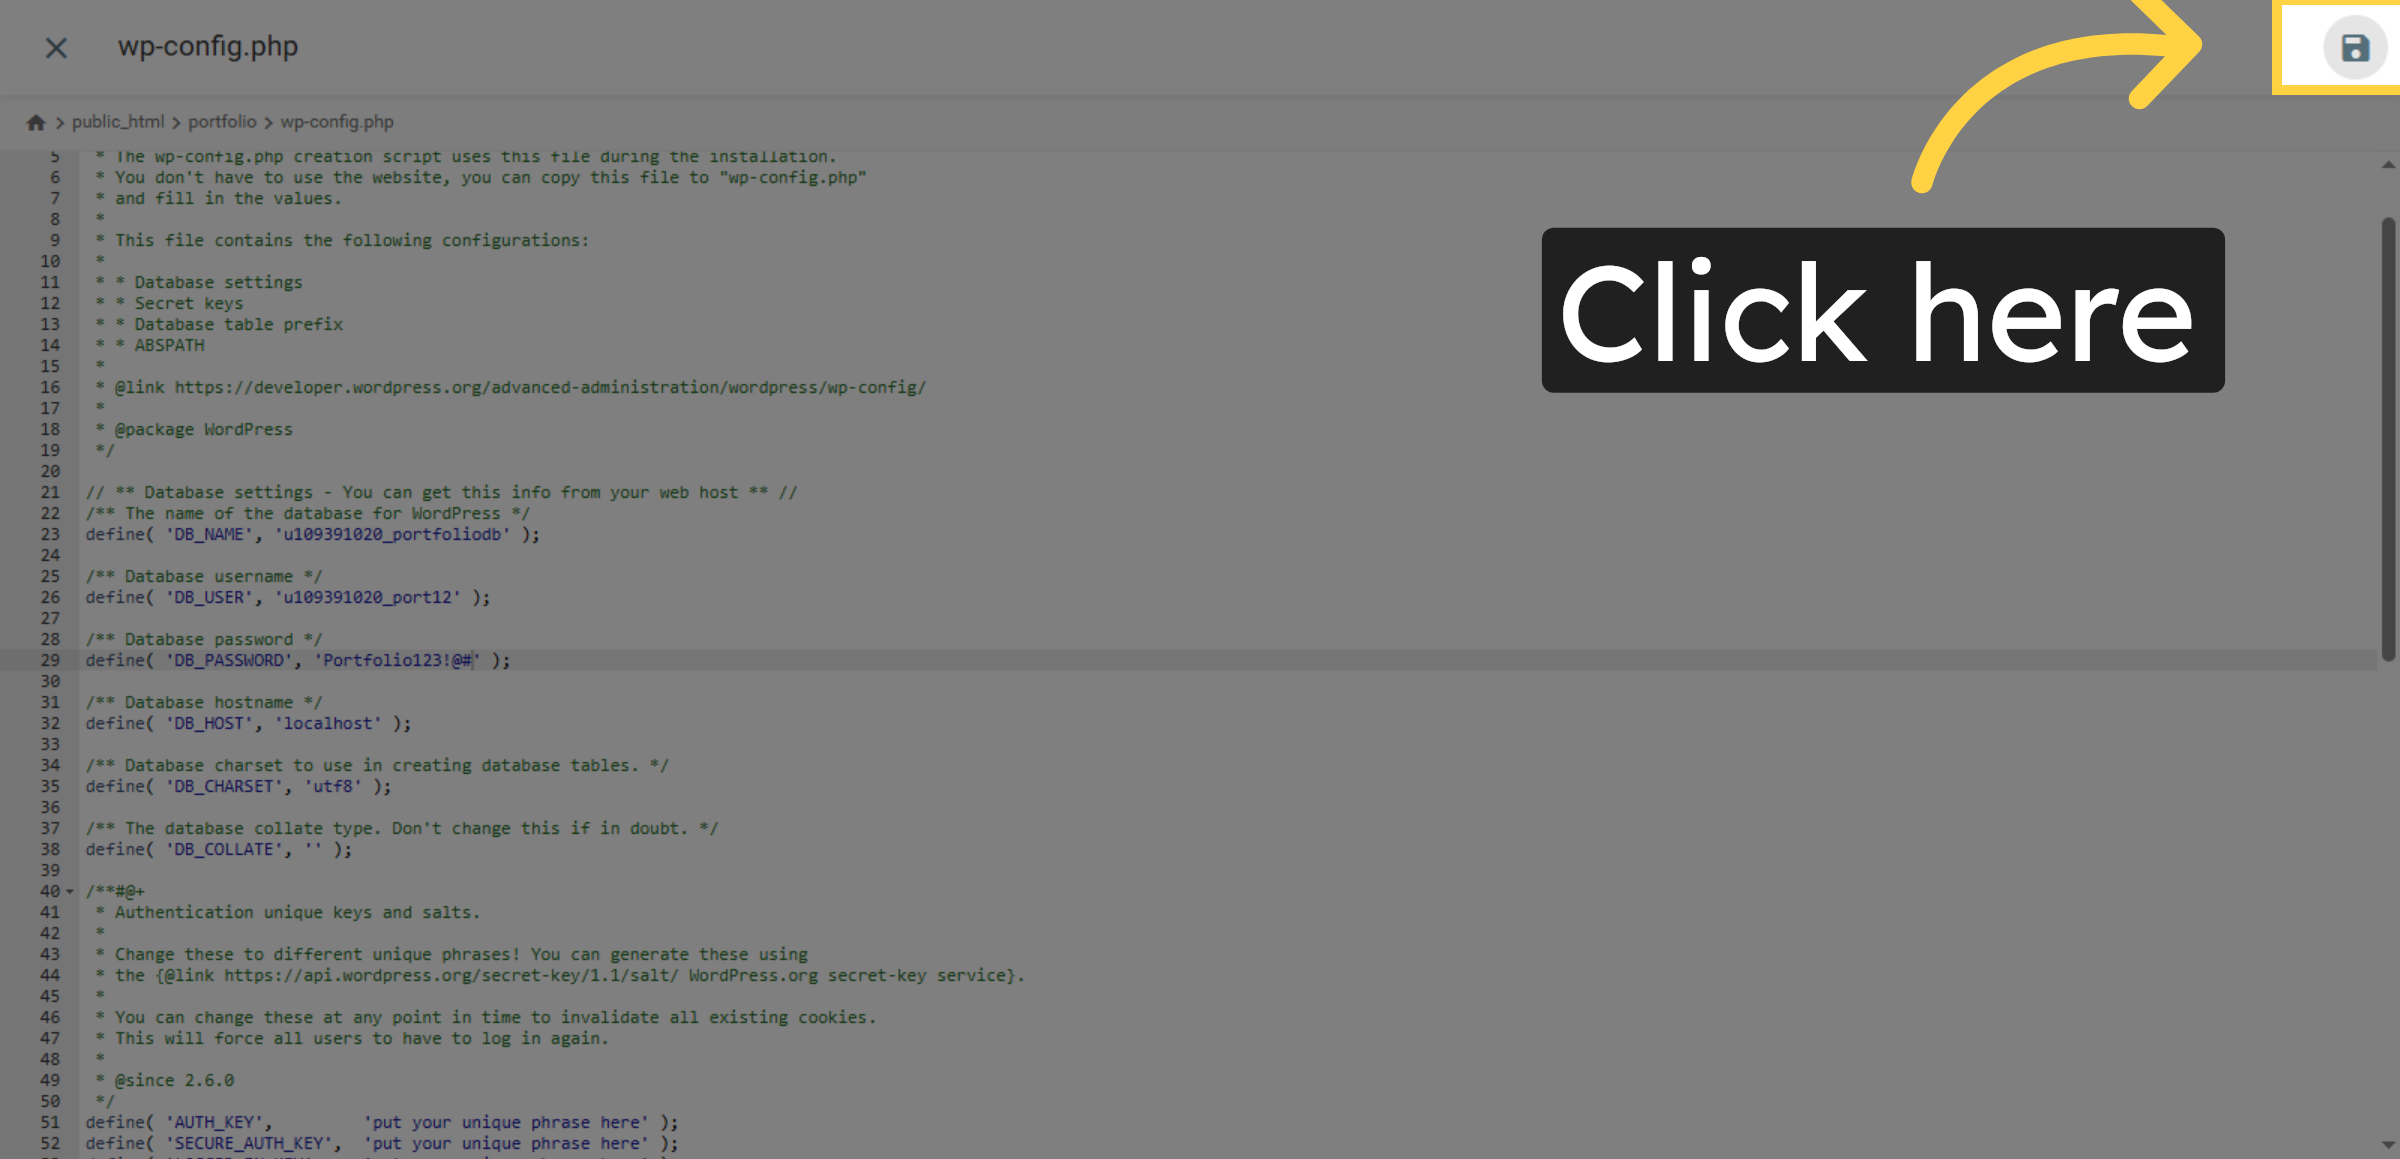
31. Click to Save Changes
Click here to save the changes made to the wp-config.php file.
32. Navigate to Websites Section
Click Websites to return to your list of managed sites.
33. Click Website Management
Click here to open the management dashboard for your website.
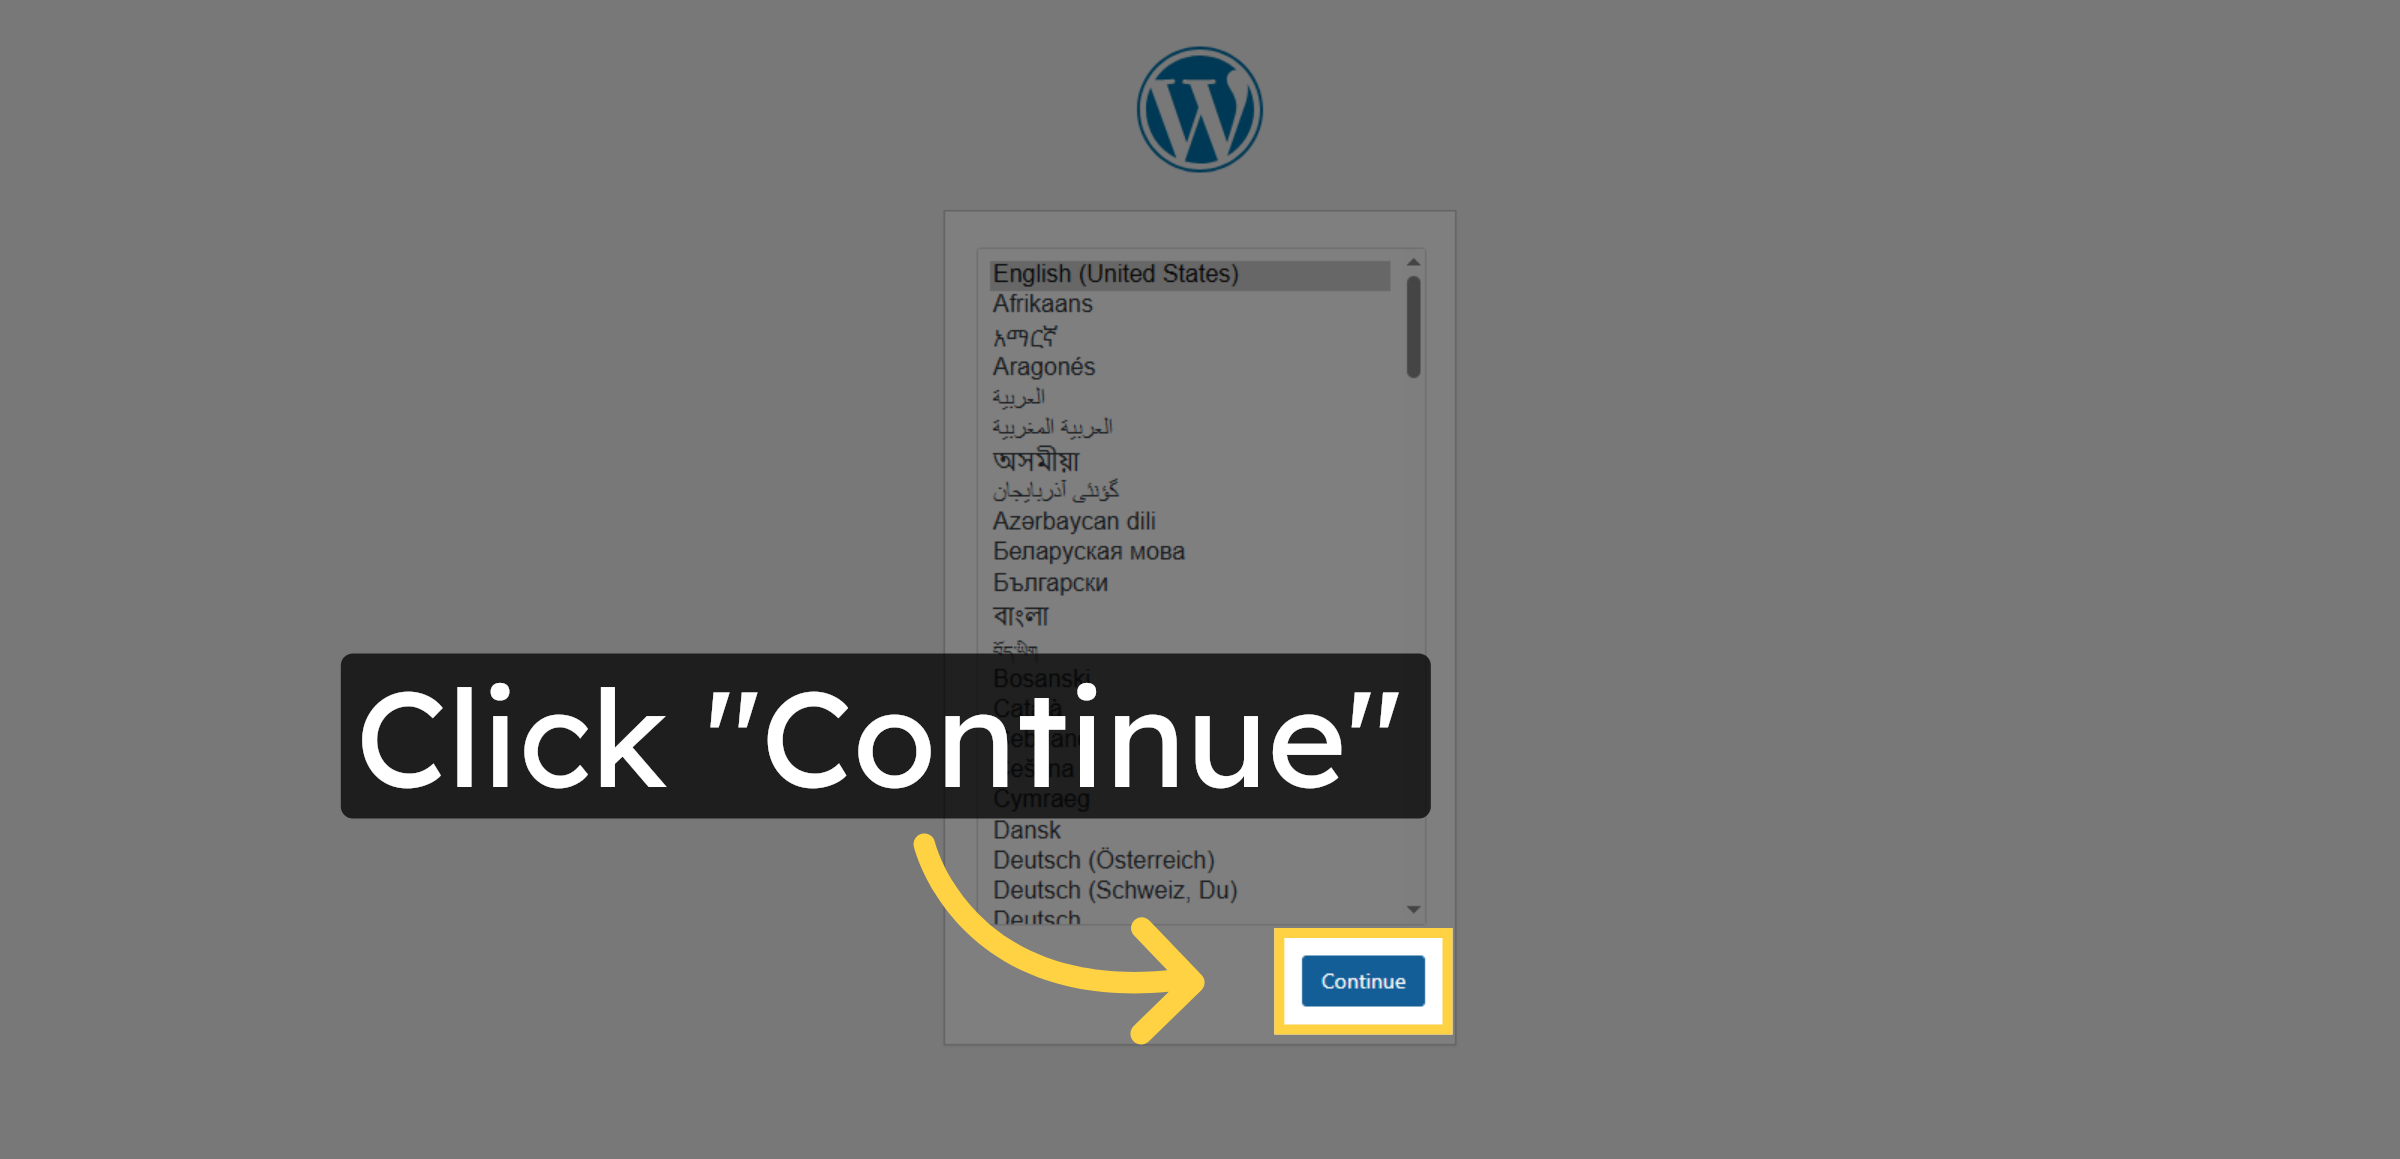
34. Click Continue Installation
Click Continue to proceed with the WordPress installation process.
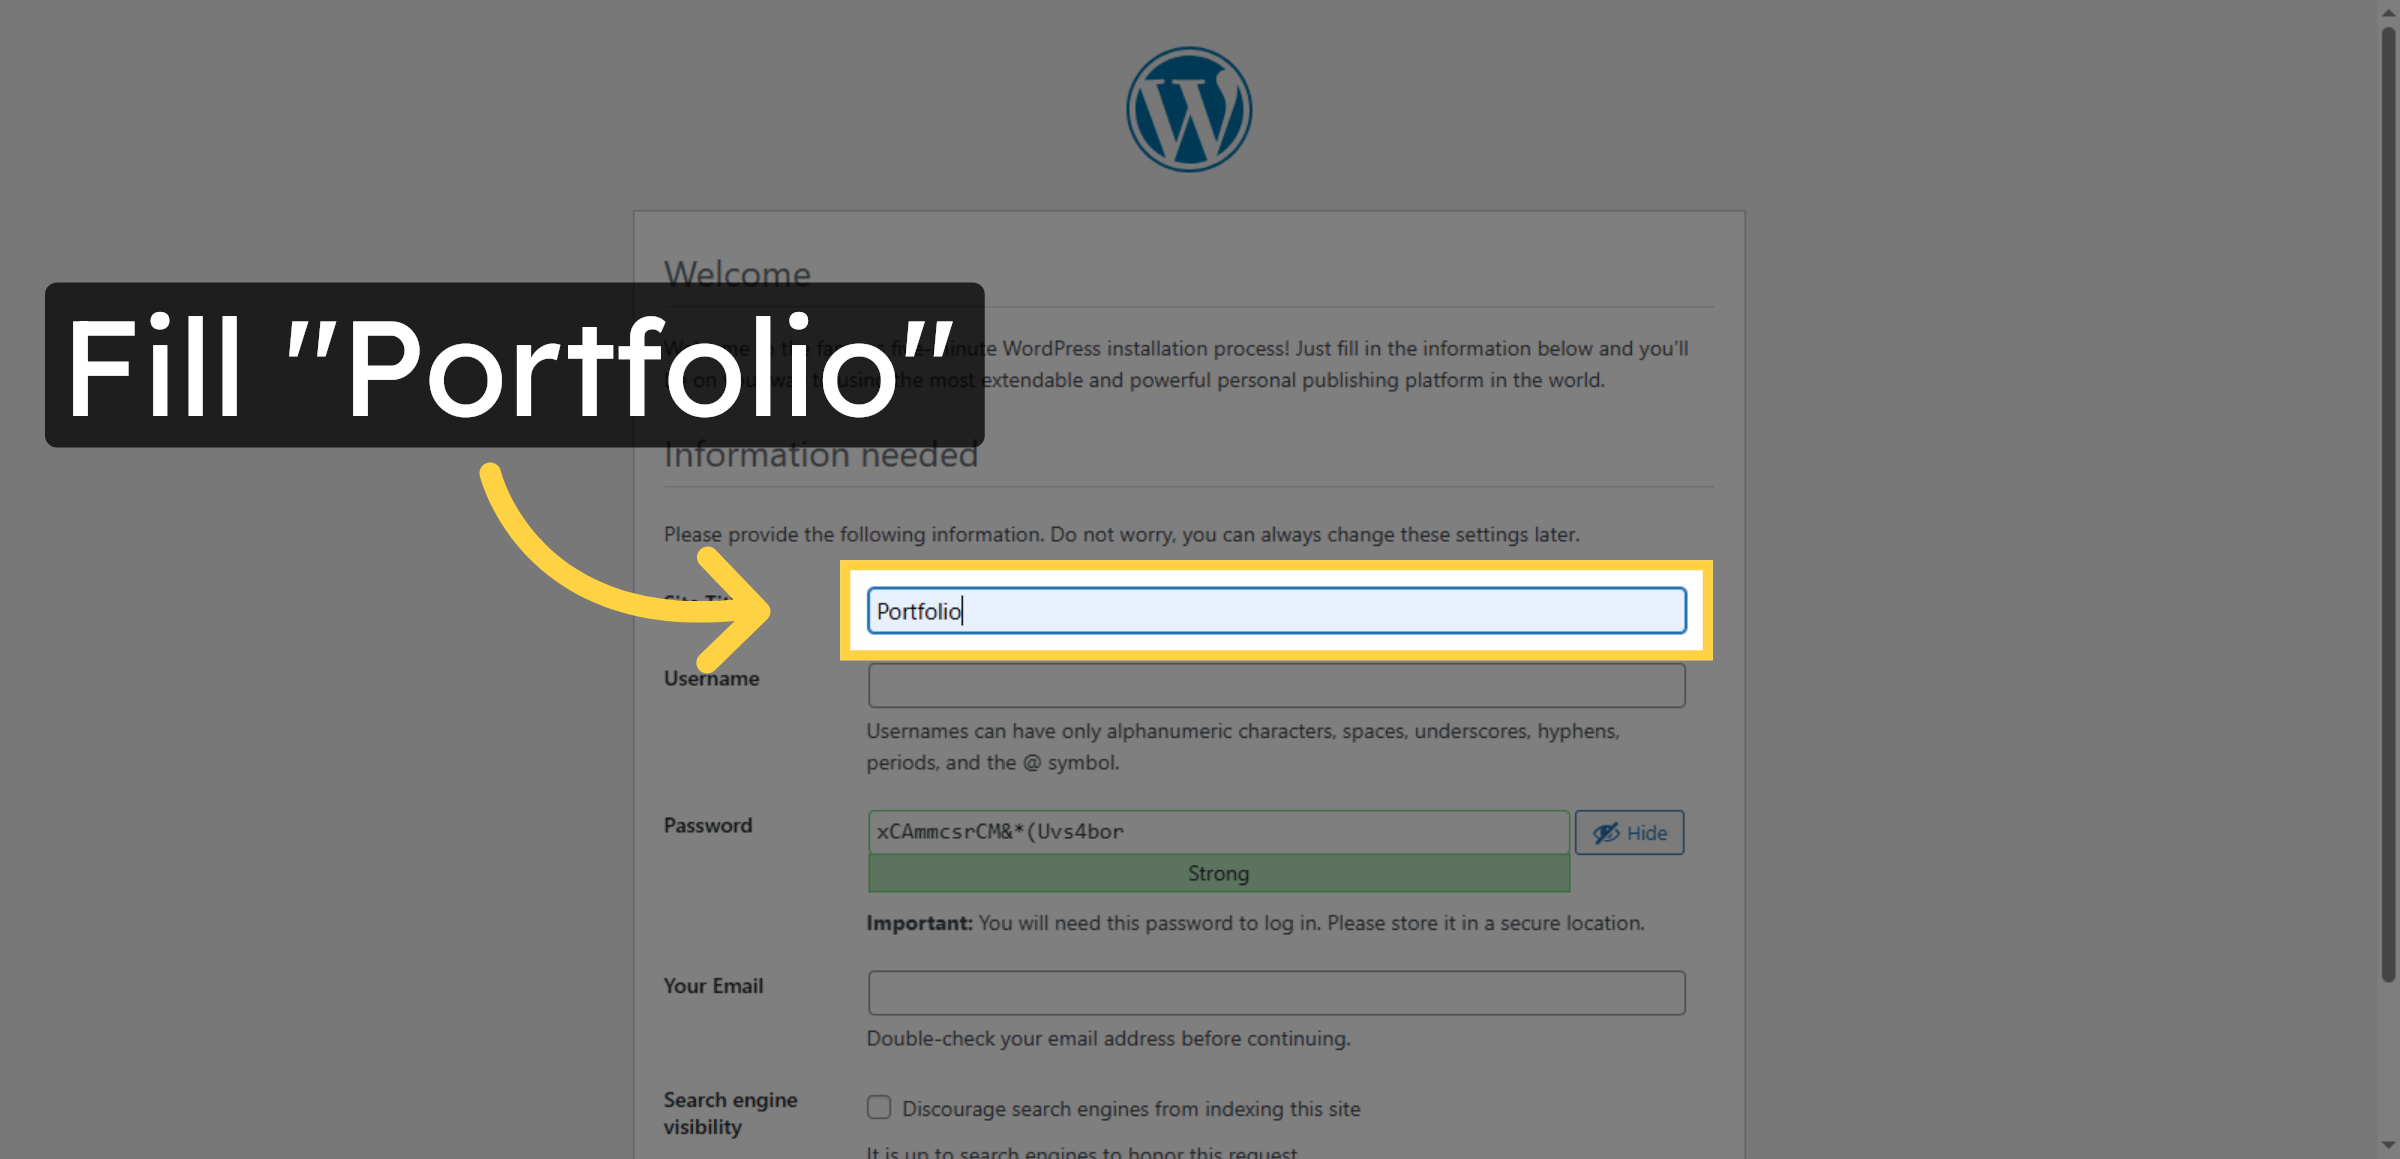
35. Enter Site Title
Enter your desired site title to identify your WordPress website.
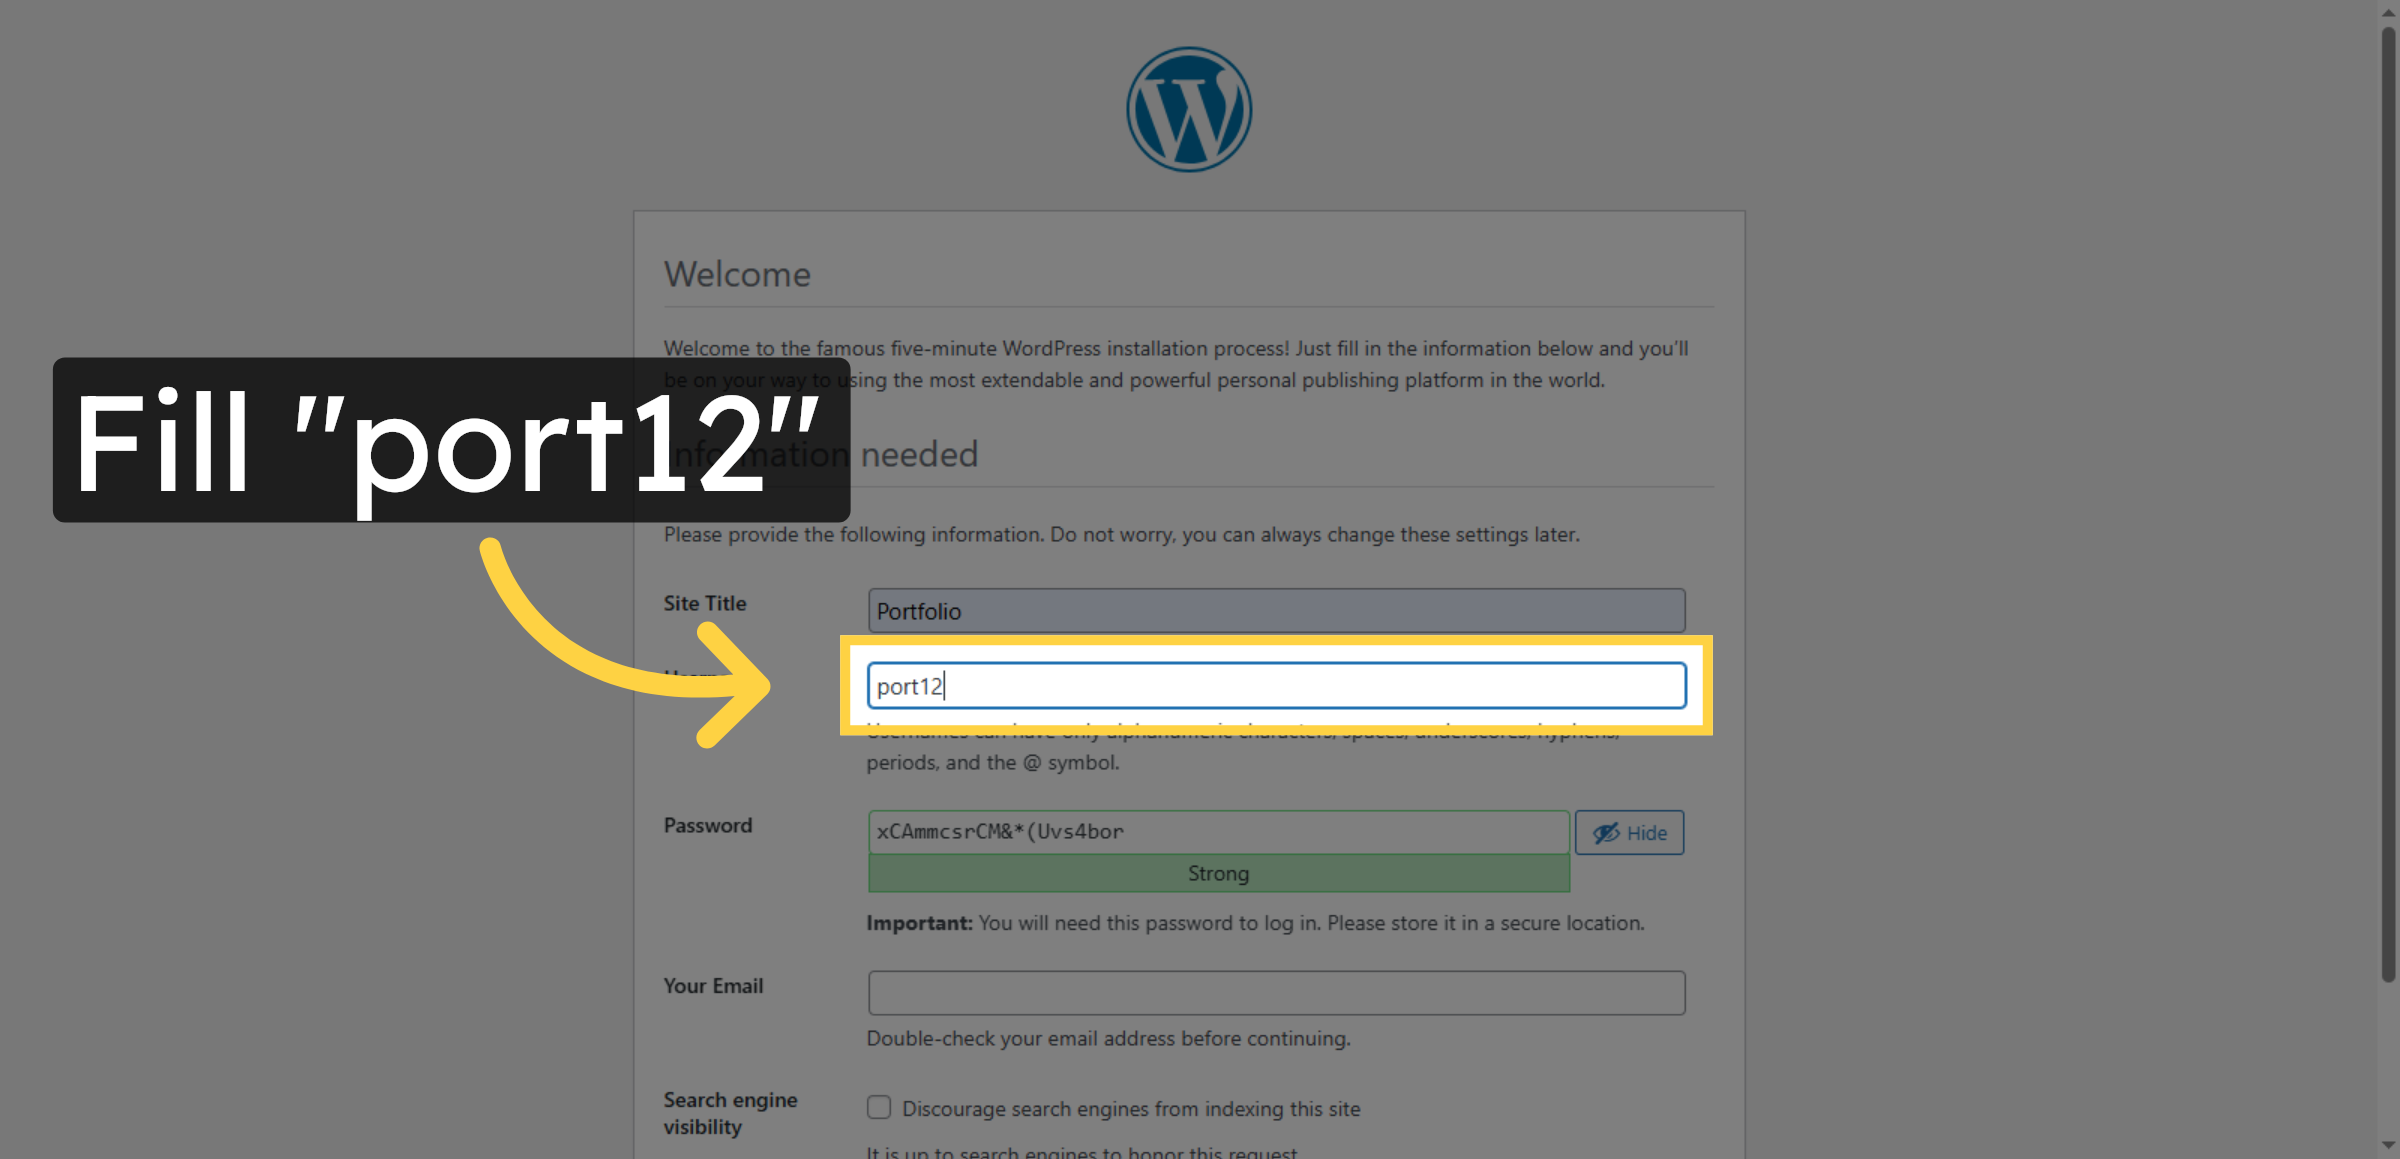
36. Enter Username
Enter your chosen username for WordPress administration access.
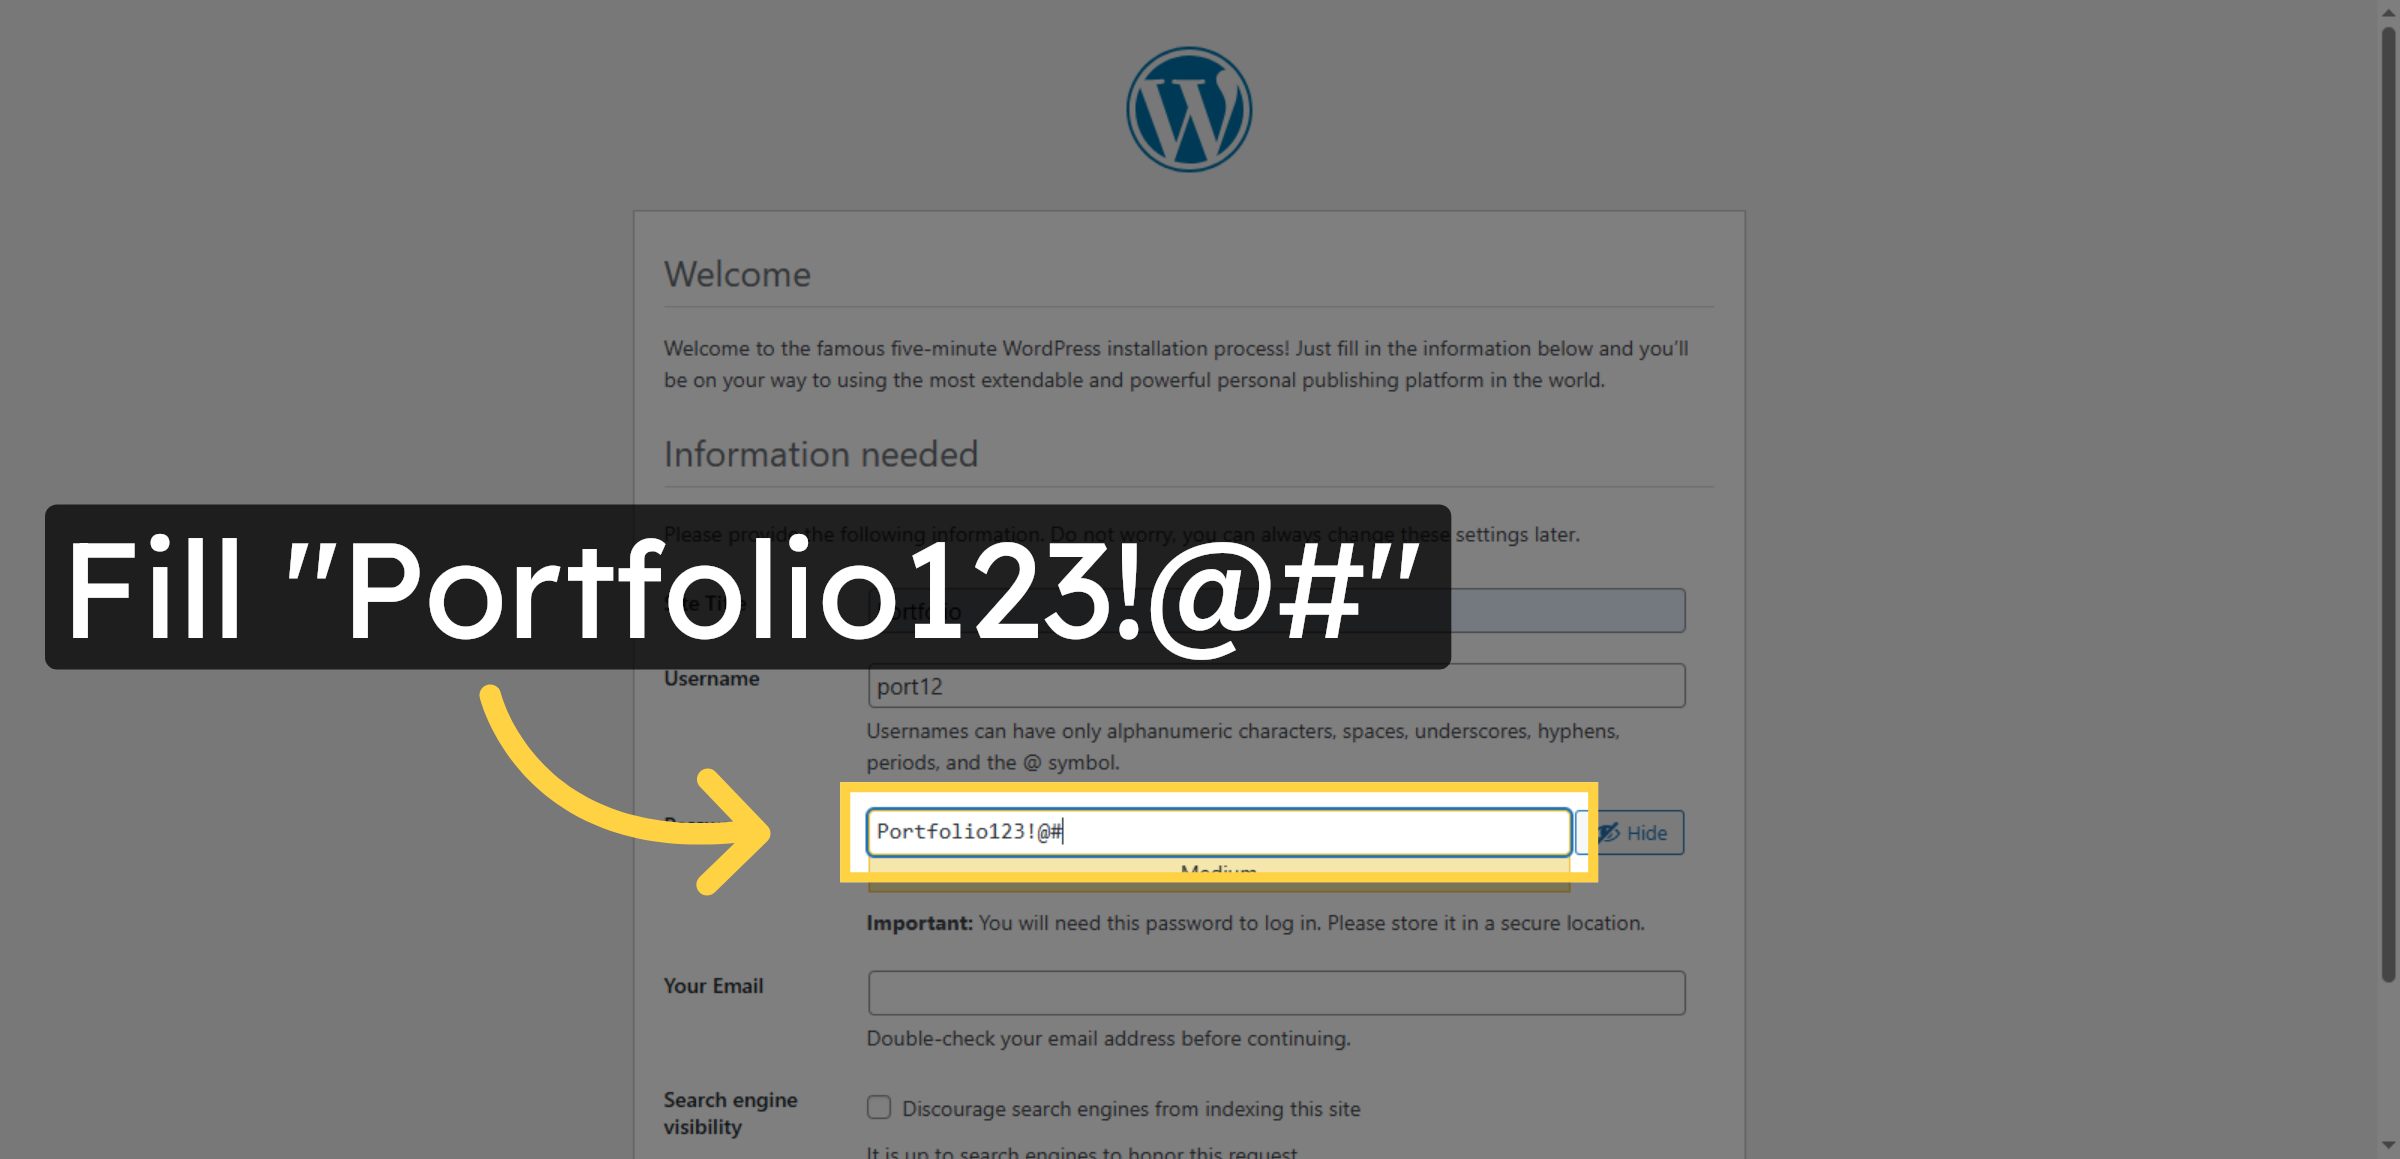
37. Confirm Password Entry
Confirm your password by entering it again for accuracy.
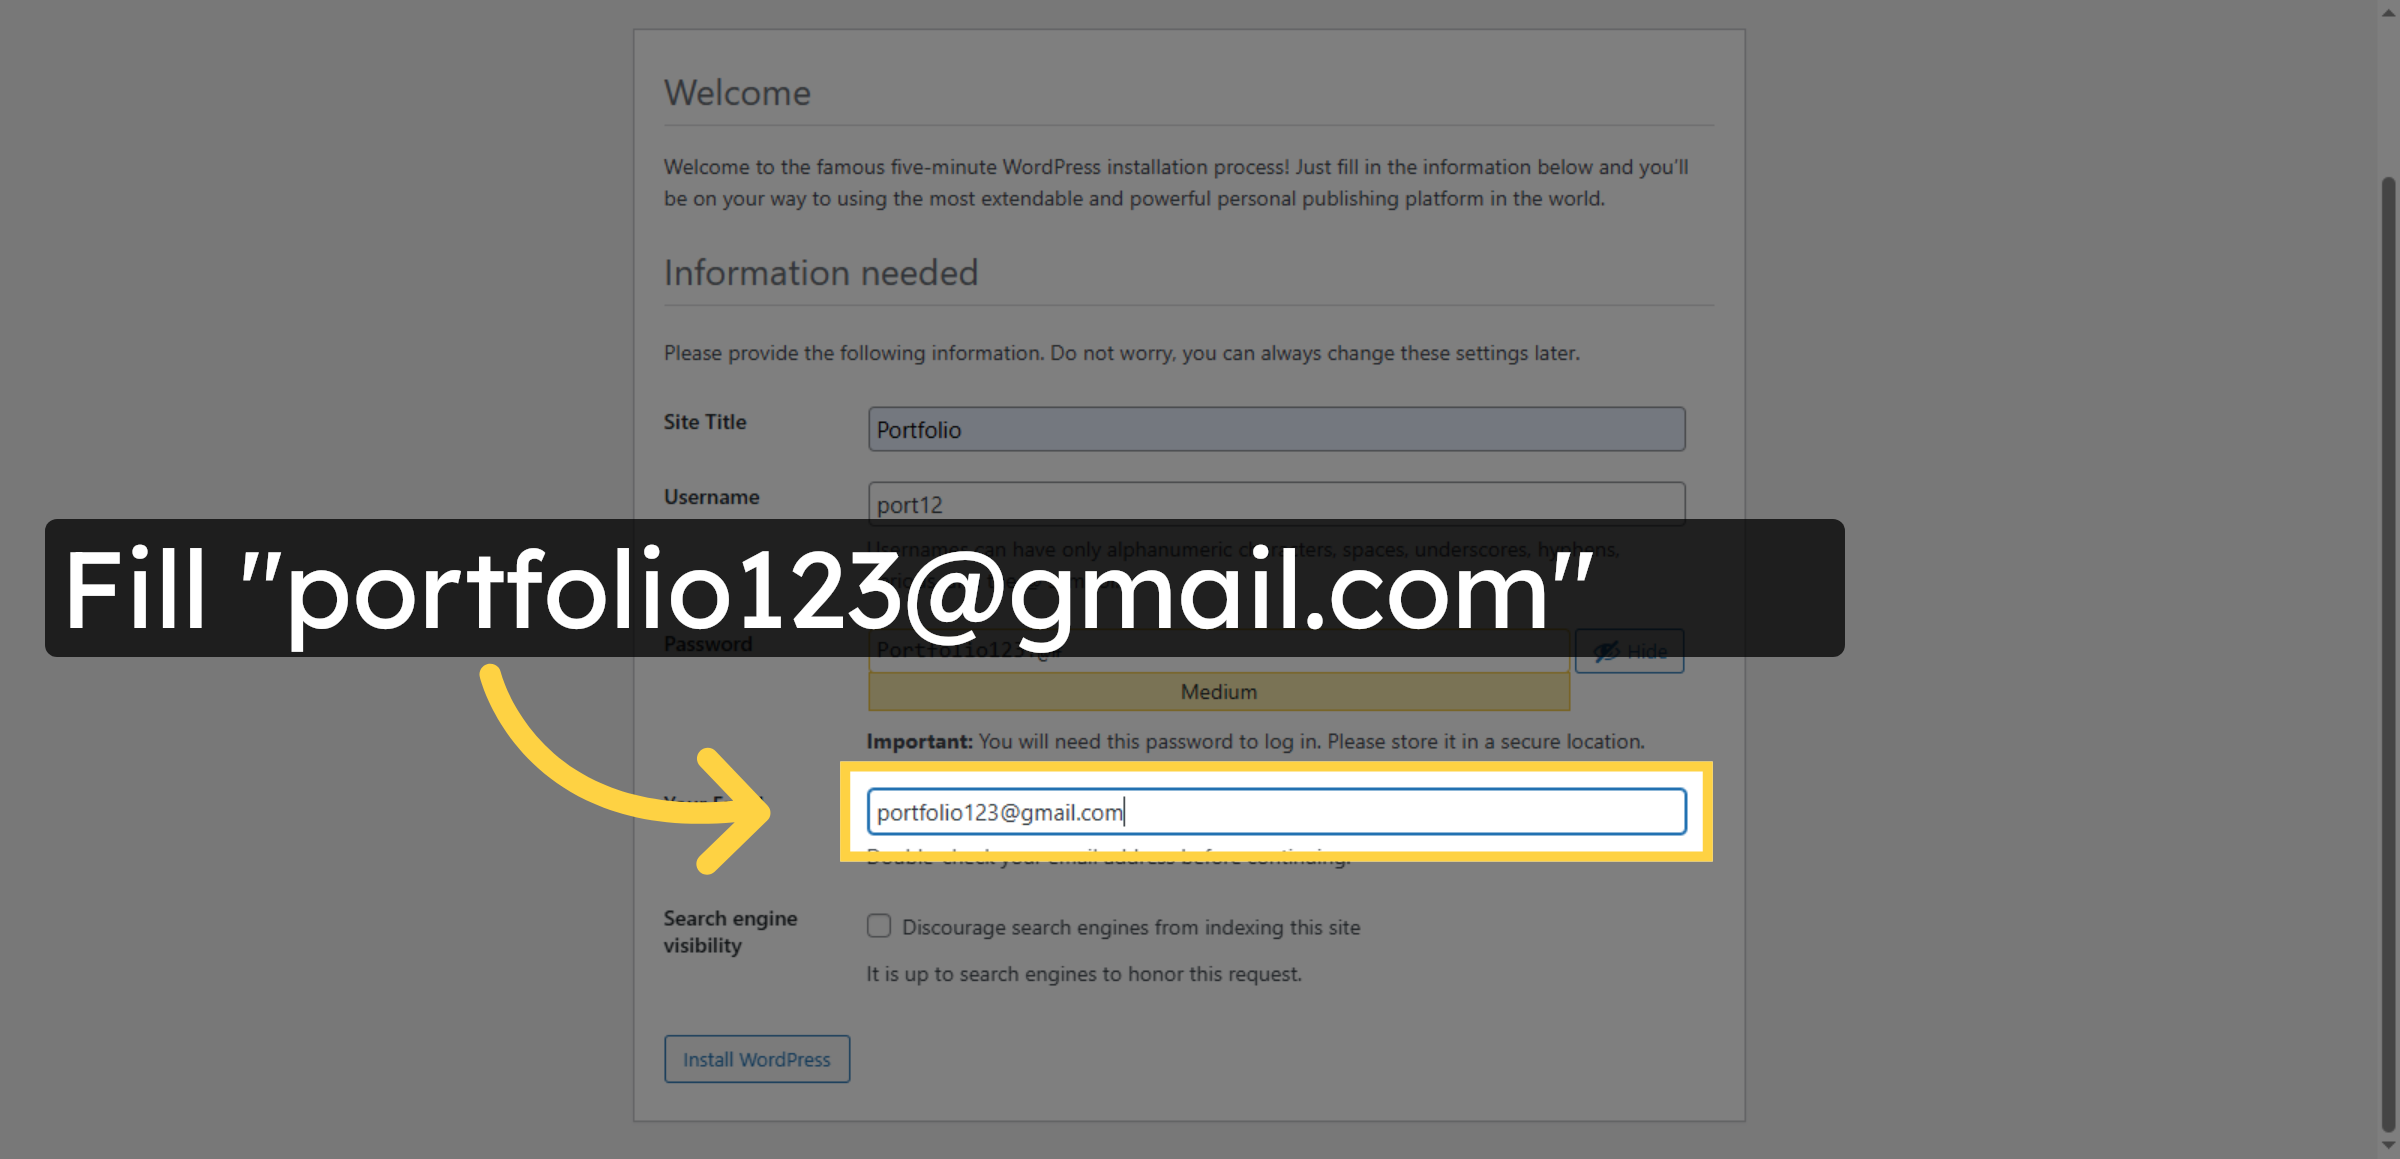
38. Enter Email Address
Enter your email address to receive WordPress notifications and password resets.
39. Disable Search Engine Indexing
Checking the “Discourage search engines” option prevents search engines from crawling and indexing your site, keeping it hidden from search results. Use this for sites still in development or not ready for public access.

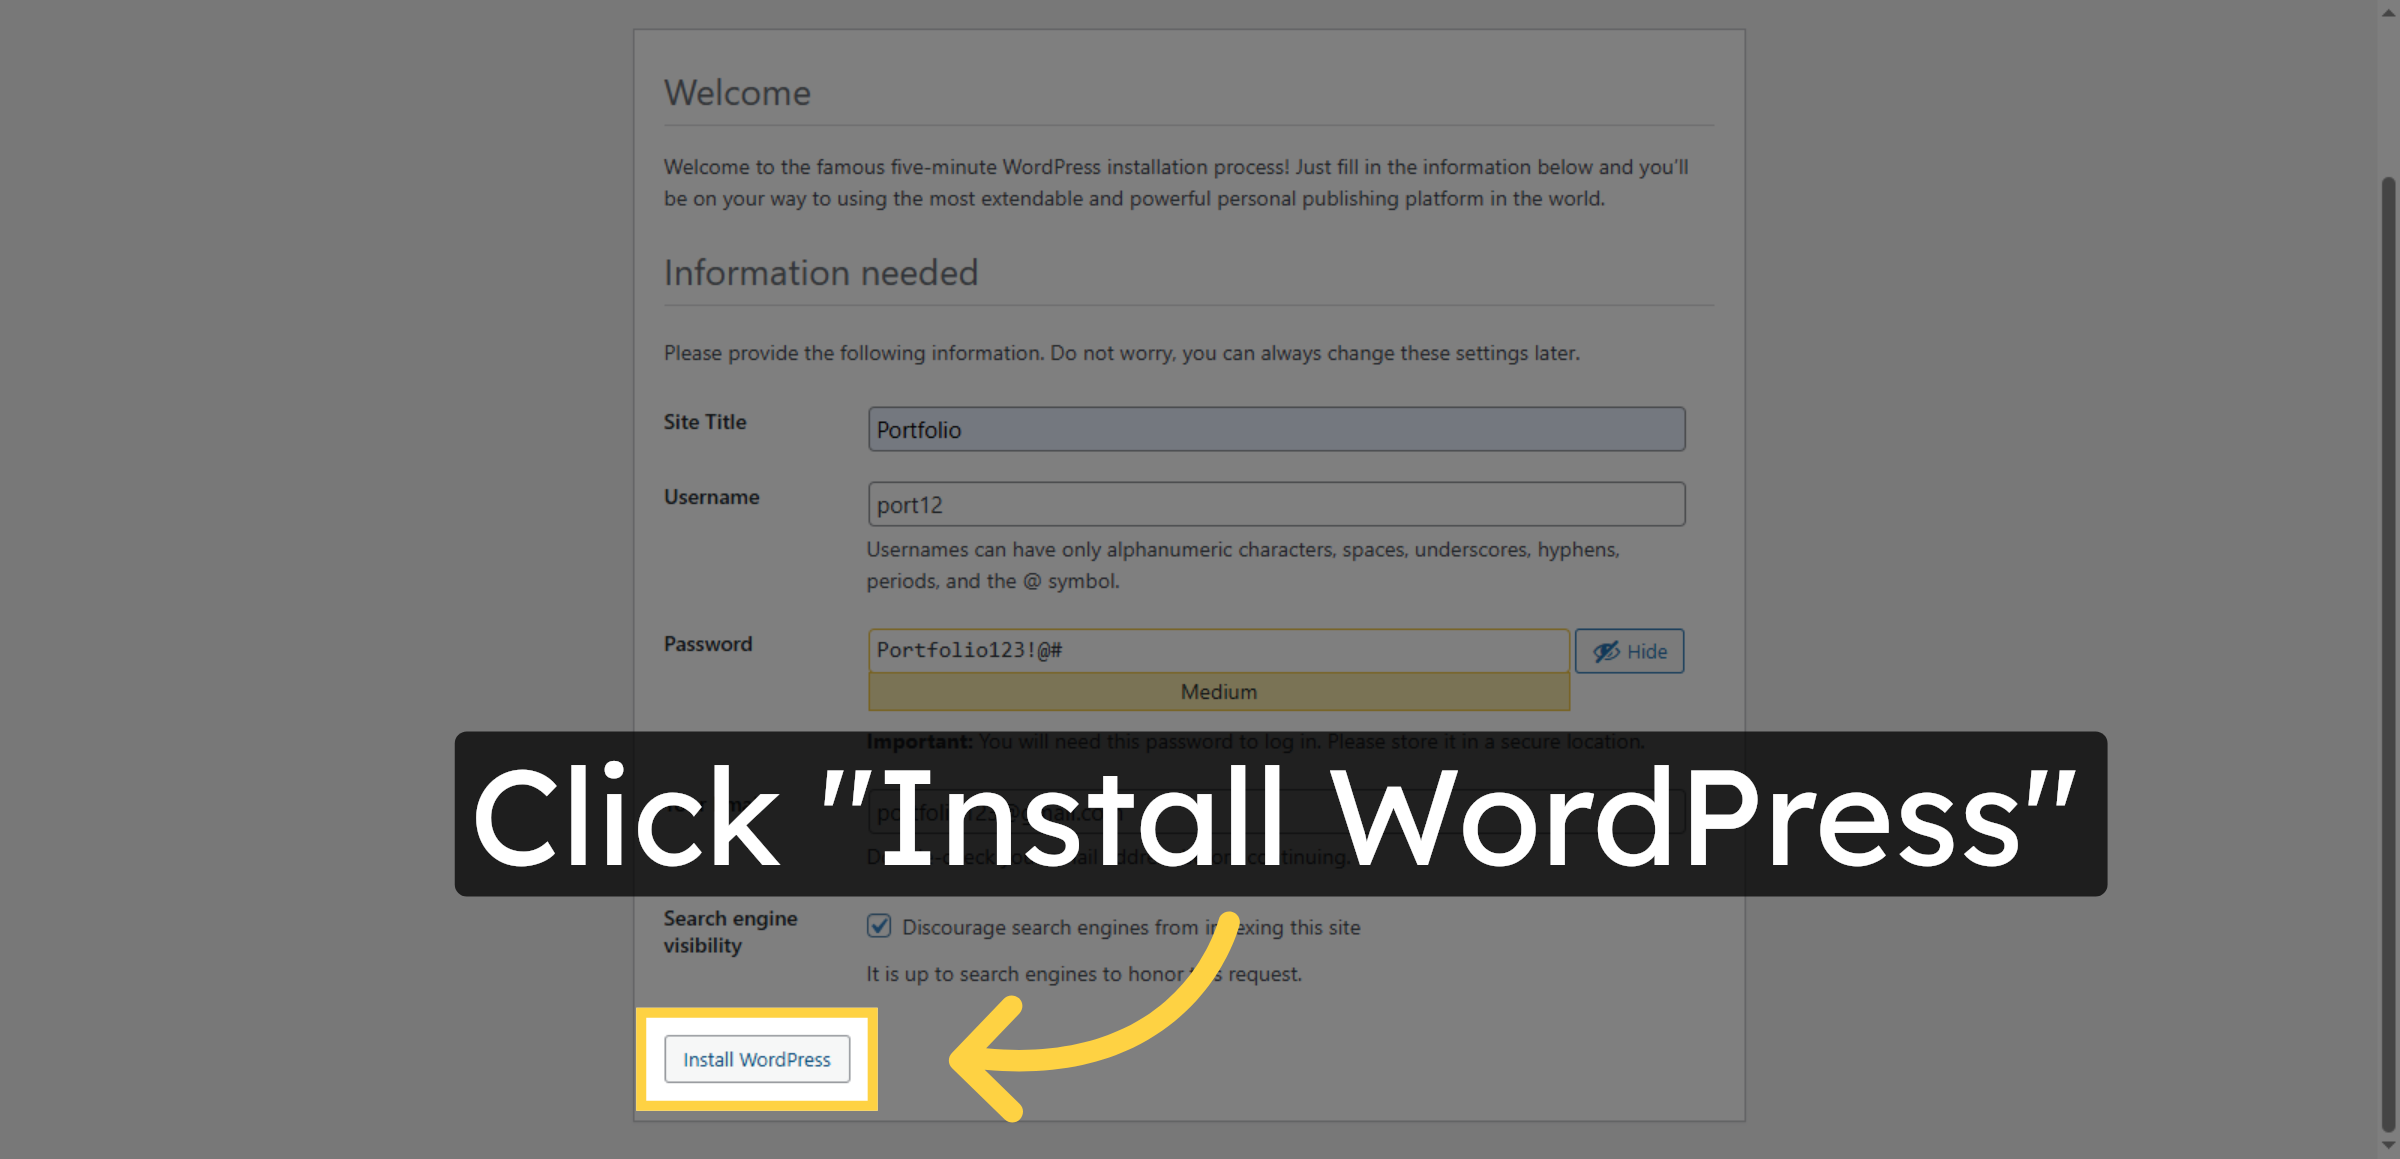
40. Install WordPress
Click Install WordPress to complete the manual installation process.
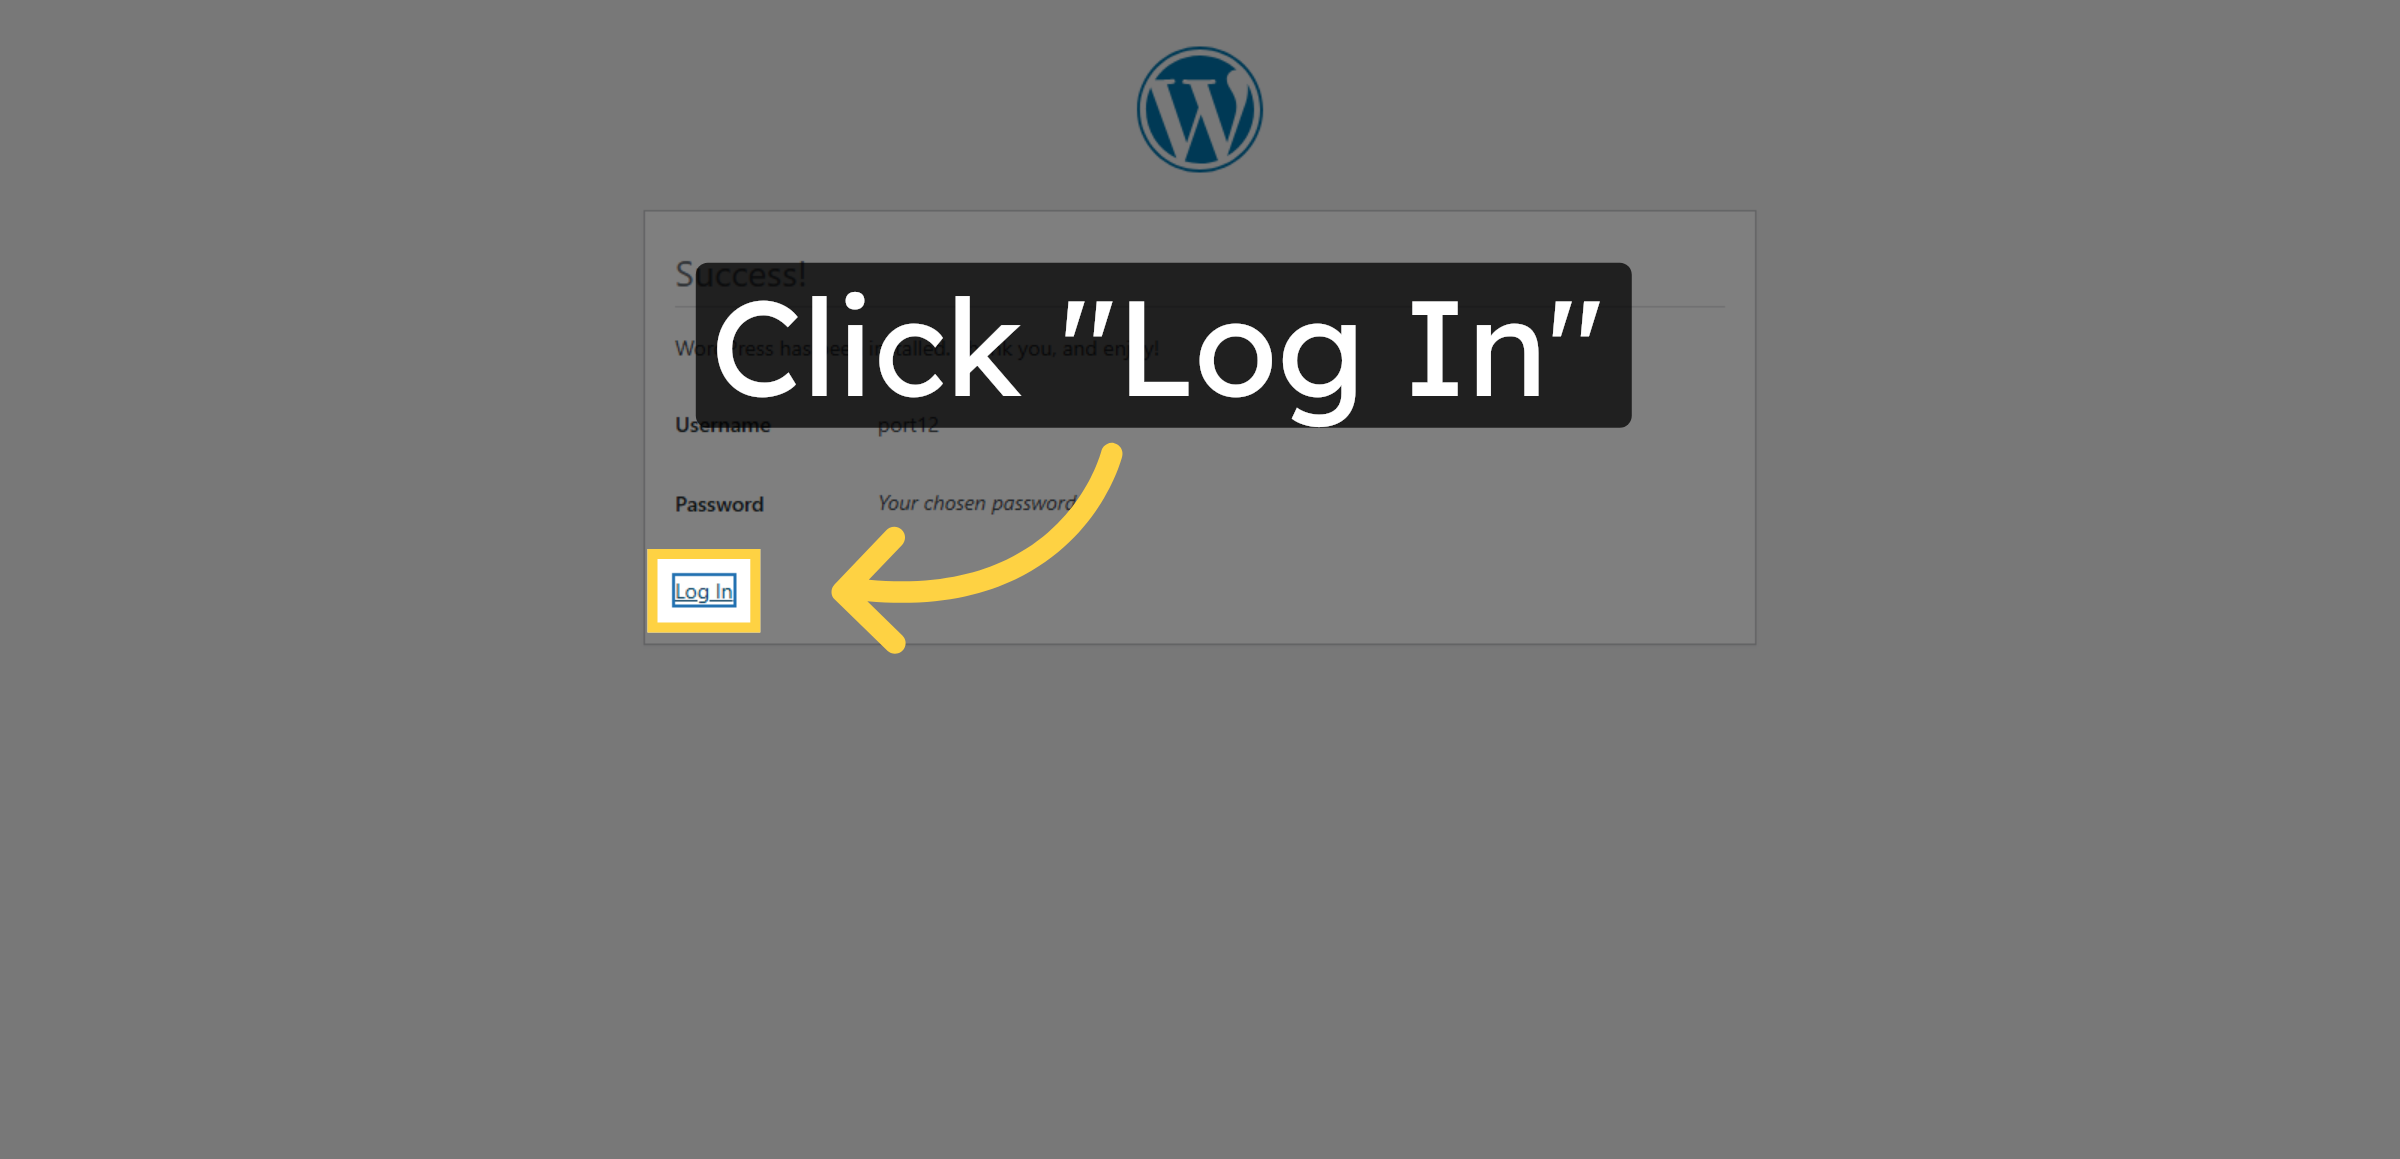
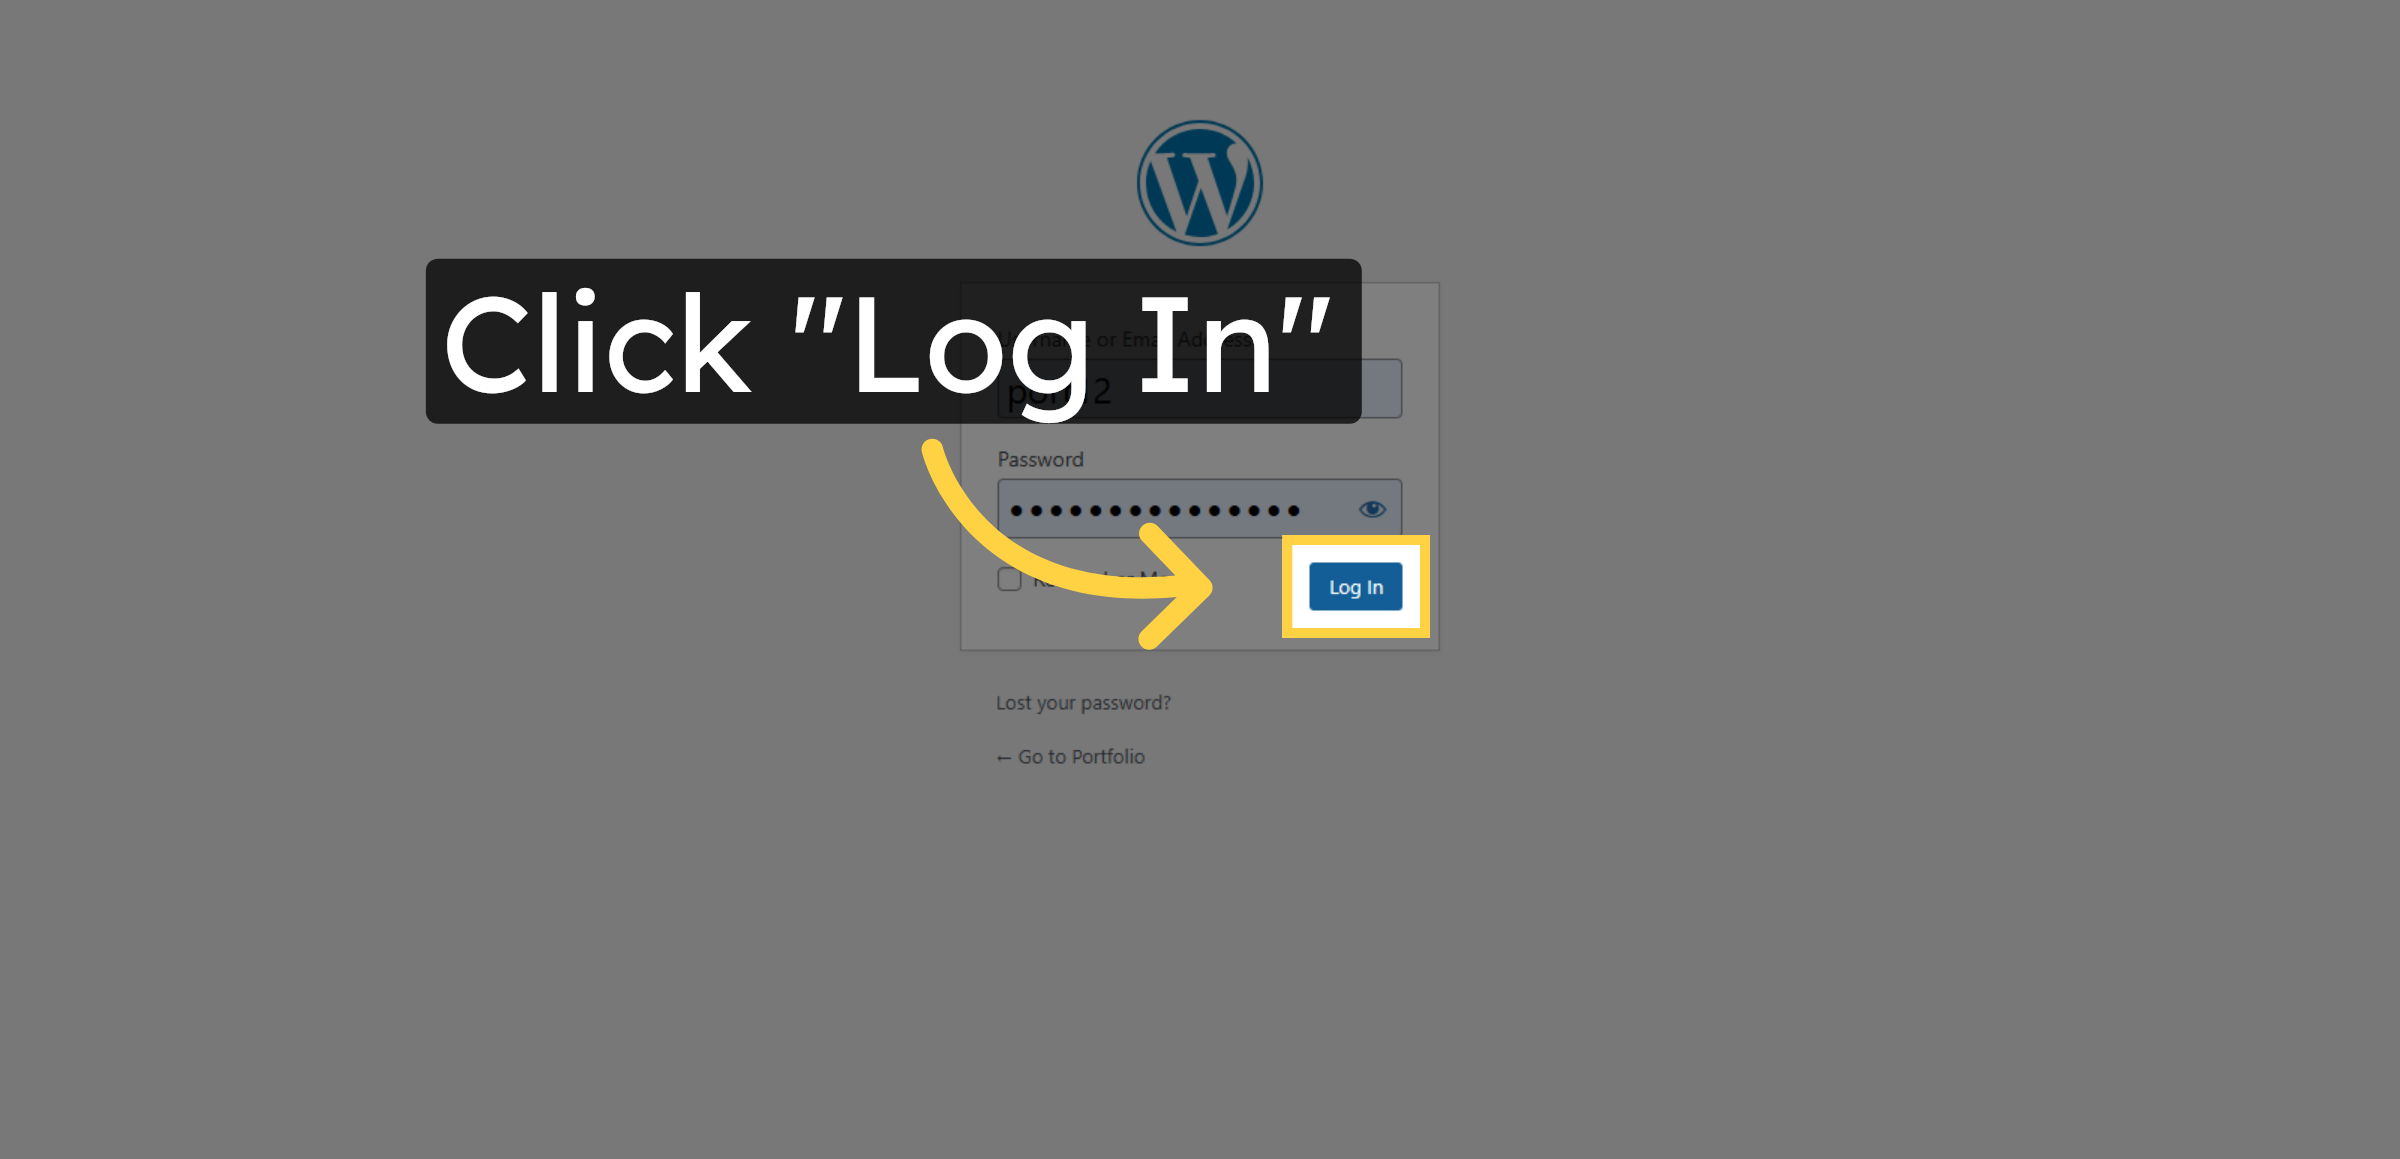
41. Click Log In
Click Log In to access your new WordPress admin dashboard.
42. Submit Login Form
Click Log In to access your WordPress administration panel.
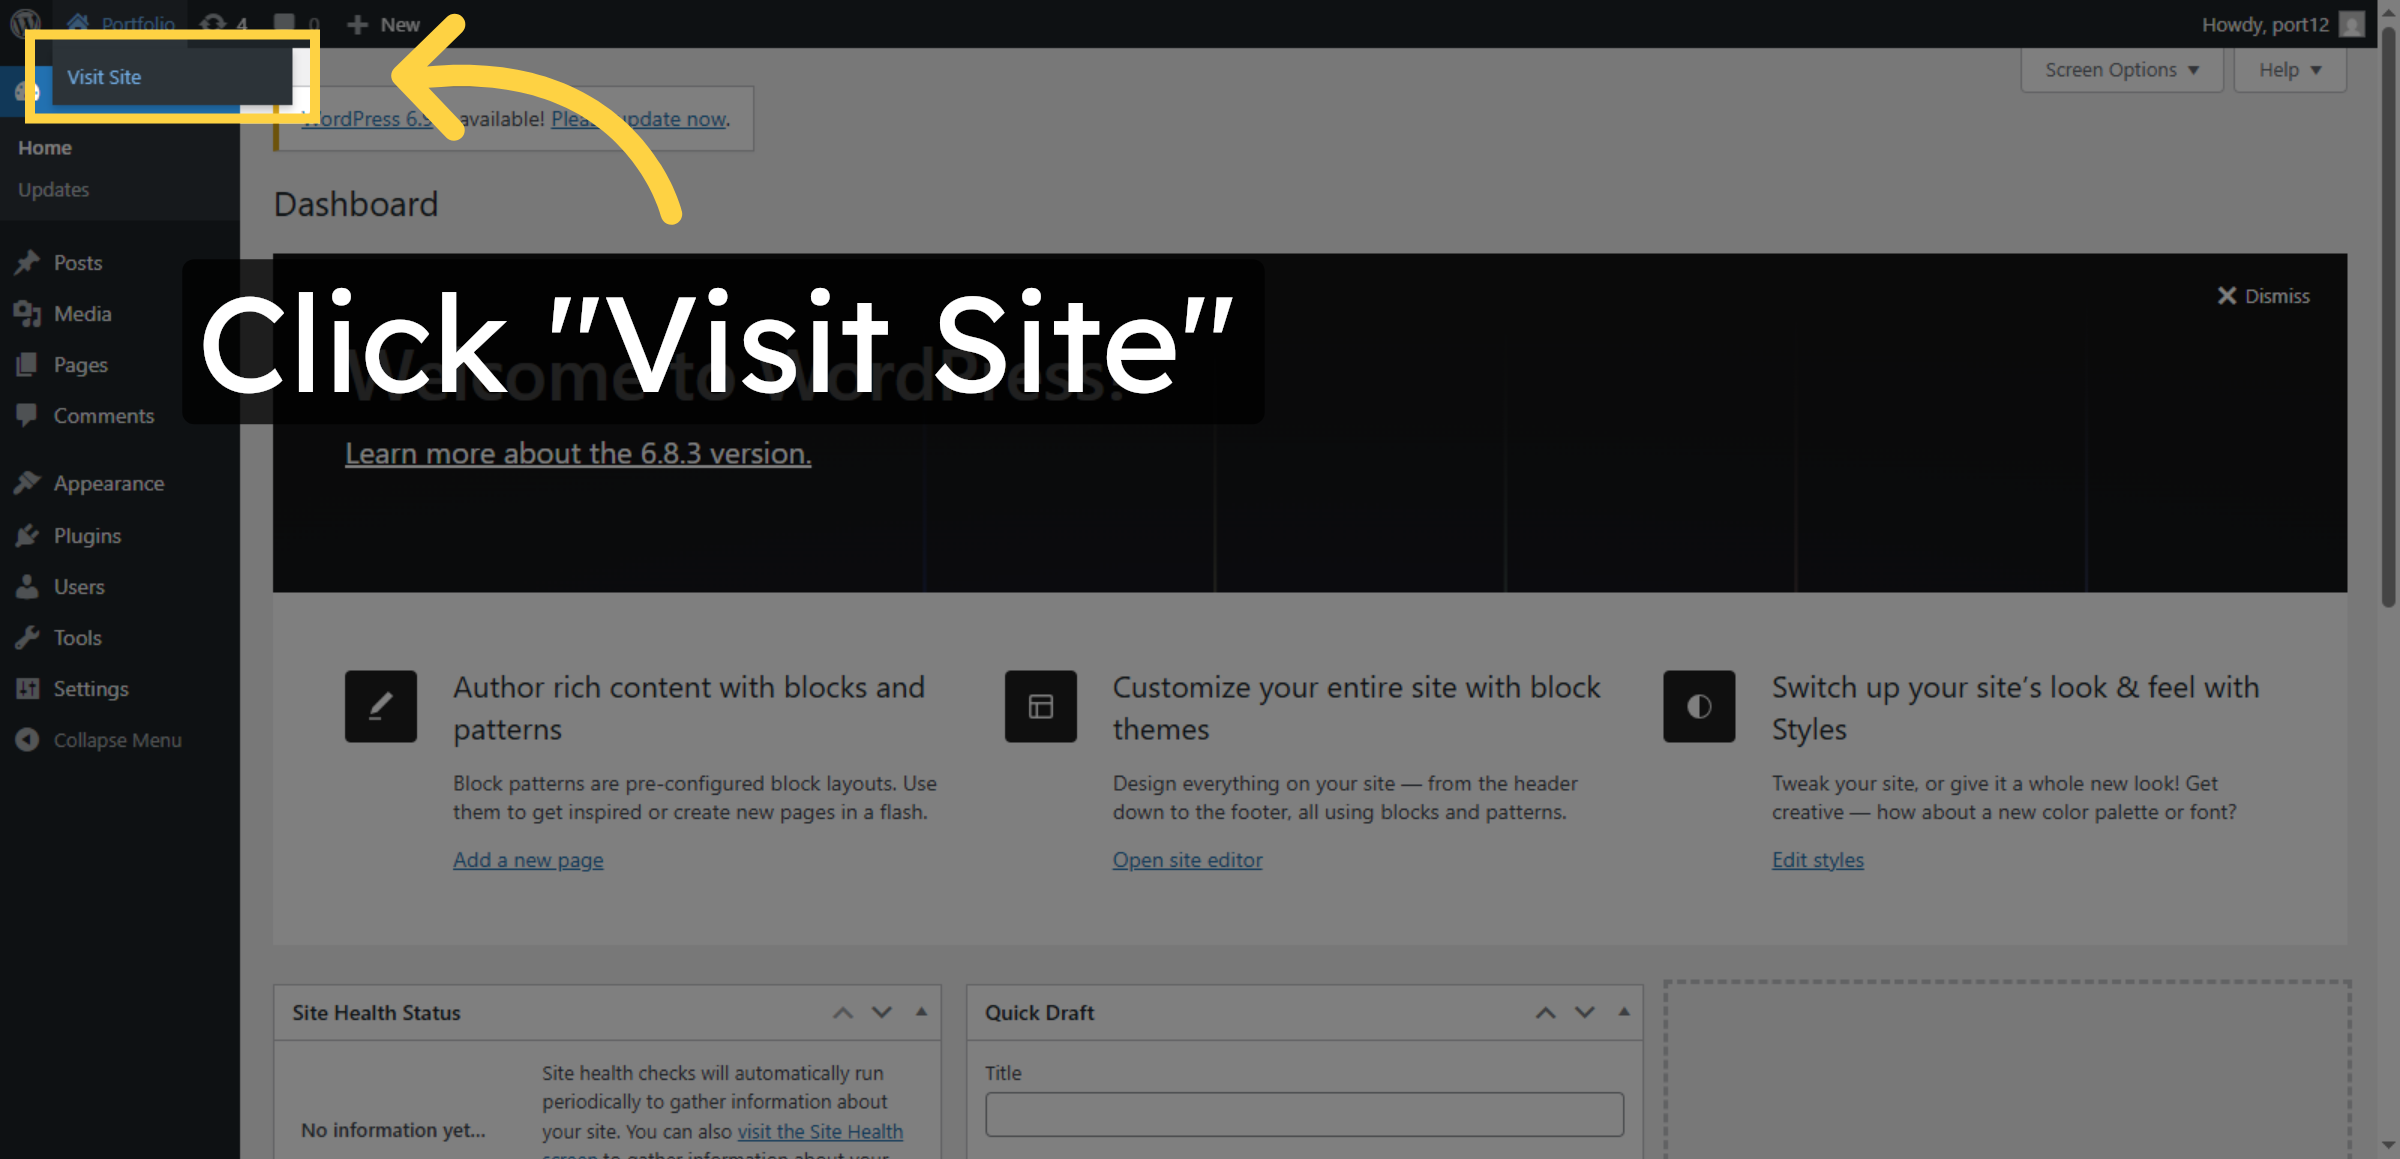
43. Visit WordPress Site
Click Visit Site to view your newly installed WordPress website.
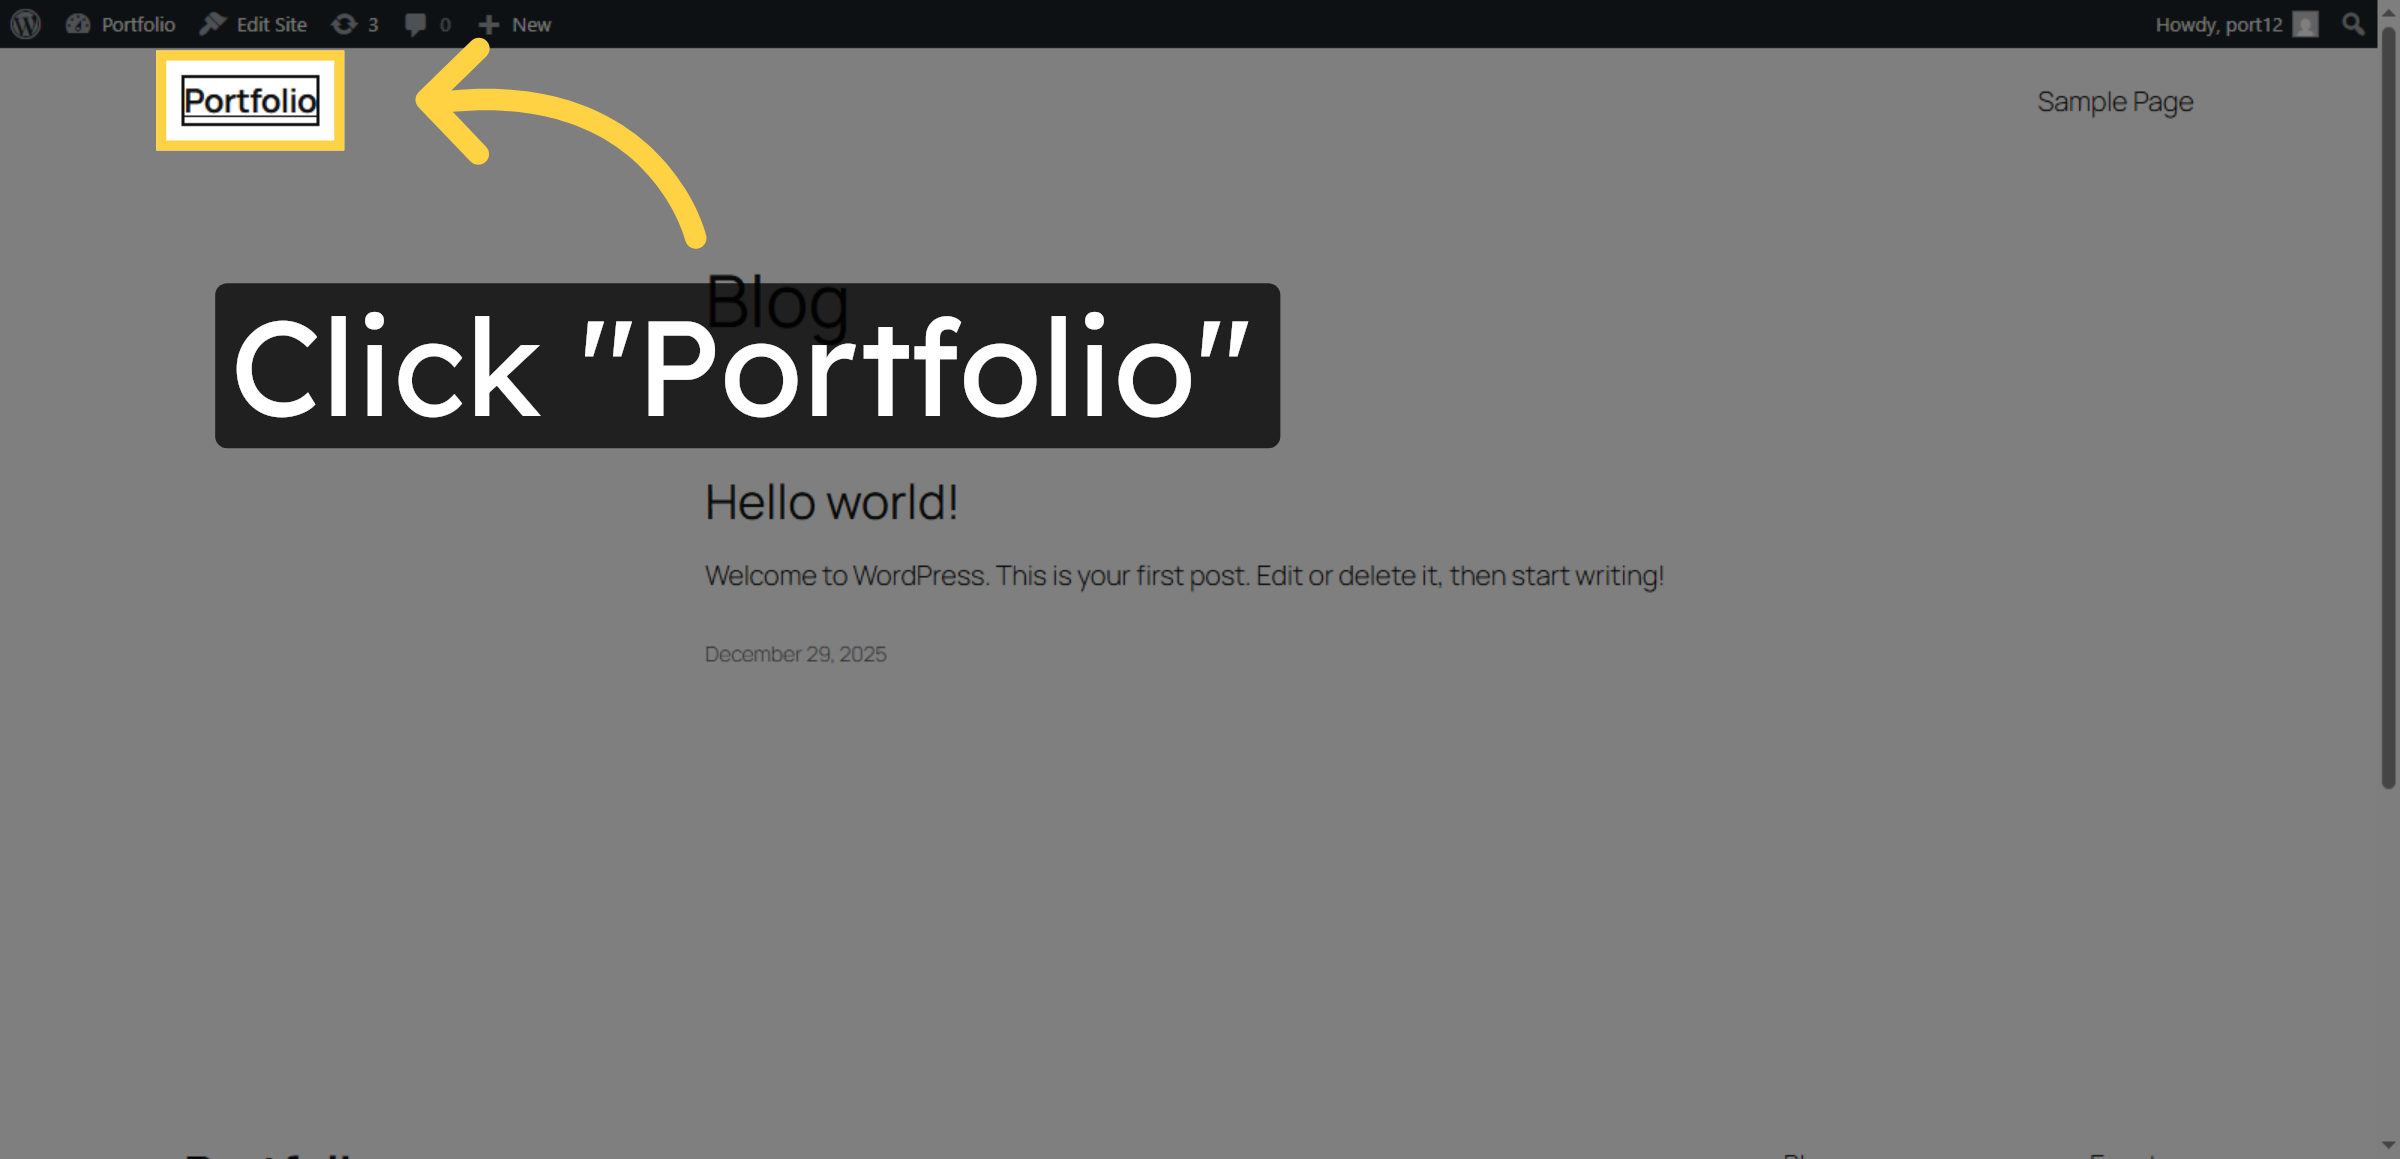
44. Access Site Dashboard
Click Portfolio to open your WordPress site dashboard and begin customization.
Conclusion
By following this guide, you have successfully completed the manual installation of WordPress on Hostinger hosting. Your website is now properly connected to the database, configured for secure operation, and ready for customization. Manual installation ensures better understanding of backend settings and improves long-term site management.
To maintain stability and security, regularly update WordPress, install trusted plugins, and back up your website data. Proper maintenance will help keep your website fast, secure, and reliable.
WooHelpDesk Support
Need help with WordPress installation, hosting configuration, or website optimization? WooHelpDesk provides expert support to ensure smooth website setup and management.
Visit: https://www.woohelpdesk.com
Call Us Toll-Free: +1 888 602 0119 (US & Canada)
Easy Setup | Expert Support | Trusted Solutions