How to Create And Manage Subdomains With WordPress On HostGator
Introduction
Creating and managing subdomains is an effective way to organize website content, host multiple projects, and expand your online presence without purchasing additional domains. Subdomains allow website owners to run separate WordPress installations for portfolios, blogs, test environments, or business sections under the same primary domain. Hosting providers such as HostGator offer powerful tools through cPanel and domain management features to simplify subdomain creation and configuration.
This guide provides a detailed, step-by-step process for creating and managing subdomains on HostGator WordPress hosting and installing WordPress on a newly created subdomain. It covers domain setup, file management, WordPress file extraction, database creation, user configuration, and final installation procedures. By following this guide, users can efficiently deploy fully functional WordPress websites on subdomains while maintaining centralized control over their hosting environment.
1. HostGator Dashboard
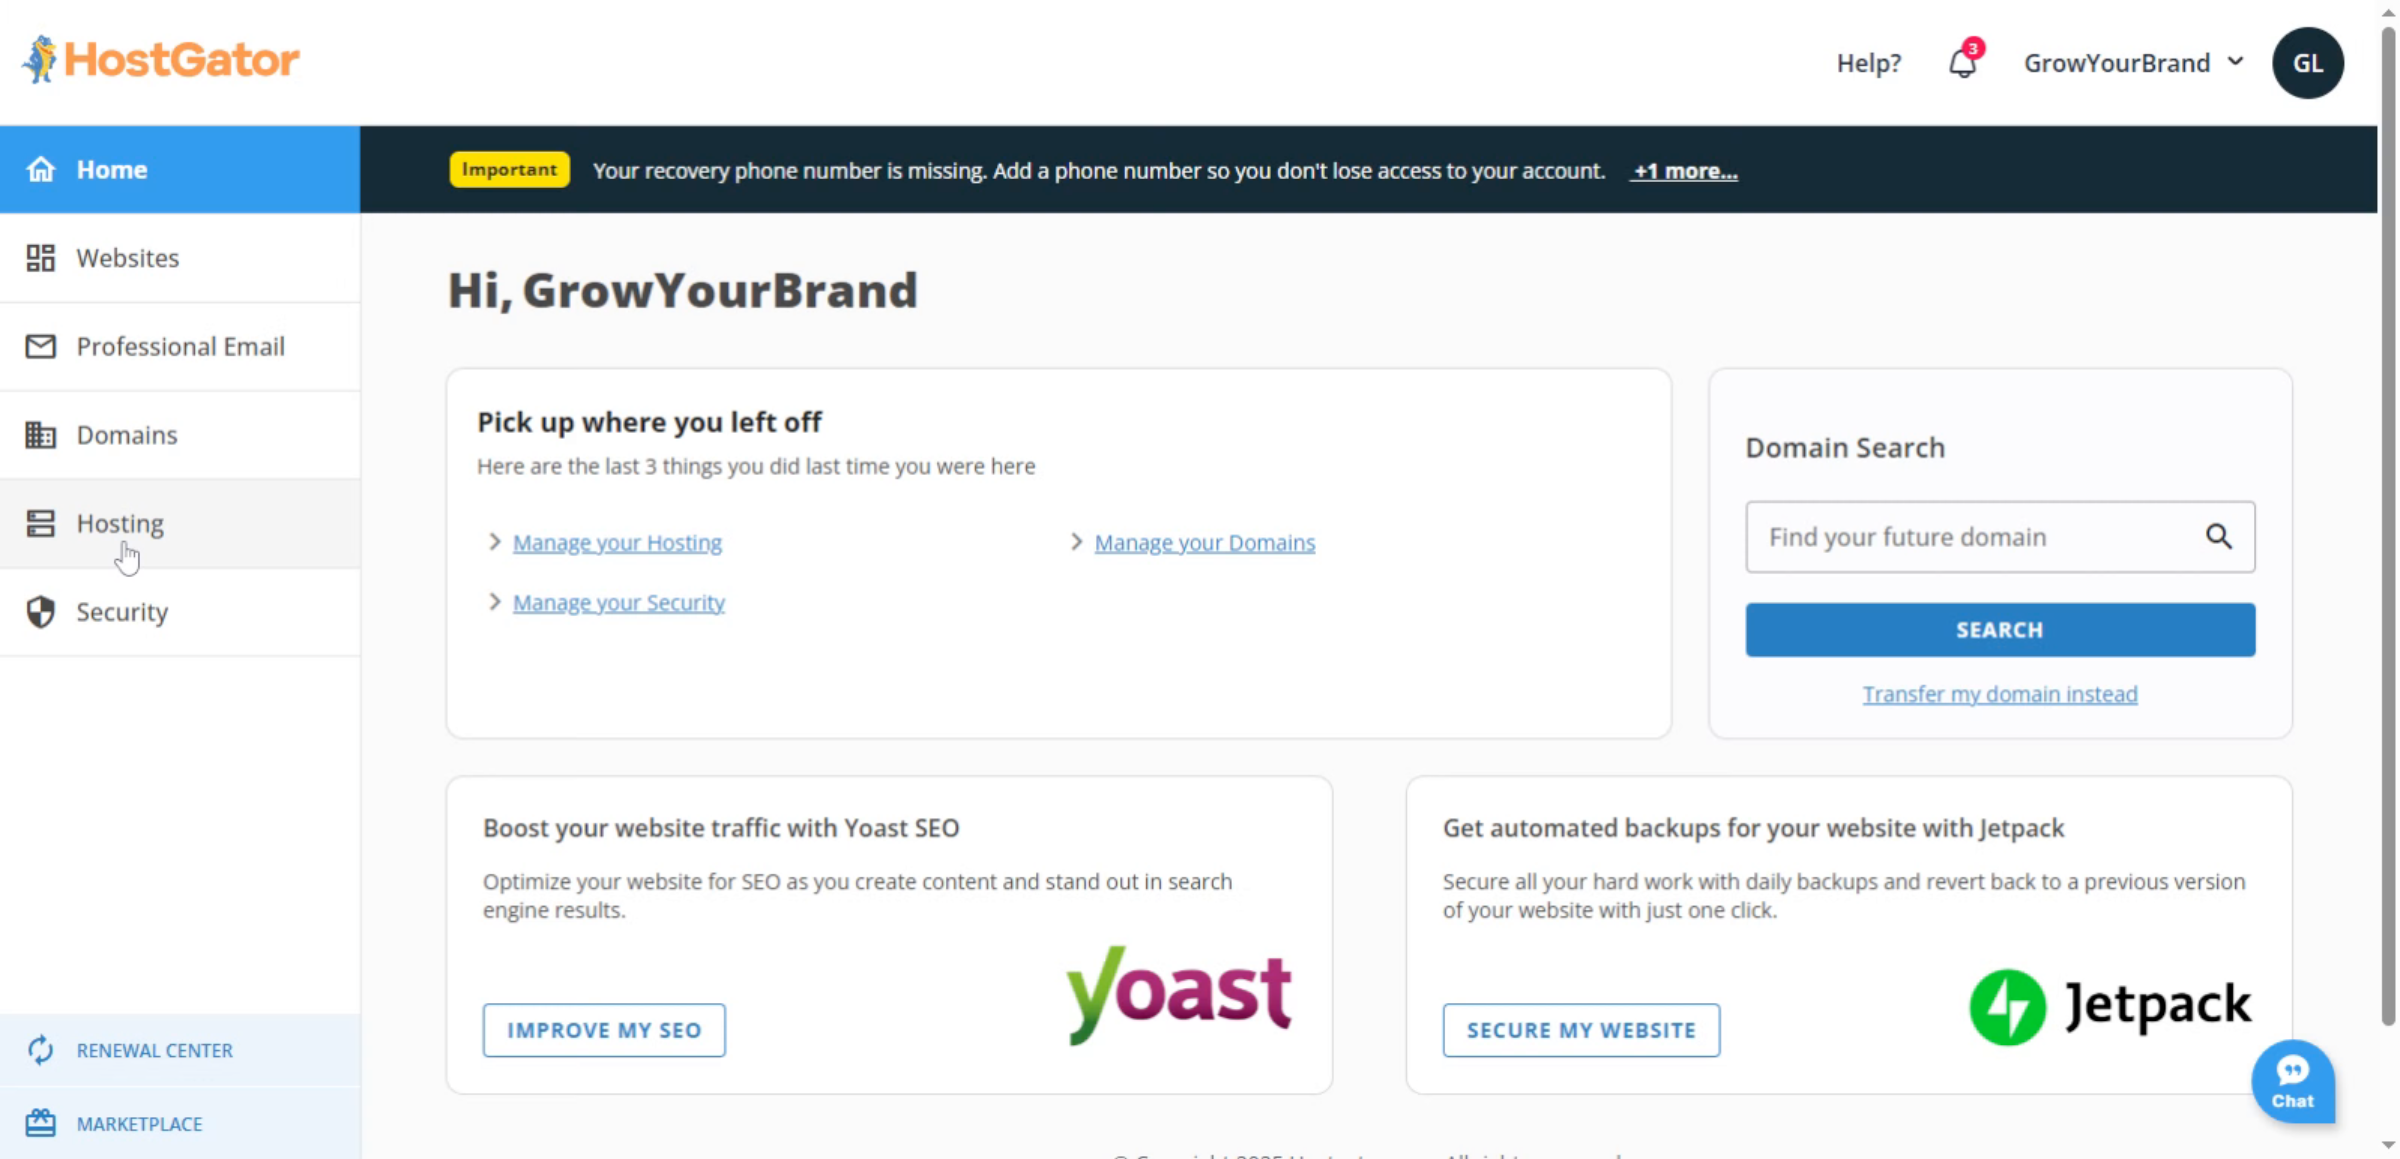
2. Access DNS Hosting

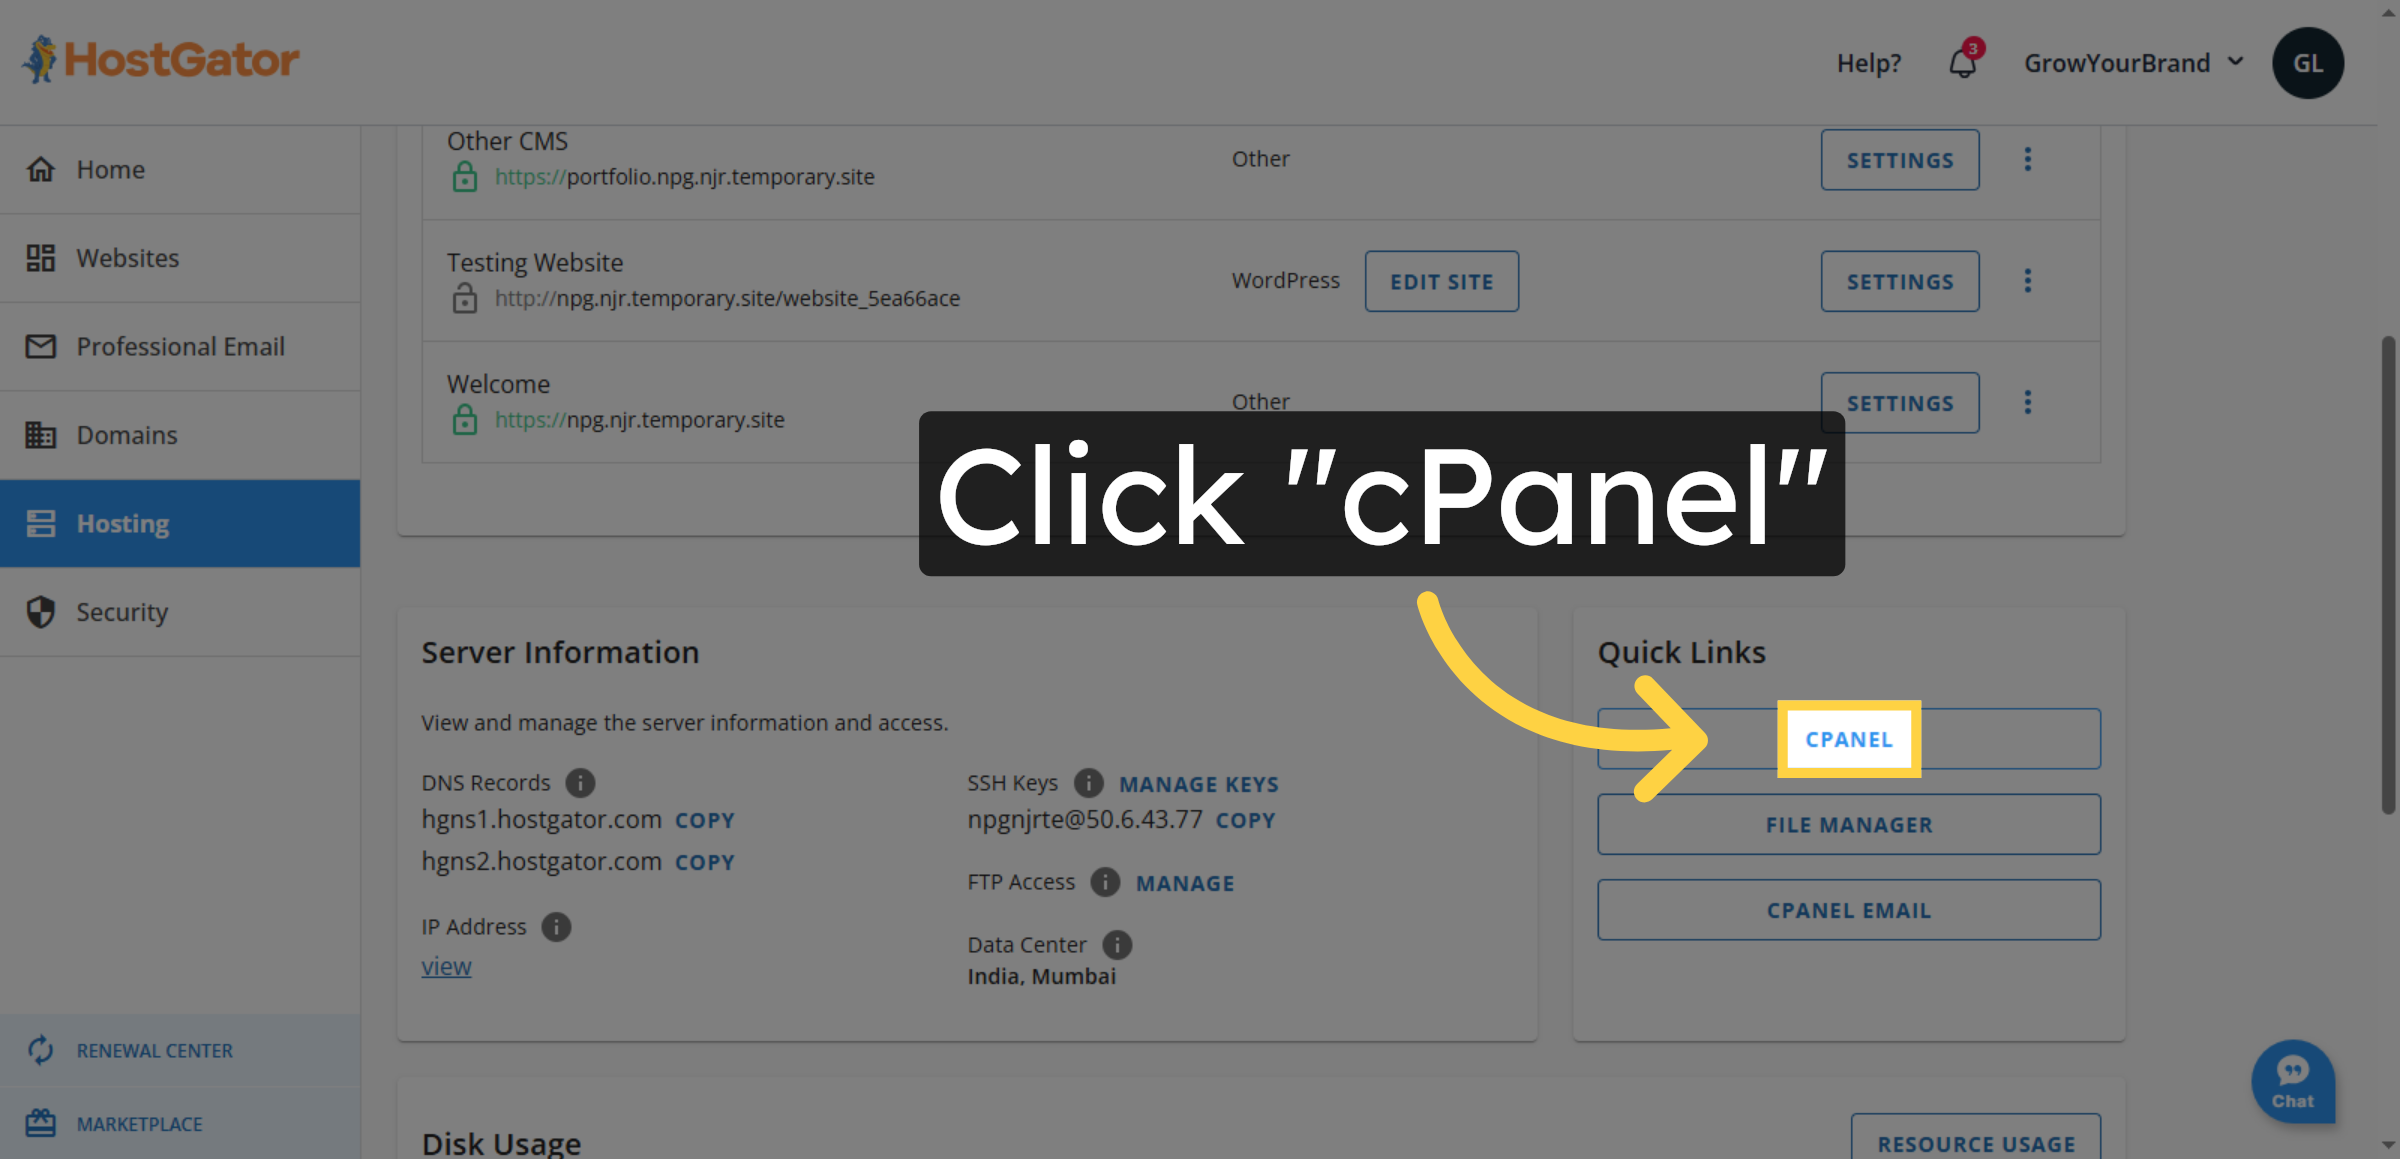
3. Open cPanel
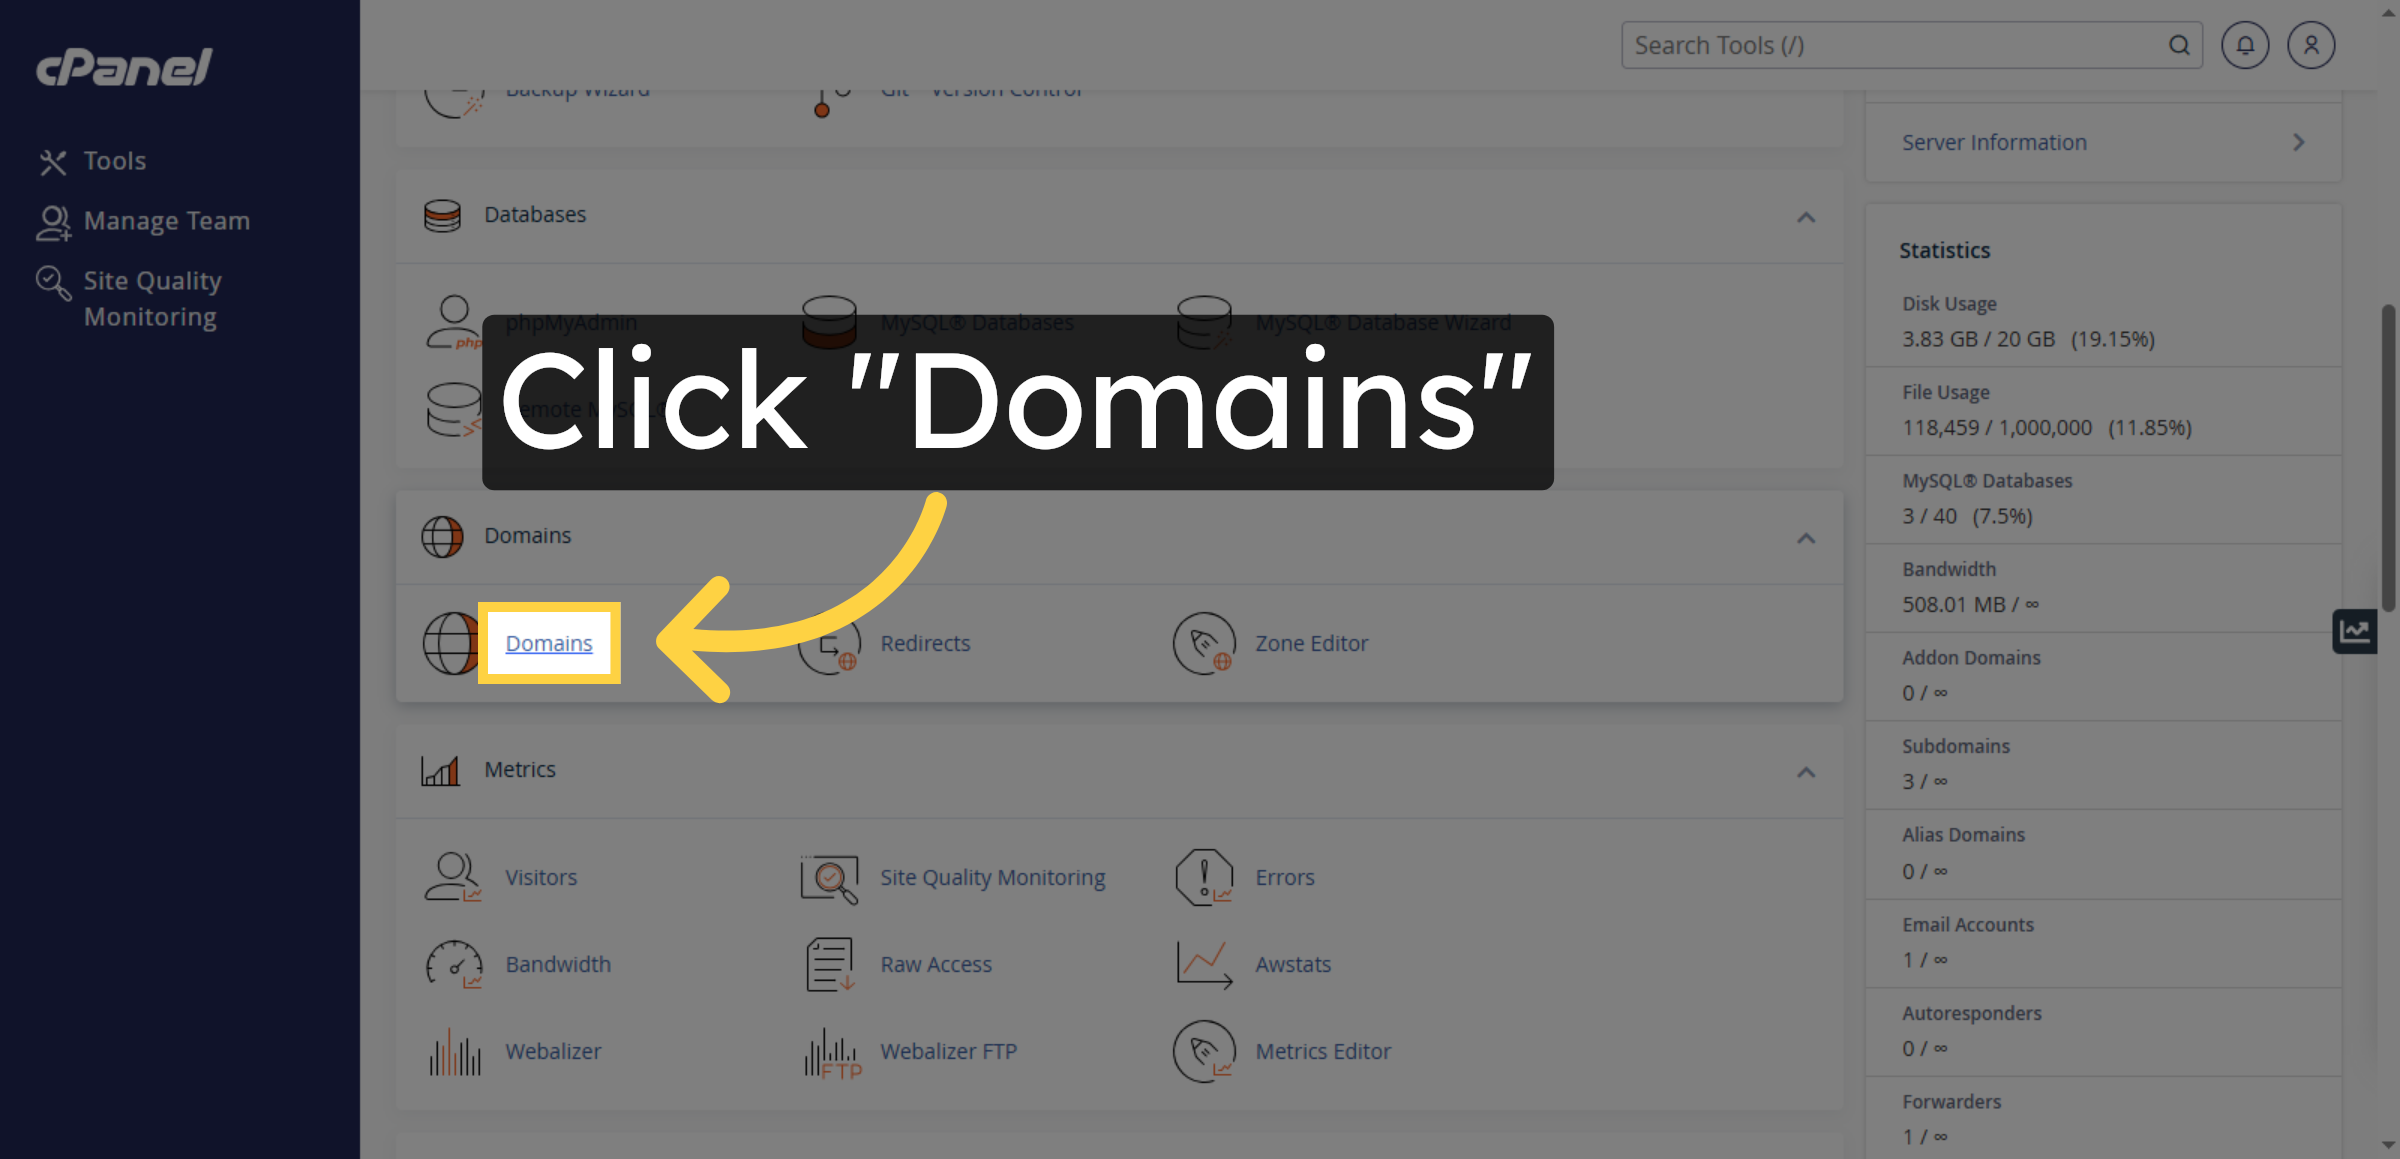
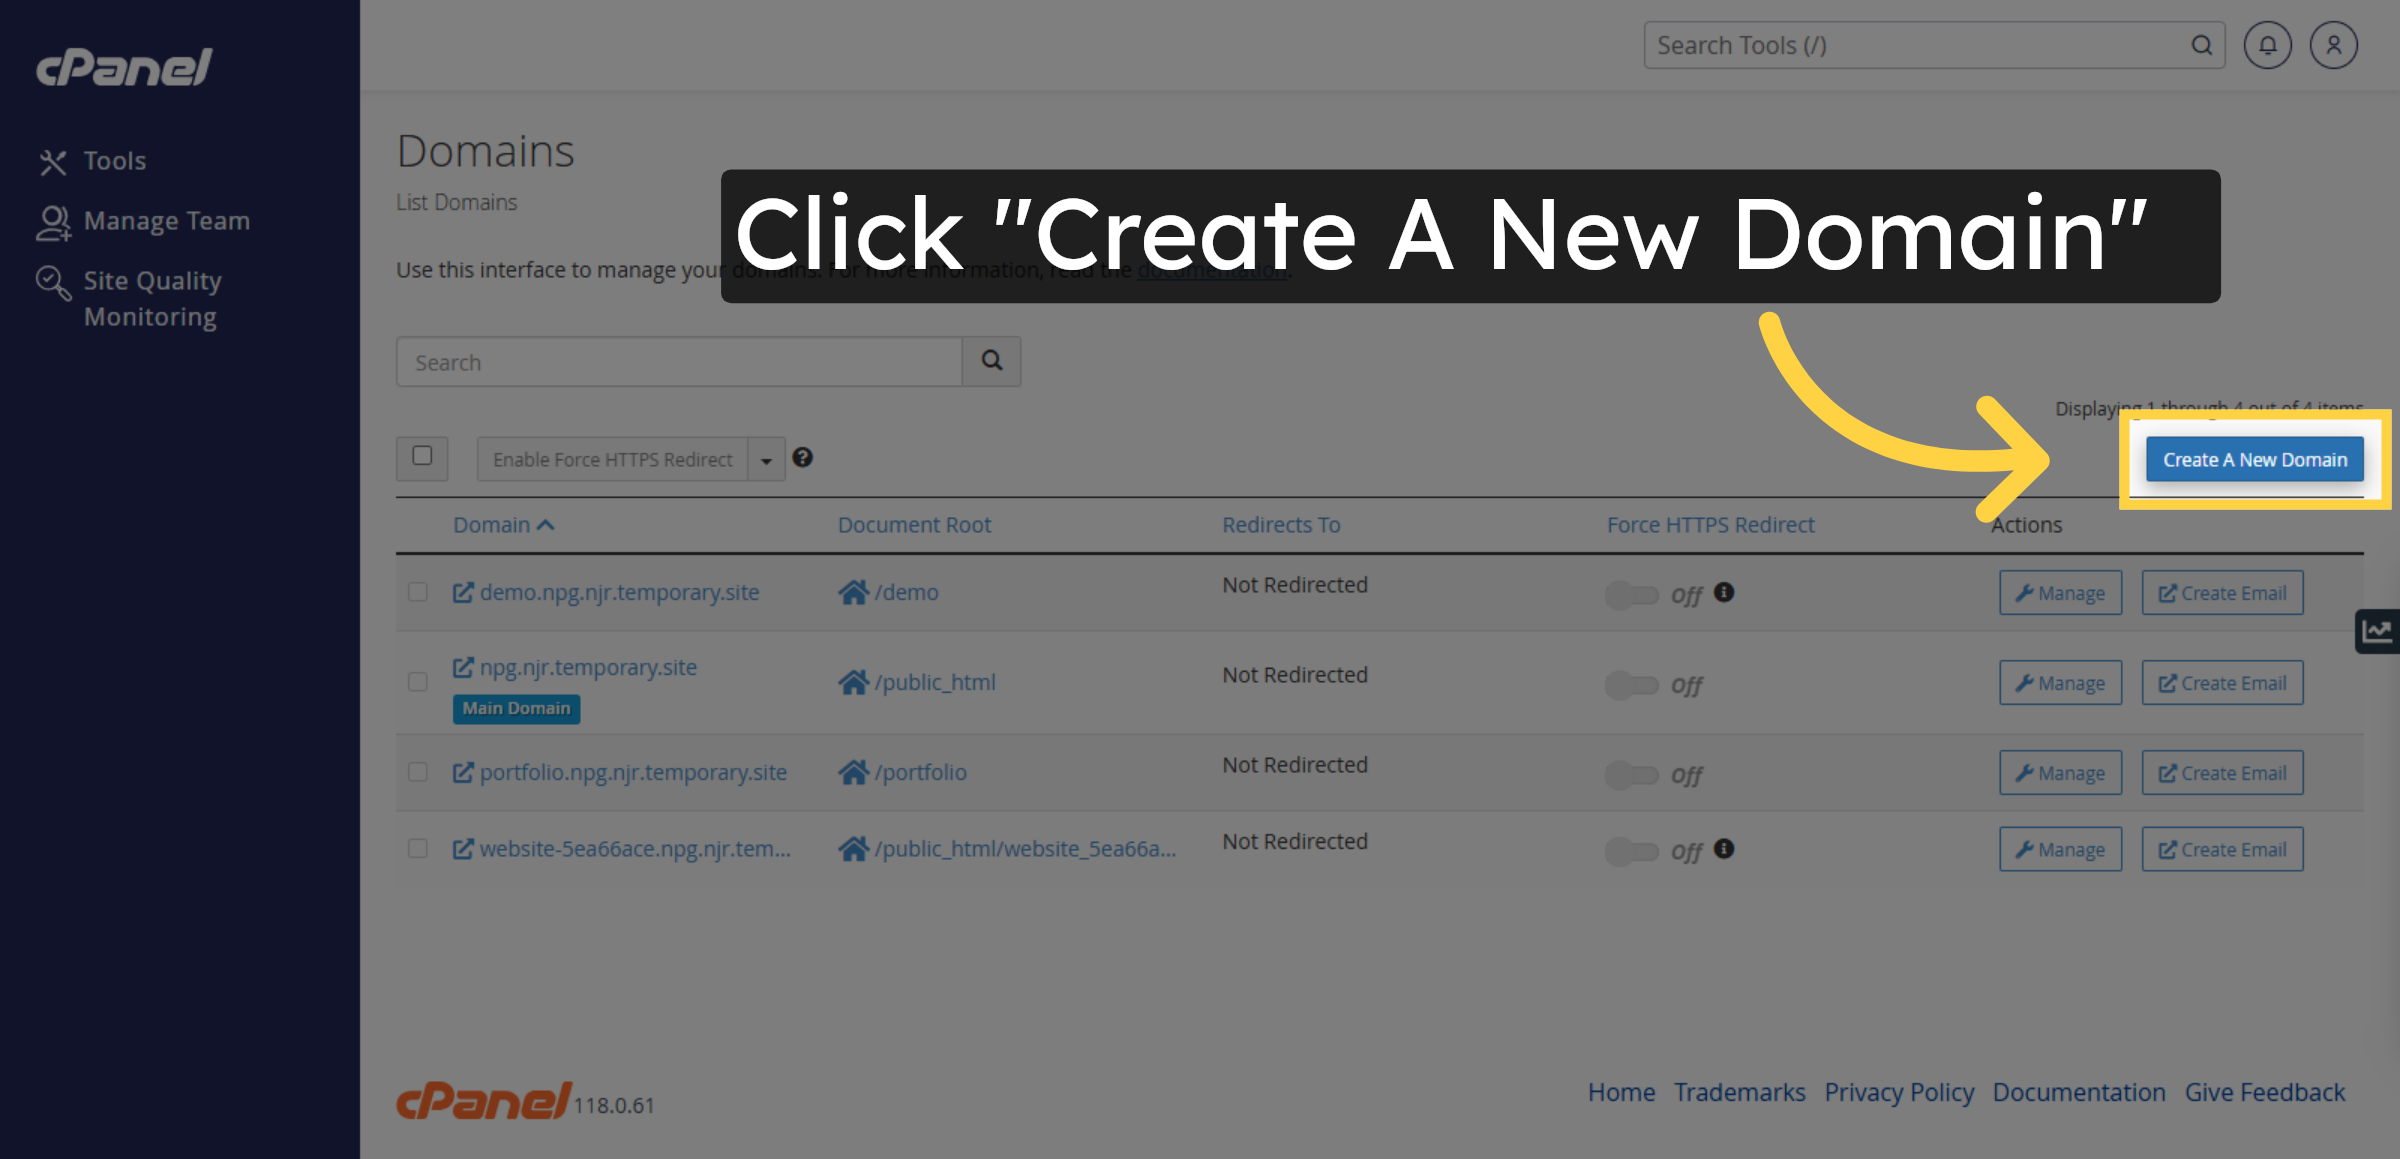
4. Navigate To Domains Section
5. Initiate New Domain Creation
6. Enter Subdomain Full Name
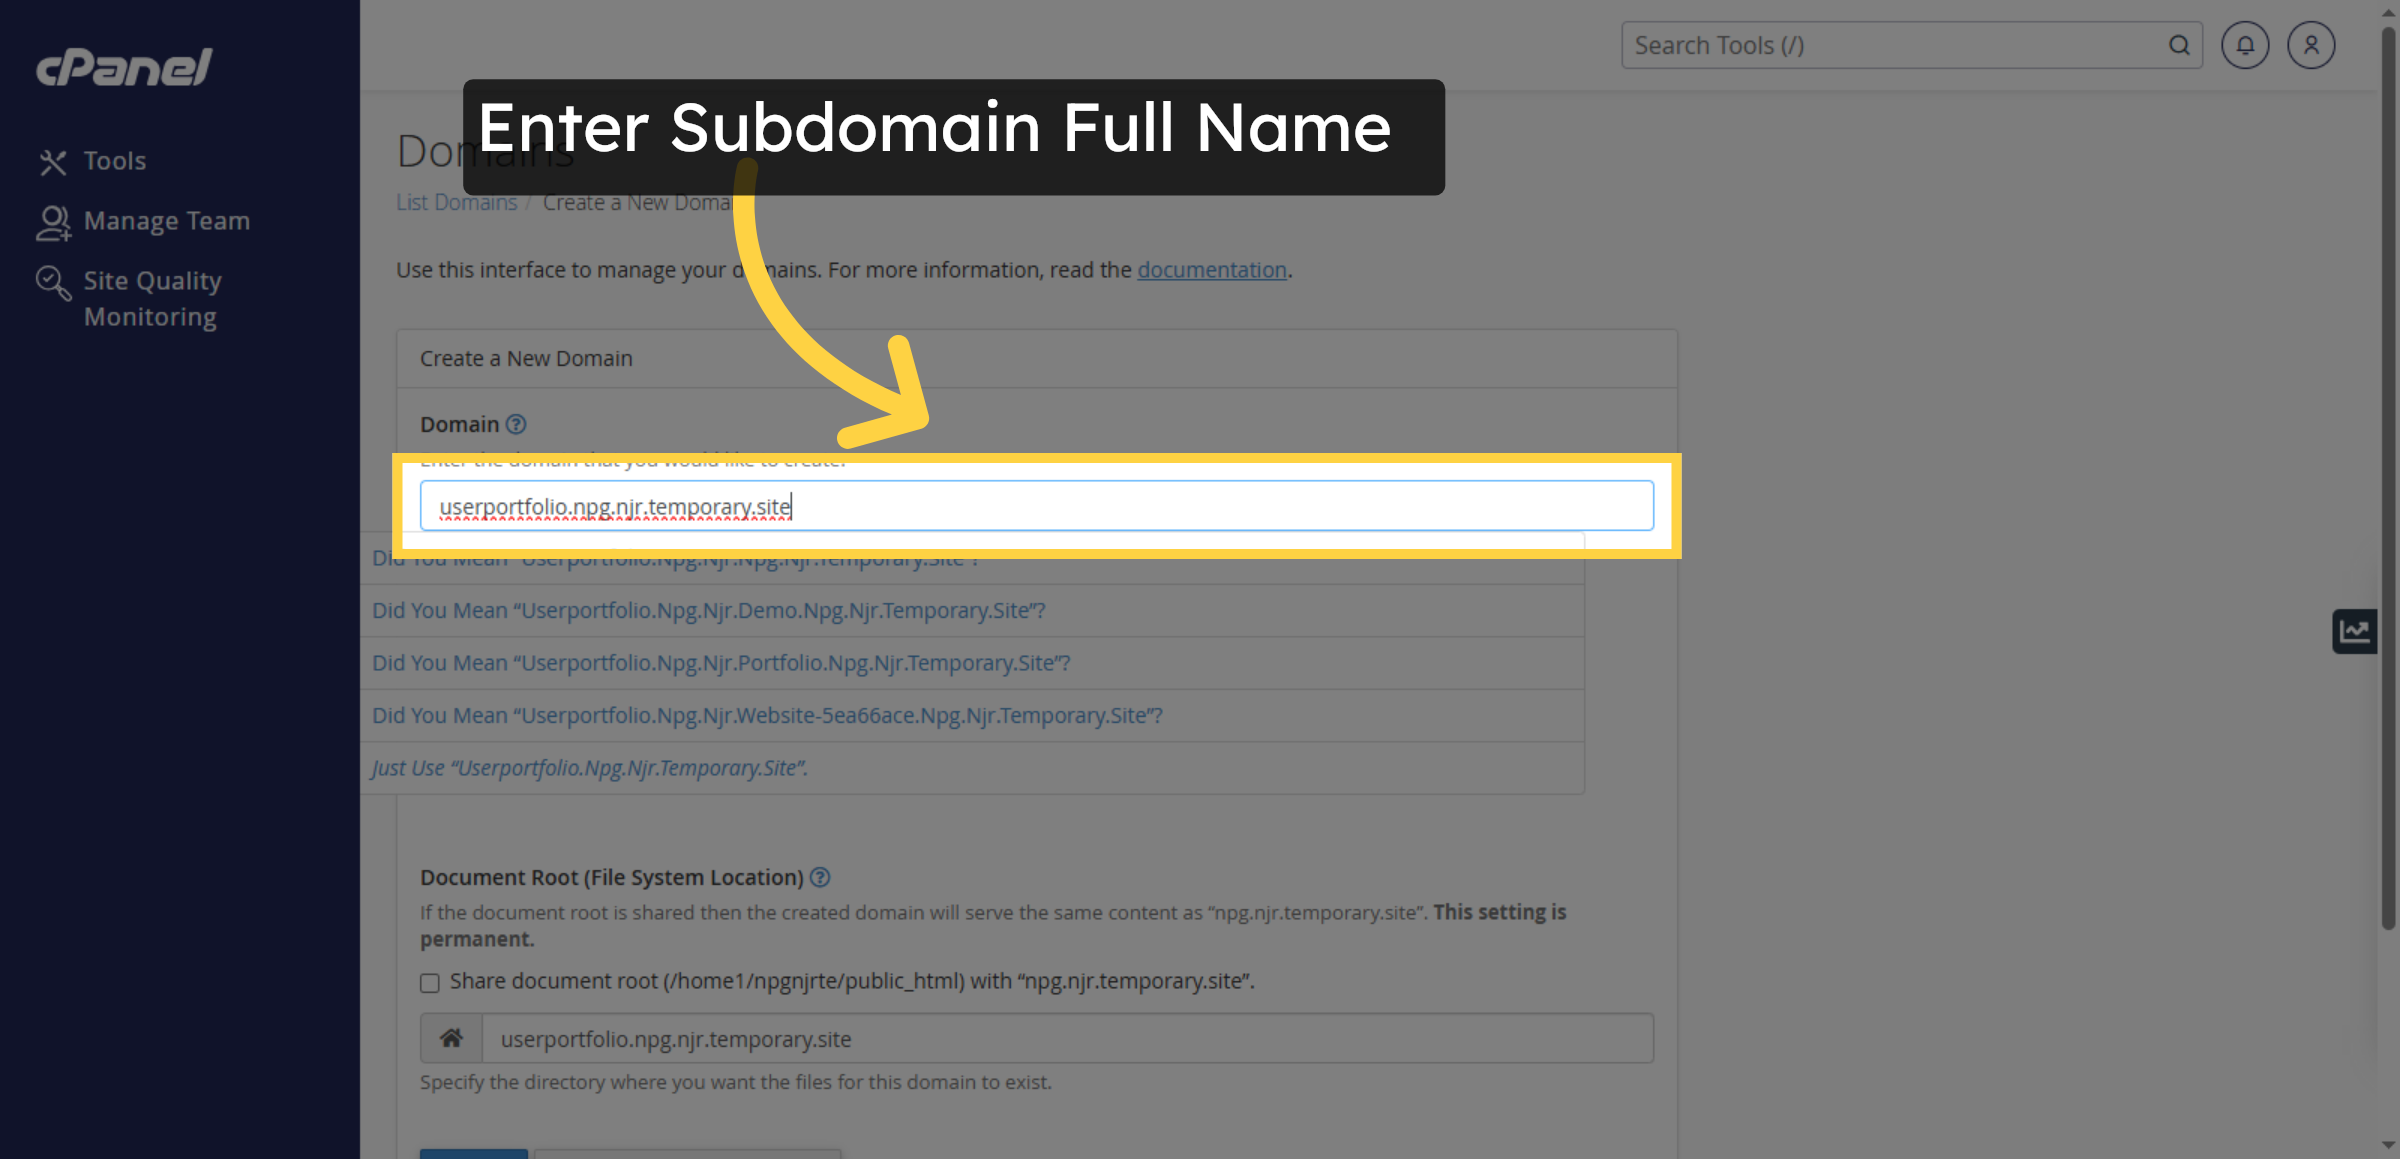
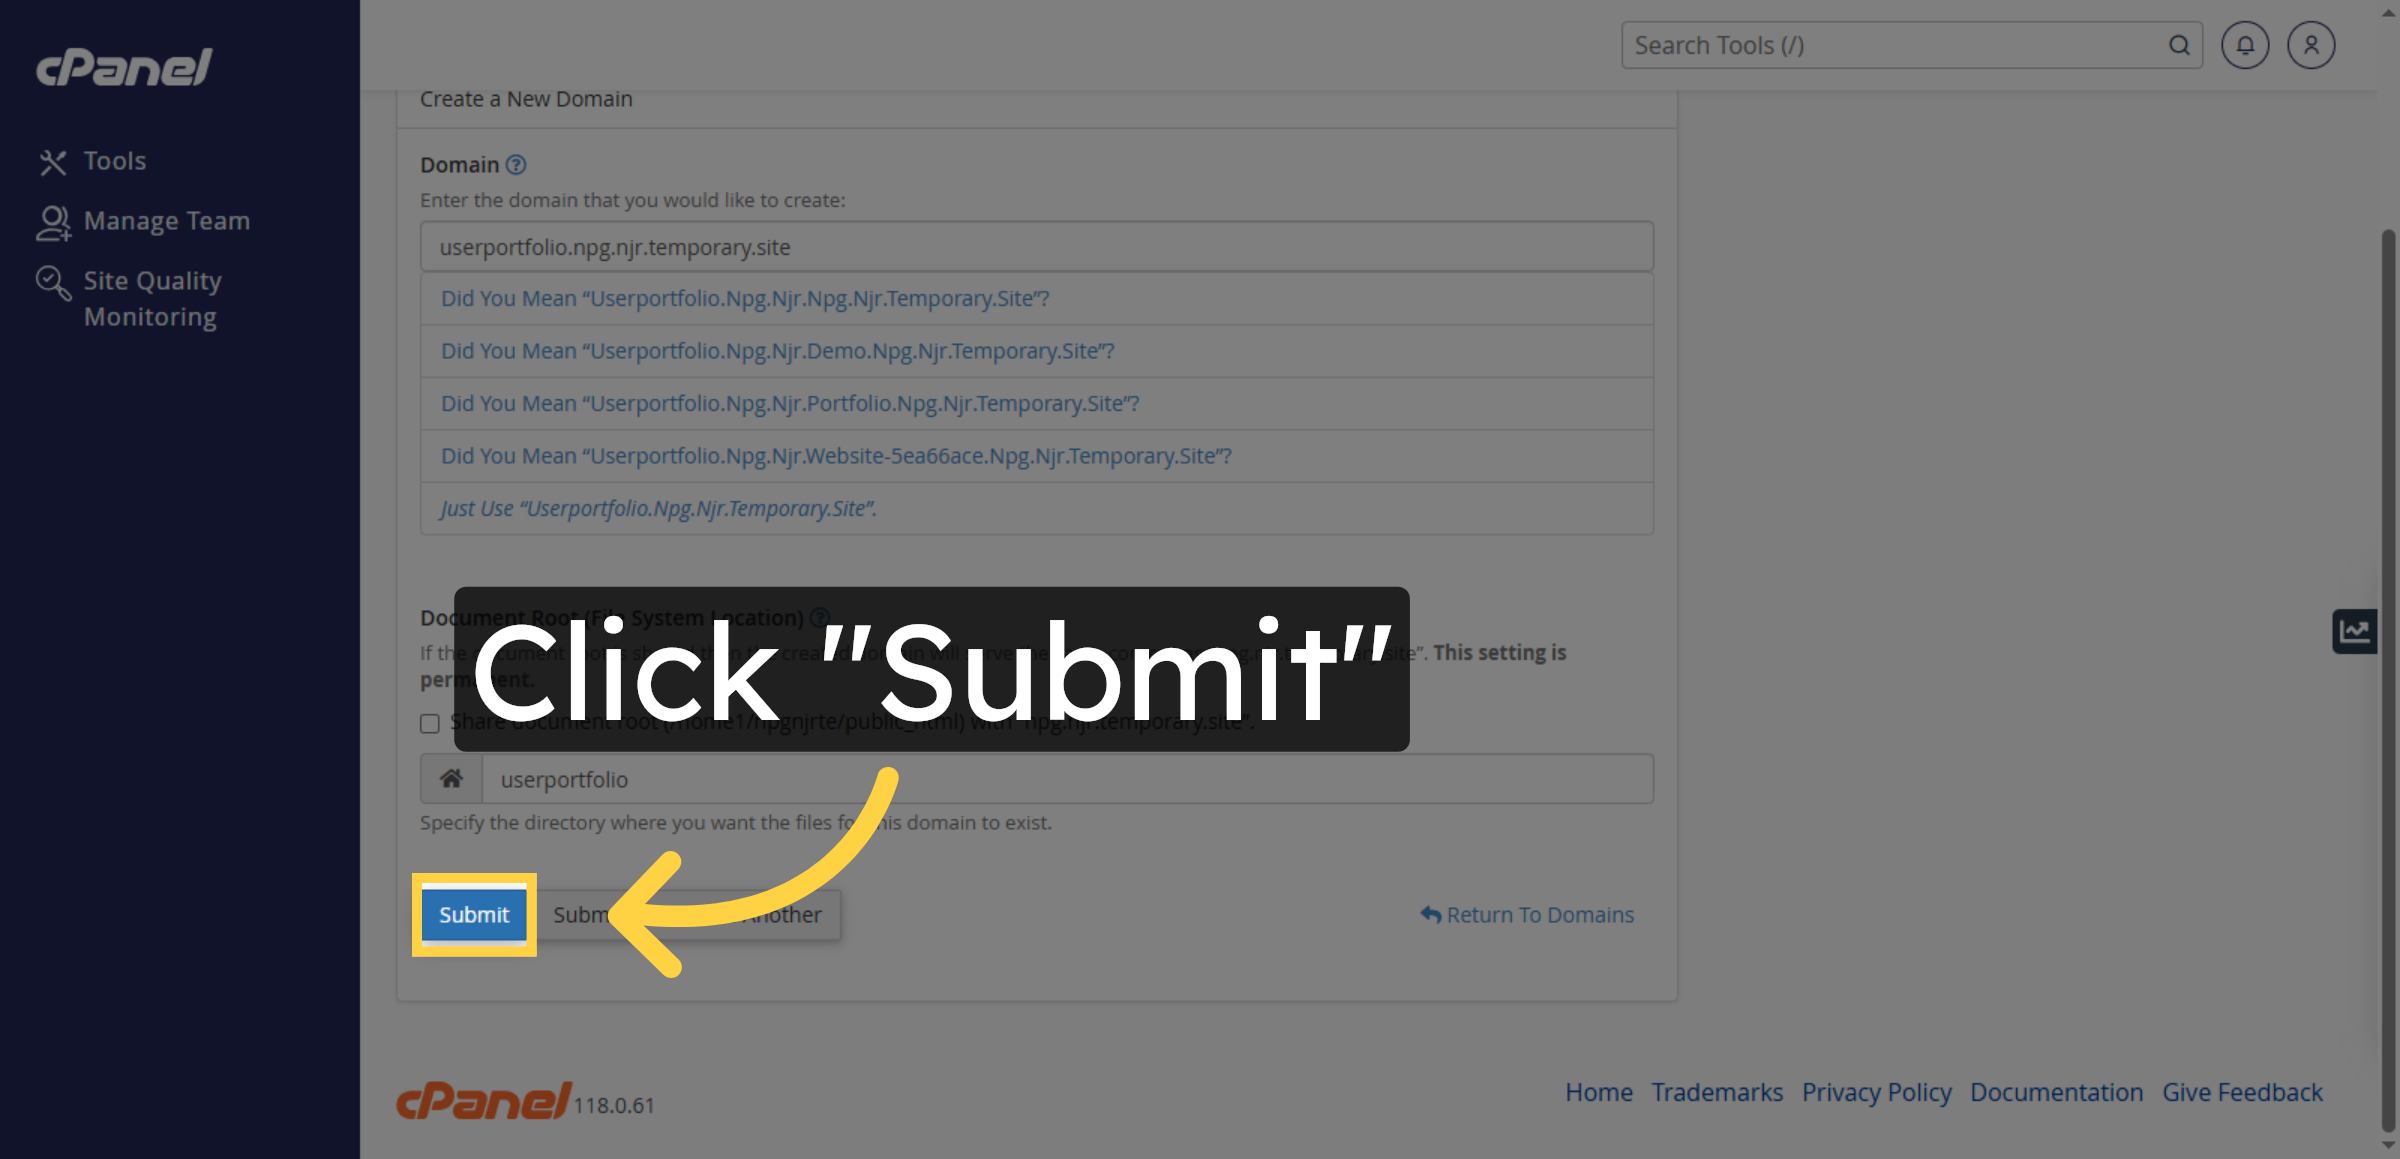
7. Enter Subdomain Directory

8. Submit Subdomain Creation
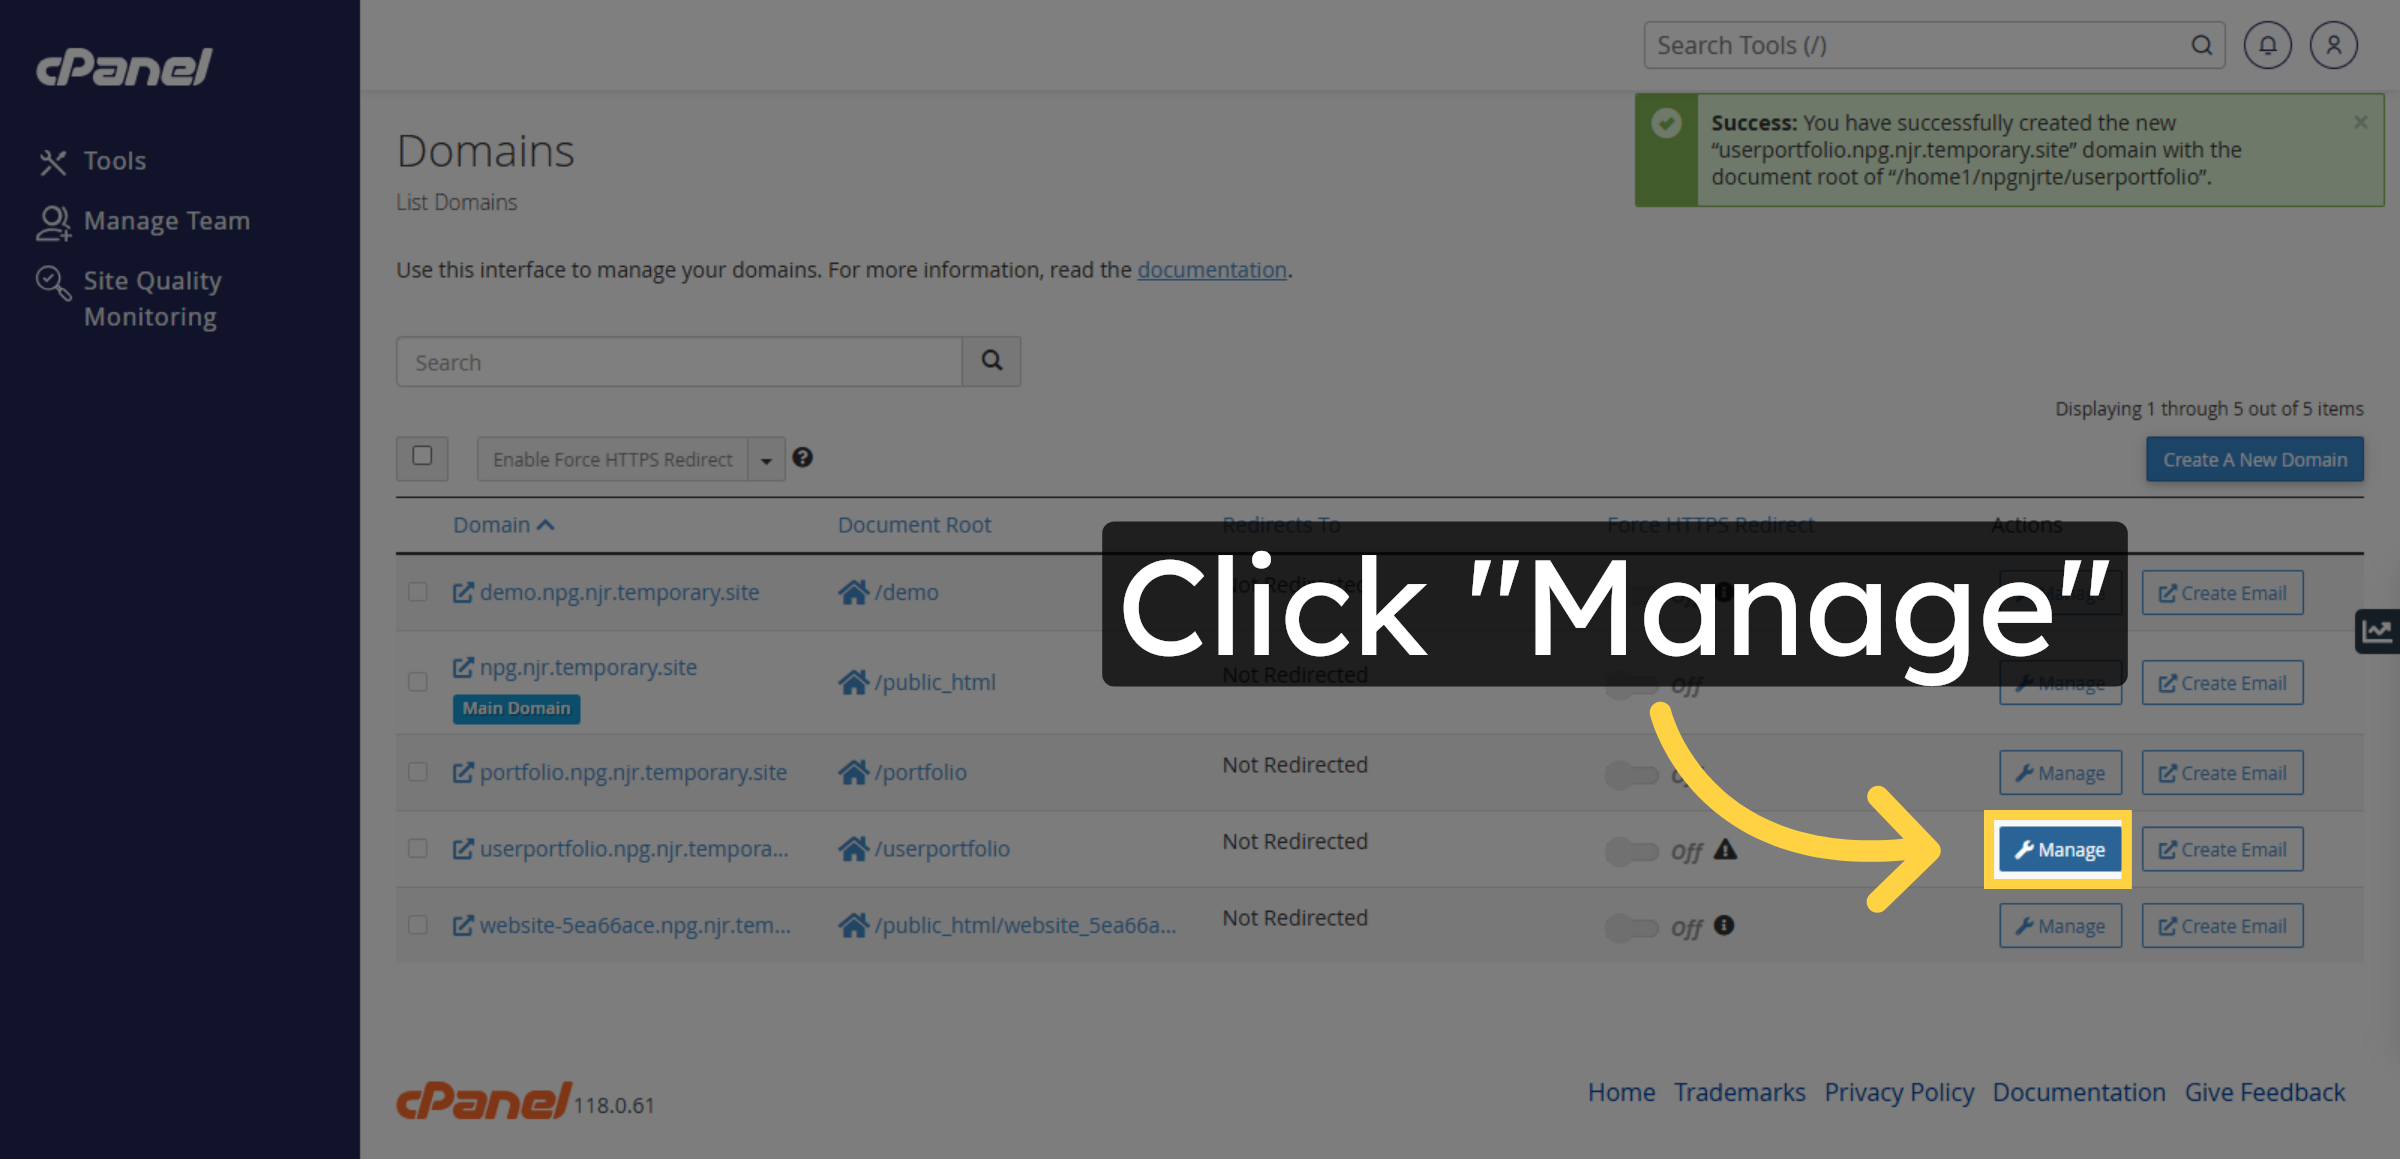
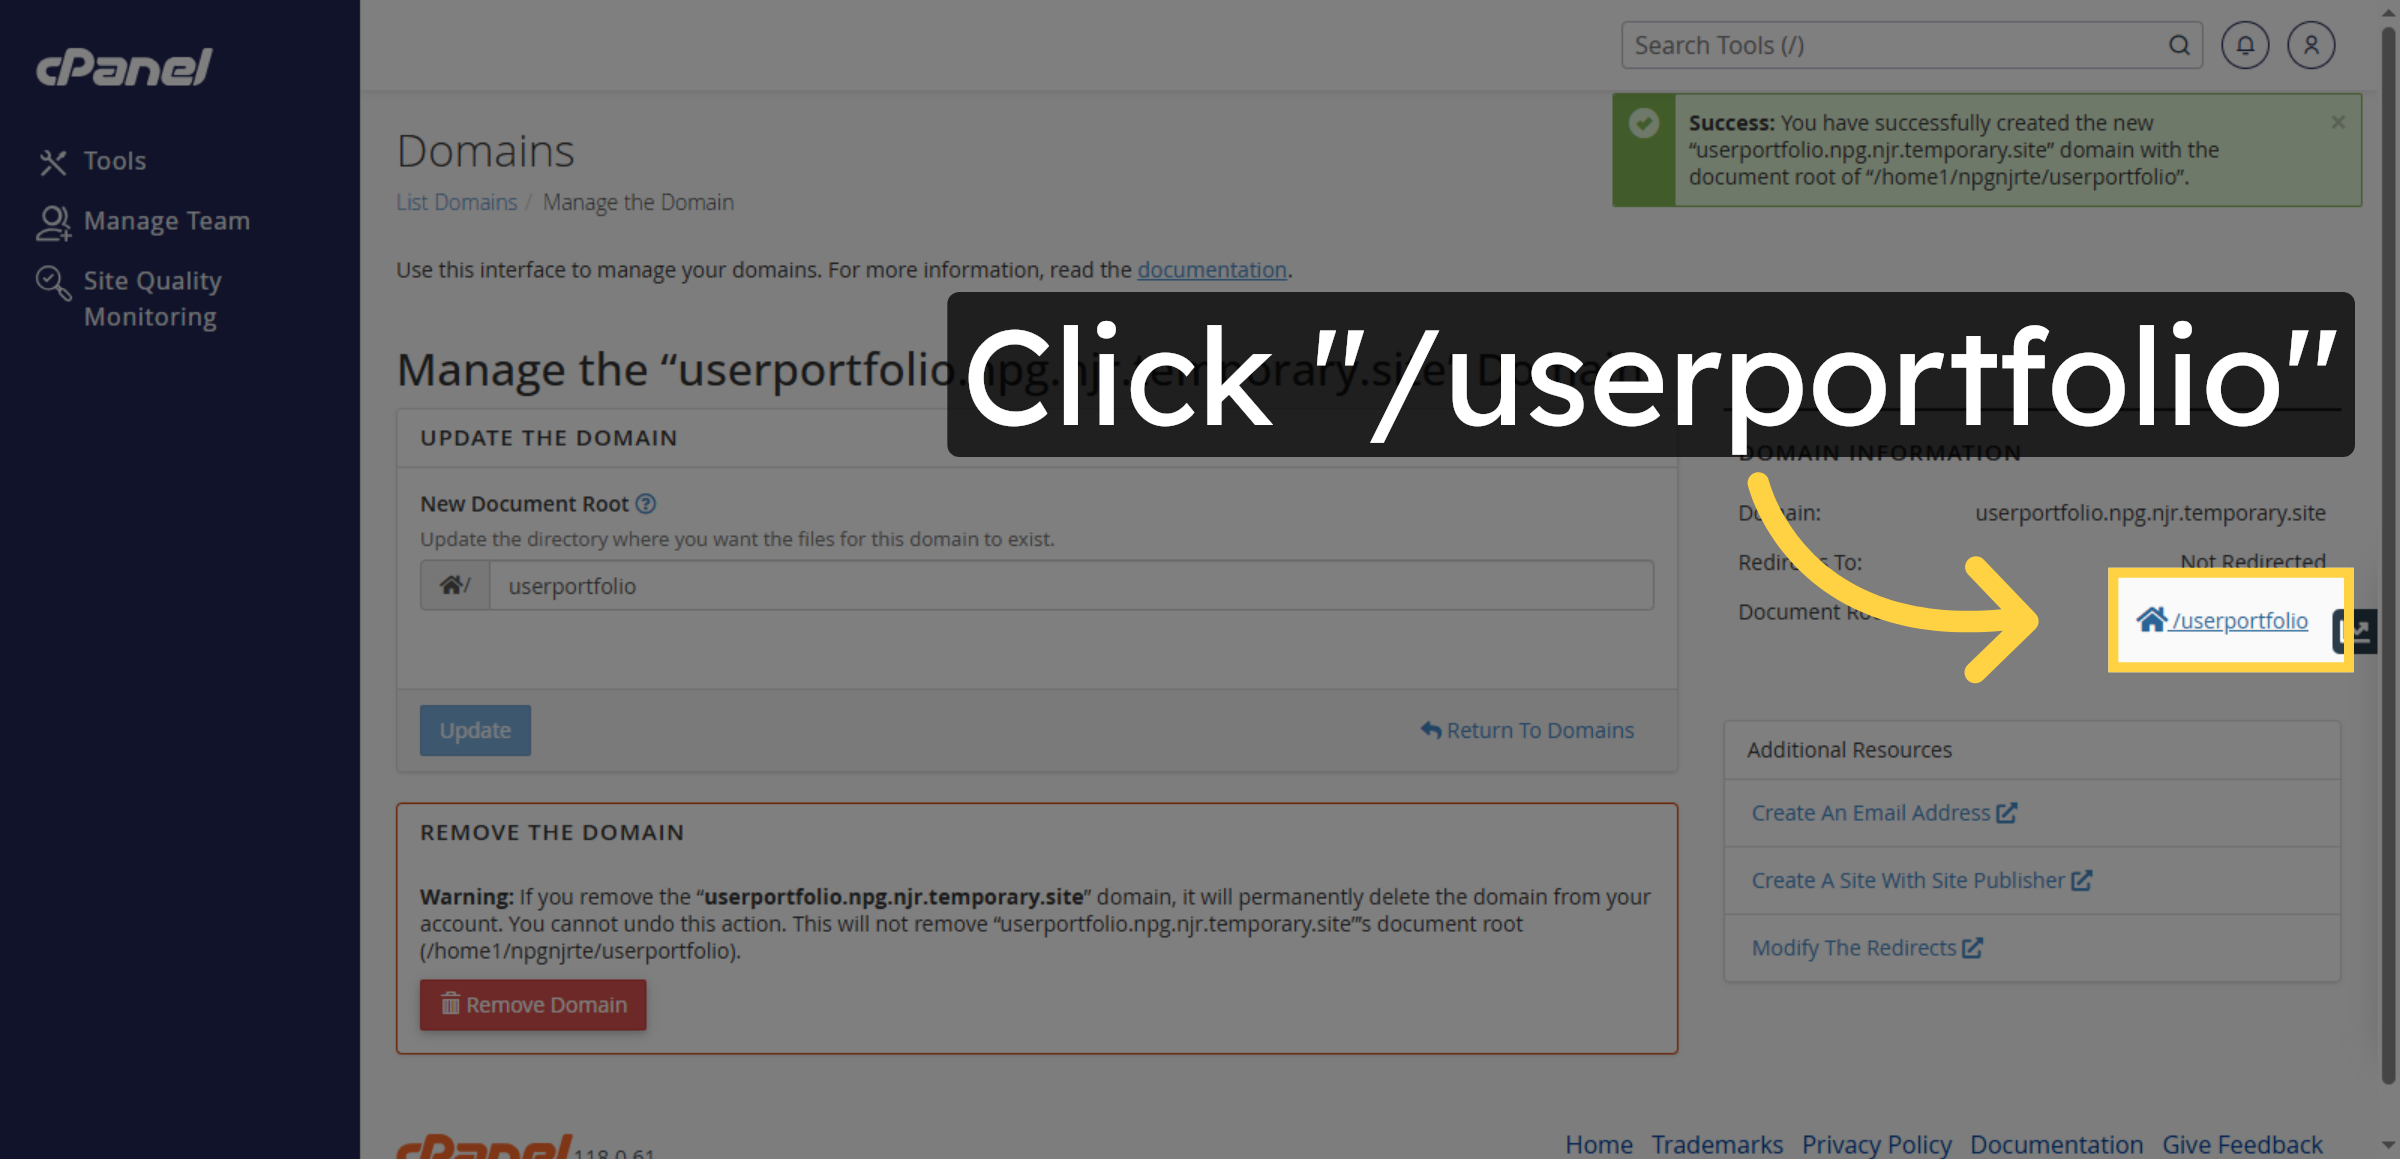
9. Open Subdomain Management
10. Access Subdomain Folder
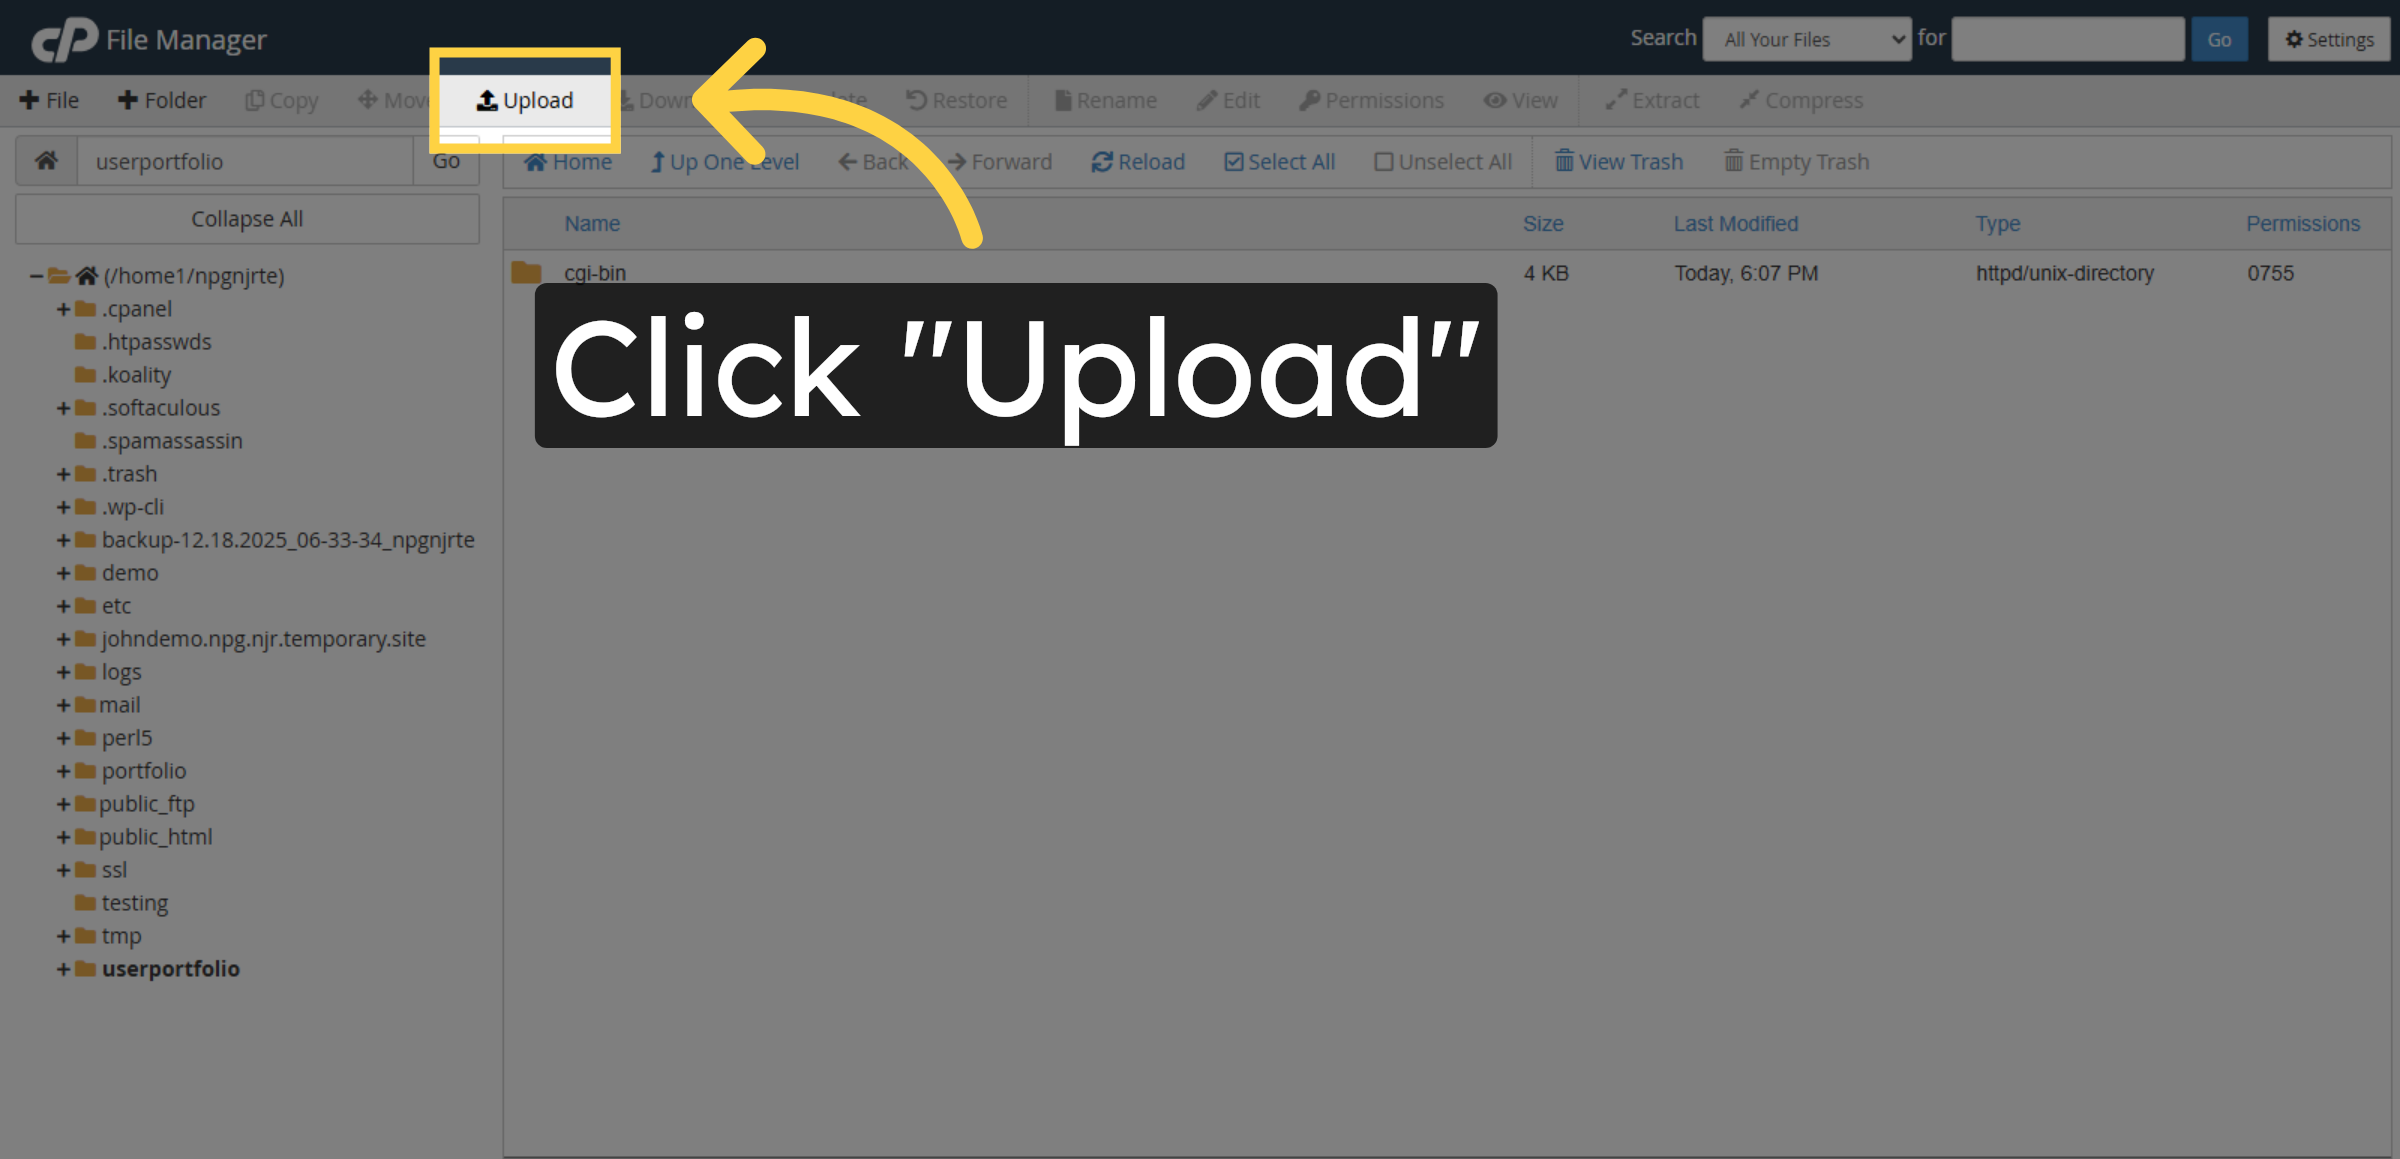
11. Open Upload Interface
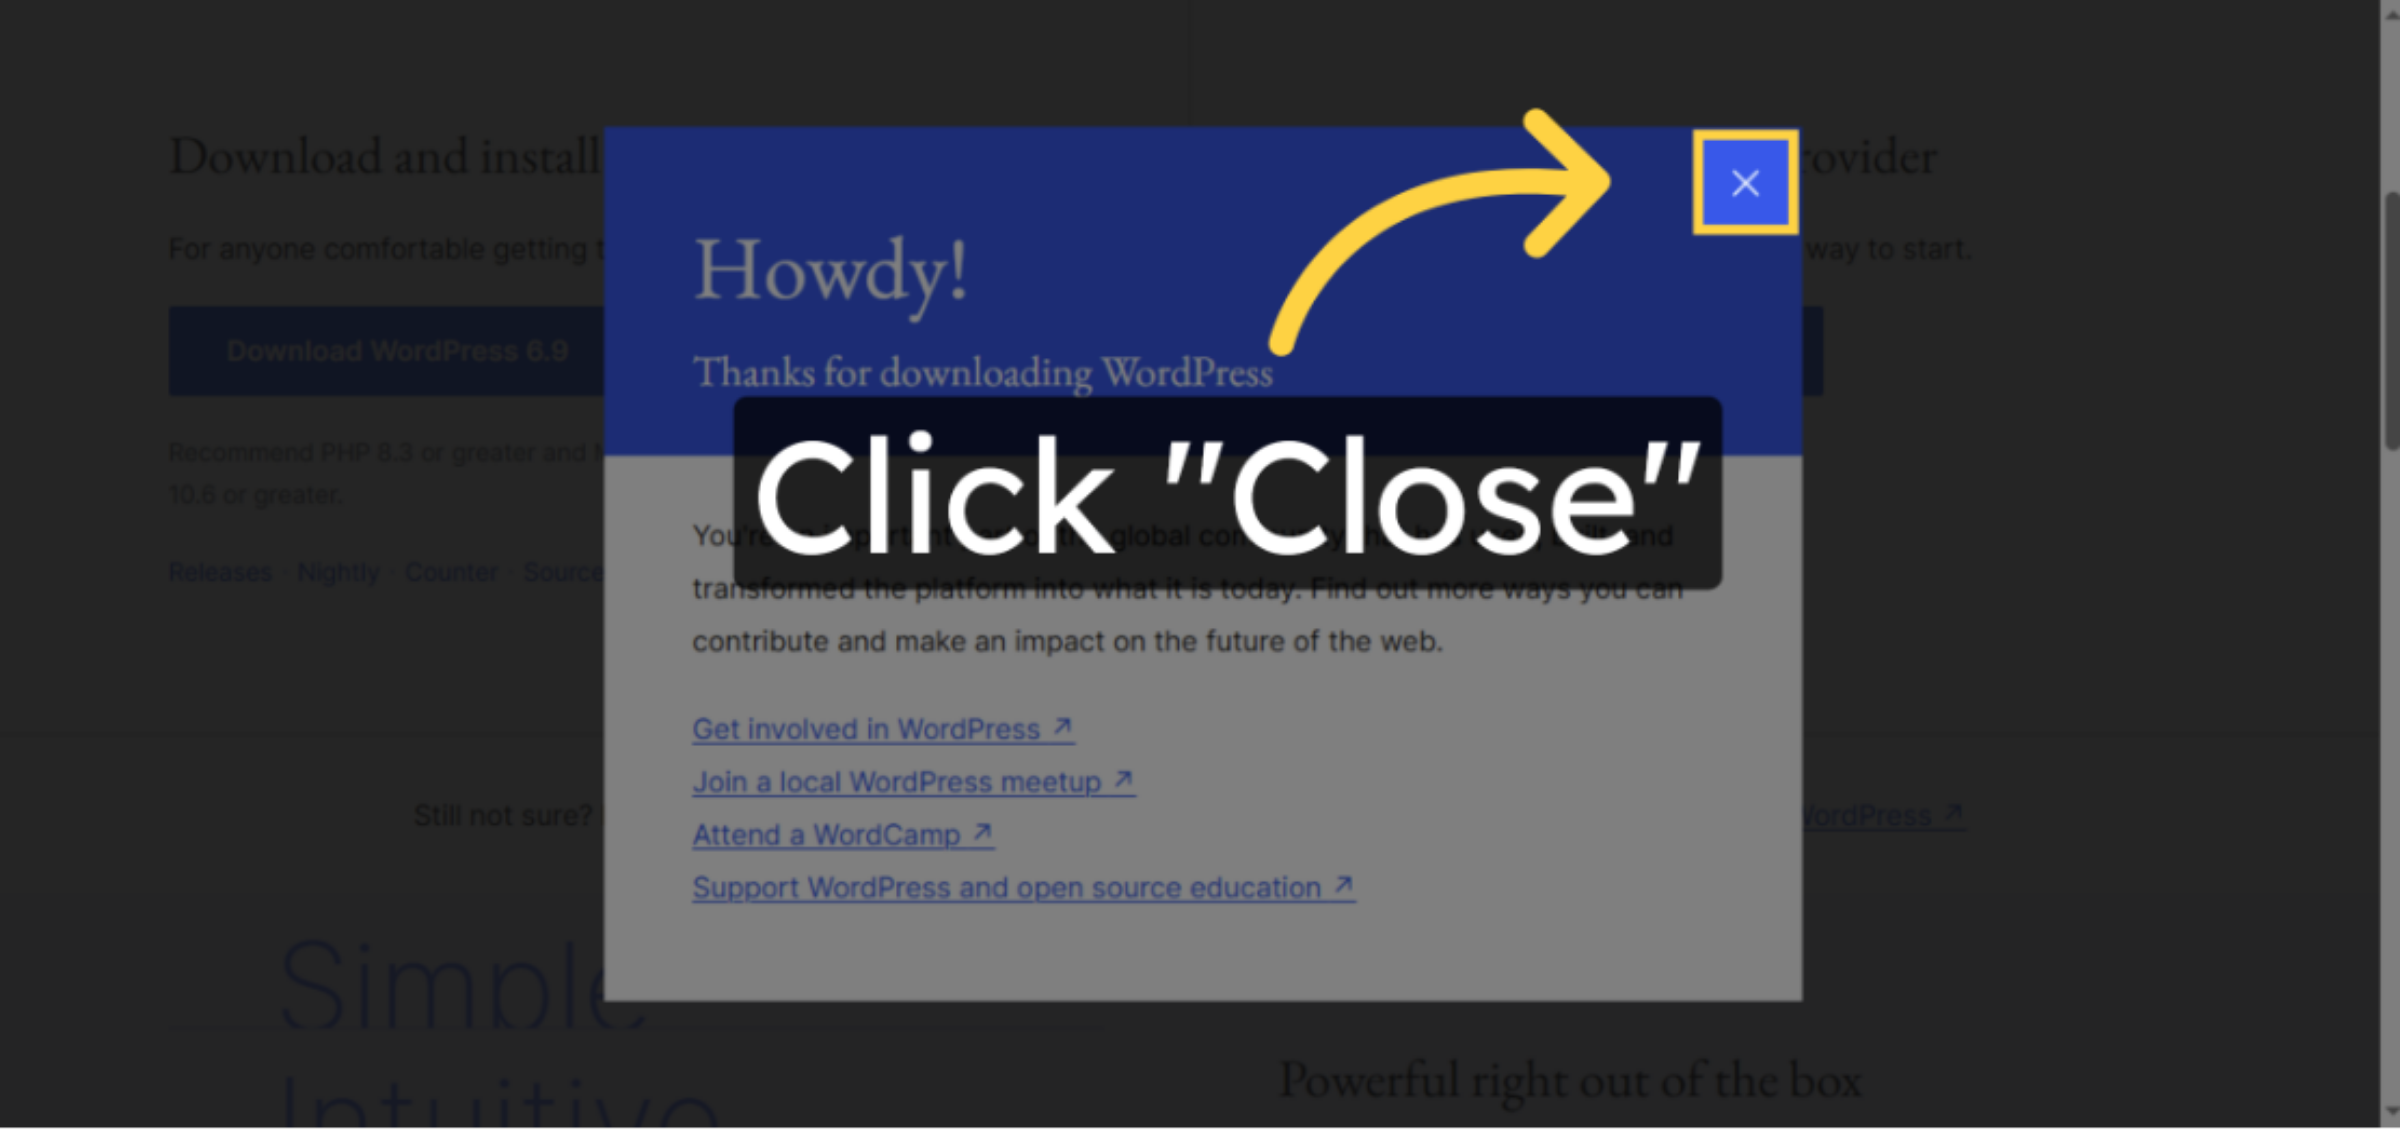
12. Download WordPress

13. Close the Popup Window
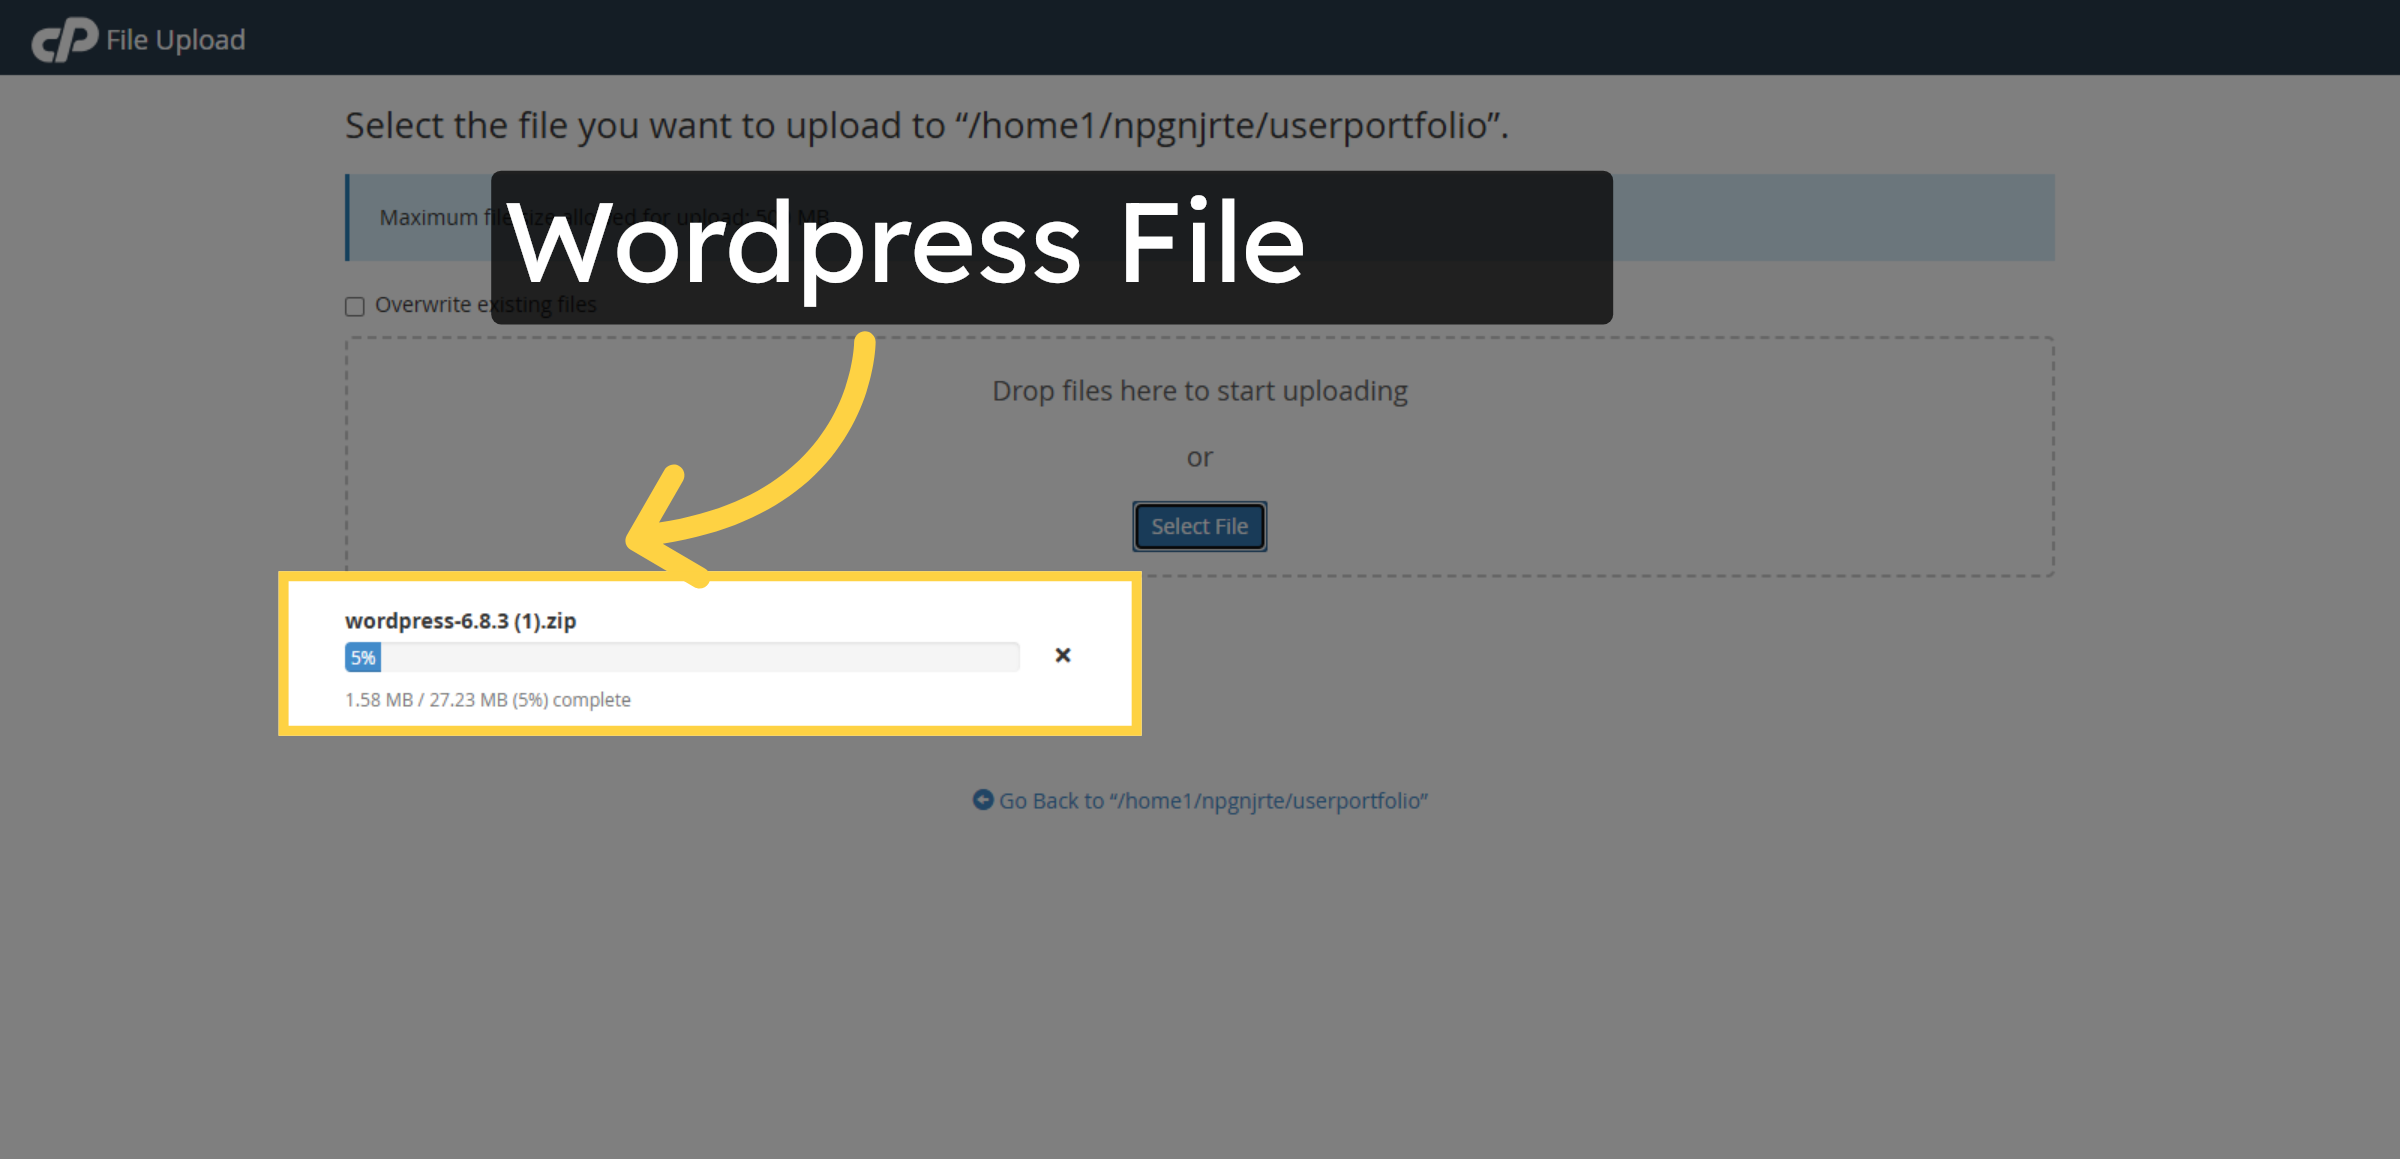
14. Select File To Upload

15. Choose WordPress Zip File
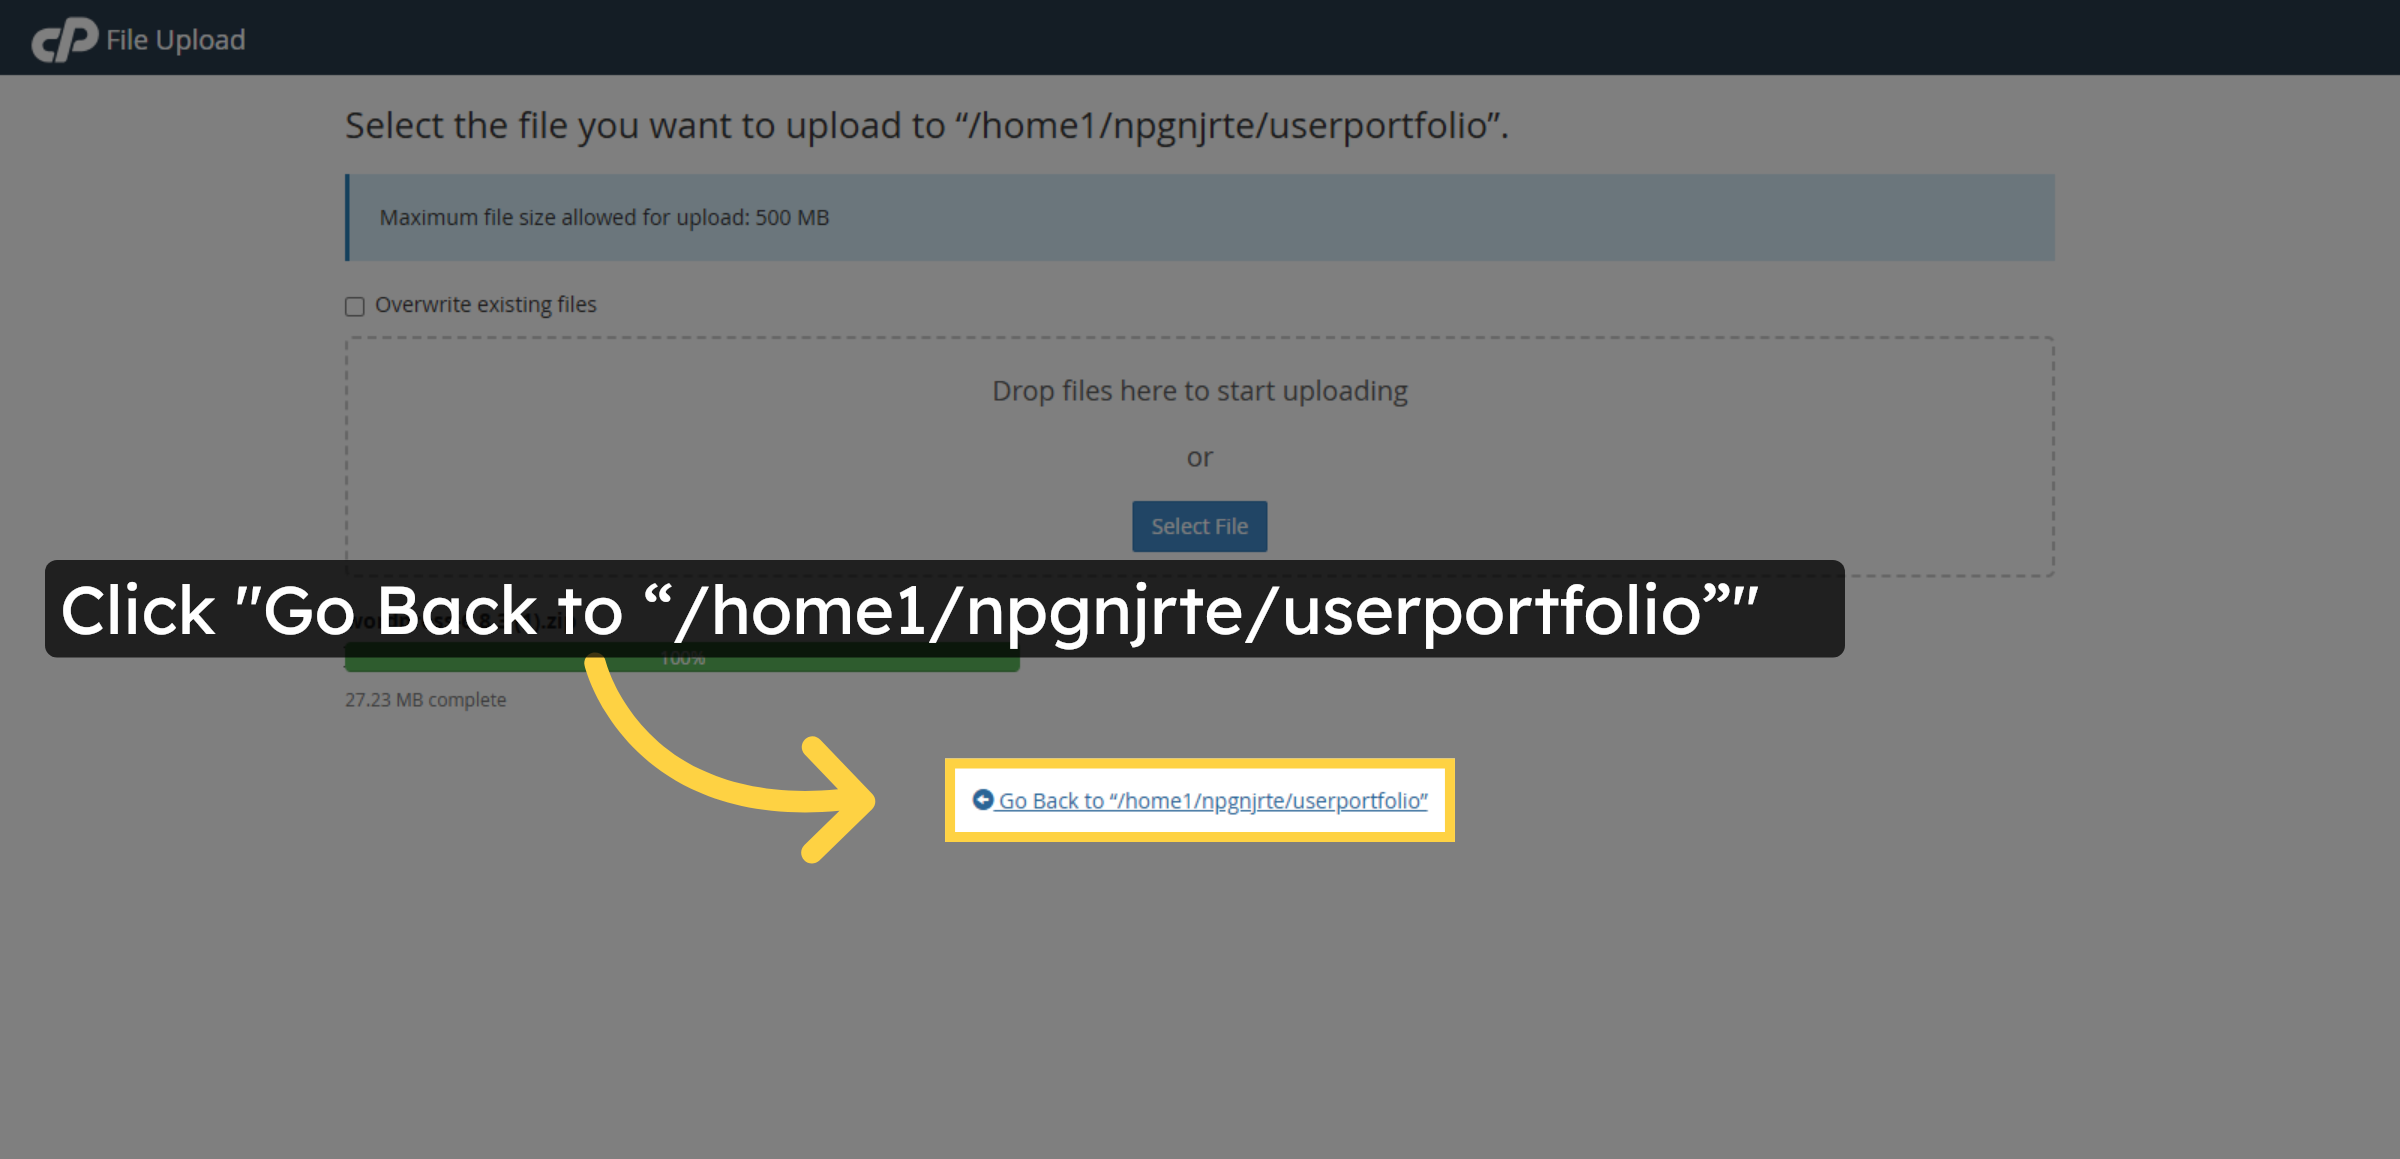
16. Return To Subdomain Directory
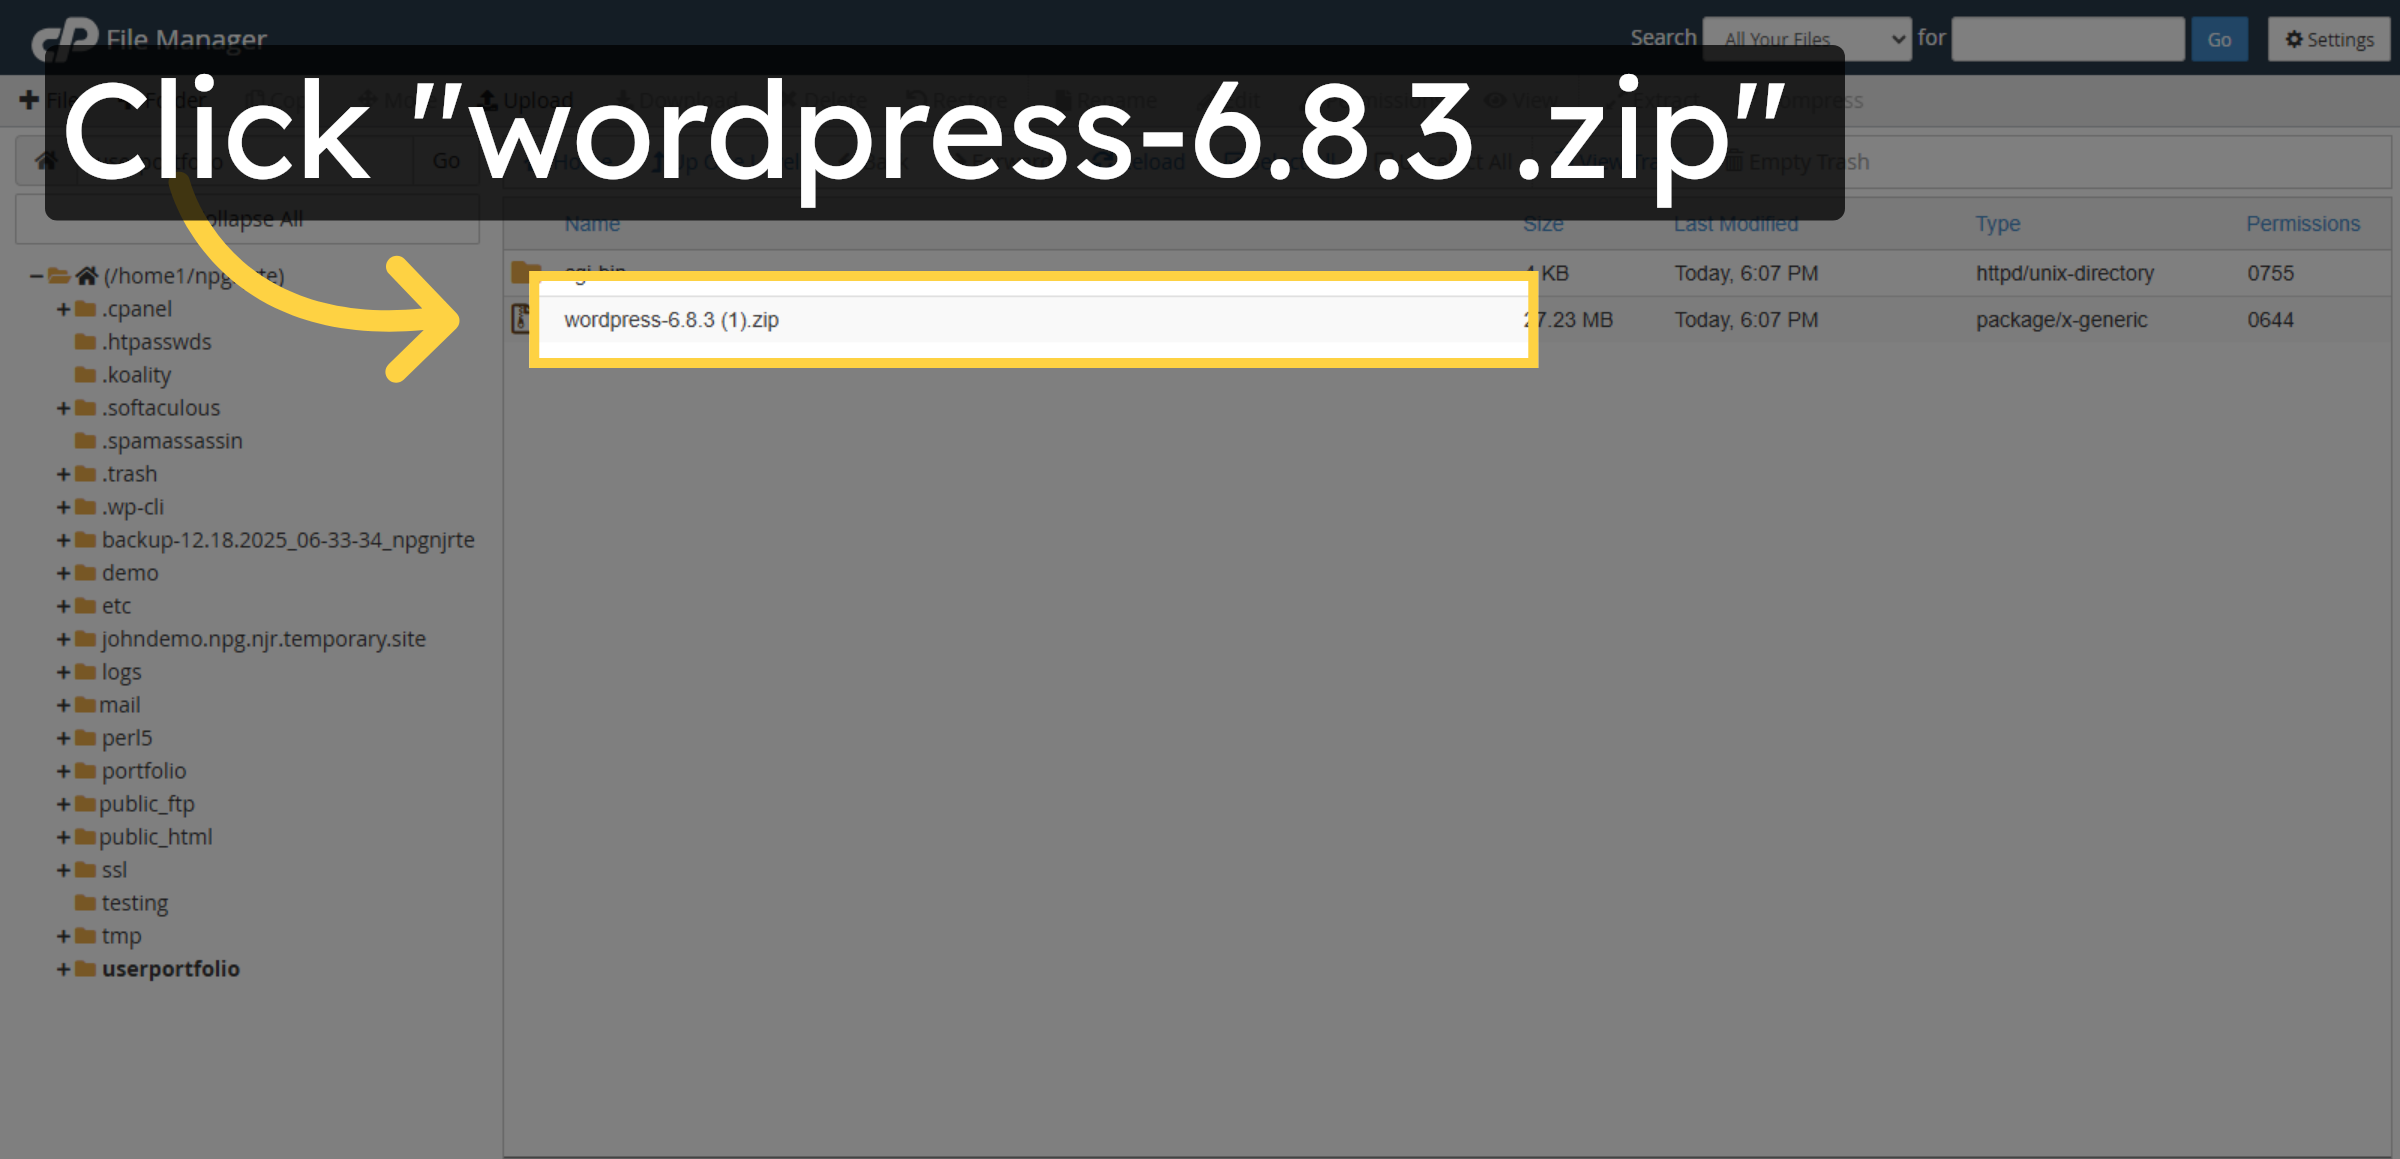
17. Select WordPress Zip File
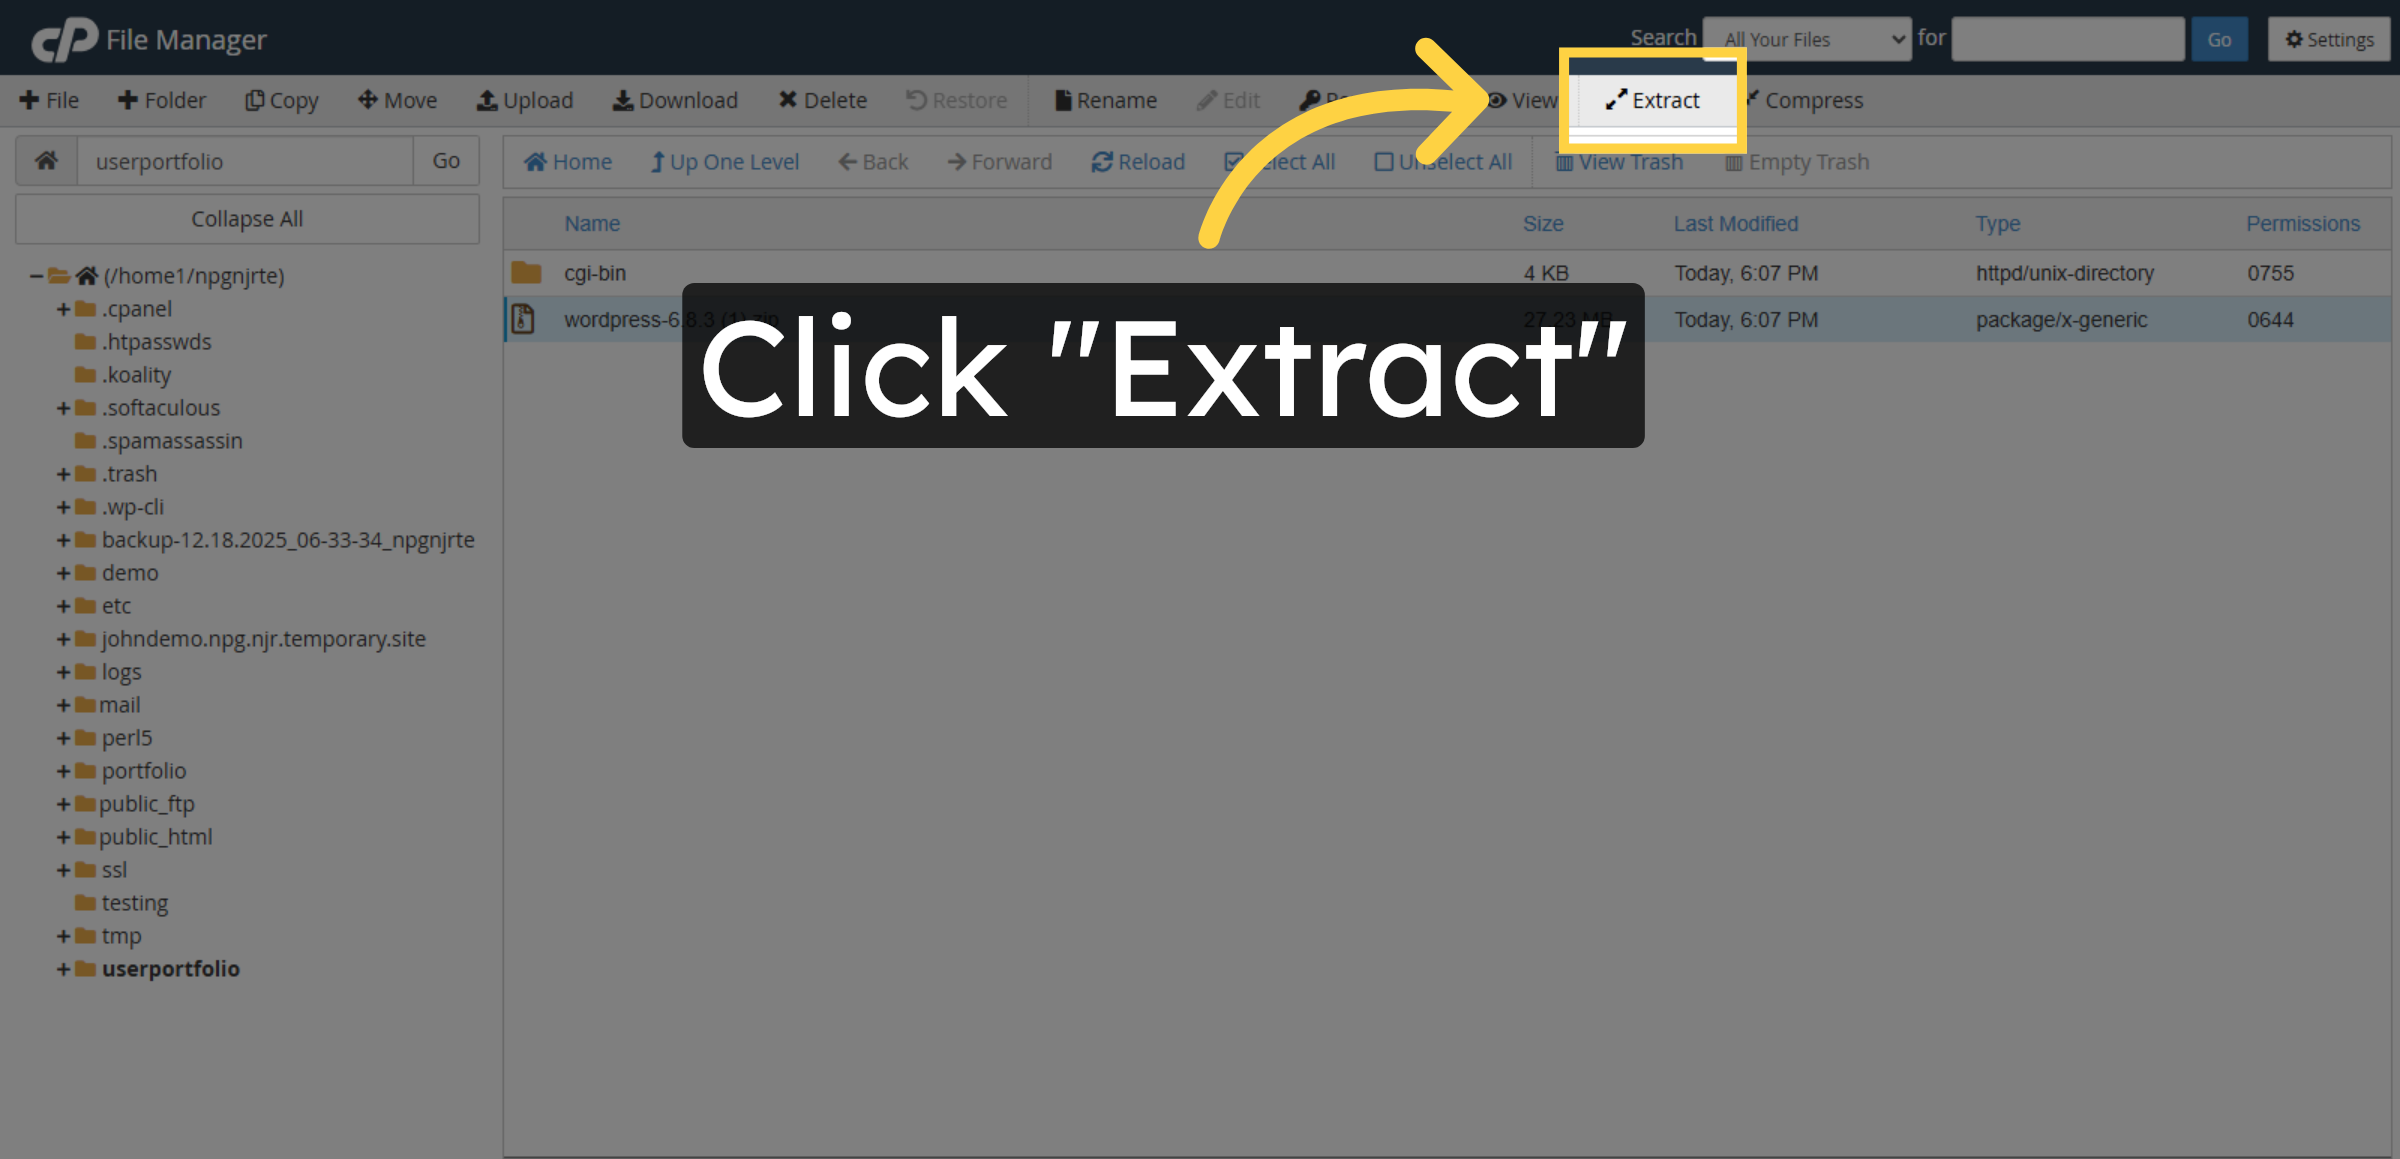
18. Extract WordPress Files
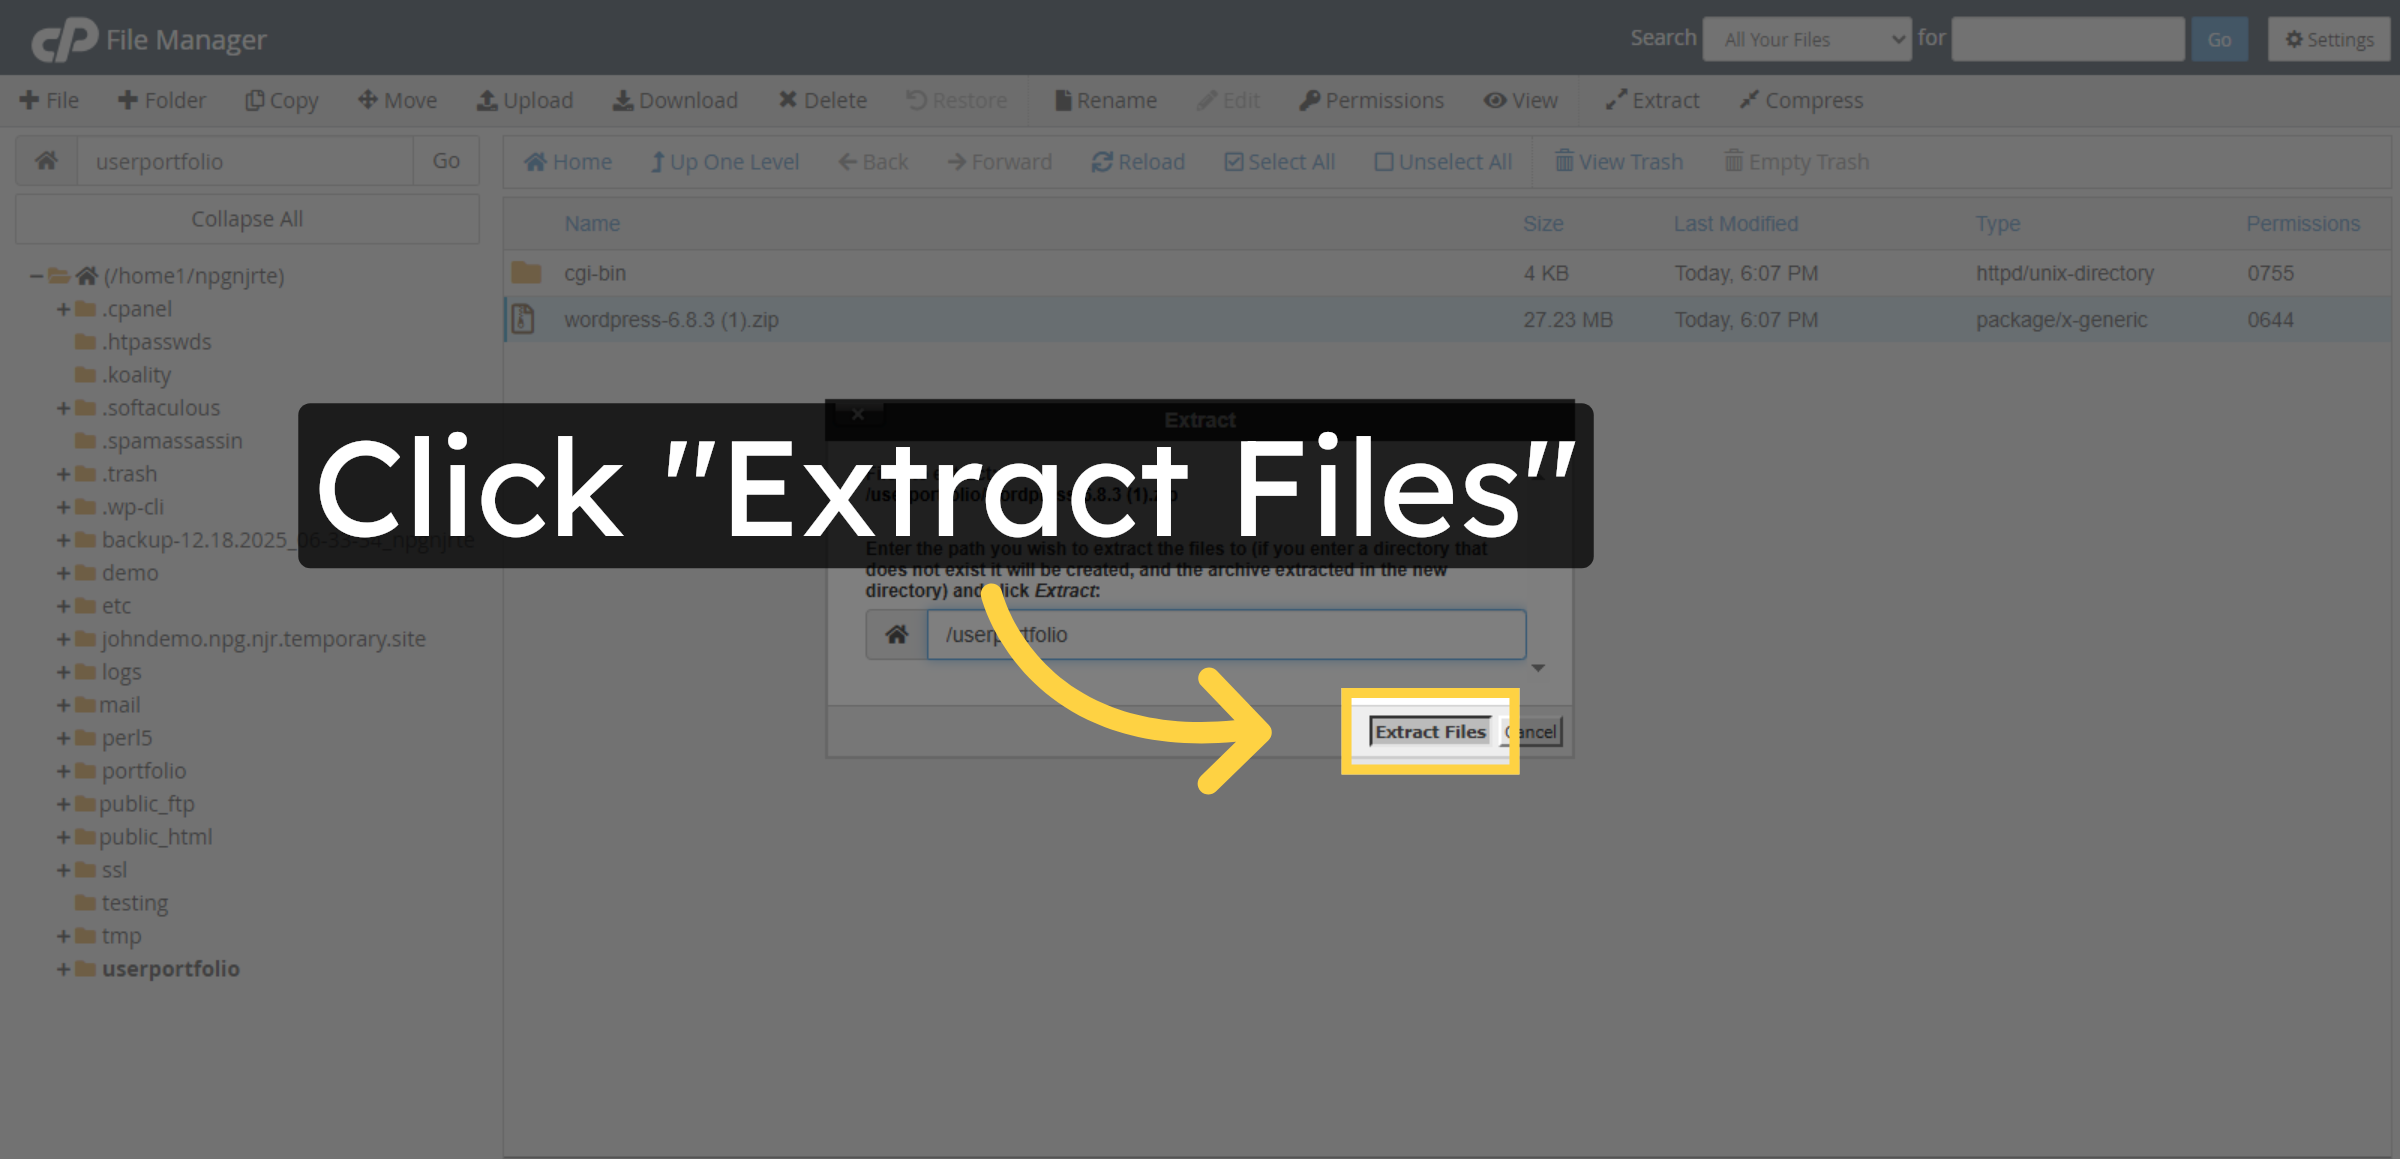
19. Confirm Extraction
20. Close Extraction Window

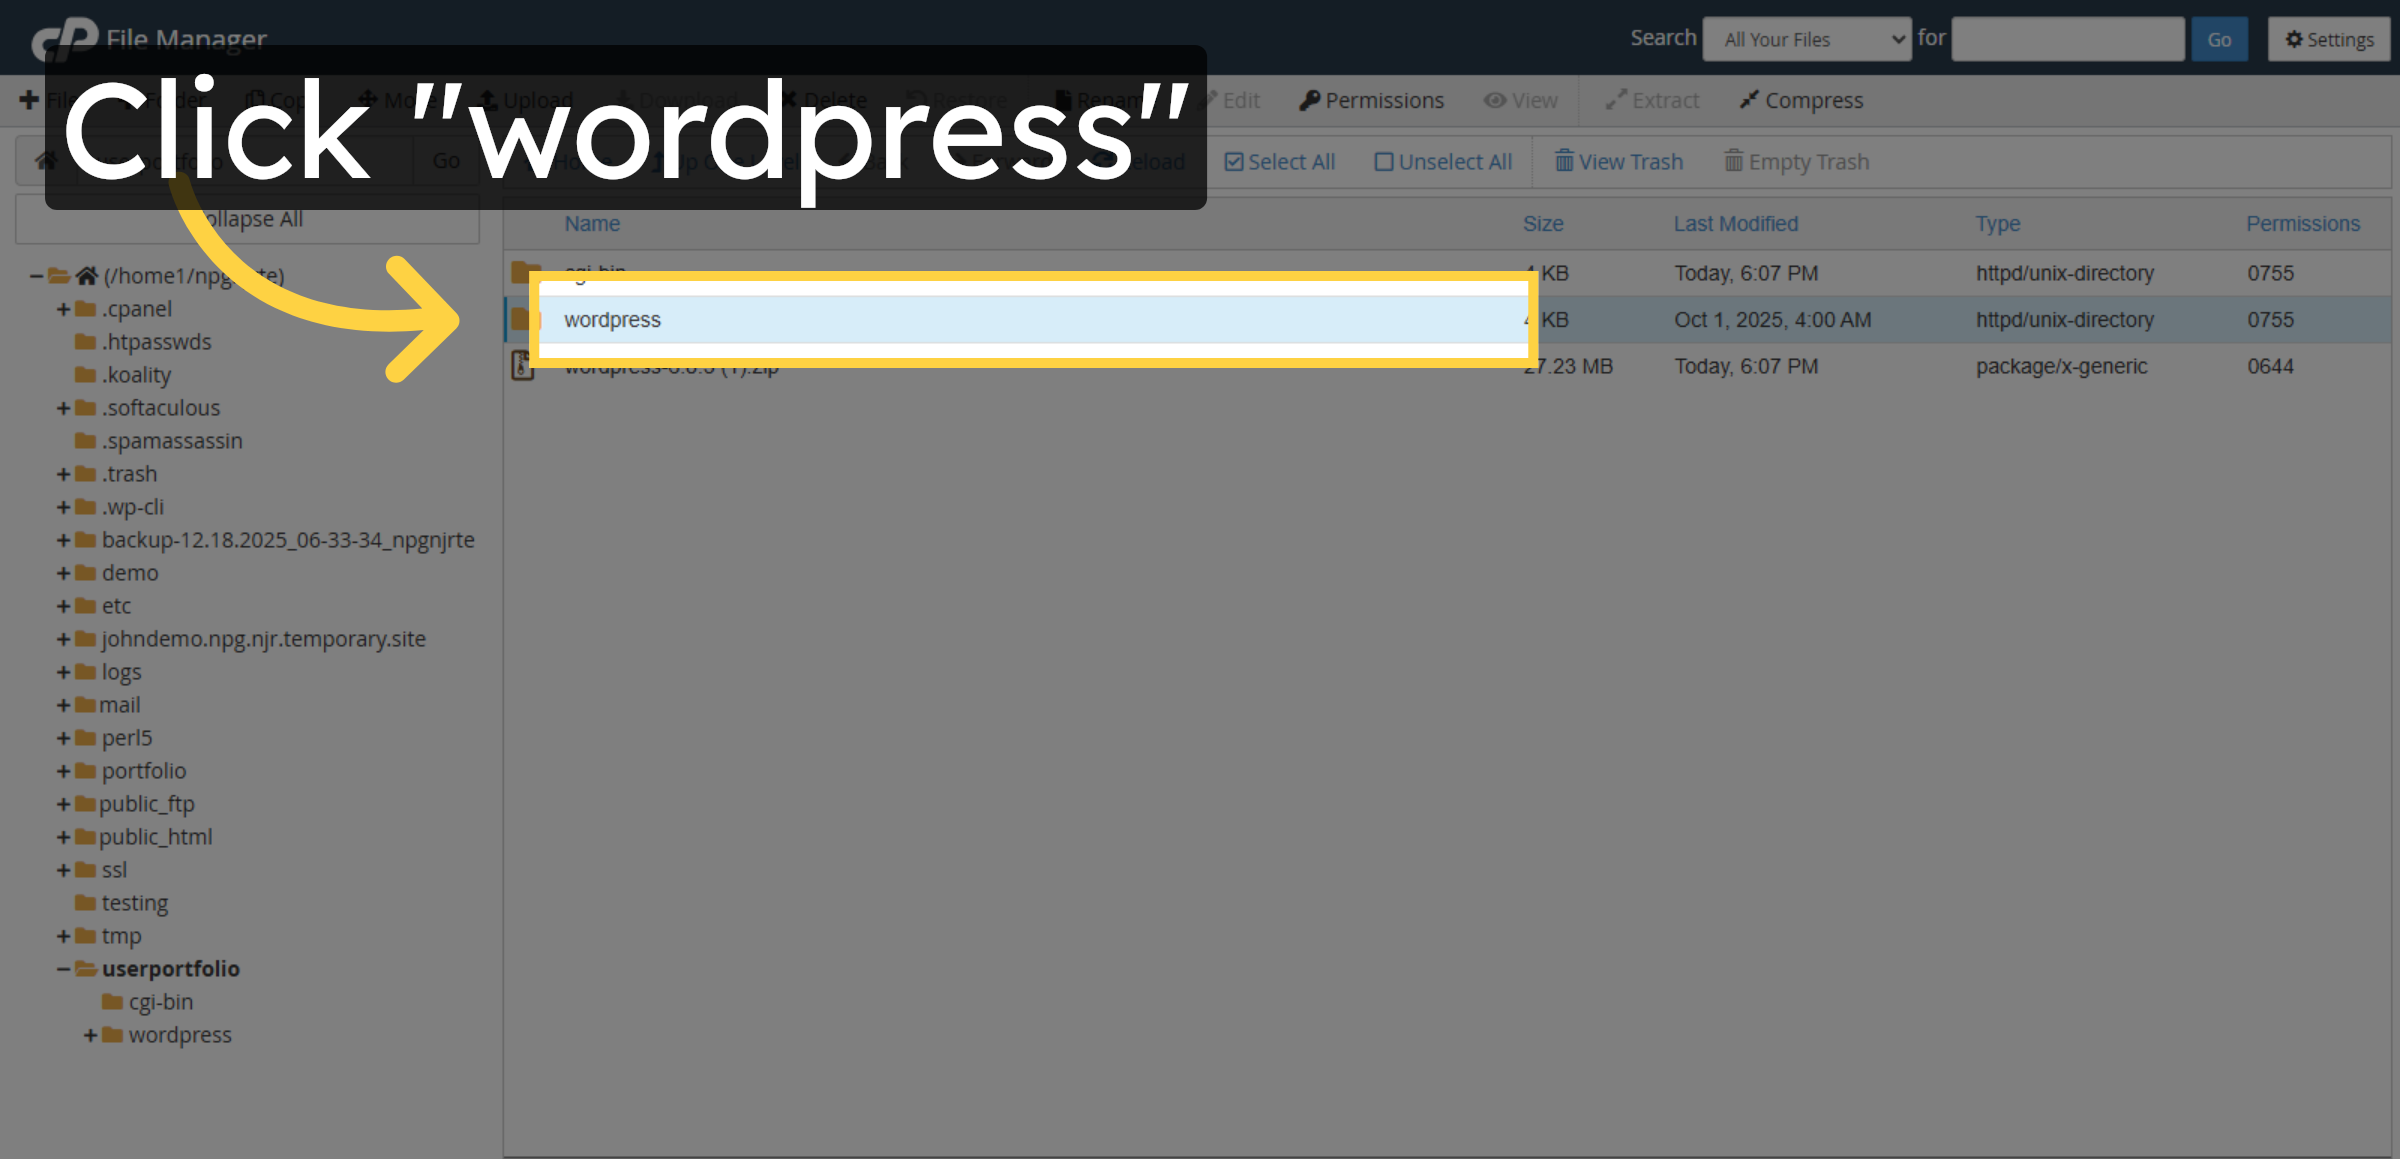
21. Open Inner WordPress Folder
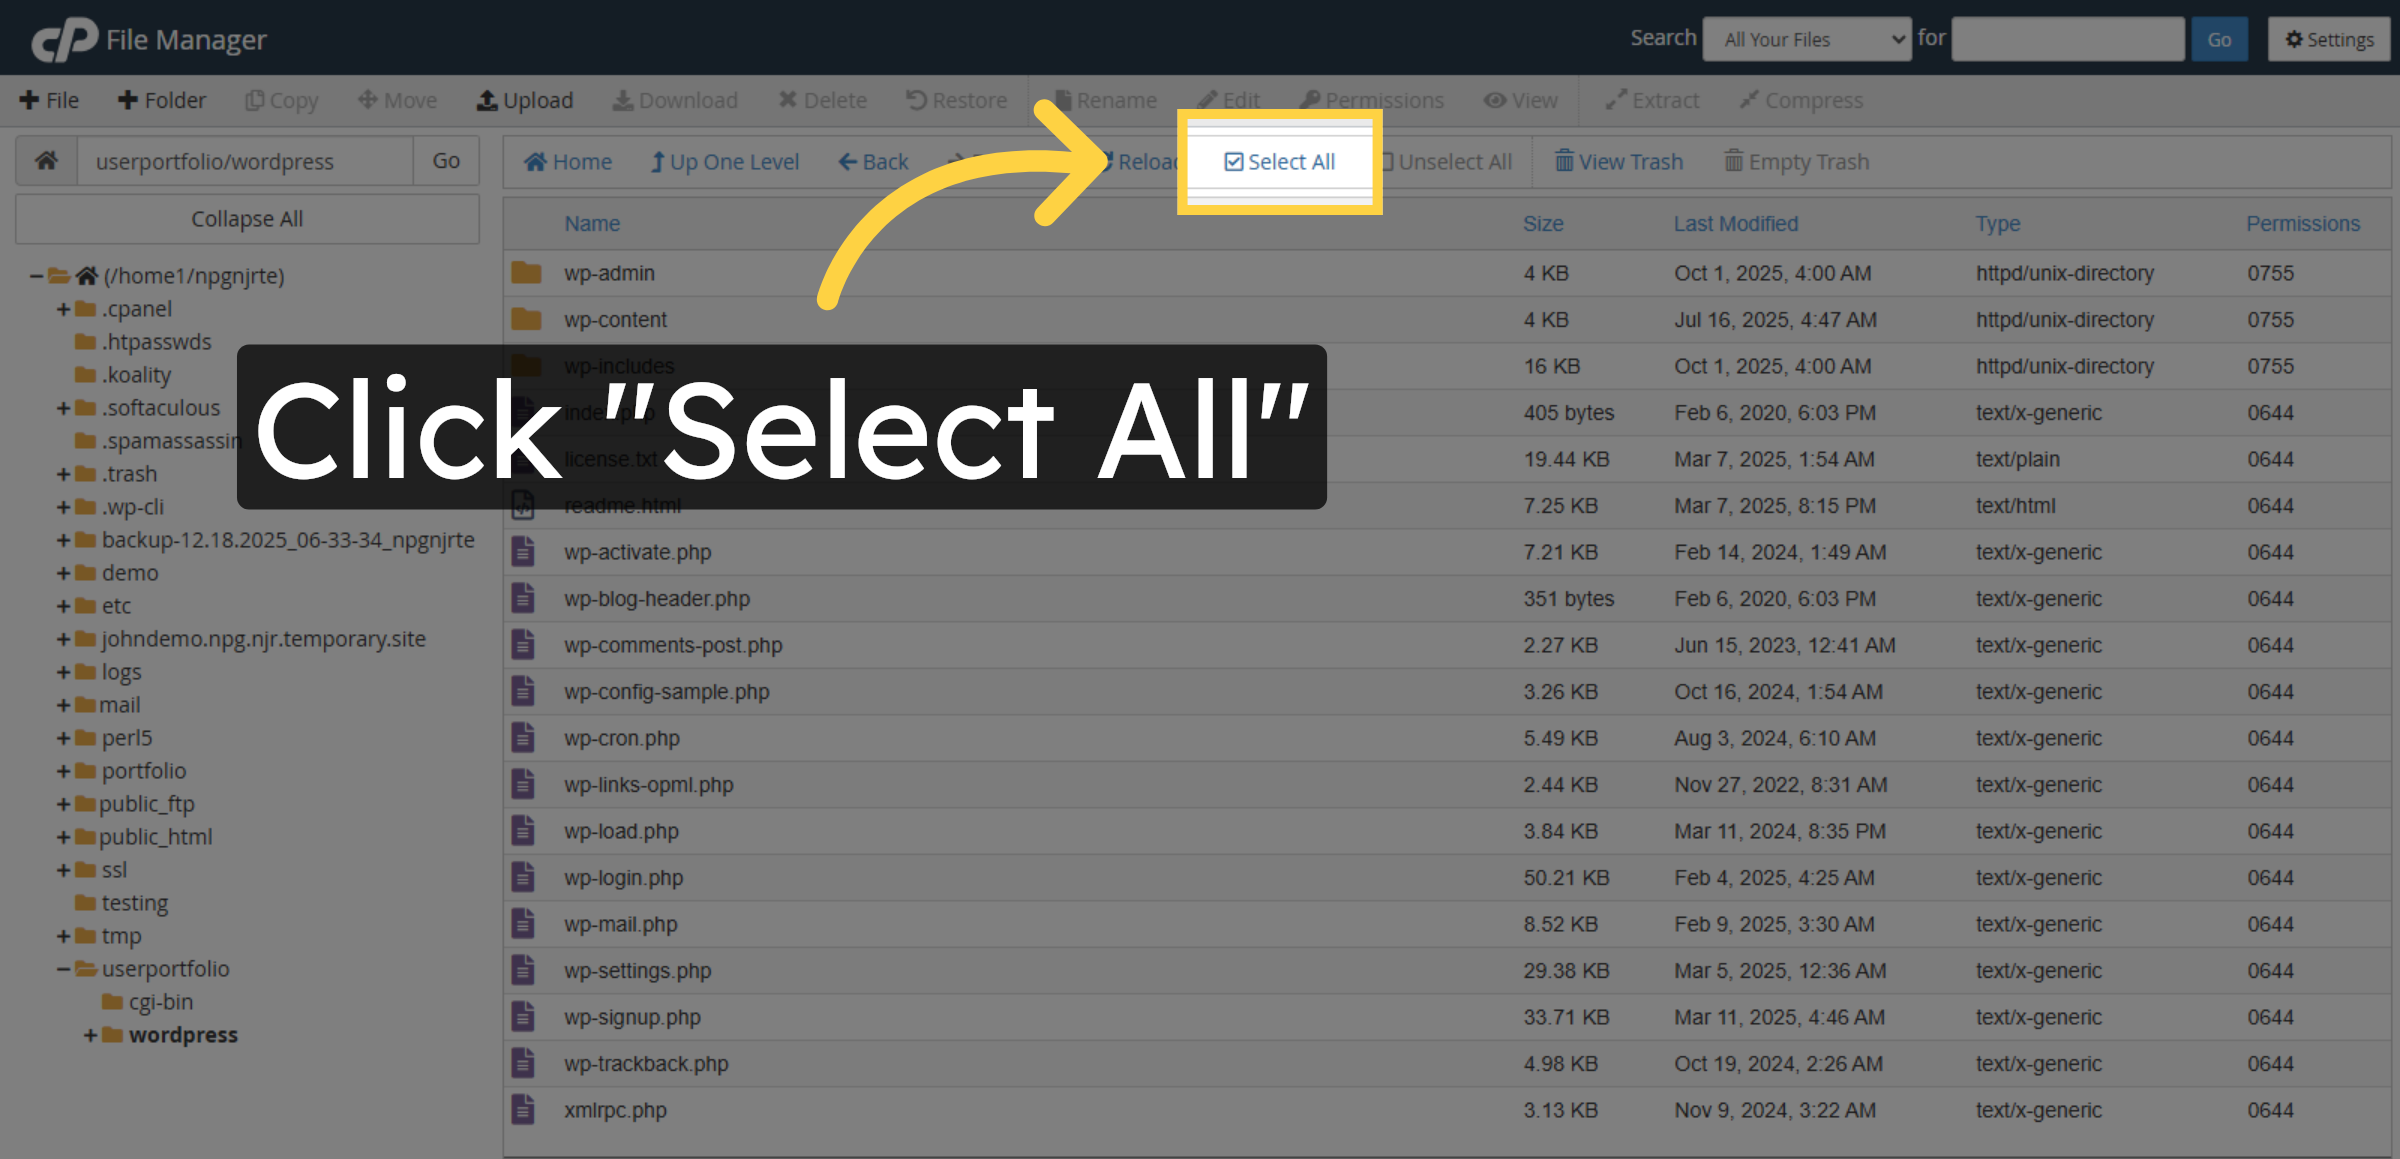
22. Select All WordPress Files
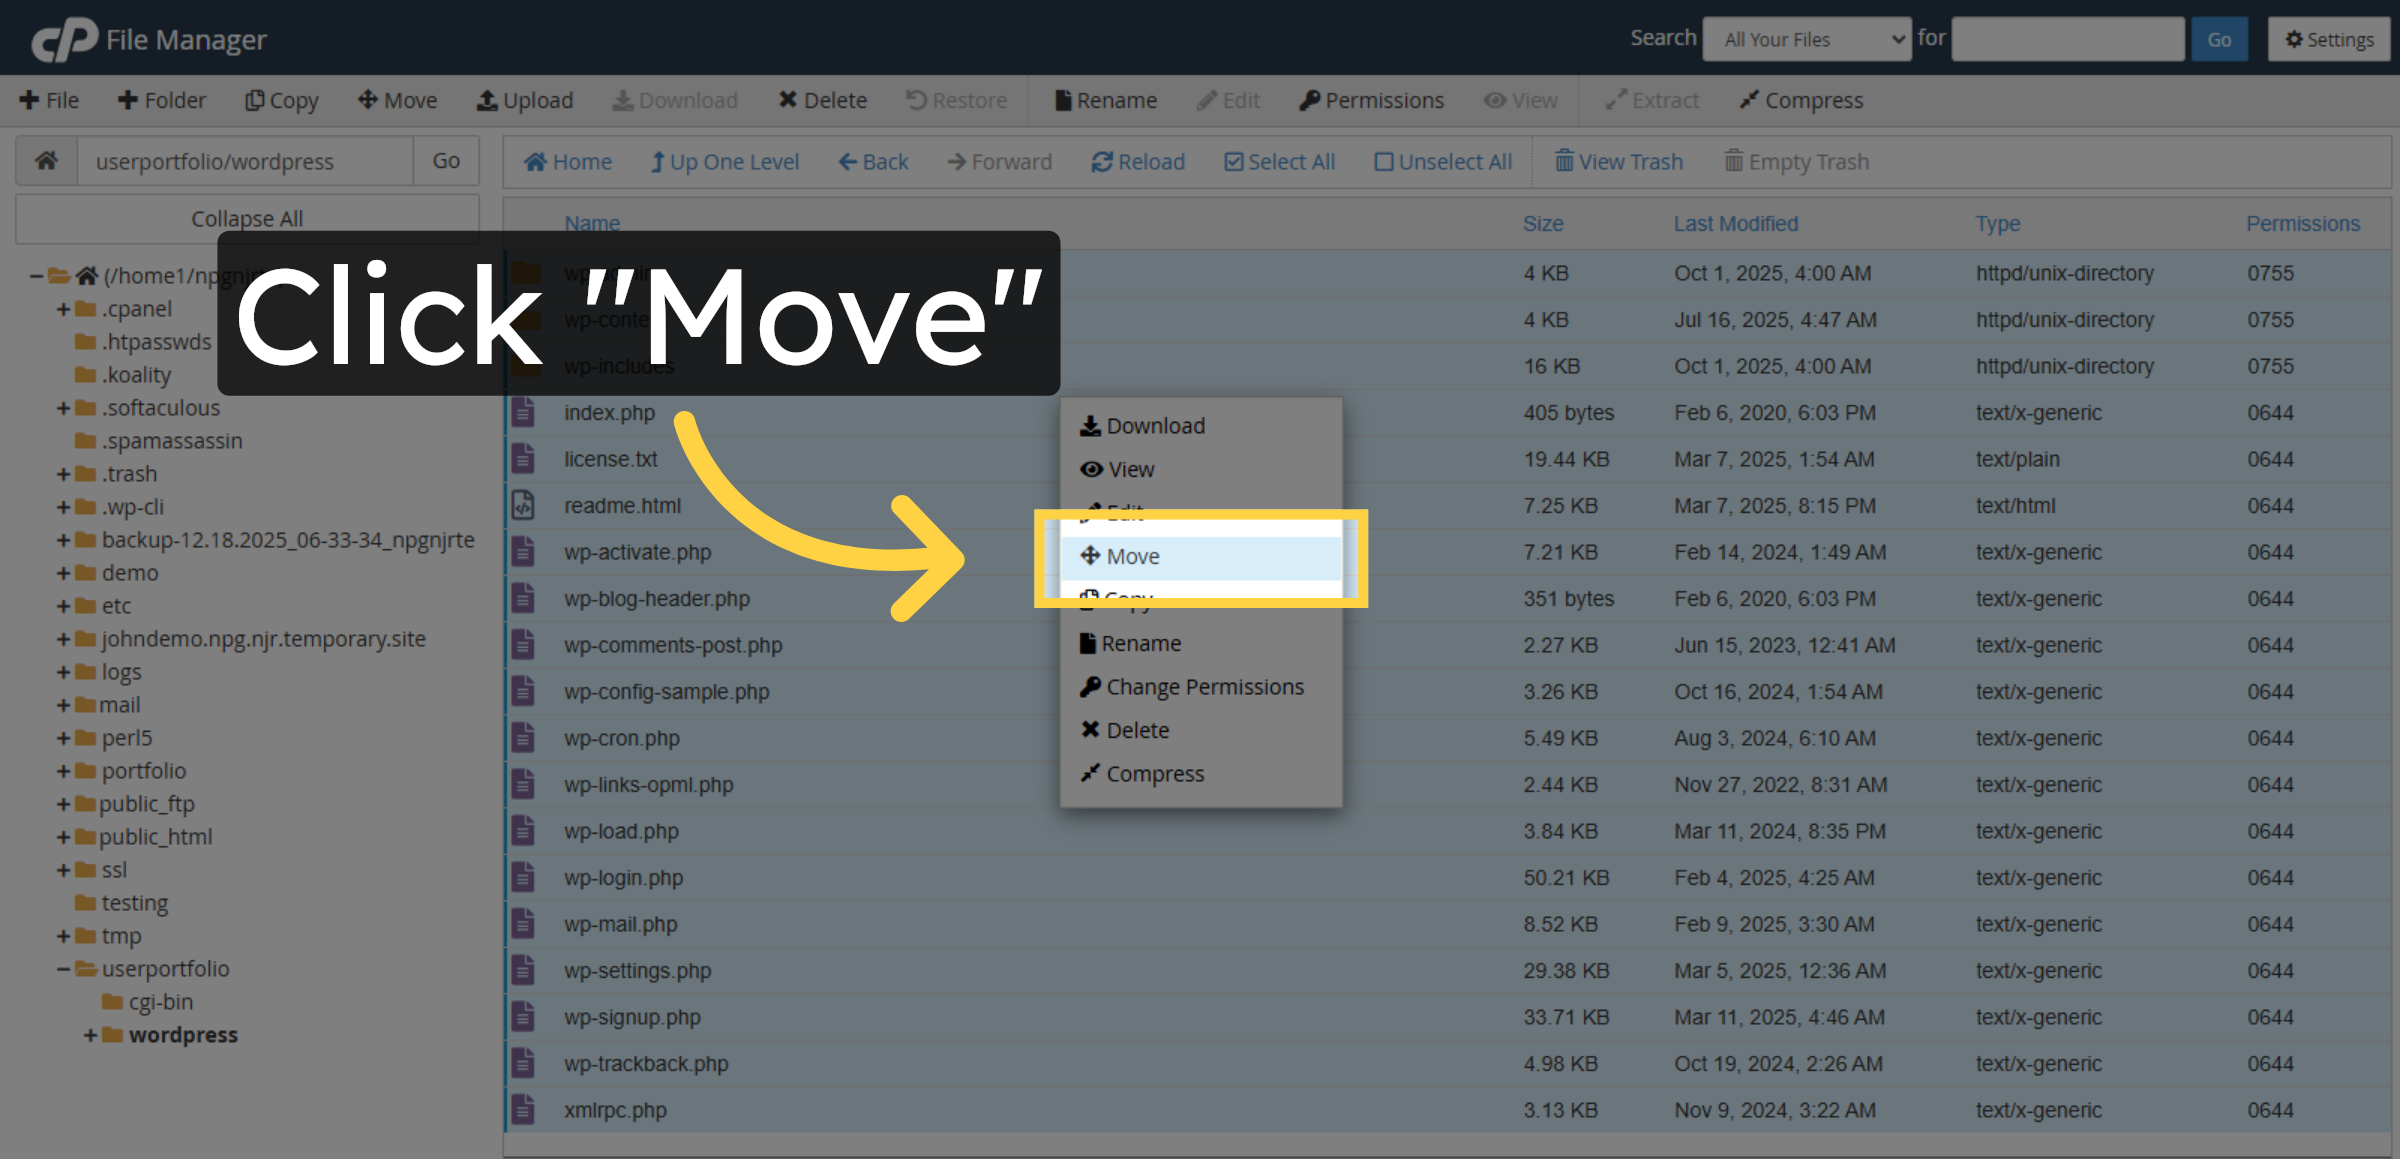
23. Initiate File Move
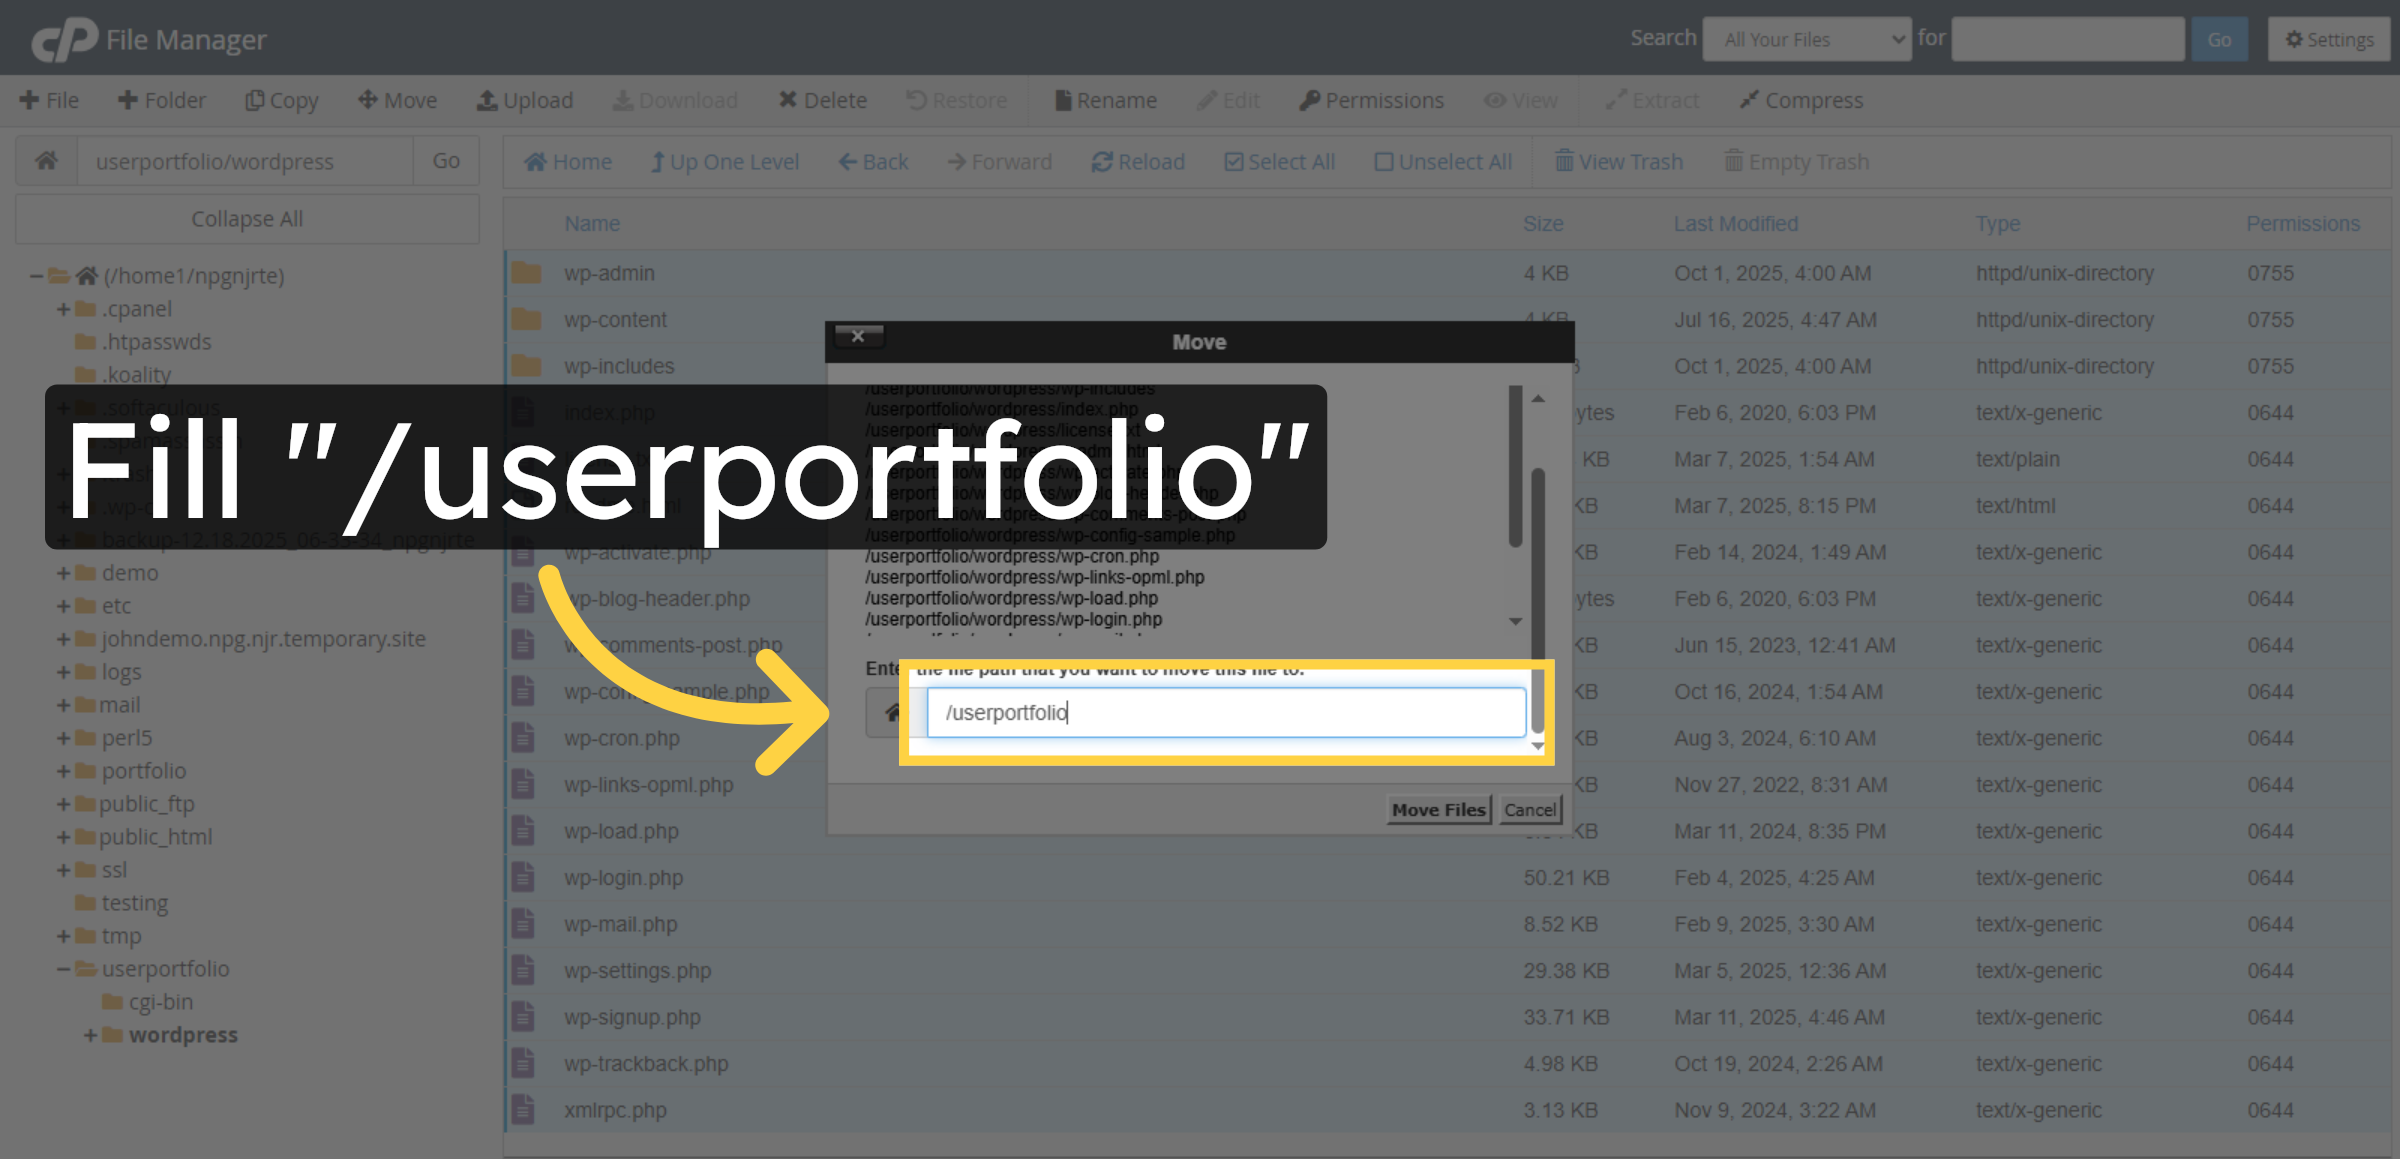
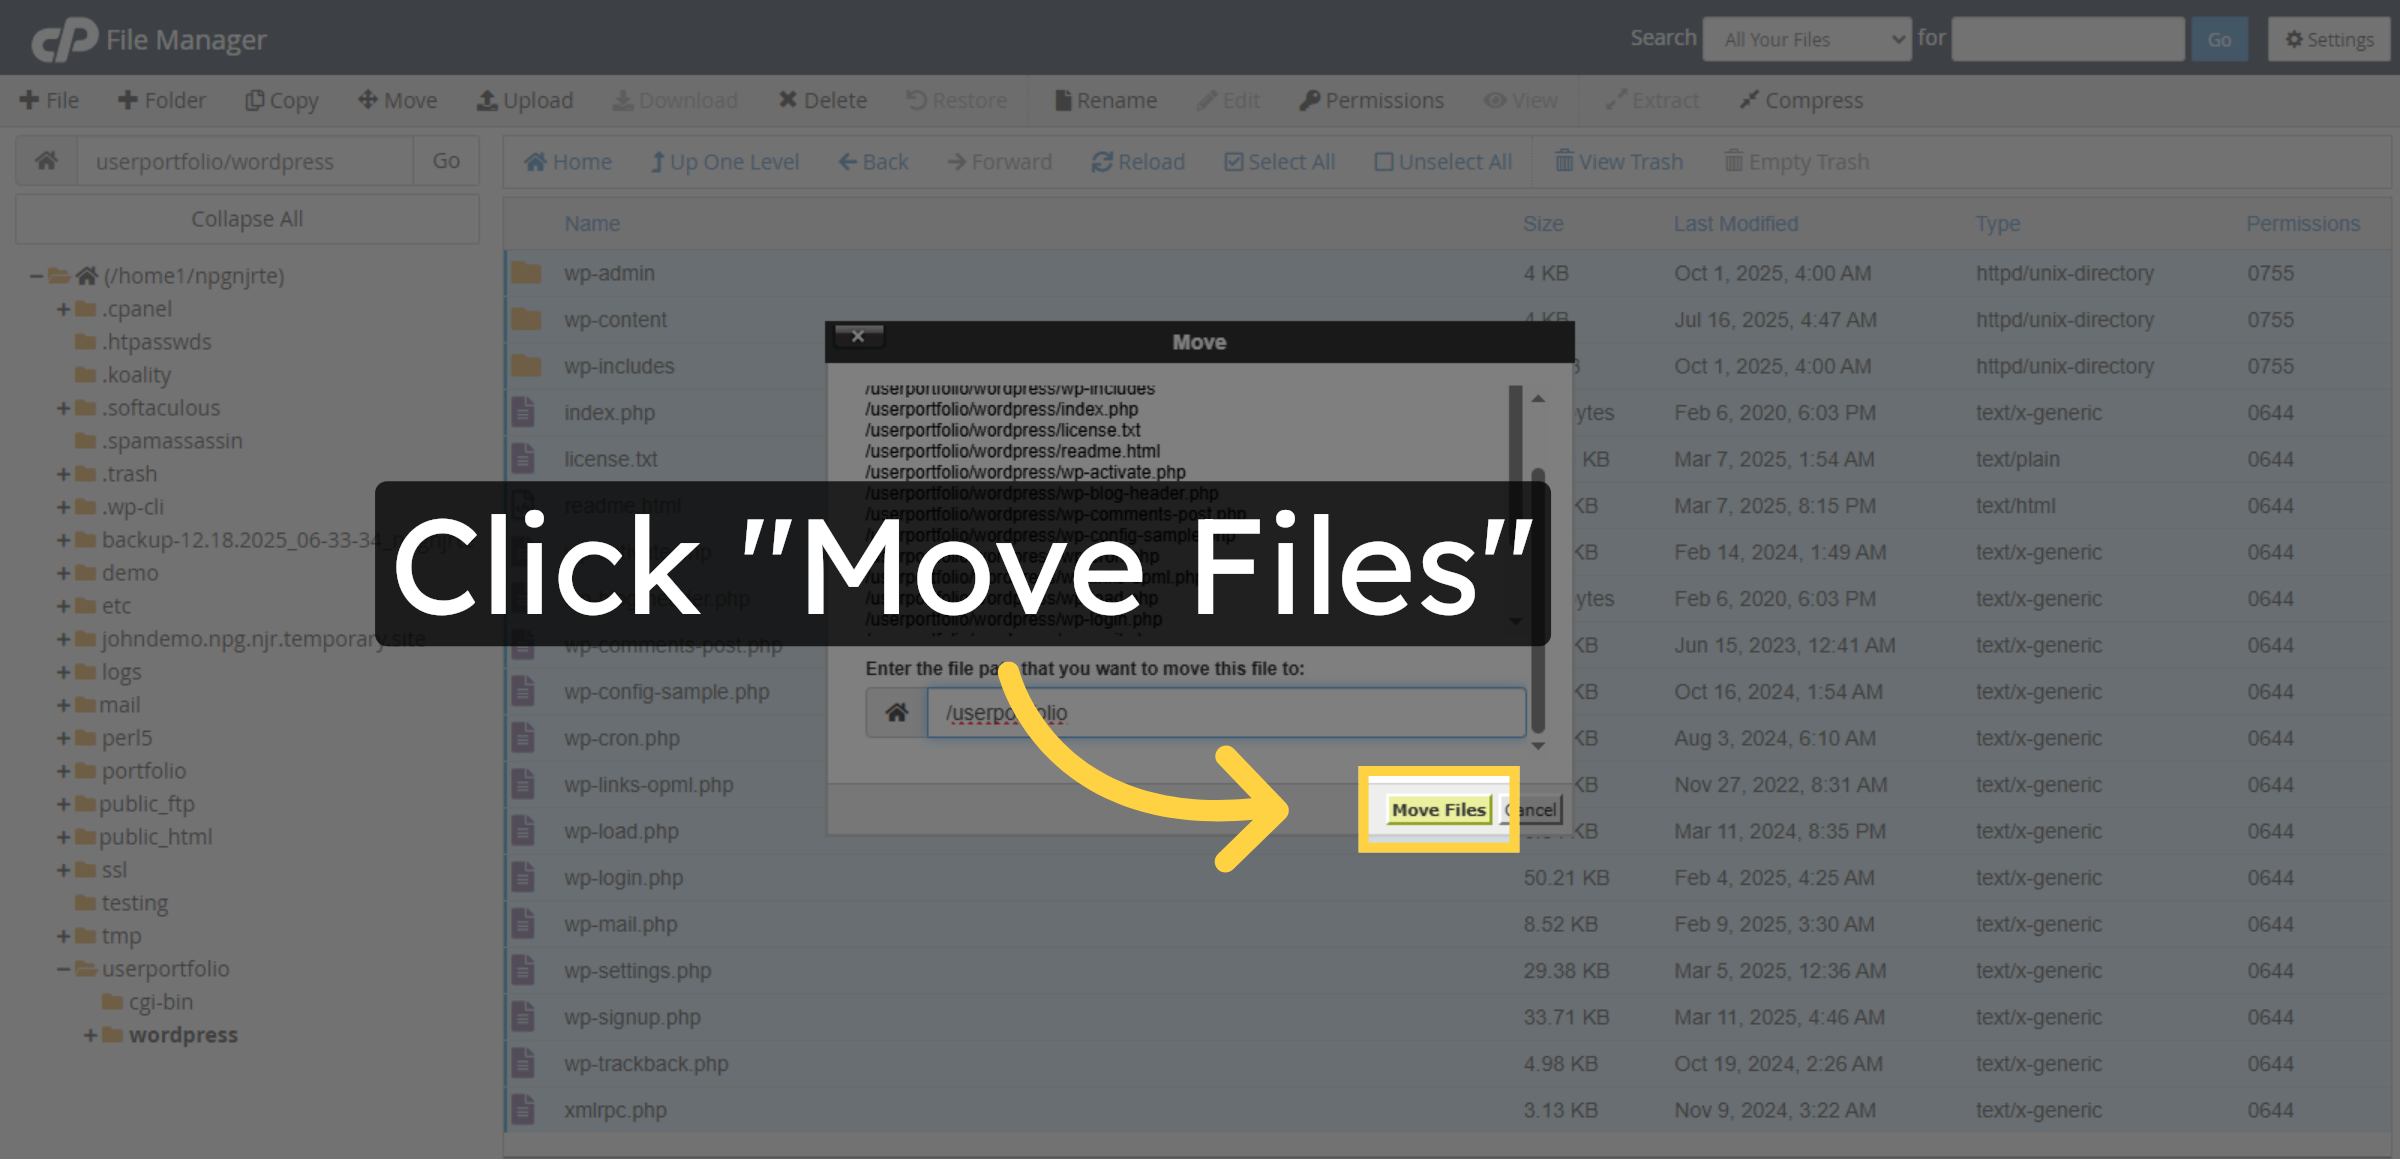
24. Specify Destination Folder
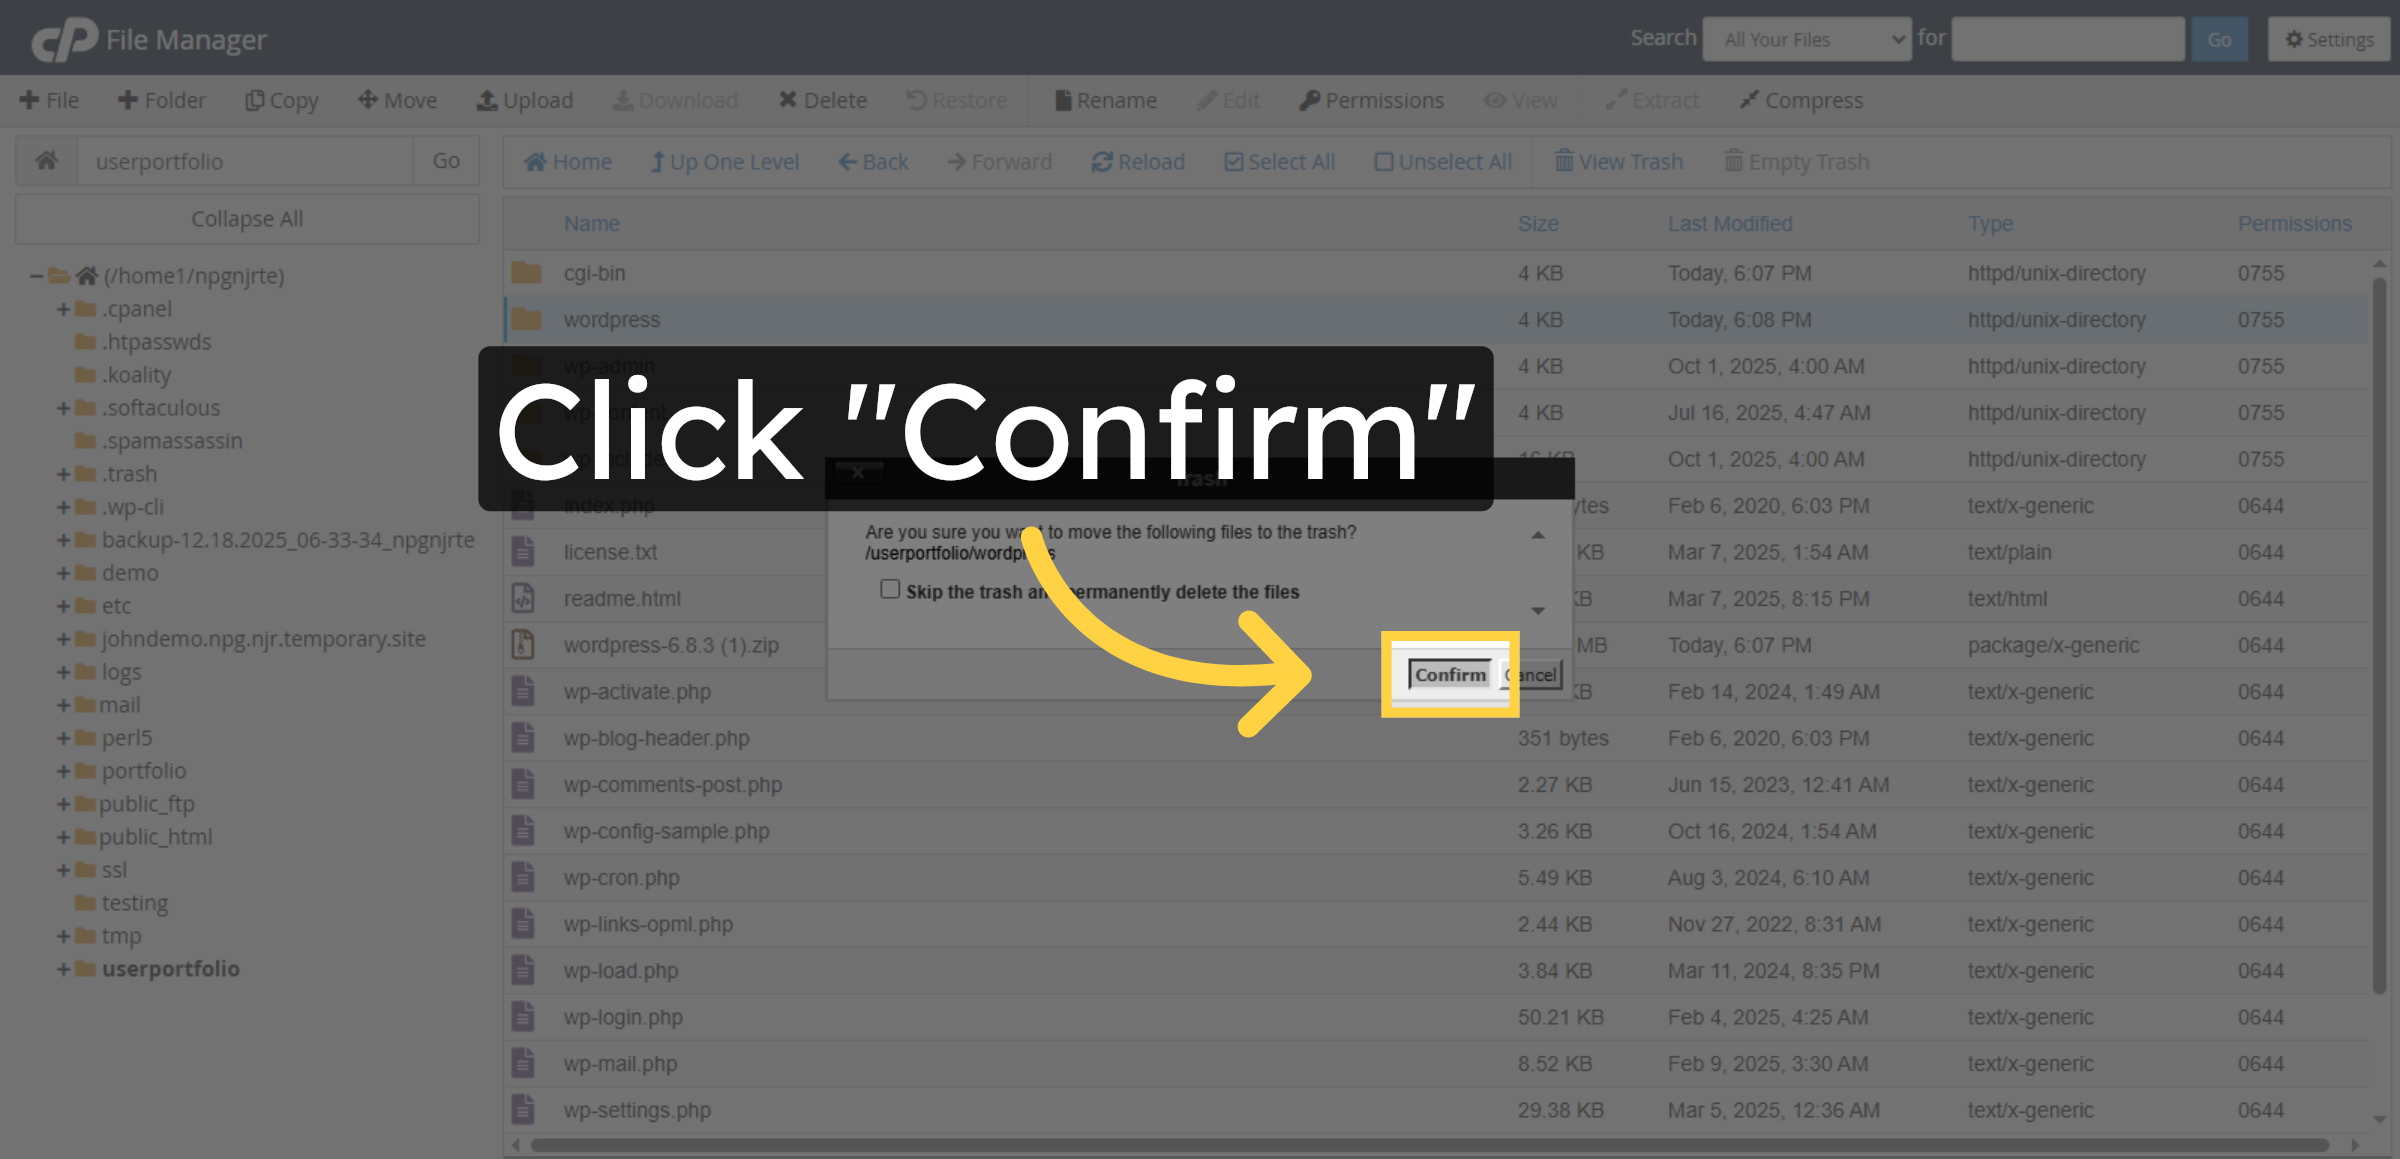
25. Confirm File Move
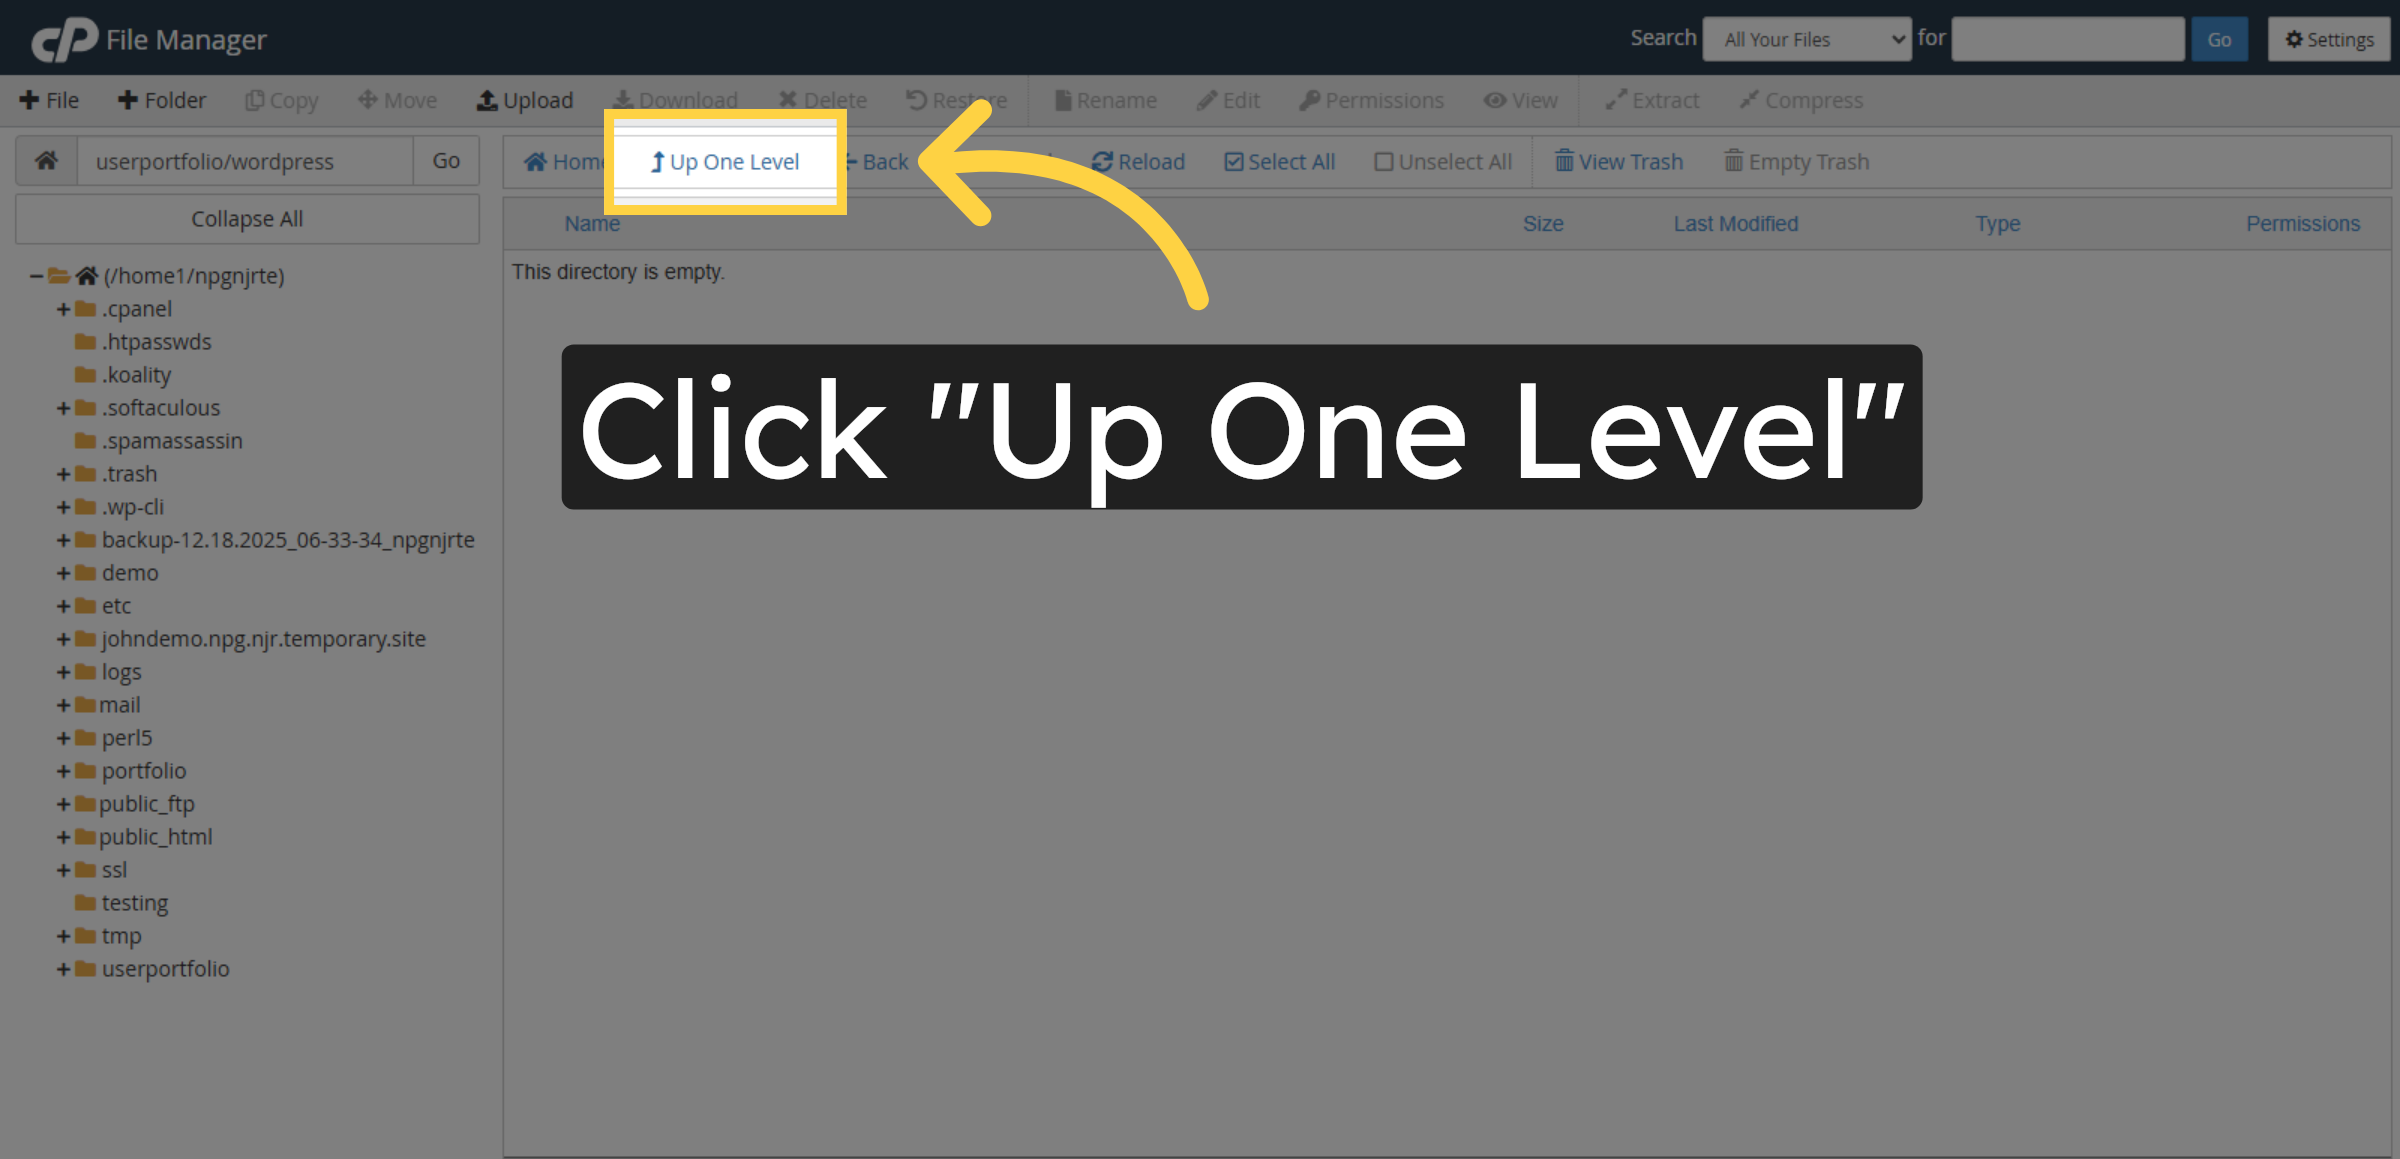
26. Navigate Up One Level
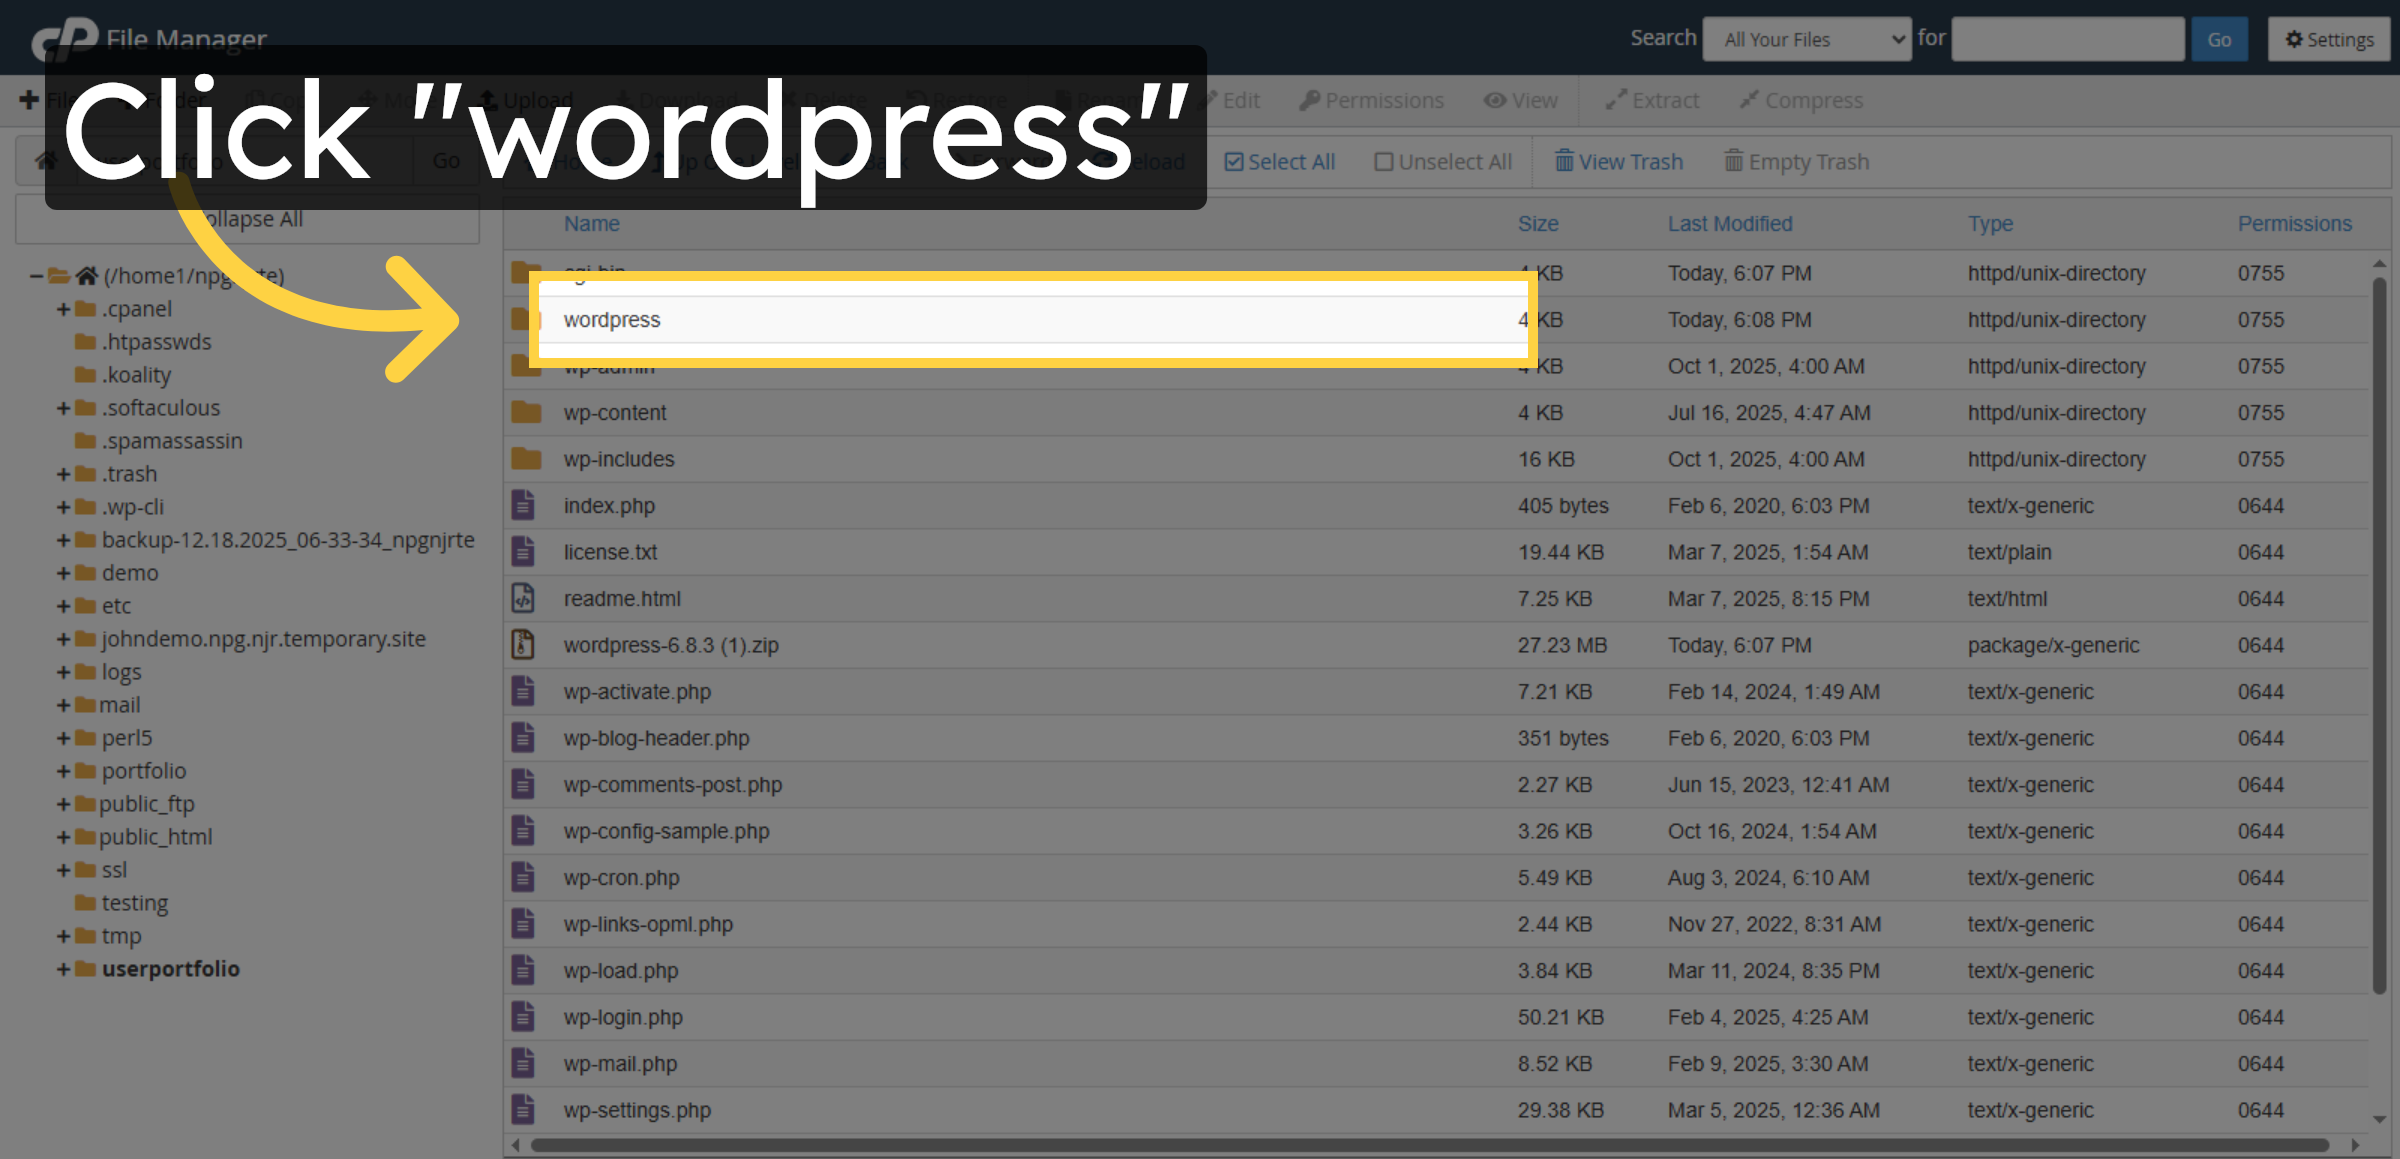
27. Open WordPress Folder
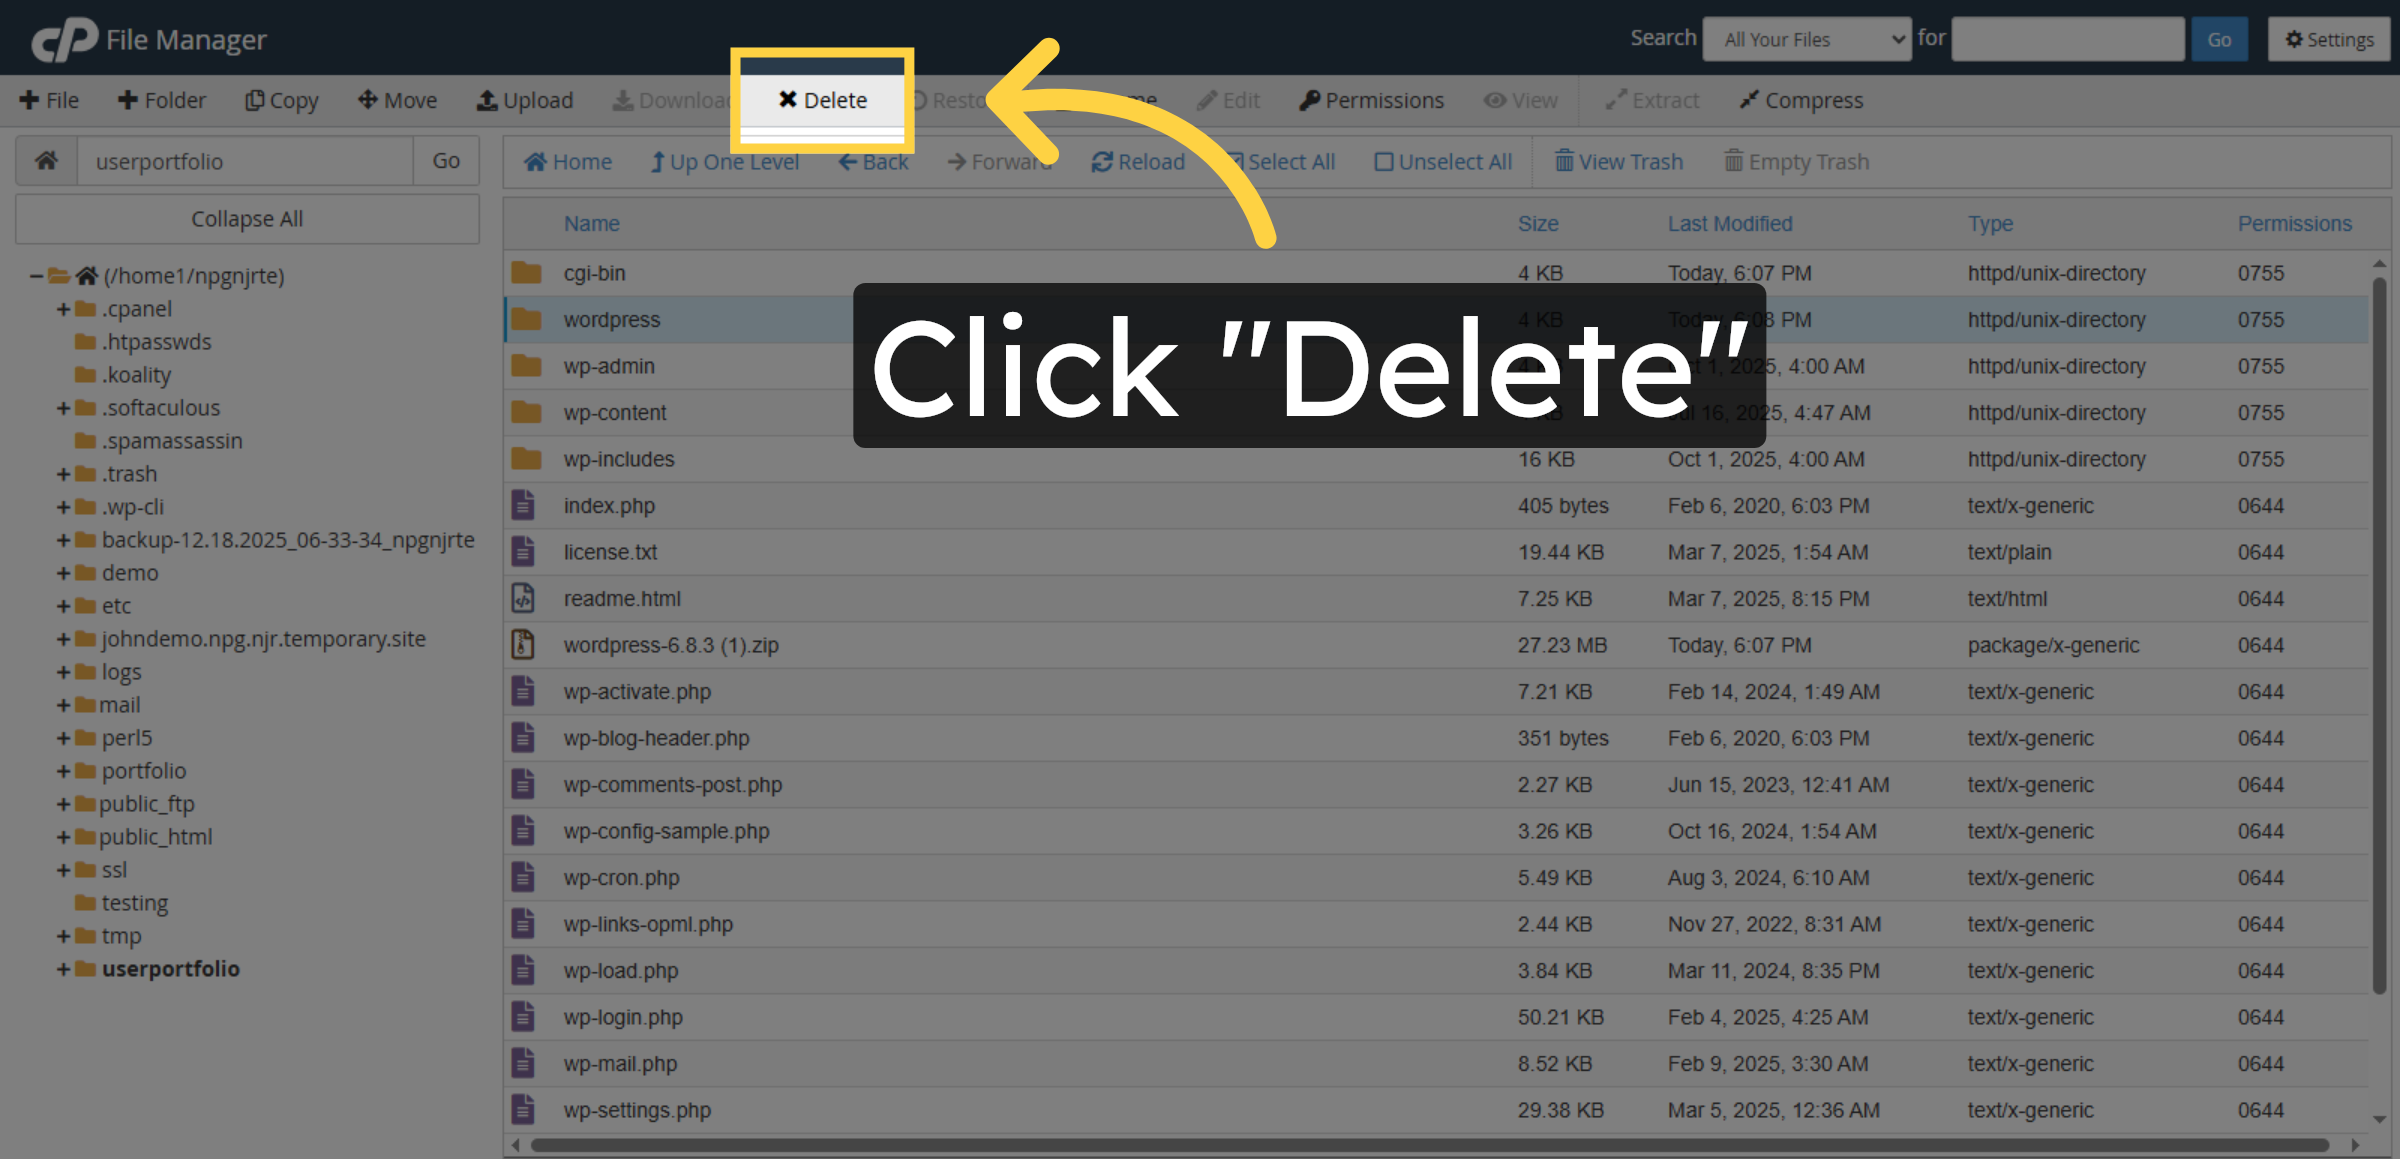
28. Delete WordPress Folder
29. Confirm Deletion
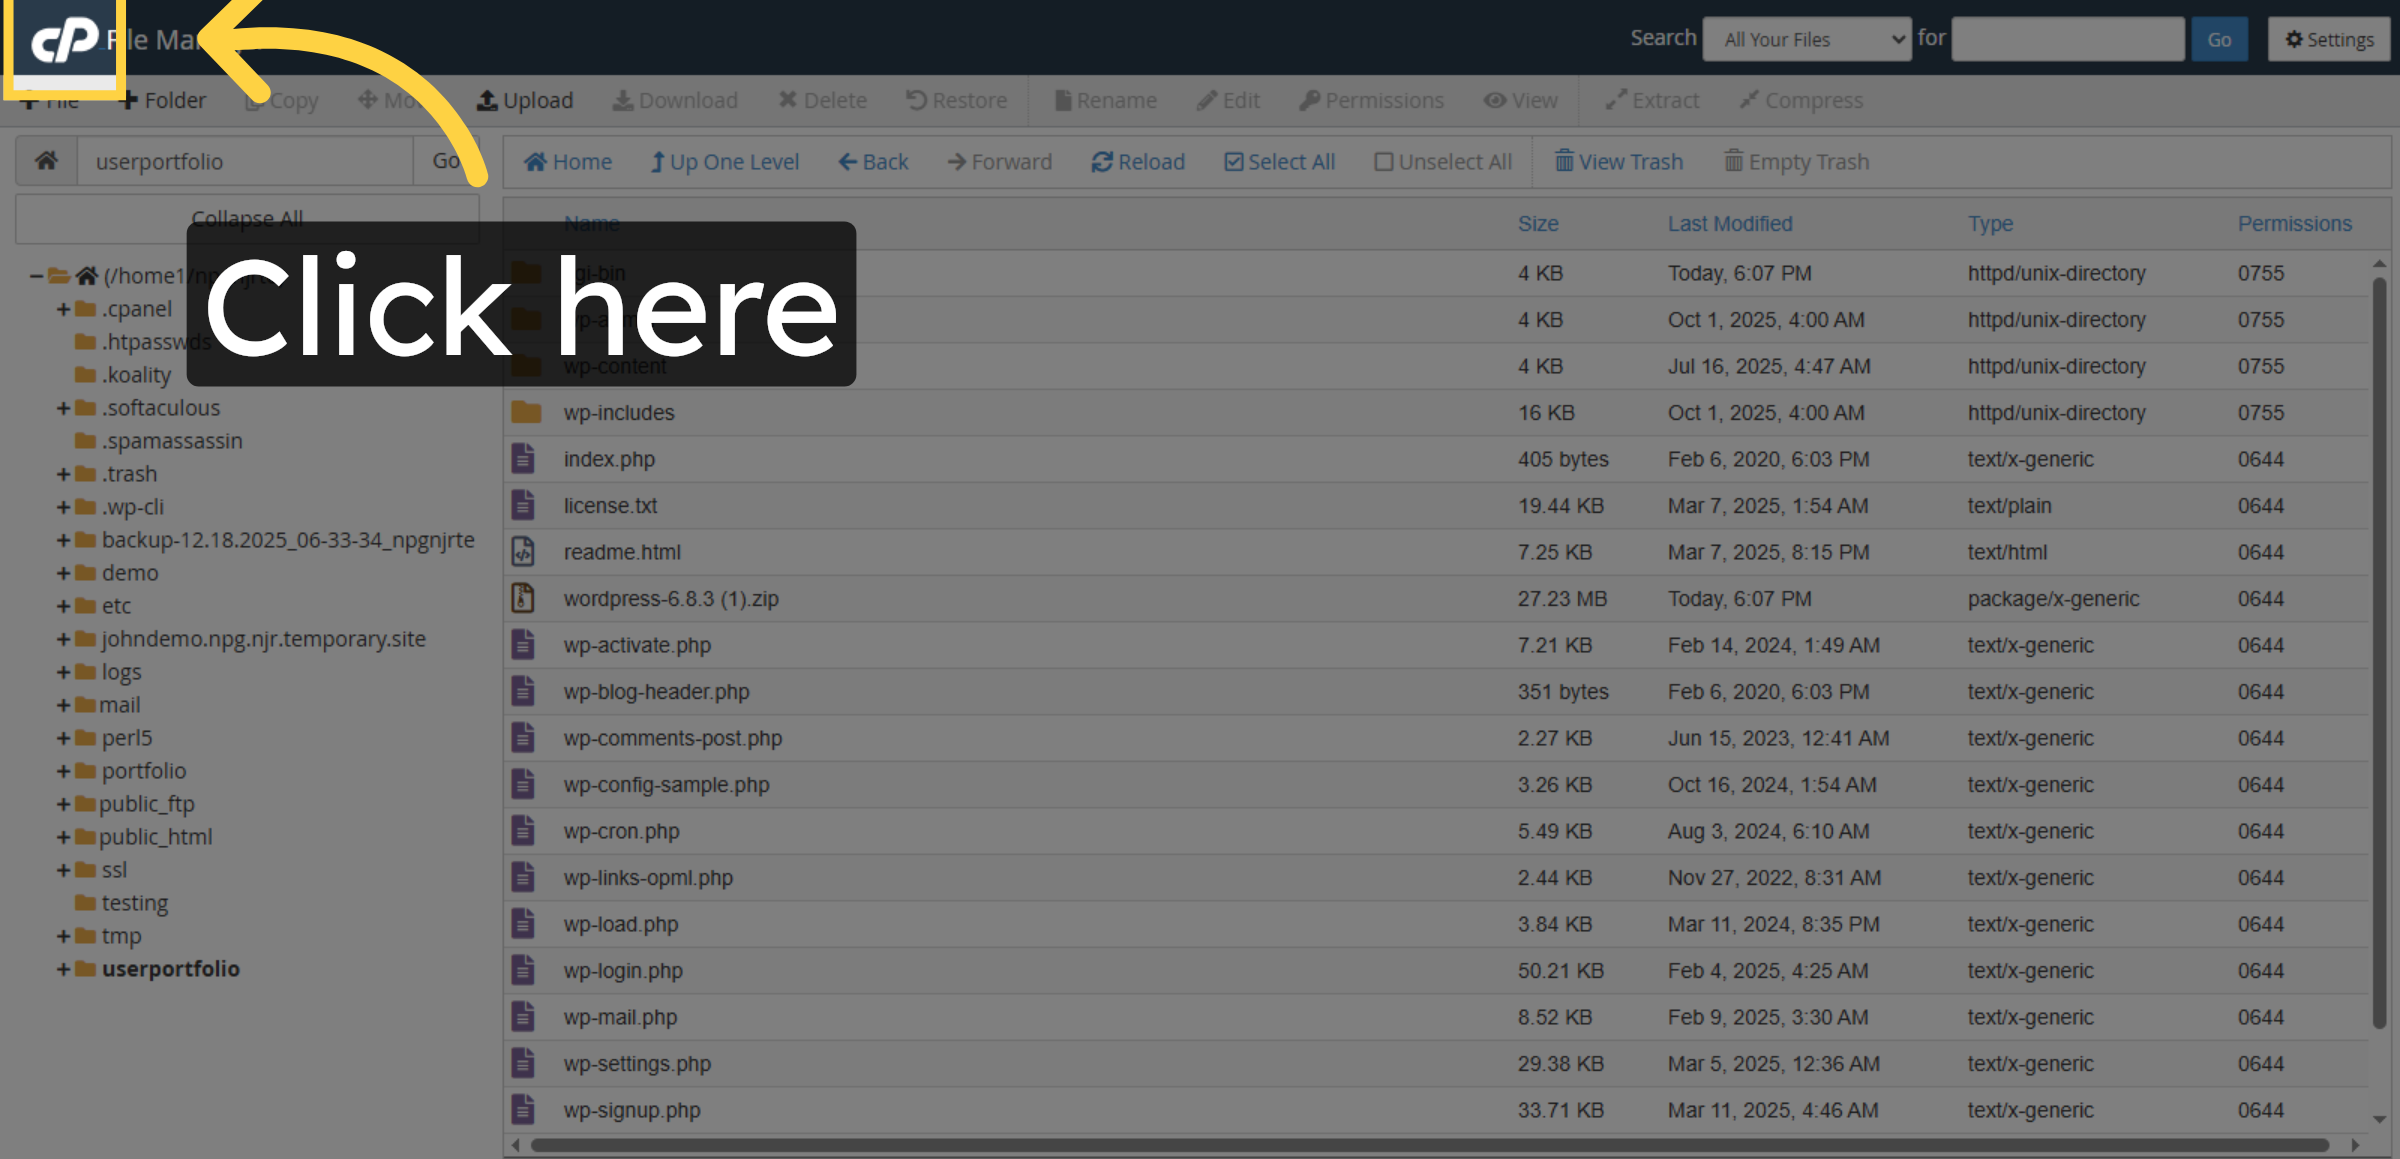
30. Access Control Panel
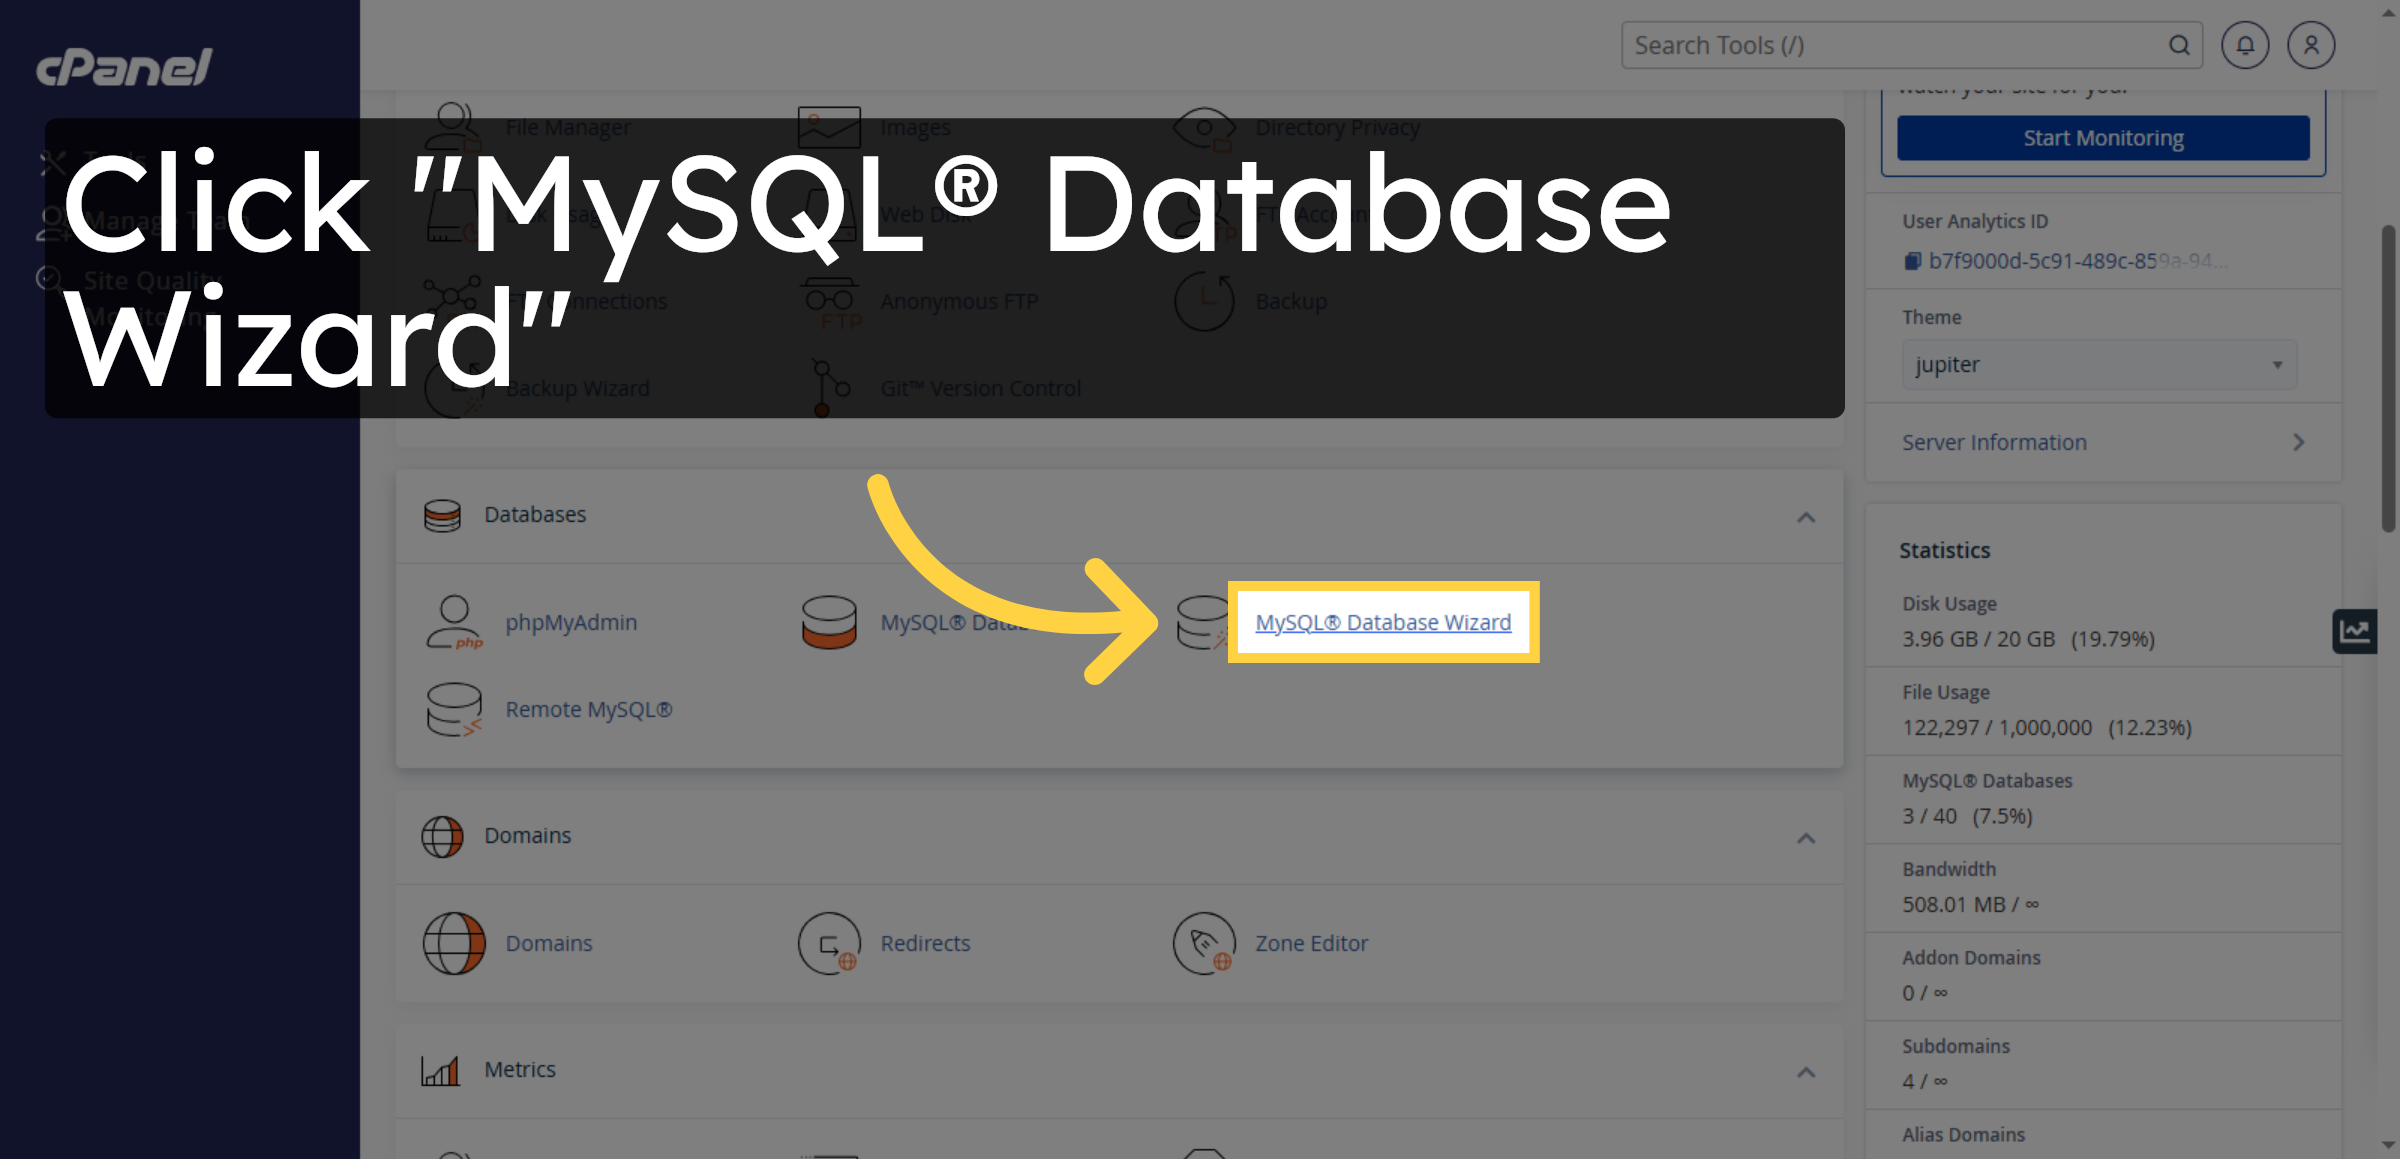
31. Open MySQL Database Wizard
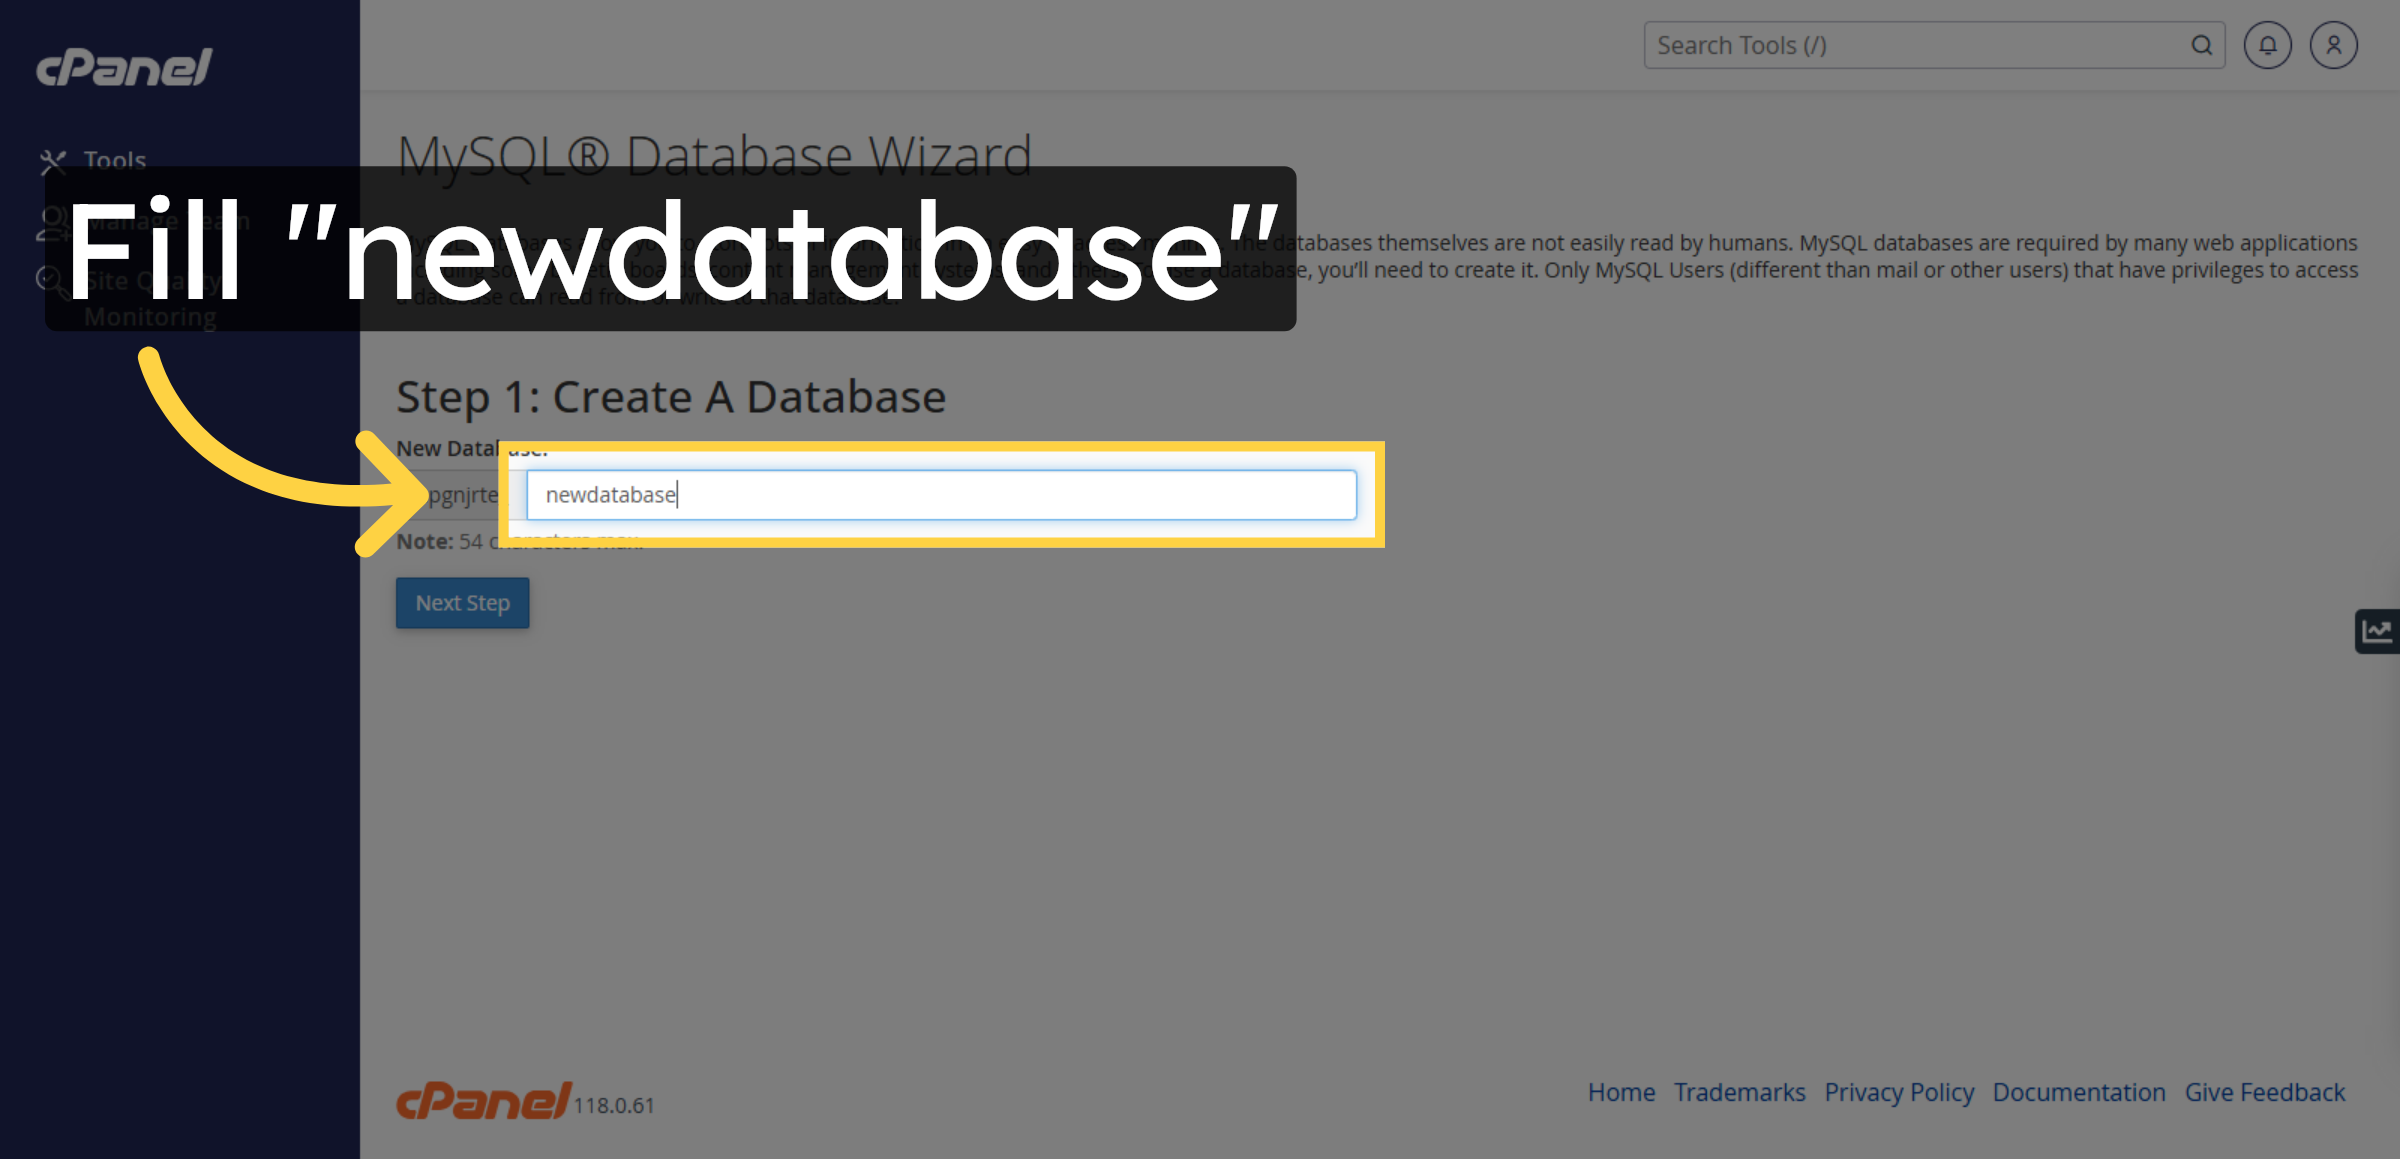
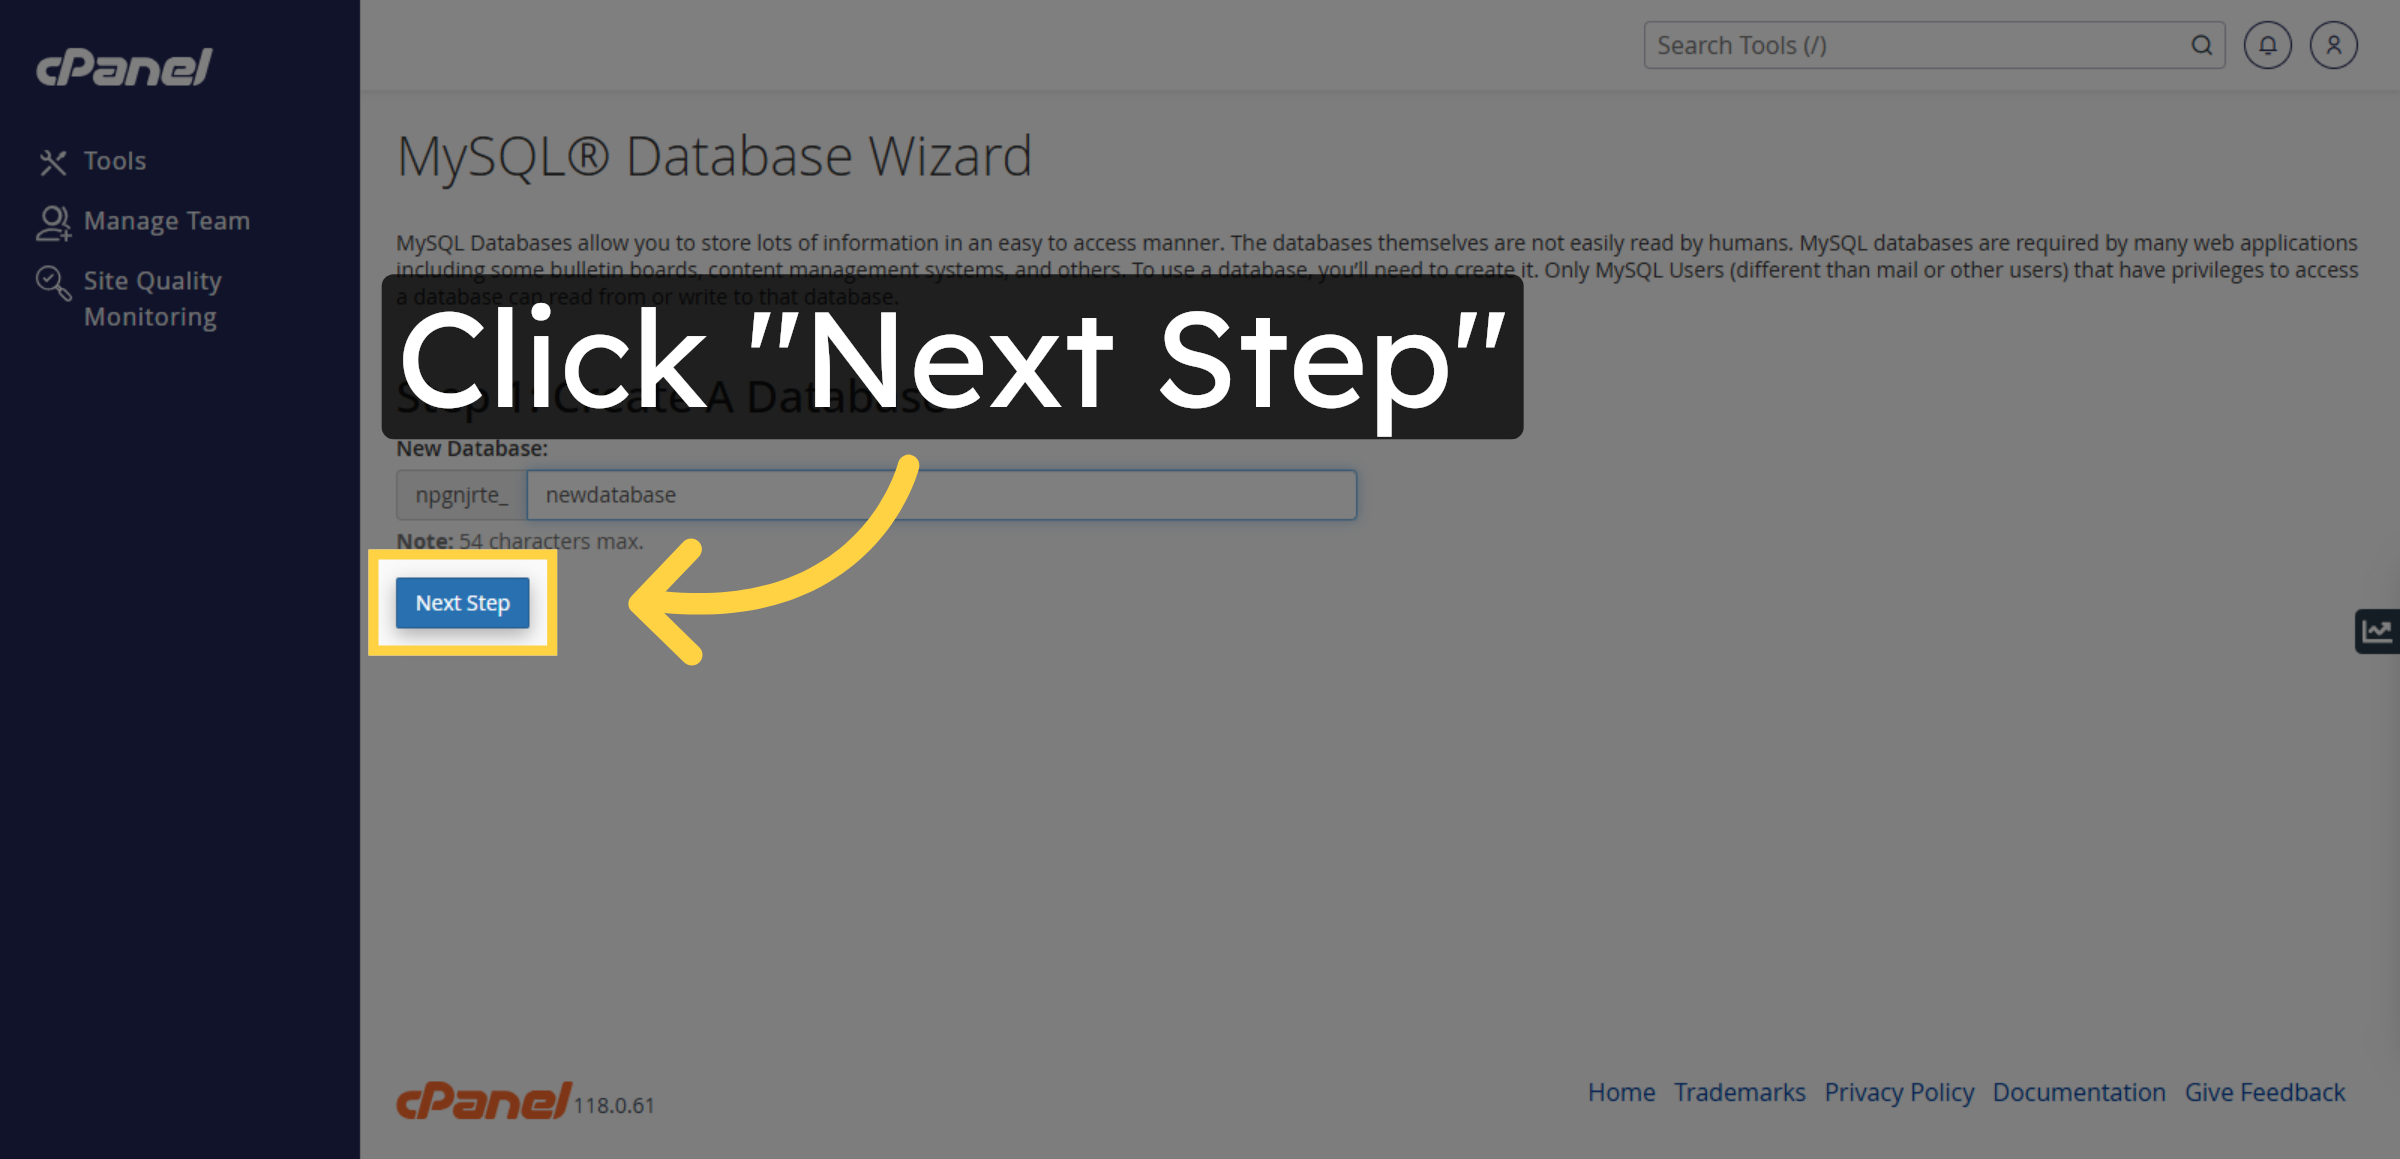
32. Enter Database Name
33. Proceed To Next Step
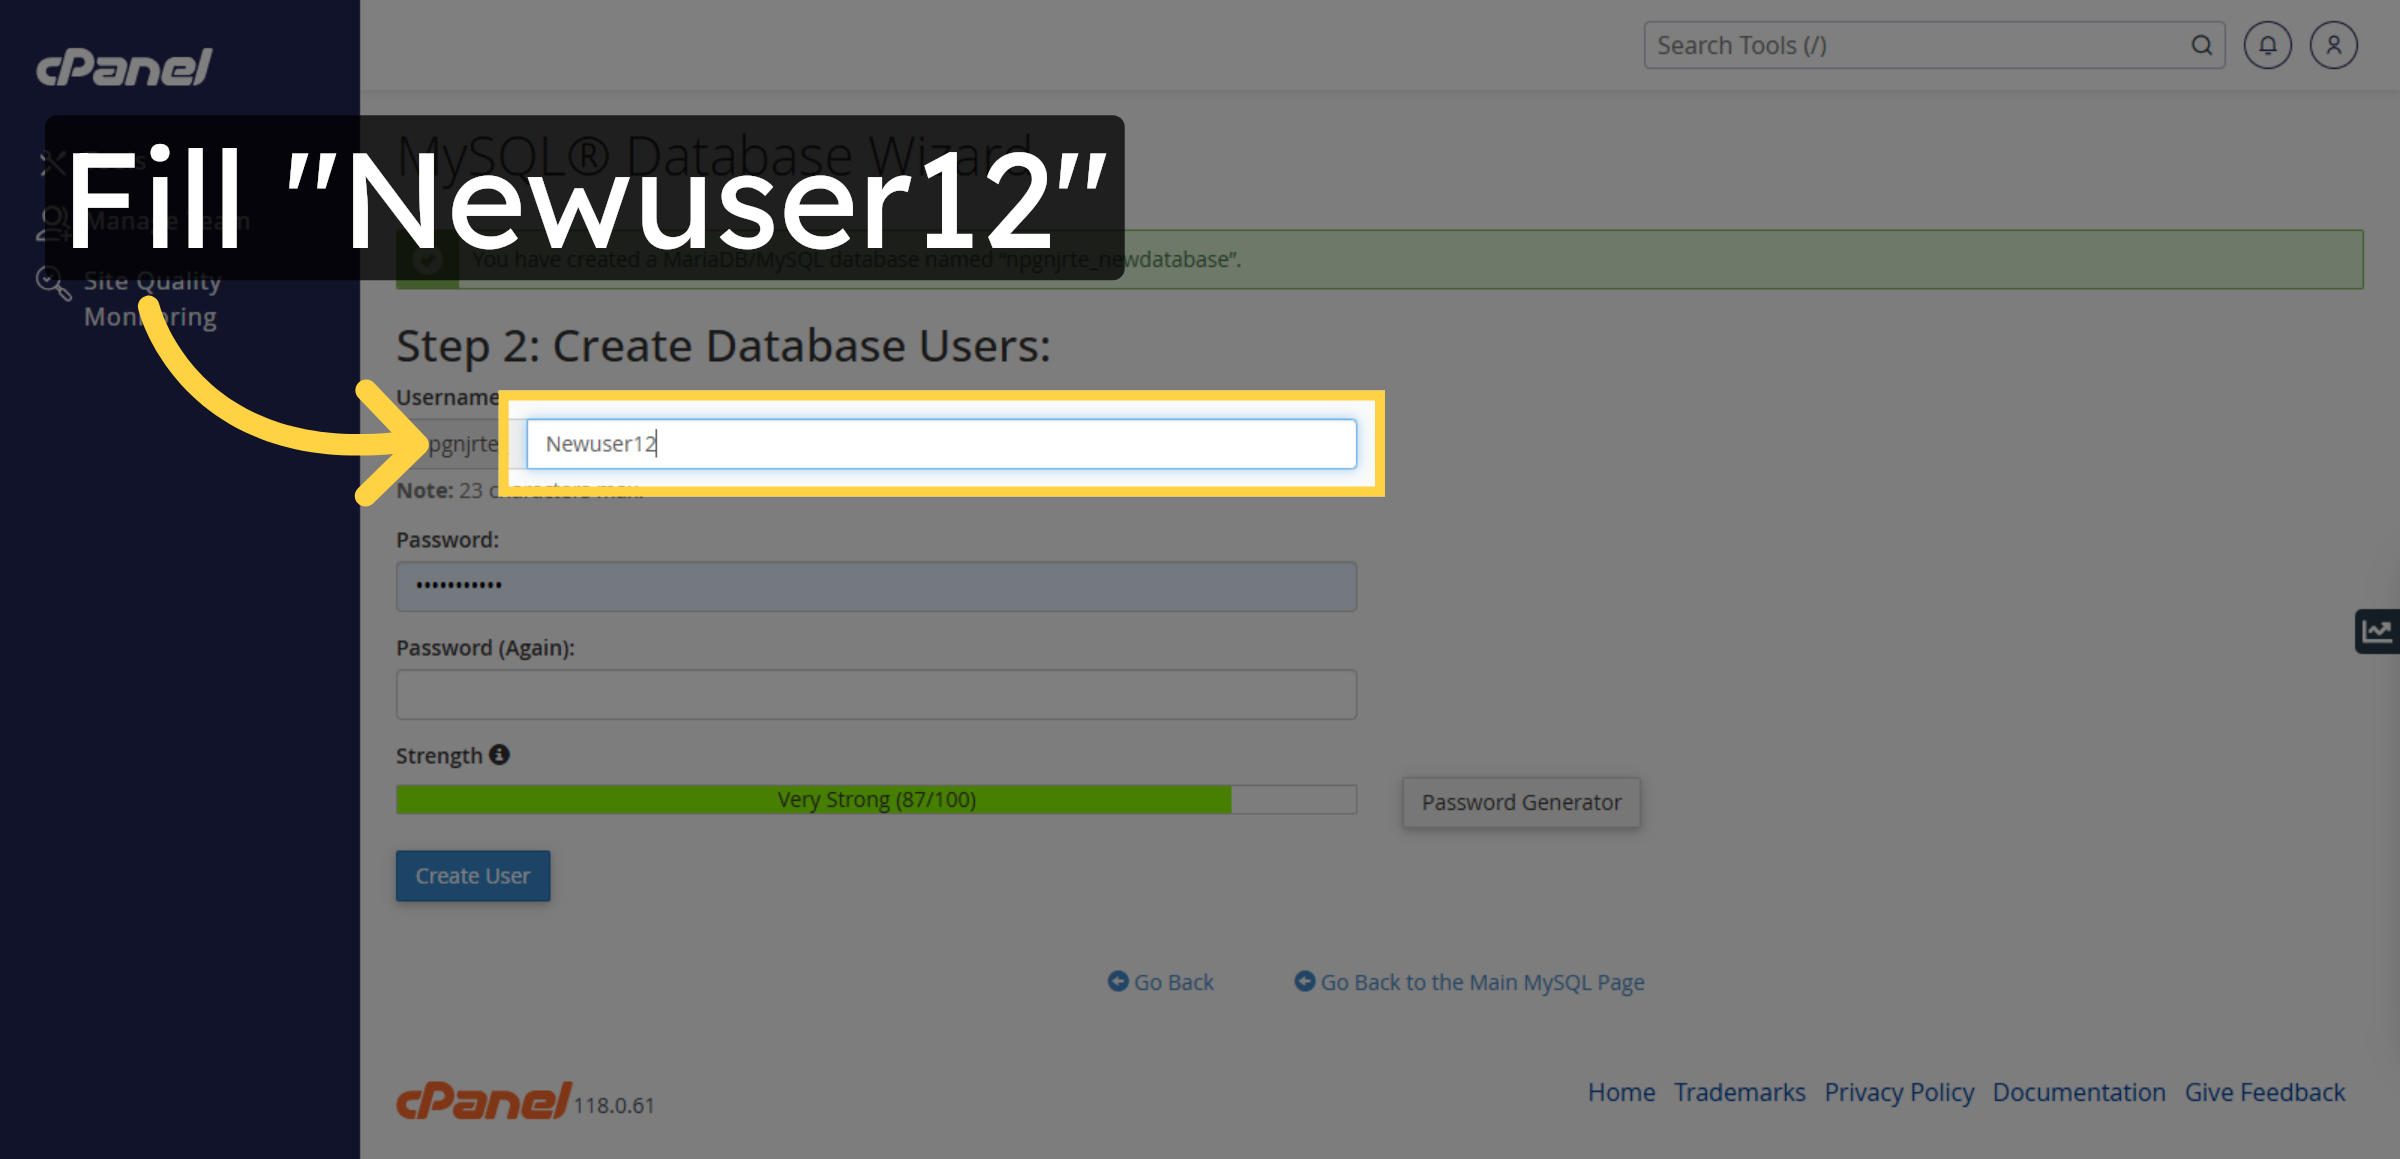
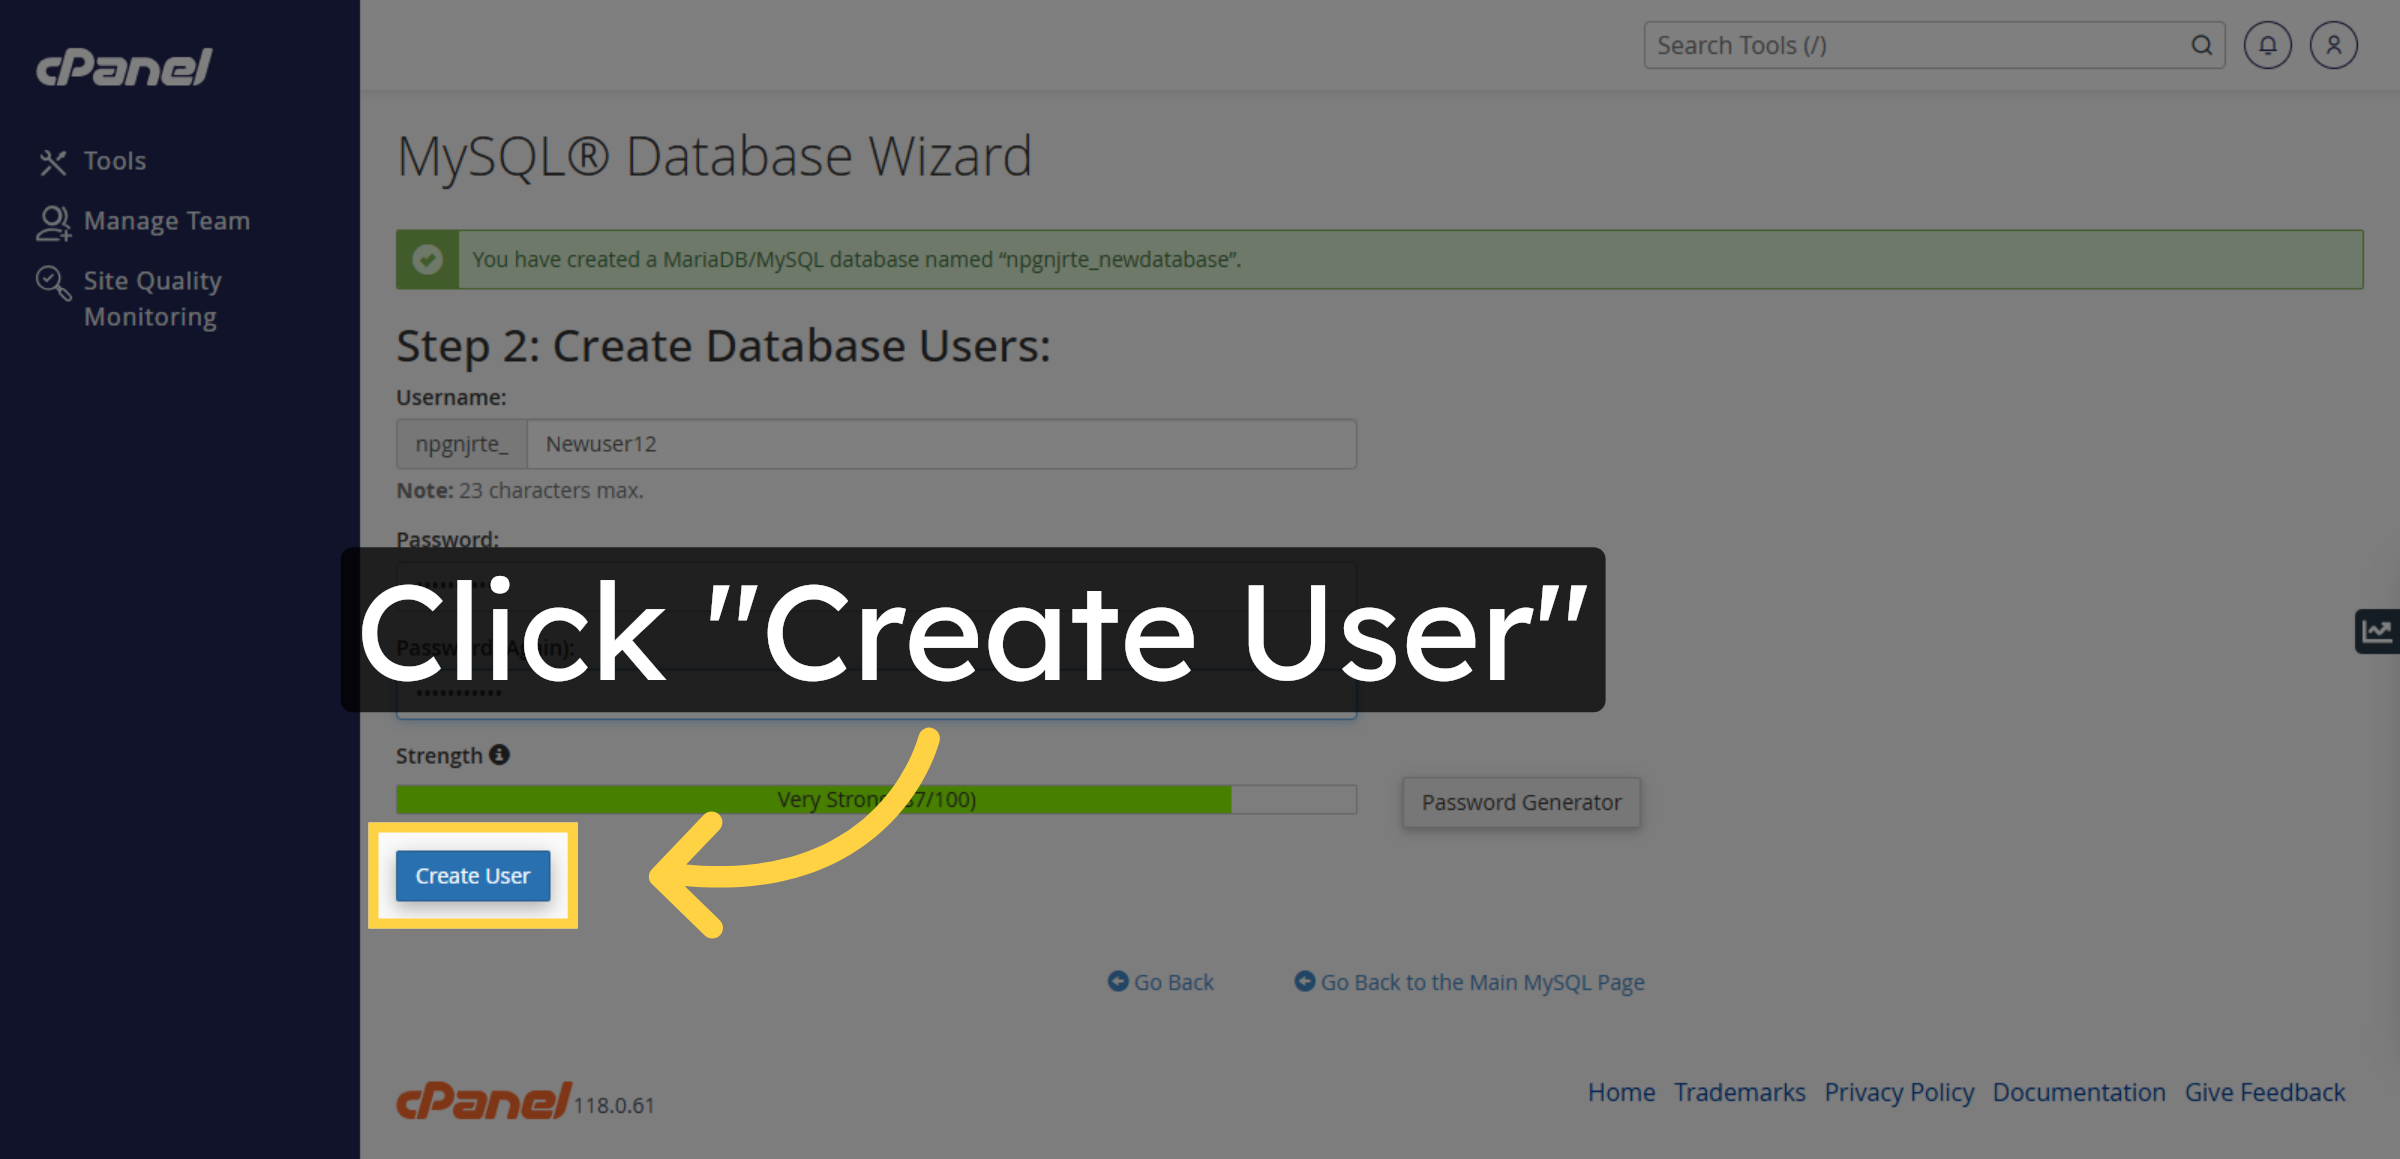
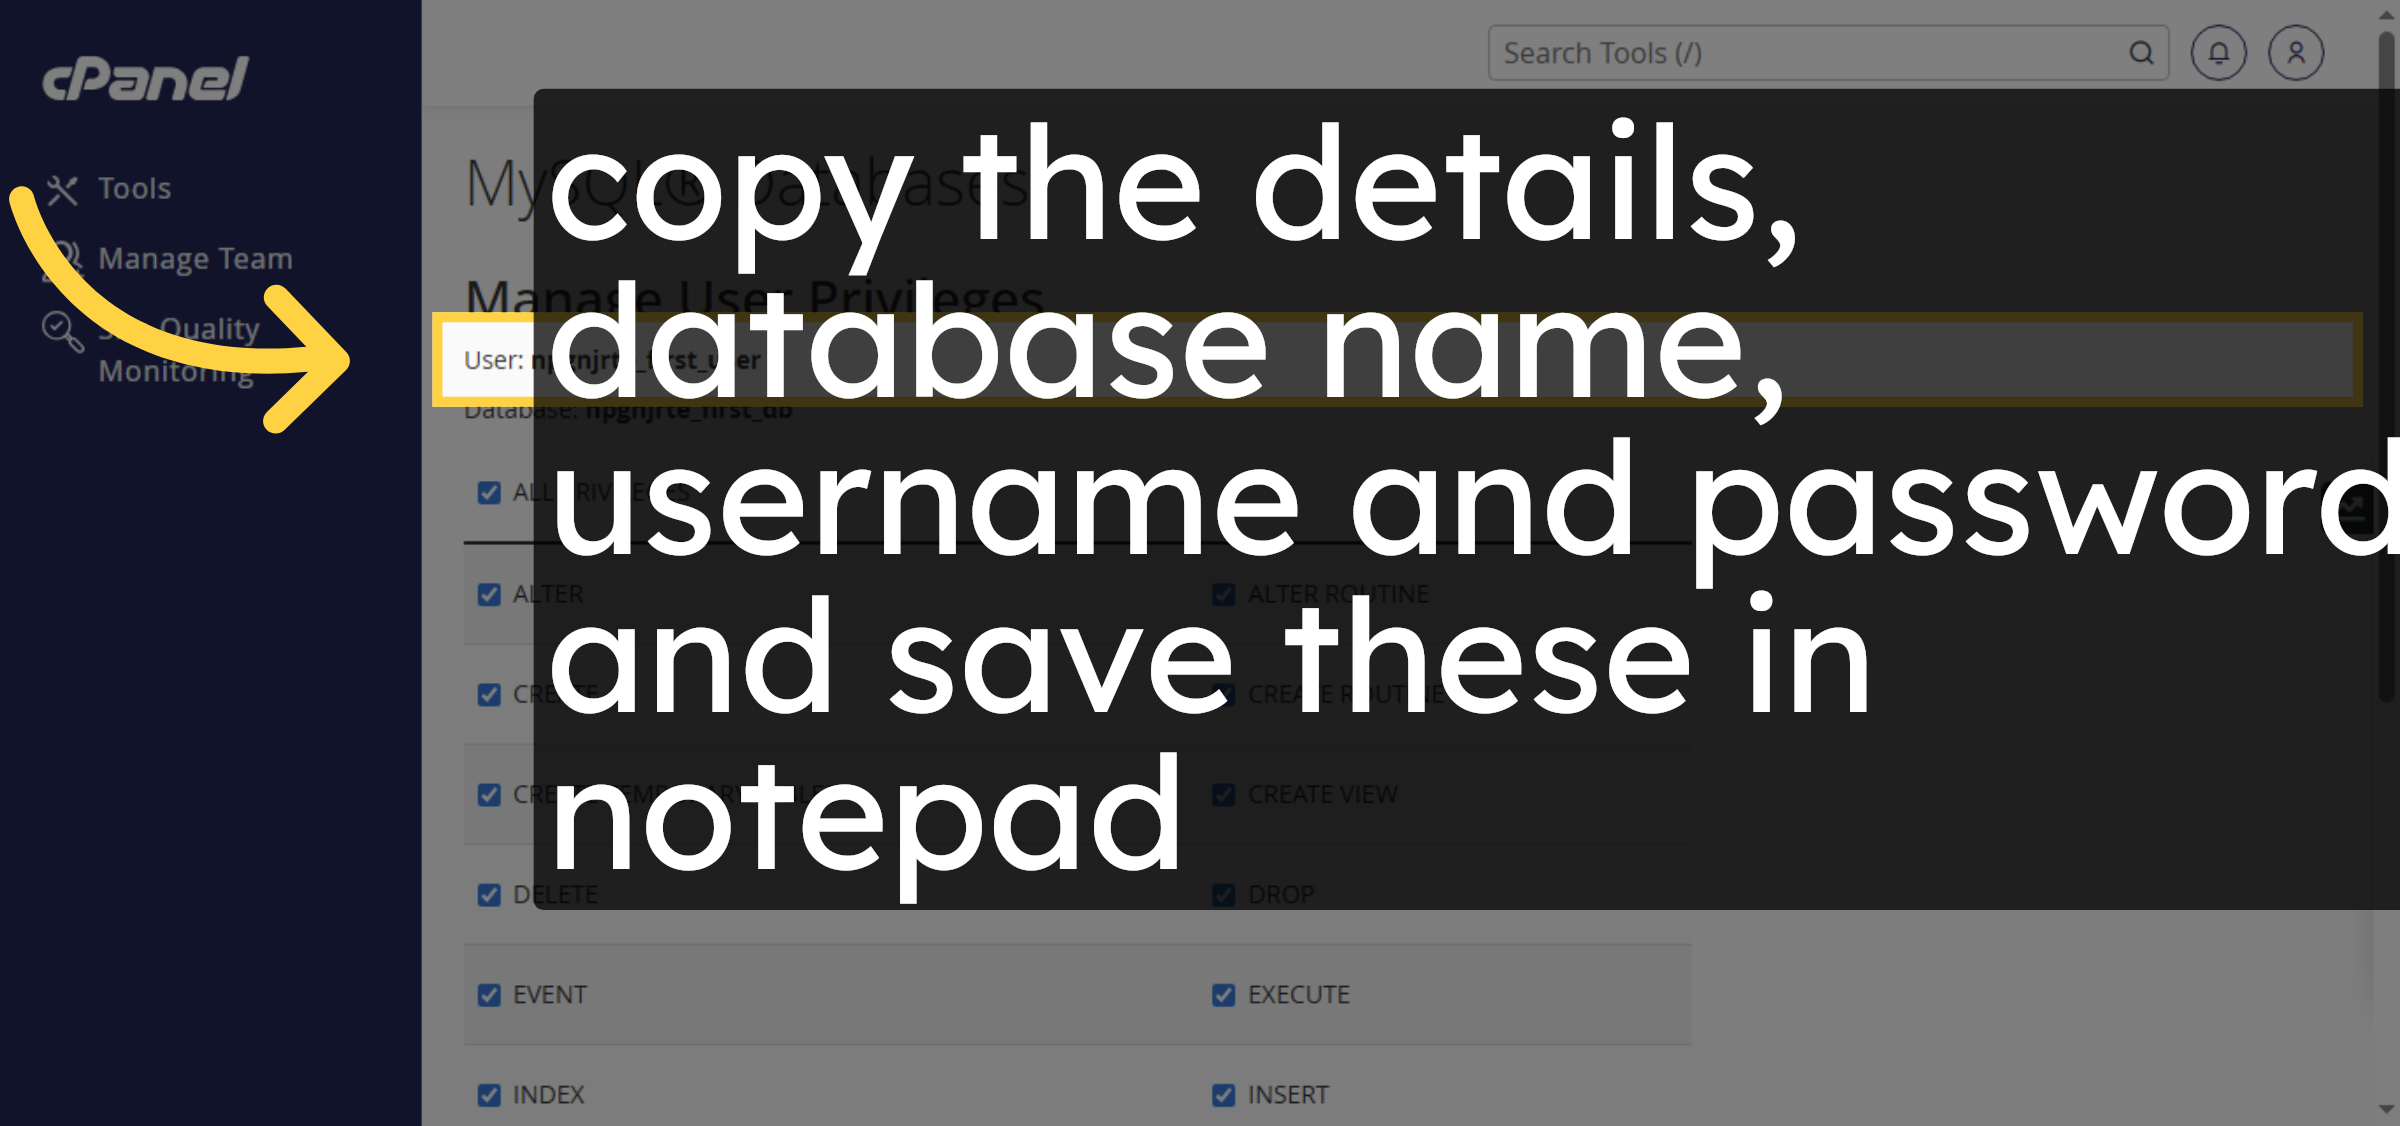
34. Enter Database Username
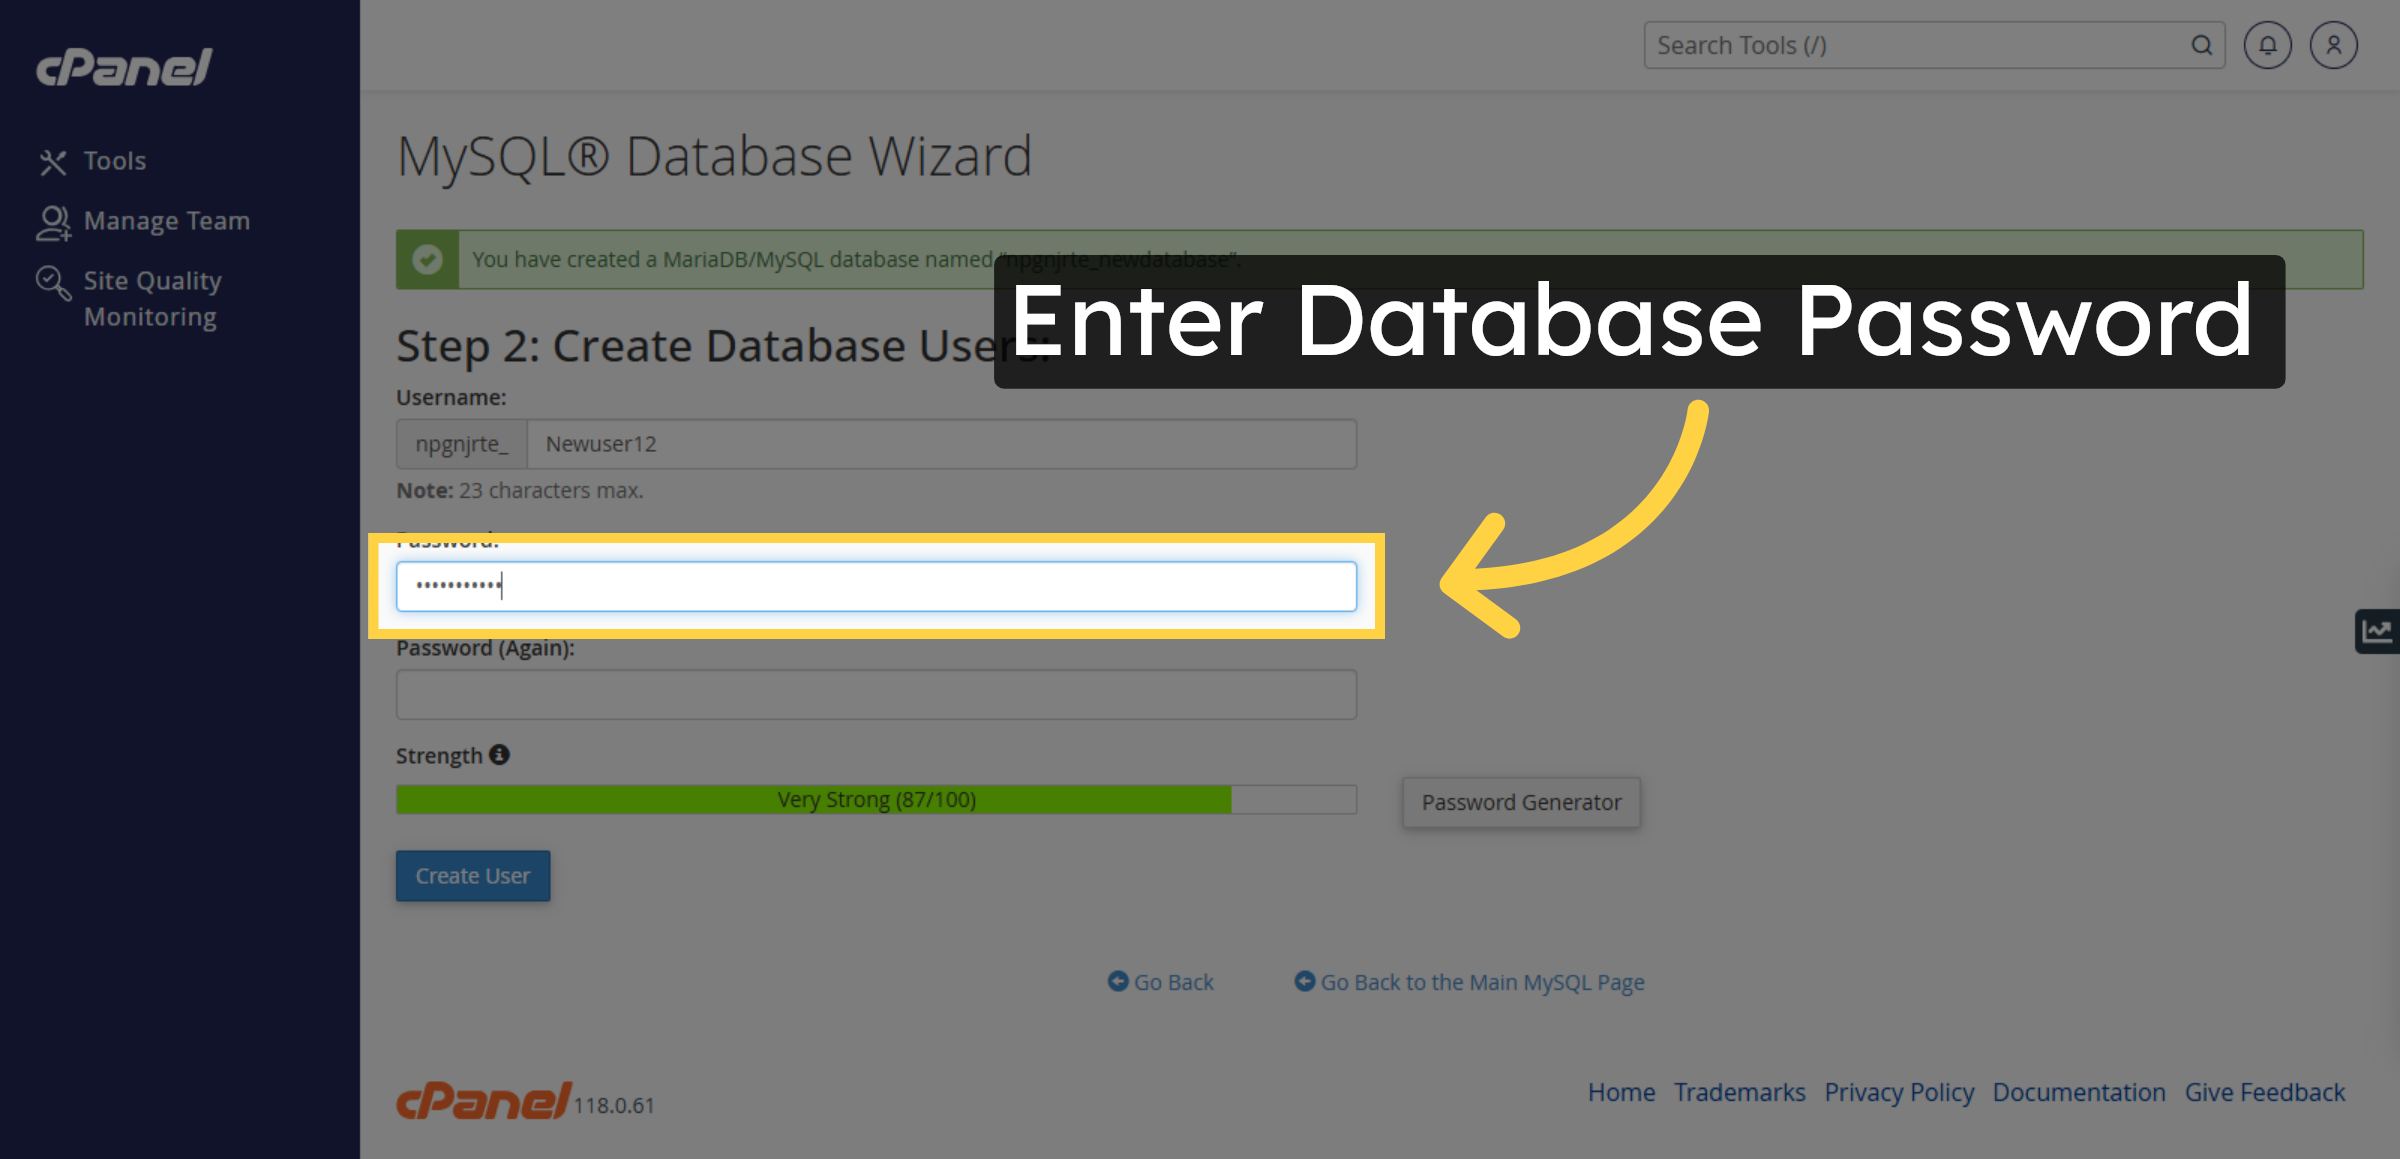
35. Enter Database Password


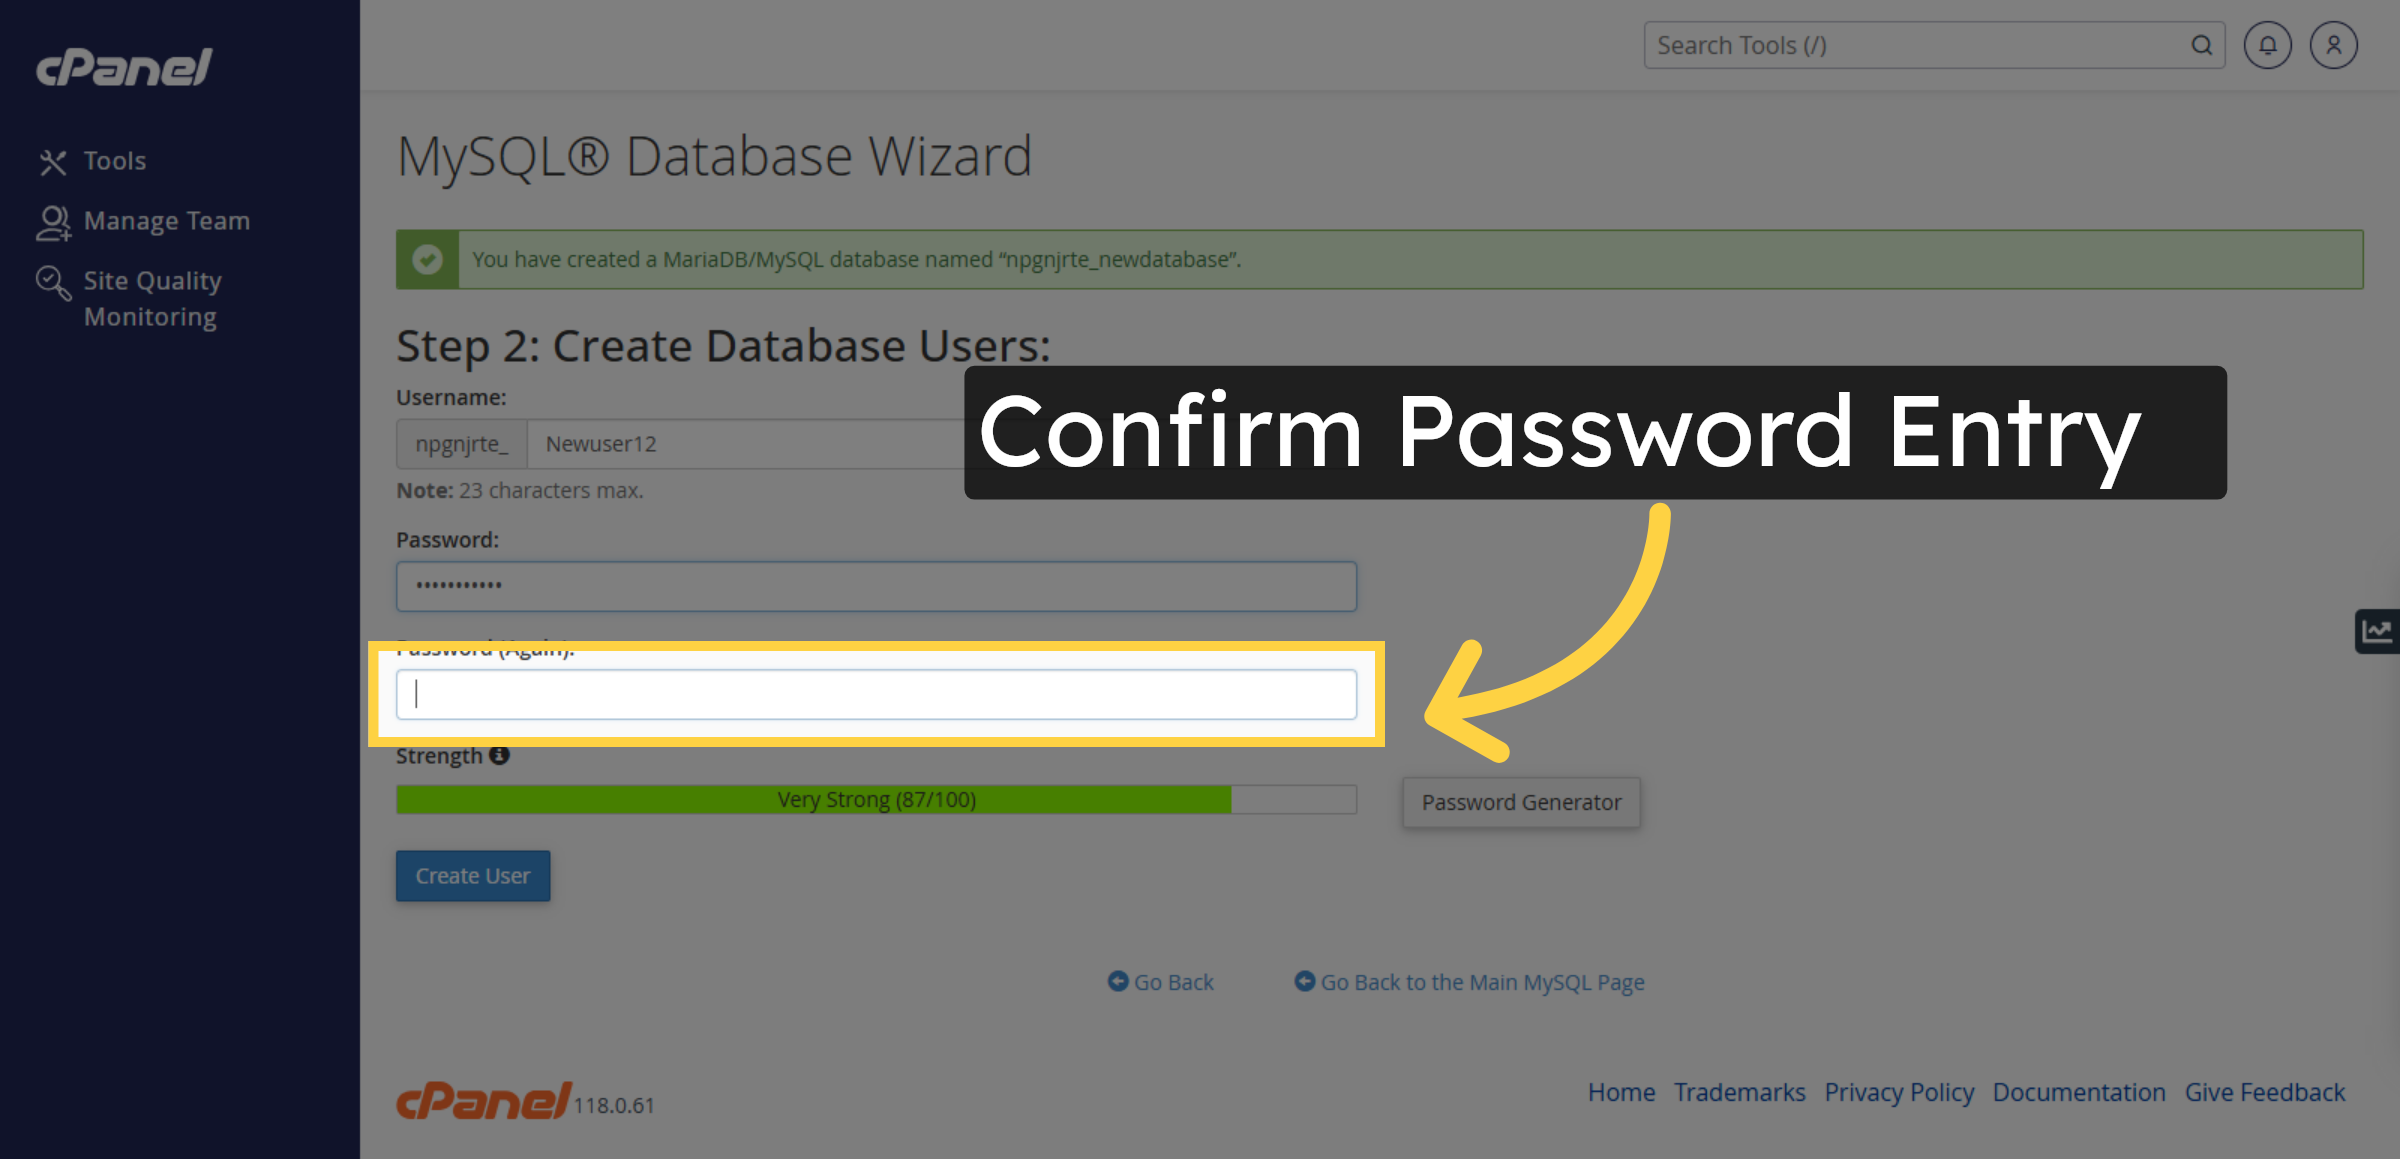
36. Re-enter Database Password
37. Create Database User
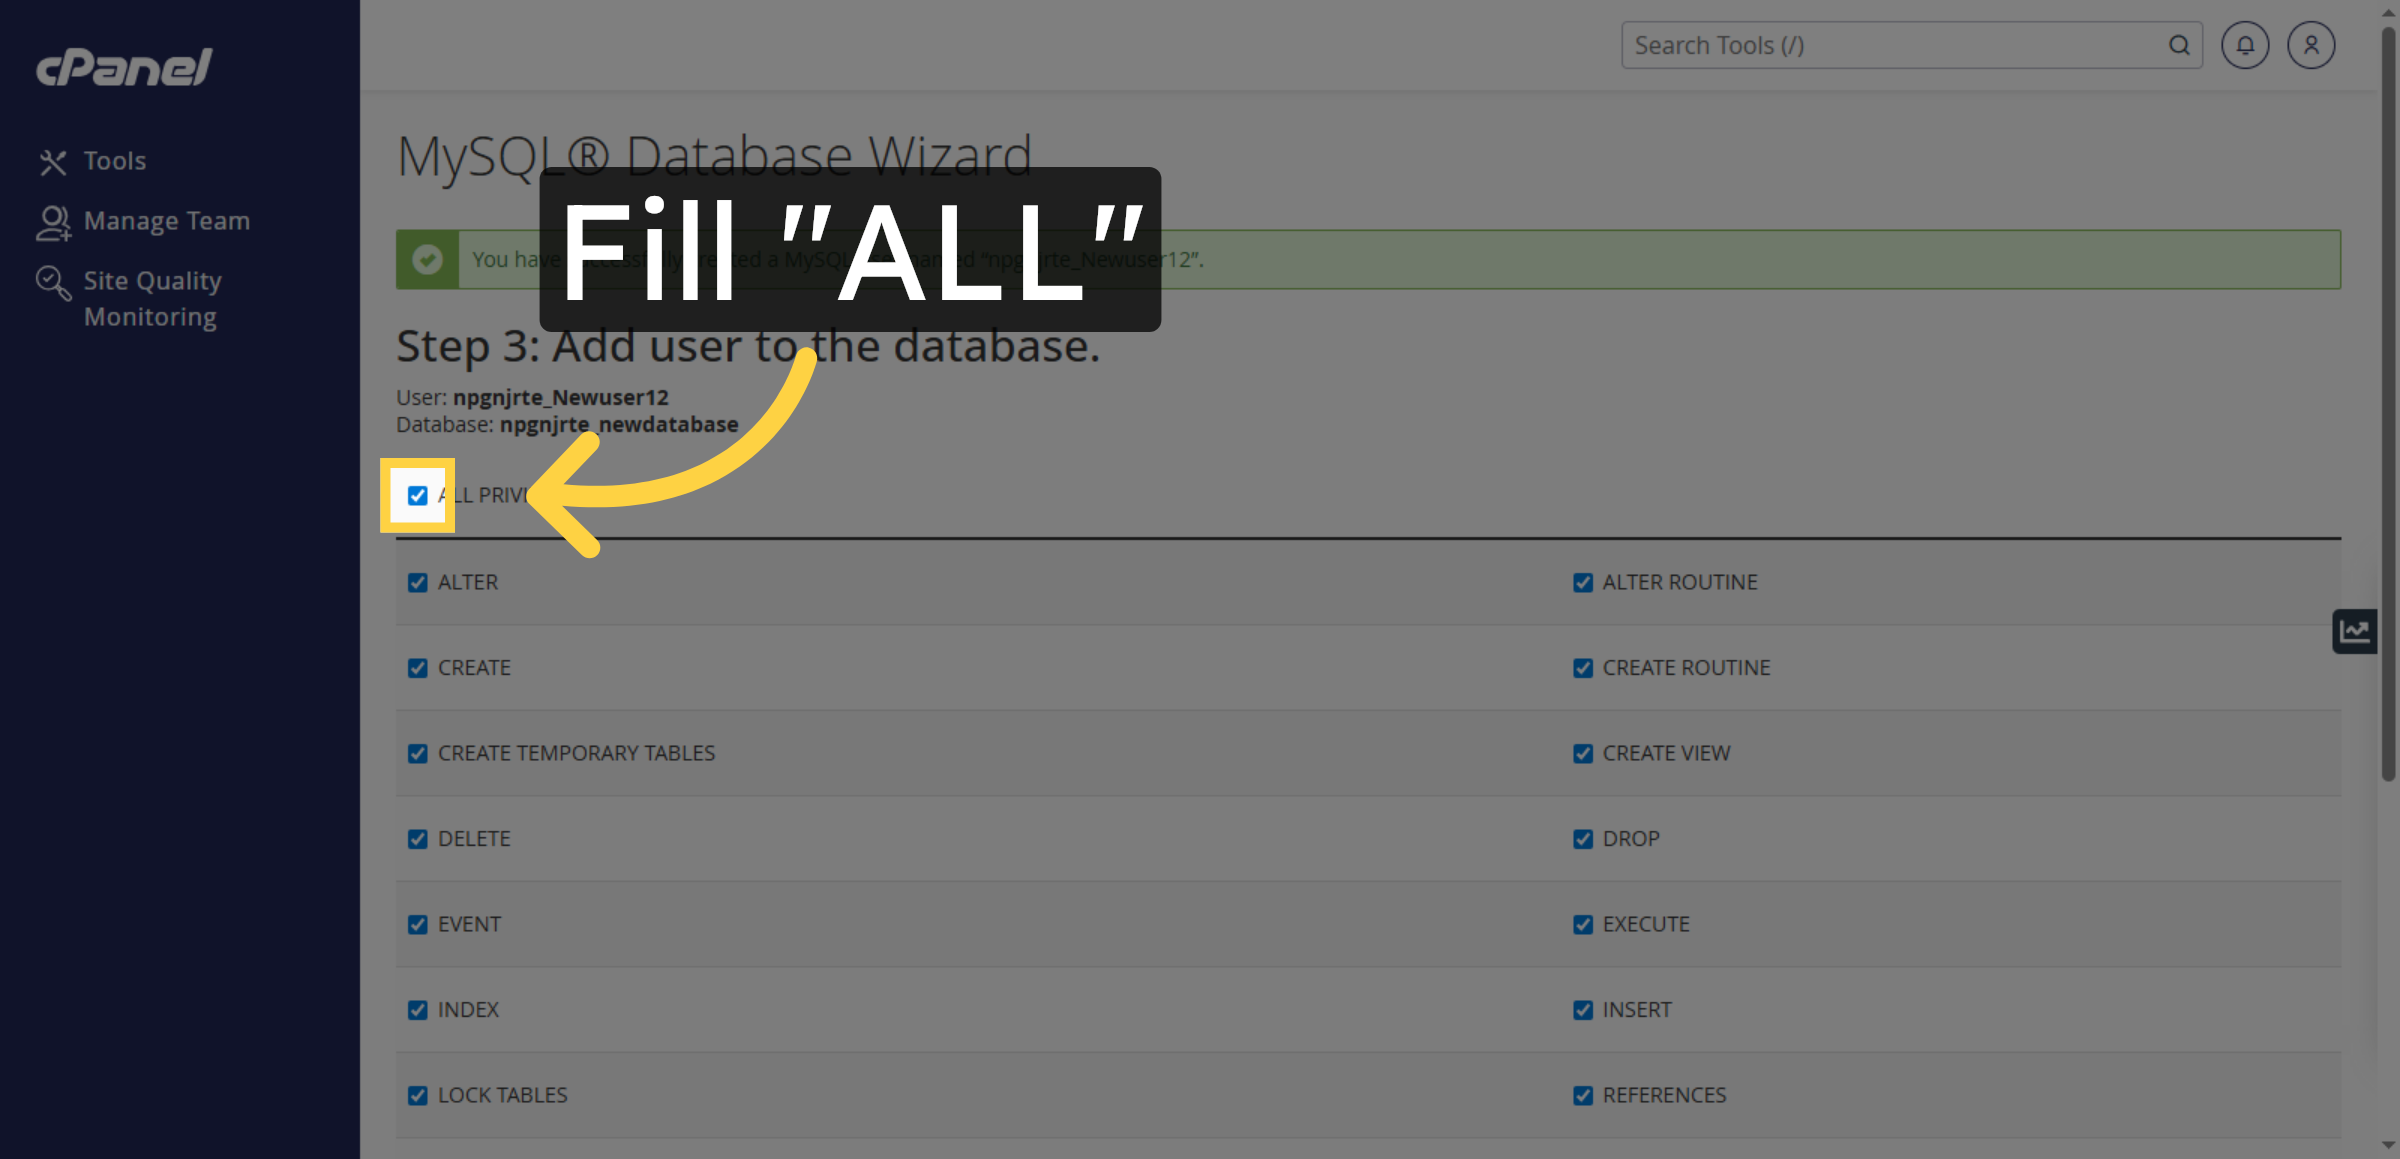
38. Grant All Privileges
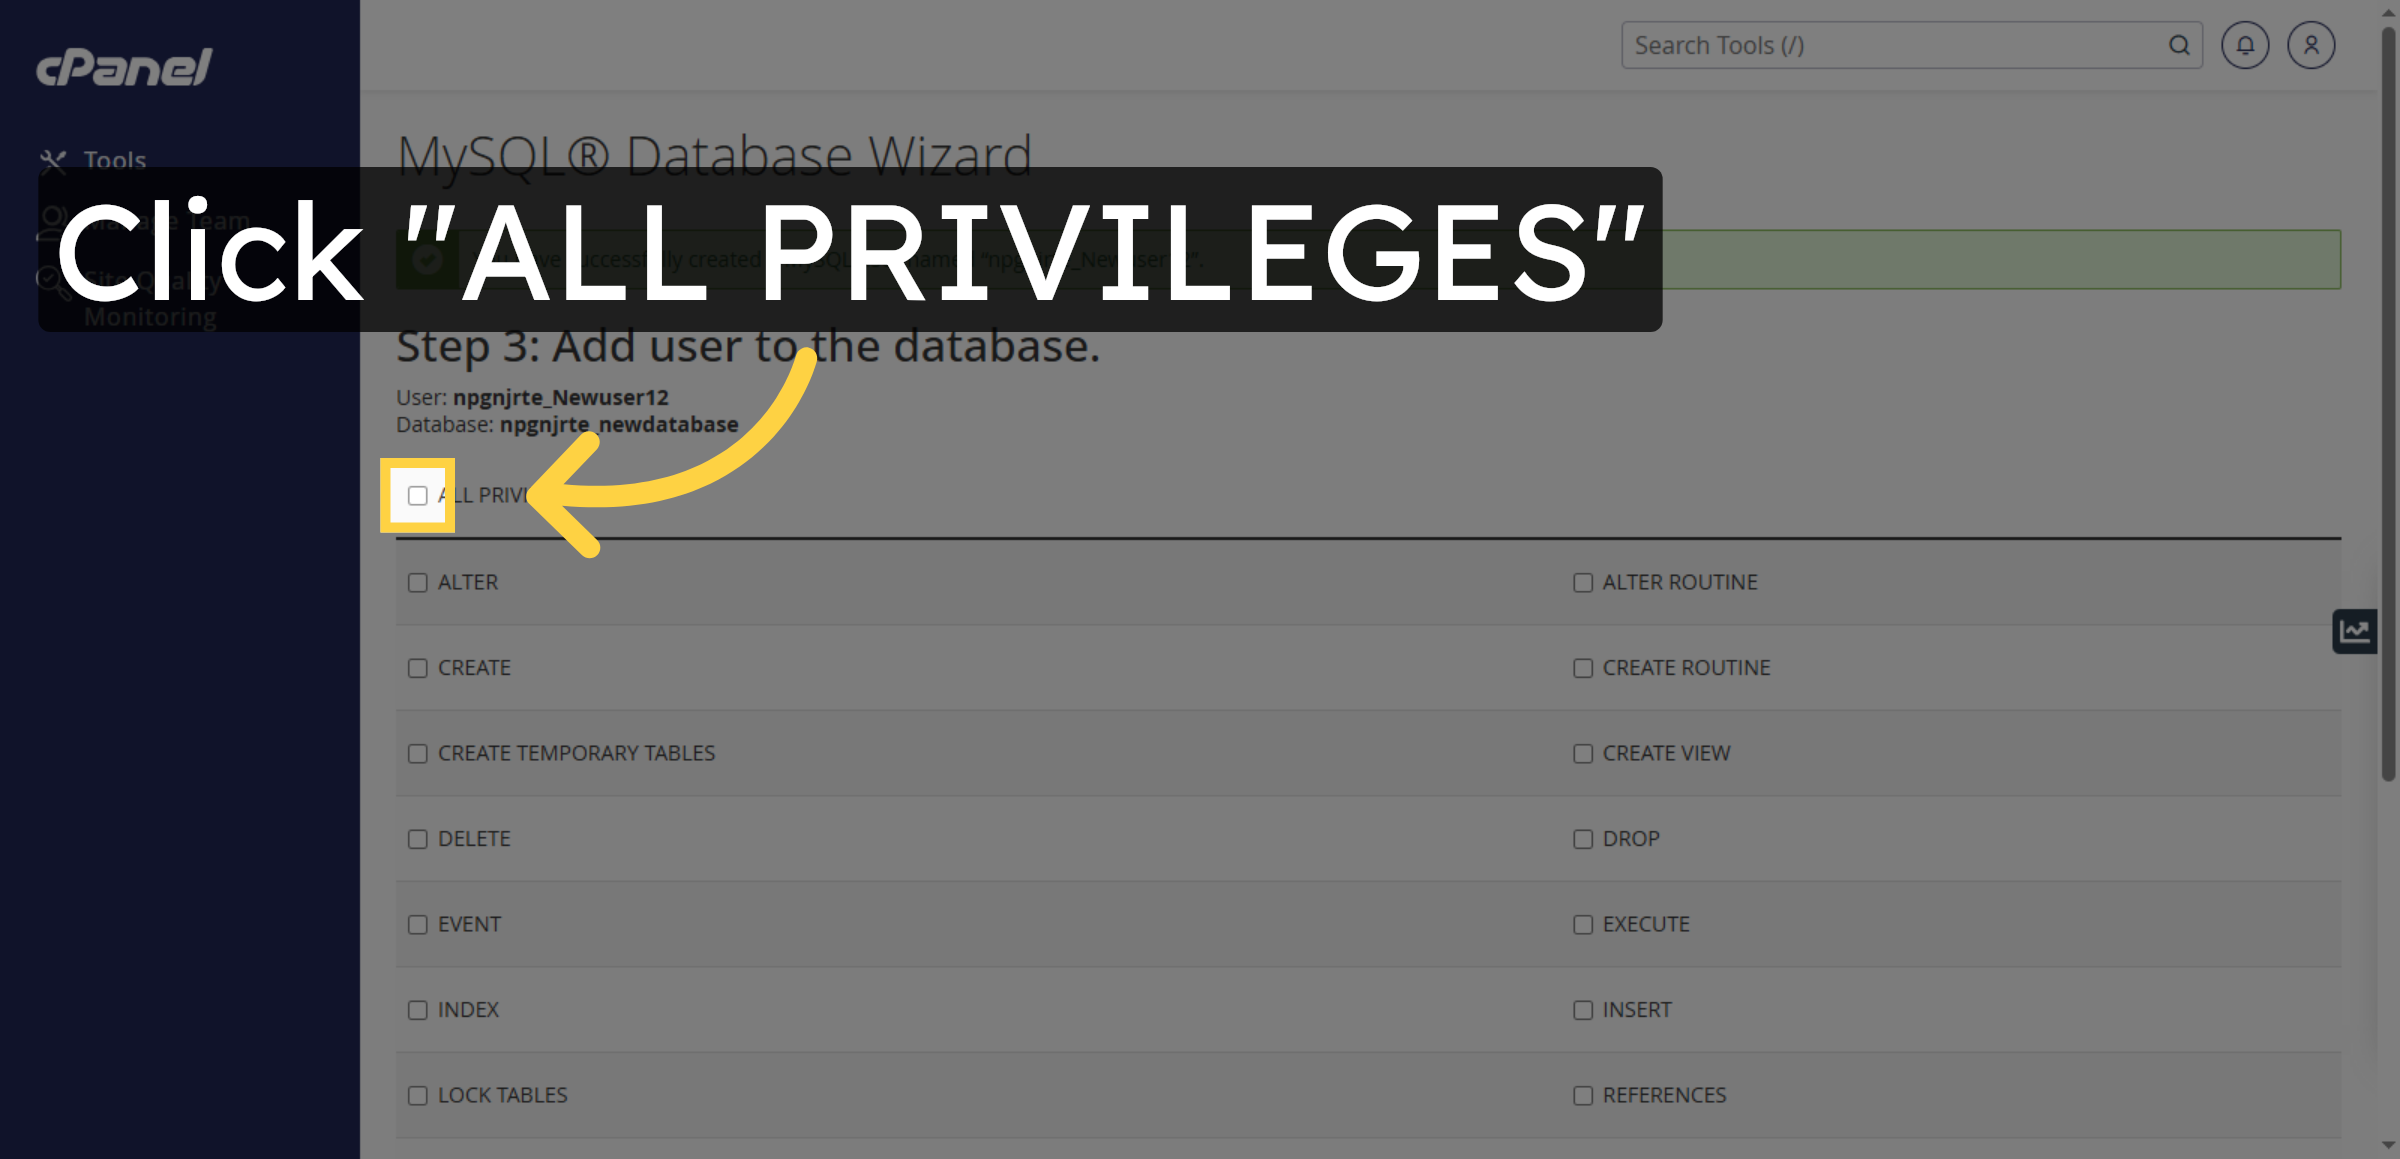
39. Confirm Privileges Selection
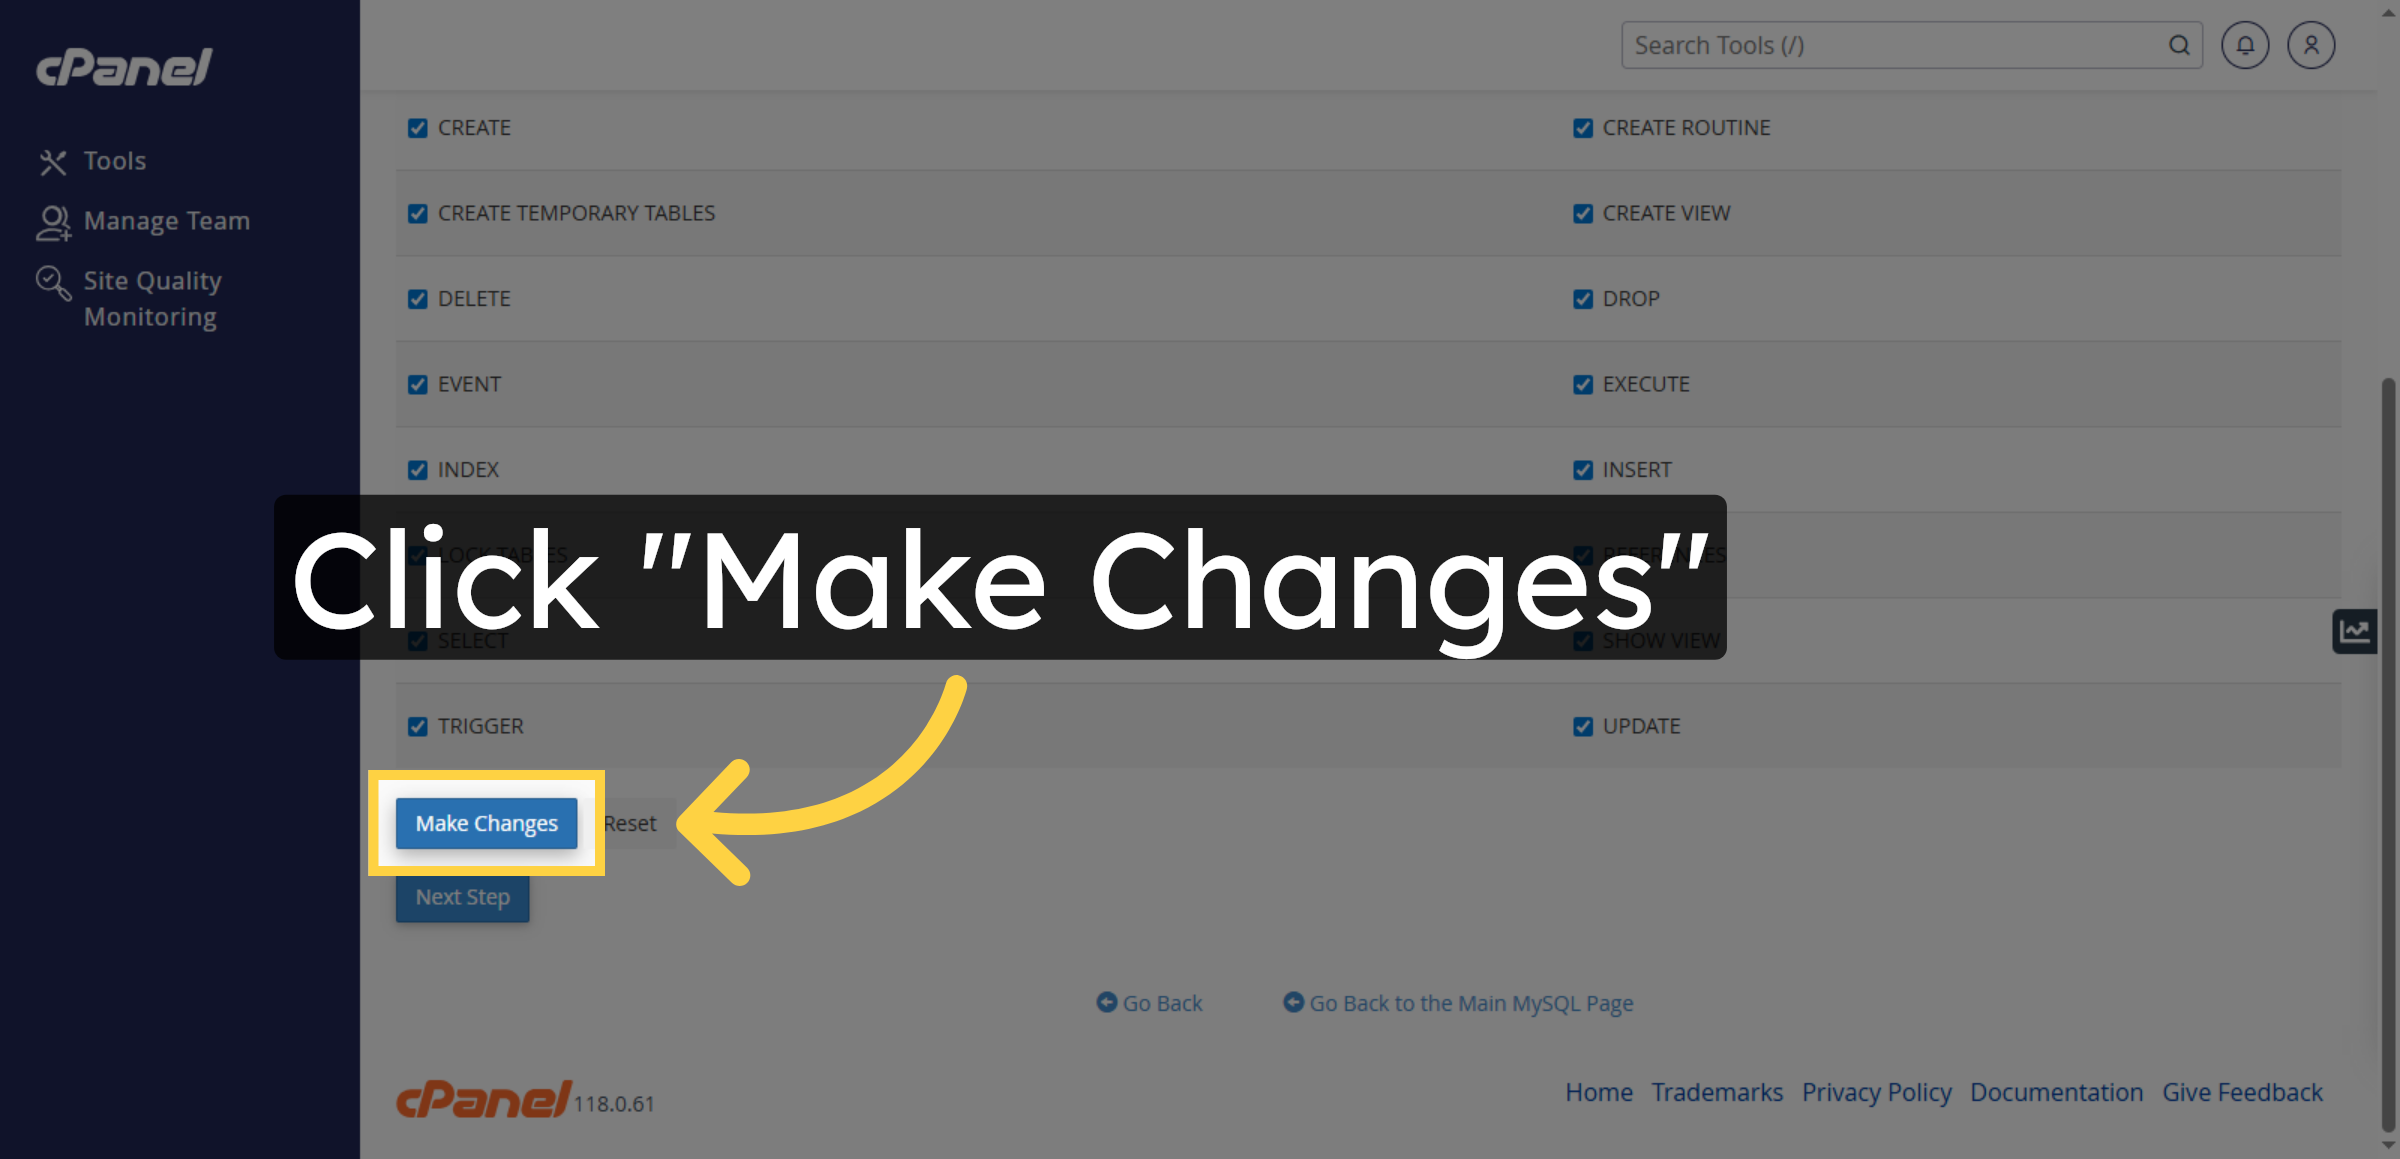
40. Apply Privilege Changes
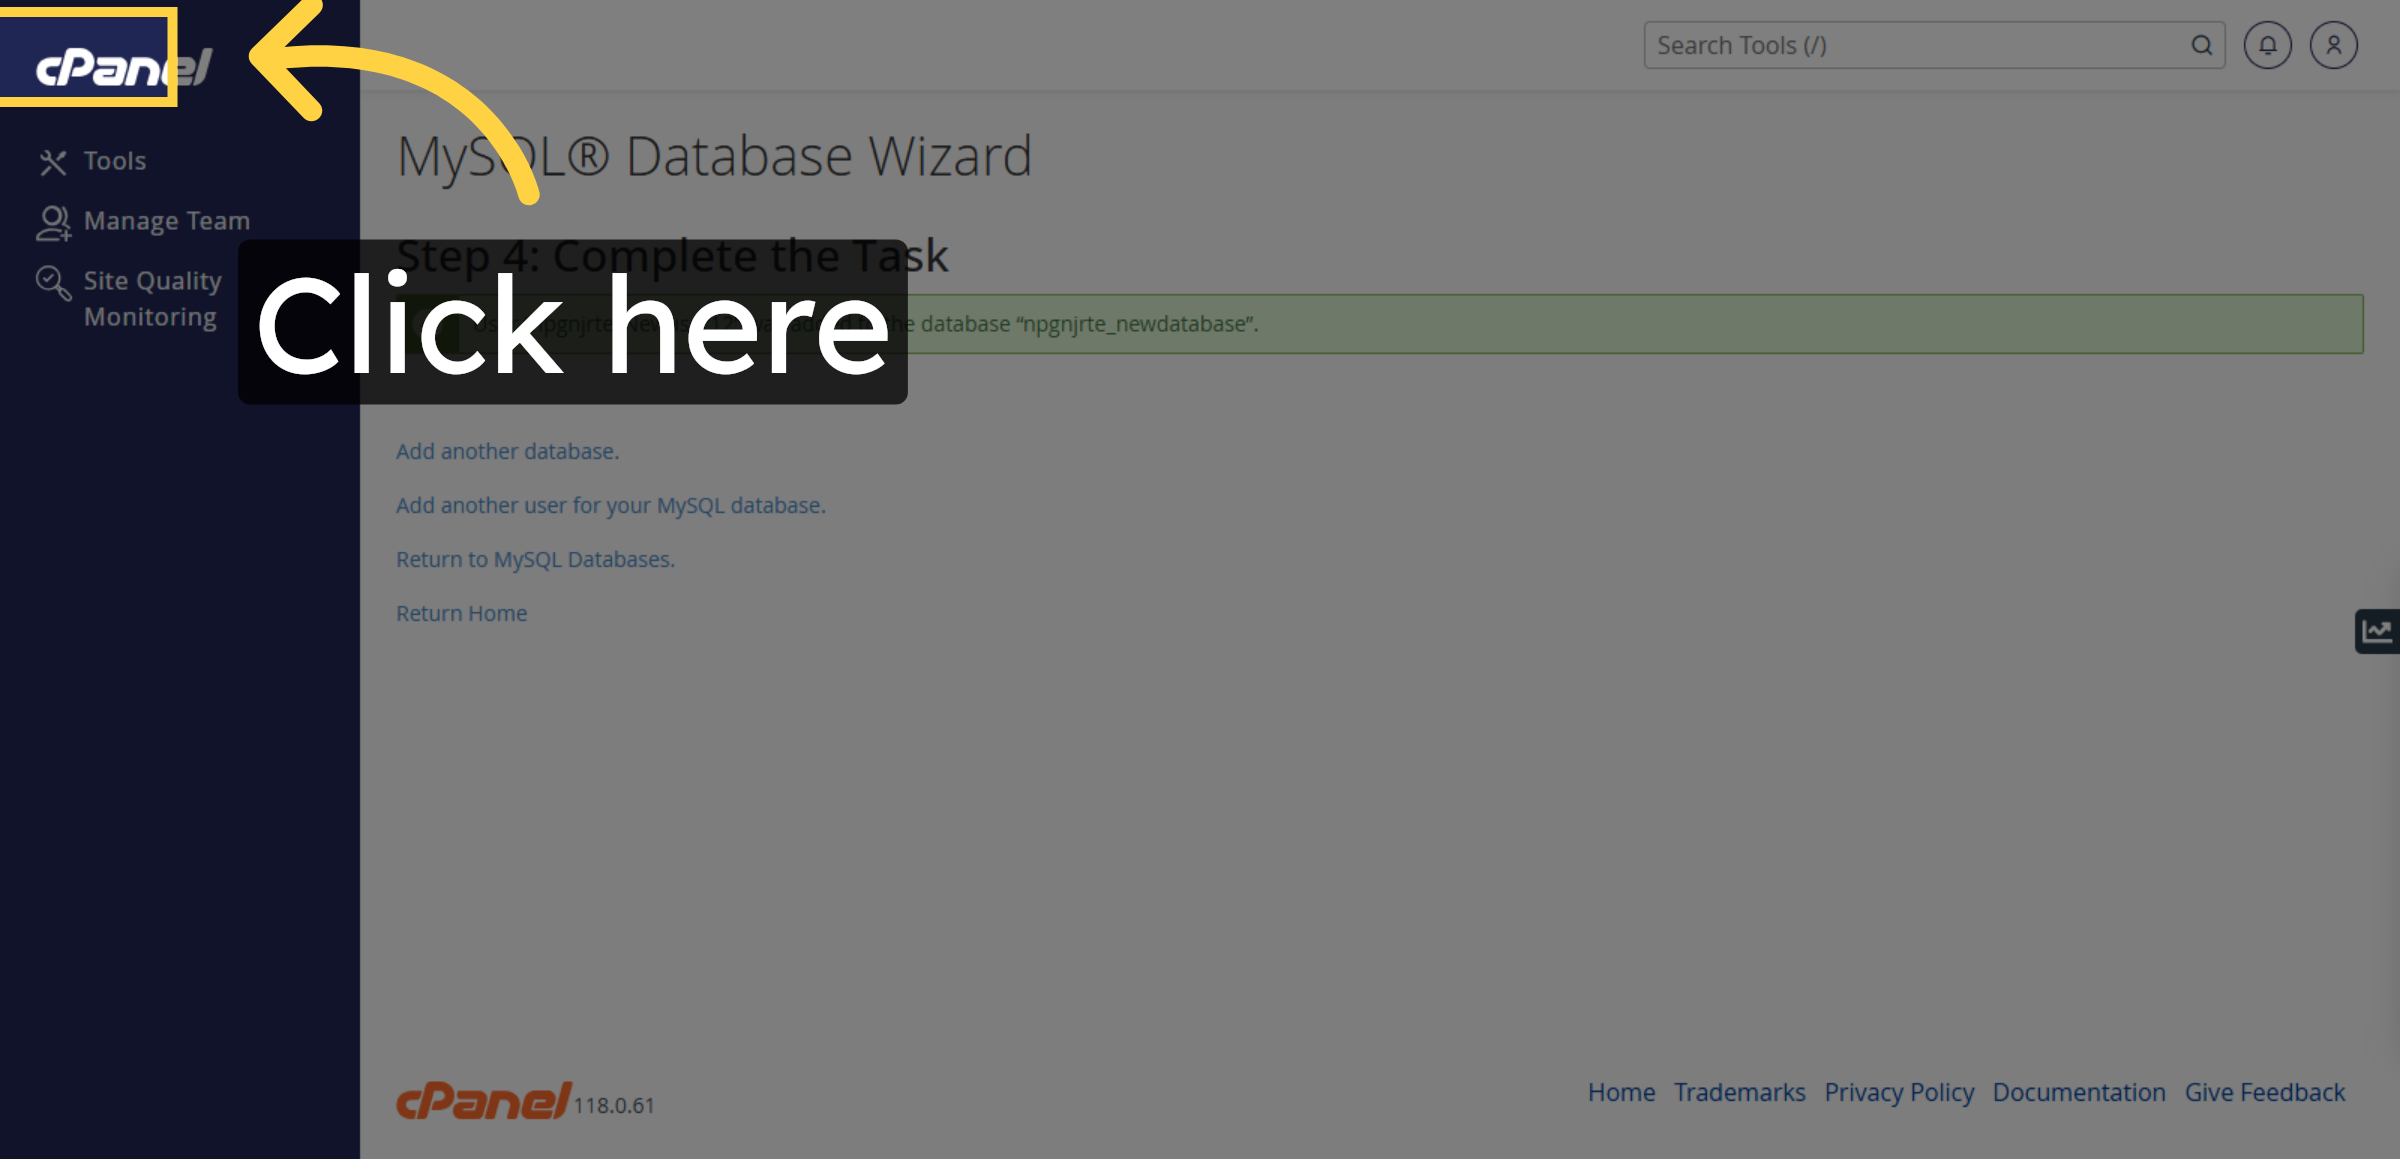
41. Switch to WordPress Site
42. Return To Control Panel
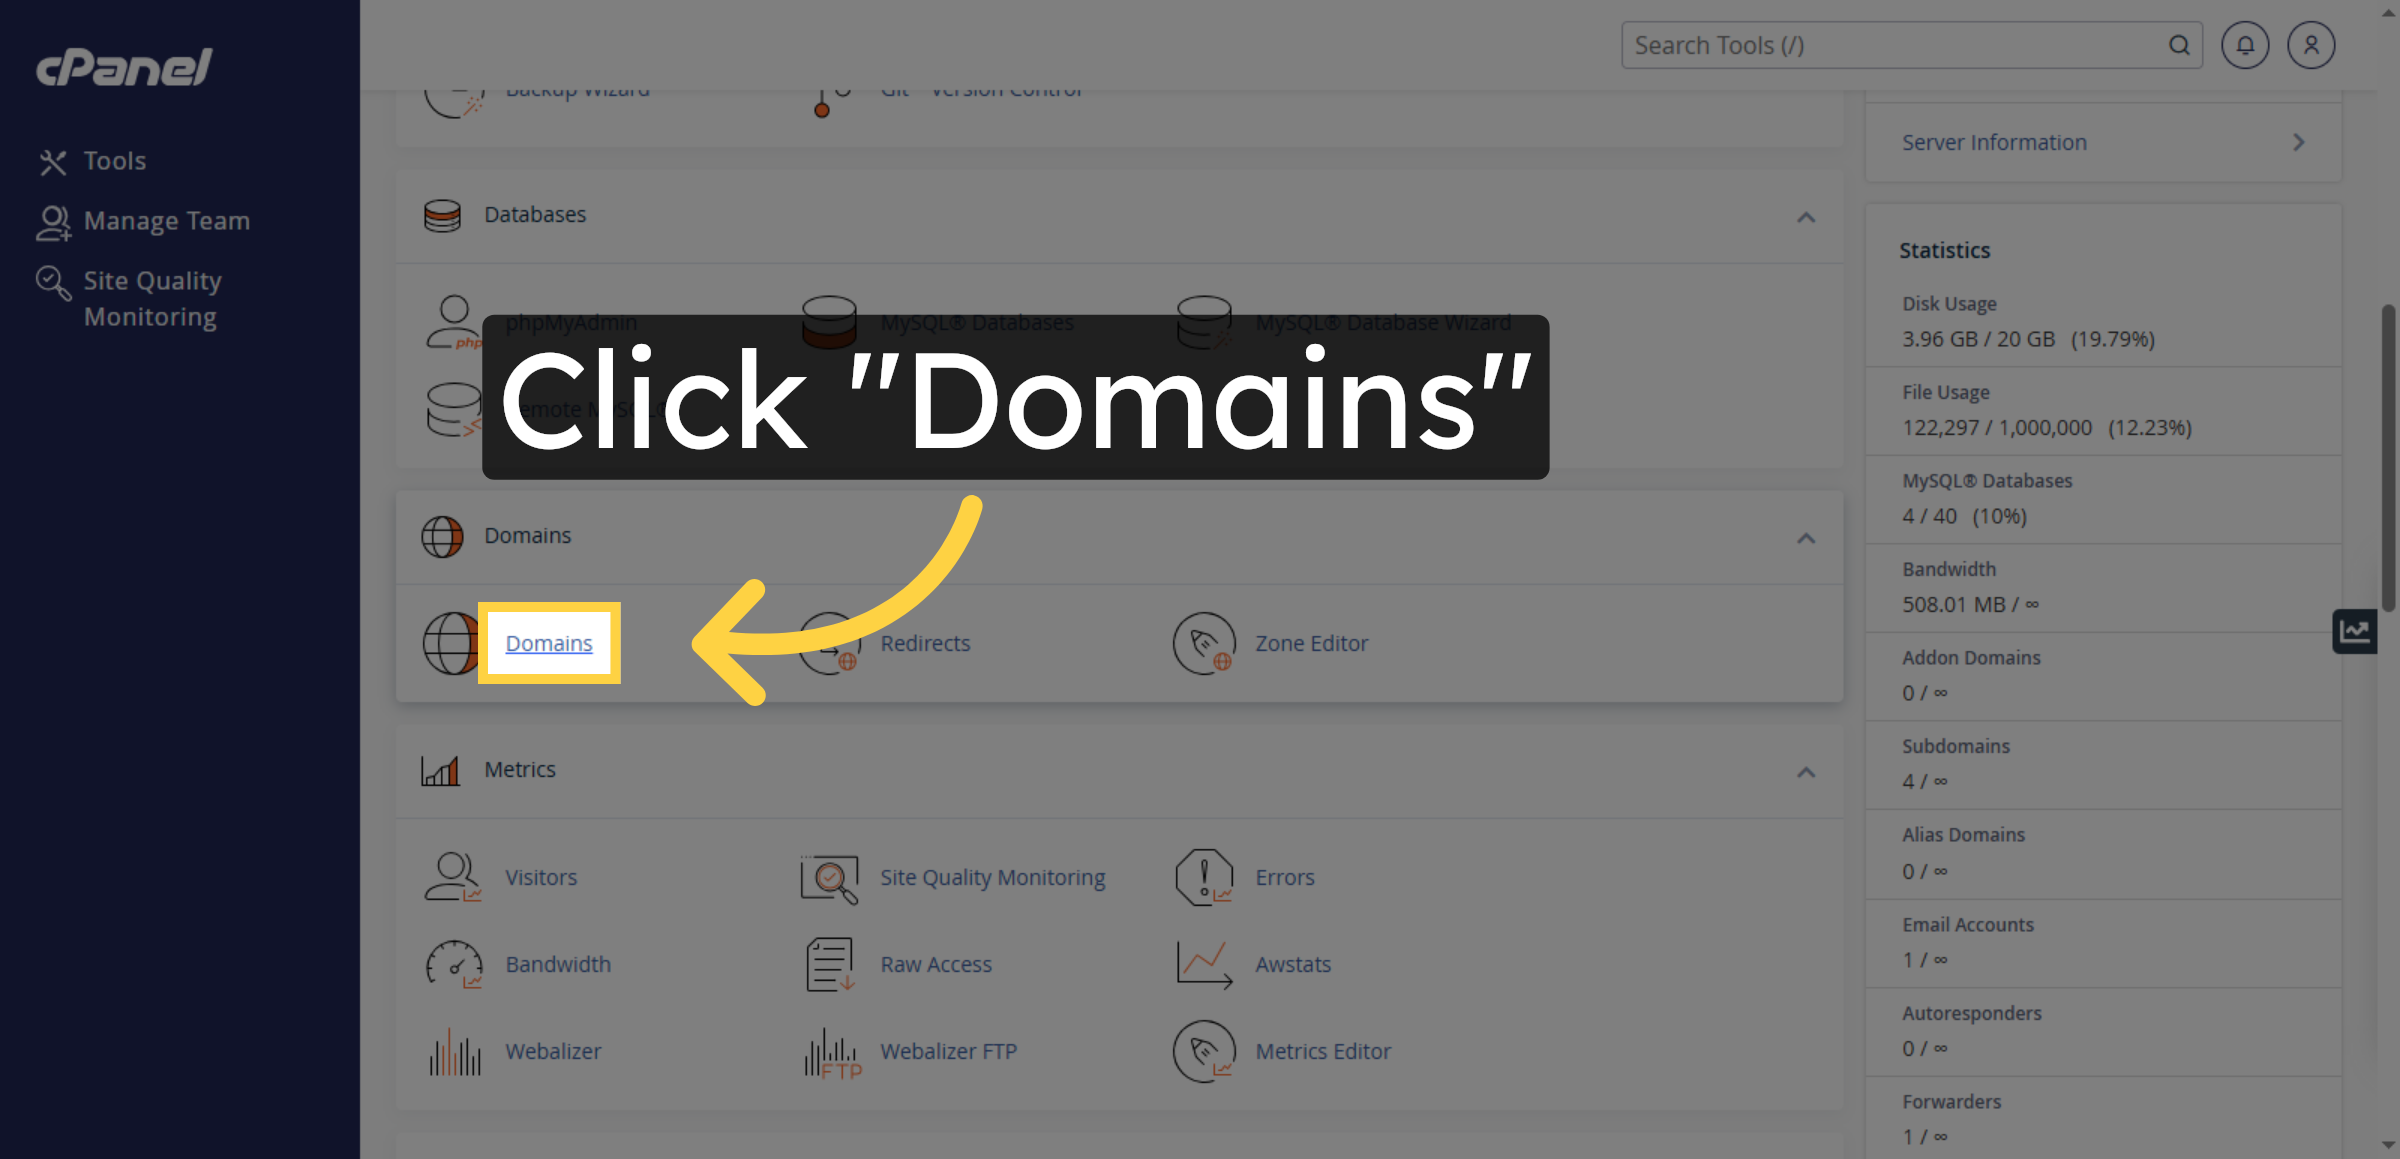
43. Open Domains Section
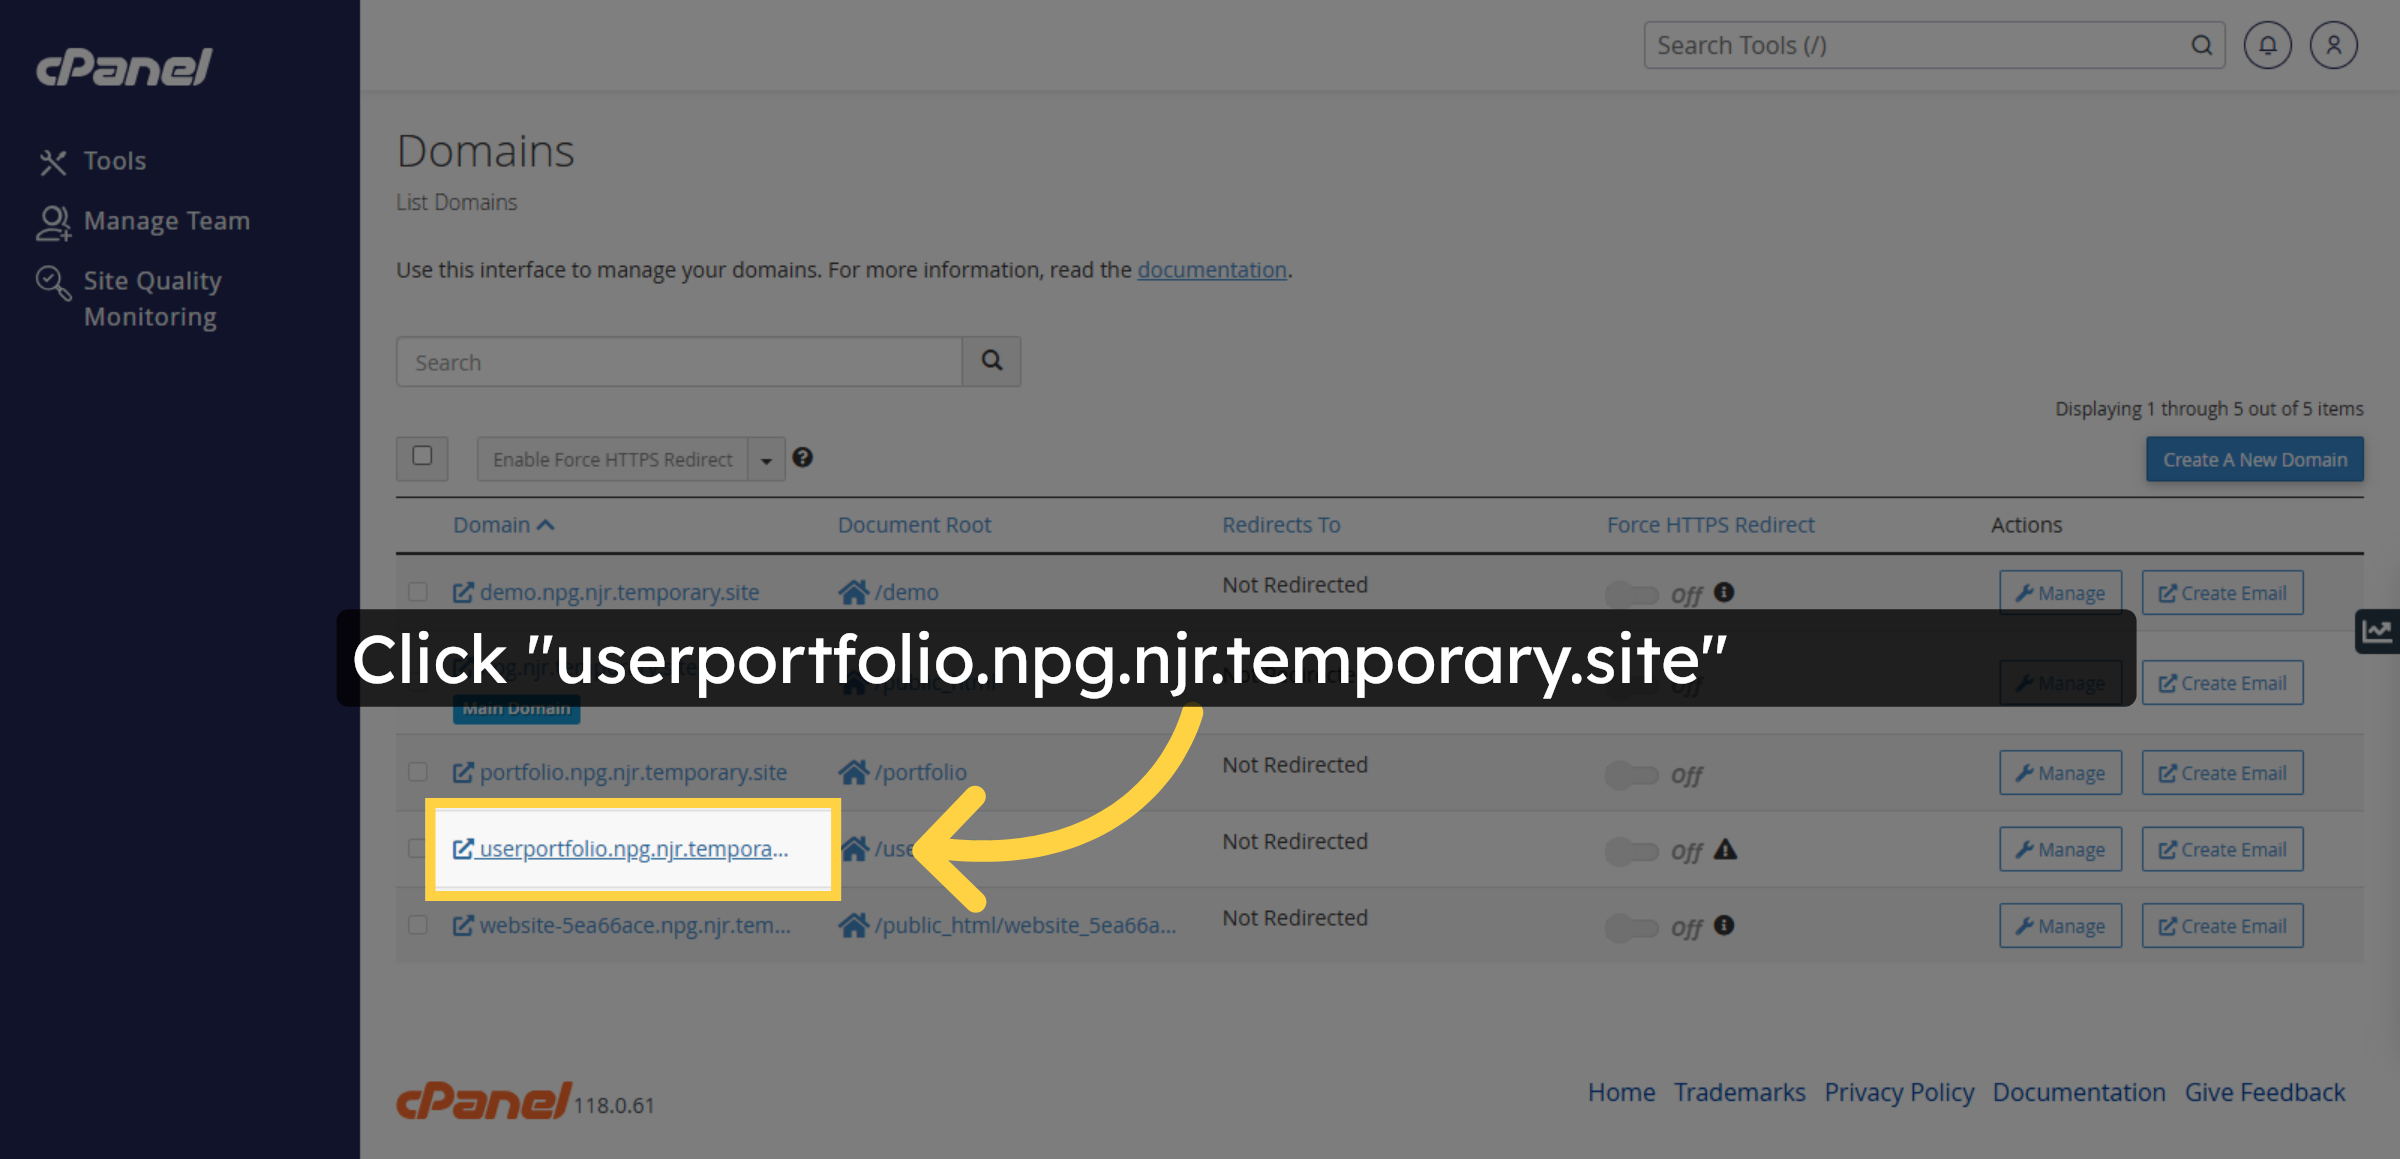
44. Select Subdomain
45. Continue WordPress Setup
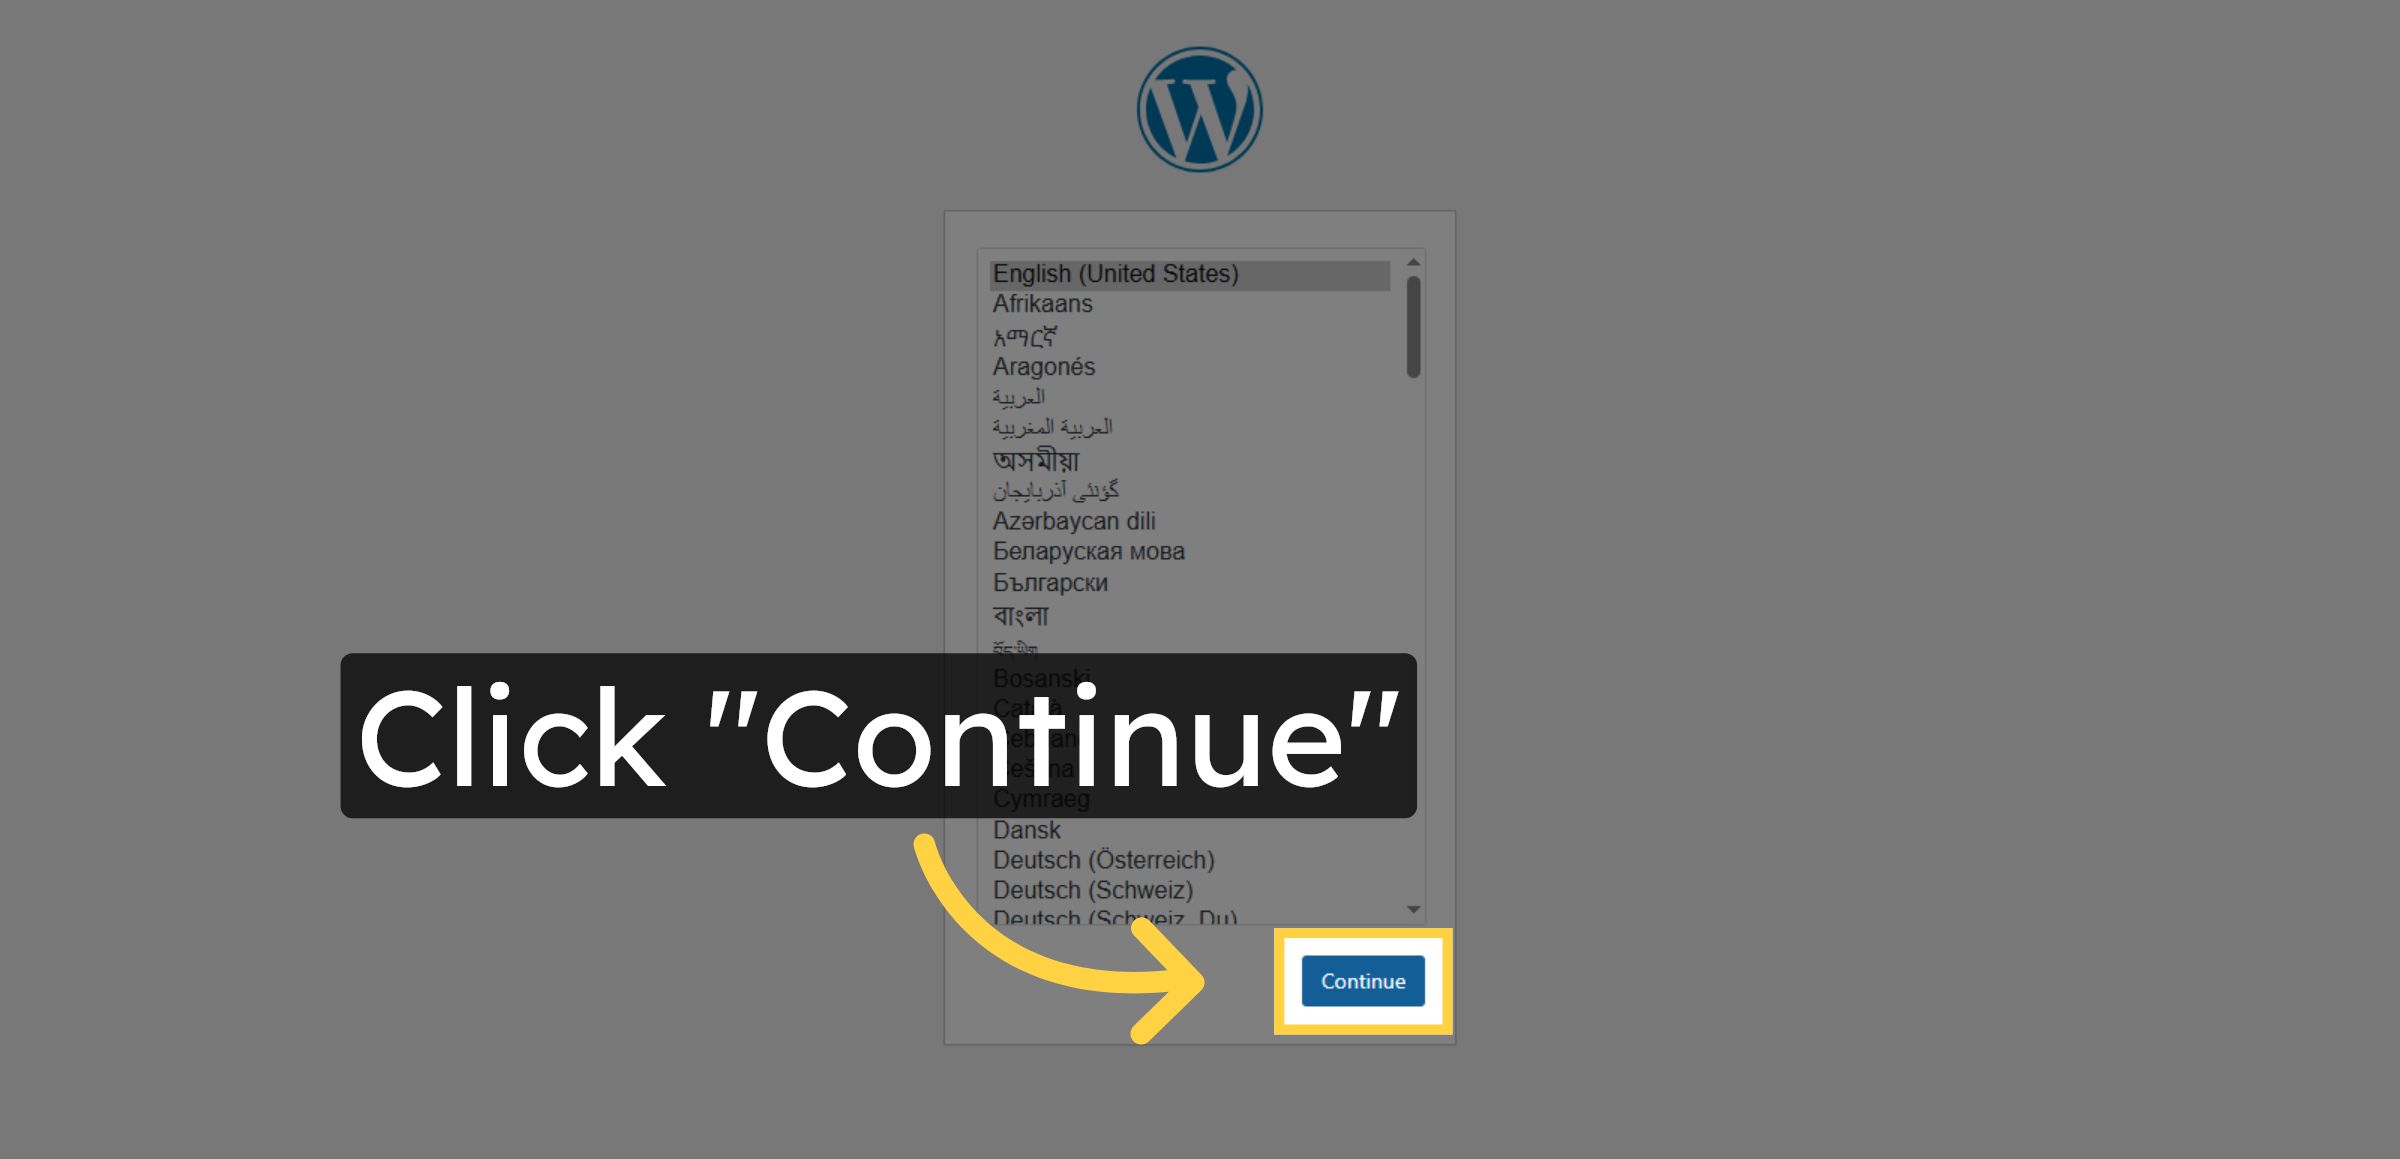
46. Start WordPress Installation
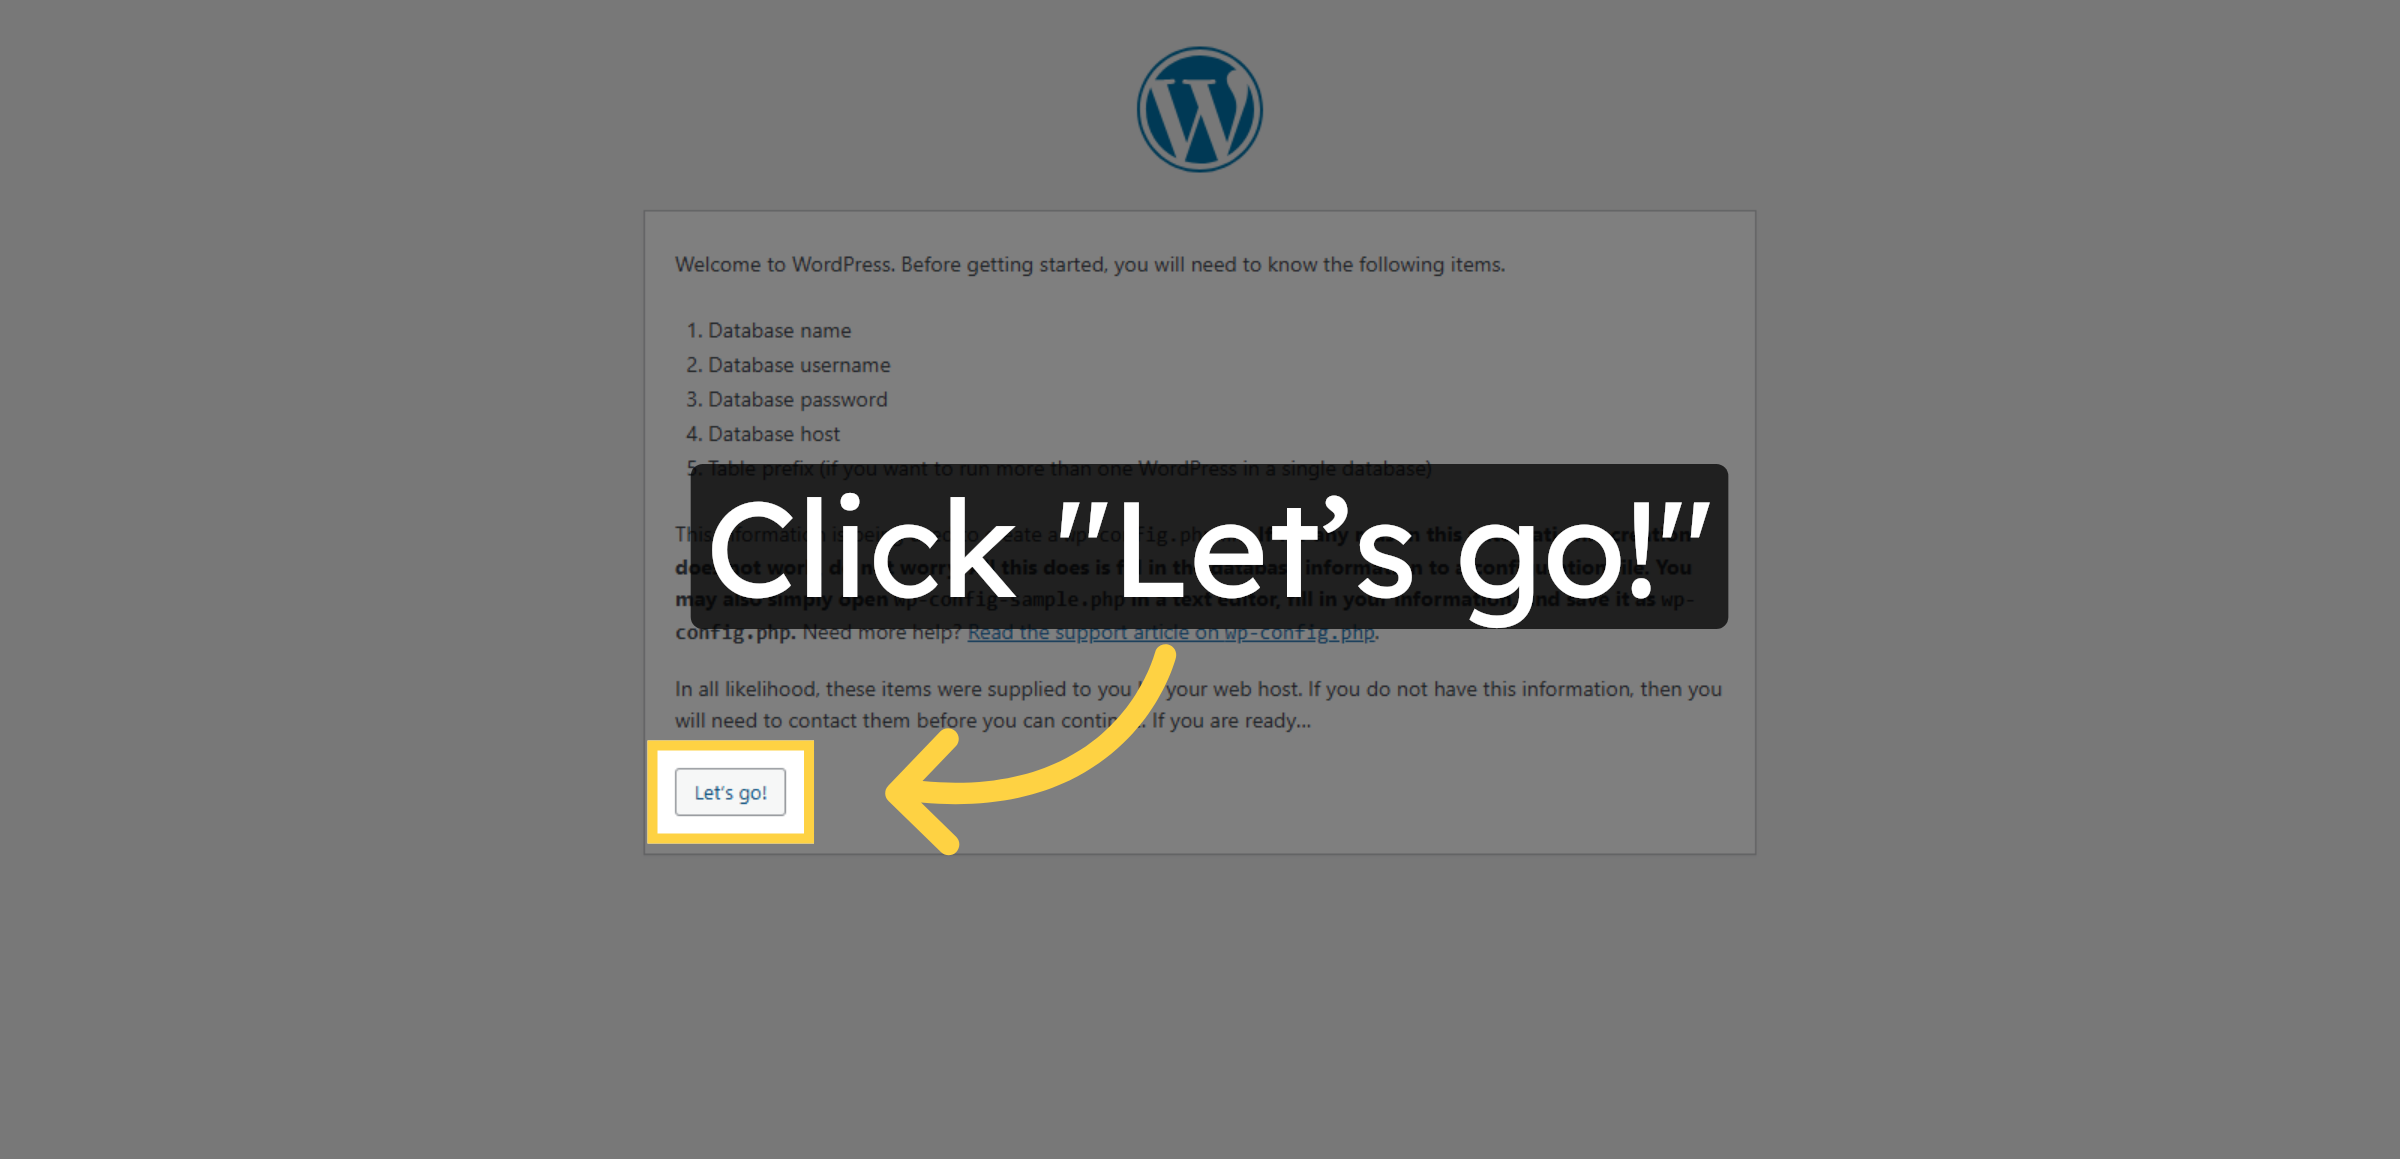
47. Enter Database Name
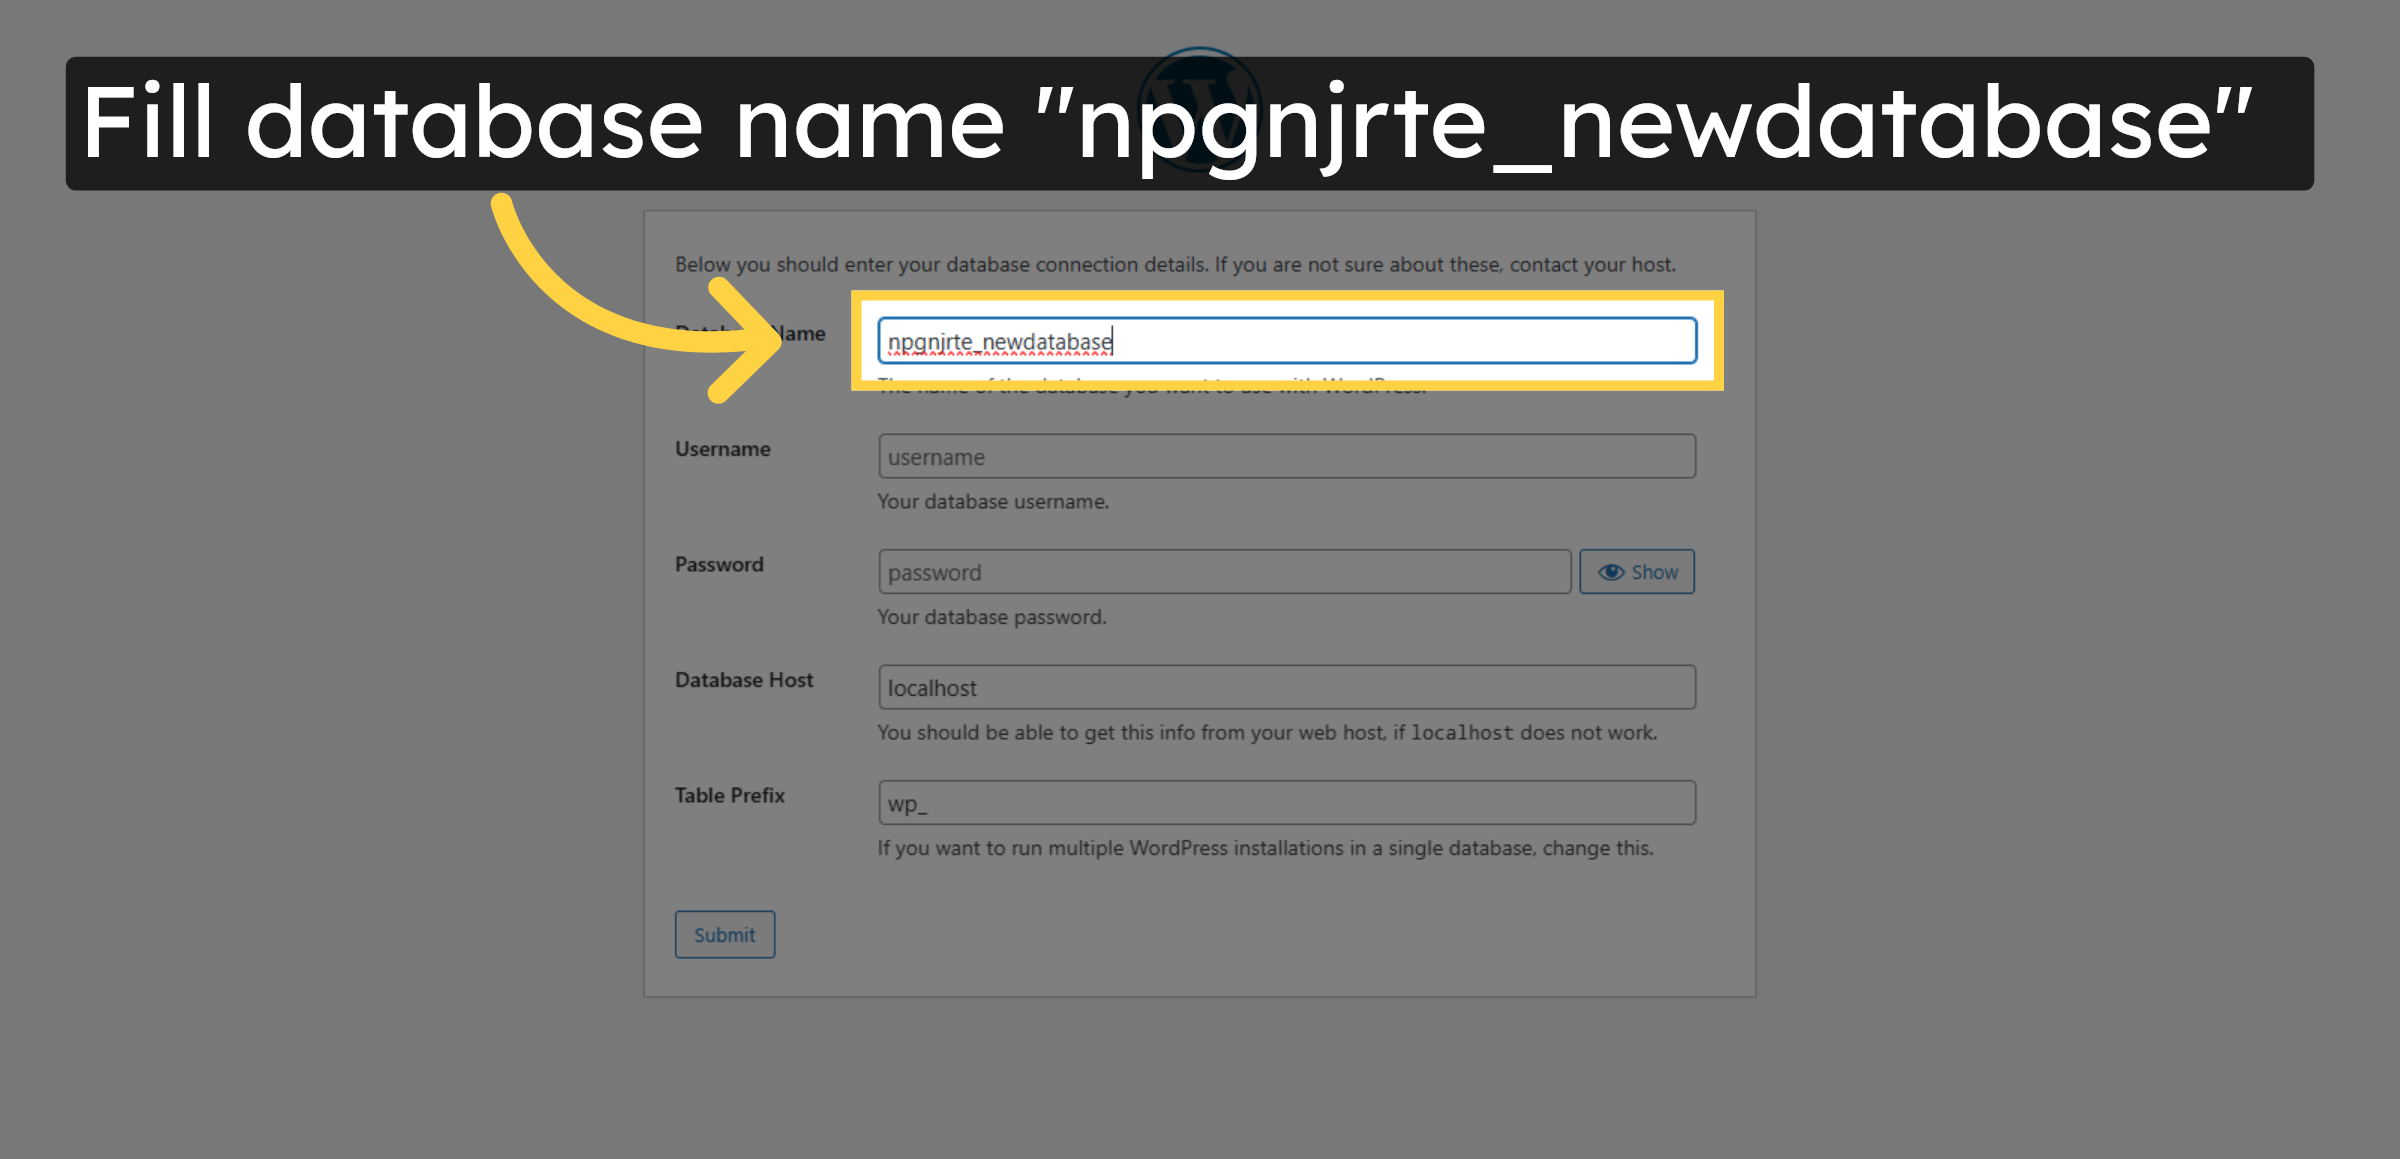
48. Select Username Field
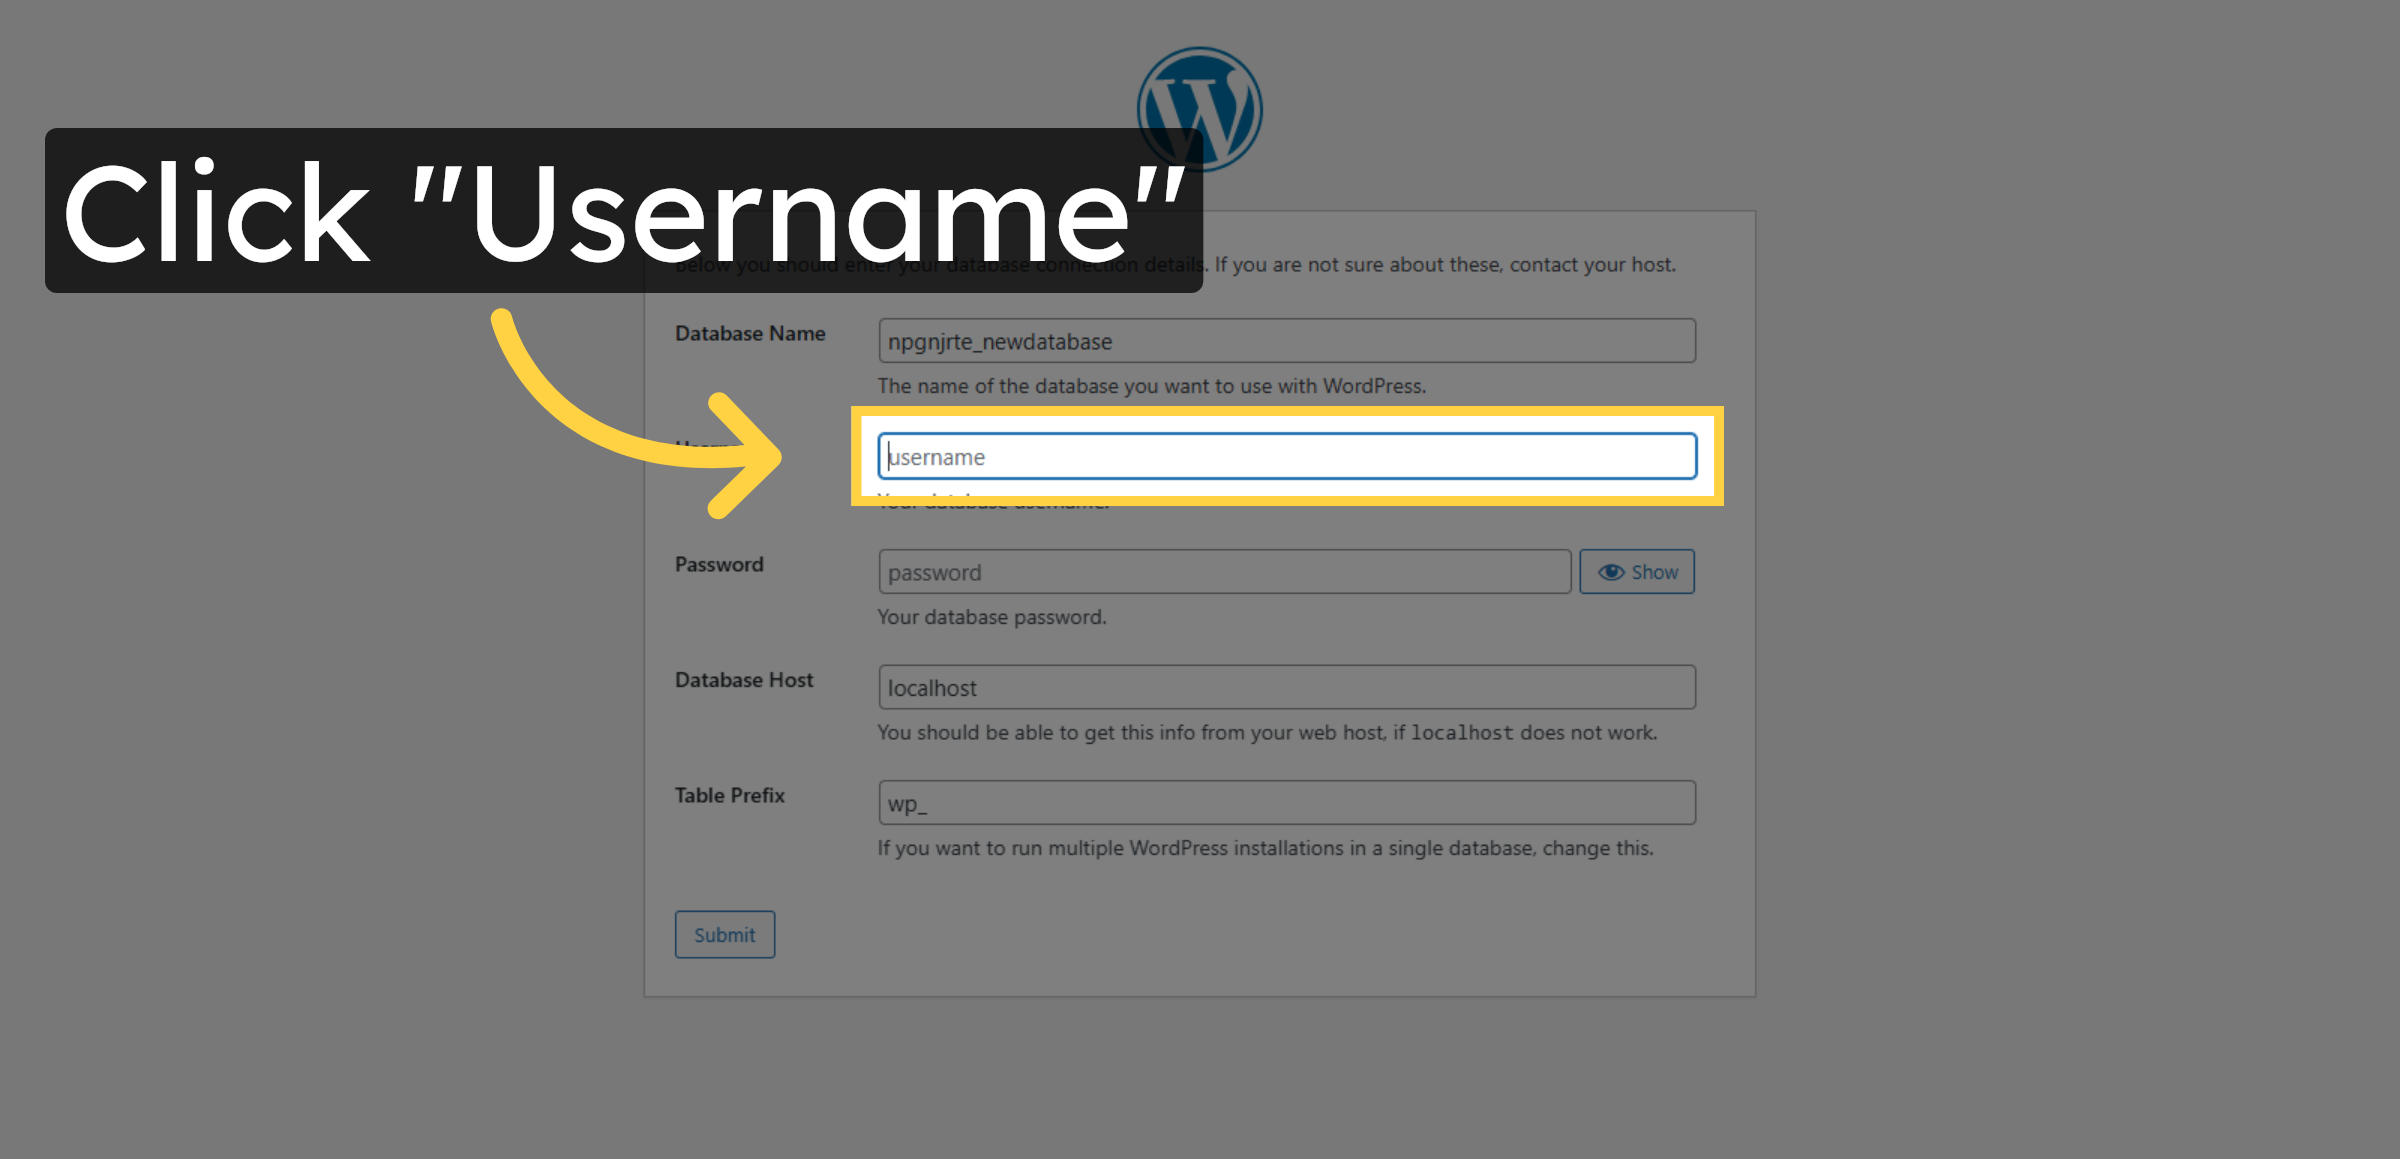
49. Enter Database Username
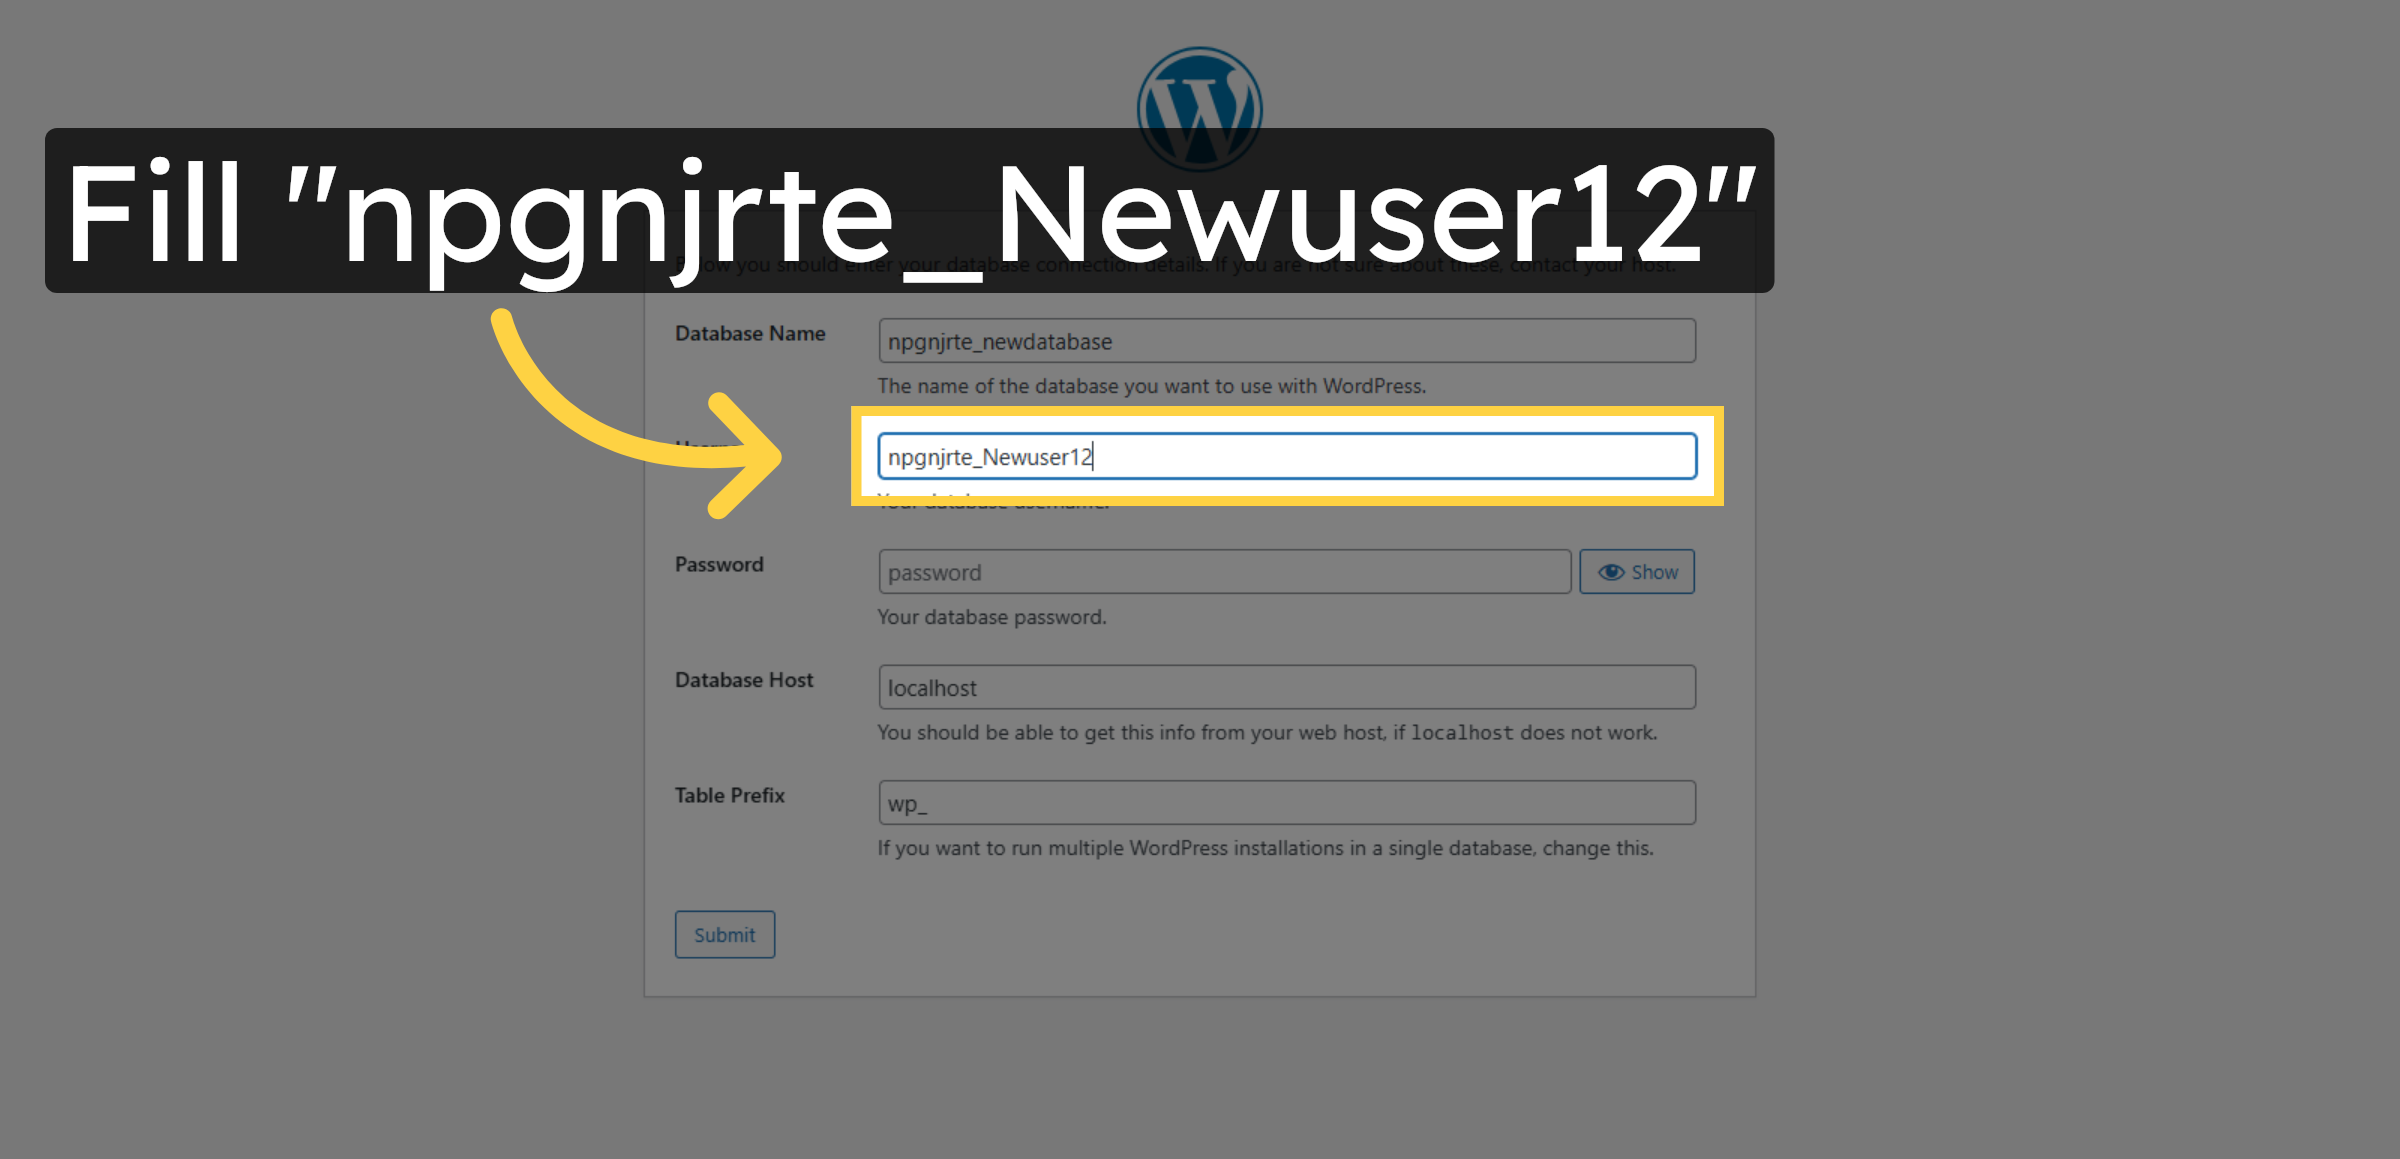
50. Enter Database Password
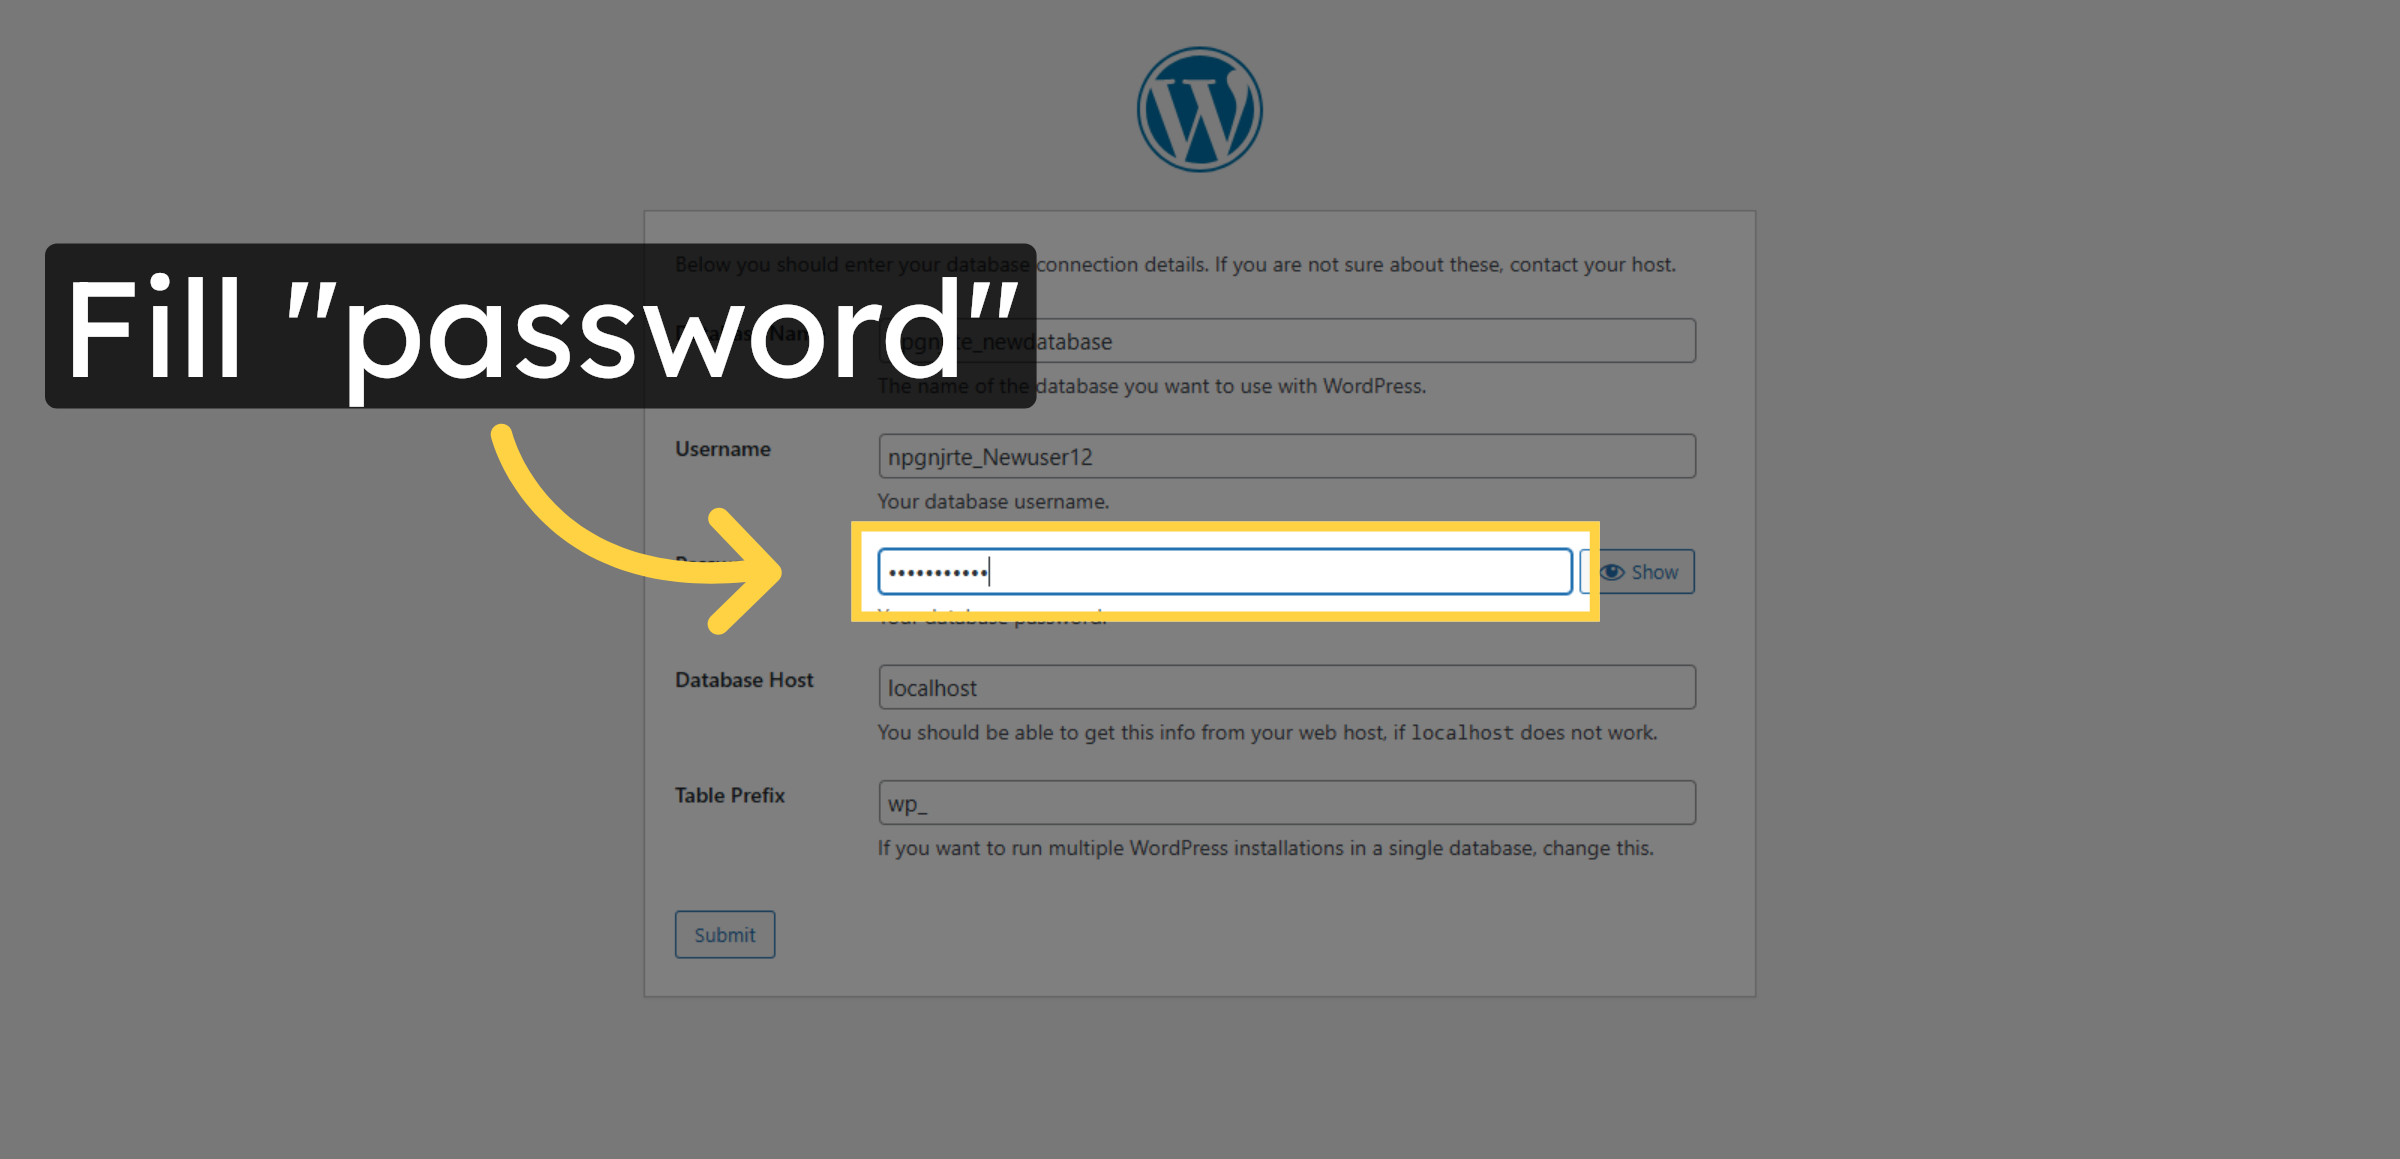
51. Submit Database Credentials

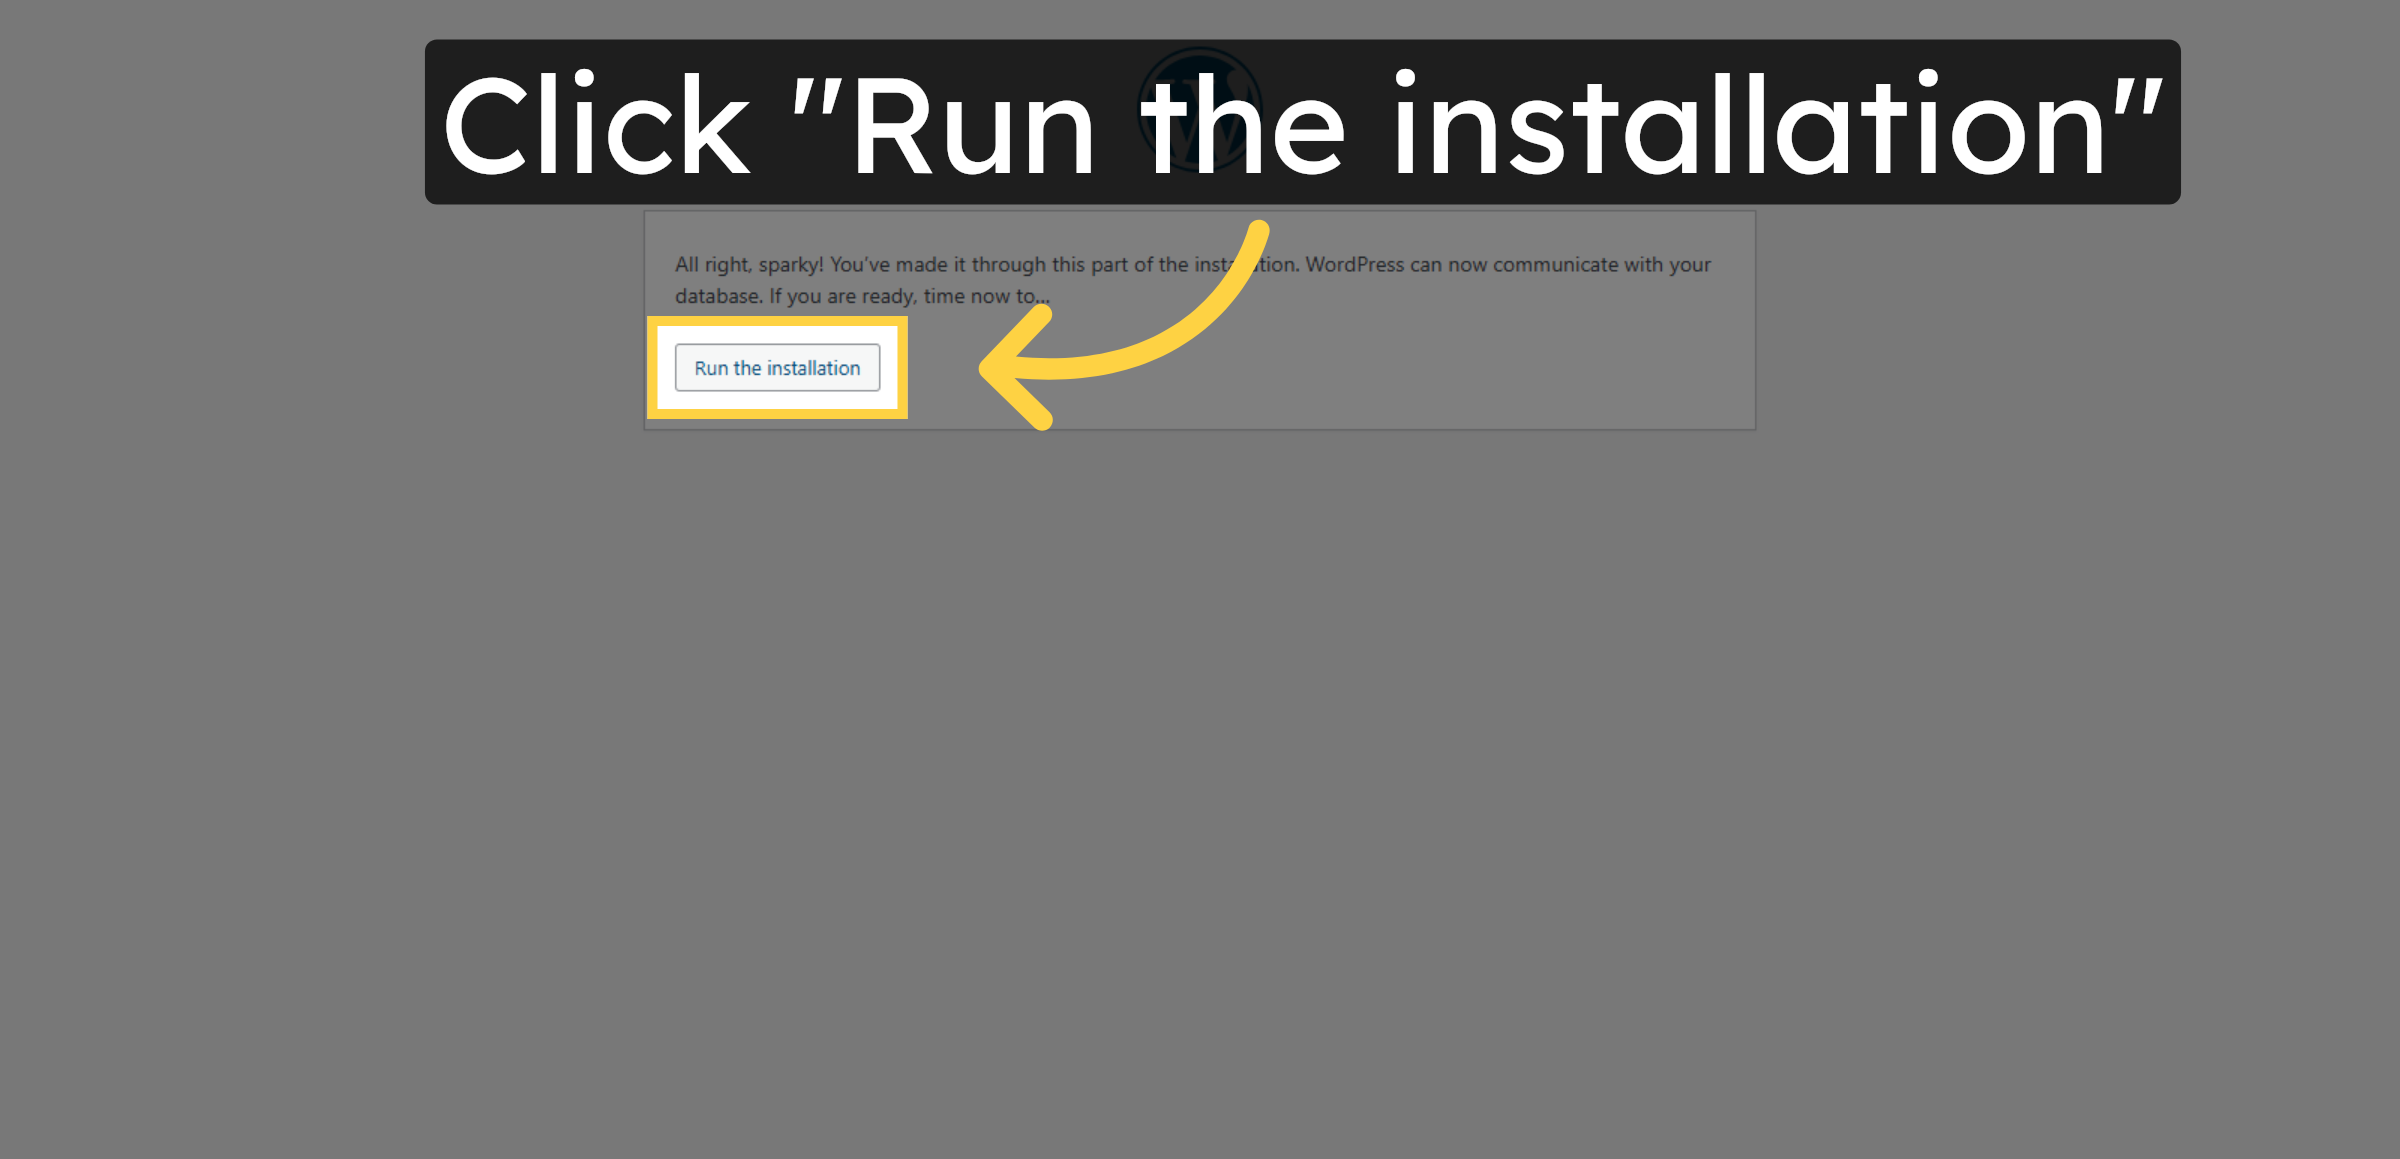
52. Run WordPress Installation
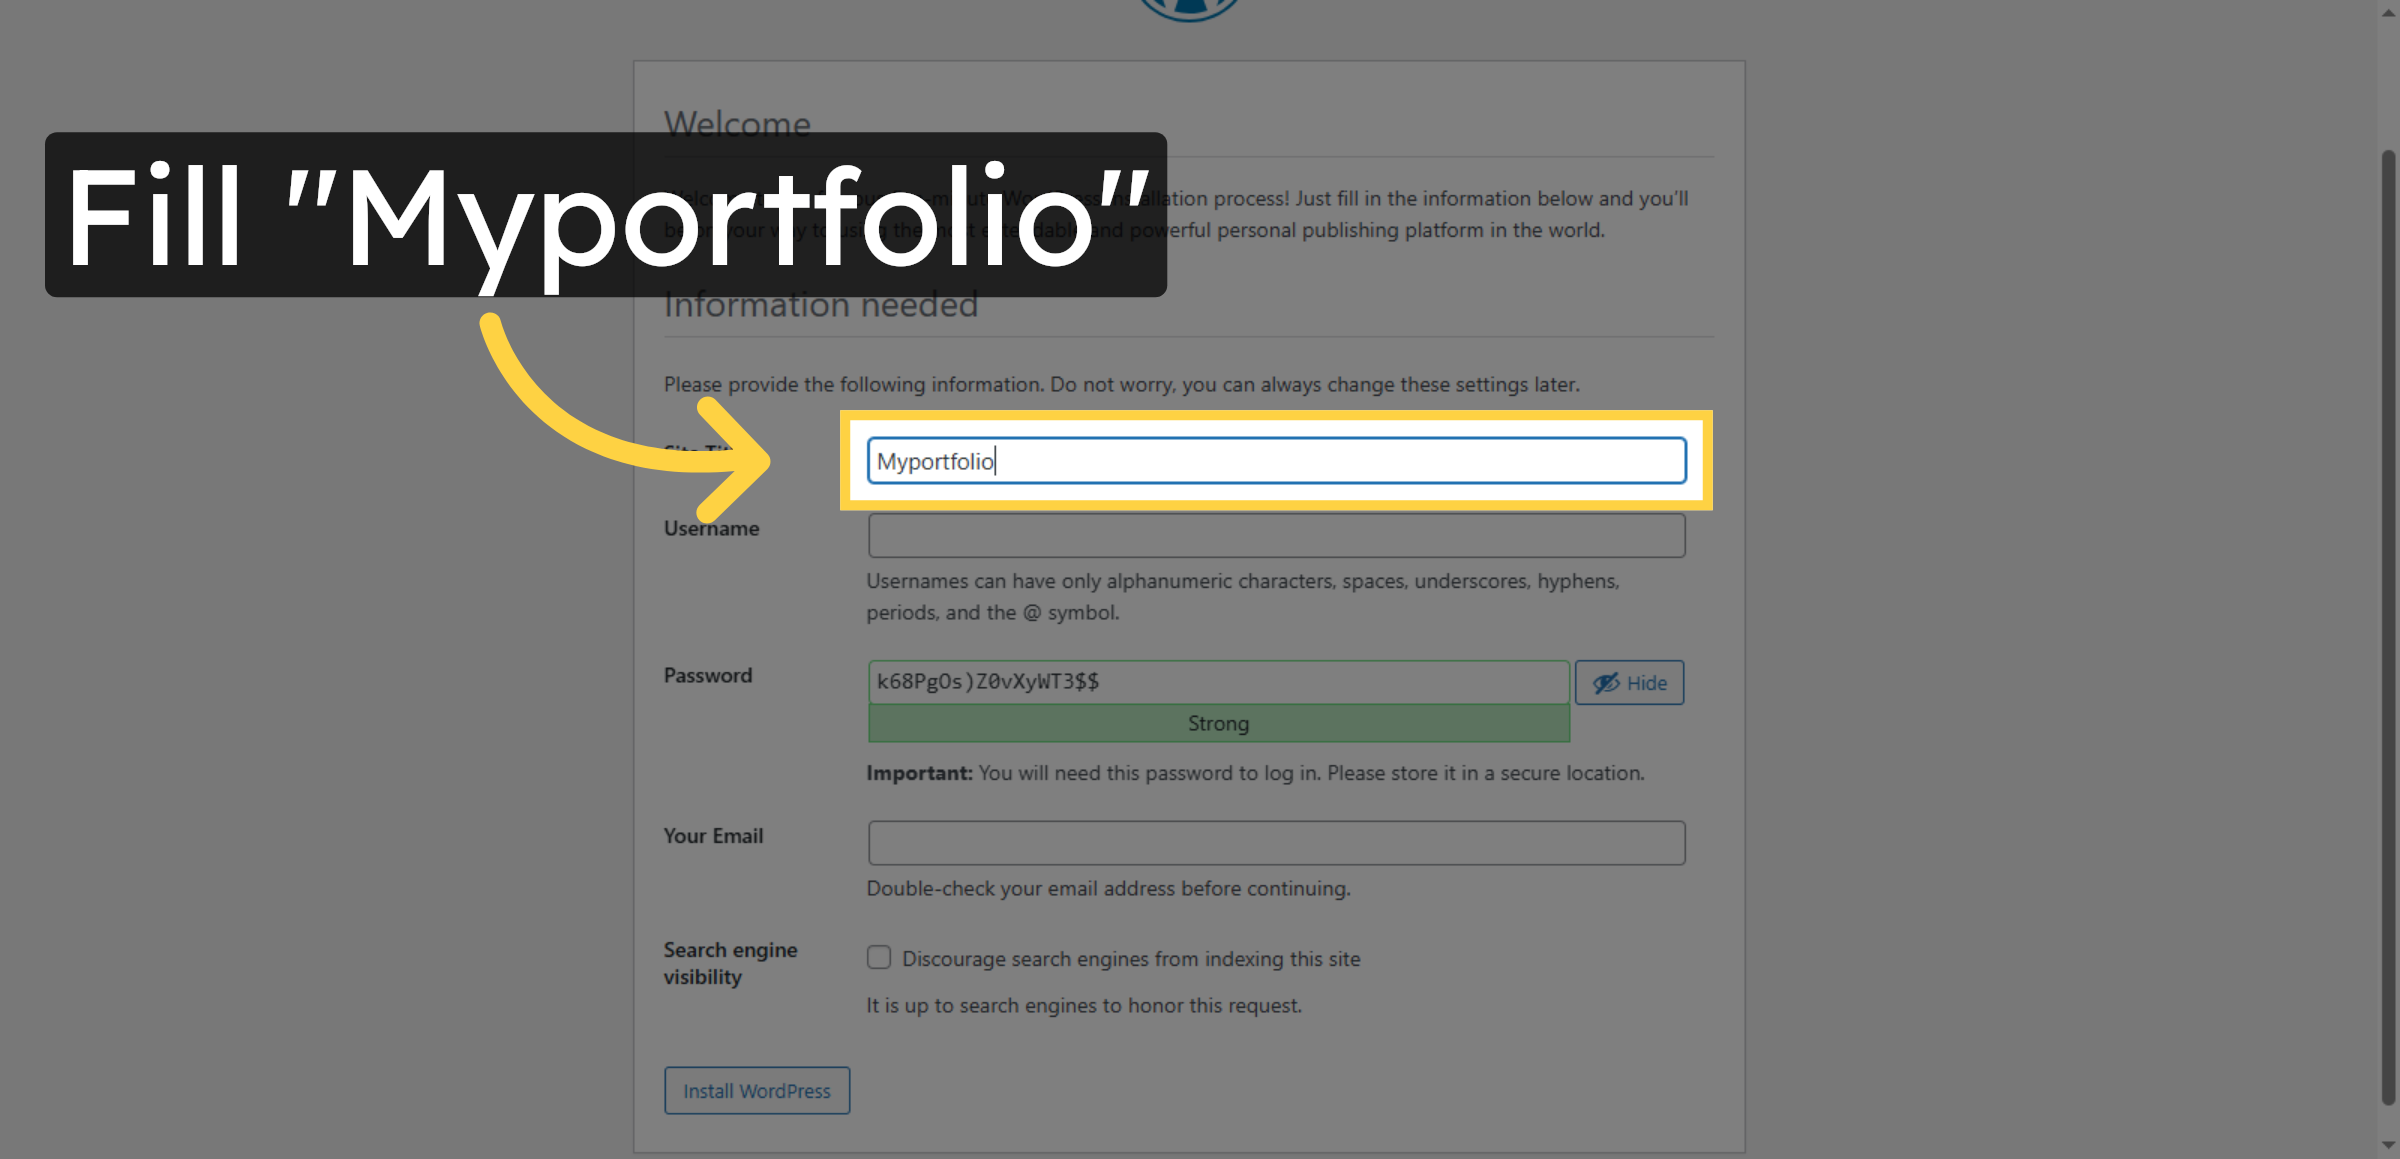
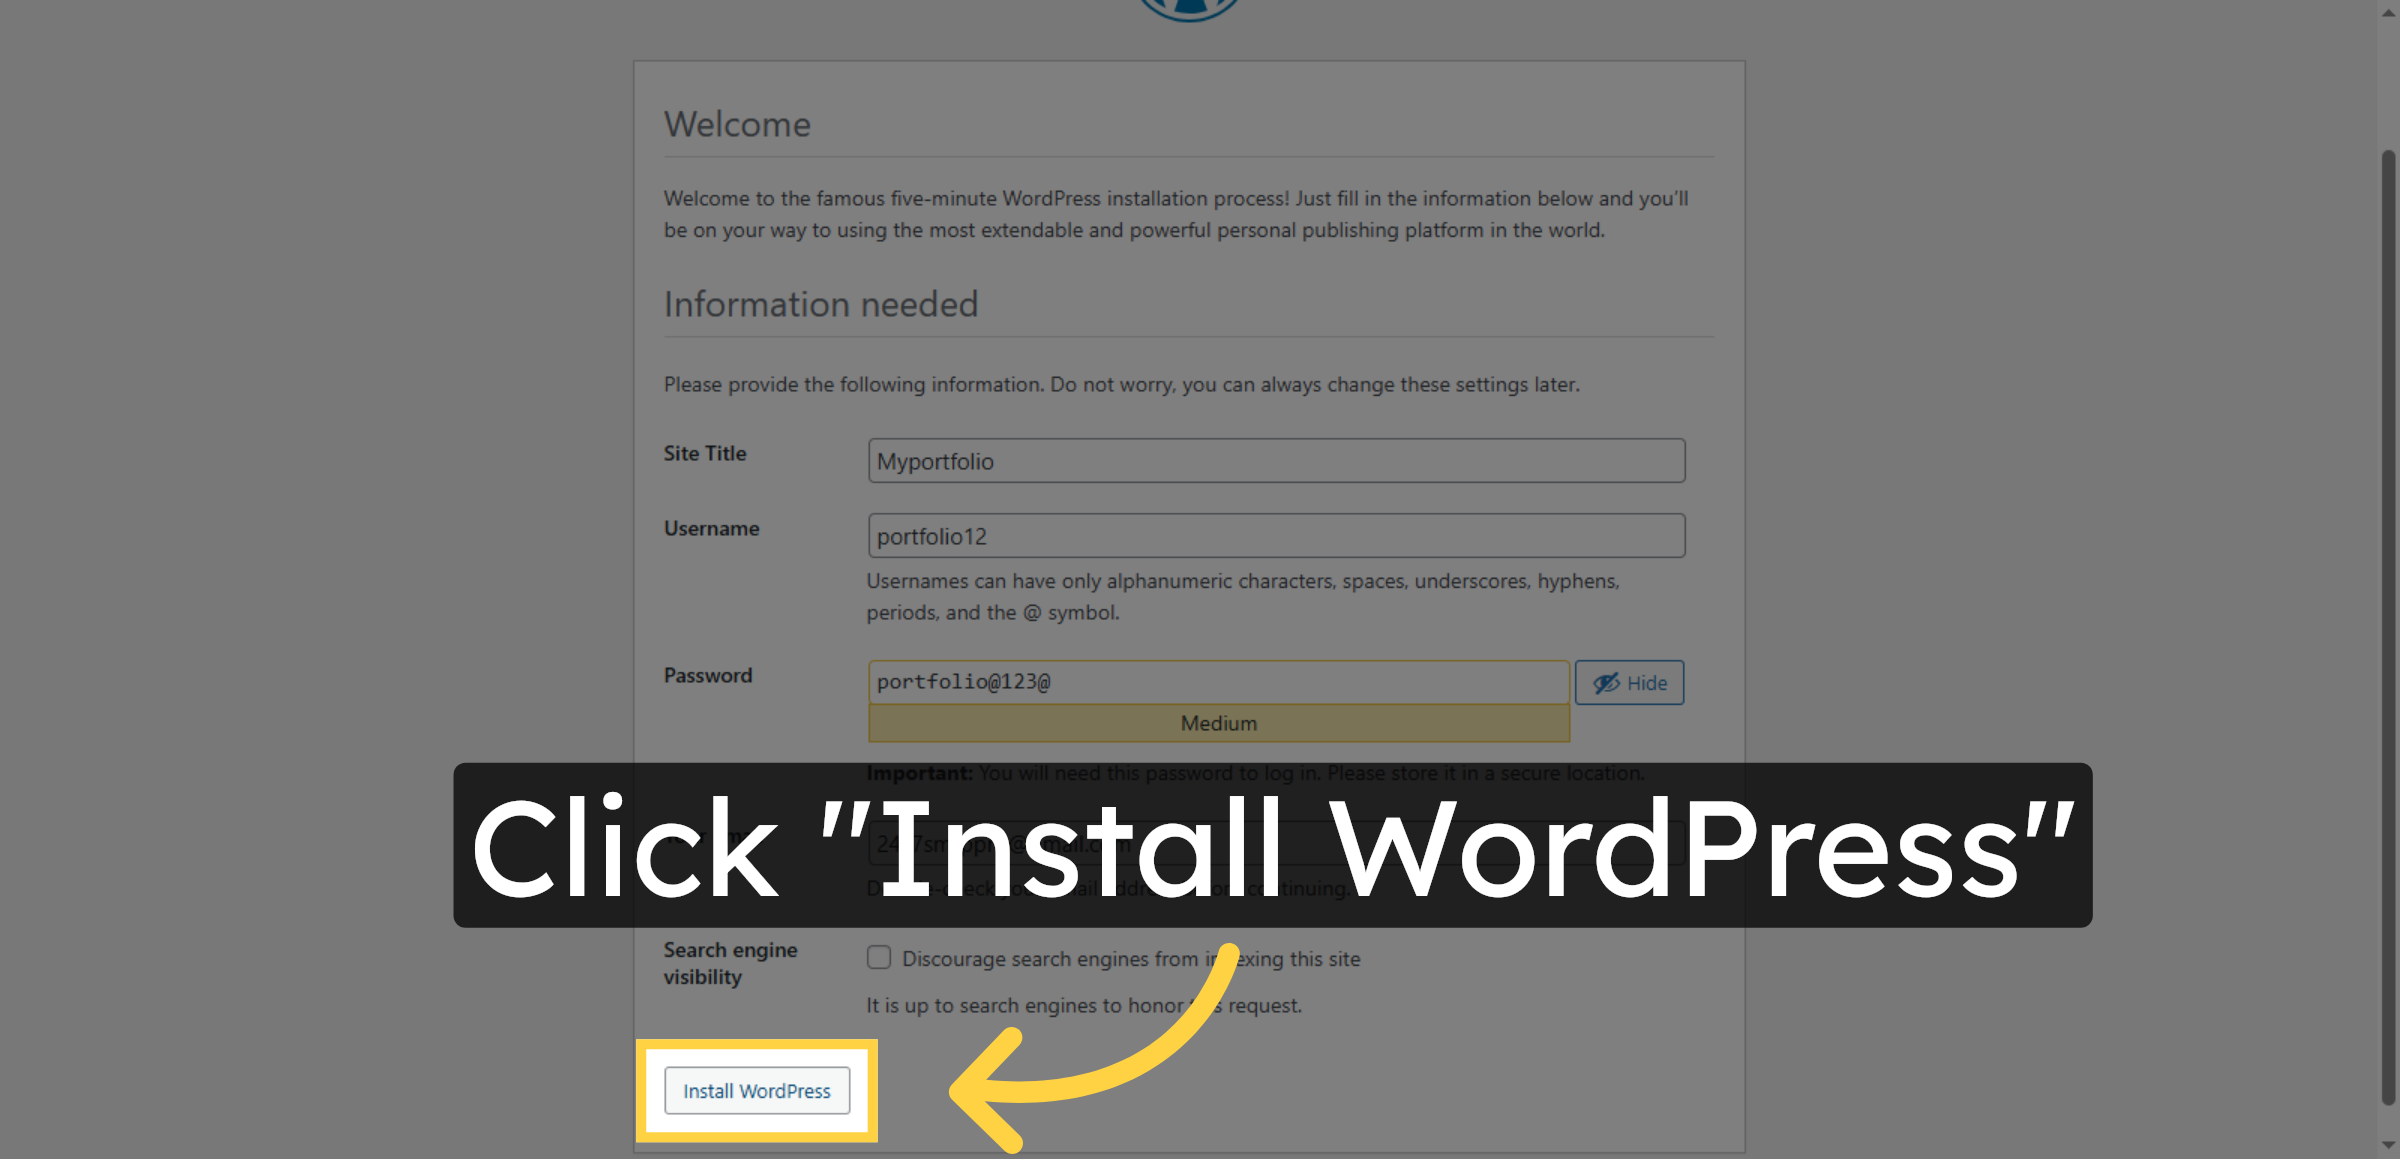
53. Enter Site Title
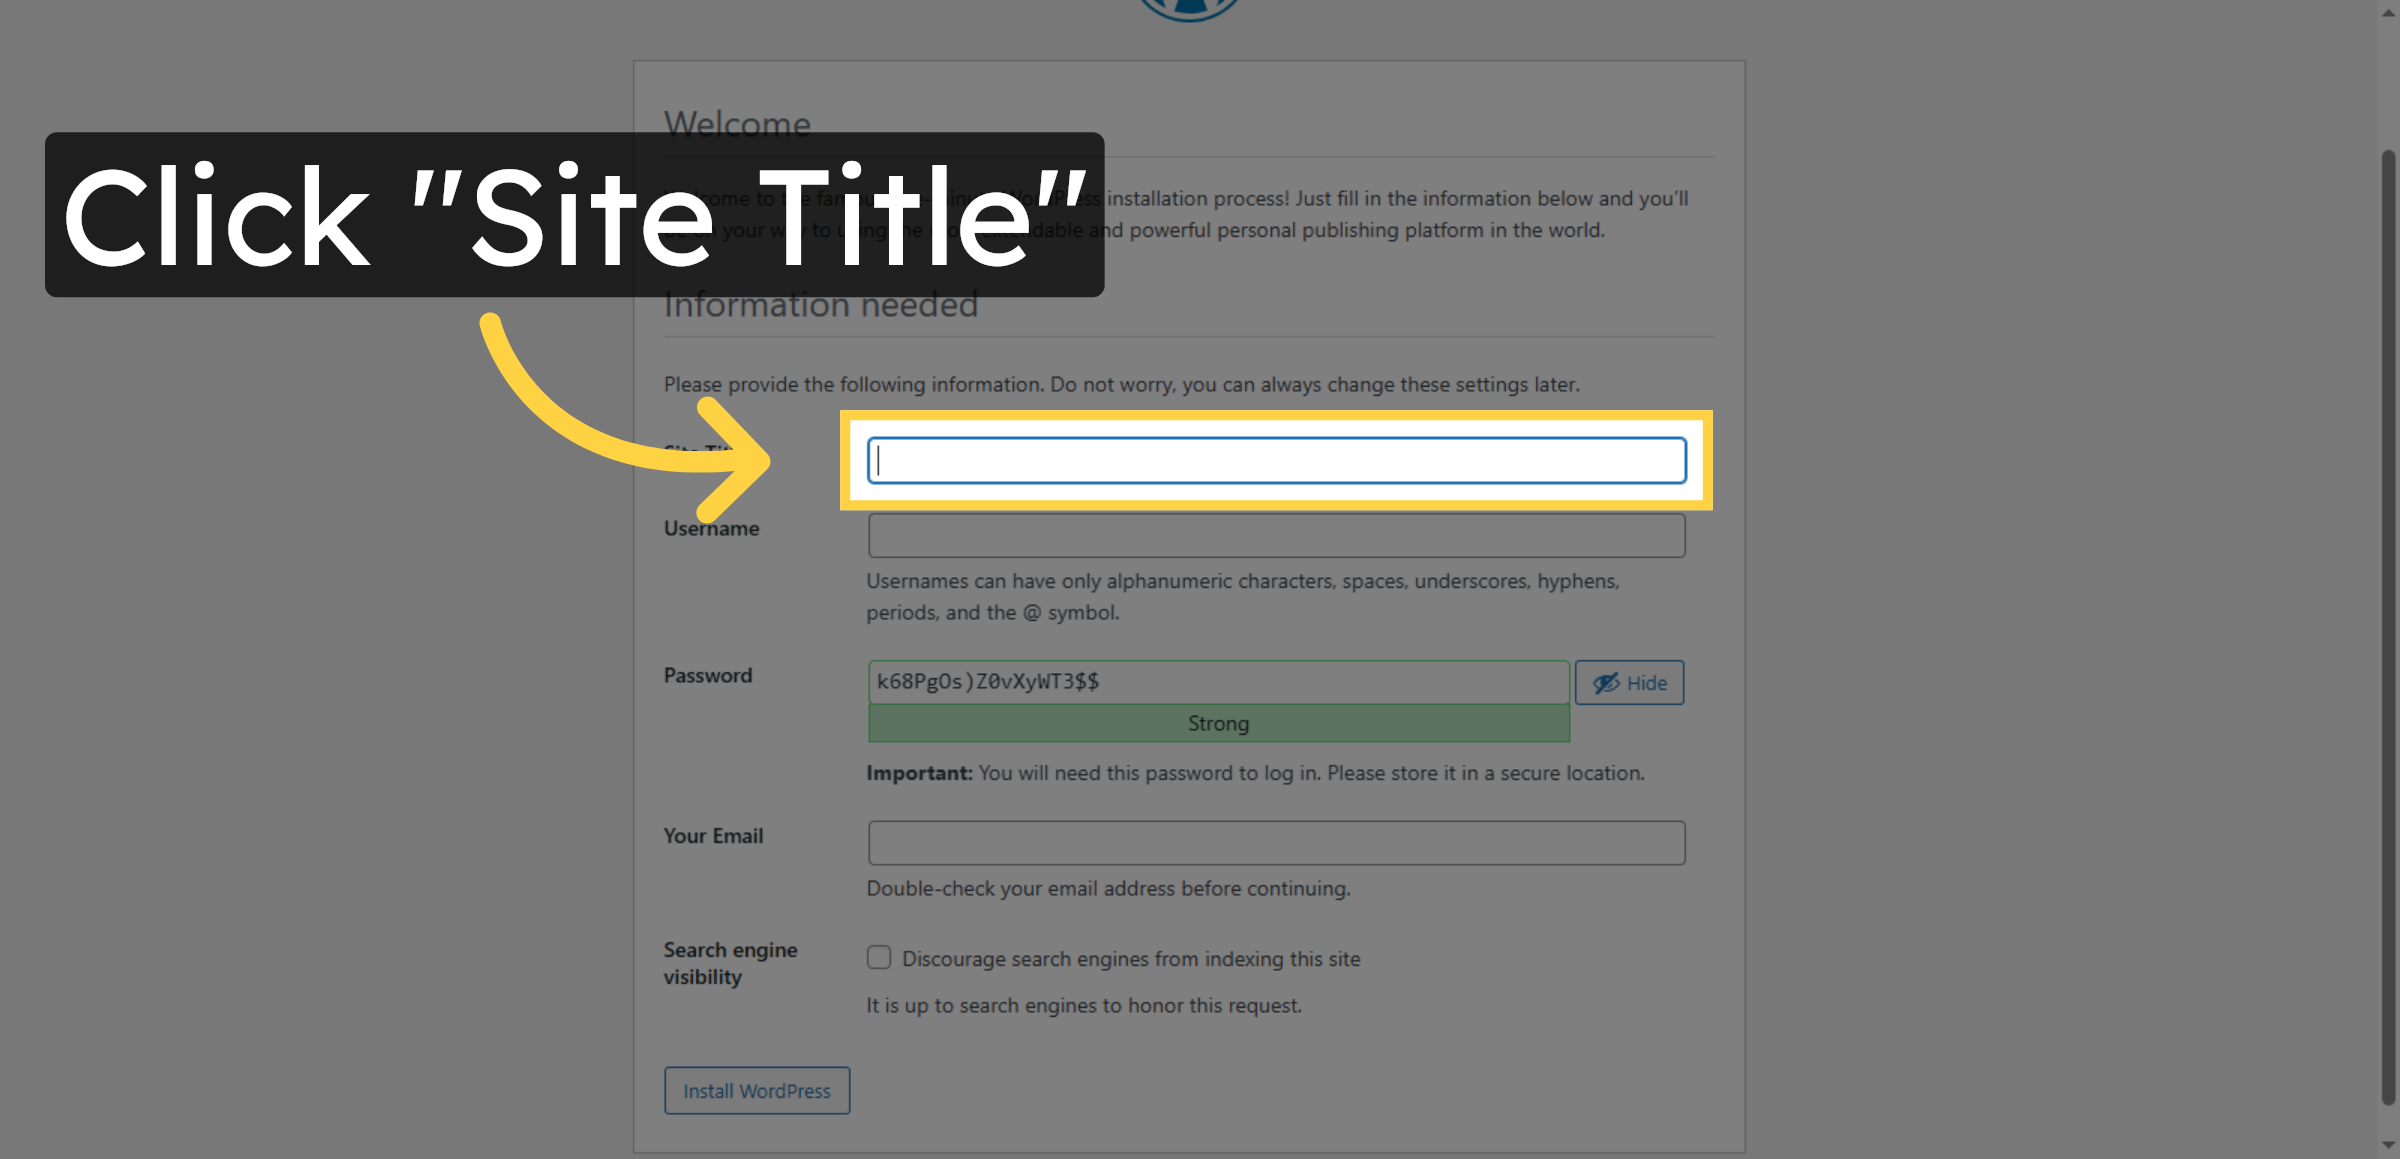
54. Fill Site Title
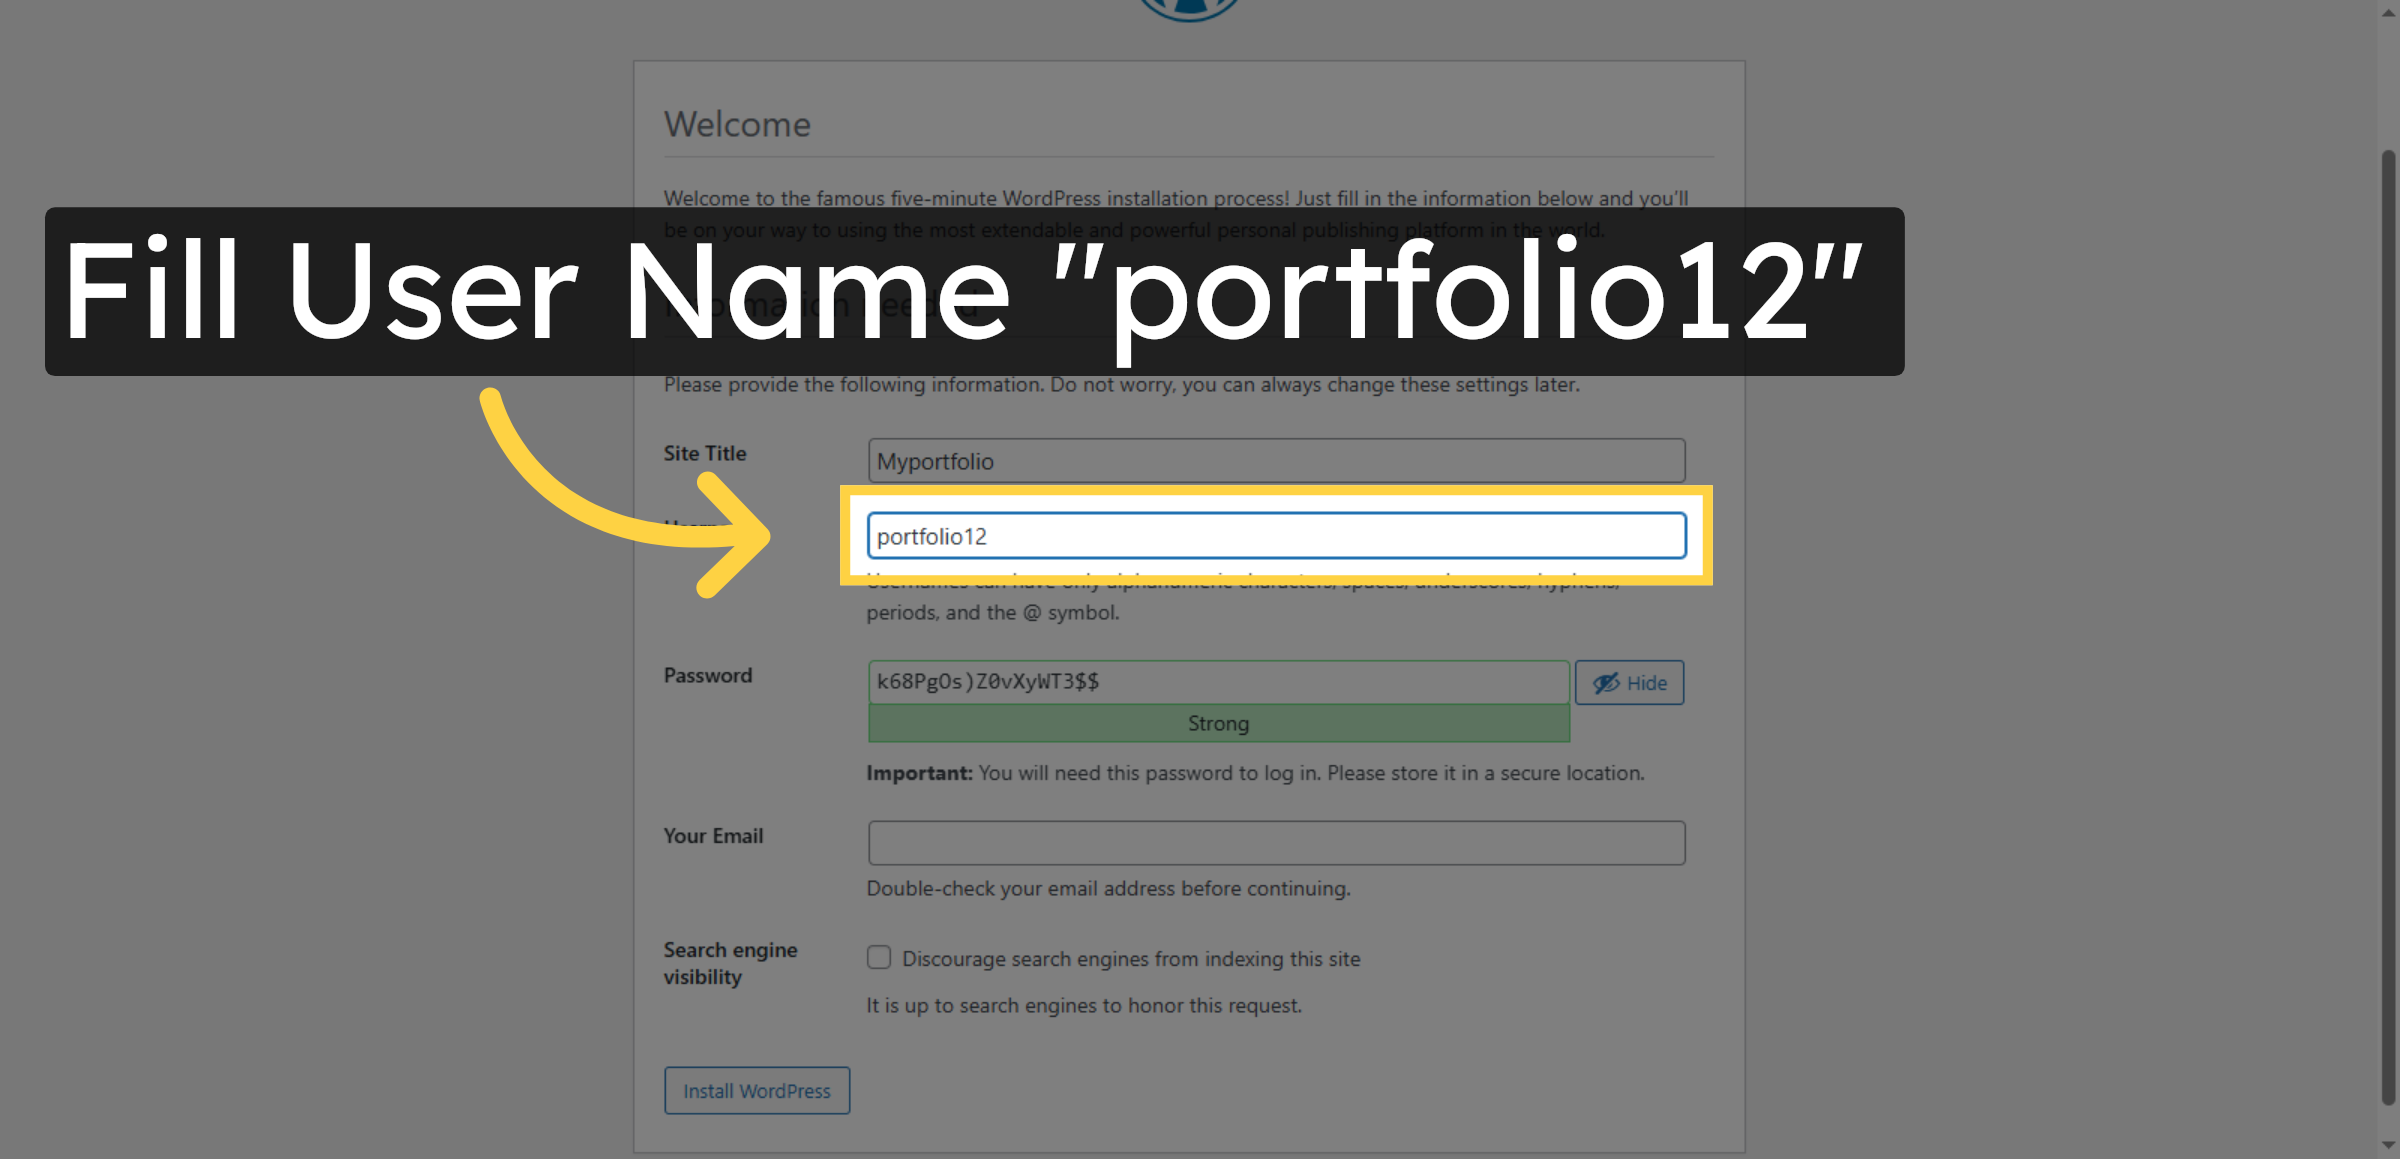
55. Enter Username
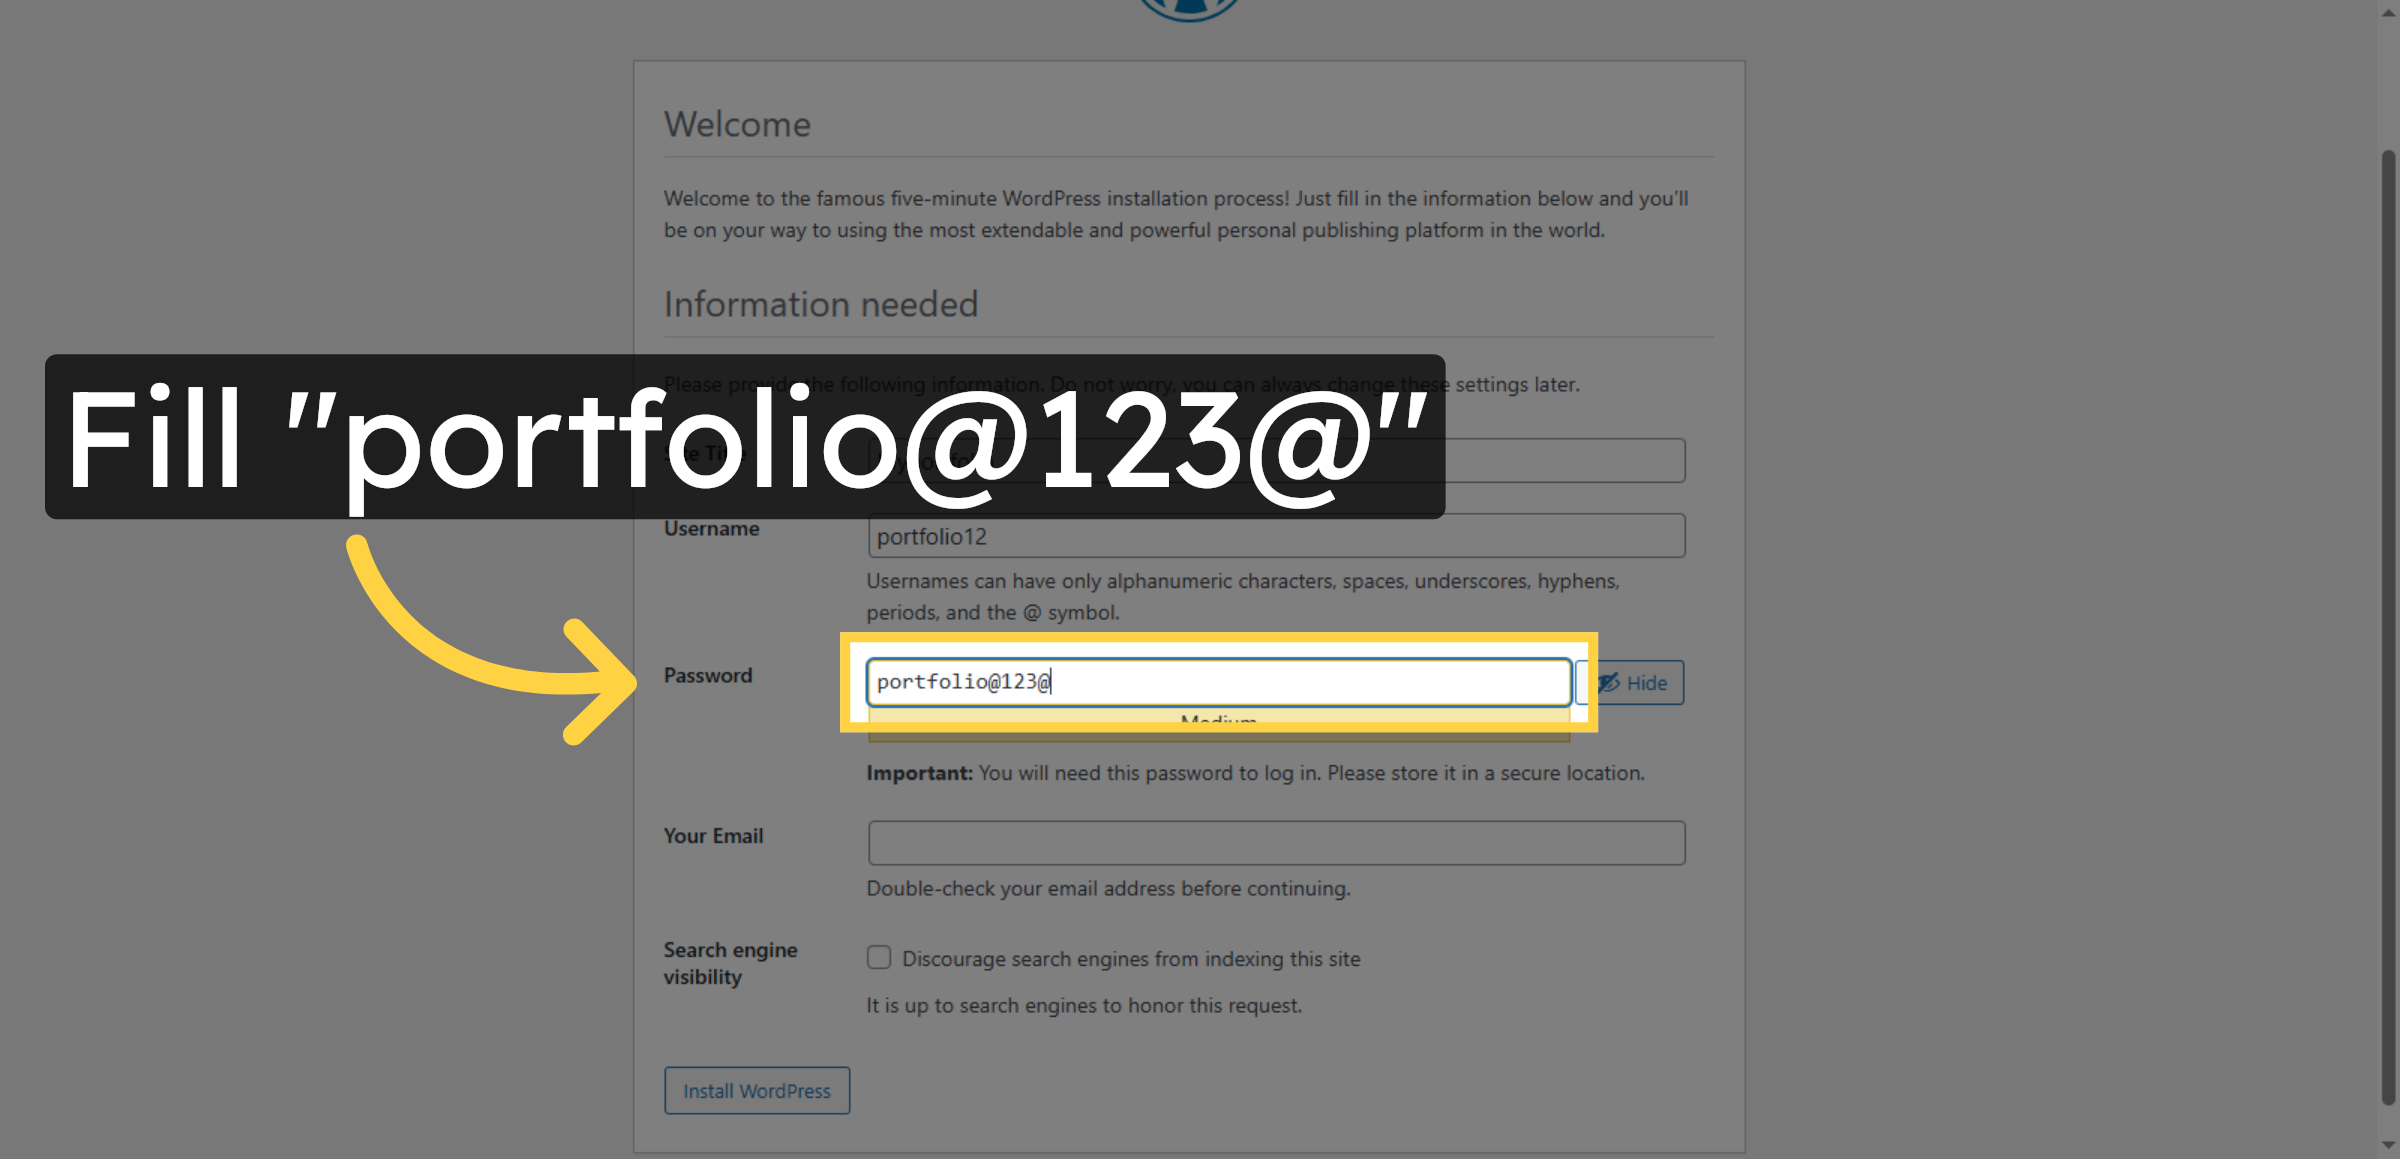
56. Enter Password
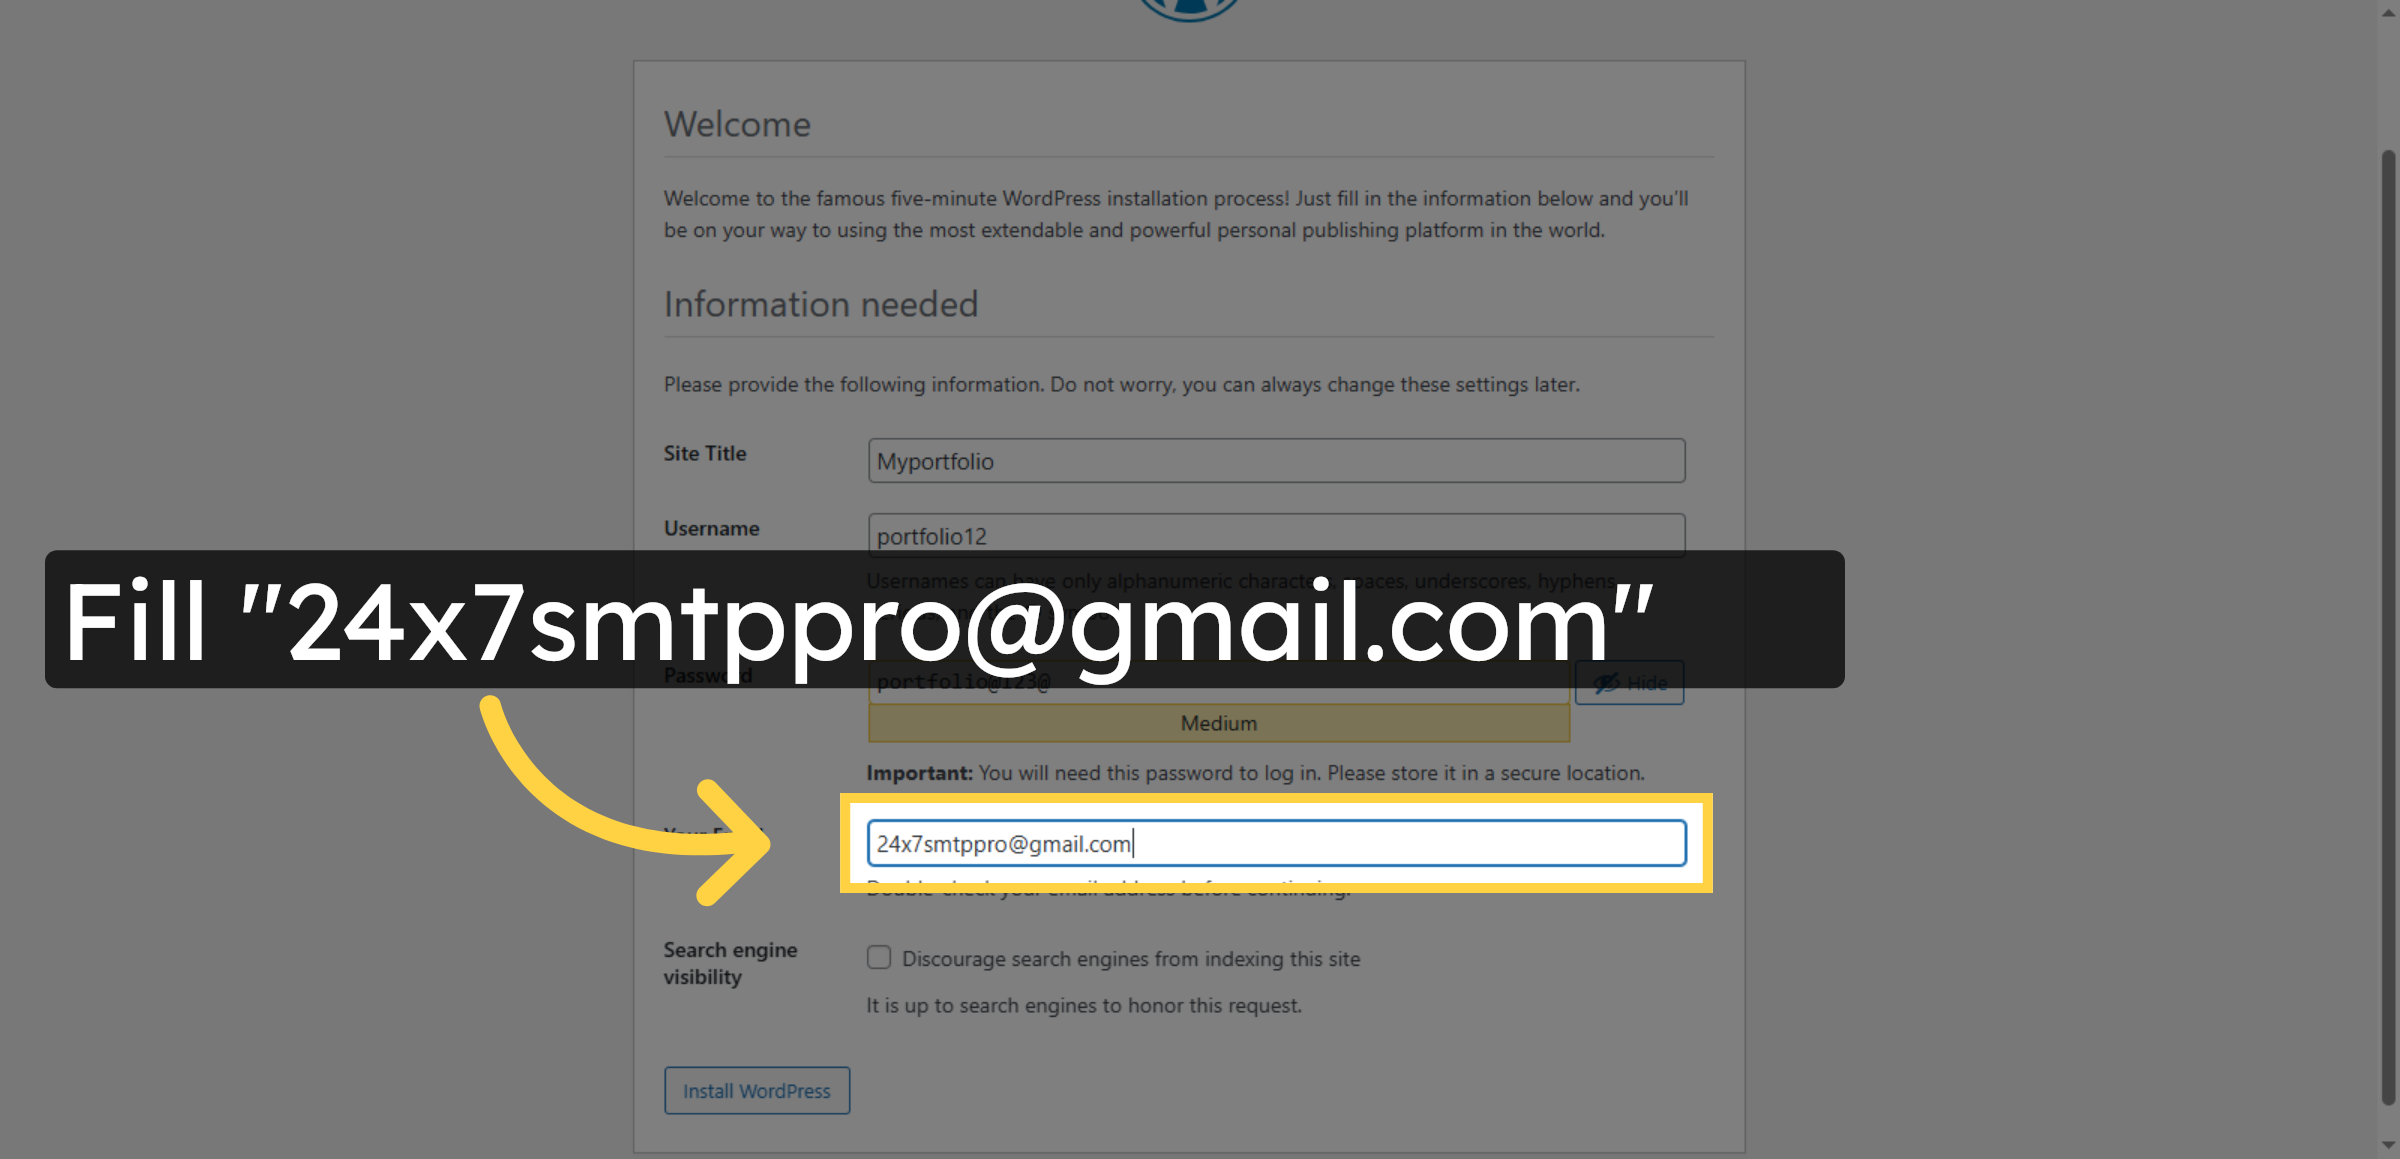
57. Enter Admin Email
58. Install WordPress
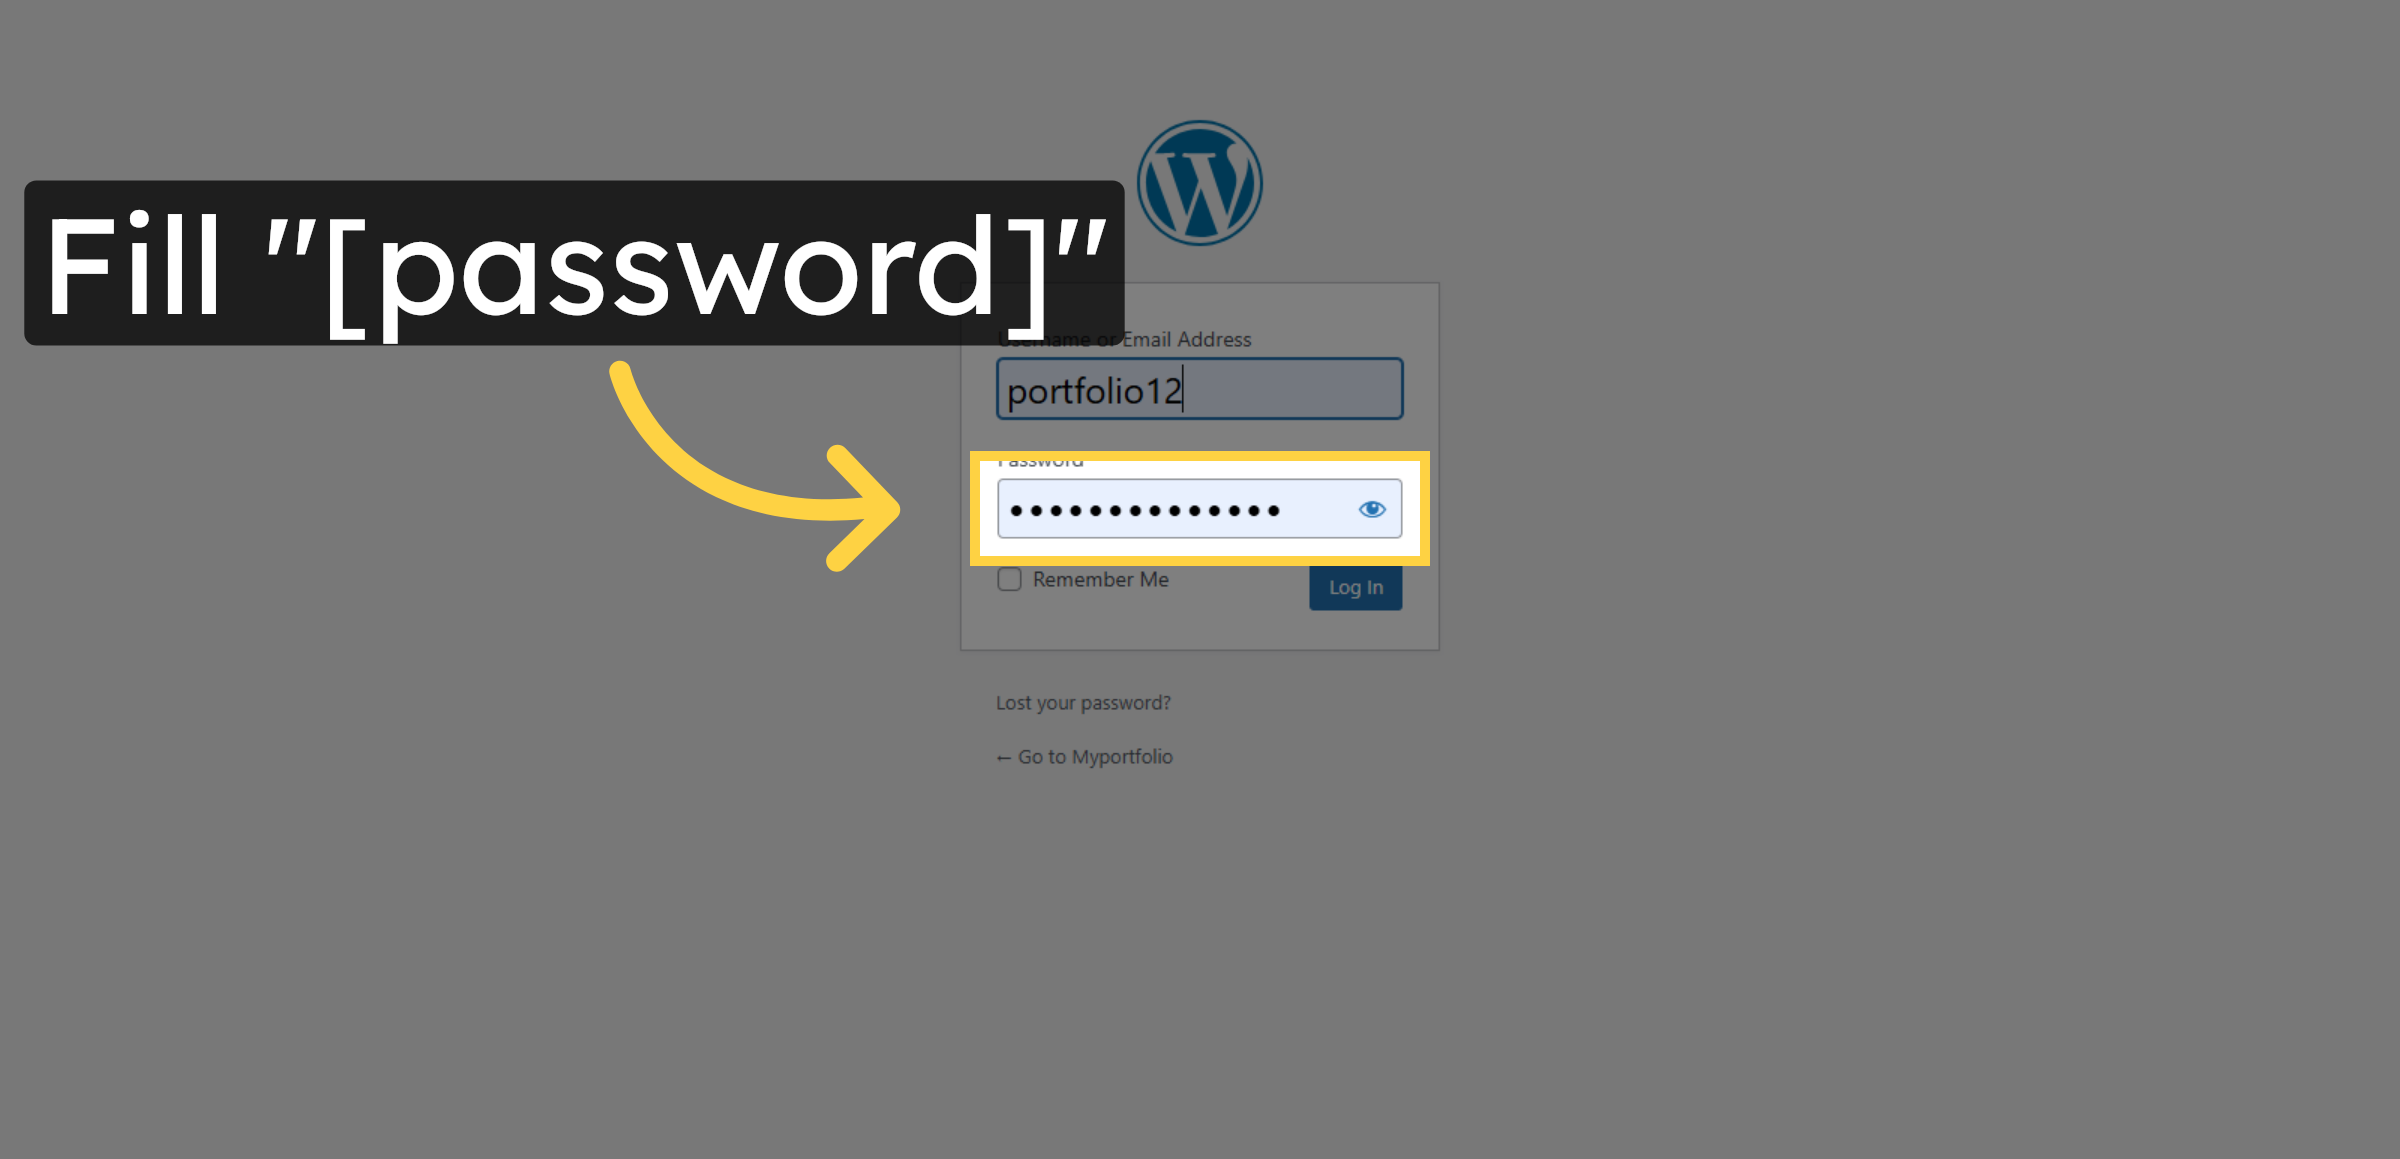
59. Login WordPress

60. Fill Username and Password
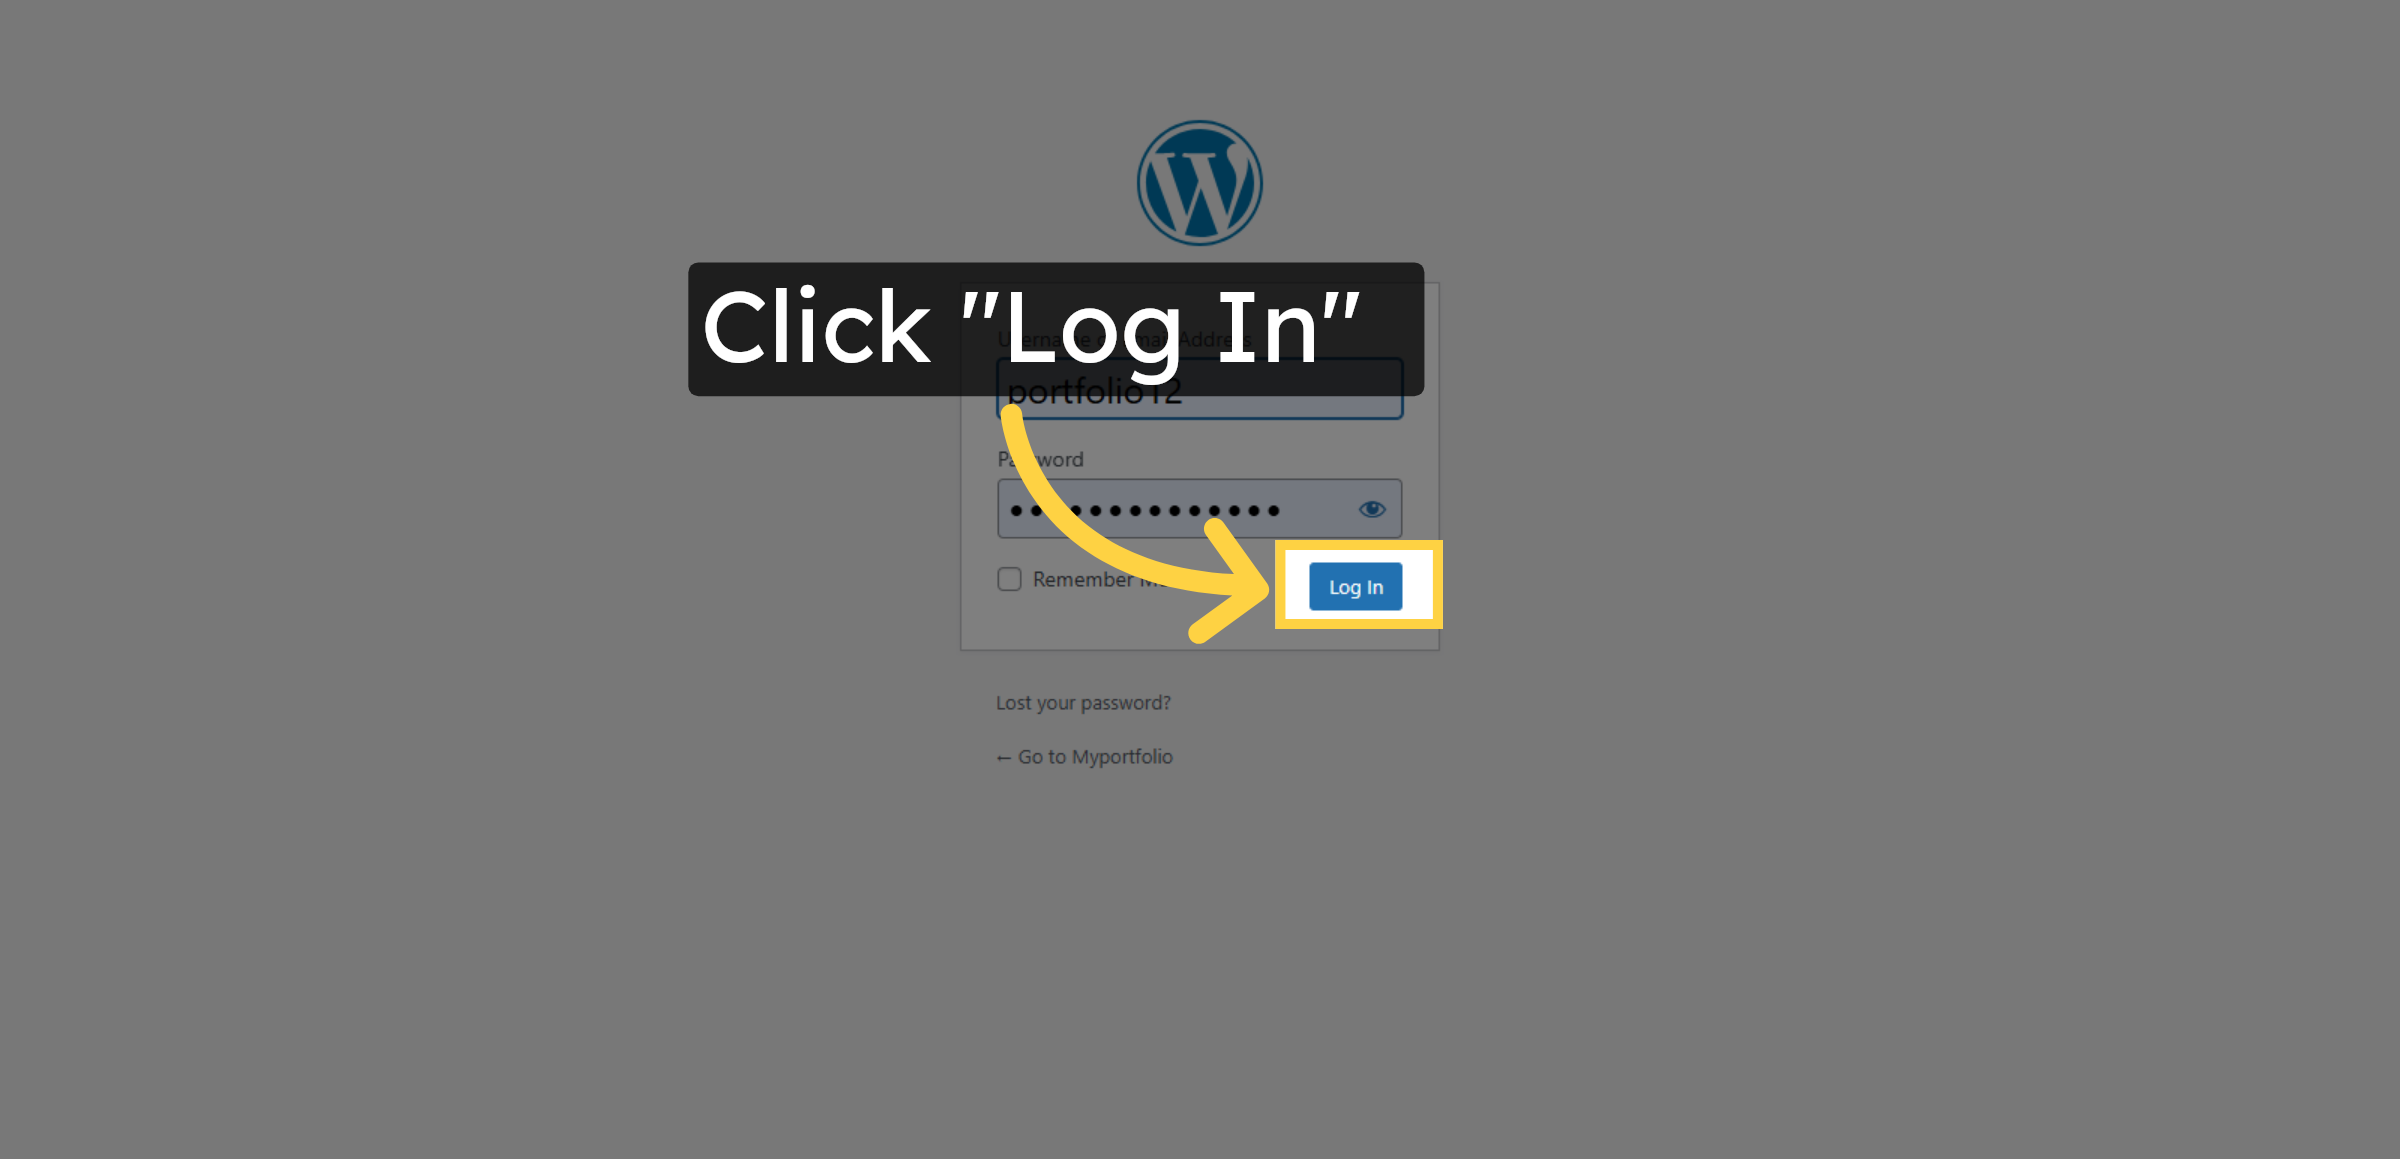
61. Click Login In button
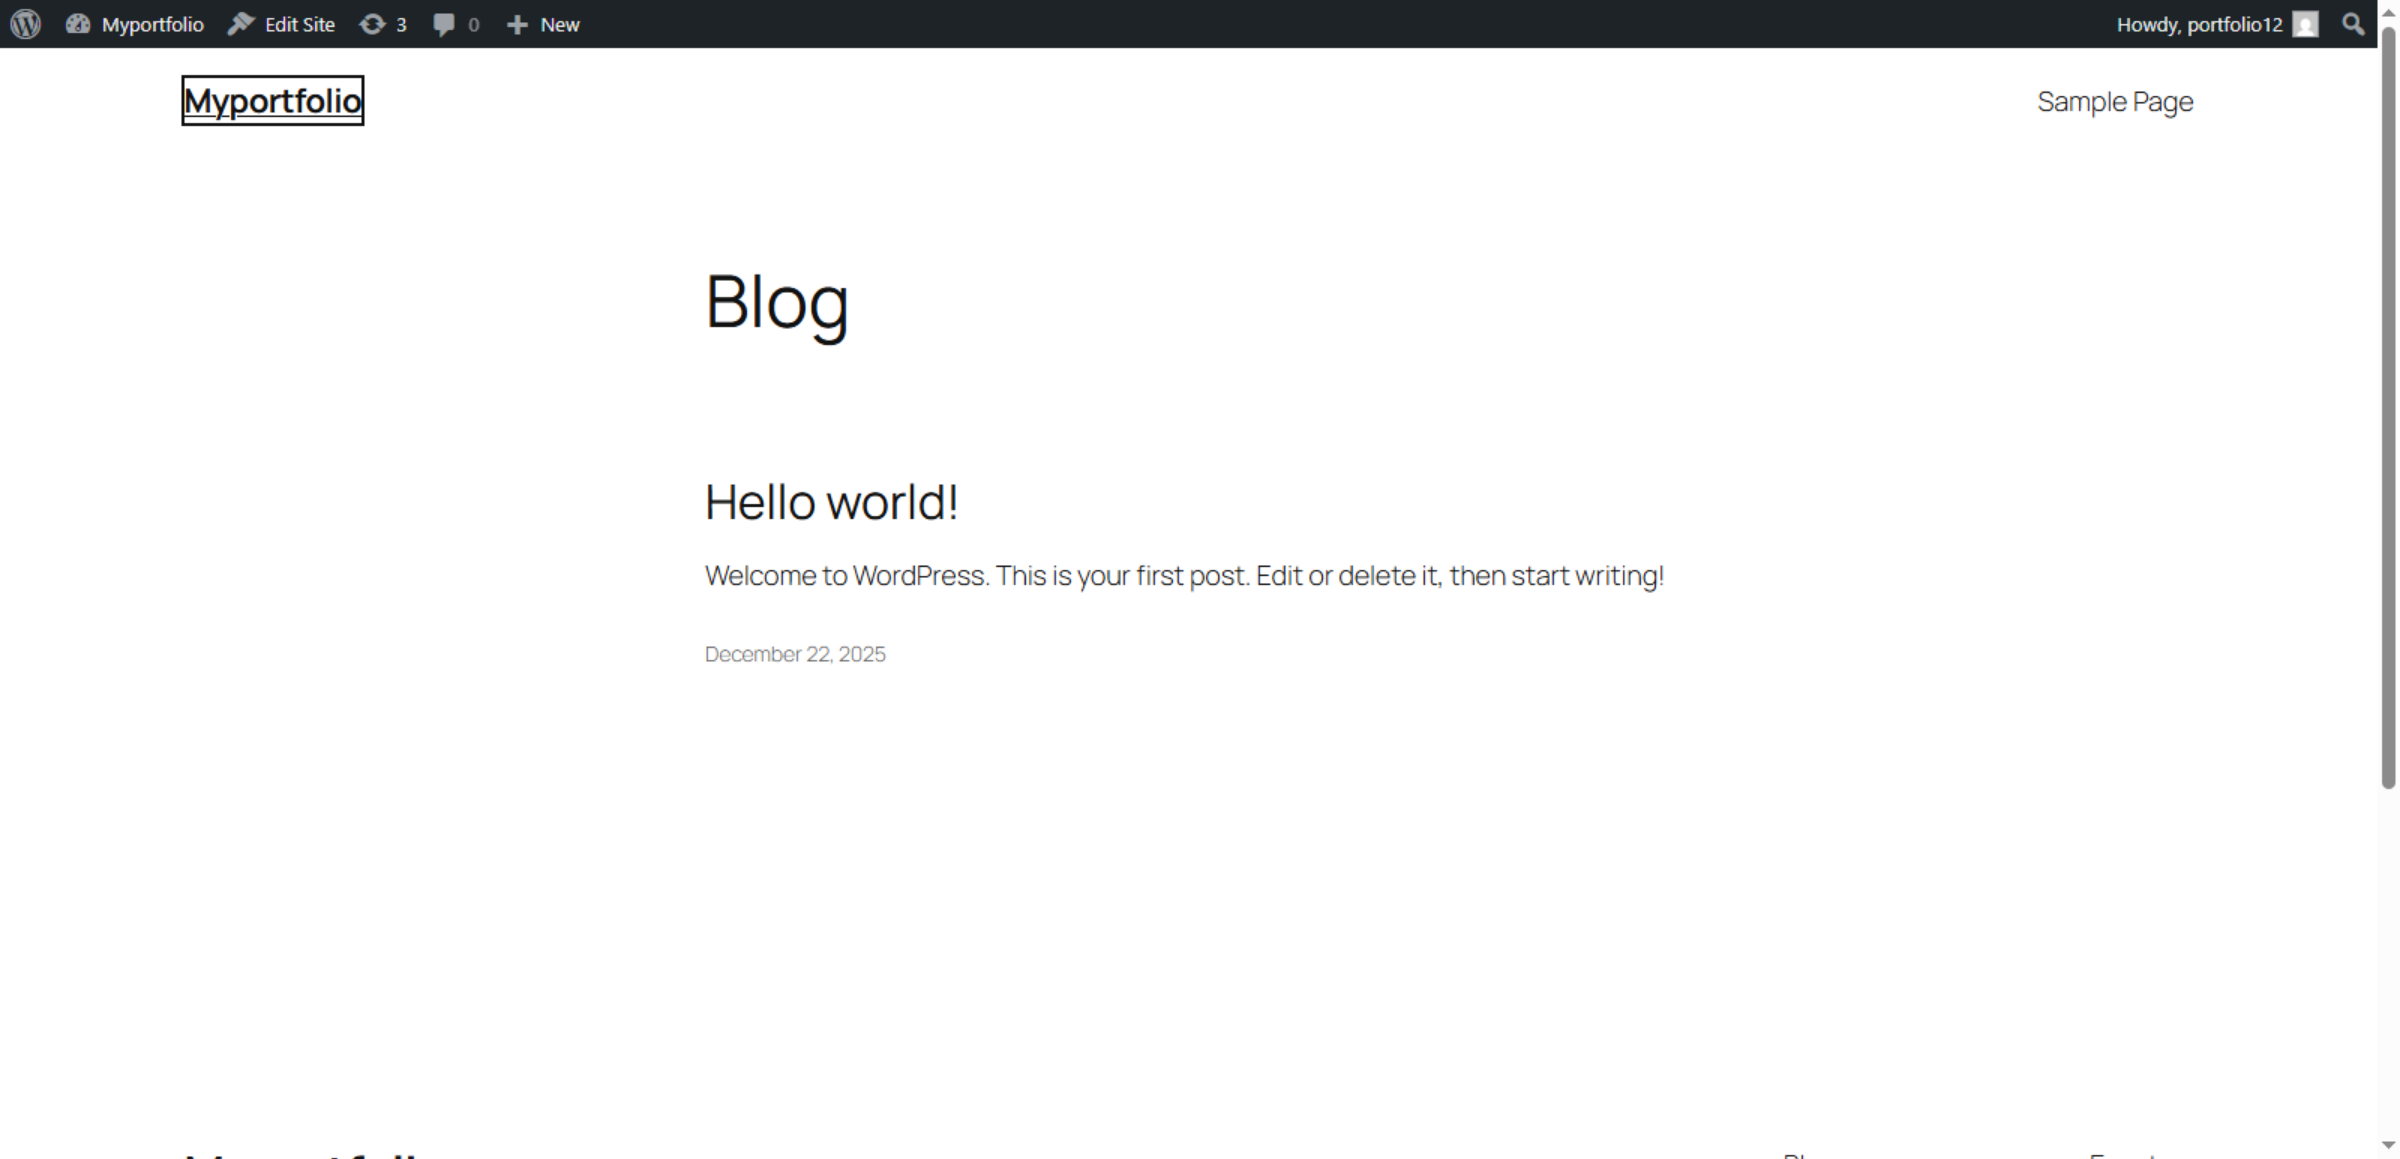
62. Access Site Home
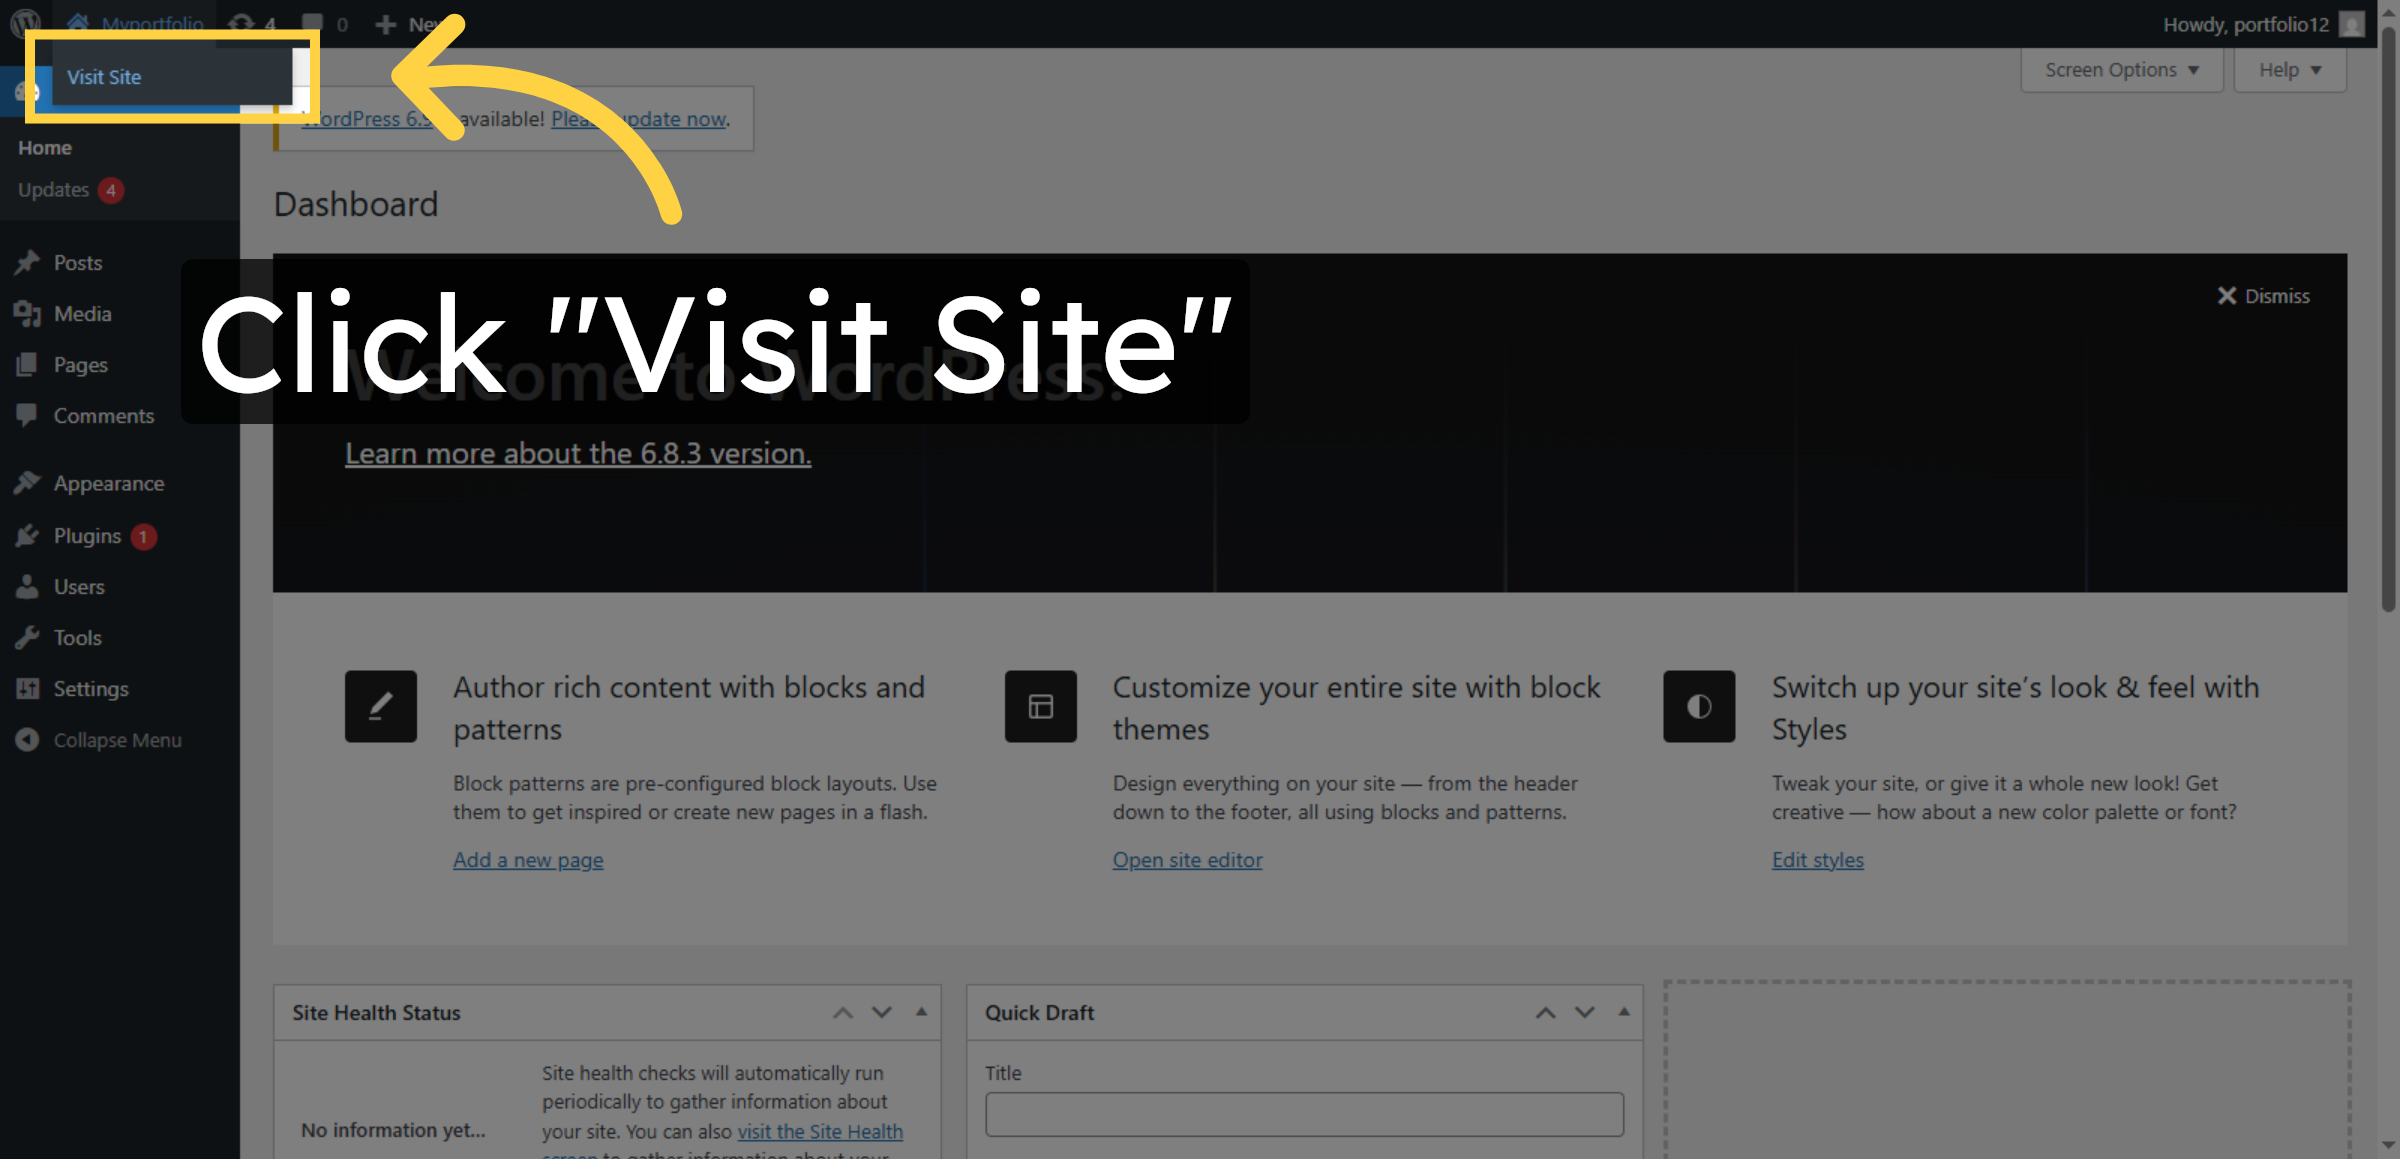
63. Click “Myportfolio”
Conclusion
Proper subdomain management and WordPress installation are essential for maintaining a structured, scalable, and professional web presence. By completing the steps outlined in this guide, you have successfully created a subdomain, uploaded and configured WordPress files, established a secure database connection, and launched a fully operational WordPress website. This setup enables you to manage multiple projects independently while leveraging the same hosting infrastructure.
To ensure long-term stability and security, it is recommended to regularly update WordPress, monitor database performance, maintain backups, and review domain configurations. Consistent maintenance will help prevent technical issues and optimize website performance. With these best practices in place, your subdomain-based WordPress site will remain reliable, secure, and adaptable to future growth.
WooHelpDesk Support
Need professional assistance with subdomain configuration, WordPress installation, hosting setup, or website optimization? WooHelpDesk offers expert technical support to help you manage and scale your online presence with confidence.
Visit: https://www.woohelpdesk.com
Call Us Toll-Free: +1 888 602 0119 (US & Canada)
Expert Setup | Secure Configuration | Reliable Support
Contact WooHelpDesk today for trusted WordPress and hosting support solutions.


