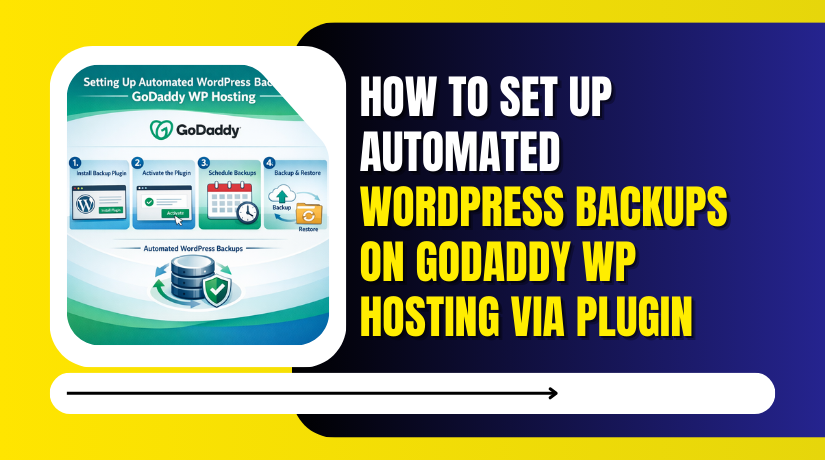
How to Set Up Automated WordPress Backups On Godaddy WP Hosting Via Plugin
Introduction
Backing up your WordPress website is a critical step to protect your data from unexpected issues such as server failures, plugin conflicts, hacking attempts, or accidental deletions. In this guide, you’ll learn how to set up automated WordPress backups on GoDaddy using the UpdraftPlus plugin. UpdraftPlus is a powerful and user-friendly backup solution that allows you to schedule regular backups for both website files and databases with minimal effort. This article walks you through installing the plugin, configuring backup schedules, selecting retention limits, enabling email notifications, and managing backup settings directly from your WordPress dashboard. Having a reliable backup strategy ensures that your website can be quickly restored in case of data loss, minimizing downtime and stress. By following these steps, you gain better control over your website’s safety and ensure long-term stability for your WordPress site hosted on GoDaddy.
1. Introduction
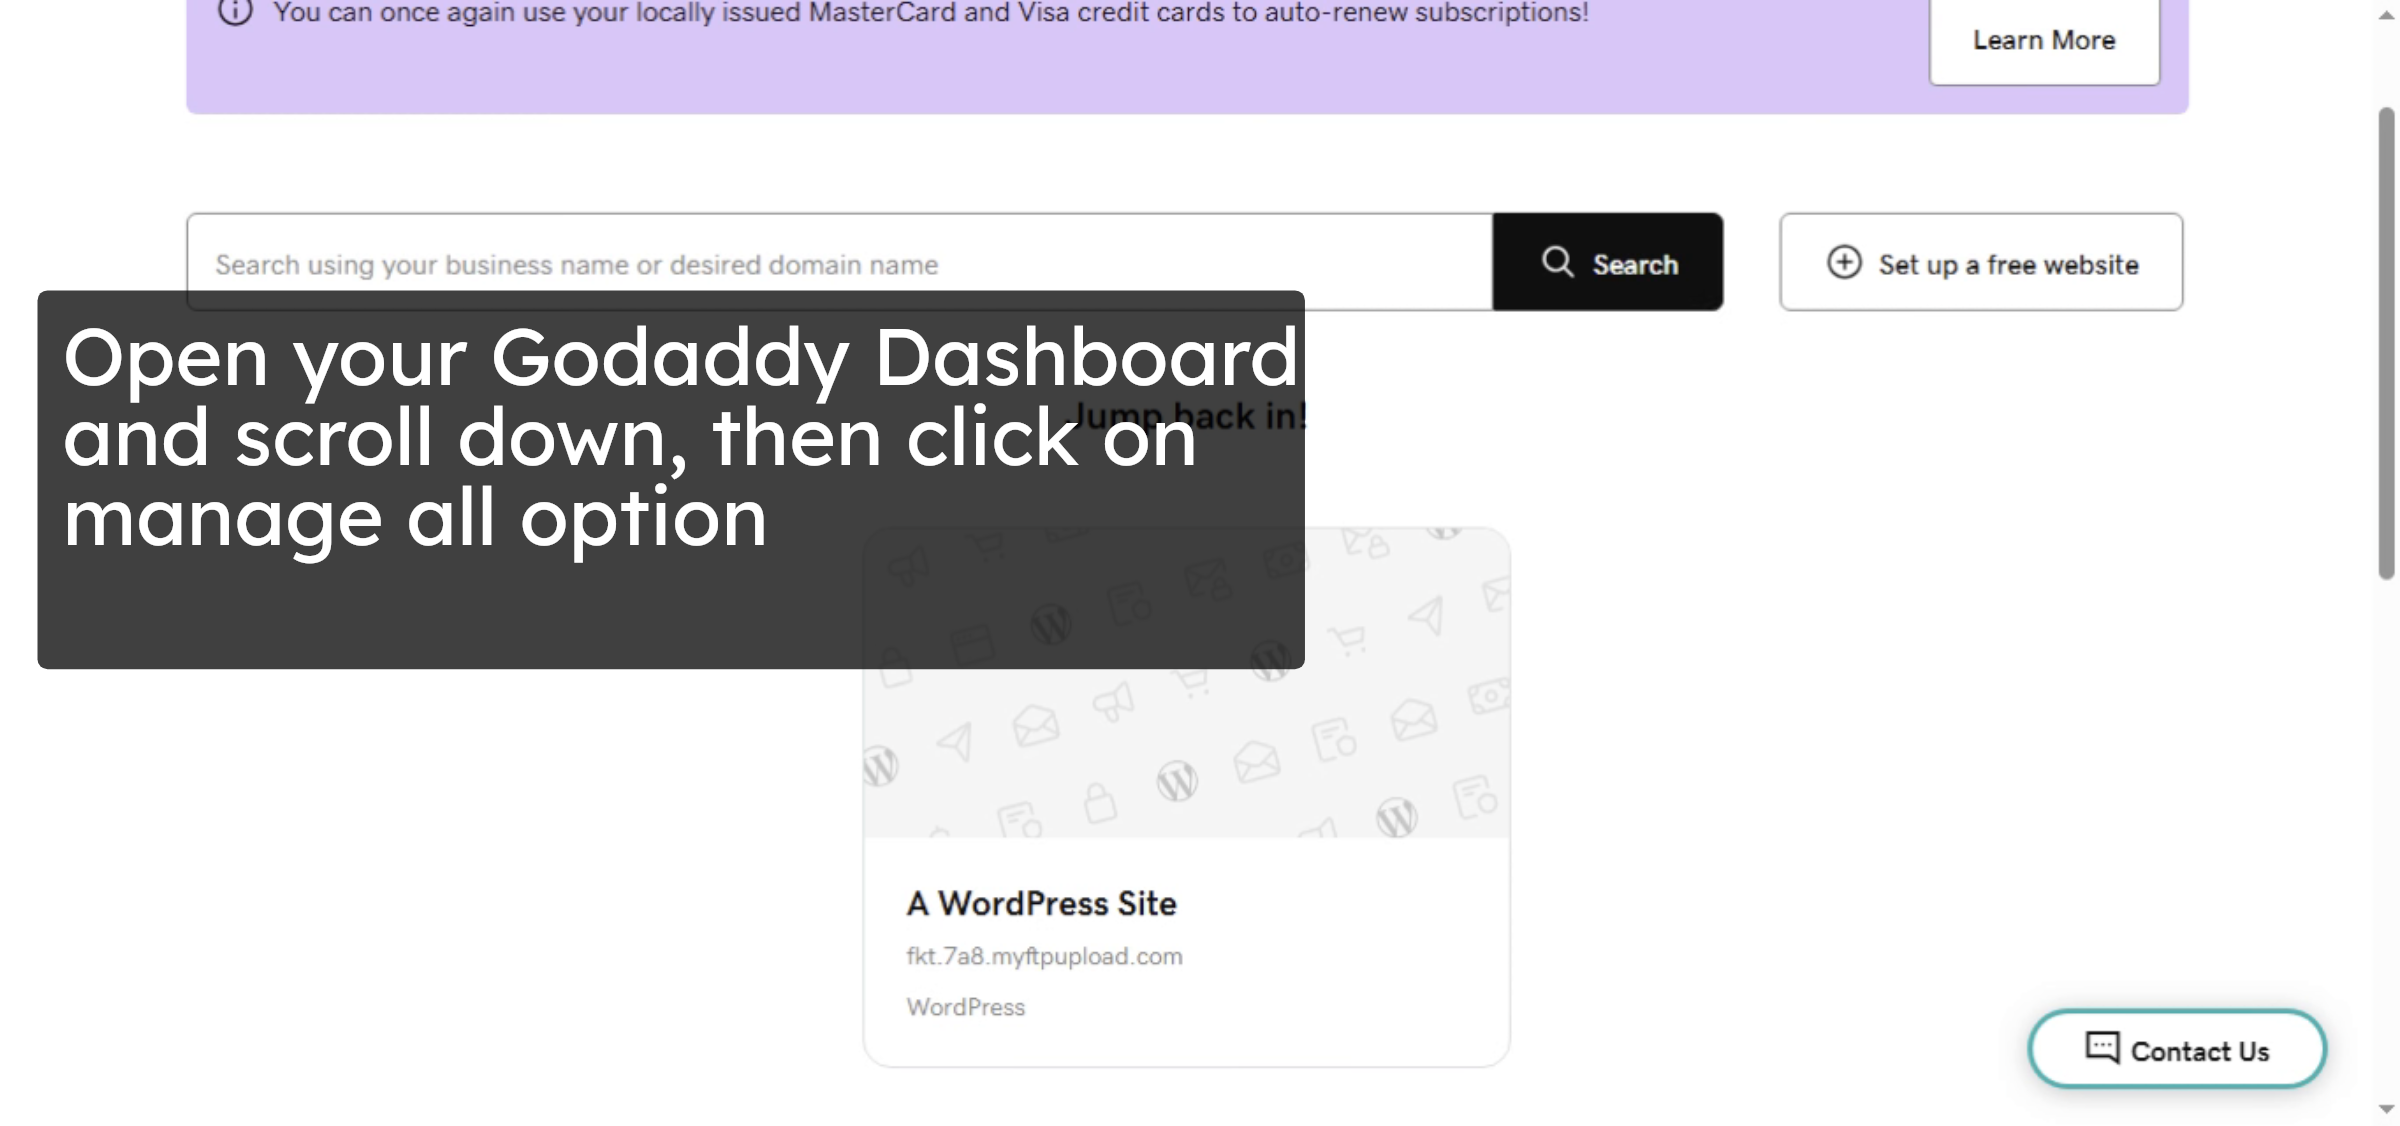
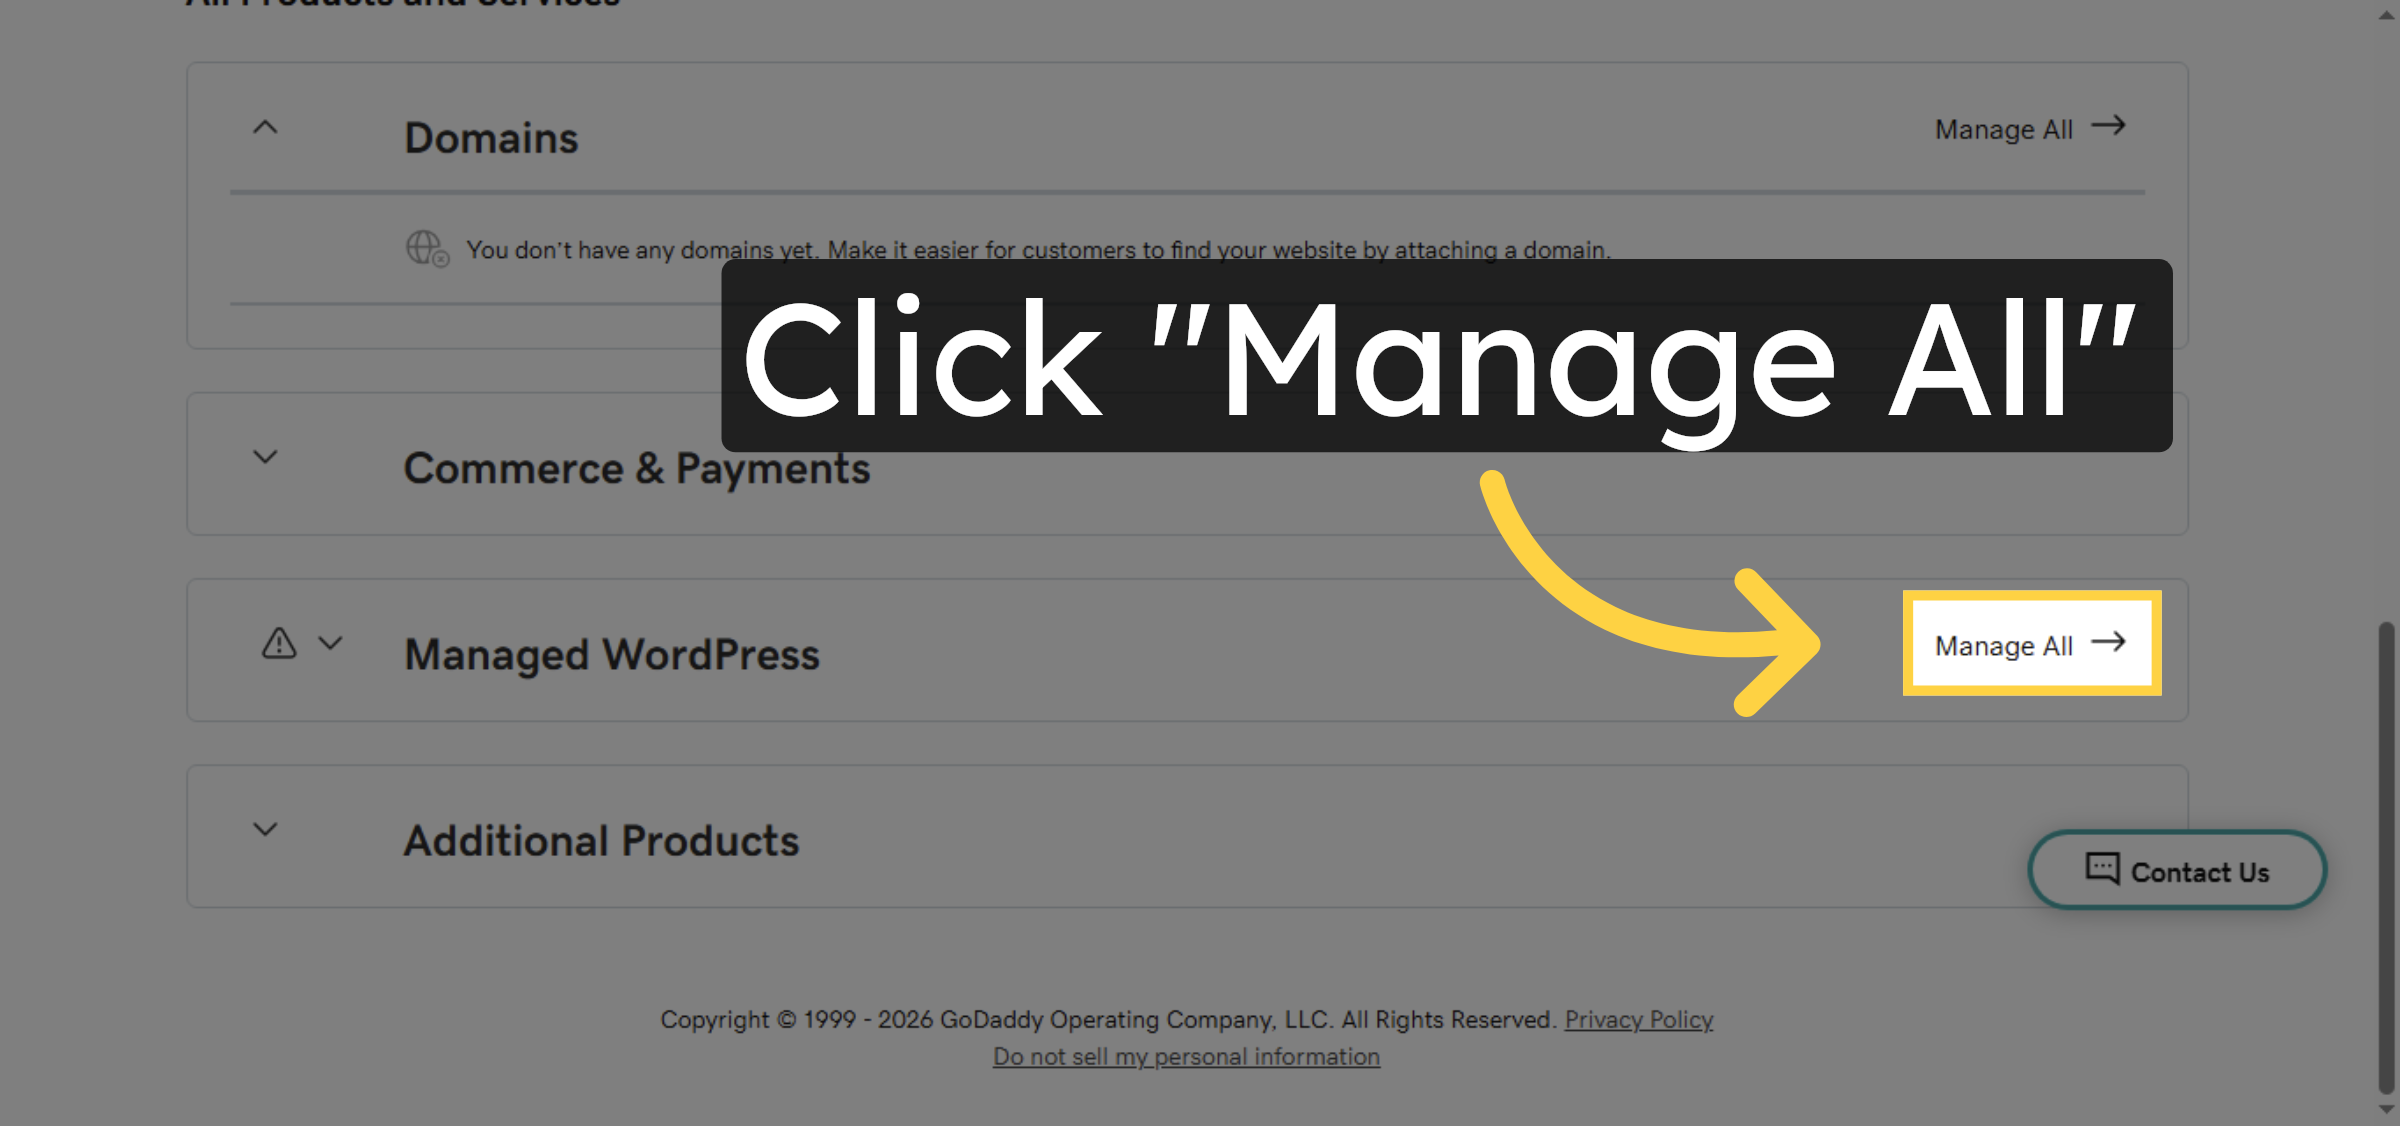
2. Access Manage All Products
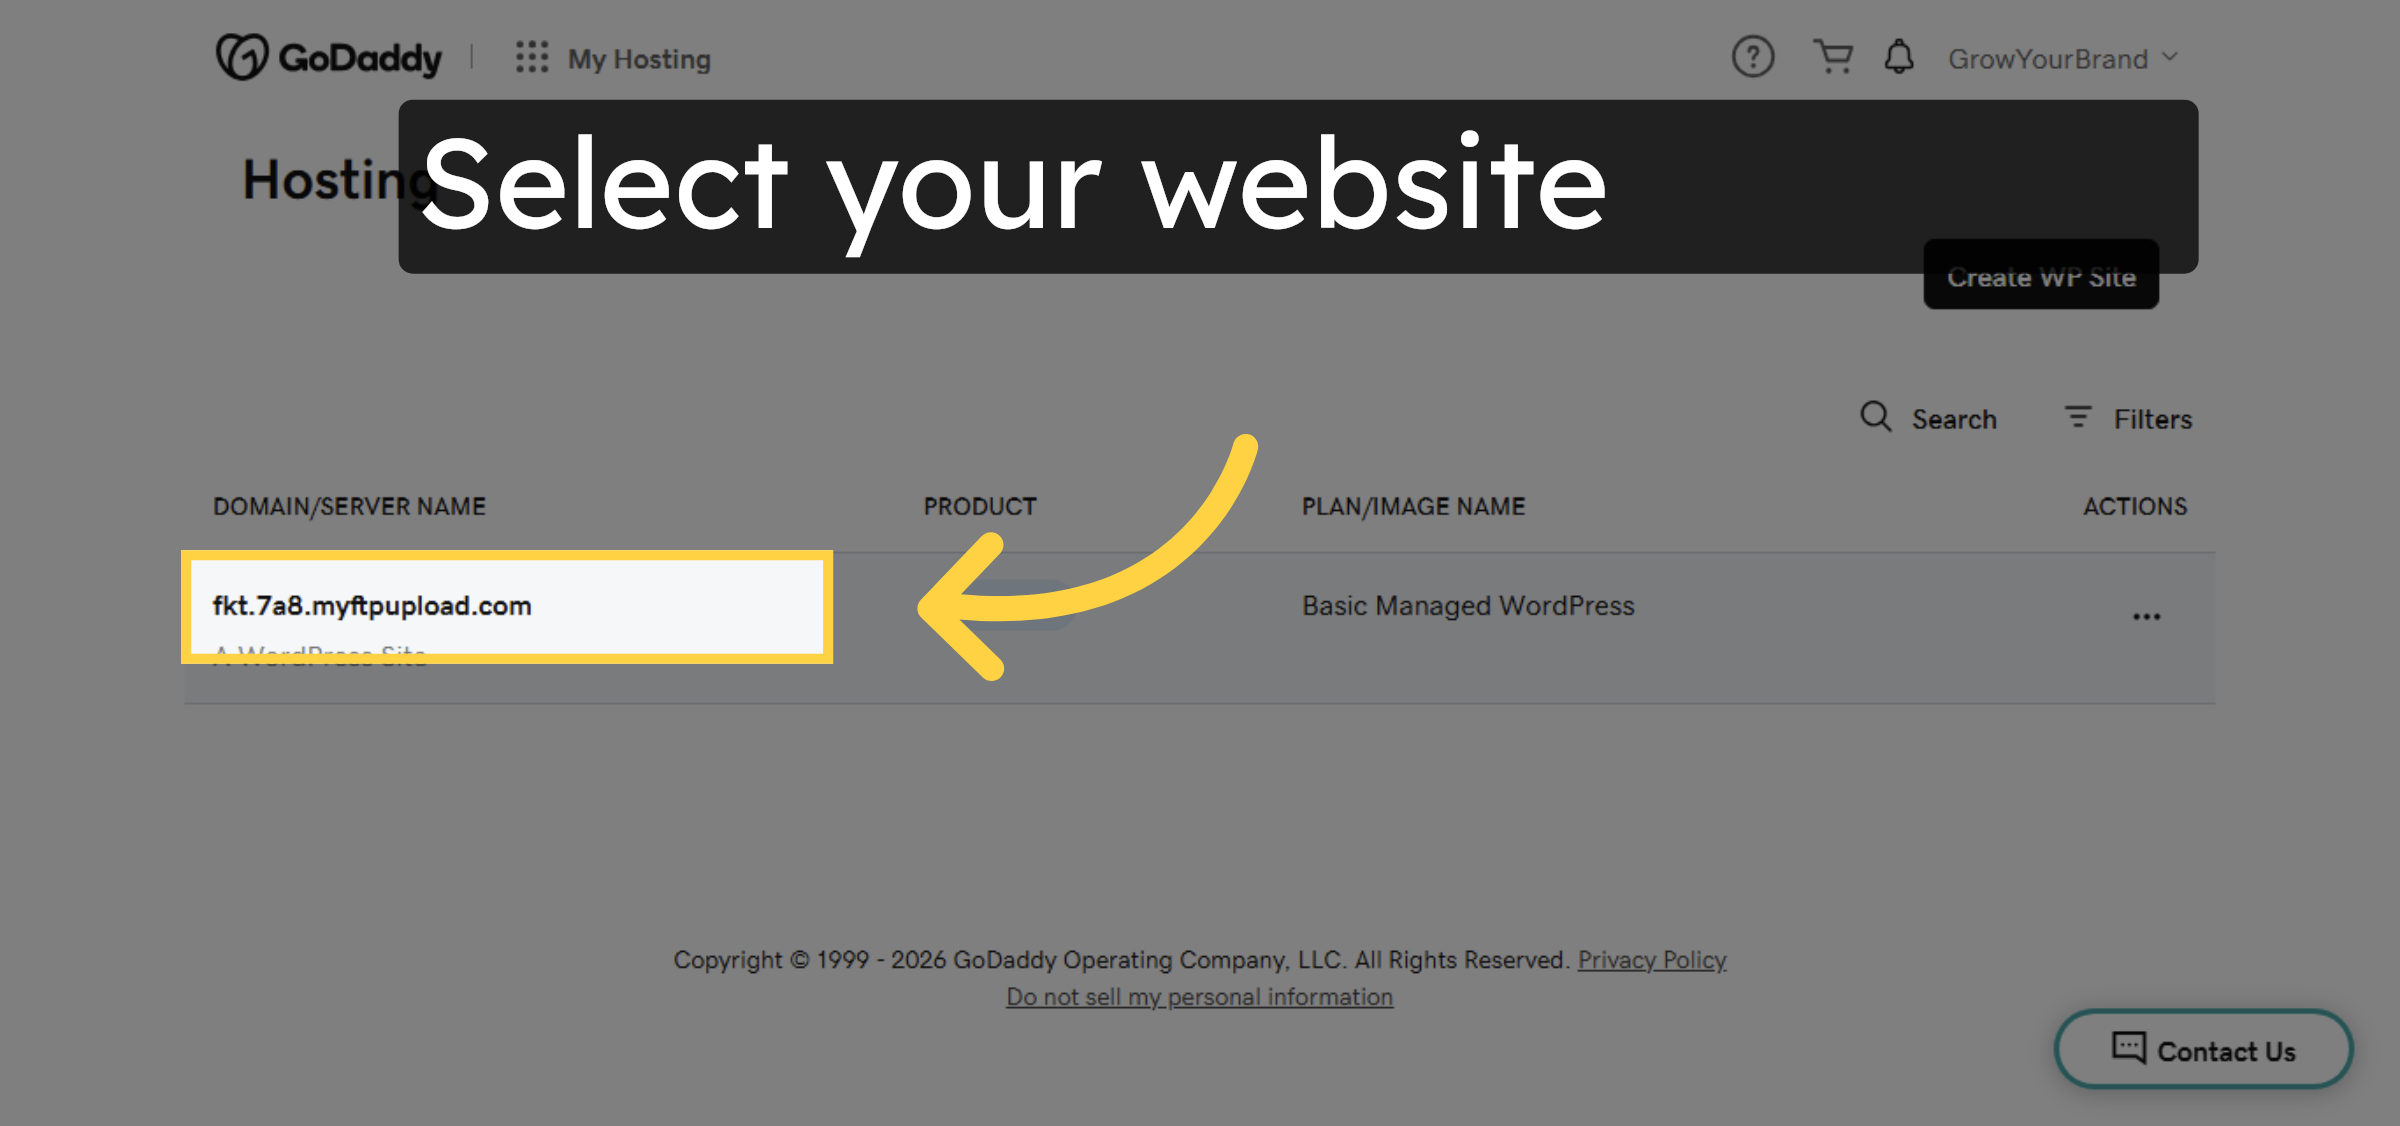
3. Select Hosting Account
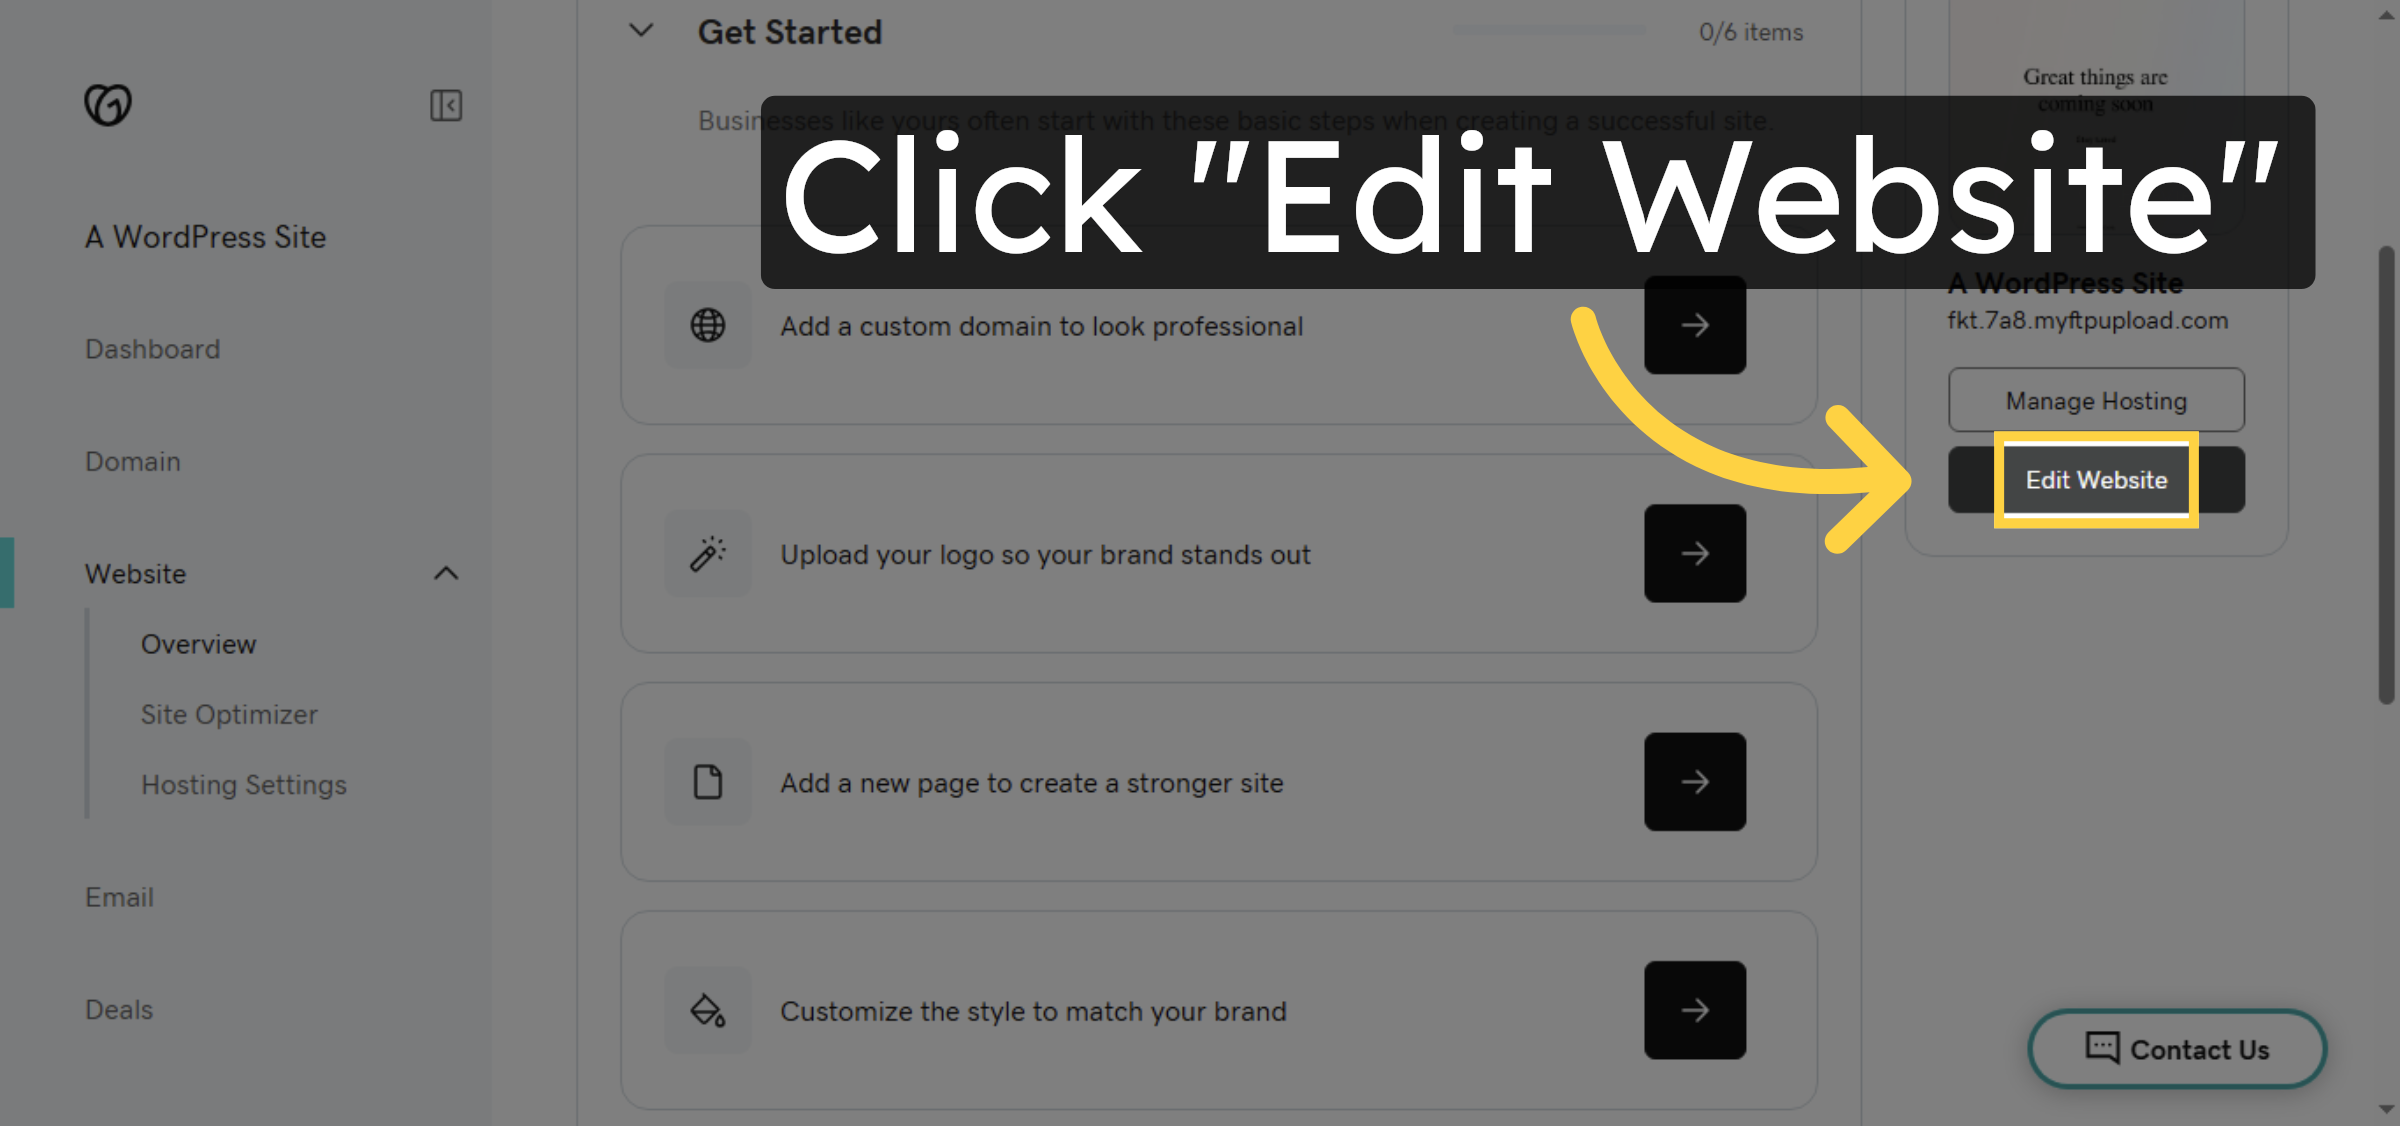
4. Edit WordPress Website
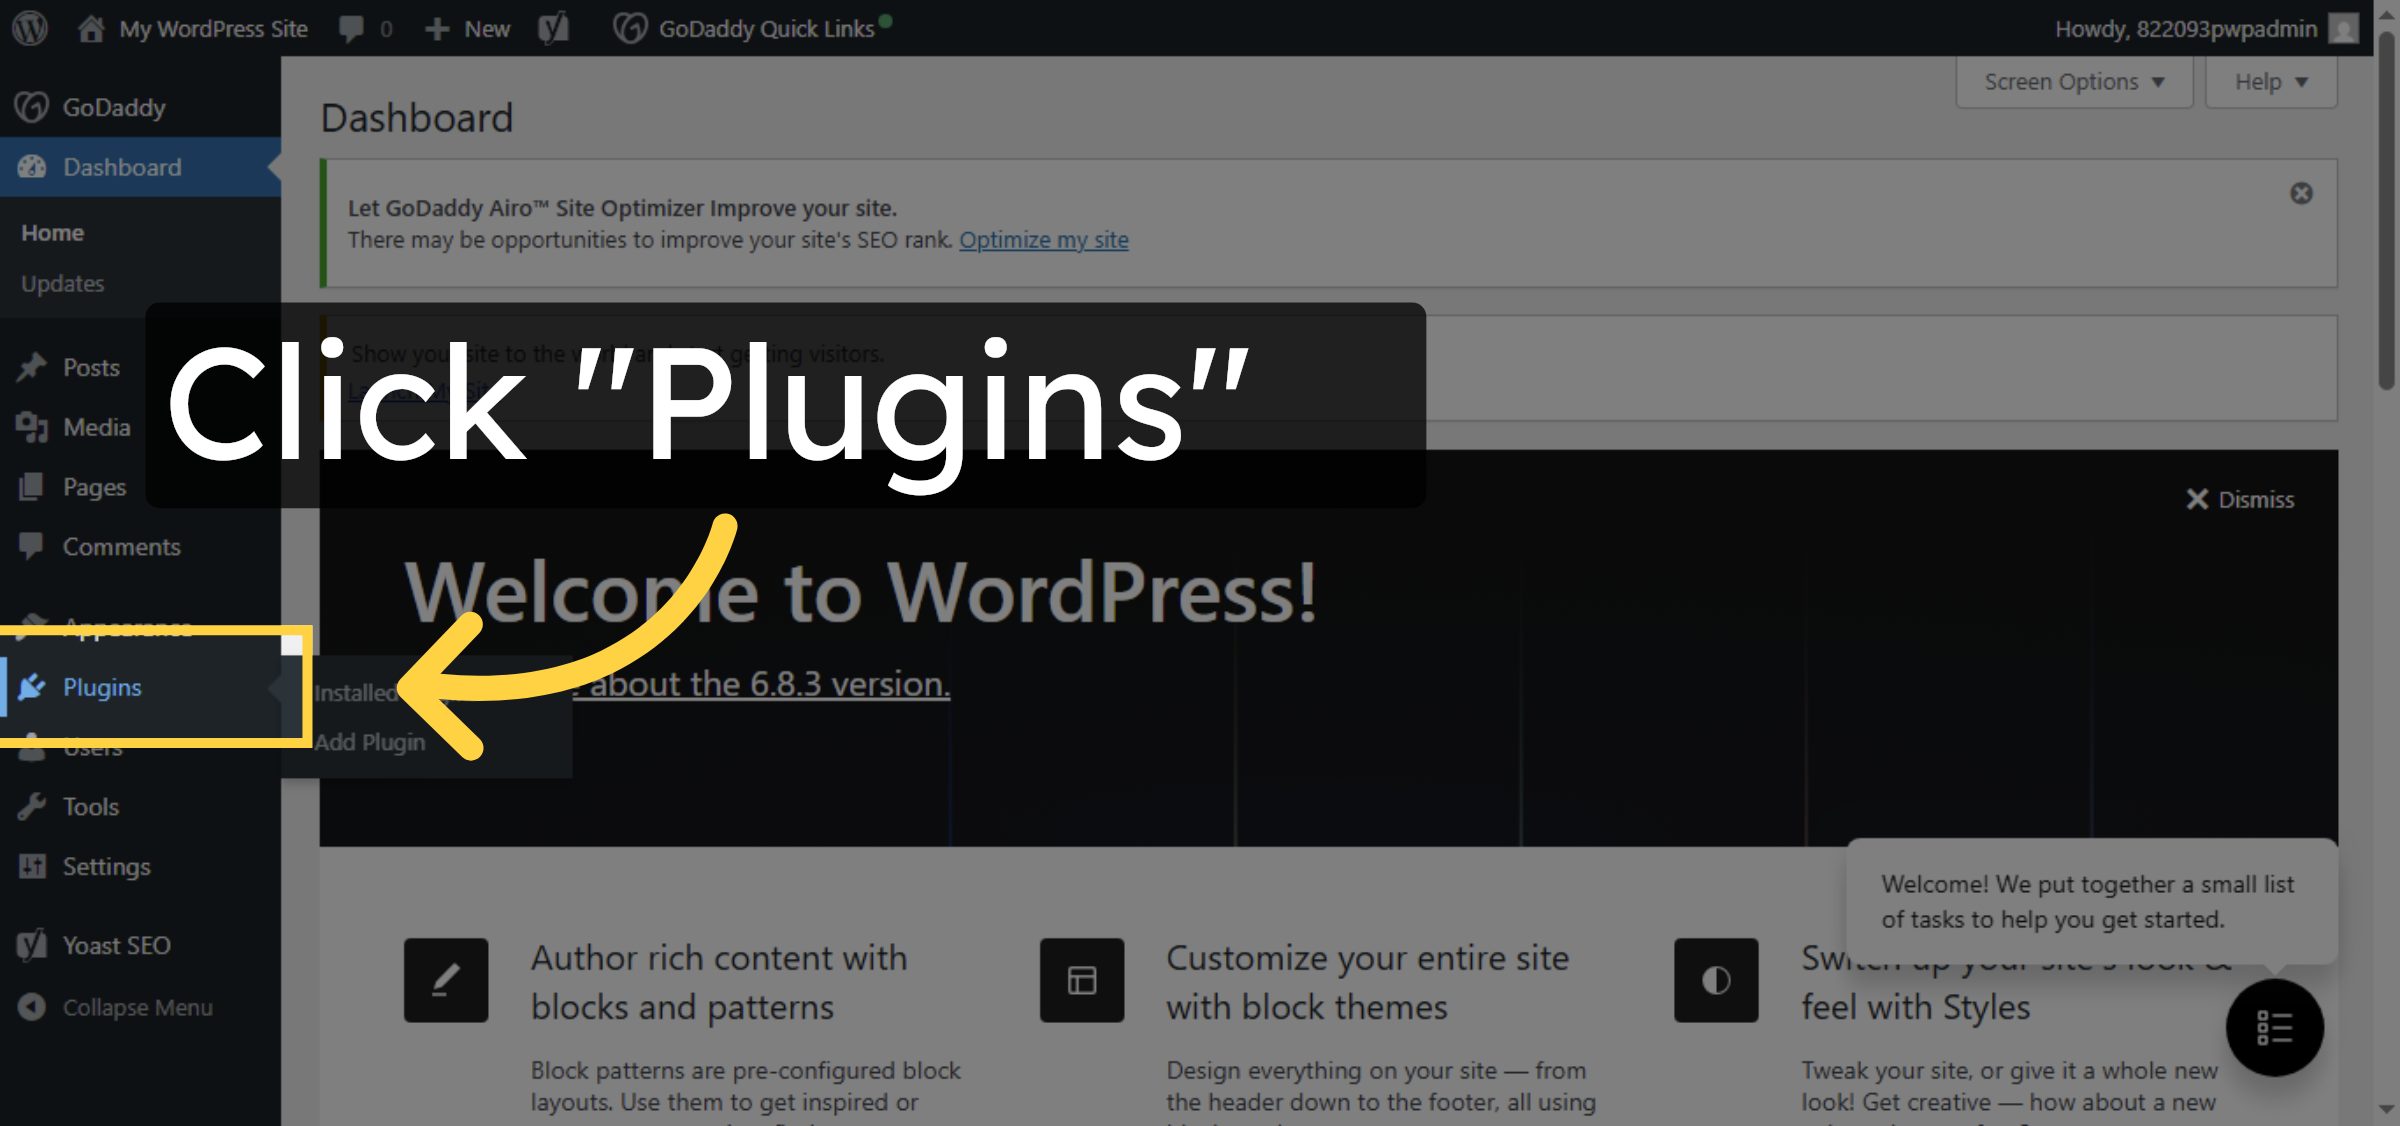
5. Open Plugins Section
6. Add New Plugin

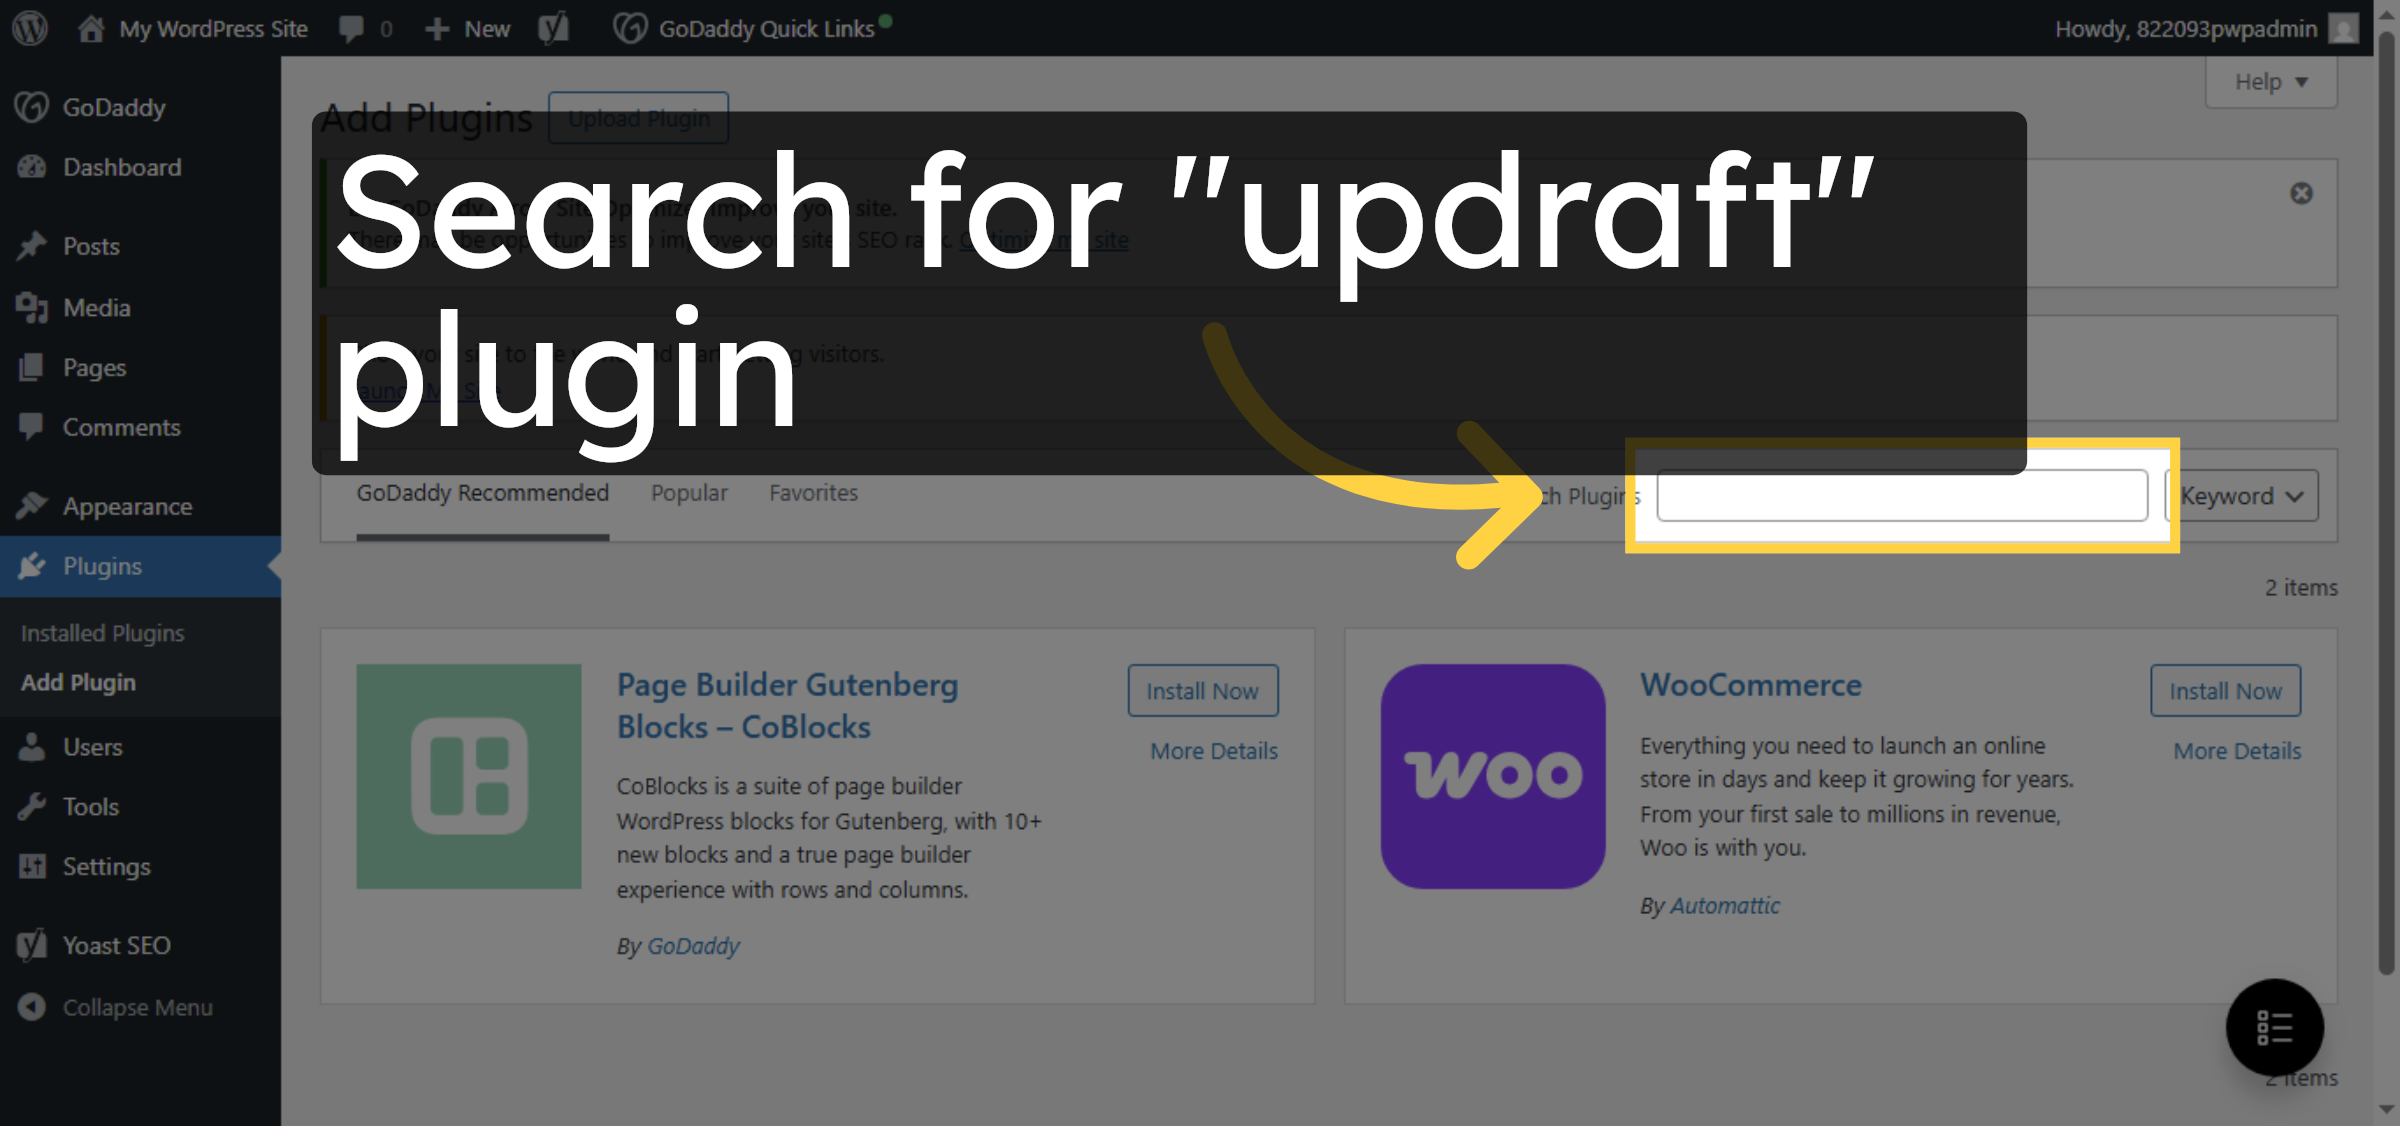
7. Search for Plugin
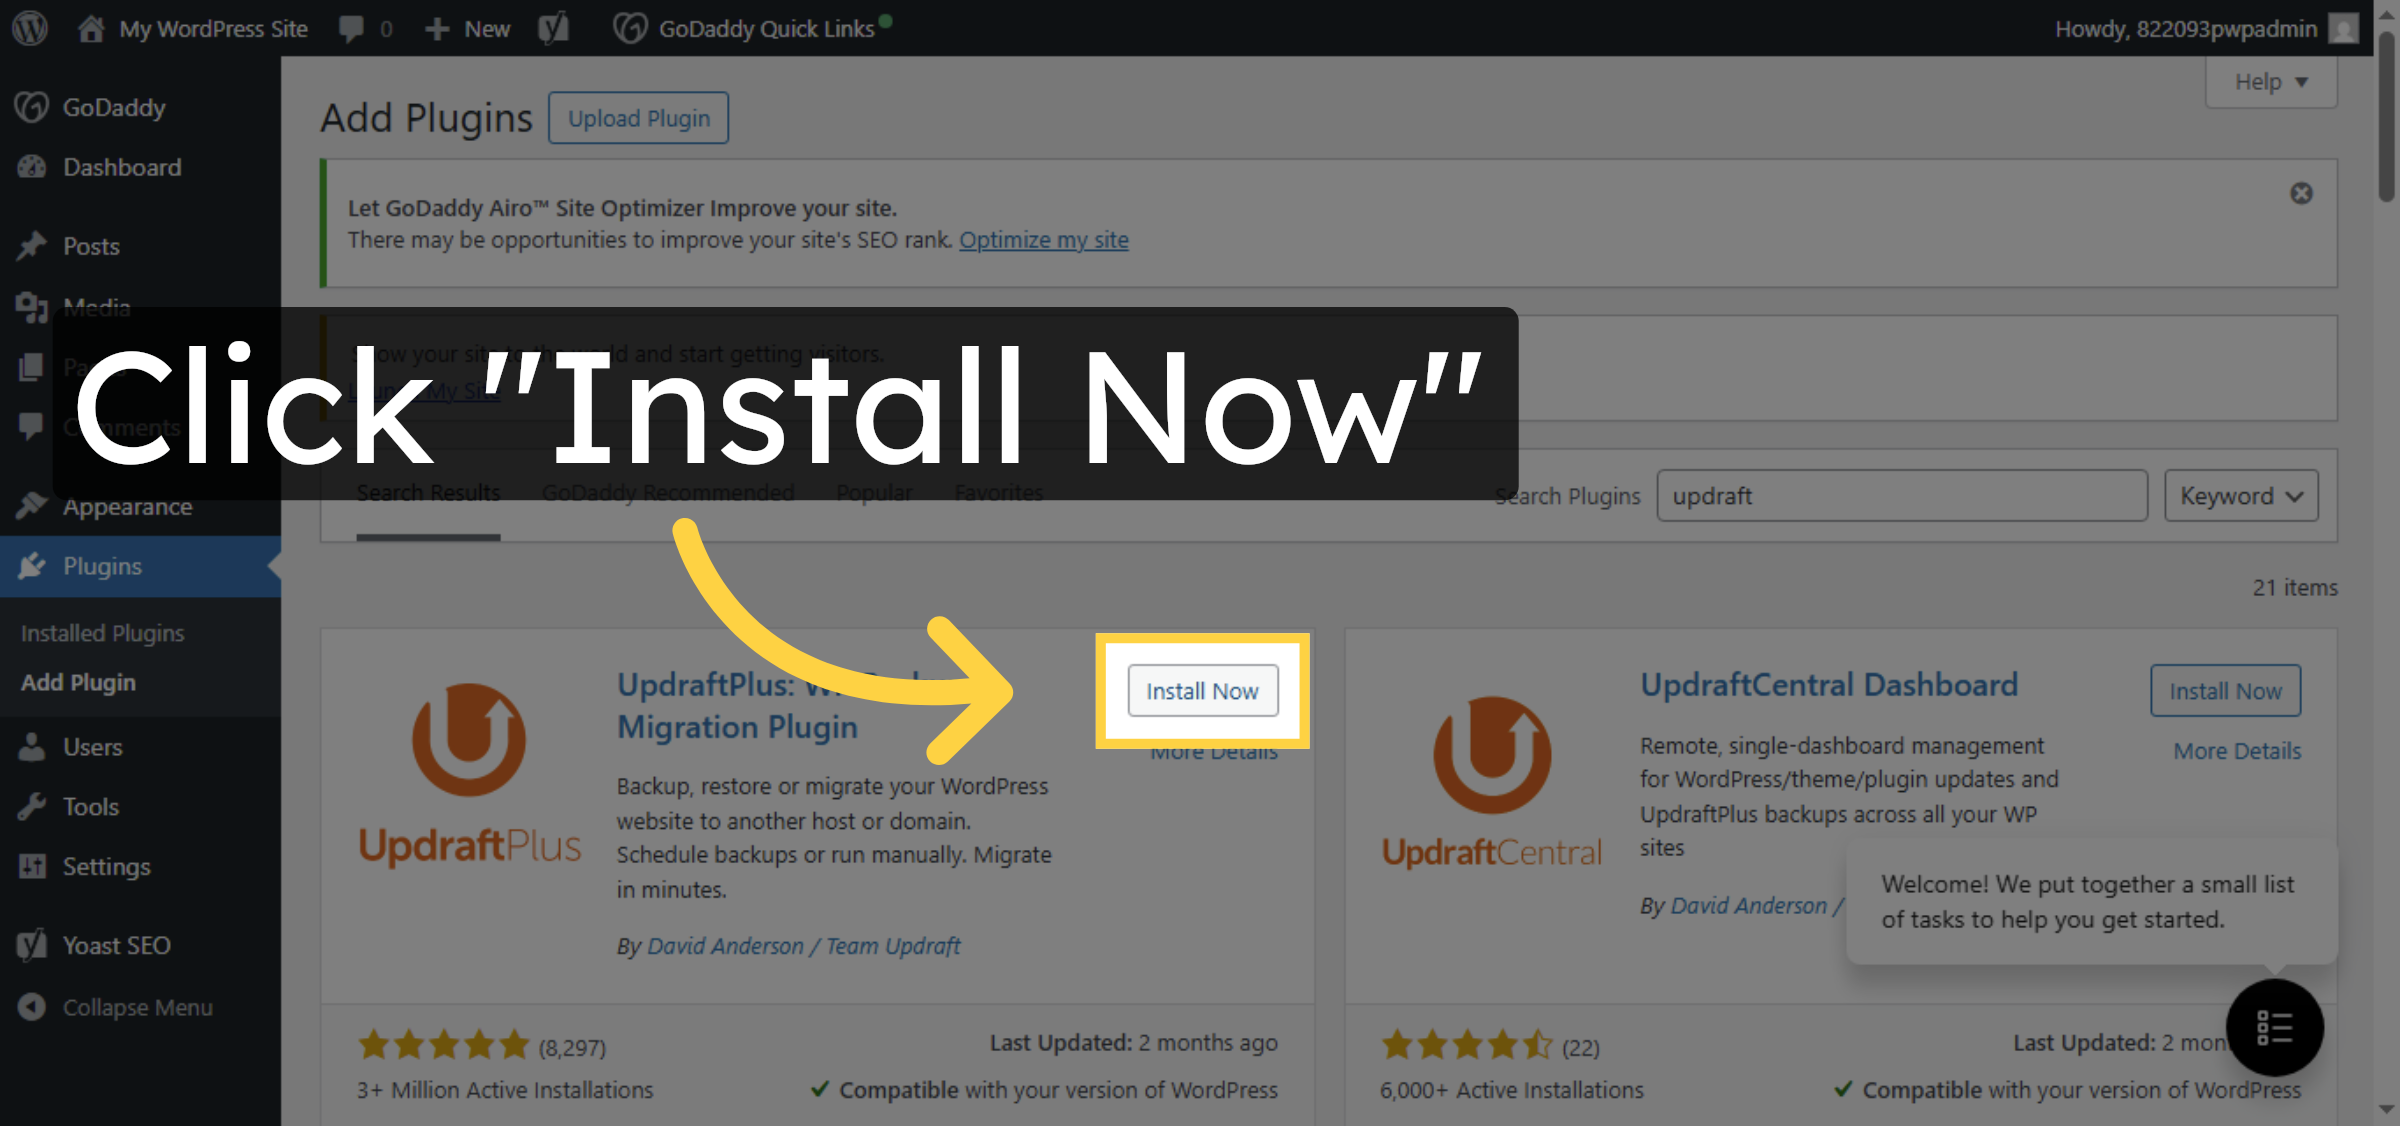
8. Install UpdraftPlus Plugin
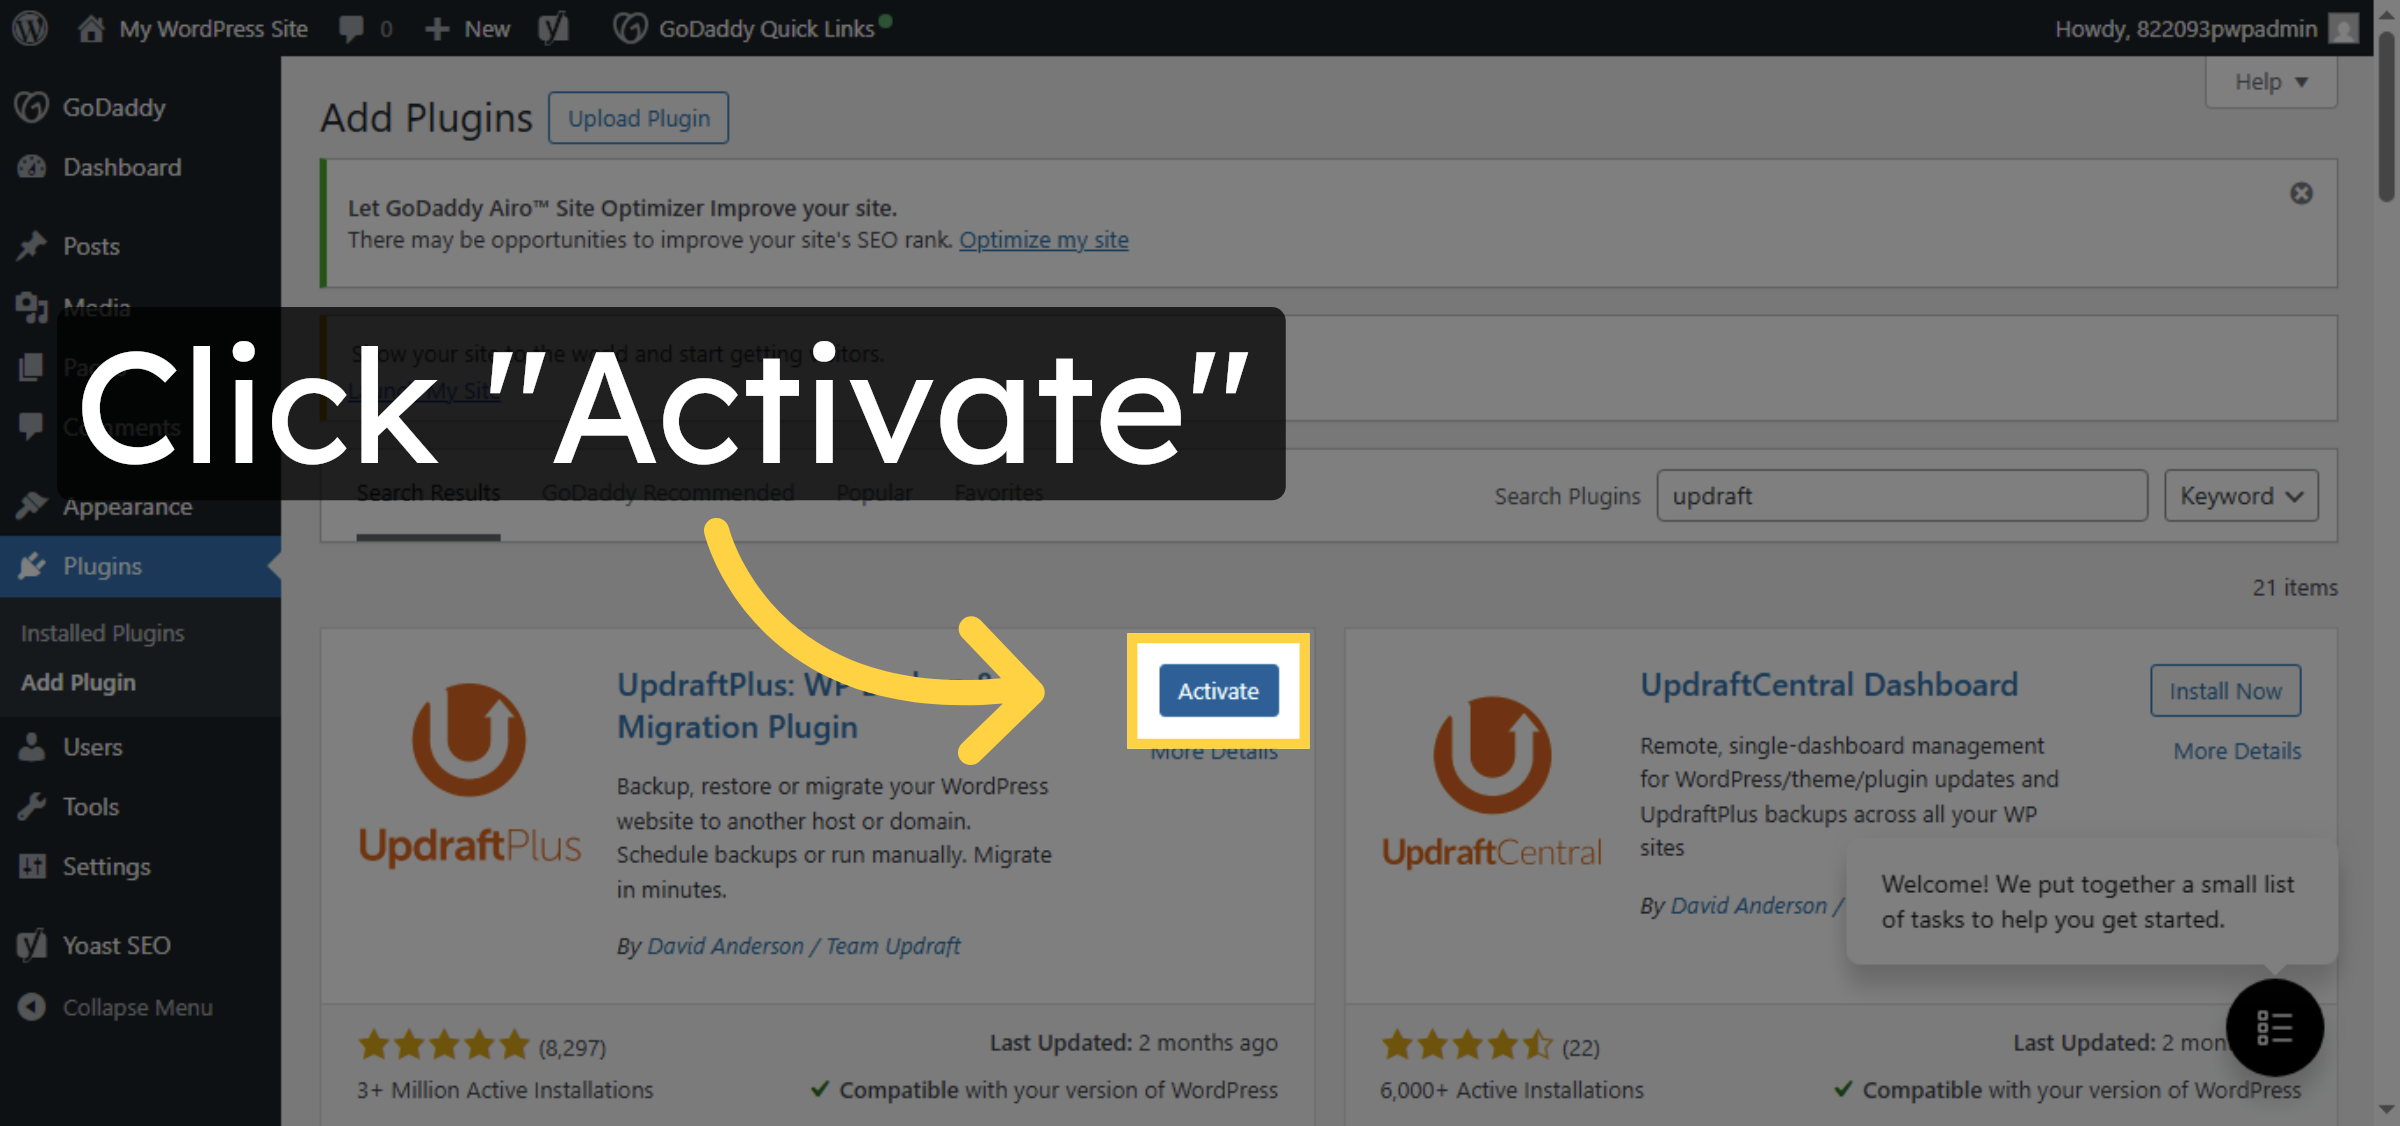
9. Activate UpdraftPlus Plugin
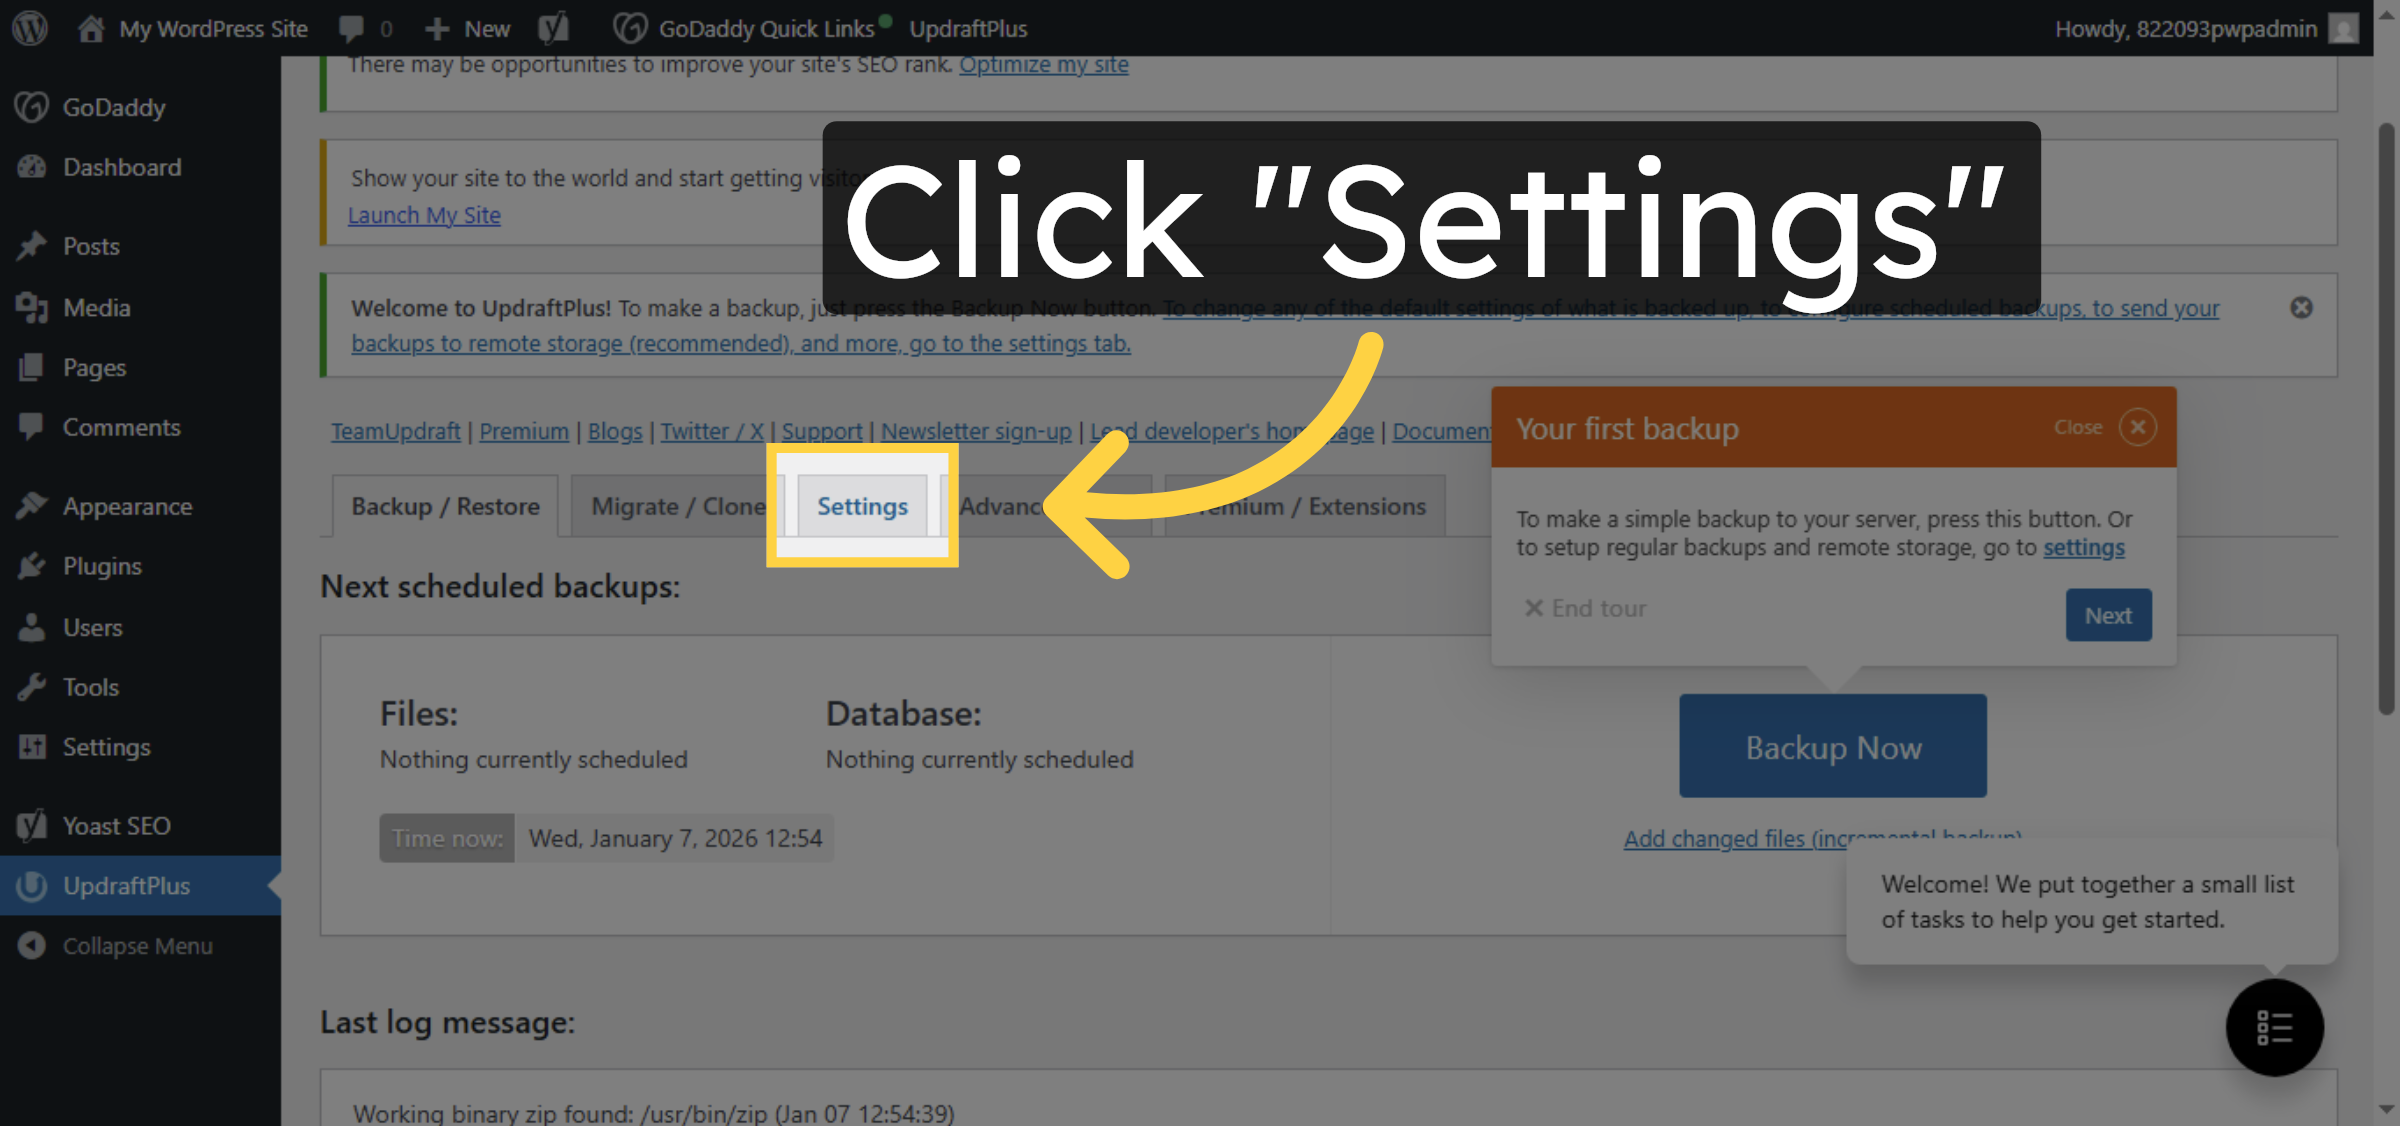
10. Open Plugin Settings

11. Access UpdraftPlus Settings
12. Open Backup Schedule Options
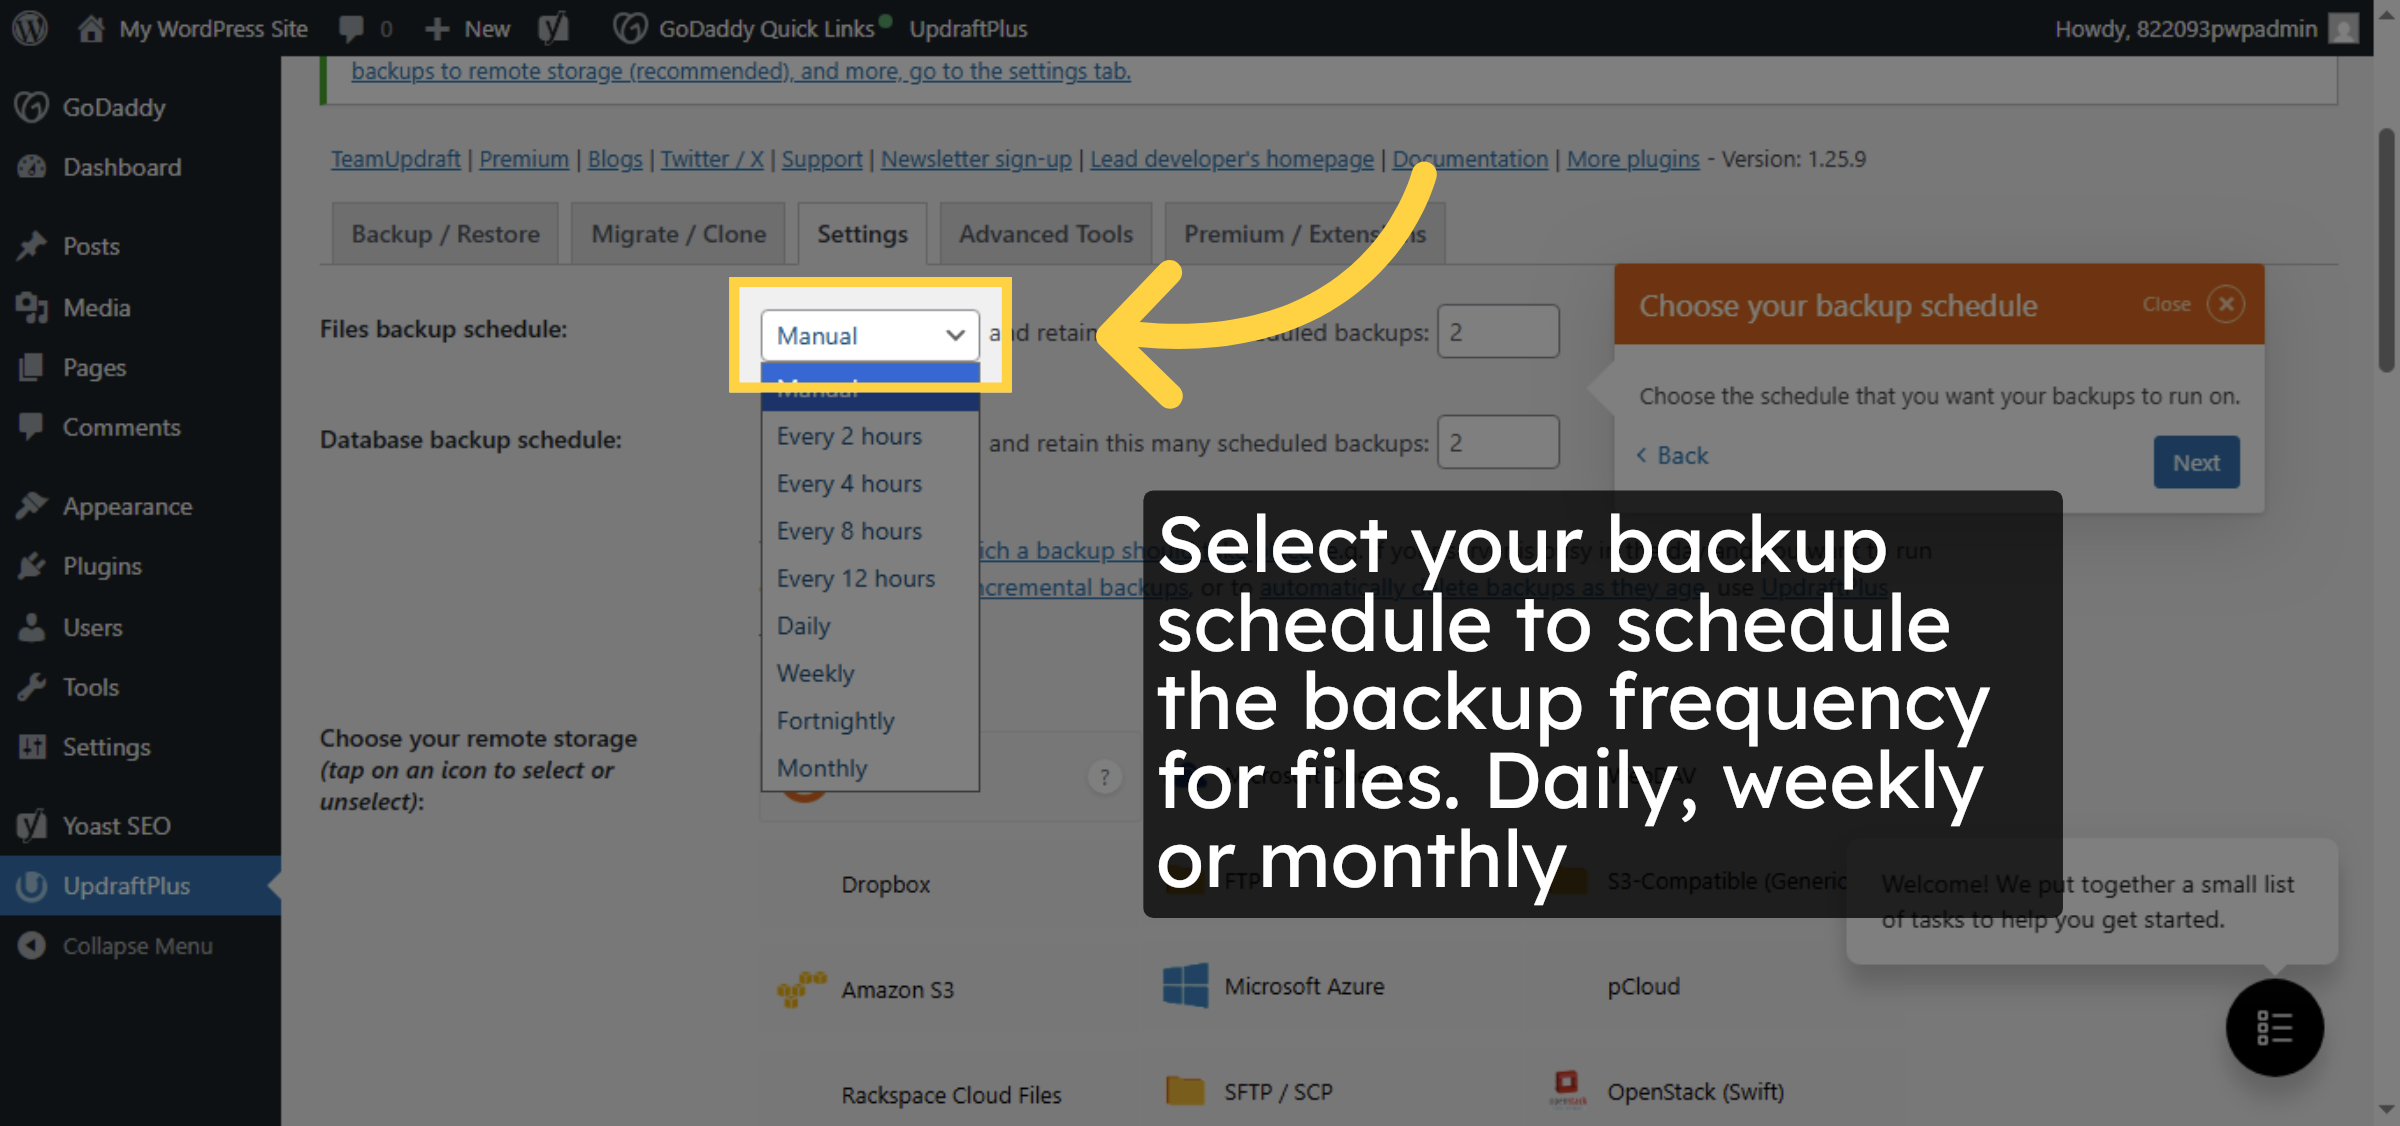


13. Select Backup Interval for files
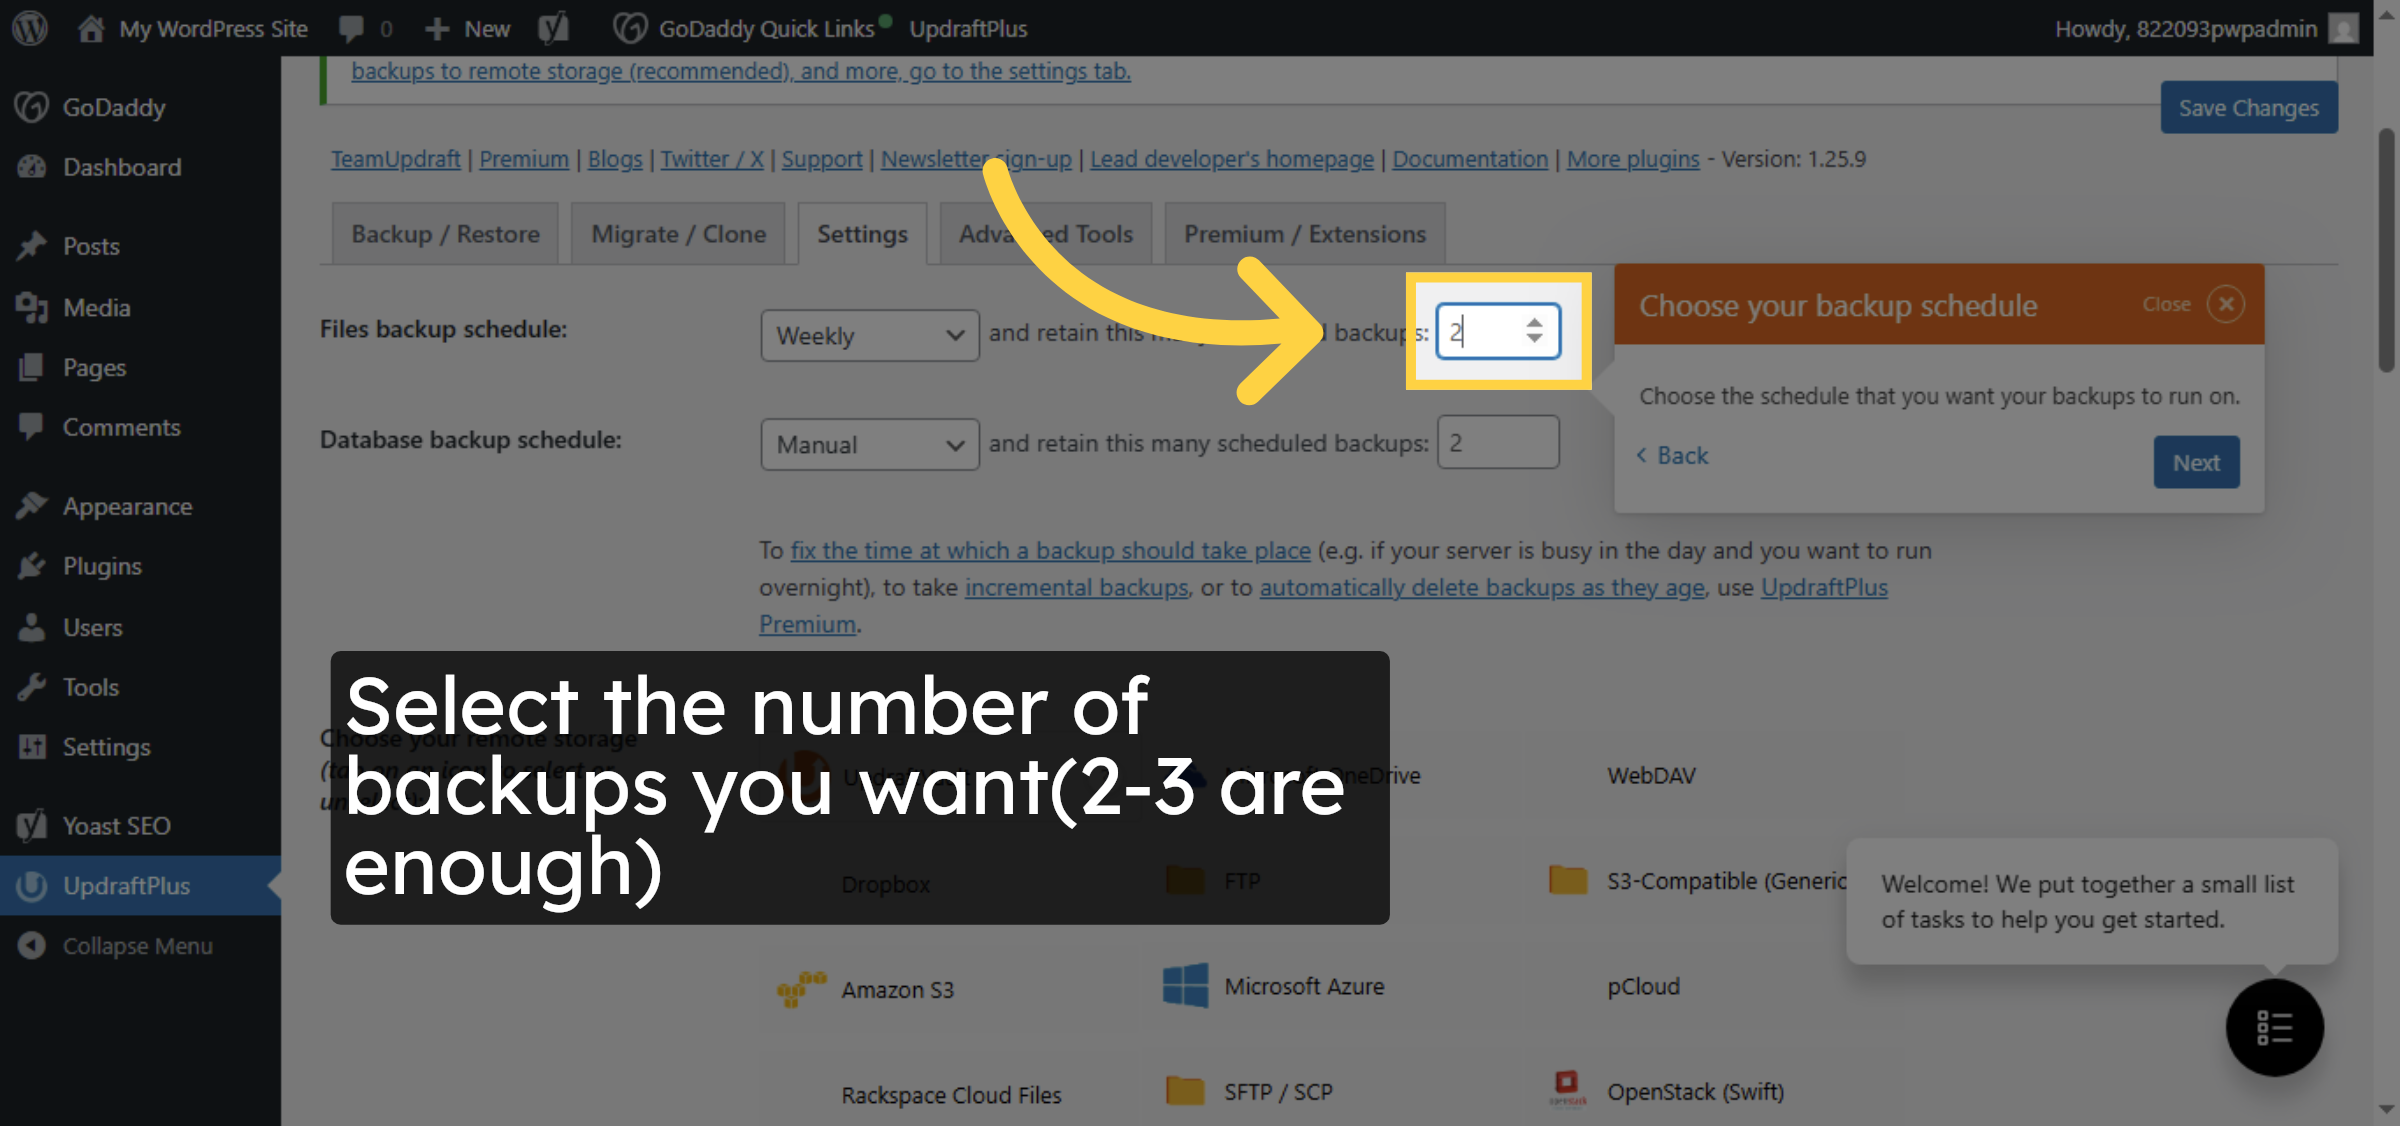
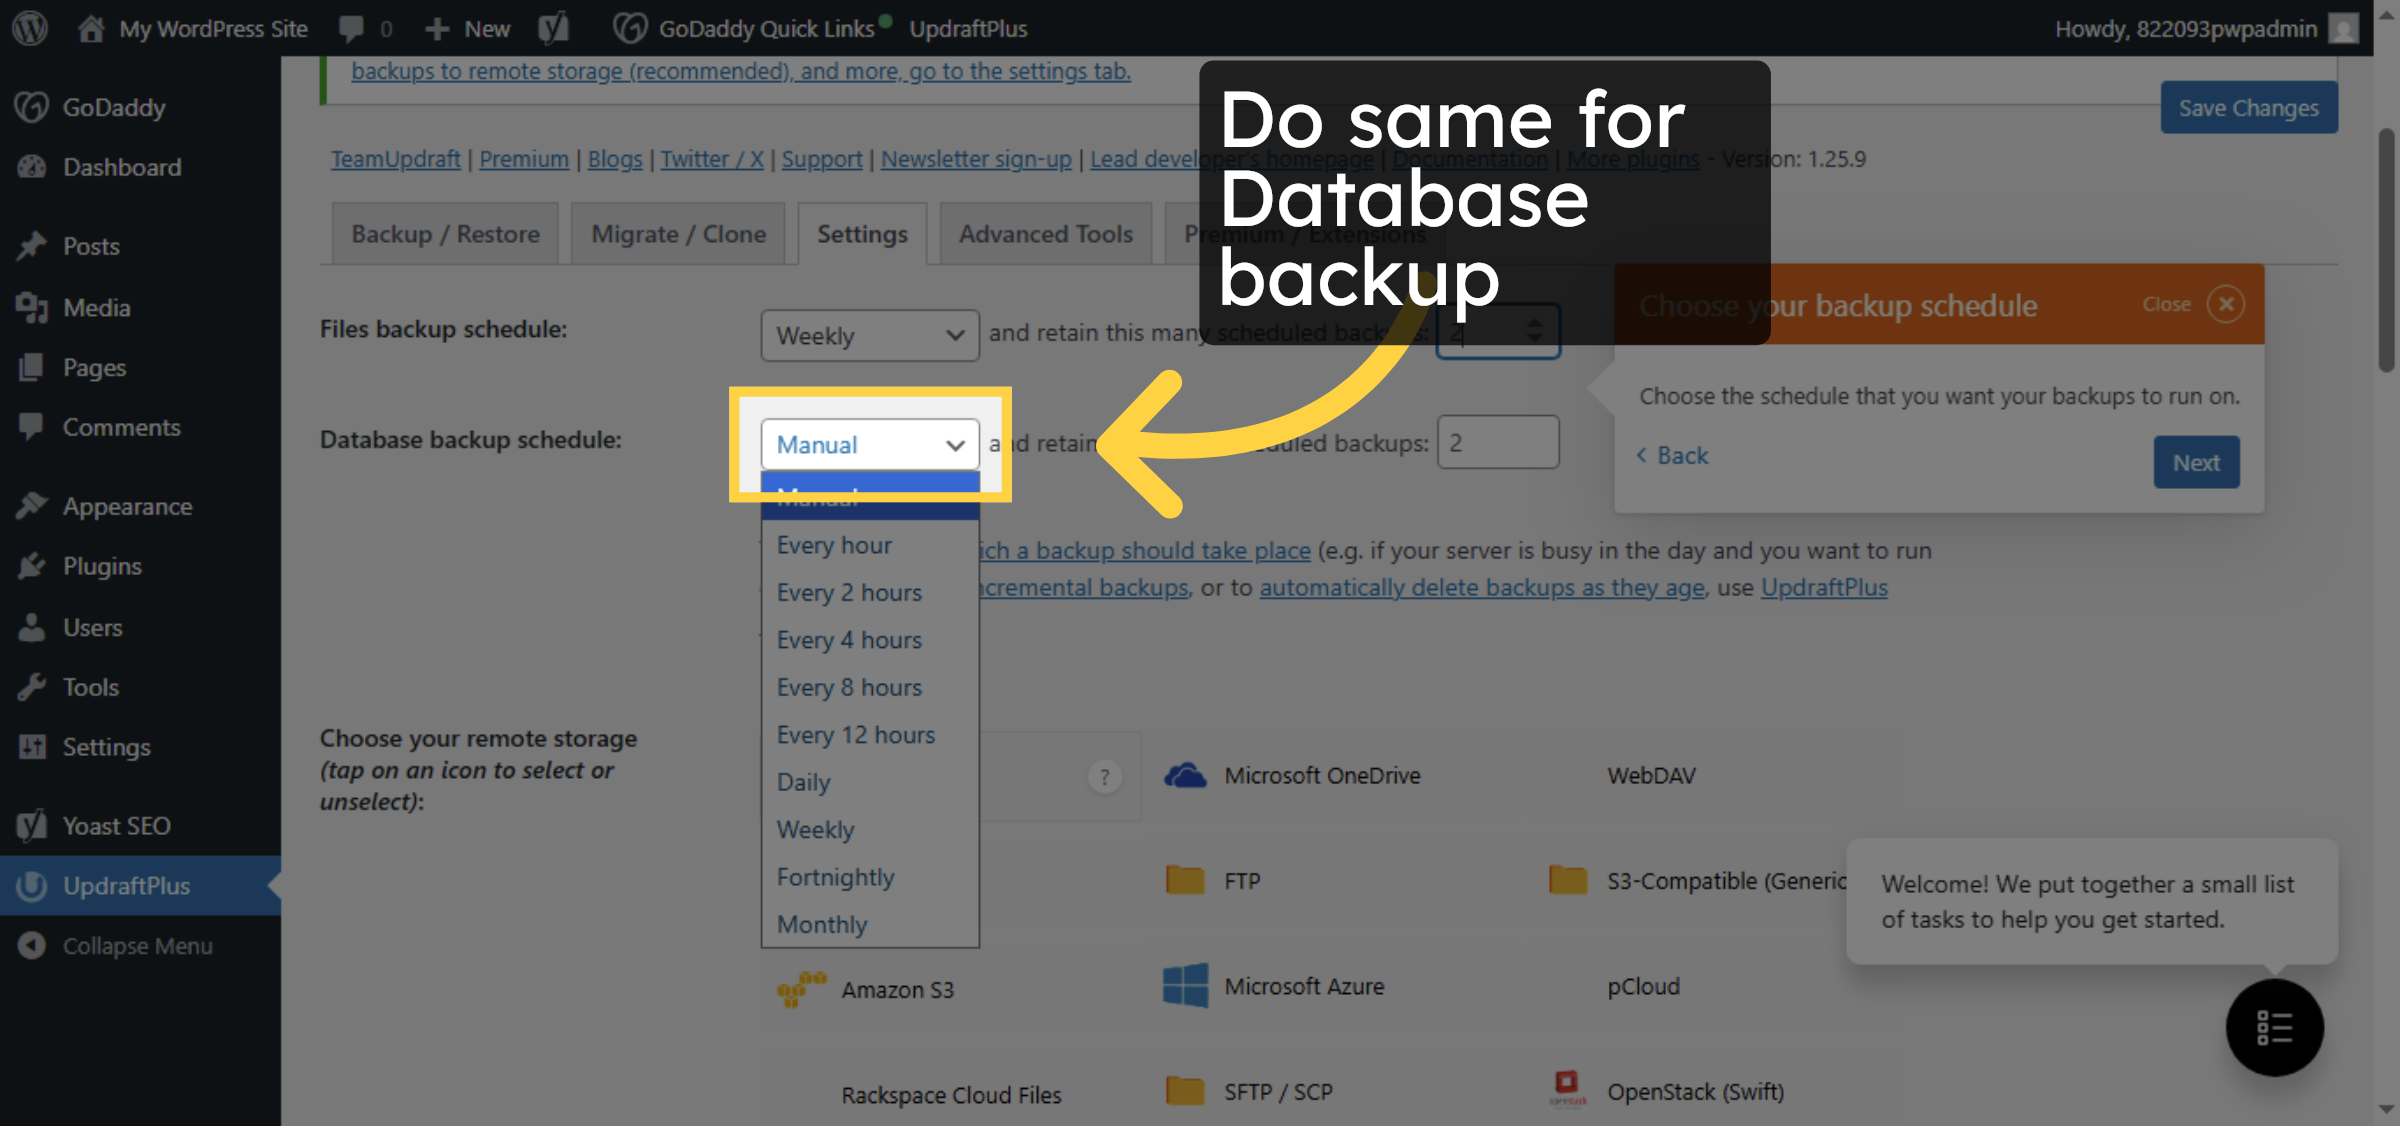
14. select backup schedule for database
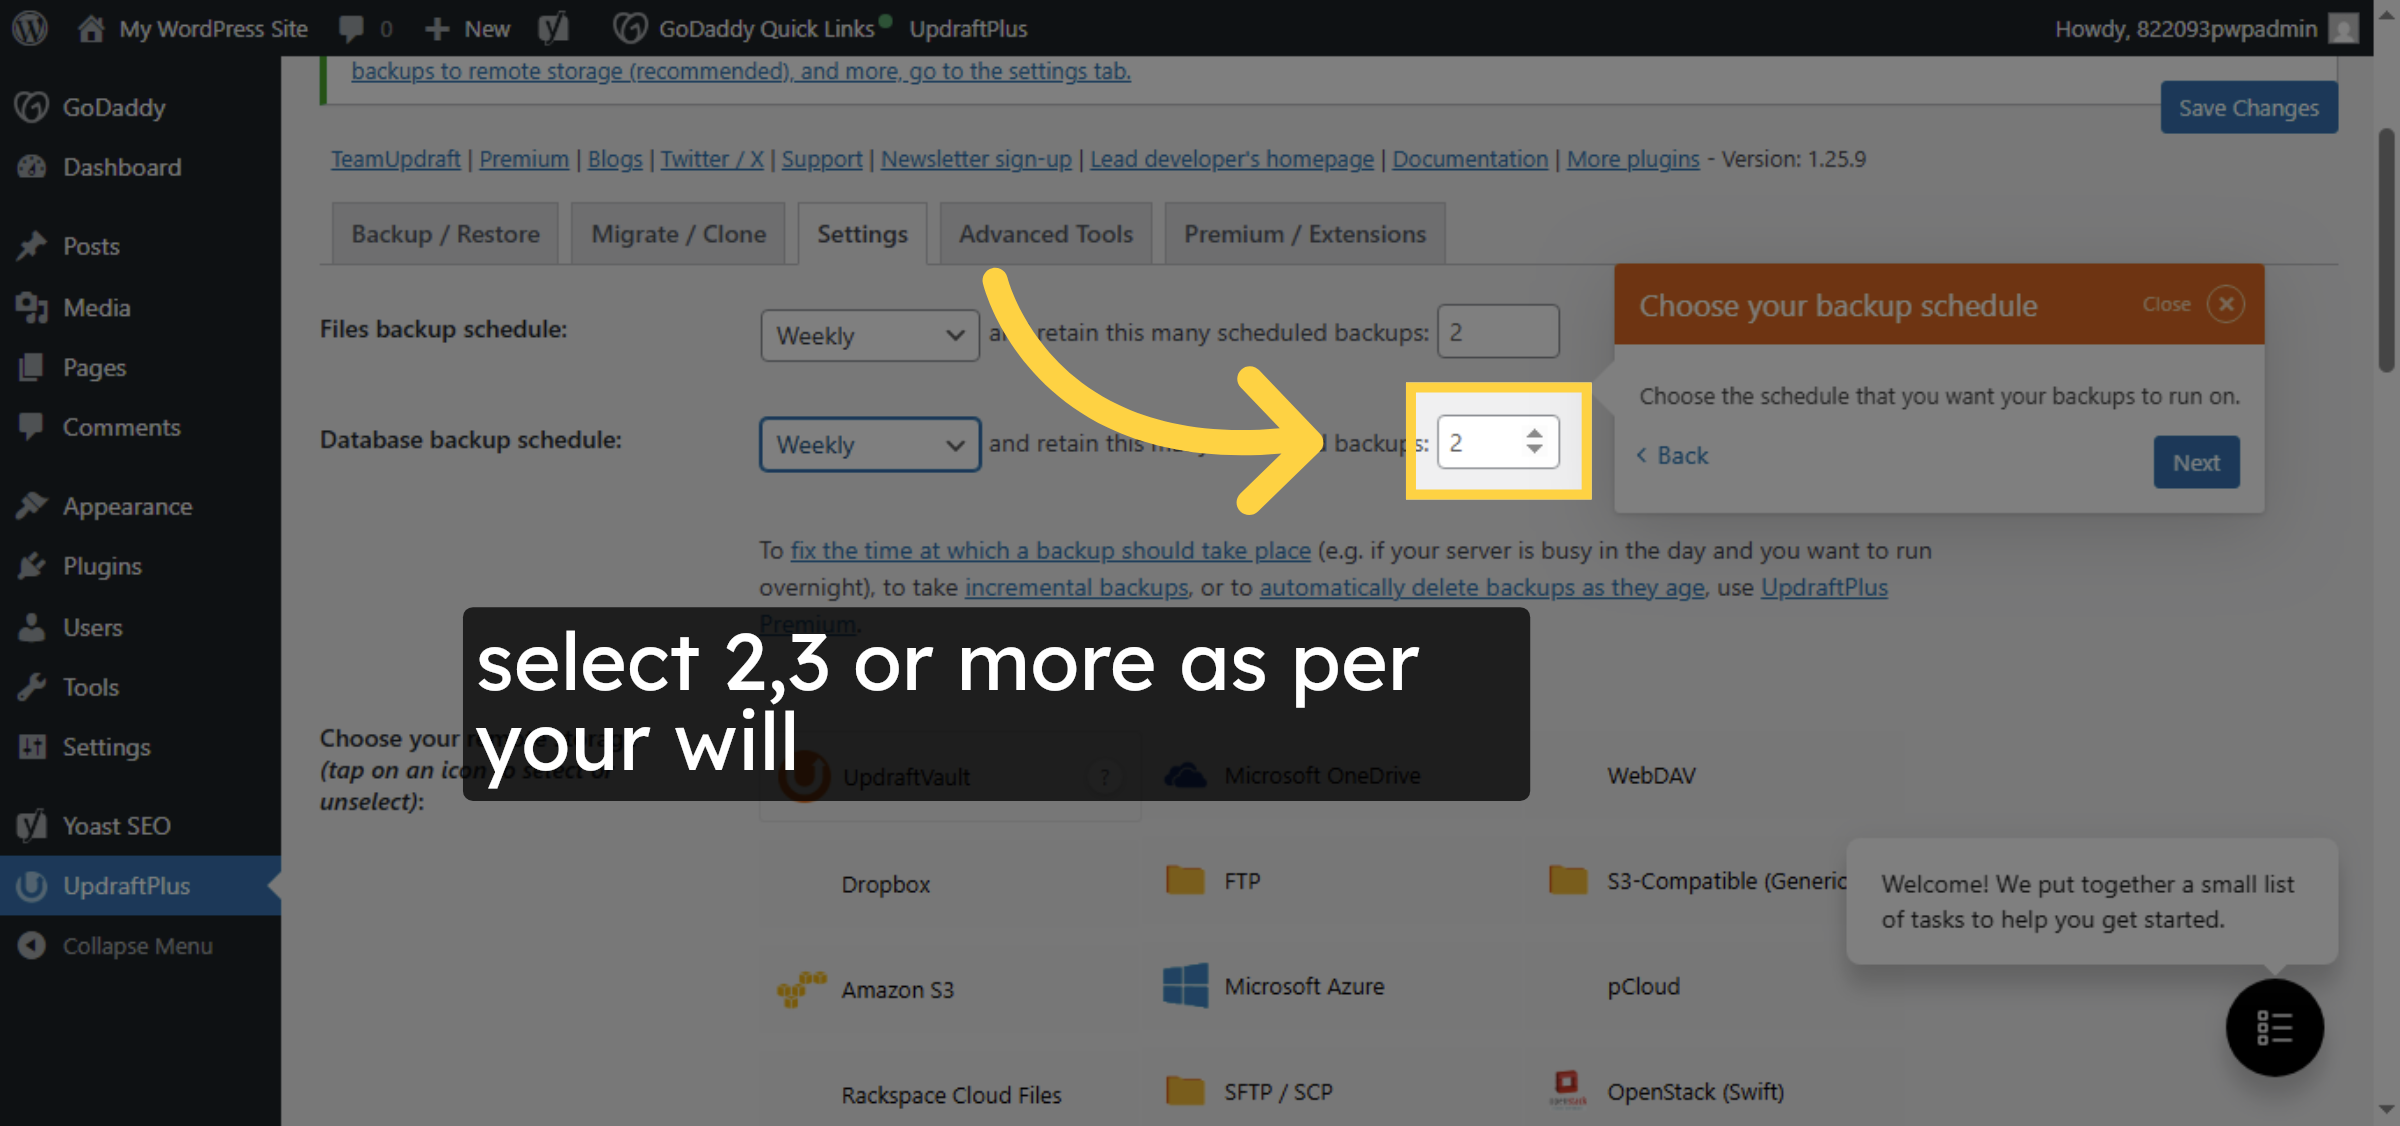
15. Select File Backup Interval for database
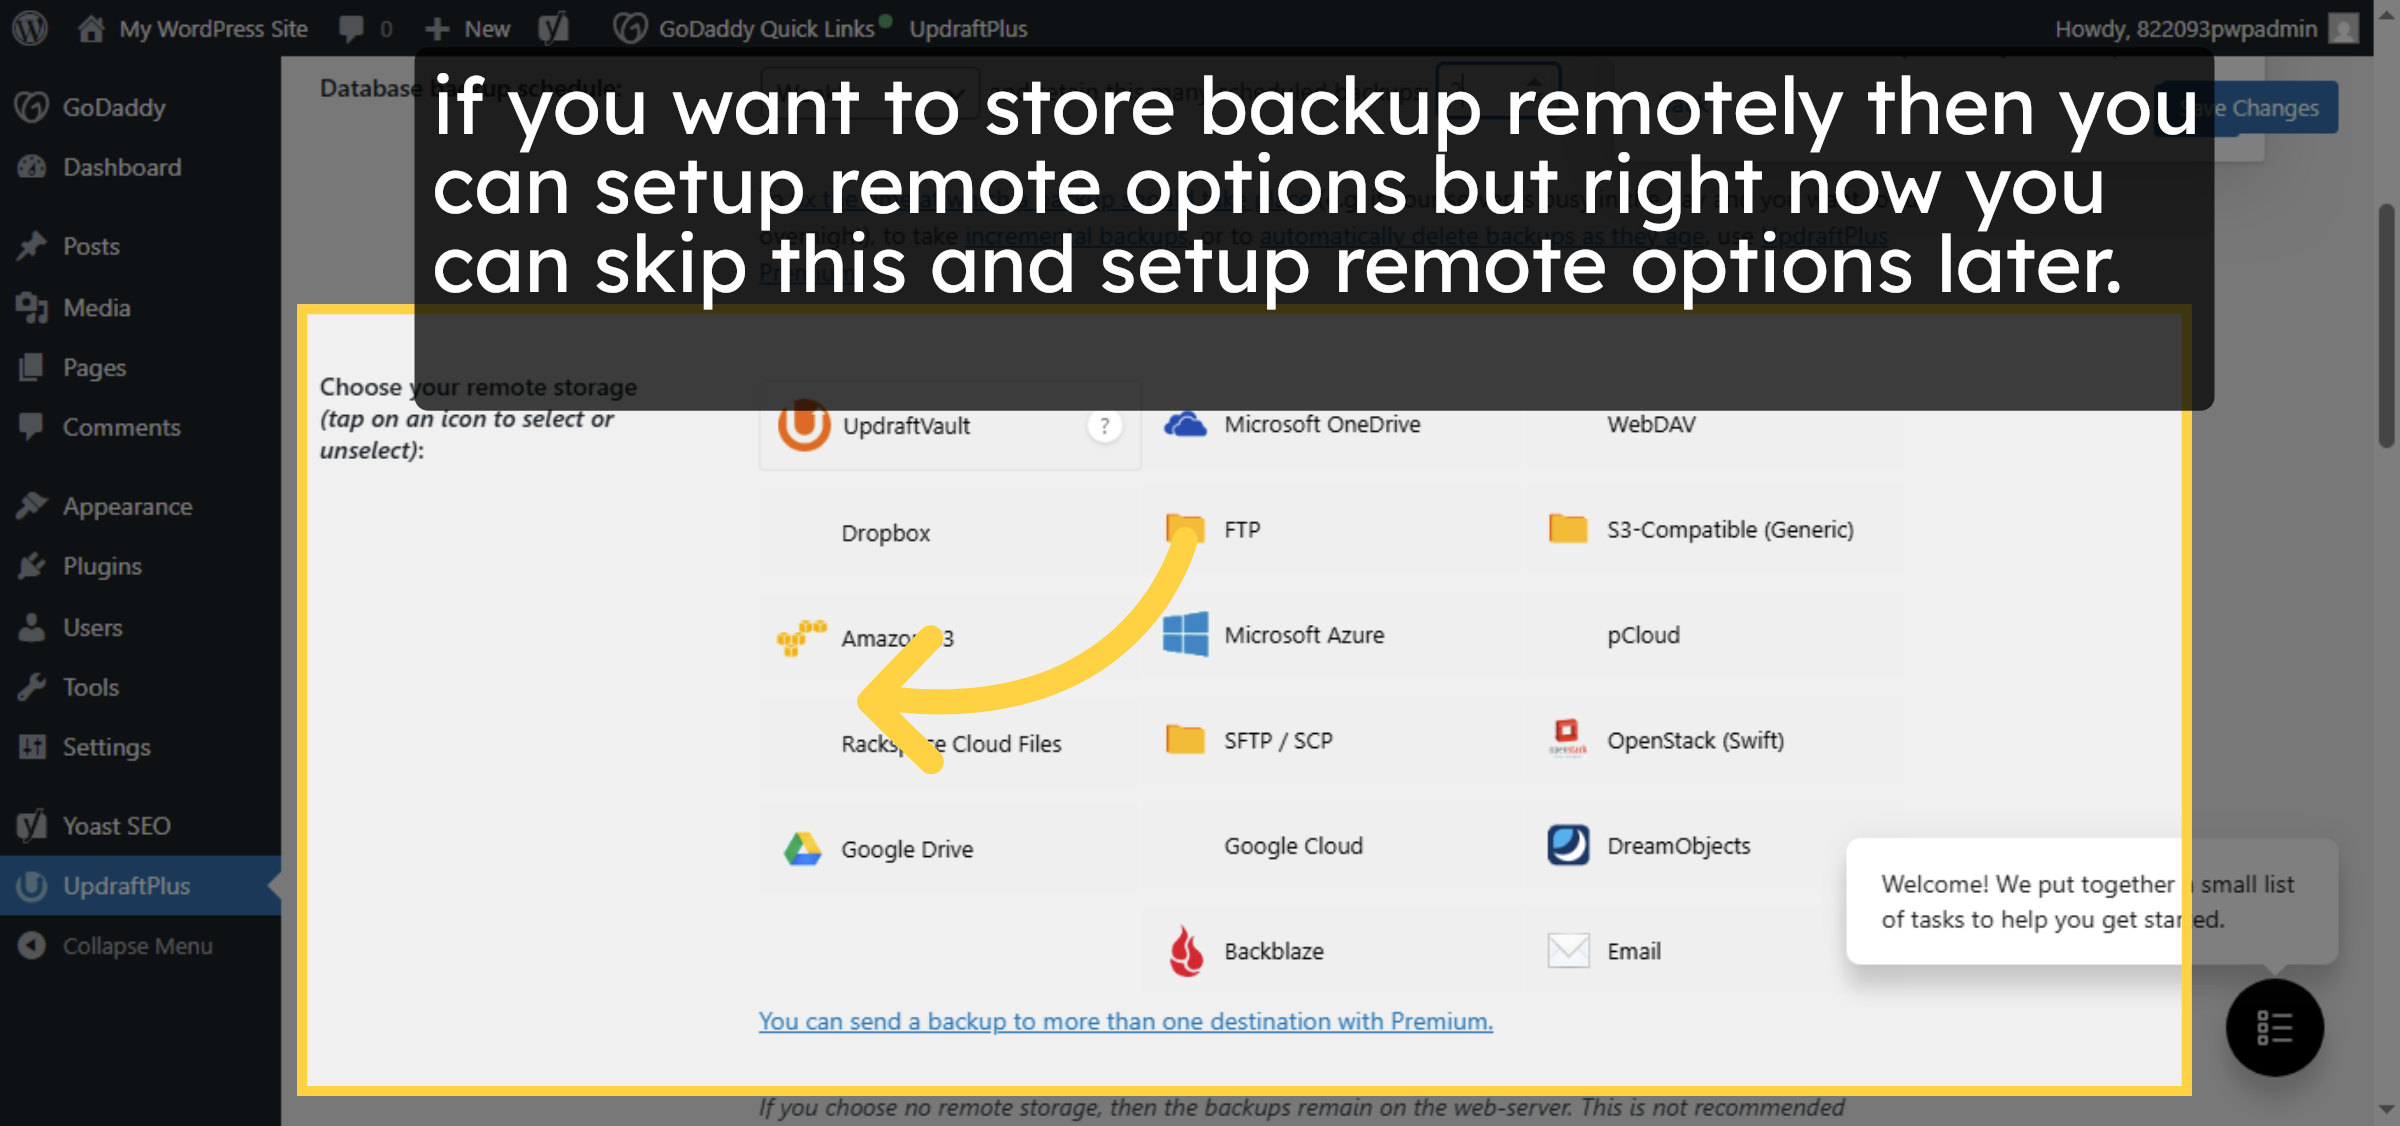
16. Choose Remote Storage
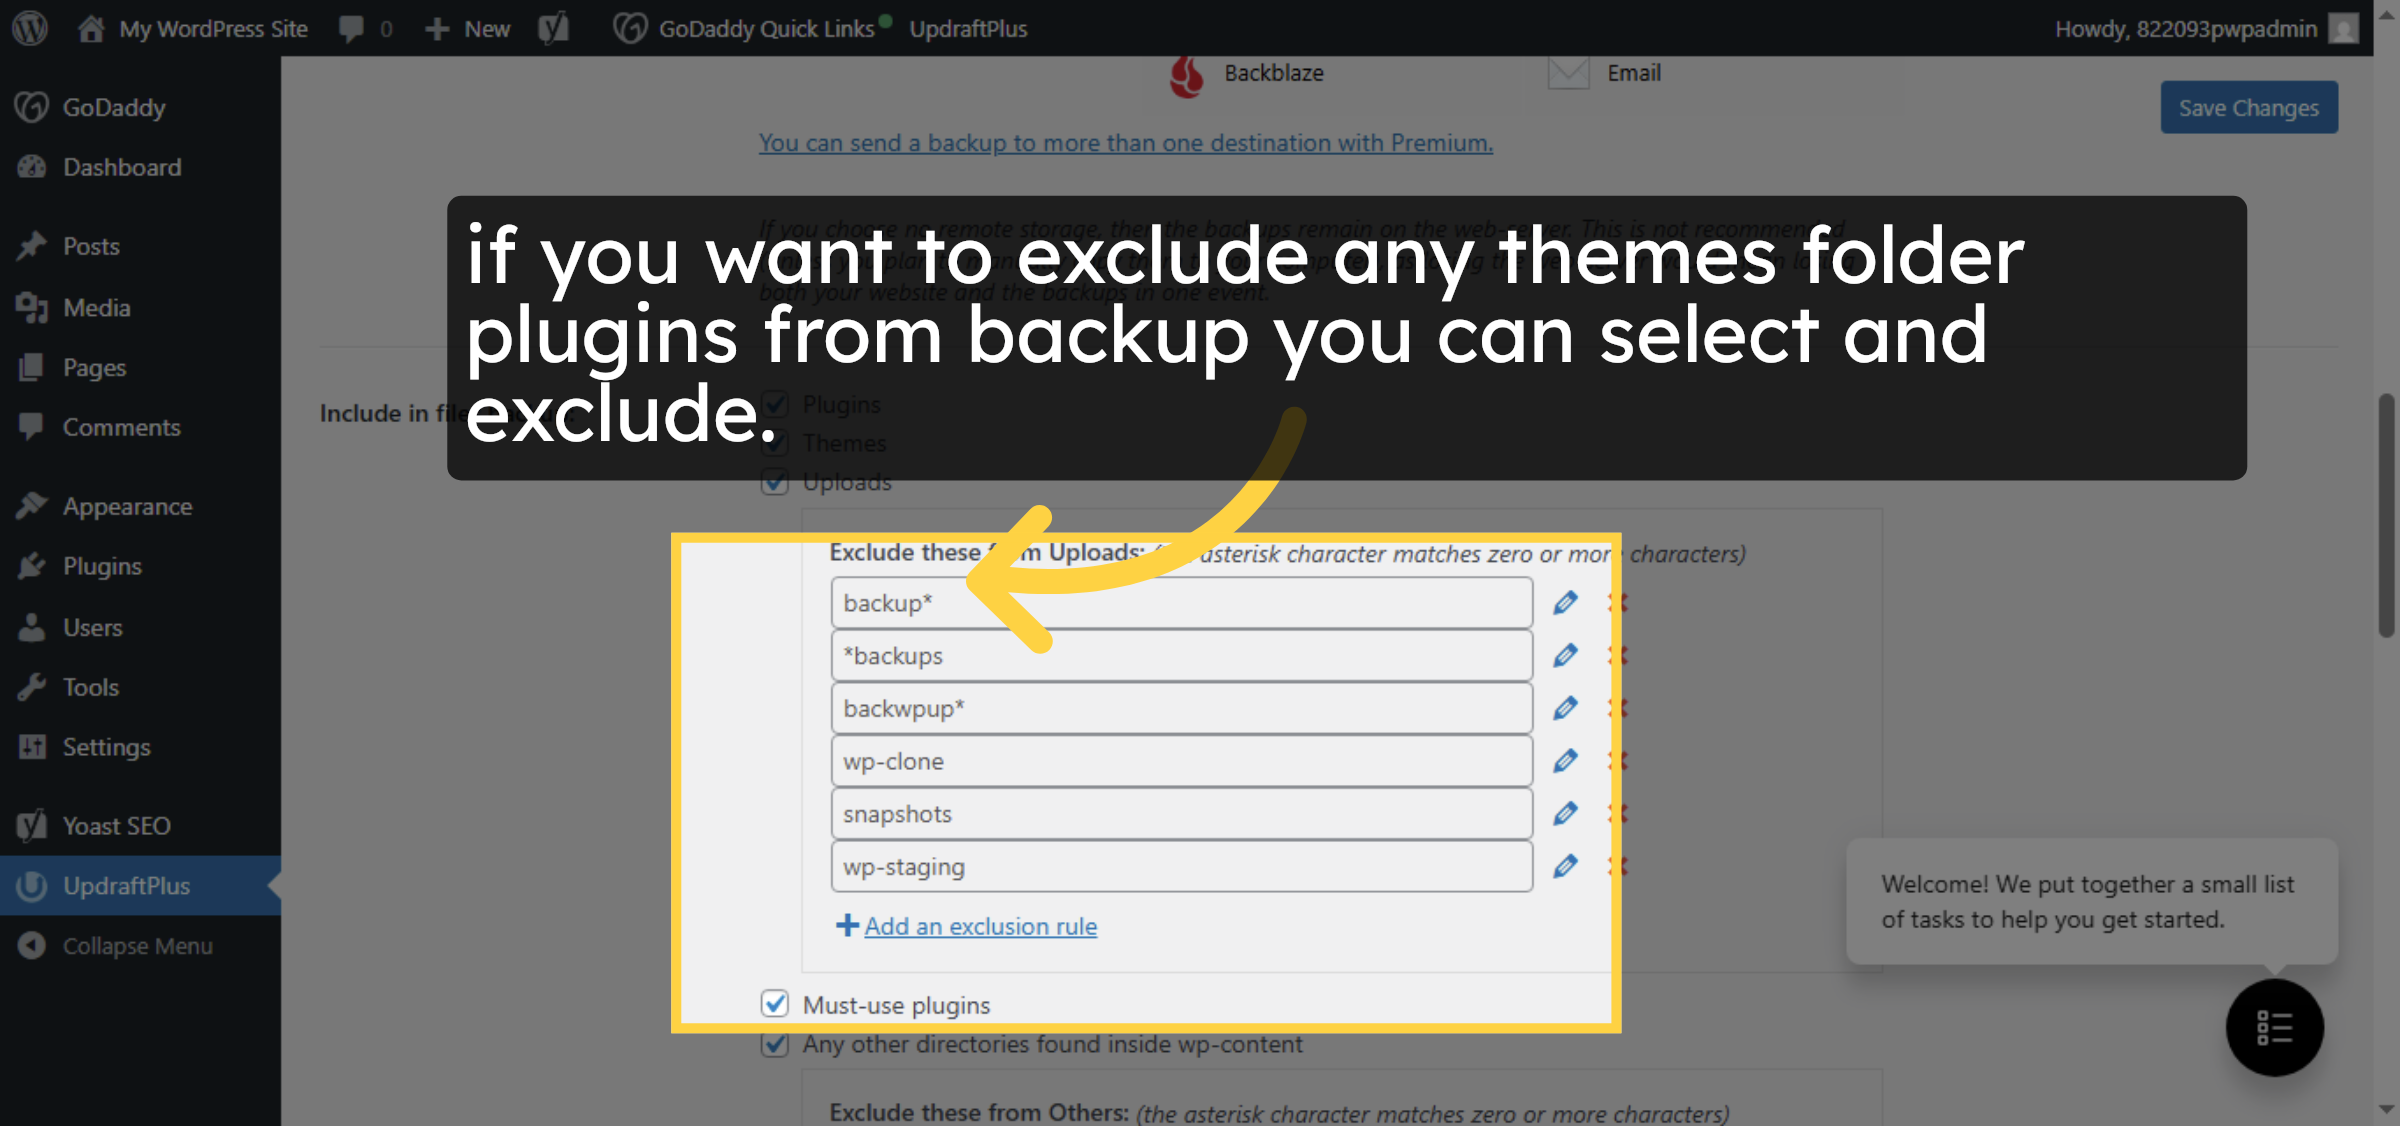
17. Configure Backup Exclusions
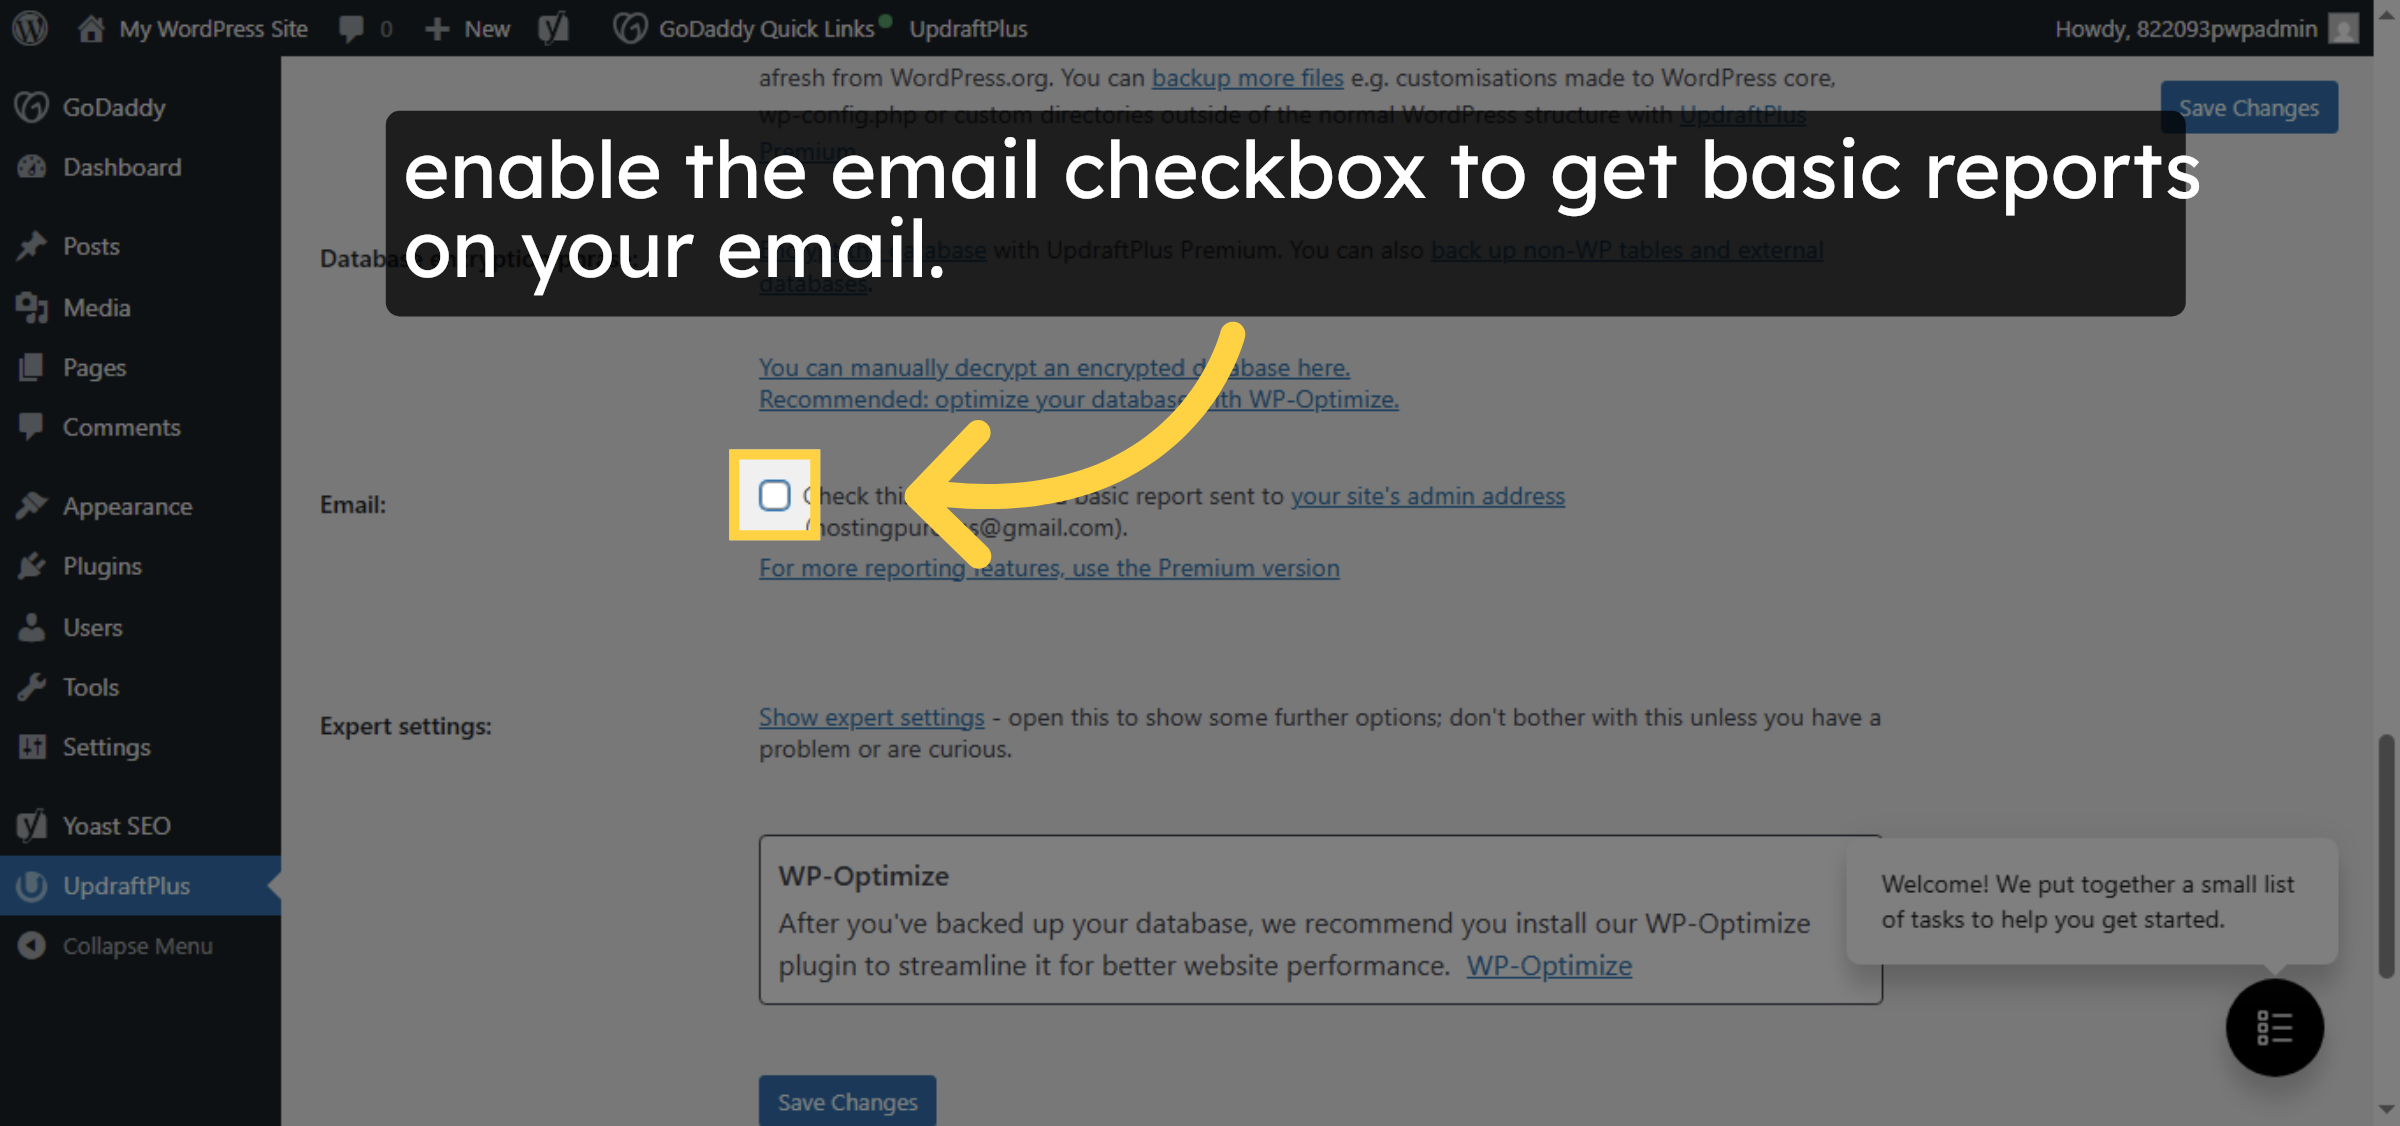
18. Enable Backup Reports
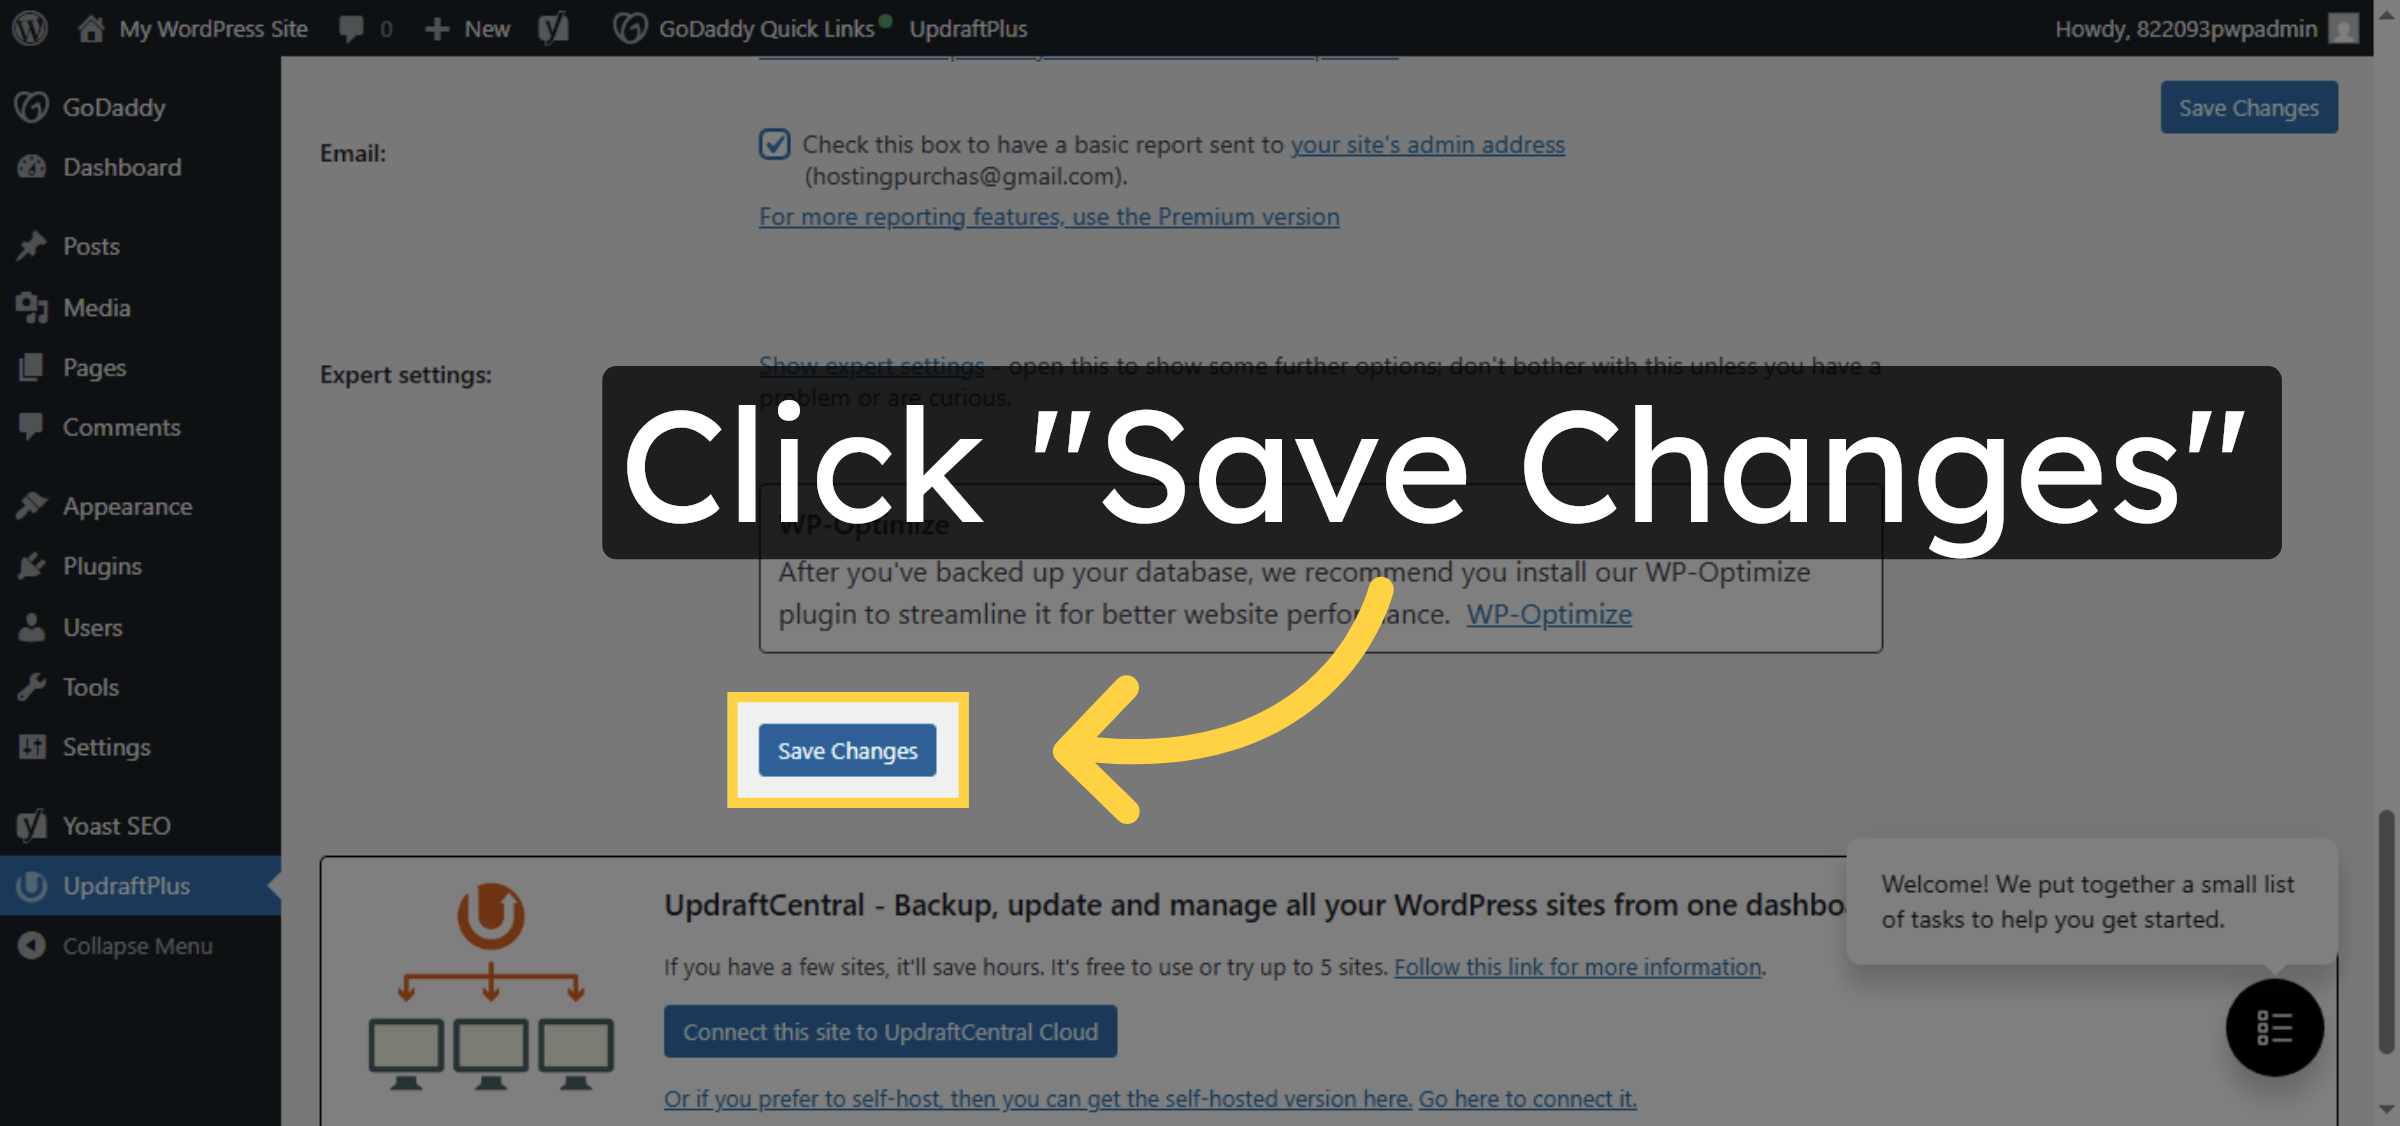
19. Save Backup Settings
Conclusion
By following this guide, you have successfully configured automated WordPress backups on GoDaddy using the UpdraftPlus plugin. Setting backup schedules, retention limits, and email notifications helps keep your website data secure and recoverable at all times. Regular backups are essential for protecting your site, ensuring quick recovery, and maintaining smooth website operations.
-
Visit: https://www.woohelpdesk.com
-
Call Us Toll-Free: +1 888 602 0119 (US & Canada)
-
Get professional support for WordPress backups, GoDaddy hosting assistance, UpdraftPlus configuration, website recovery, and WooCommerce solutions


