
How To Optimize WordPress Database Tables Using phpMyAdmin on BlueHost
Introduction
Over time, a WordPress database can accumulate unnecessary data such as overhead, revisions, and unused entries, which may affect website performance. Optimizing your database helps improve loading speed, reduces database size, and ensures efficient data management. This guide walks you through optimizing WordPress database tables using phpMyAdmin on Bluehost hosting. It covers selecting the correct database, creating a backup for safety, choosing specific tables, and running the optimize table operation. By following these steps carefully, you can maintain a clean and efficient database structure without affecting your website content. Regular database optimization is an important maintenance task that helps keep your WordPress site running smoothly and performing at its best.
1. Navigate to Websites Section
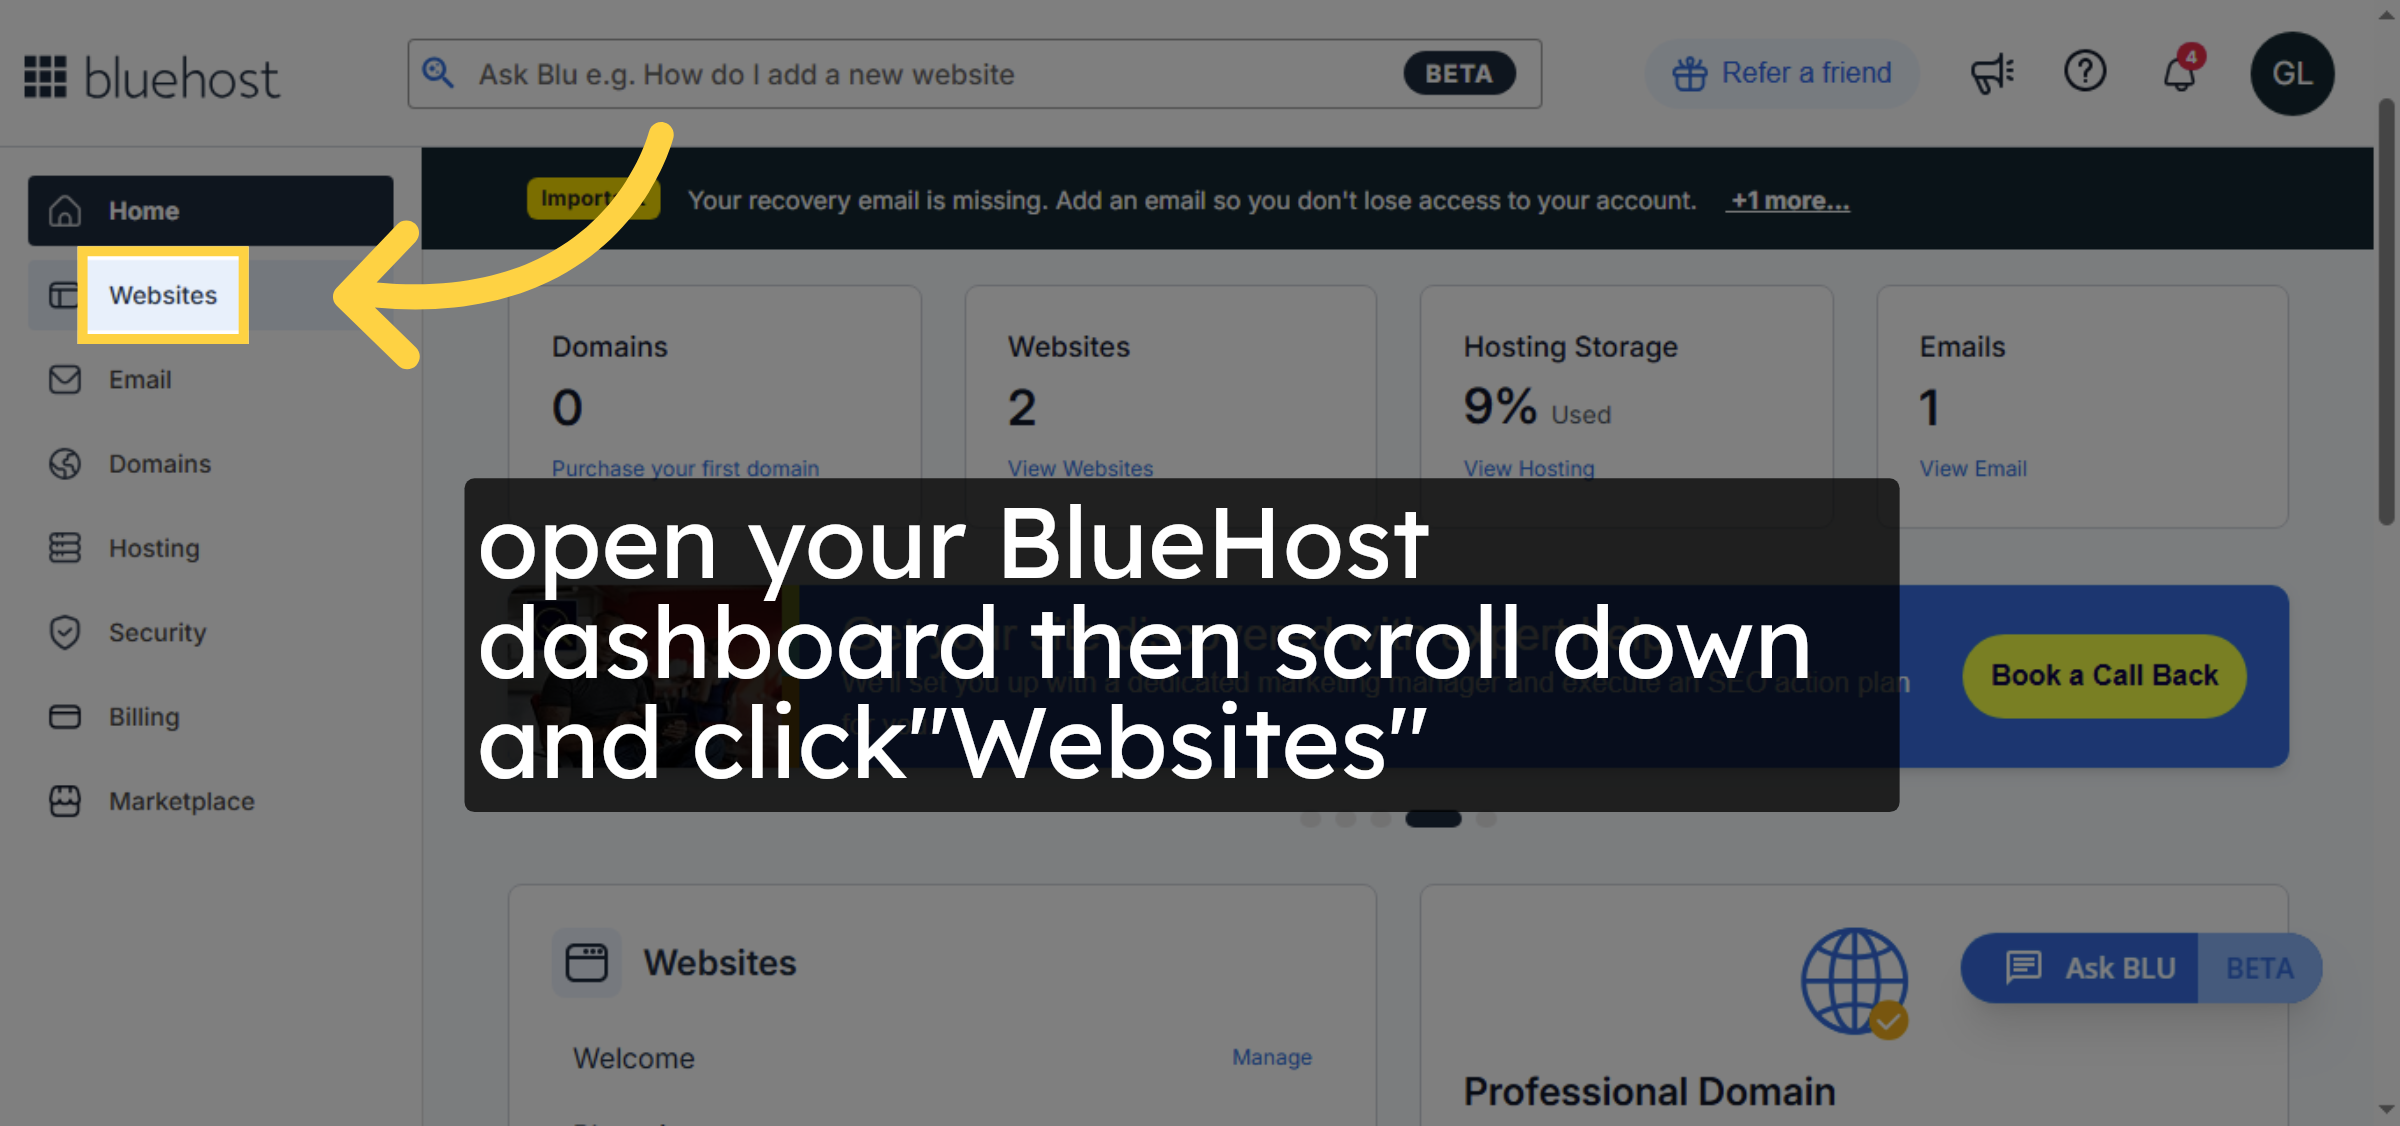
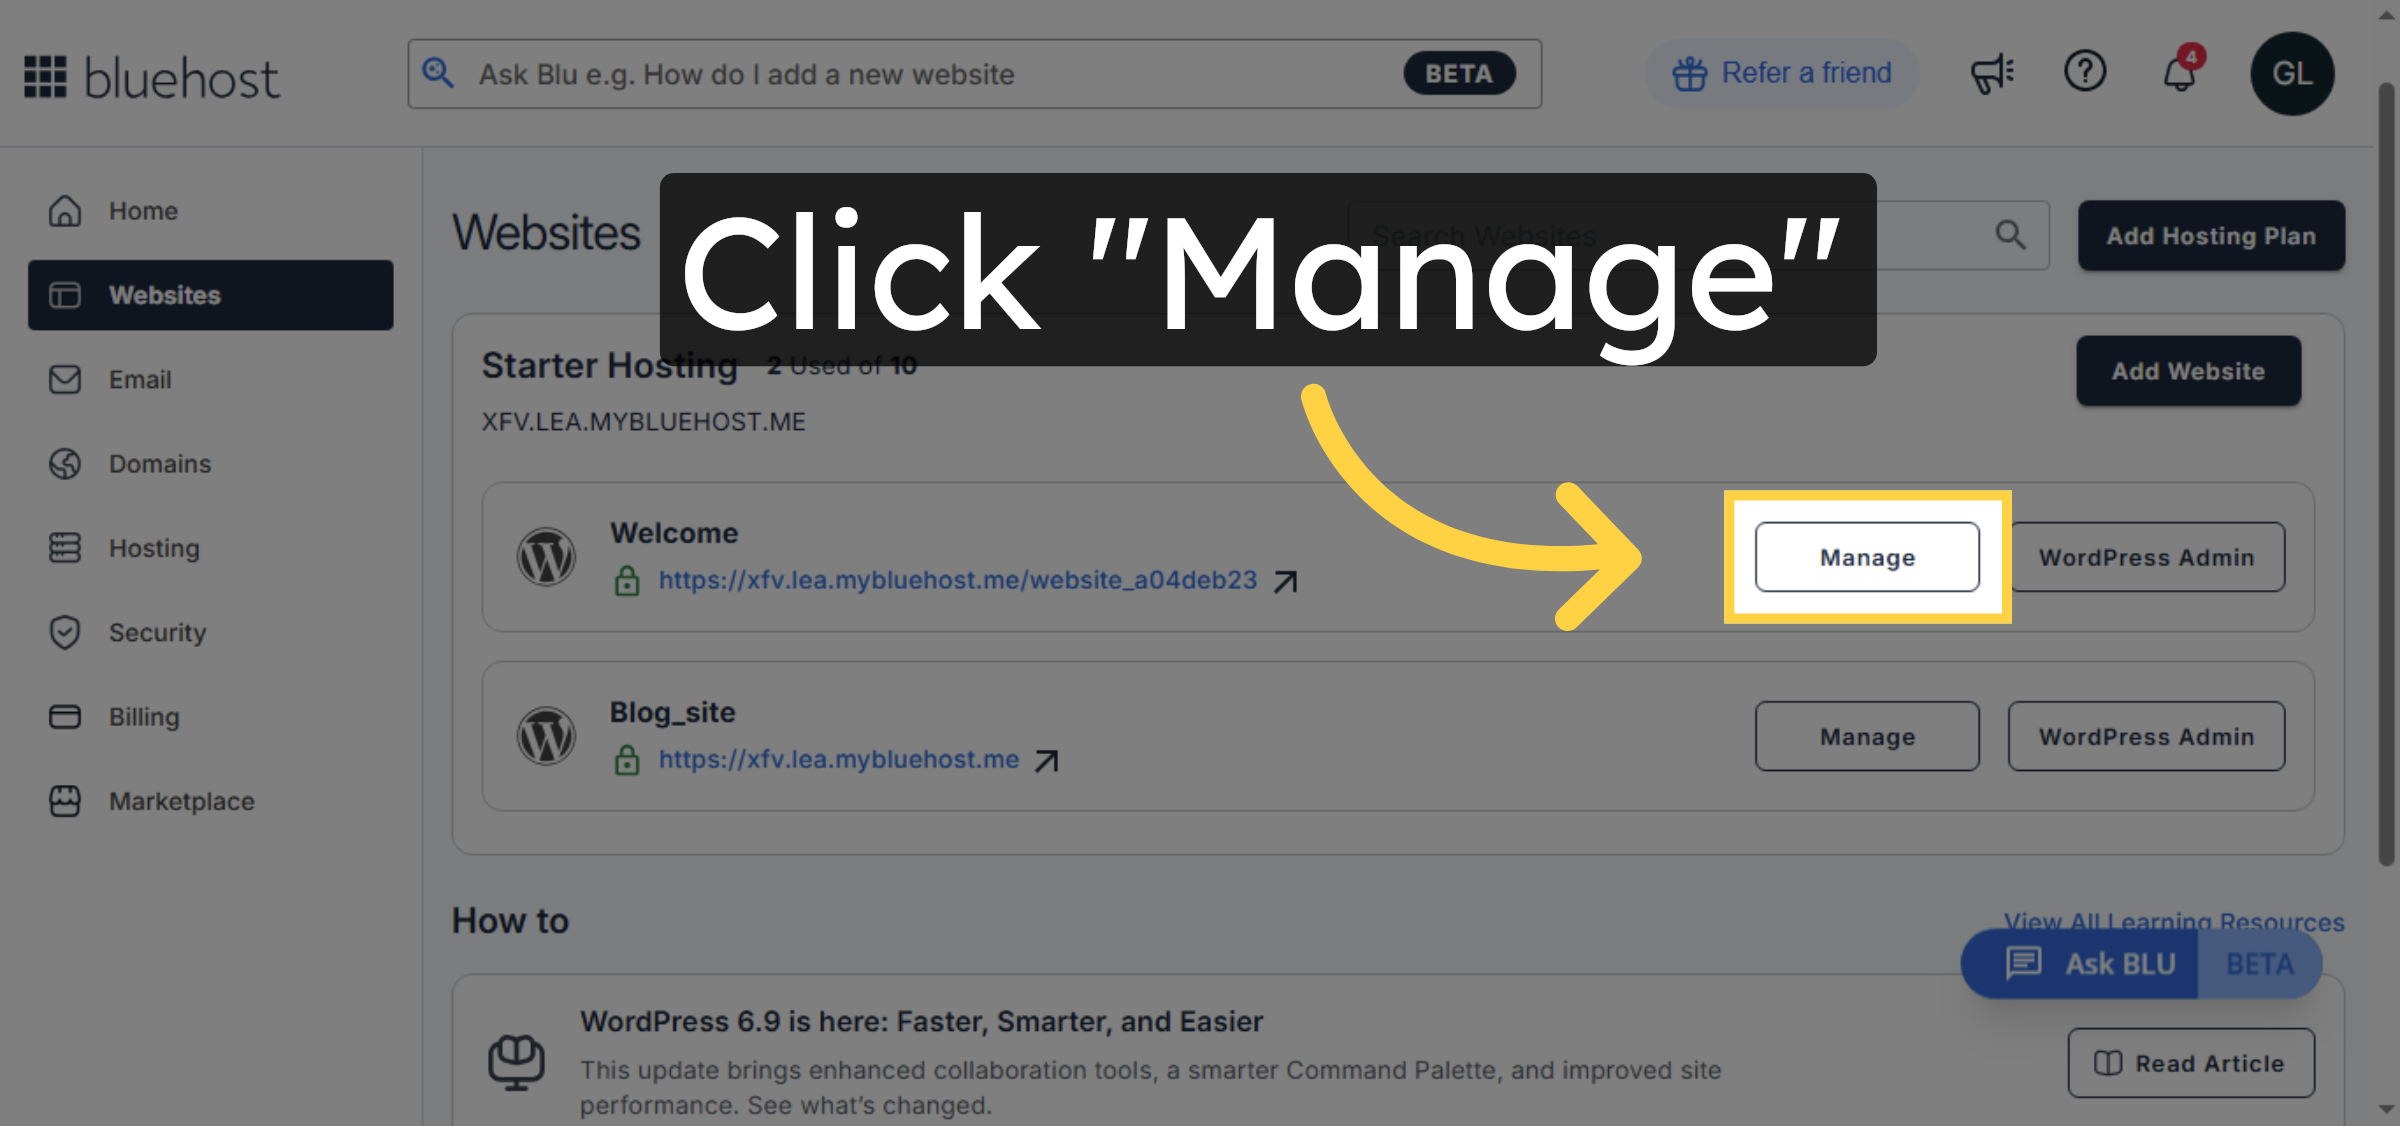
2. Access Site Management
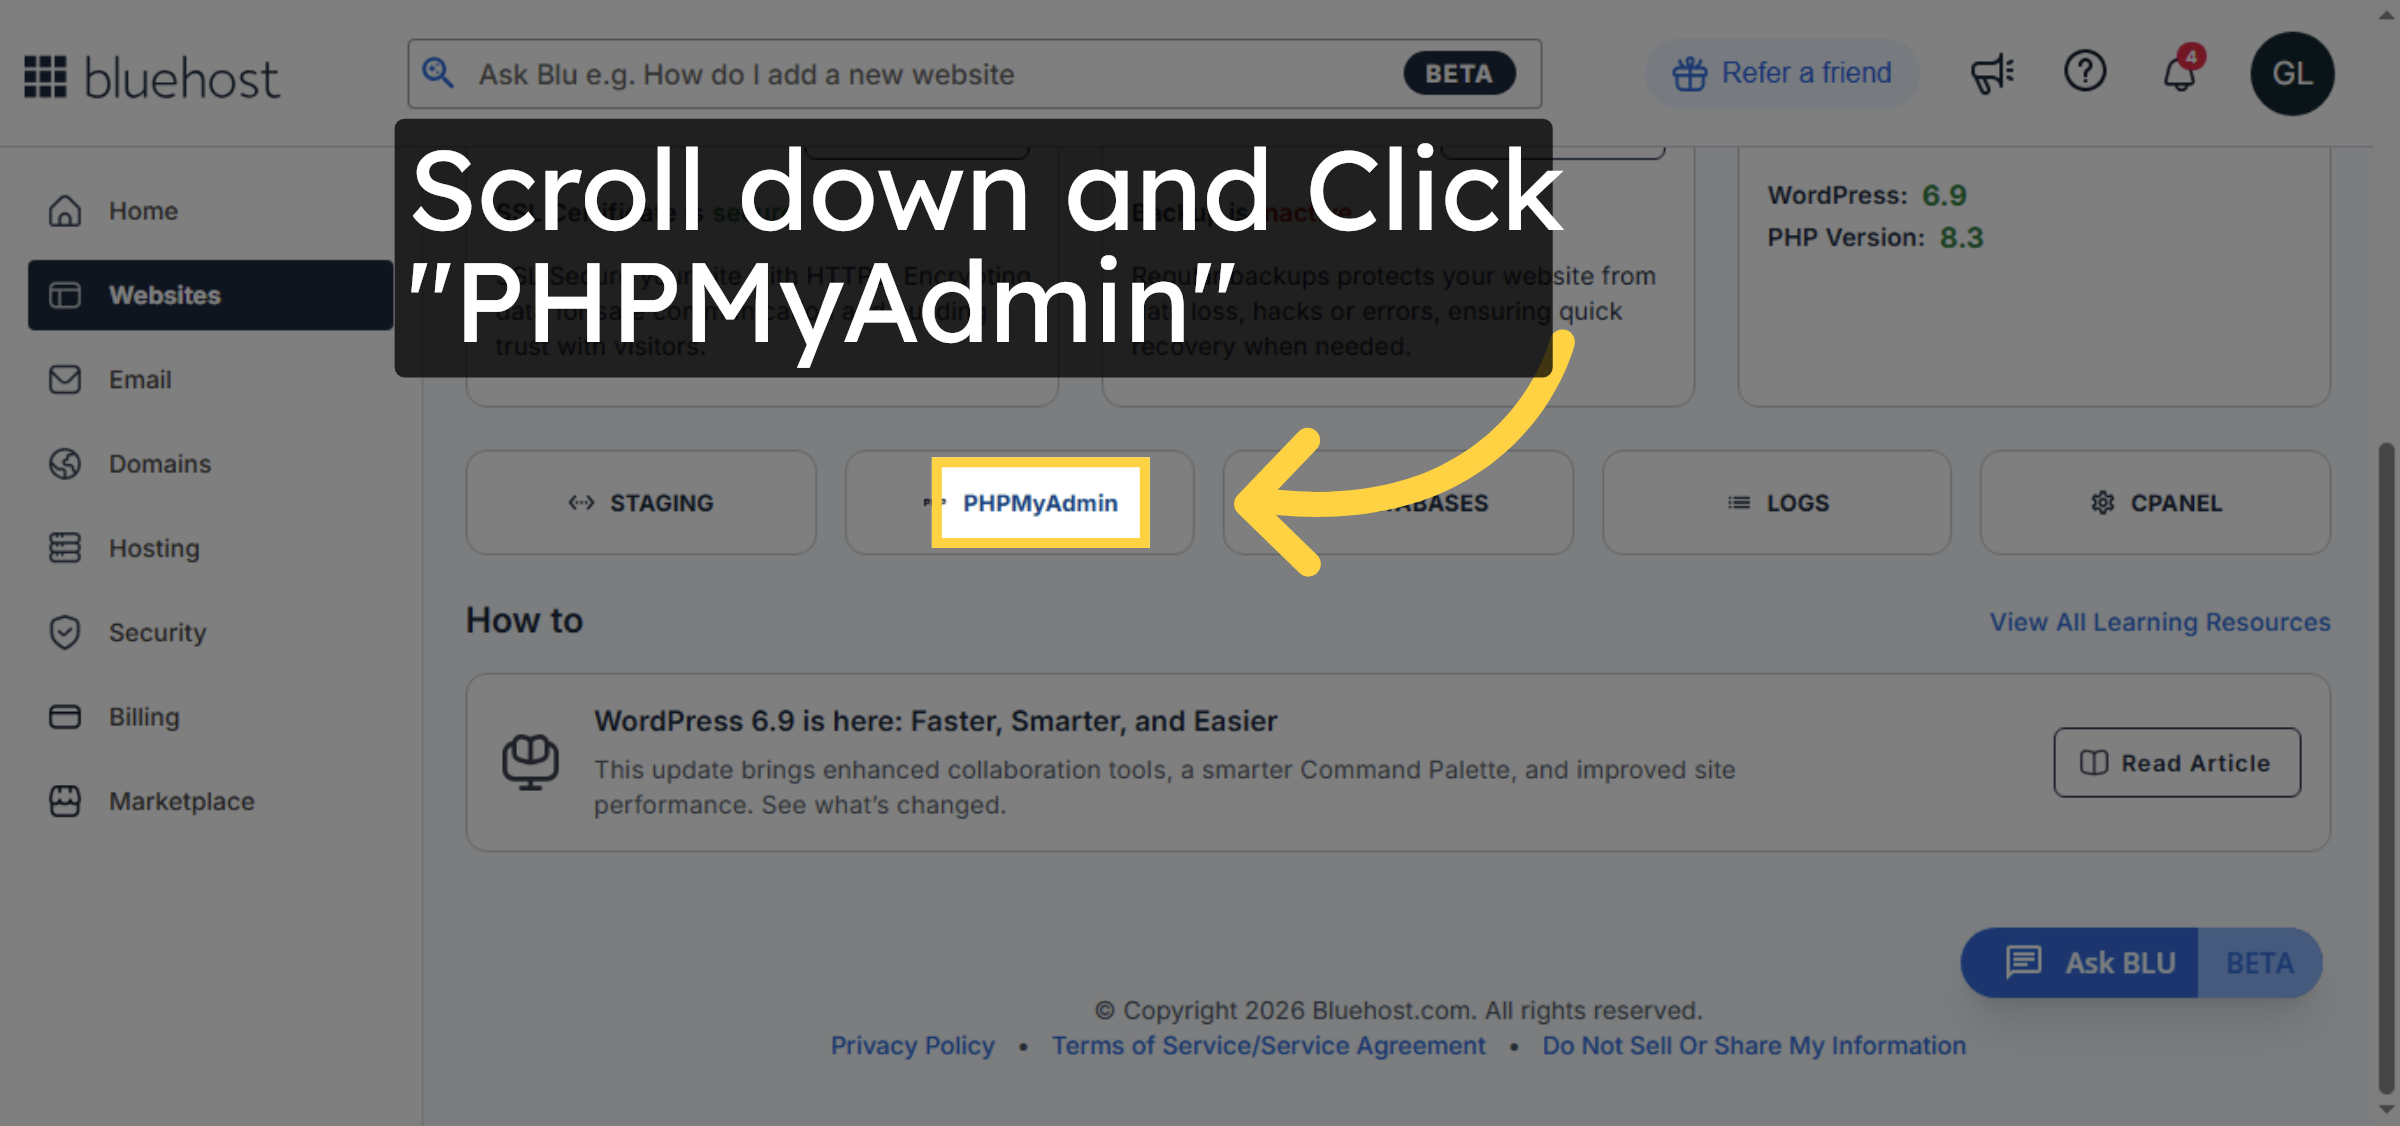
3. Open phpMyAdmin Tool
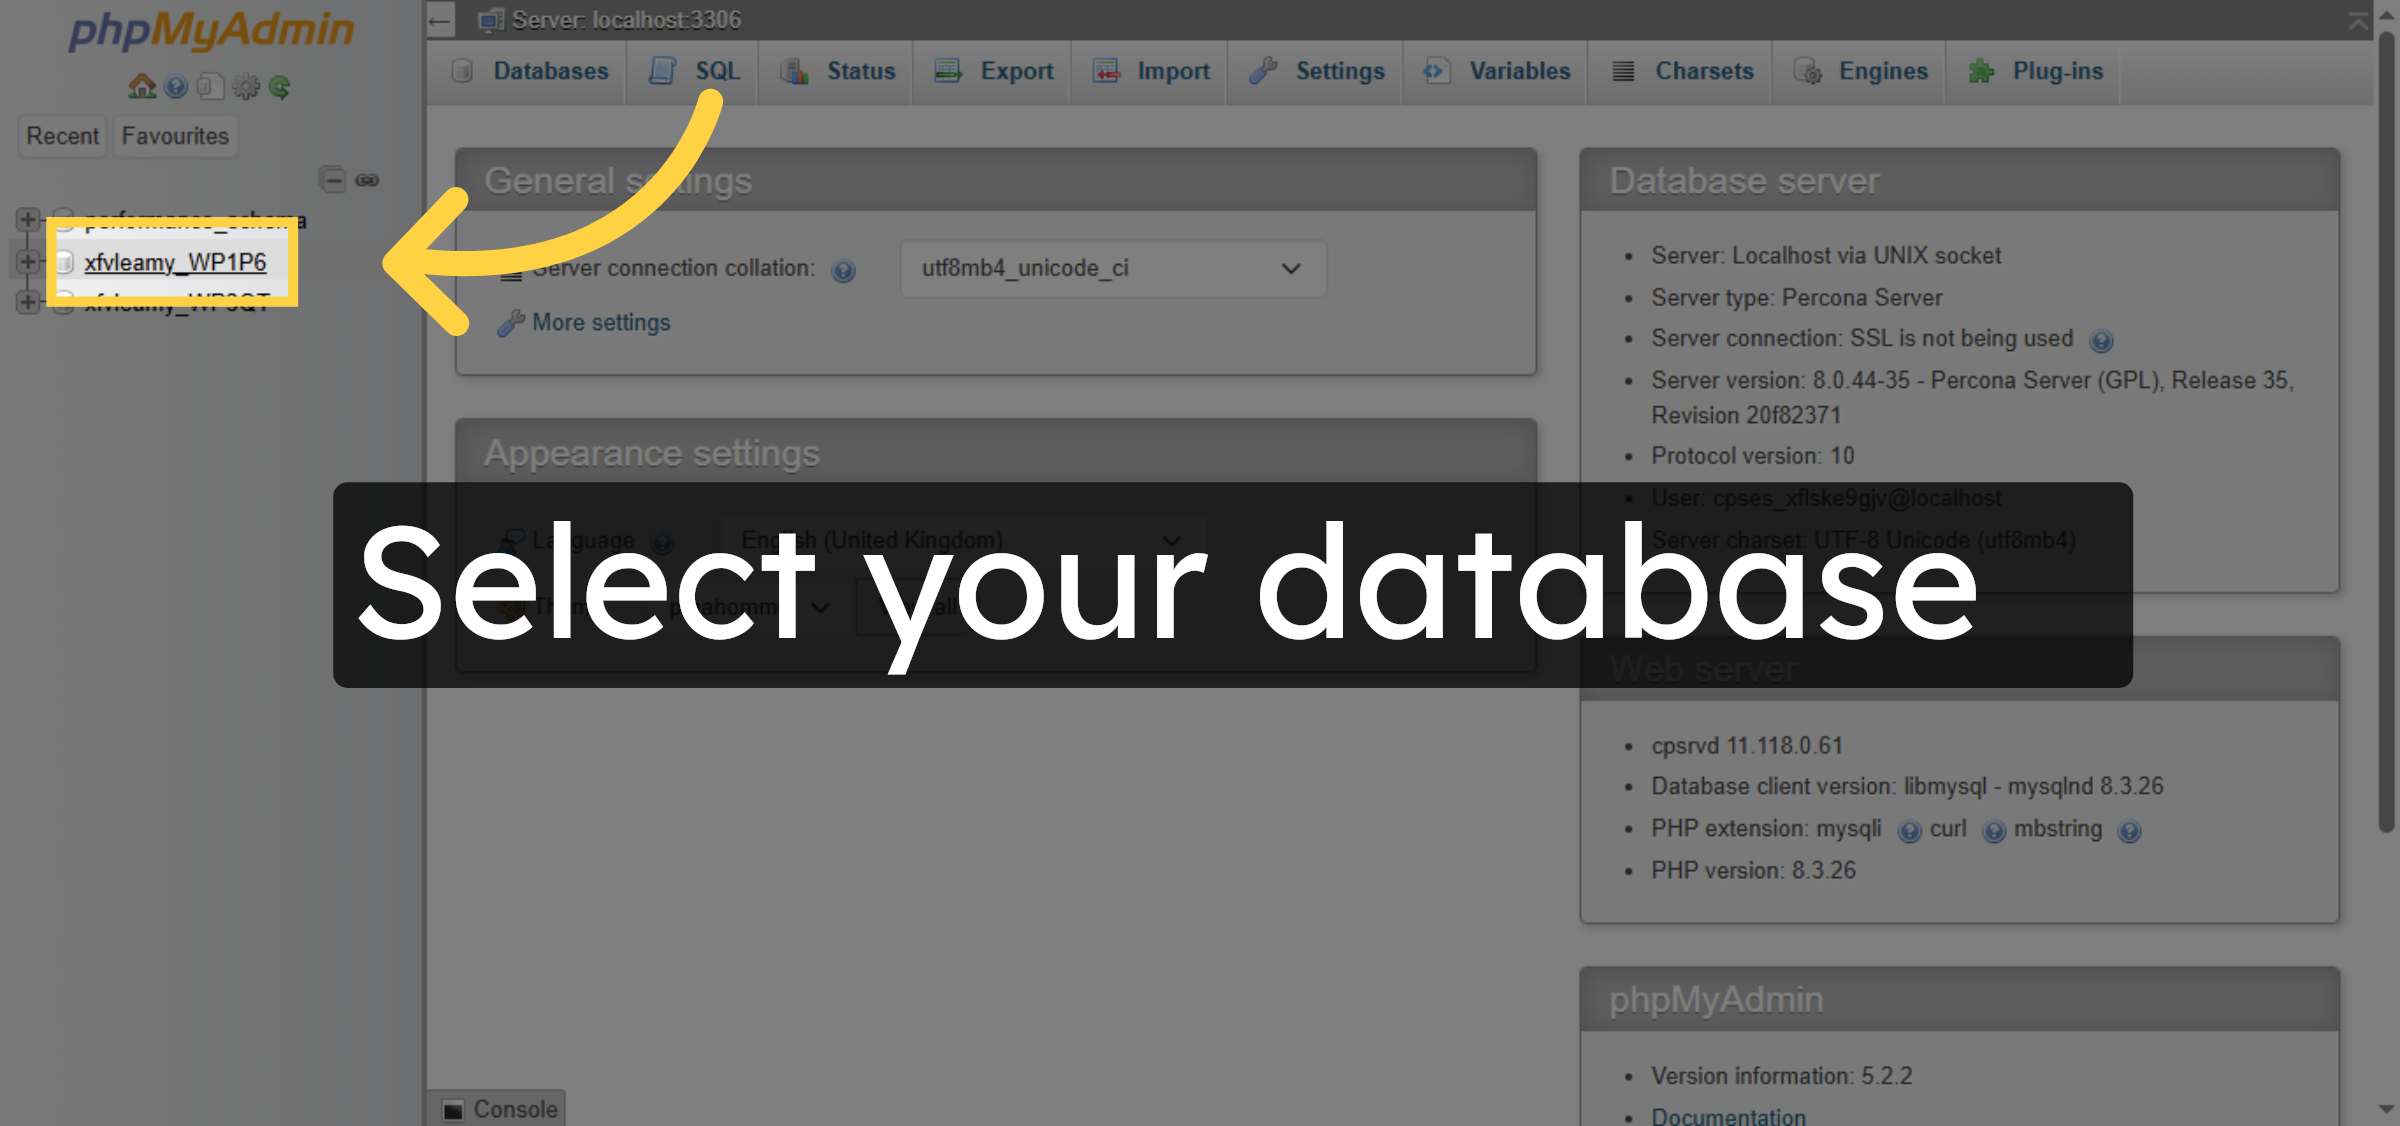
4. Select WordPress Database
5. Backup your database
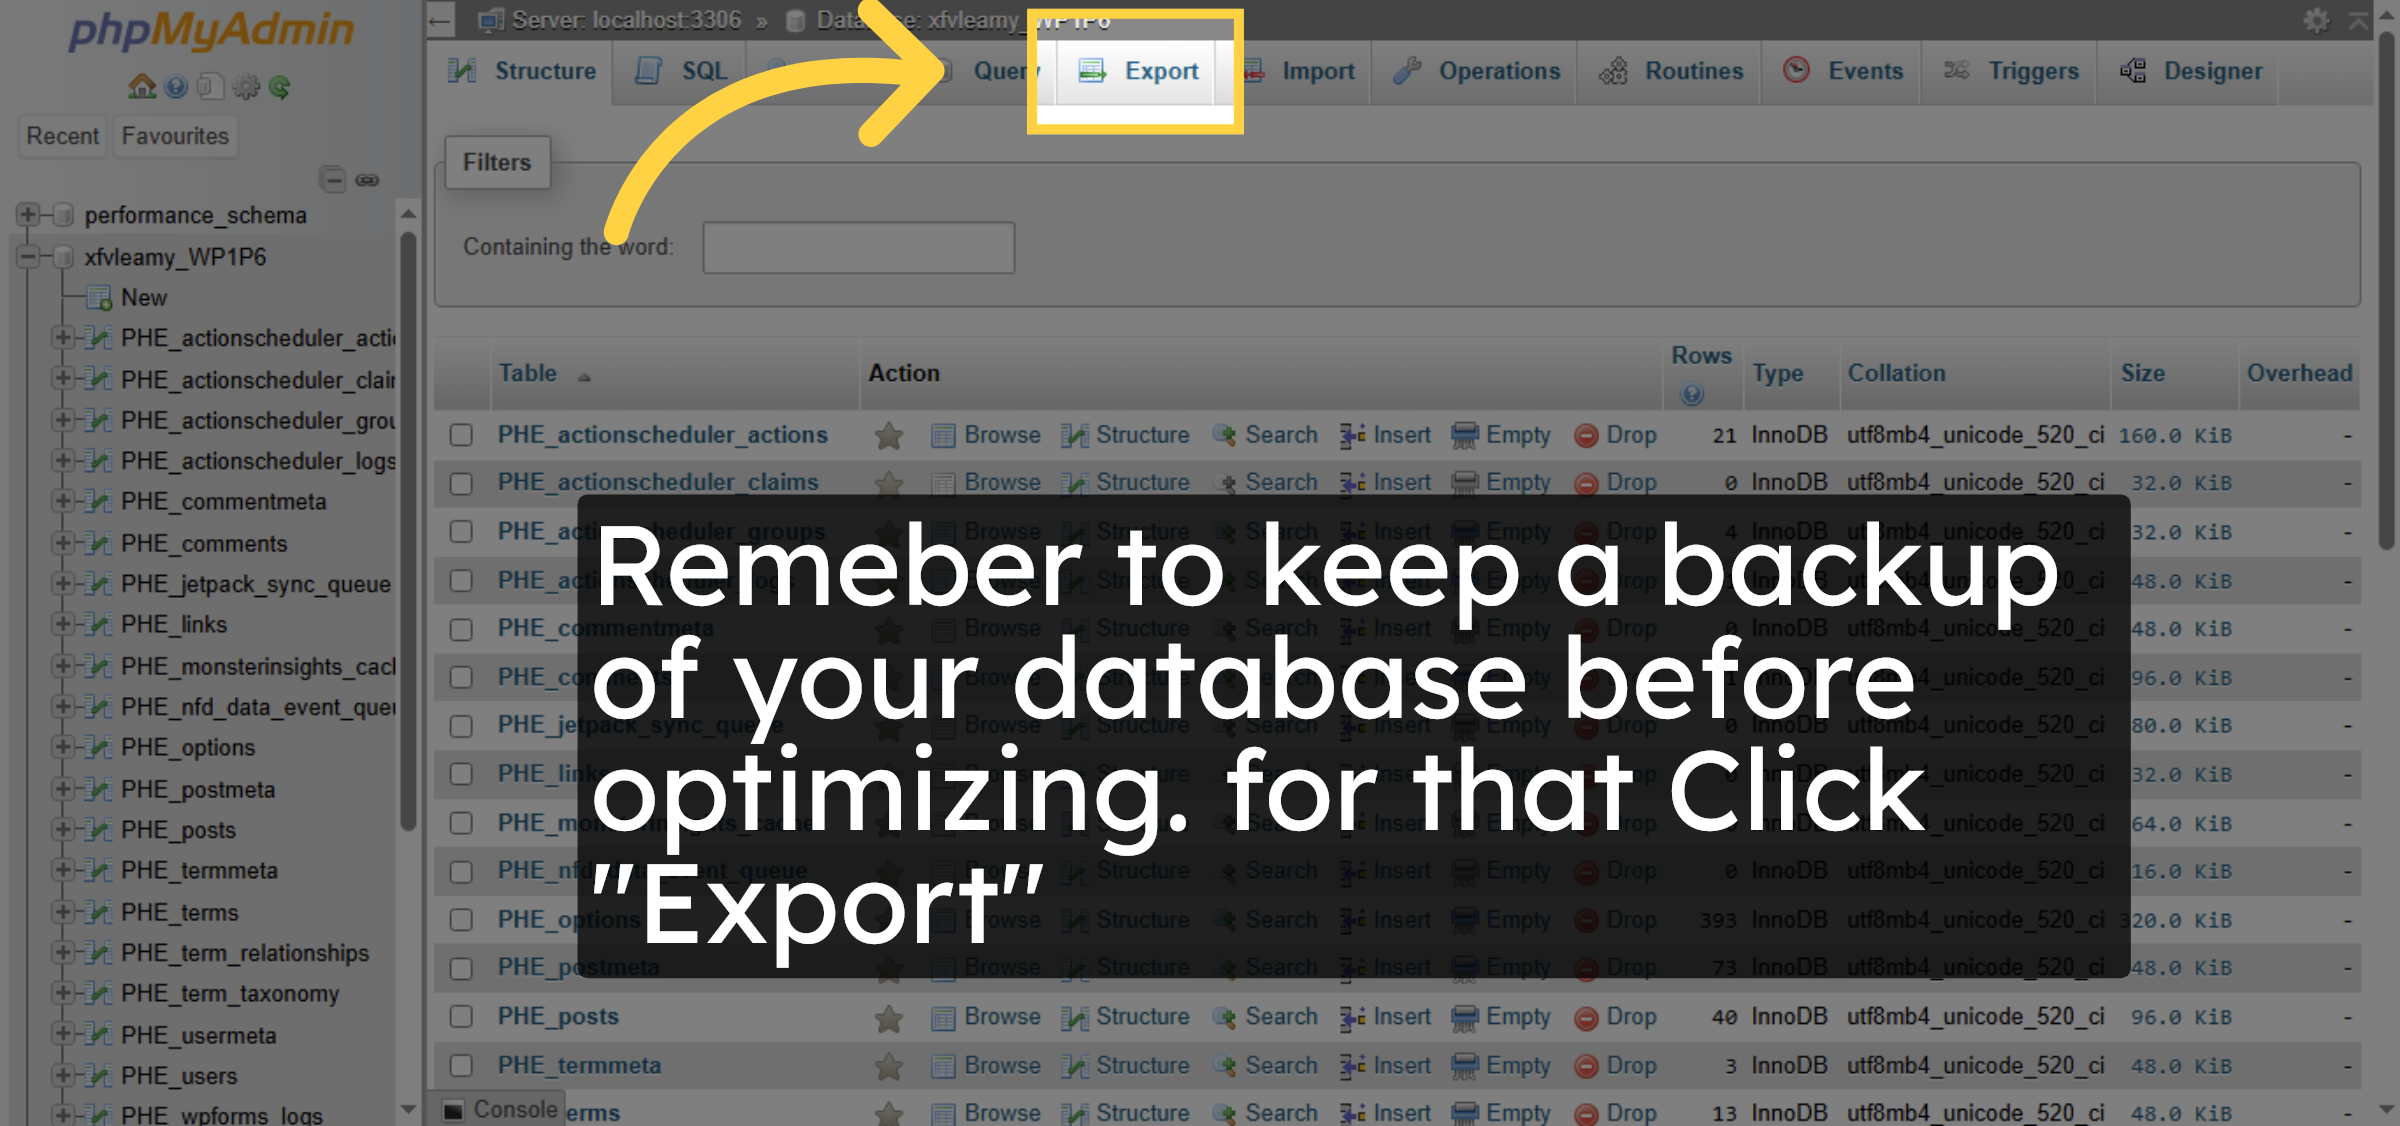
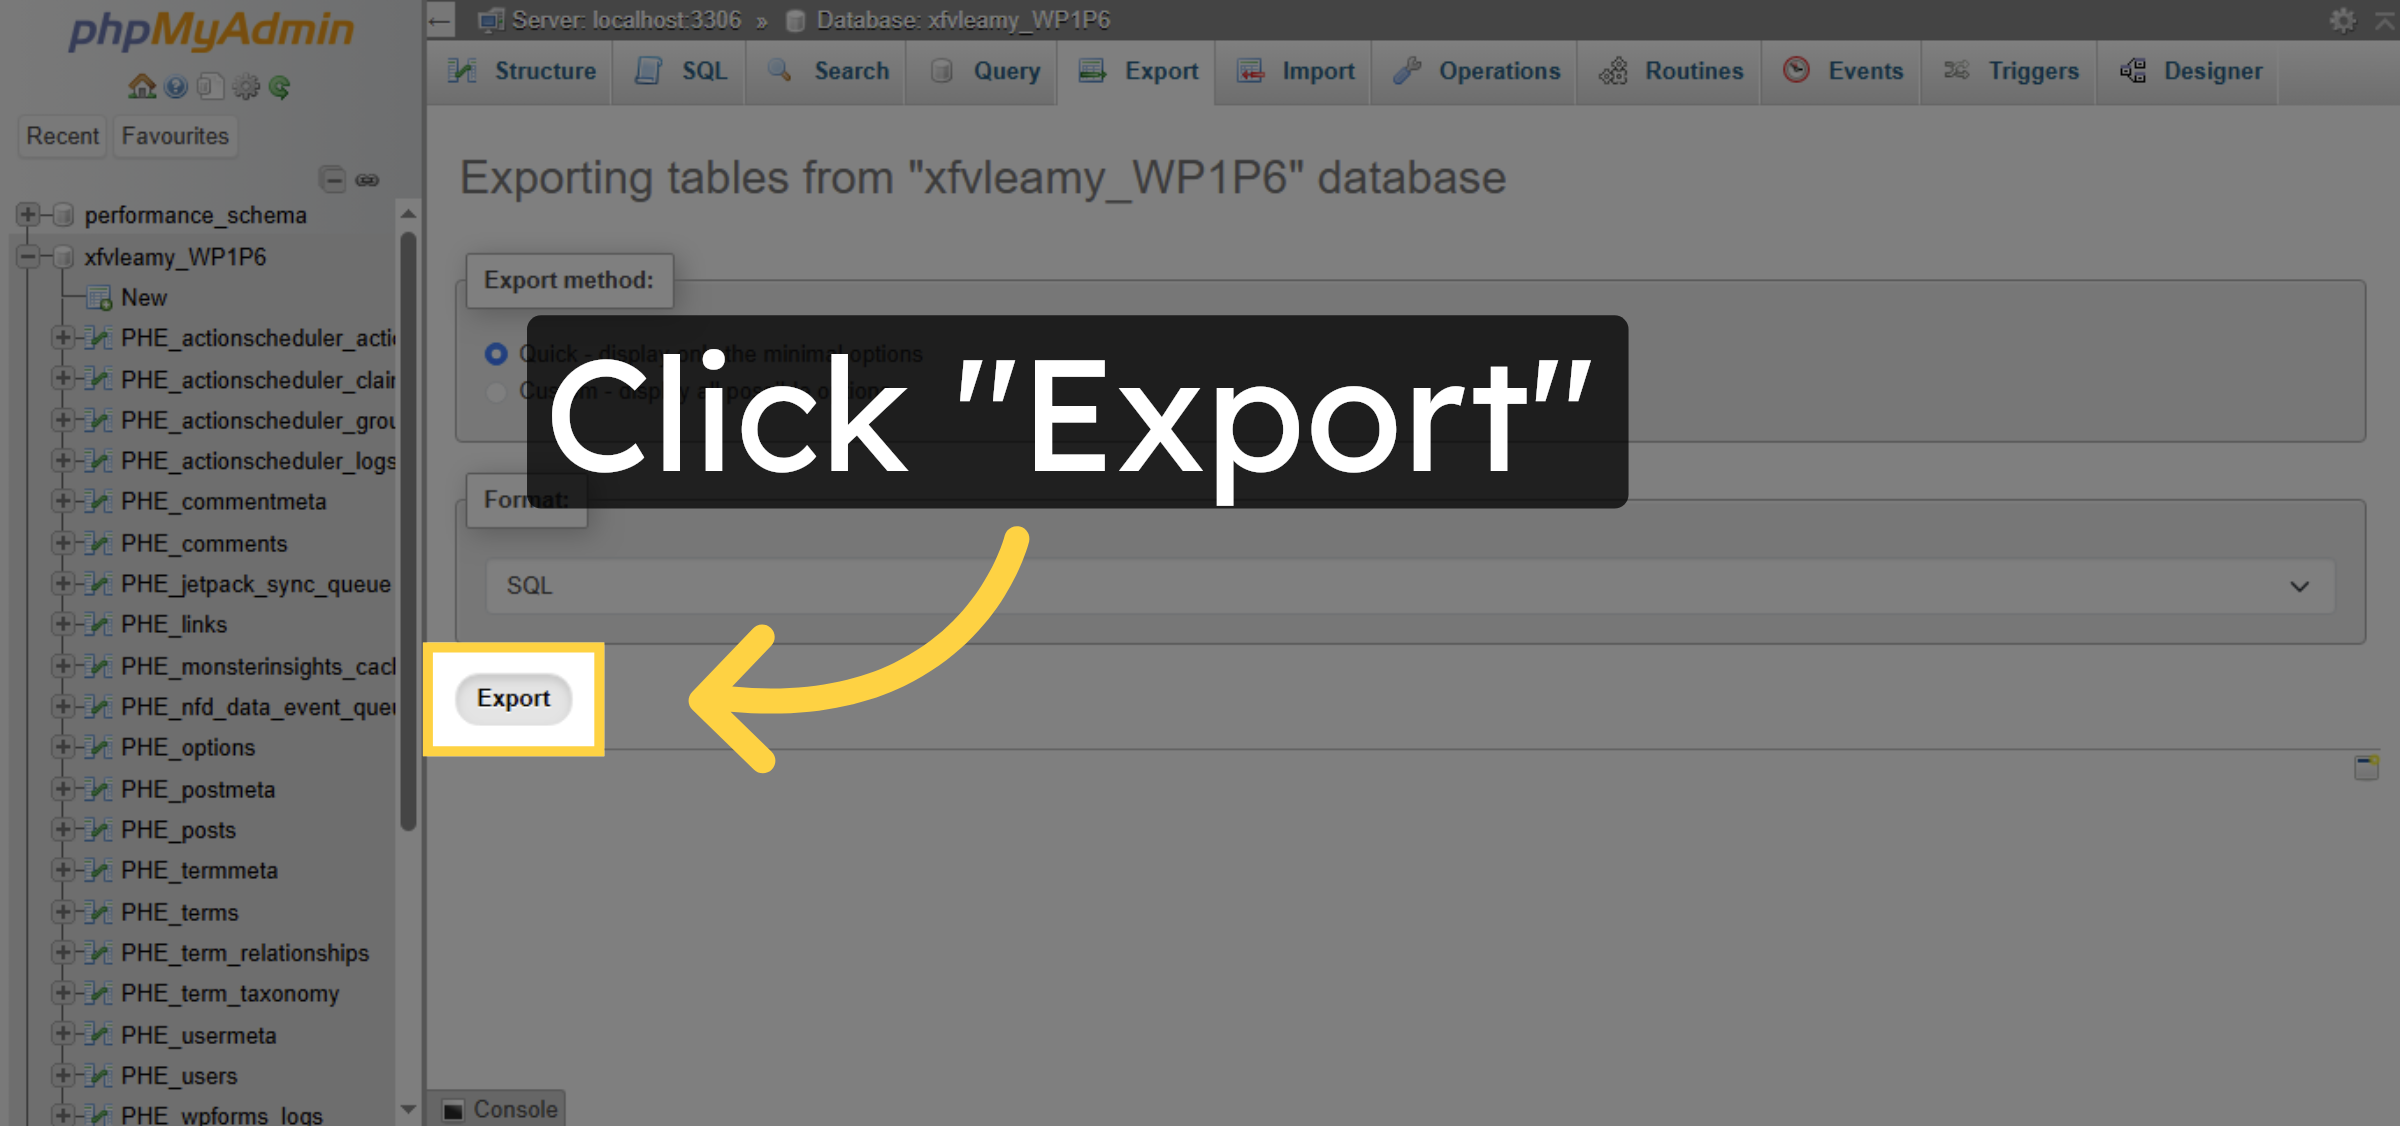
6. Start Database Export
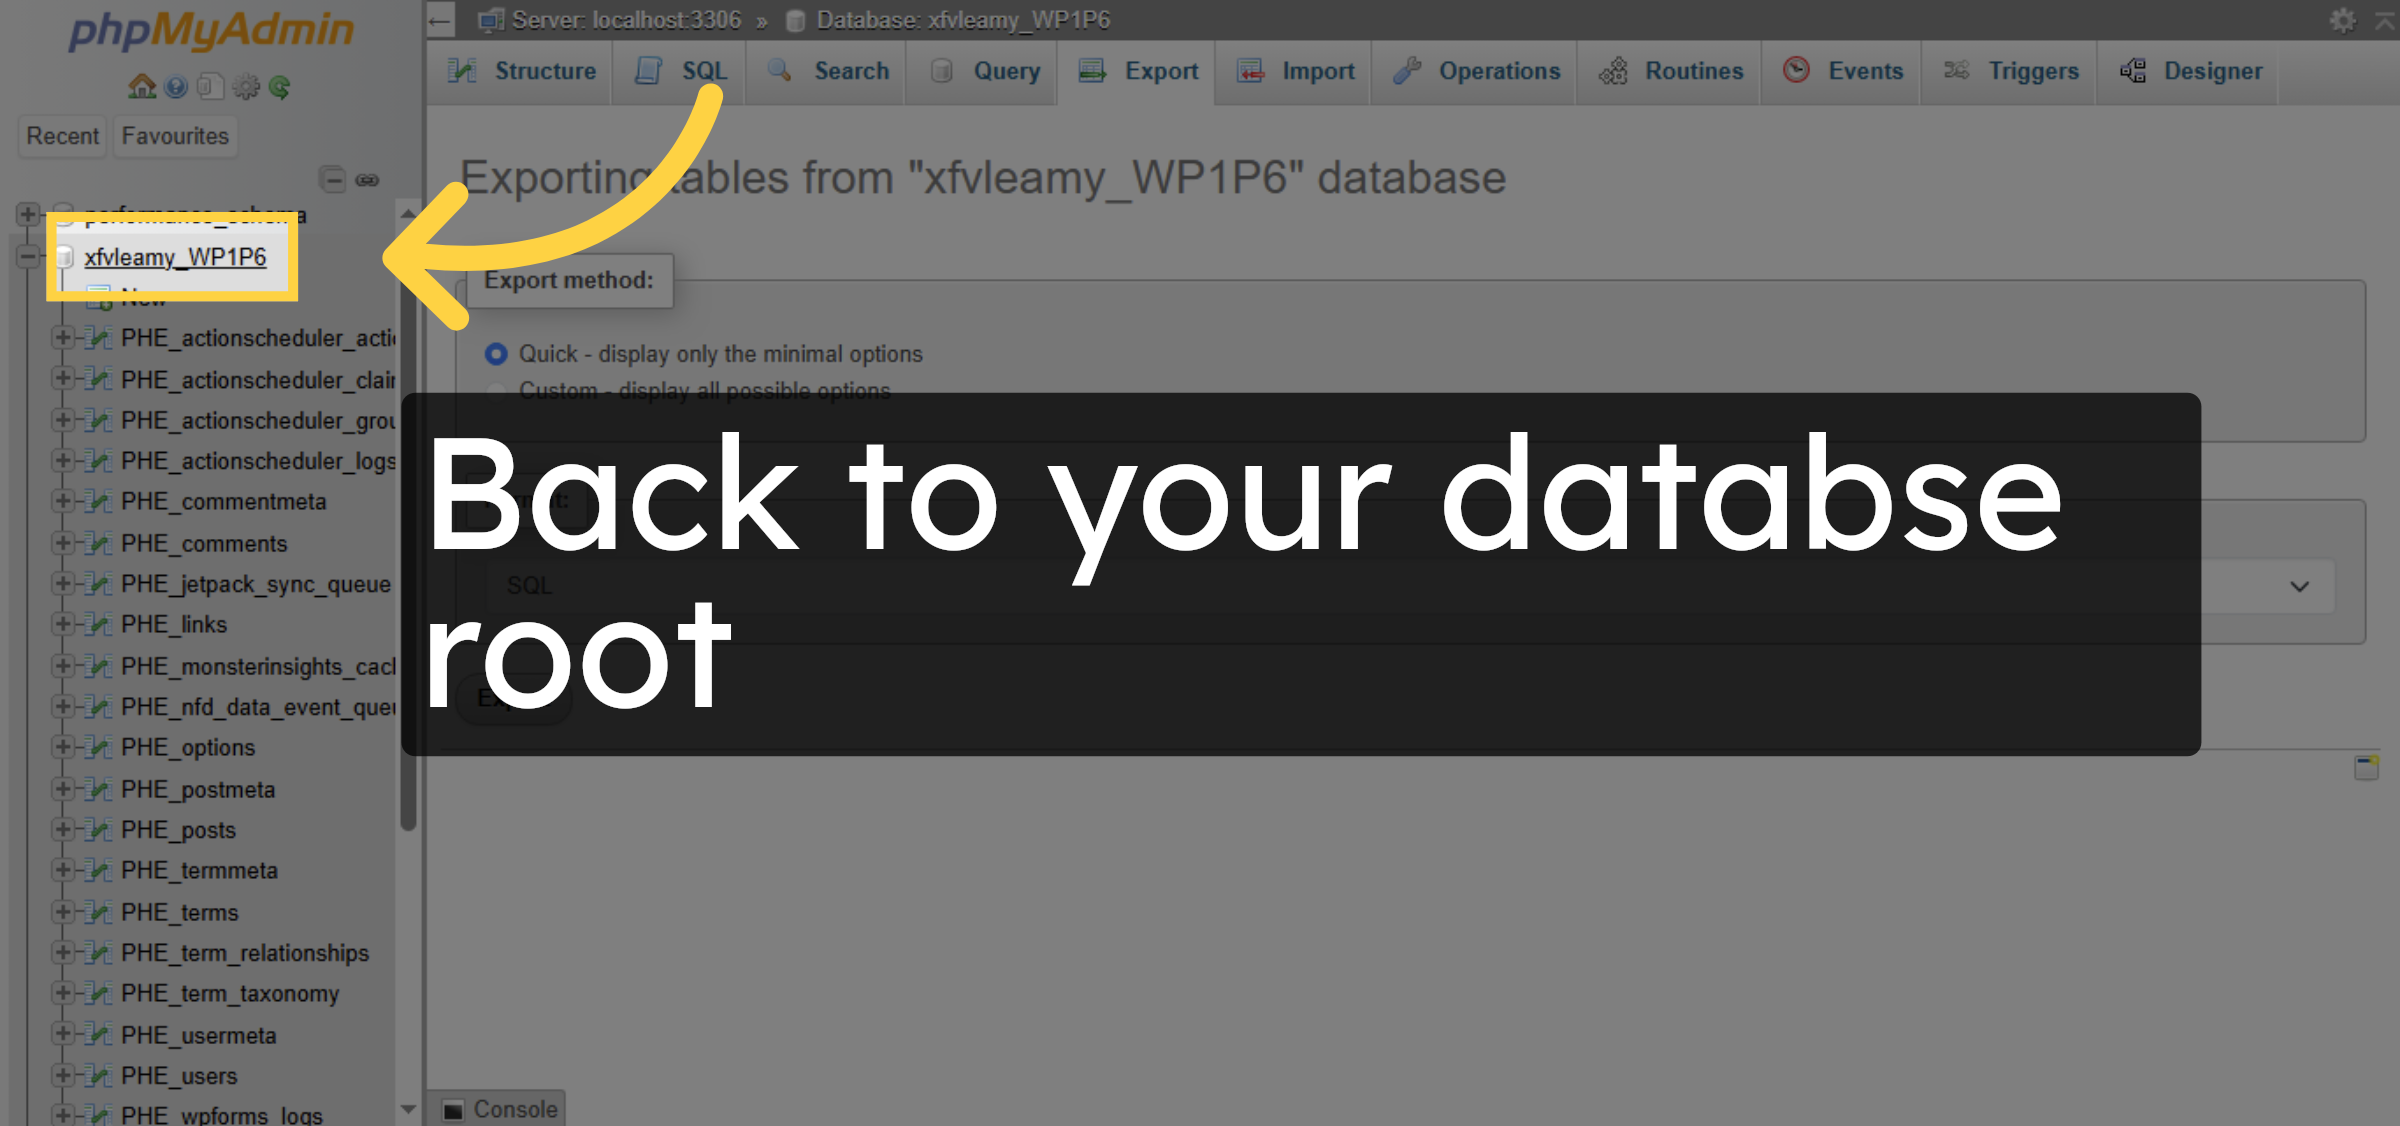
7. Return to Database Tables
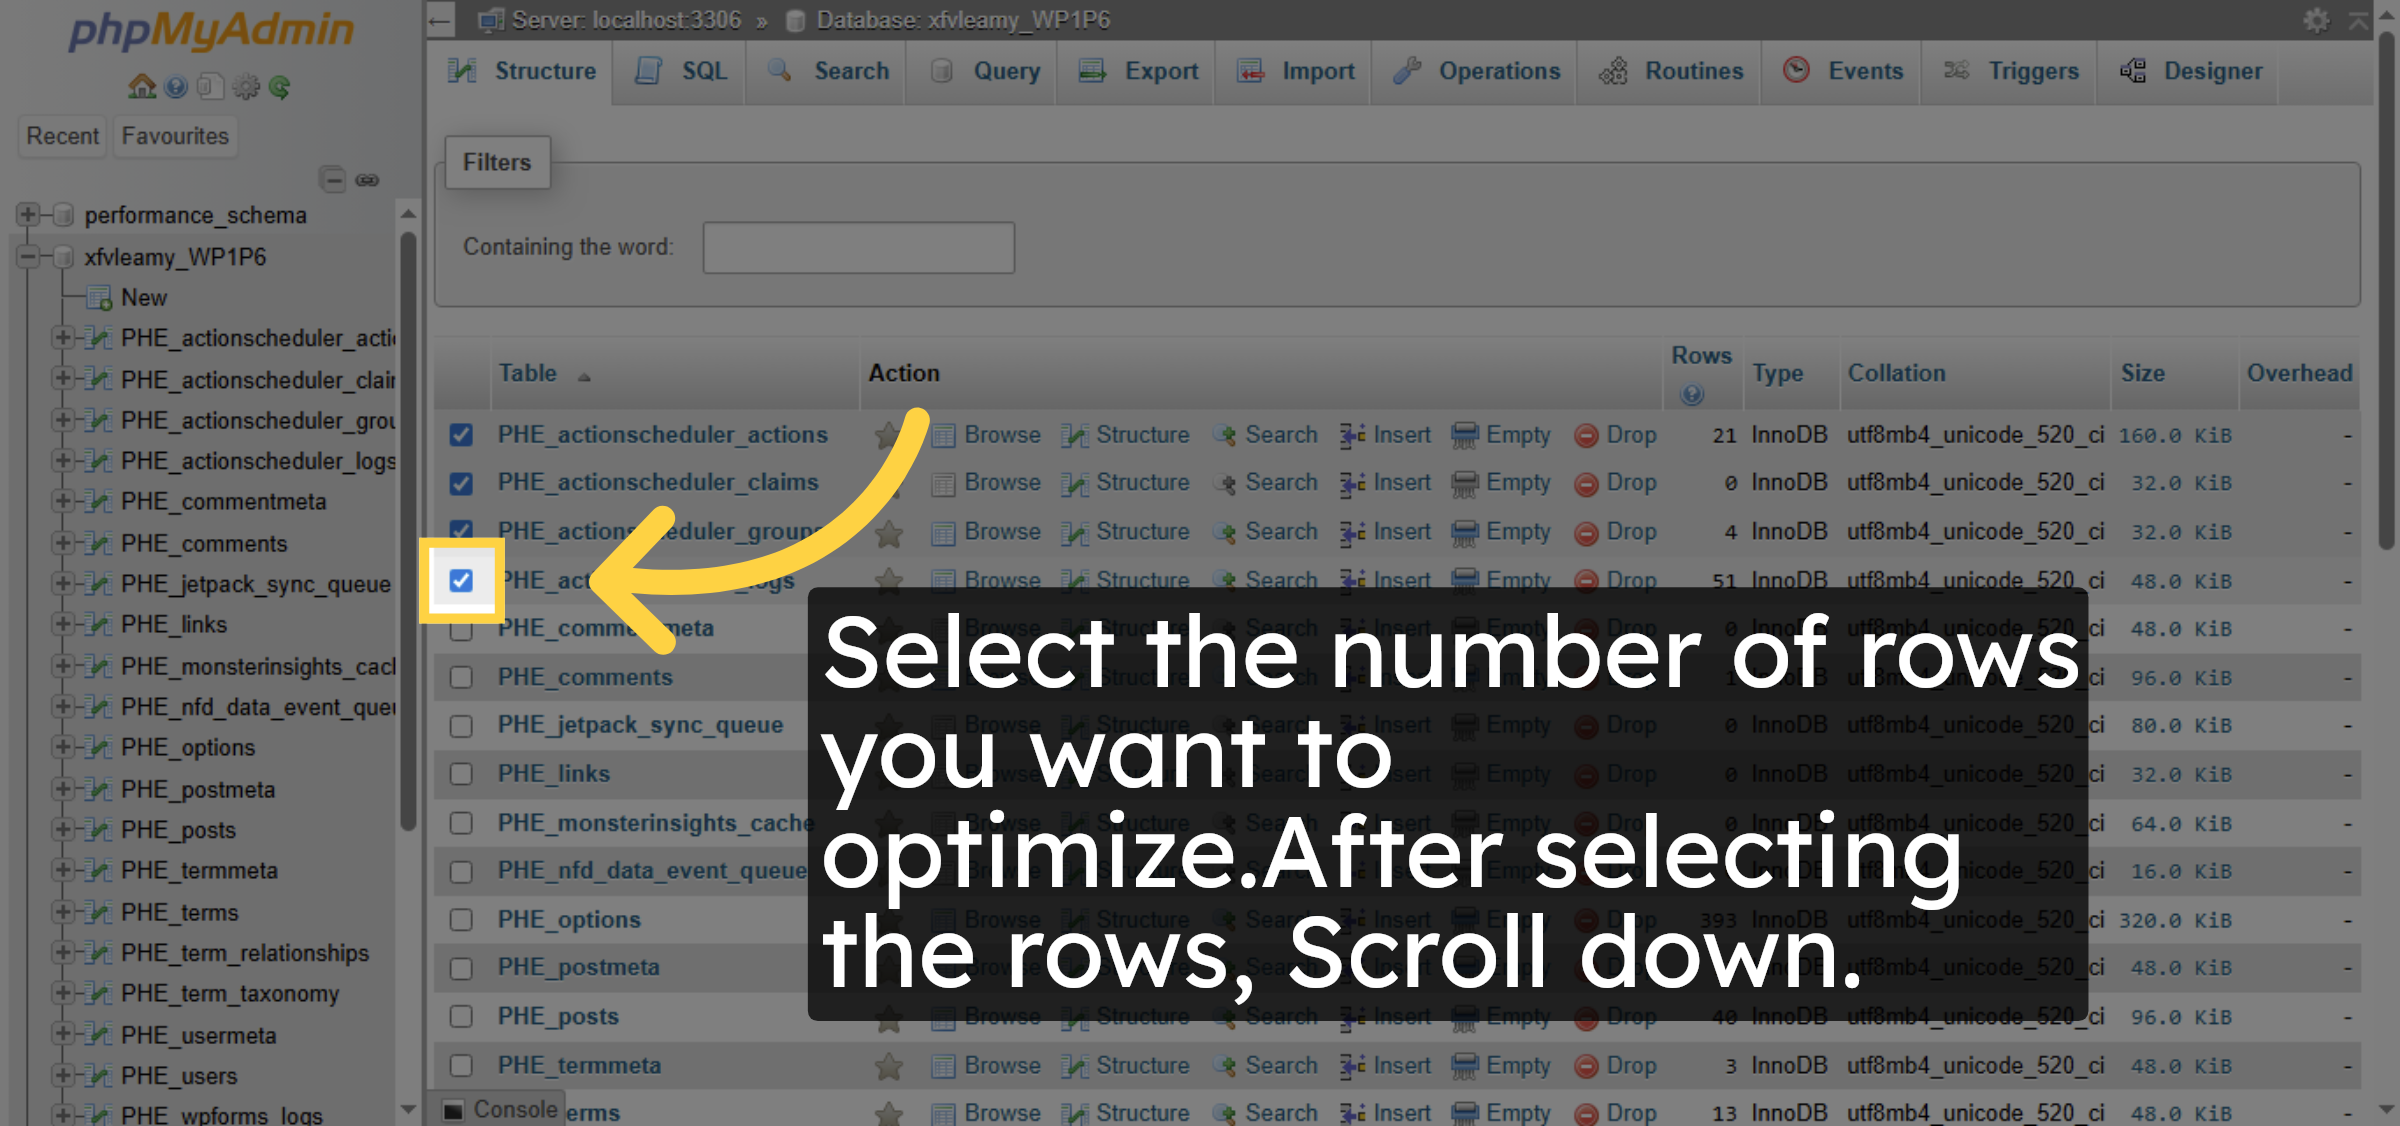
8. Select The number of rows


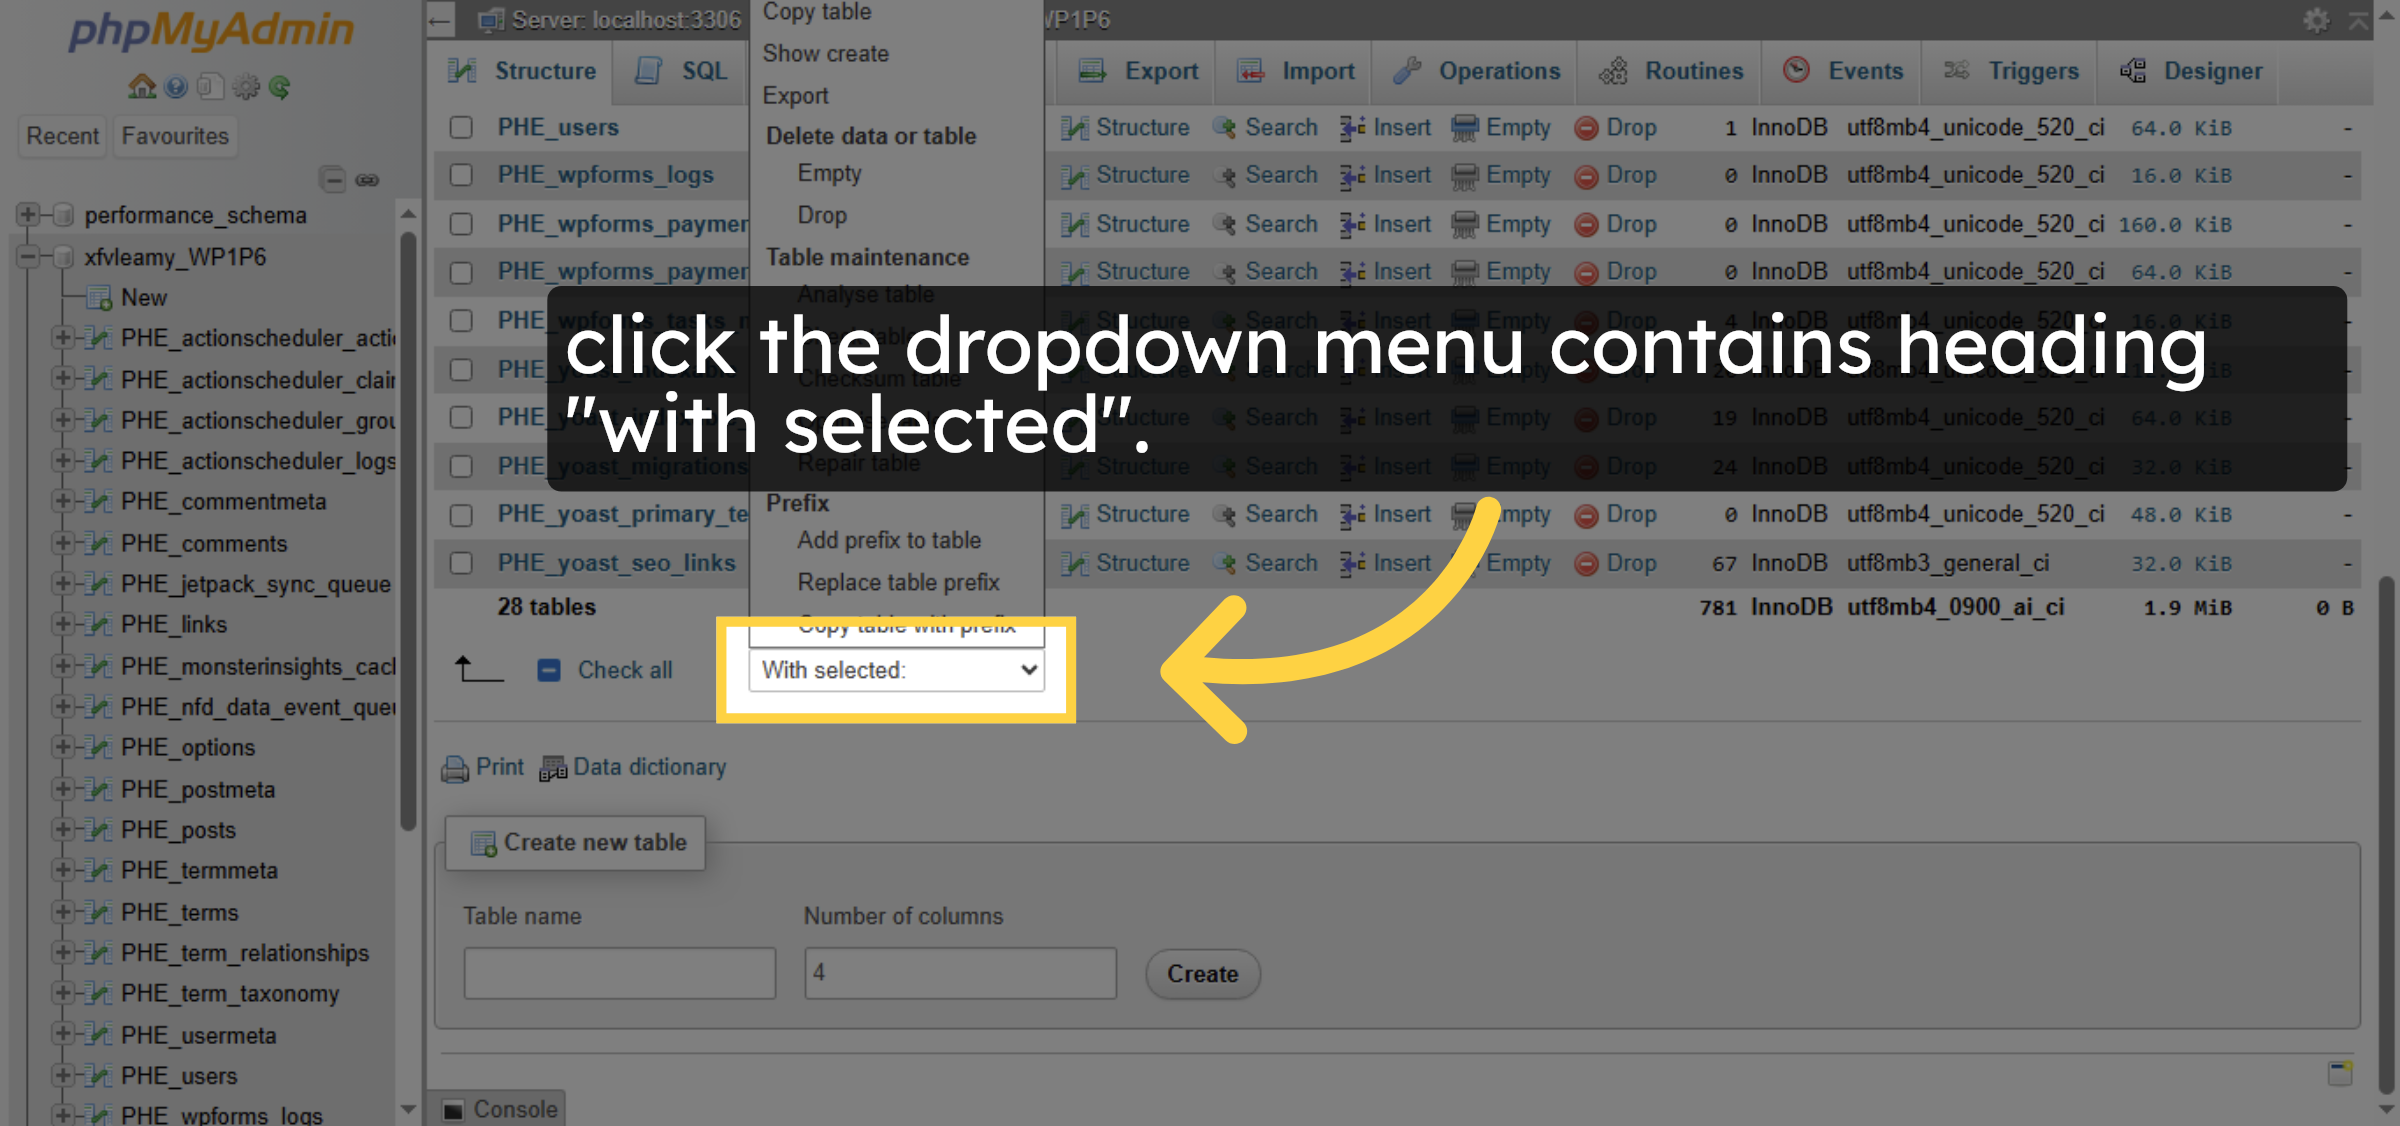
9. Open Table Operations Menu
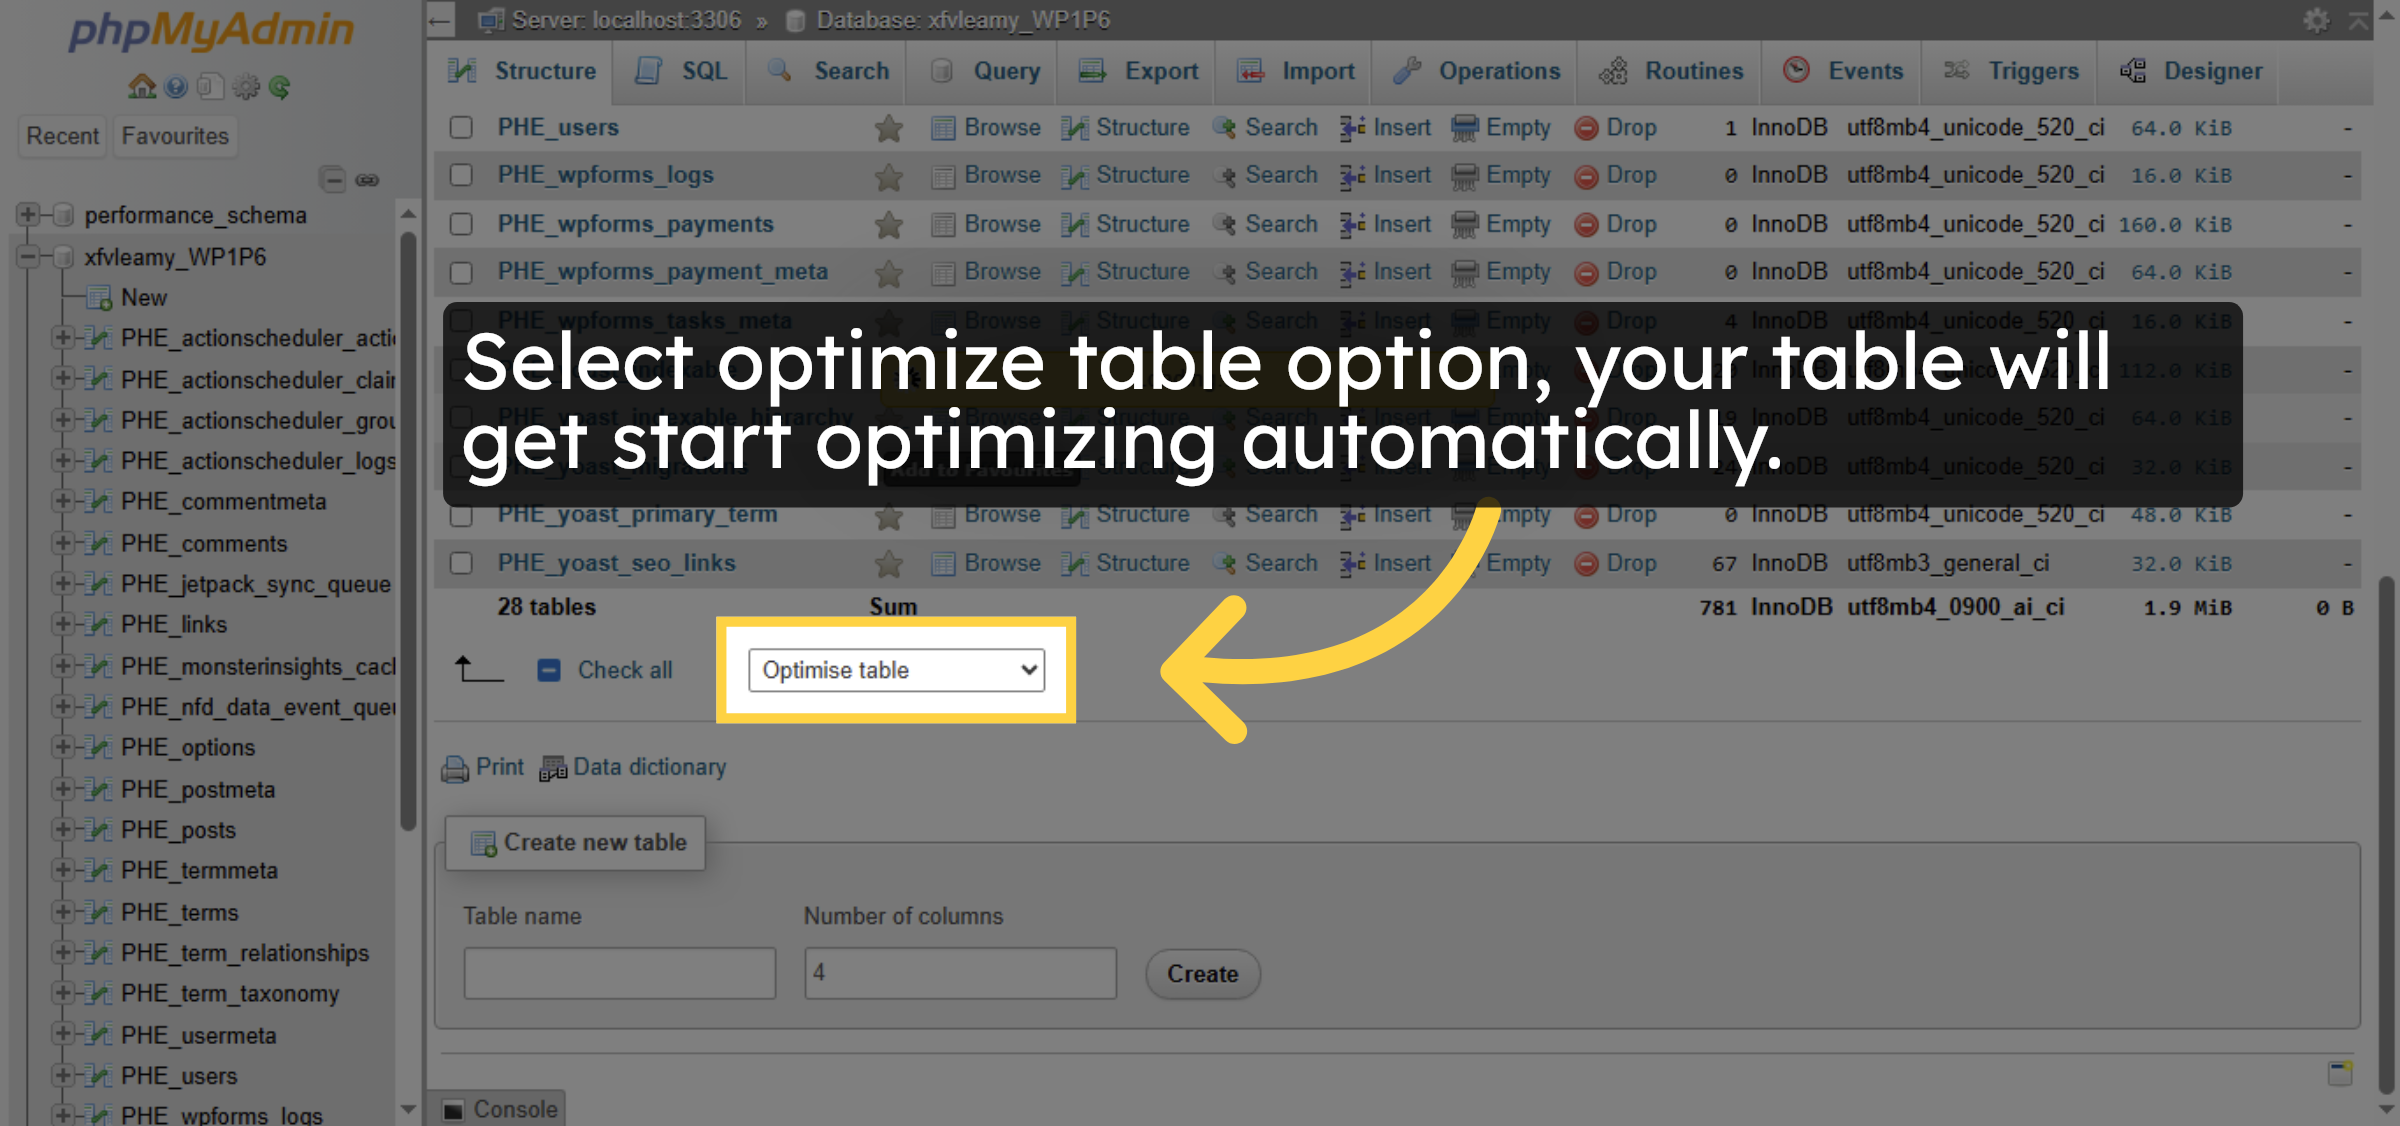
10. Choose Optimize Table
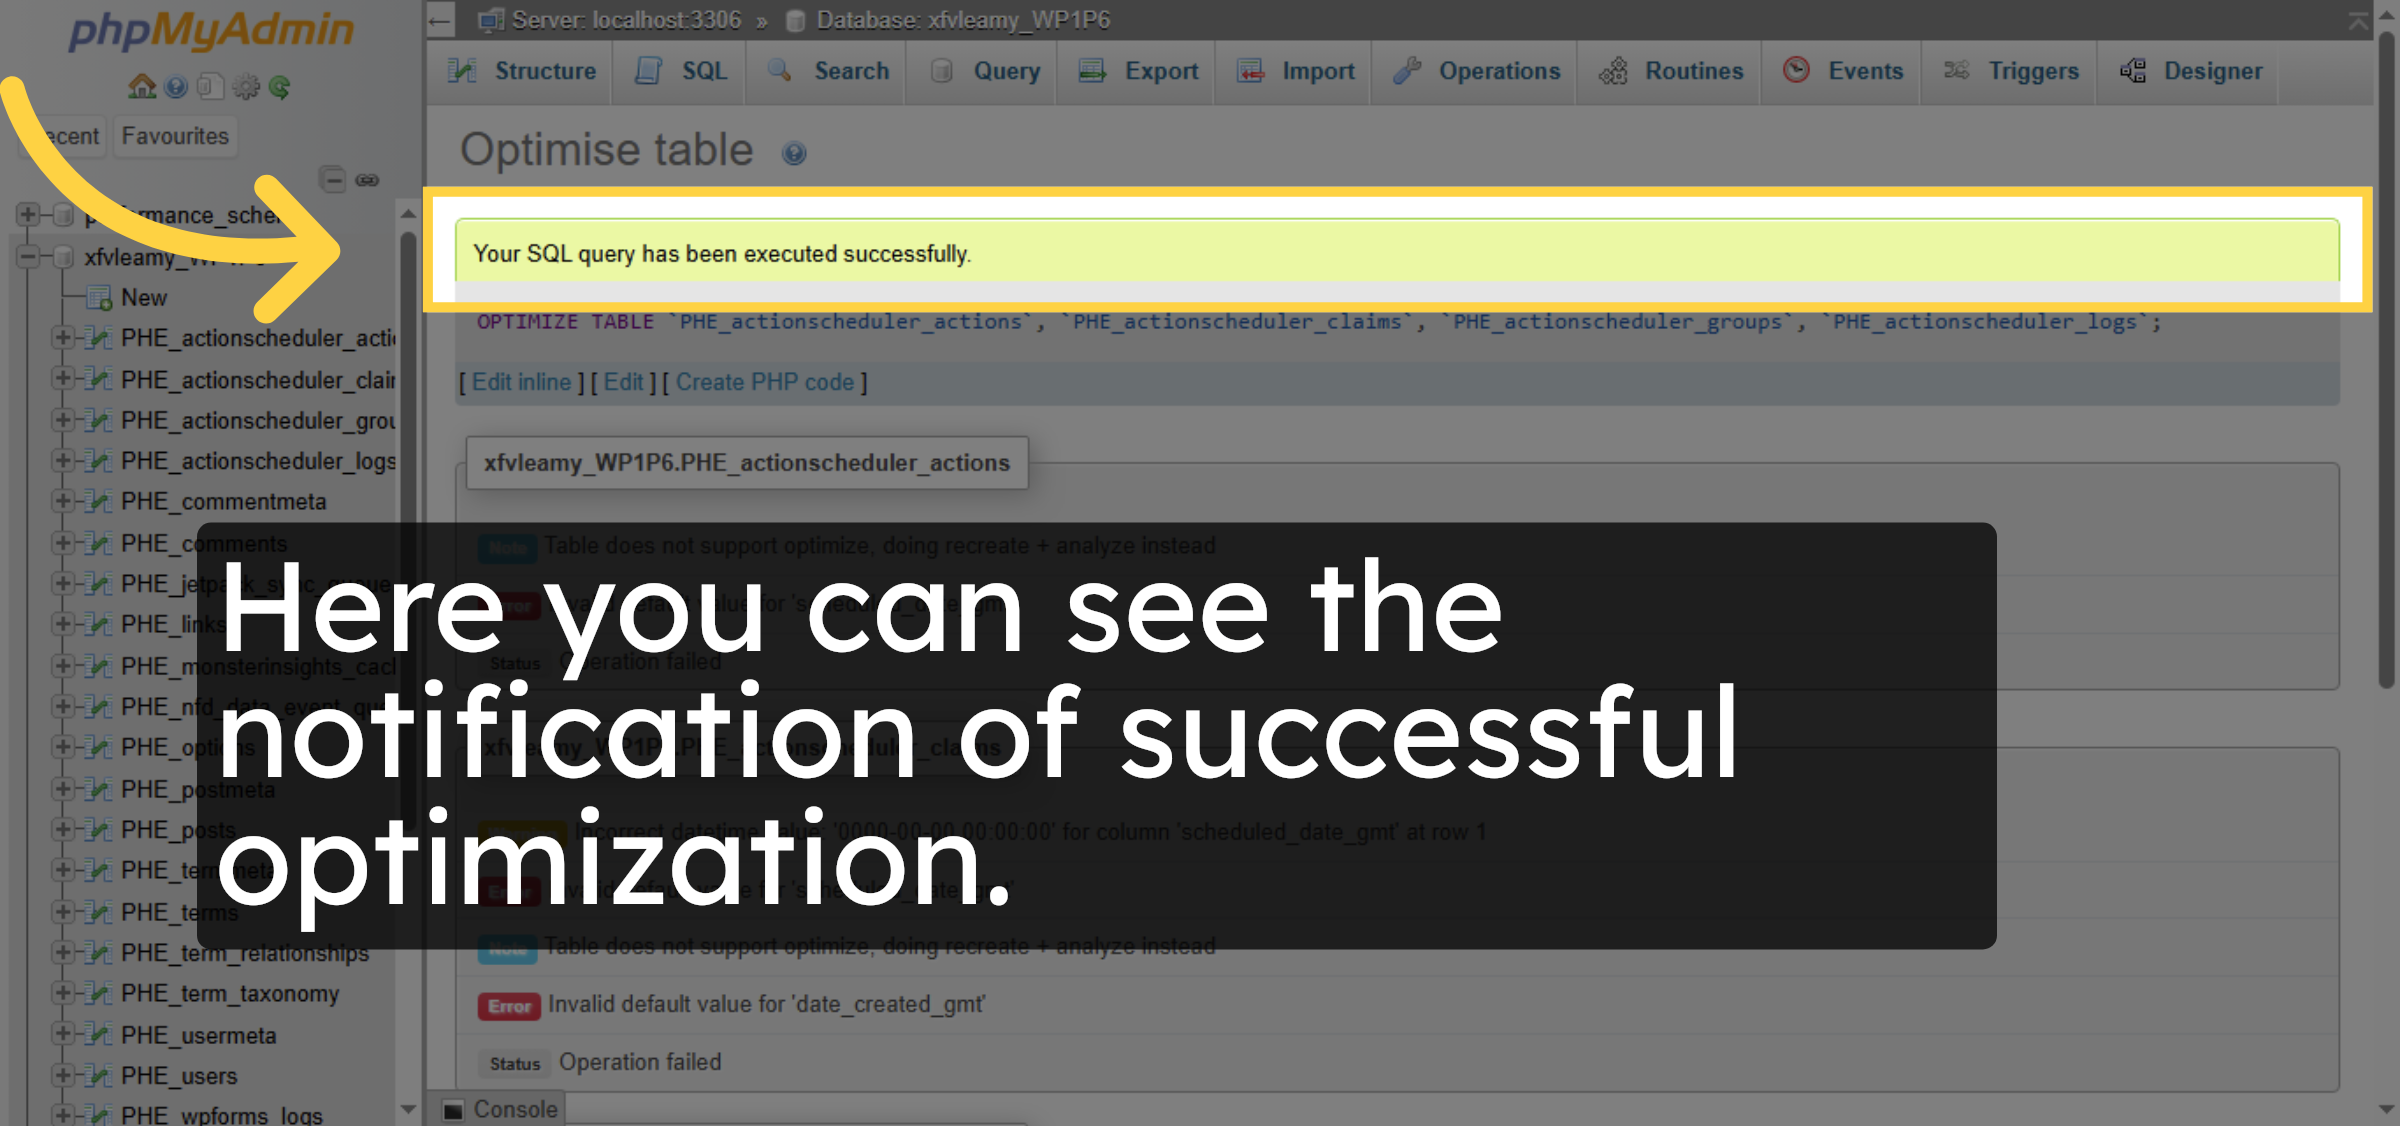
11. Verify optimization.
Conclusion
By following the steps in this guide, you have successfully optimized your WordPress database tables using phpMyAdmin on Bluehost. Creating a backup before optimization ensures data safety, while optimizing tables helps improve database efficiency and overall site performance. Performing this task periodically can contribute to faster load times and a more stable WordPress website.
-
Visit: https://www.woohelpdesk.com
-
Call Us Toll-Free: +1 888 602 0119 (US & Canada)
-
Get professional support for WordPress database optimization, Bluehost hosting management, performance tuning, troubleshooting, and WooCommerce solutions


