
How to Manage WordPress Databases Using phpMyAdmin in Hostinger
Introduction
Managing your WordPress database is essential for maintaining website performance, security, and data integrity. Hostinger provides access to phpMyAdmin through its hPanel, allowing users to view, edit, back up, and manage database records efficiently. In this guide, you will learn how to access phpMyAdmin, navigate database tables, run SQL queries, edit user records, and safely delete unwanted data.
1. Hostinger hPanel
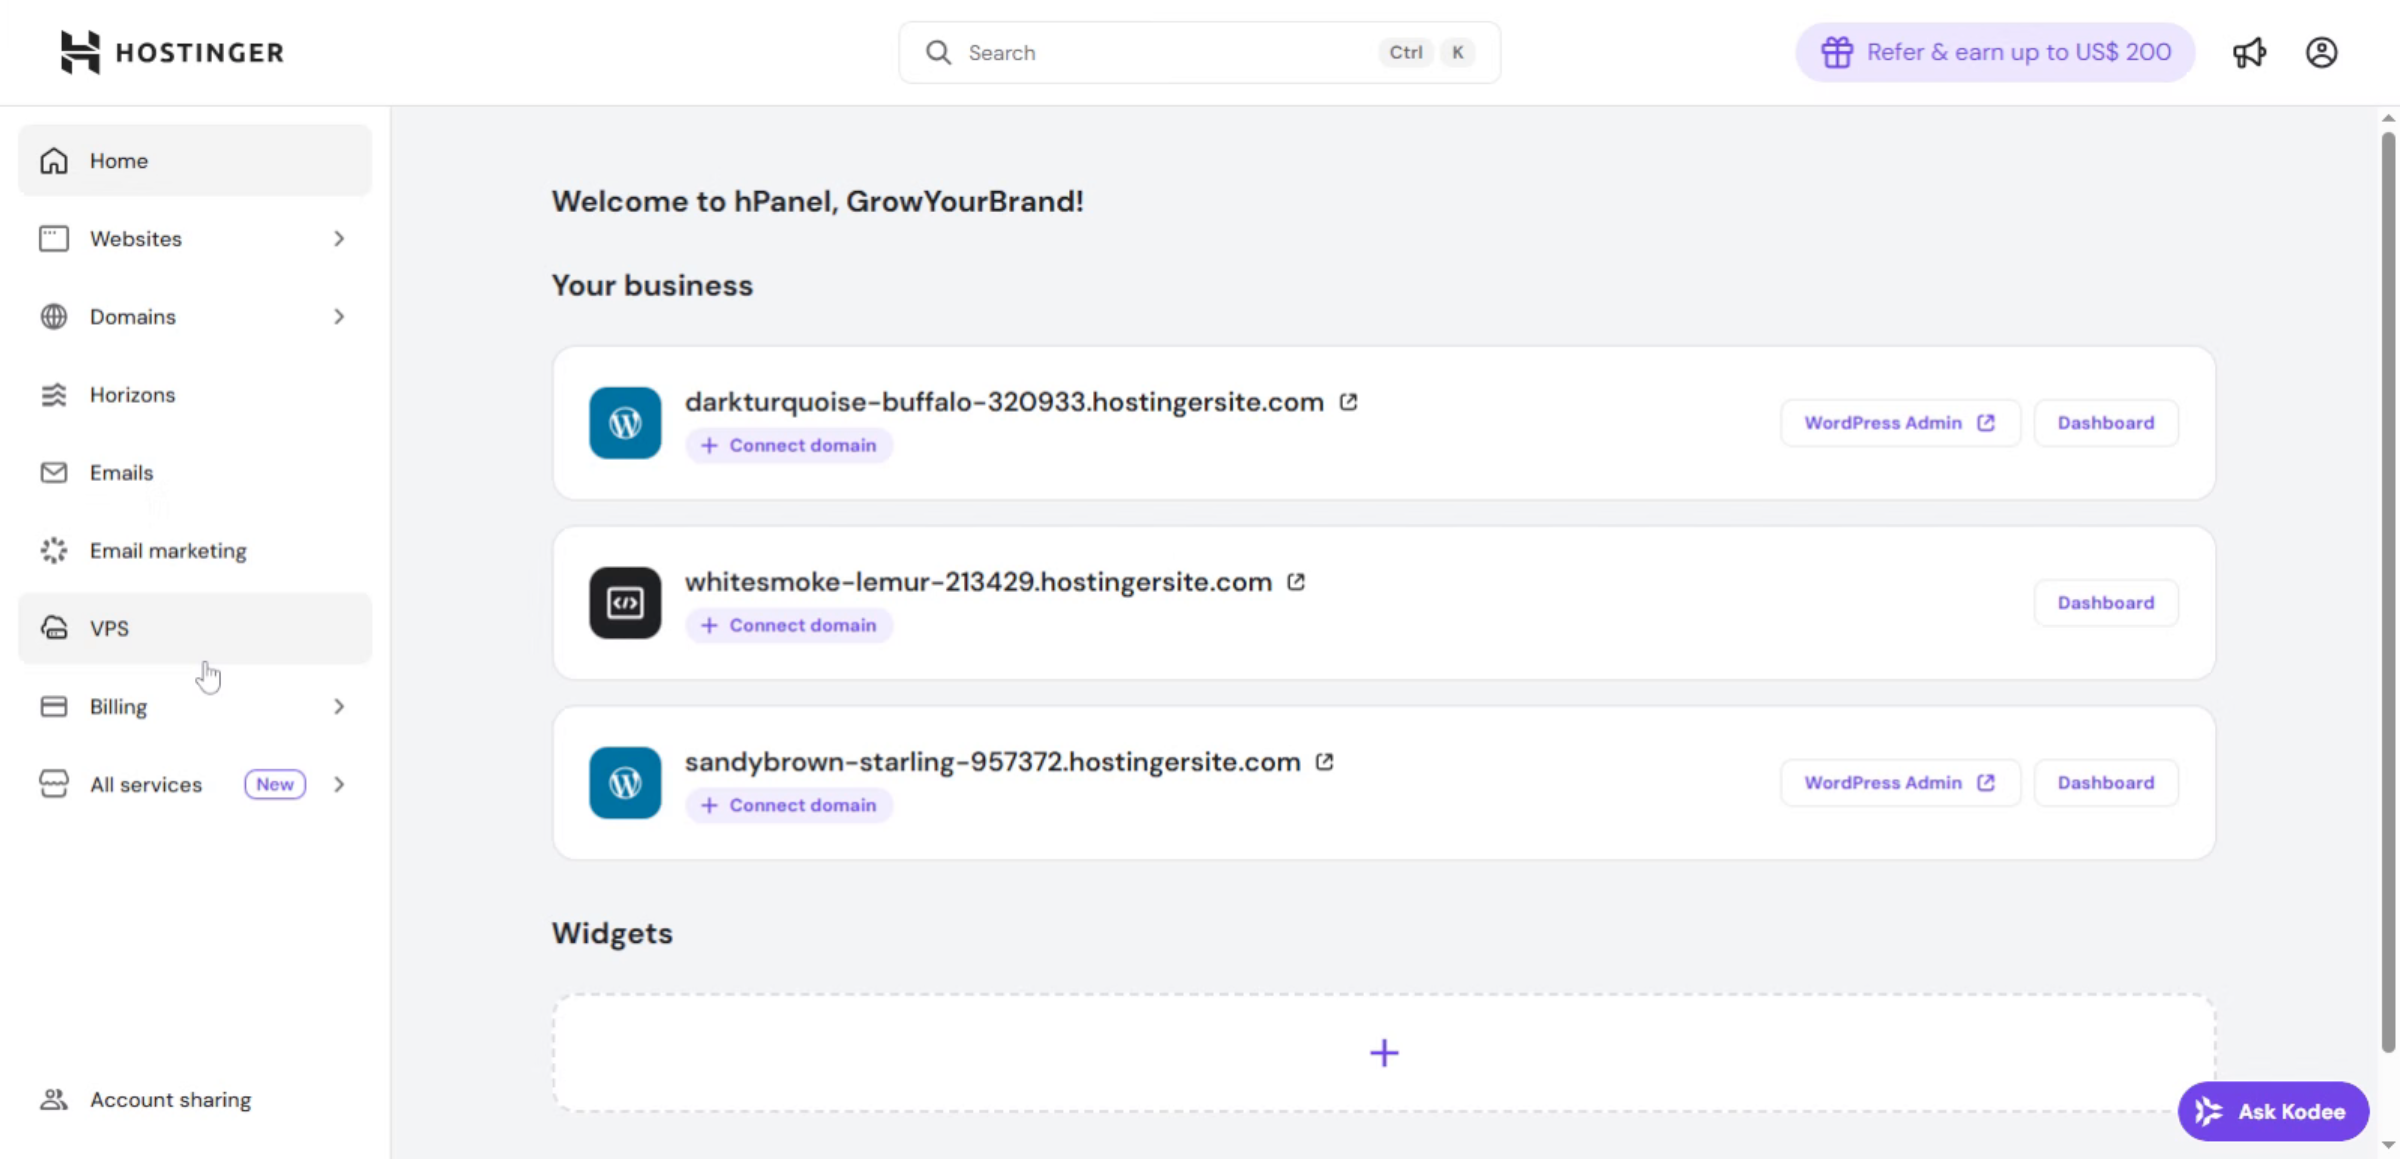
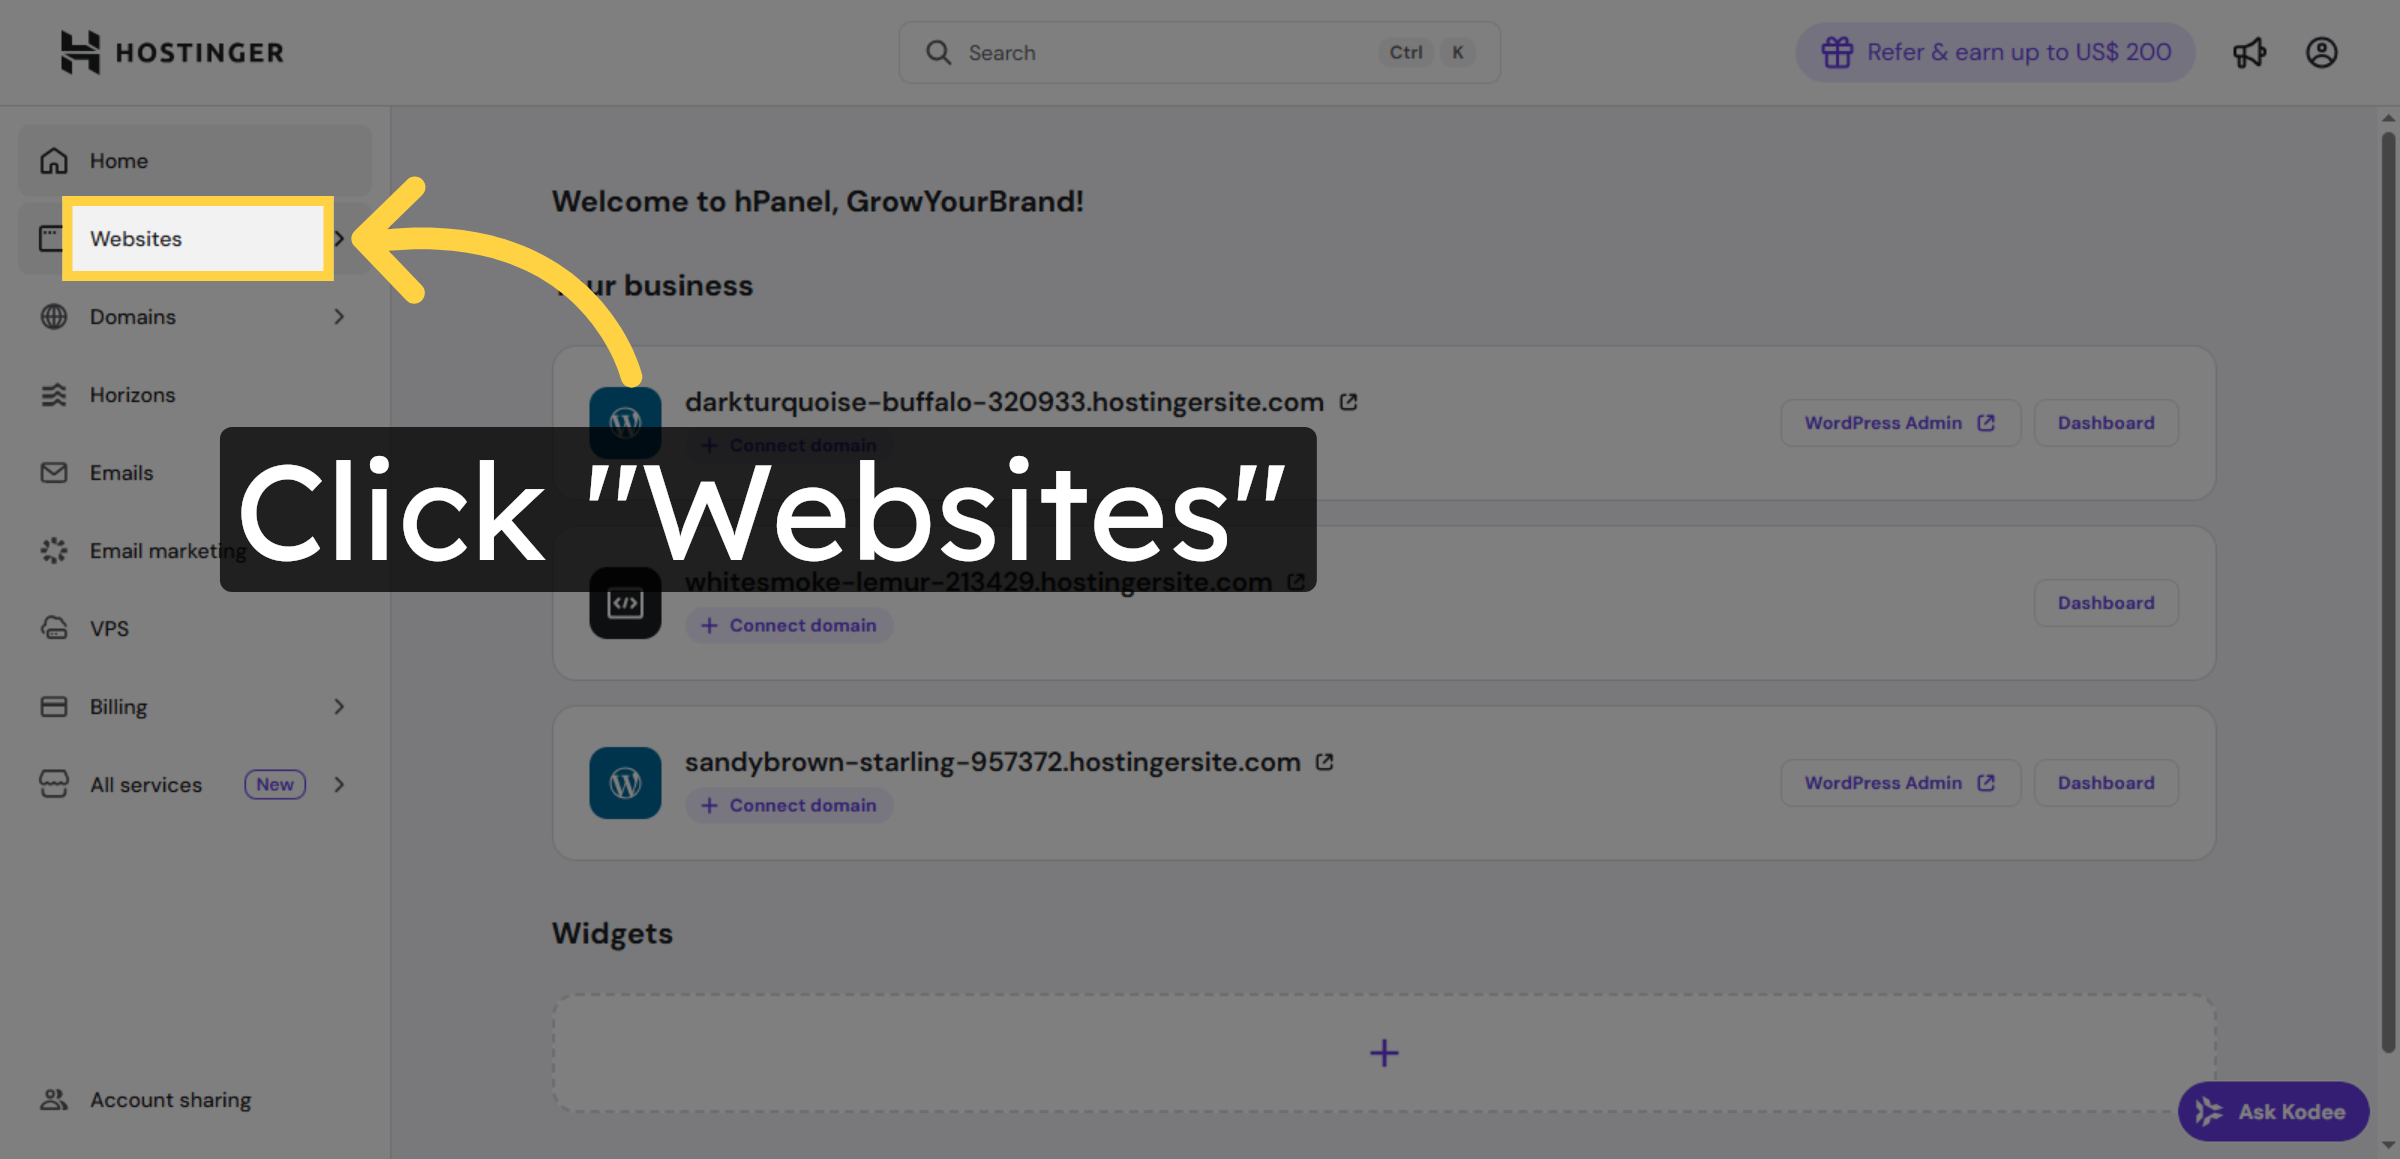
2. Navigate to Websites Section
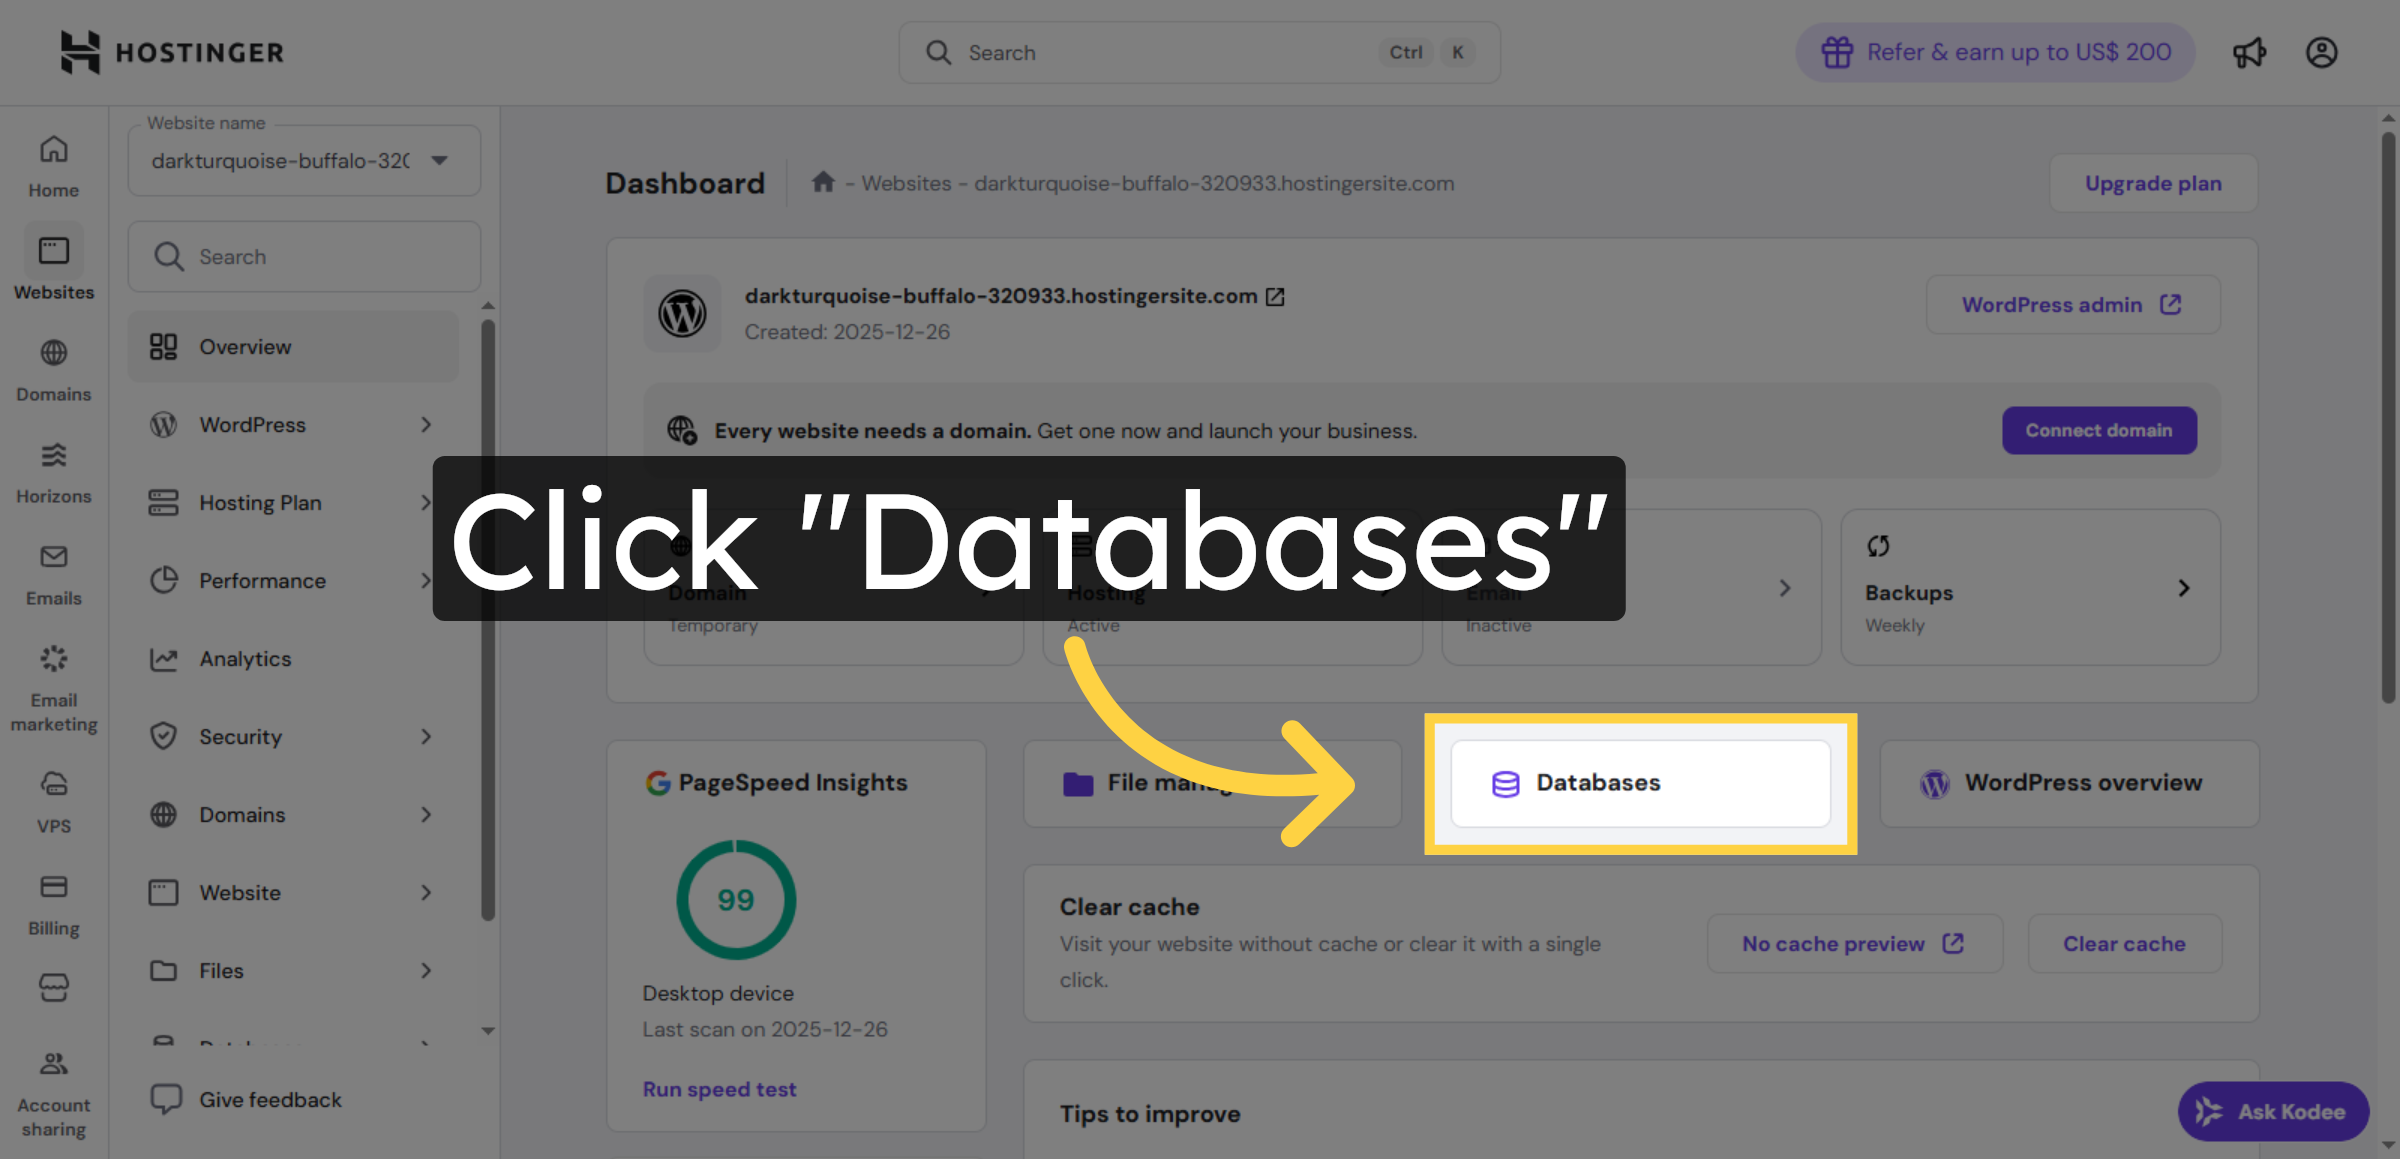
3. Open Website Dashboard

4. Access Databases Menu
5. Click phpMyAdmin Interface

6. Switch to Database Server
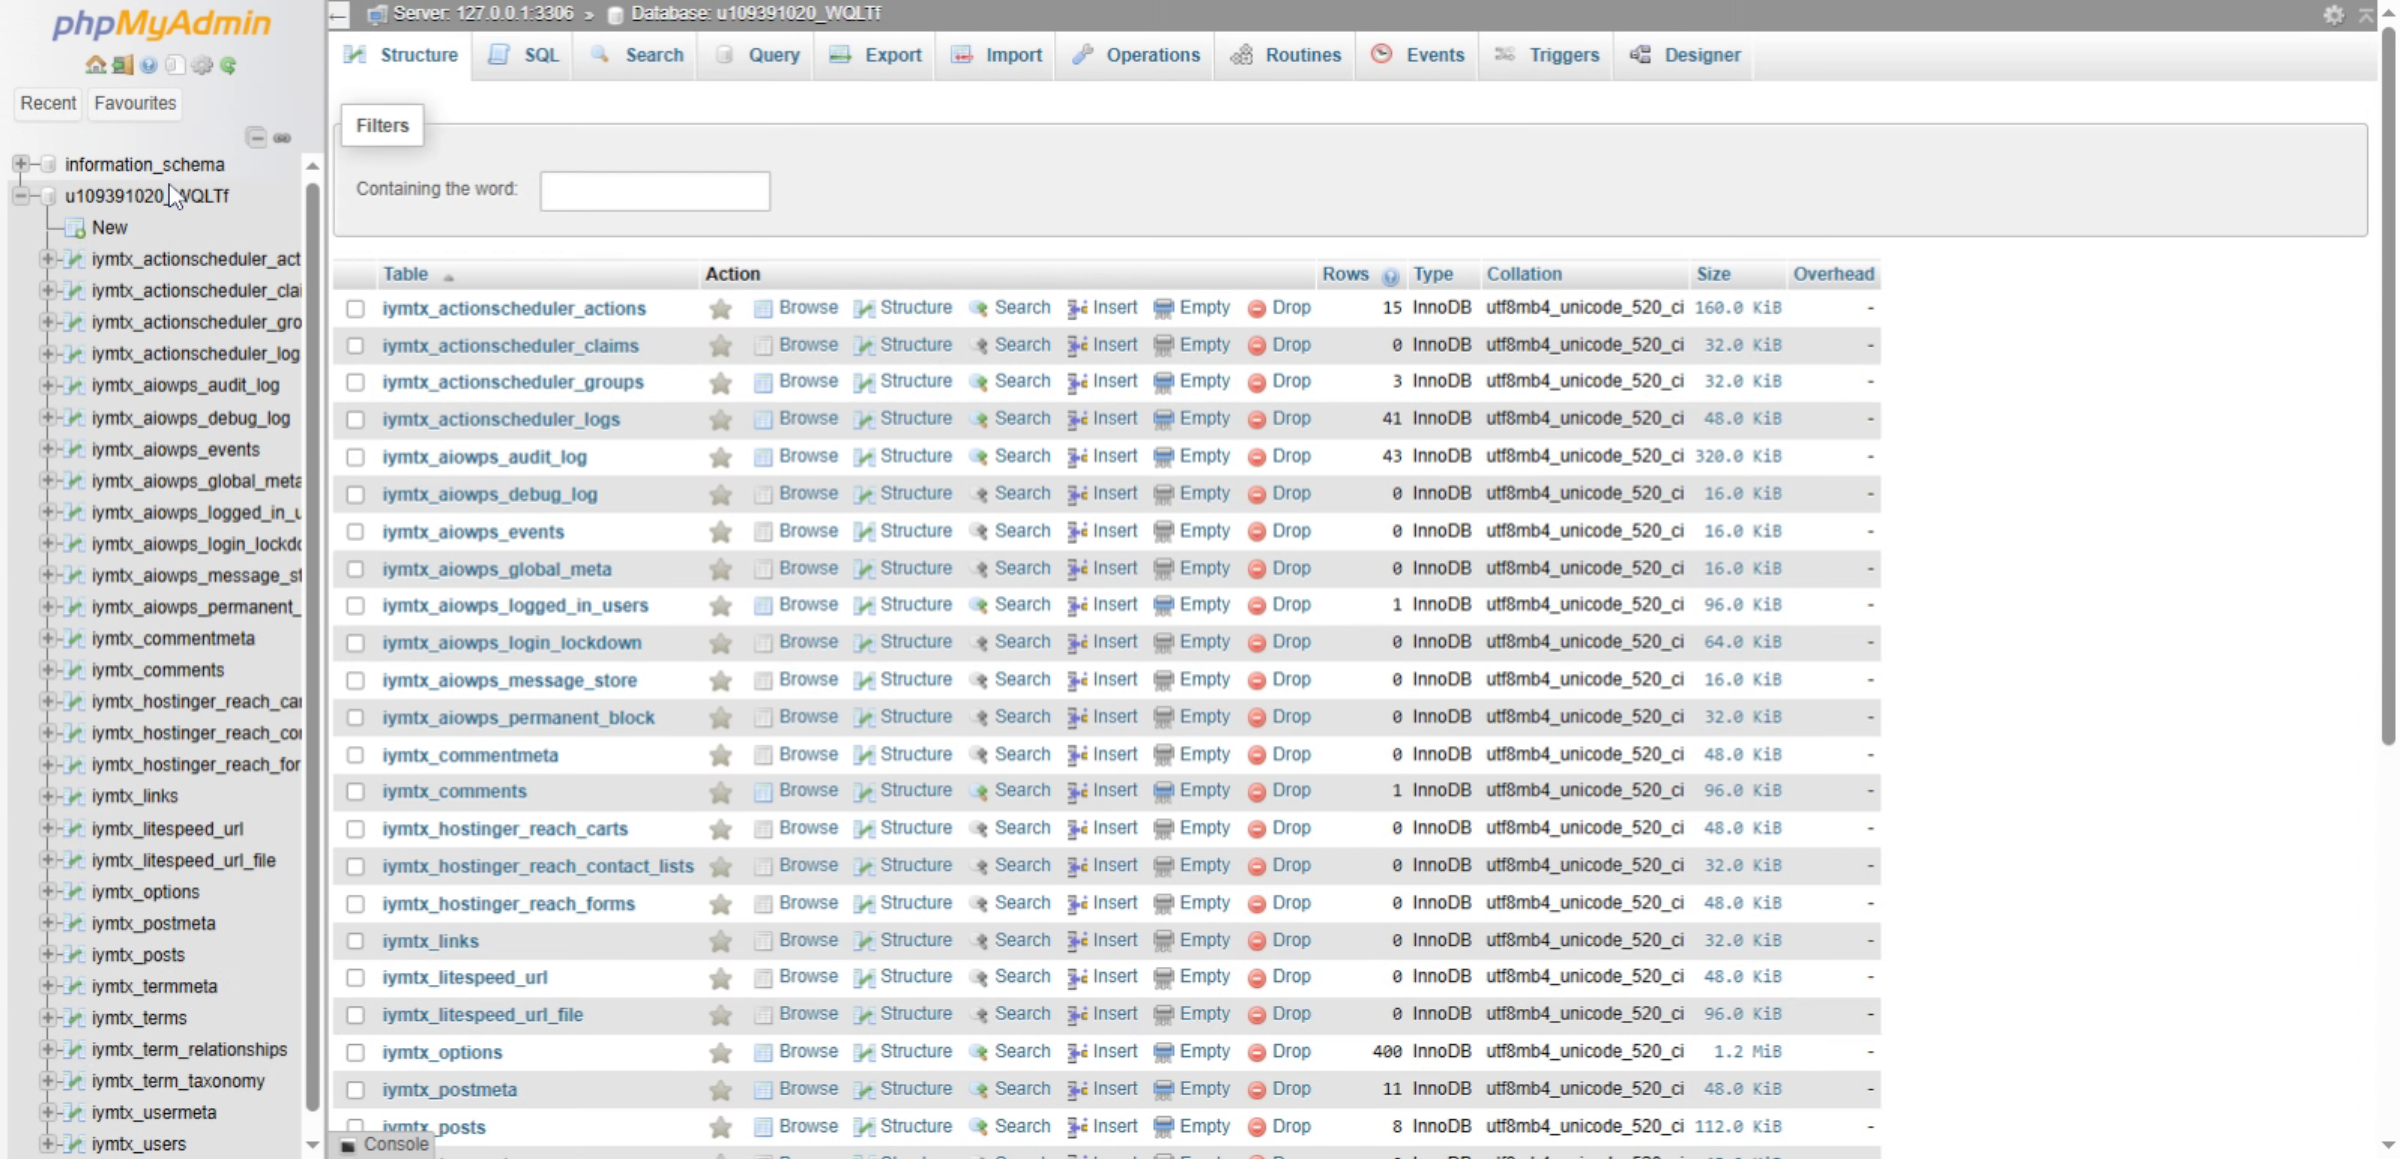
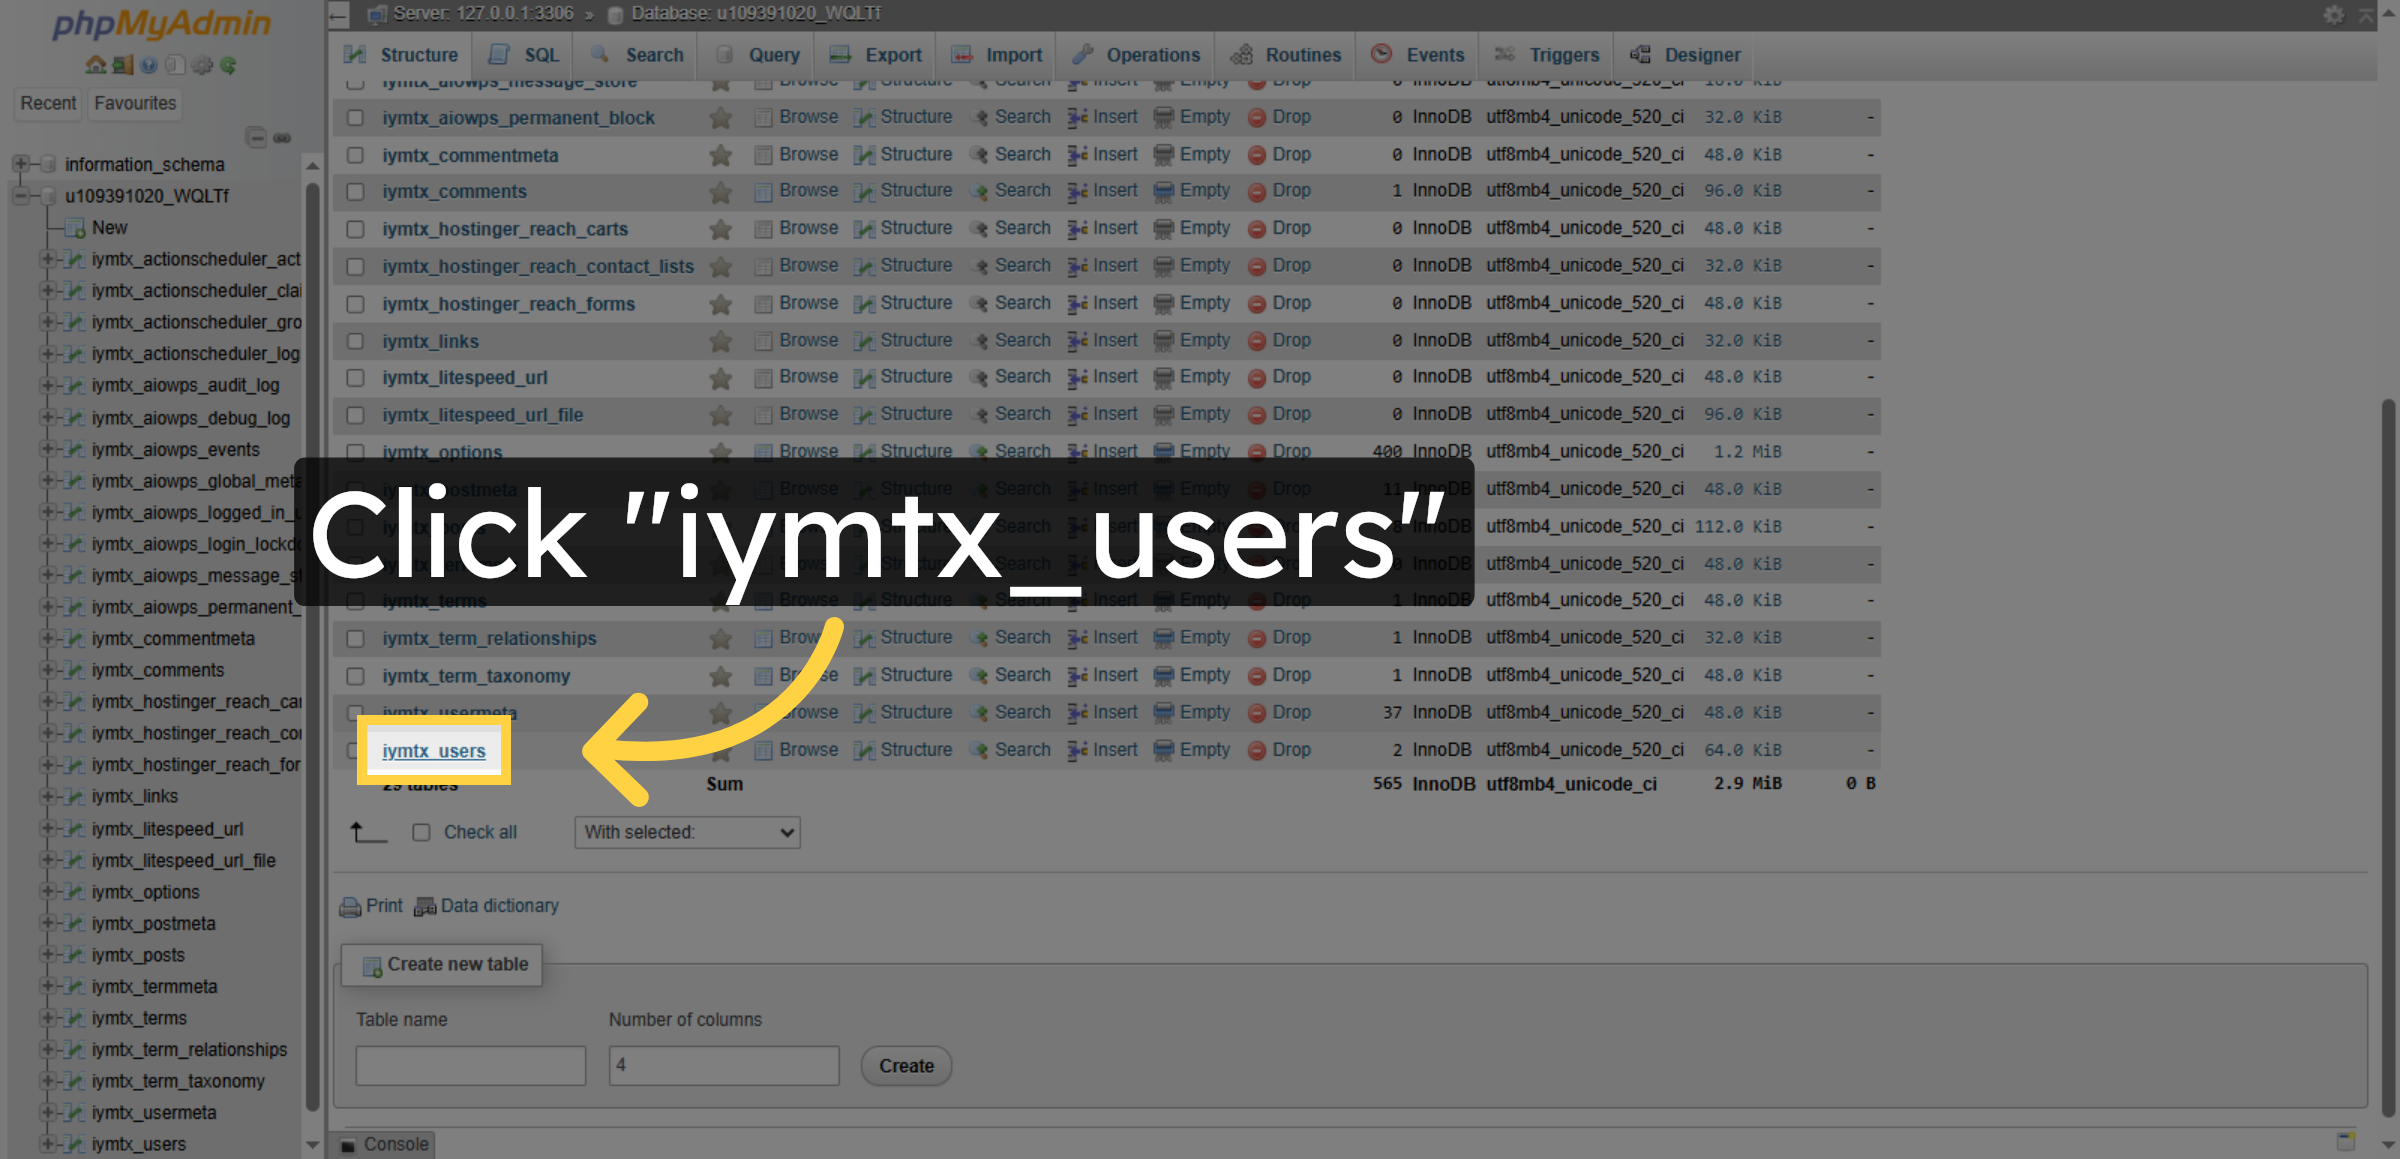
7. Open User Table
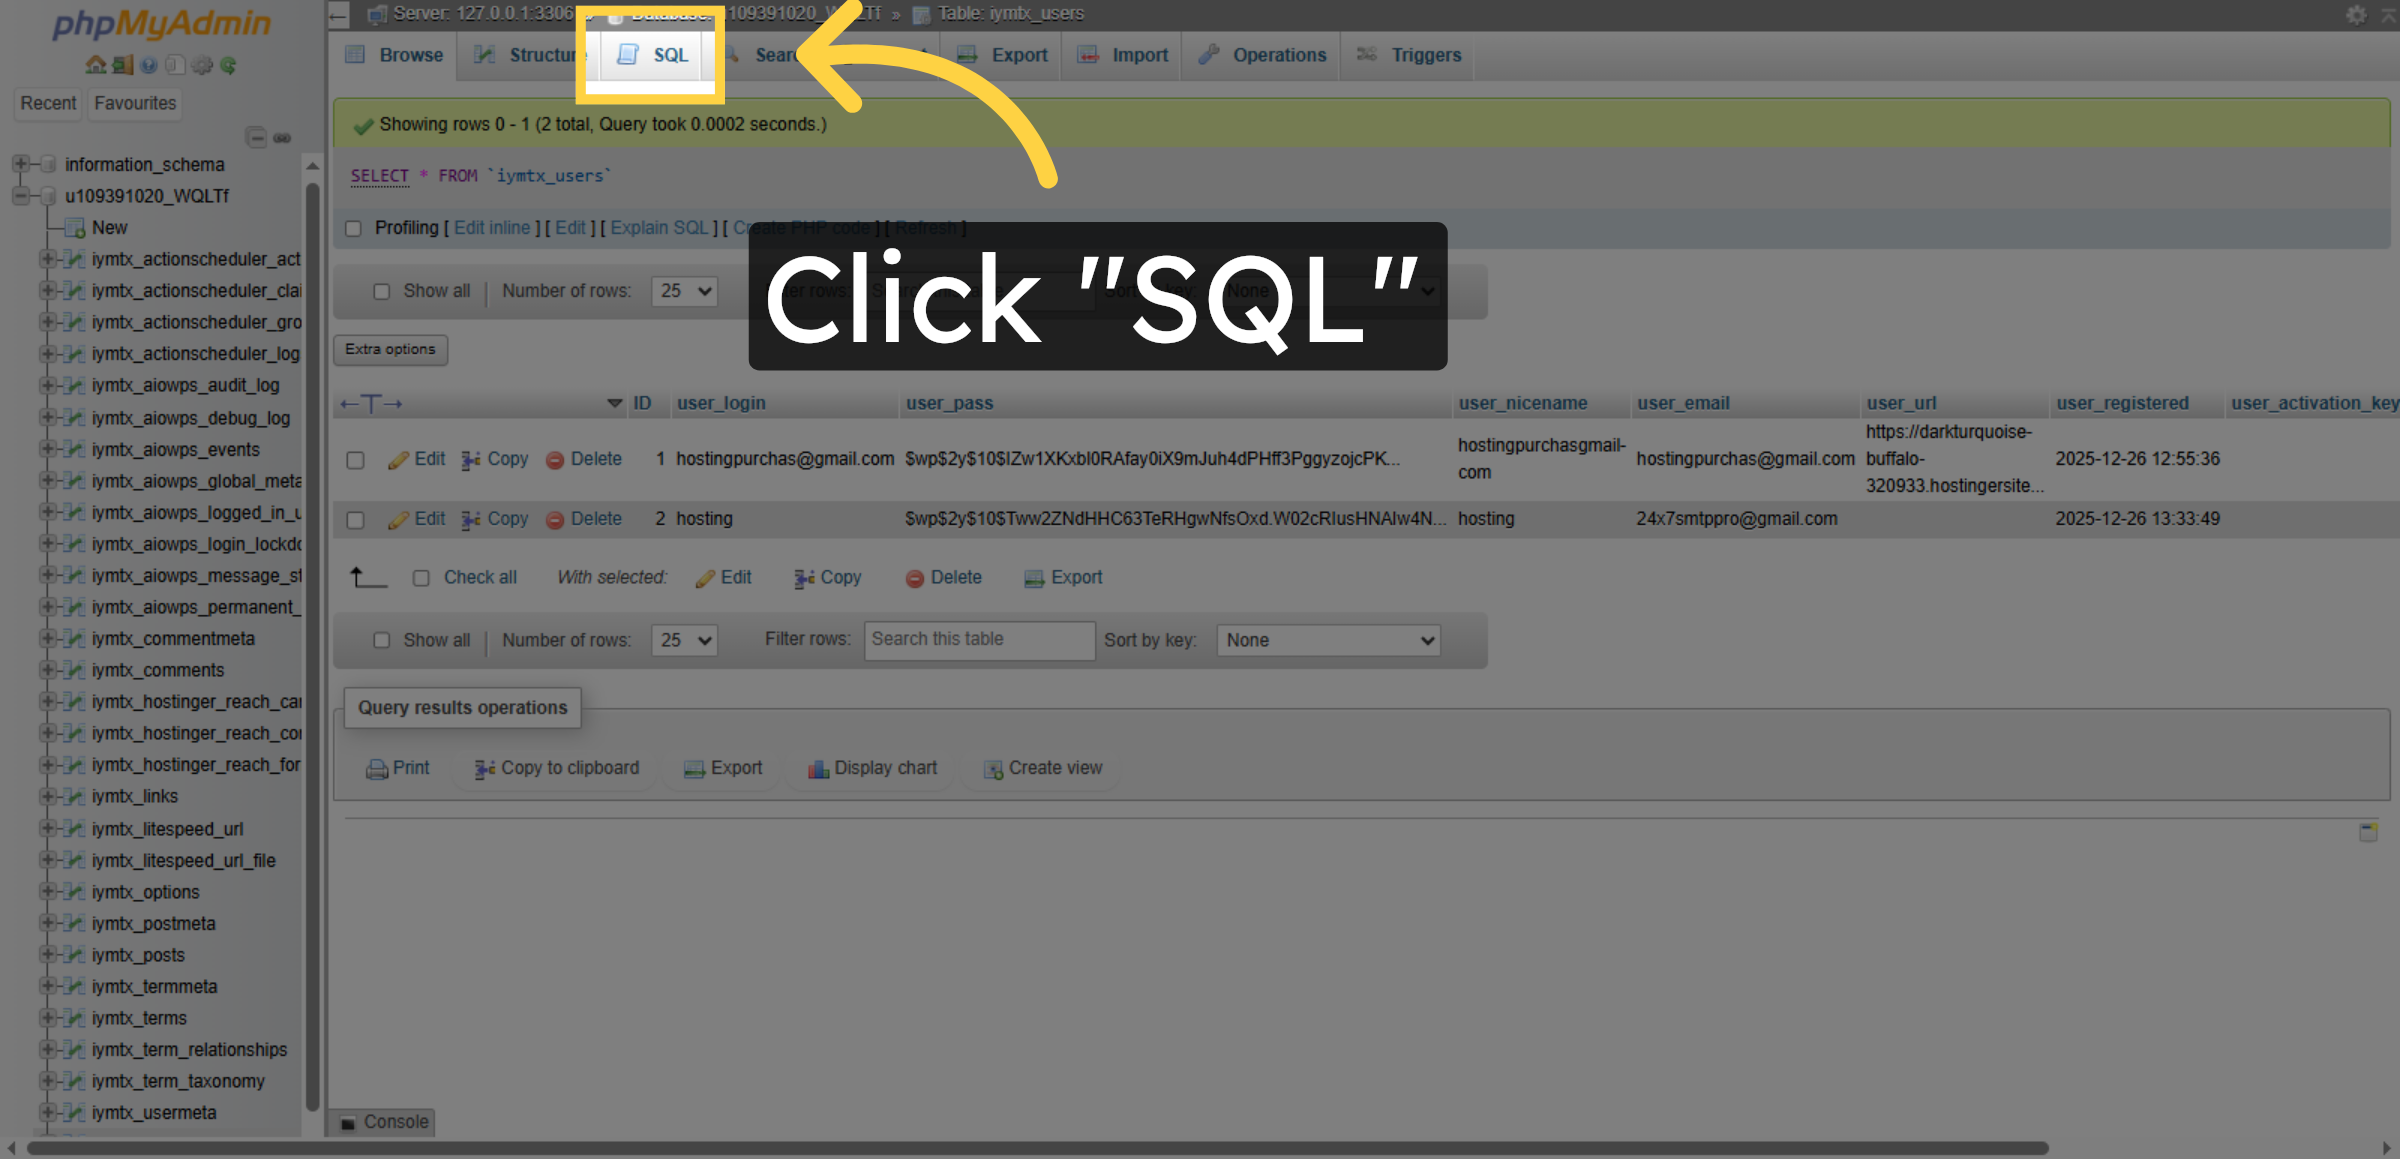
8. Access SQL Tab
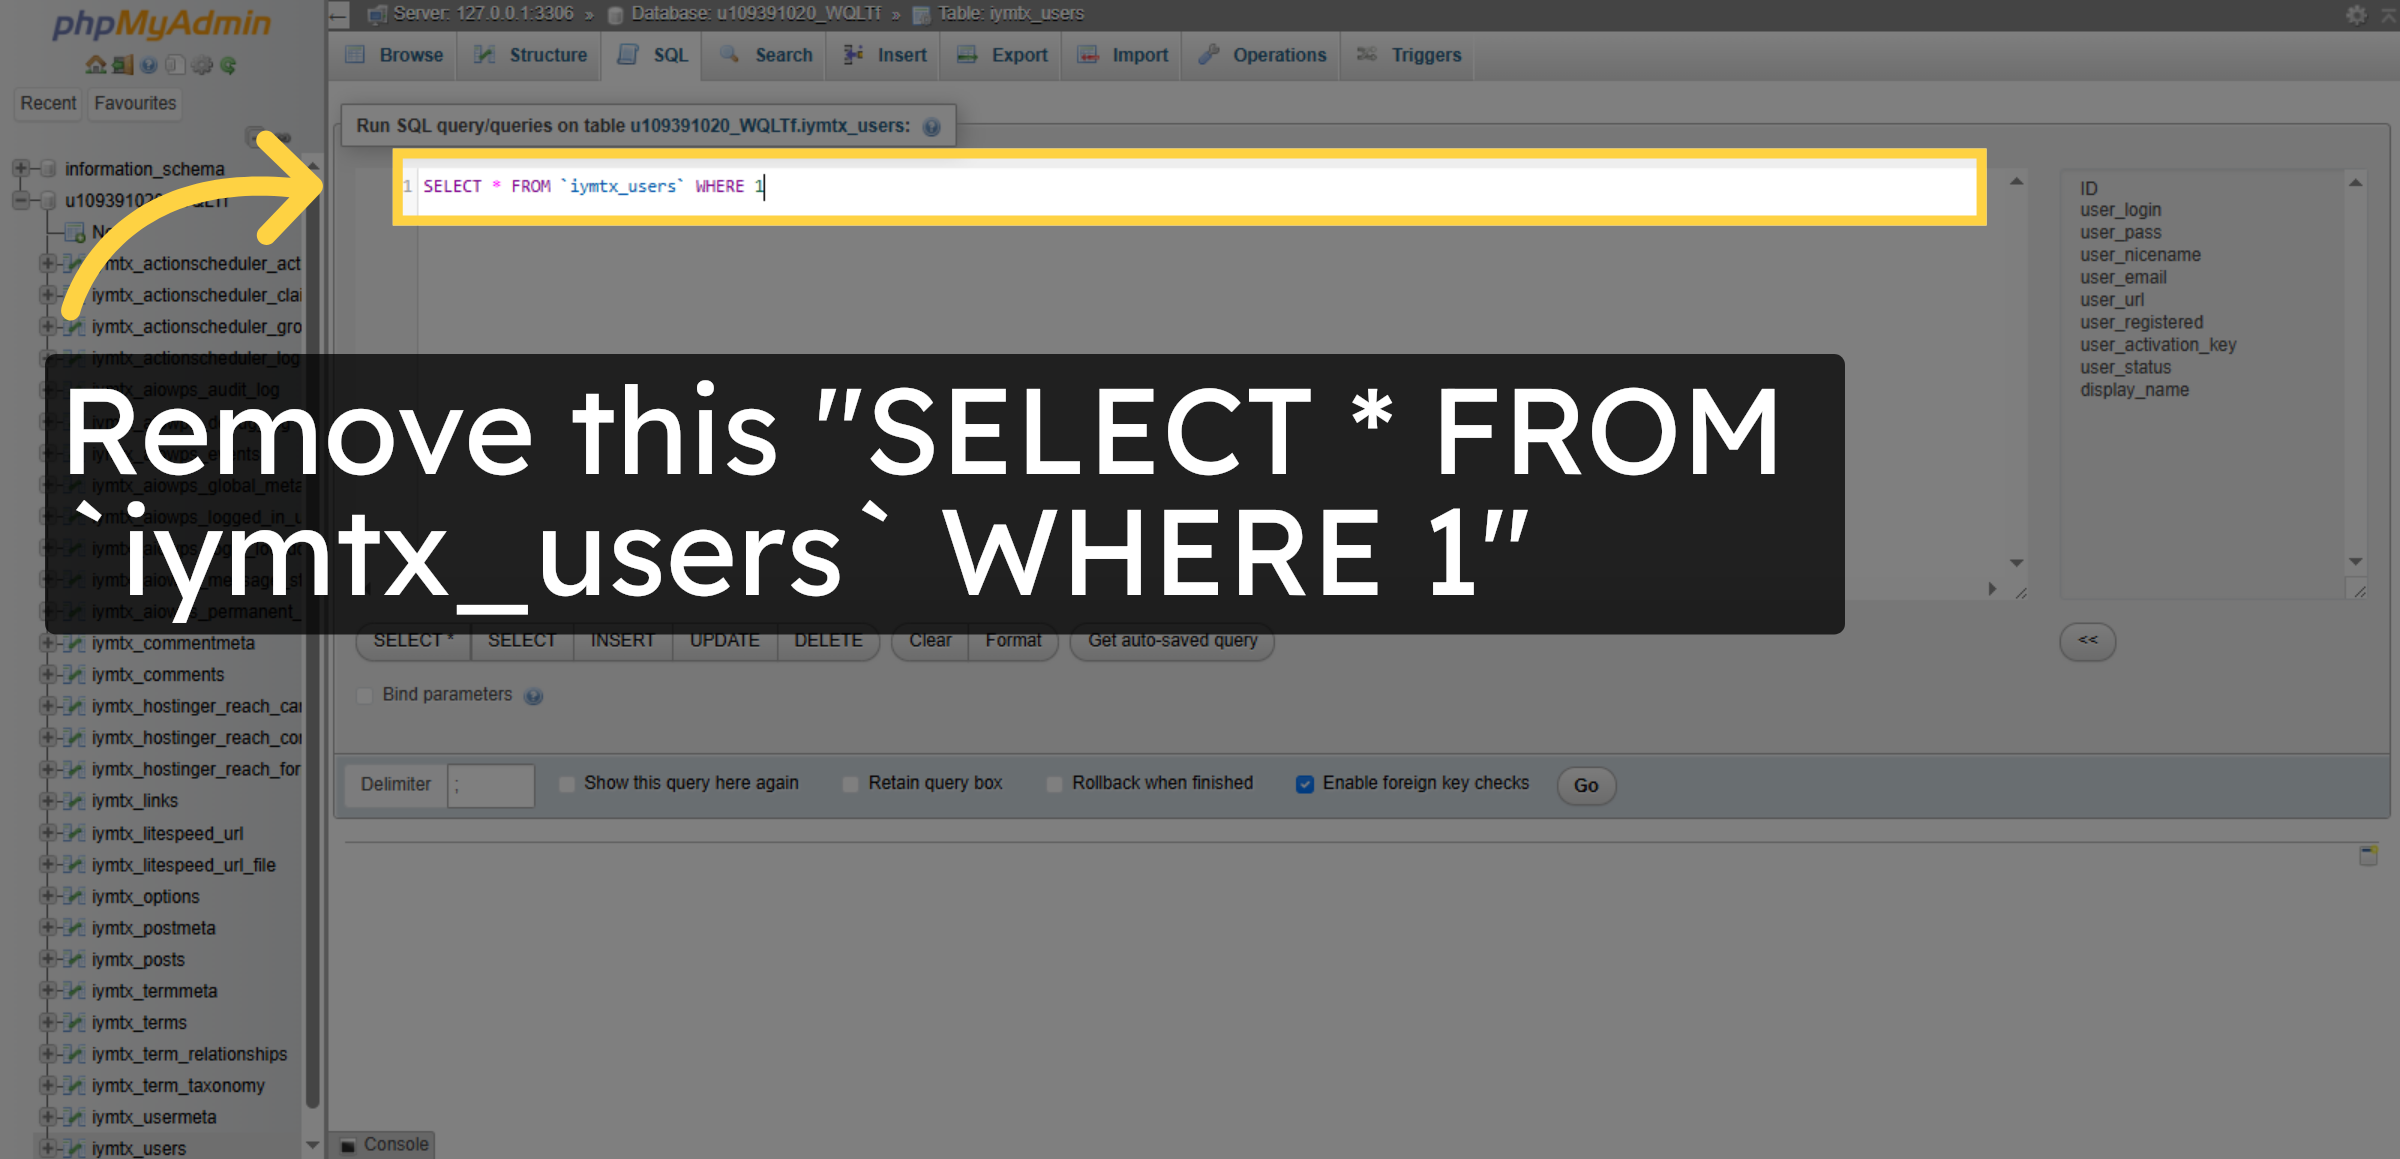
9. Select All User Records
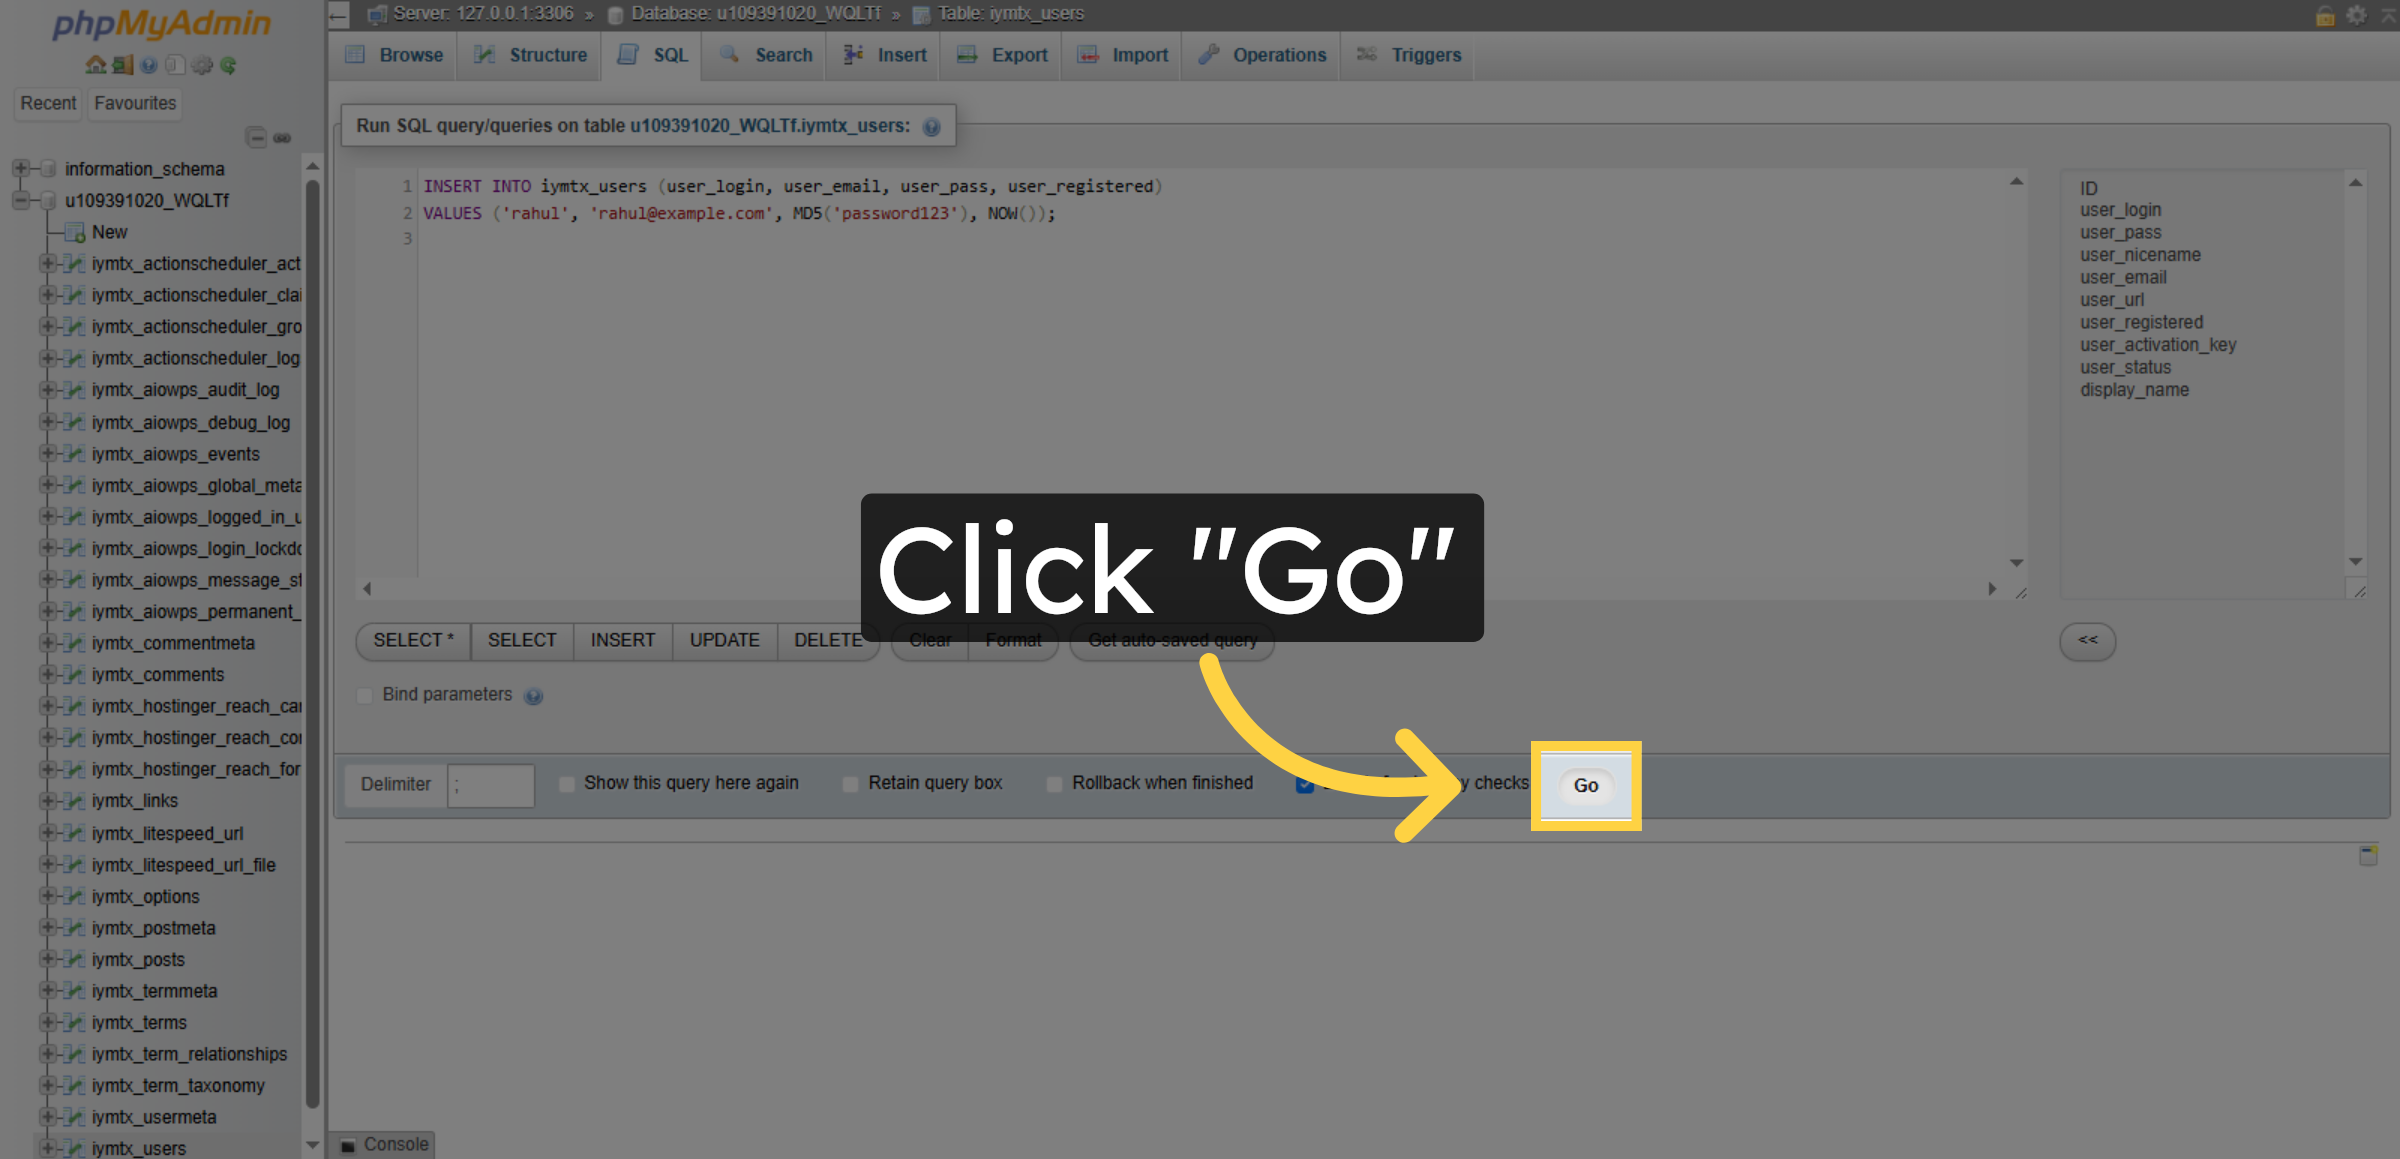
10. Run SQL Query Again
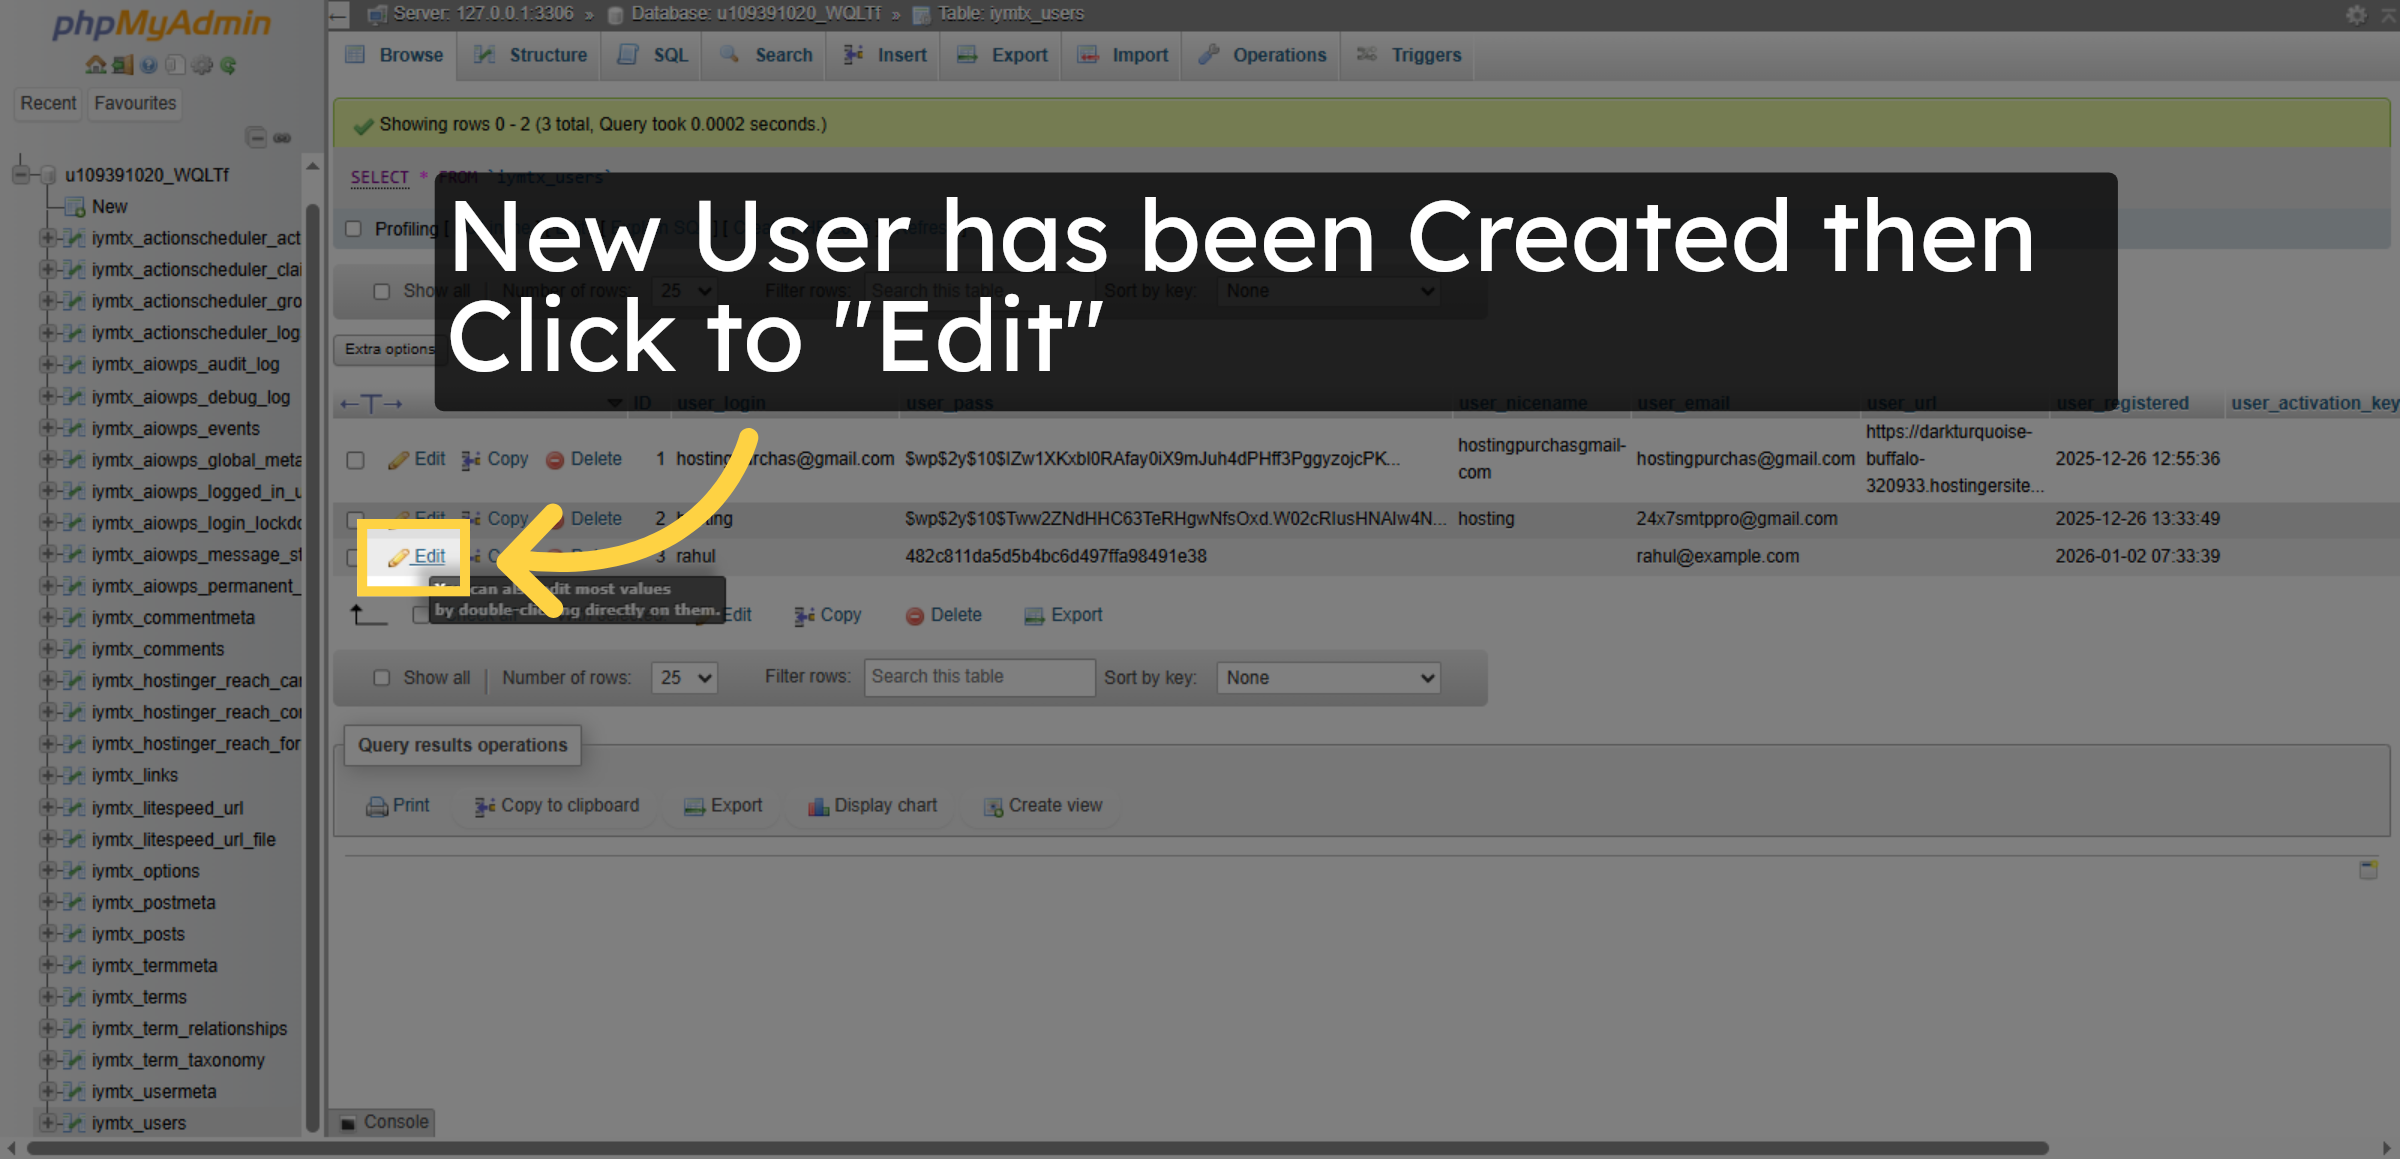
11. Reopen User Table


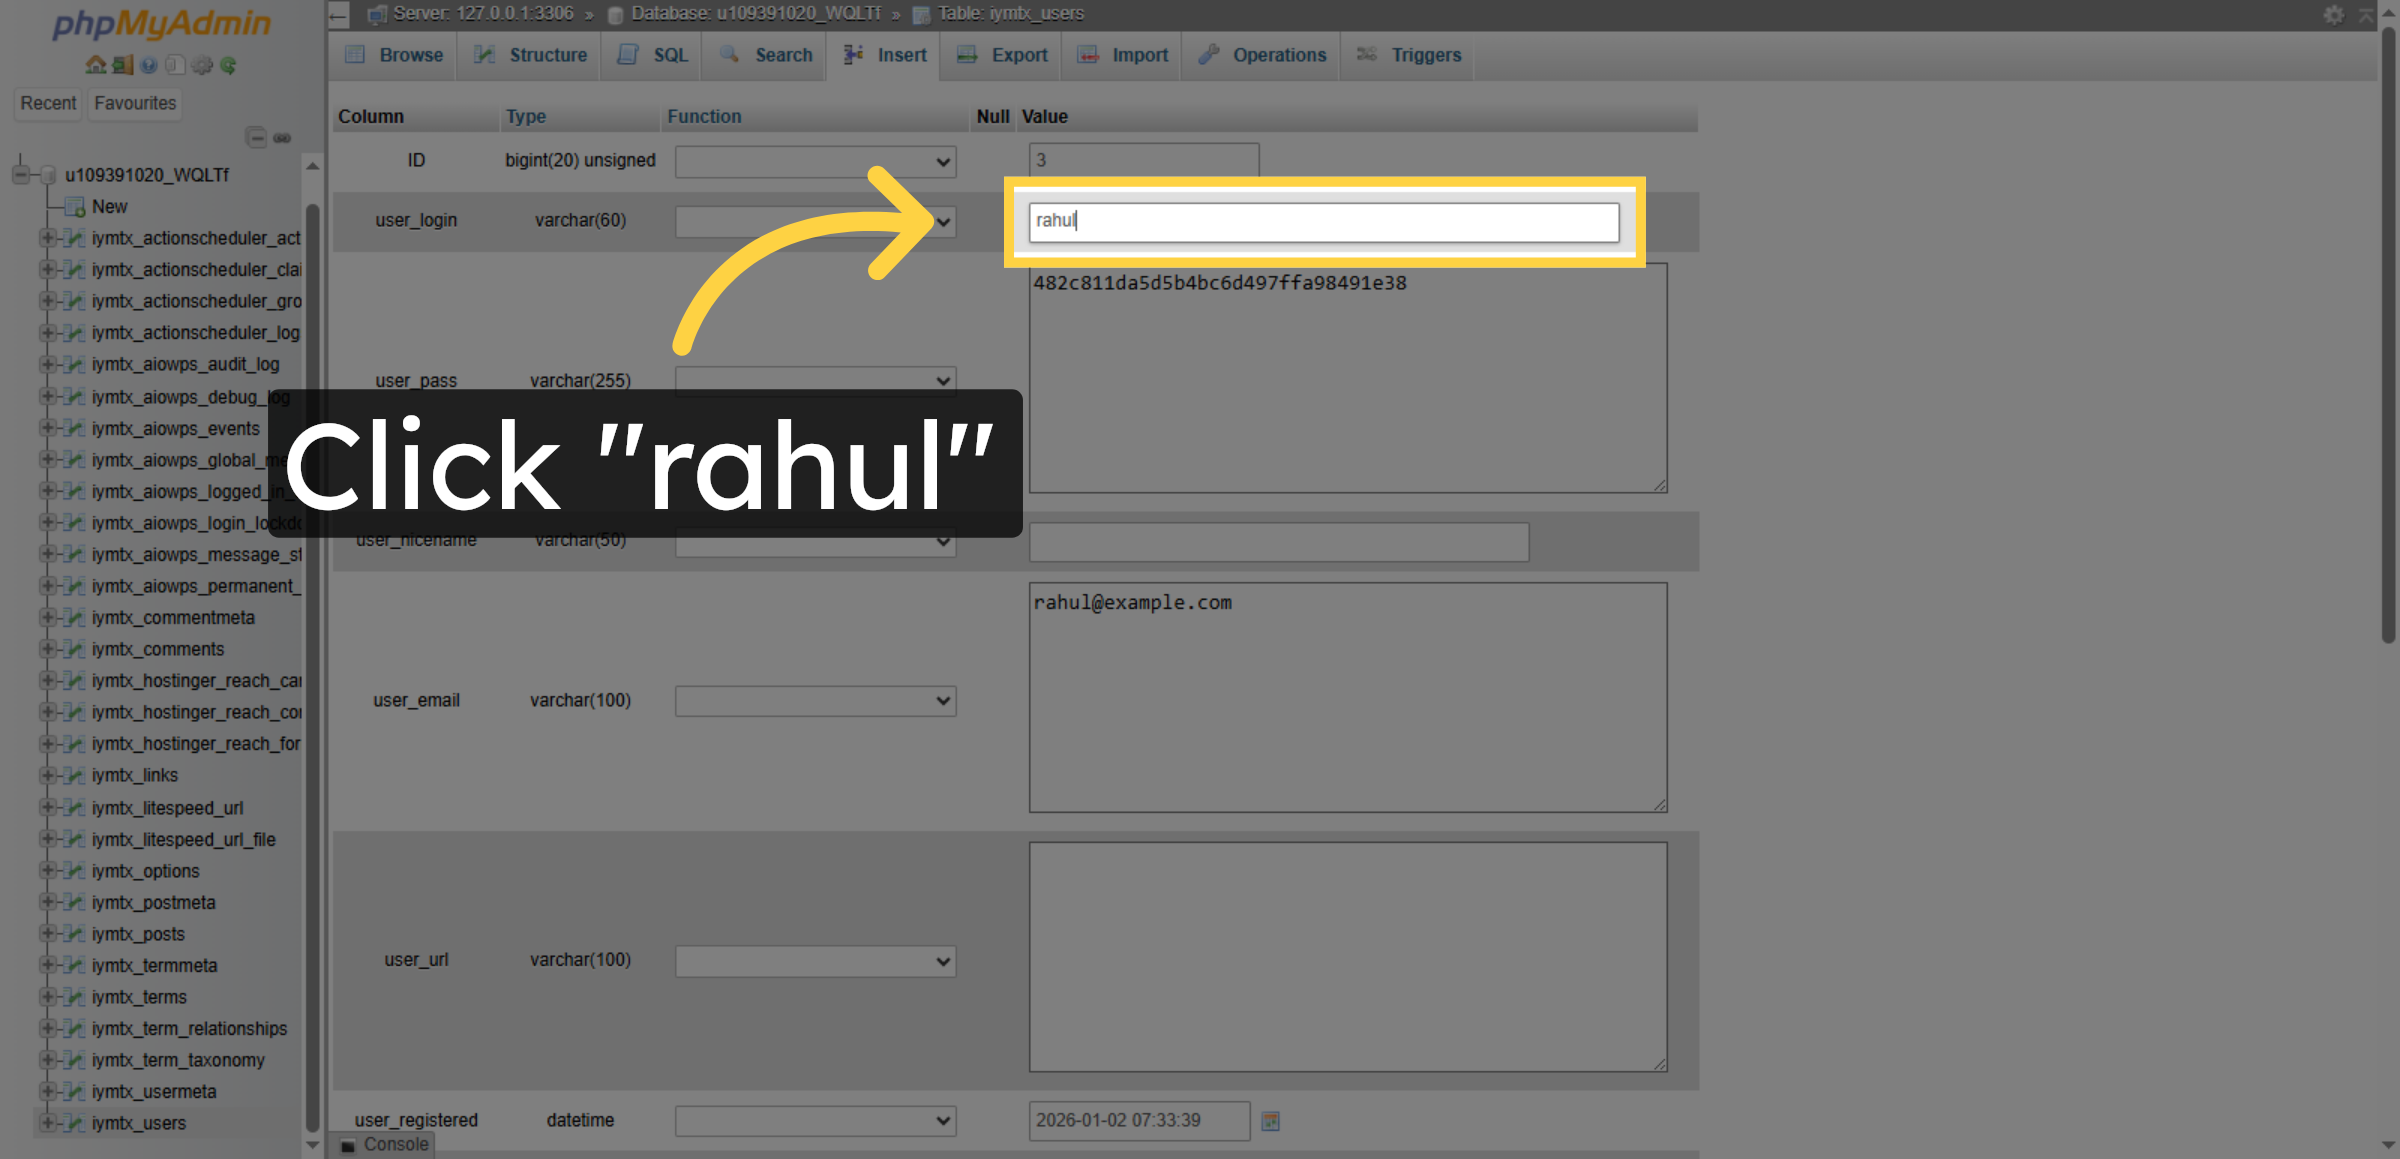
12. Edit User Record
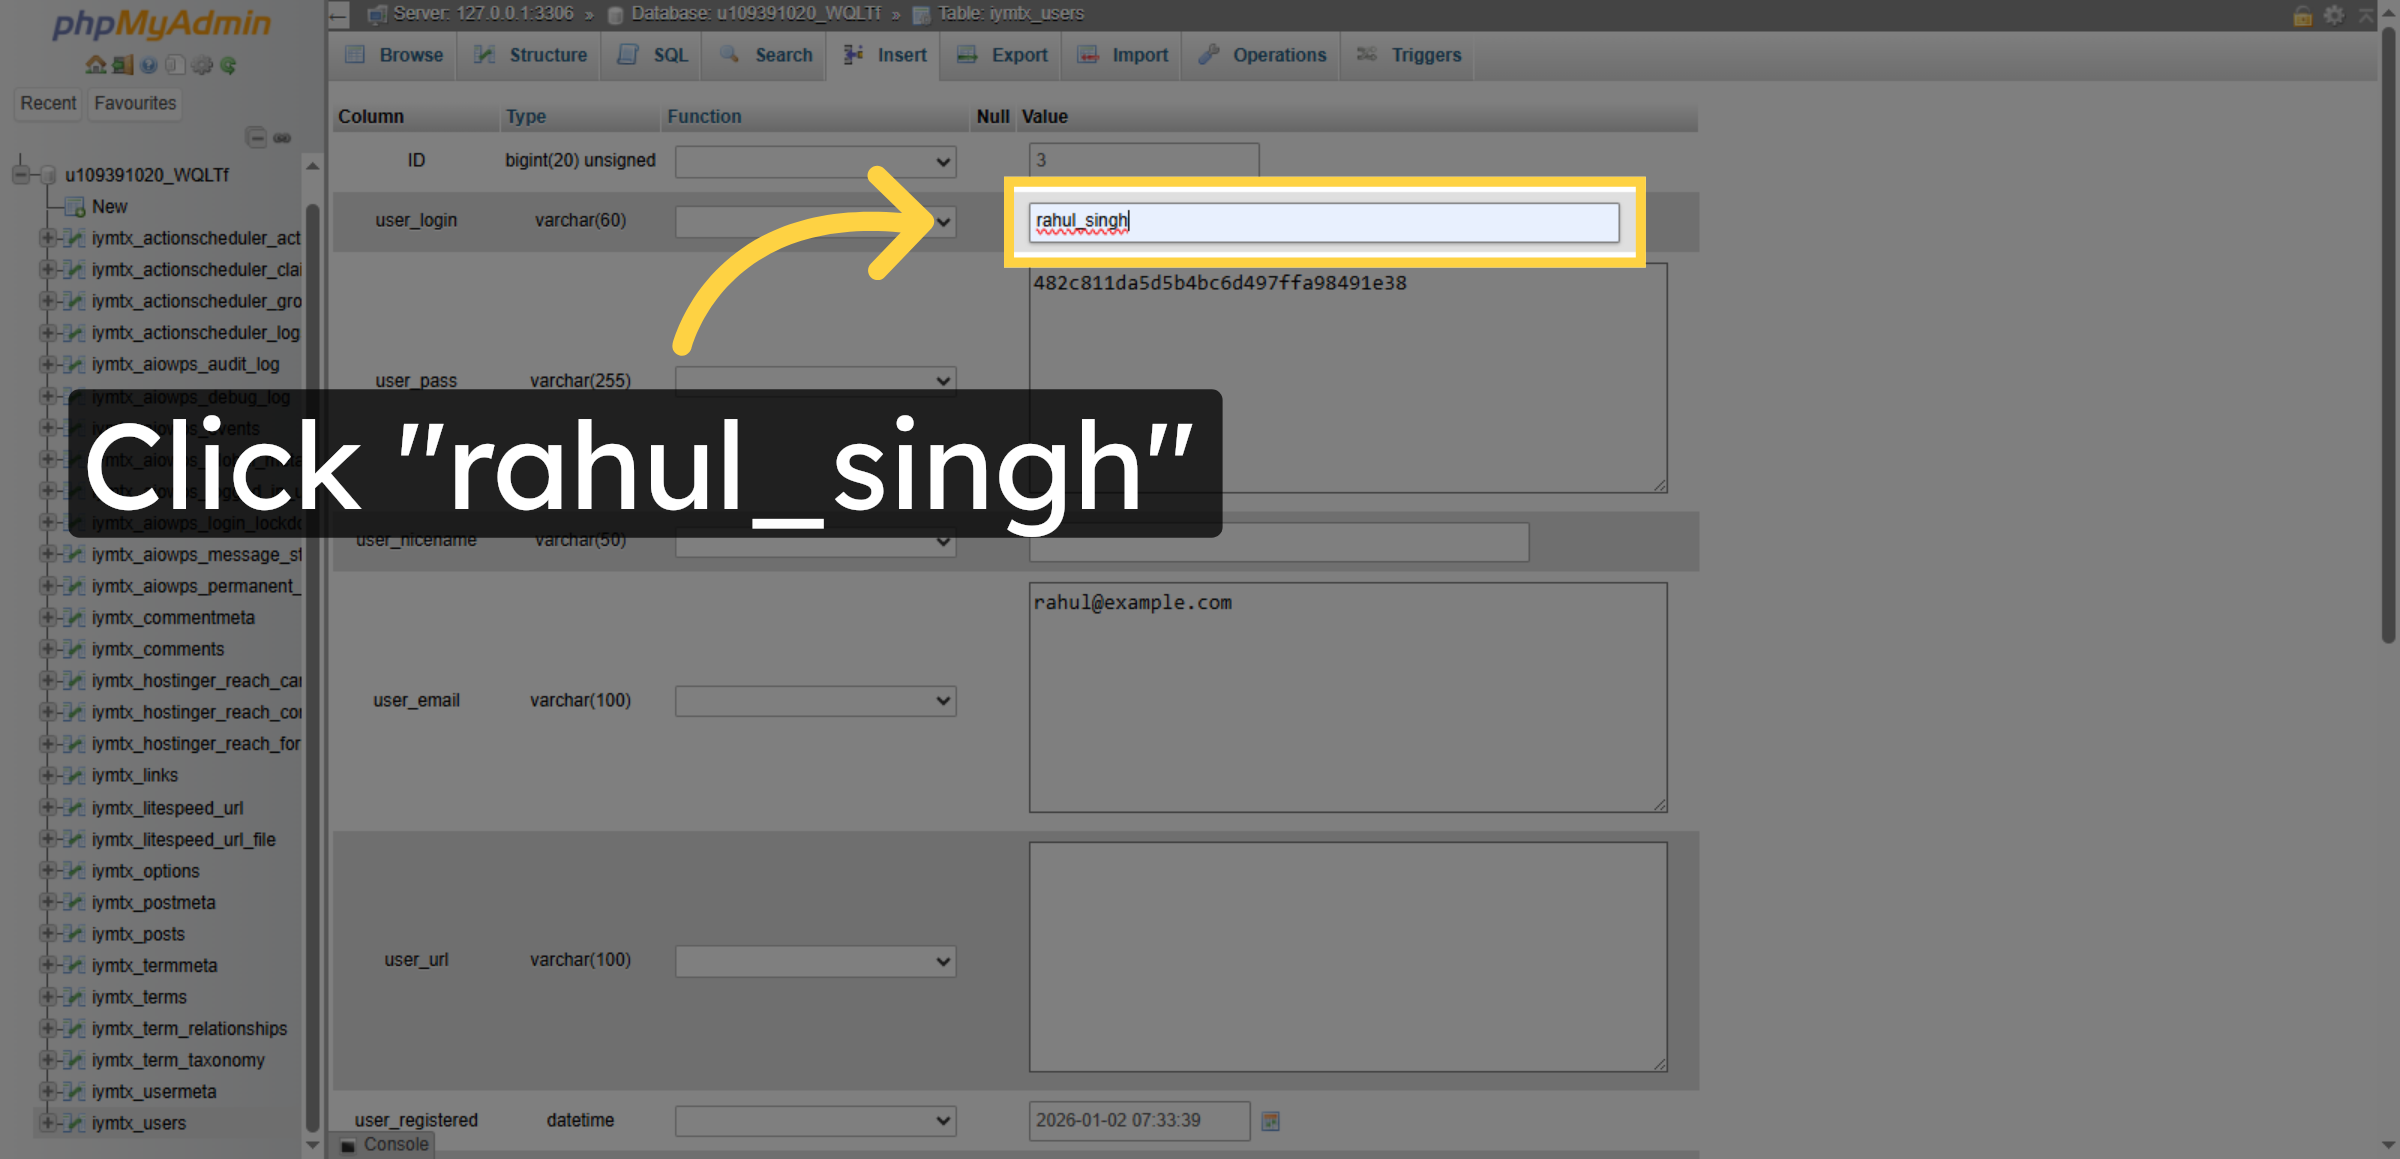
13. Select Username Field
14. Select Updated Username
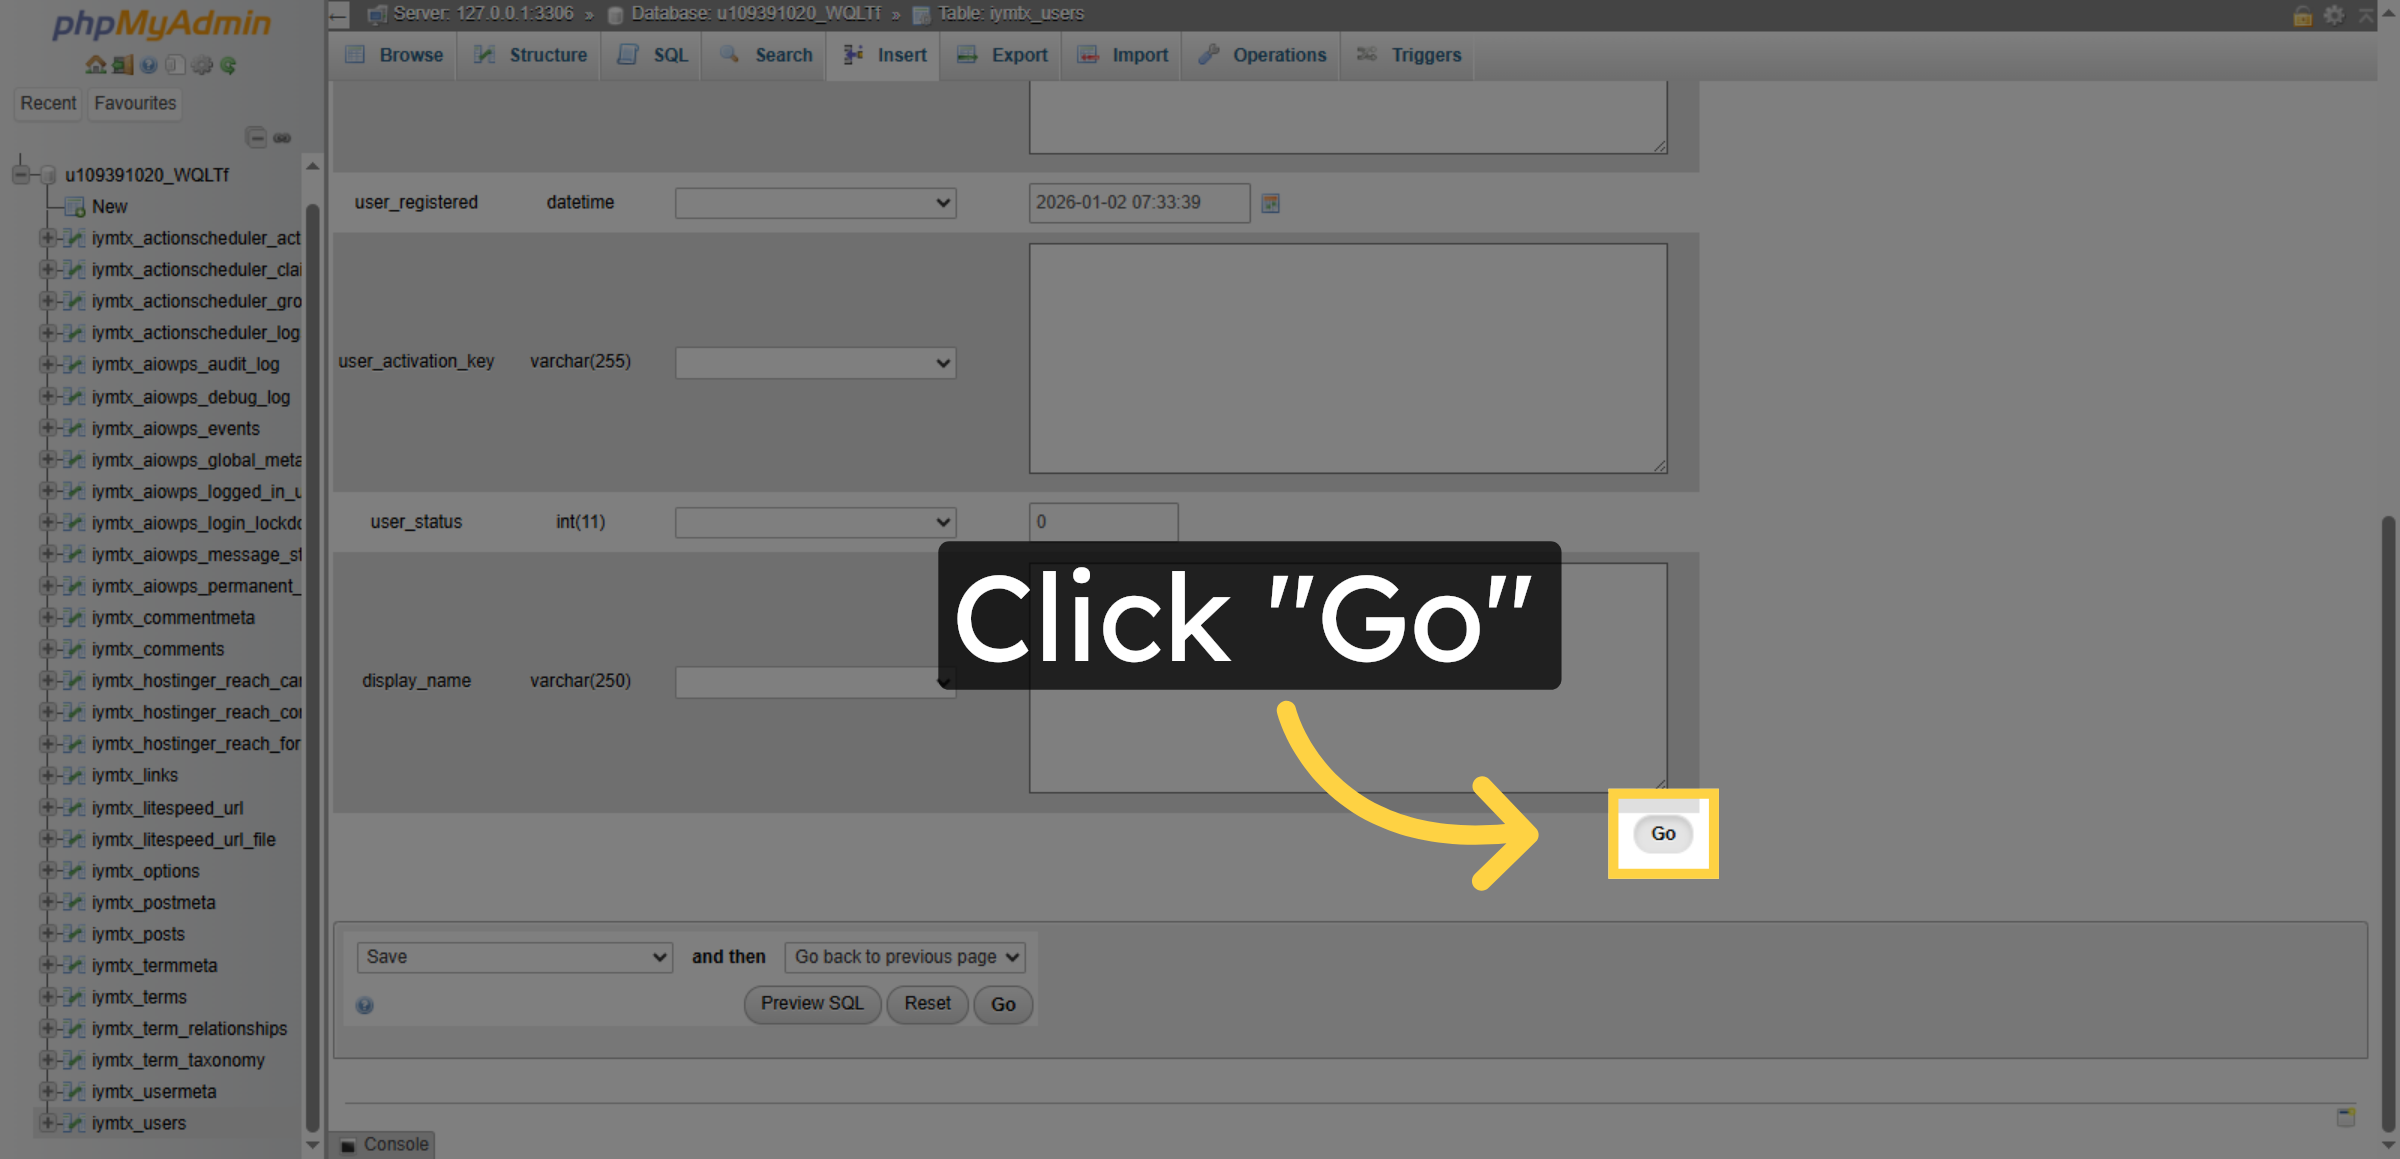
15. Save Changes
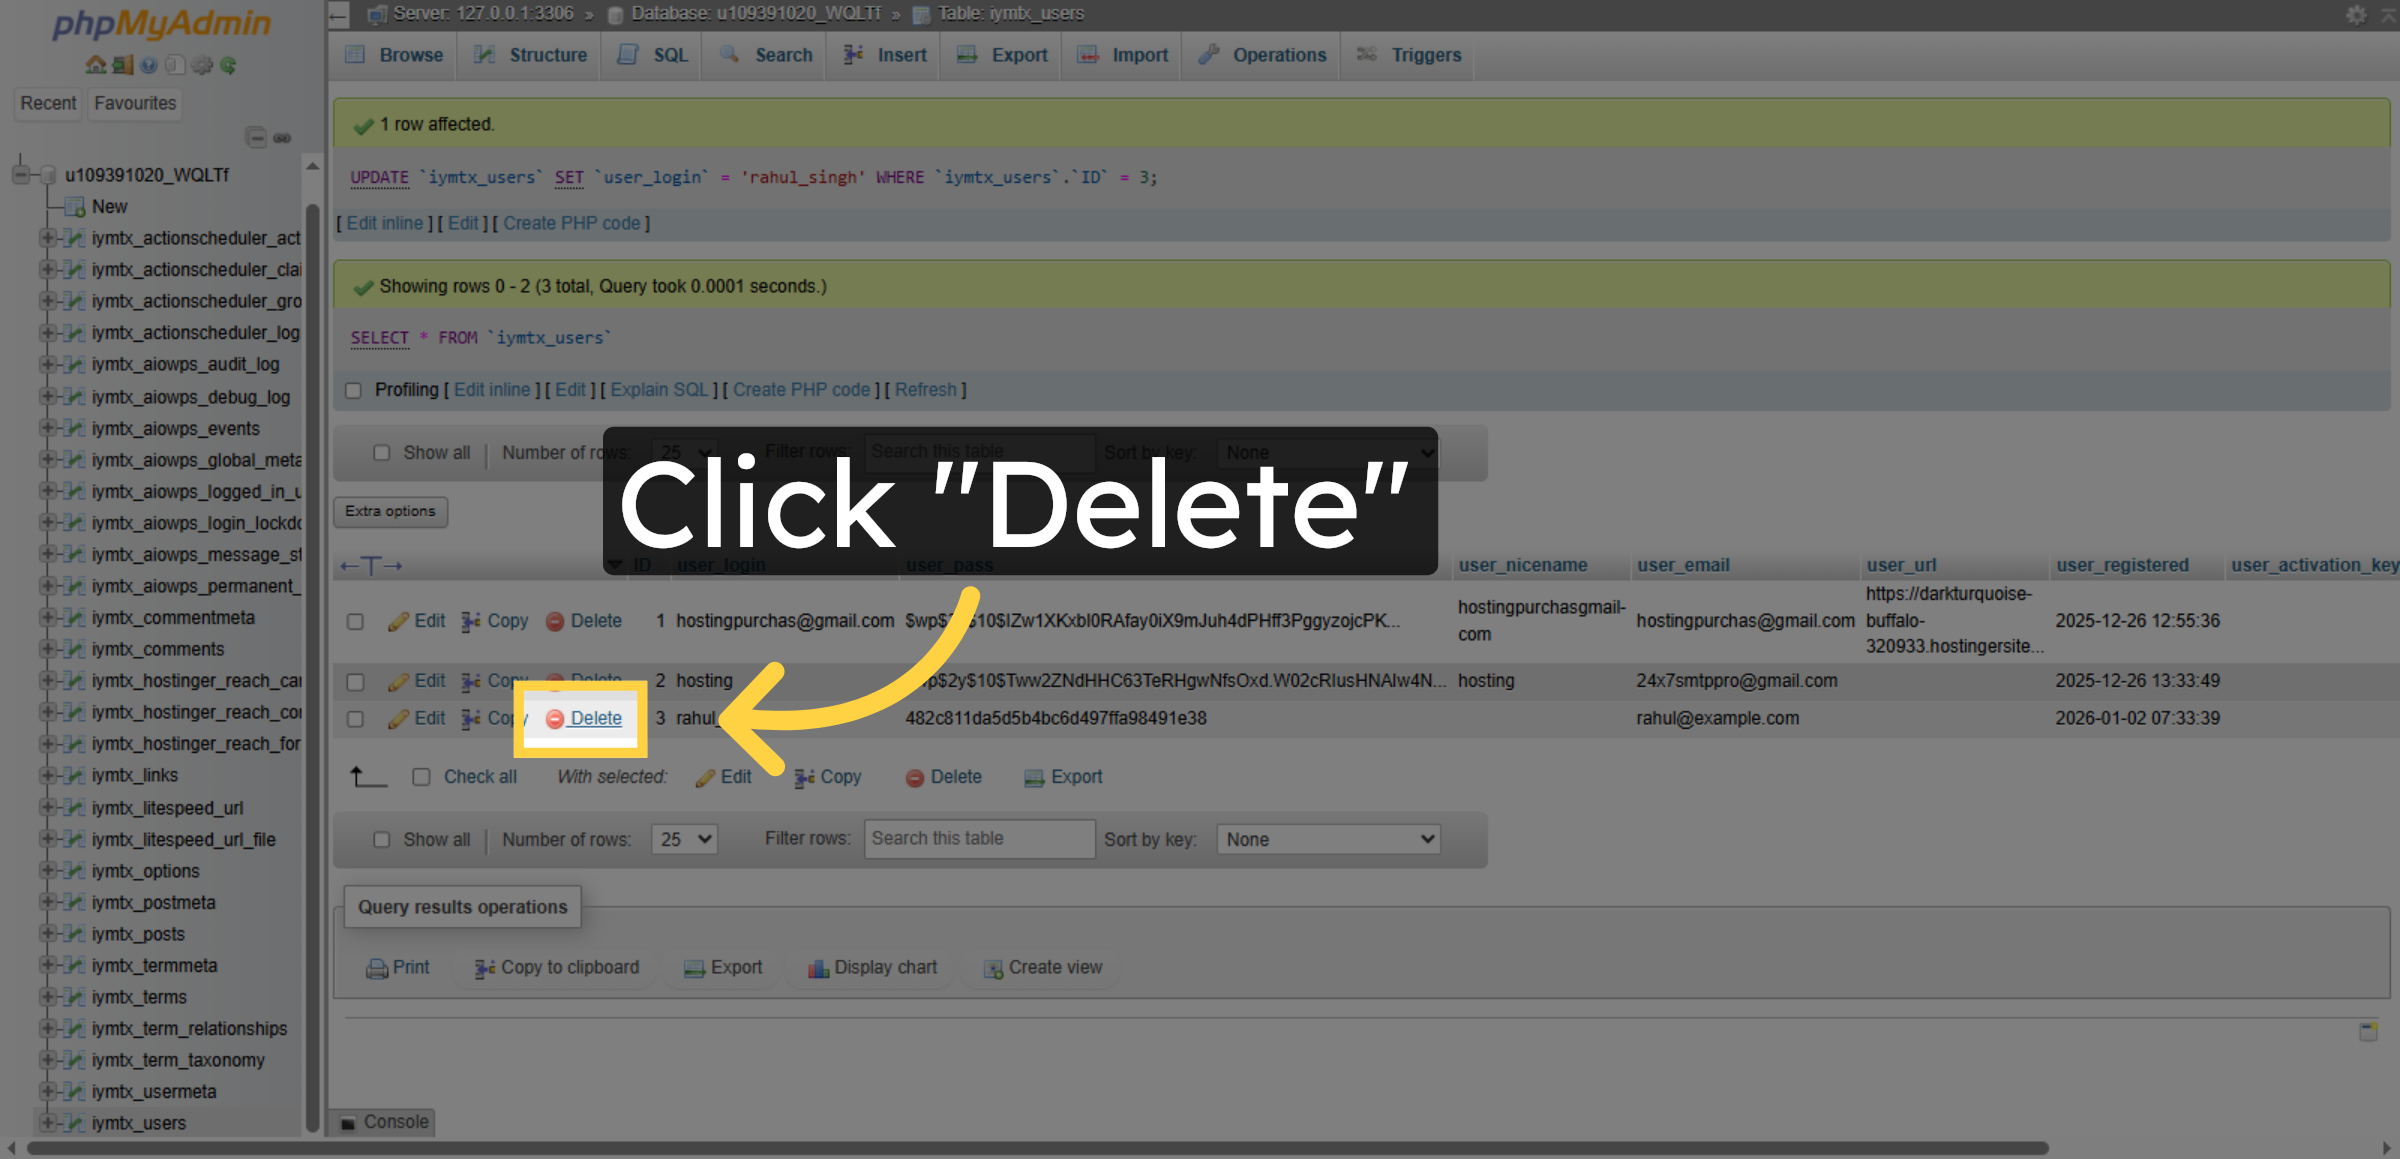
16. Delete User Record
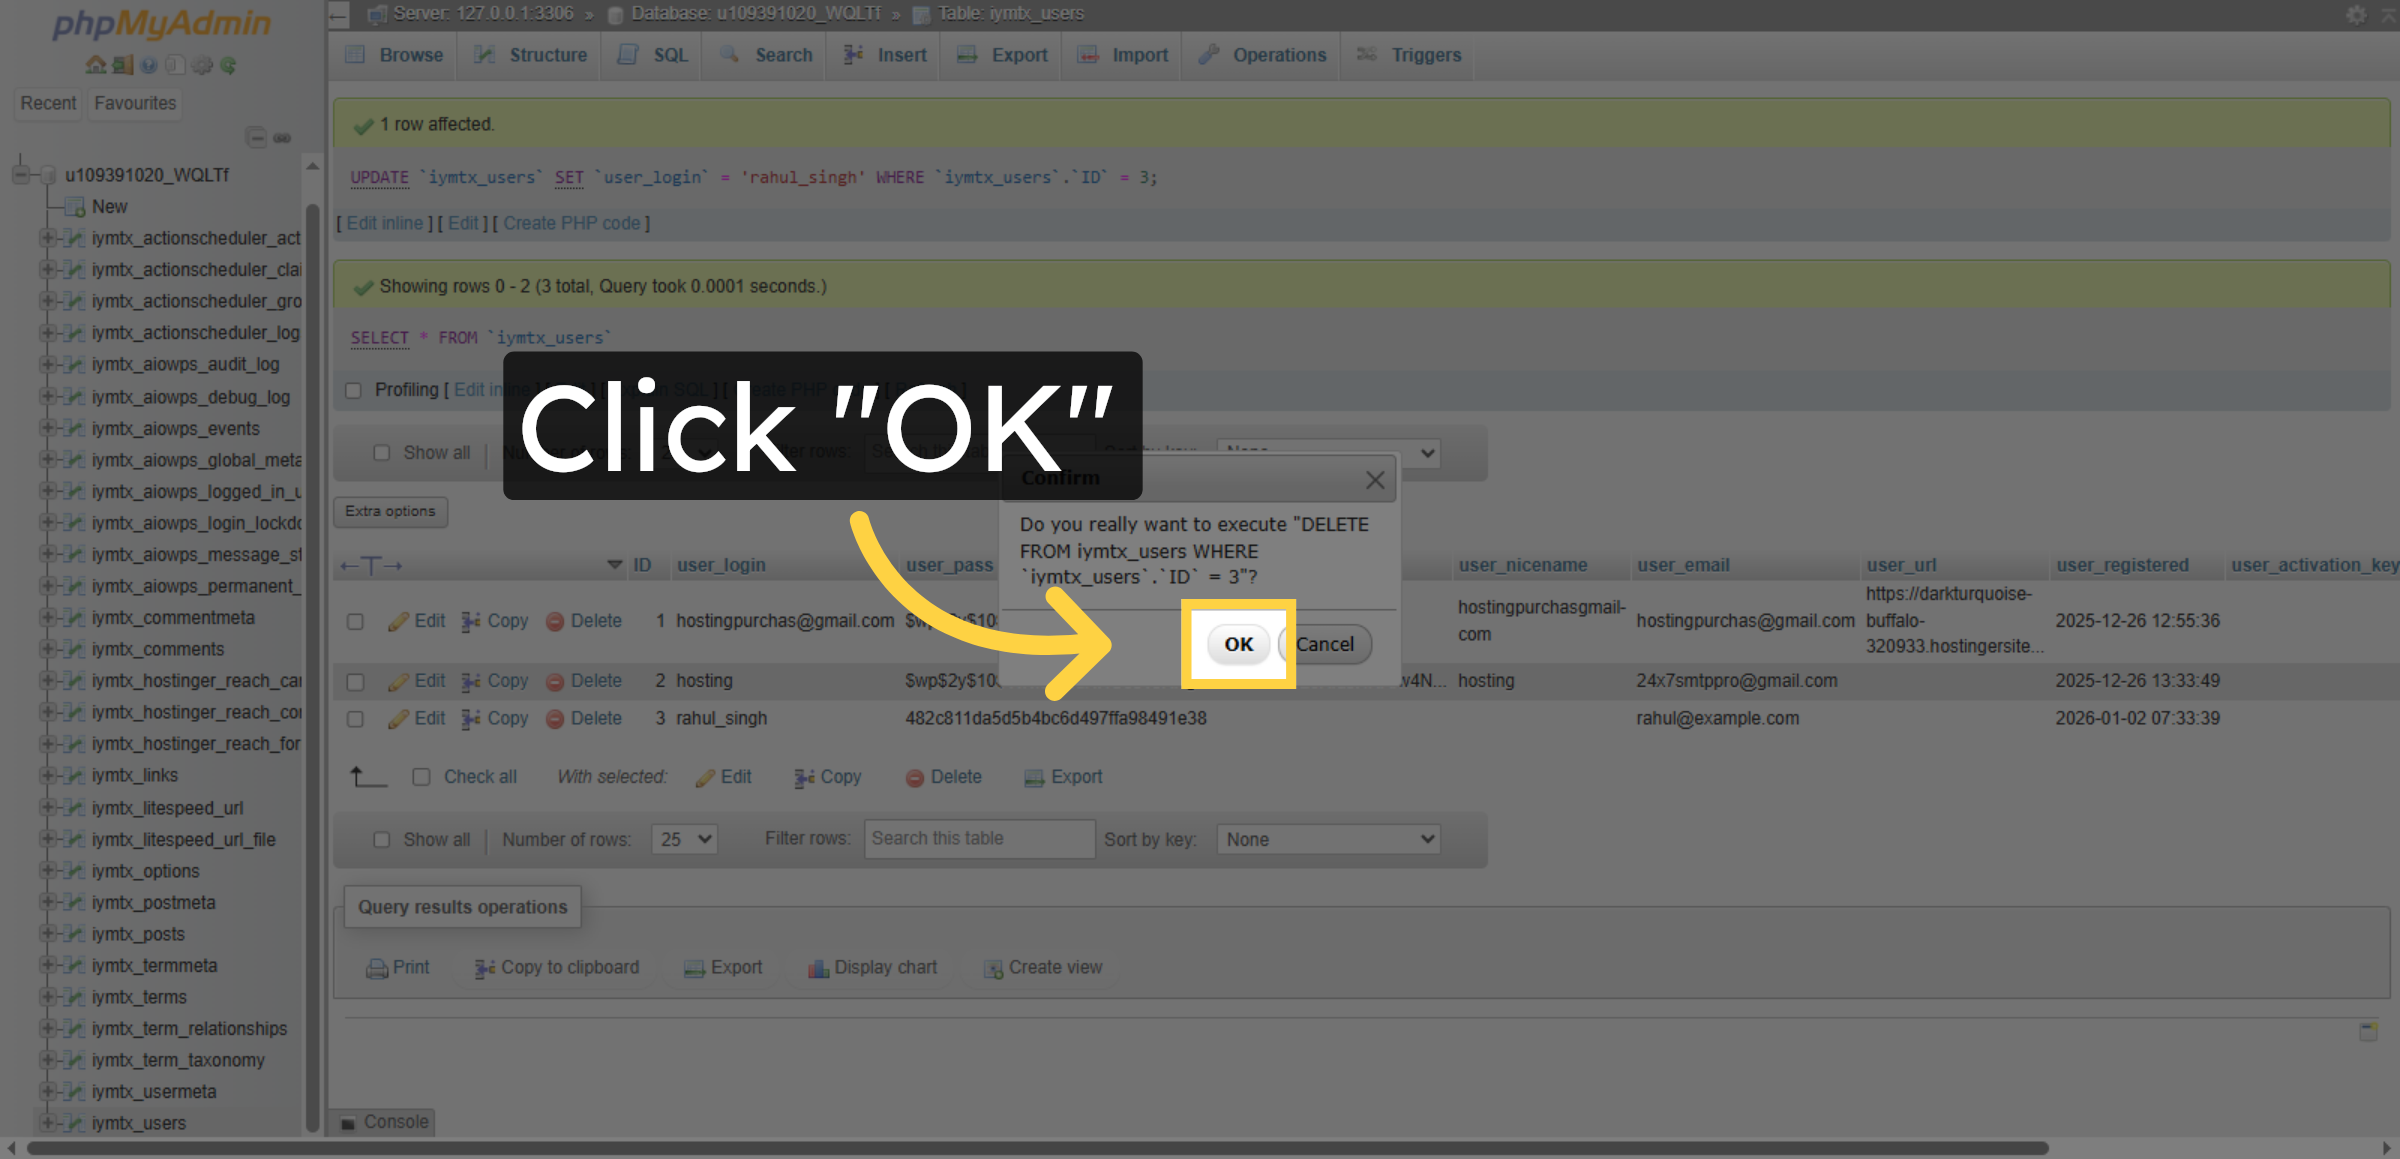
17. Confirm Deletion
Conclusion
By following this guidde, you have successfully accessed and managed your WordPress database using phpMyAdmin in Hostinger. You learned how to view user tables, execute SQL queries, edit database entries, and delete records securely. Proper database management helps improve website stability, enhances security, and ensures smooth WordPress operations. Regular backups and careful handling of database changes are recommended to avoid data loss.
WooHelpDesk Support
Need expert assistance with WordPress database management, backups, optimization, or recovery?
Visit: https://www.woohelpdesk.com
Call Us Toll-Free: +1 888 602 0119 (US & Canada)
Our specialists are available to help you manage and protect your website data with confidence.


