How to Fix Slow WordPress Admin Dashboard On HostGator Hosting
Introduction
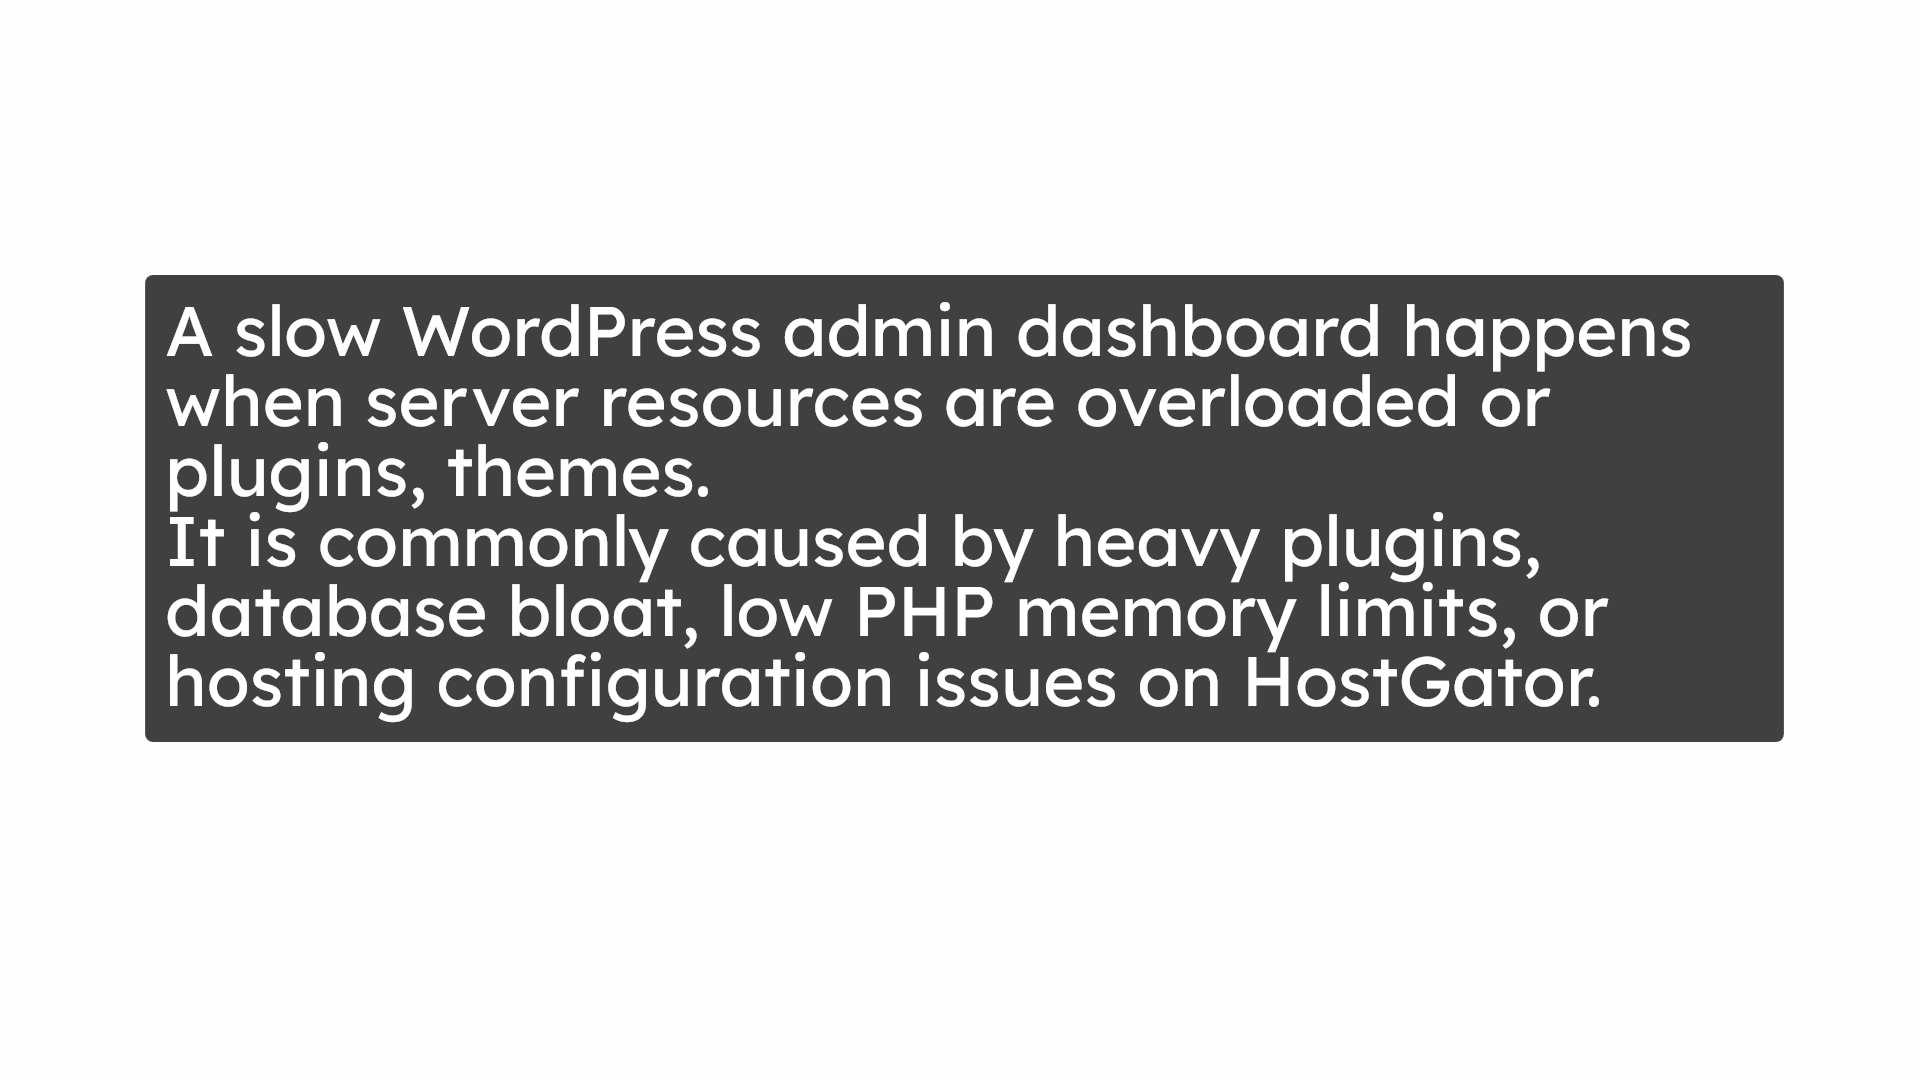
A slow WordPress admin dashboard can significantly affect productivity, website management efficiency, and overall system performance. Delayed loading times, unresponsive menus, and frequent timeouts are often caused by overloaded plugins, unused themes, insufficient server resources, outdated configurations, or unoptimized databases. When left unresolved, these issues can disrupt daily website operations and increase the risk of system errors.
This guidde explains how to fix slow performance issues in the WordPress admin dashboard on HostGator hosting. It provides step-by-step instructions for removing unnecessary plugins and themes, optimizing PHP configuration settings, increasing memory limits, installing performance-enhancing plugins, and cleaning database records. By following this guide, website administrators can restore dashboard responsiveness, improve backend efficiency, and maintain a smooth website management experience.
1. Problem Slow WordPress Admin Dashboard.
2. Log In to WordPress Dashboard

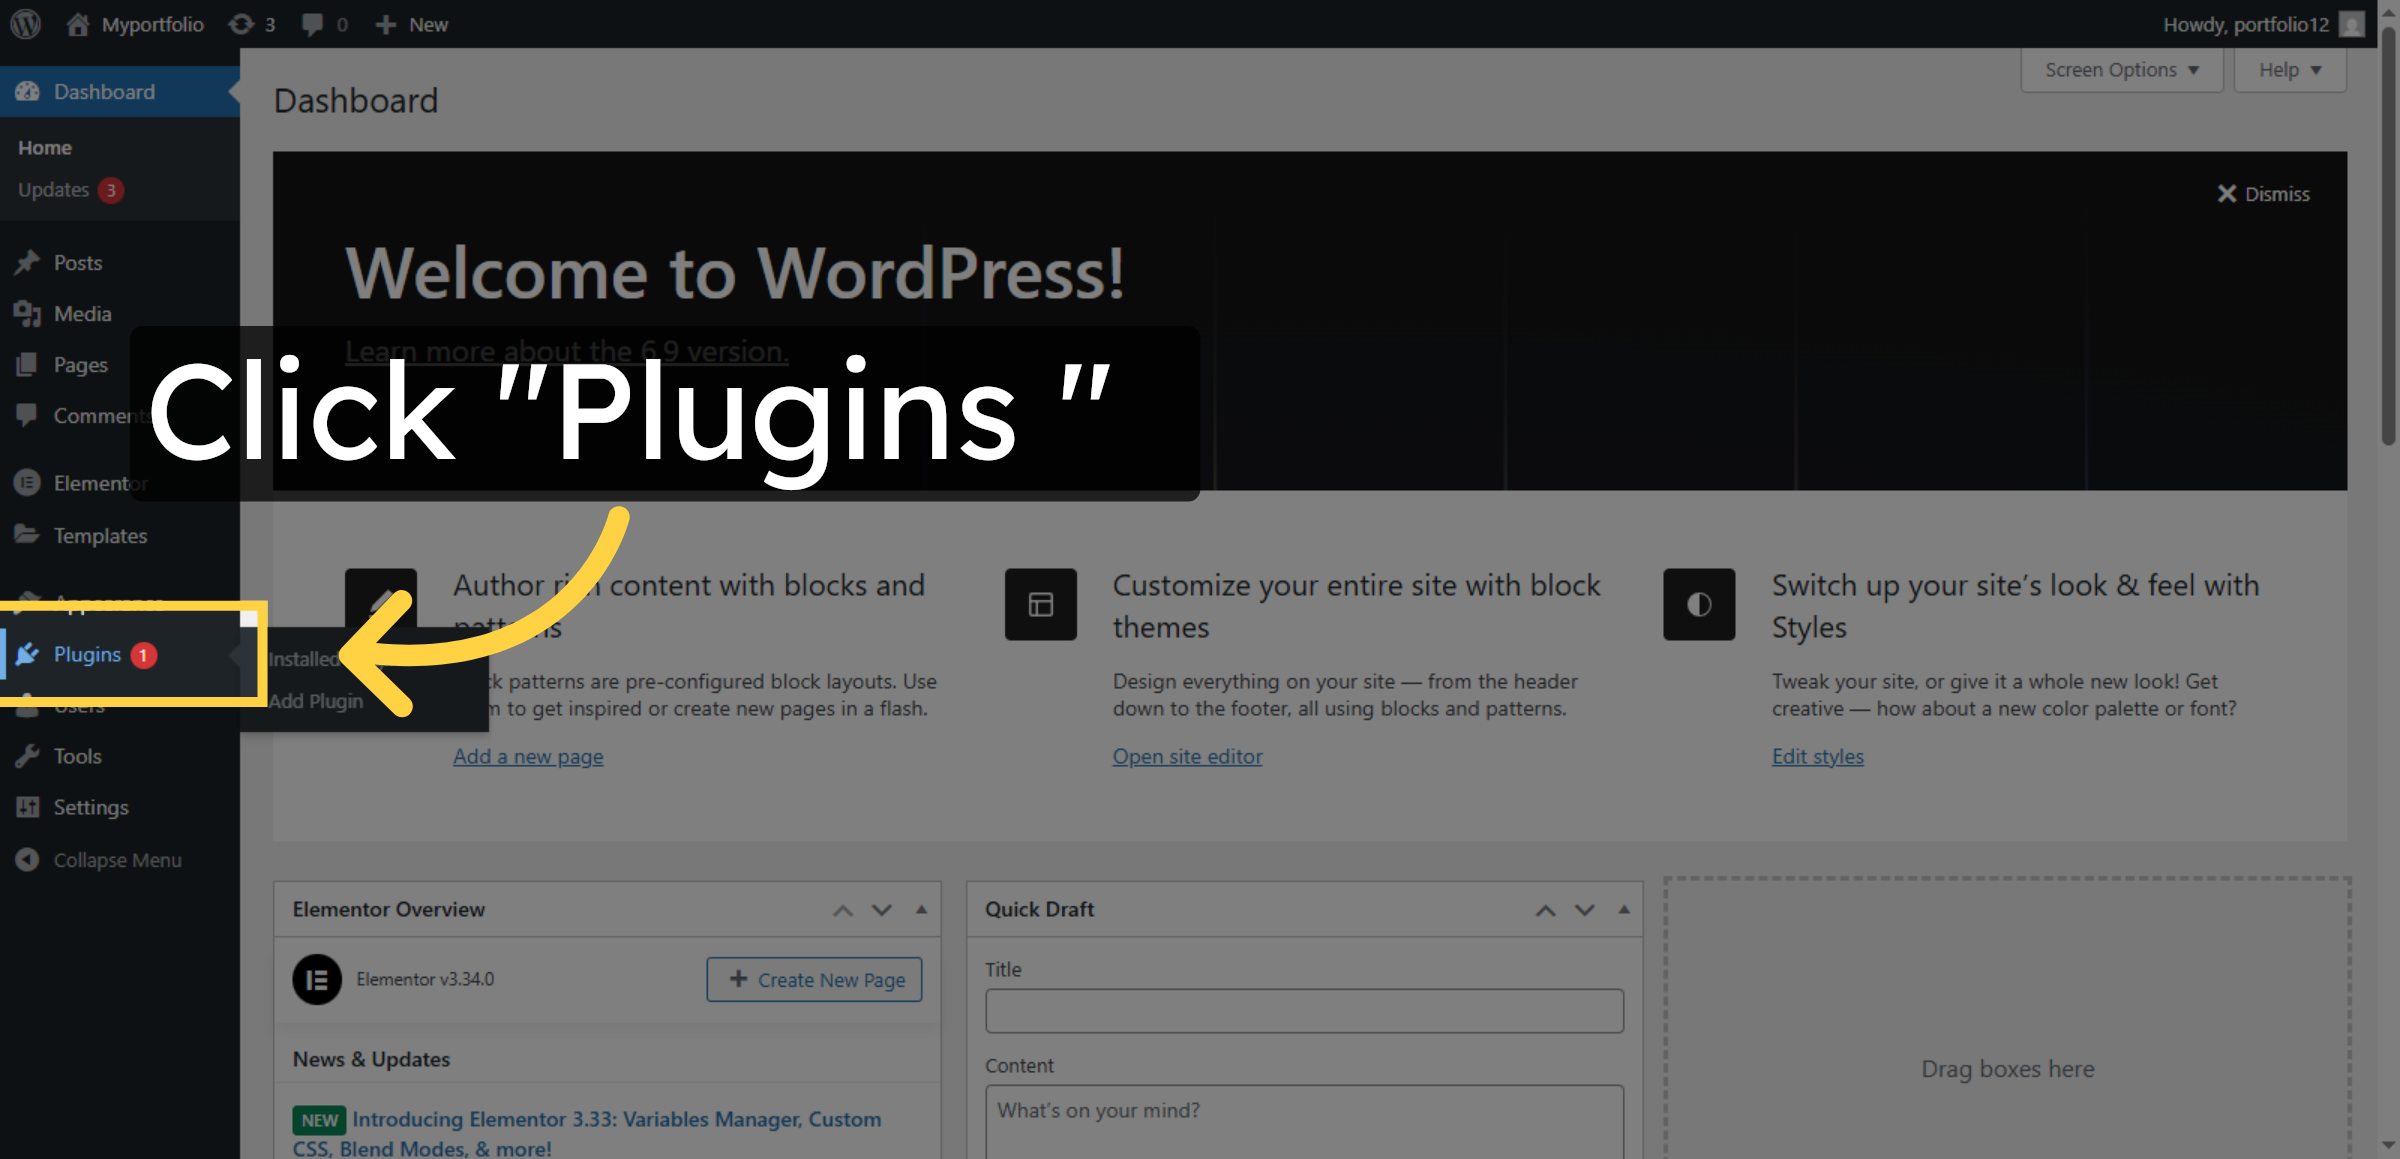
3. Open Plugins Section
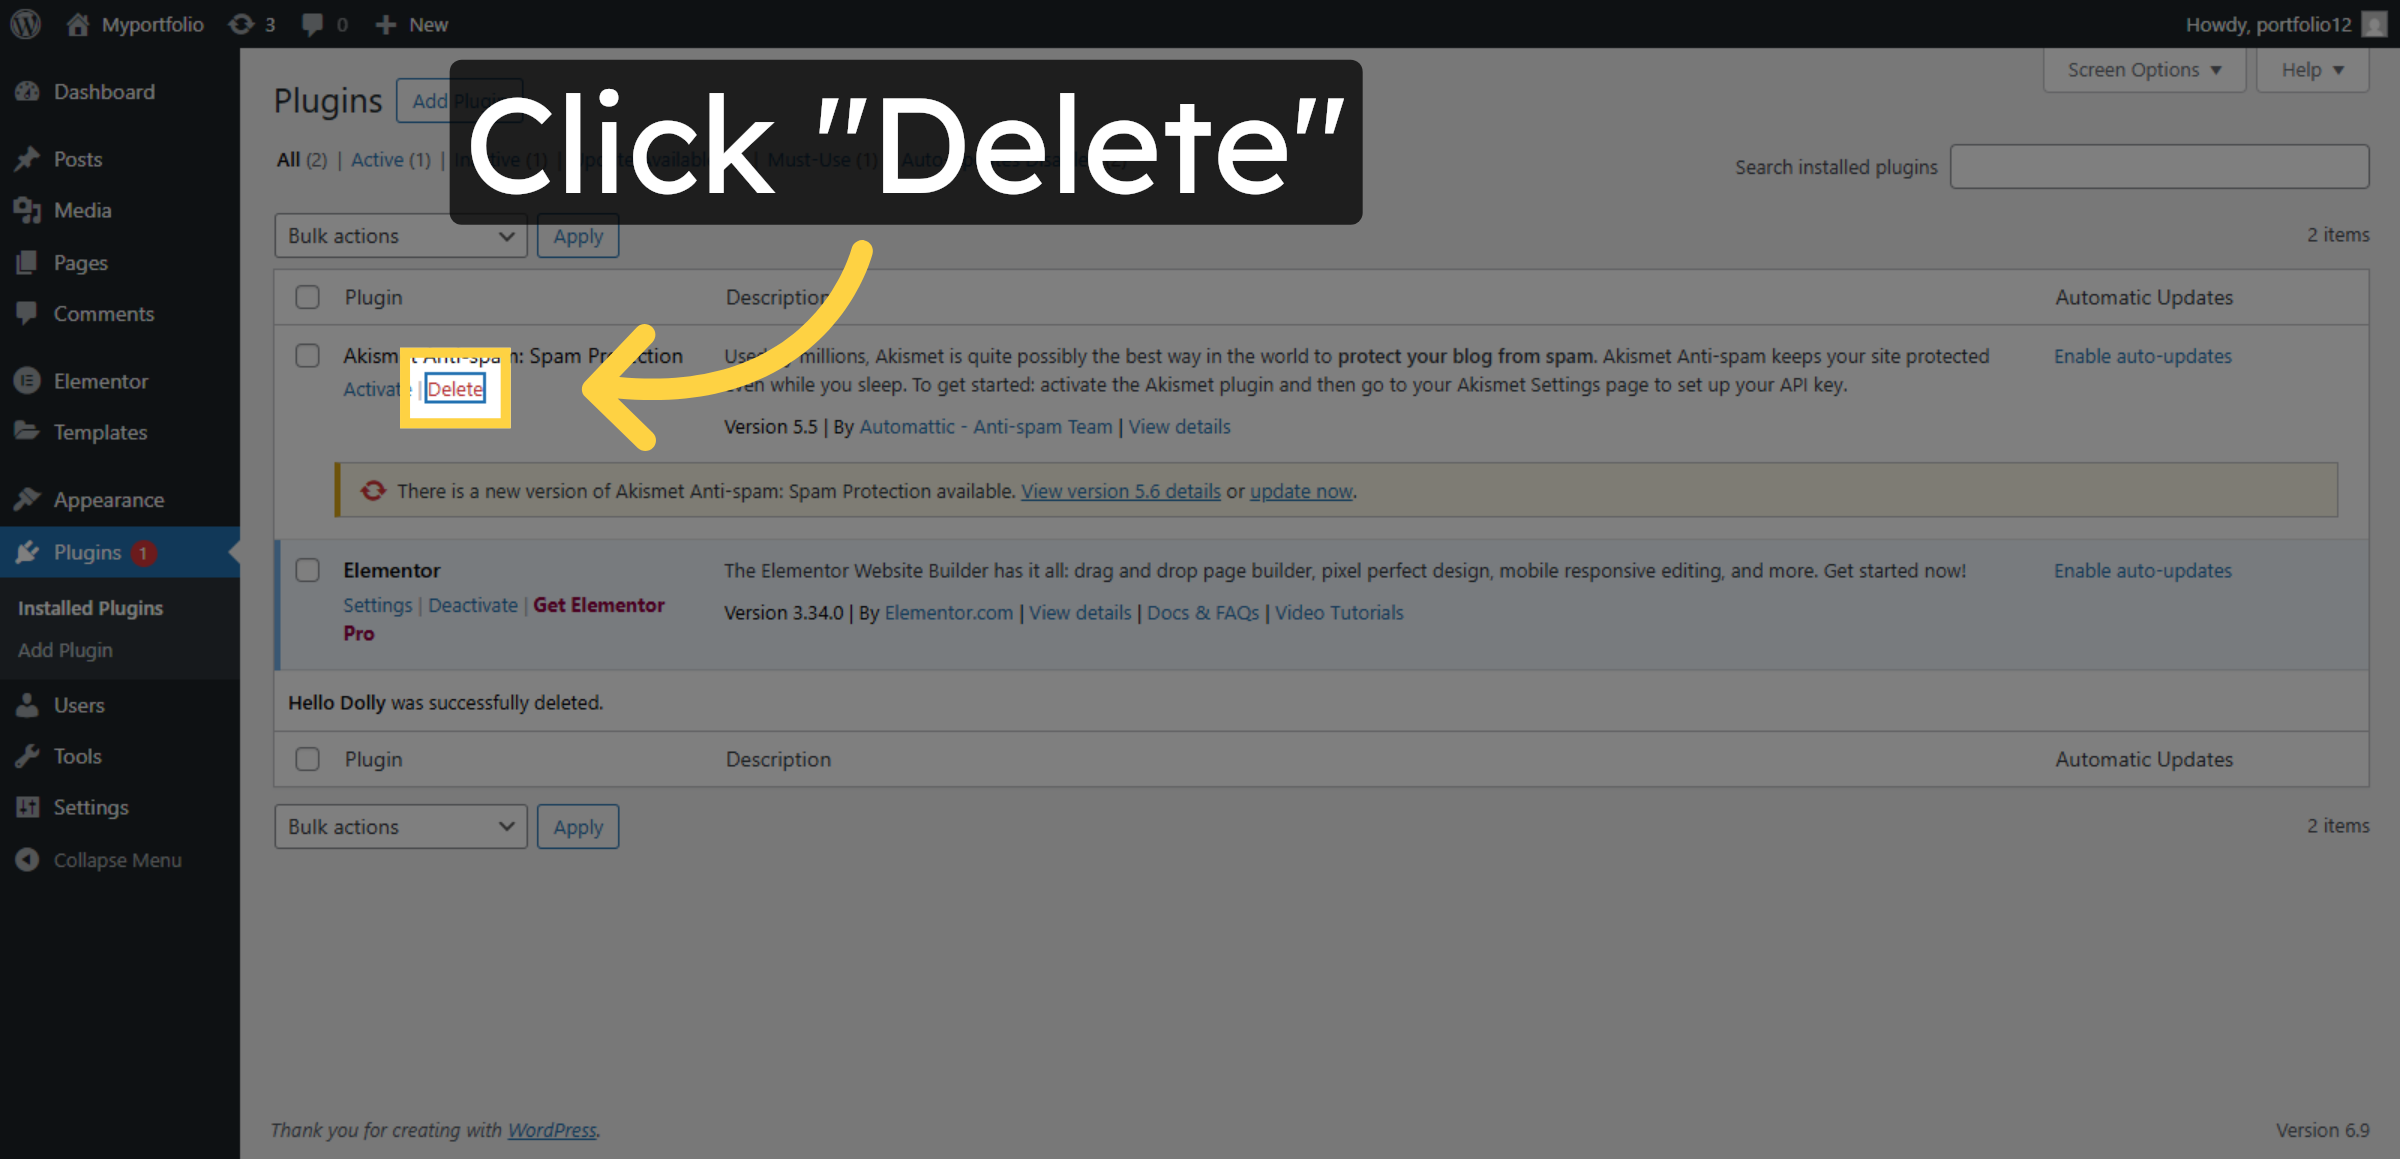
4. Initiate Plugin Deletion
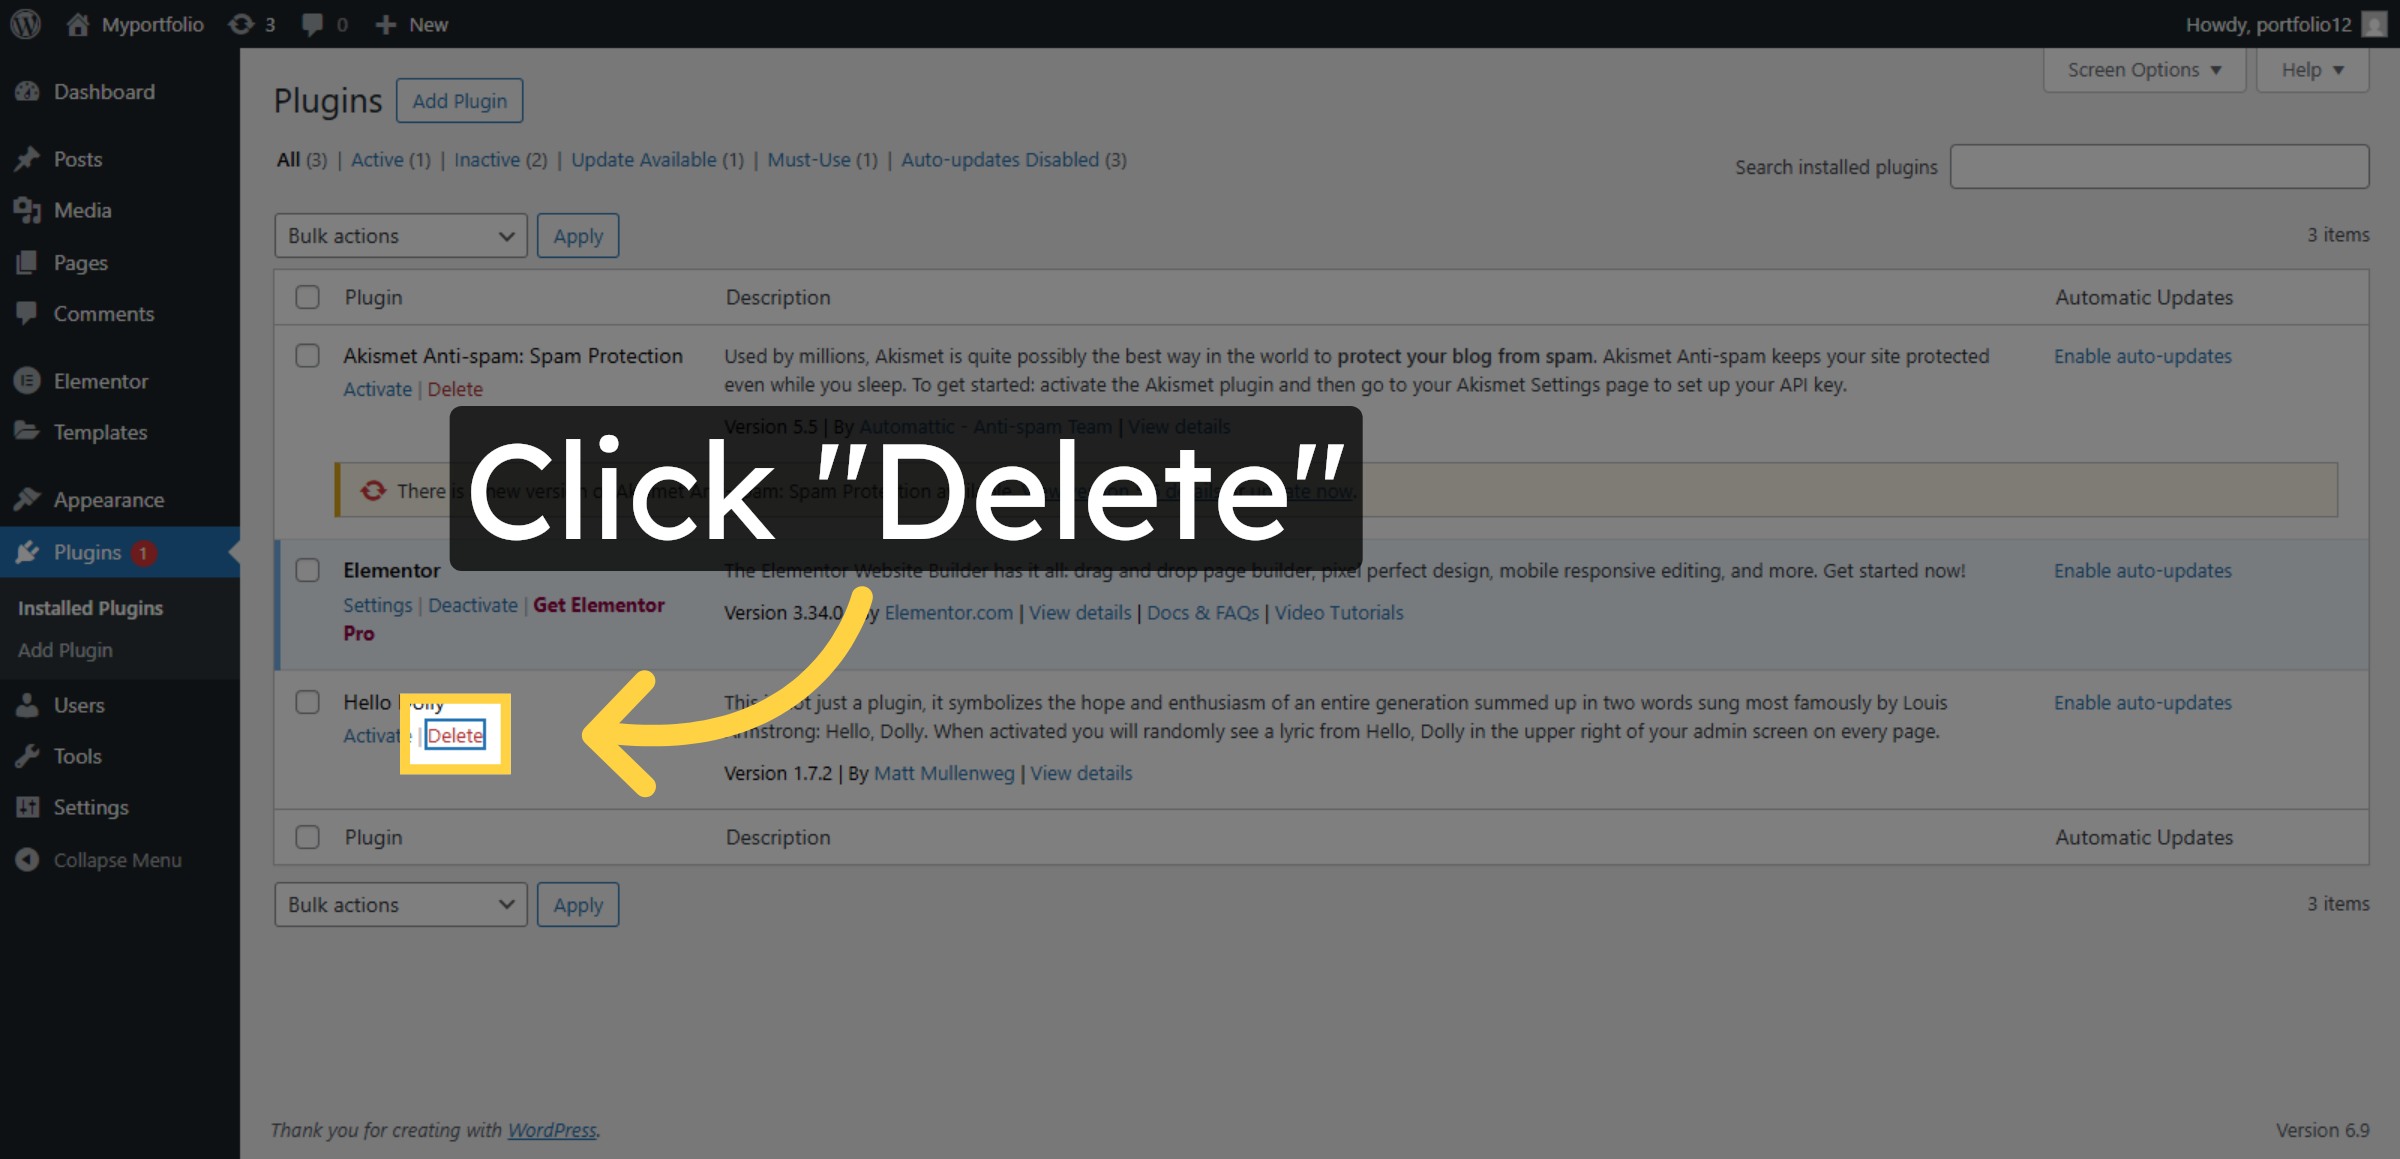
5. Confirm Plugin Deletion
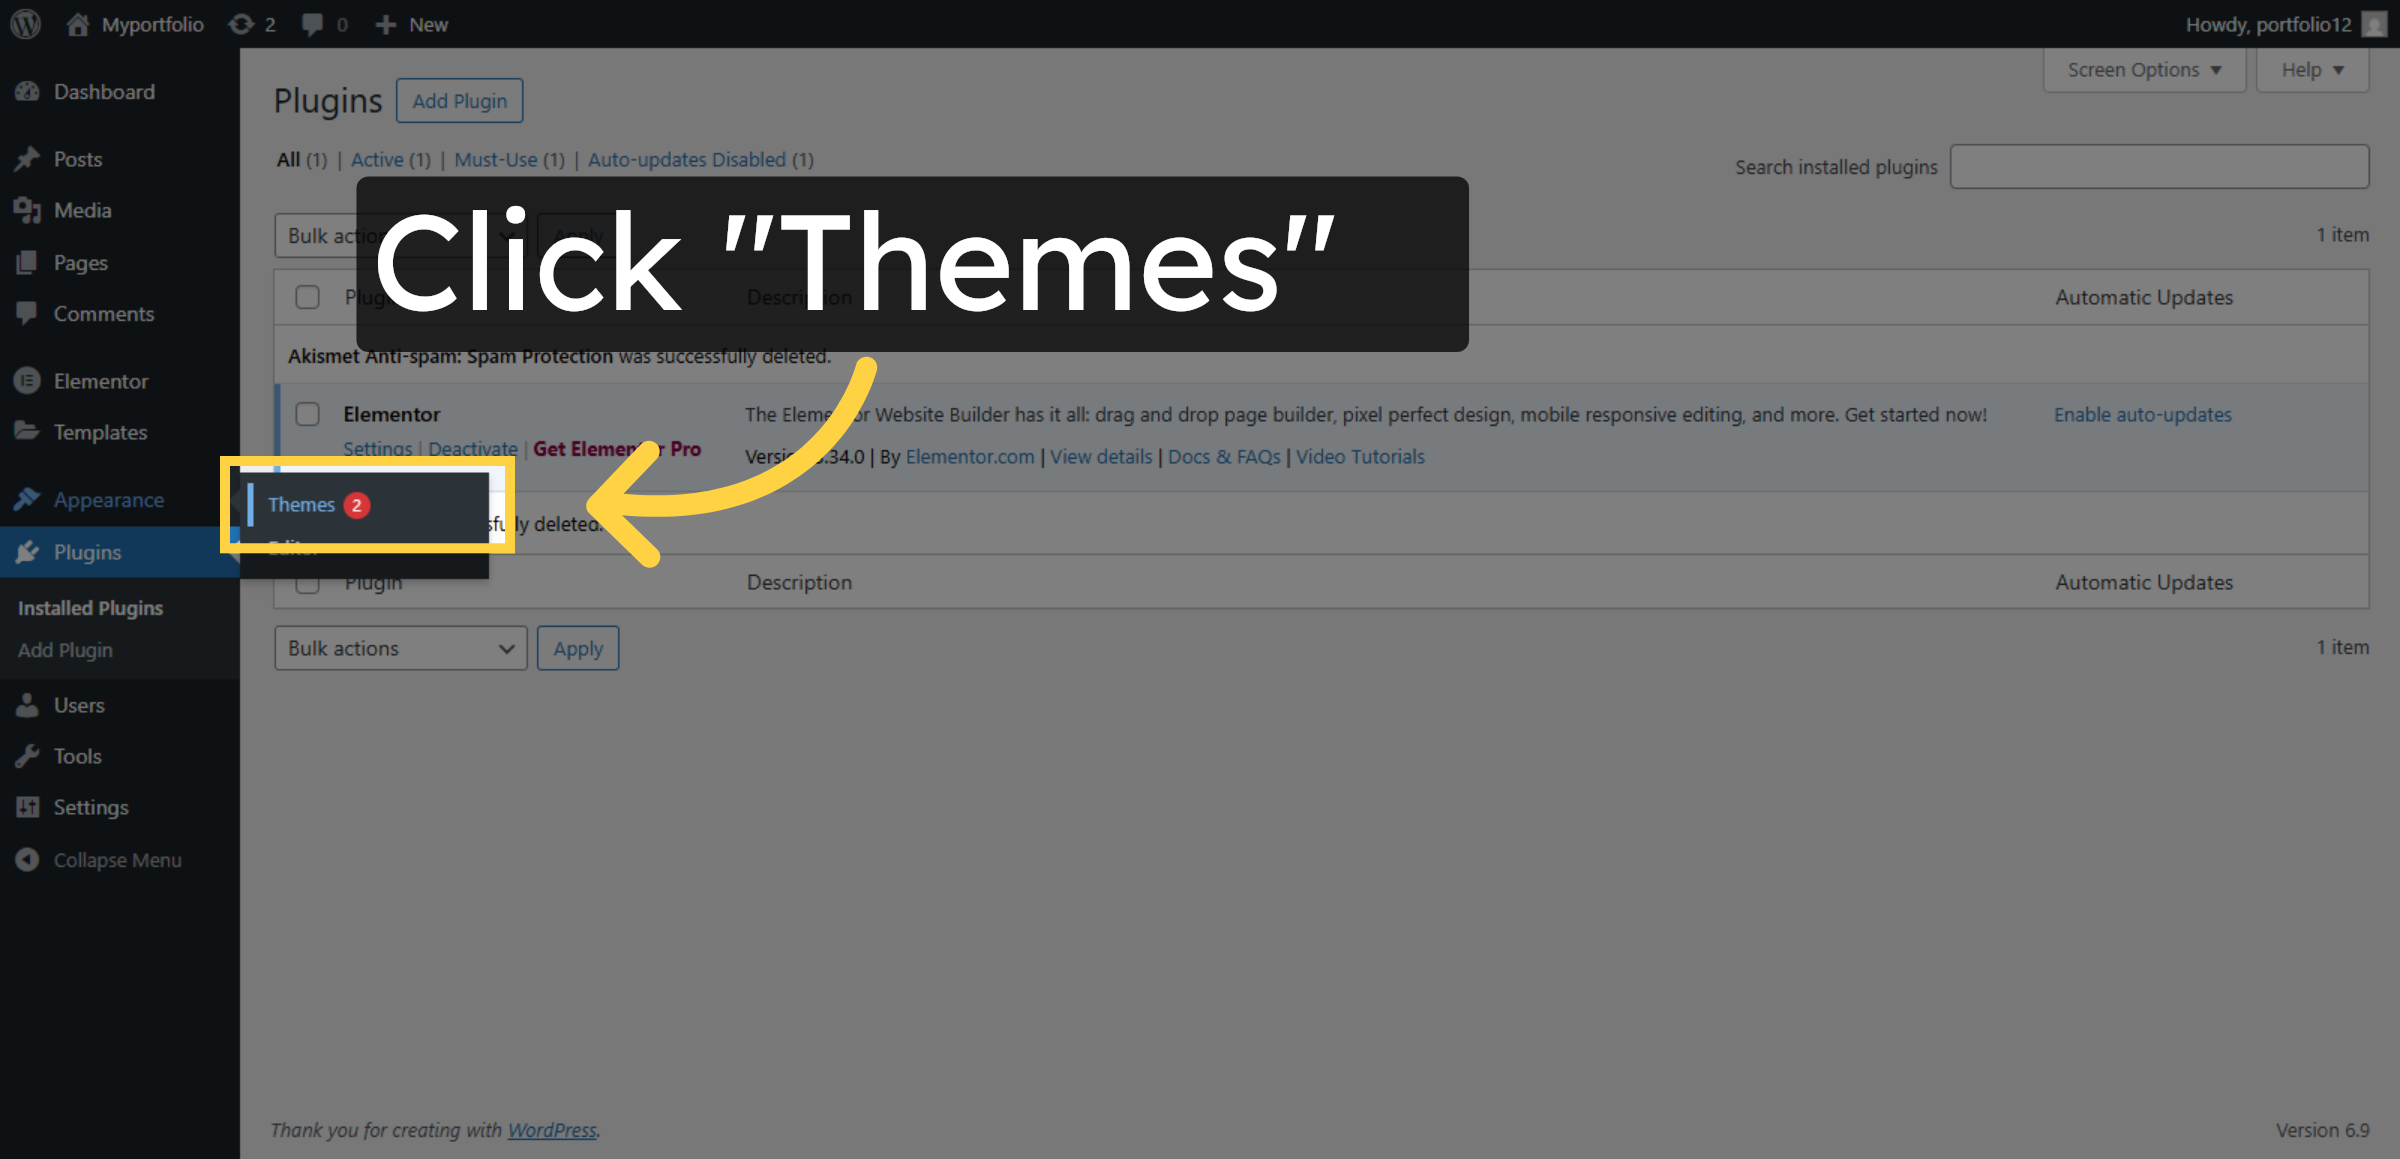
6. Return To Themes Section
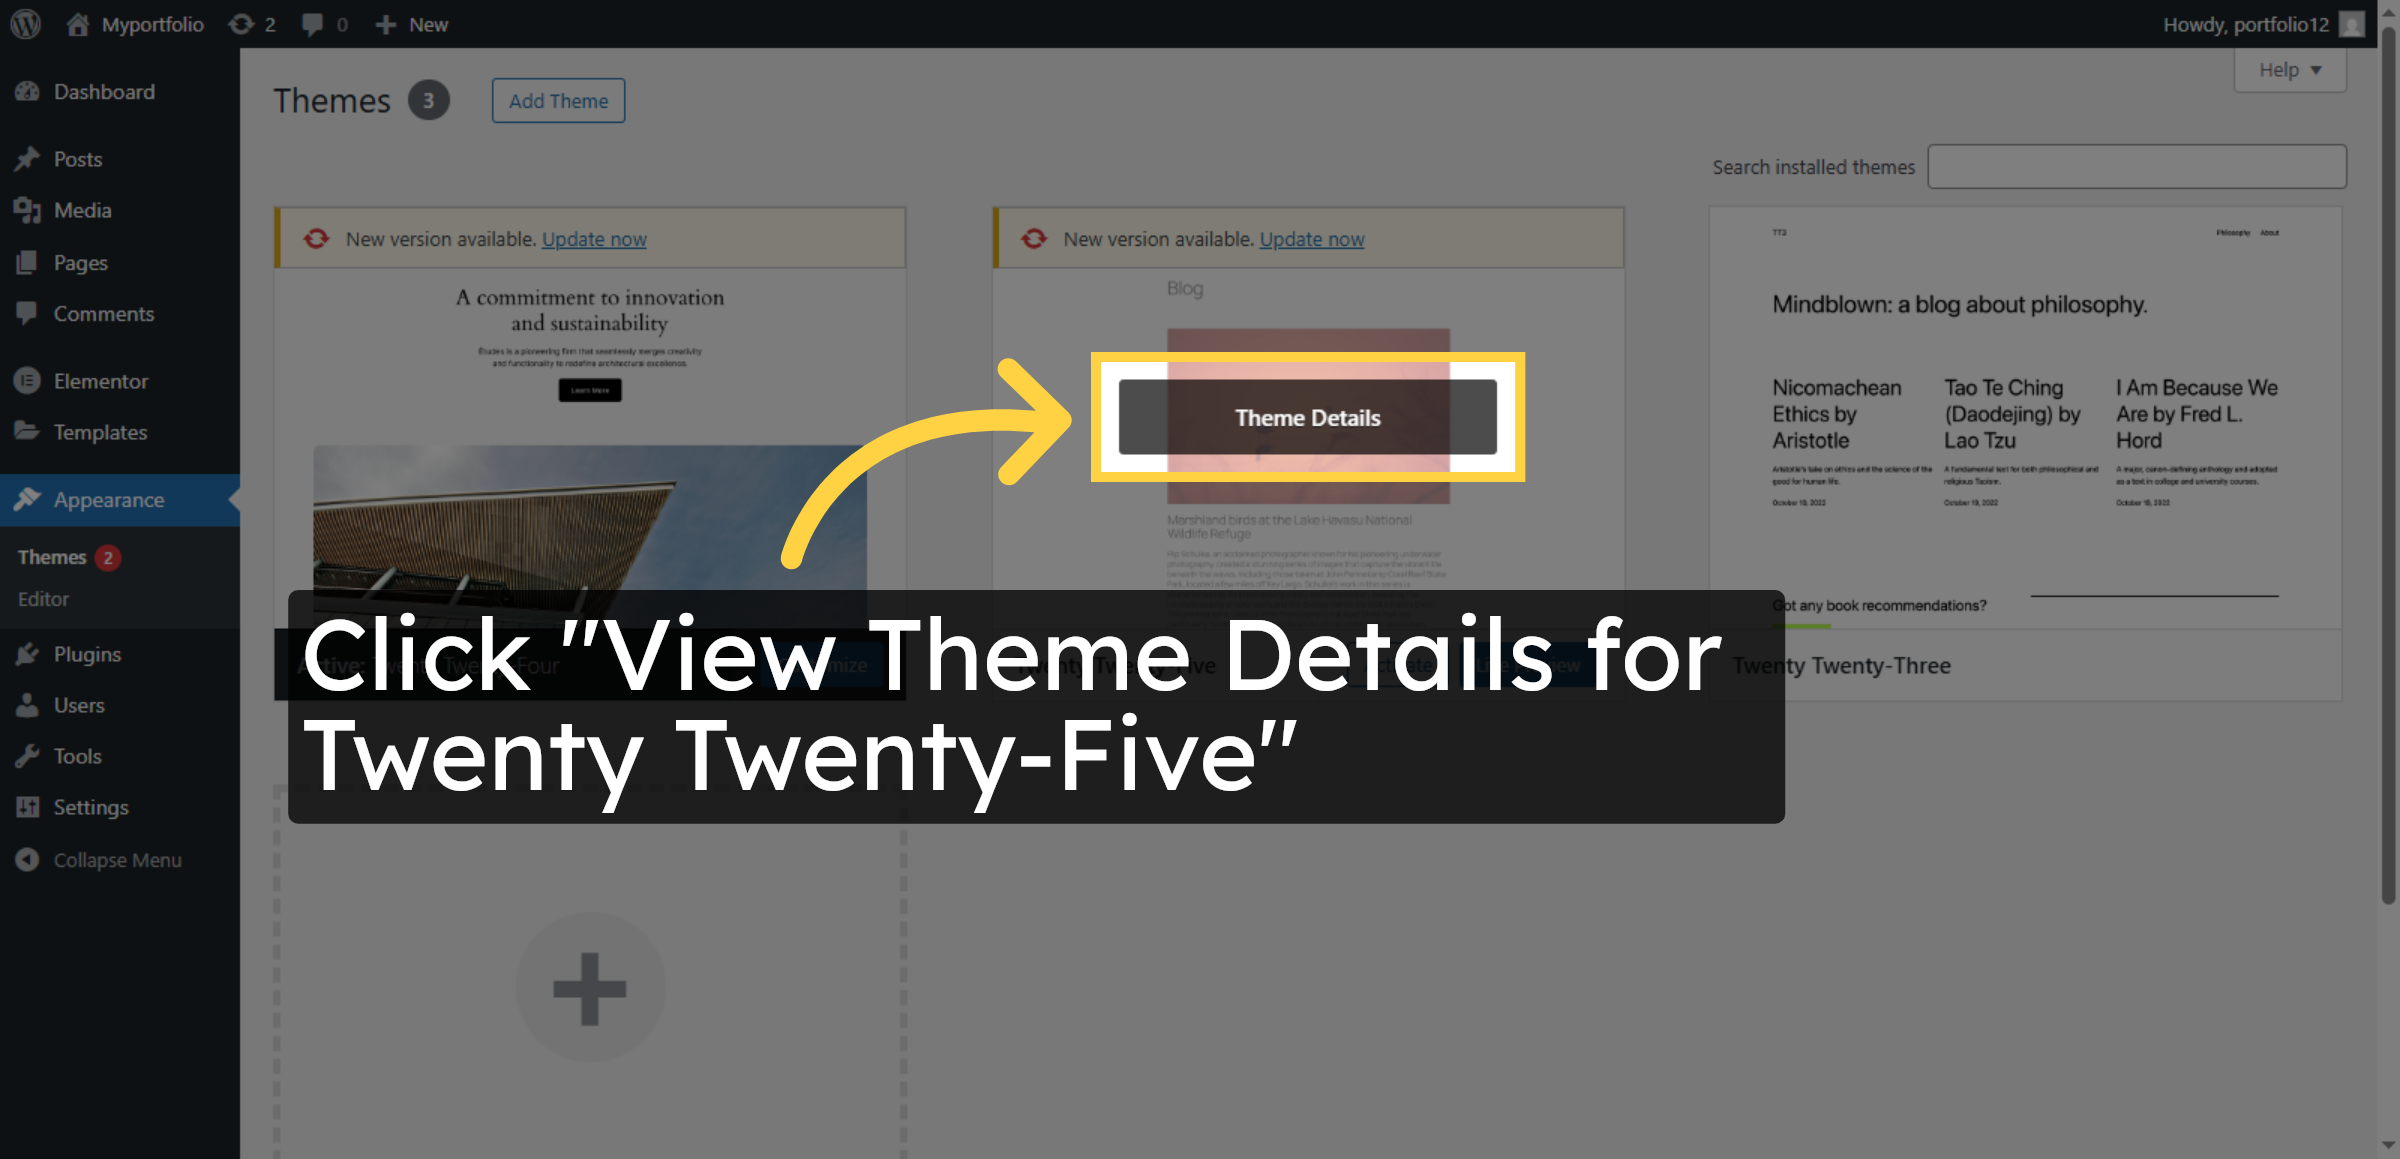
7. View Twenty Twenty-Five Theme Details
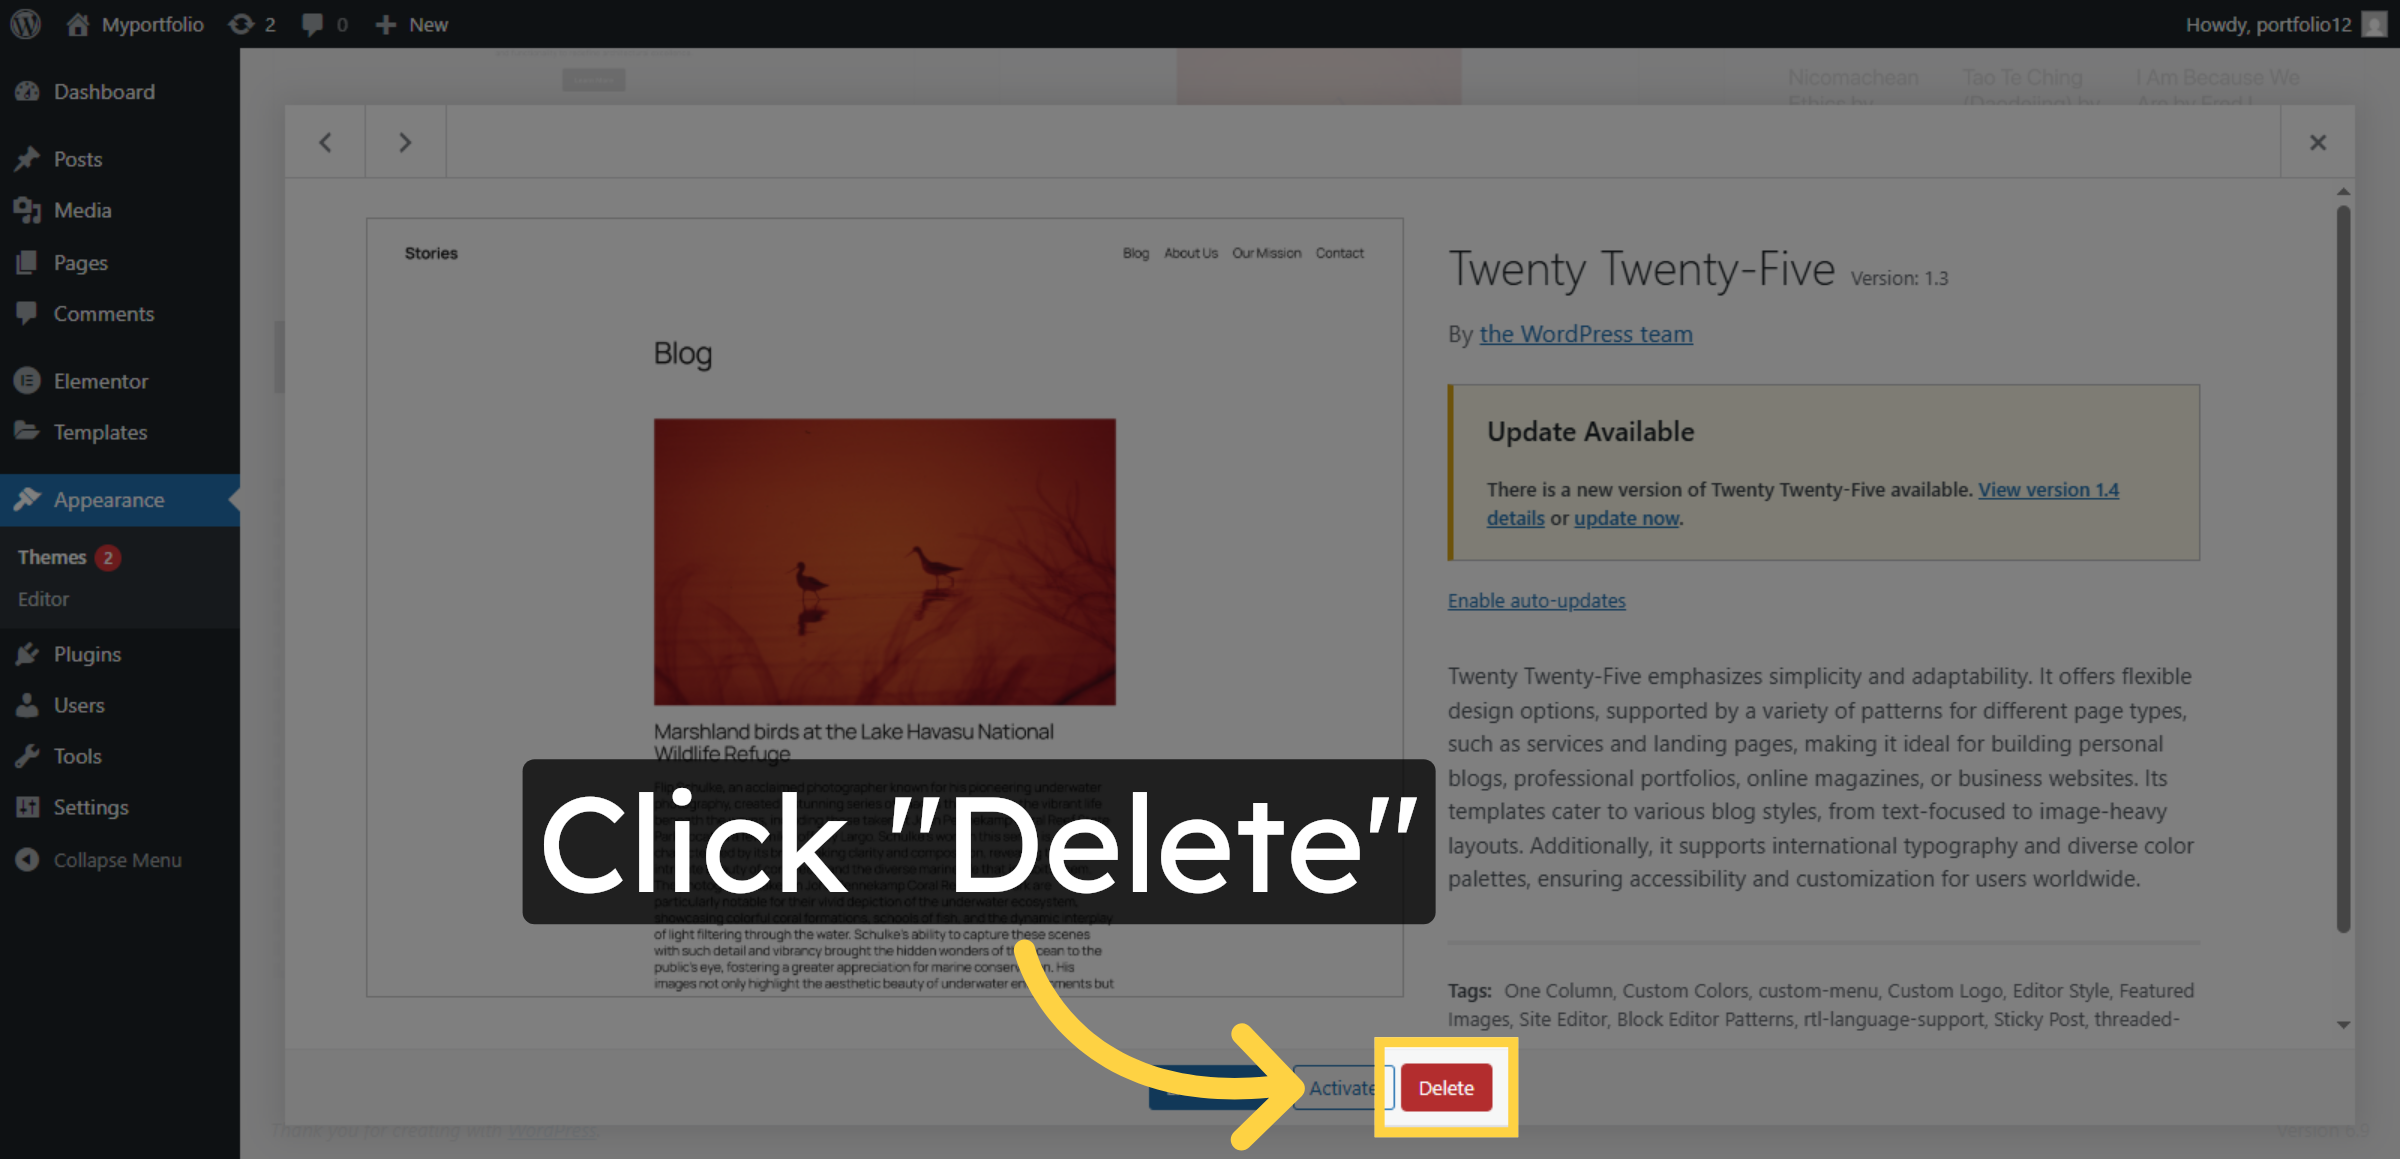
8. Delete Twenty Twenty-Five Theme
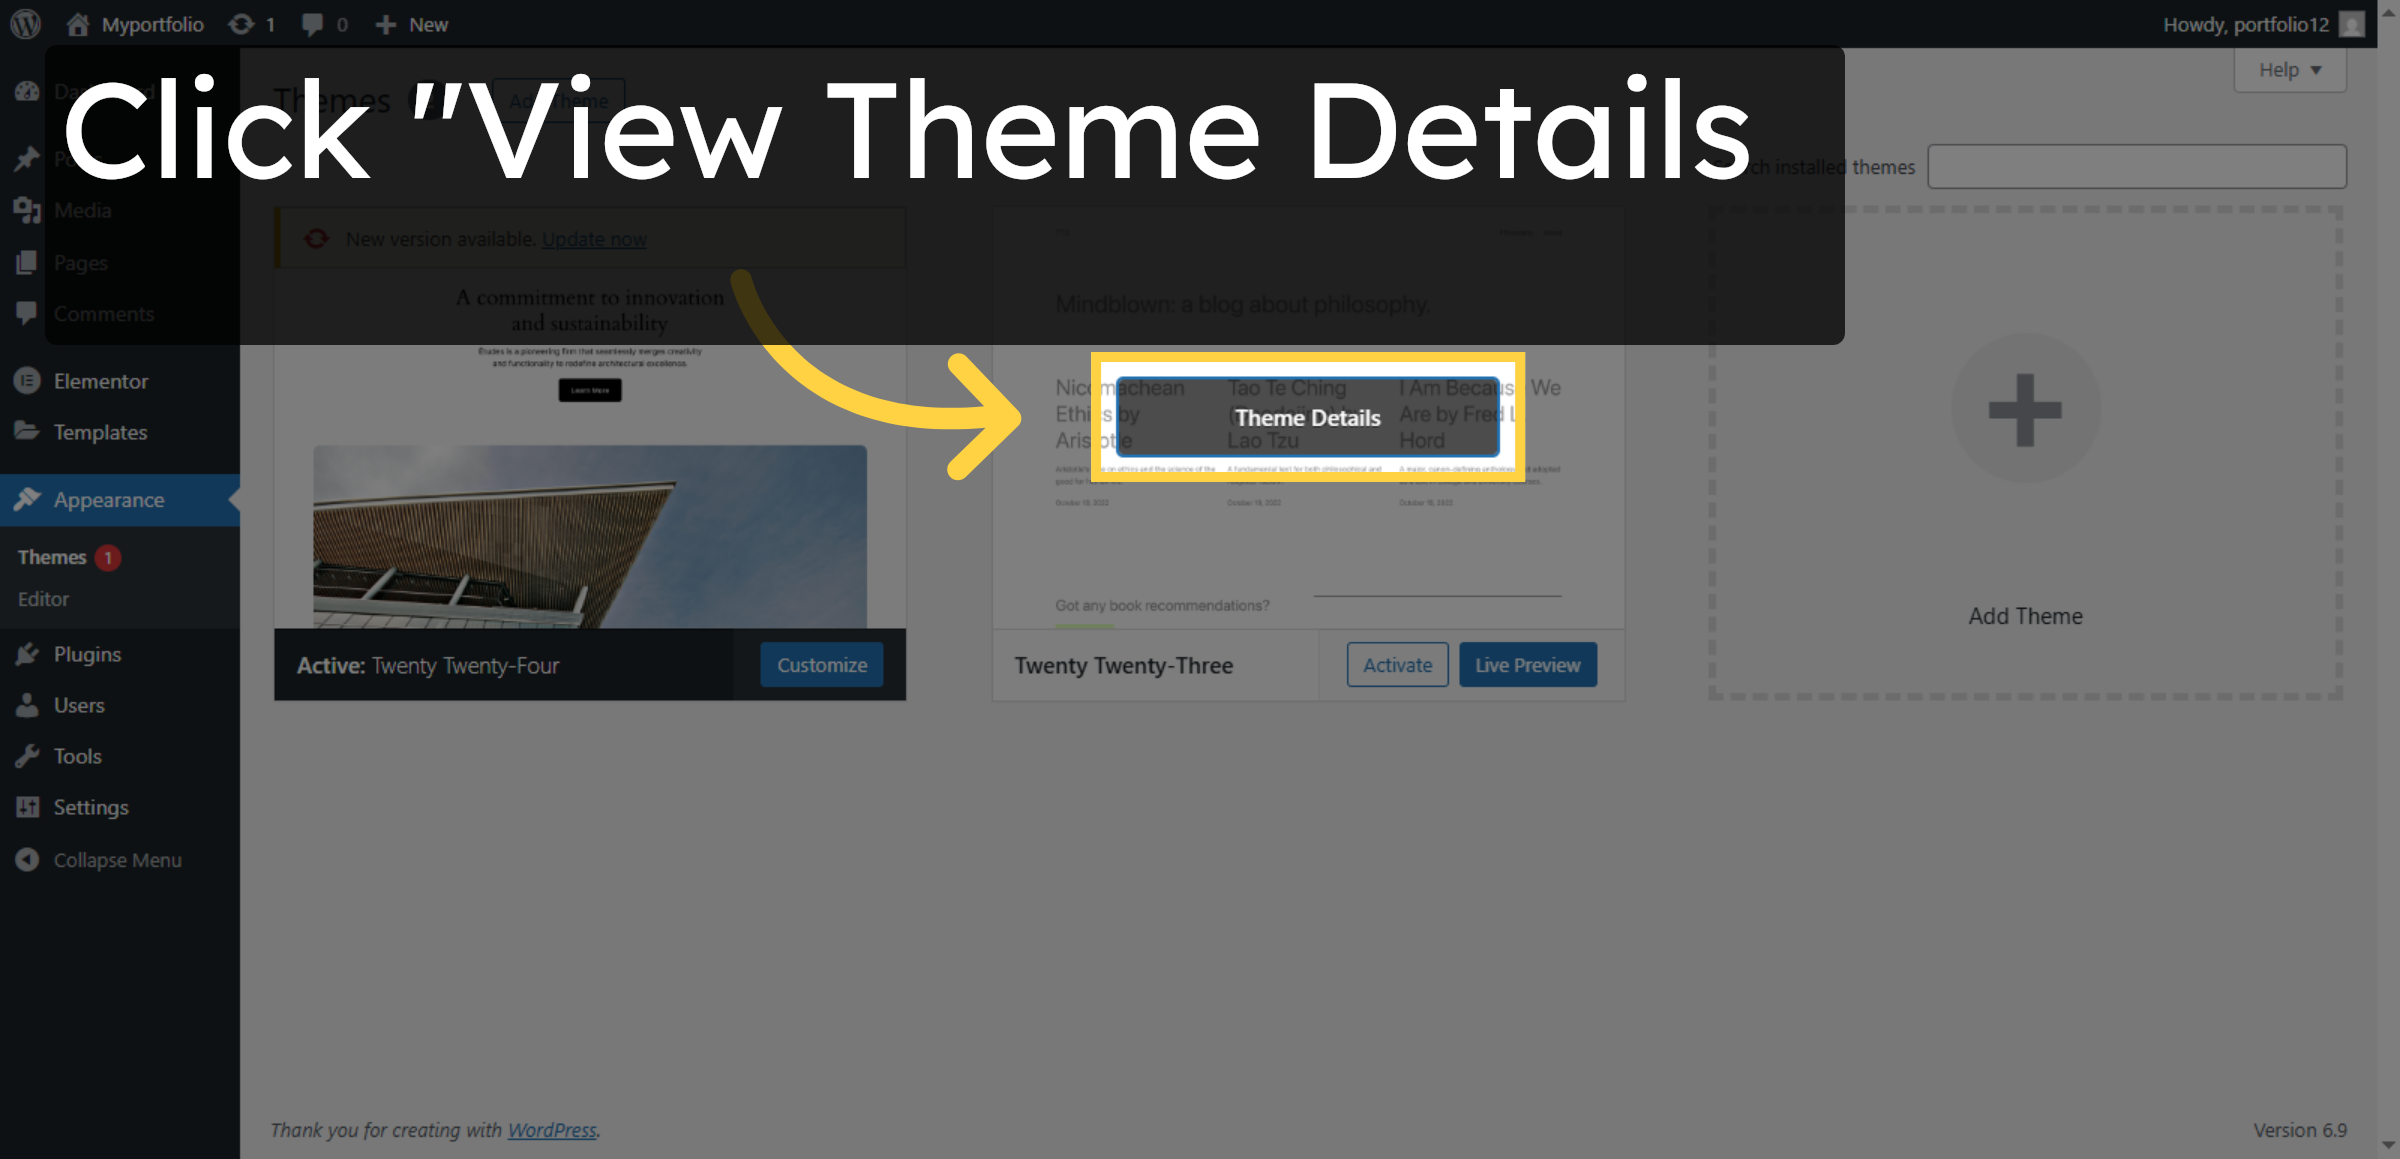
9. View Twenty Twenty-Three Theme Details
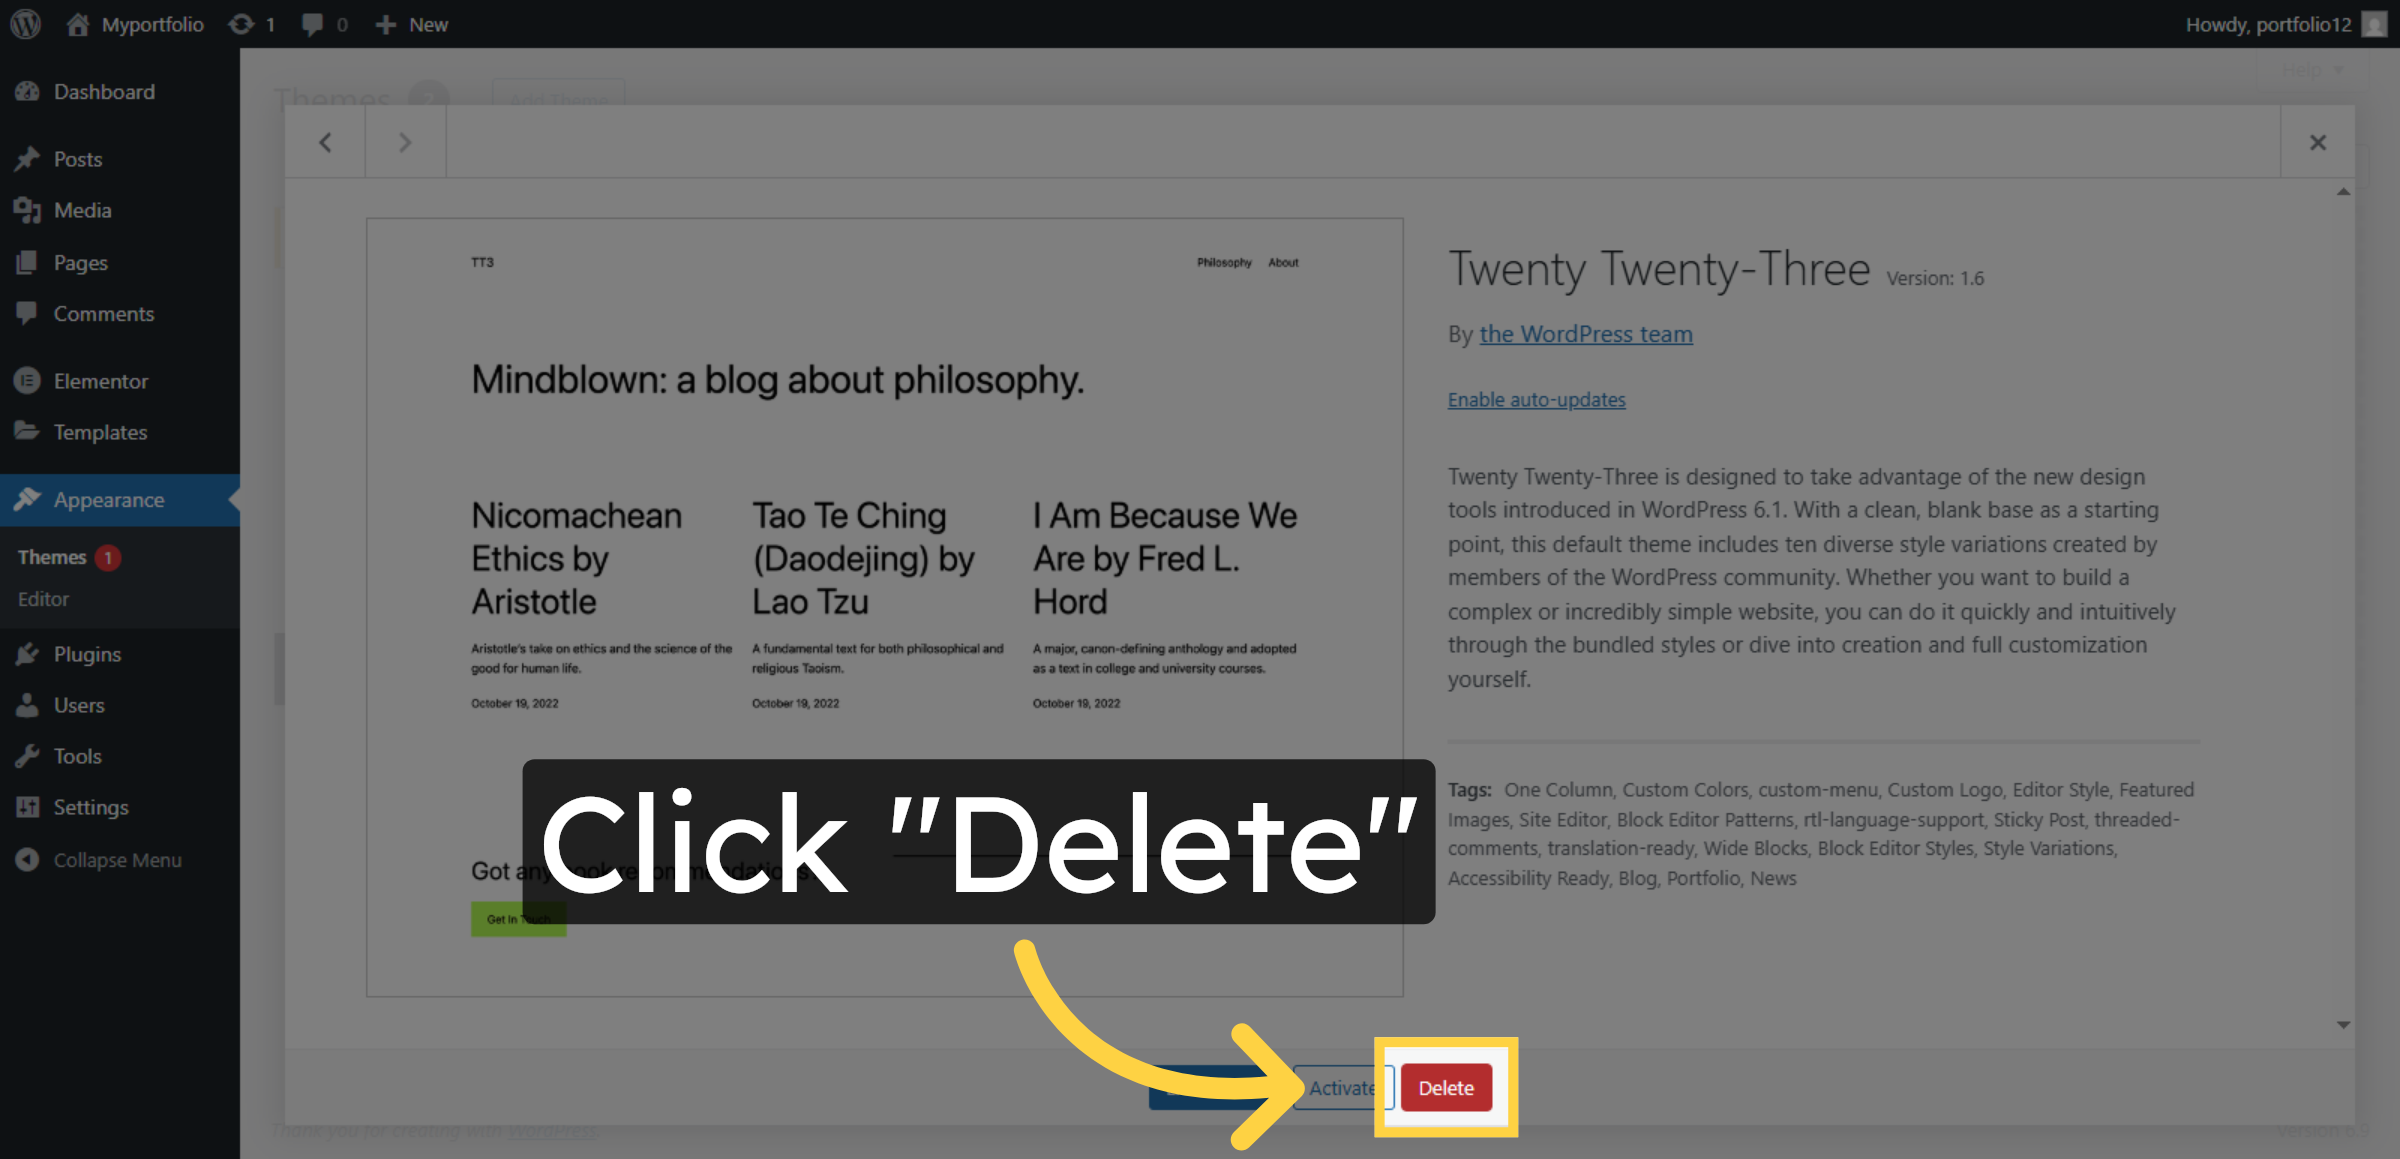
10. Delete Twenty Twenty-Three Theme
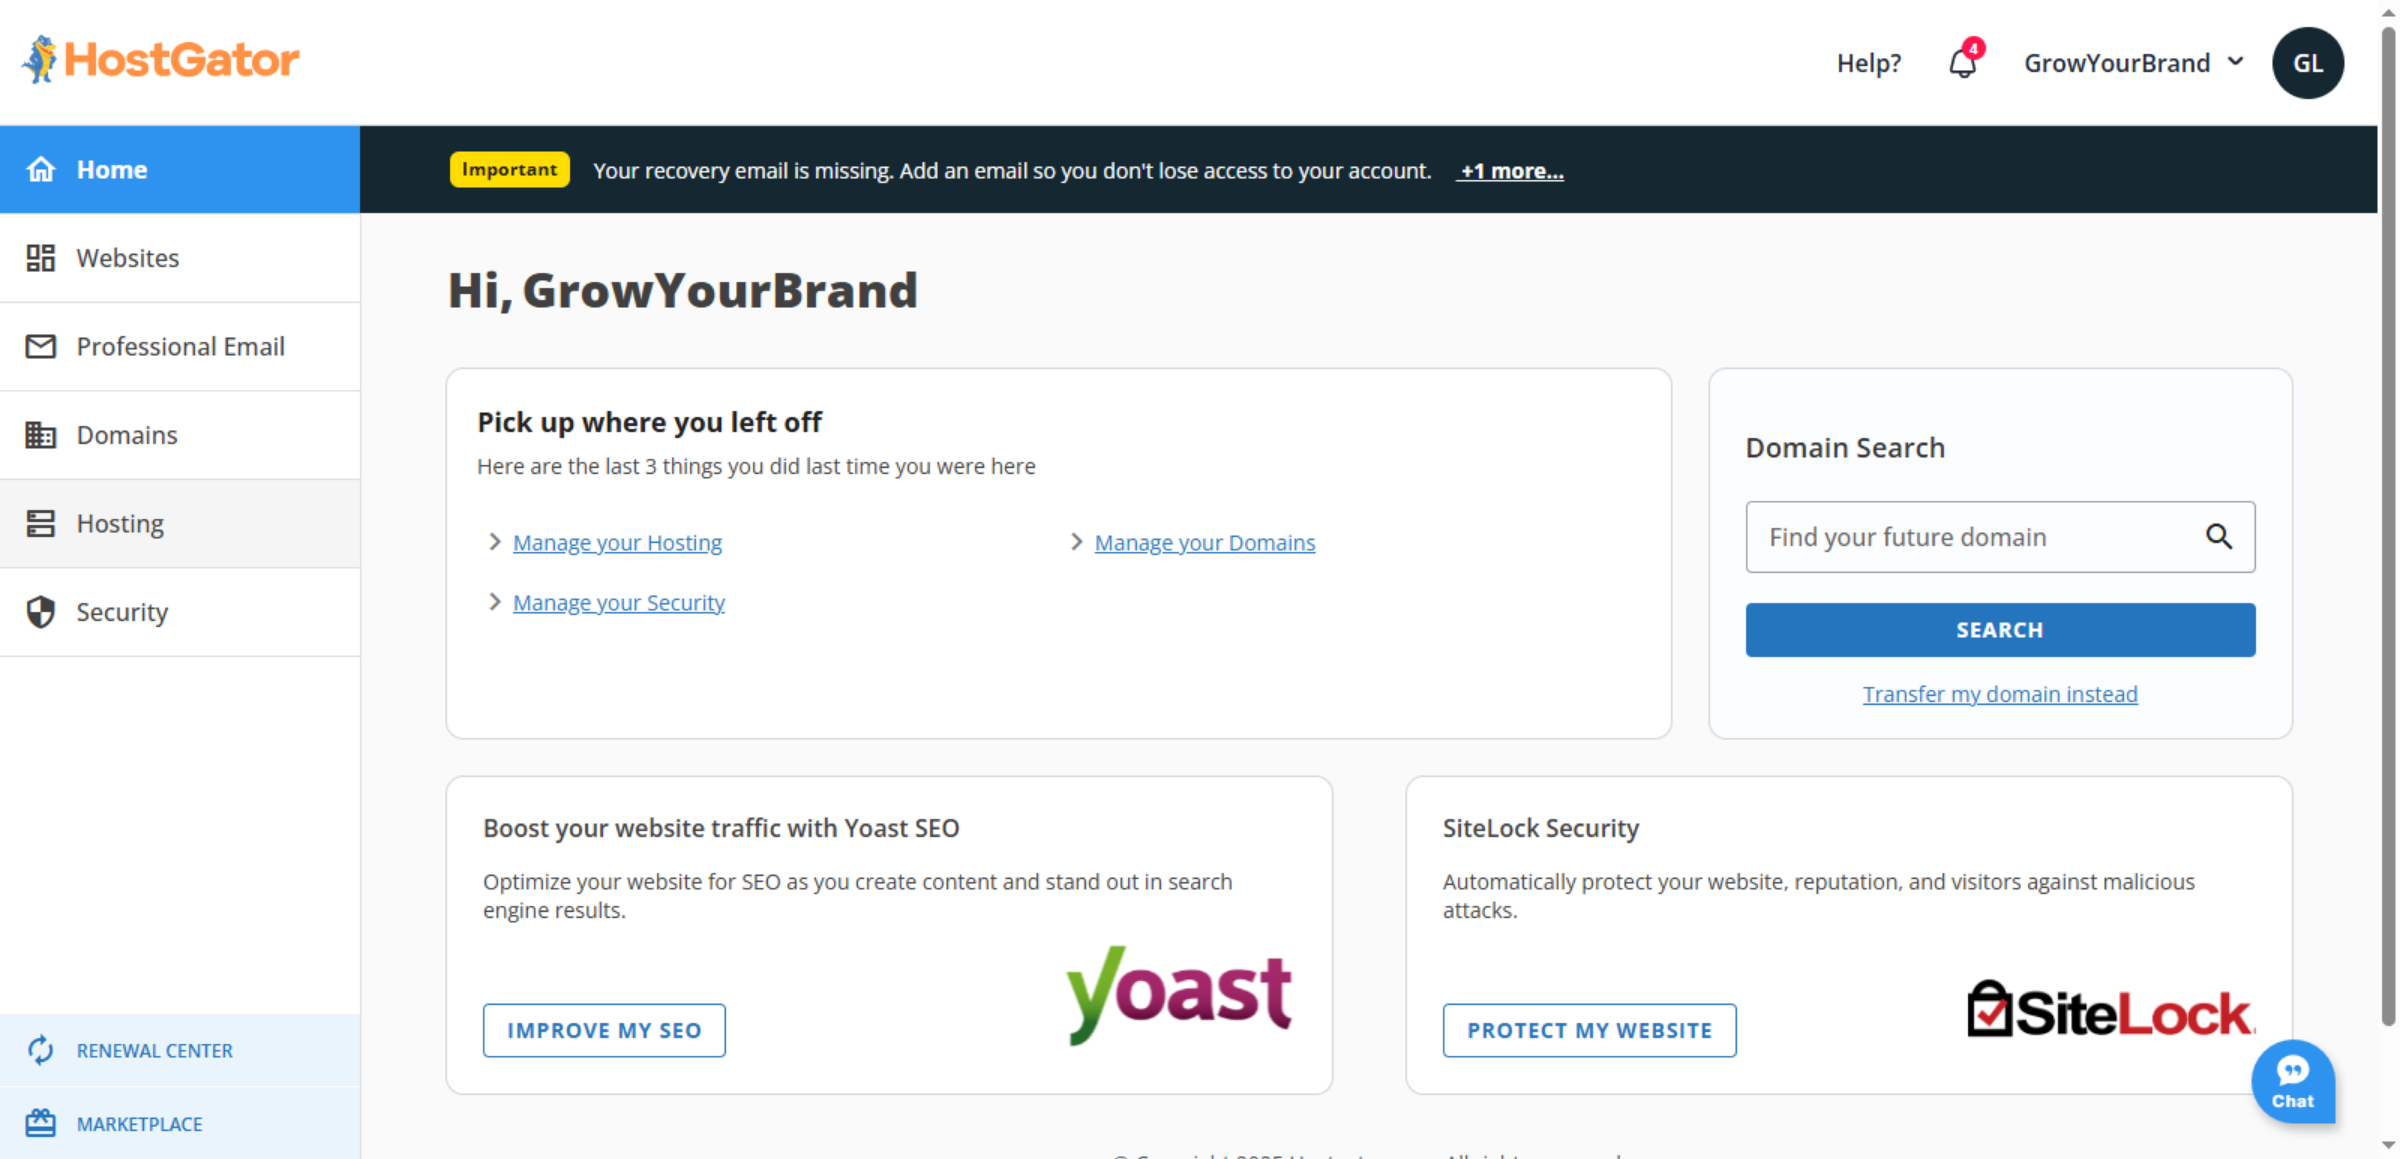
11. Navigate To HostGator Website
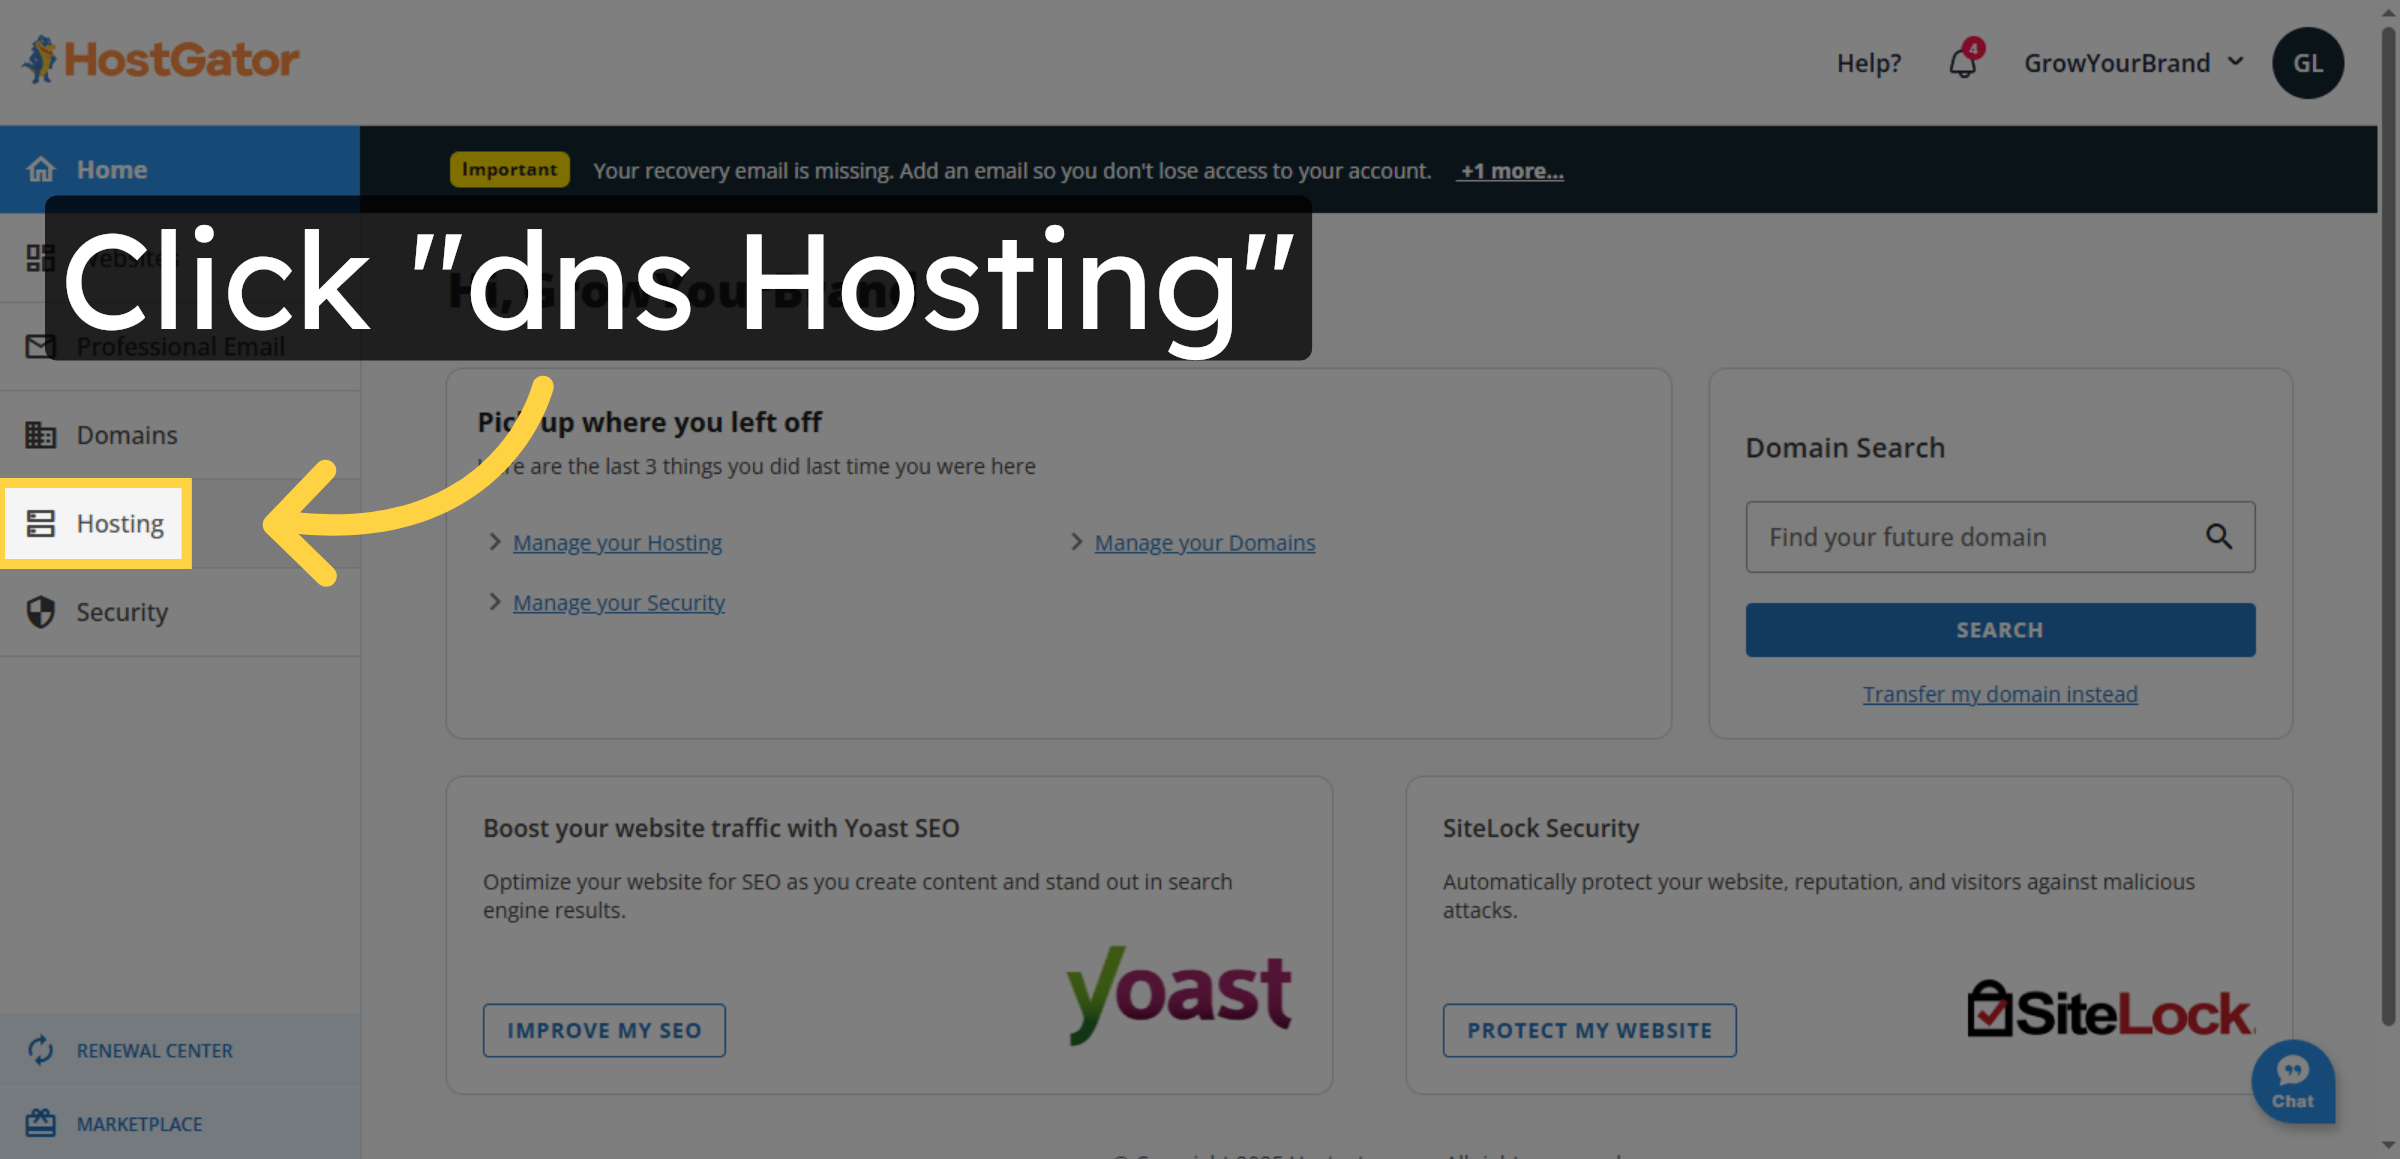
12. Open DNS Hosting Section
13. Access cPanel Interface
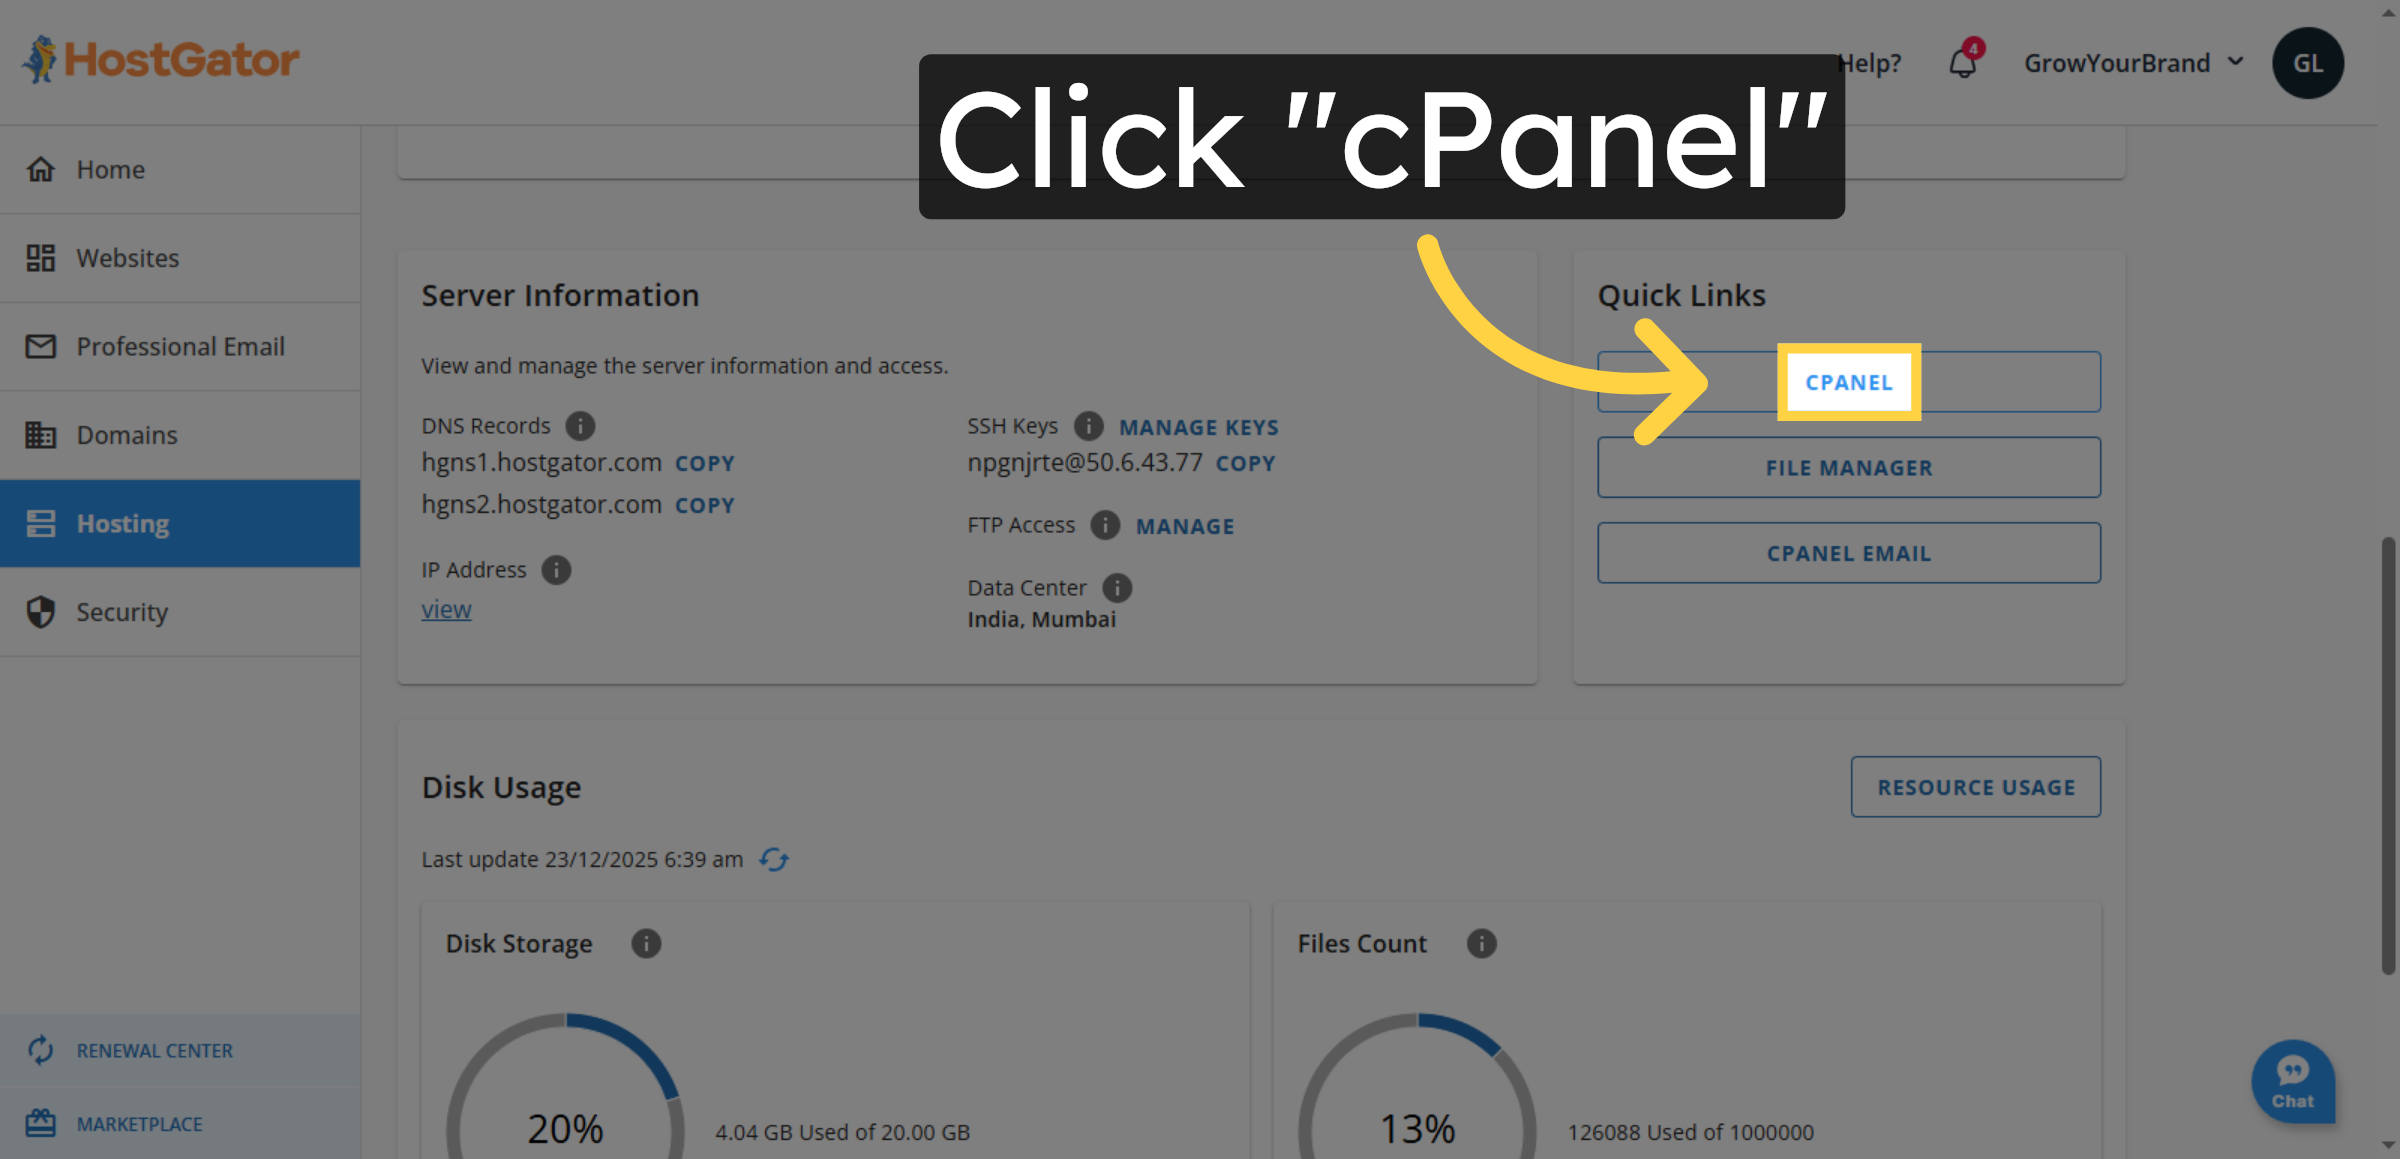
14. Switch To cPanel Login
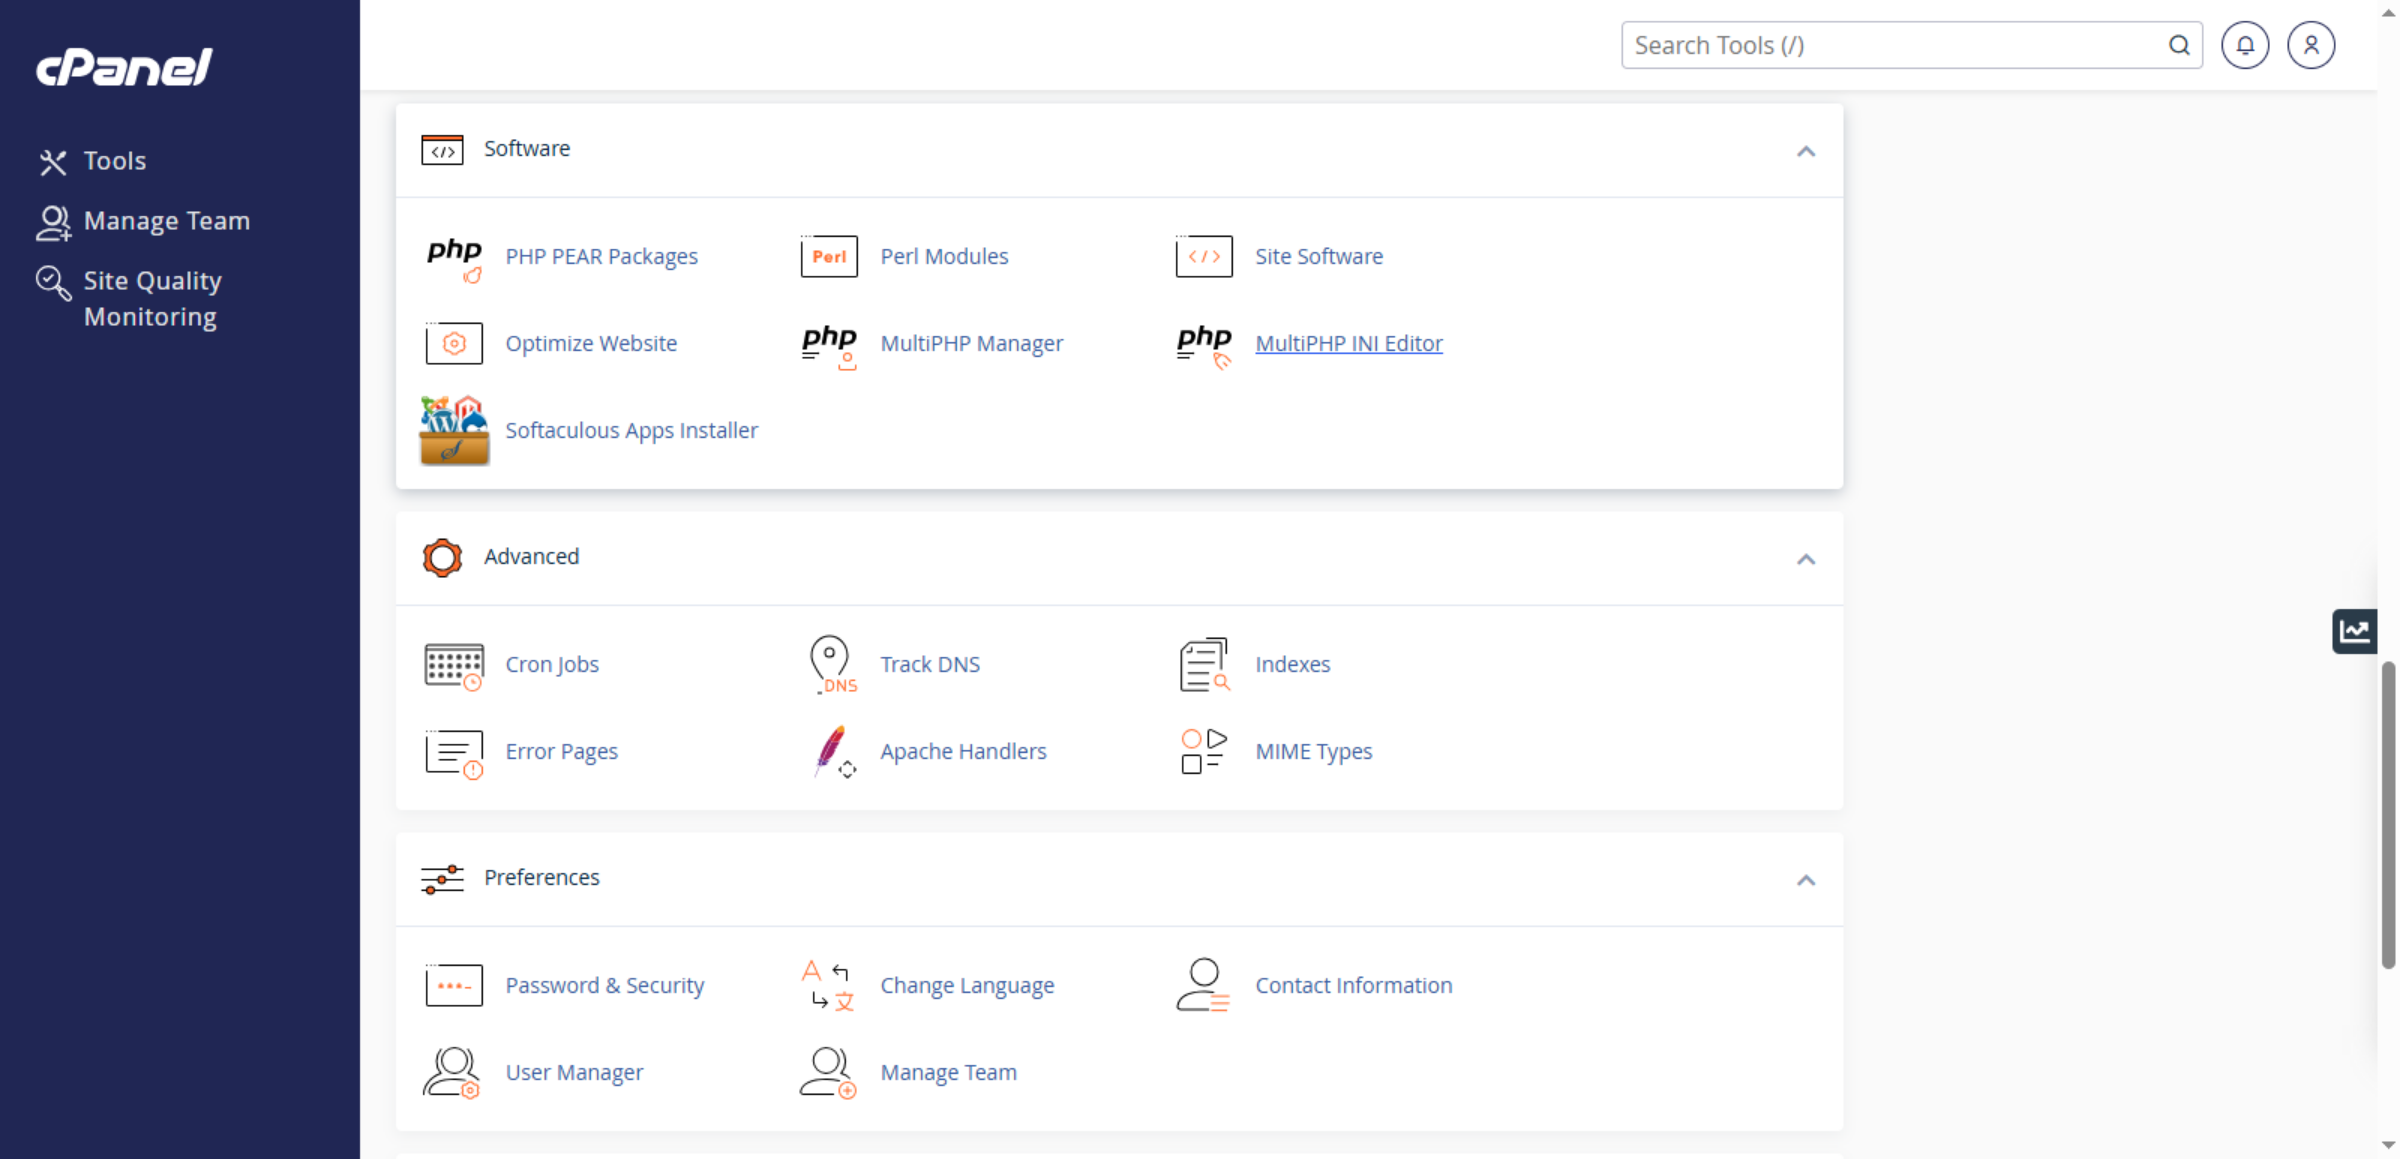
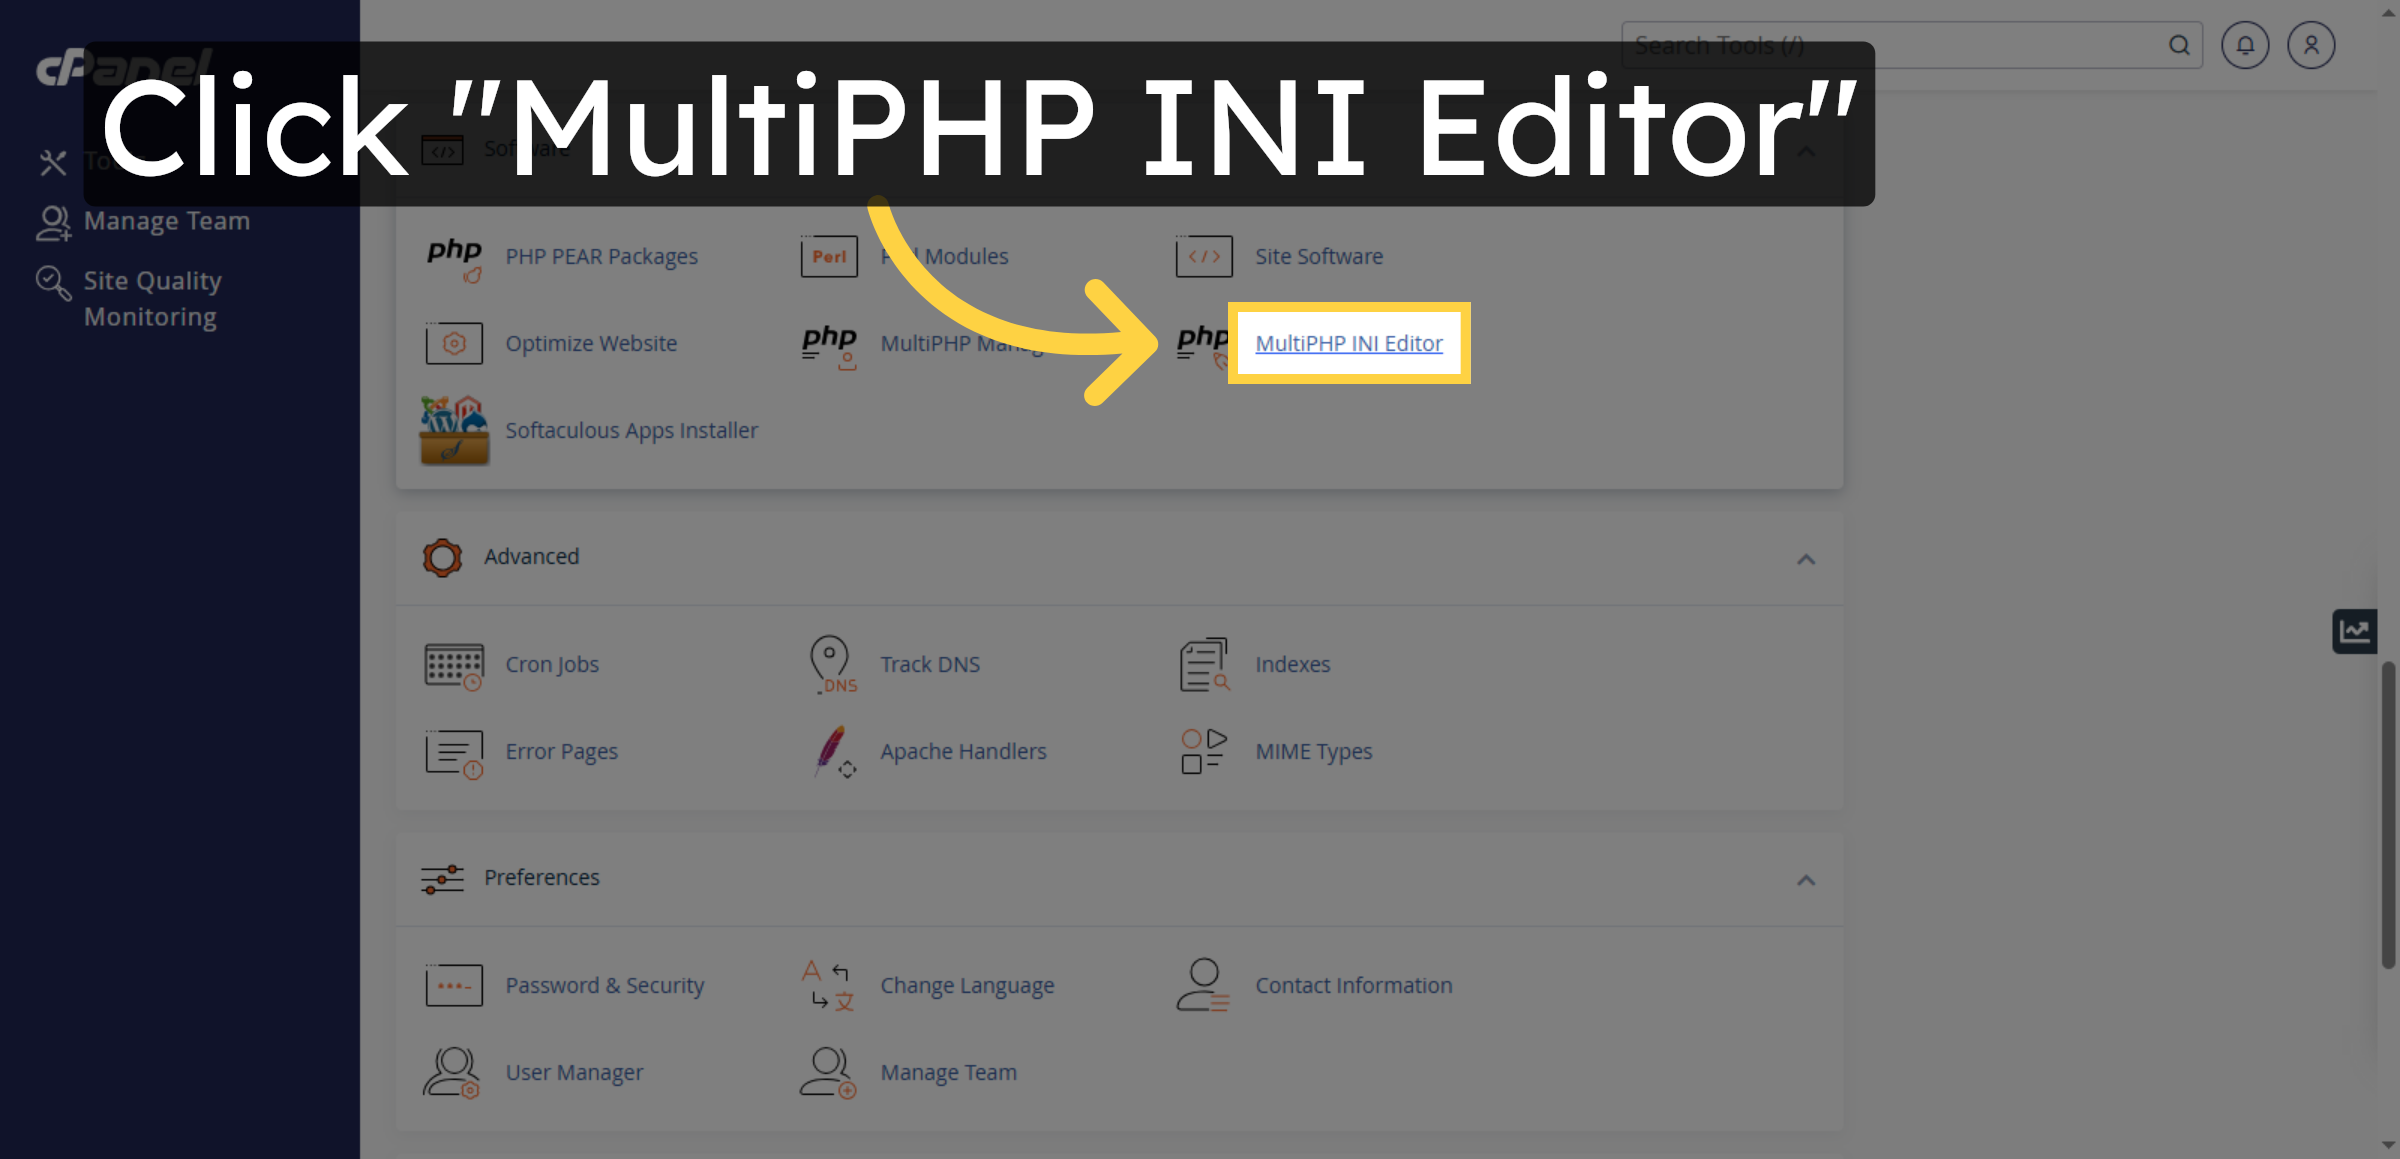
15. Open MultiPHP INI Editor
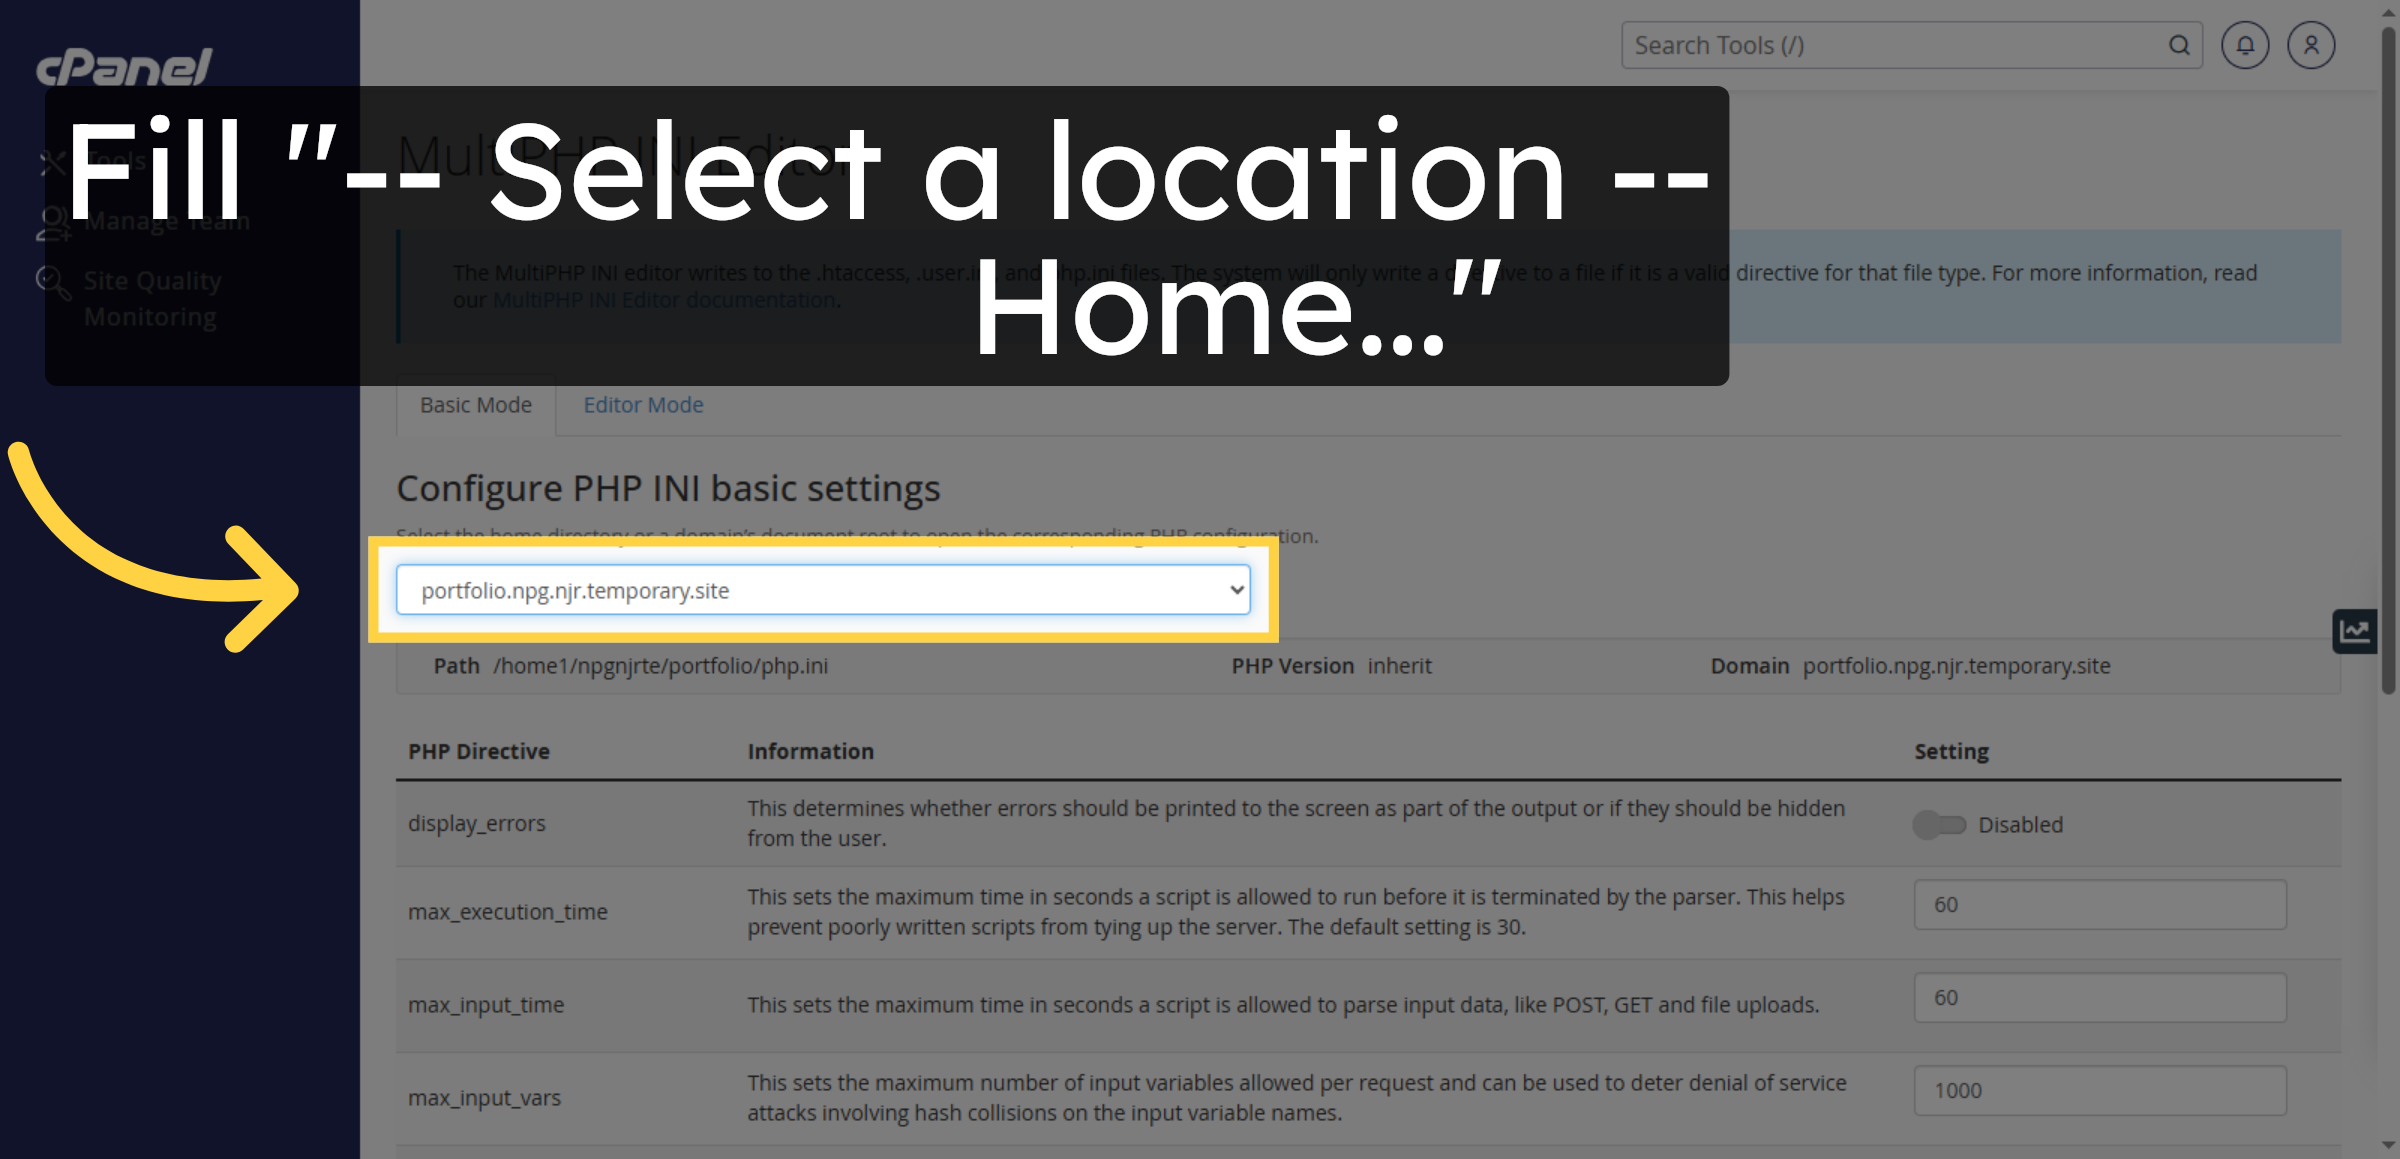
16. Select Home Directory Again
17. Select Max Execution Time
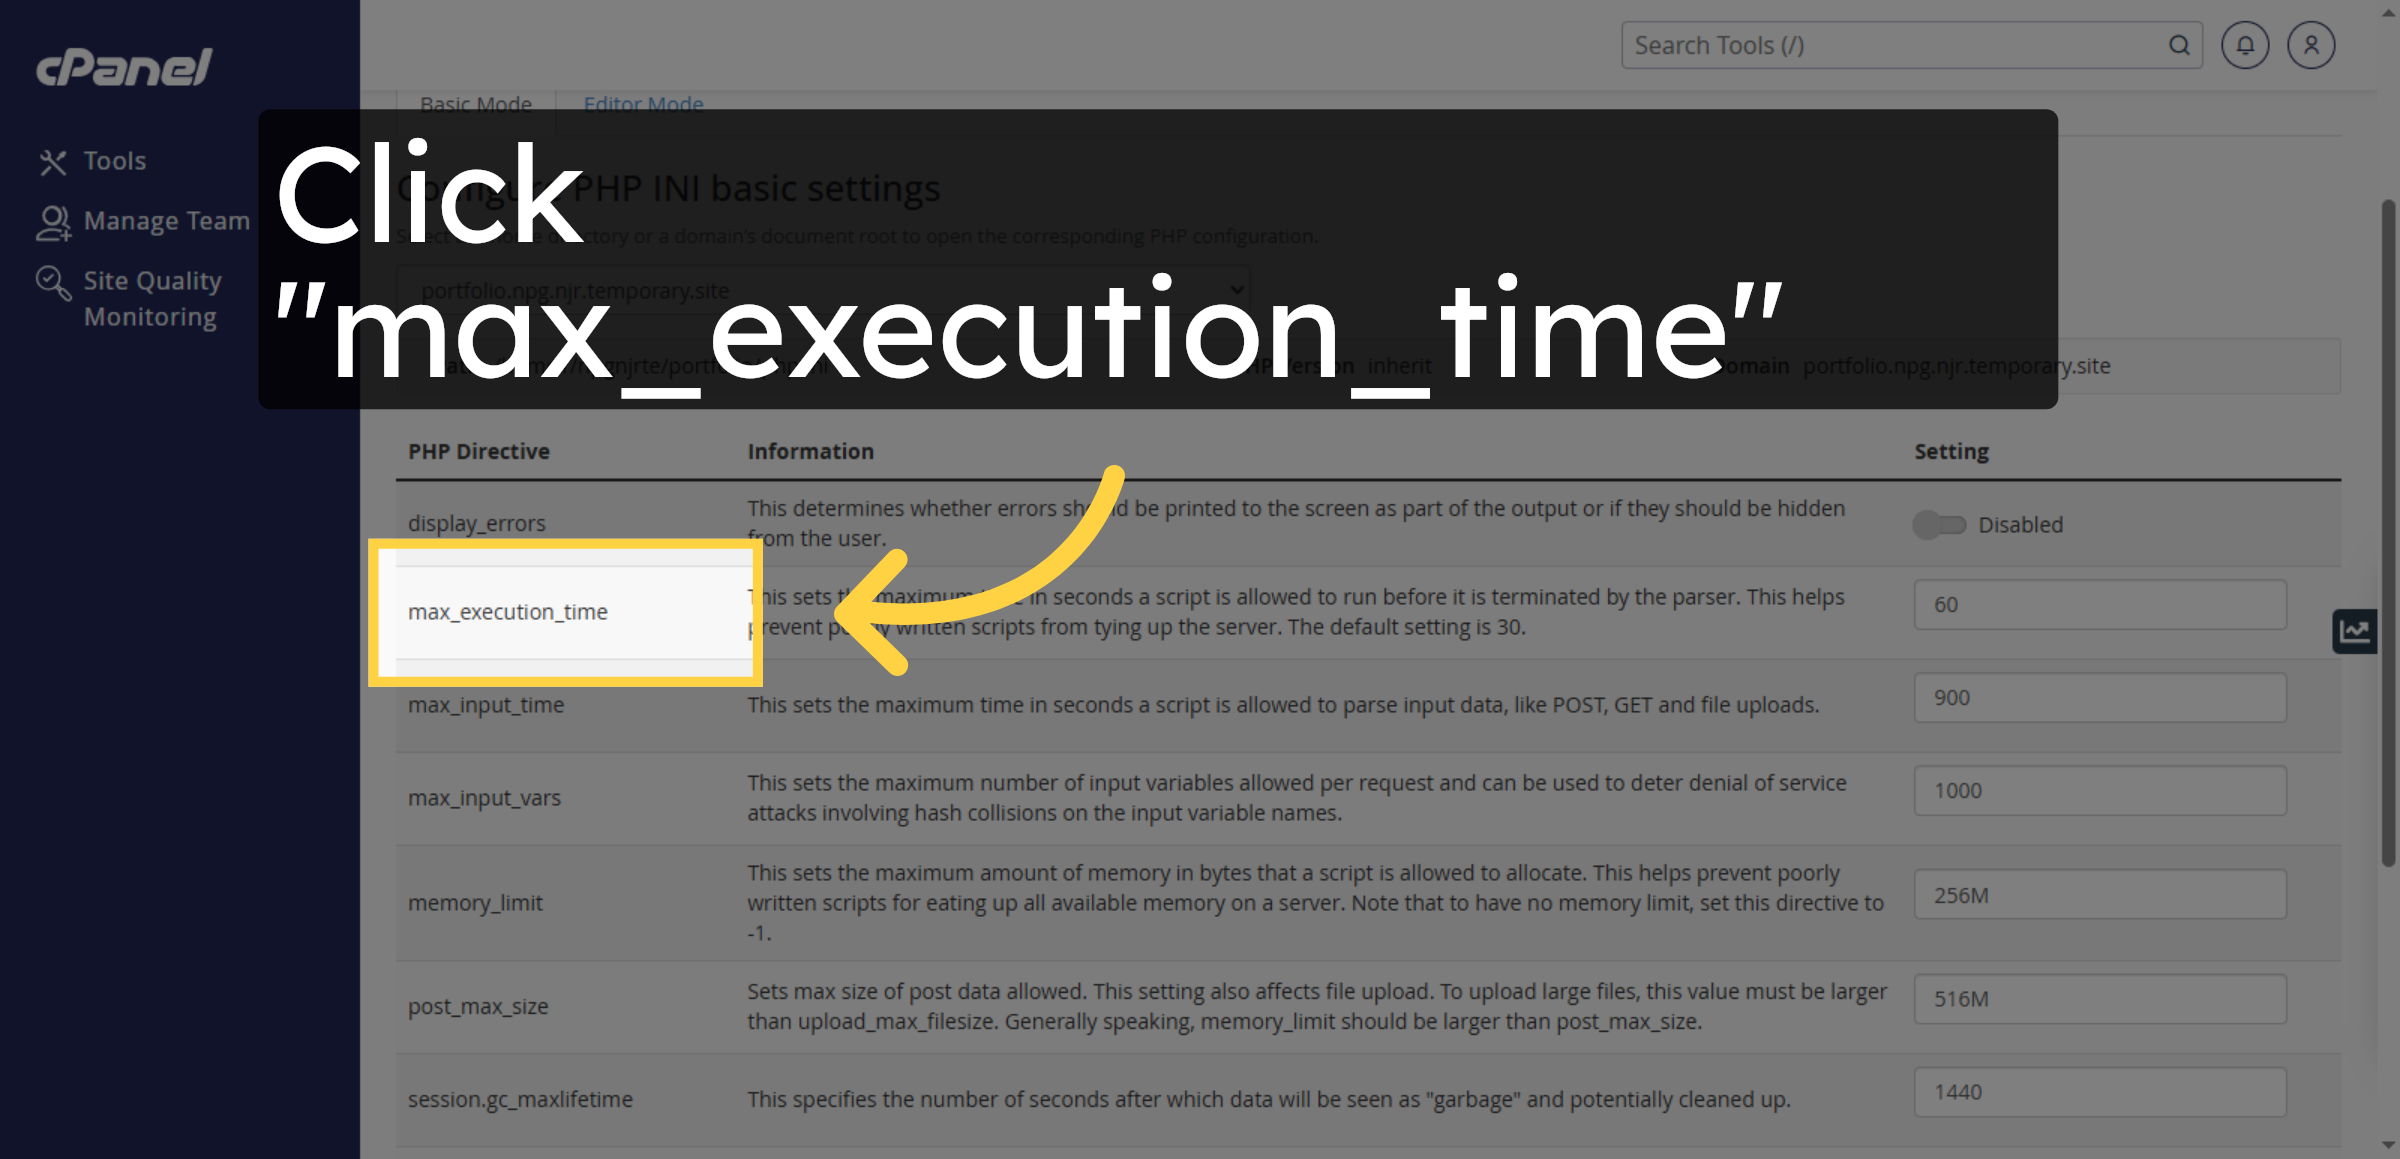
18. Choose Current Execution Time
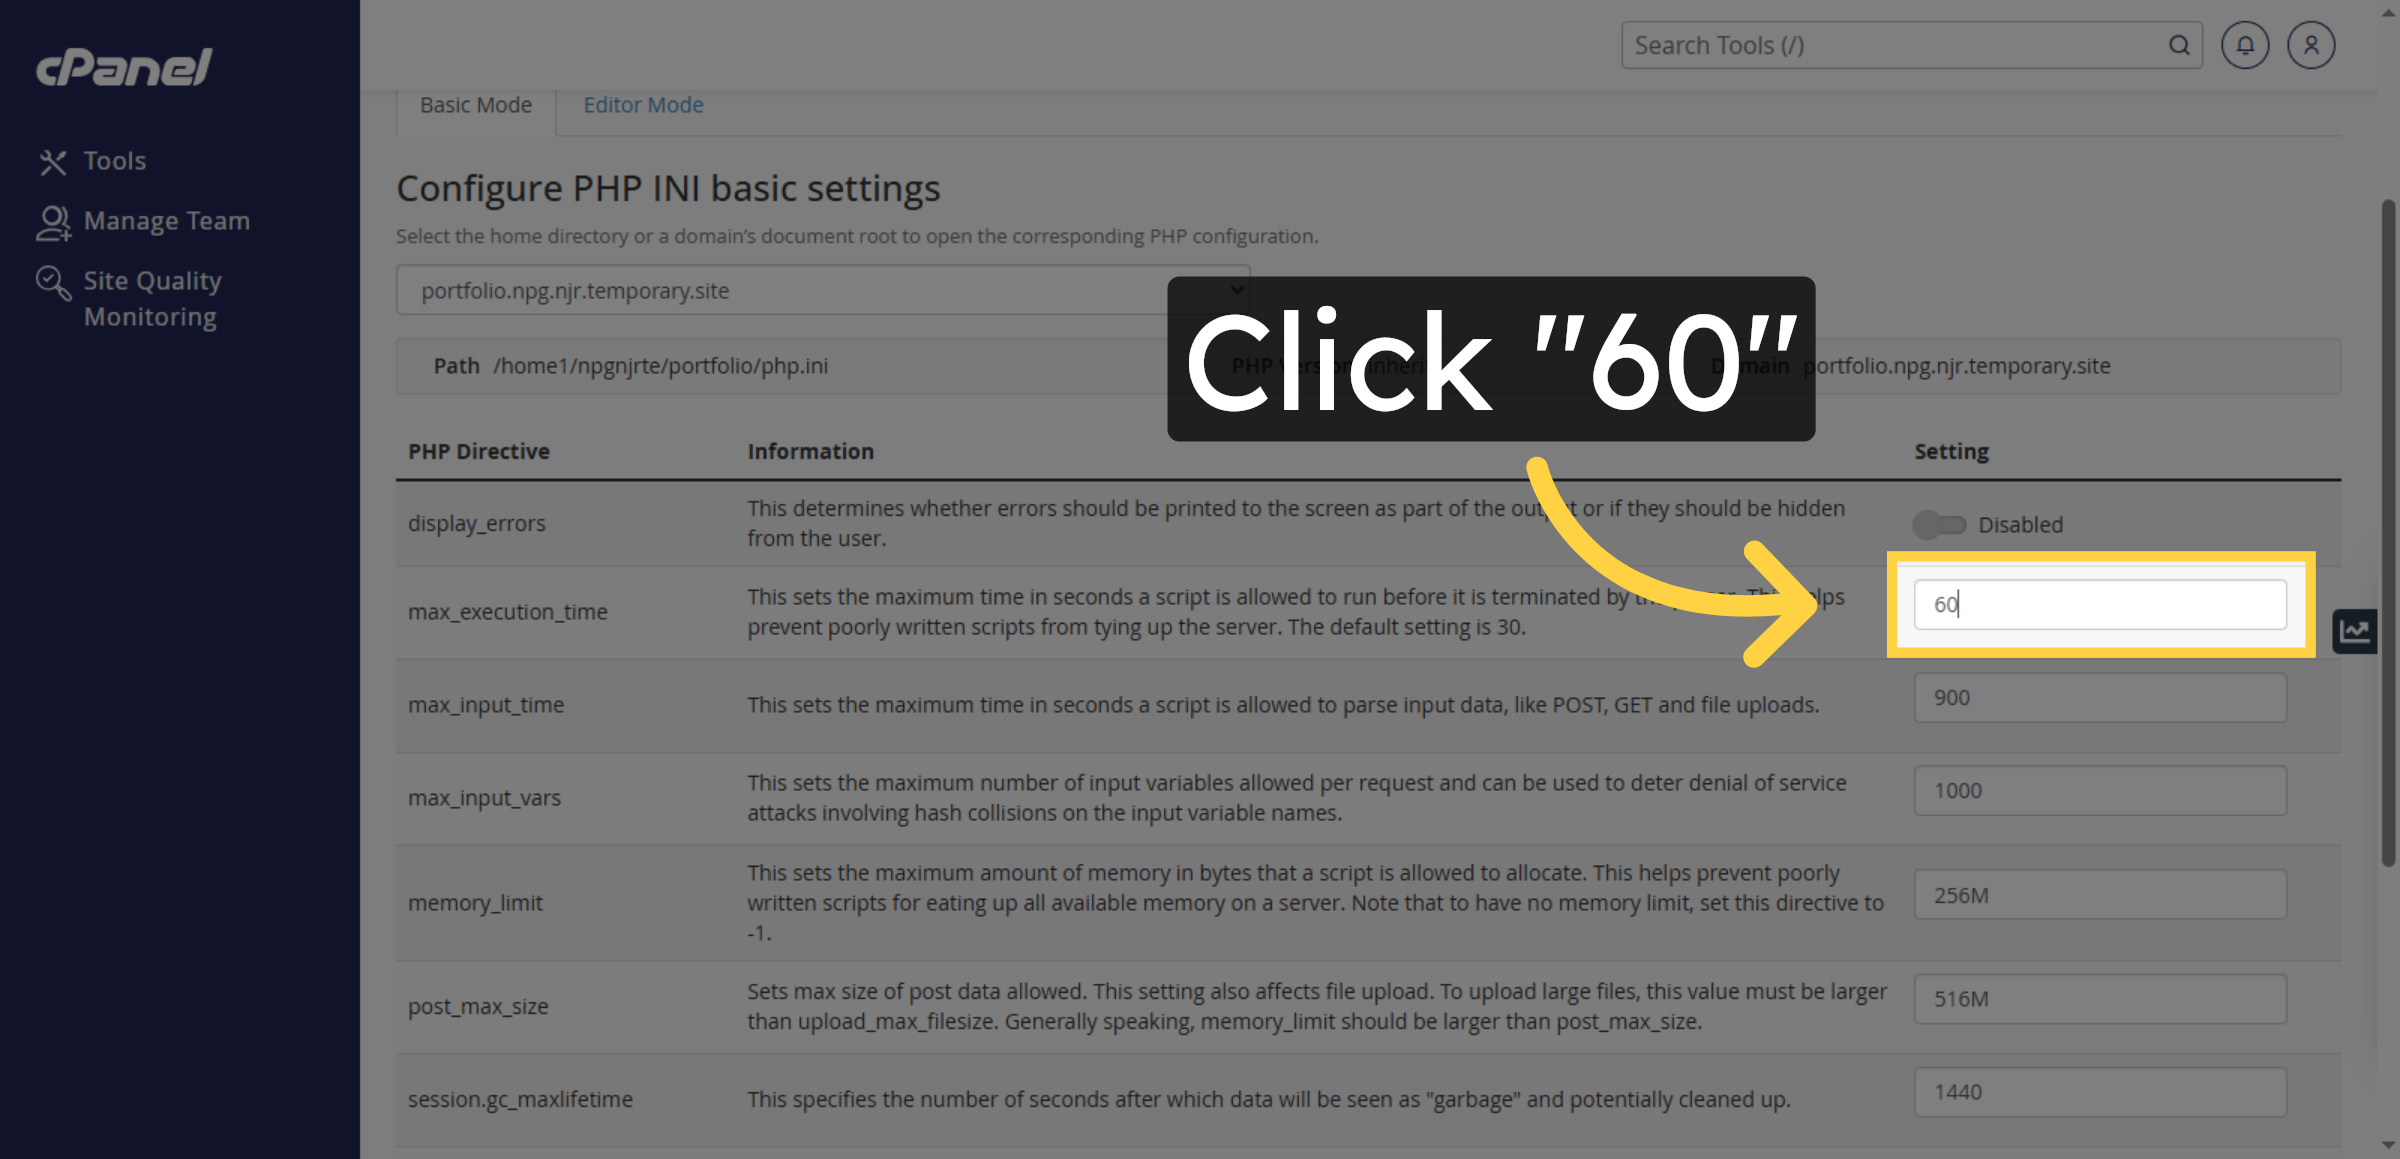
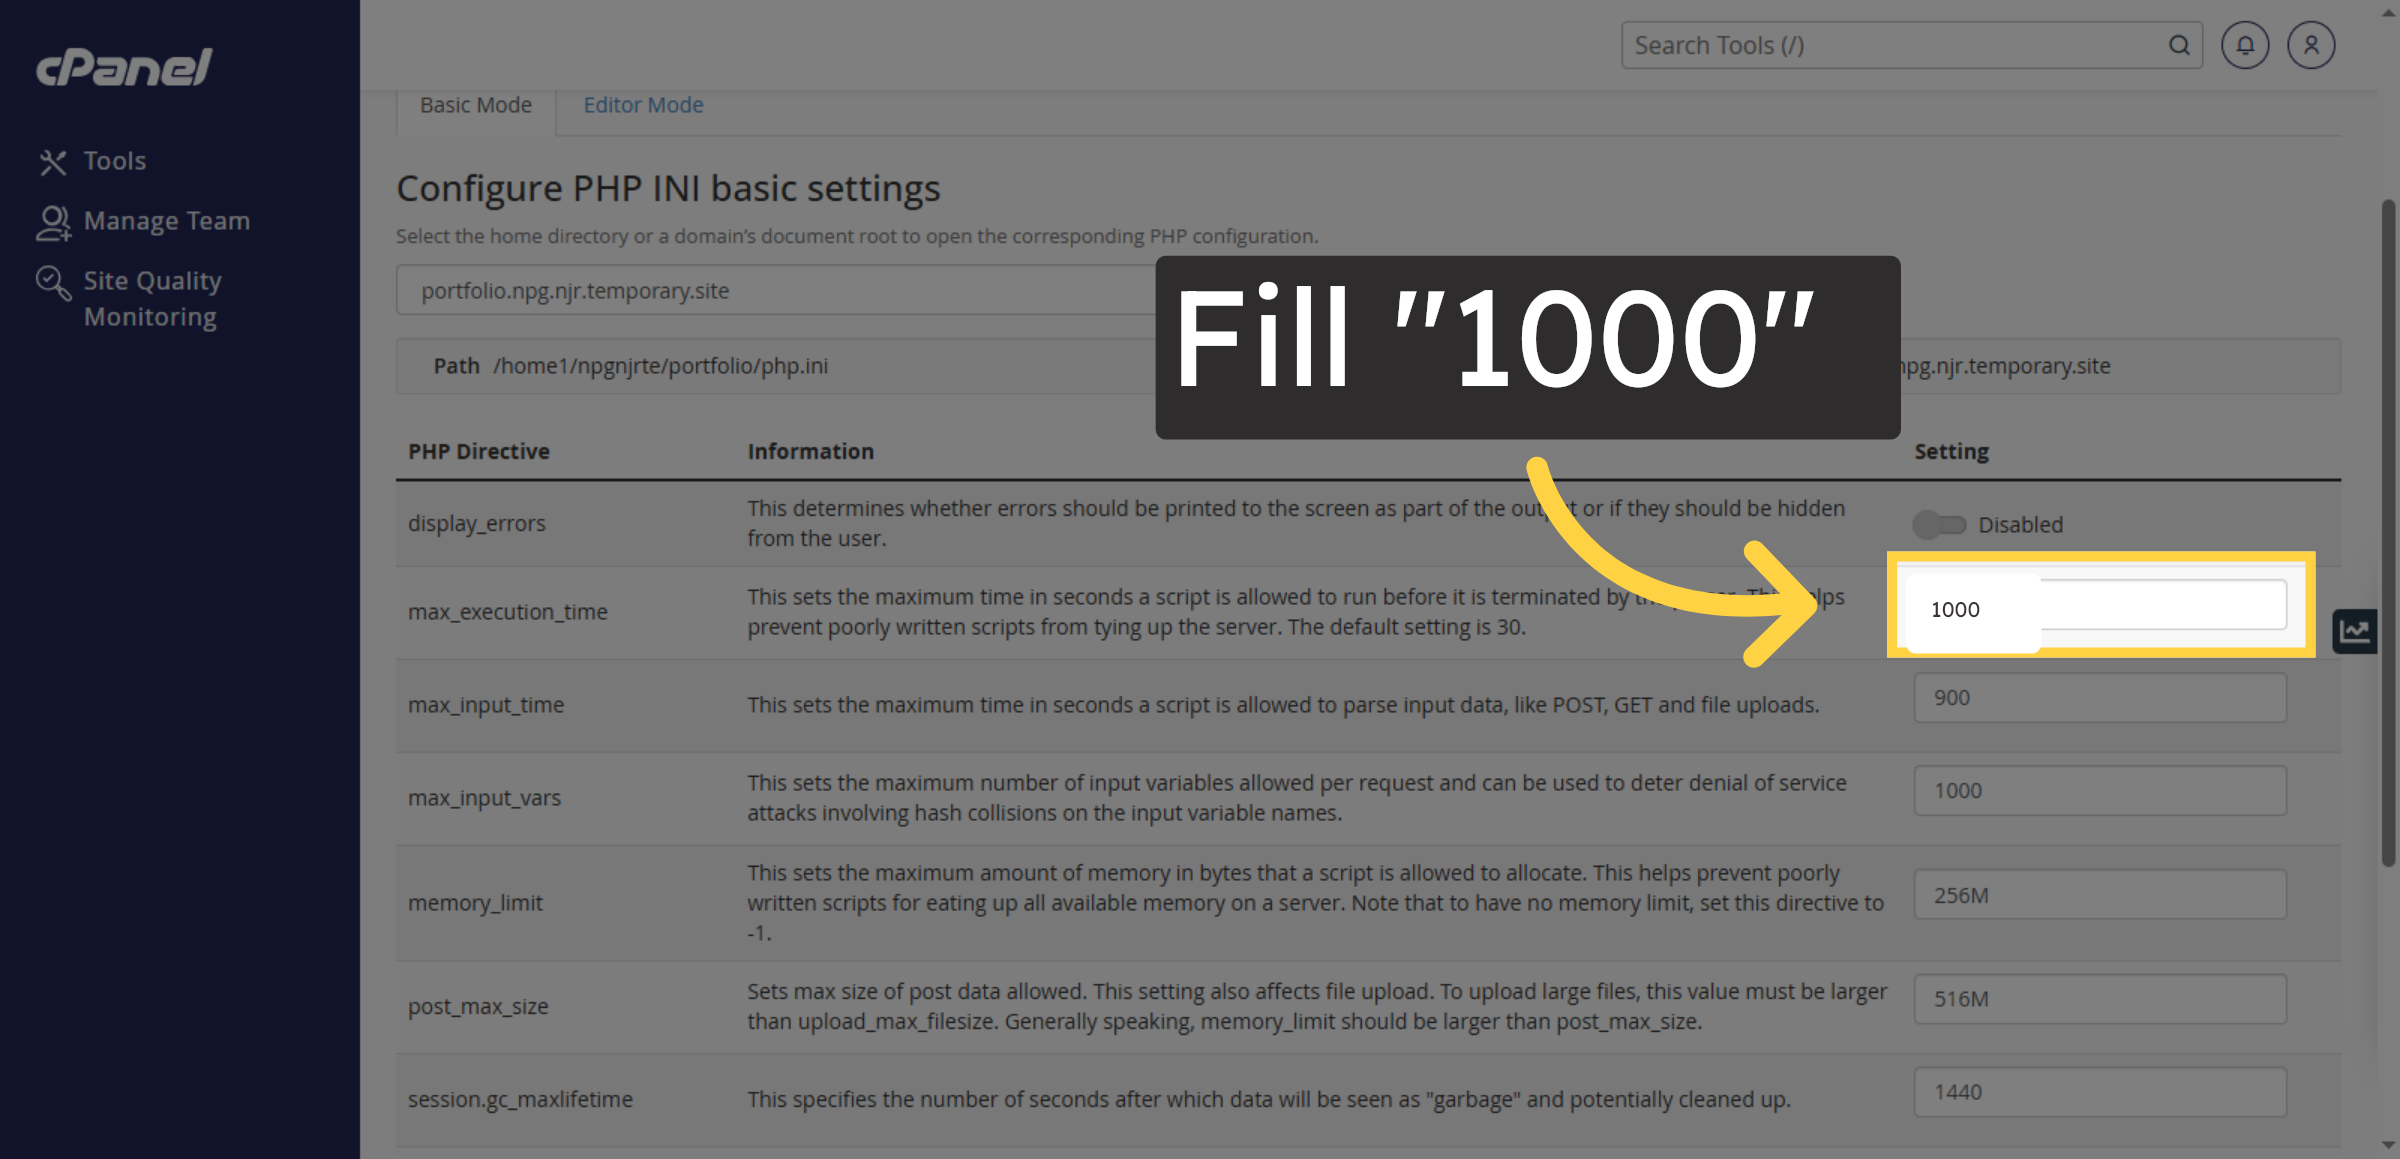
19. Choose Current Execution Time
20. Select Memory Limit Setting
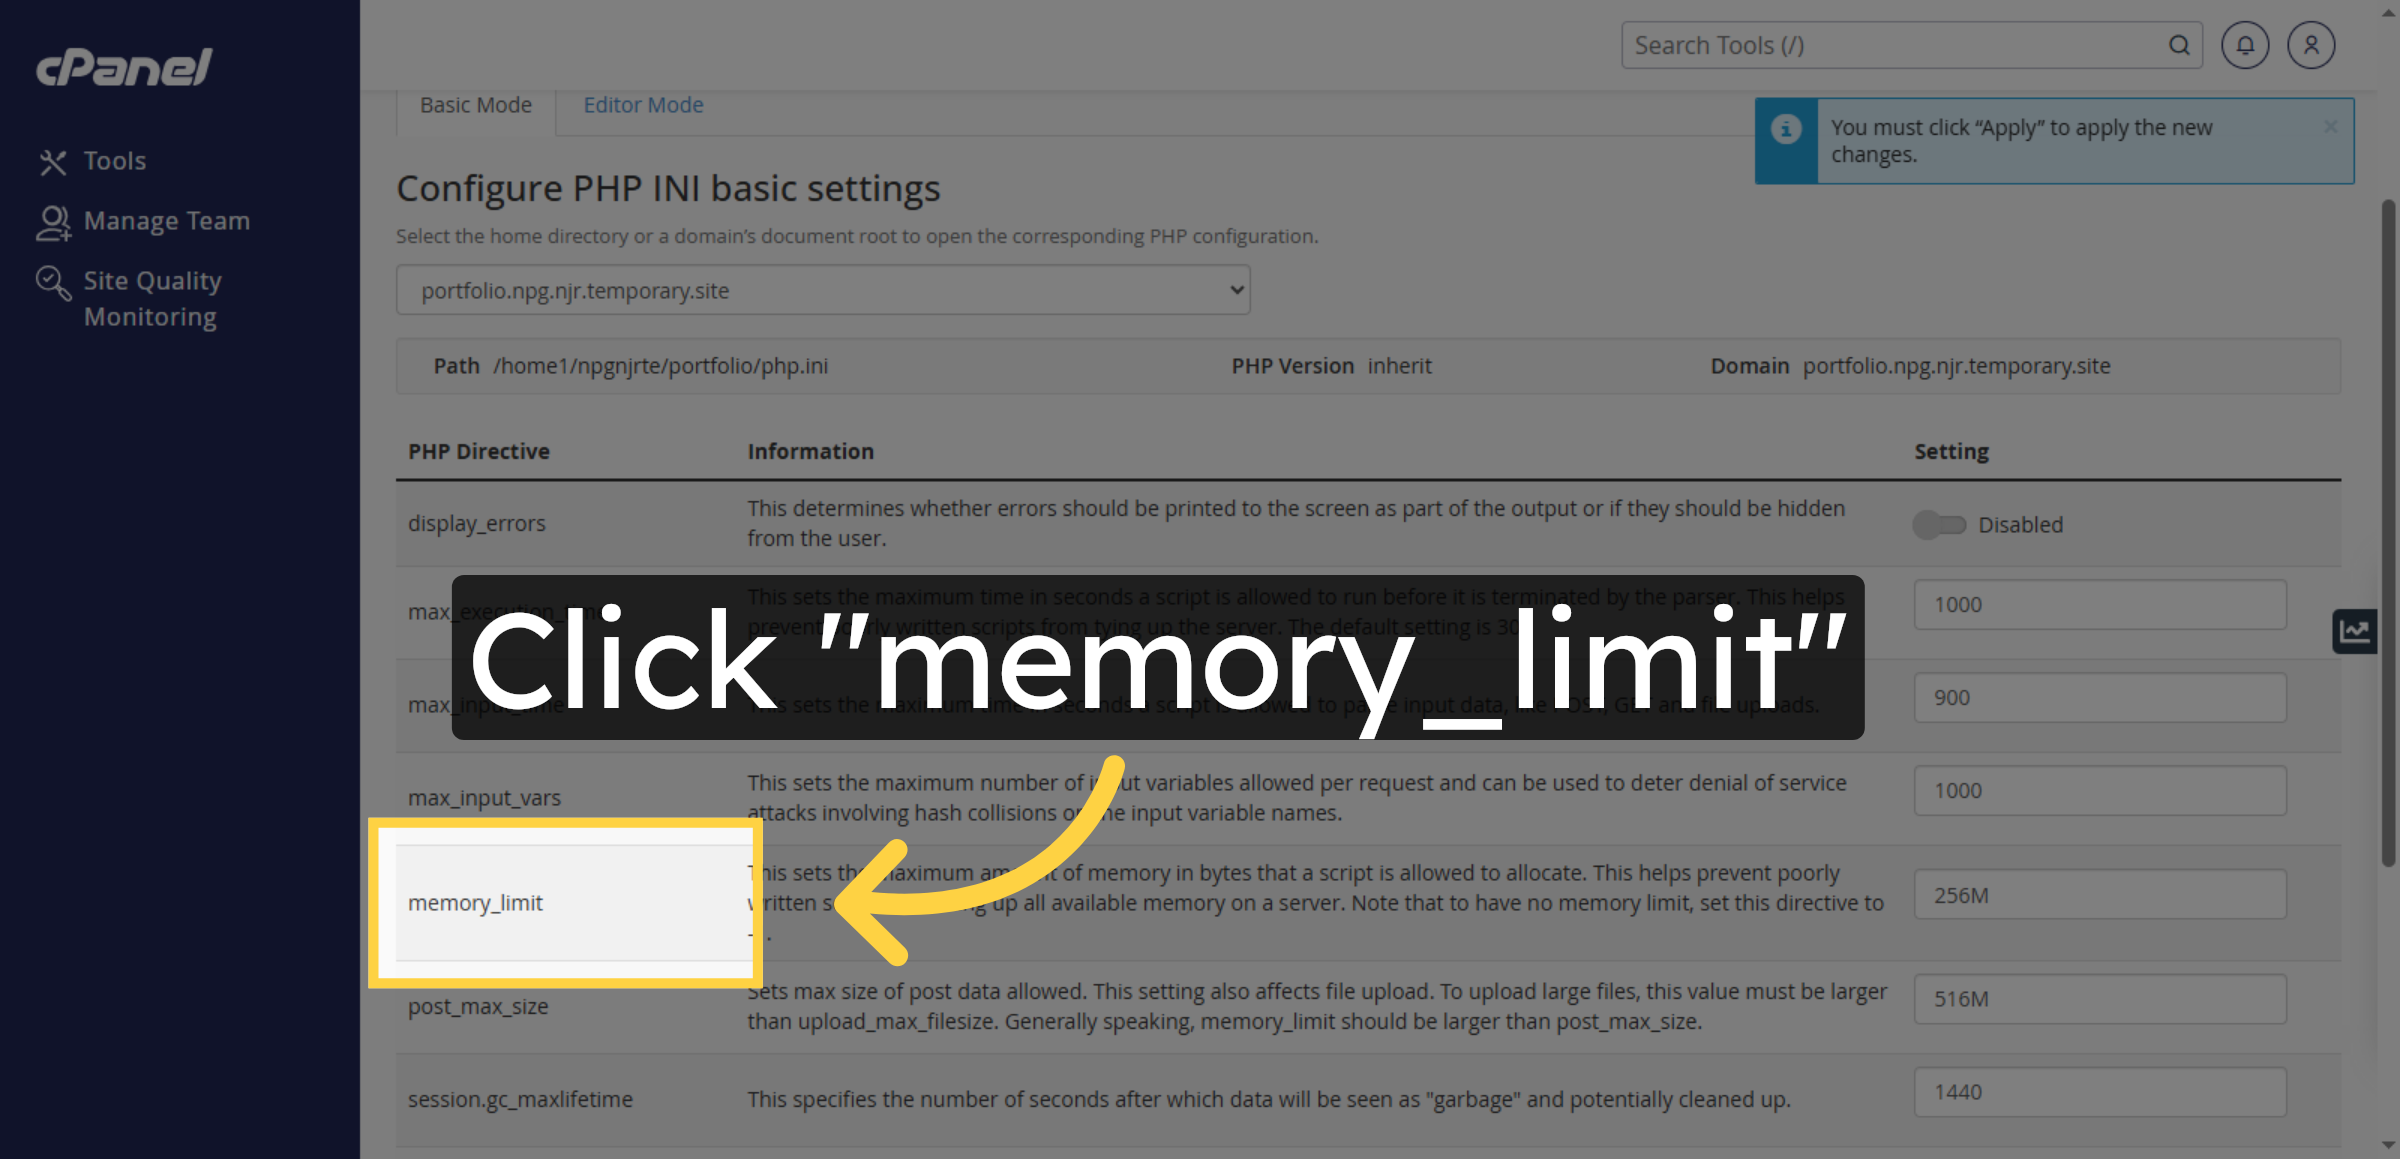
21. Choose Current Memory Limit
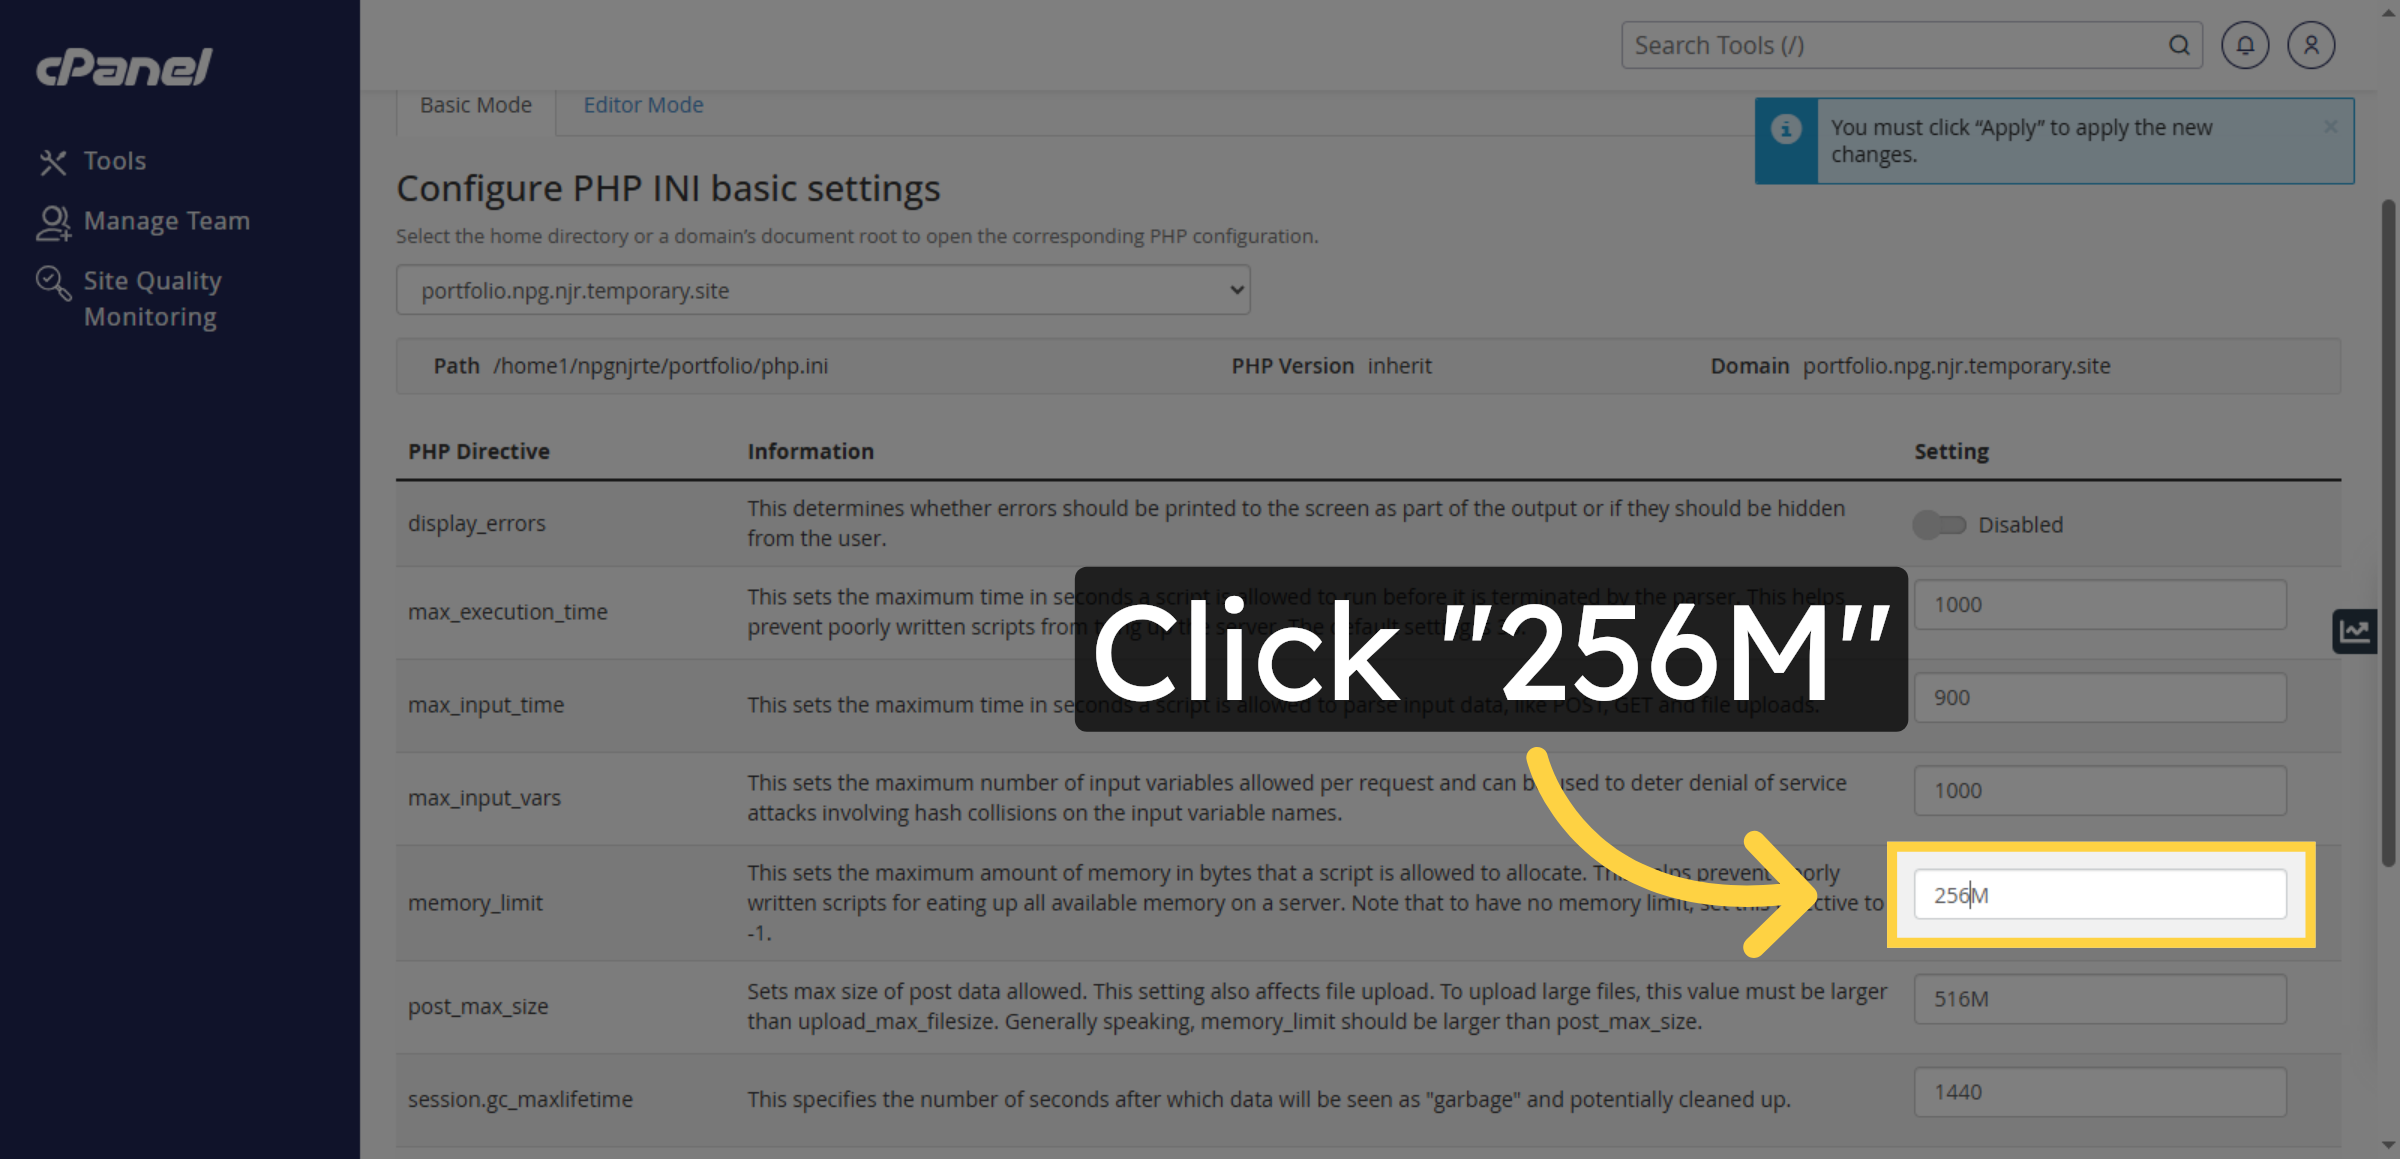
22. Enter New Memory Limit
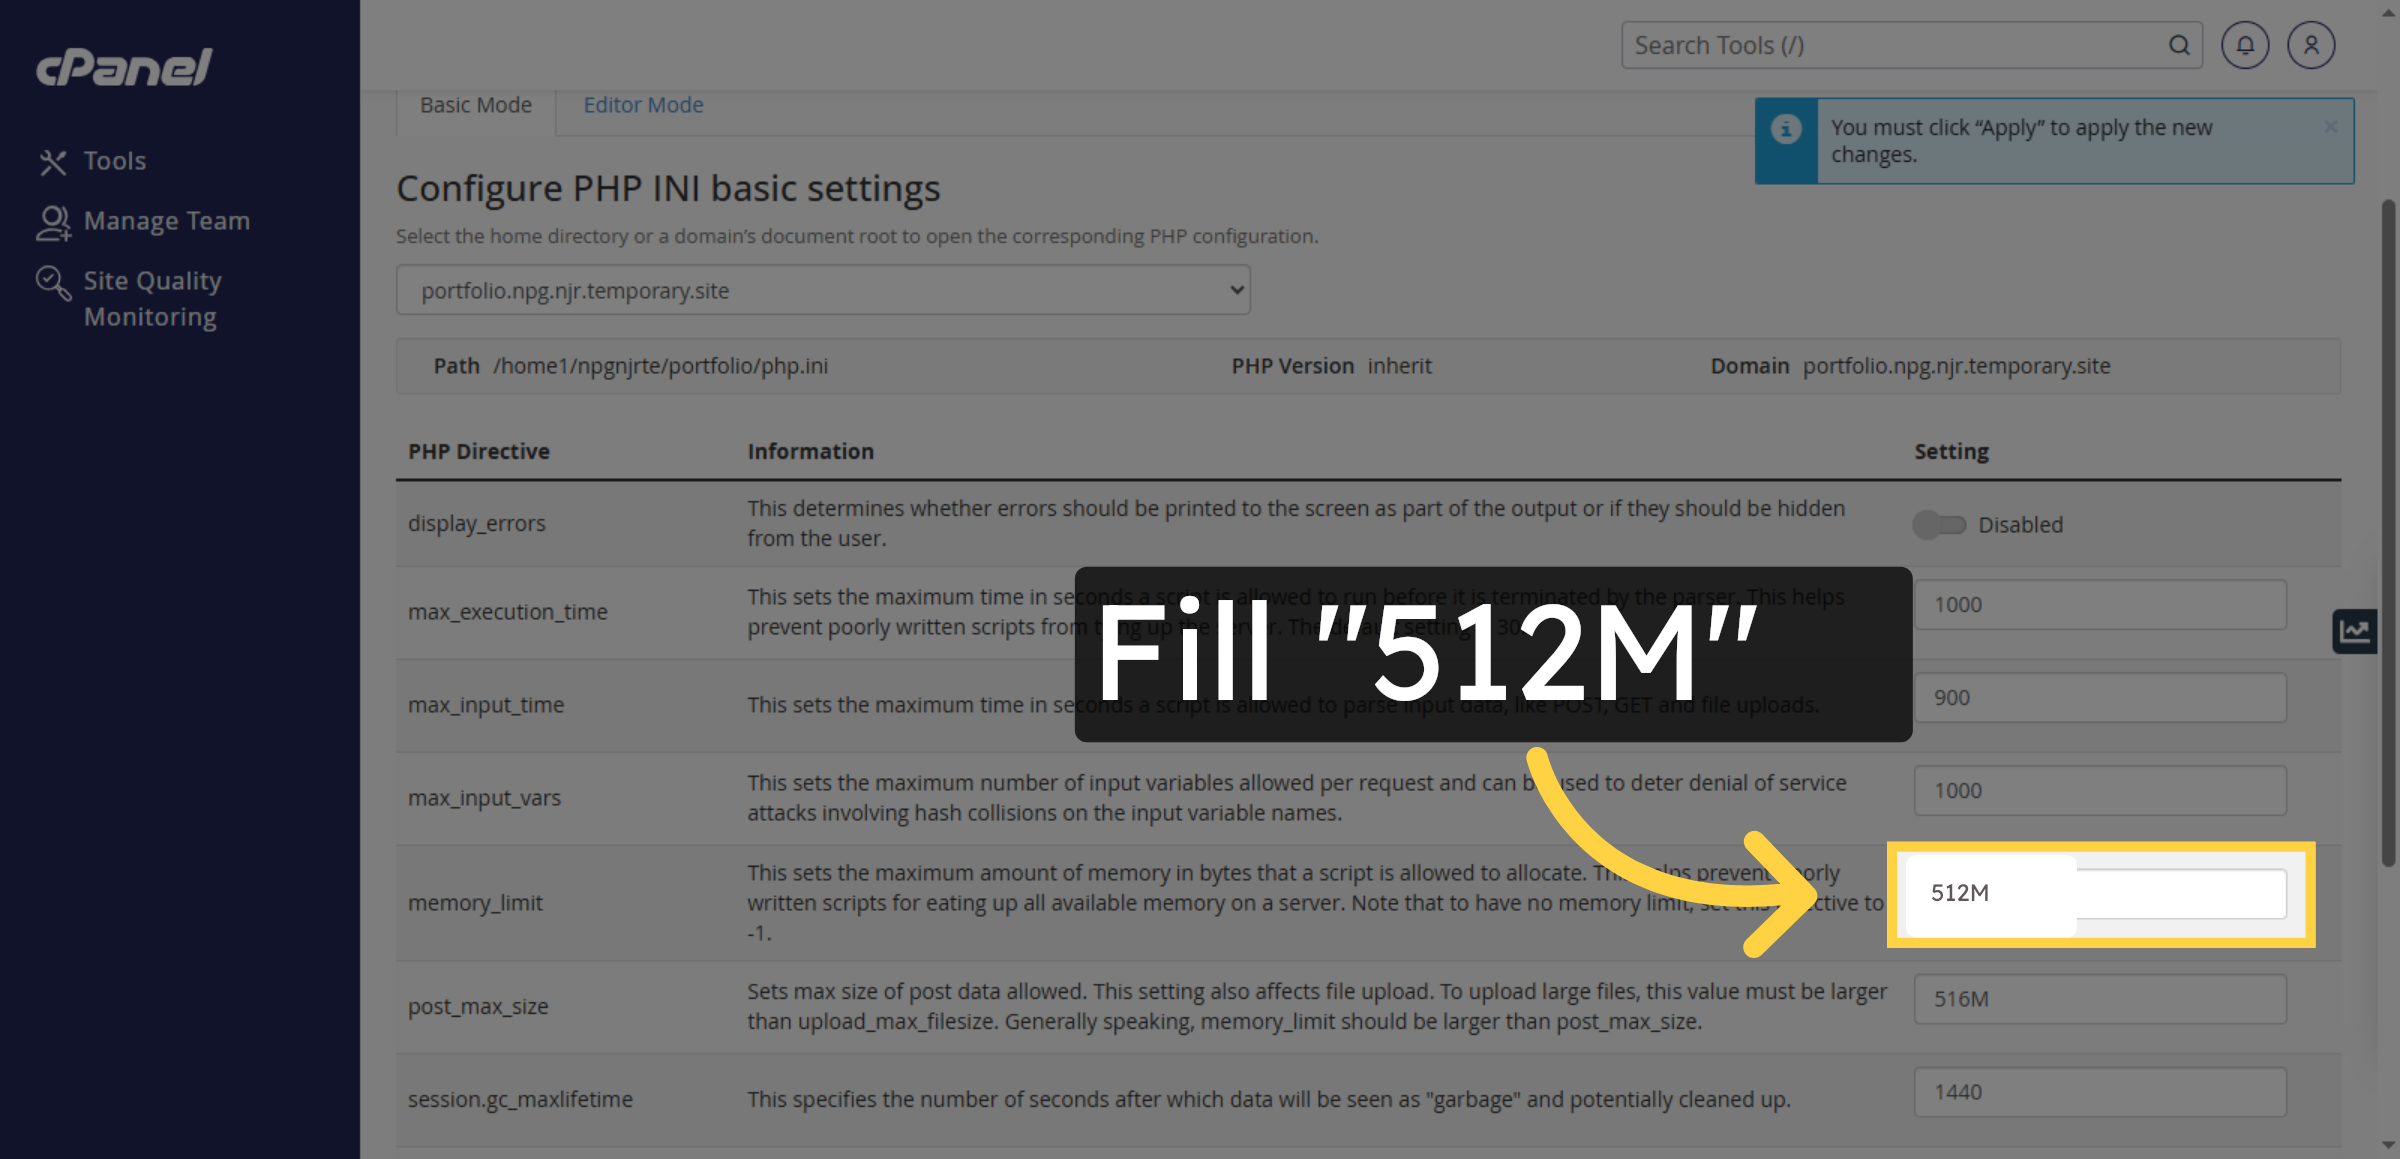
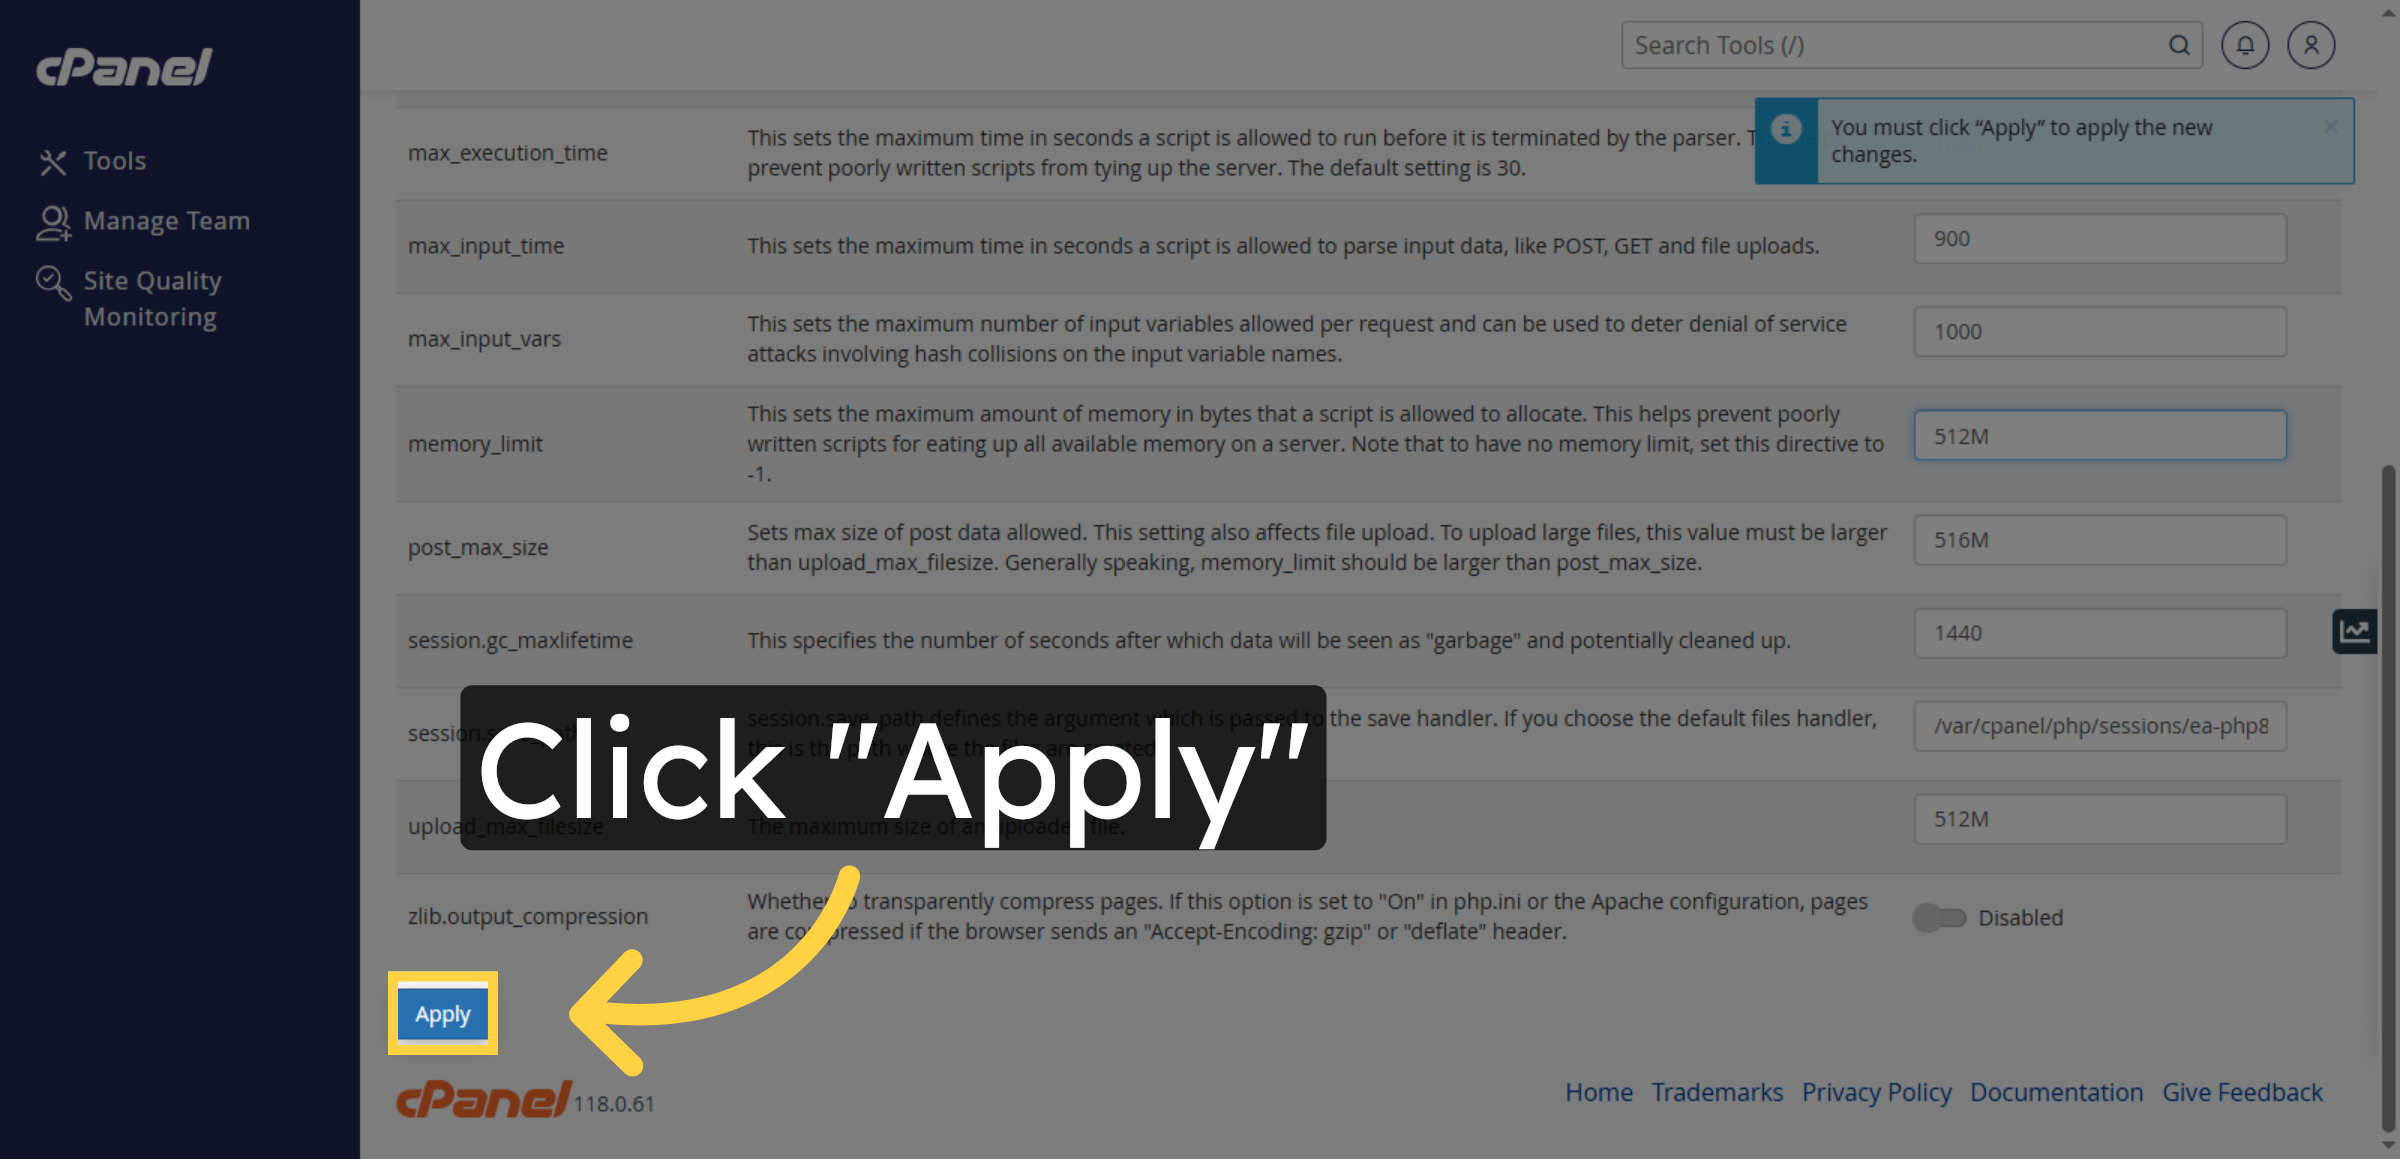
23. Apply Configuration Changes


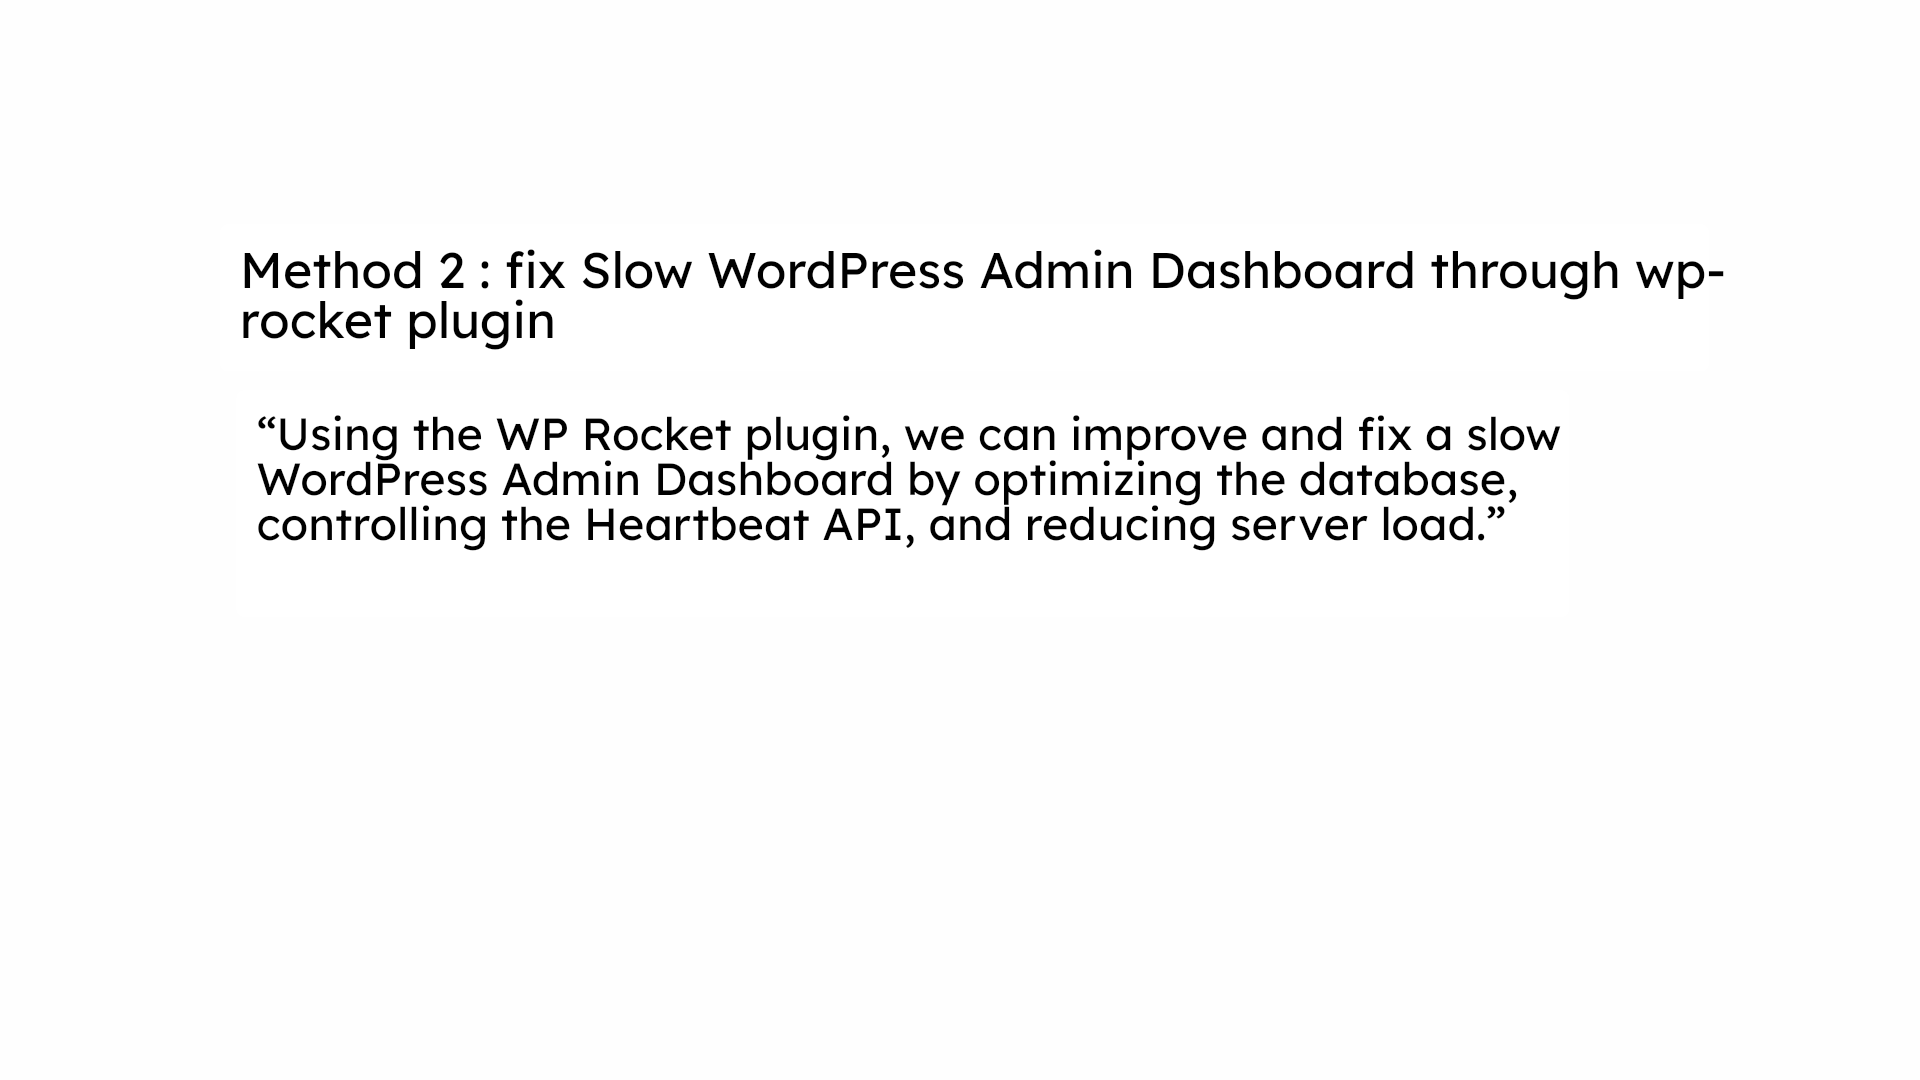
24. Method 2 : fix Slow WordPress Admin Dashboard through wp-rocket plugin
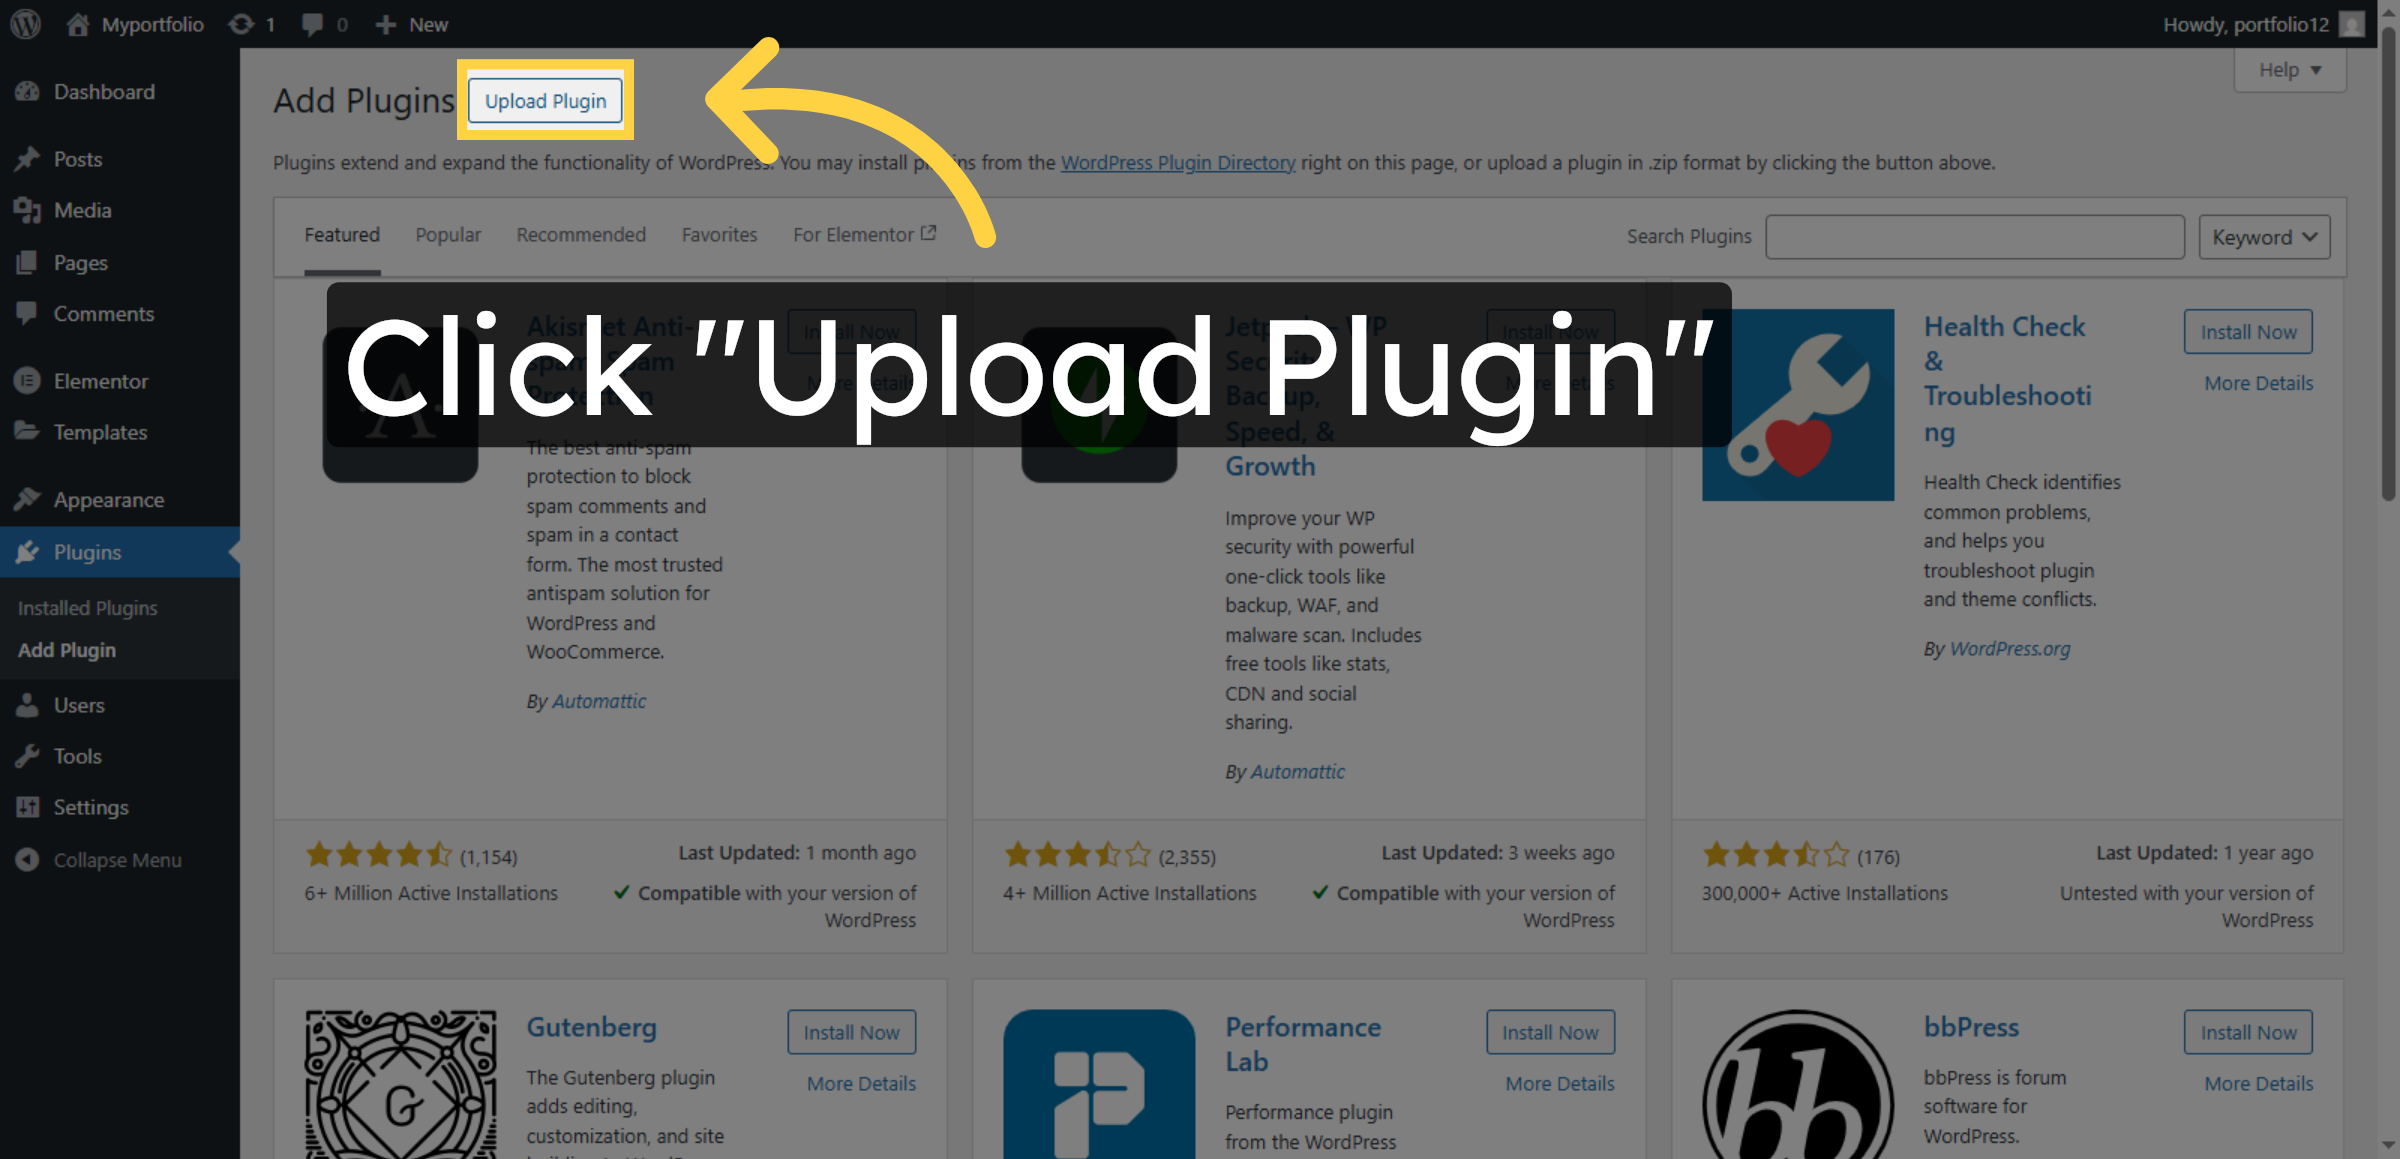
25. Select Upload Plugin
26. Enter Plugin File Path

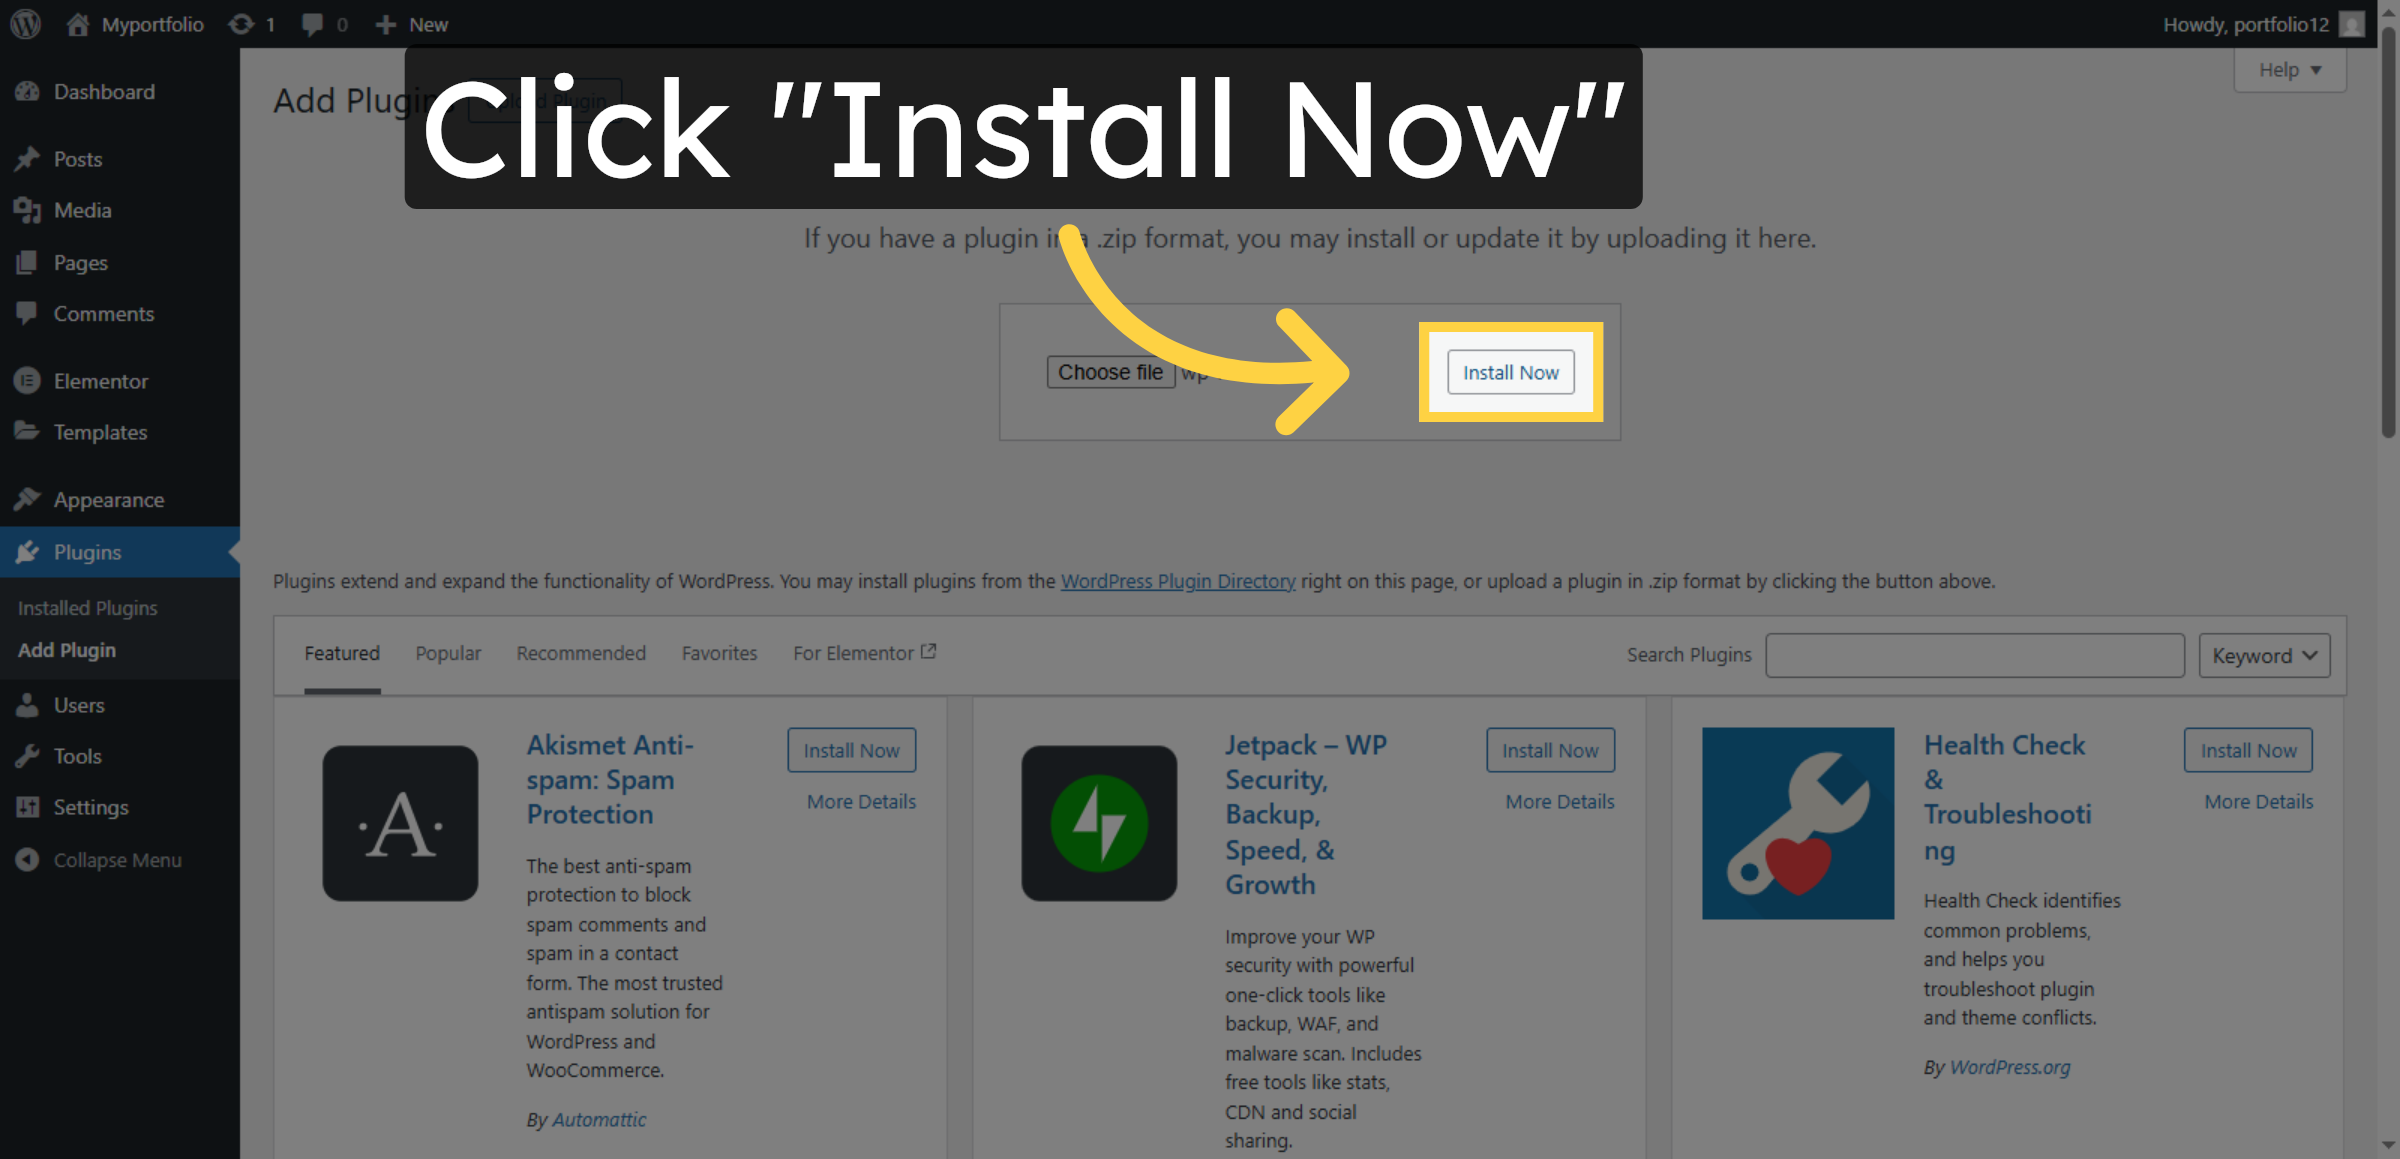
27. Install Plugin
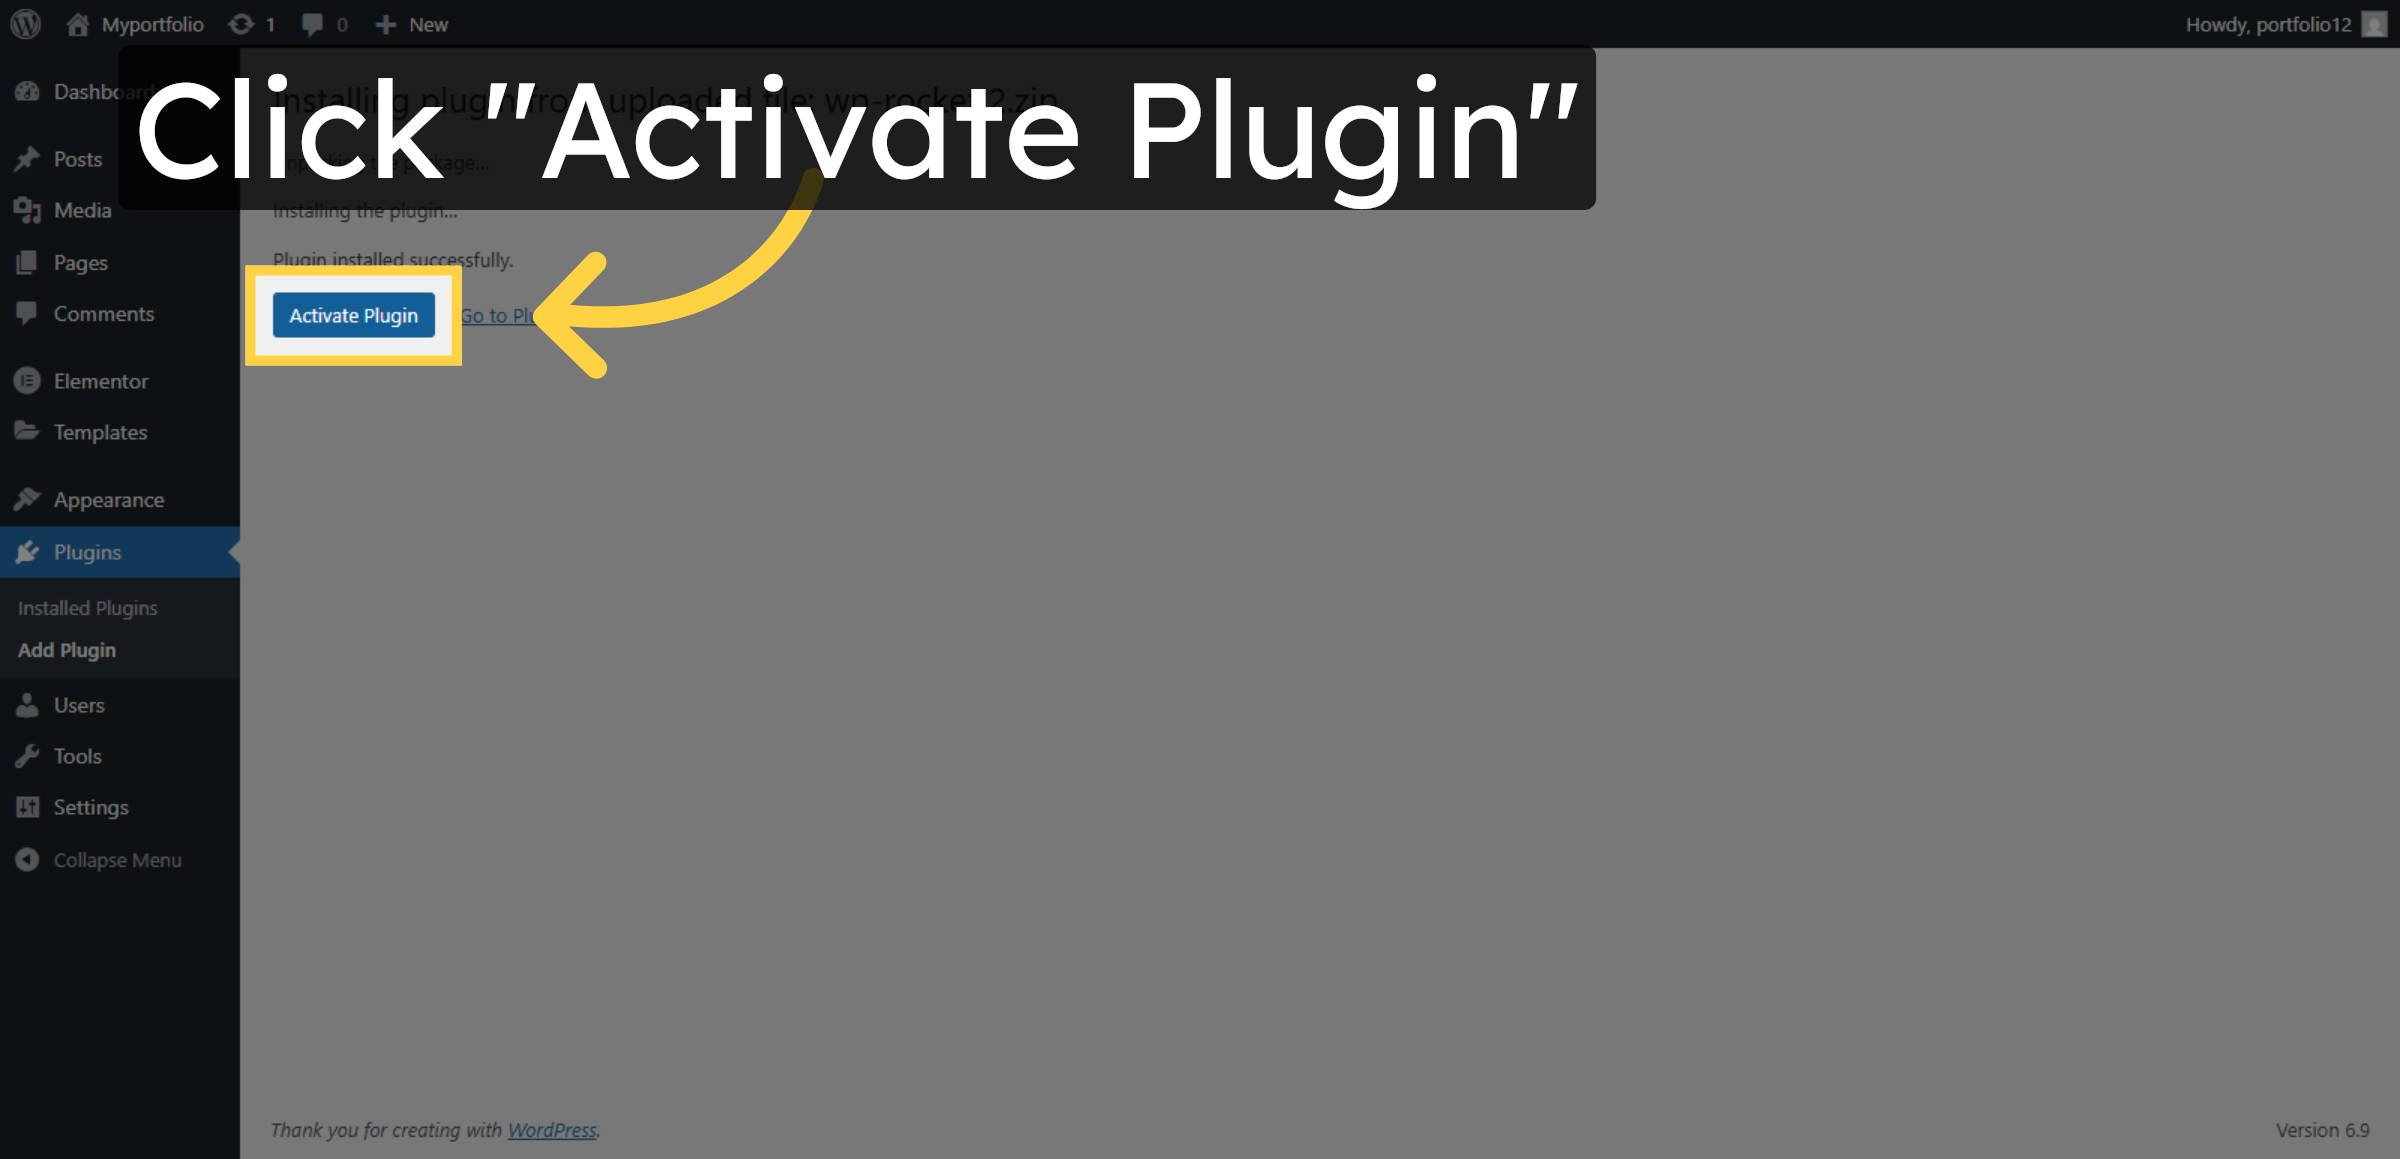
28. Activate Plugin
29. Open Plugin Settings
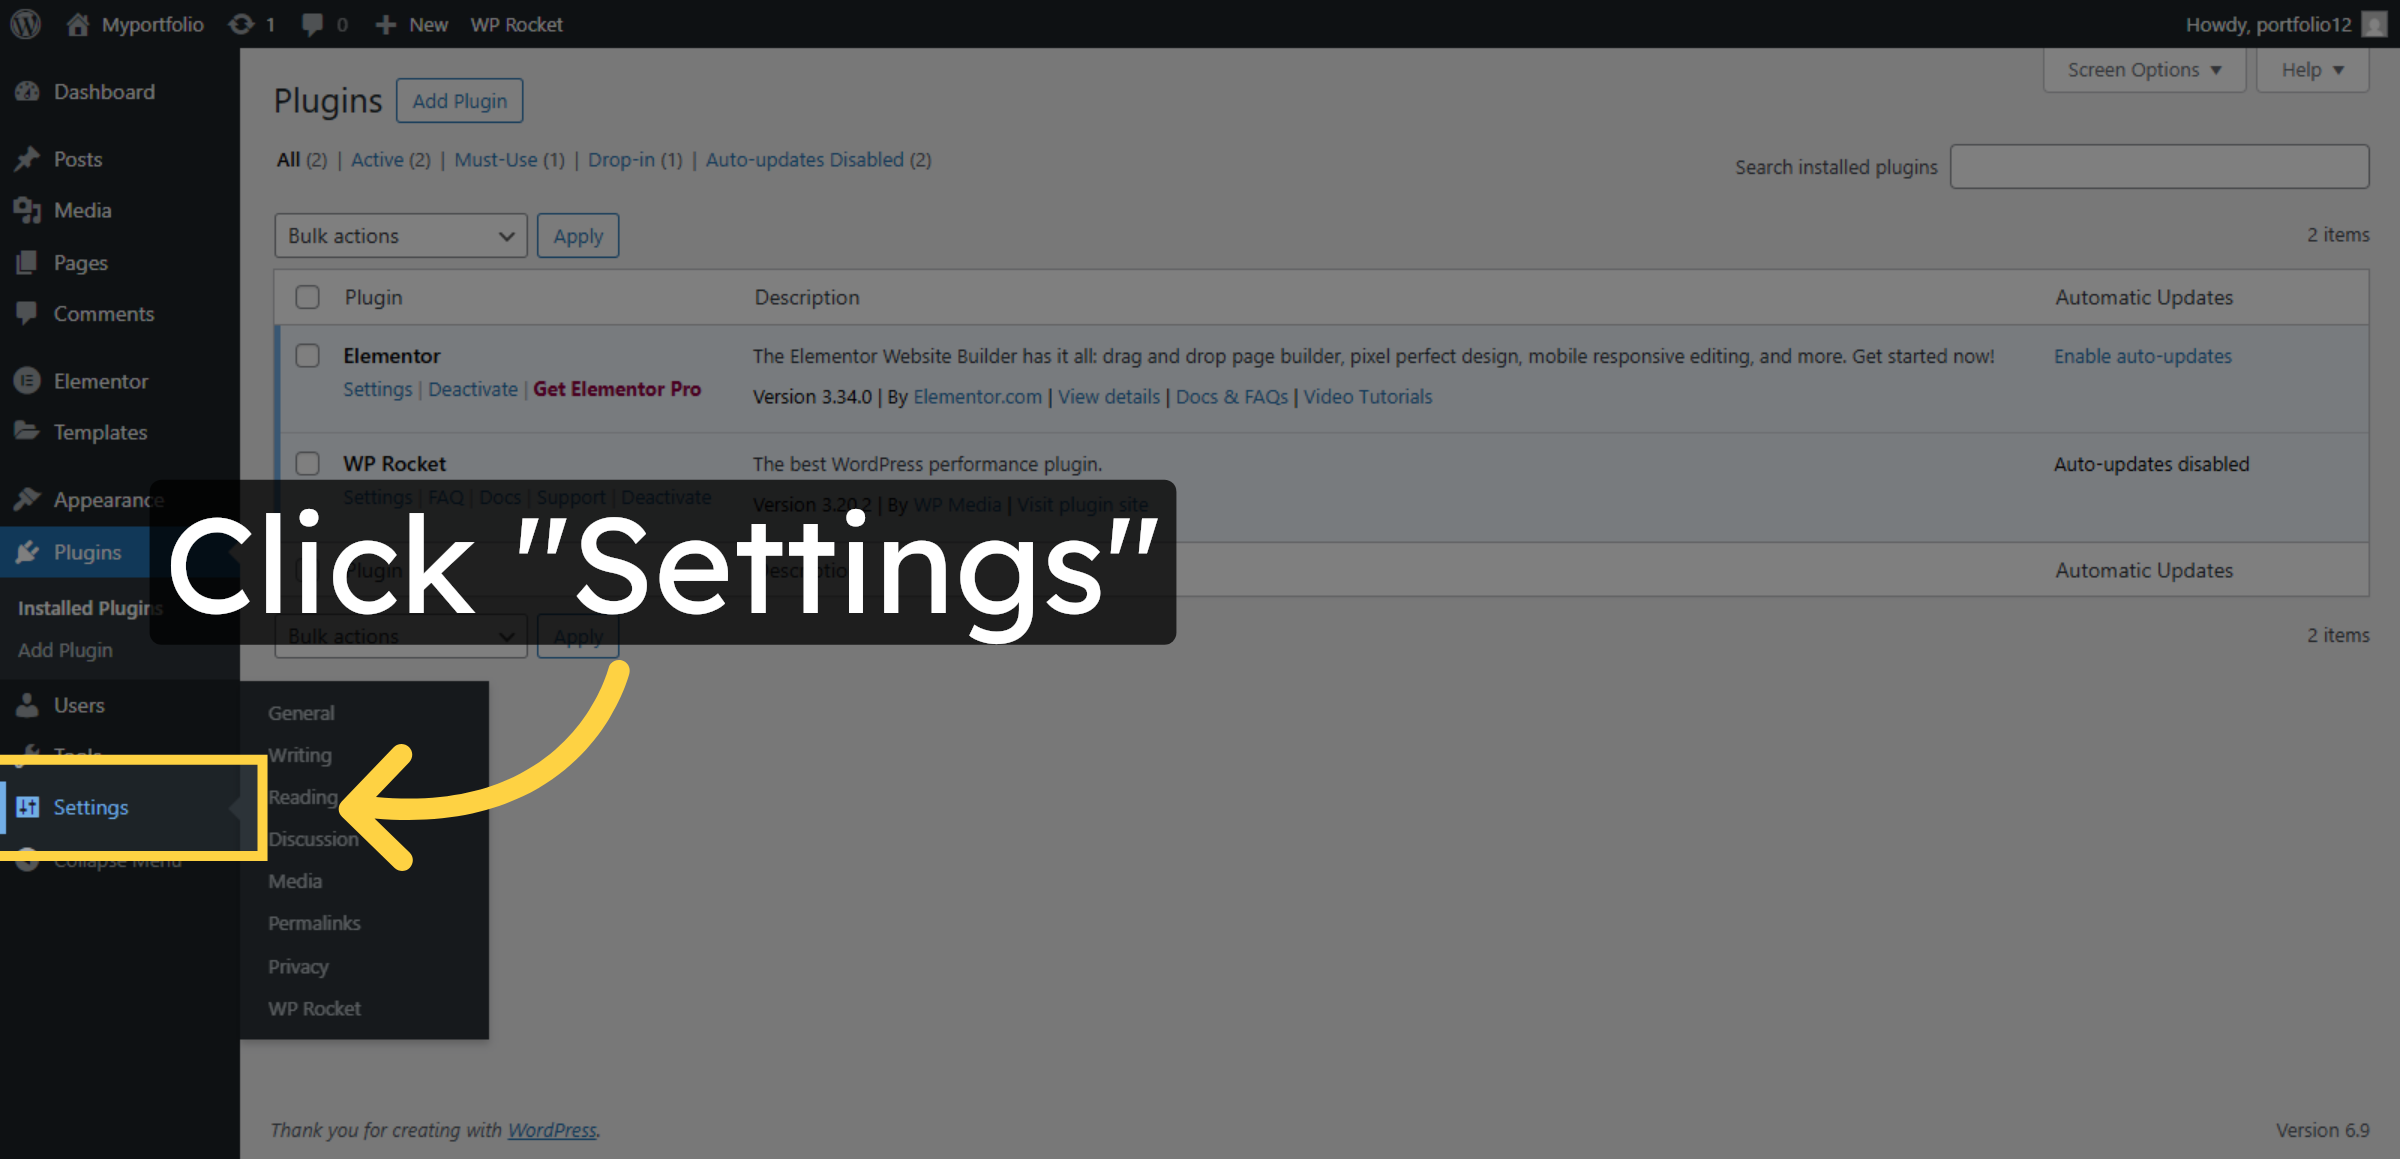
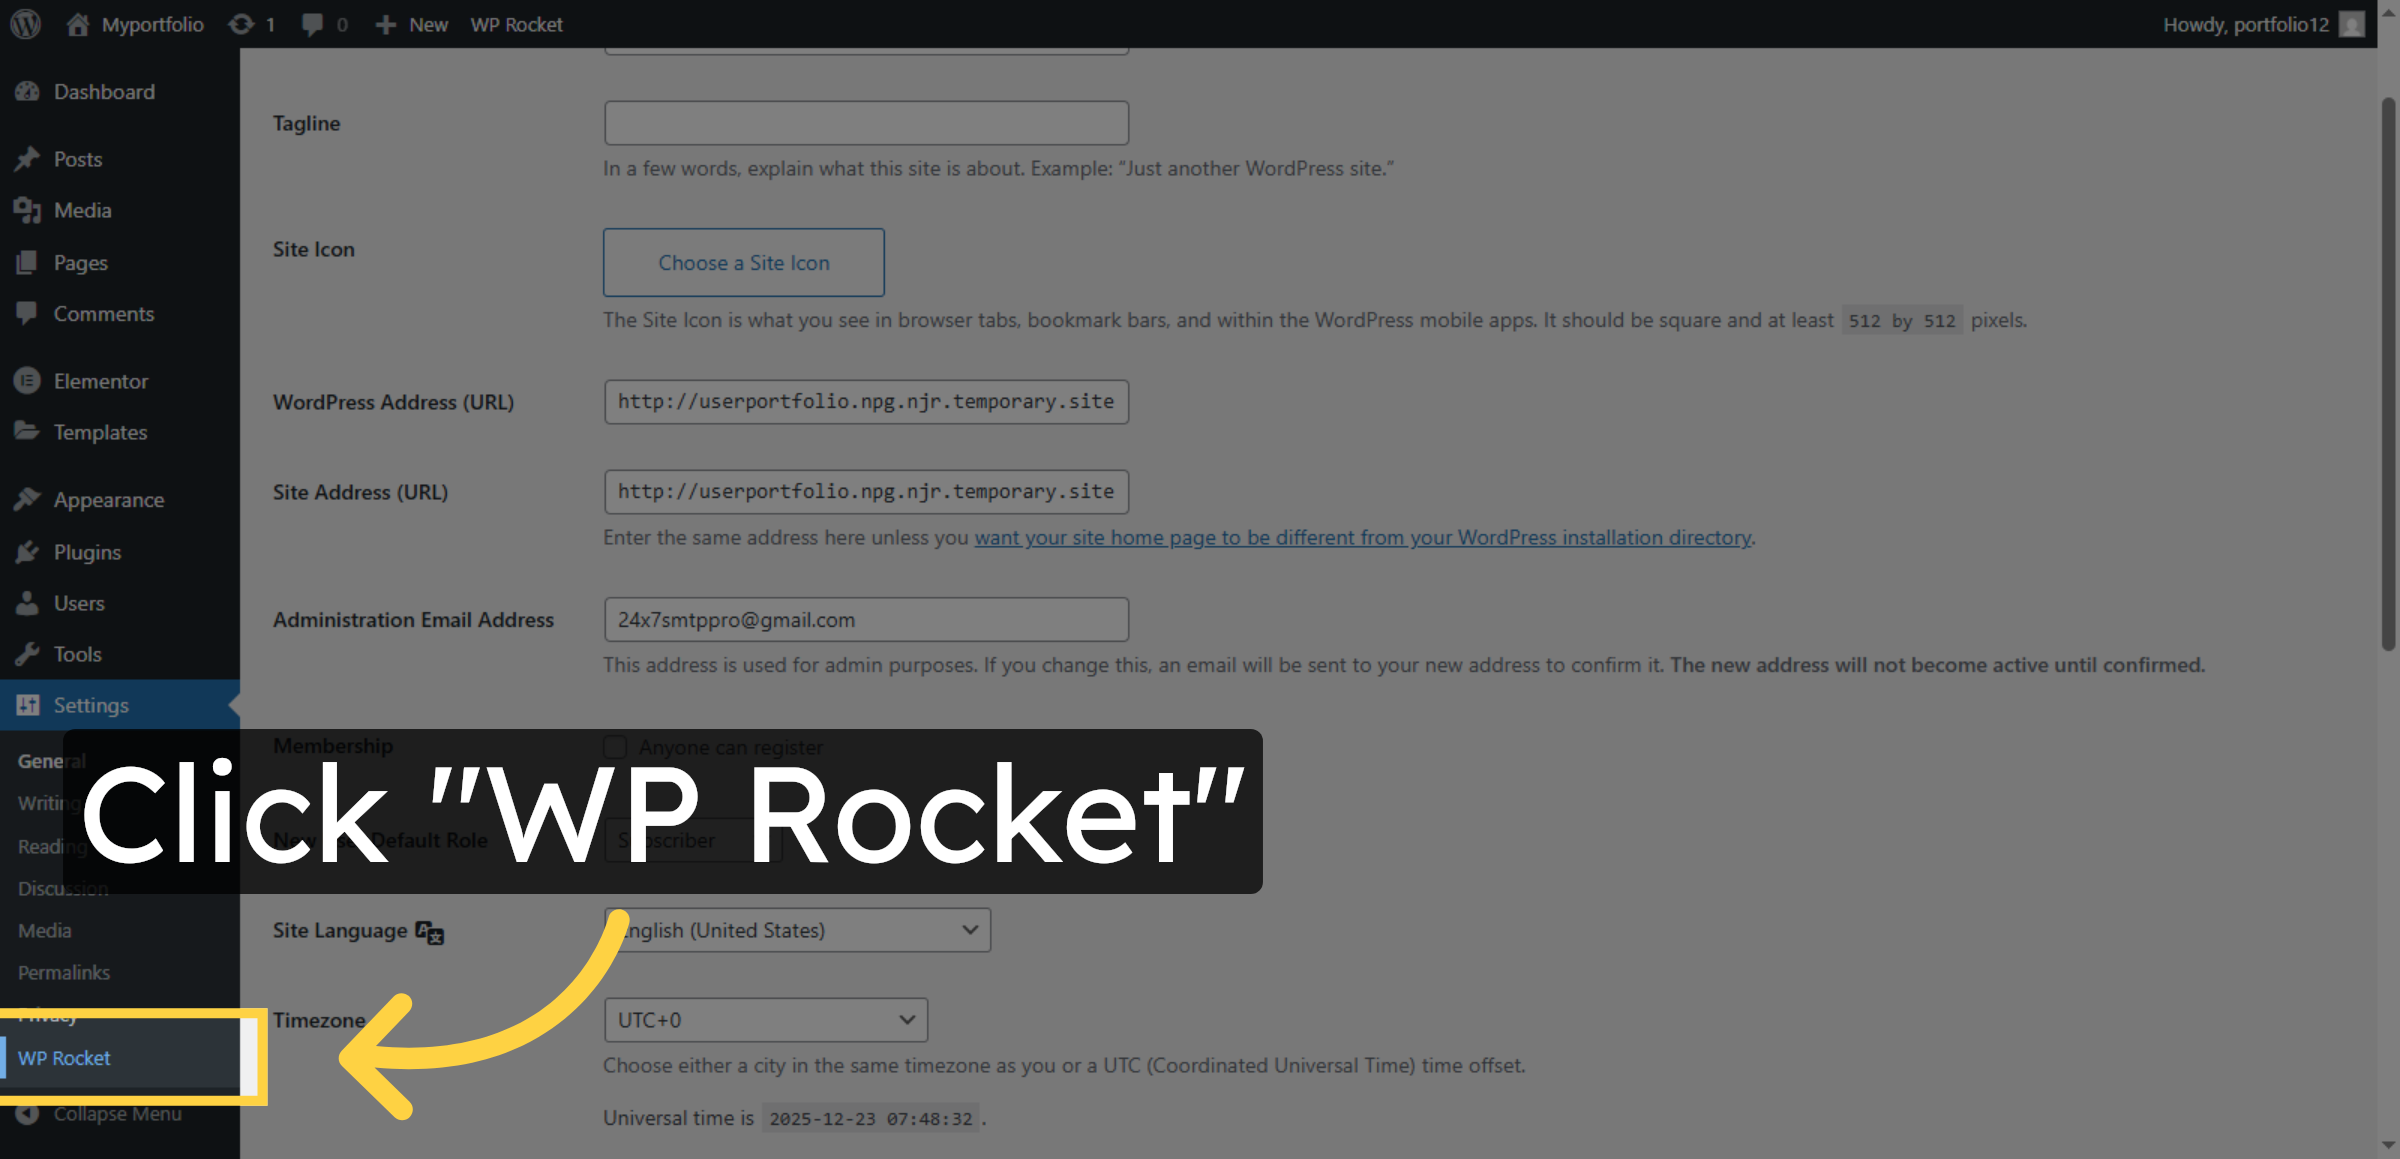
30. Select WP Rocket Settings
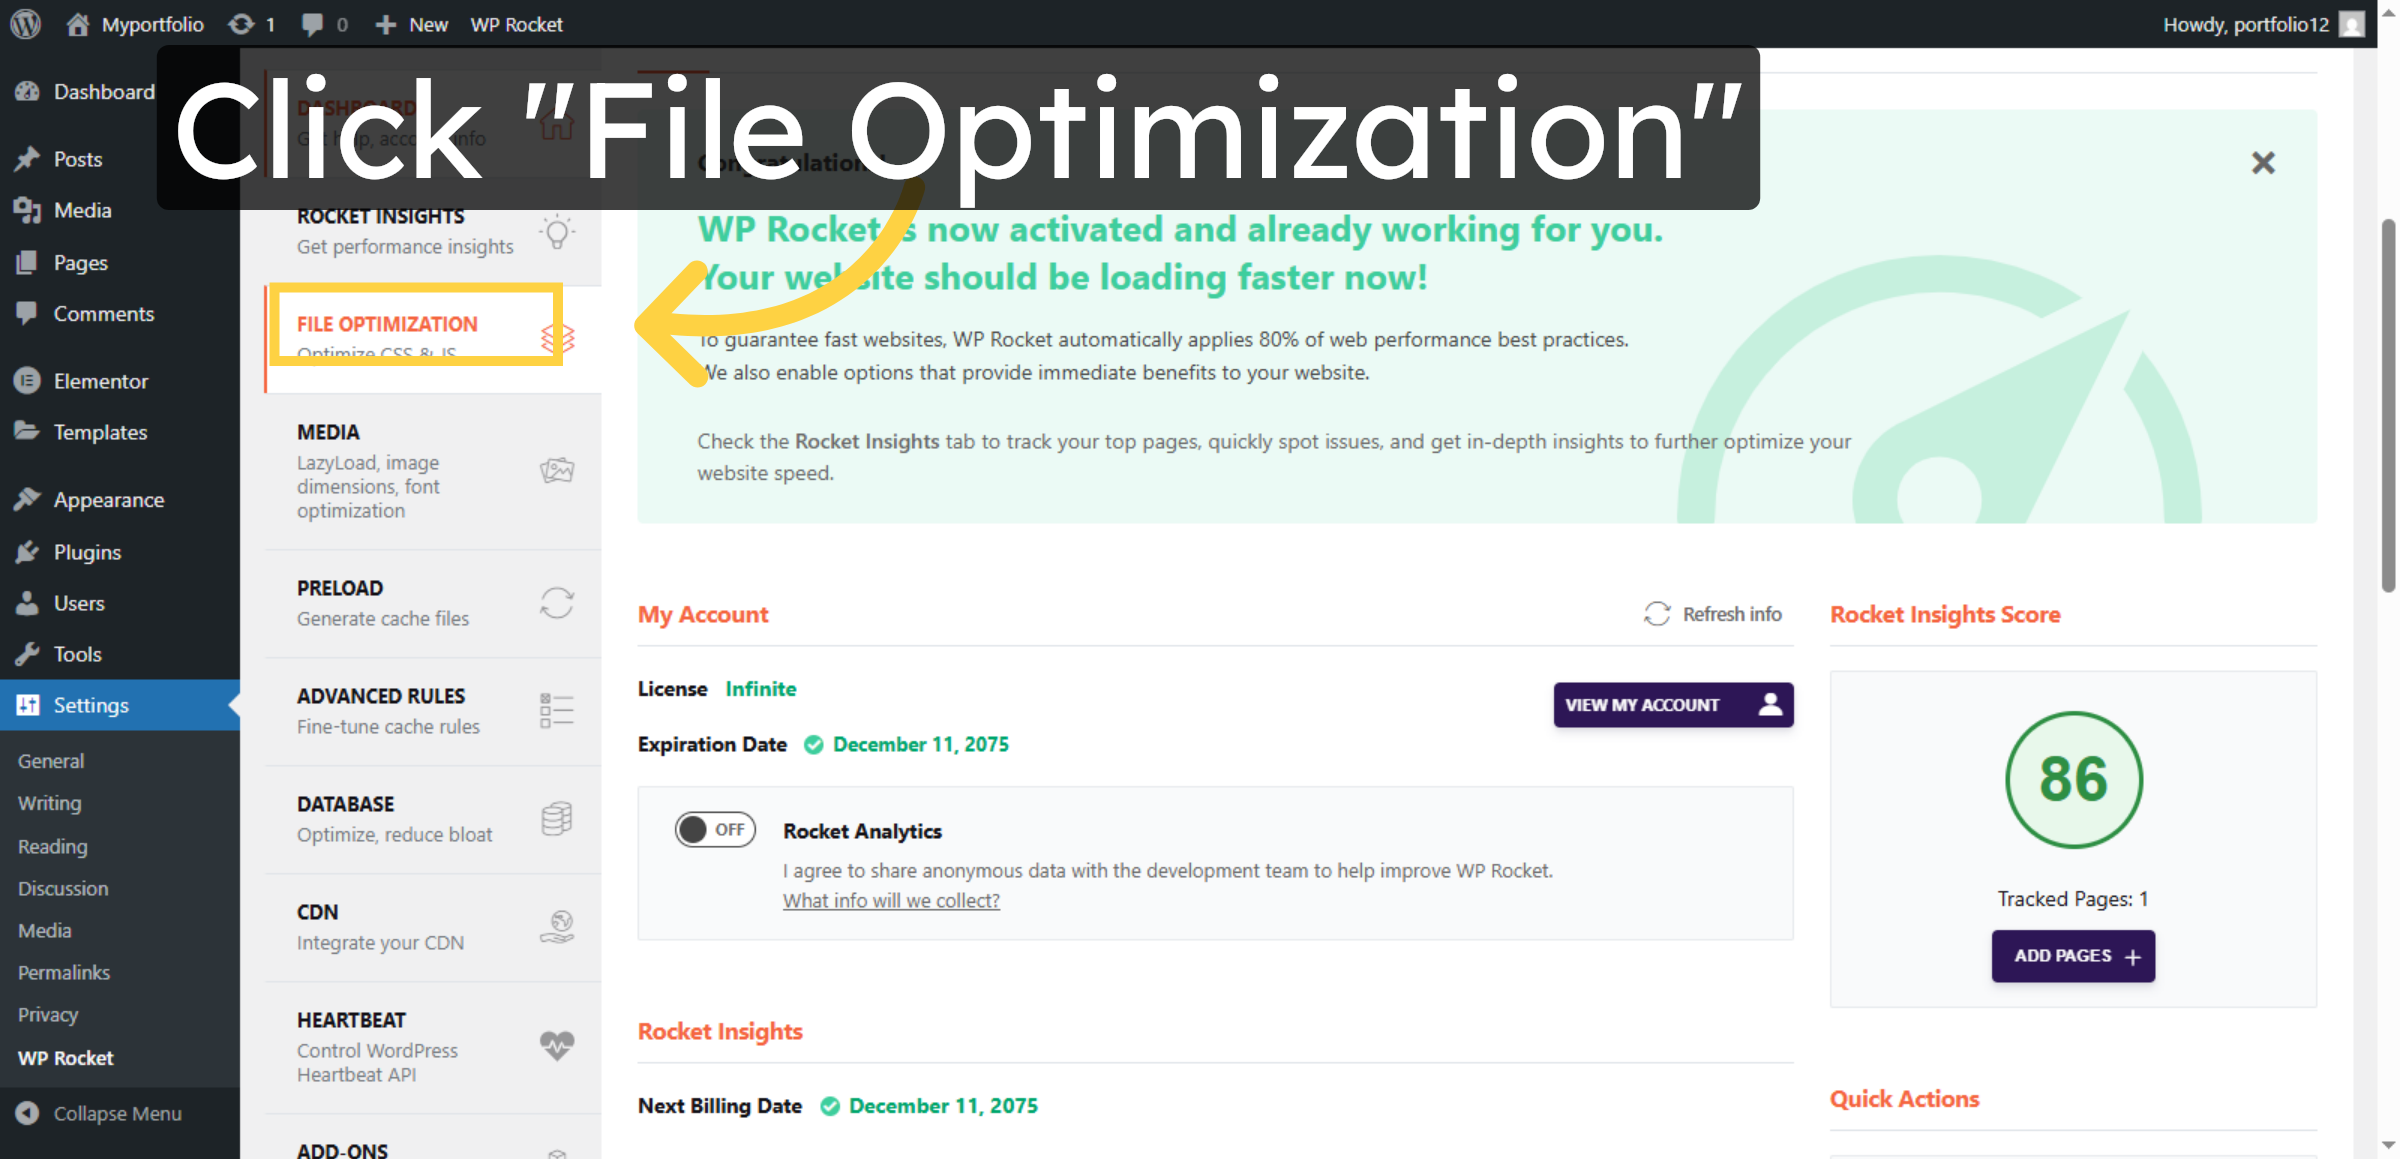
31. Access File Optimization
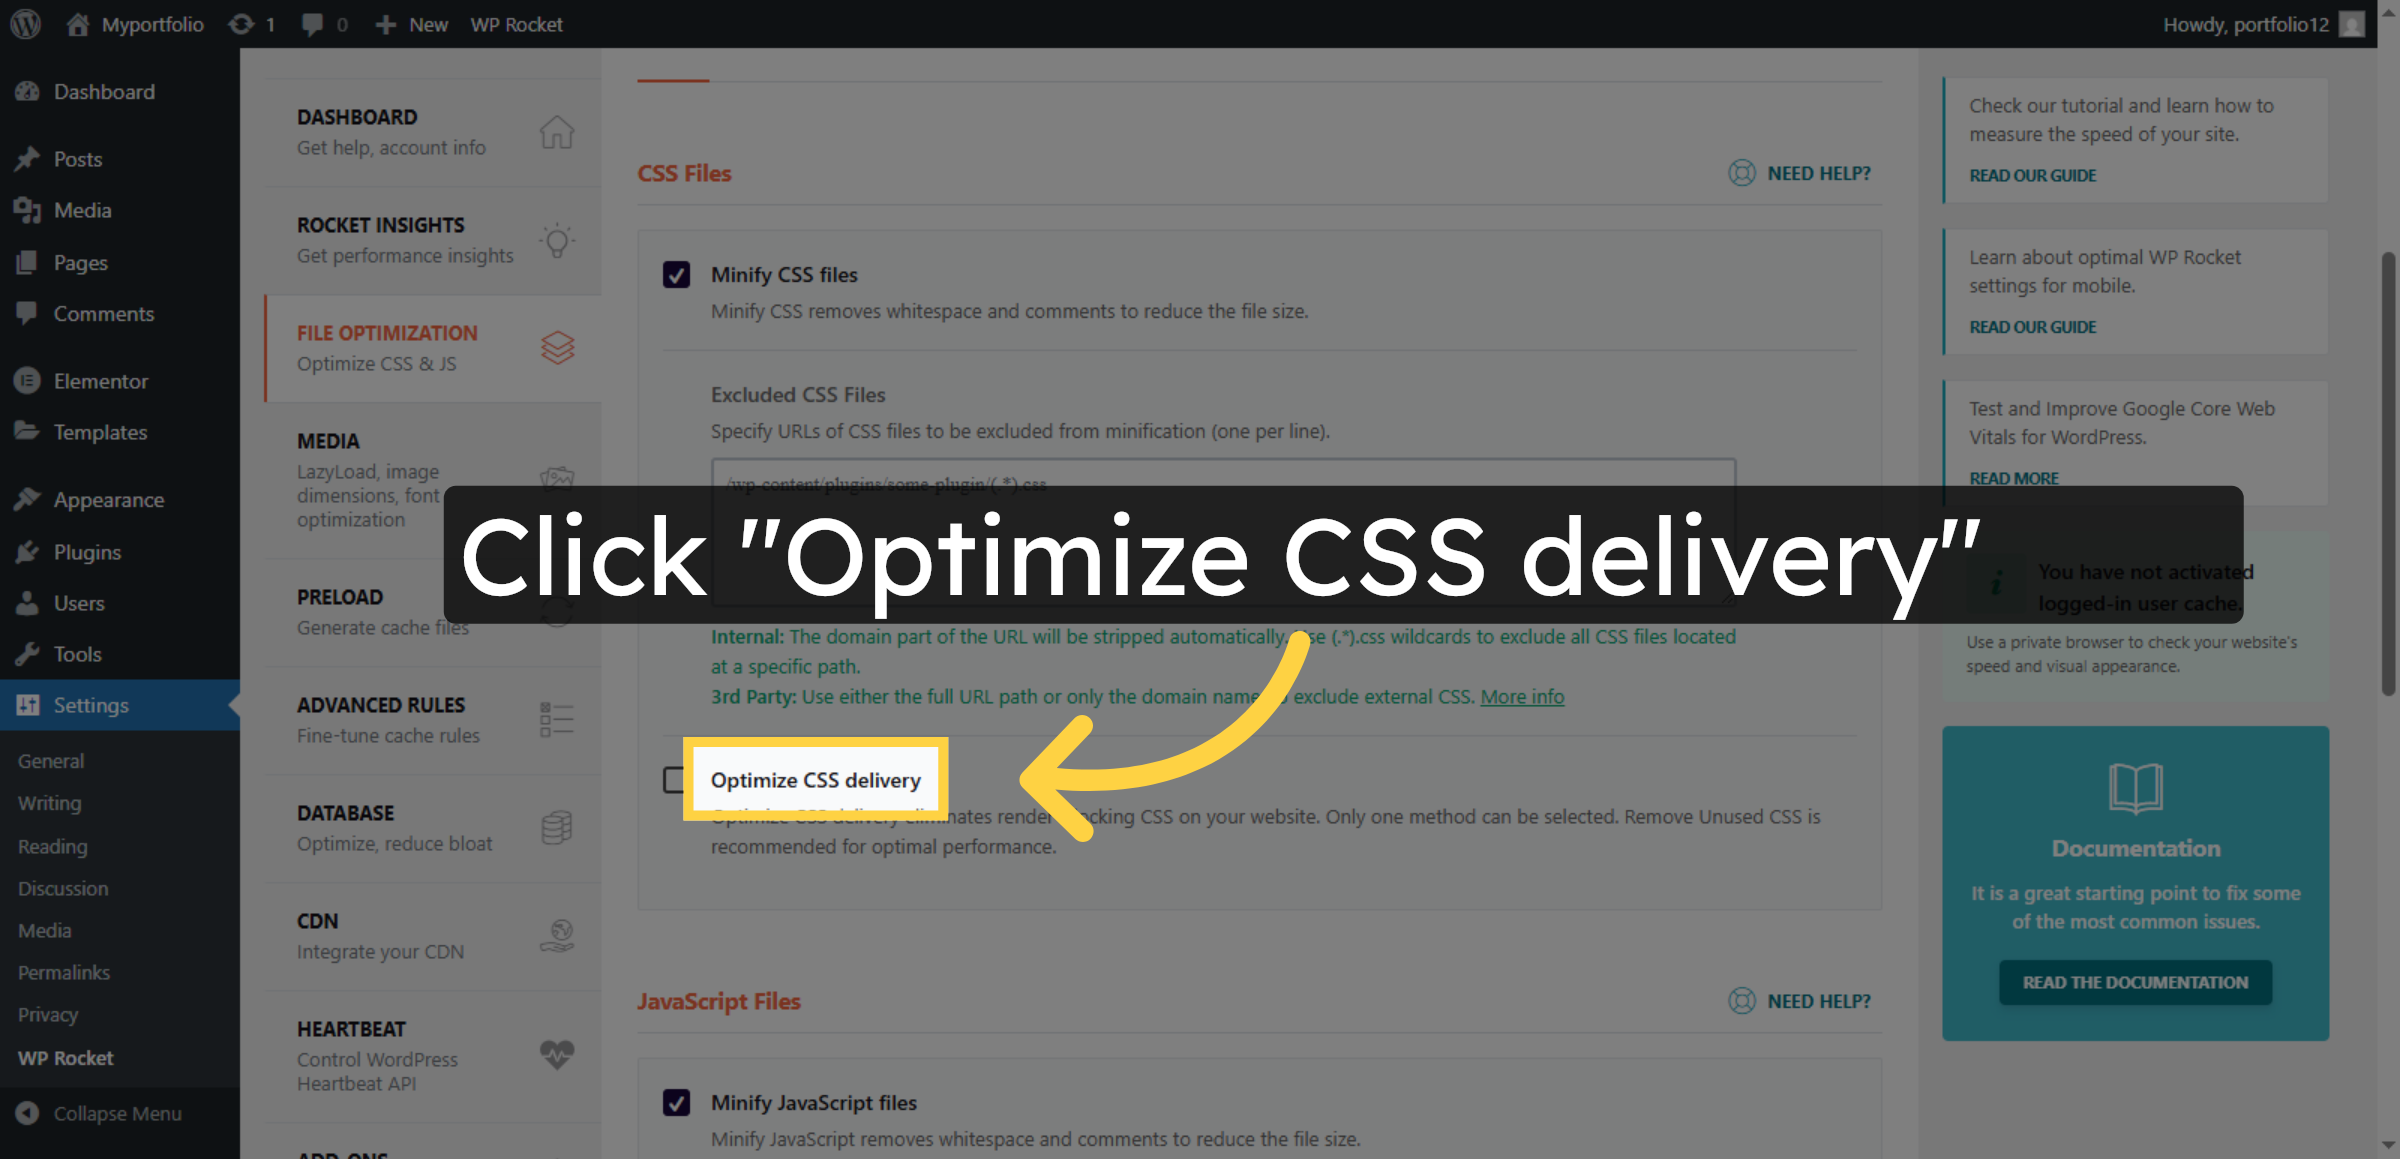
32. Enable CSS Delivery Optimization
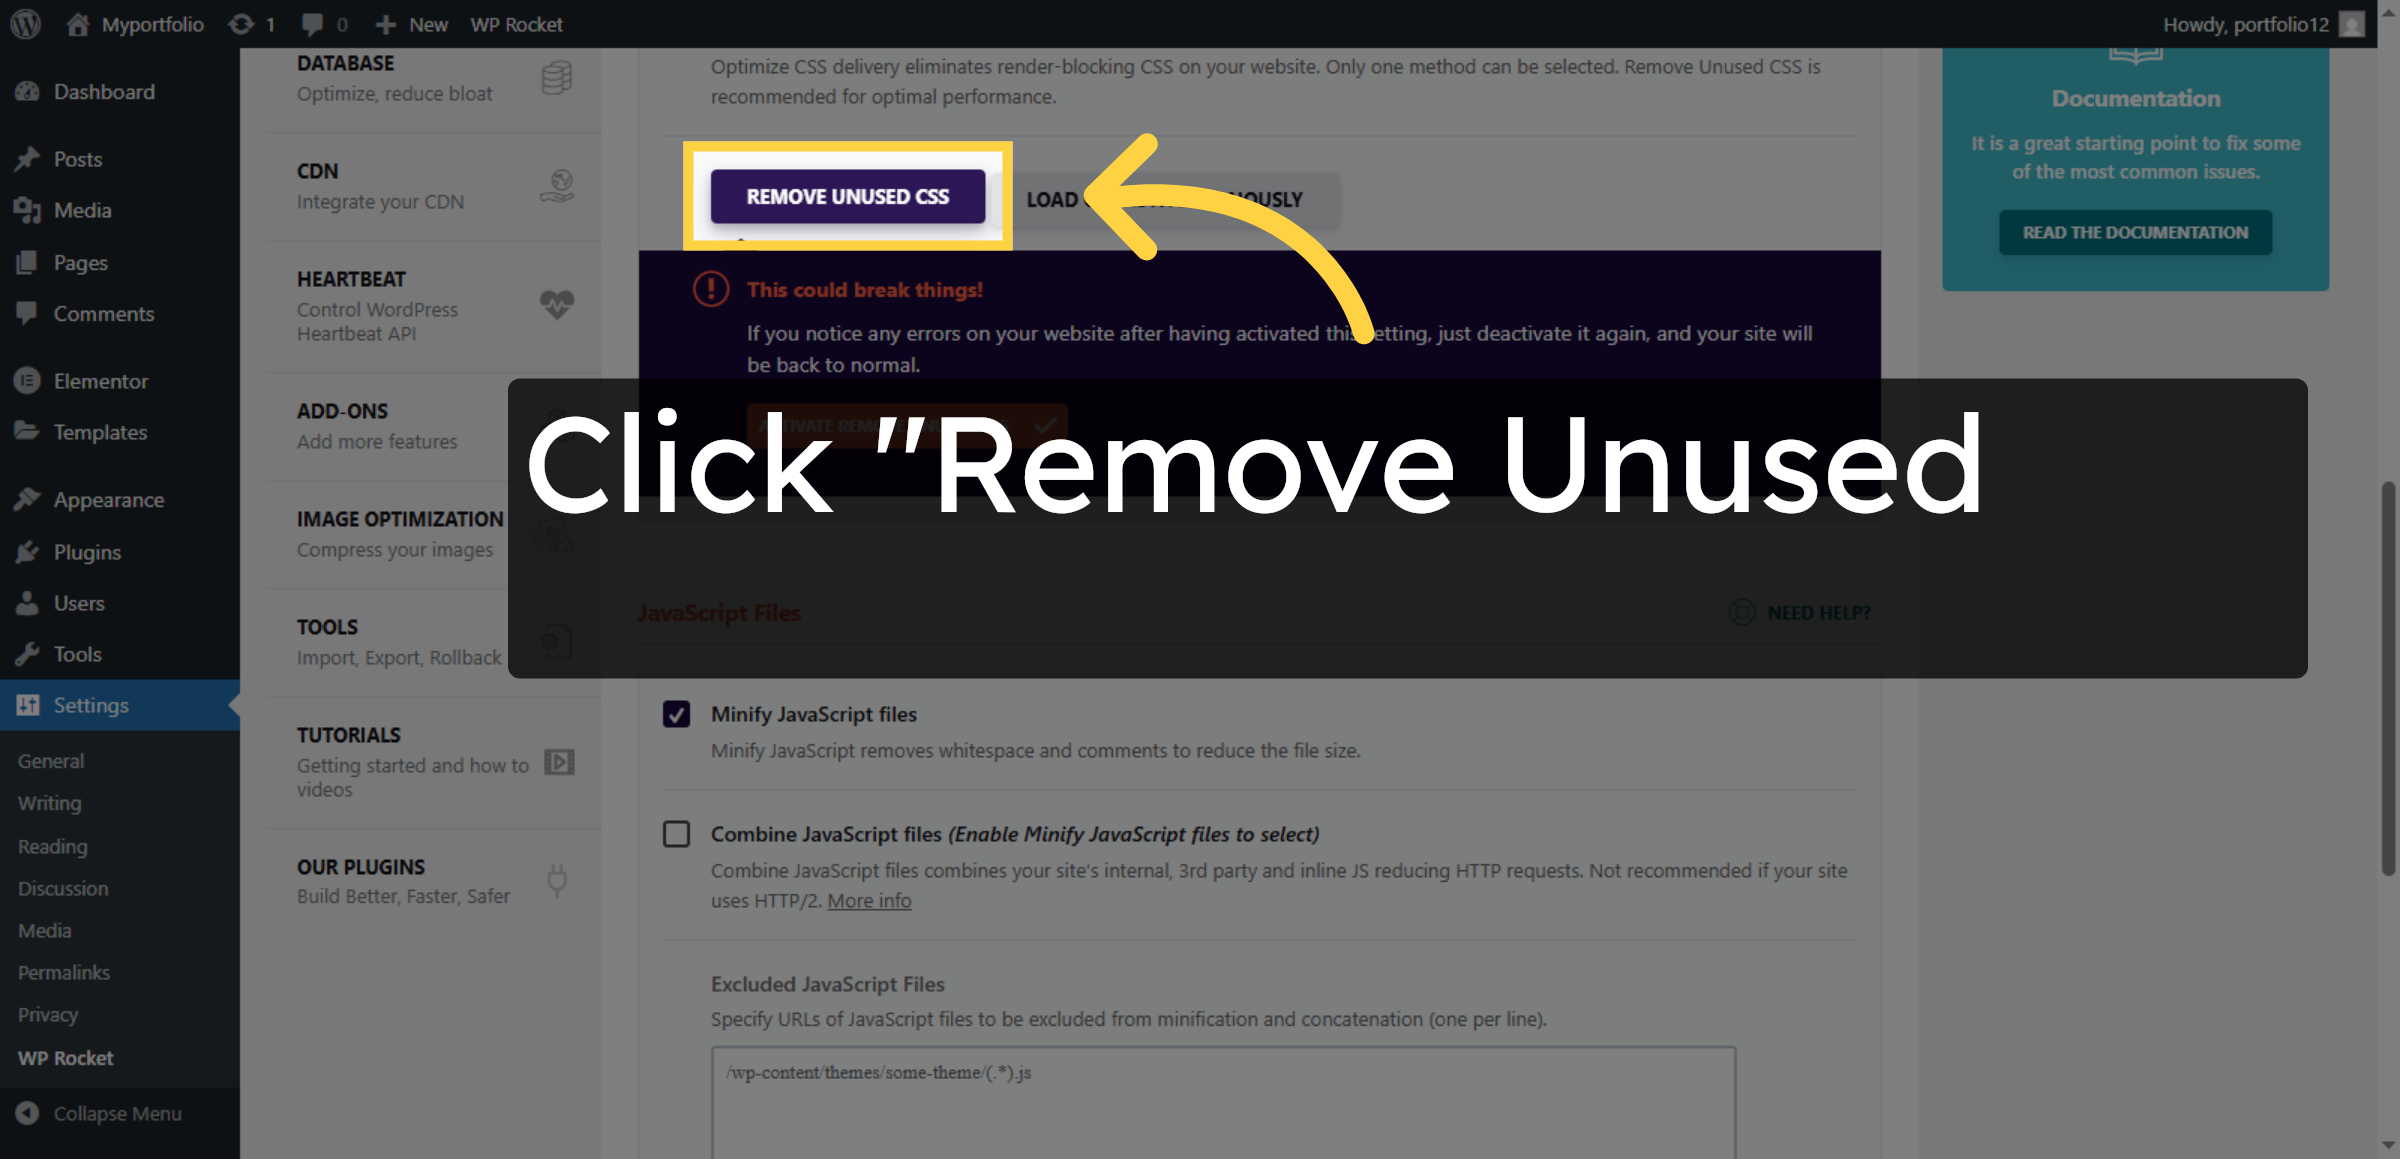
33. Enable Remove Unused CSS
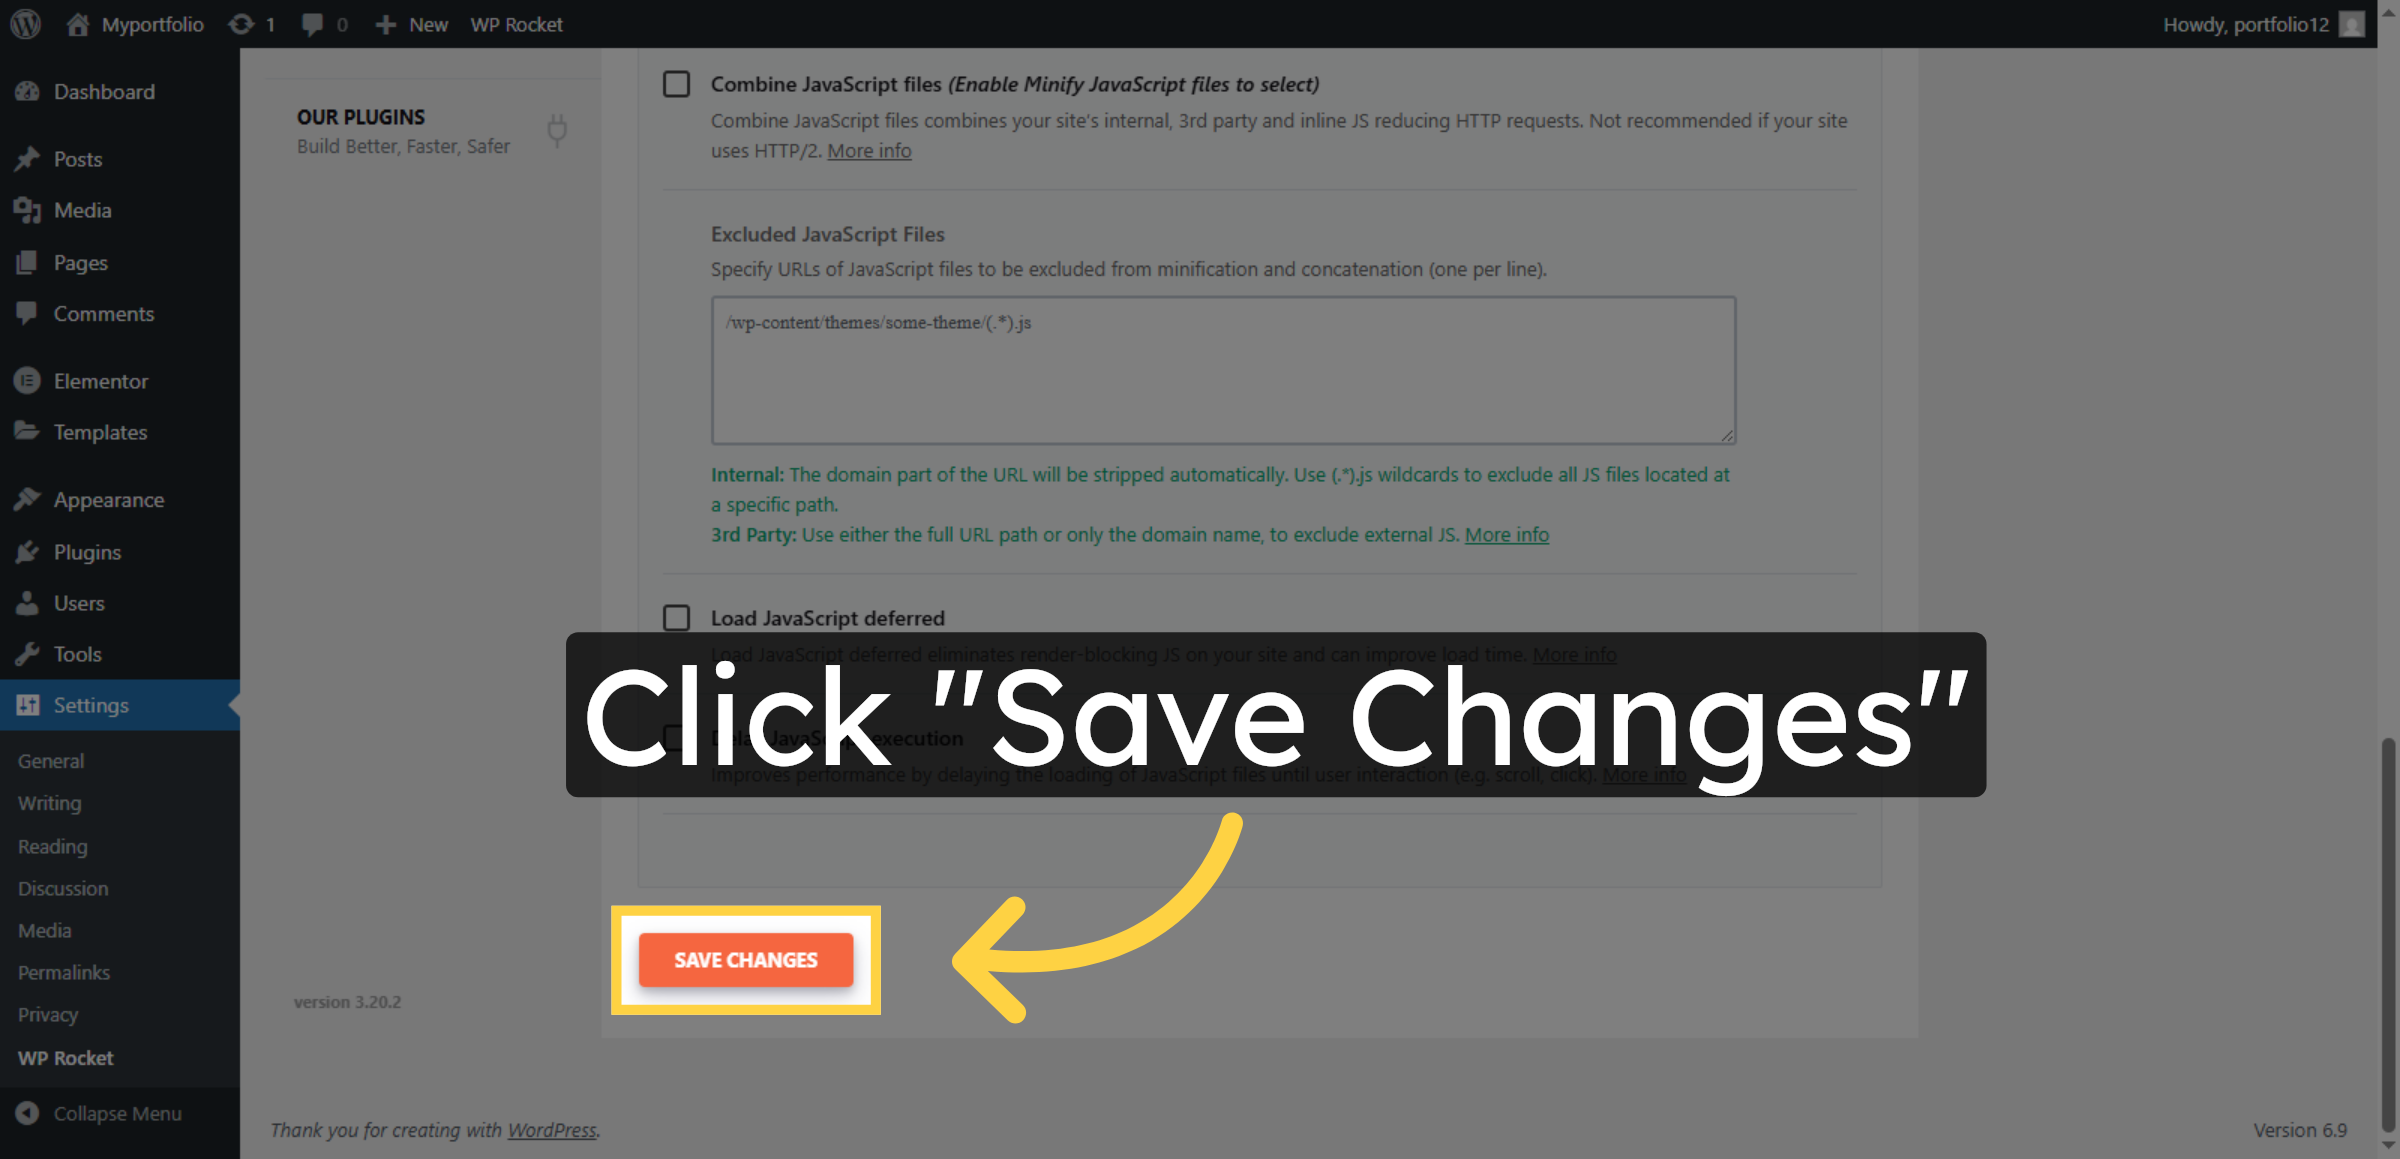
34. Save File Optimization Changes
35. Set Trashed Posts Limit
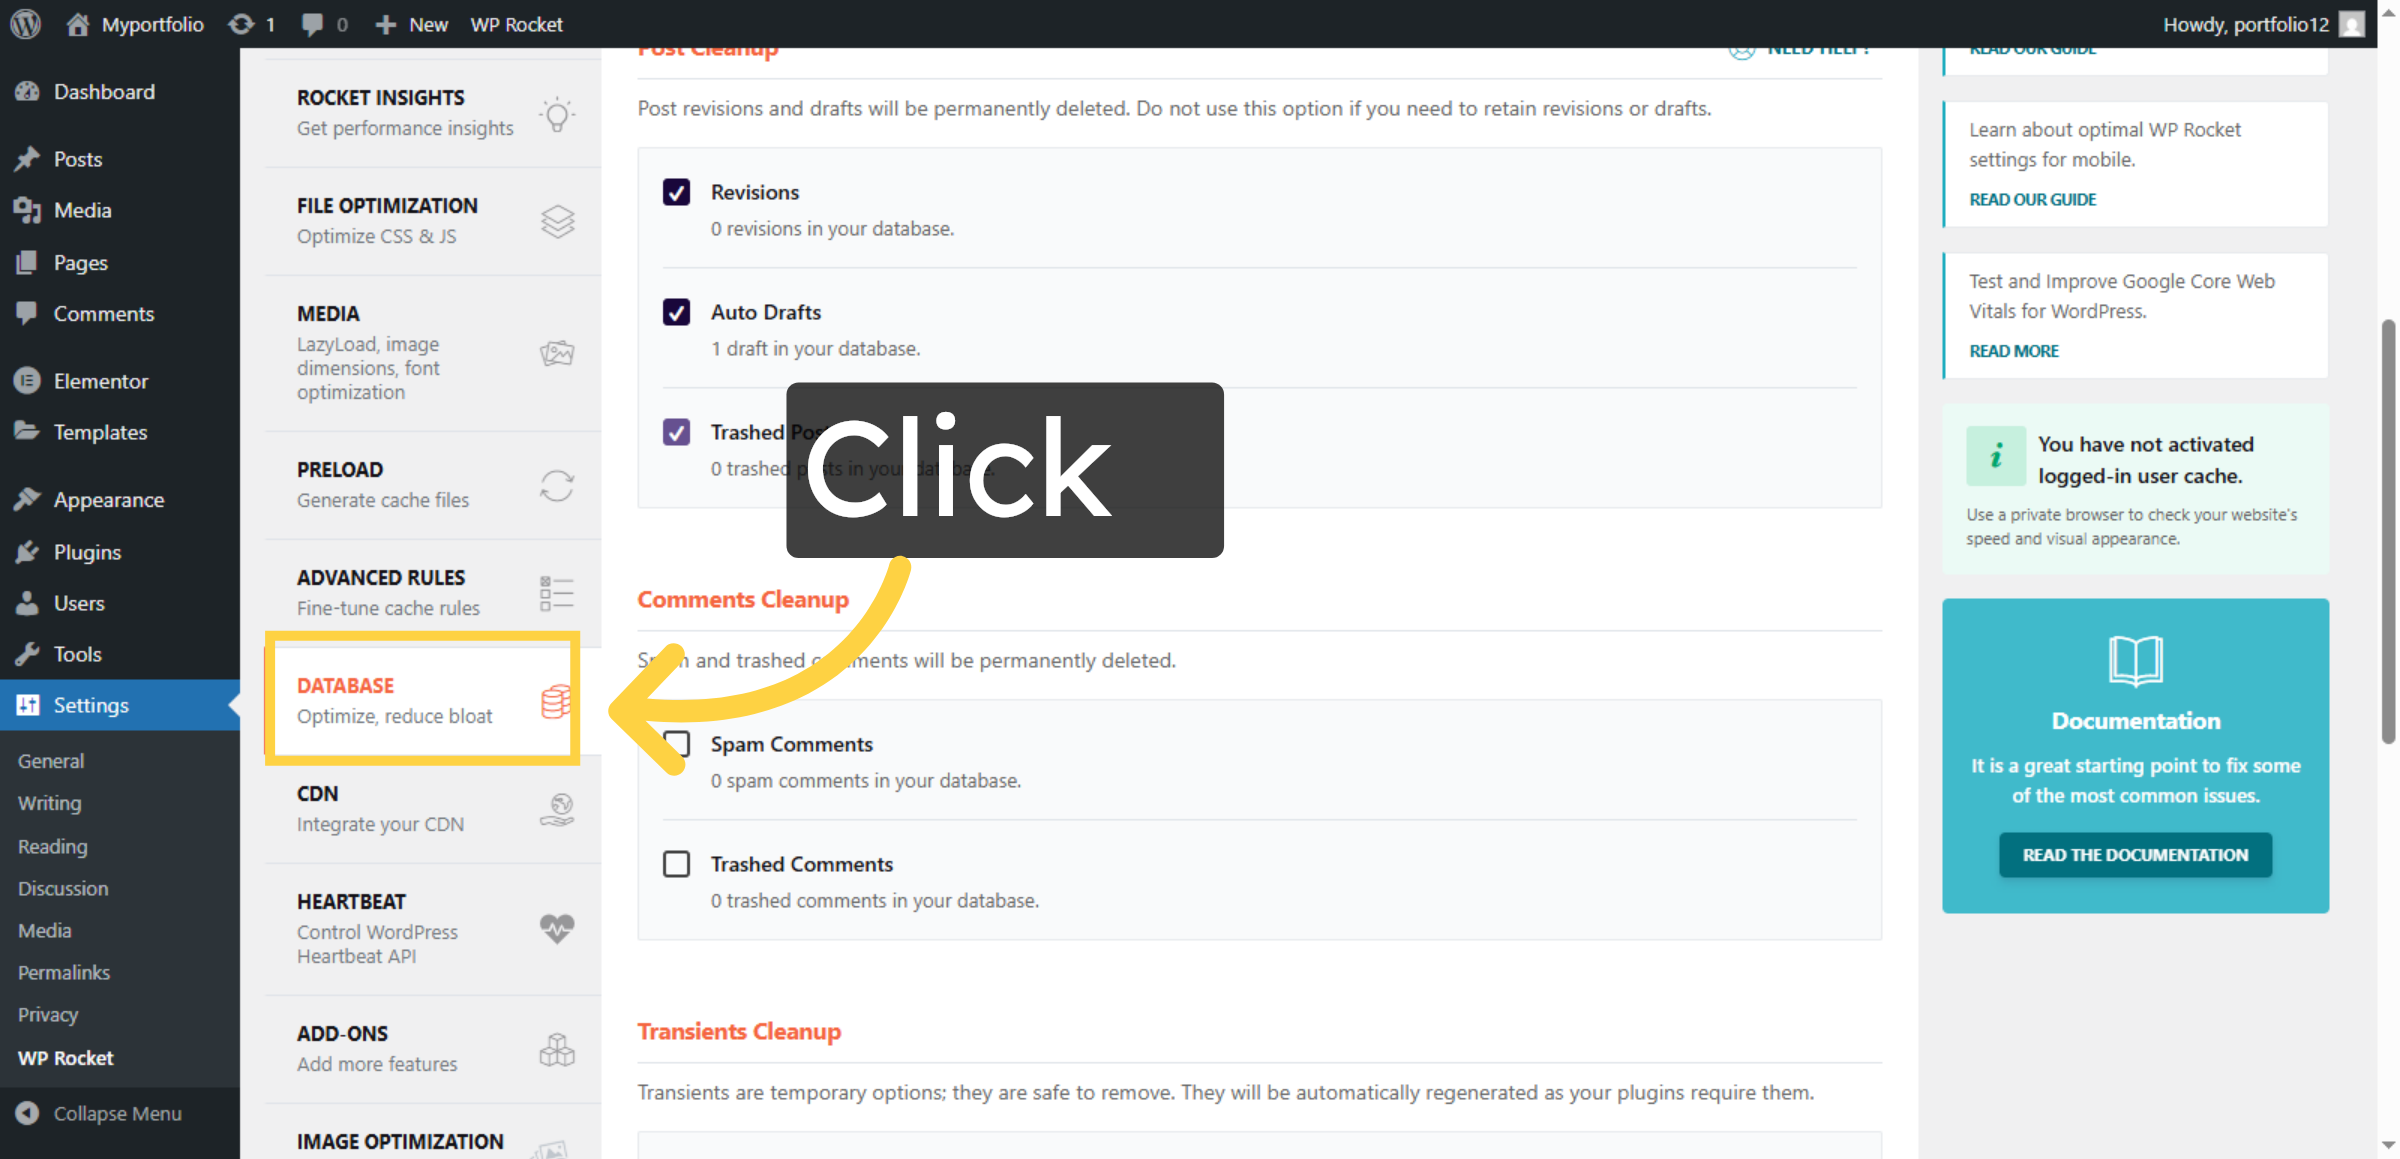
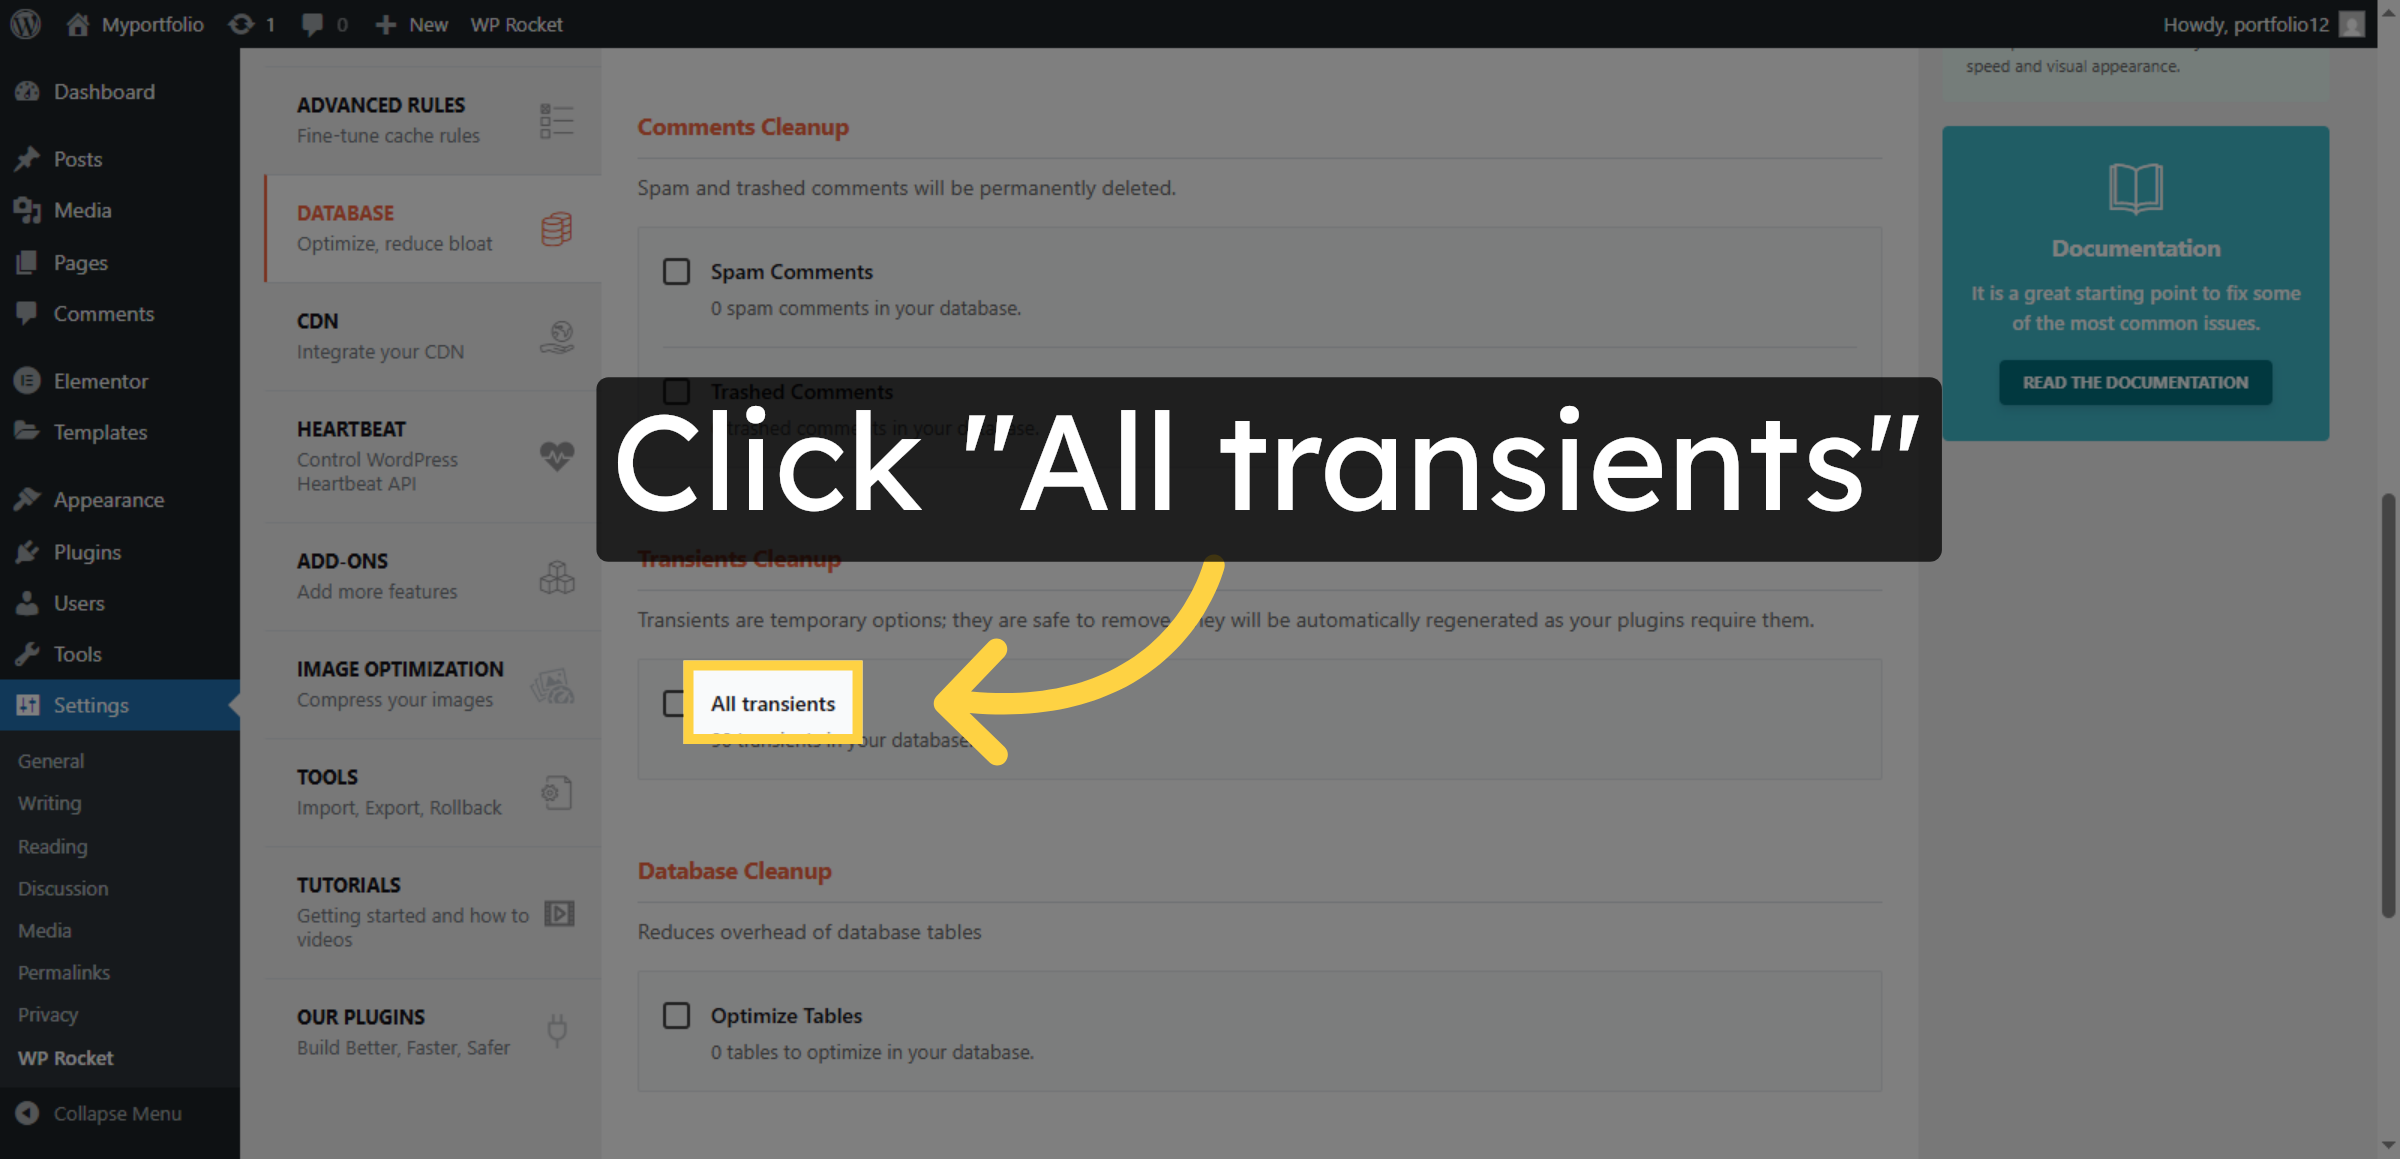
36. Manage All Transients
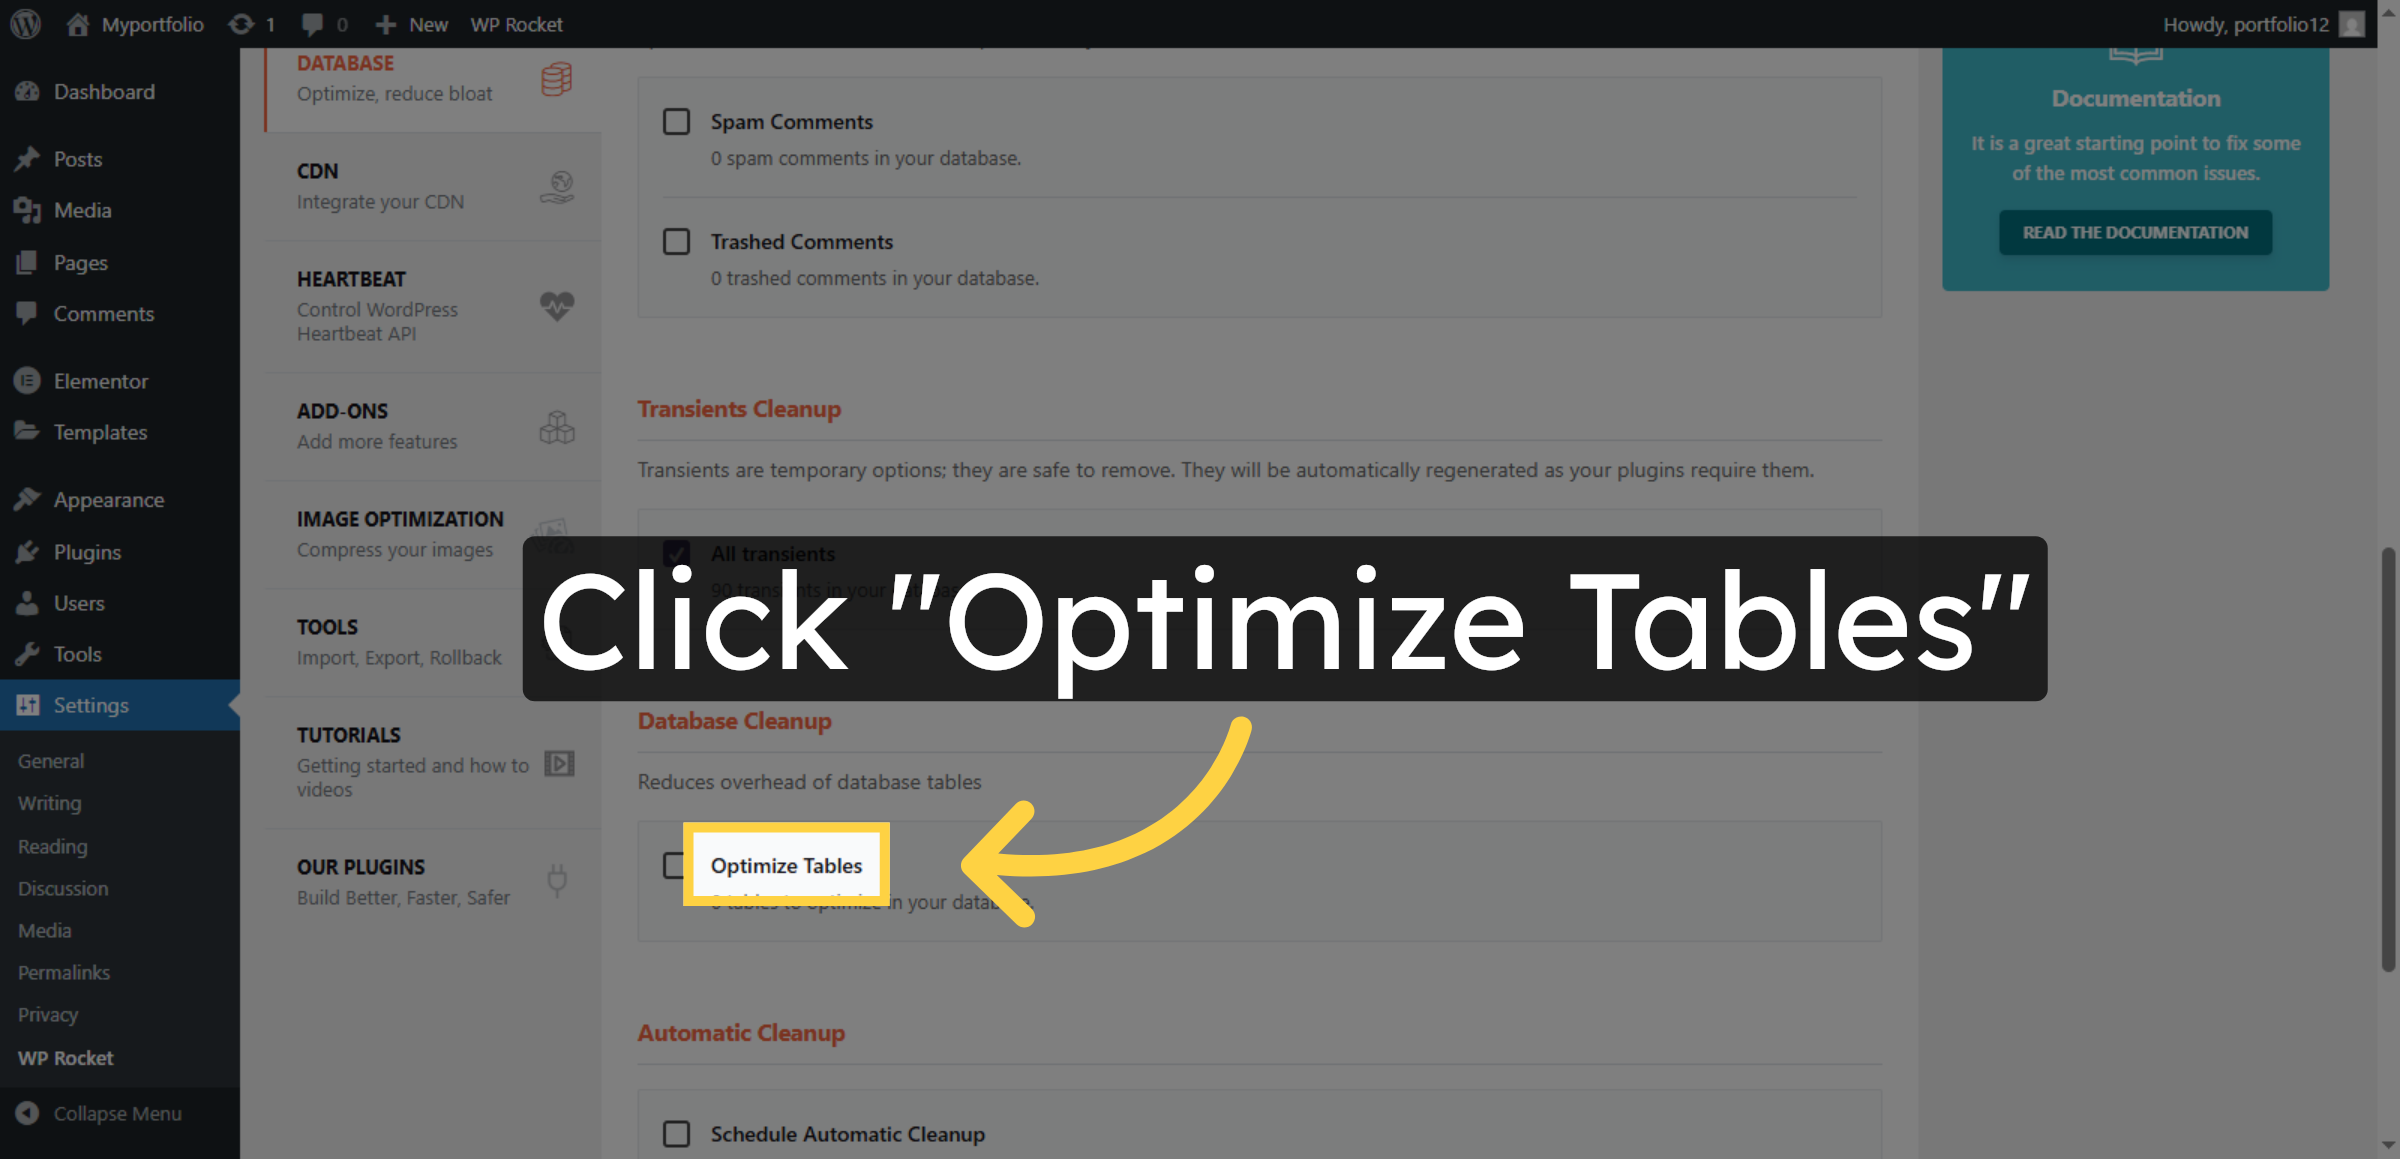
37. Optimize Database Tables
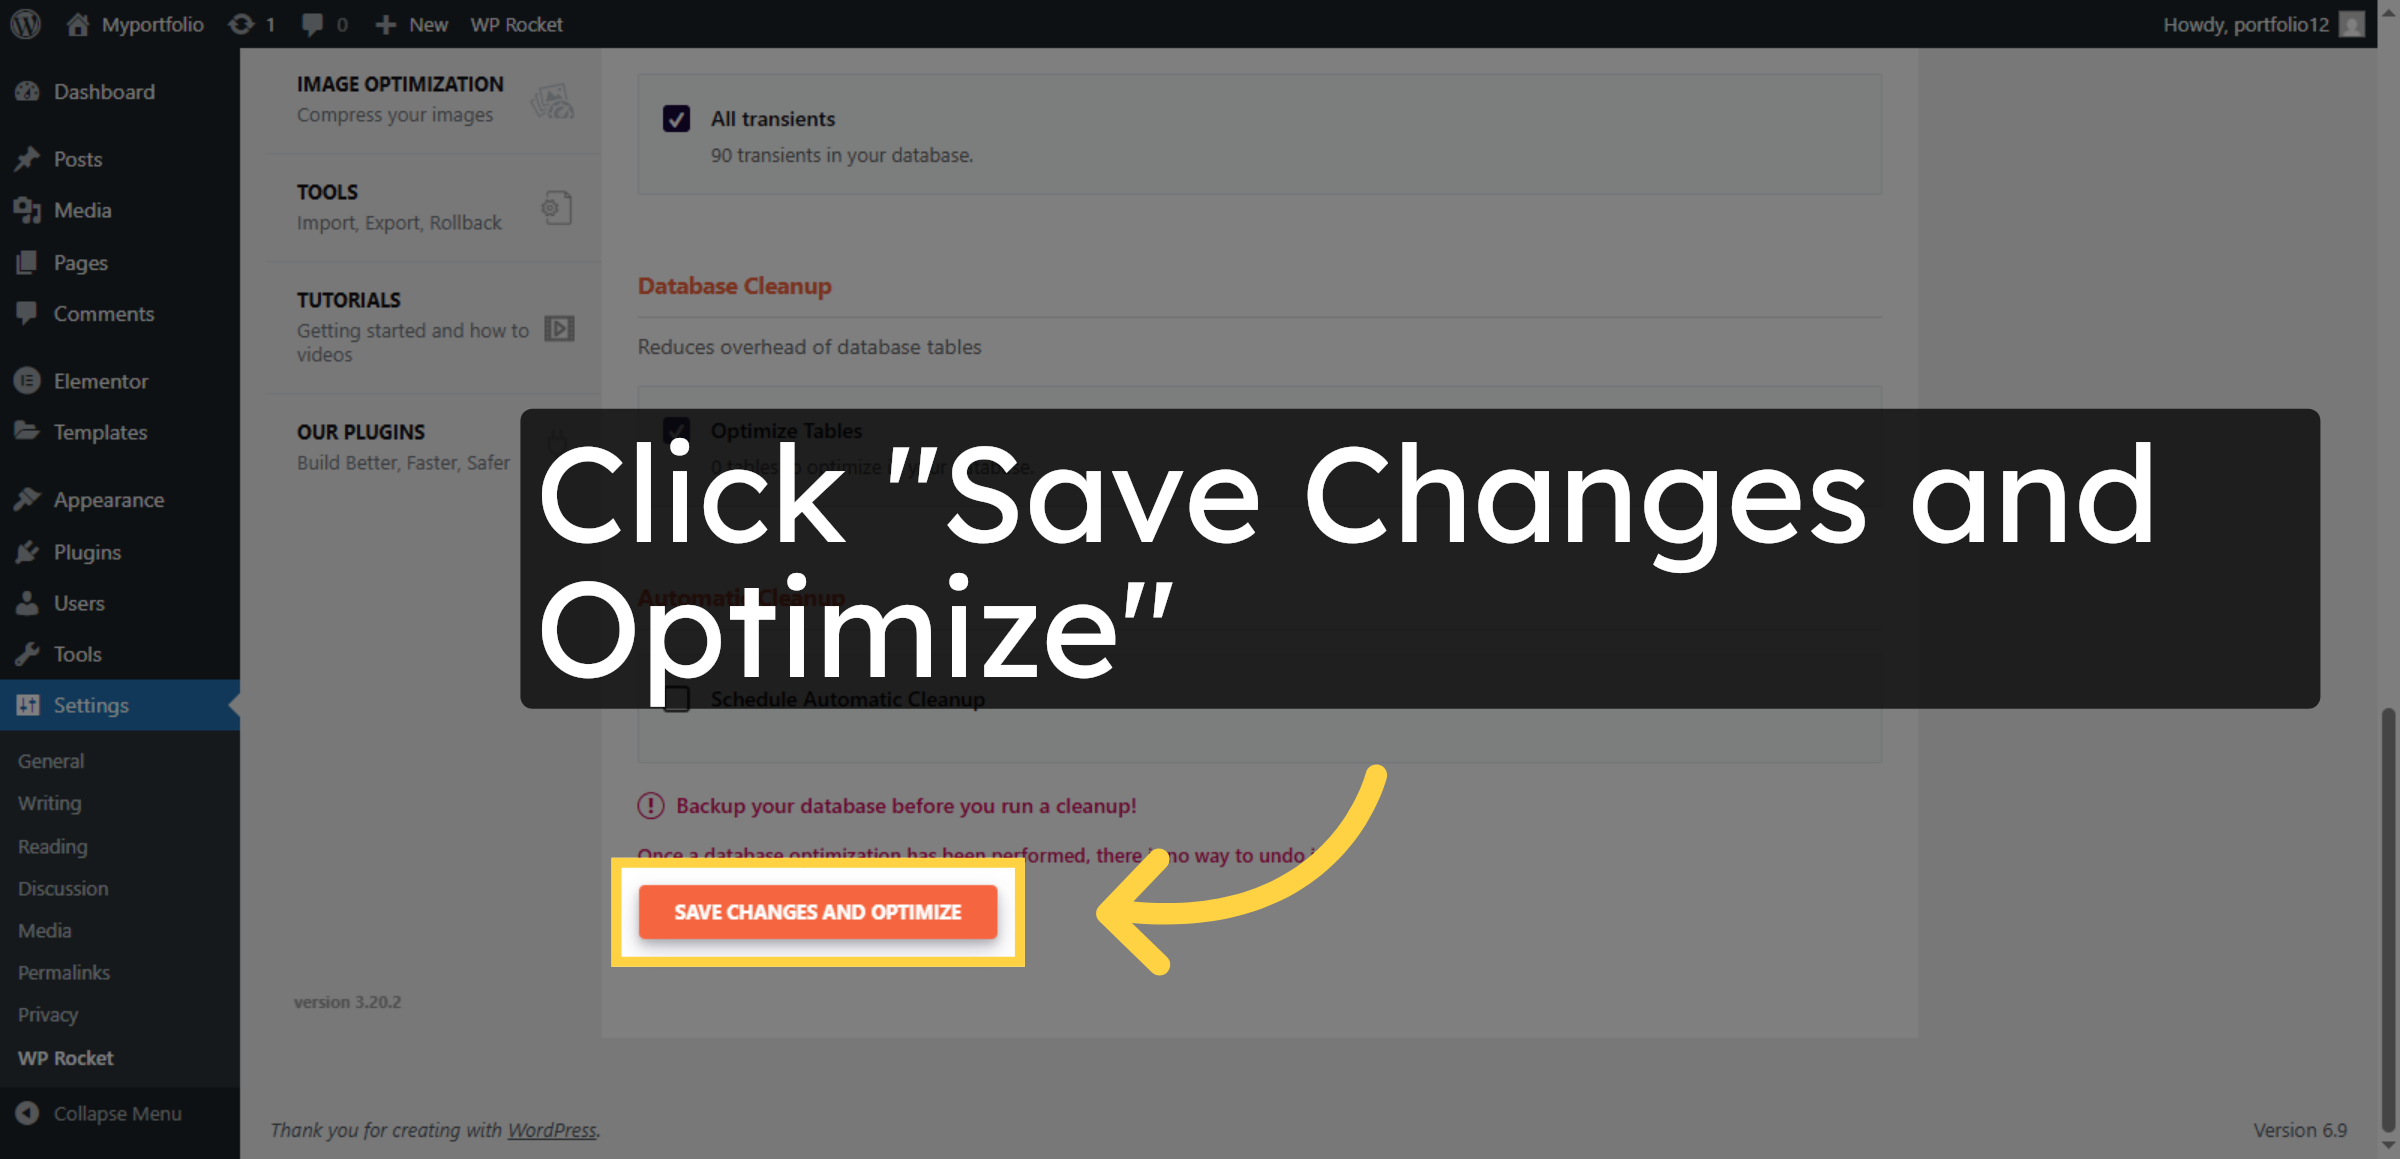
38. Save and Optimize Database
39. Conclusion

Conclusion
Improving the speed of the WordPress admin dashboard is essential for maintaining smooth and reliable website operations. By following the steps outlined in this guide, you have successfully optimized your hosting environment by removing unused components, adjusting server configurations, enhancing caching performance, and cleaning unnecessary database data. These improvements help reduce system load, minimize delays, and enhance administrative responsiveness.
To maintain long-term performance, it is recommended to regularly review plugins and themes, monitor server resources, perform routine database optimization, and keep WordPress updated. Proactive maintenance and performance monitoring will help prevent future slowdowns and technical issues. With consistent optimization practices in place, your WordPress dashboard will remain fast, stable, and fully functional.
WooHelpDesk Support
Need professional assistance with WordPress performance tuning, admin dashboard optimization, server configuration, or website maintenance? WooHelpDesk provides expert technical support to keep your website running efficiently.
Visit: https://www.woohelpdesk.com
Call Us Toll-Free: +1 888 602 0119 (US & Canada)
Faster Performance | Expert Support | Reliable Solutions
Contact WooHelpDesk today for trusted WordPress and HostGator support services.


