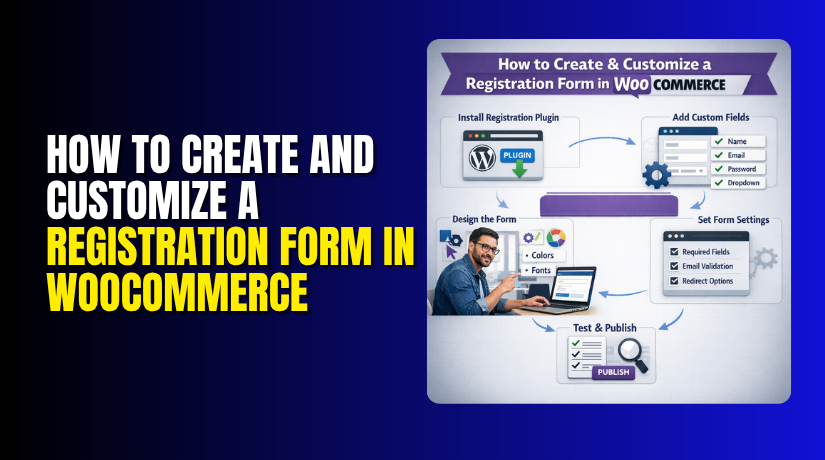
How to Create and Customize a Registration Form in WooCommerce (Step-by-Step Guide)
Table of Contents
- Introduction
- What a WooCommerce Registration Form Is and How It Works on a Store
- How to Create a Registration Form in WooCommerce (Step by Step Guide)
- How to Customize a Registration Form in WooCommerce (Step by Step Guide)
- Common Problems When Customizing a WooCommerce Registration Form and How to Fix
- Conclusion
Introduction
A smooth signup process helps customers start shopping without confusion. It also helps store owners collect useful customer details early. That is why the WooCommerce registration form is important for any online store. It is often the first step before a customer places an order, tracks purchases, or saves account details. If this form is simple, users can register quickly and continue shopping with ease.
If it feels confusing, many users may leave before completing signup. This can hurt user experience and reduce conversions. A well-designed form also makes account creation look more professional and trustworthy. It gives your store a better first impression.
Many store owners start with the default WooCommerce form. Later, they often need more control over fields, layout, and design. That is where WooCommerce signup form customization becomes useful. It helps you build a form that matches your business needs. You may want to collect a phone number, company name, or billing details. You may also want to adjust labels, change field order, or improve the style.
In some cases, you may need a WooCommerce registration form plugin for easier setup and better control. This guide will help you understand the basics before moving to setup and customization. You will learn what this form is, where it appears, and why many stores choose to improve it. If you plan to add registration form WooCommerce users can complete easily, this topic is worth understanding first.
What a WooCommerce Registration Form Is and How It Works on a Store
A WooCommerce registration form is the signup form used by new customers. It allows visitors to create an account on your store. Once registered, they can log in, manage orders, save addresses, and view account details. This form is usually shown on the My Account page. In many WooCommerce stores, login and registration appear together on the same page. New users fill in their details and create an account from there. This setup helps store owners manage customer access in one place. It also makes the shopping process easier for returning users.
The default form in WooCommerce is simple. It usually asks for an email address and password. In some setups, WooCommerce creates the password automatically. This default option works for small stores with basic signup needs. It is quick to enable and easy to use. However, many businesses need more than these basic fields. They may want first name, last name, phone number, company name, or custom user details. That is why many store owners create a WooCommerce custom registration form instead of using only the standard setup.
A custom form gives more control over the signup process. You can decide what information to collect and how the form should appear. This helps you match the registration experience with your store type. For example, a wholesale store may need GST details or business name. A service-based store may need a phone number or user role selection. In these cases, the default form is not enough. A better setup is needed for smoother registration and better data collection.
How to Create a Registration Form in WooCommerce (Step by Step Guide)
Creating a registration form in WooCommerce is simple when you follow the right steps. WooCommerce already includes a built-in account registration option. You just need to enable it and make sure the correct page is assigned. If you want more fields later, you can use a WooCommerce registration form plugin. Follow these steps carefully.
Step 1: Log in to Your WordPress Dashboard
- First, open your WordPress admin panel.
- Enter your username and password.
- After login, go to the left sidebar.
- This is where you will manage WooCommerce settings and pages.
Step 2: Open WooCommerce Settings
- In the left menu, click WooCommerce.
- Then click Settings.
- This page controls many important store options.
- You need it to enable the WooCommerce registration form for your customers.
Step 3: Go to the Accounts and Privacy Tab
- Now click the Accounts and Privacy tab at the top.
- This section manages login, account creation, and guest checkout settings.
- Here you can control where and how users register on your store.
Step 4: Enable Customer Registration on the My Account Page
- Scroll down until you see the account creation options.
- Check the box that says customers can create an account on the My Account
- This is the key setting that helps you add registration form WooCommerce stores need.
- You can also enable account creation during checkout if needed.
- This is useful when customers want a faster signup process while placing orders.
Step 5: Choose Username and Password Options
In the same section, you will see options for username and password creation. WooCommerce can create usernames automatically from customer email addresses. It can also generate passwords automatically.
Choose the setup that fits your store best:
- Manual password entry gives users more control
- Automatic password generation makes signup faster
Step 6: Save the Settings
- After enabling the registration options, click the Save changes
- This step is very important.
- If you do not save, the registration form will not appear on your site.
Step 7: Check the My Account Page
- Now go to Pages in your WordPress dashboard.
- Find the page called My Account.
- Open it and make sure it exists.
- WooCommerce usually uses this page to show login and registration forms.
- If the page is missing, create a new page named My Account.
- Then assign it correctly inside WooCommerce settings.
Step 8: Confirm the My Account Page Is Assigned Correctly
- Go to WooCommerce > Settings > Advanced.
- Look for the page setup section.
- Check whether the My Account page is selected there.
- If another page is selected by mistake, the registration form may not appear correctly.
- Choose the correct page and save the settings again.
Step 9: View the Registration Form on the Front End
- Open your website in a private browser window.
- Visit the My Account
- You should now see the login form and the registration form.
- This is your default WooCommerce registration form.
Usually, the form includes:
- Email address
- Password or auto-generated password option
This setup works well for a basic store.
Step 10: Test the Registration Form
- Now test the form like a real customer.
- Enter a new email address and complete the signup process.
- Check if the account is created successfully. Then log in using the new account.
This test helps confirm:
- The form is showing correctly
- Signup works properly
- New user accounts are being created
Step 11: Decide If the Default Registration Form Is Enough
At this point, your basic registration form is ready. Now think about your business needs. Some stores only need email and password. Other stores need more details like:
- First name
- Last name
- Phone number
- Company name
- Billing details
If you need those fields, the default form may not be enough.
Step 12: Use a Plugin If You Need More Fields
If you want more control, install a WooCommerce registration form plugin. A plugin helps you create a WooCommerce custom registration form without writing code.
With a plugin, you can:
- Add extra fields
- Change labels
- Rearrange field order
- Make fields required or optional
- Improve form design
This is the easiest way to handle WooCommerce signup form customization for most store owners.
Step 13: Test the Form Again After Any Changes
- If you use a plugin or make changes later, test the form again.
- Check the full signup process from start to finish.
- Also test the form on mobile devices.
- This helps you make sure users get a smooth experience on every screen.
That is the full step-by-step process to create a registration form in WooCommerce. First, enable registration in settings. Then check the My Account page. After that, test the form properly. If needed, use a plugin for advanced setup. Once this basic process is complete, you can move to the next level and customize WooCommerce my account page for a better signup experience.
How to Customize a Registration Form in WooCommerce (Step by Step Guide)
Customizing a registration form in WooCommerce helps you collect better customer details. It also makes your signup page easier to use and better matched to your store design. The default WooCommerce registration form is basic. It works for simple stores, but many businesses need more control. Follow these steps to build a better form.
Step 1: Make Sure the WooCommerce Registration Form Is Already Enabled
- Before customization, confirm that registration is enabled in WooCommerce.
- Go to WooCommerce > Settings > Accounts and Privacy.
- Enable the option that allows customers to create an account on the My Account
- Save the changes.
- This is the first step before any WooCommerce signup form customization work begins.
Step 2: Check the My Account Page First
- Now open your My Account page on the front end.
- Make sure the registration section is visible and working.
- This page is where most store owners later customize WooCommerce my account page for a better signup experience.
- If the page is missing or broken, fix that first before changing form fields.
Step 3: Decide What Information You Want to Collect
Next, plan the form before editing it. Think about what details your store really needs. Do not add random fields without purpose. A shorter form is easier to complete.
Common fields store owners add include:
- First name
- Last name
- Phone number
- Company name
- Address details
- Business or tax information
This planning step helps you build a useful WooCommerce custom registration form instead of a long and confusing one.
Step 4: Choose How You Want to Customize the Form
Now choose your method. You can customize the form in two common ways:
- Using a WooCommerce registration form plugin
- Using custom code
For most users, a plugin is easier and safer. It gives more control without editing PHP files. Custom code is better for advanced stores with special needs.
Step 5: Install a WooCommerce Registration Form Plugin
- If you choose the plugin method, go to Plugins > Add New in WordPress.
- Search for a plugin that supports WooCommerce registration field editing.
- Install and activate the plugin.
A good WooCommerce registration form plugin usually helps you:
- Add extra fields
- Edit labels
- Change field order
- Set required fields
- Add validation rules
- Improve form design
This is one of the easiest ways to add registration form WooCommerce users can complete smoothly.
Step 6: Add New Fields to the Registration Form
After plugin activation, open its field editor or settings area. Now add the extra fields your store needs. Choose the right field type for each one.
Examples:
- Text field for first name
- Number field for phone
- Dropdown for business type
- Checkbox for terms acceptance
Only add fields that support your business process. A clean WooCommerce registration form performs better than a crowded one.
Step 7: Edit the Existing Registration Fields
Now review the default fields already in the form. Improve them where needed. You may want to change labels, placeholders, or help text.
Examples:


- Change “Username” to “Email Address”
- Add placeholder text for phone number
- Use clear field instructions
This part of WooCommerce signup form customization makes the form easier to understand and reduces mistakes.
Step 8: Make Important Fields Required
Some fields should be required. Others should remain optional. Only mark a field as required when it is truly needed for account creation or future support.
Usually required fields include:
- Email address
- Password
- Terms acceptance
You may also require a phone number or company name if your store needs them. This step helps create a better WooCommerce custom registration form without making it too hard to complete.
Step 9: Rearrange the Fields in a Better Order
Field order affects the user experience. A random order makes the form harder to fill. Arrange the fields in a natural flow.
A simple order can be:
- First name
- Last name
- Email address
- Phone number
- Company name
- Password
Many plugin tools allow drag-and-drop sorting. A better order makes the WooCommerce registration form look cleaner and feel more professional.
Step 10: Add Validation Rules to Prevent Wrong Entries
Validation checks the data before form submission. It helps stop incomplete or incorrect entries. This improves the signup process and keeps your user data cleaner.
Examples of validation:
- Email must be in correct format
- Required fields cannot stay empty
- Password must meet strength rules
- Phone field accepts only numbers
This step is very useful in WooCommerce signup form customization because it prevents common registration errors.
Step 11: Style the Registration Form to Match Your Website
Now improve the design of the form. A form should match your store layout, colors, and button style. If it looks disconnected, users may feel unsure.
Focus on:
- Proper spacing between fields
- Clear labels
- Easy-to-see button
- Mobile-friendly layout
- Clean font size
This is also a good stage to customize WooCommerce my account page so the full account section looks polished and branded.
Step 12: Check Where the Custom Field Data Is Saved
After adding fields, make sure the entered data is saved correctly. Register a test account and then open that customer profile in the admin area. Confirm whether the custom data appears in the correct place.
This step matters because some fields may show on the form but not save properly. A good WooCommerce custom registration form should both display and store data correctly.
Step 13: Test the Registration Form Like a Real Customer
Now test the full process from start to finish. Open the My Account page in a private browser window. Fill out the form and create a new account.
Check these points:
- Form loads correctly
- Required field warnings work
- Account is created successfully
- Custom fields are saved
- Login works after registration
Also test the form on mobile. Many users sign up from phones, so mobile testing is very important.
Step 14: Check for Theme or Plugin Conflicts
After customization, review the form carefully. Sometimes a theme or another plugin may affect layout, field display, or form submission. If something looks wrong, deactivate recent plugins one by one and test again.
This step helps you find issues early before customers report them.
Step 15: Keep the Registration Form Simple and Useful
The final step is reviewing the whole form with the customer in mind. Remove anything unnecessary. Keep only the fields that help your business. A shorter and clearer WooCommerce registration form usually gets better signup results.
That is the full step-by-step process for How to Customize a Registration Form in WooCommerce. First, enable the form and check the My Account page. Then add fields, edit labels, control required settings, improve layout, add validation, and test everything carefully. A well-planned WooCommerce custom registration form makes signup easier for users and more useful for store owners.
Common Problems When Customizing a WooCommerce Registration Form and How to Fix
WooCommerce Registration Form Is Not Showing on the My Account Page
One common problem is that the WooCommerce registration form does not appear at all. This usually happens when customer registration is disabled in WooCommerce settings. It can also happen when the My Account page is missing, set incorrectly, or broken by a theme issue. In some cases, a plugin conflict hides the form layout from the page. To fix this, first check WooCommerce > Settings > Accounts and Privacy and make sure account creation is enabled. Then confirm that the correct My Account page is assigned in WooCommerce. After that, test the page again in a private browser window.
Custom Registration Fields Are Not Appearing Properly
Another common issue is that the extra fields do not appear after customization. You may have added fields through a plugin or code, but they still do not show on the live form. This often happens because the field is disabled, assigned to the wrong form area, or not saved correctly. Sometimes cache also causes this problem by loading an old version of the page. If you are using a WooCommerce registration form plugin, check its field settings carefully. Make sure the fields are active, connected to the registration form, and saved properly. Then clear your website cache and browser cache before testing again.
Registration Form Data Is Not Saving After Submission
Sometimes the form shows correctly, but the entered details do not save. A customer may fill all fields, submit the form, and create an account, but the custom data never appears in the user profile. This is a serious issue because the full purpose of a WooCommerce custom registration form is to collect and store useful user details. This problem usually happens when the display part works, but the save function is missing or broken. It can also happen because of plugin conflicts or wrong field mapping. To handle this, test the form with a new user account and then check the saved details in the WordPress admin area.
Registration Form Design Looks Broken or Unprofessional
A customized form may work well technically, but still look broken visually. This is very common when theme CSS overrides the plugin styling. You may notice uneven spacing, broken field alignment, small buttons, or mobile layout issues. These styling problems can make the signup page look unprofessional and reduce user trust. This matters even more when you want to customize WooCommerce my account page and create a clean branded experience. To fix this, test the page on desktop, tablet, and mobile devices. Then review field spacing, button design, label size, and layout consistency across all screen sizes.
Required Fields and Validation Rules Are Not Working Correctly
Validation problems are another common issue during WooCommerce signup form customization. A required field may not show an error when left empty. A phone field may accept letters. A password field may allow weak entries without warning. When validation does not work, users can submit incomplete or wrong information. That creates more work later and reduces data quality. It can also confuse customers because the form does not clearly guide them. To handle this, test each field one by one. Leave required fields empty on purpose and enter wrong values in different formats. This will help you confirm whether the validation rules are working properly.
Plugin Conflicts Are Breaking the Registration Form
Many WooCommerce stores use multiple plugins at the same time. This can sometimes create conflicts, especially when two plugins try to control the same form area. For example, one plugin may handle registration fields, while another changes login behavior or redirects users after signup. These tools may not work well together. As a result, the WooCommerce registration form may stop loading, stop saving data, or show layout issues. To handle this problem, deactivate recently installed plugins one by one and test the form after each step. This is one of the easiest ways to find which plugin is causing the issue.
The Registration Form Works on Desktop but Fails on Mobile
Some registration forms look fine on large screens but become hard to use on mobile devices. Fields may overlap, buttons may become too small, and labels may break into bad spacing. Since many customers sign up from phones, this is a very important issue. A mobile-friendly WooCommerce custom registration form should be easy to read, tap, and submit without zooming or confusion. To handle this problem, always test the form on different screen sizes. Check field width, input spacing, button size, and error messages. If the mobile layout feels crowded, update the form styling before using it on a live store.
The Registration Page Refreshes but Does Not Create the Account
Sometimes the user submits the form, but nothing useful happens. The page may refresh, stay on the same screen, or show a general error without creating the account. This usually happens because of JavaScript errors, broken redirects, spam protection tools, or incomplete custom field setup. In some cases, the user believes the account was created, but the process actually failed. This creates a poor signup experience and can reduce trust. To fix this, test the full process carefully with a fresh email address. Also check whether the user account is actually created in the WordPress Users section after submission.
Conclusion
Creating and customizing a WooCommerce registration form is an important step for any growing online store. A simple and clear form helps new users register without confusion. It also helps store owners collect the right customer details from the beginning. This improves account setup, reduces errors, and creates a smoother shopping journey. While WooCommerce gives a basic registration option, many stores need more control over fields, layout, styling, and validation.
That is why WooCommerce signup form customization becomes useful for better performance and better user experience. The main goal should always be simple. Keep the form easy to use, collect only useful details, and test every change carefully. When your registration process works well, it builds trust and supports more successful customer signups.
If you need help creating, editing, or fixing your WooCommerce registration form, WooHelpDesk can help you. Whether you want to add extra fields, build a WooCommerce custom registration form, fix field display problems, or improve the full signup experience, the team can support you with the right solution. WooHelpDesk can also help you choose the best WooCommerce registration form plugin, solve data saving issues, and customize WooCommerce my account page so it looks clean and works properly. If your registration form is not showing, not saving data, or not matching your store design, WooHelpDesk can help you fix it in a professional way.


