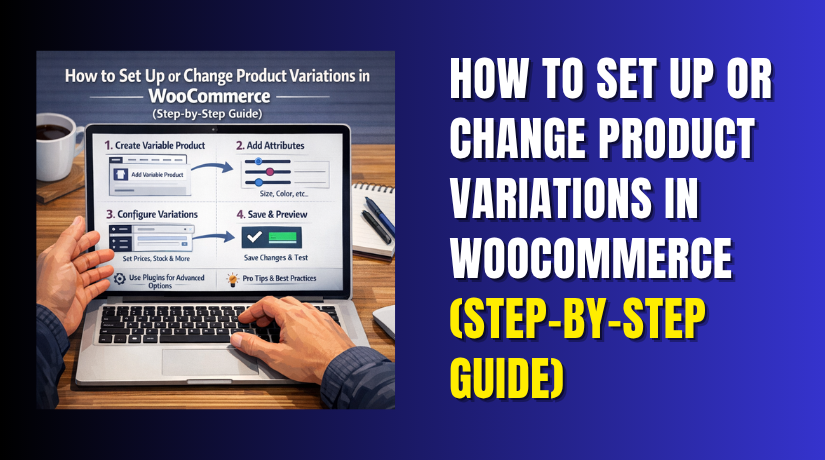
How to Set Up or Change Product Variations in WooCommerce (Step-by-Step Guide)
Table of Contents
- Introduction
- What Product Variations Mean in WooCommerce and How They Work?
- When You Should Use Product Variations Instead of Separate Products
- What You Should Prepare Before You Start Setting Up Variations
- How to Set Up Product Variations in WooCommerce (Step By Step Guide)
- How to Change Product Variations in WooCommerce (Step by Step Guide)
- Common Problems While Setting Up or Changing Variations in WooCommerce
- Conclusion
Introduction
WooCommerce product variations help one product show many options in one place. A shirt can offer size, color, and fabric choices. A phone case can offer model and finish choices. In WooCommerce, this works through a variable product and its attributes. Those attributes can then create variation options for shoppers. This setup keeps the product page clean and easy to use. It also helps store owners manage price, stock, SKU, and images for each option. In this guide, you will learn how to set variations in WooCommerce, understand the basic WooCommerce variation settings, and see how product options work before moving to the setup steps.
What Product Variations Mean in WooCommerce and How They Work?
A simple product has one fixed version. A variable product has many possible choices under one parent product. That is the main difference store owners need to know first. In a WooCommerce variable product setup, attributes such as size, color, or style are added to the product. After that, those attributes are used to create the actual variations. This means one product page can offer Small, Medium, and Large, or Black and Blue, without making many separate product pages.
WooCommerce also allows each variation to have its own regular price, sale price, stock level, SKU, weight, and image. That is why many store owners prefer this method. It gives better control and makes the shopping experience smoother. If you want a clear WooCommerce variable product tutorial, this is the base idea you must understand first.
When You Should Use Product Variations Instead of Separate Products
Use product variations when the same item comes in different sizes
This is one of the most common cases. A T-shirt may come in Small, Medium, and Large. The product stays the same, but the size changes. In this case, WooCommerce product variations keep everything under one product page. This makes shopping easier and keeps your store better organized.
Use product variations when the same item comes in different colors
Many products are sold in more than one color. A bottle may come in black, blue, and white. A shopper should not open a different page for each color. Variations solve this problem well. They let users choose the color on one page and place the order quickly.
Use product variations when each option has a different price
Some product options cost more than others. A large pizza costs more than a small one. A 256GB phone costs more than a 128GB version. In such cases, variations are the right choice. WooCommerce lets each variation have its own price. This makes the WooCommerce variable product setup more flexible and useful.
Use product variations when each option has its own stock quantity
Not every option stays in stock at the same time. A red shirt may be sold out, while the blue one is available. Variations help you manage stock for each option separately. This is useful for stores with many product choices. It also helps avoid wrong orders and stock confusion.
Use product variations when the product needs different images for each option
Some products look different based on the selected option. A sofa in grey should show a grey image. A gold ring should show the gold version. Variation images help customers see the right option clearly. This improves trust and also supports better buying decisions on the product page.
Use separate products when the items are not truly the same
Sometimes two products look related but are still different items. For example, a backpack and a travel bag should not be one variable product. They have different use cases and may need separate descriptions. In such cases, separate products make more sense. Variations should only be used when the main product stays the same.
Use product variations when you want a cleaner and simpler product page
Too many separate product pages can make a store look messy. Customers may get confused while browsing similar items. Variations keep related choices together on one page. This creates a better shopping experience. It also makes it easier later if you want to edit WooCommerce product variations or update options.
What You Should Prepare Before You Start Setting Up Variations
Prepare the product name and full product details first
Start with the main product information. Write the product title clearly. Add the short description and full description. Make sure the basic details are ready before variation work begins. This gives you a strong base and helps the full product look complete.
Prepare the product images before creating variations
Images are very important for a product page. You should have the main product image ready first. If each variation looks different, keep those images ready as well. This saves time during setup. It also helps when adjusting WooCommerce variation settings for each option.
Prepare the attribute names that you want to use
Attributes are the foundation of variations. Decide what options the product will offer. These may include size, color, material, style, storage, or pack type. Keep attribute names simple and clear. Clear attribute planning makes it easier to understand how to set variations in WooCommerce properly.
Prepare the values under each attribute carefully
After choosing the attribute names, list the values under each one. For size, you may use Small, Medium, and Large. For color, you may use Black, White, and Blue. These values will later become the variation options. Good planning here prevents confusion during the setup process.
Prepare the price for each product variation in advance
Not all product options cost the same. Some variations may have a higher price. Some may also need a sale price. Write down those price details before starting. This makes the WooCommerce variable product tutorial process smoother. It also reduces setup mistakes inside the product editor.
Prepare the stock quantity for each option before setup
Each variation may have different stock levels. One size may have ten units. Another may have only two. You should note this before setup begins. This helps you manage variation stock more accurately. It also makes it easier later if you need to change variations in WooCommerce for stock updates.
Prepare separate SKUs if you want better product tracking
SKUs help you track each variation clearly. For example, a red shirt in medium size can have its own SKU. A blue shirt in large size can have another one. This is helpful for inventory, order handling, and reporting. SKU planning may seem small, but it supports better store management.
Prepare your option structure before opening the product editor
Do not start setup without a clear plan. Decide how many attributes the product needs. Decide how many values each attribute will have. Also check whether every combination should become a variation. This planning step makes the full WooCommerce product variations process easier, faster, and more accurate.
How to Set Up Product Variations in WooCommerce (Step By Step Guide)
Step 1: Open a New Product or Edit an Existing Product First
- Go to Products in your WordPress dashboard first.
- Then click Add New Product or open an existing product for editing.
- WooCommerce starts variable products from the normal product editor, so this is always the first step in any WooCommerce variable product setup.
Step 2: Add the Product Name and Main Product Details Properly
- Enter the product name clearly.
- Then add the product description and other basic details.
- This main product will work as the parent item, and all variation options will sit under it later.
- This is the right starting point if you are learning how to set variations in WooCommerce in a simple way.
Step 3: Change the Product Type to Variable Product
- Now go to the Product data
- Select Variable Product from the list.
- WooCommerce uses this product type for items that come in different options, such as size or color.
- This is the core step in every WooCommerce variable product tutorial.
Step 4: Understand What Changes After You Select Variable Product
- Once you choose a Variable Product, WooCommerce prepares the item for attribute-based options.
- It can then create multiple choices under one product page.
- WooCommerce also lets each variation have its own price, SKU, stock level, and other settings.
- This is why WooCommerce product variations are useful for stores with option-based products.
Step 5: Open the Attributes Tab Before Creating Variations
- Click the Attributes tab inside the product data area.
- WooCommerce explains that attributes are added first and then used to define the actual product variations.
- So, before you try to edit WooCommerce product variations, you must build the attributes correctly.
Step 6: Choose Whether You Want Global or Product-Specific Attributes


- WooCommerce gives you two choices here.
- You can use a global attribute that already exists in your store, or you can create a new attribute only for this product.
- Global attributes are easier to reuse across many items, while product-level attributes work well for one product only.
- Both options are part of normal WooCommerce variation settings.
Step 7: Add an Existing Global Attribute If You Already Created One
- If your store already has attributes like color or size, choose one from the Add Existing
- Then select the values you want to use for that product.
- WooCommerce also lets you choose all values at once or select them one by one.
- This keeps your WooCommerce variable product setup more organized and flexible.
Step 8: Create a New Product Attribute If Needed for This Product
- If you do not want to use a global attribute, click Add New
- Then enter the attribute name, such as Size or Color.
- After that, add the values you need.
- WooCommerce says custom values should be separated with the | symbol, such as Small | Medium | Large.
- This is an important step in how to set variations in WooCommerce correctly.
Step 9: Save the Attributes Before Moving to the Variations Section
- After adding the attribute names and values, click Save Attributes.
- This step is very important because WooCommerce uses these saved attributes to create the variation options later.
- If the attributes are not saved, your next variation steps may not work correctly.
- This also matters later when you need how to change variations in WooCommerce without errors.
Step 10: Get Ready for the Next Step Where WooCommerce Creates the Variations
- Once the attributes are saved, the product is ready for the Variations
- That is where WooCommerce can generate all possible variation combinations or let you add them manually.
- This is the next stage after the attribute work, and it is where your real WooCommerce product variations begin to take shape.
At this stage, your product variations should be fully created and ready to use. You have built the variation combinations, added the main details, and tested the buying flow on the product page. This part is the heart of the full WooCommerce product variations process because it turns saved attributes into real, sellable product options.
How to Change Product Variations in WooCommerce (Step by Step Guide)
Changing existing WooCommerce product variations is simple when the product is already set as a variable product. WooCommerce lets you update prices, stock, images, shipping details, and even default variation values from the product editor. It also allows bulk editing when many variations need the same update. This makes the process faster for store owners who want to edit WooCommerce product variations without creating the product again.
Step 1: Open the Existing Variable Product You Want to Edit
- Go to Products in your WordPress dashboard first.
- Then open the variable product you want to change.
- WooCommerce stores all variation controls inside the product editor, so you do not need to build a new product to update existing options.
- This is always the first step if you want to learn how to change variations in WooCommerce correctly.
Step 2: Check the Product Type Before Making Any Variation Changes
- Inside the Product data area, confirm that the product type is still set to Variable Product.
- WooCommerce uses this product type for items with different options under one parent product.
- Each variation can have its own price, stock, image, and shipping data, so this setting must stay correct before you edit anything else.
Step 3: Open the Variations Tab to Edit Existing Options
- Click the Variations tab in the product editor.
- This is the main area where WooCommerce shows the existing variation rows.
- From here, you can expand each variation and update its details one by one.
- WooCommerce documentation lists price, stock status, weight, dimensions, shipping class, and other variation fields in this section.
Step 4: Change the Price for Any Variation That Needs an Update
- Open the variation you want to change.
- Then update the Regular Price or Sale Price fields as needed. WooCommerce notes that a variation must have a regular price to show in your store, so this field matters a lot.
- This step is useful when you need to run a sale, raise prices, or adjust different option costs inside your WooCommerce variation settings.
Step 5: Update Stock, SKU, and Inventory Details for Each Variation
- If you need to change stock, open the variation and check Manage Stock if that option should track its own quantity.
- Then enter the stock amount, stock status, backorder rule, and low stock threshold if needed.
- WooCommerce also lets each variation have its own SKU.
- This is helpful when one size or color is available but another is sold out.
- It is one of the most common tasks when store owners edit WooCommerce product variations.
Step 6: Replace the Variation Image When the Product Option Looks Different
- If a variation needs its own image, open that variation and click the image placeholder.
- Then choose the correct image for that option.
- WooCommerce supports images at the variation level, which helps customers see the exact version they select.
- This is useful for products with color, pattern, or style changes, and it improves the full WooCommerce variable product setup on the front end.
Step 7: Change Weight, Size, or Shipping Details When Needed
- WooCommerce also lets you update variation-specific shipping information.
- You can change weight, length, width, height, and shipping class for each variation.
- This matters when larger options cost more to ship or use different shipping rules.
- If your store sells products with different package sizes, this step helps keep checkout details more accurate.
Step 8: Add New Variation Options by Updating Attributes First
- If you want to add a new size, color, or style, go to the Attributes tab first.
- Add the new value there, then save the attributes.
- After that, return to the Variations tab and either generate variations from all attribute values or add the new variation manually.
- WooCommerce warns that if you change product attributes after creating variations, you may need to redefine the variations so the combinations work correctly.
- This is an important rule in how to set variations in WooCommerce and later update them safely.
Step 9: Remove Old or Unwanted Variations Carefully
- If a variation is no longer sold, you can remove it from the product.
- WooCommerce also offers Bulk actions in the Variations tab, and one of the available options is Delete all variations.
- That is helpful when a product needs a full reset, but you should use it carefully.
- For small changes, edit only the options that need updates so you do not remove good data by mistake.
Step 10: Use Bulk Actions When Many Variations Need the Same Change
- When a product has many options, editing each one can take too long.
- WooCommerce includes Bulk actions at the top of the Variations tab for faster changes.
- These actions can set regular prices, raise or lower prices, set sale prices, toggle stock management, change stock status, and update shipping measurements across all variations.
- This is one of the easiest ways to manage large WooCommerce product variations without wasting time.
Step 11: Set a Default Variation If You Want One Option Preselected
- WooCommerce also lets you set a default form value at the top of the variation settings.
- This means one variation can already be selected when a shopper opens the product page.
- WooCommerce says shoppers can add the variable product to the cart without making a new selection when default values are set.
- This is useful when one size or color is your main selling option.
Step 12: Save Changes and Update the Product Before Leaving
- After making variation changes, click Save changes in the variation area.
- Then click Update on the main product page.
- WooCommerce uses both steps in the editing flow, so missing one can leave your changes incomplete.
- This is a very important final step for anyone learning how to change variations in WooCommerce without confusion.
Step 13: Test the Product Page After Every Important Variation Update
- Open the product page on the front end and check the dropdowns.
- Test the option selection, image switch, price display, stock behavior, and add-to-cart process.
- WooCommerce notes that customers must select all required options before adding a variable product to the cart.
- A quick test helps you catch wrong prices, missing images, or broken variation combinations before customers see them.
Changing variations in WooCommerce becomes much easier once you know where each setting lives. Most updates happen inside the Variations tab, while new option values start in the Attributes tab. Price, stock, SKU, image, and shipping changes can all be handled from the existing product page, and bulk actions make larger updates much faster. If you follow these steps carefully, you can manage WooCommerce product variations, update your WooCommerce variation settings, and keep your store accurate without creating products again.
Common Problems While Setting Up or Changing Variations in WooCommerce
Why a variation may not show on the product page
A variation usually does not show because the setup is incomplete. WooCommerce requires attributes to be added first, saved, and then used to create the variations. It also requires a regular price for each variation that should appear in the store. If one of these parts is missing, the variation may not display as expected.
Why the dropdown can look empty or not work correctly
The dropdown can fail when attributes are changed after the variation setup. WooCommerce clearly notes that after altering product attributes, you may need to redefine the variations for the combinations to work correctly. This is why careful attribute editing matters in every WooCommerce variable product tutorial.
Why the price may not appear after creating a variation
This problem is usually simple. WooCommerce says the Regular Price field is required for a variation. If the variation has no regular price, it does not show in the store. So, always check the price field first when a variation looks missing or incomplete.
Why the variation image may not change on the front end
The variation image must be added inside that exact variation row. WooCommerce allows you to click the image placeholder and assign an image to that variation. If the image was not saved there, customers may keep seeing the parent product image instead of the selected option image.
Why stock may not update the way you expect
WooCommerce supports stock at the product level, the variation level, or a mix of both. If Manage Stock is not enabled on the variation, that option may pull stock from the main product instead. This is why stock behavior can look confusing when the inventory method is not checked first.
Why new variations sometimes do not save properly
New variations often fail because store owners forget the final save steps. WooCommerce asks you to click Save changes in the variation menu and then click Publish or Update on the main product page. Missing one of these steps can leave the new variation incomplete.
Why products with many variations need extra testing
Very large variation sets need more care. WooCommerce notes that dynamic product dropdown behavior changes for products with more than 30 variations. That does not always mean something is broken, but it does mean you should test the product page more carefully before going live.
Conclusion
Setting up and changing product variations in WooCommerce is not hard. You just need the right process from the start. First, plan your attributes clearly. Then create the variations carefully. After that, add the correct price, stock, image, and other details. When everything is set properly, your product page becomes easier to manage and easier to shop from. This also helps customers choose the right option without confusion. A clean variation setup improves product control, store accuracy, and the overall buying experience. If you review your settings often and test important changes, your variable products will work much better over time.
If you need expert help with WooCommerce product variations, product settings, or store issues, WooHelpDesk is here for you. Our team can help you fix variation errors, improve product setup, and keep your WooCommerce store running smoothly. Visit WooHelpDesk for reliable WooCommerce support and expert guidance.


