HTML Sitemap Creator Plugin: Create an HTML Sitemap in WordPress (Step-by-Step)
Table of Contents
- Introduction: What You’ll Build and Why It Matters
- What an HTML Sitemap Is and How It Differs From an XML Sitemap
- Before You Start: Quick Checklist
- Method 1: Create an HTML Sitemap Using a Plugin (Step-by-Step)
- Method 2: Create an HTML Sitemap Manually (No Plugin)
- Build the List Using WordPress Menus (Fast Manual Option)
- When Manual Is Better (And When It’s Not)
- Best HTML Sitemap Creator Plugins
- Make the Sitemap Easy to Find
- Conclusion
Introduction: What You’ll Build and Why It Matters
An HTML sitemap is a page visitors can open and use. It shows your site links in one place. People use it to find pages faster. It also helps users who feel lost on large sites. You will learn how to create an HTML sitemap in WordPress step by step. You will build a clean sitemap page with clear links. You can do this with or without a plugin. Both methods work well on most WordPress themes. This guide stays simple and easy to follow. You will not need coding skills for basic setup. You will also keep the sitemap page user-friendly and neat. A clear sitemap can reduce clicks for key pages. It can also support better internal linking structure. This is helpful for content-rich blogs and business sites. Many USA users expect fast navigation on mobile devices. An HTML sitemap helps them reach content quickly. It also makes your site feel more organized and trusted.
Here are common cases where an HTML sitemap helps most:
- Your blog has many posts across multiple categories.
- Your site has many service pages and location pages.
- Visitors often use search and still miss key pages.
- You want one page with all important internal links.
- You want better navigation without changing menus.
By the end, your sitemap page will be live. It will be easy to find and use. It will also match a professional blog style.
What an HTML Sitemap Is and How It Differs From an XML Sitemap
An HTML sitemap is made for real people. It is a normal page with clickable links. Visitors can open it from your footer or menu. They can scan sections and jump to pages fast. It is like a clean directory of your site. You can list pages, categories, and key posts. You can also group links in a simple layout. This makes it easier for new visitors to explore. It also helps returning users reach important pages quickly.
An XML sitemap is different in its main purpose. It is built for search engines and crawlers. It lists URLs in a structured file format. Search tools use it to understand your site structure. It helps them find new and updated content faster. Most SEO plugins create an XML sitemap automatically. You usually do not show it to visitors.
Here is the simple difference you should remember:
- HTML sitemap: made for visitors, readable, and clickable.
- XML sitemap: made for search engines, structured, and technical.
You do not need to pick only one option. Many sites use both together for best results. An XML sitemap supports crawling and indexing work. An HTML sitemap supports navigation and user experience. This is why both can be useful on WordPress sites.
In this guide, you will focus on the visitor sitemap. You will learn how to add HTML sitemap page in WordPress properly. You will keep the page clean and easy to scan. Later steps also show plugin and manual methods. Some plugins generate links with a shortcode. In many setups, you can use an HTML sitemap shortcode WordPress tool. That helps you place a sitemap anywhere you want. You can add it on a new page in seconds. You can also adjust what links it shows.
Before You Start: Quick Checklist
Before you create a sitemap page, check your site structure. A sitemap works best when your content is organized. If your pages are messy, the sitemap looks messy too. Spend a few minutes preparing your links first. This will save time during setup and edits later.
Start by reviewing your key site areas in WordPress. Open your Pages screen and scan your main pages. Check your blog categories and confirm they make sense. If you run WooCommerce, review your shop pages too. Remove draft pages from your public plan. Also avoid listing private or member-only pages.
Use this checklist before you begin:
- Confirm your important pages are published and updated.
- Review your main categories and remove unused category names.
- Decide if you want posts listed by category or not.
- Decide if products should appear in the sitemap page.
- Identify pages you should never list for visitors.
- Make sure permalinks are working and links open correctly.
Now decide what the sitemap should include for real users. Most sites should keep it simple and focused. A sitemap page should guide visitors, not overwhelm them. If your site has hundreds of posts, avoid listing everything. Instead, show key pages and main categories first. You can also include popular posts if needed.
Also decide what to exclude from the sitemap for safety. Many WordPress sites have pages that should stay hidden. These pages are not helpful for normal visitors. Examples include cart and checkout pages for WooCommerce. Thank-you pages and account pages also do not help most users.
Common pages you may exclude are:
- Cart, checkout, and order confirmation pages
- My account, login, register, and password reset pages
- Privacy policy pages if you want less clutter
- Tag archives that create too many repeated links
- Test pages, landing drafts, or old campaign pages
When your plan is clear, the setup becomes easy. Your sitemap page will look clean and professional. It will also help people find content faster.
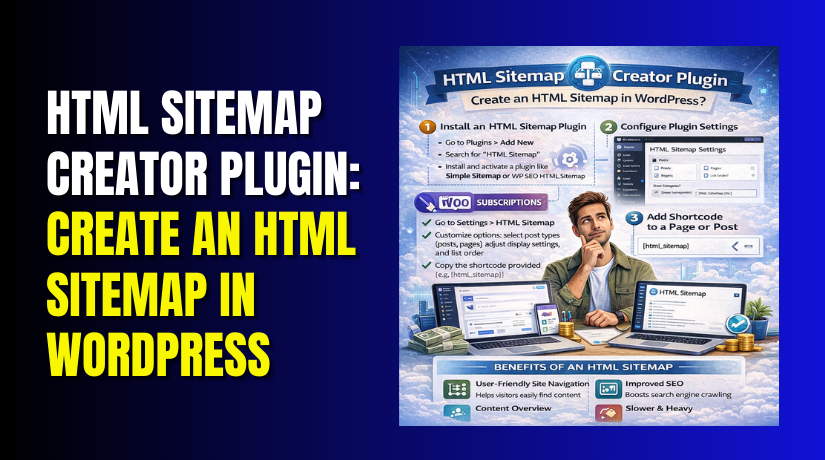
Method 1: Create an HTML Sitemap Using a Plugin (Step-by-Step)
Choose the Right Plugin for Your Site
A plugin is the fastest way to build a sitemap page. It can auto-generate links from your site content. It can also group links in a clean layout. Many plugins let you control what the sitemap shows. This is important for larger blogs and business sites.
When choosing, focus on features that save time later. The best HTML sitemap plugin for WordPress should be simple. It should also give you control over the output. You should be able to include and exclude content easily. You should also get a clean layout that matches your theme.
Look for these features before you install anything:
- Shortcode or block support for quick page insertion
- Options to include pages, posts, categories, and products
- Exclusion rules for specific pages, categories, or post types
- Sorting options like title order or menu order
- Clean output that works well on mobile screens
- Recent updates and good user ratings
If you want a simple visitor directory, pick a plugin. Then you can quickly create site map page WordPress visitors can use. Plugins also reduce manual work when you add new pages. The sitemap updates automatically in most cases. That saves time when your site grows.
Install and Enable the Plugin
Once you pick a plugin, install it from your dashboard. This part is quick and beginner-friendly. You do not need FTP or file edits. Everything happens inside WordPress admin.
Follow these steps to install the plugin:
- Go to WP Admin and open Plugins.
- Click Add New at the top of the screen.
- Search for the plugin name in the search box.
- Click Install Now and wait for completion.
- Click Activate to enable the plugin.
After activation, check for plugin settings. Some plugins add a settings page. Others work directly through blocks or shortcodes. Either way, you are ready for the next steps.
Configure What the Sitemap Should Show
Now open your plugin settings and plan the sitemap output. Every plugin looks a little different inside WordPress. Most provide options for pages, posts, and categories. Some also support WooCommerce products and custom post types. Your goal is a sitemap page that stays helpful for visitors.
Start with the content types you want to display. For many blogs, pages and categories are enough. If you publish many posts, add post lists carefully. A full post list can become too long very fast. In that case, show posts by category or show only key posts.
Here are the most useful items to include for most sites:
- Main pages like Home, About, Contact, Services, Blog
- Core categories that group your blog topics
- Important landing pages that bring conversions
- WooCommerce Shop and key product categories, if needed
Now decide what should stay out of the sitemap. Some pages are not useful for visitors. Some pages can also create confusion during checkout flows. Removing those links keeps the sitemap clean and safe.
Common items you should exclude from the sitemap output:
- Cart and checkout related pages
- Thank-you and order received pages
- Account, login, register, and reset password pages
- Old tag archives with repeated or thin content
- Test pages and temporary landing pages
Next, choose how the links should appear on the page. Many plugins let you sort links by title or menu order. Title order works well for long page lists. Menu order works better for business websites and services. Category grouping helps large blogs stay readable.
Check these display controls if your plugin includes them:
- Sort order: title, date, or menu order
- Grouping: by post type, category, or parent page
- Link depth: parent pages only or include child pages
- Exclusions: by ID, category, or post type
If the plugin supports it, keep headings enabled for sections. Headings help users scan faster on mobile screens. They also make the page feel like a real directory. Once this setup looks right, move to the sitemap page creation.
Create a New Sitemap Page and Insert the Output
Now you will build the actual sitemap page in WordPress. This is where visitors will browse your links. You can name it “Sitemap” for clarity and trust. Many sites also add it in the footer menu.


Follow these steps to build the page:
- Go to Pages and click Add New.
- Title the page as Sitemap or HTML Sitemap.
- Add a short intro line at the top.
- Insert the plugin output using its block or shortcode.
- Preview the page to confirm the layout looks clean.
Most sitemap plugins provide a shortcode for insertion. If your plugin uses a shortcode, copy it from settings. Then paste it into the page editor using a shortcode block. This is where you will use an HTML sitemap shortcode WordPress users rely on. It outputs the links automatically on the page.
Here is a simple way to structure the sitemap page content:
- A short intro sentence that explains what the page does
- A section for pages and key site links
- A section for categories and blog topics
- Optional sections for products or resources
If you prefer a more focused sitemap, keep only pages and categories. This makes it faster to scan and easier to maintain. If your site is bigger, allow post lists by category. That keeps the sitemap useful without becoming too long.
When the shortcode output appears, review the link list carefully. Click a few links and confirm they open correctly. If something feels wrong, adjust plugin settings and refresh. This is the main step in how to create an HTML sitemap in WordPress without manual link work.
Publish and Verify on Mobile
Once your sitemap looks good in preview, publish it. After publishing, test it like a real visitor would. Many USA users browse on phones and tablets. A sitemap must stay readable on small screens. A messy sitemap can increase bounce and frustration.
Use this quick mobile testing checklist:
- Open the sitemap page on a phone browser
- Check headings and spacing between sections
- Confirm links are easy to tap and not too close
- Scroll the page and check loading speed
- Confirm there are no broken links or missing sections
If the sitemap looks crowded, reduce what you show. Remove long post lists and keep only key links. If the plugin output looks unstyled, check theme typography settings. You can also adjust spacing using editor blocks. Many plugins also offer layout options inside settings.
After mobile testing, your sitemap page is ready to use. Next, you can add it to your footer or menu. That helps users find it quickly when needed.
Method 2: Create an HTML Sitemap Manually (No Plugin)
Create a Page and Add a Simple Structure
A manual sitemap is perfect for small or medium sites. You control every link that appears on the page. This method is also great when you want a clean layout. It avoids extra plugin settings and shortcode styling issues. You will build a sitemap page using normal WordPress blocks.
Start by creating a new page in your WordPress dashboard. Go to Pages and click Add New. Give the page a clear title like “Sitemap.” Add a short intro line at the top. Explain that visitors can find all key site links here. This helps users understand the page right away.
Now add a simple structure with headings and link lists. Keep the structure short and easy to scan. Most visitors only want important site areas first. If you list everything, the page becomes too long.
Here is a clean structure that works on most blogs:
- Main Pages
- Blog Categories
- Helpful Resources (optional)
- Popular Posts (optional, keep short)
Under each heading, add links using a list block. Add only the pages that matter most. This helps you create site map page WordPress visitors can trust. It also keeps the page fast and neat on mobile screens.
Use these link selection tips for a better manual sitemap:
- Add pages that appear in your main menu
- Add your top service or category pages
- Add your contact and support pages
- Avoid adding thin pages with little content
- Avoid adding checkout or account related pages
After you add the links, preview the page once. Click a few links and confirm they open correctly. If everything looks clean, save the page as a draft for now. Next, you will build a smarter manual sitemap using menus.
Build the List Using WordPress Menus (Fast Manual Option)
If you want easy control, use WordPress menus for your sitemap. This is the fastest manual approach for many site owners. You can update the sitemap by editing one menu later. You do not need to edit the page each time. This method also keeps your sitemap organized in a structured list.
First, create a special menu for the sitemap. Go to Appearance → Menus in your dashboard. Click Create a new menu and name it “Sitemap Menu.” Now add the items you want listed. You can add pages, categories, and custom links. You can also arrange them in a clean order.
Use this approach to build a useful sitemap menu:
- Add only important pages first
- Add category pages for major blog topics
- Add key landing pages that visitors often need
- Keep the menu short and easy to scan
Once your Sitemap Menu is ready, place it on your sitemap page. Open the sitemap page in the editor again. Add a heading like “Site Links” or “Browse by Section.” Then insert a Navigation block. Select your “Sitemap Menu” from the block settings. The links will appear automatically on the page.
This menu-based method is simple and stable. It also avoids shortcode layout issues. It is a great option if you do not want plugin output. It gives you full control over what visitors see.
When Manual Is Better (And When It’s Not)
A manual sitemap is not always the best choice. It depends on your site size and how often you publish. Manual pages need updates when your structure changes. If you add pages often, updates take more time. If you rarely add pages, manual sitemaps stay easy.
Manual method works best in these cases:
- Your site has fewer pages and fewer blog categories
- You want full control over link order and grouping
- You want a clean sitemap without plugin styling
- You want to list only key pages, not everything
Manual method is not ideal in these cases:
- Your blog publishes many posts every week
- Your site has hundreds of pages and categories
- You want auto-updates without editing menus
- You want the sitemap to list posts automatically
If your site is large, a plugin method is usually easier. A plugin can update links when you publish new content. It can also generate structured lists using site data. Many plugins also provide an HTML sitemap shortcode WordPress editors can insert quickly. That is why plugins often fit larger sites better.
If your site is smaller, manual works great. You can keep the sitemap simple and user-focused. You can guide visitors to your most useful pages fast.
Best HTML Sitemap Creator Plugins
If you want speed, choose the best HTML sitemap plugin for WordPress. Most options give an HTML sitemap shortcode WordPress users can paste. Pick one based on your site size and content types.
- Simple Sitemap
Simple Sitemap lets you build an HTML sitemap using editor blocks. You can preview the sitemap right inside the page editor. It can list pages, posts, and custom content types quickly. It works well when you want a clean, responsive layout. - WP Sitemap Page
WP Sitemap Page creates a sitemap page using one simple shortcode. It can list pages, posts, categories, and many custom content types. You can exclude specific pages and control what appears on the list. It is great for fast setup, but long sites may need limits. - HTML Page Sitemap
HTML Page Sitemap is a lightweight option focused on listing pages. It uses the [html_sitemap] shortcode to show a clear page tree. You can set depth levels and include or exclude pages by ID. It fits service sites that only need a page directory. - PS Auto Sitemap
PS Auto Sitemap can generate a sitemap page from your site content. It offers basic display settings and some ready-made layout styles. It can work for simple sites, but it may feel dated. Test it on a staging site before using it on production. - All in One SEO (AIOSEO)
AIOSEO includes an HTML sitemap feature inside its sitemap settings. You can display it with a shortcode or inside the block editor. It lets you pick post types and exclude items you want. It is useful if you already use AIOSEO for SEO tasks. - SEOPress
SEOPress supports an HTML sitemap using a shortcode or a block. You can sort items, exclude IDs, and control listed content types. It can follow your noindex choices, which keeps lists more clean. It works well for bigger sites that need better control.
Make the Sitemap Easy to Find
After you create the page, place it where users look. This helps visitors reach key pages without extra searching. It also helps you create site map page WordPress users can trust.
Use these placement ideas for better visibility:
- Add the sitemap link in your footer menu area.
- Add it under Help, Support, or About in navigation.
- Link it from your Contact page for quick site access.
- Add it in your site’s “Start Here” page, if used.
This is also how to add HTML sitemap page in WordPress correctly. The page must be visible, not hidden in drafts.
Conclusion
You now know how to create an HTML sitemap in WordPress. Choose a plugin for fast setup and automatic link updates. Choose manual links when your site is small and stable. Add the sitemap link in your footer for easy access. Test the page on mobile and check every important link. Pick the best HTML sitemap plugin for WordPress for growing sites. Use an HTML sitemap shortcode WordPress option for quick placement. Keep the page simple, with clear headings and short link lists. If you need help, WooHelpDesk can set everything up properly. Contact WooHelpDesk today and make your site easier to browse.


