How To Recover Deleted Files And Databases On Hostinger
3 mins read

How To Recover Deleted Files And Databases On Hostinger

Introduction

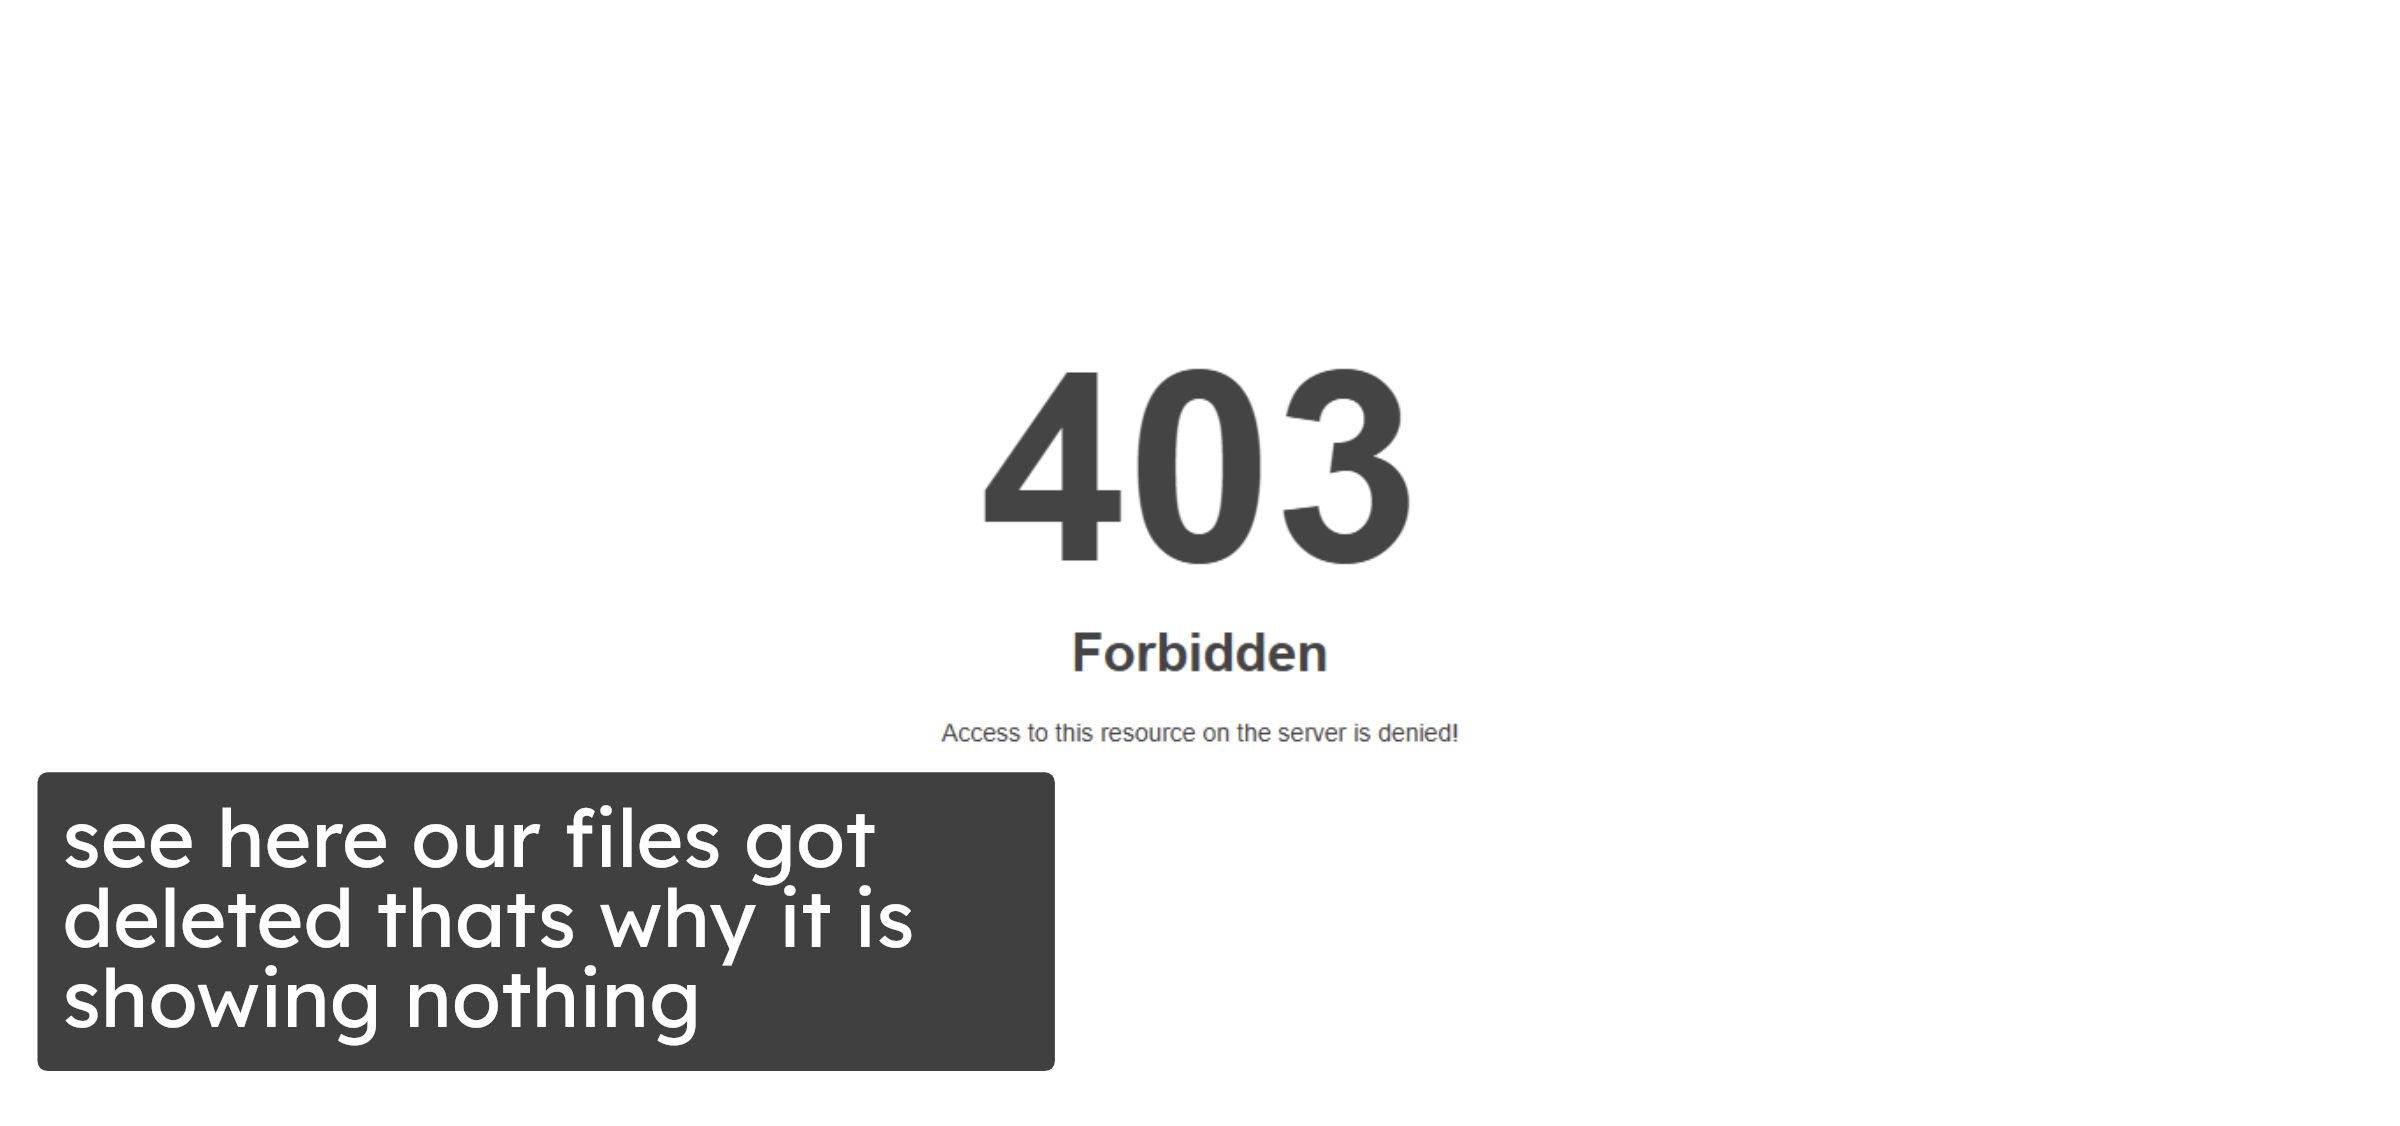
A 403 error on your website often indicates missing or deleted files, incorrect permissions, or server-level issues that prevent your site from loading properly. On Hostinger, accidental file or database deletion can cause your website to become inaccessible, but the built-in backup system makes recovery straightforward. Hostinger provides weekly backups that allow you to restore both website files and databases directly from the dashboard without manual uploads or complex configurations. In this guide, you’ll learn how to identify missing website files using the File Manager, restore deleted files and databases from Hostinger backups, and verify that your website is functioning correctly after recovery. Understanding this process ensures quick recovery from critical errors and minimizes website downtime.

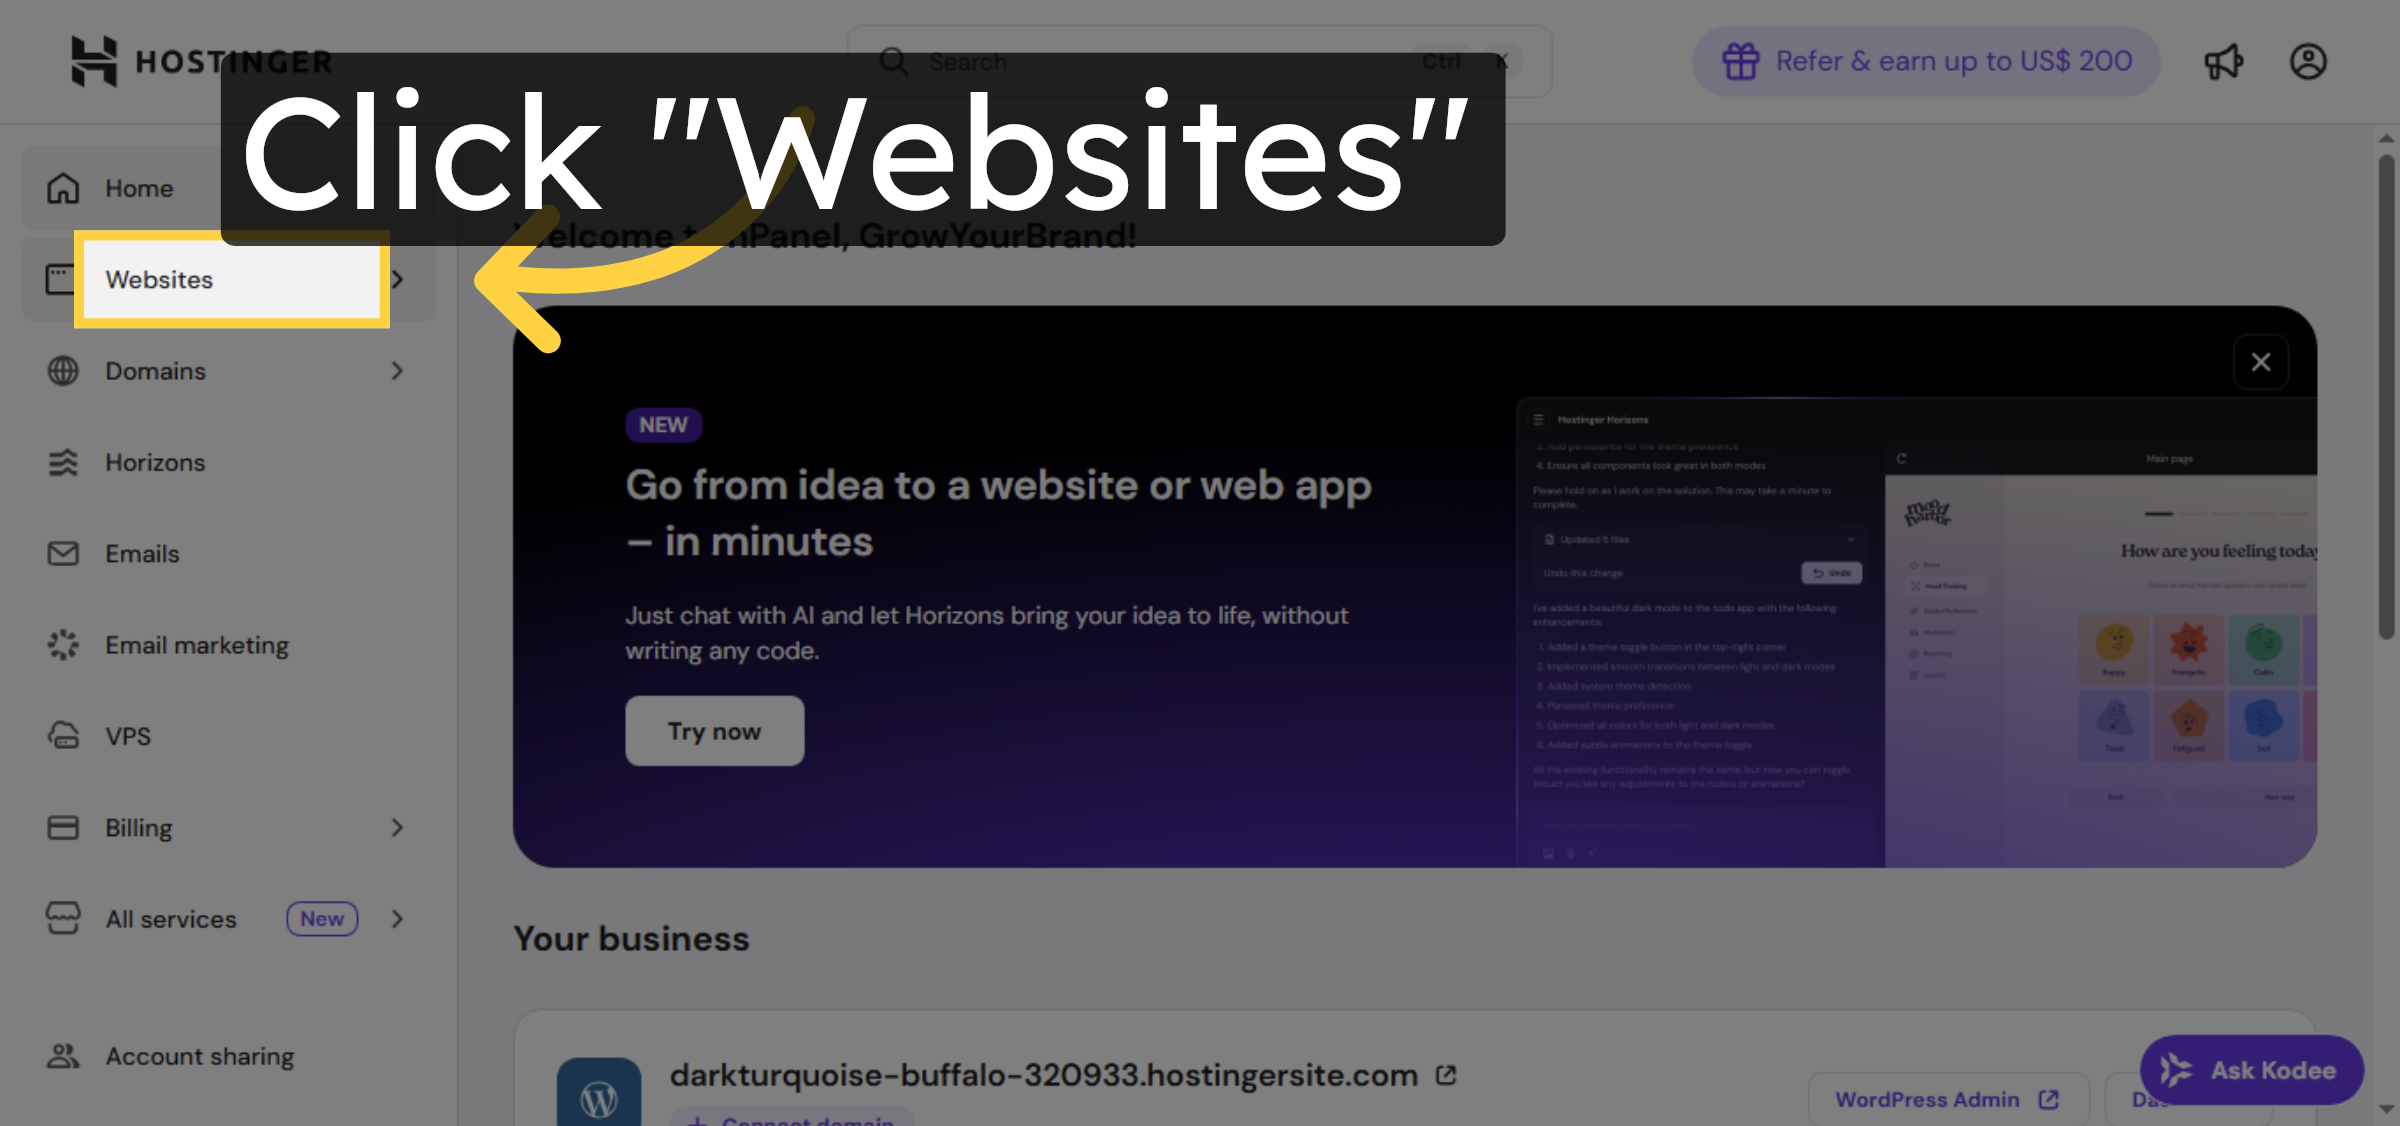
1. Navigate To Websites Section

Login to Hostinger Dashboard.

Navigate To Websites Section

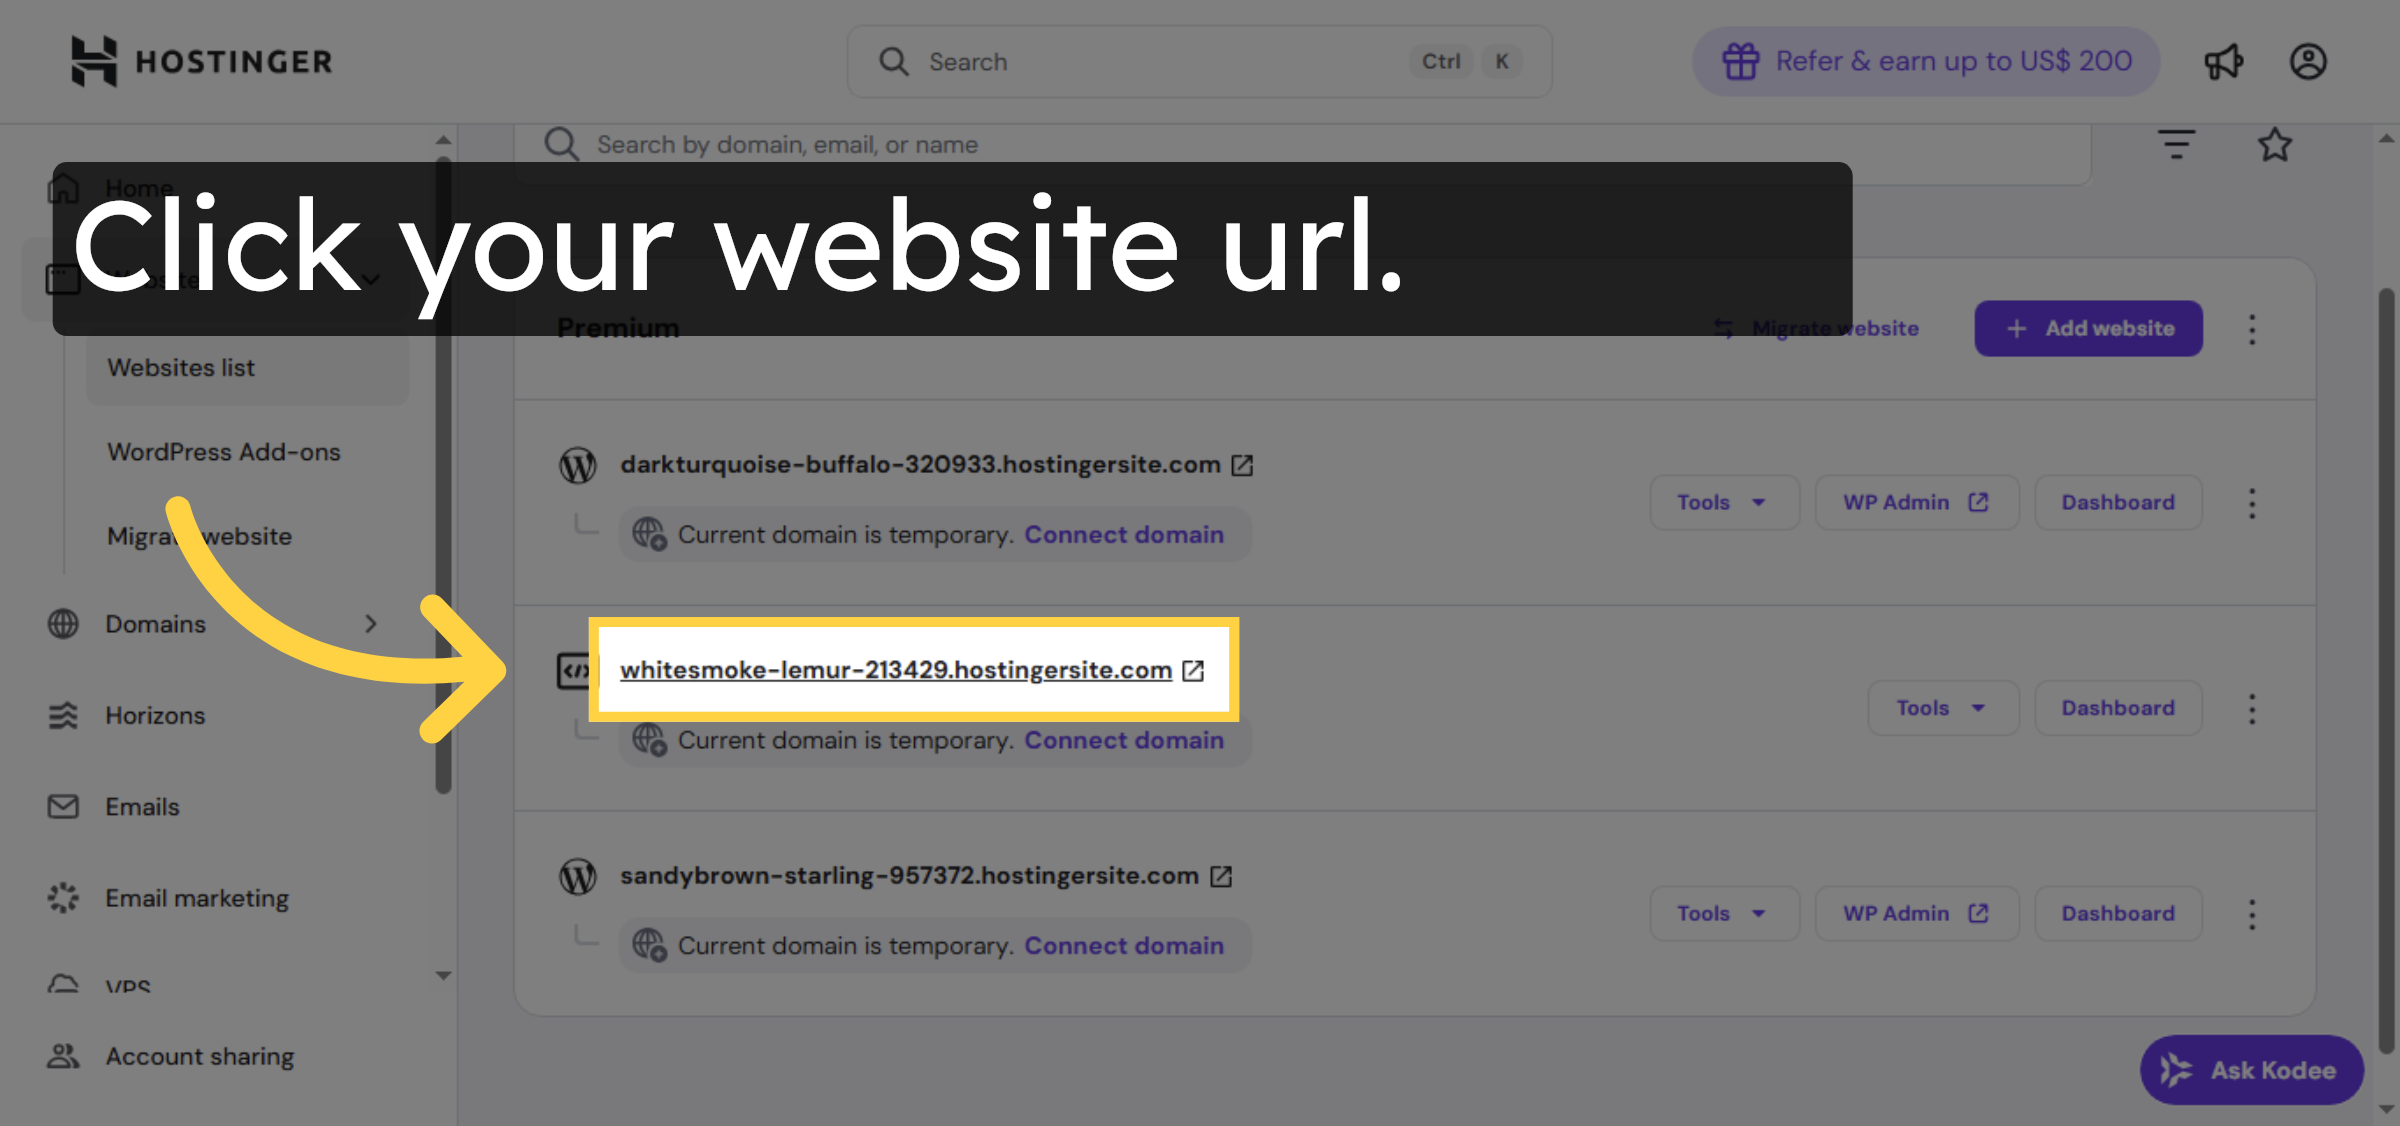
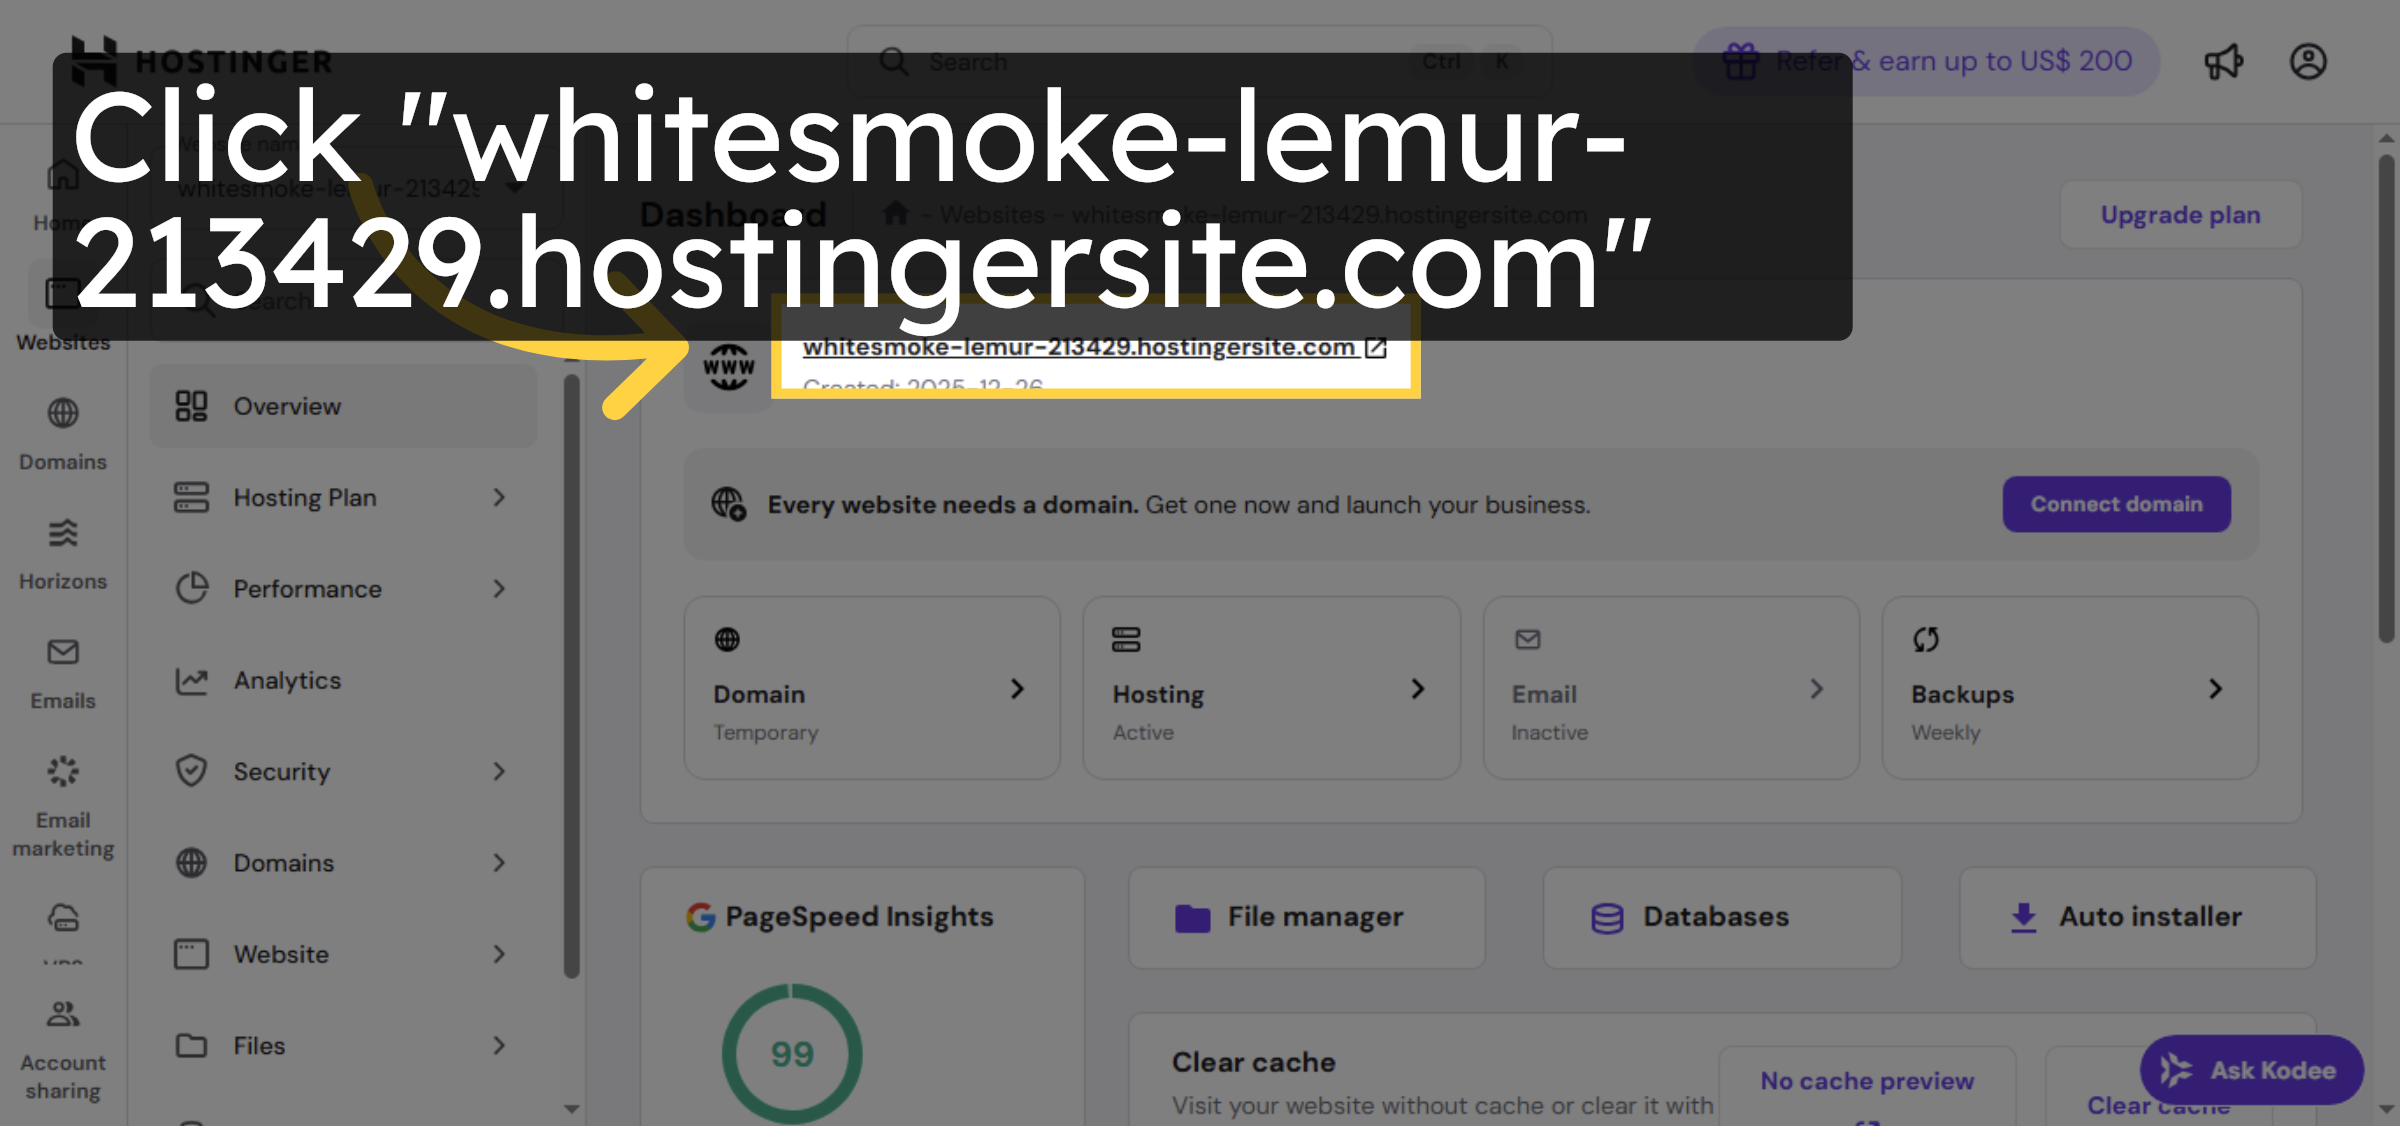
2. Select Your Website

Click your specific website from the list to manage its settings and files.

Select Your Website

3. Switch To Website Tab
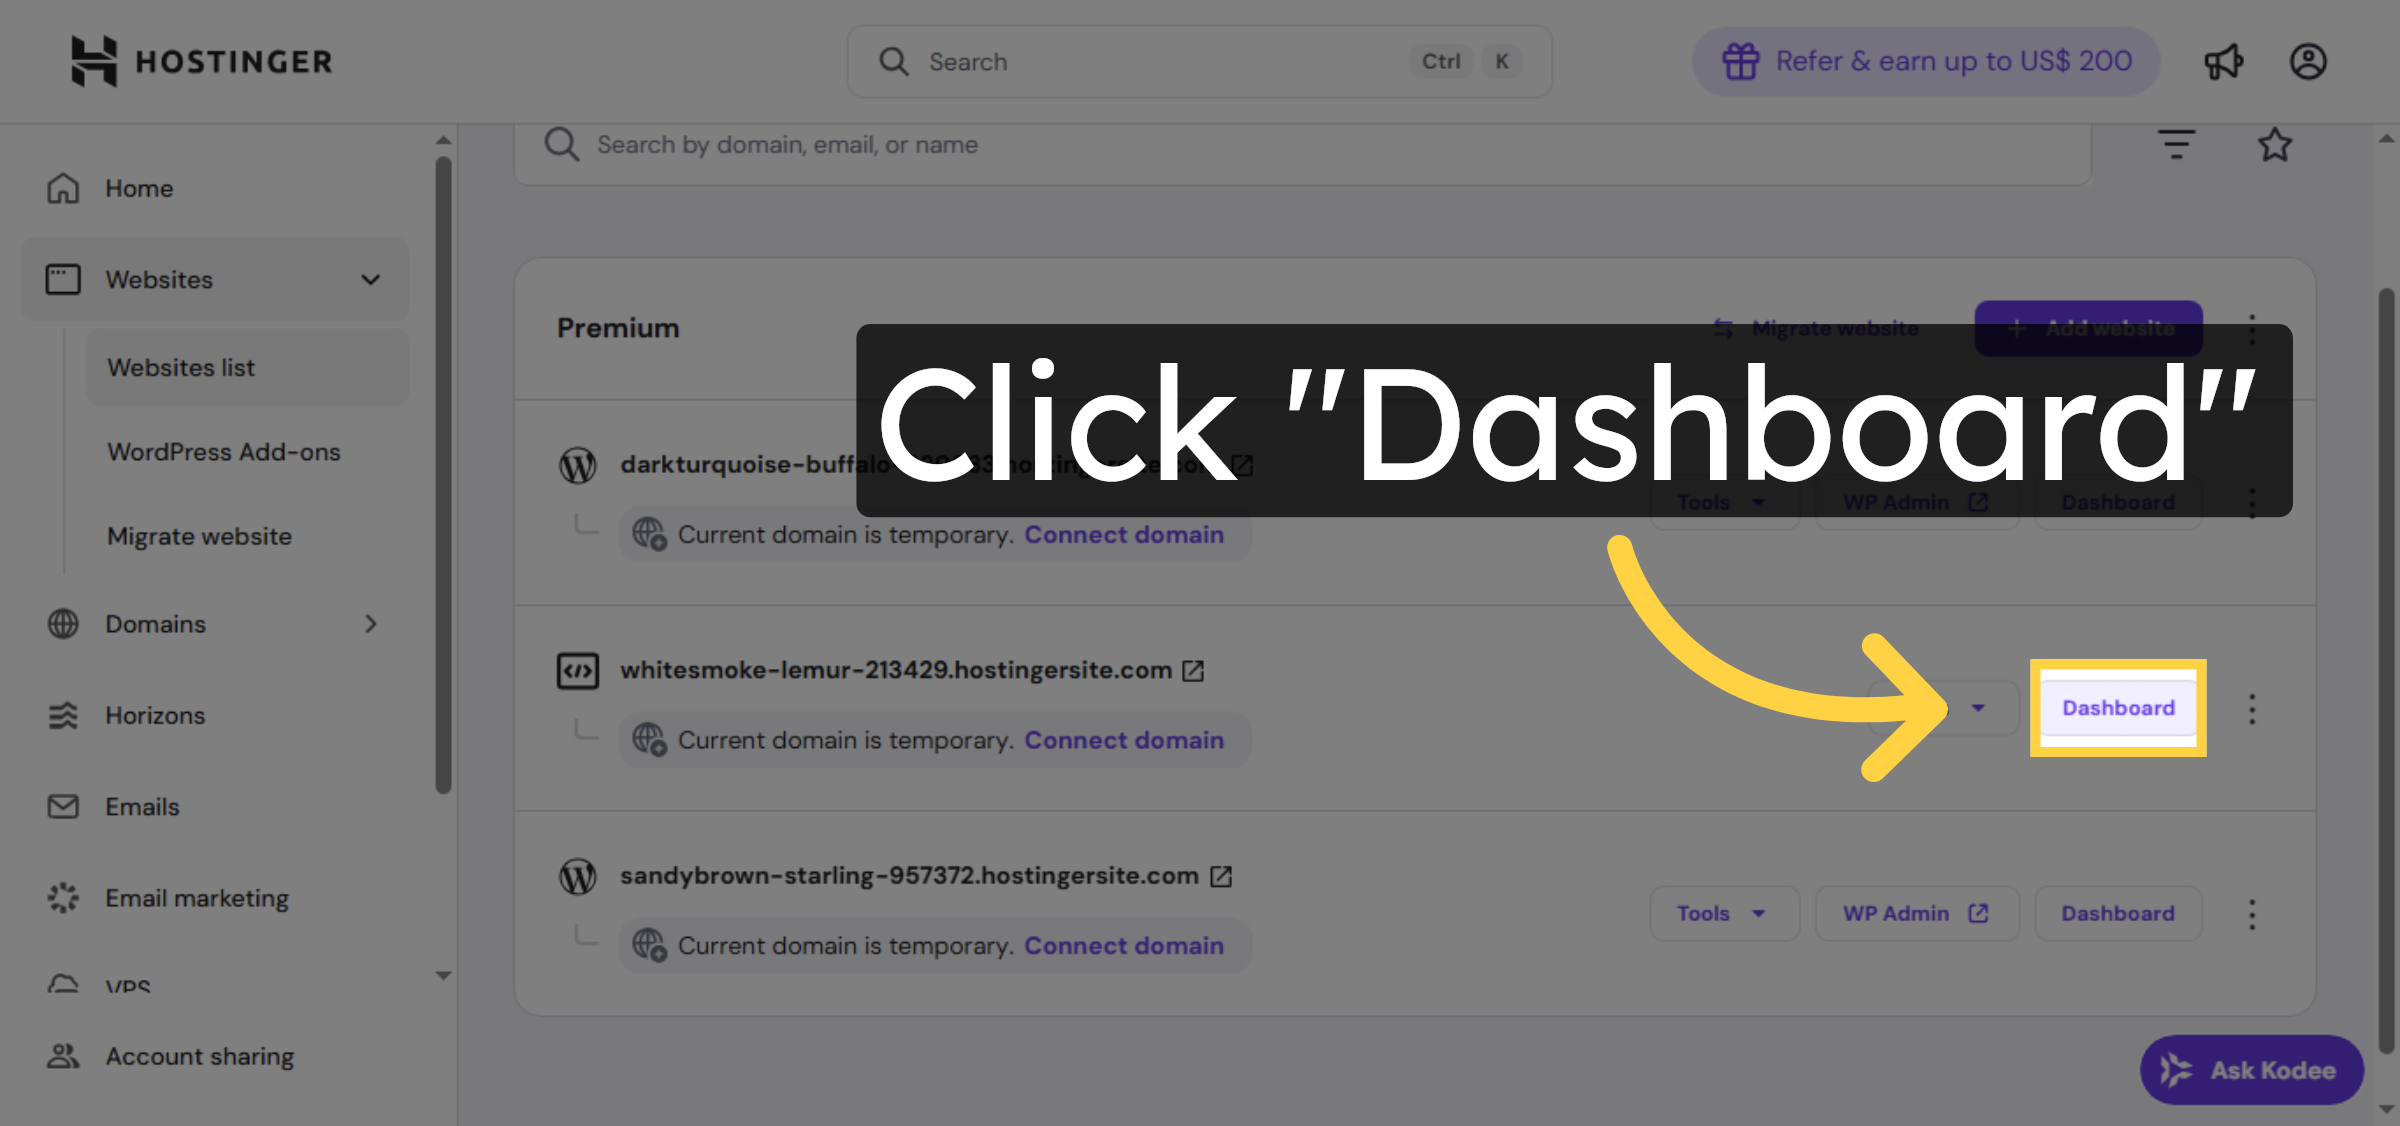
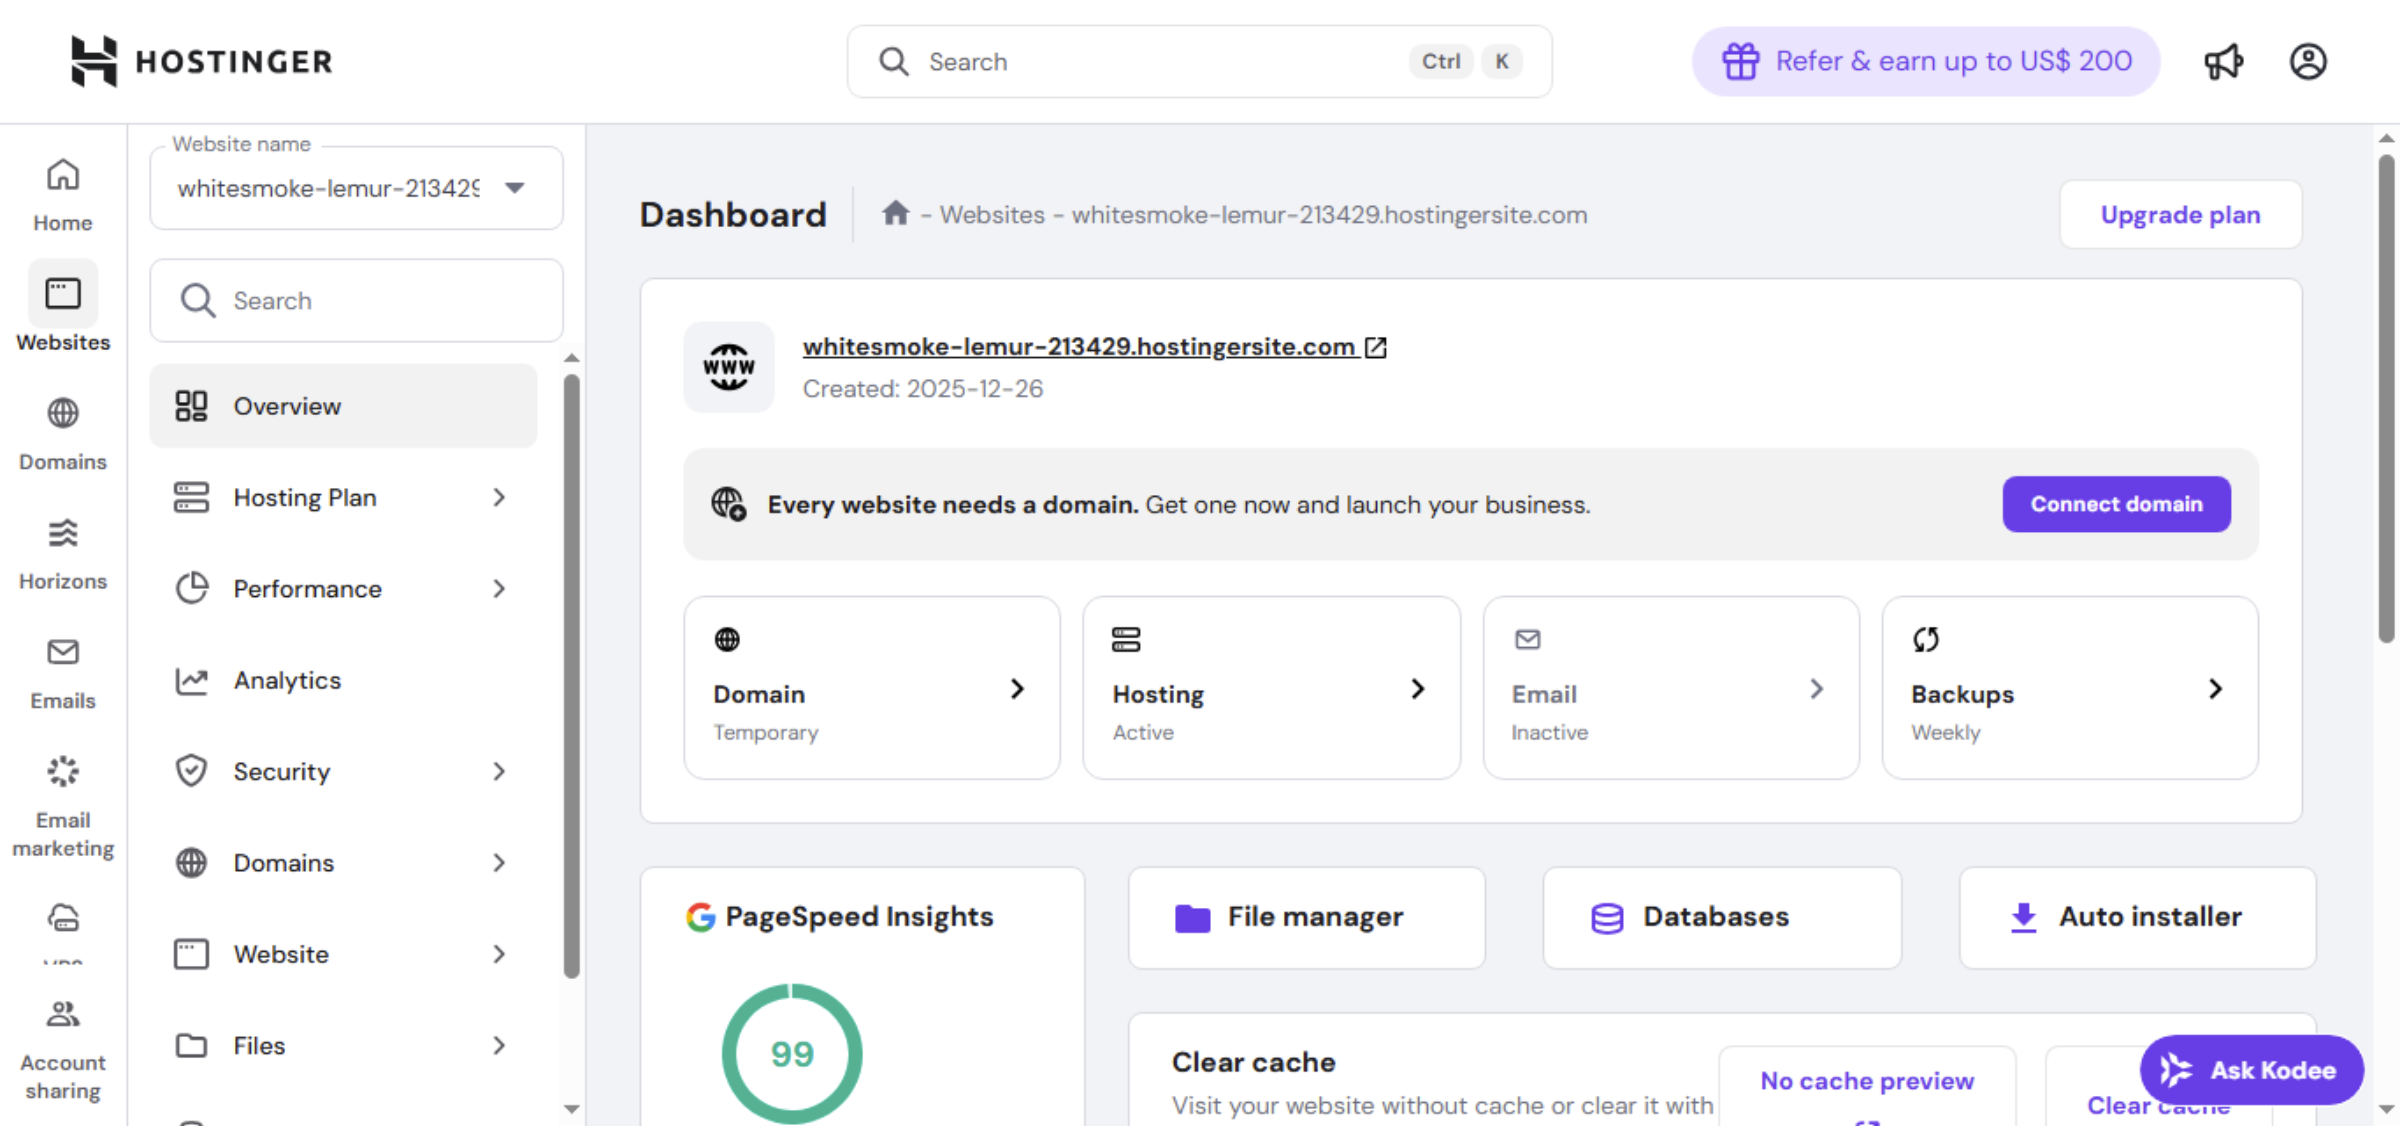
Here you can see our website is not visible it is showing ERROR “403”.

Switch To Website Tab

4. Open Dashboard

Return to Hostinger Dashboard and click on Dashboard of selected website.

Open Dashboard

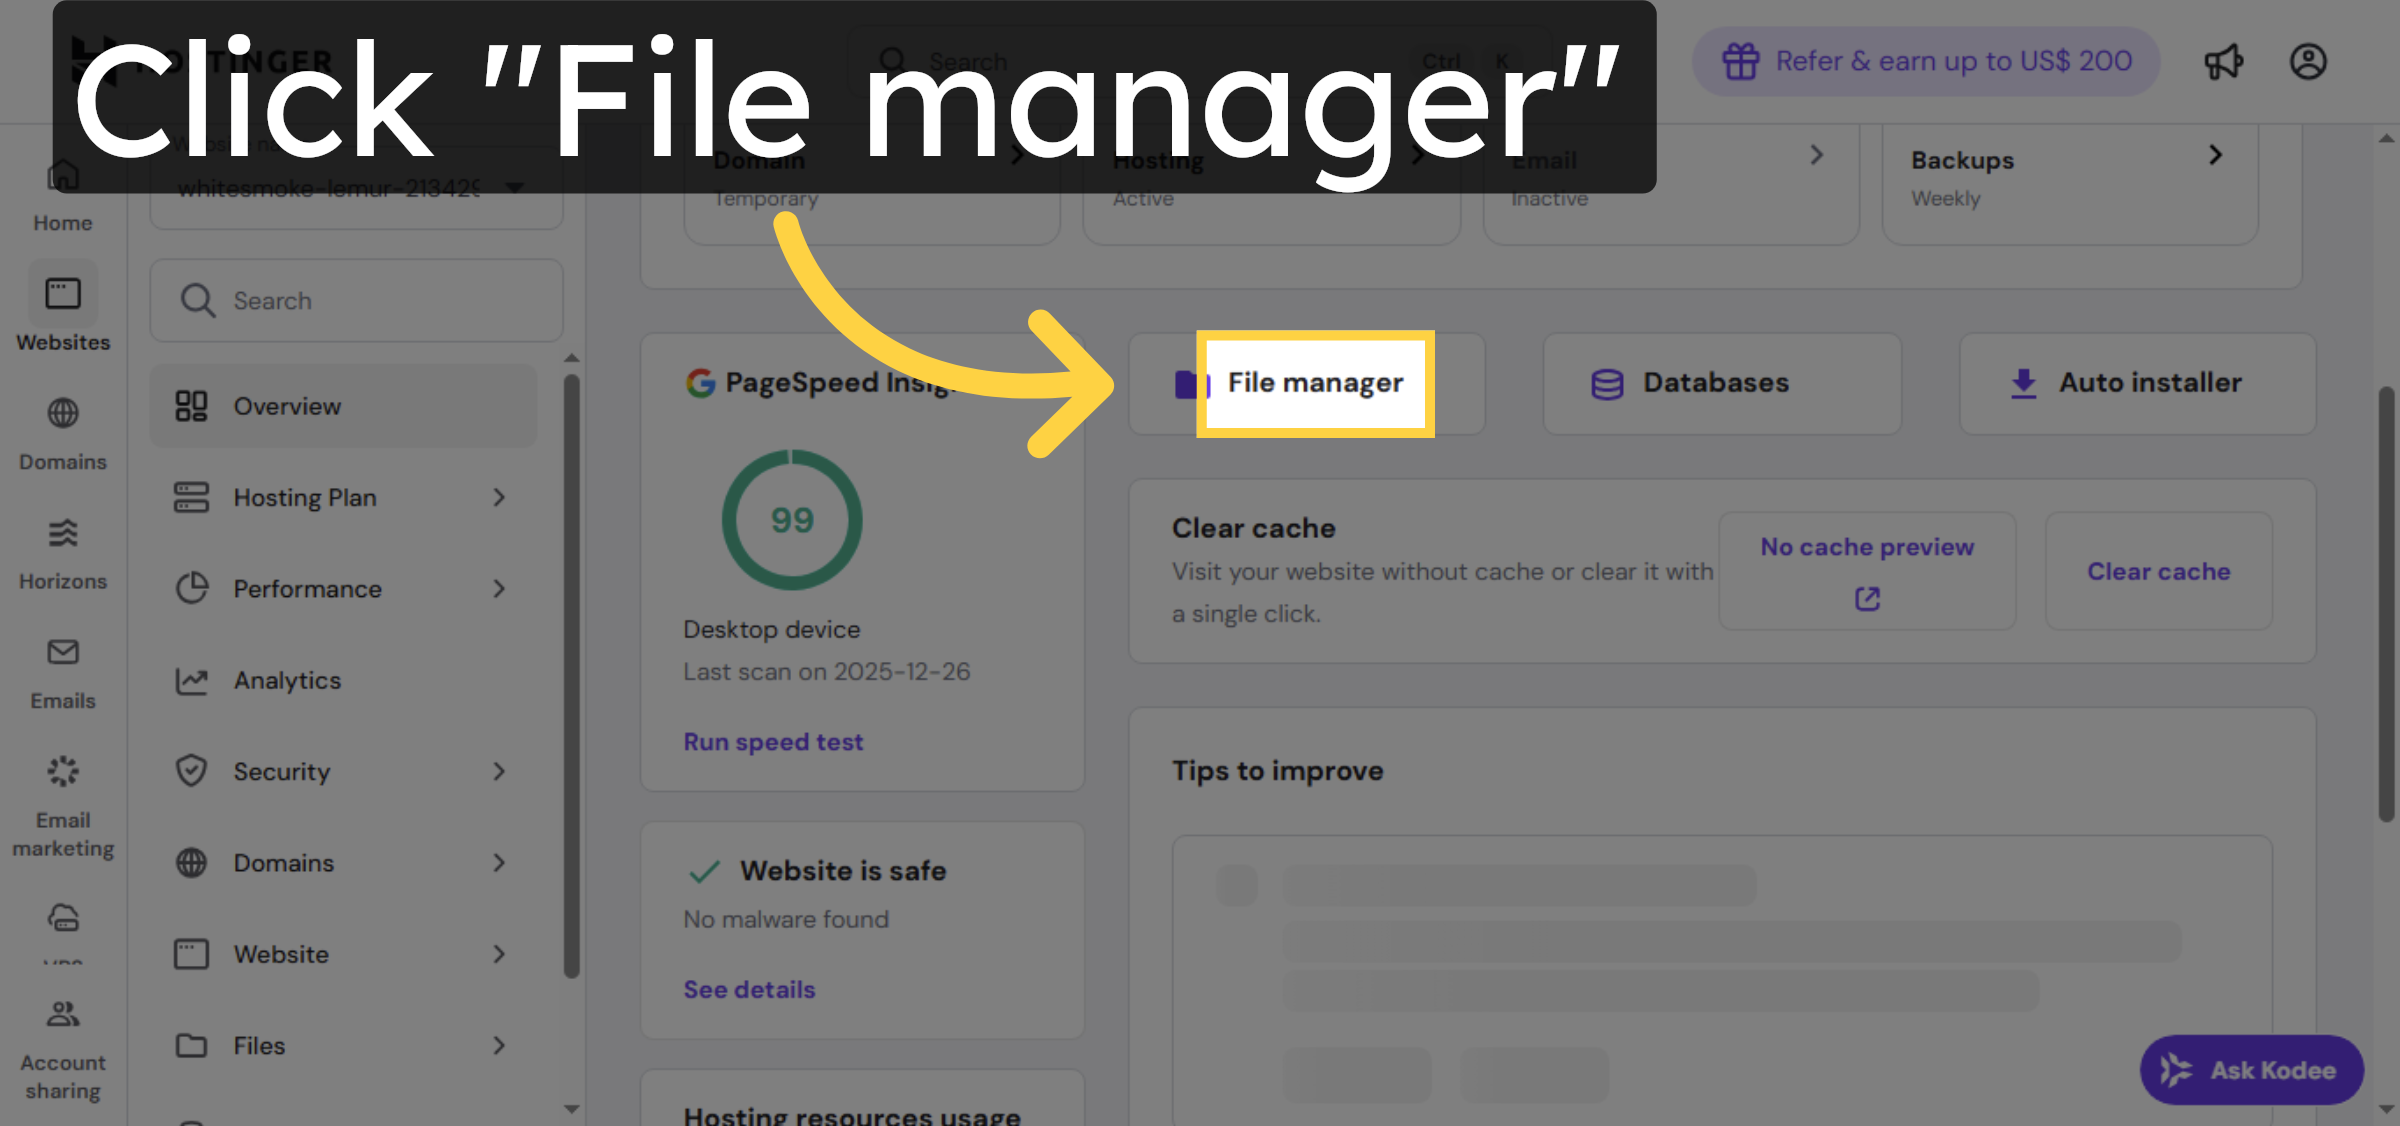
5. Open File Manager

Click the File Manager to browse and manage your website files directly.

Open File Manager

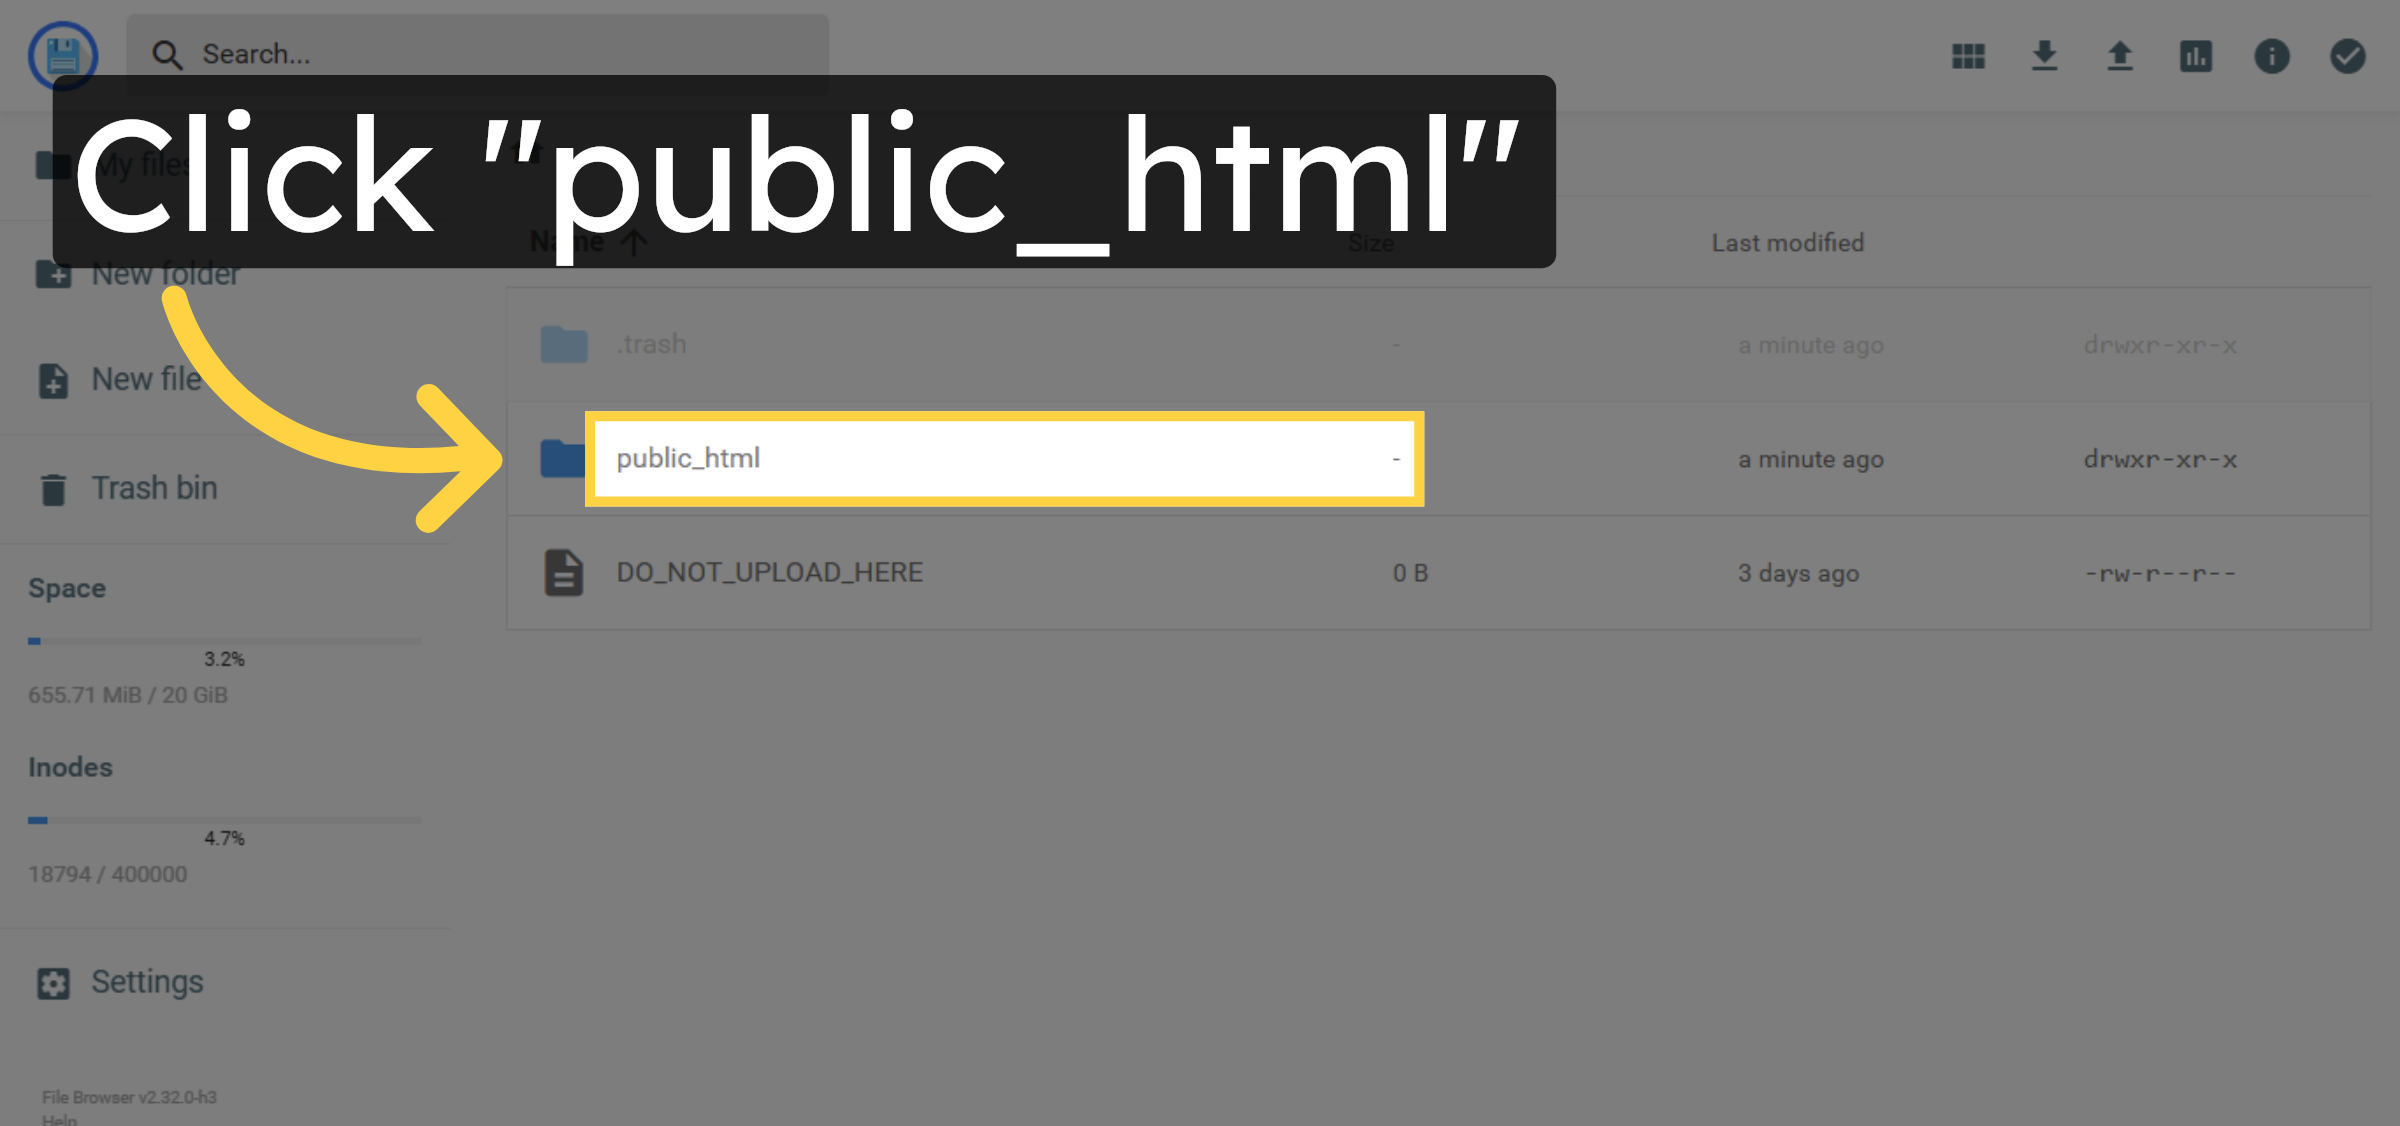
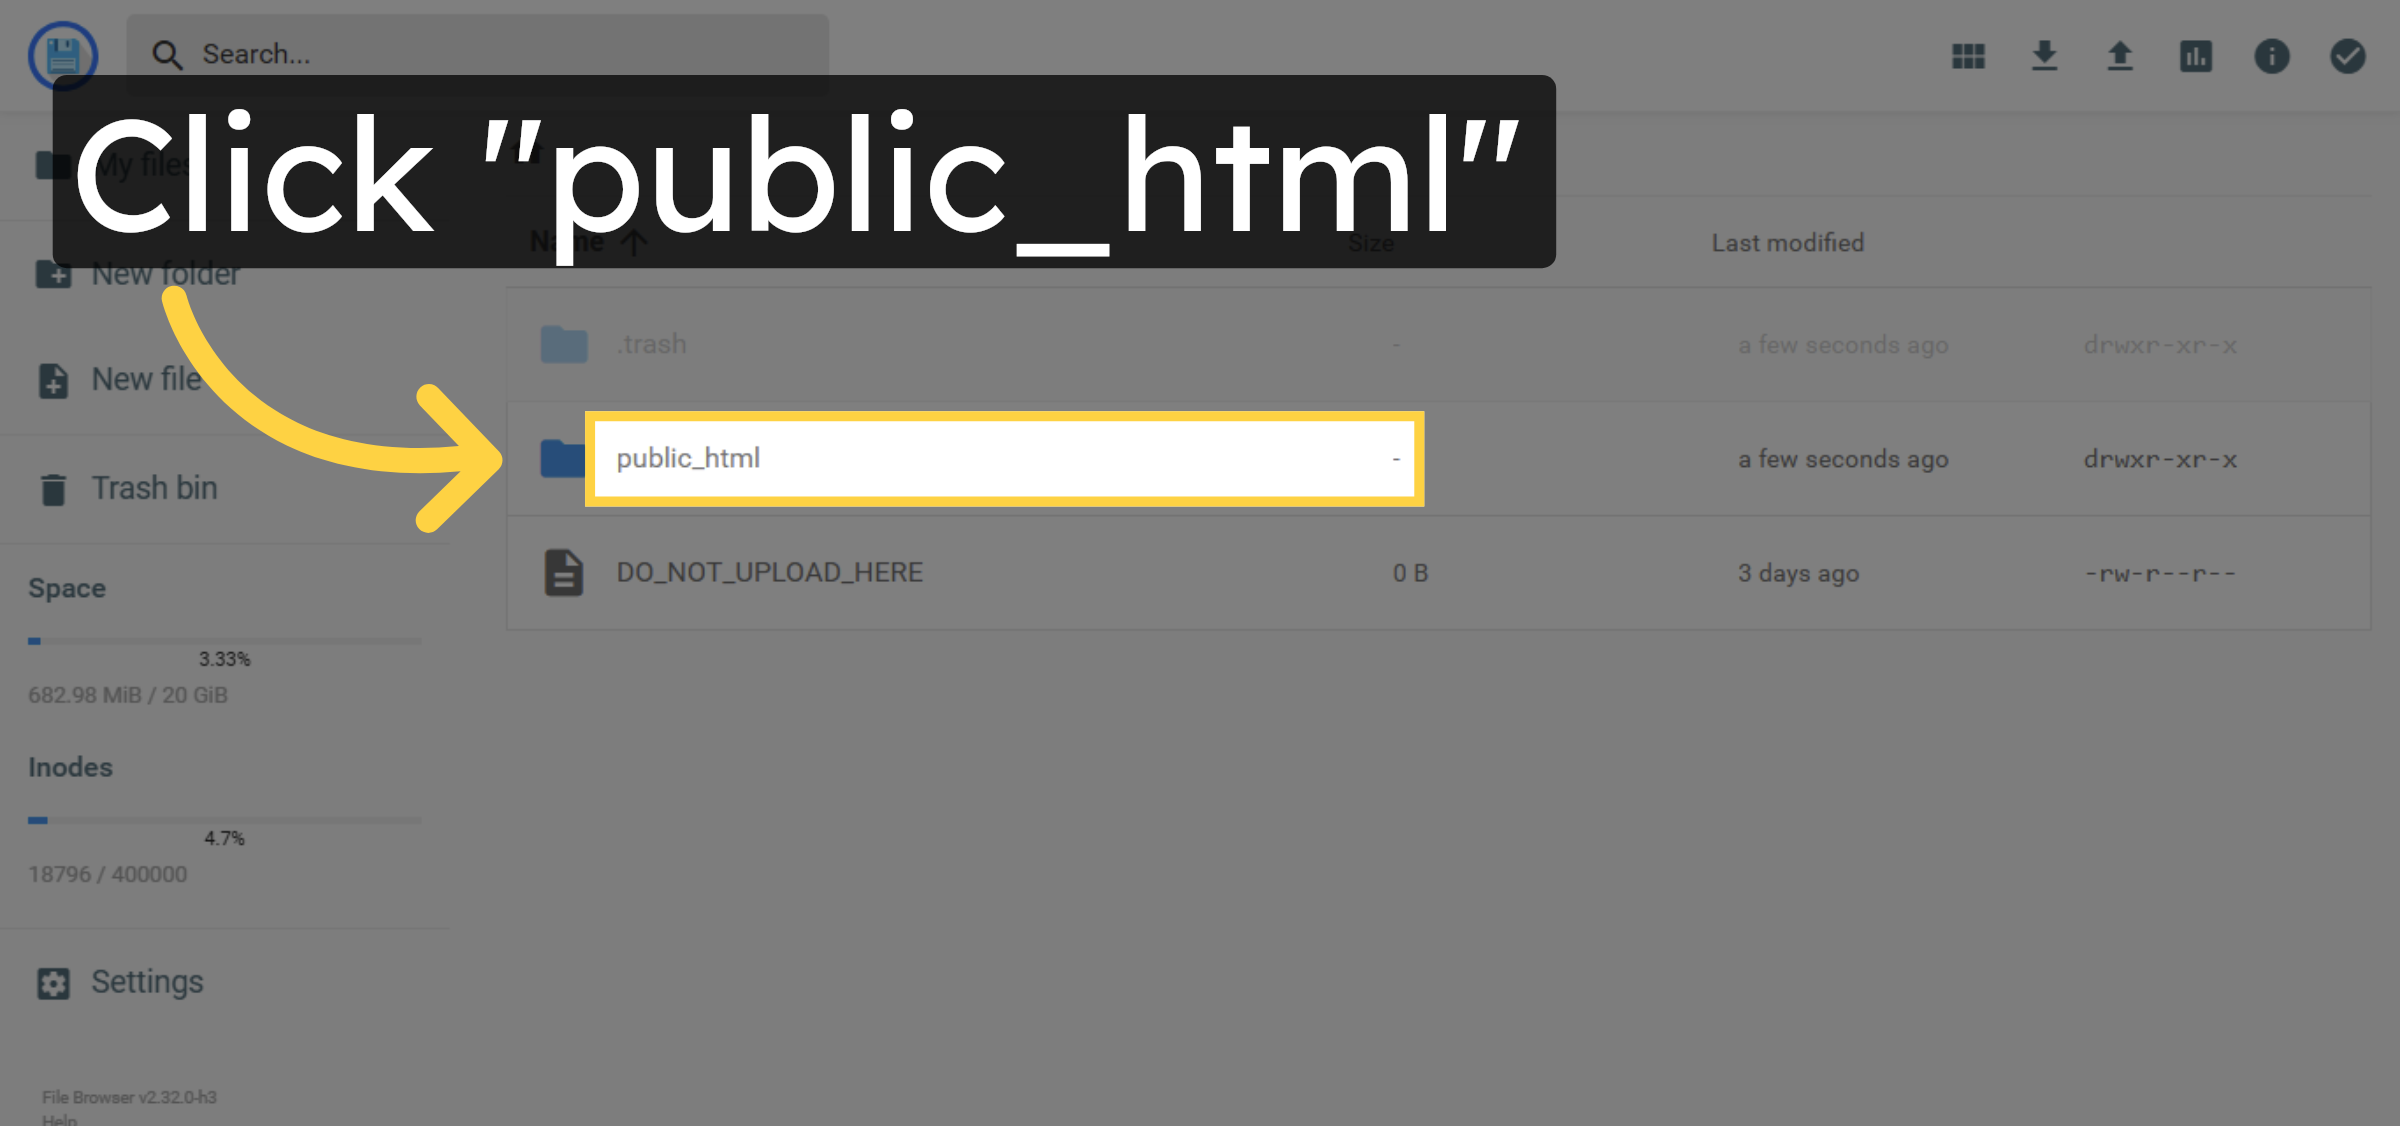
6. Open Public HTML Folder

Click the public_html folder where your website’s main files are stored.

Open Public HTML Folder

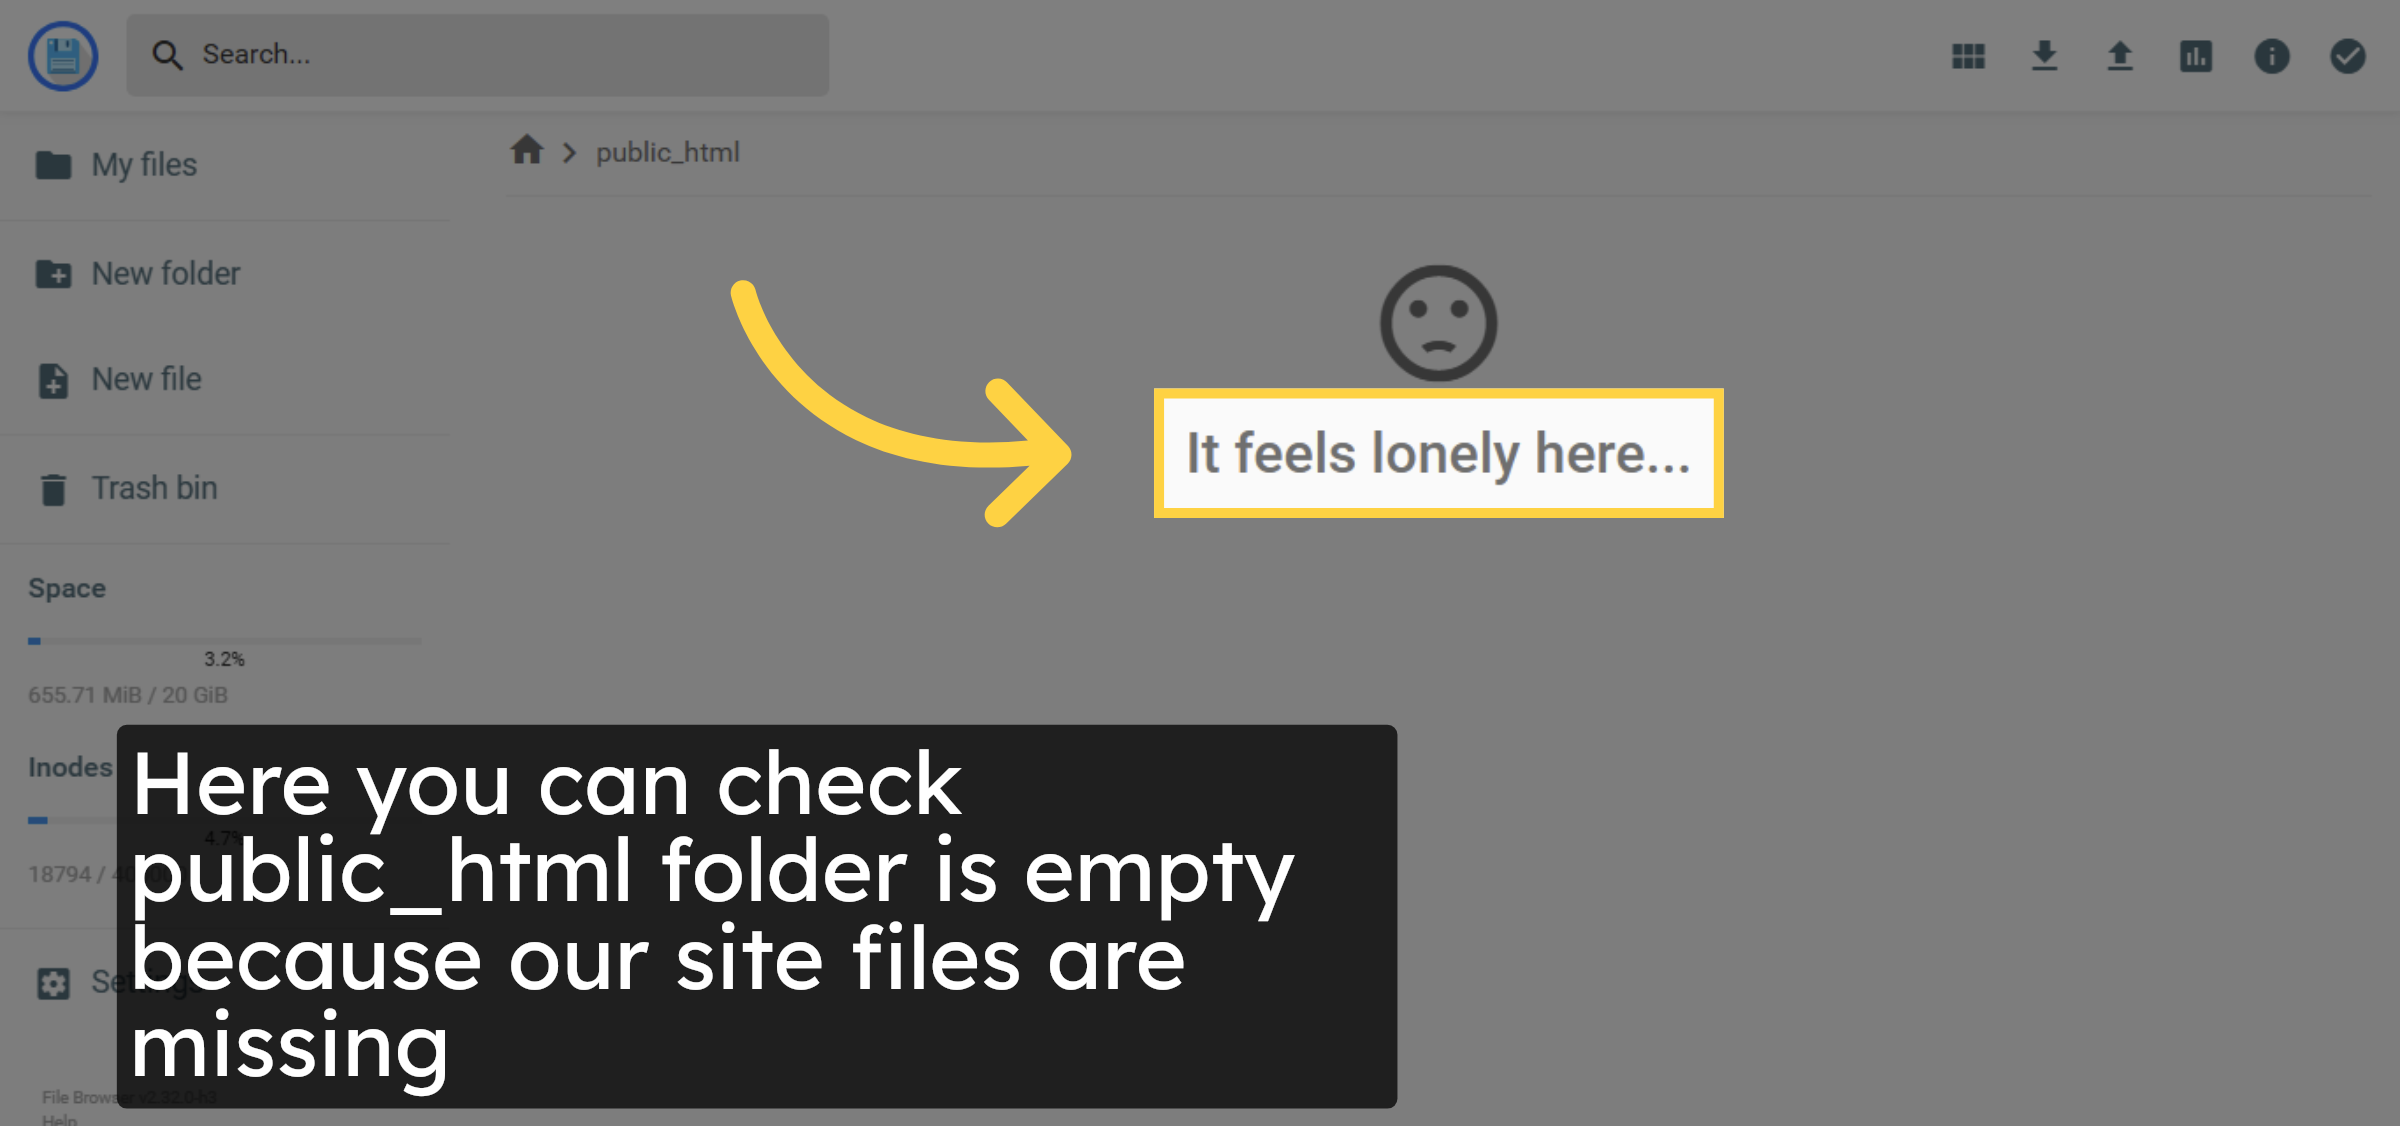
7. Check For Empty Directory

Here your can check our site files are missing/deleted.

Check For Empty Directory

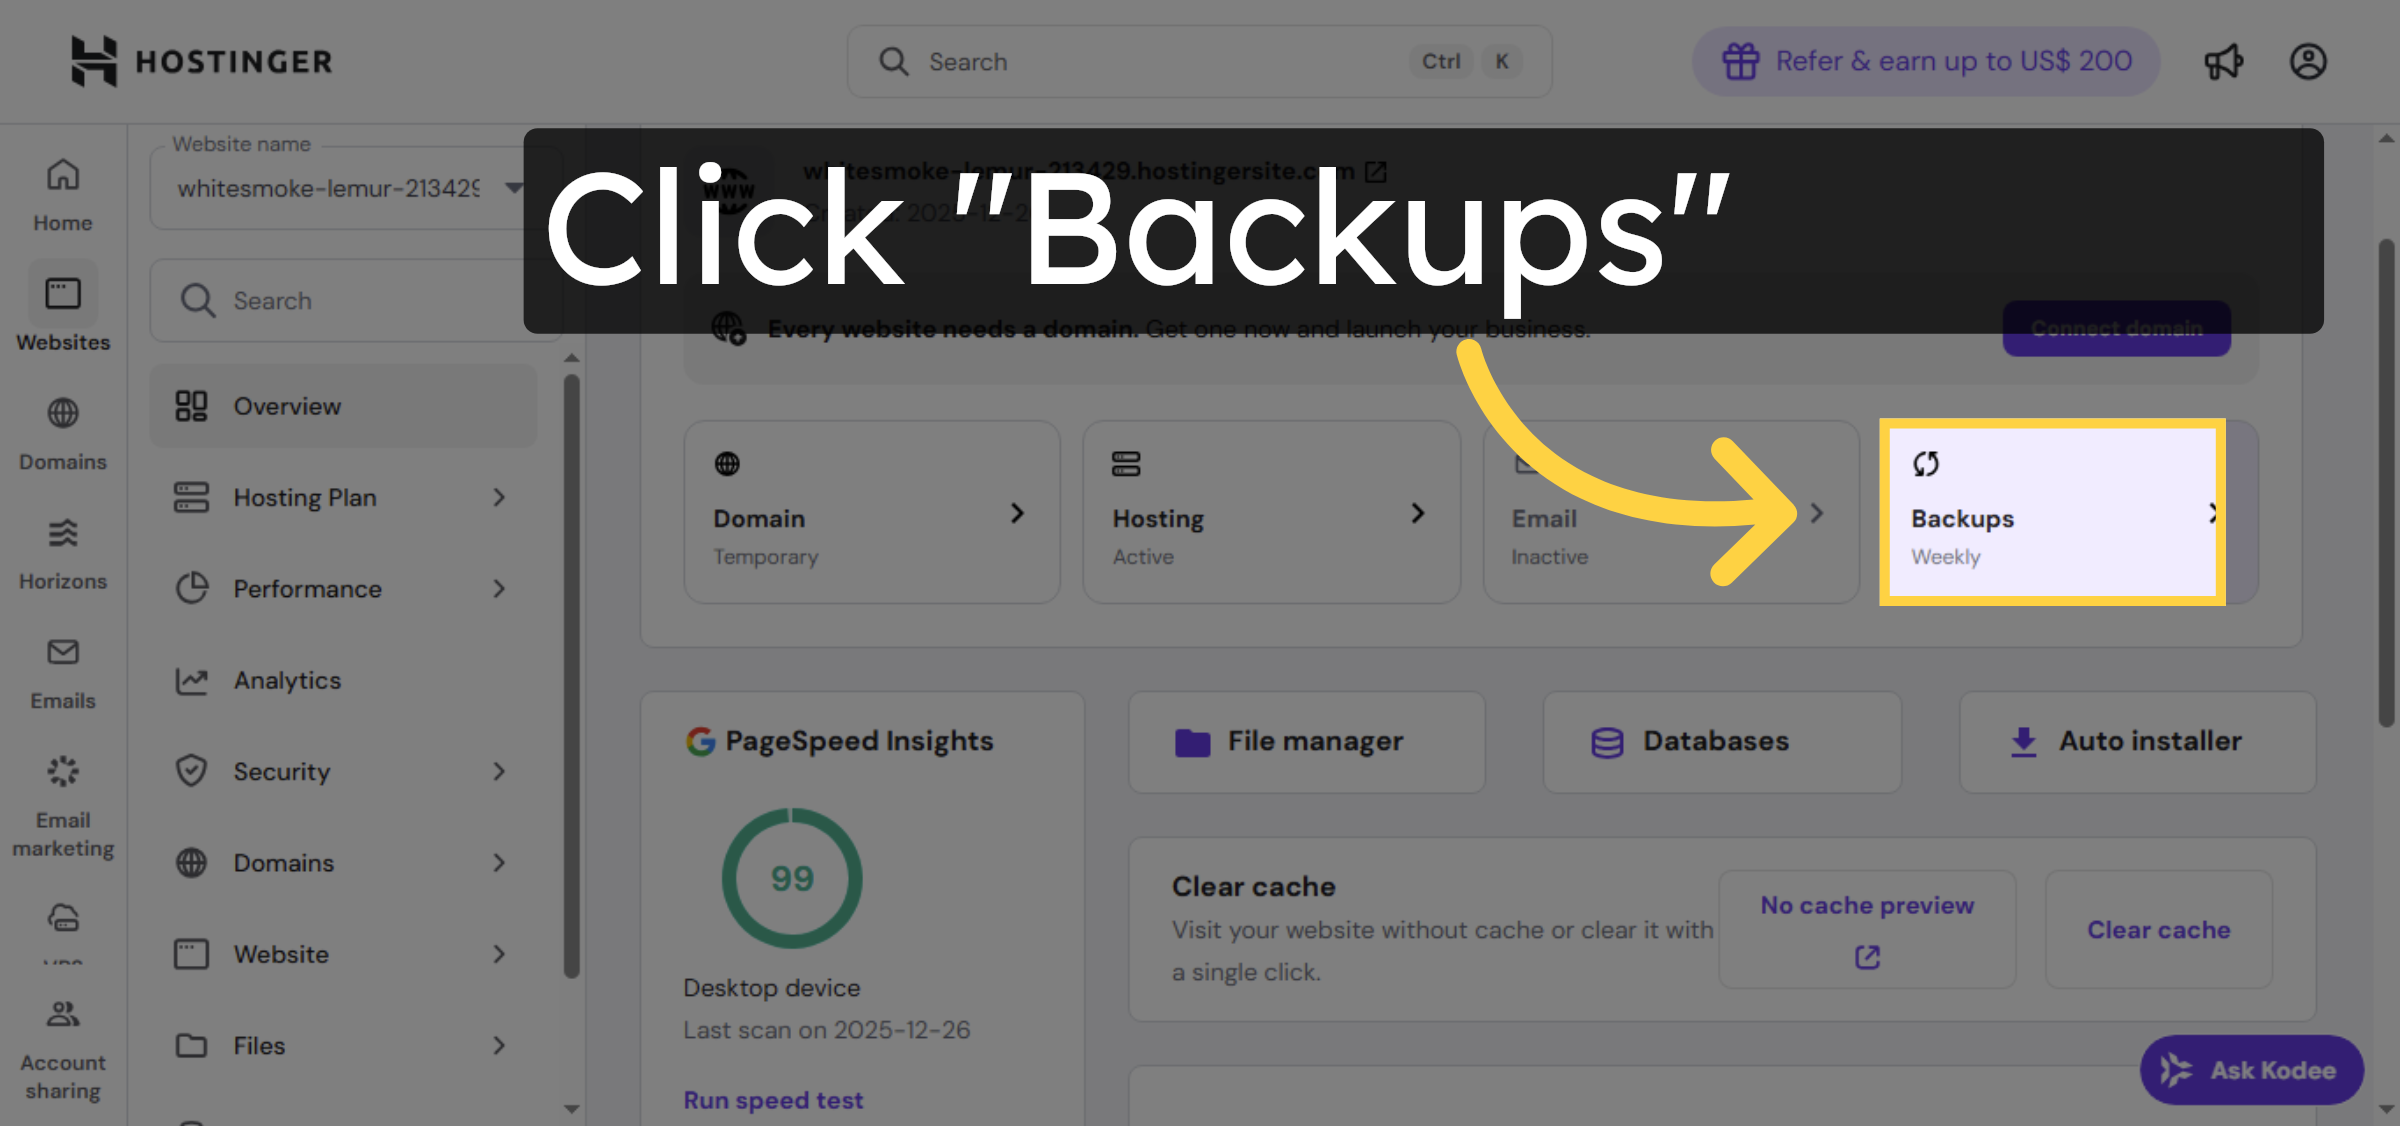
8. Open Weekly Backups

Return to website Dashboard panel and click on Backups option.

Open Weekly Backups

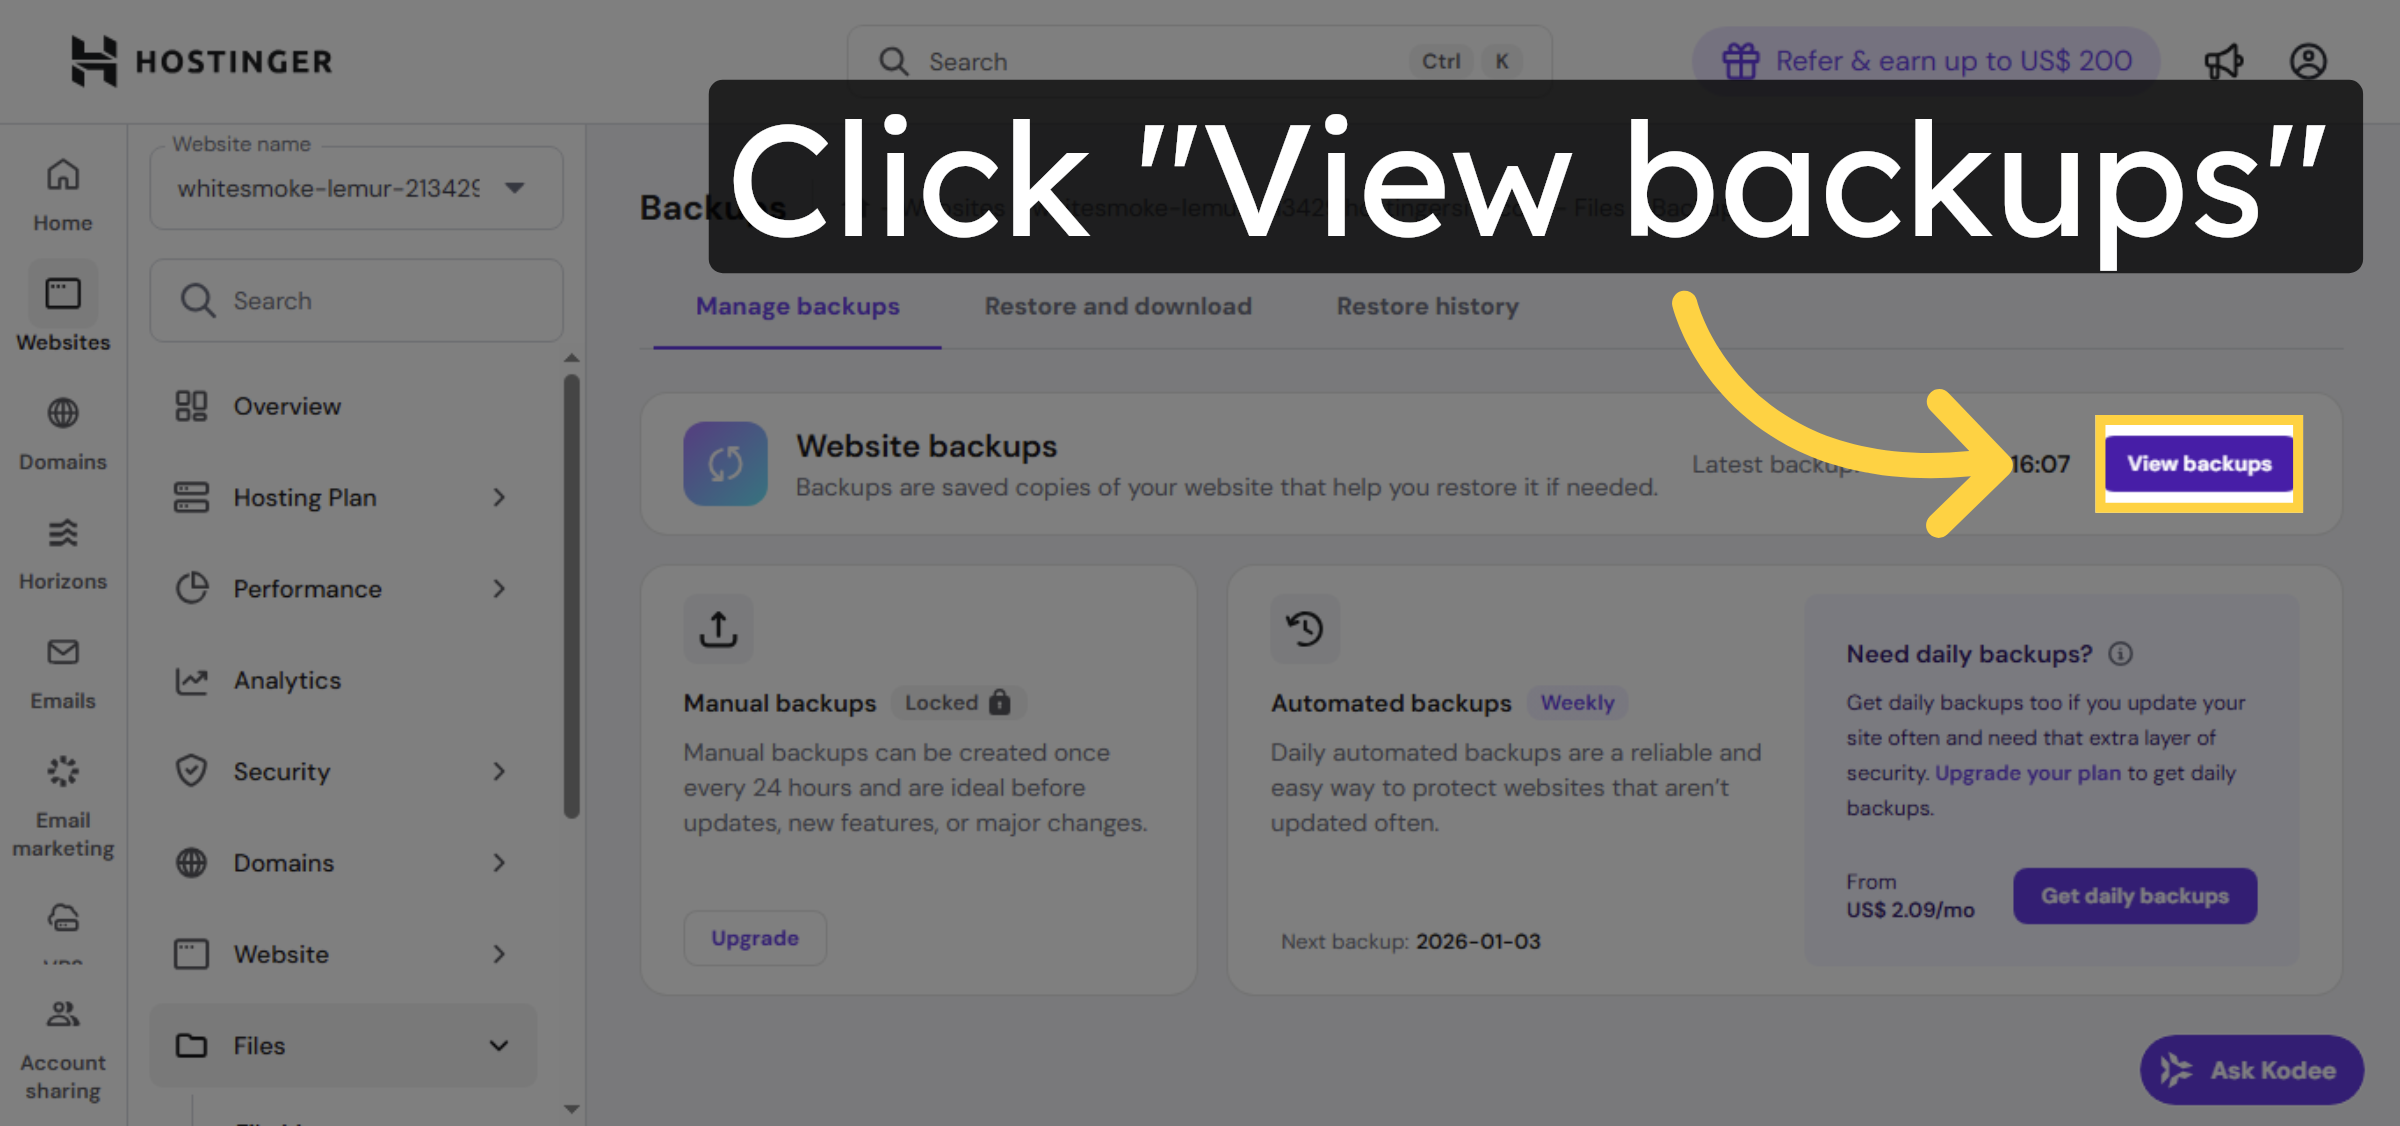
9. View Available Backups

Click View backups to see the list of saved backup points for your files and databases.

View Available Backups

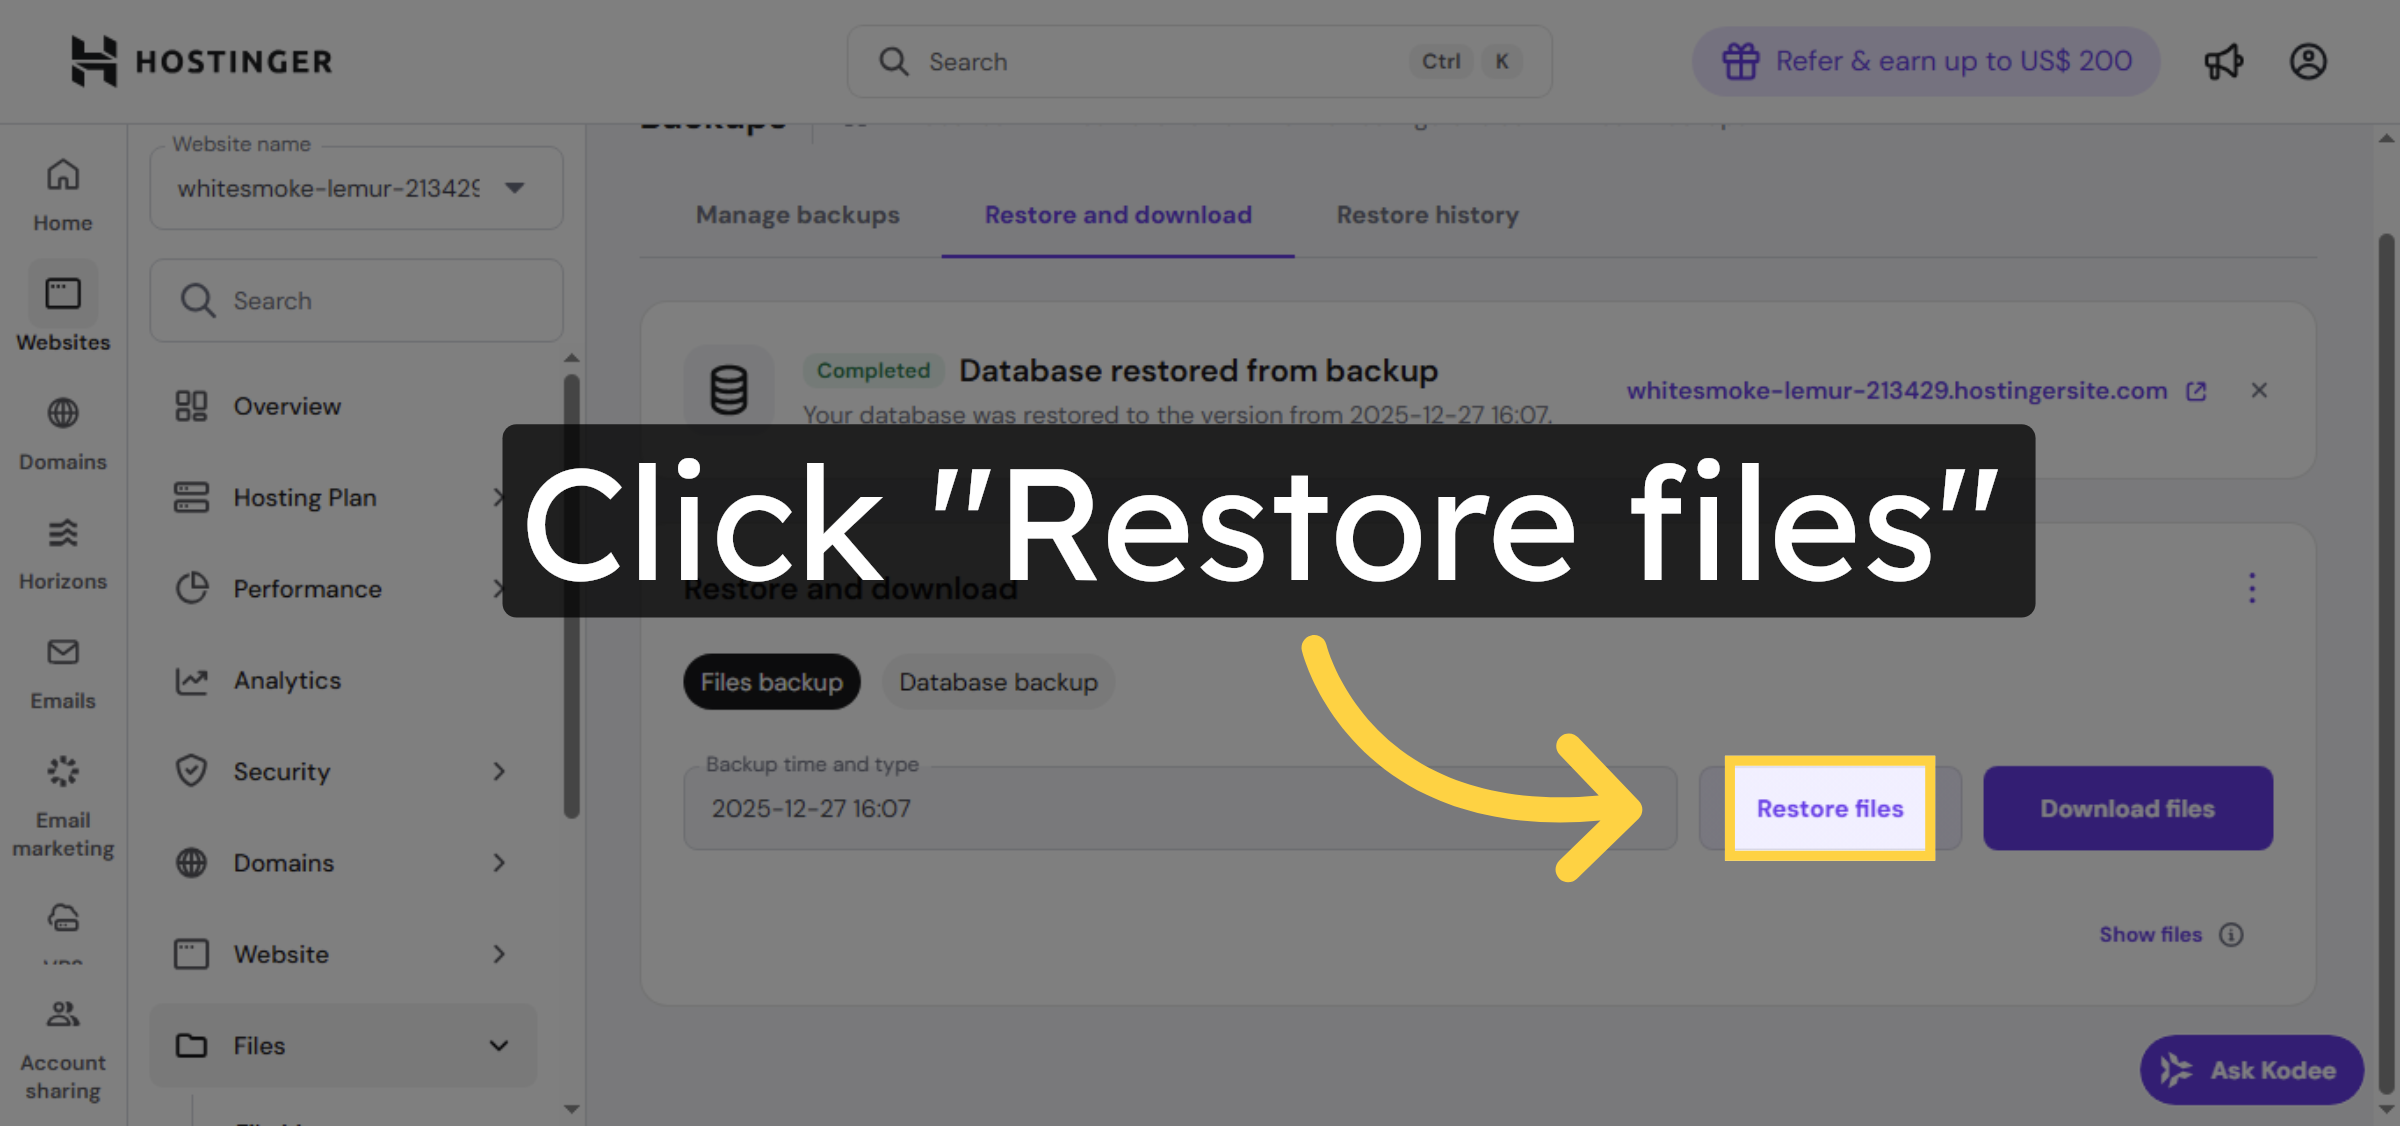
10. Initiate File Restore

Click Restore files to start the process of recovering your deleted website files.

Initiate File Restore

11. Select Files To Restore

give confirmation.

Select Files To Restore

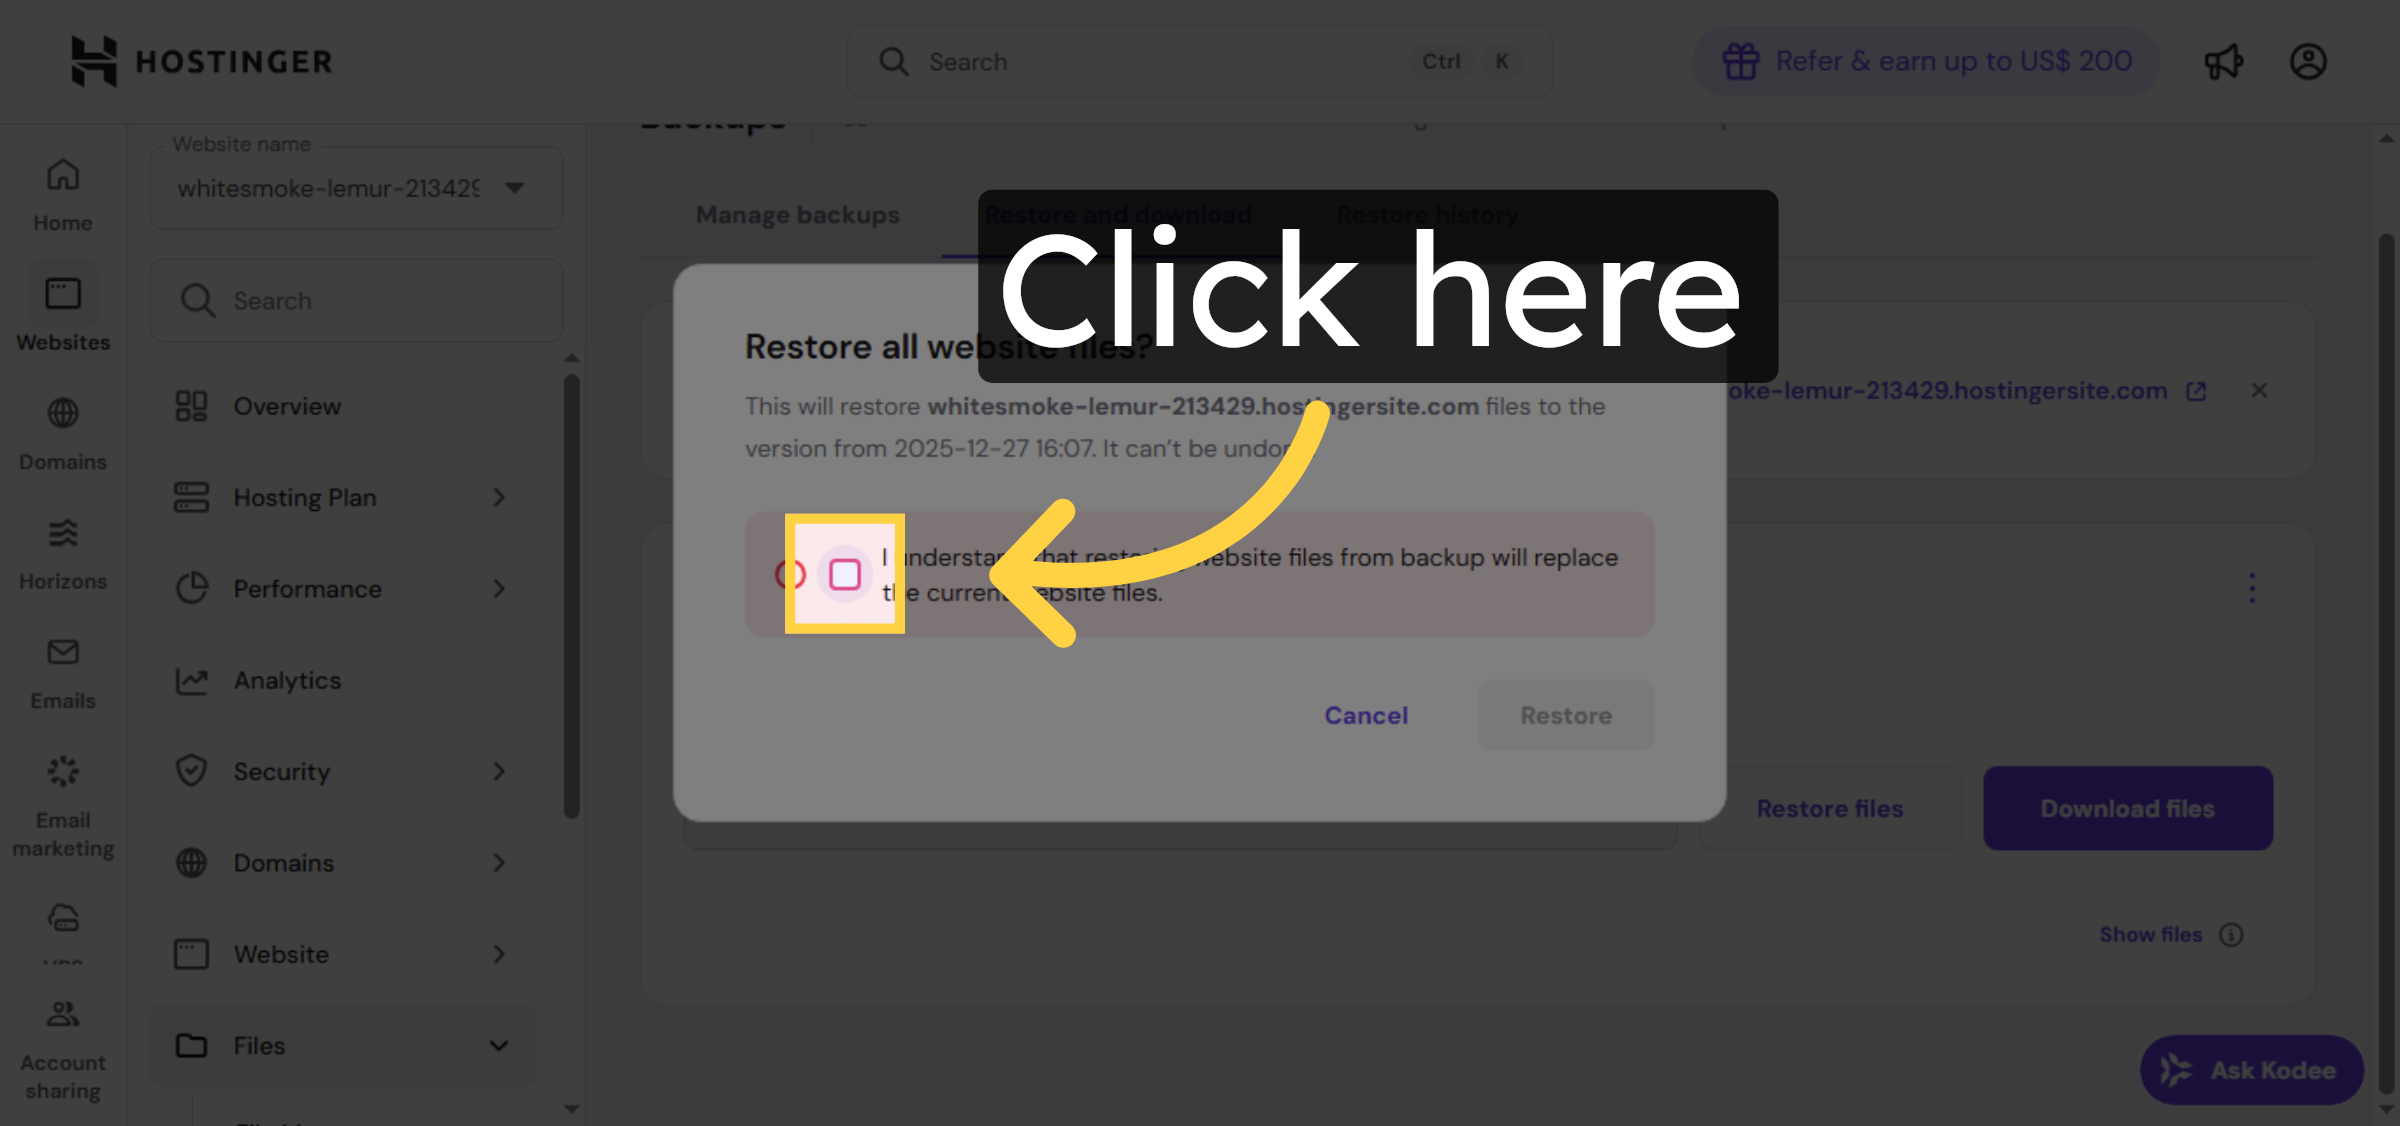
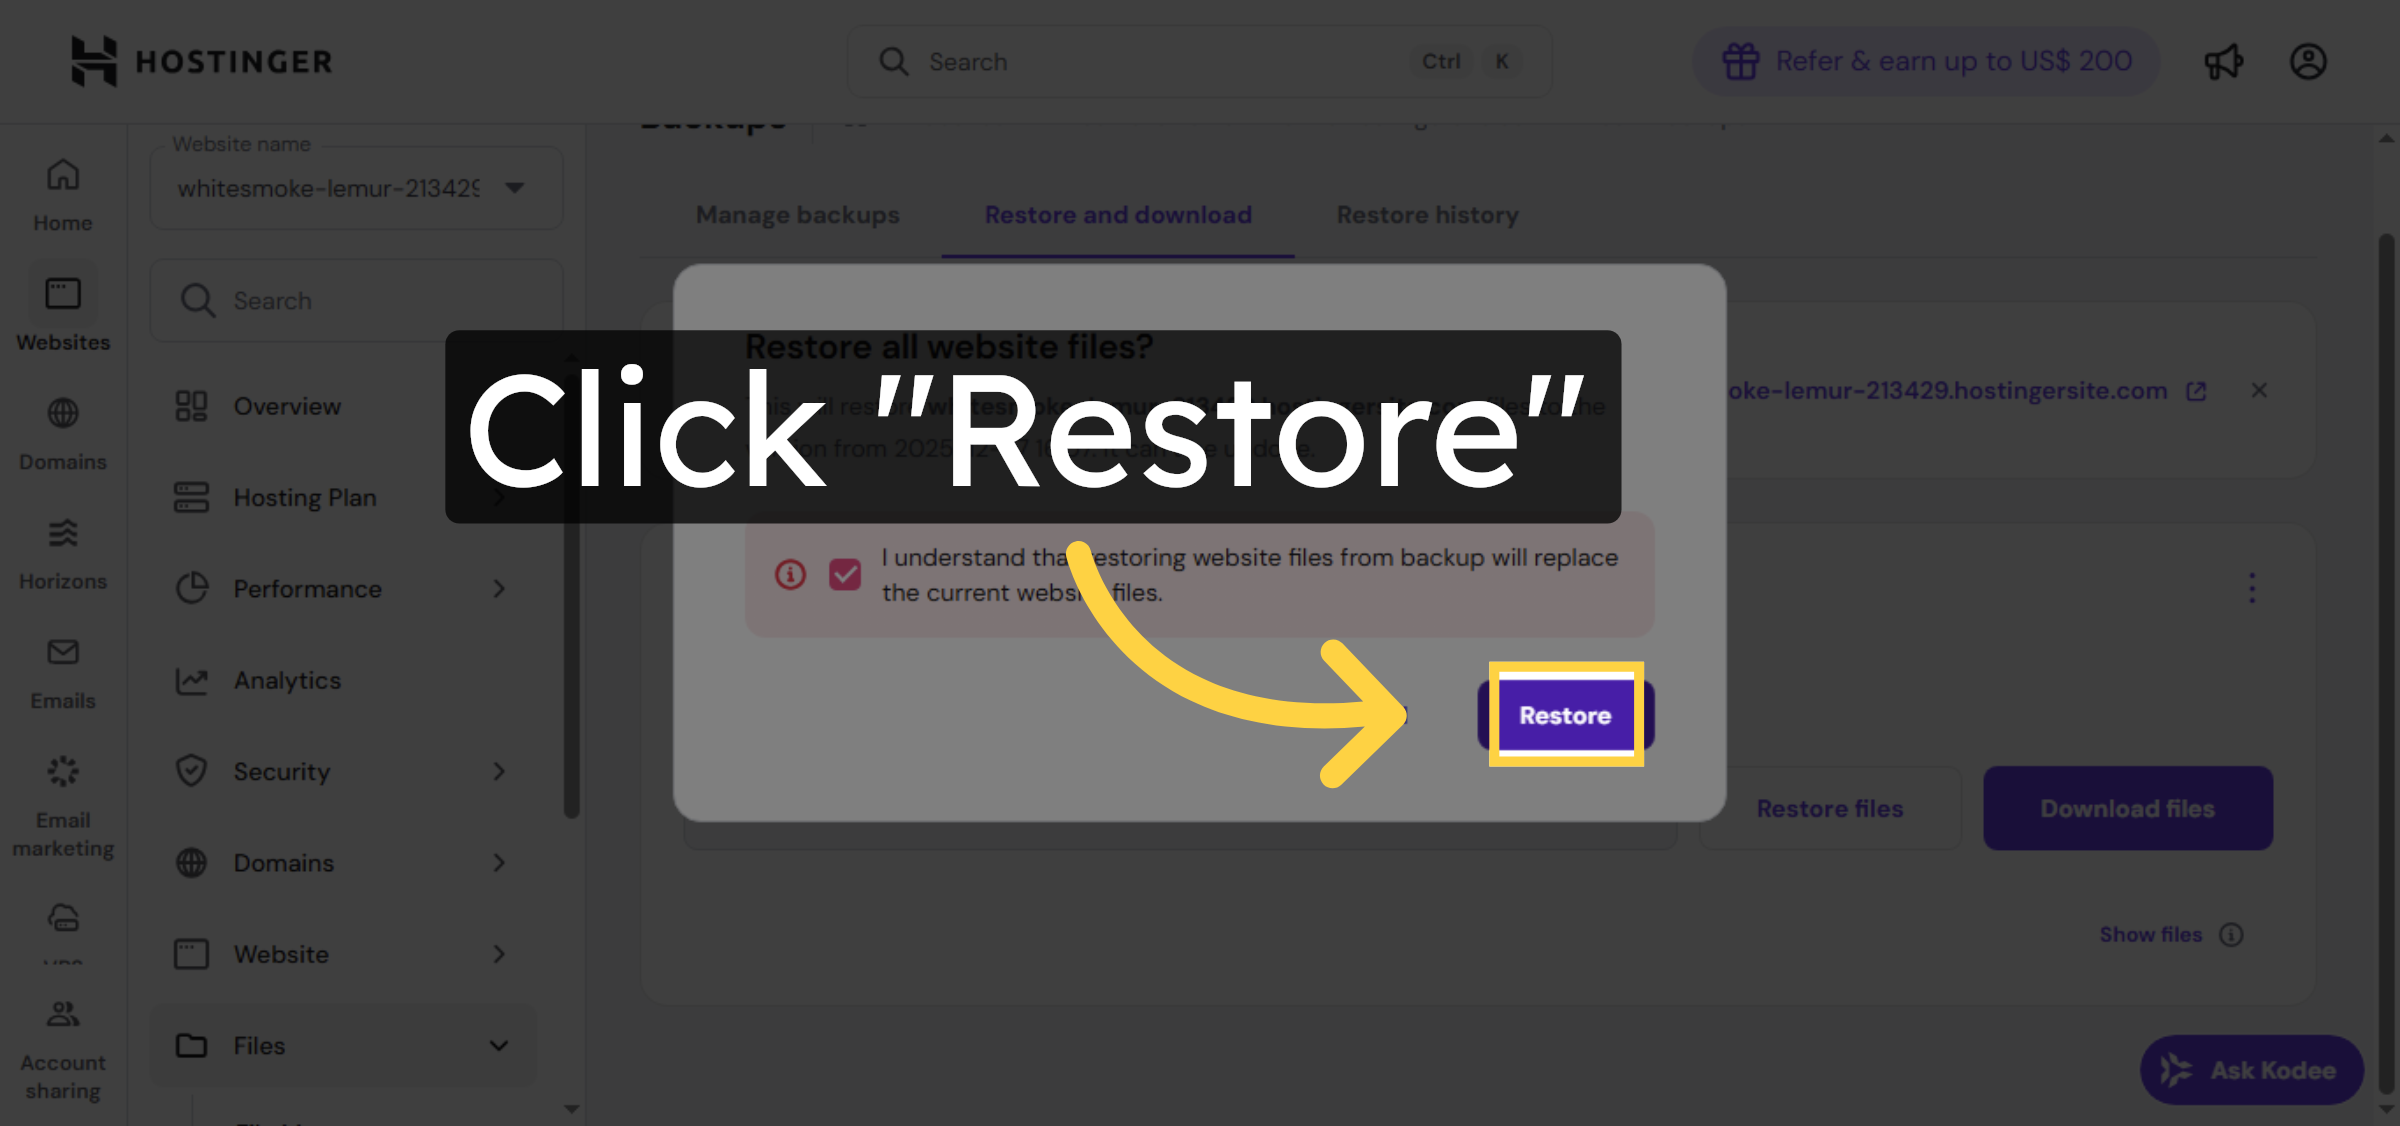
12. Confirm File Restoration

Click Restore to confirm and begin restoring your website files from the selected backup.

Confirm File Restoration

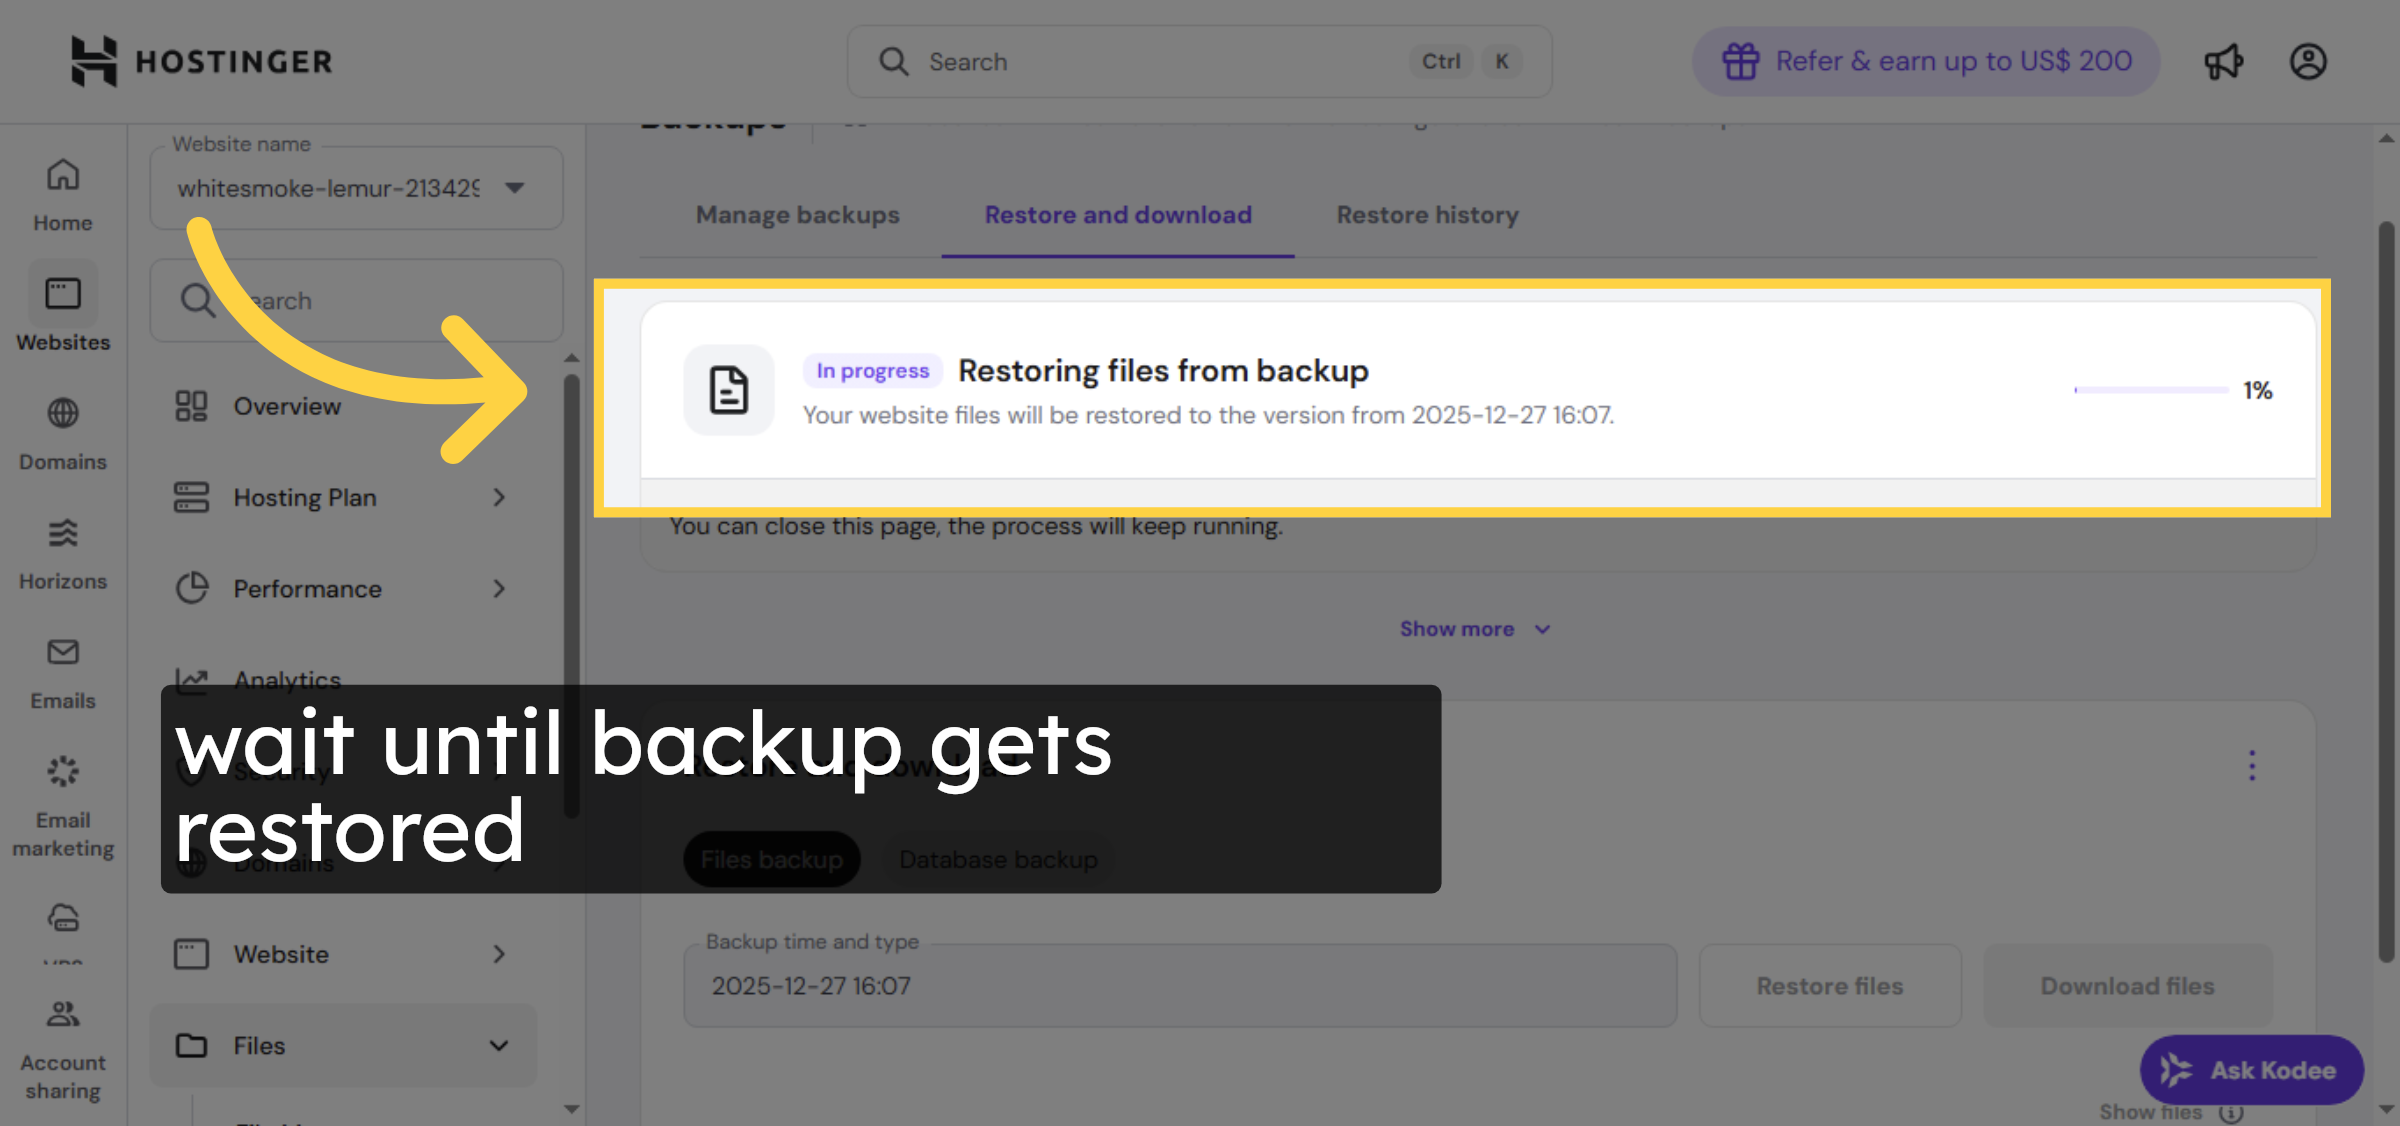
13. Monitor Restoration Progress

wait until restoration gets completed.

Monitor Restoration Progress

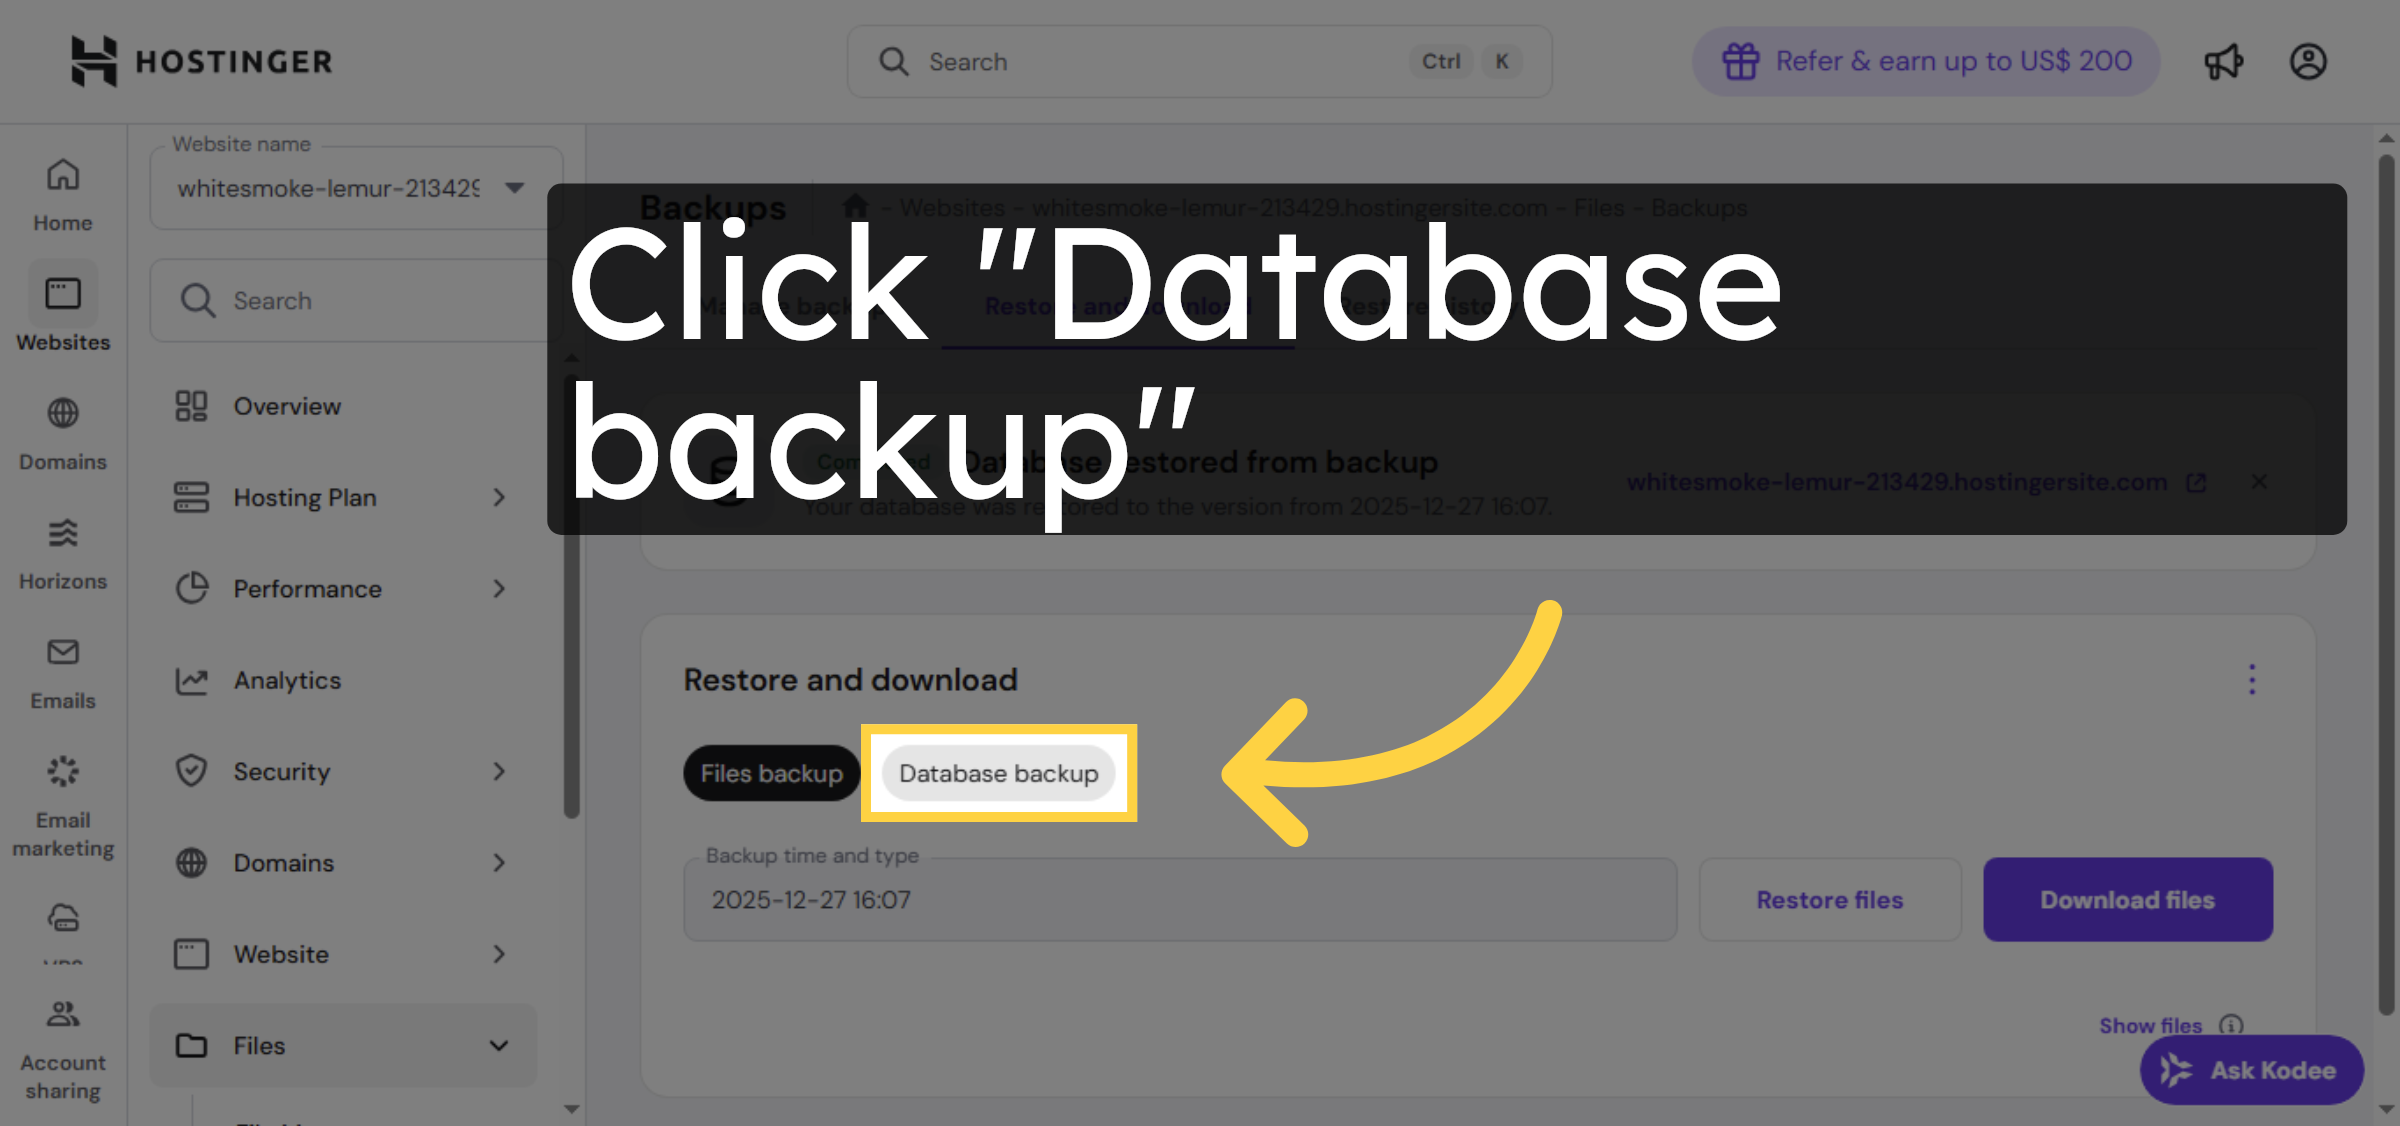
14. Access Database Backup

Click Database backup to view available backups of your website’s database.

Access Database Backup

Ad Banner

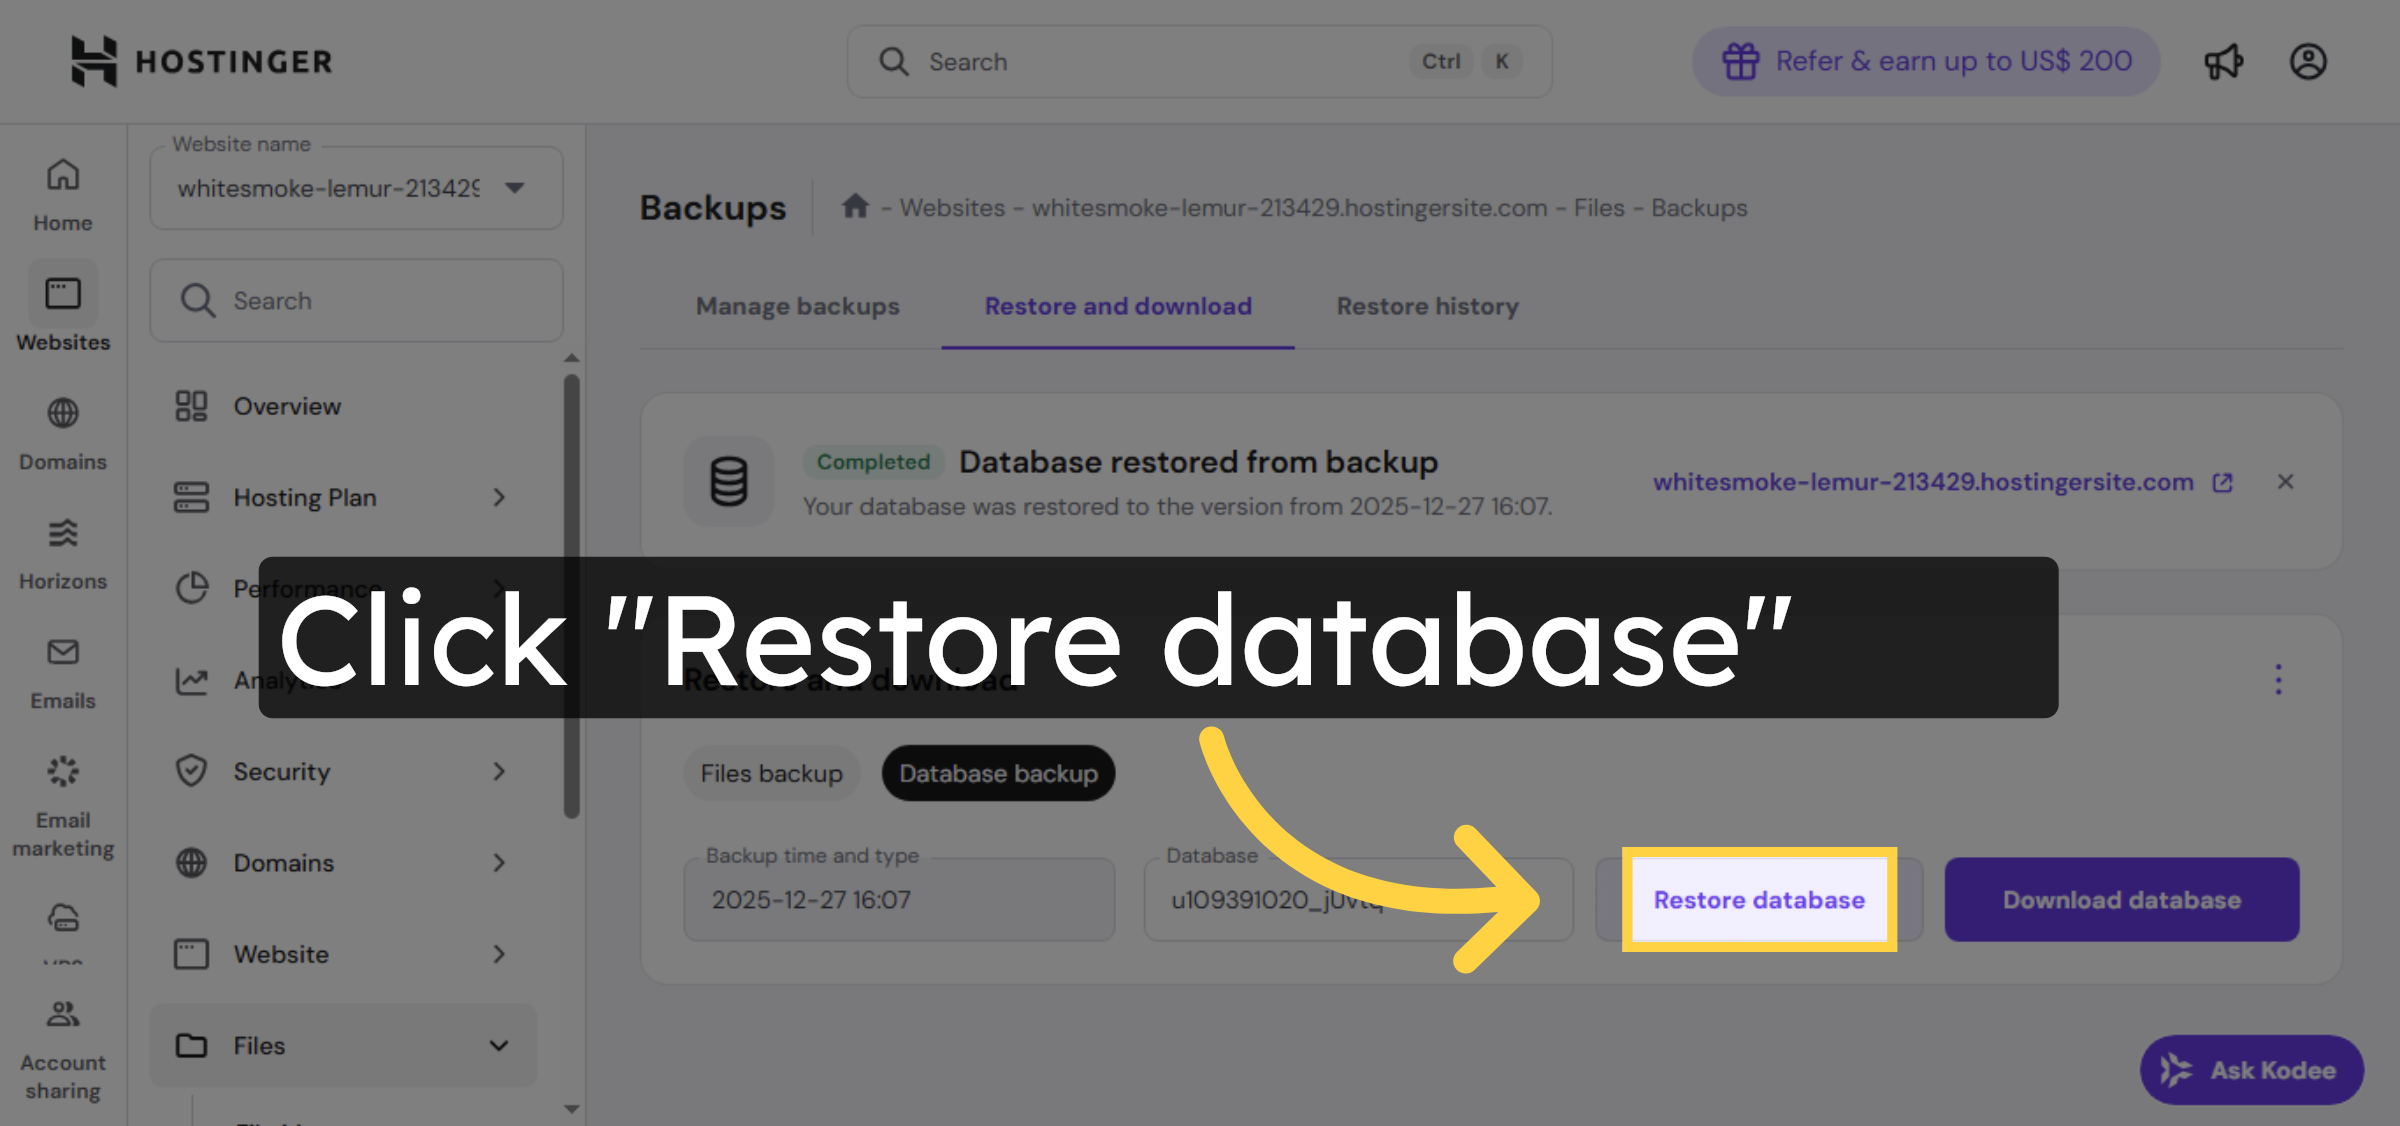
15. Start Database Restore

Click Restore database to initiate the recovery of your deleted database from backup.

Start Database Restore

16. Select Database Backup

give confirmation.

Select Database Backup

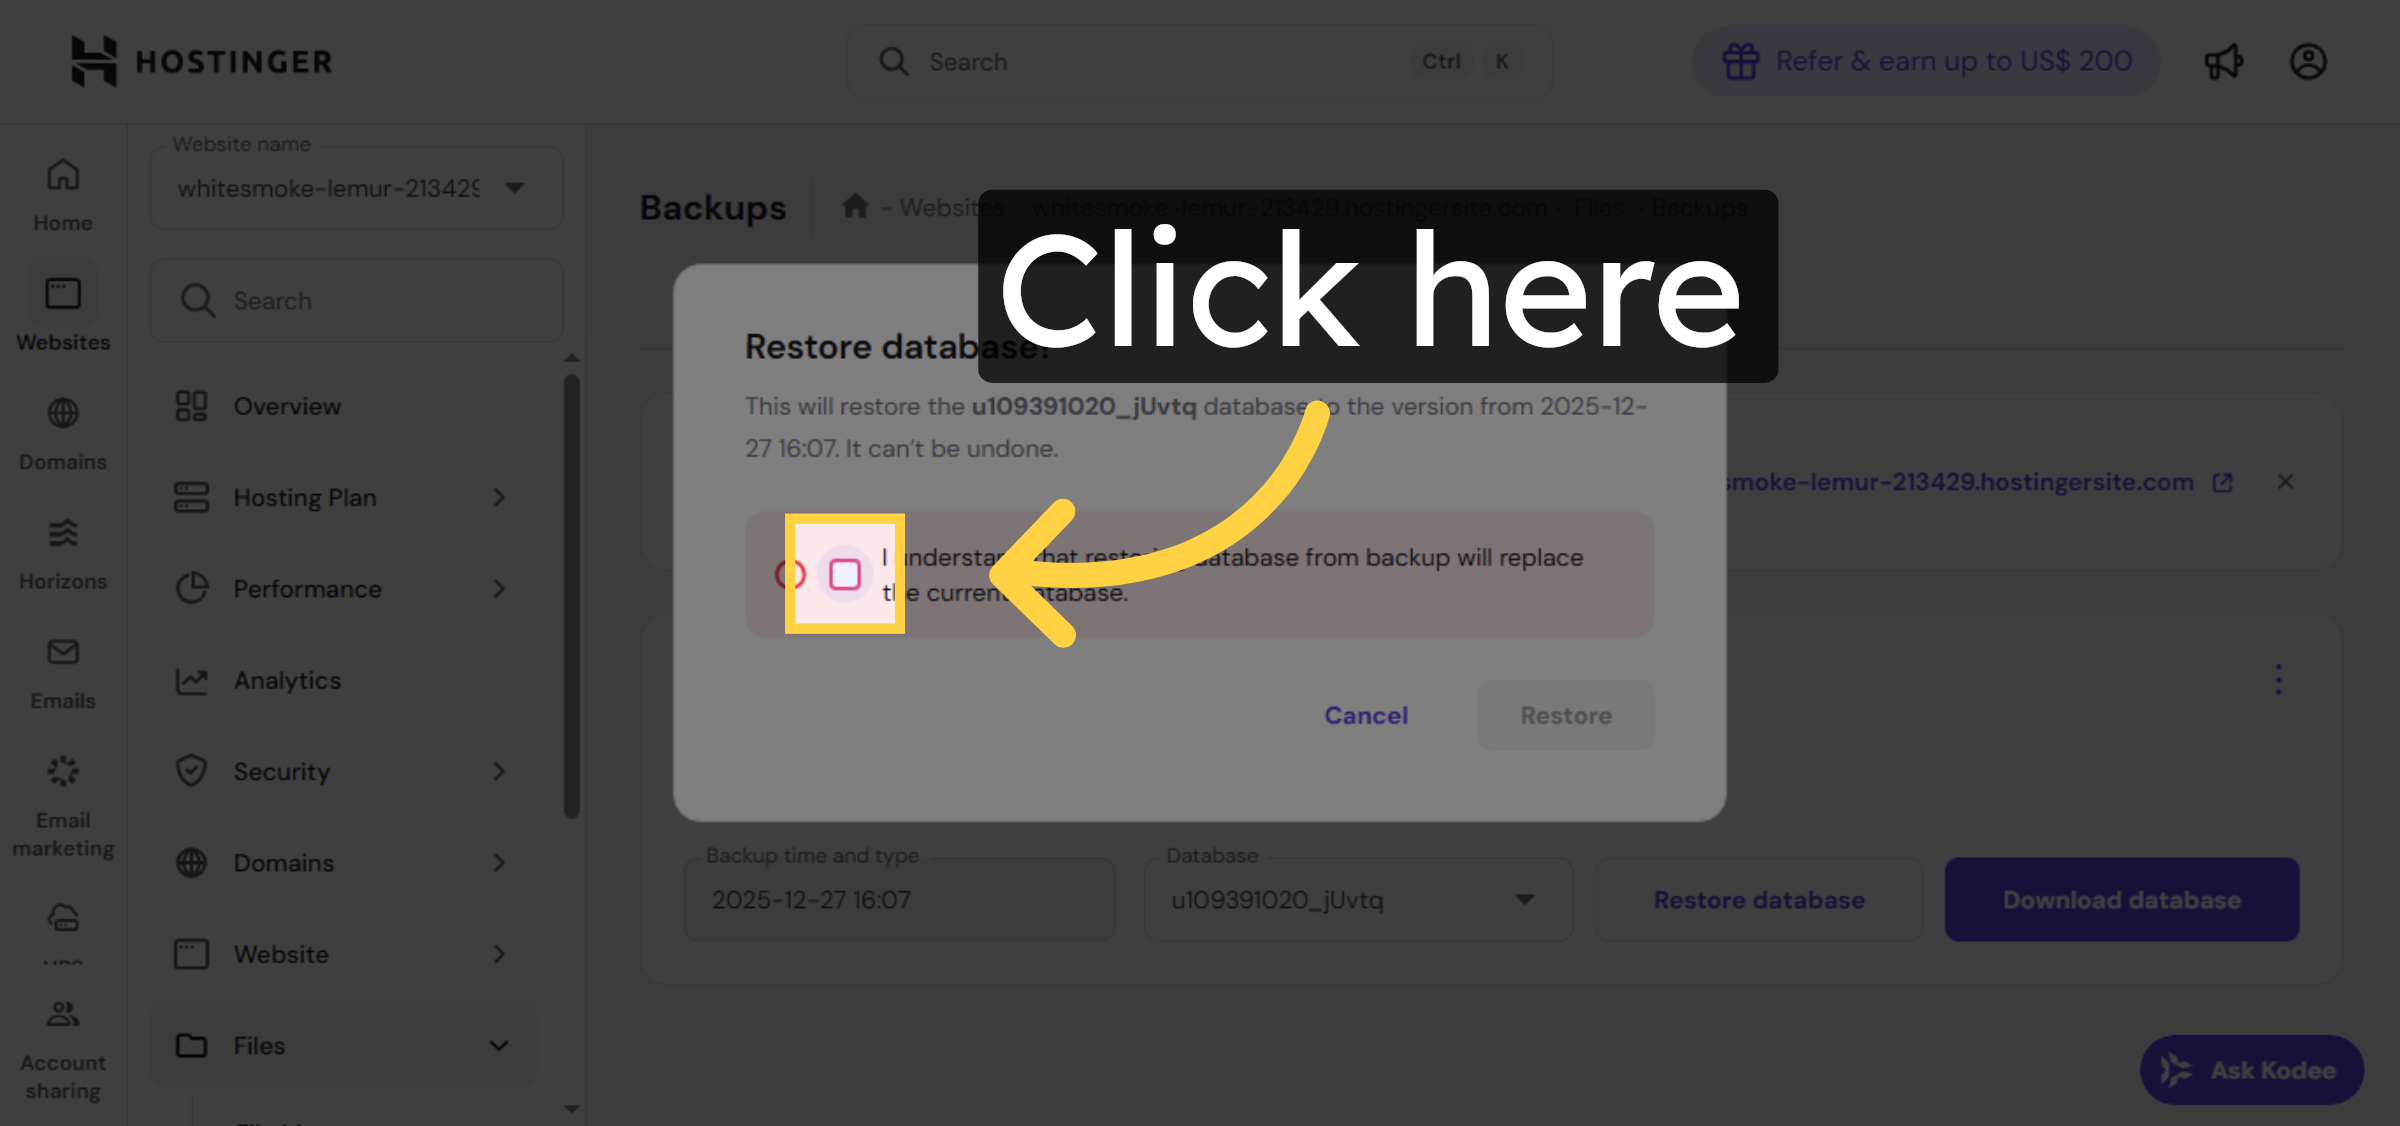
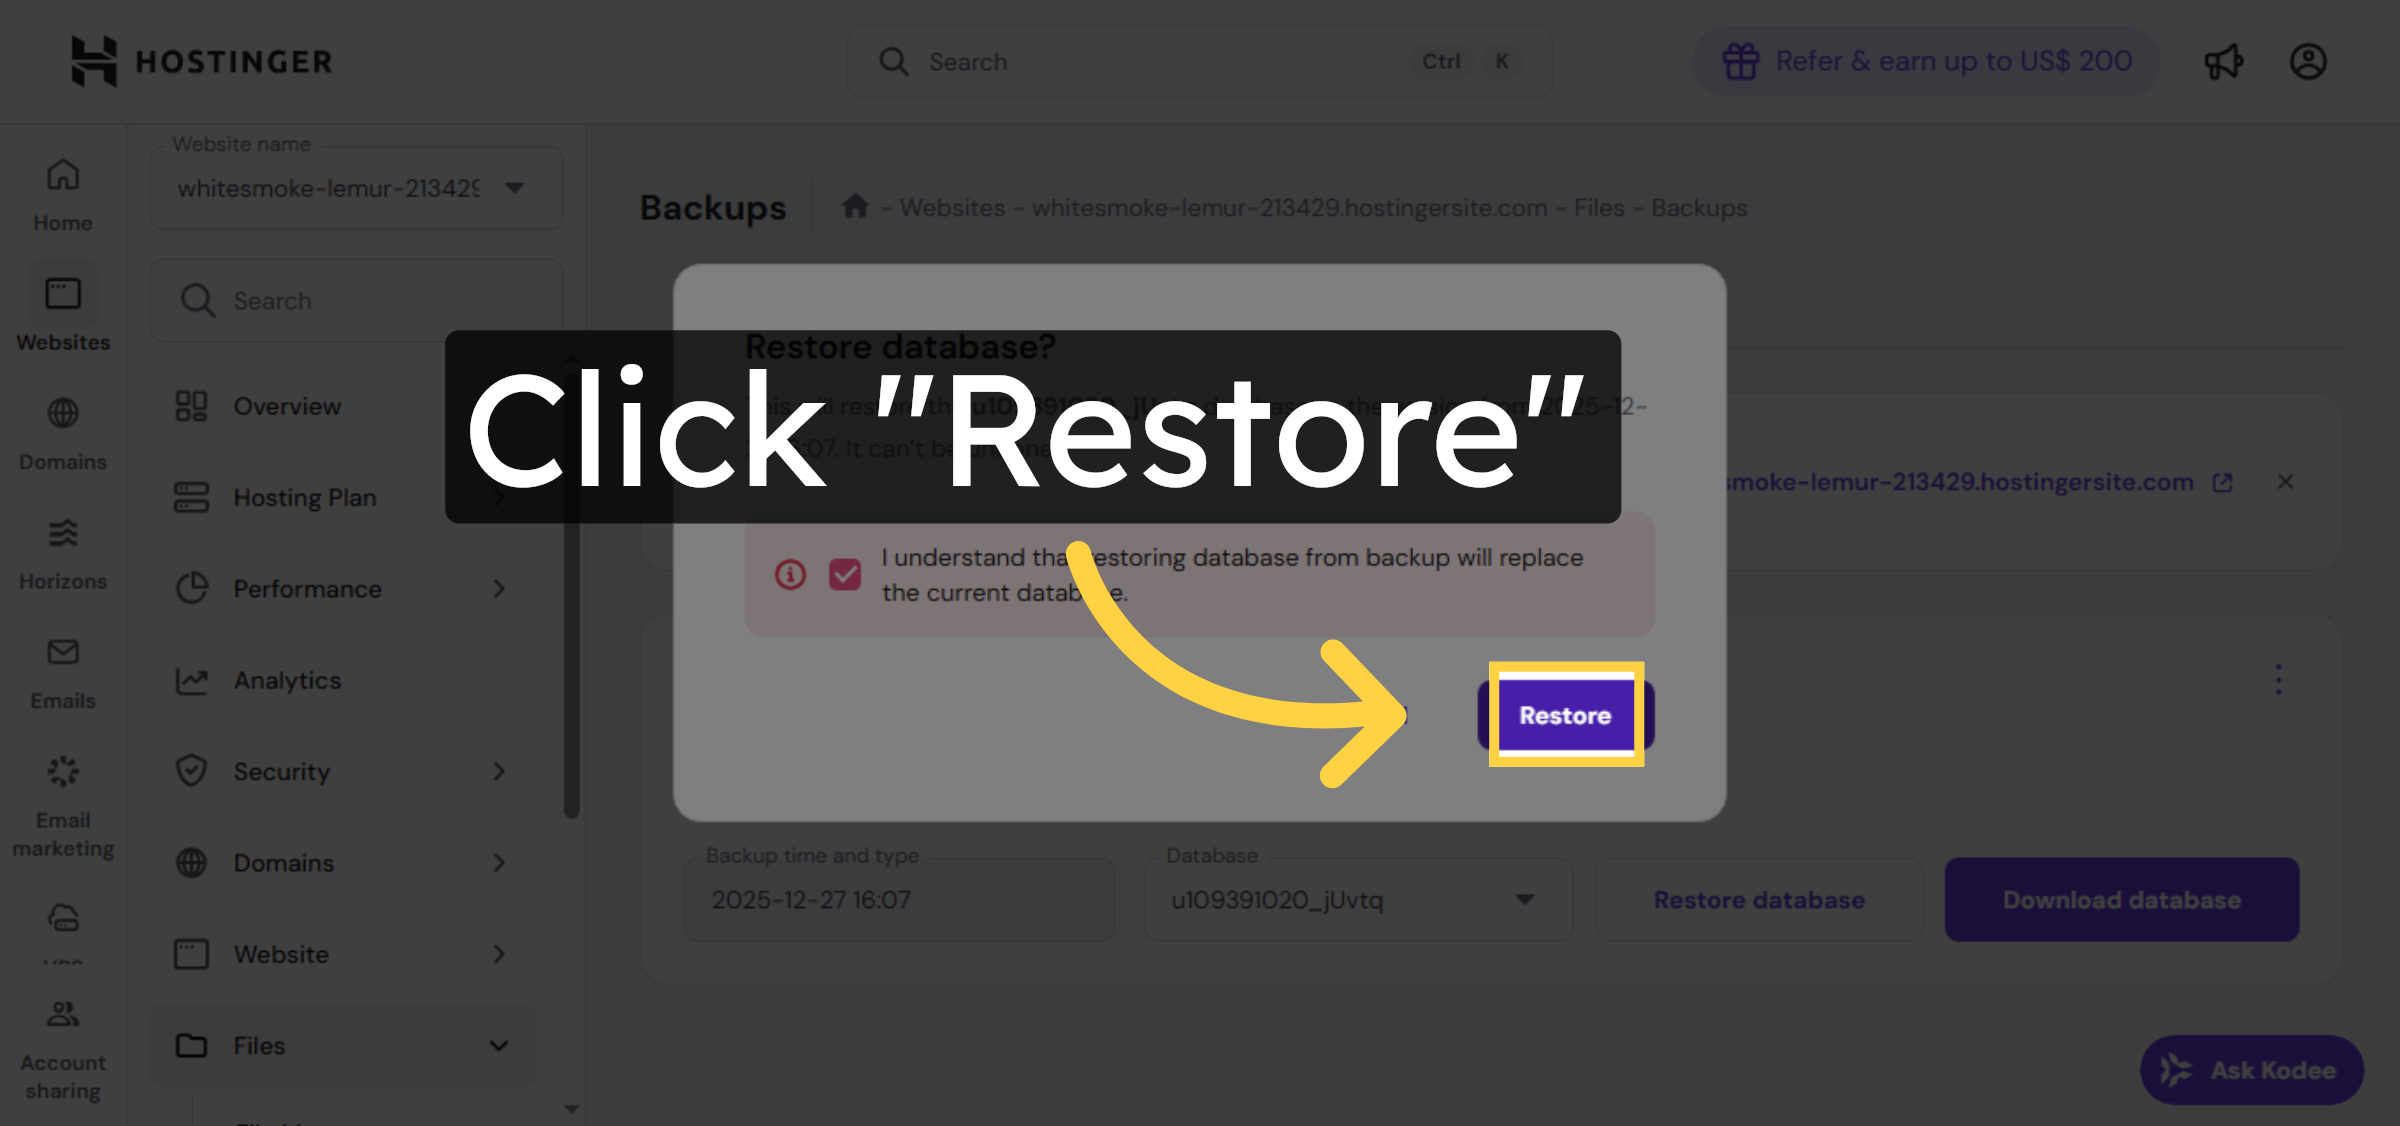
17. Confirm Database Restoration

Click Restore to confirm and start restoring your database from the chosen backup.

Confirm Database Restoration

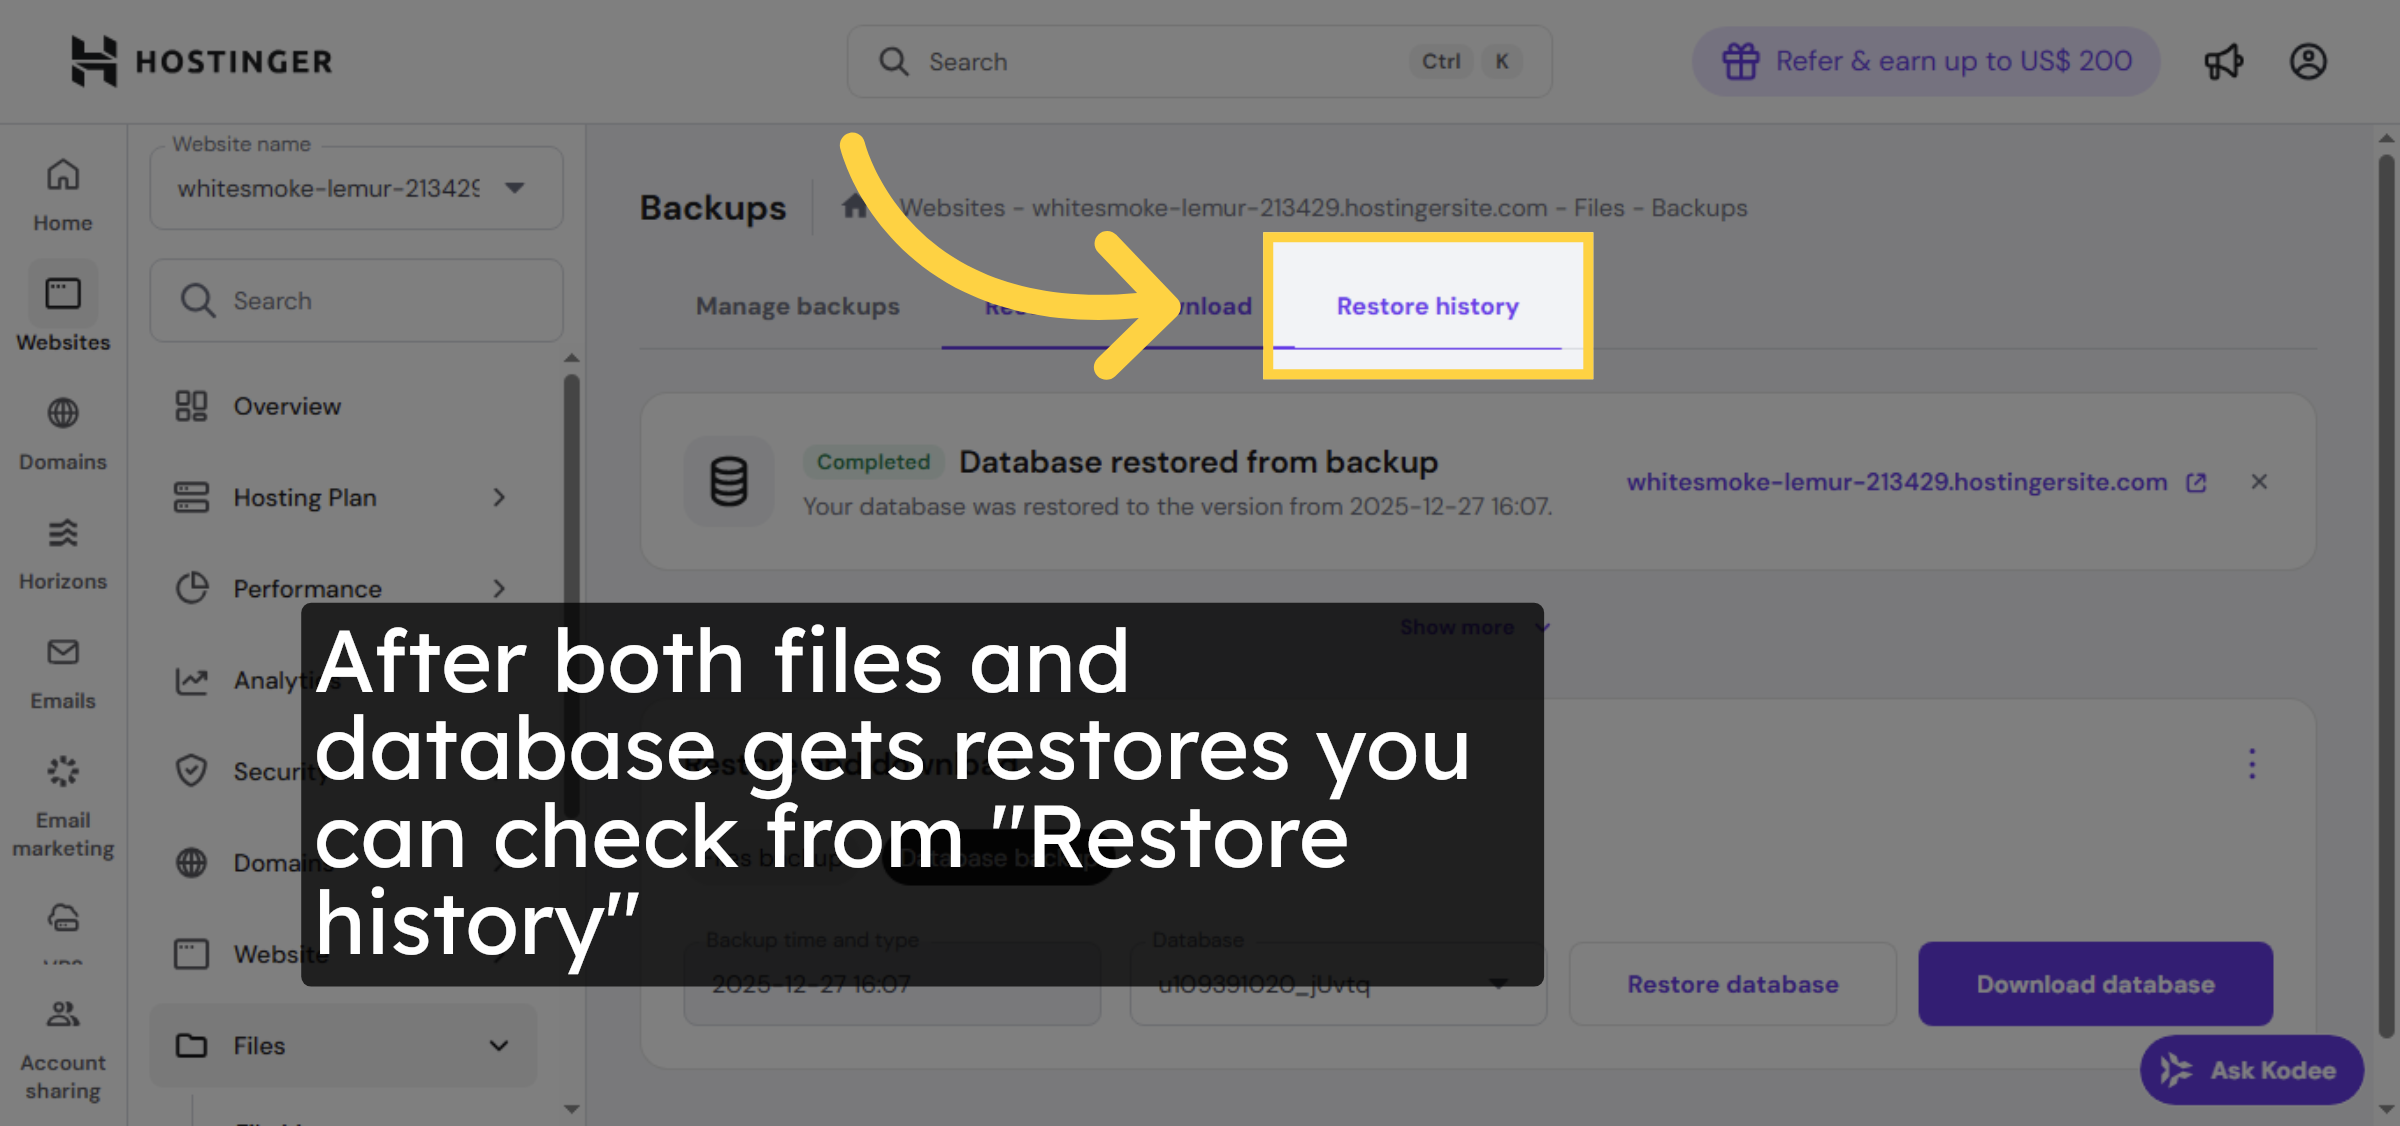
18. View Restore History

Click Restore history to review past restoration activities and verify successful recoveries.

View Restore History

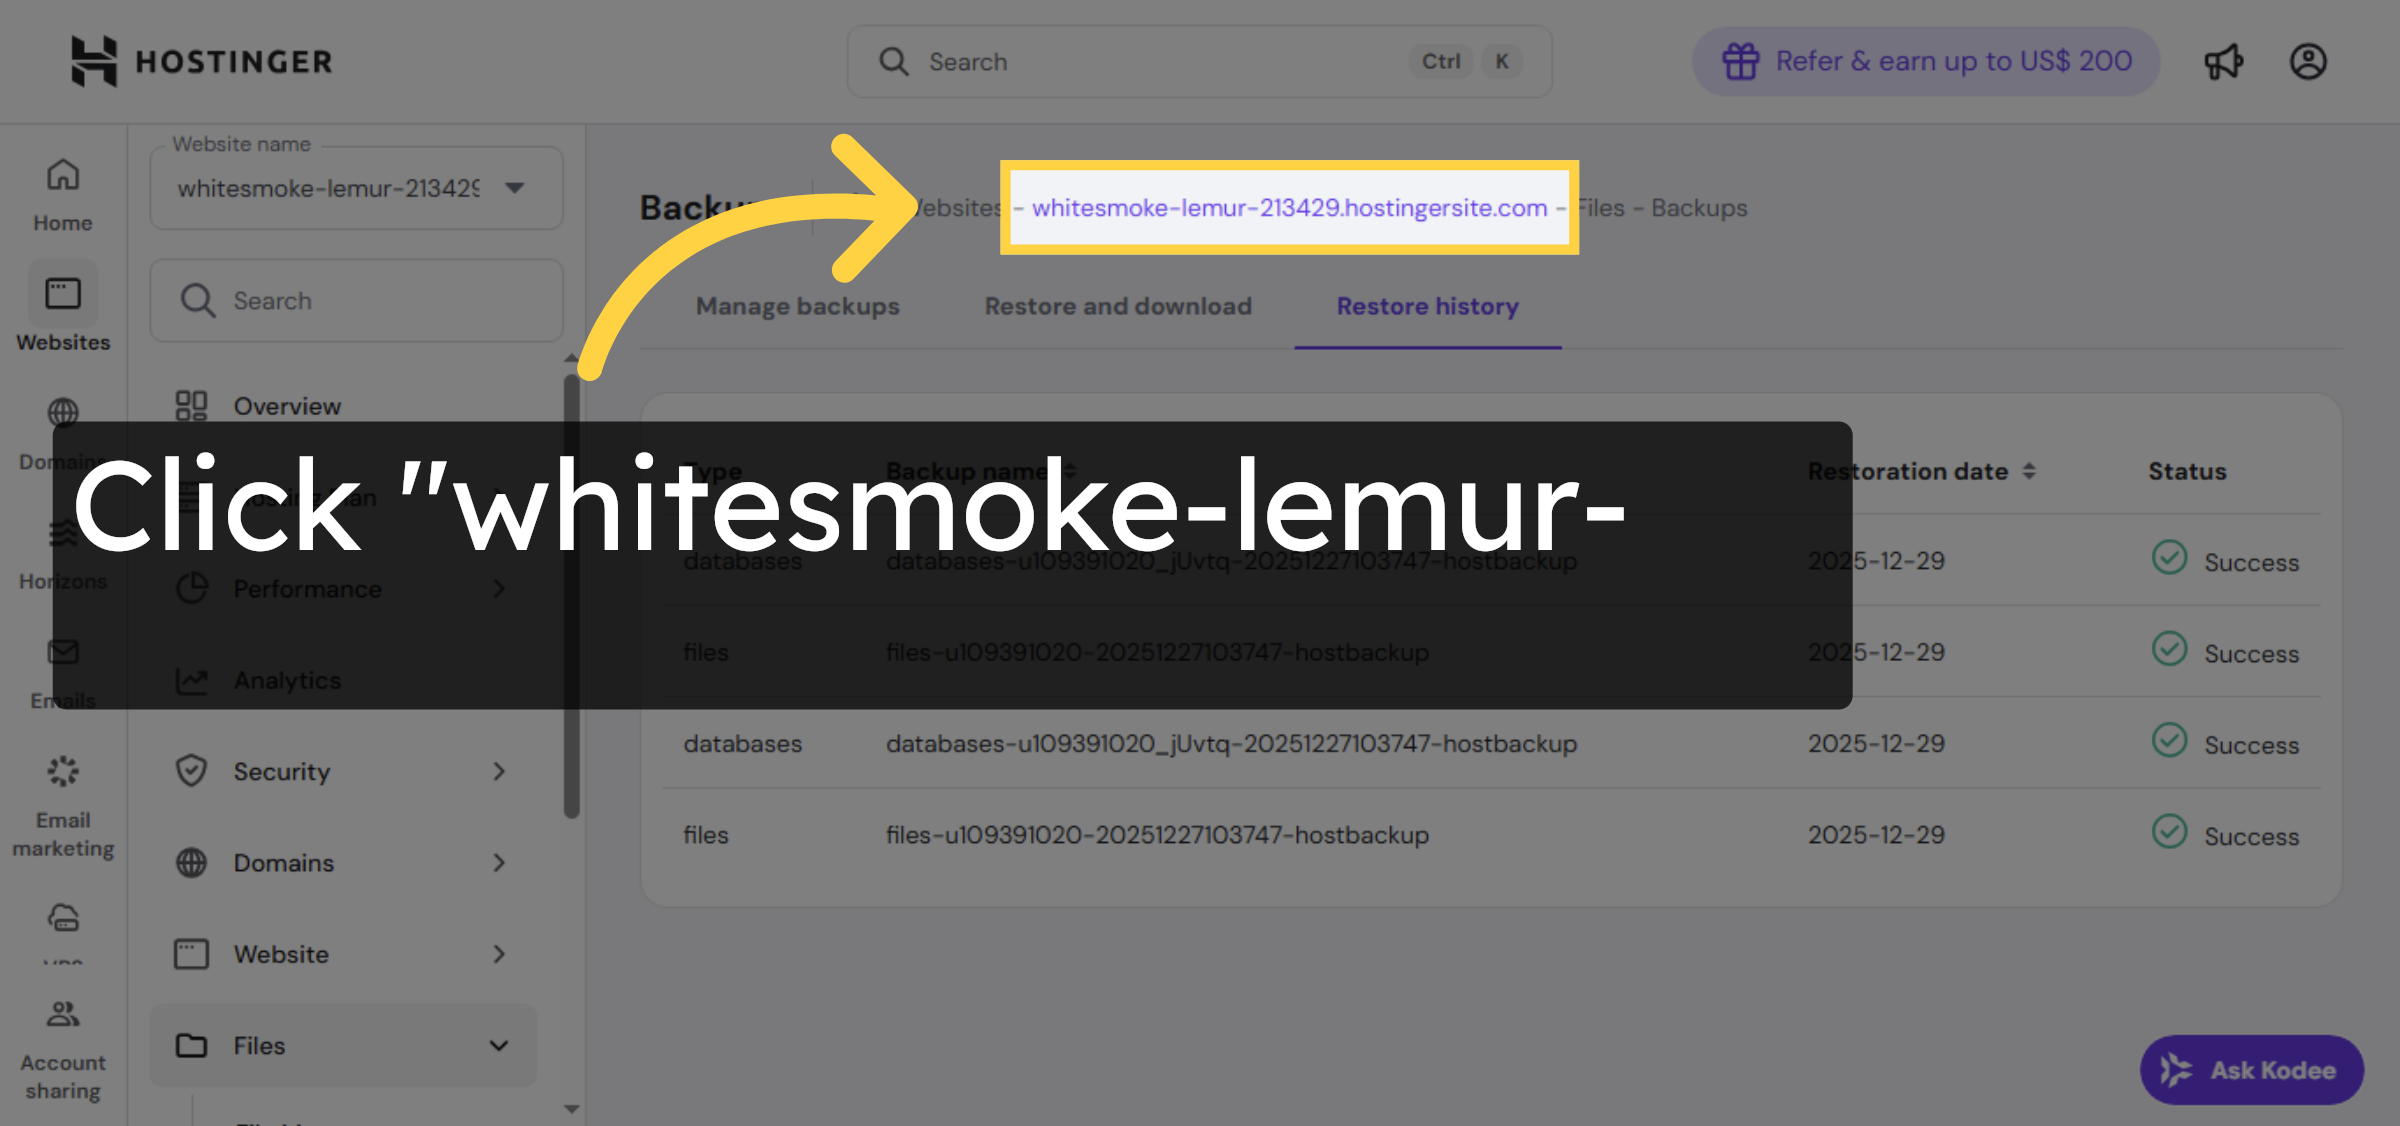
19. Select Website In History

Click your website in the restore history to see details of previous backup restorations.

Select Website In History

20. Open File Manager Again

Click File manager to re-access your website files after restoration.

Open File Manager Again

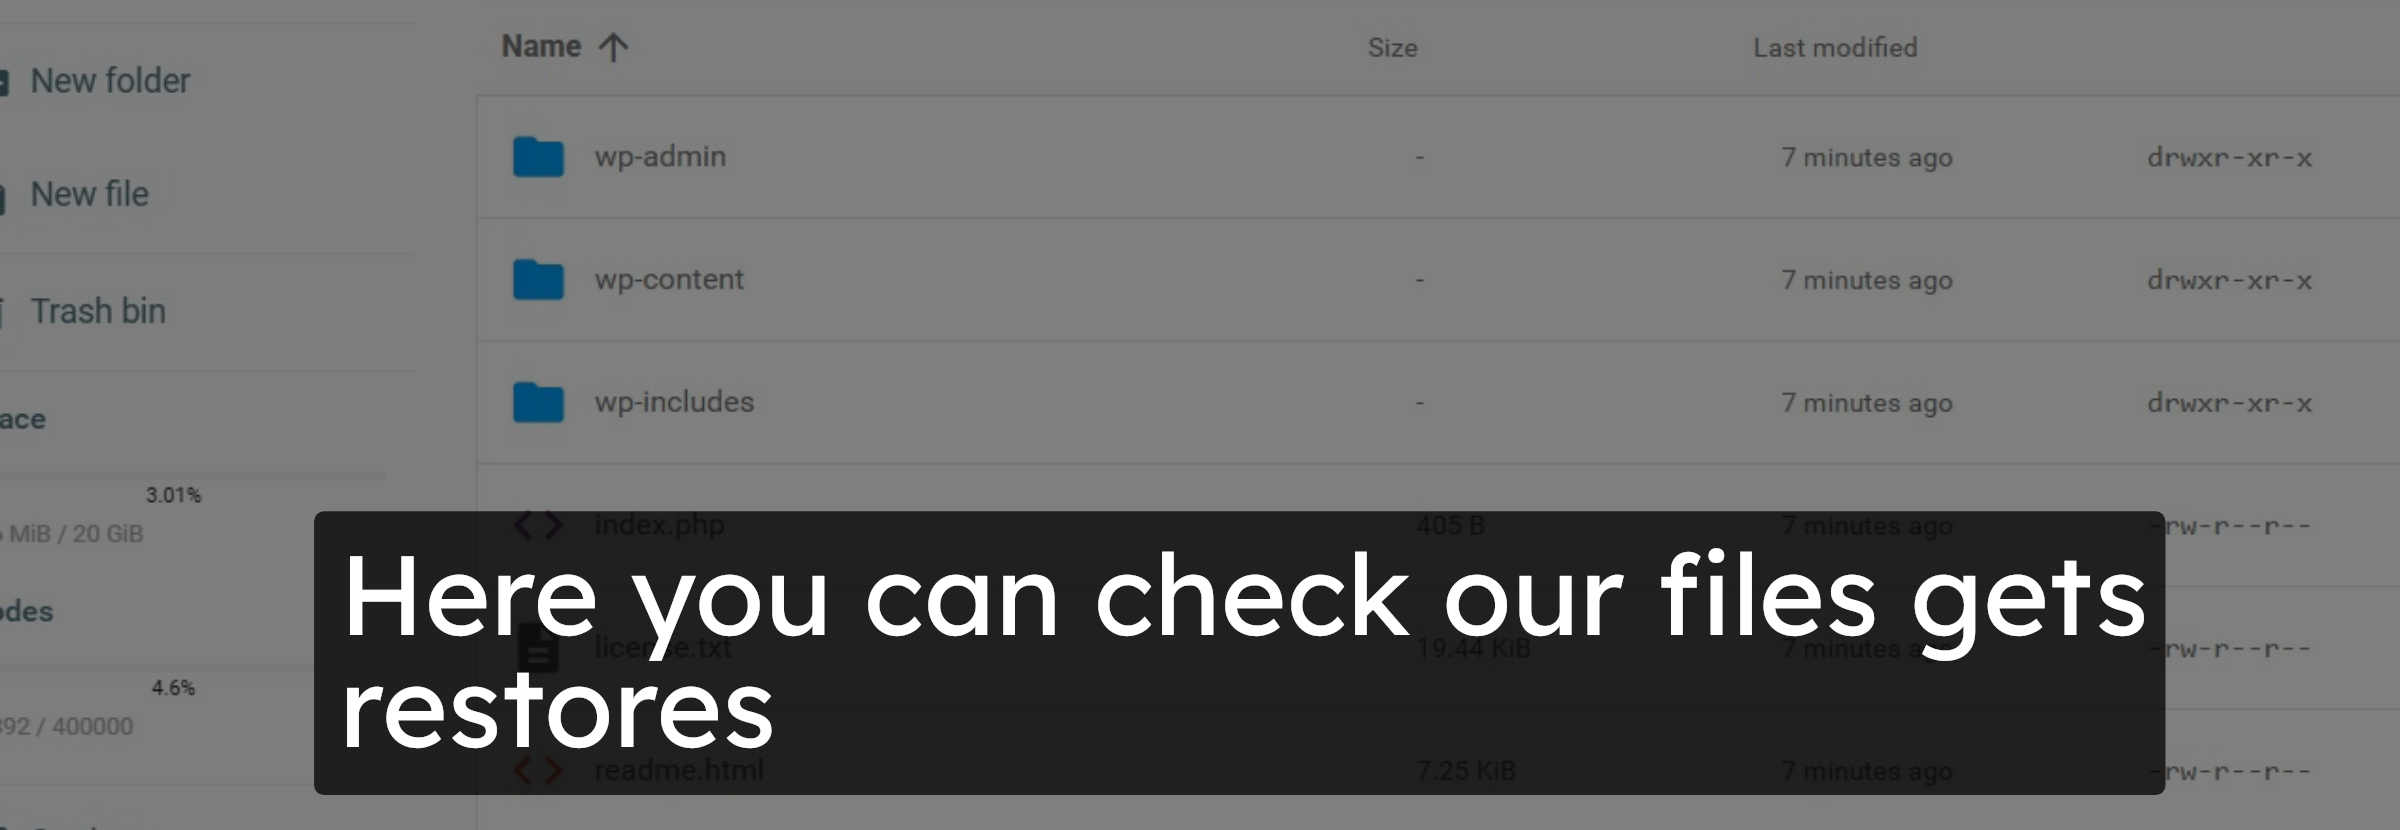
21. Open Public HTML Folder

Click public_html to confirm that your website files have been successfully restored.

Open Public HTML Folder

22. check file recovery

Here you can check our files gets restores

check file recovery

23. Return To Hostinger Panel

Switch back to the Hostinger control panel to continue website management.

Return To Hostinger Panel

24. Select Your Website Again

Click your website to access its dashboard and verify restoration status.

Select Your Website Again

25. Switch To Website View

Switch to your website’s live view to check that the restored content is displaying correctly.

Switch To Website View

Conclusion

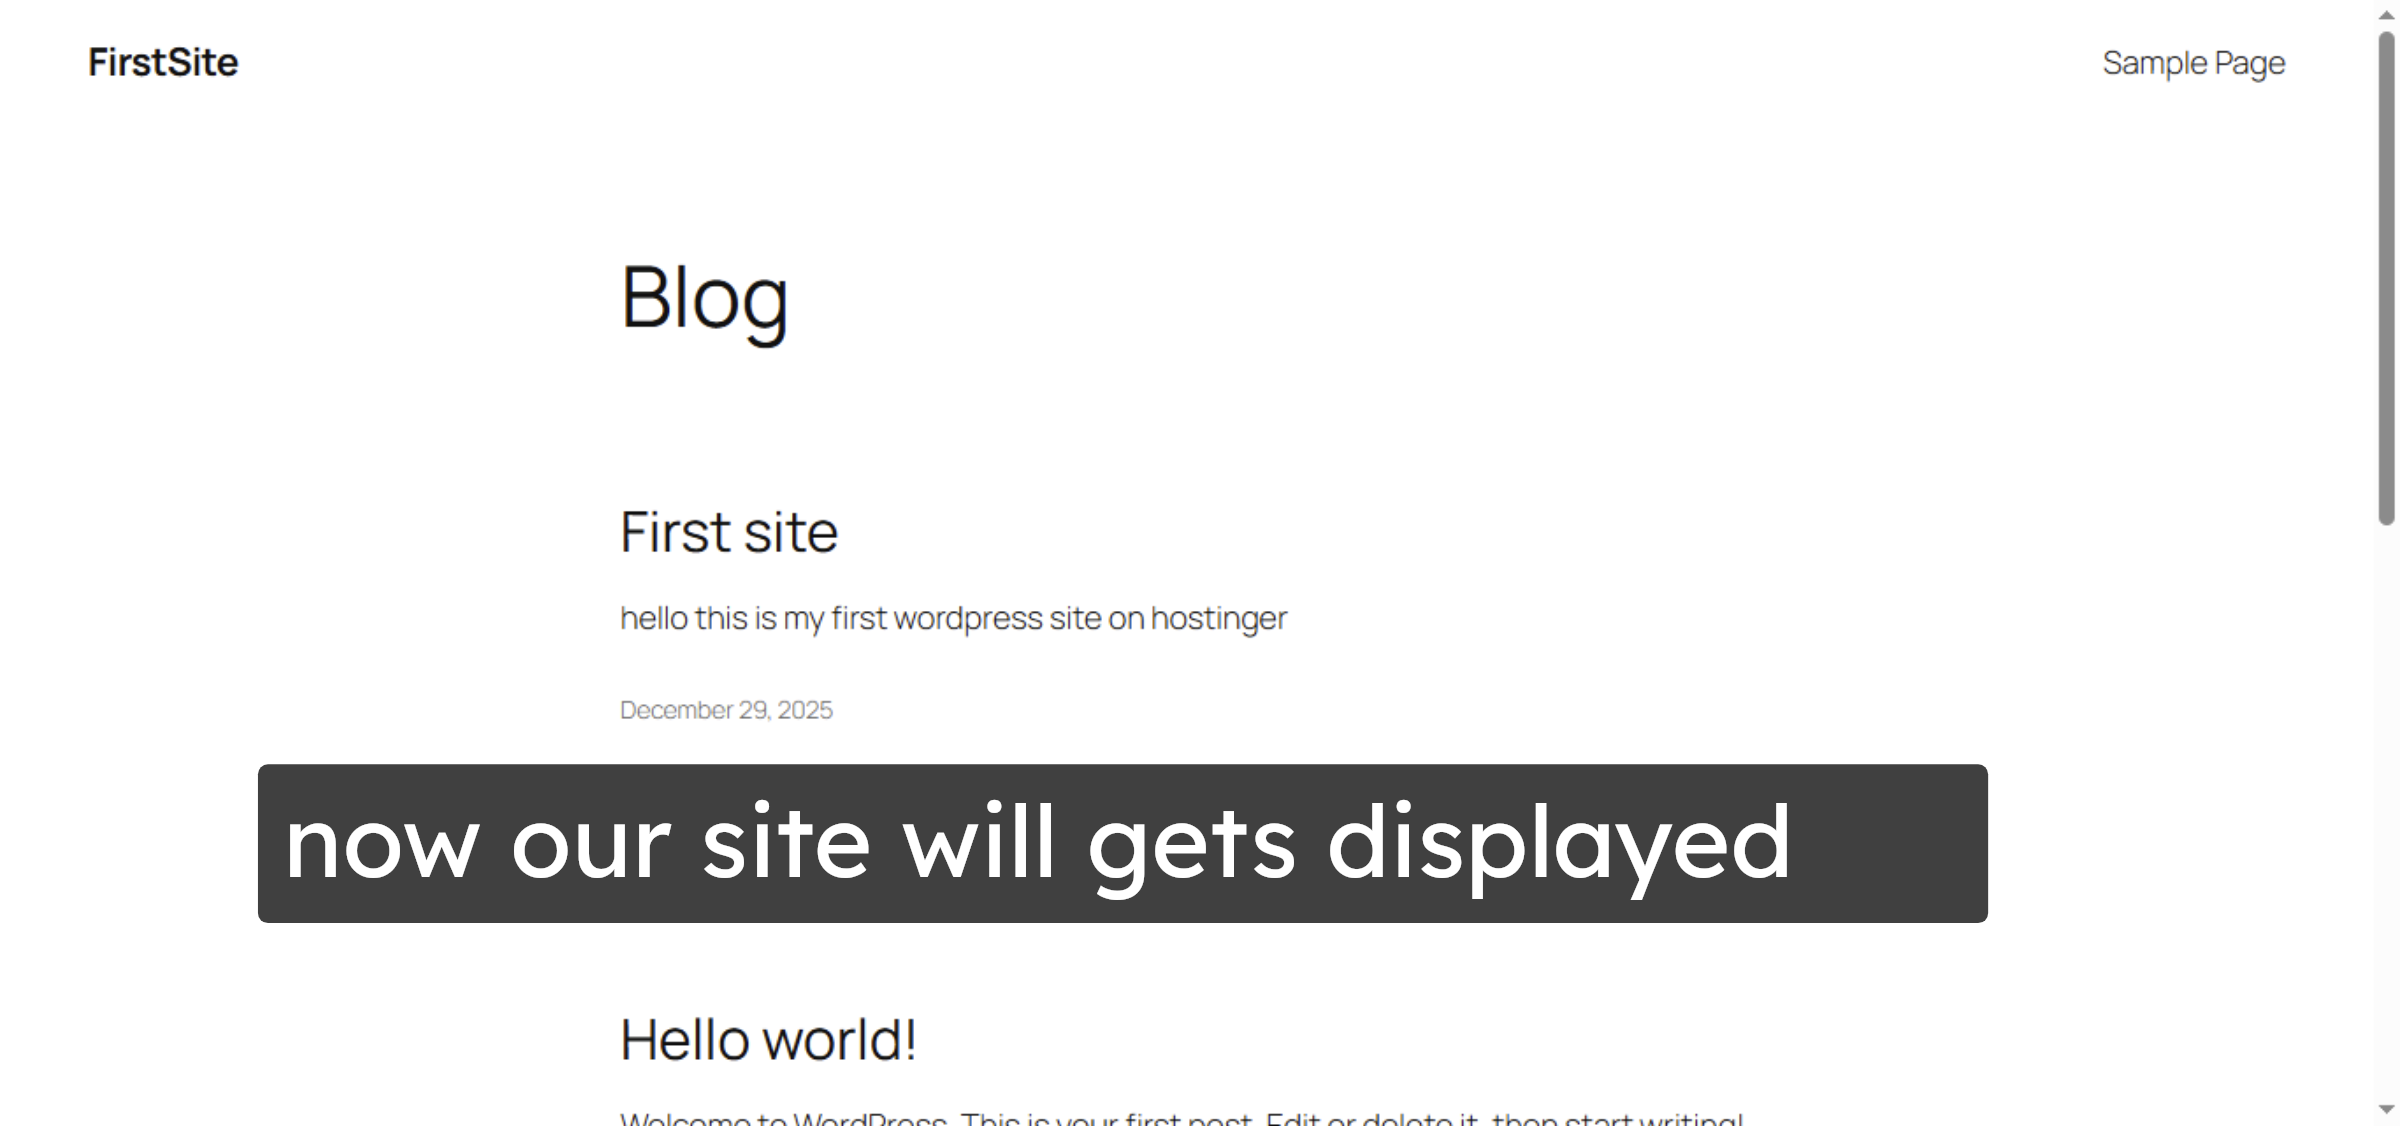
By following the steps outlined in this guide, you can successfully recover a WordPress website showing a 403 error by restoring files and databases from Hostinger’s backup system. Restoring missing files and databases helps resolve access issues and brings your website back online quickly. Regularly monitoring backups and knowing how to restore them is a best practice for maintaining website availability and reliability.

Visit: https://www.woohelpdesk.com
Call Us Toll-Free: +1 888 602 0119 (US & Canada)
Get professional support for WordPress configuration, hosting management, performance optimization, and troubleshooting.

Leave a Reply

Your email address will not be published. Required fields are marked *

Leave a Reply

Your email address will not be published. Required fields are marked *