How To Set Up Automated WordPress Backups On Hostinger
Introduction
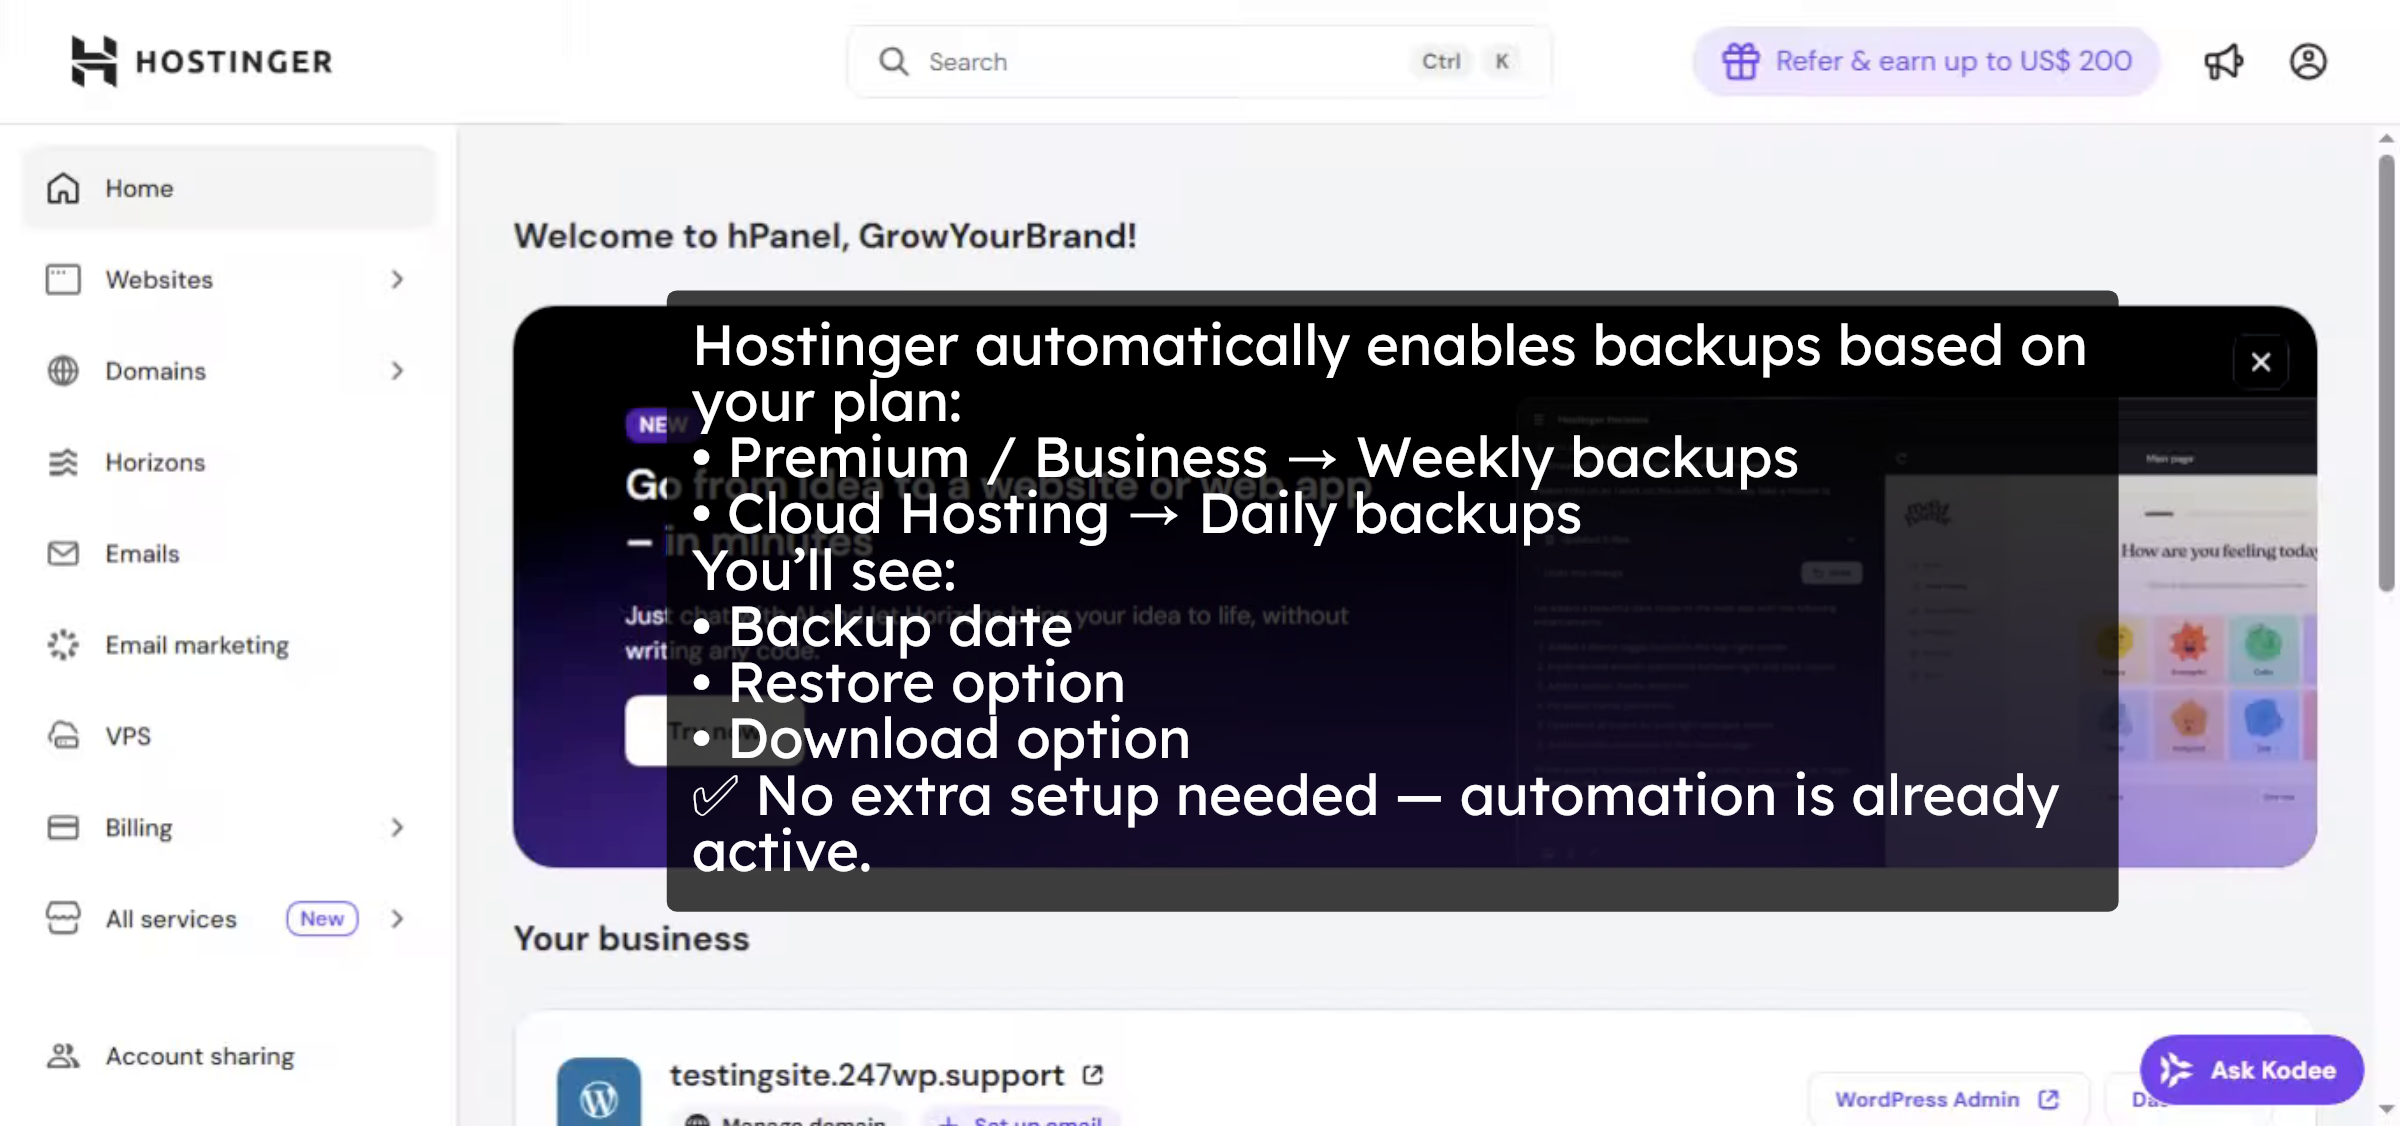
Hostinger provides built-in automatic backups for WordPress websites, making it easy to restore your site in case of data loss, accidental changes, or unexpected issues. Knowing where and how to manage these backups is essential for maintaining website stability and minimizing downtime. With Hostinger’s backup management tools, you can restore website files, databases, or both directly from the hosting dashboard without relying on third-party plugins. In this guide, you’ll learn how to access the Backups section in Hostinger, choose the appropriate backup type, restore files and databases, and monitor the restoration process. Understanding this process ensures you can quickly recover your WordPress site and maintain a secure, reliable hosting environment.
1. Introduction
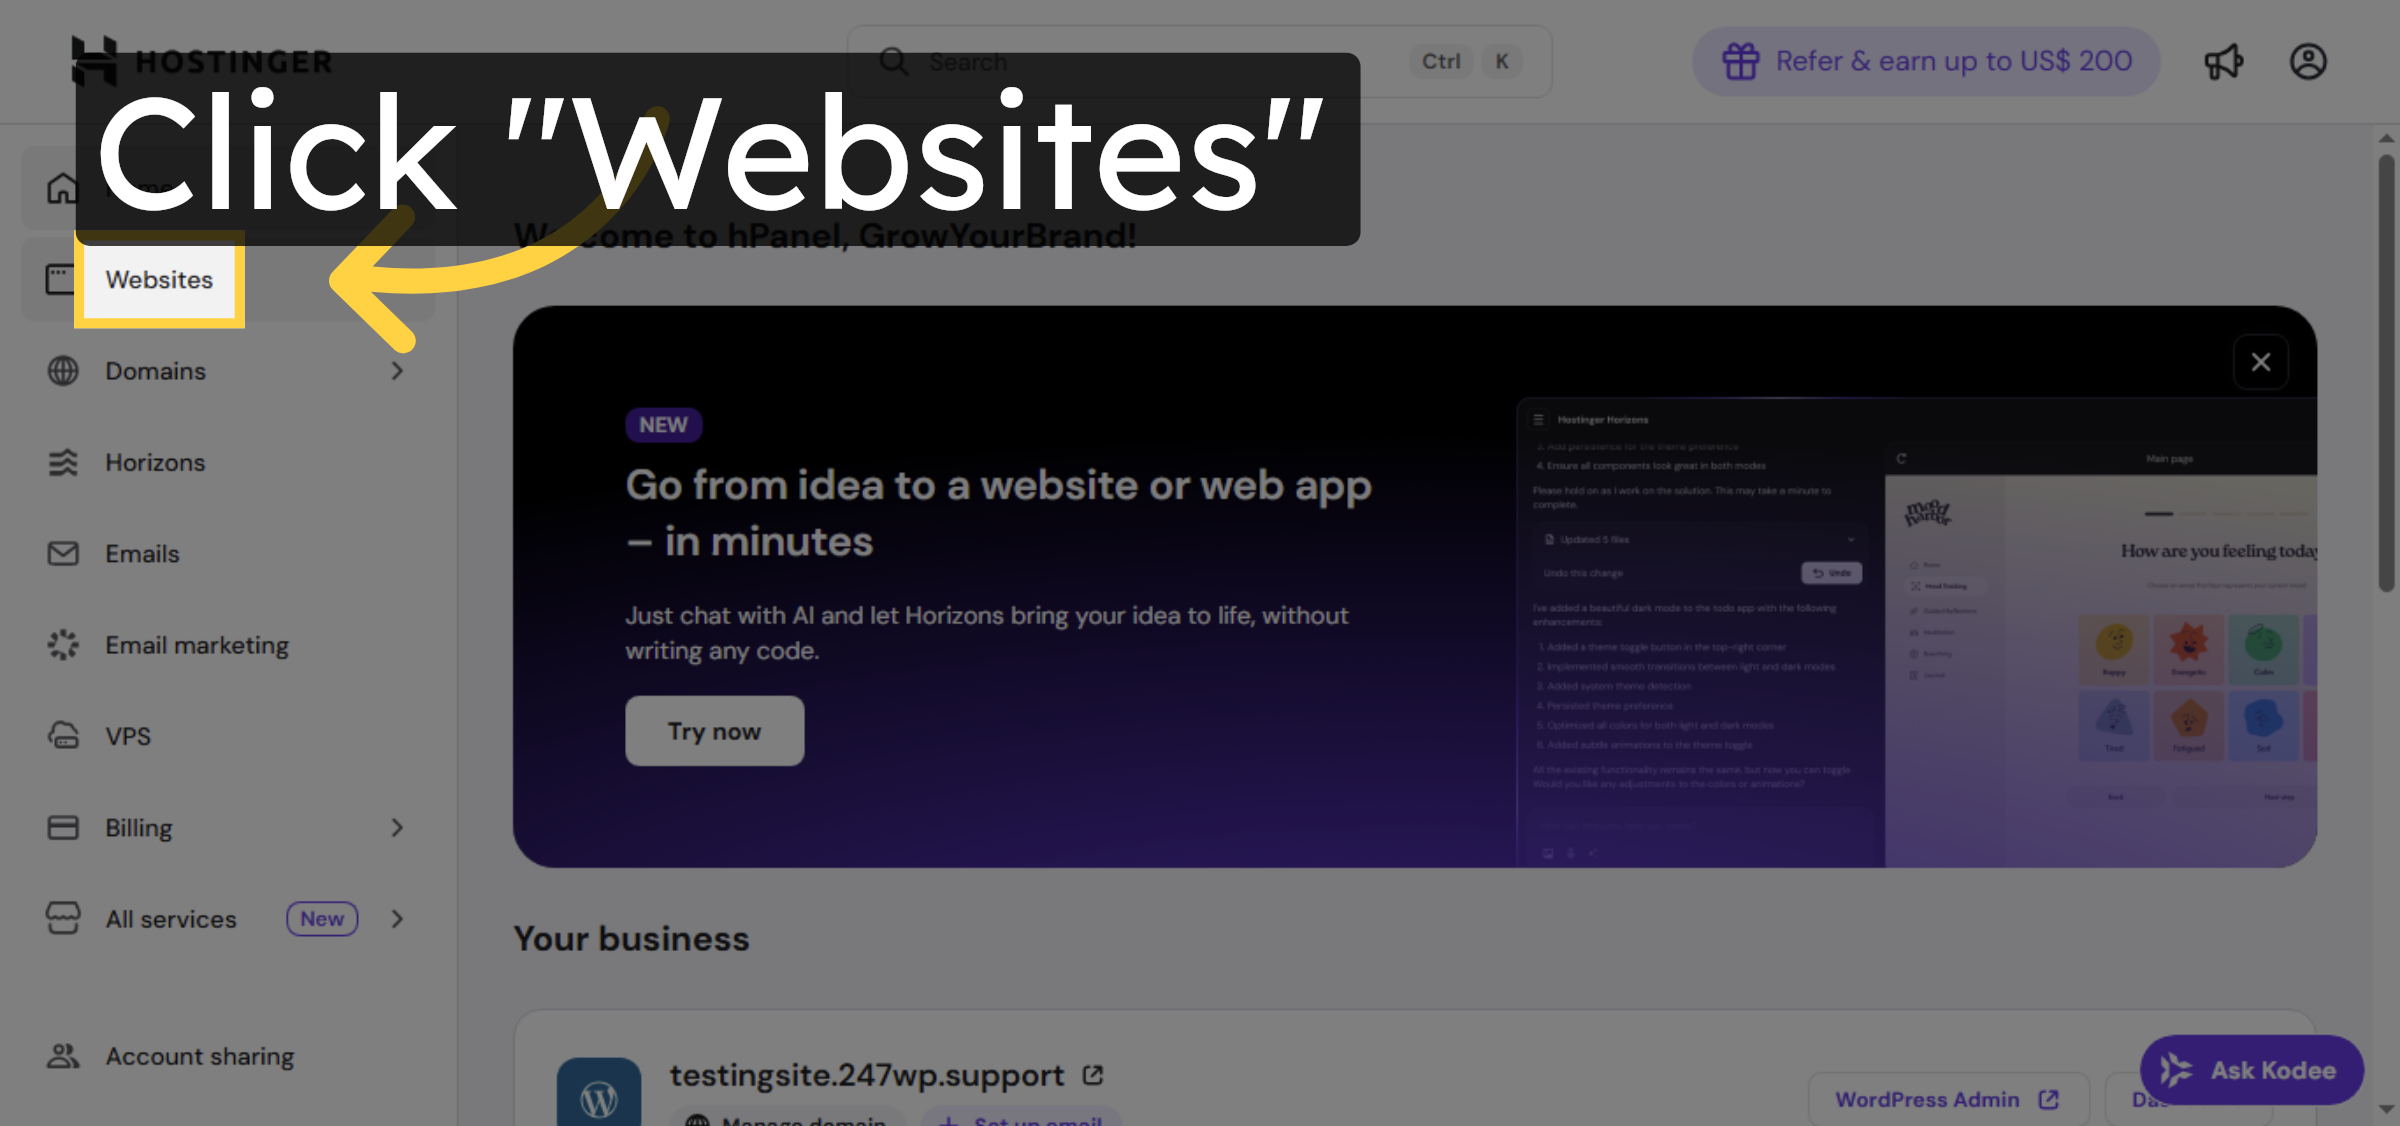
2. Navigate to Websites Section
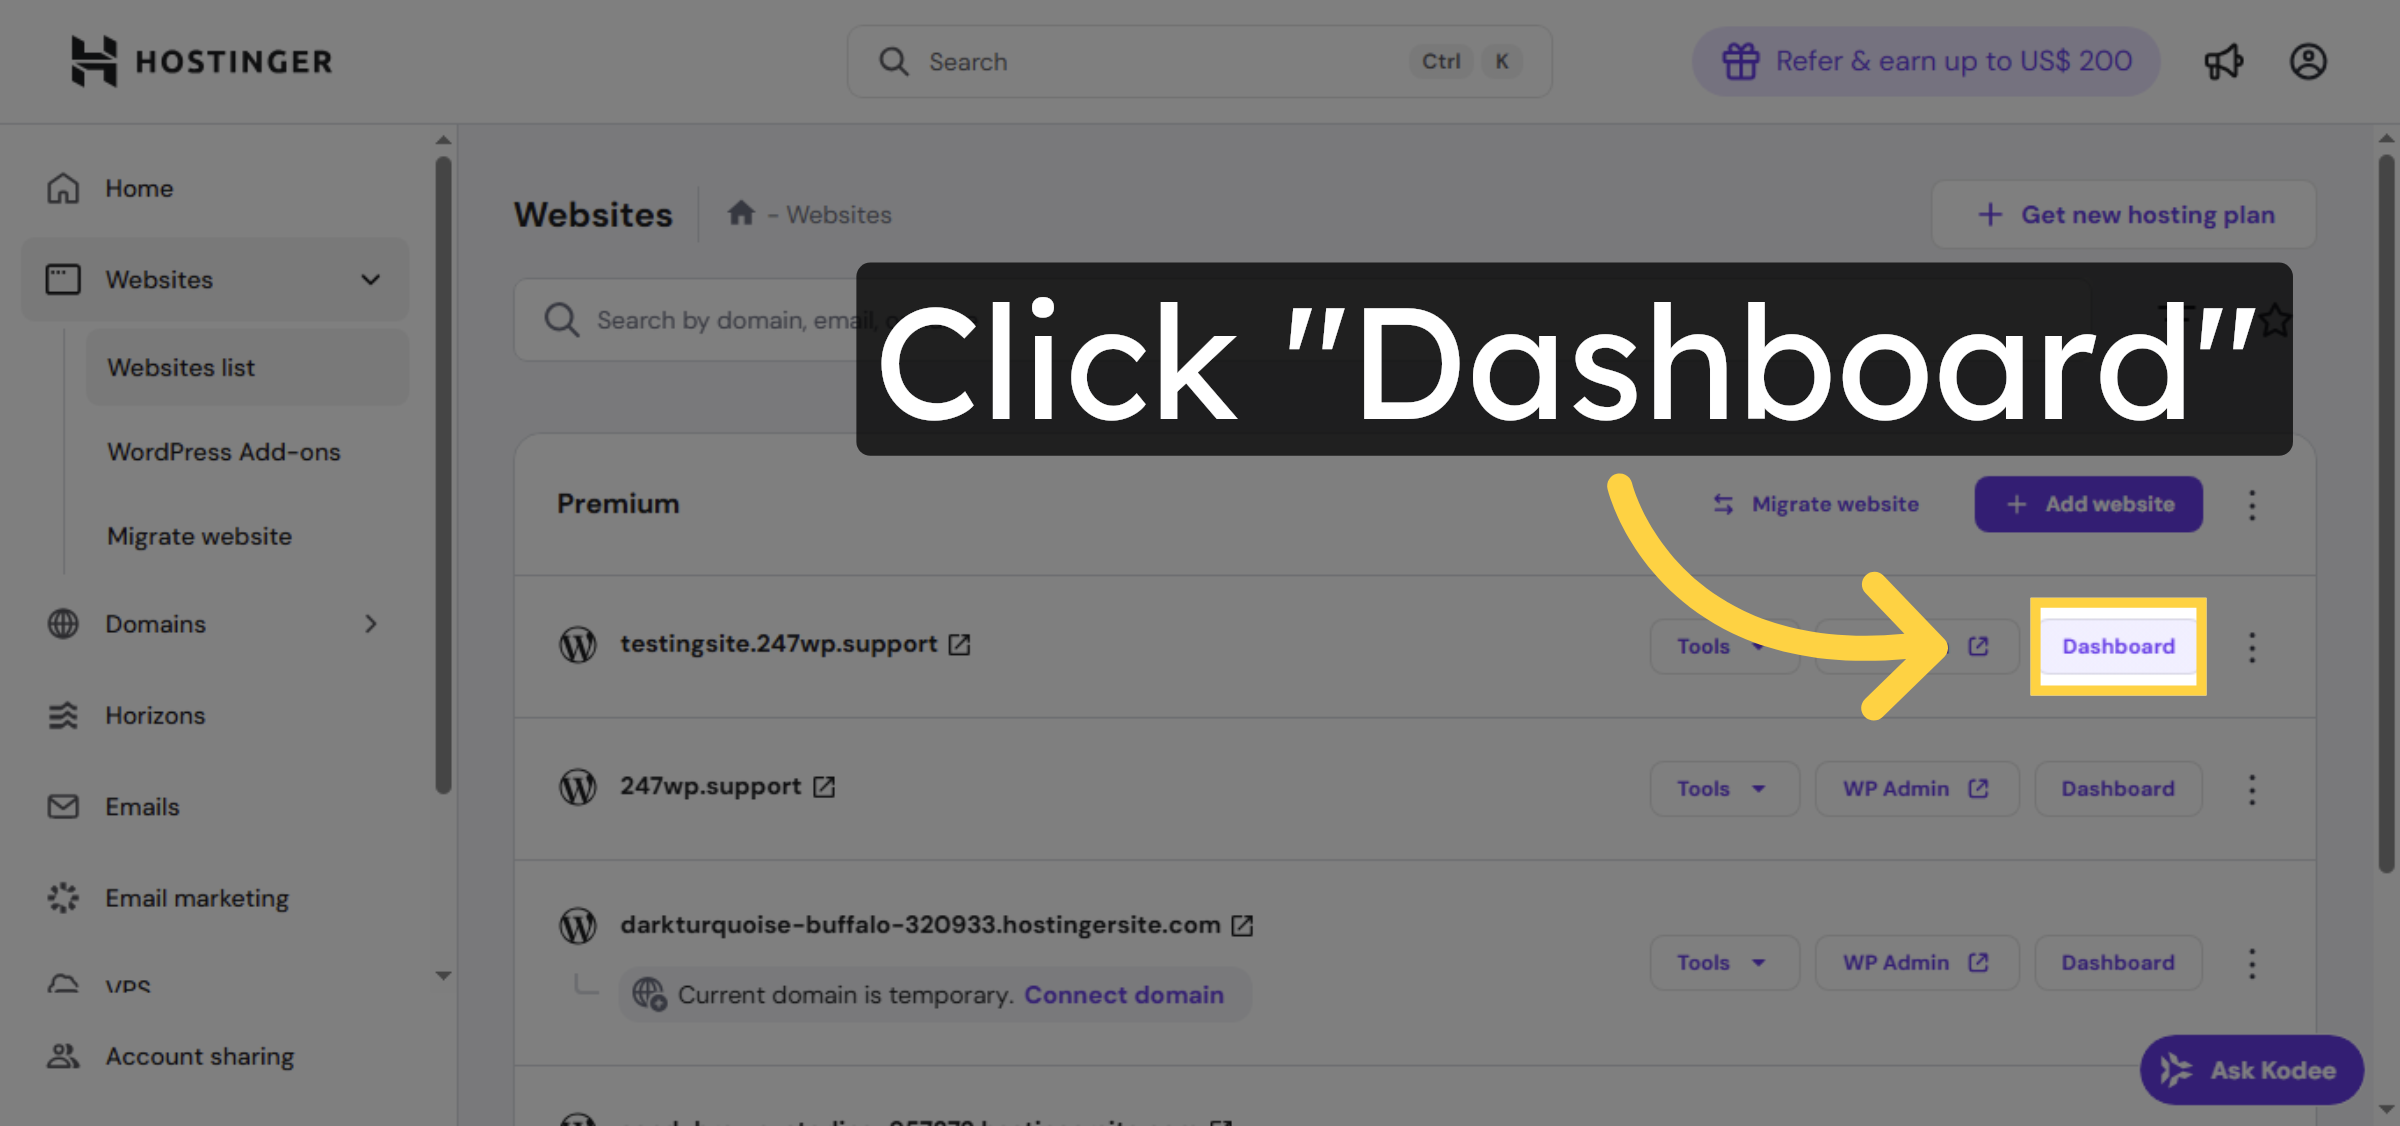
3. Open Website Dashboard
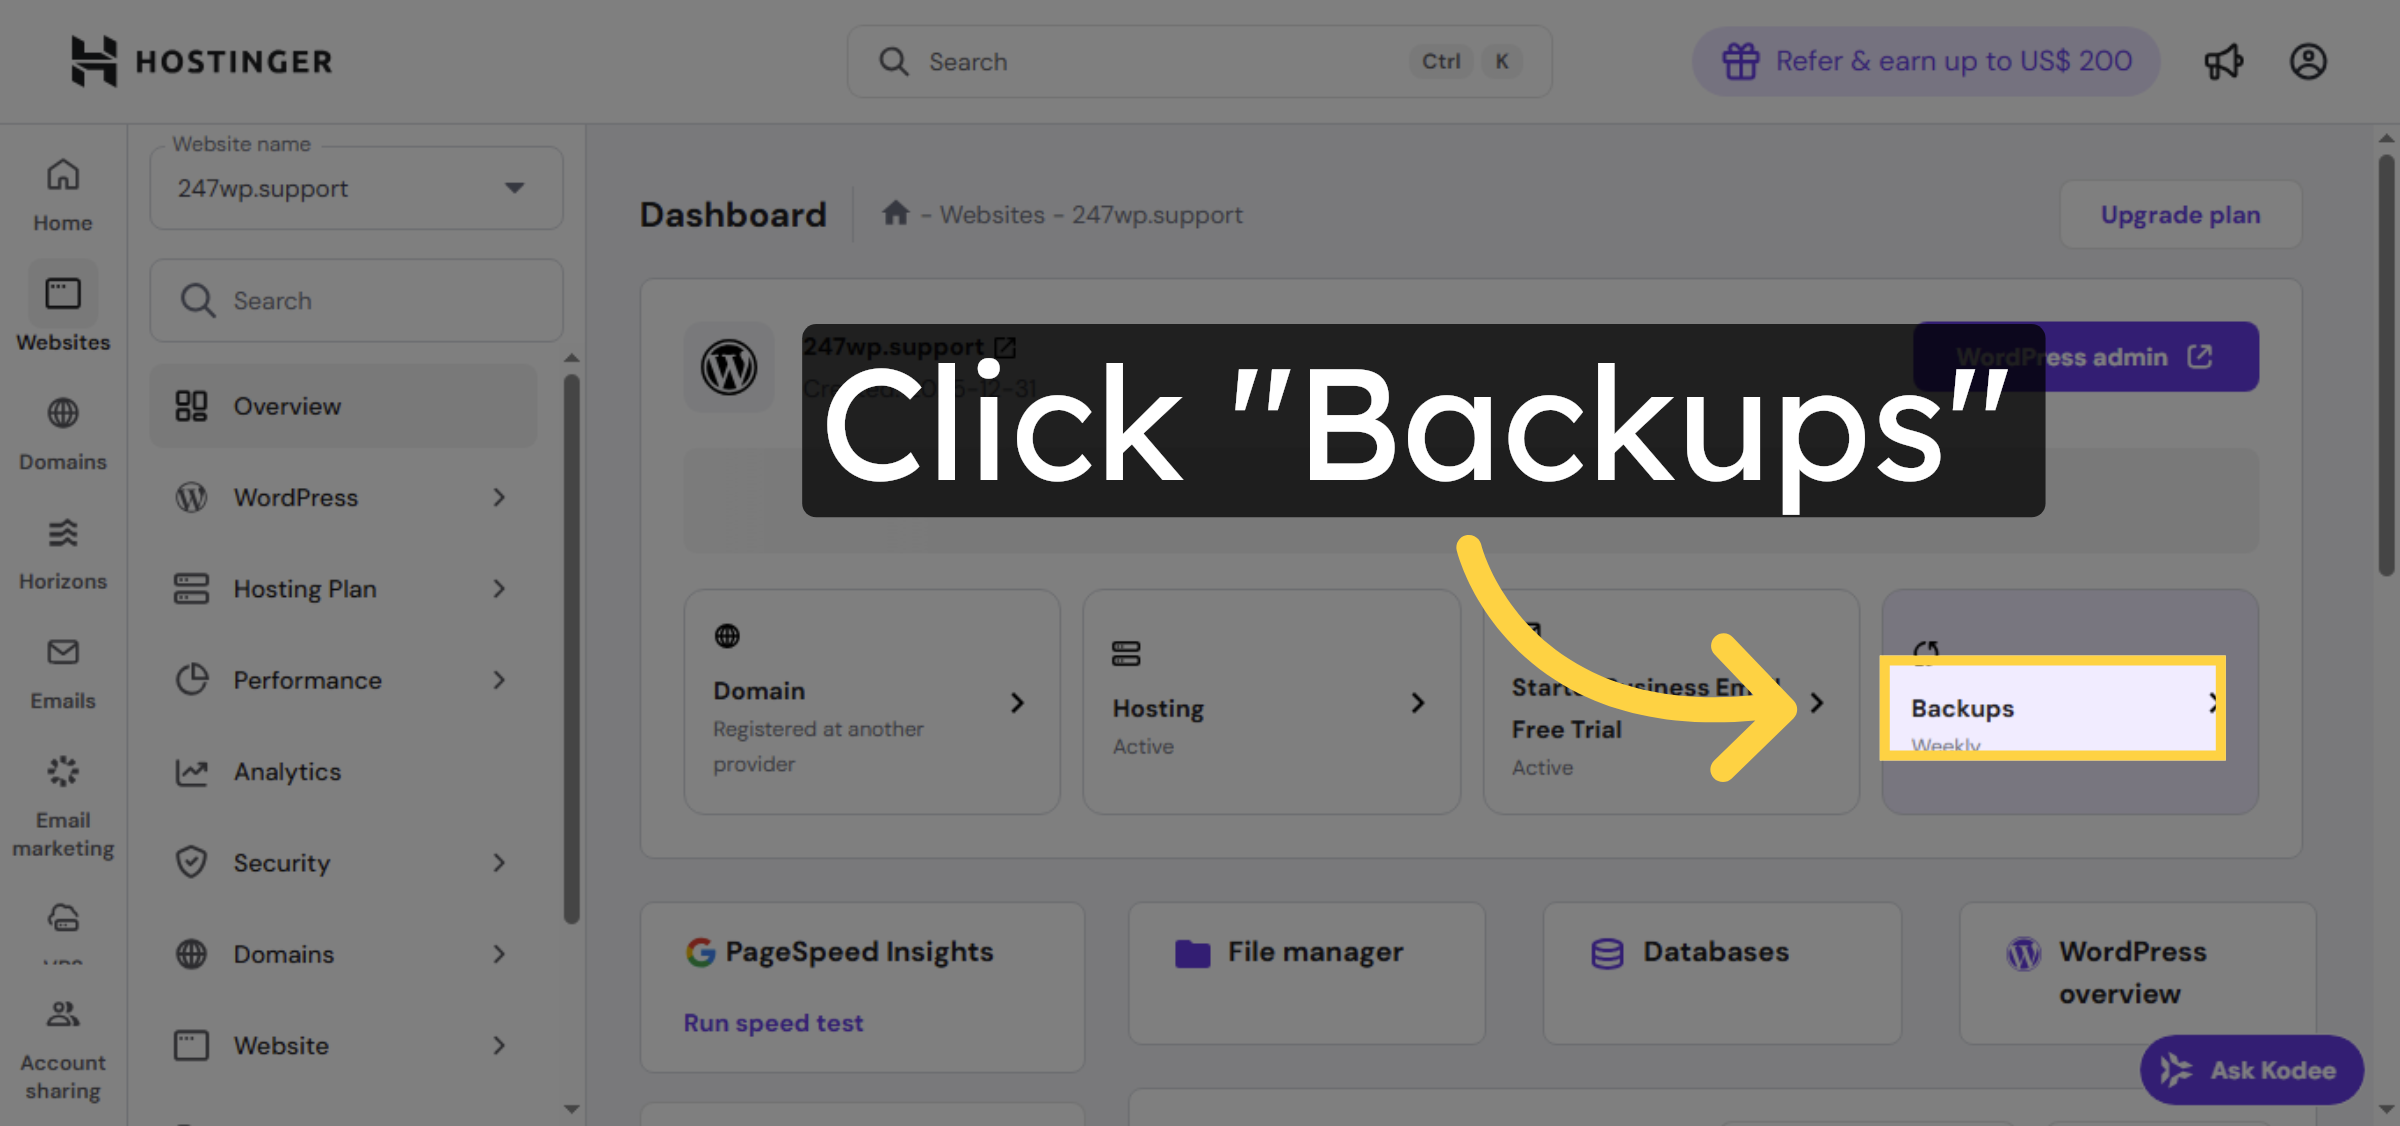
4. Access Backups Tab
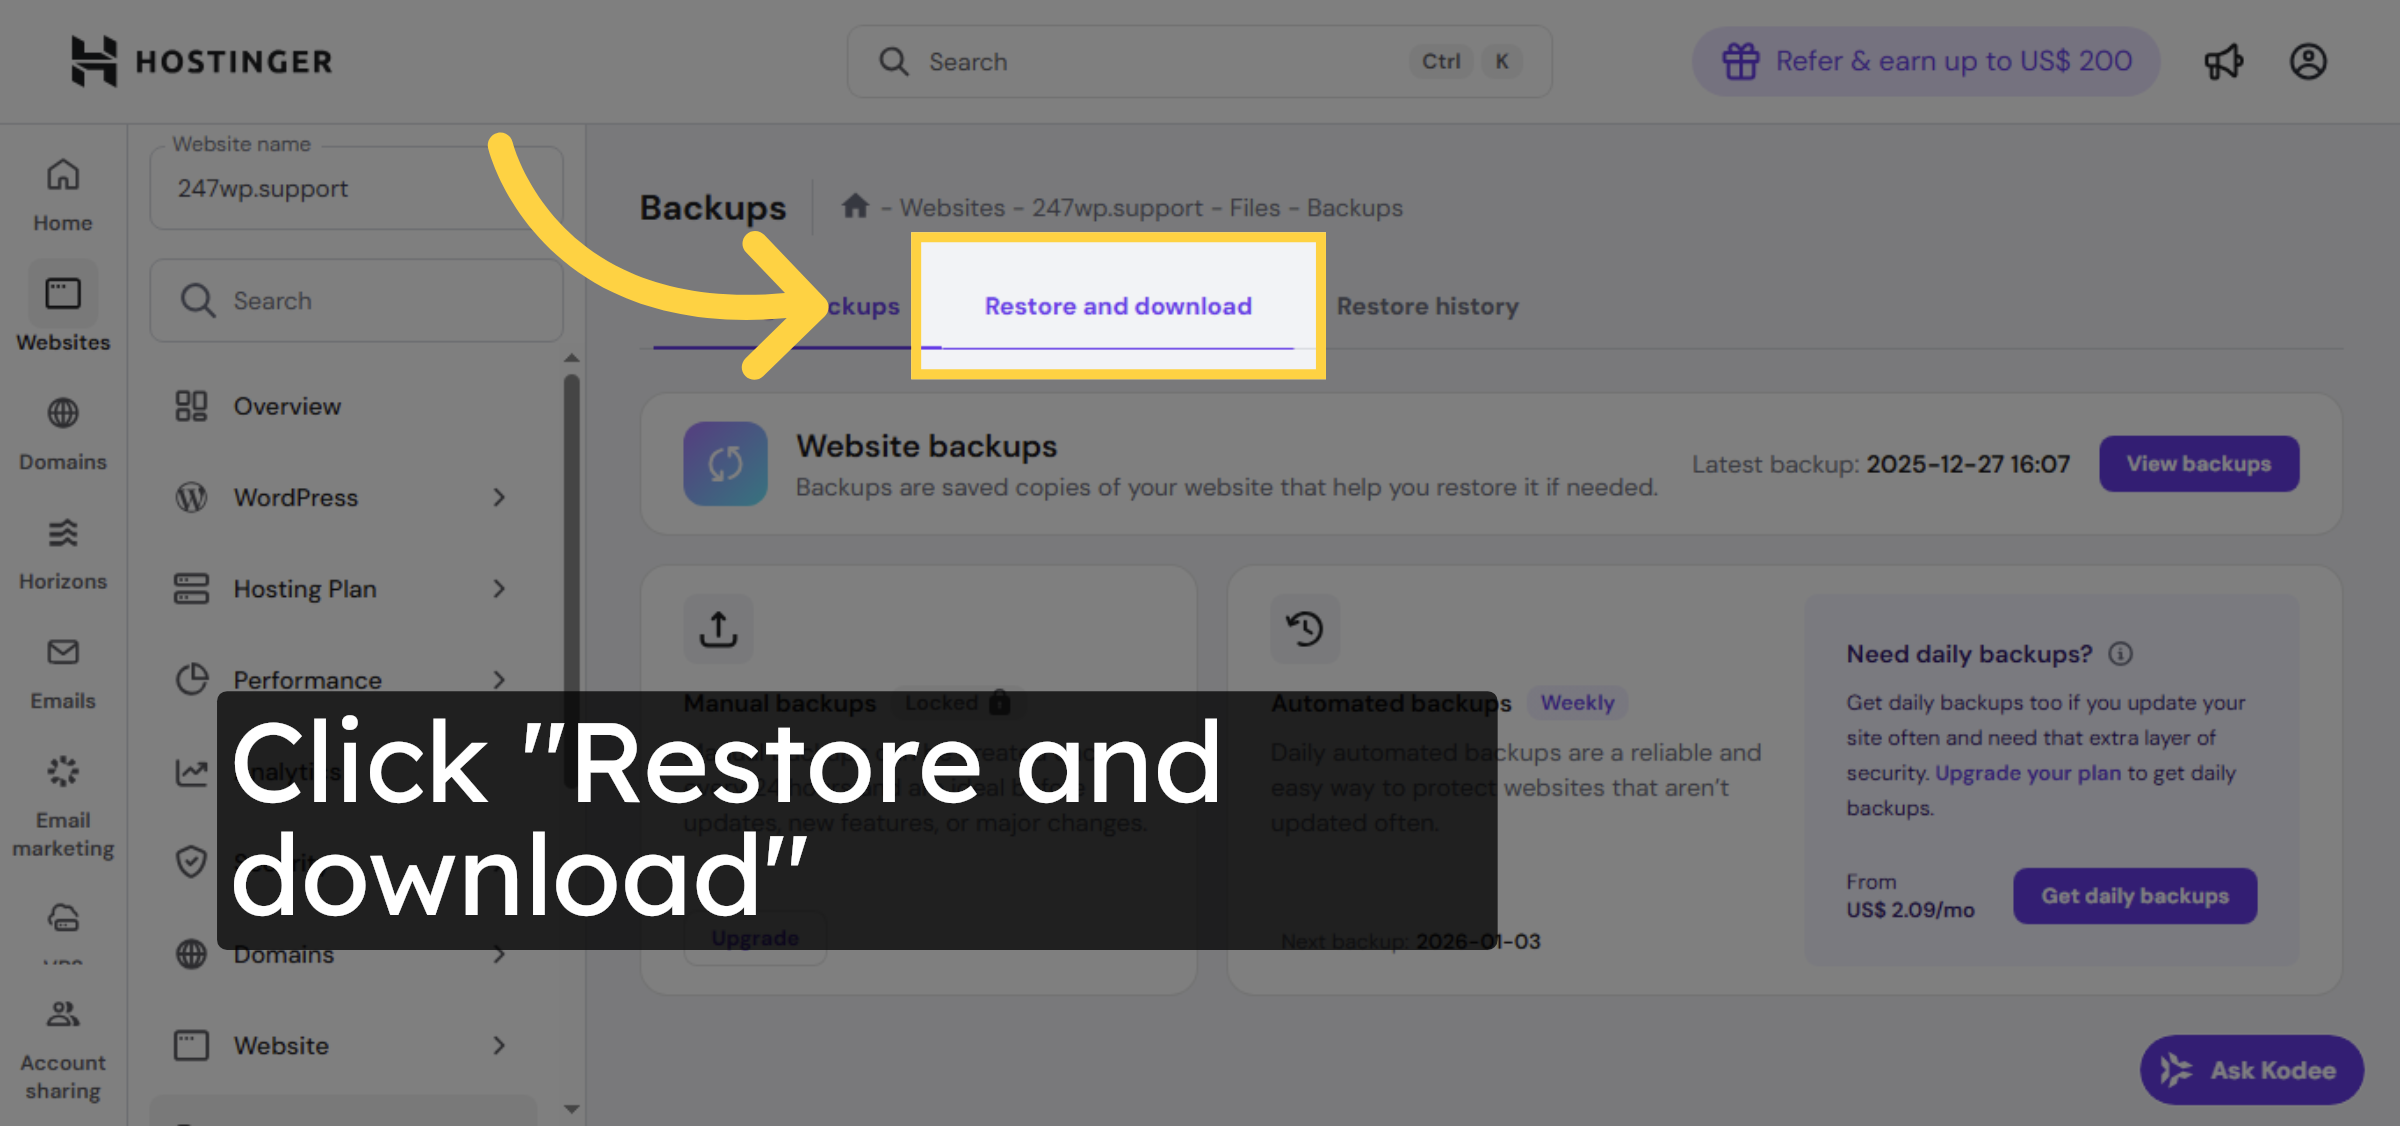
5. Select Restore and Download
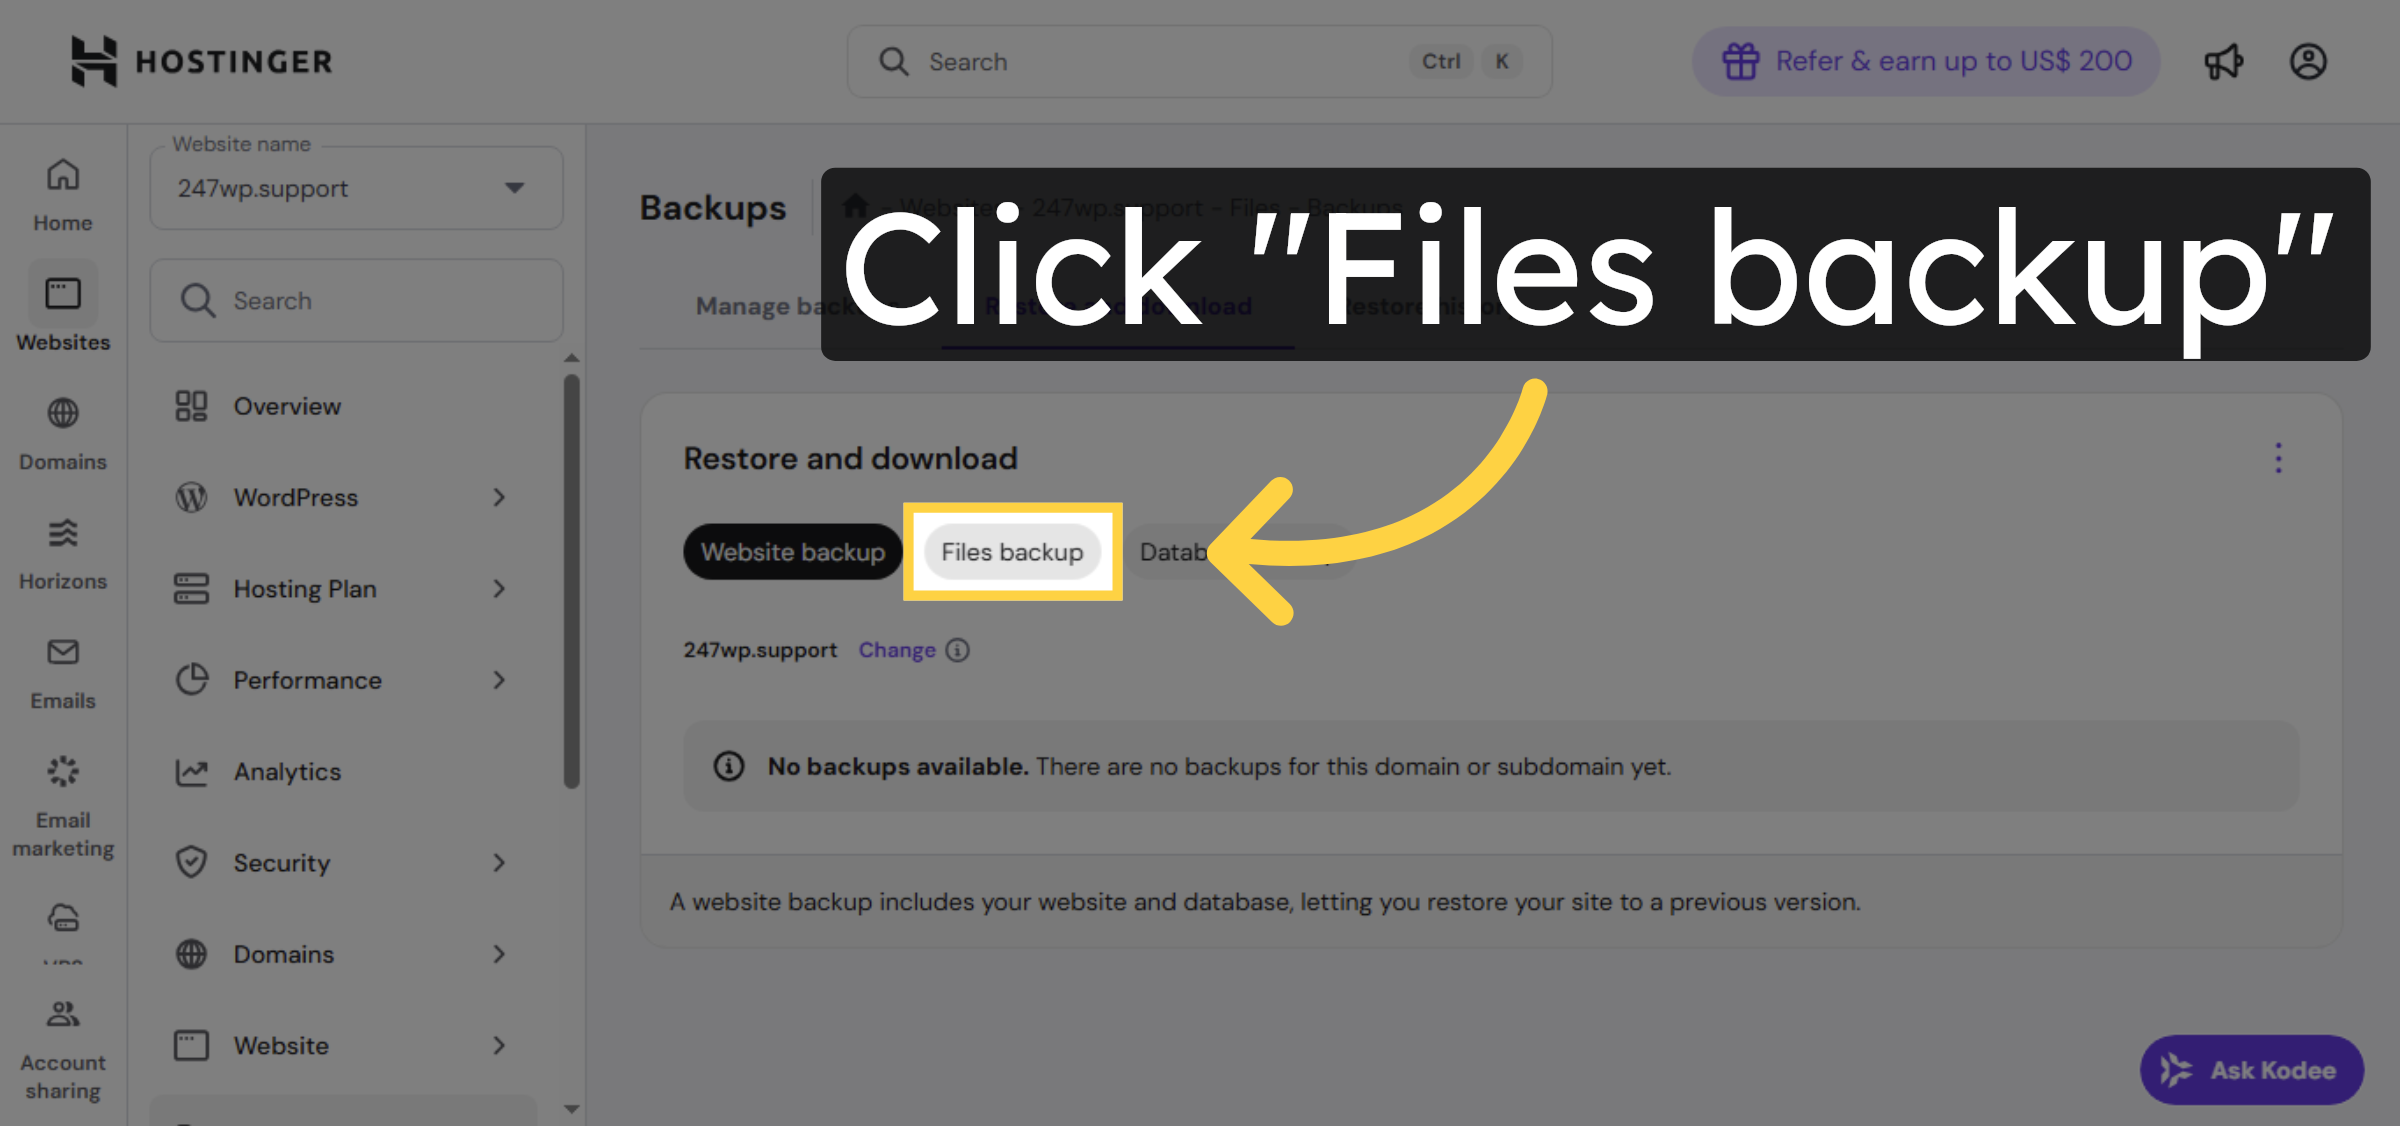
6. Choose Files Backup
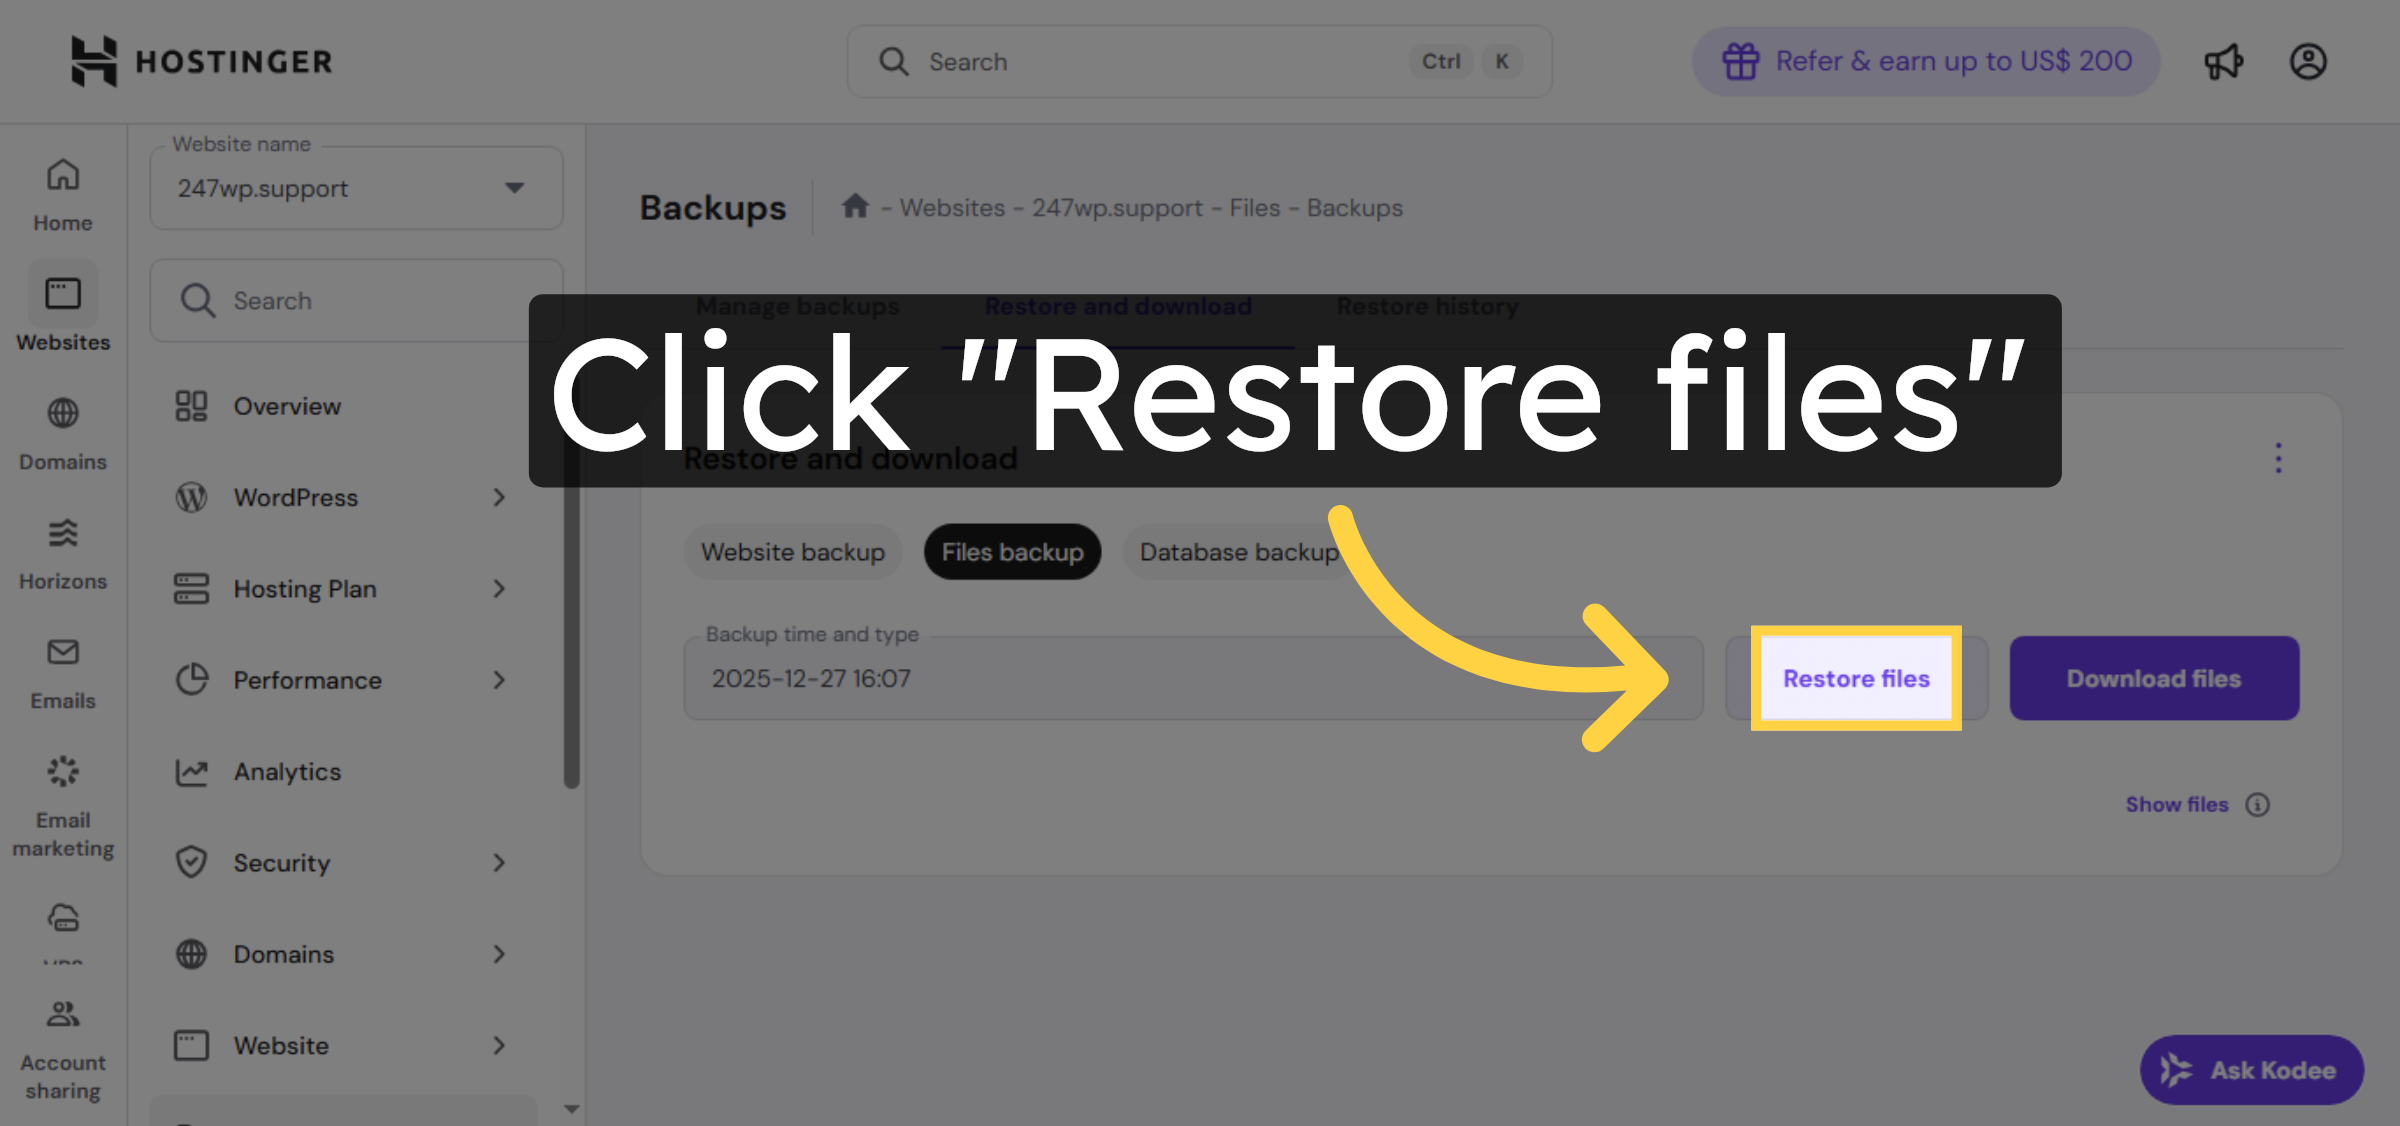
7. Initiate File Restoration
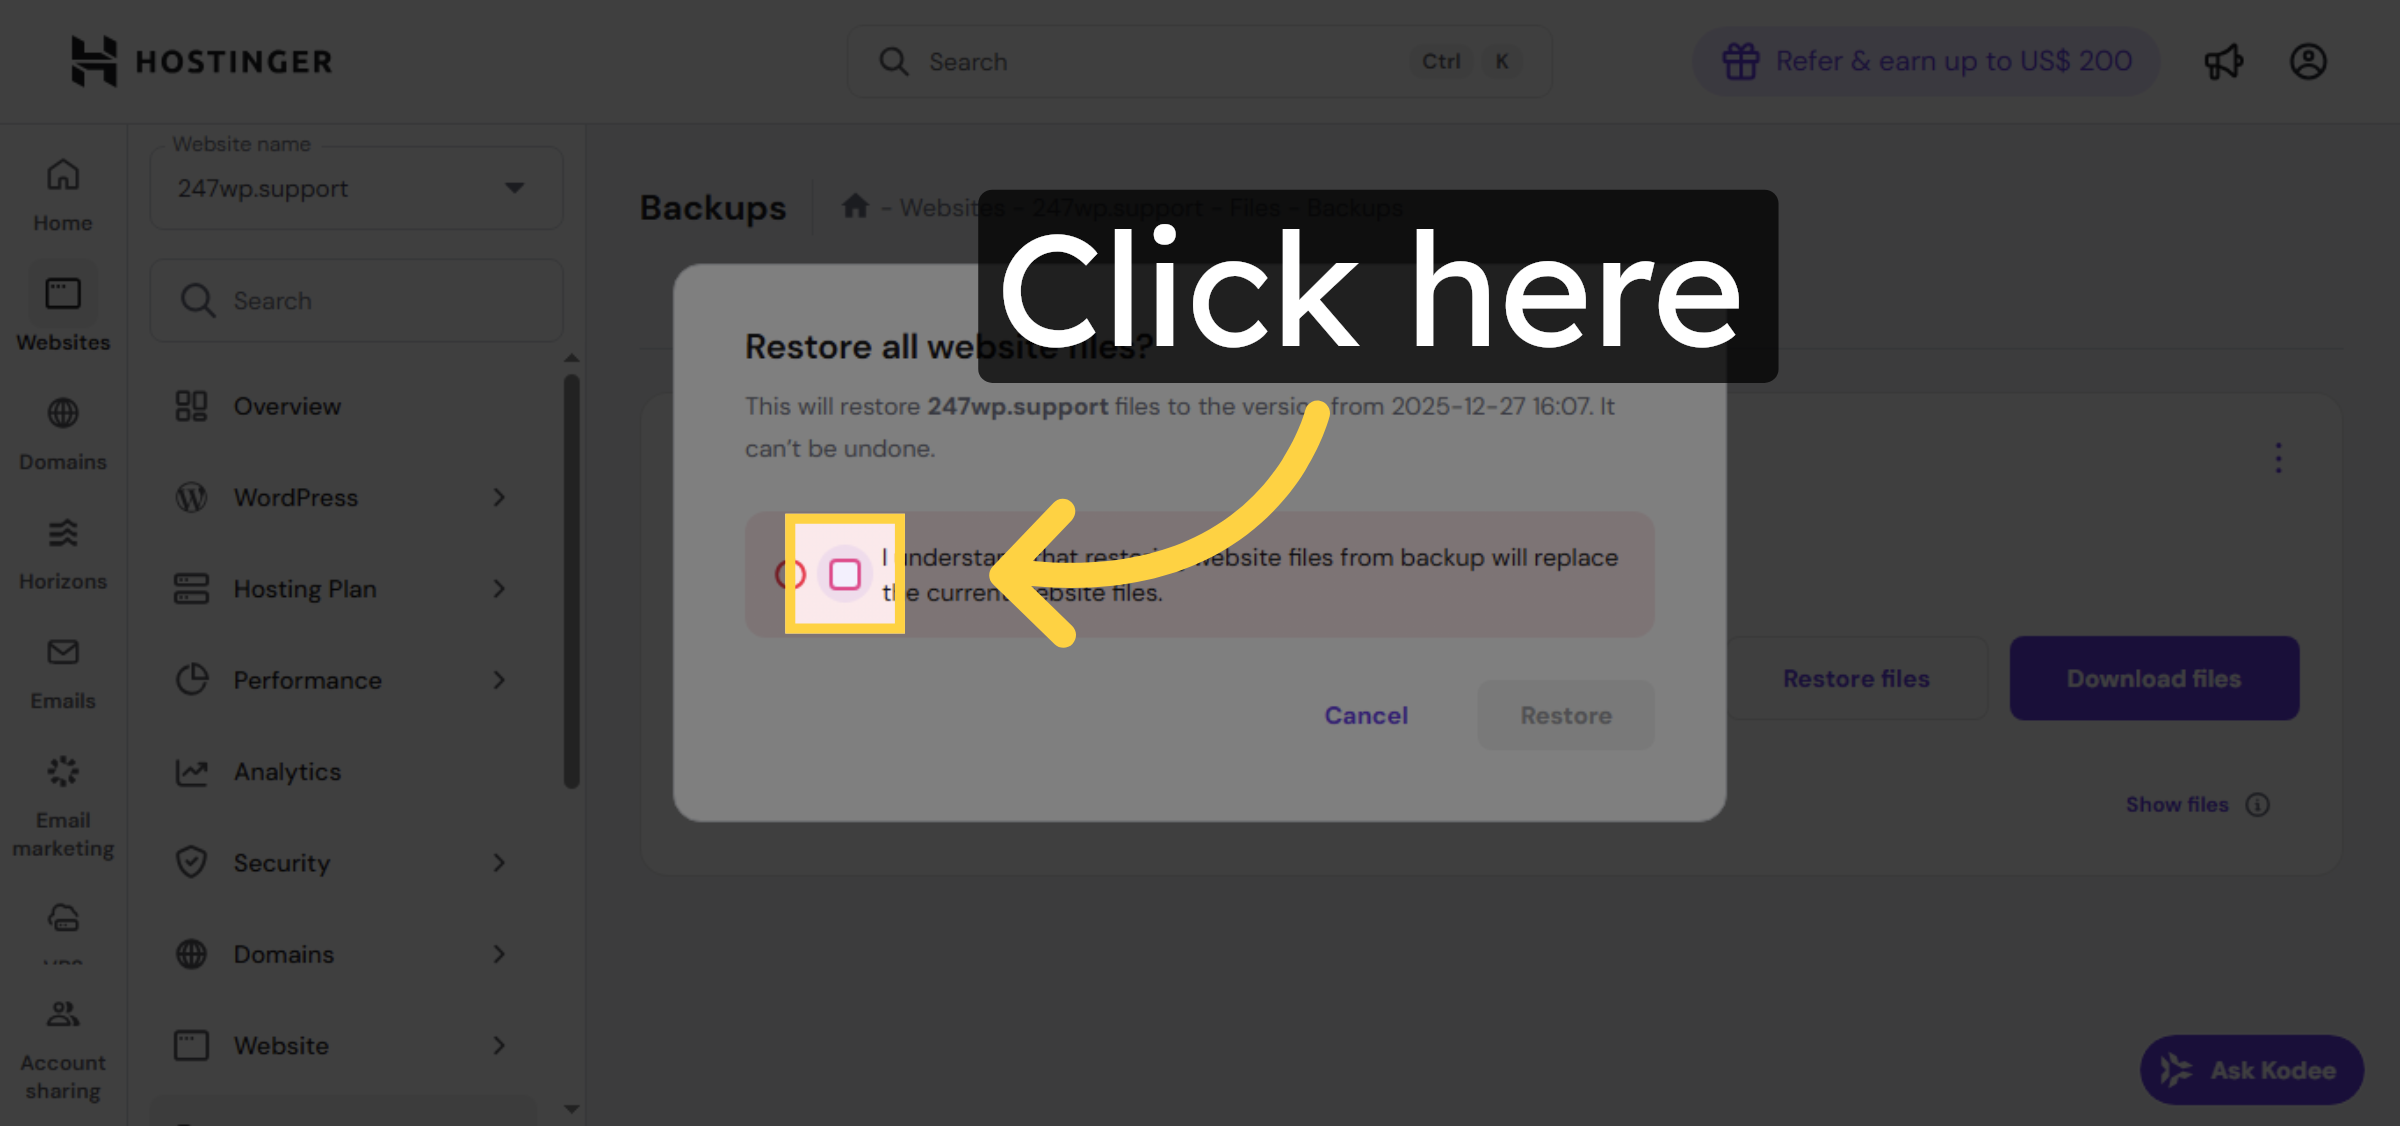
8. Confirm File Selection
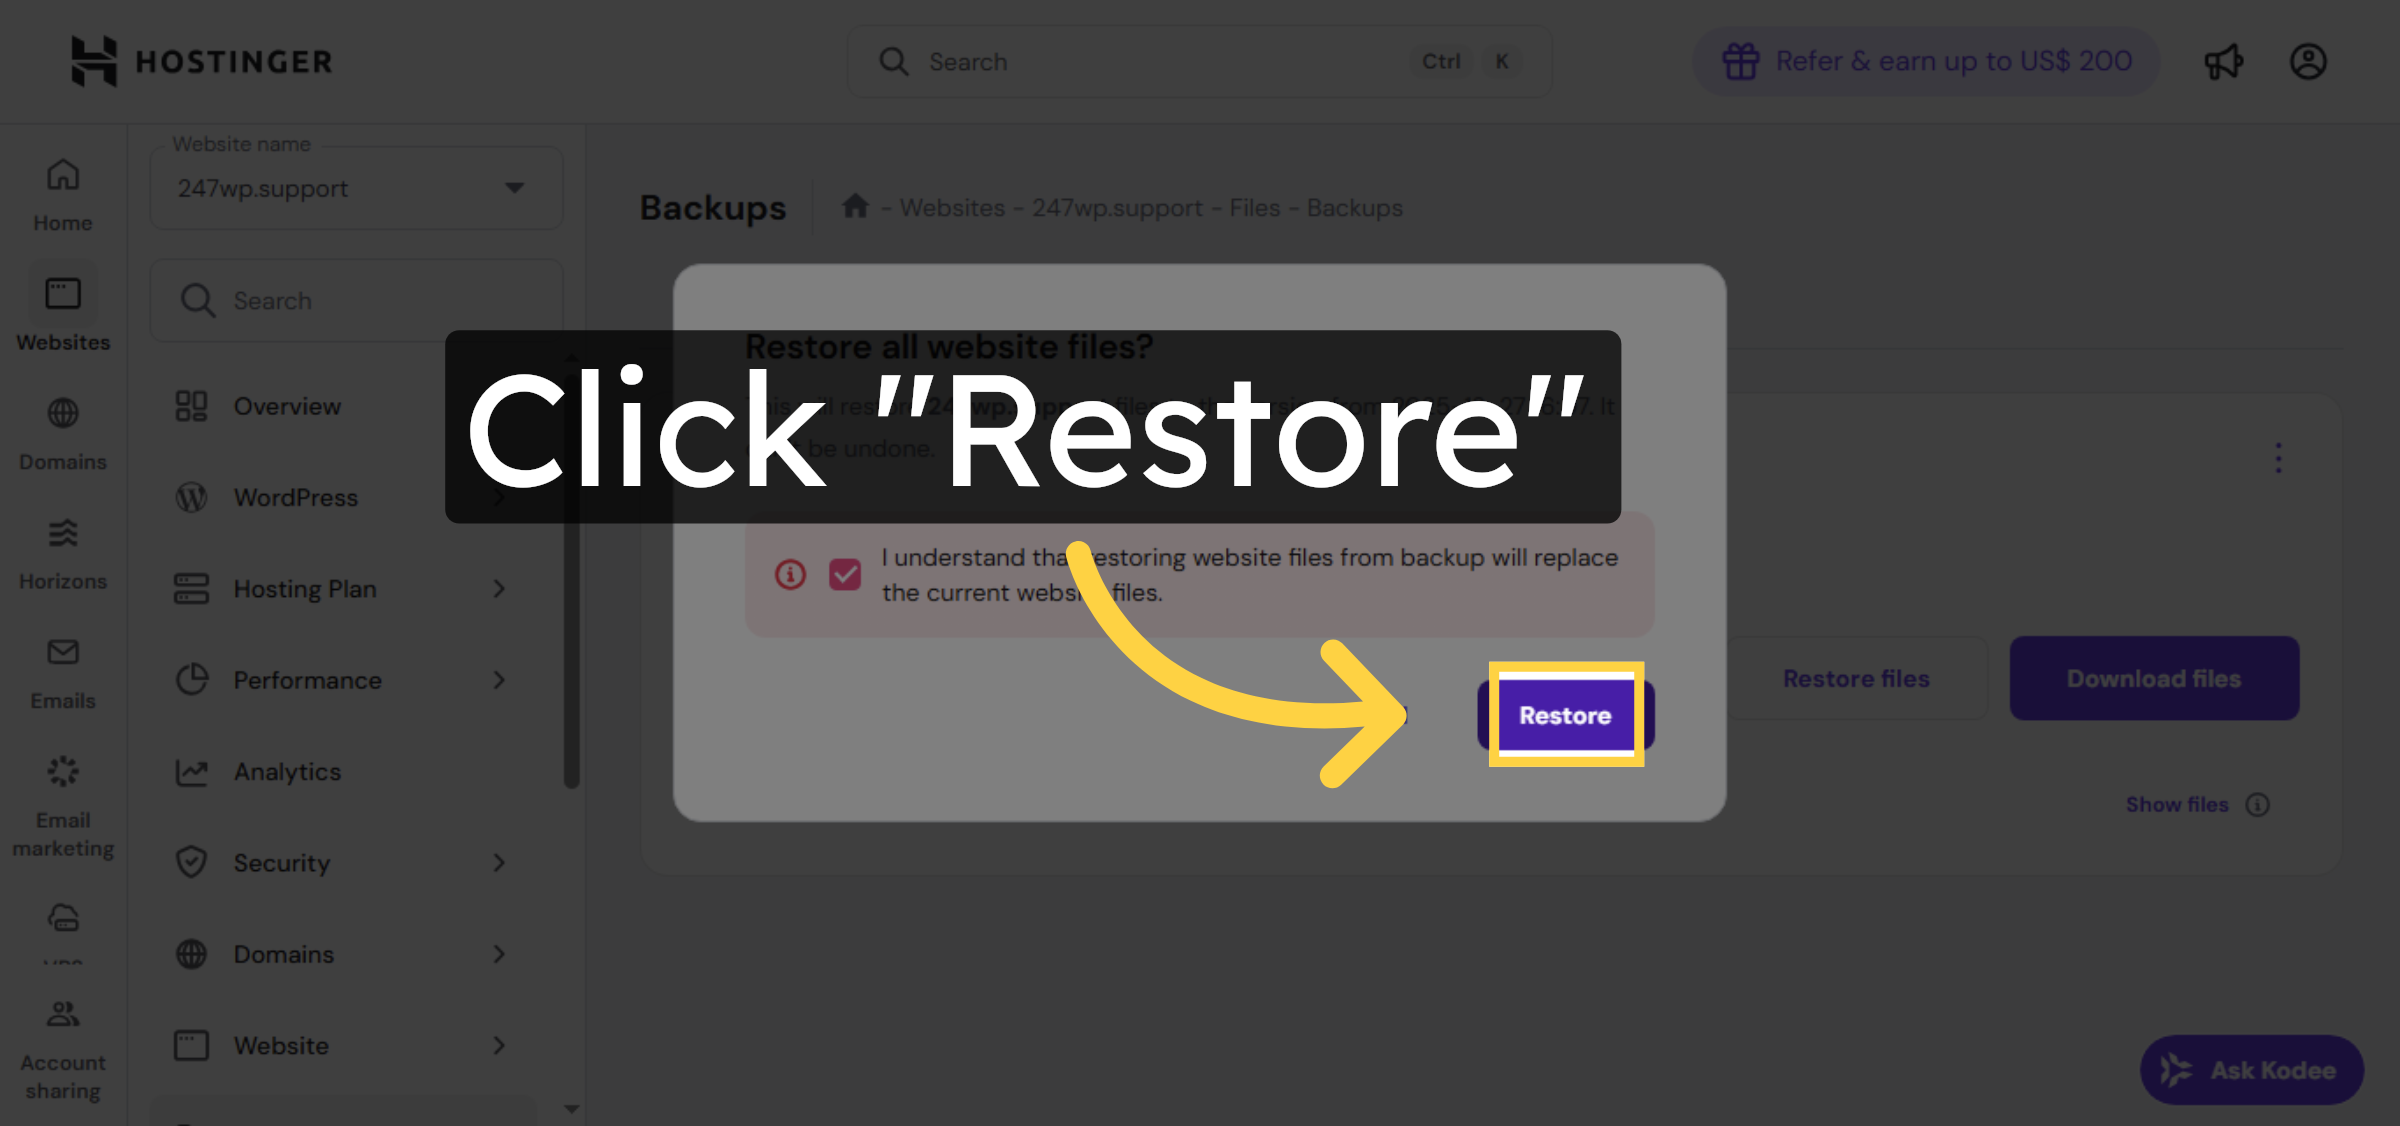
9. Execute File Restore
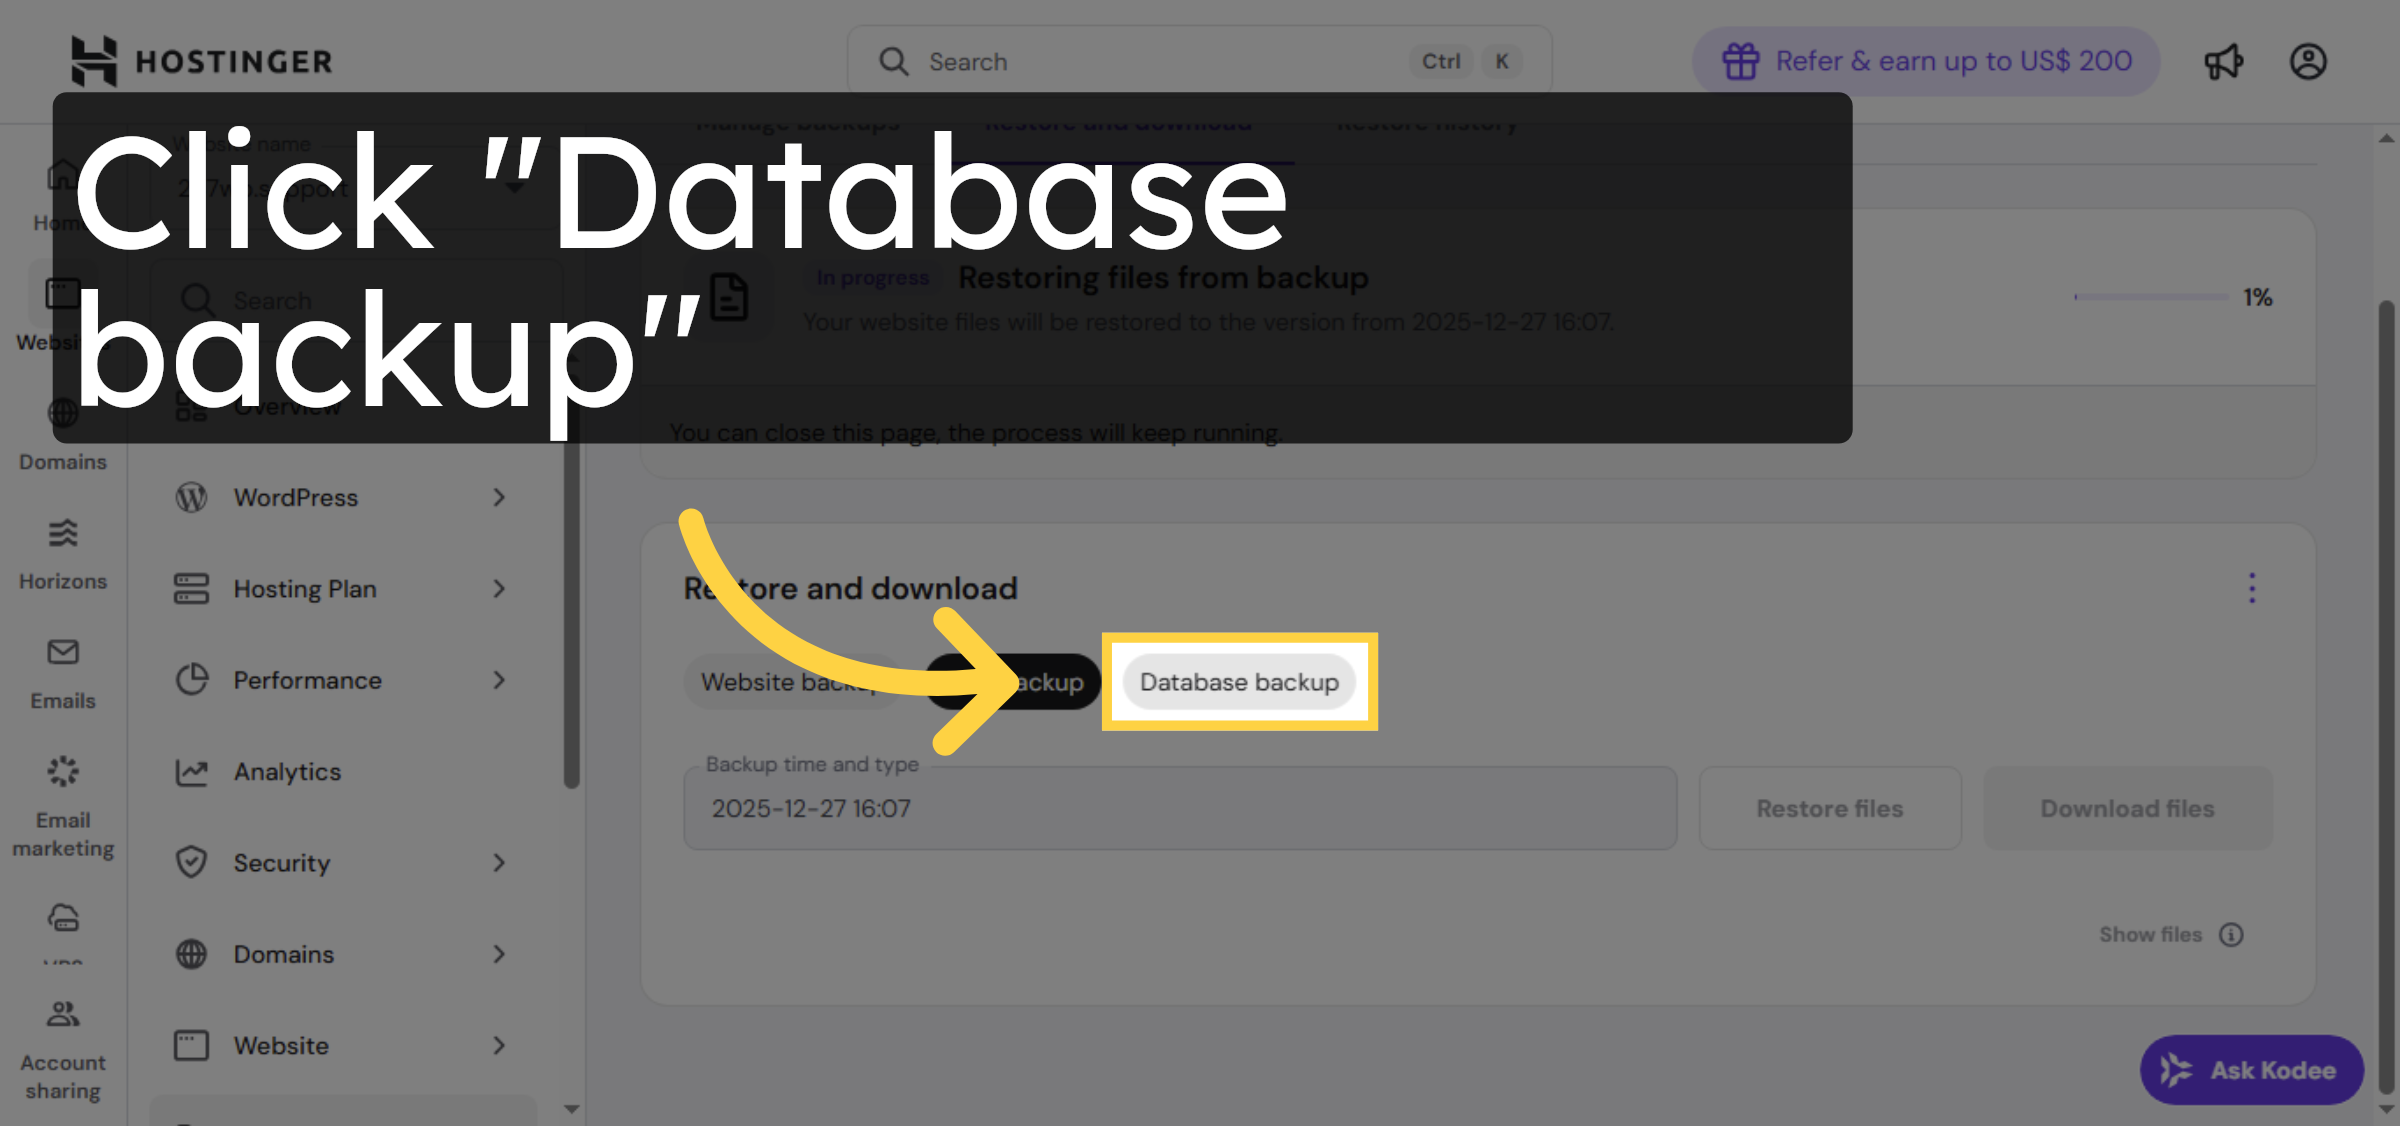
10. Select Database Backup


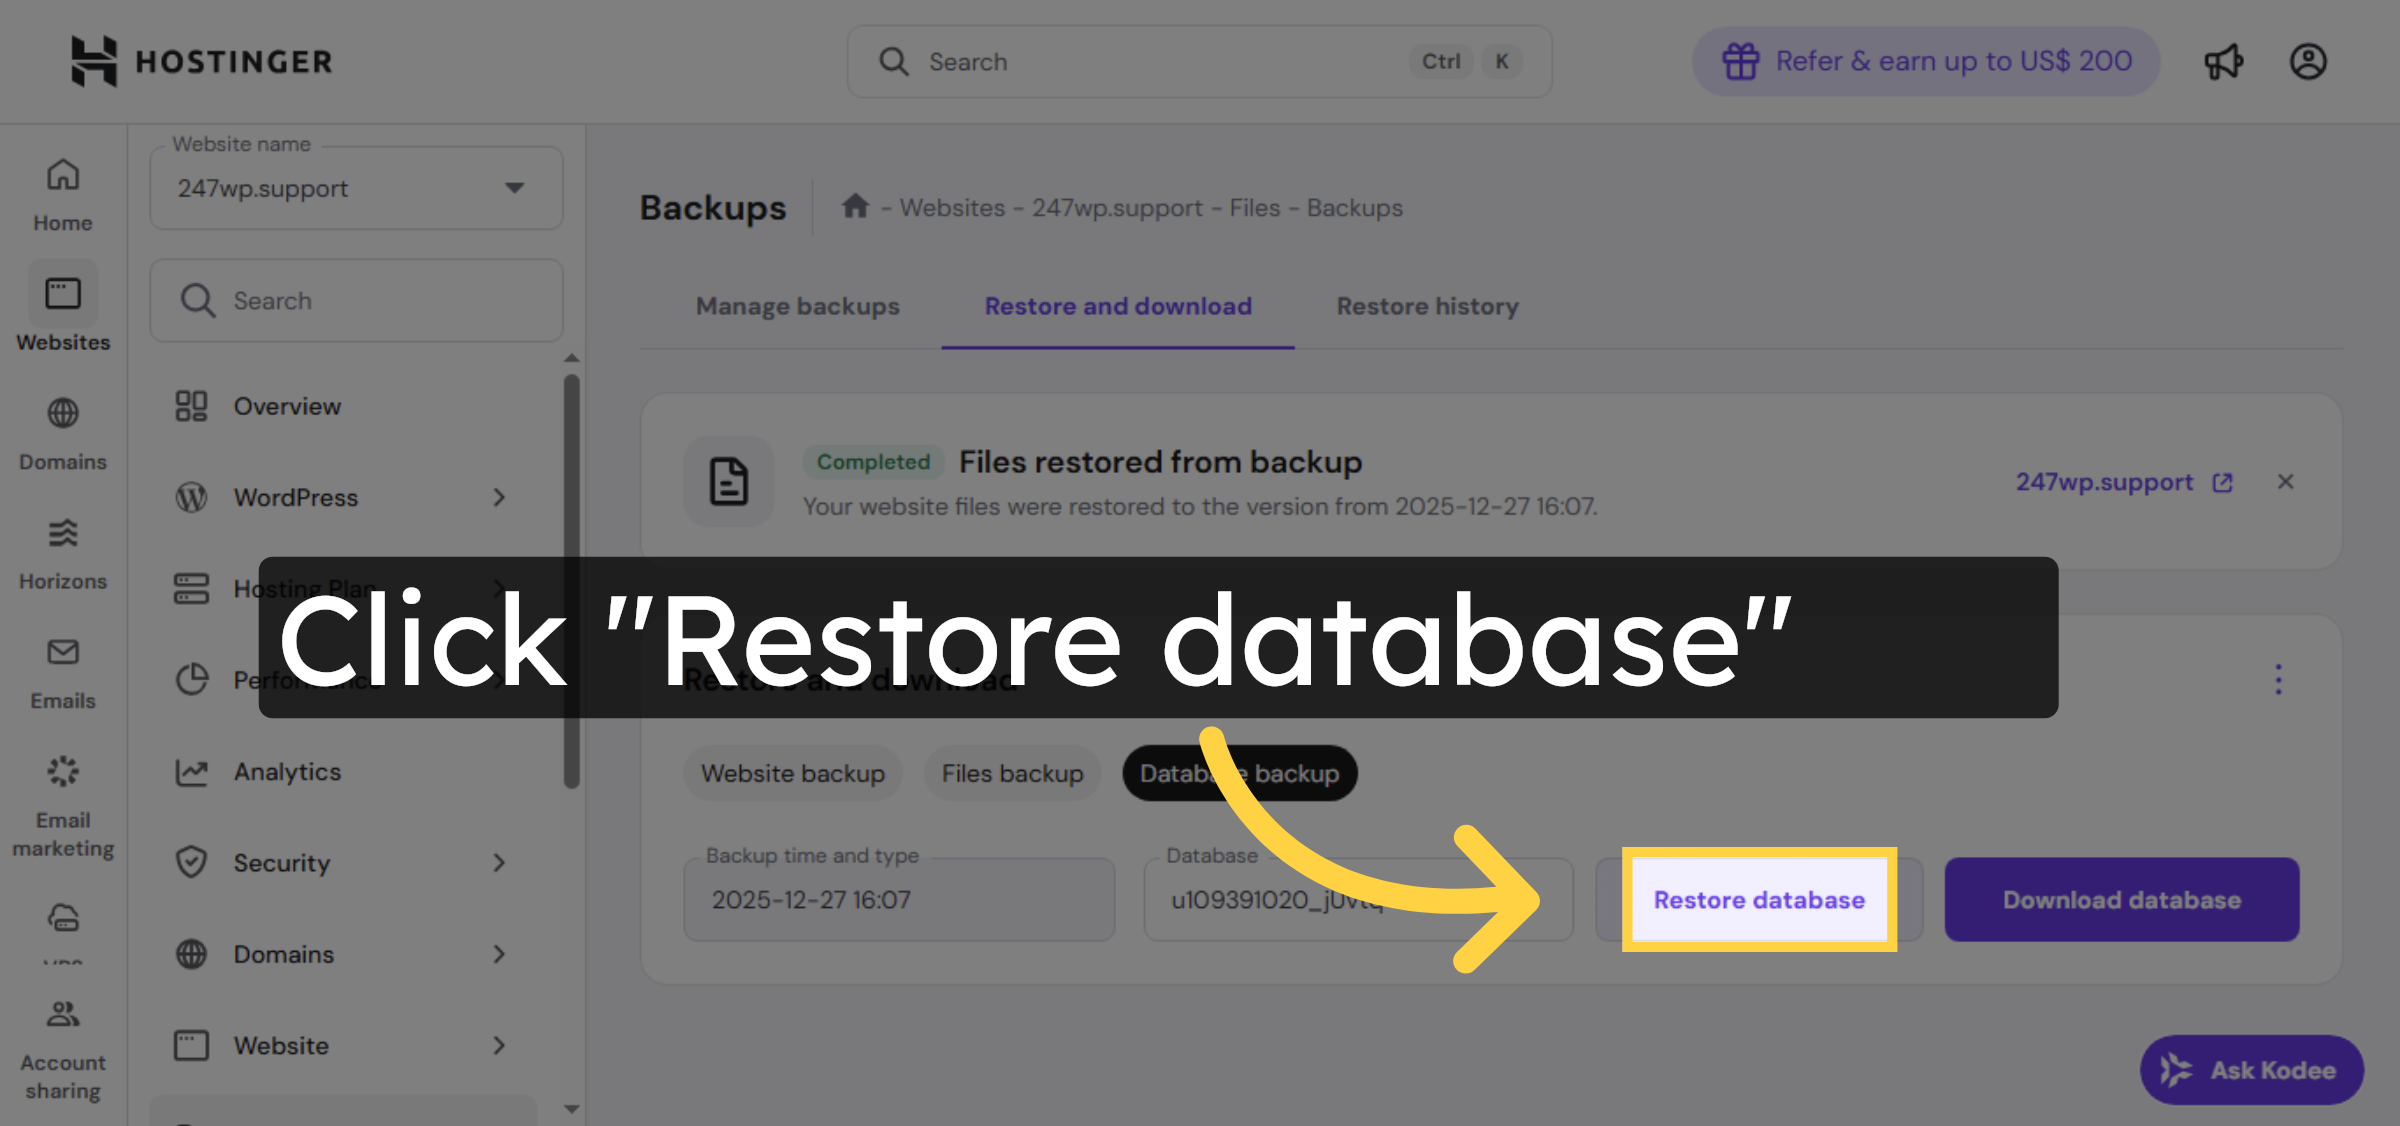
11. Start Database Restoration
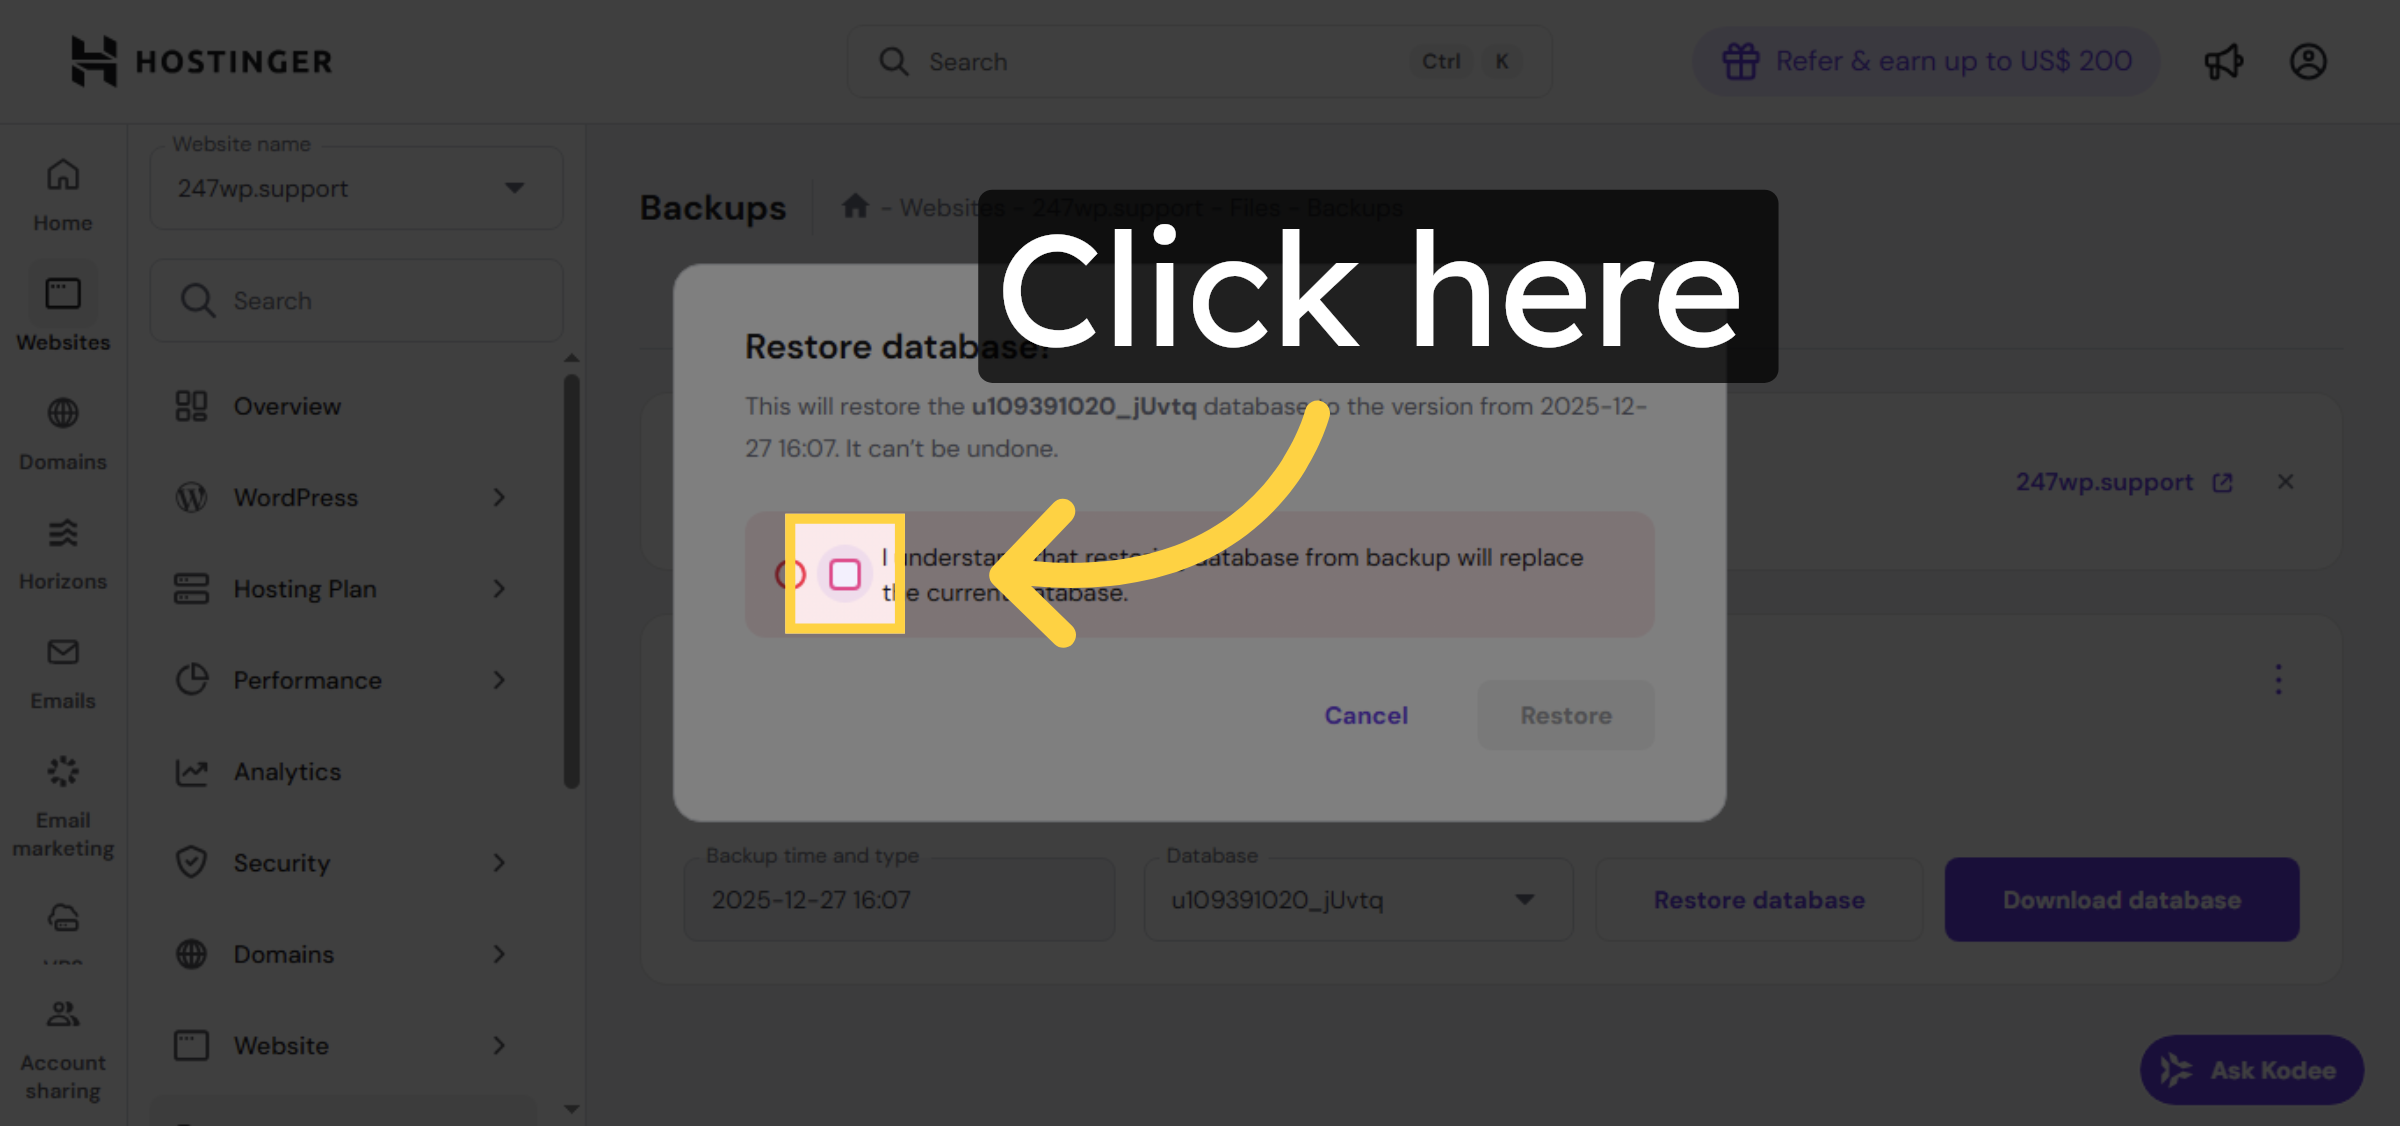
12. Confirm Database Selection
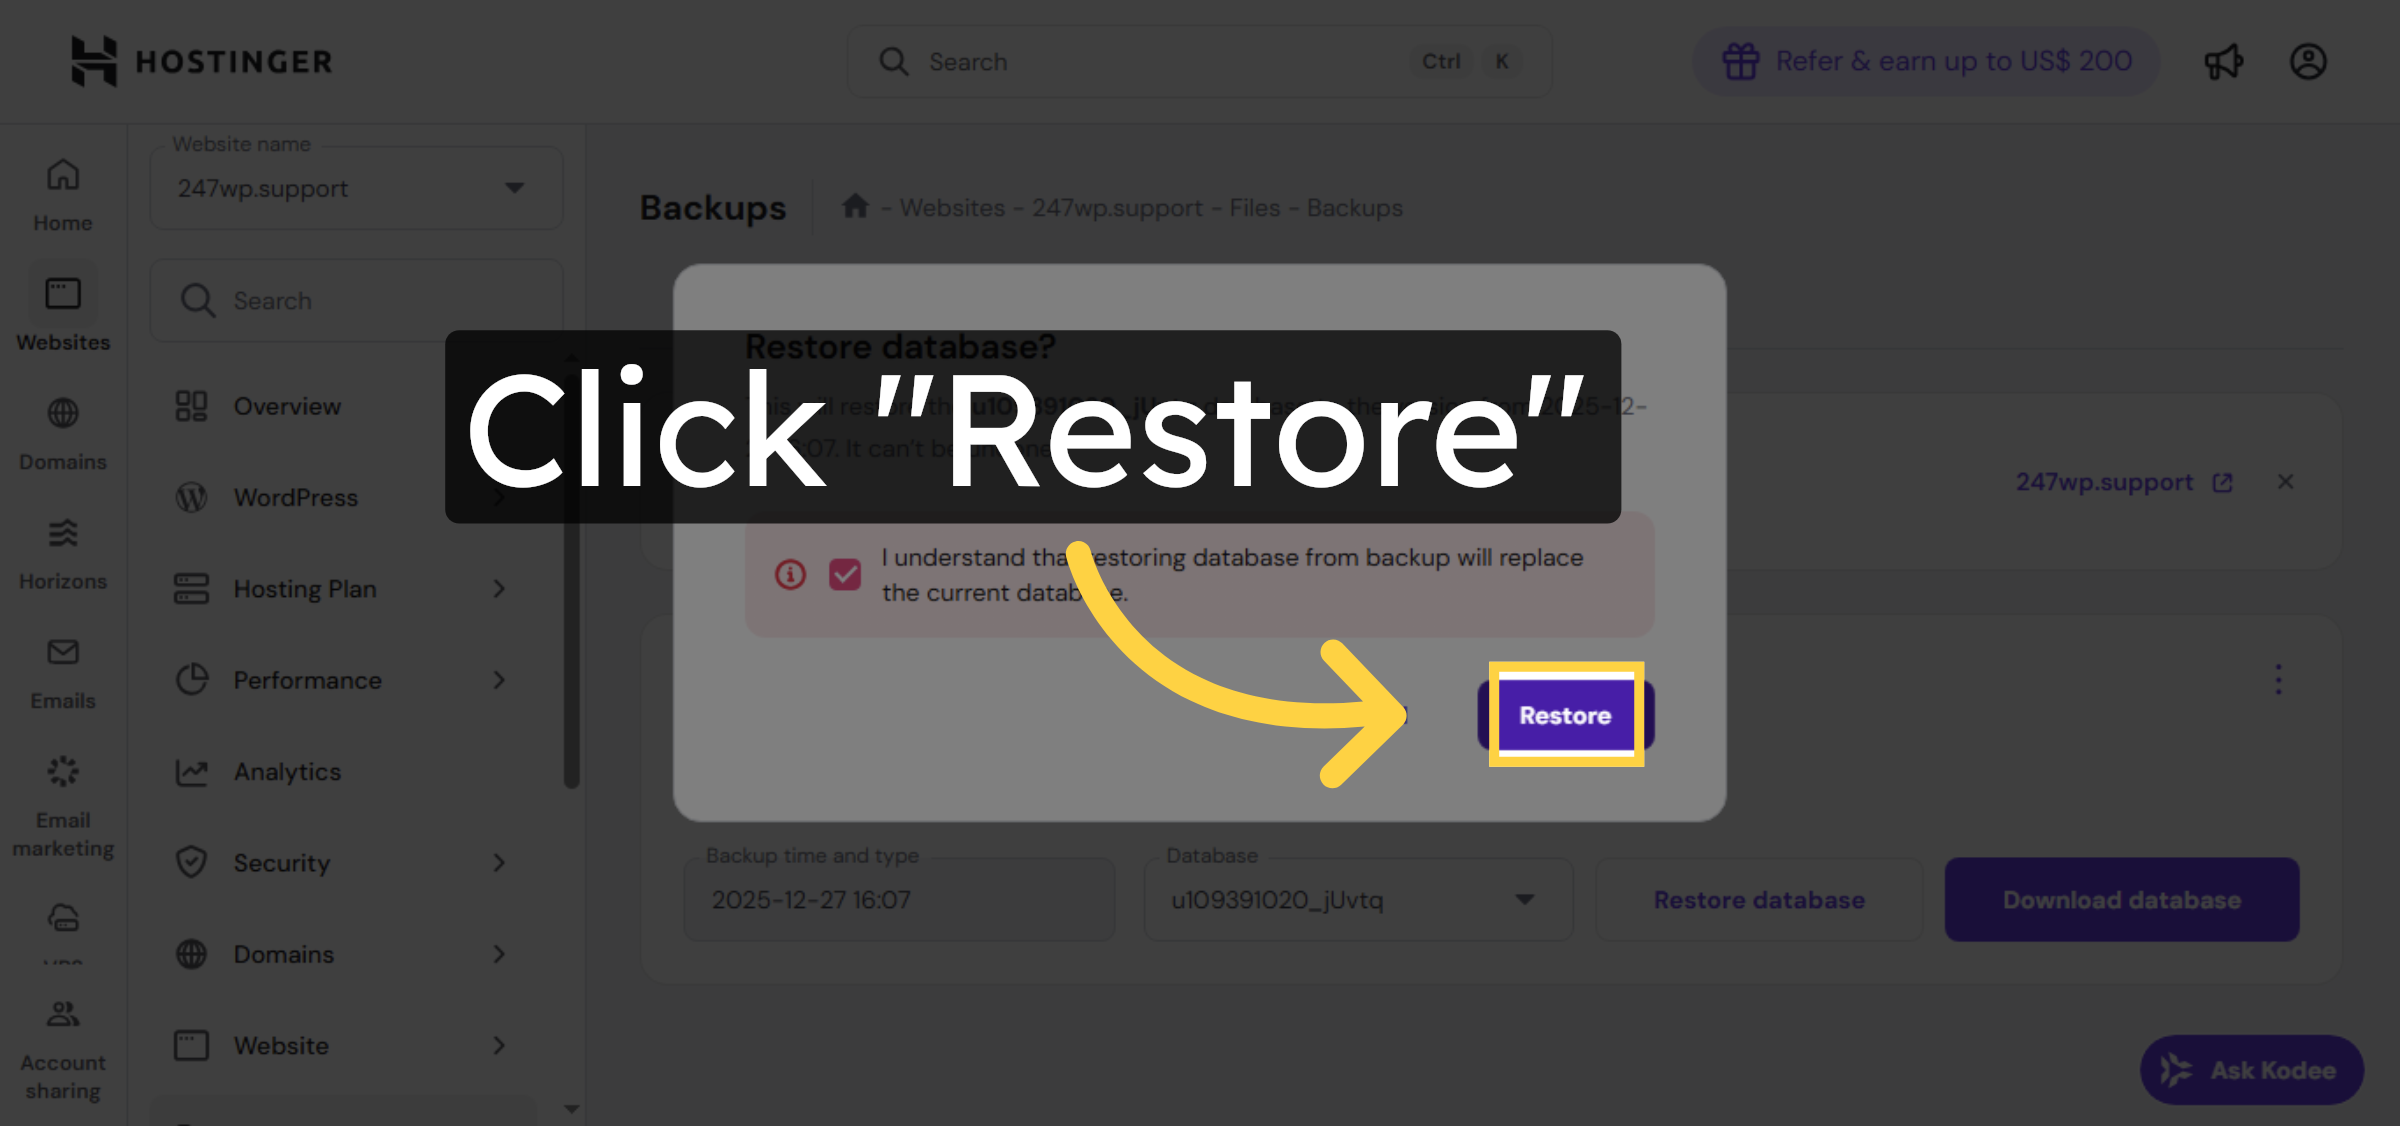
13. Execute Database Restore
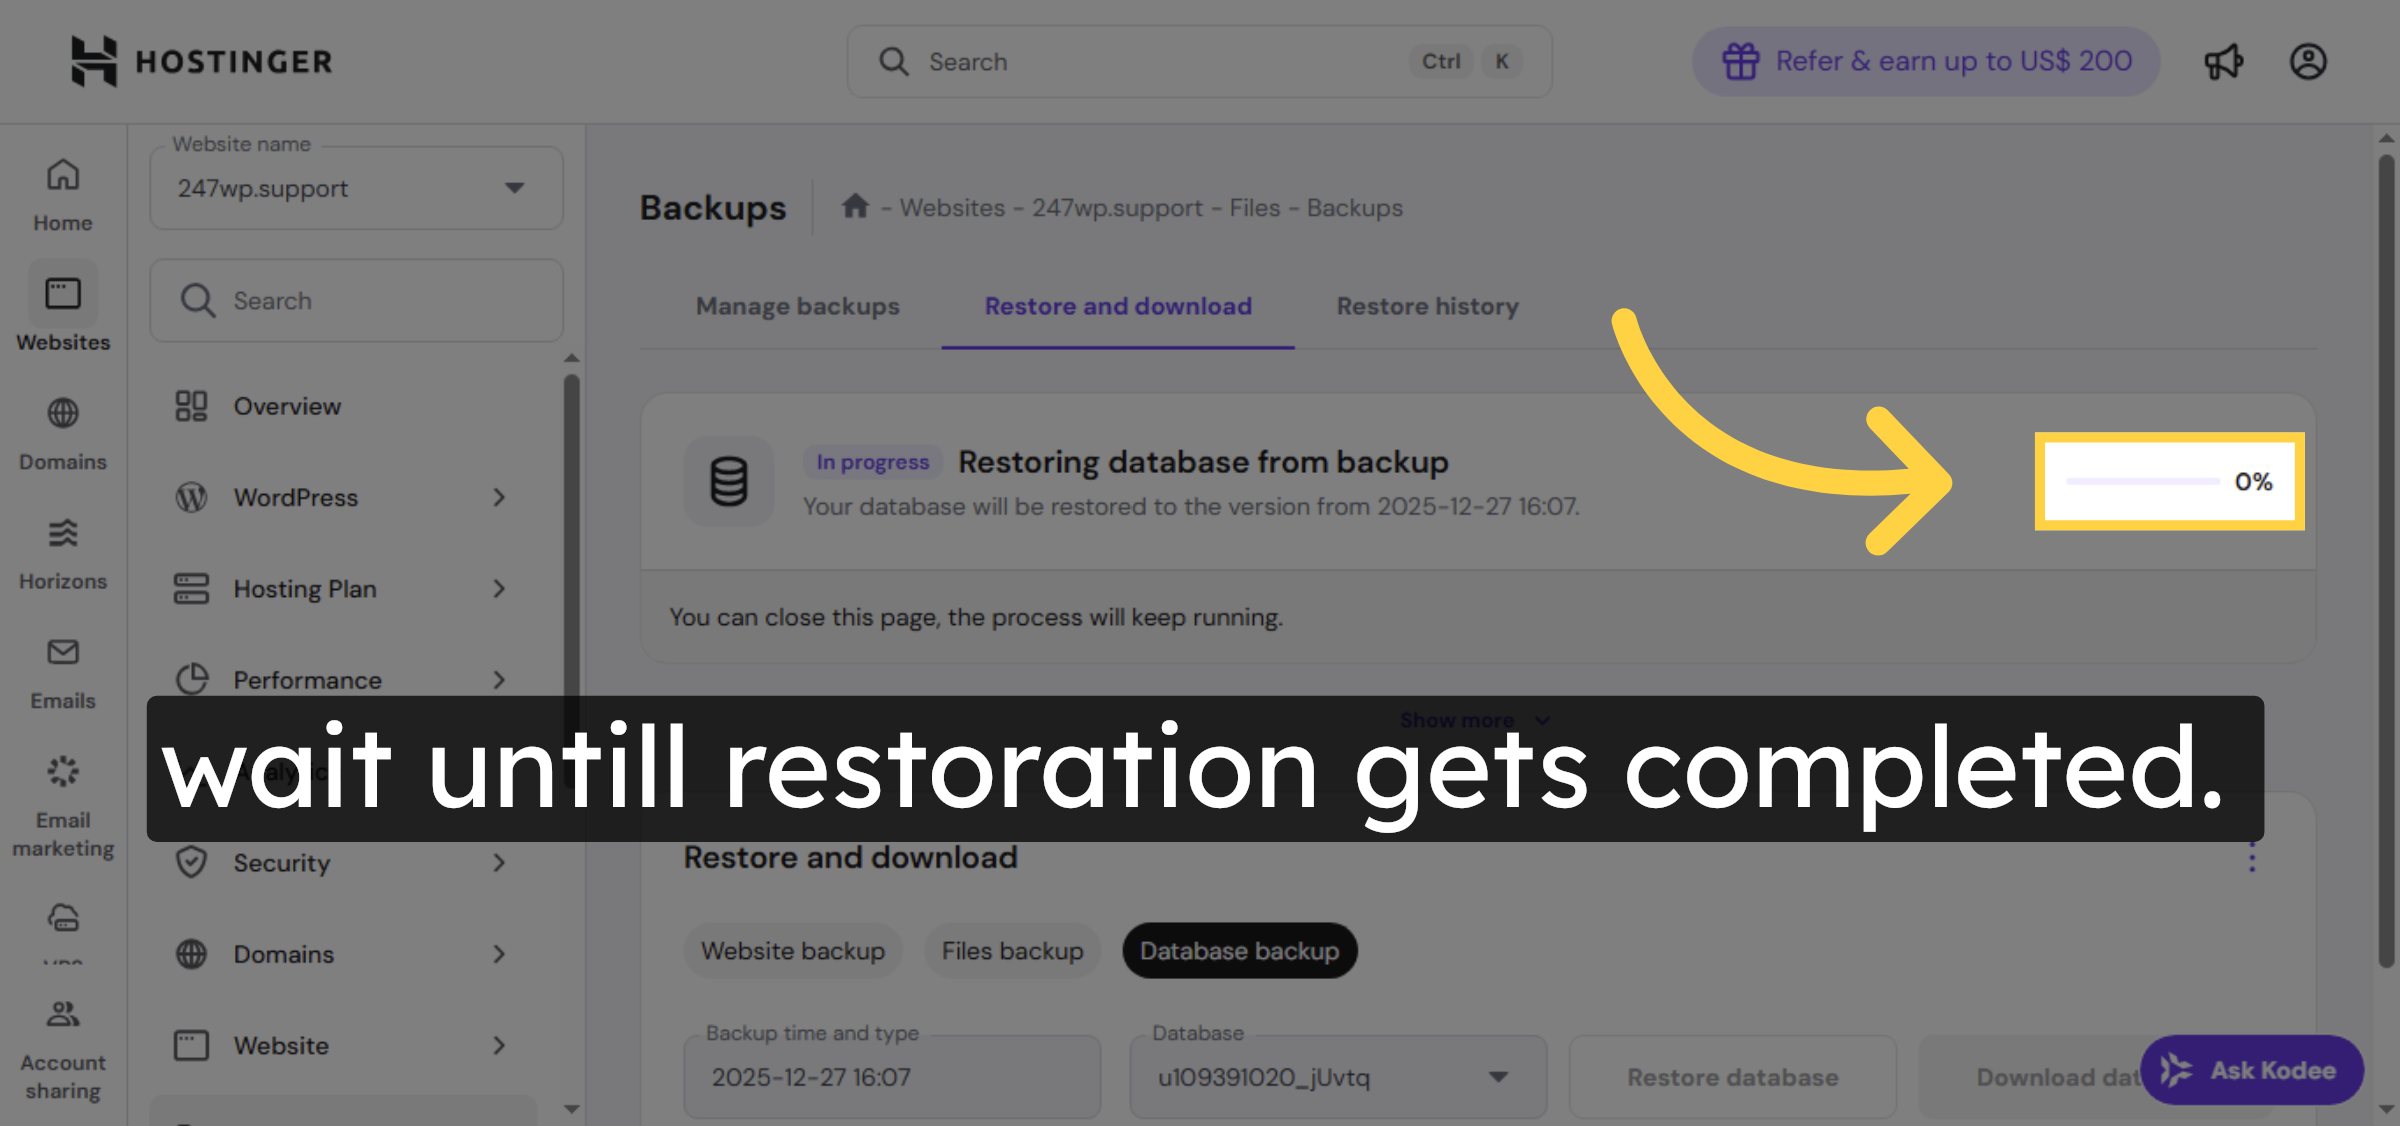
14. Monitor Restore Progress
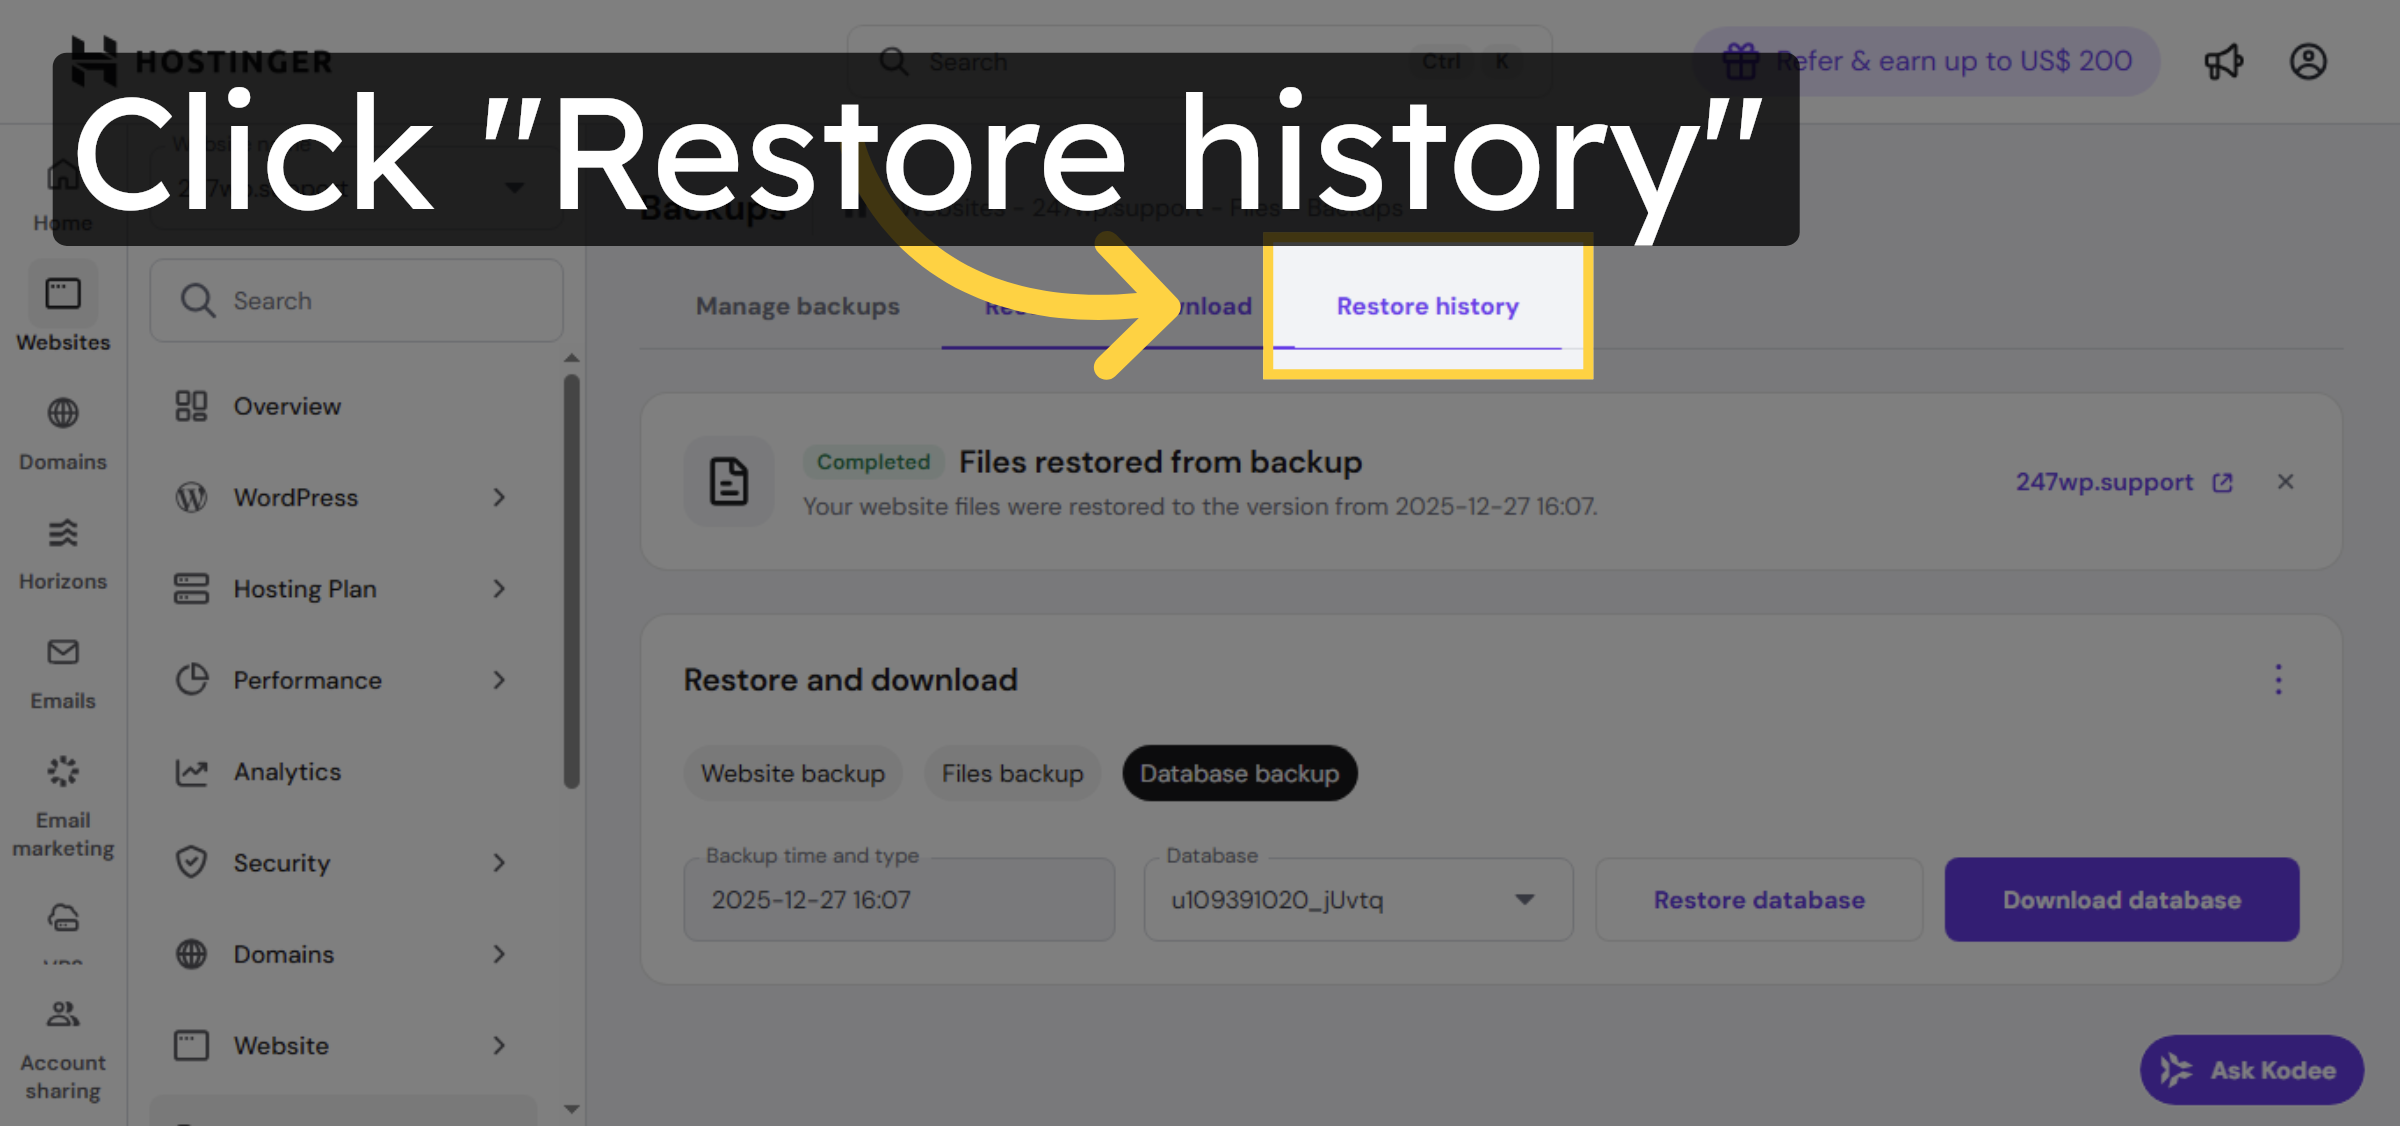
15. View Restore History
Conclusion
By following the steps outlined in this guide, you can successfully restore your WordPress website using Hostinger’s automatic backup system. Restoring files and databases from available backups helps recover your site quickly while reducing the risk of data loss or extended downtime. Regularly reviewing backup history and understanding the restore process are best practices for maintaining a stable and secure WordPress hosting environment.
Visit: https://www.woohelpdesk.com
Call Us Toll-Free: +1 888 602 0119 (US & Canada)
Get professional support for WordPress configuration, hosting management, performance optimization, and troubleshooting.


