How To Set Up Automated WordPress Backups Via Plugin On Hostinger
Introduction
Setting up automated backups is a critical step in protecting your WordPress website from data loss, security threats, and unexpected failures. With a reliable backup system in place, you can quickly restore your site in case of plugin conflicts, update errors, or accidental content deletion. UpdraftPlus is one of the most popular WordPress backup plugins, offering flexible scheduling options and support for remote storage solutions. In this guide, you’ll learn how to install and activate the UpdraftPlus plugin from the Hostinger dashboard, configure backup schedules for both database and files, select a storage location, and verify backup files. Following these steps ensures your WordPress site remains secure, recoverable, and well-maintained at all times.
1. Open your hostinger panel
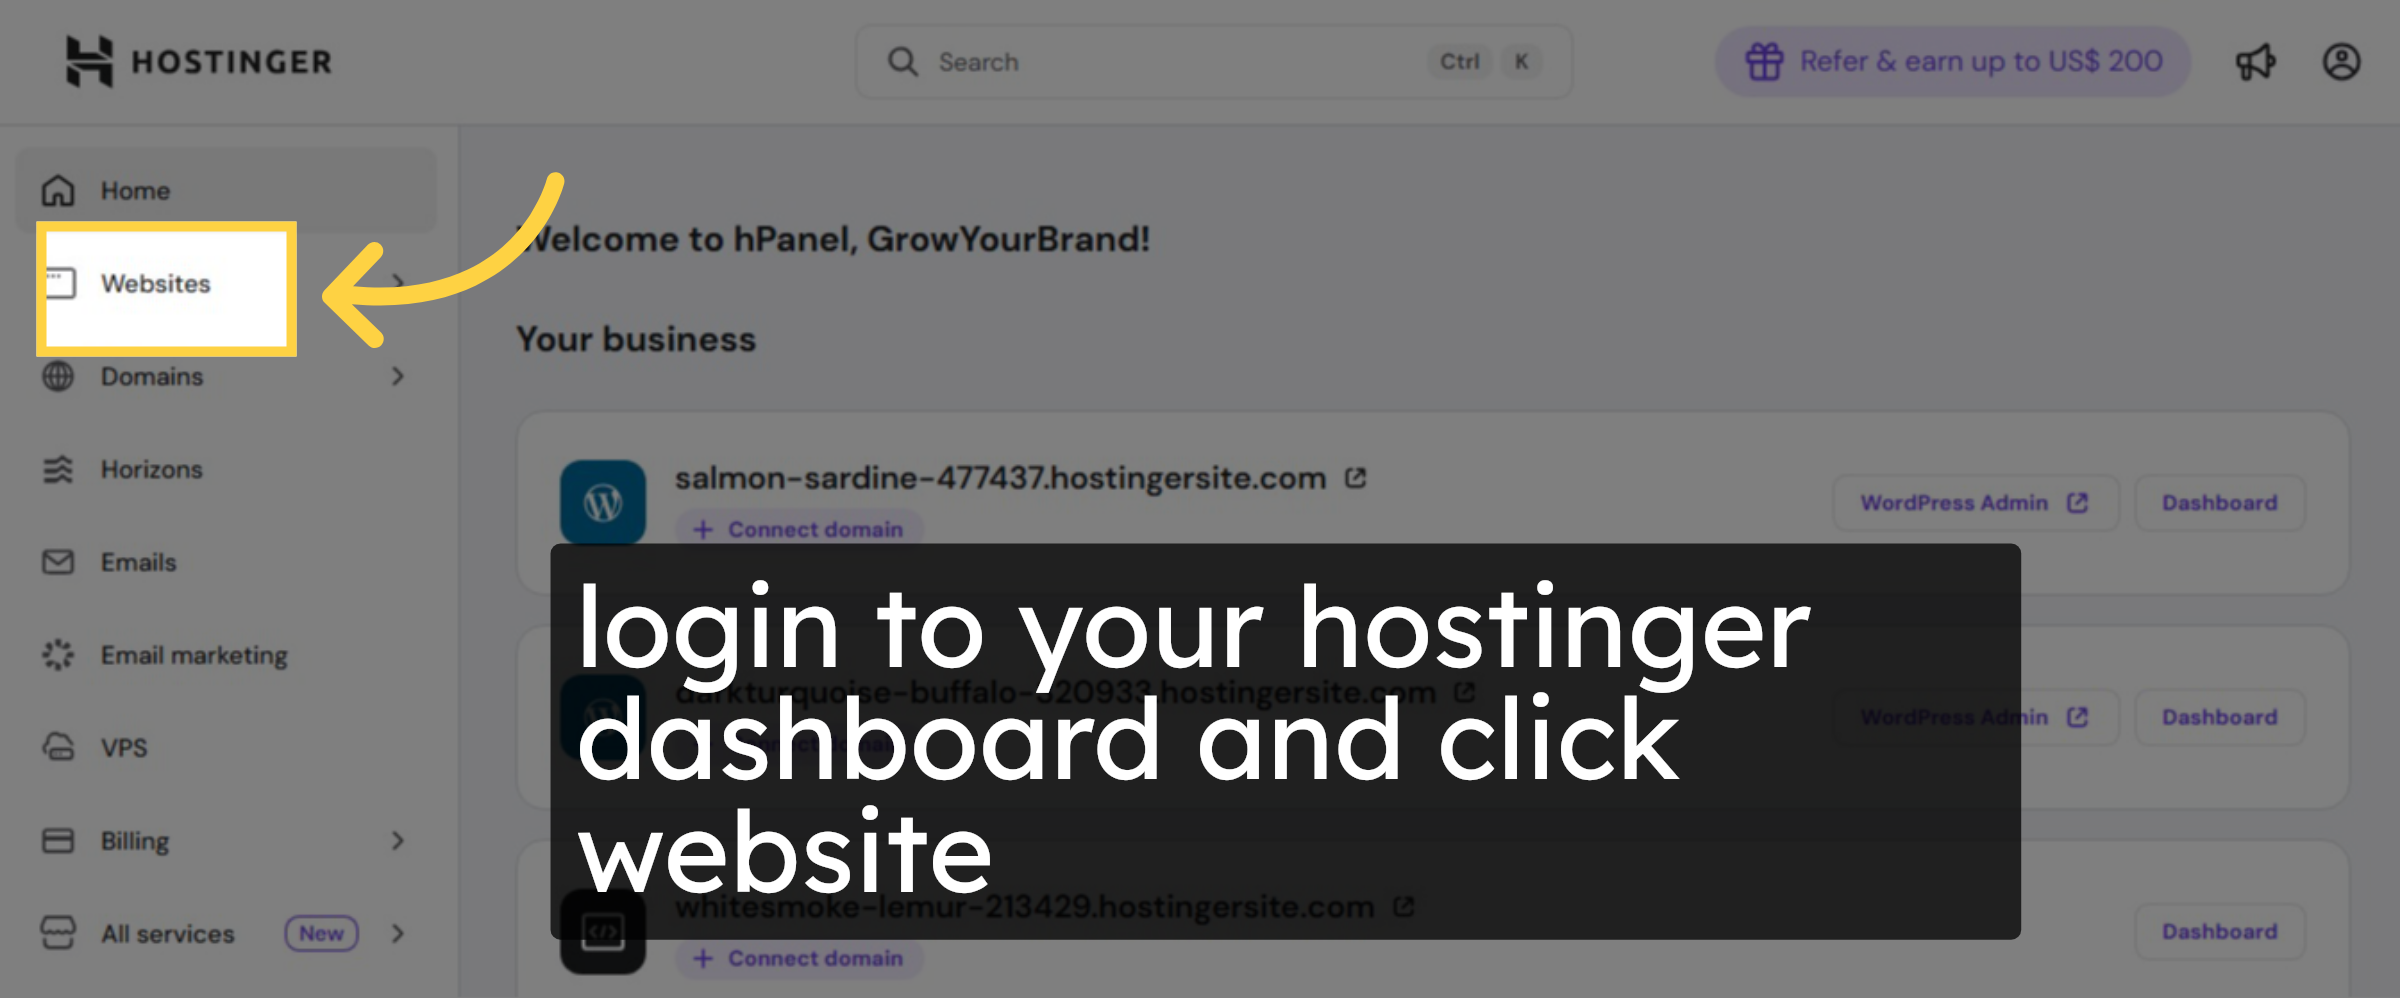
2. choose website
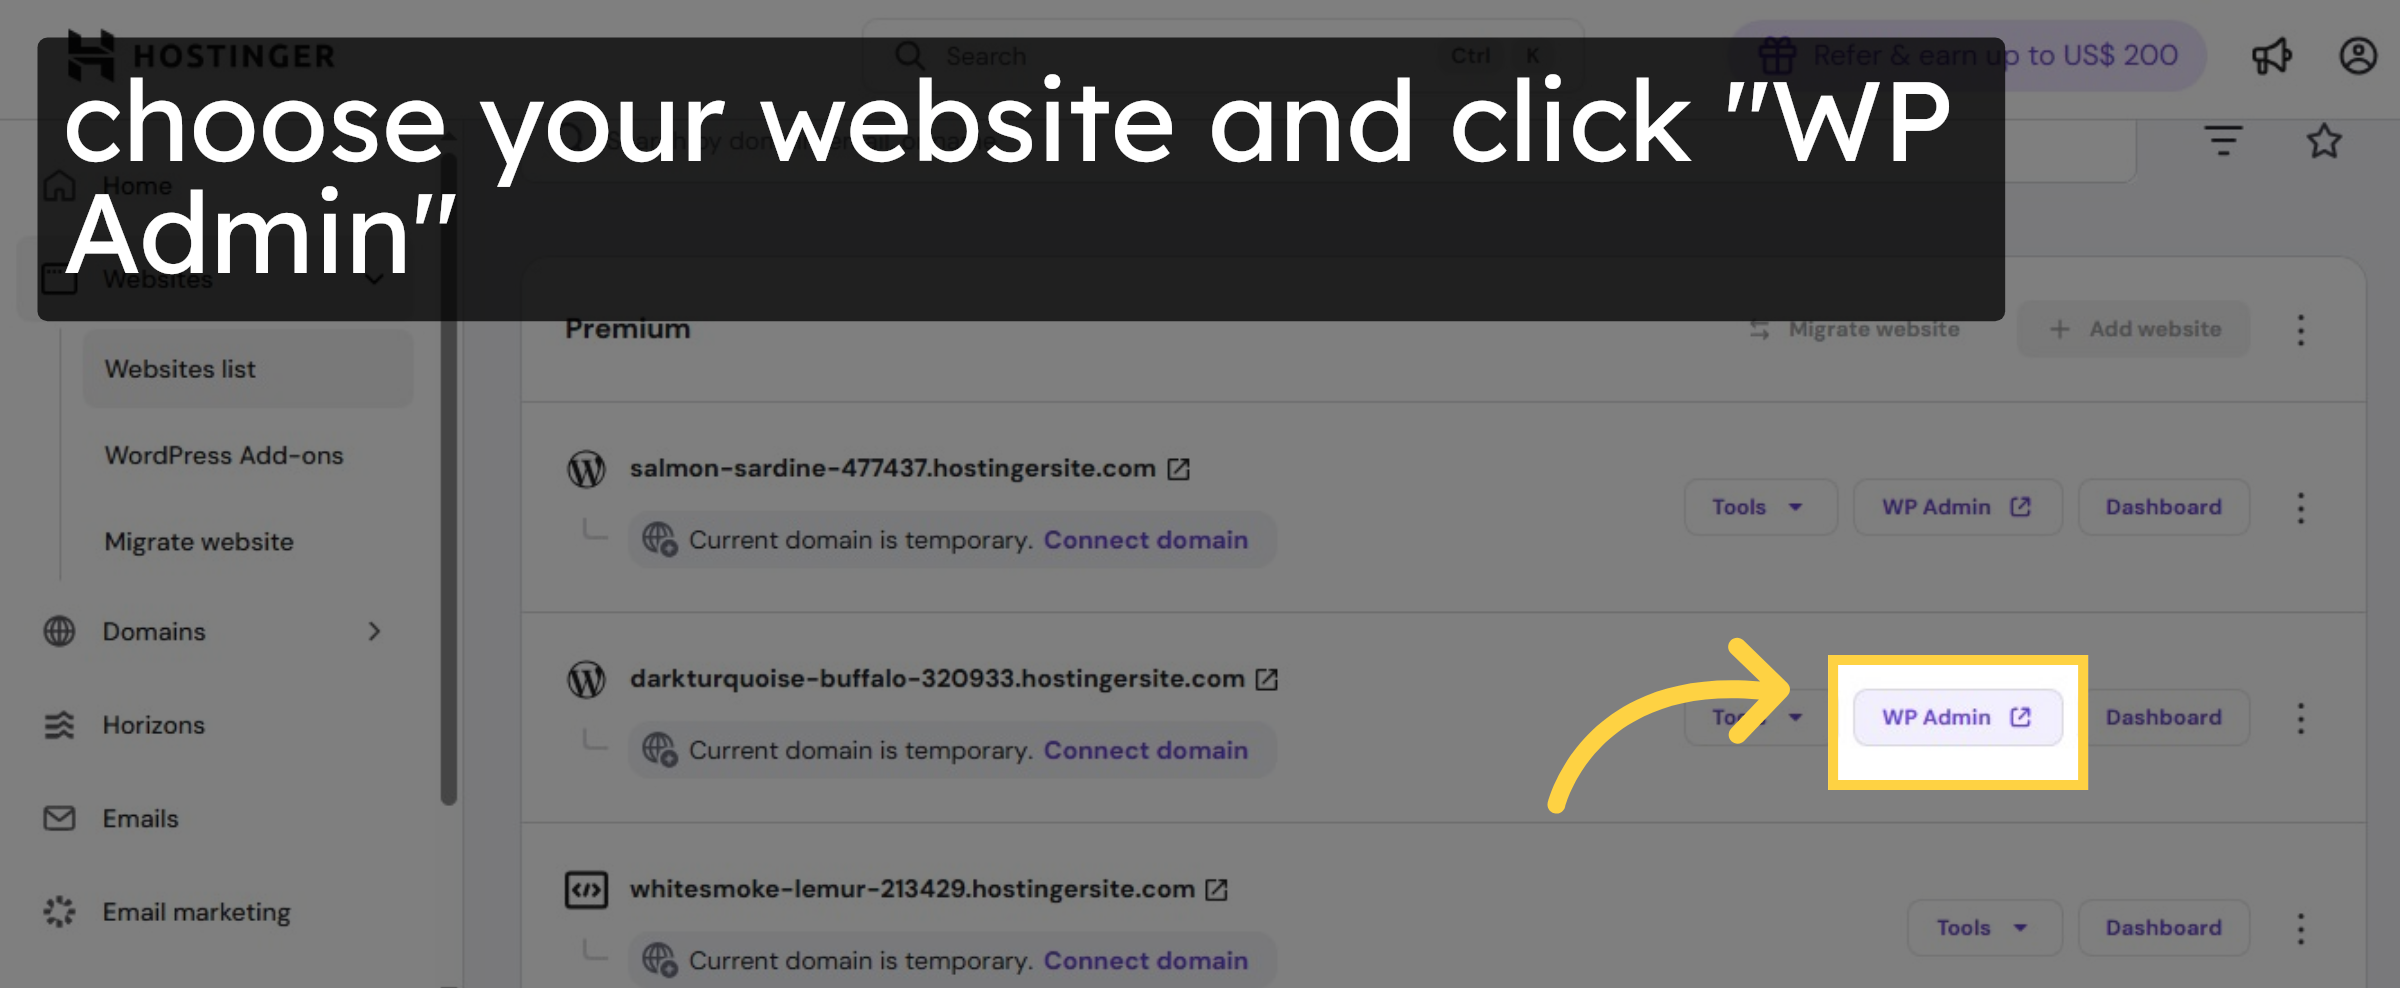
3. Navigate to WordPress Dashboard
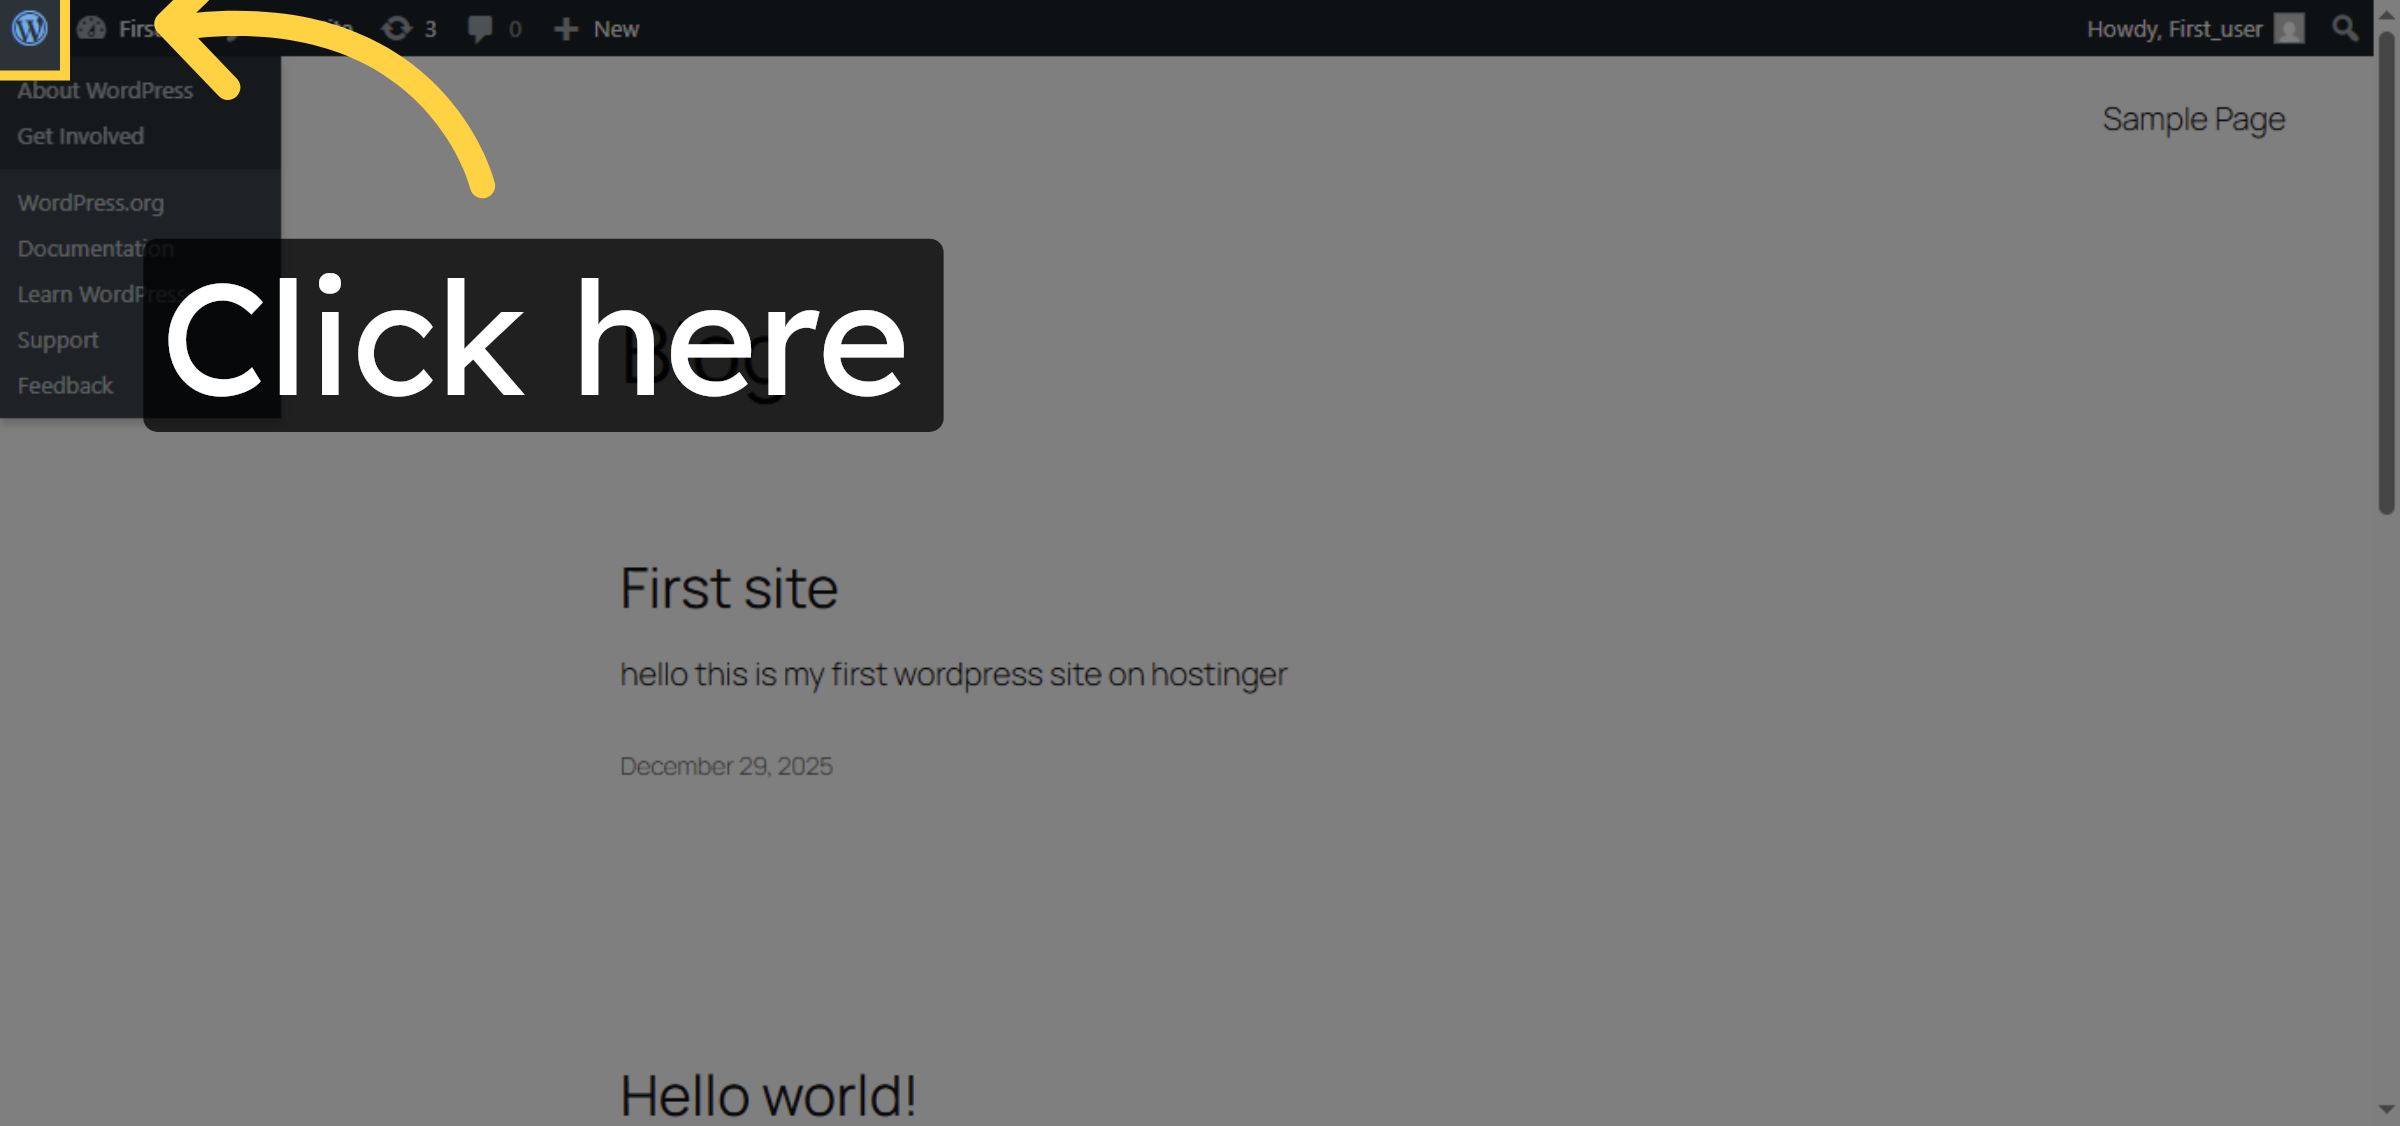
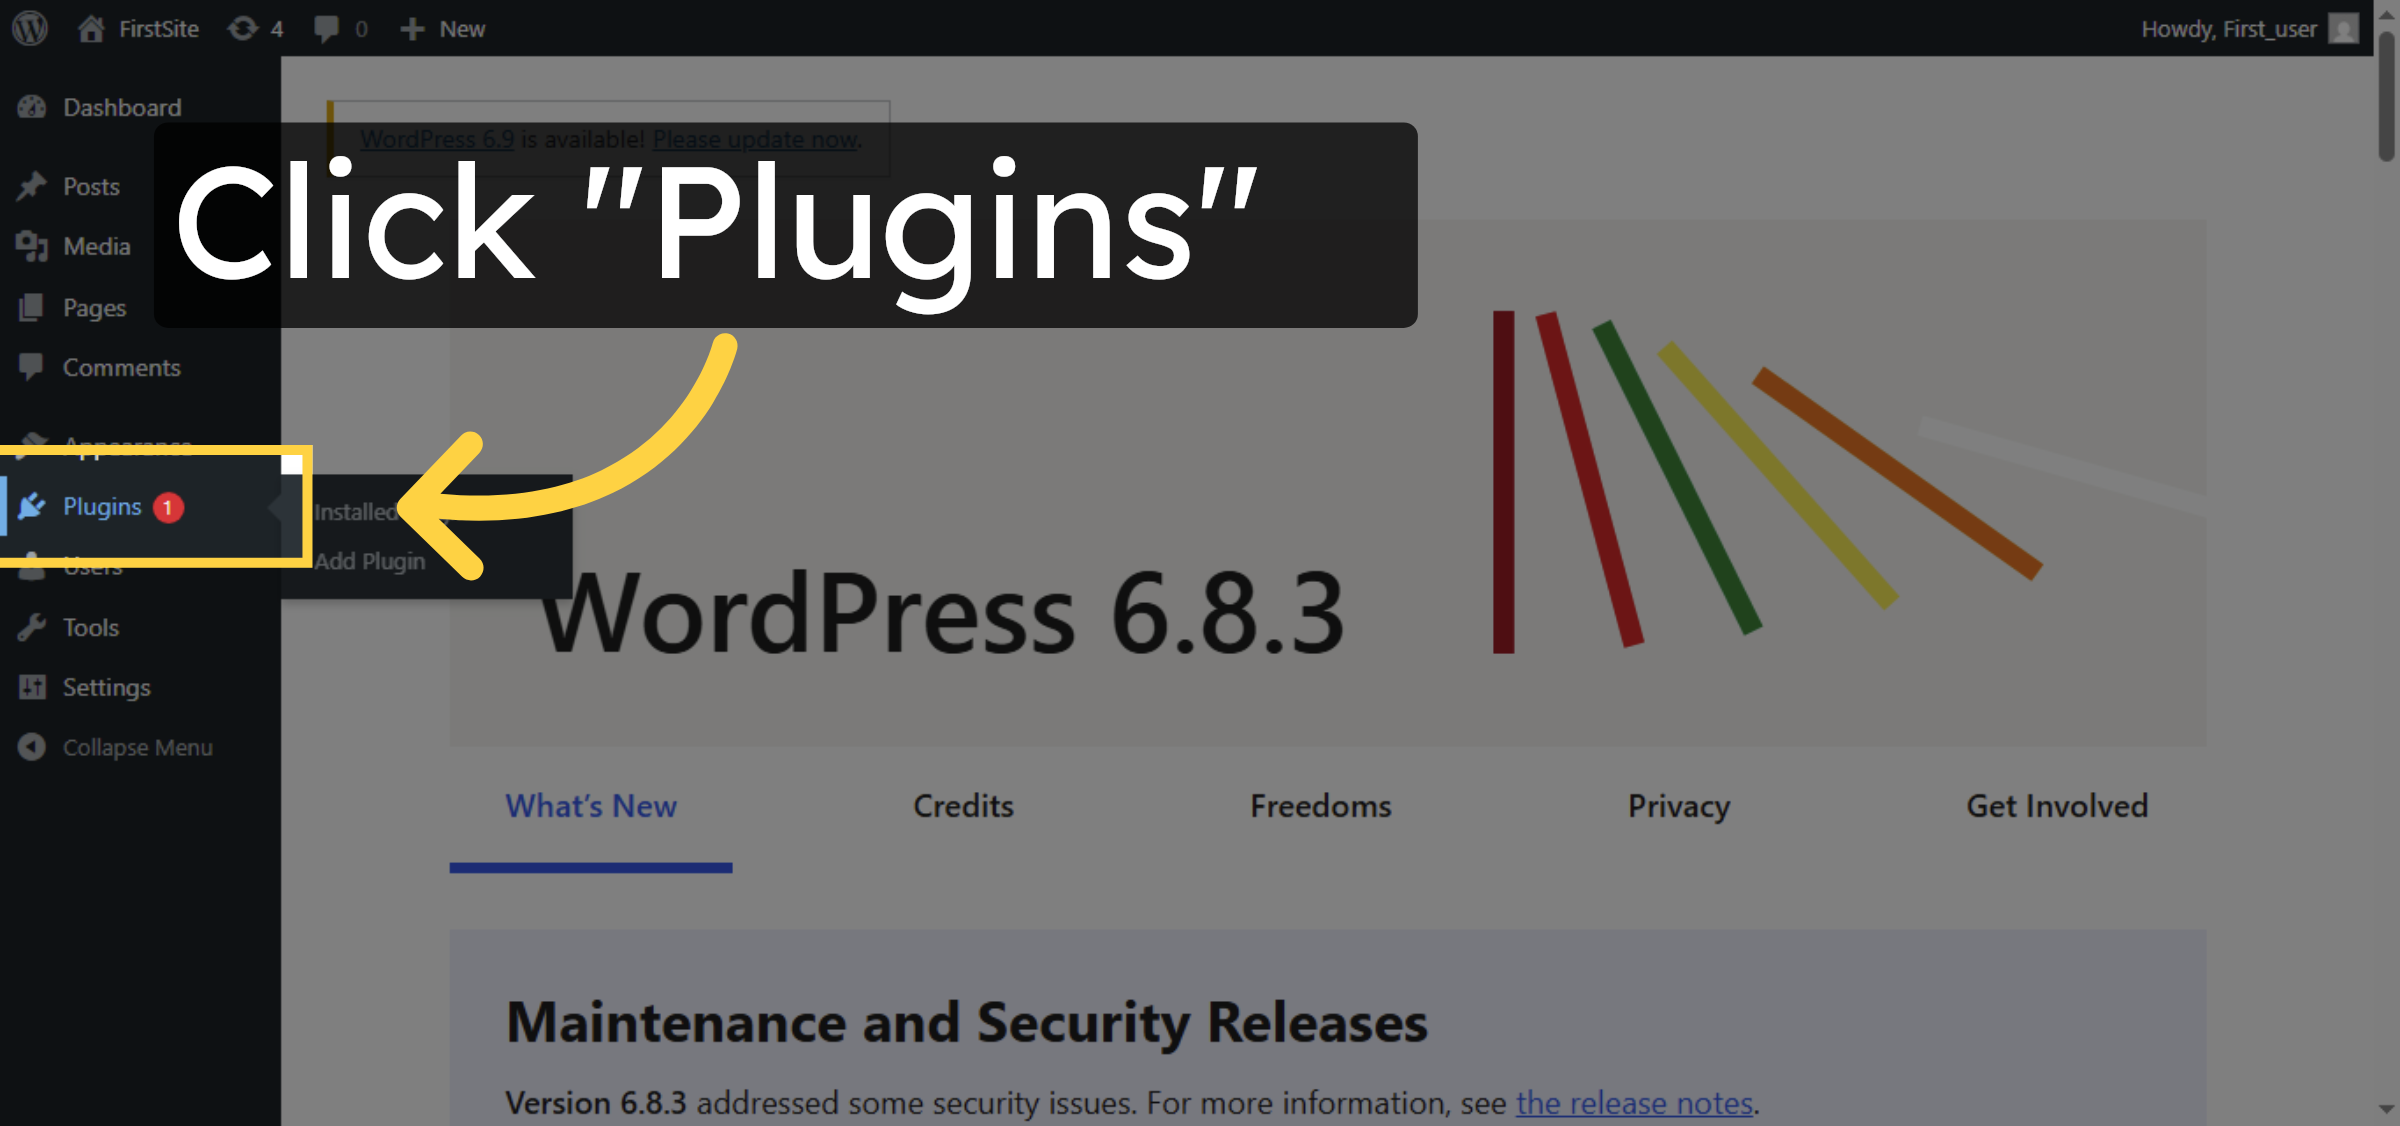
4. Access Plugins Menu
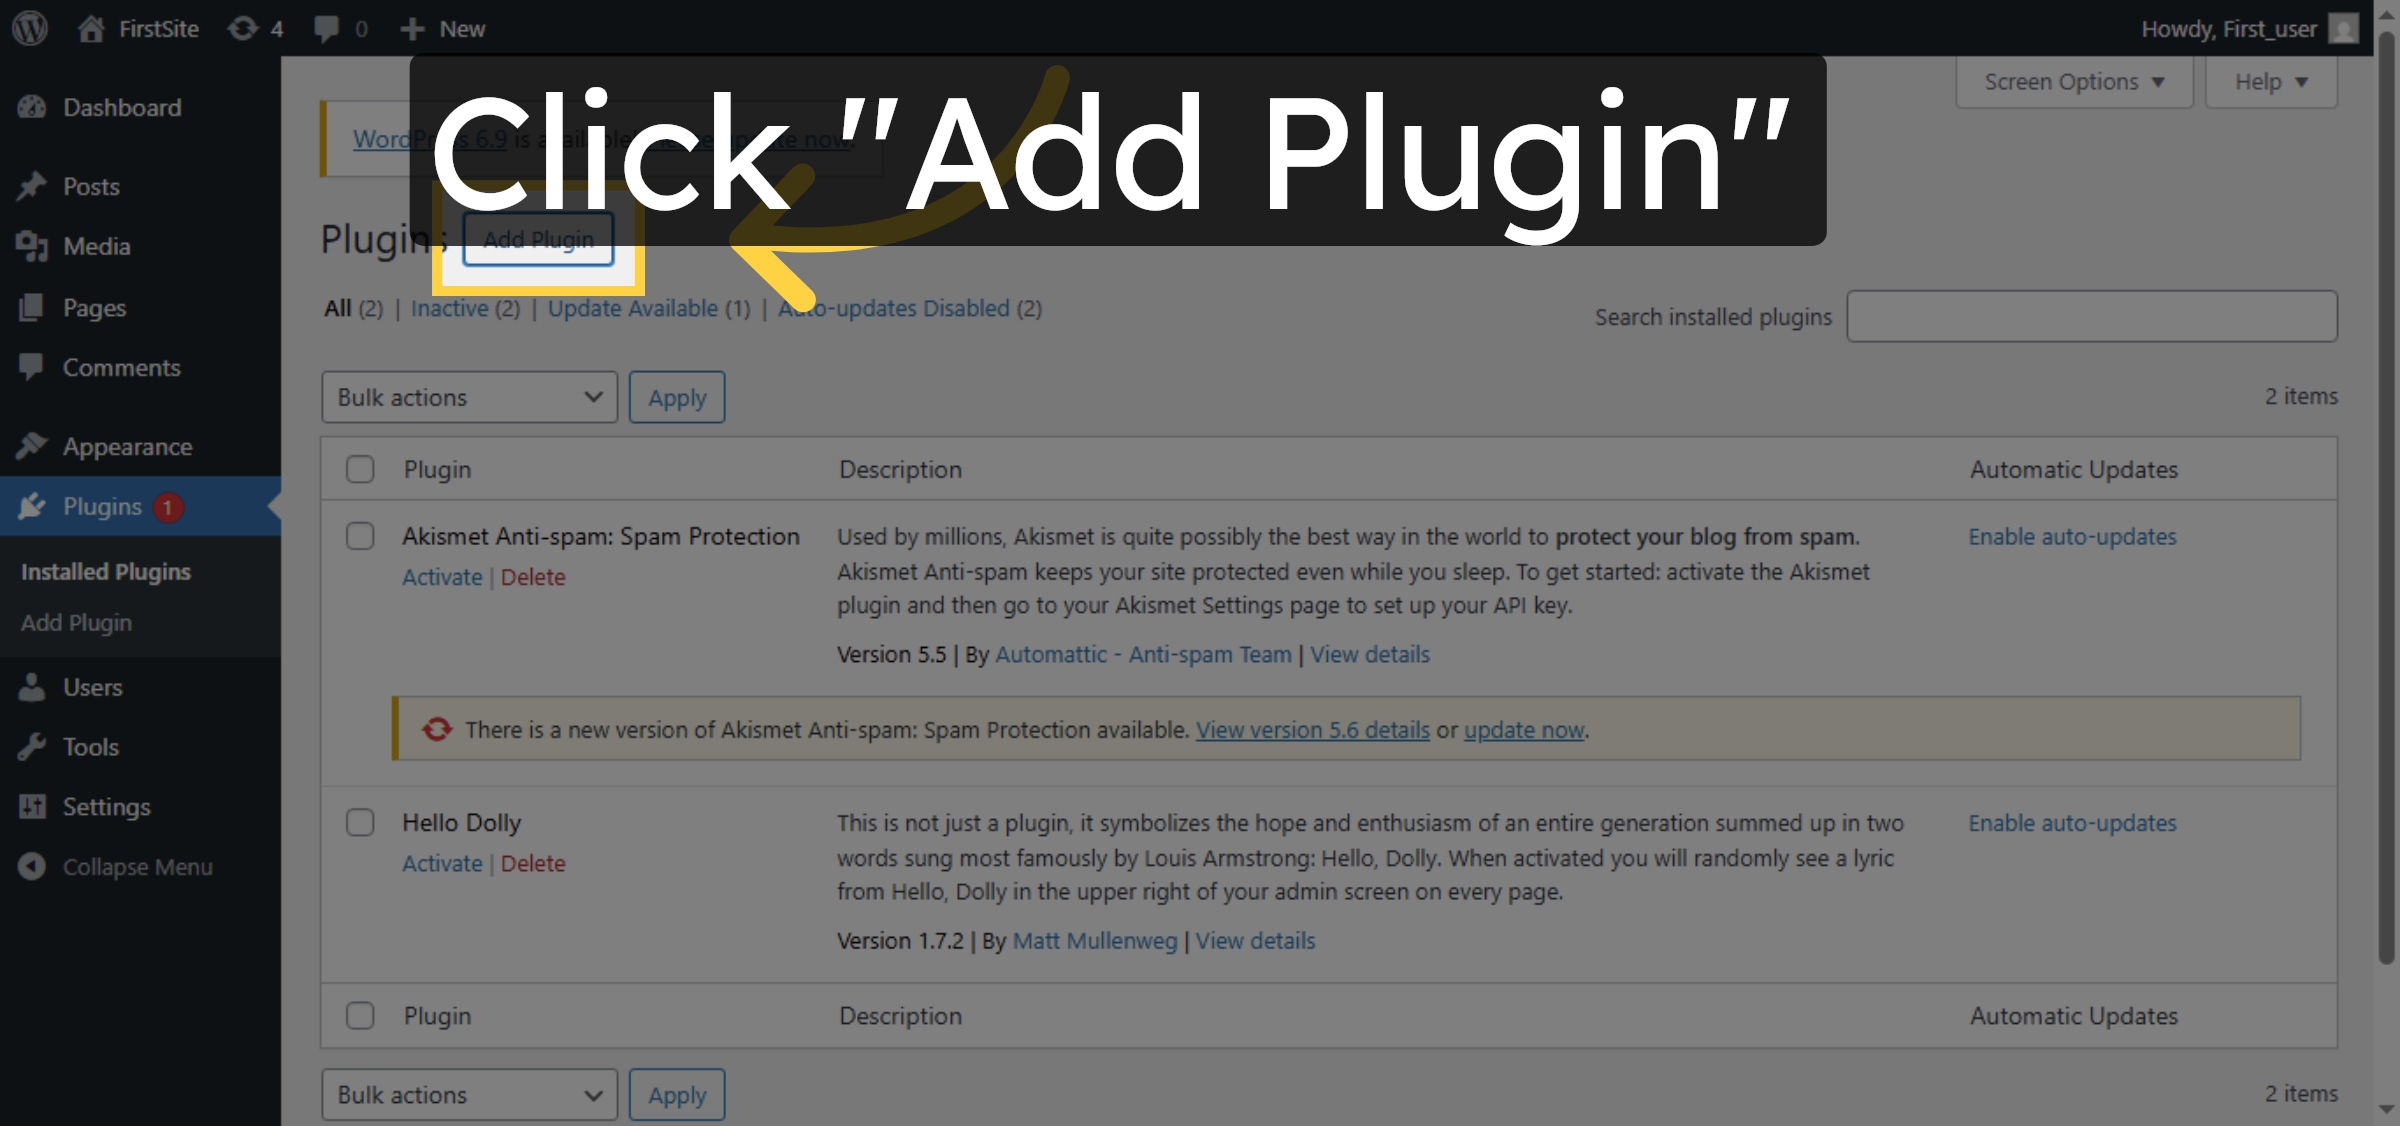
5. Open Add Plugin Page
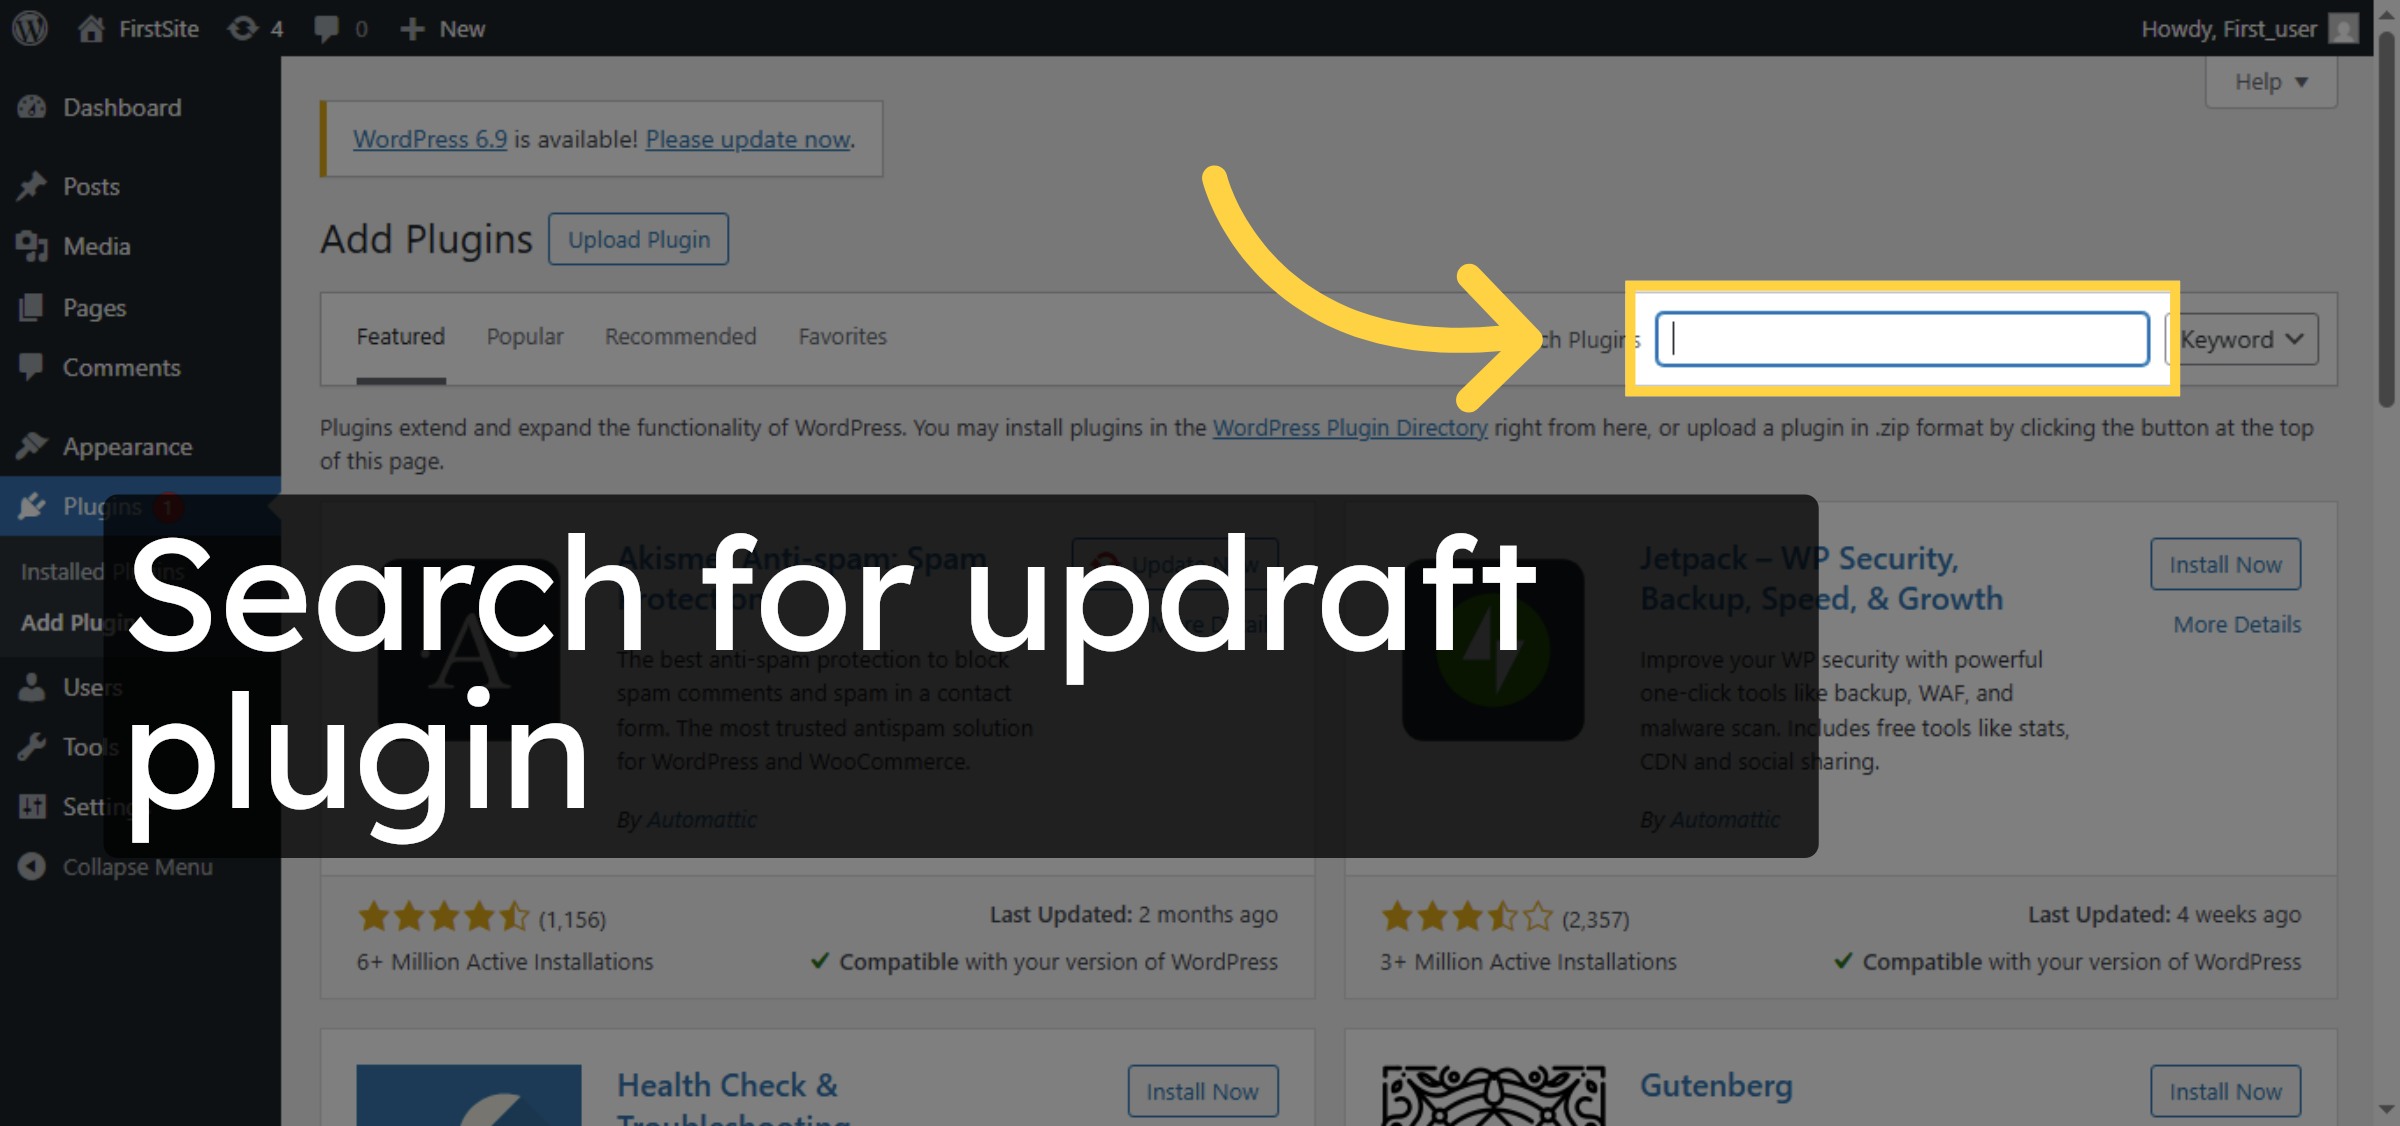
6. Search for Plugins
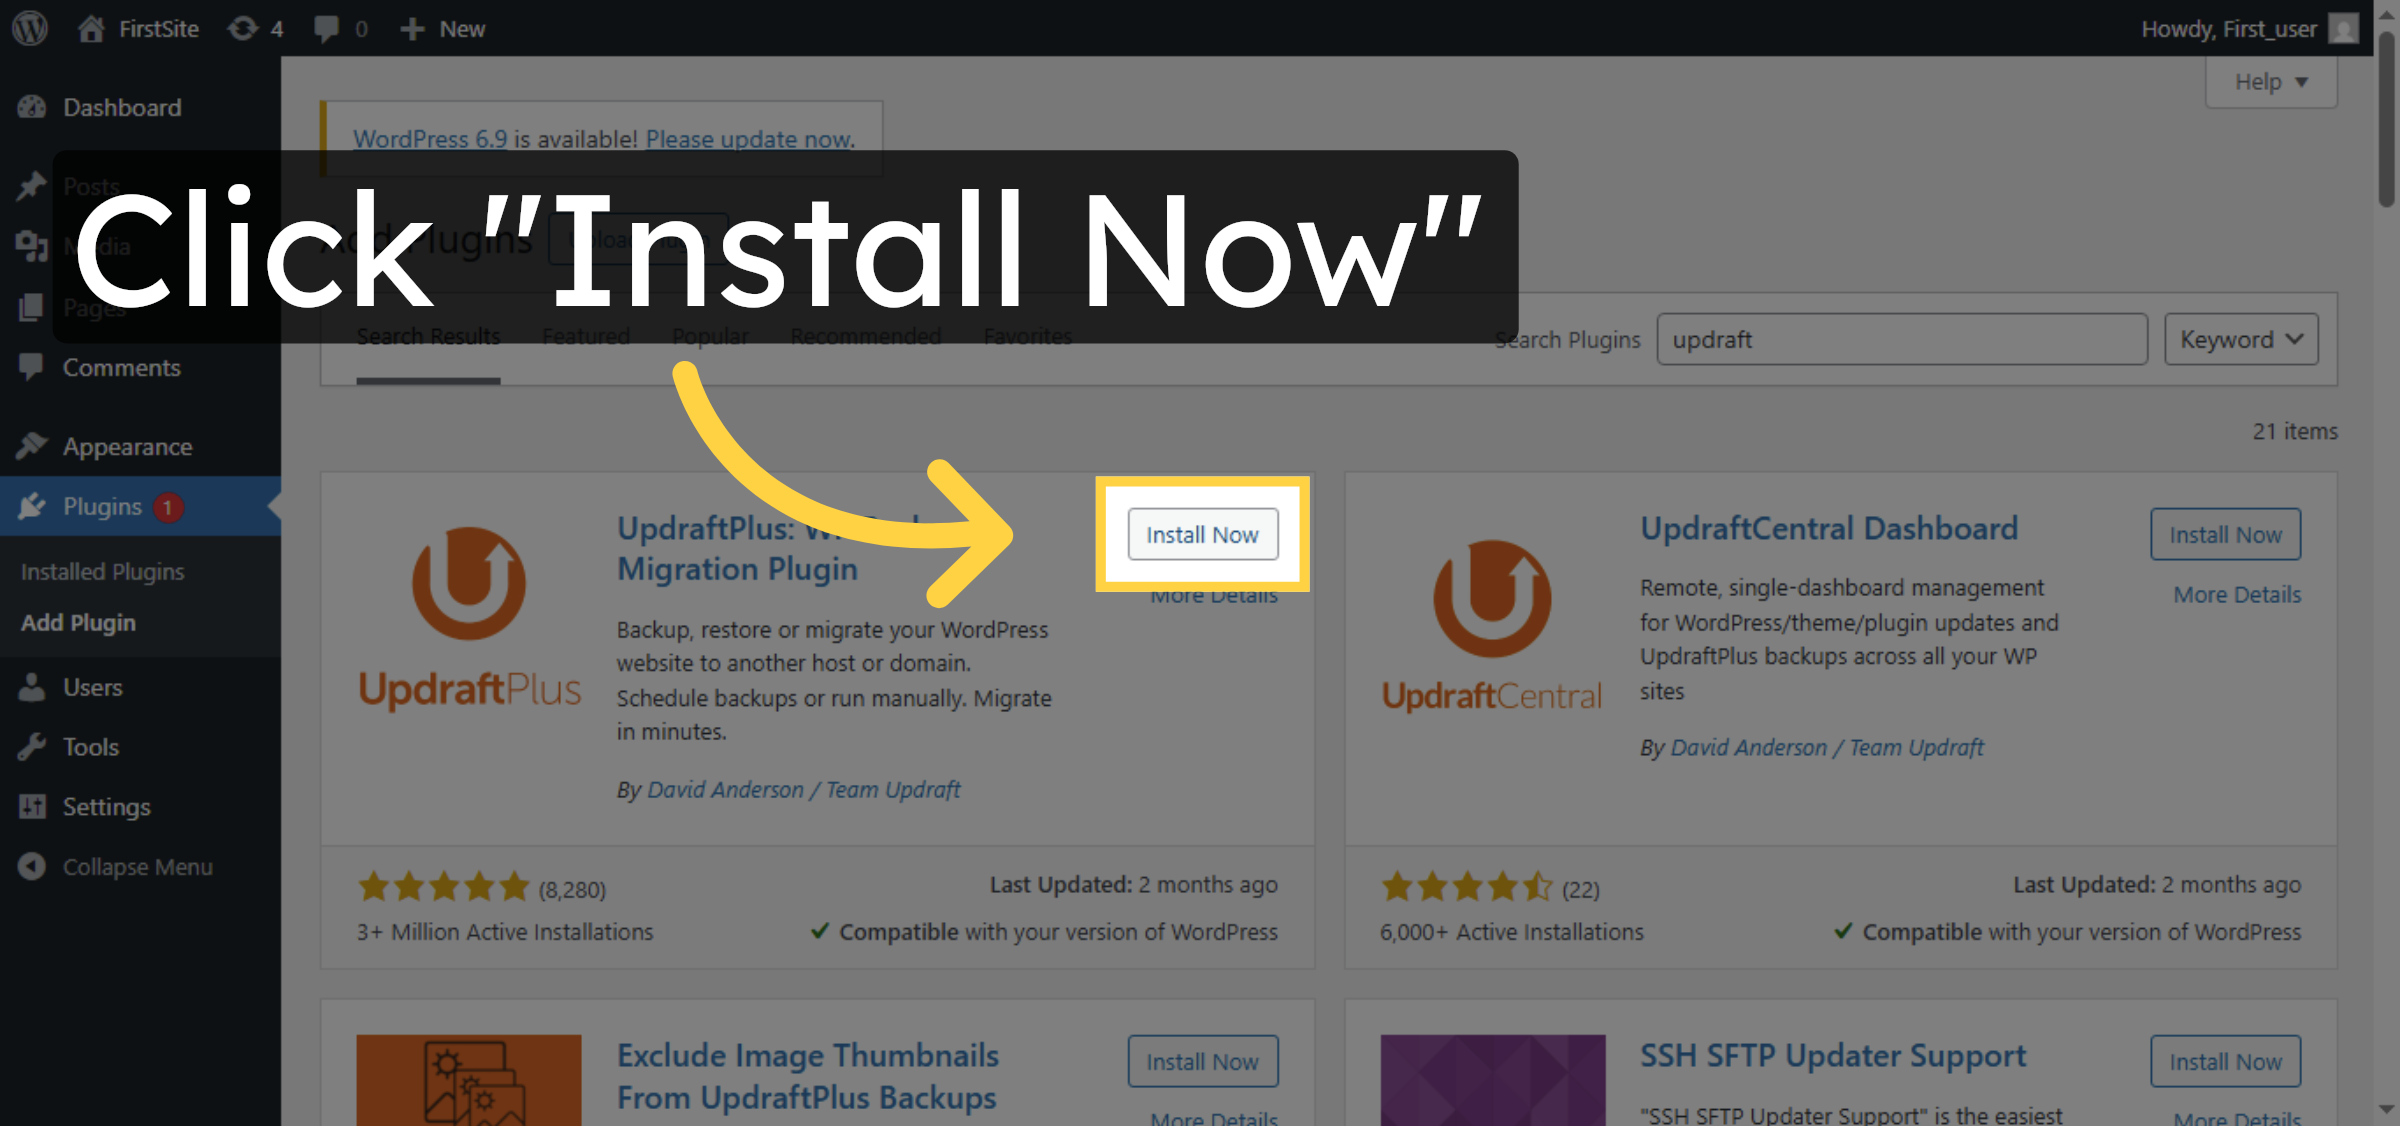
7. Install UpdraftPlus Plugin
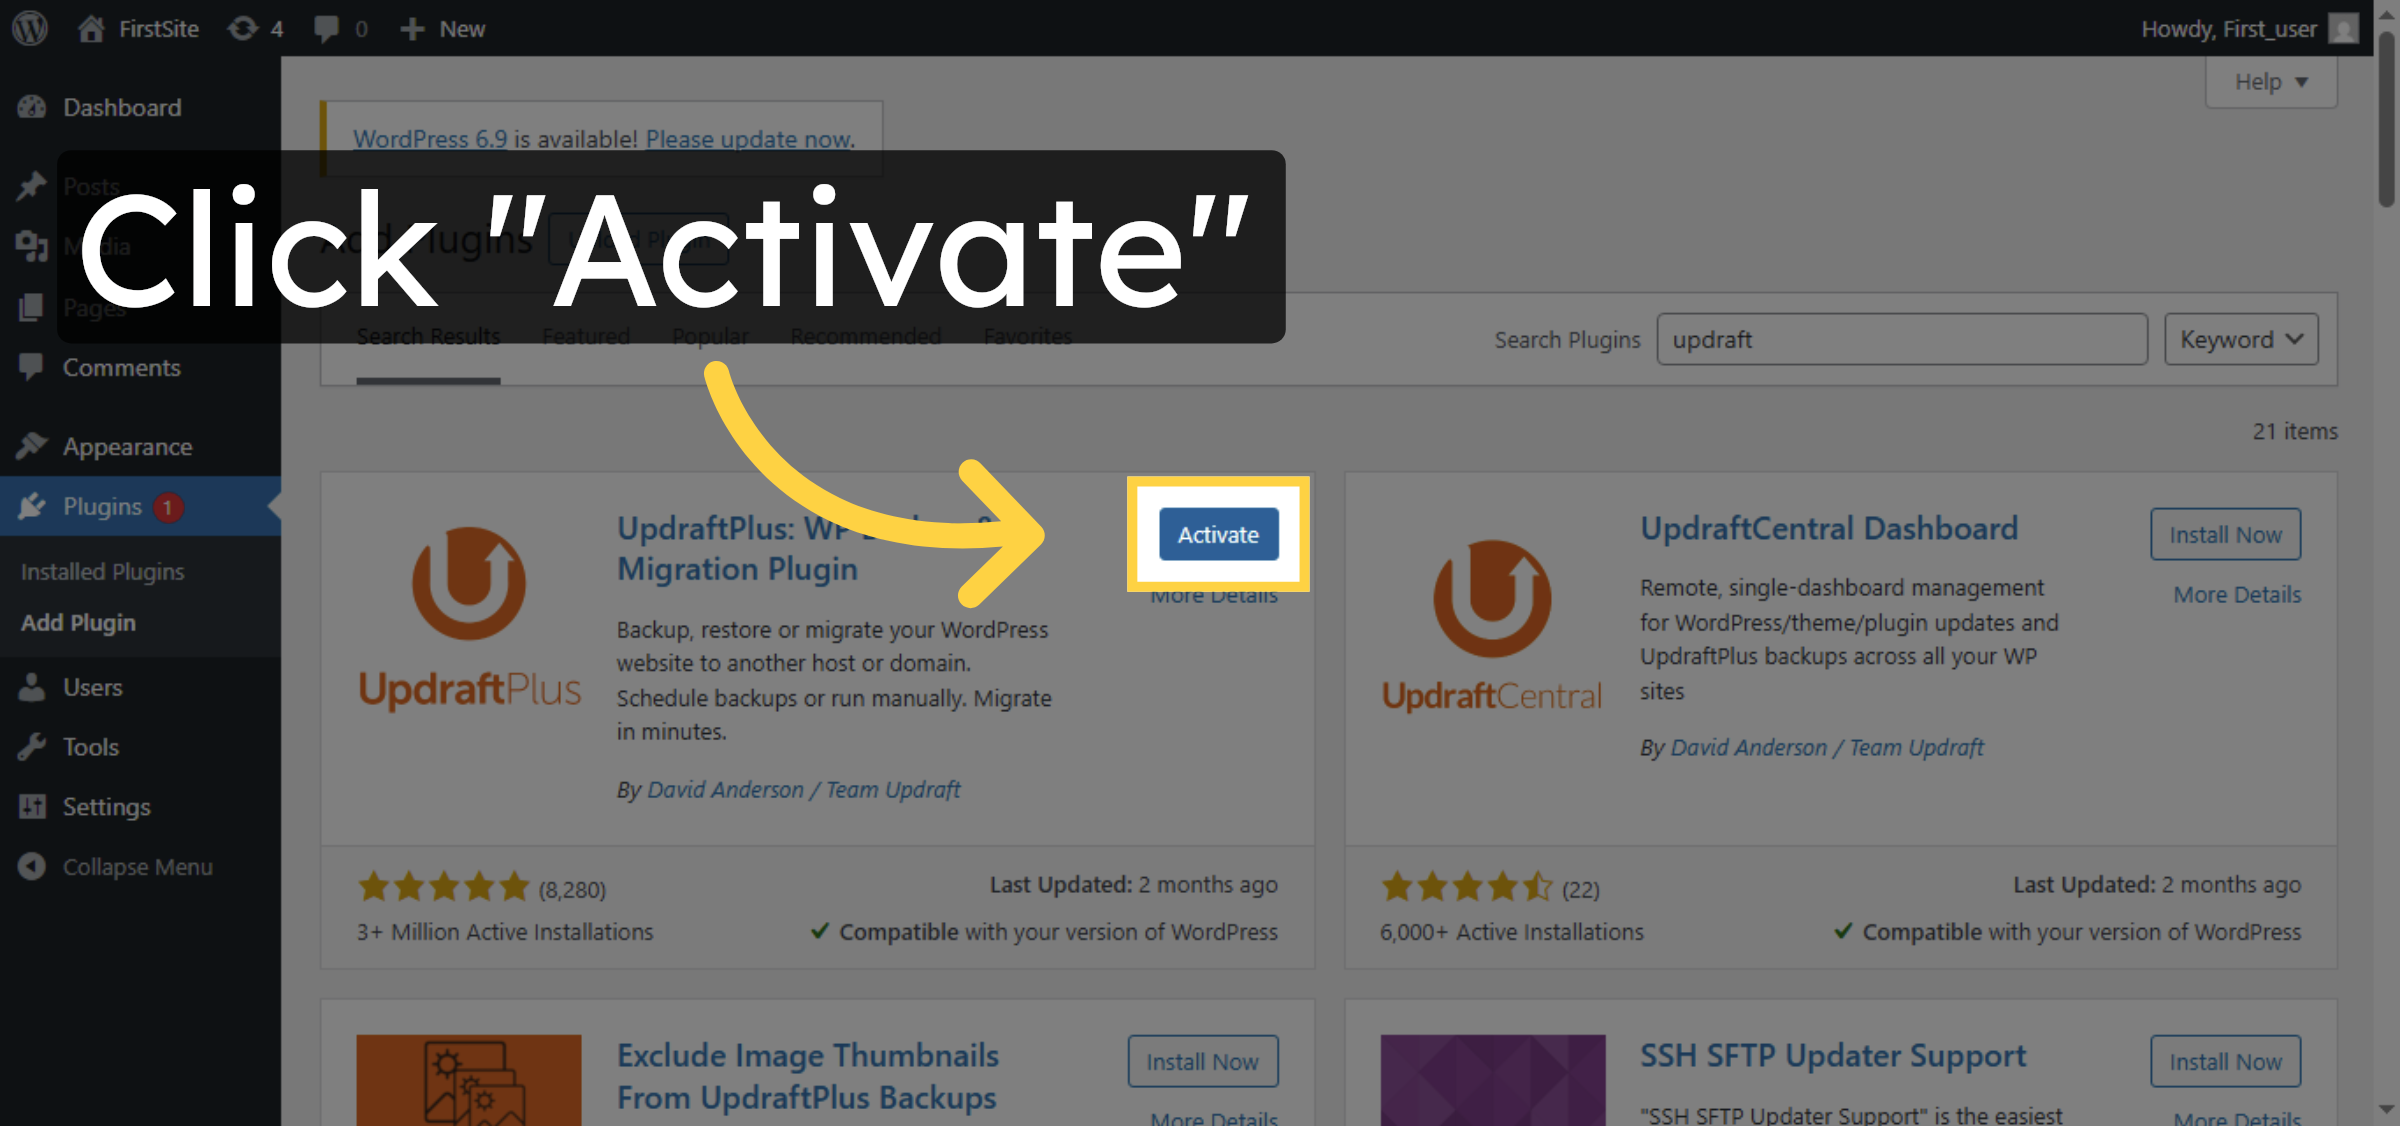
8. Activate UpdraftPlus Plugin
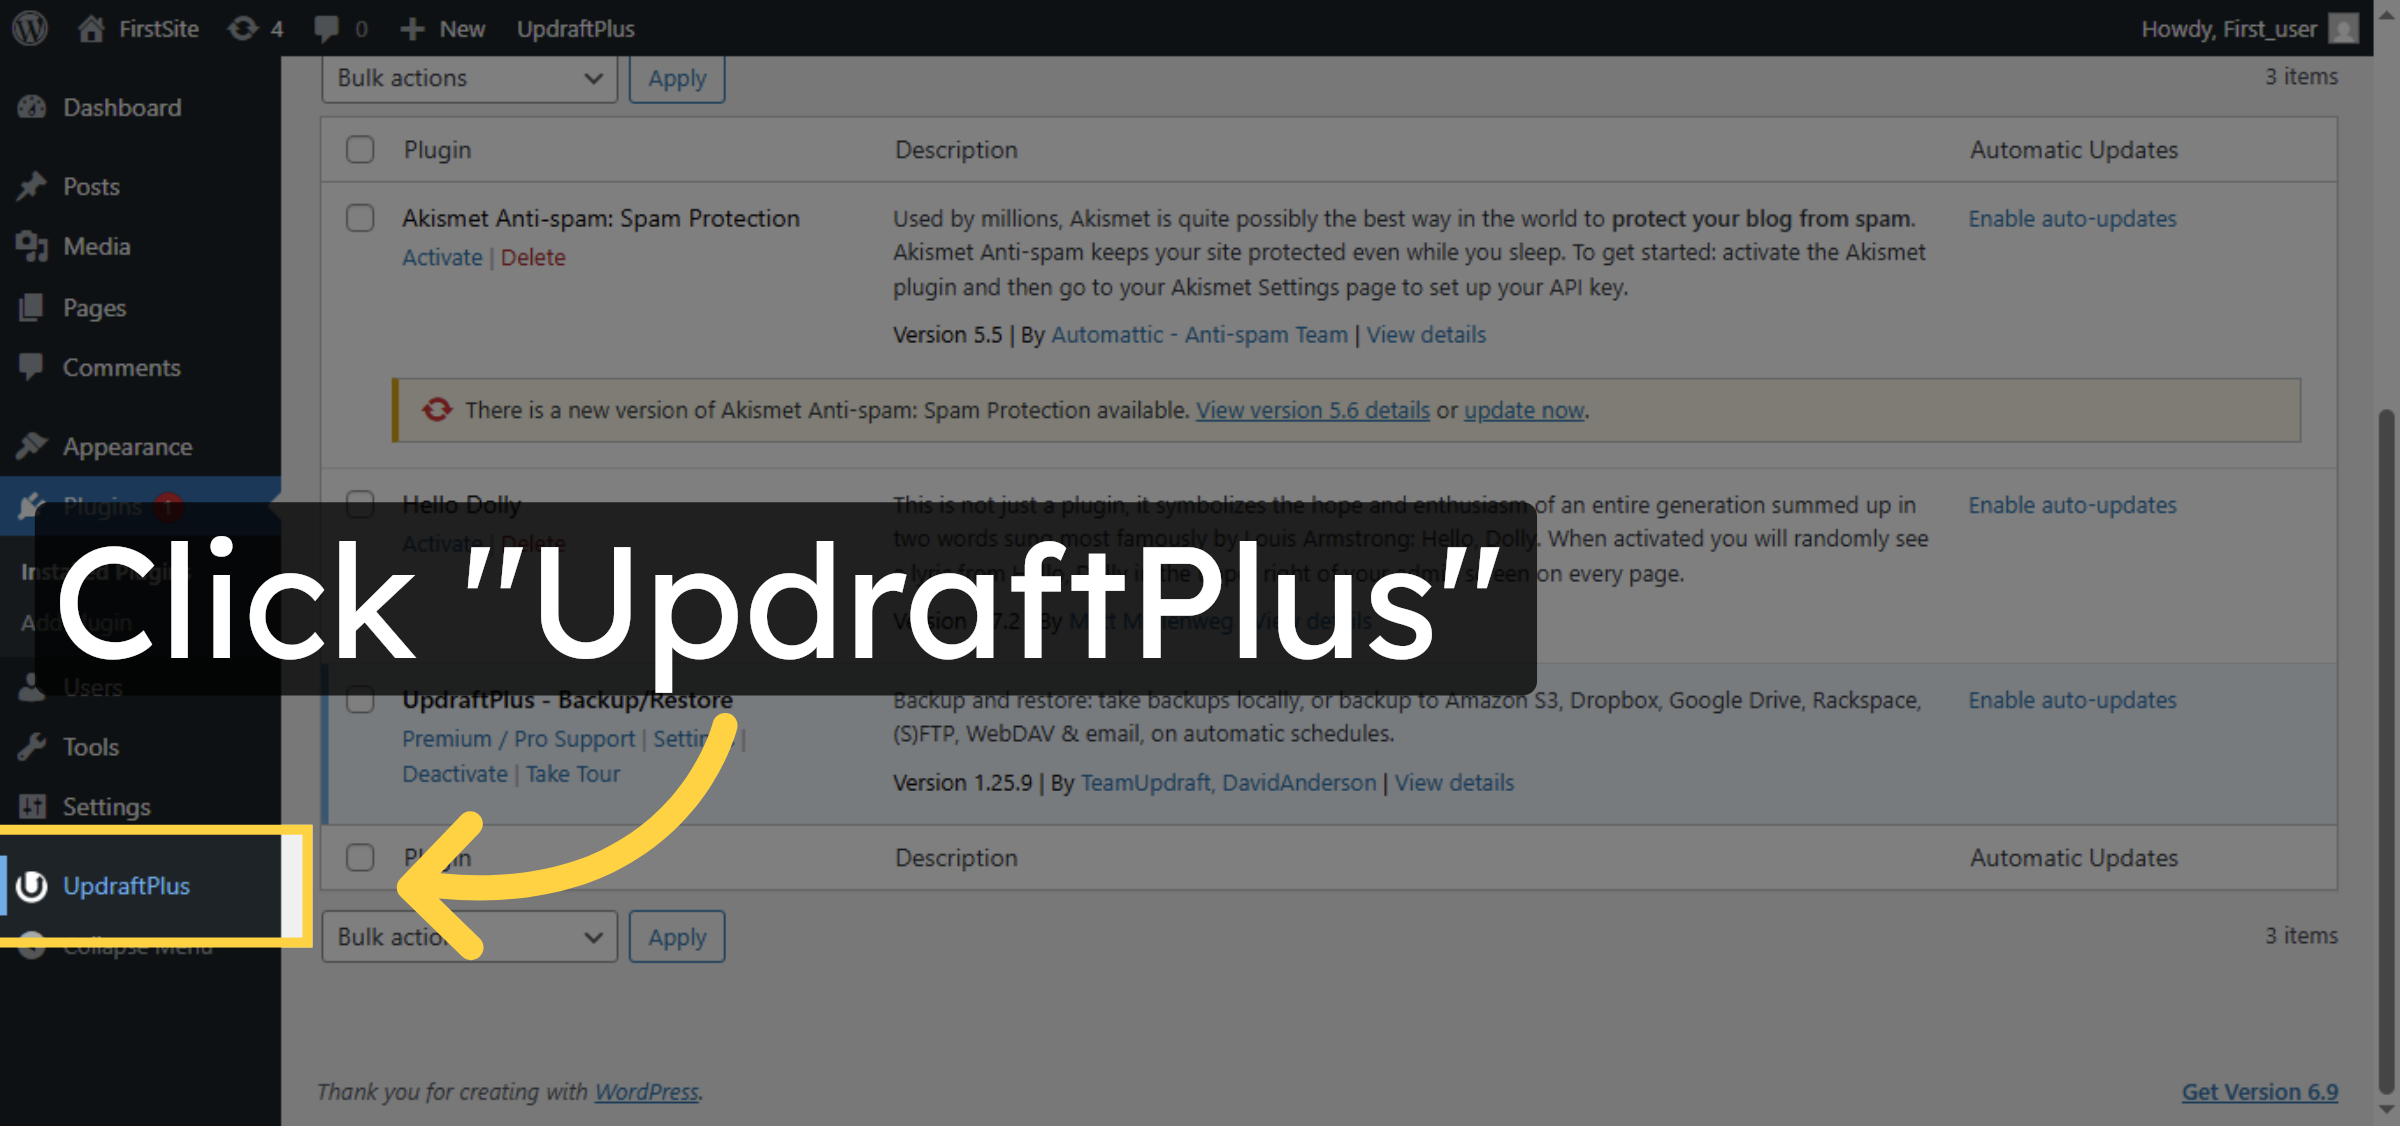
9. Open UpdraftPlus Settings
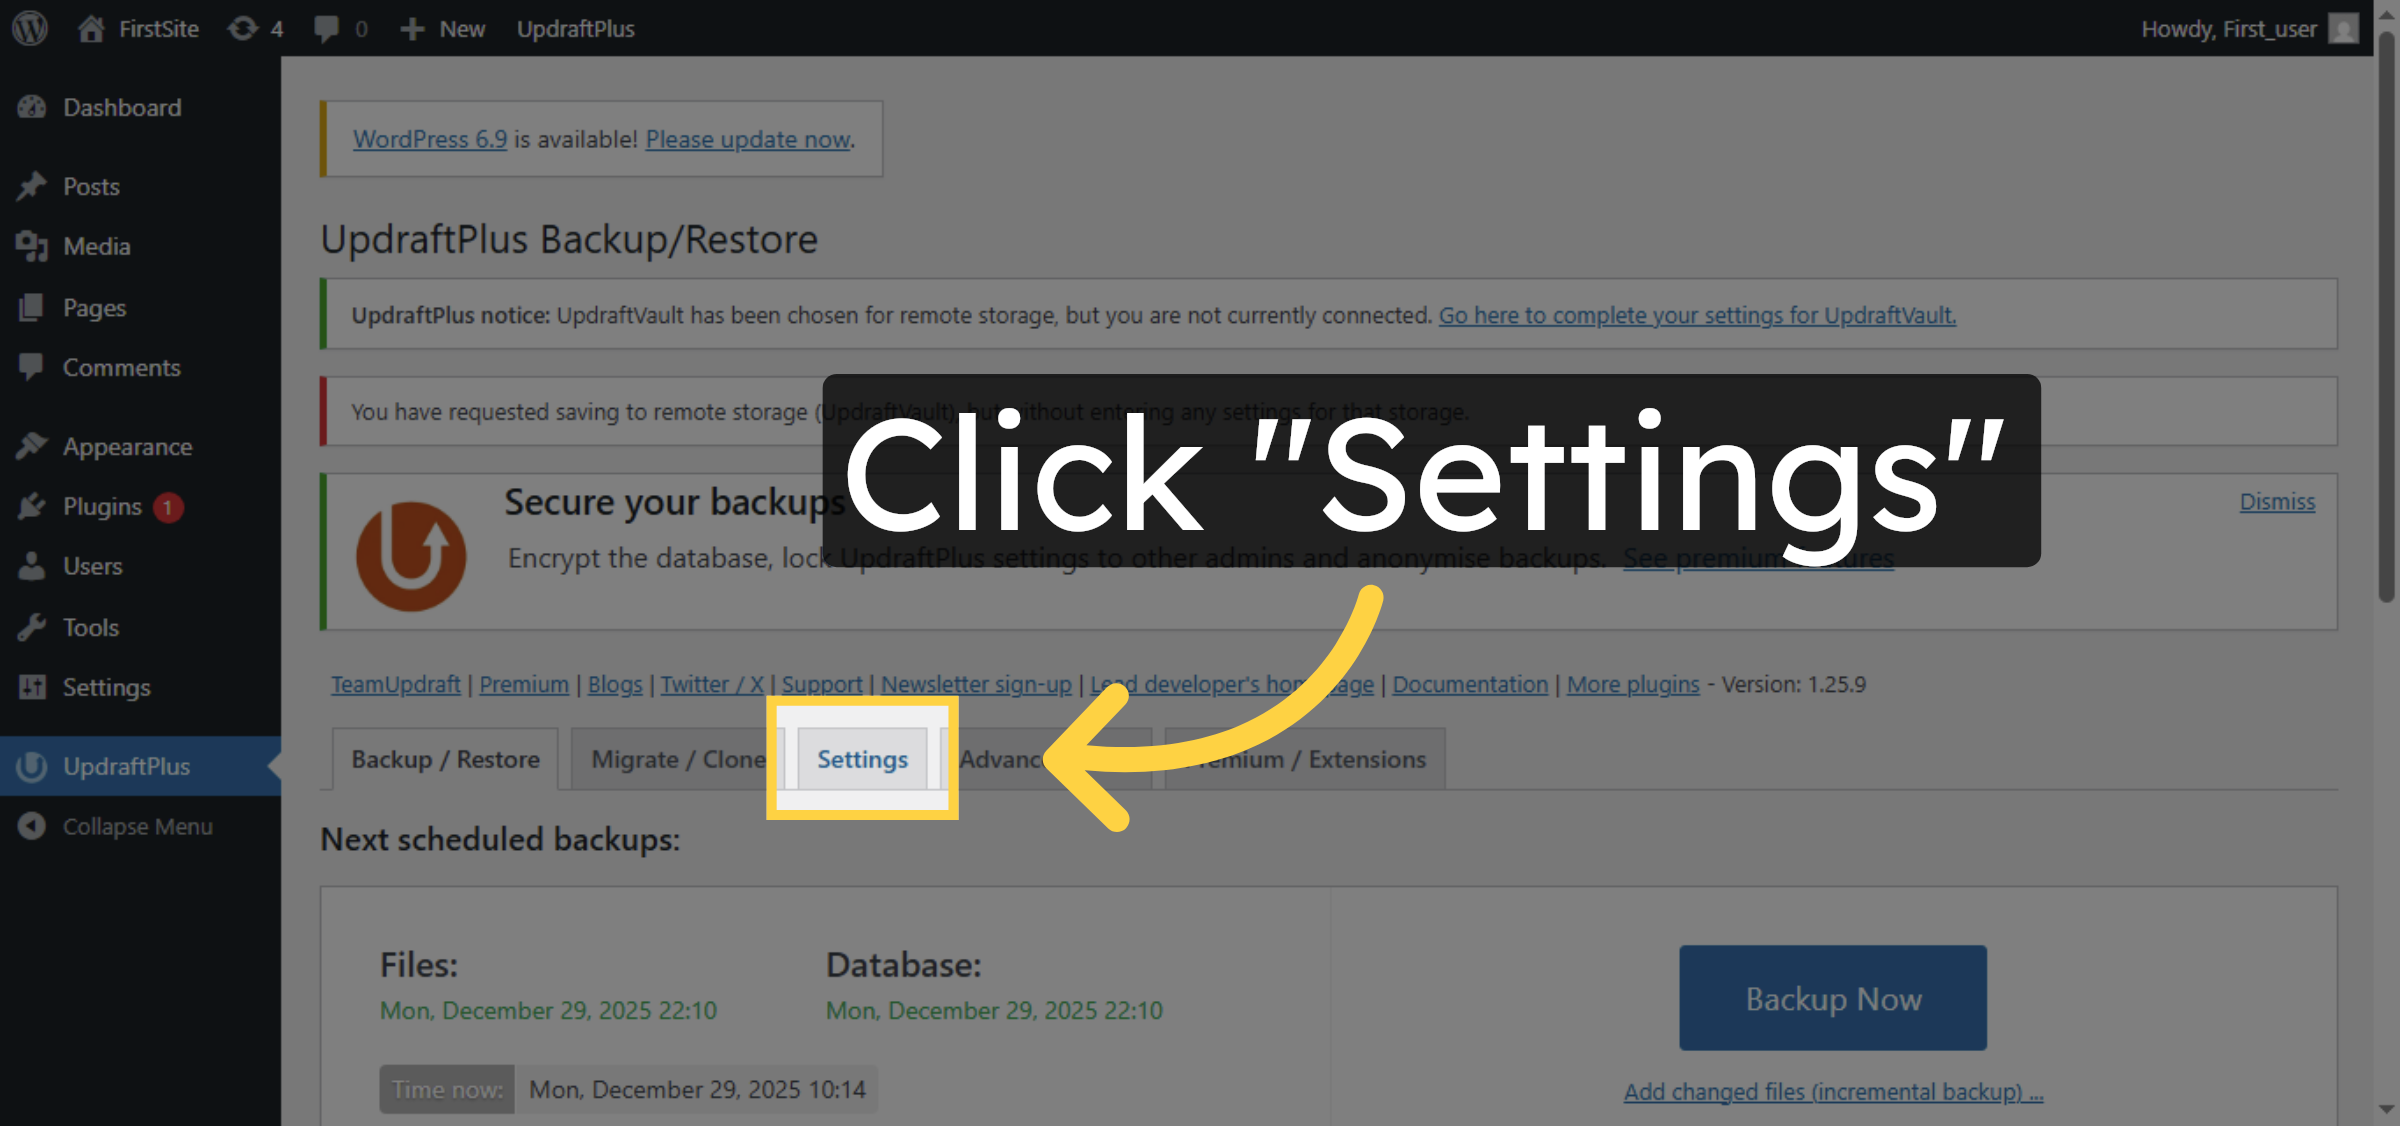
10. Access Backup Settings


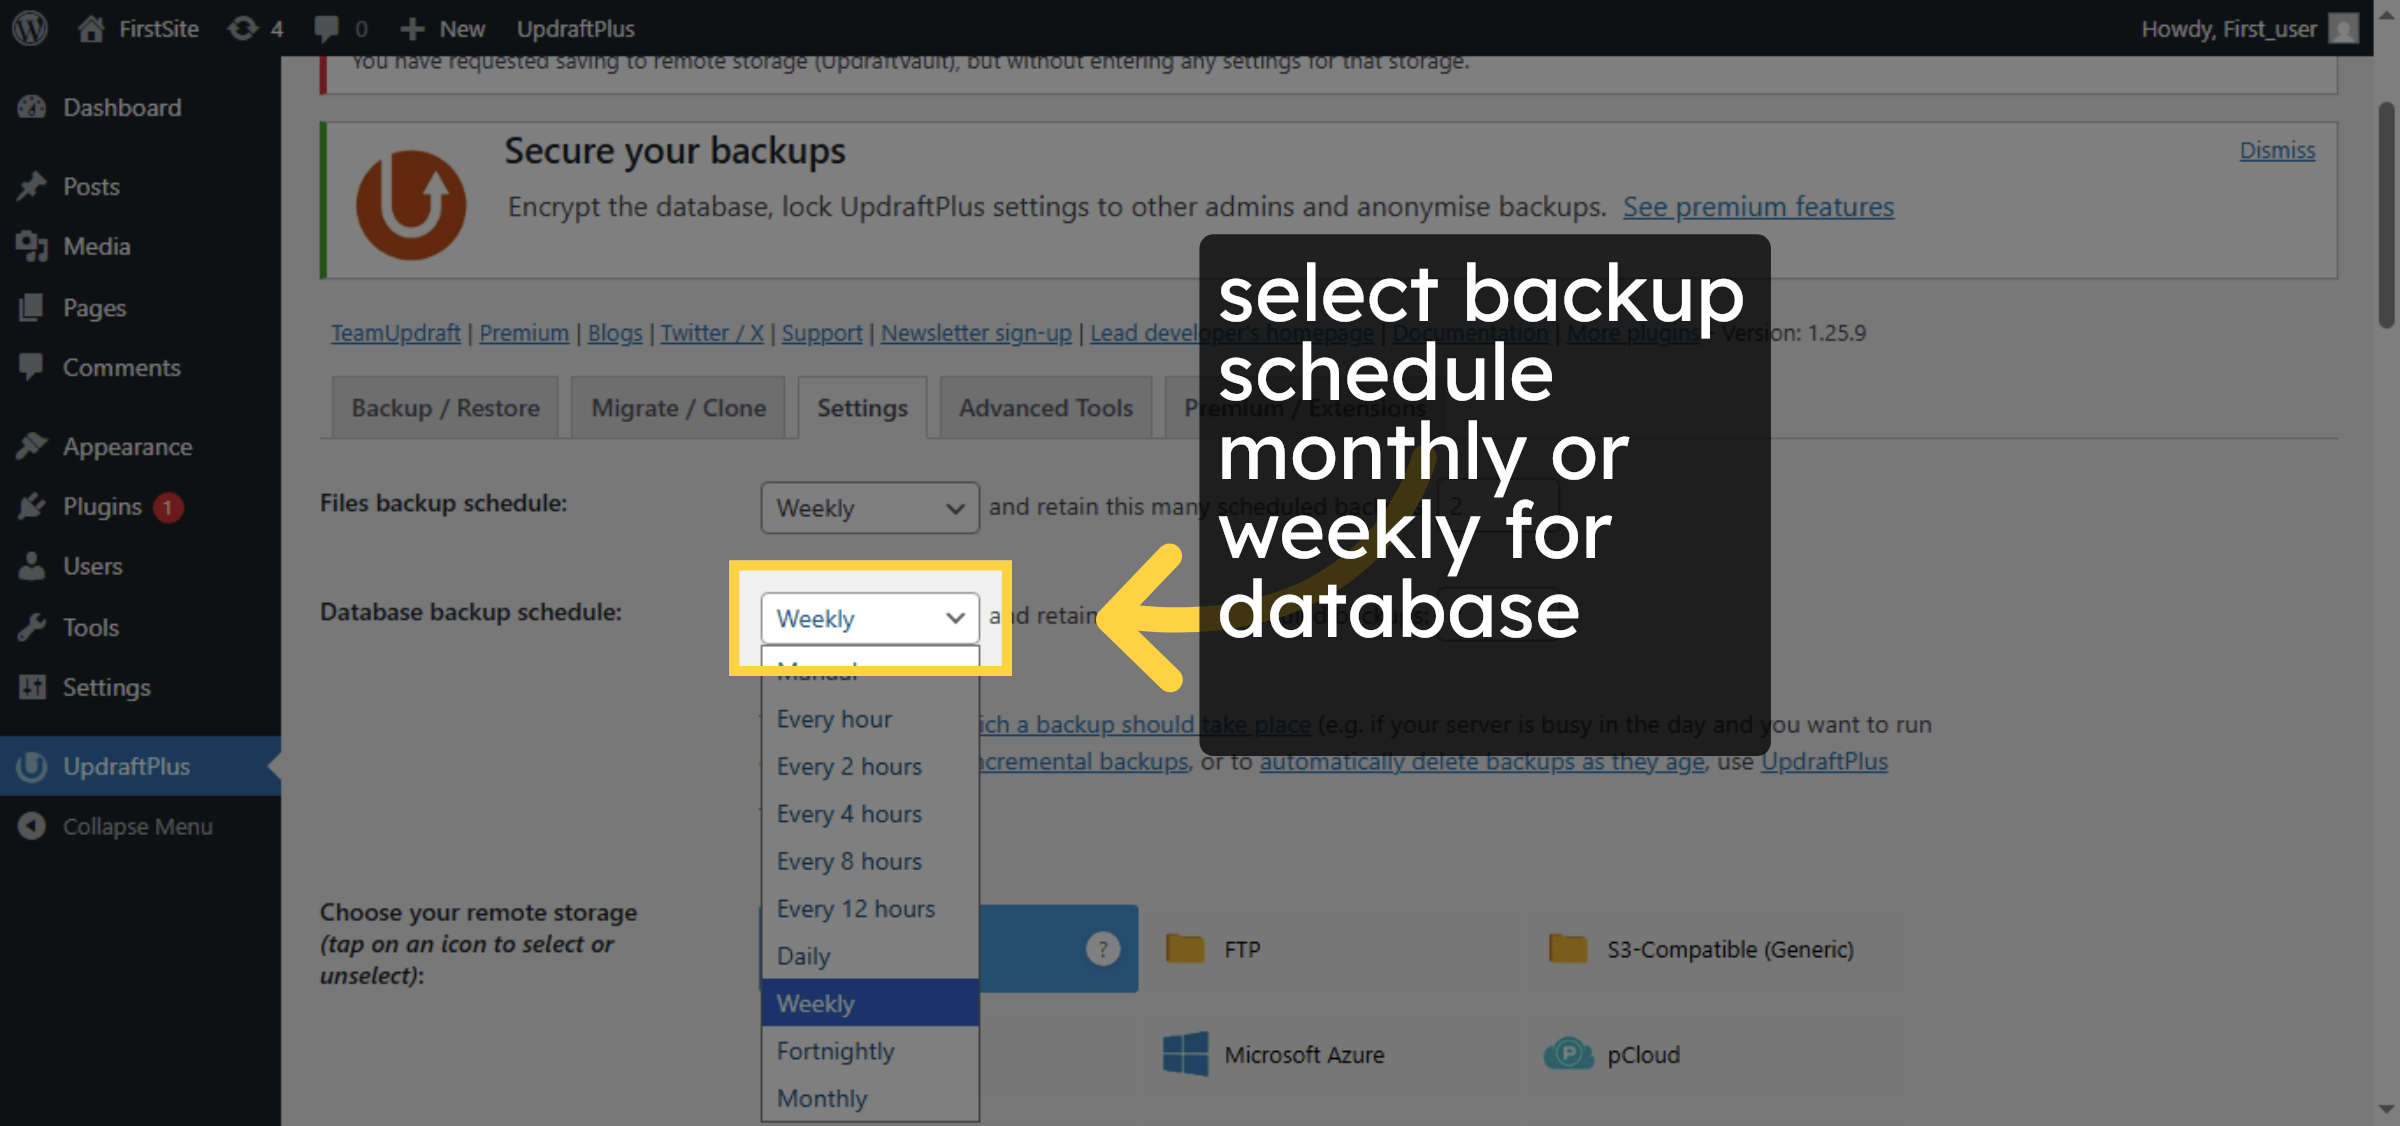
11. Set Backup Frequency
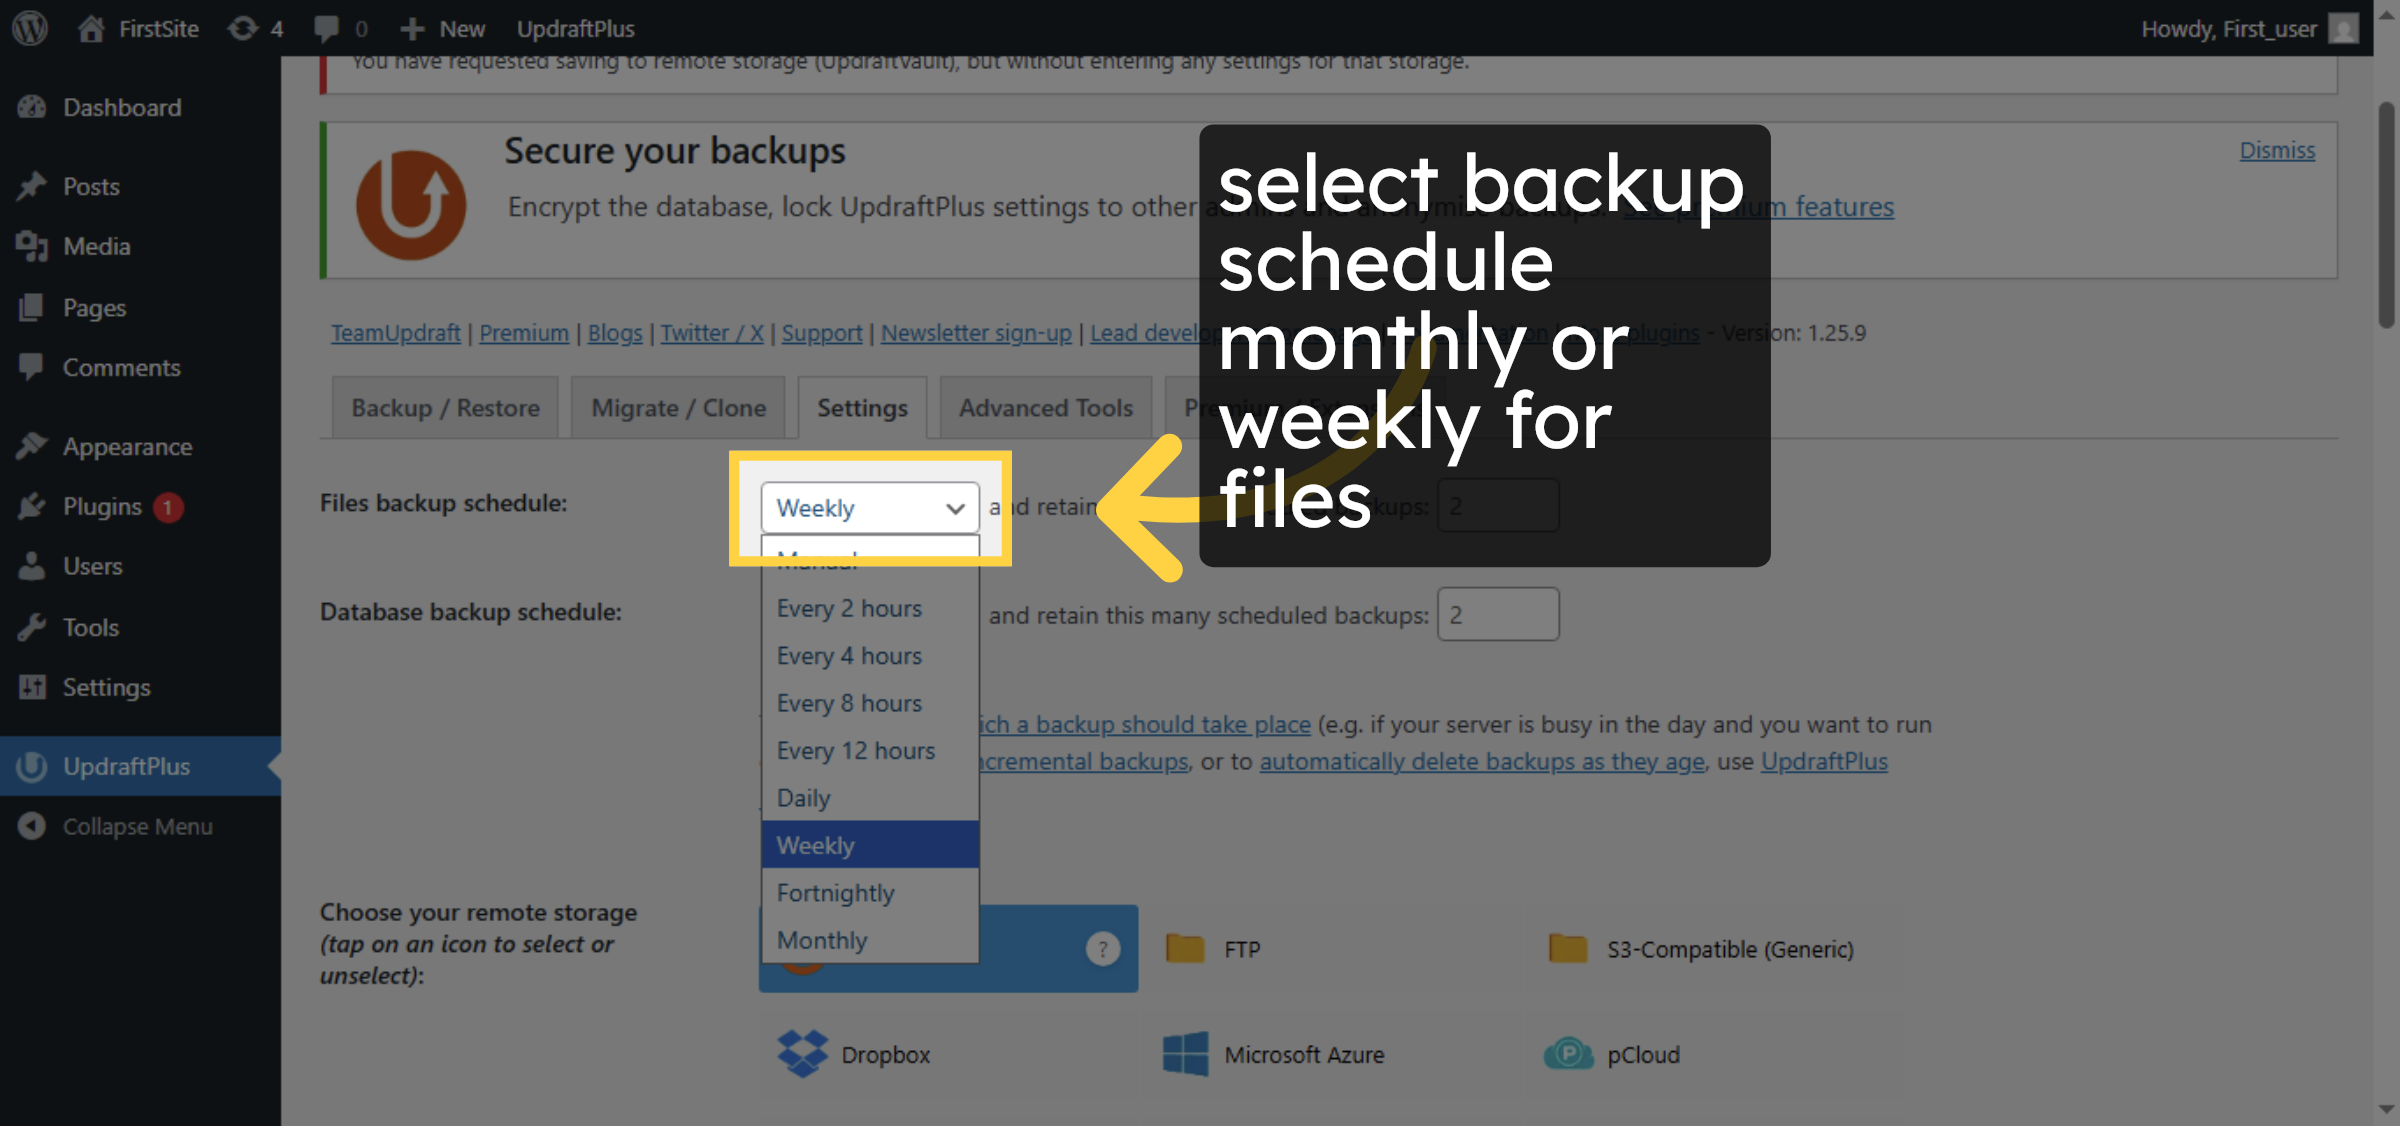
12. Set File Backup Schedule
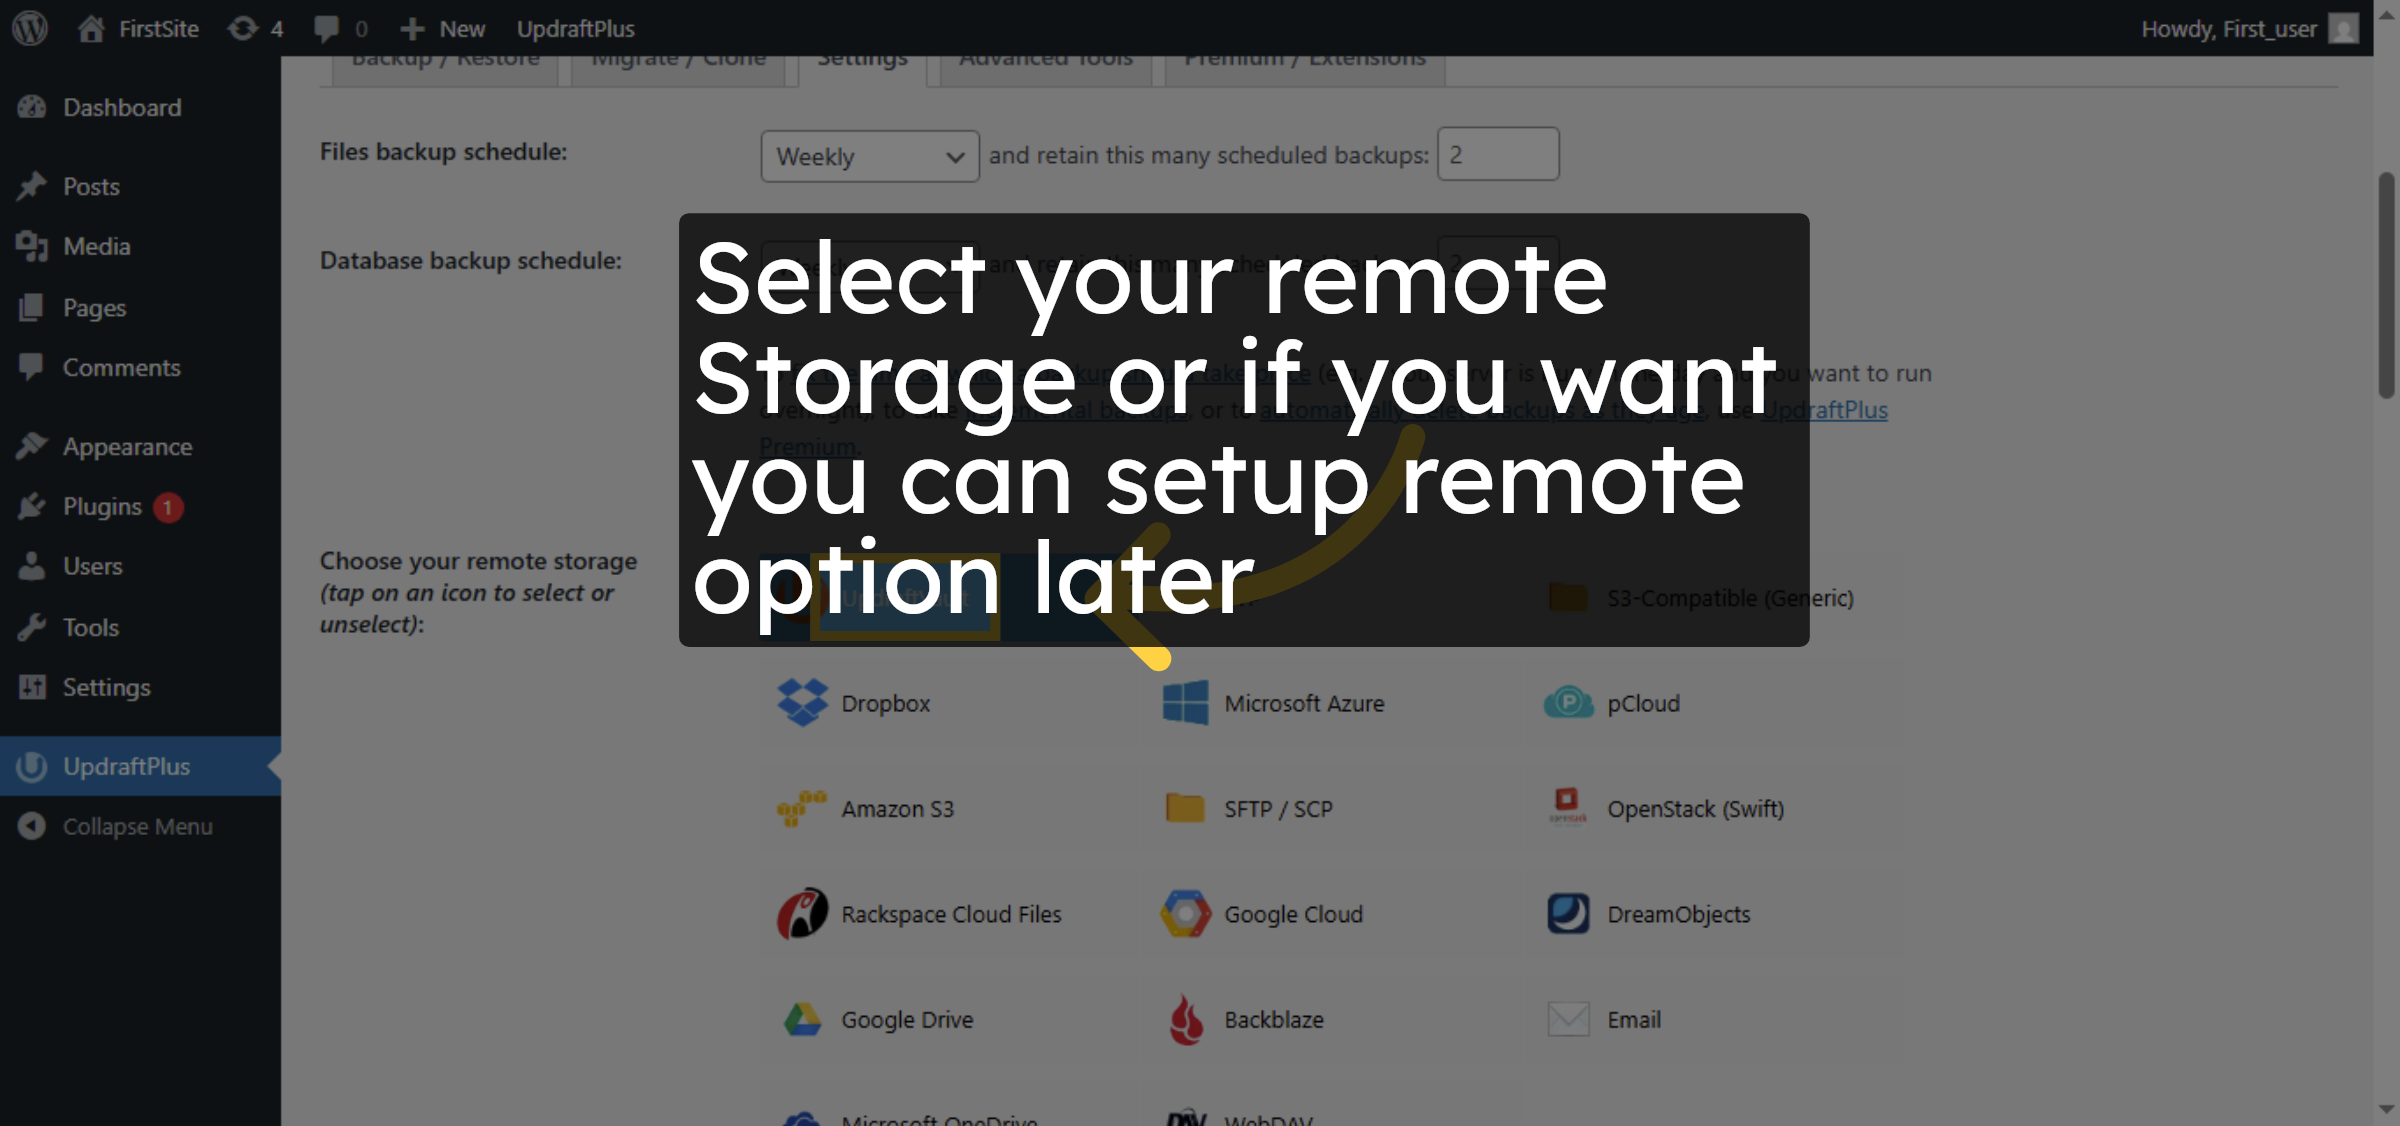
13. Select UpdraftVault Option
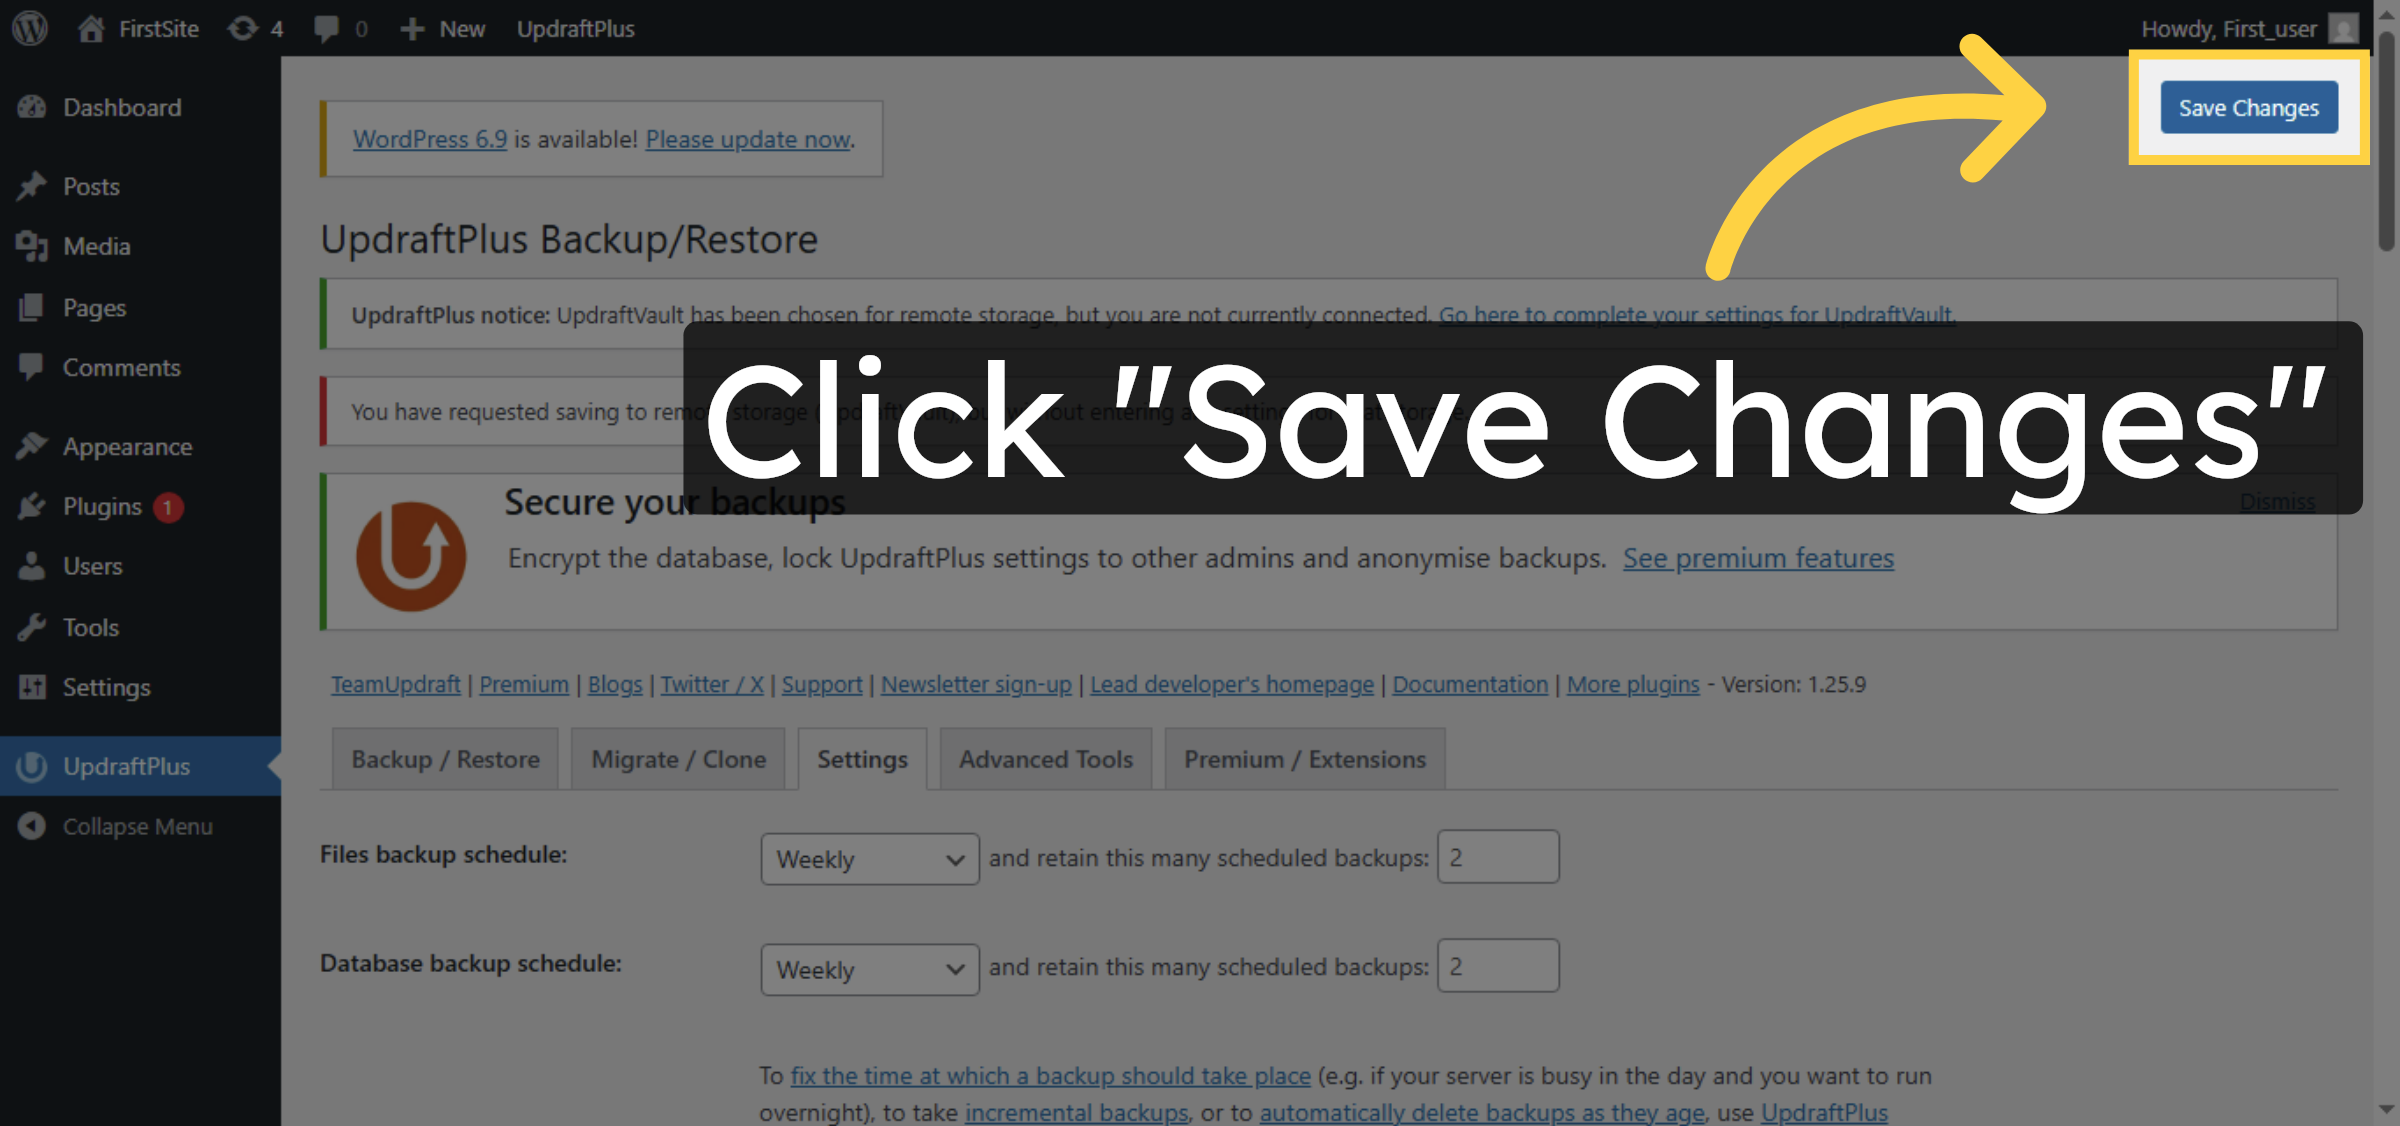
14. Save Backup Settings
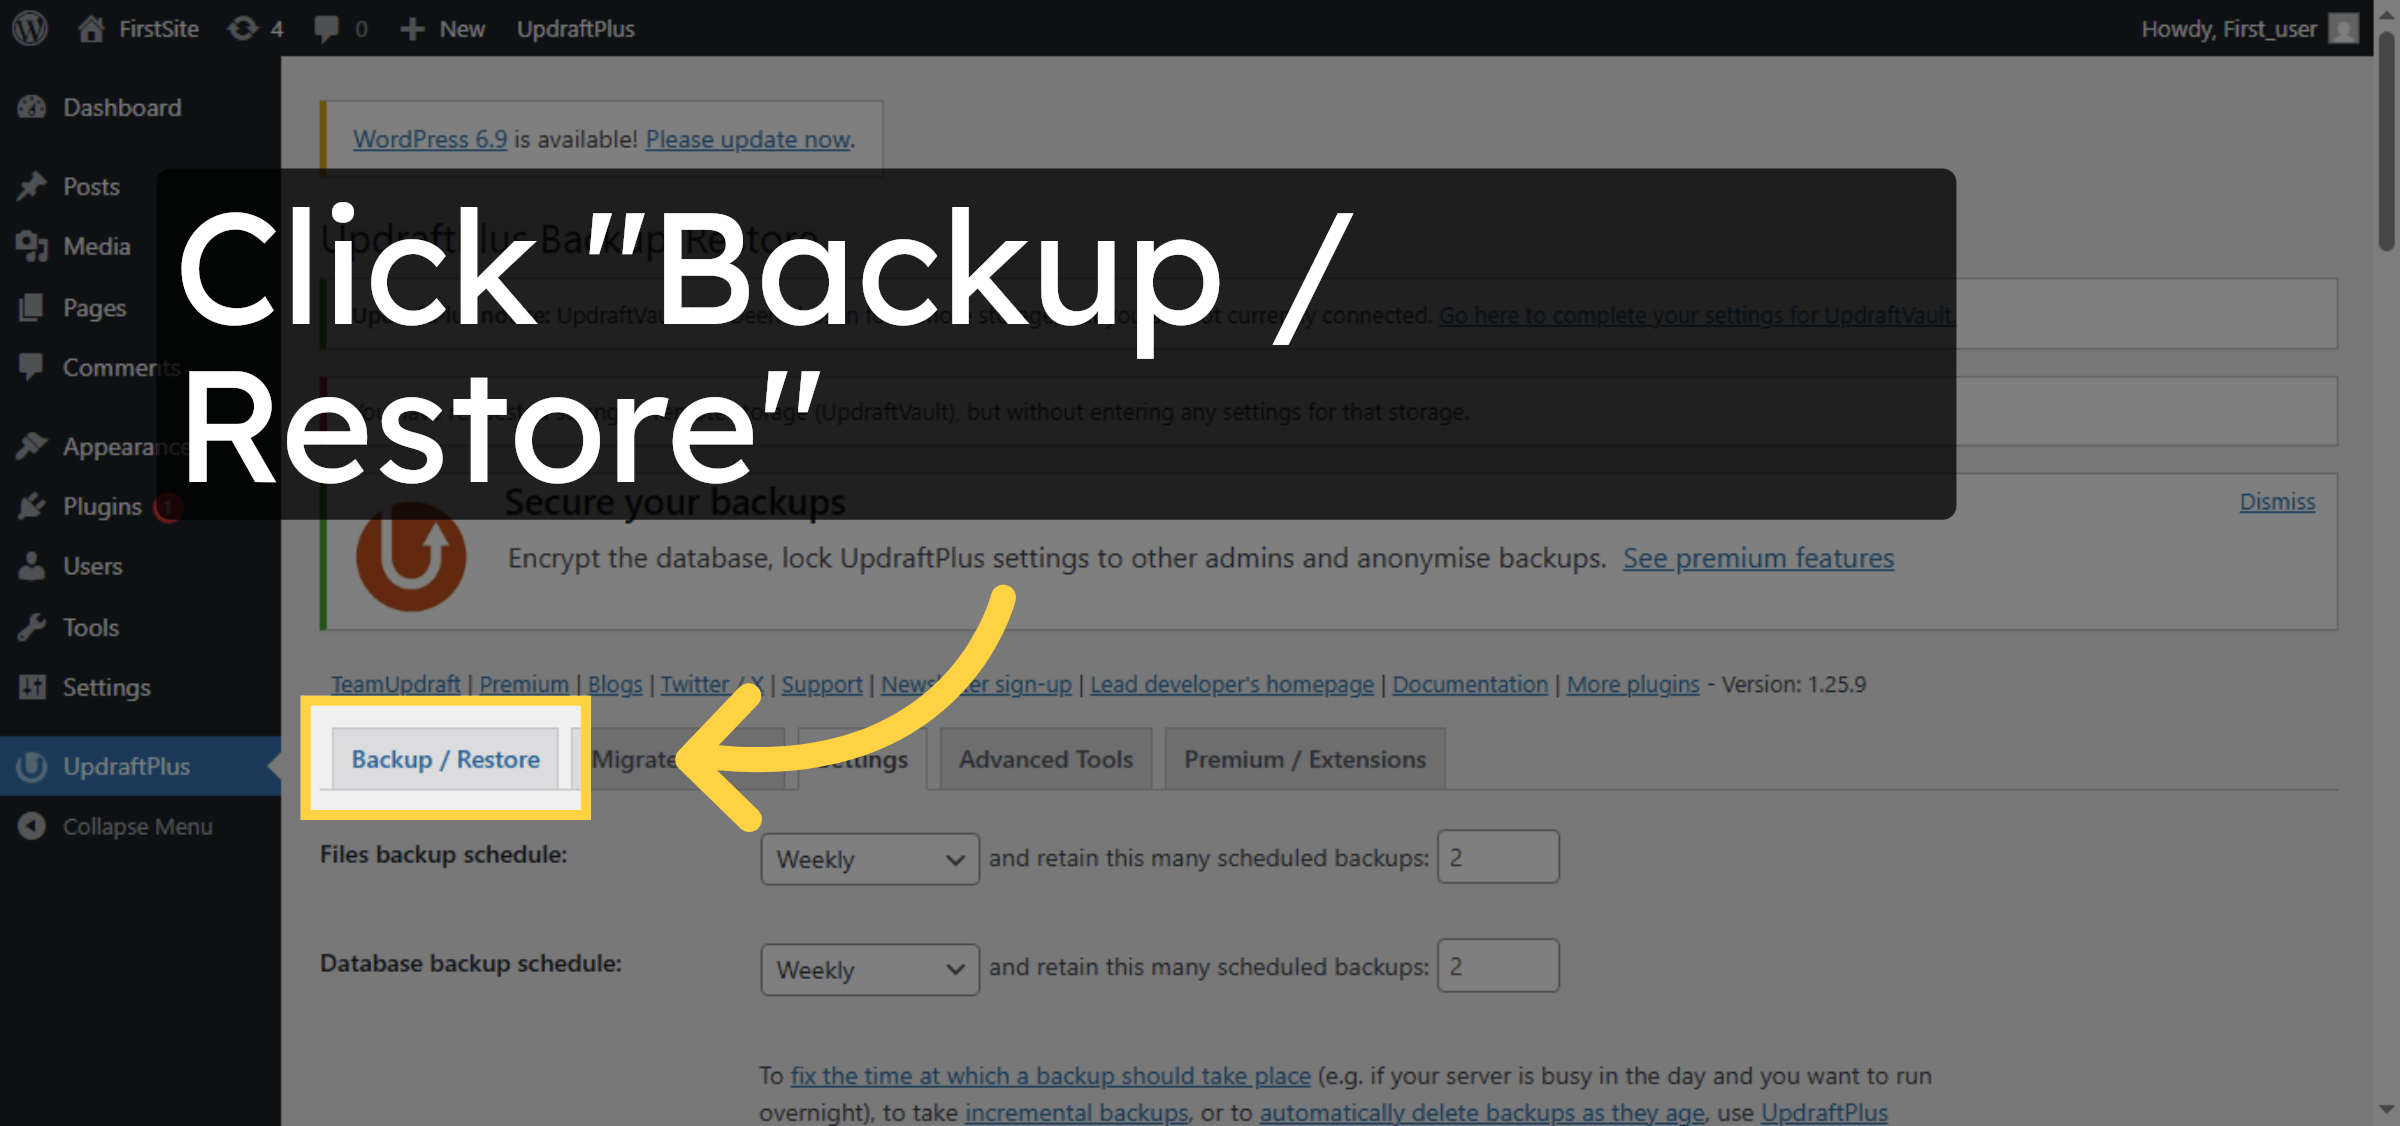
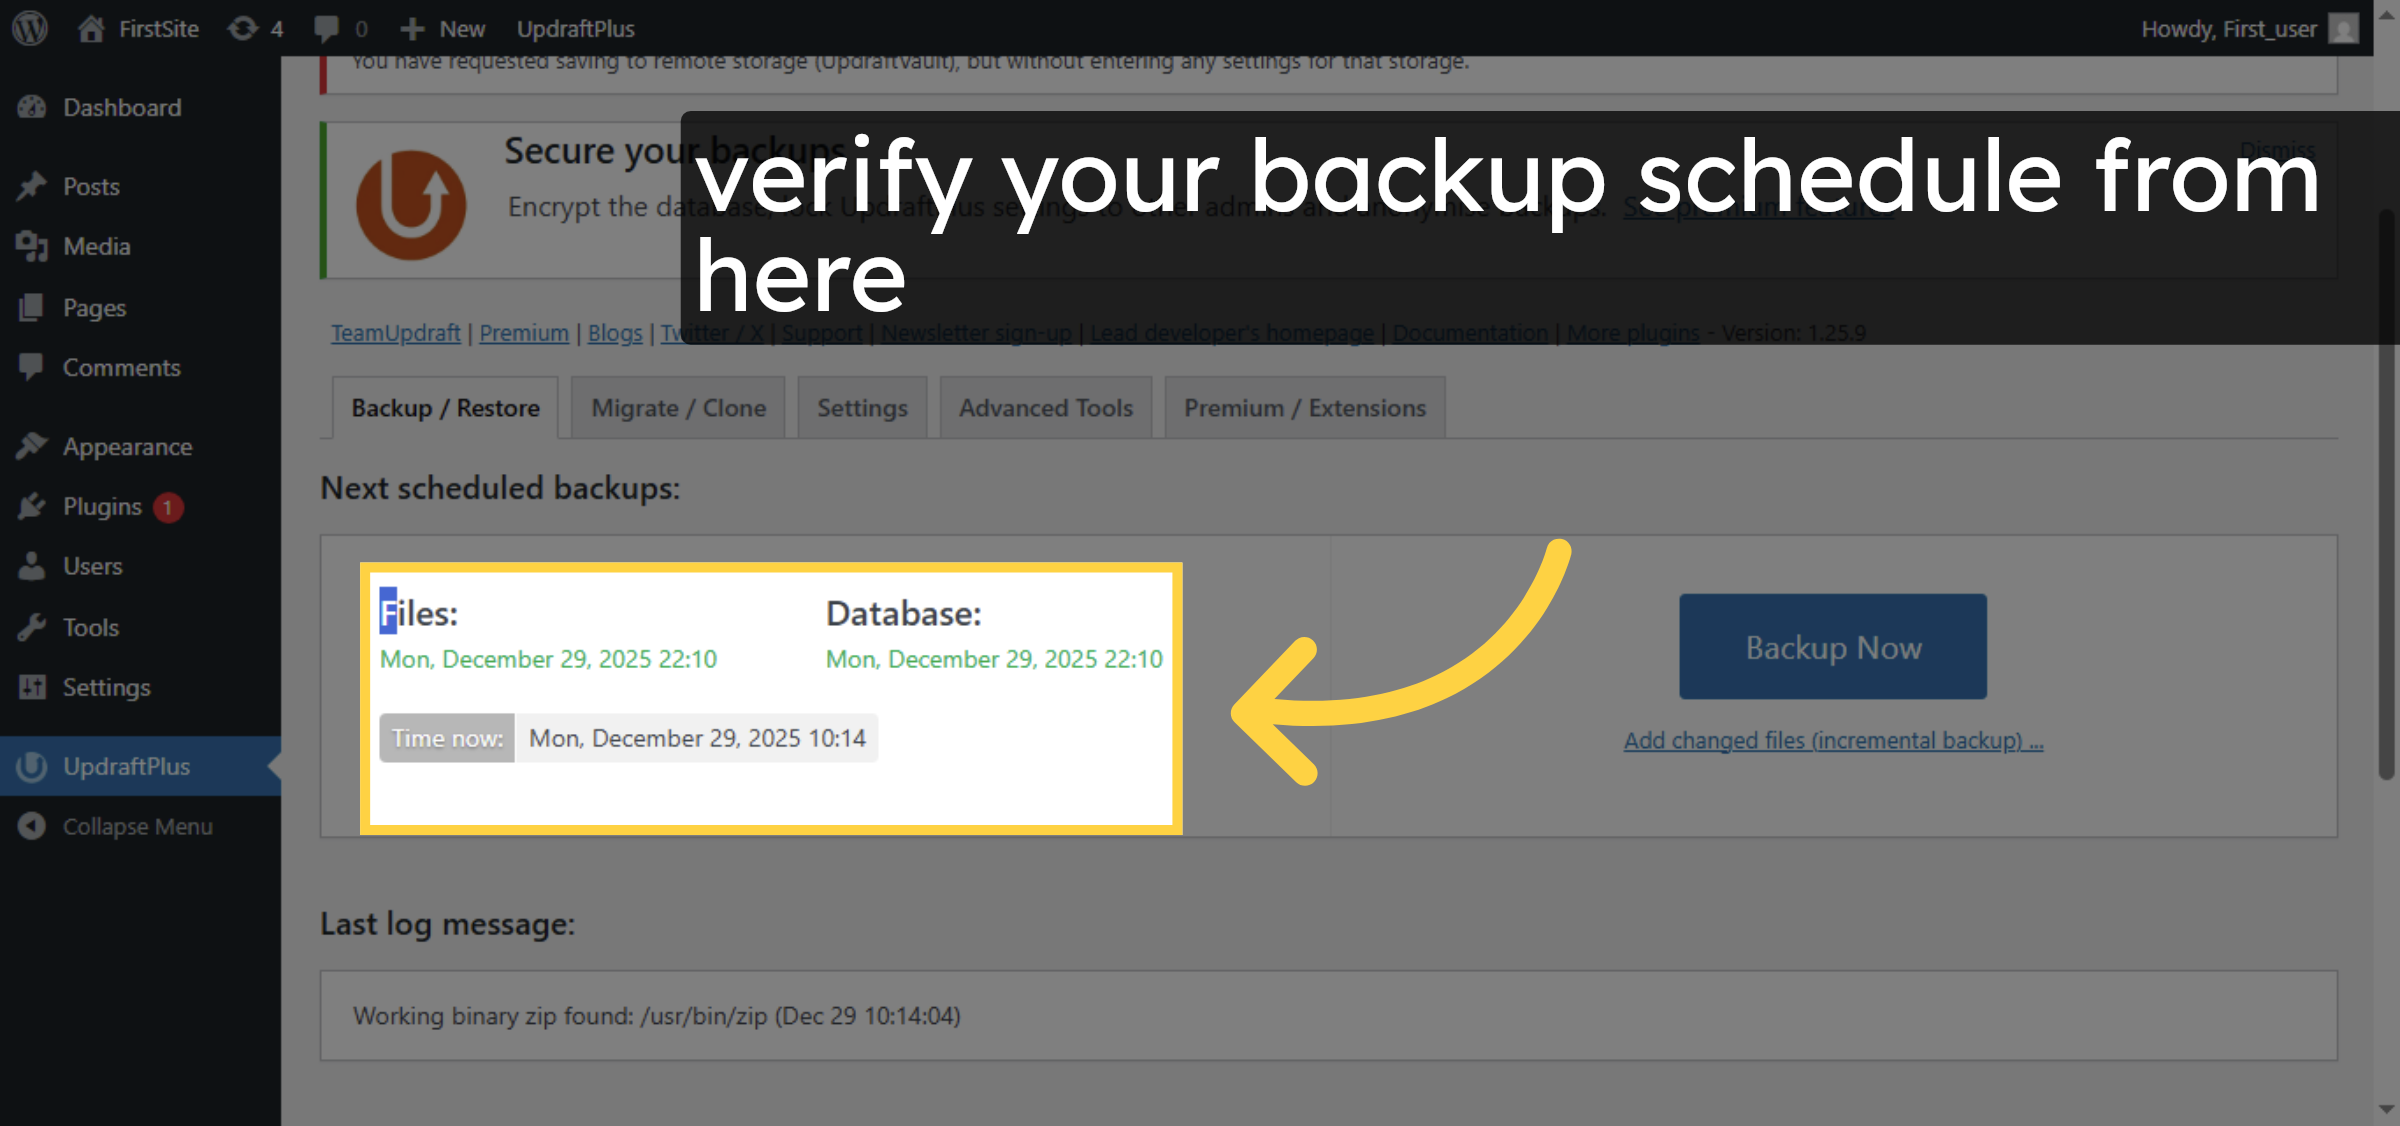
15. Open Backup/Restore Tab
16. View Backup Files
Conclusion
By following the steps outlined in this guide, you can successfully configure automated backups for your WordPress website using the UpdraftPlus plugin. Setting proper backup schedules and storage options helps safeguard your website data and ensures quick recovery when needed. Regular backups are a best practice for maintaining website security, stability, and long-term reliability.
Visit: https://www.woohelpdesk.com
Call Us Toll-Free: +1 888 602 0119 (US & Canada)
Get professional support for WordPress configuration, hosting management, performance optimization, and troubleshooting.


