How To Speed Up WordPress Website Using Hostinger WP Hosting
Introduction
Website speed plays a critical role in user experience, search engine rankings, and overall site performance. A slow-loading WordPress website can lead to higher bounce rates, reduced conversions, and lower SEO scores. Before making any optimizations, it’s important to measure your website’s current performance using tools like Google PageSpeed Insights to identify problem areas. In this guide, you’ll learn how to analyze your site speed, install and configure the WP Rocket plugin, and apply key performance optimizations such as CSS delivery optimization, lazy loading, caching, link preloading, and database cleanup. These steps help reduce page load times, improve Core Web Vitals, and deliver a smoother browsing experience. Following this process ensures your WordPress site is optimized effectively while maintaining stability and performance on Hostinger hosting.
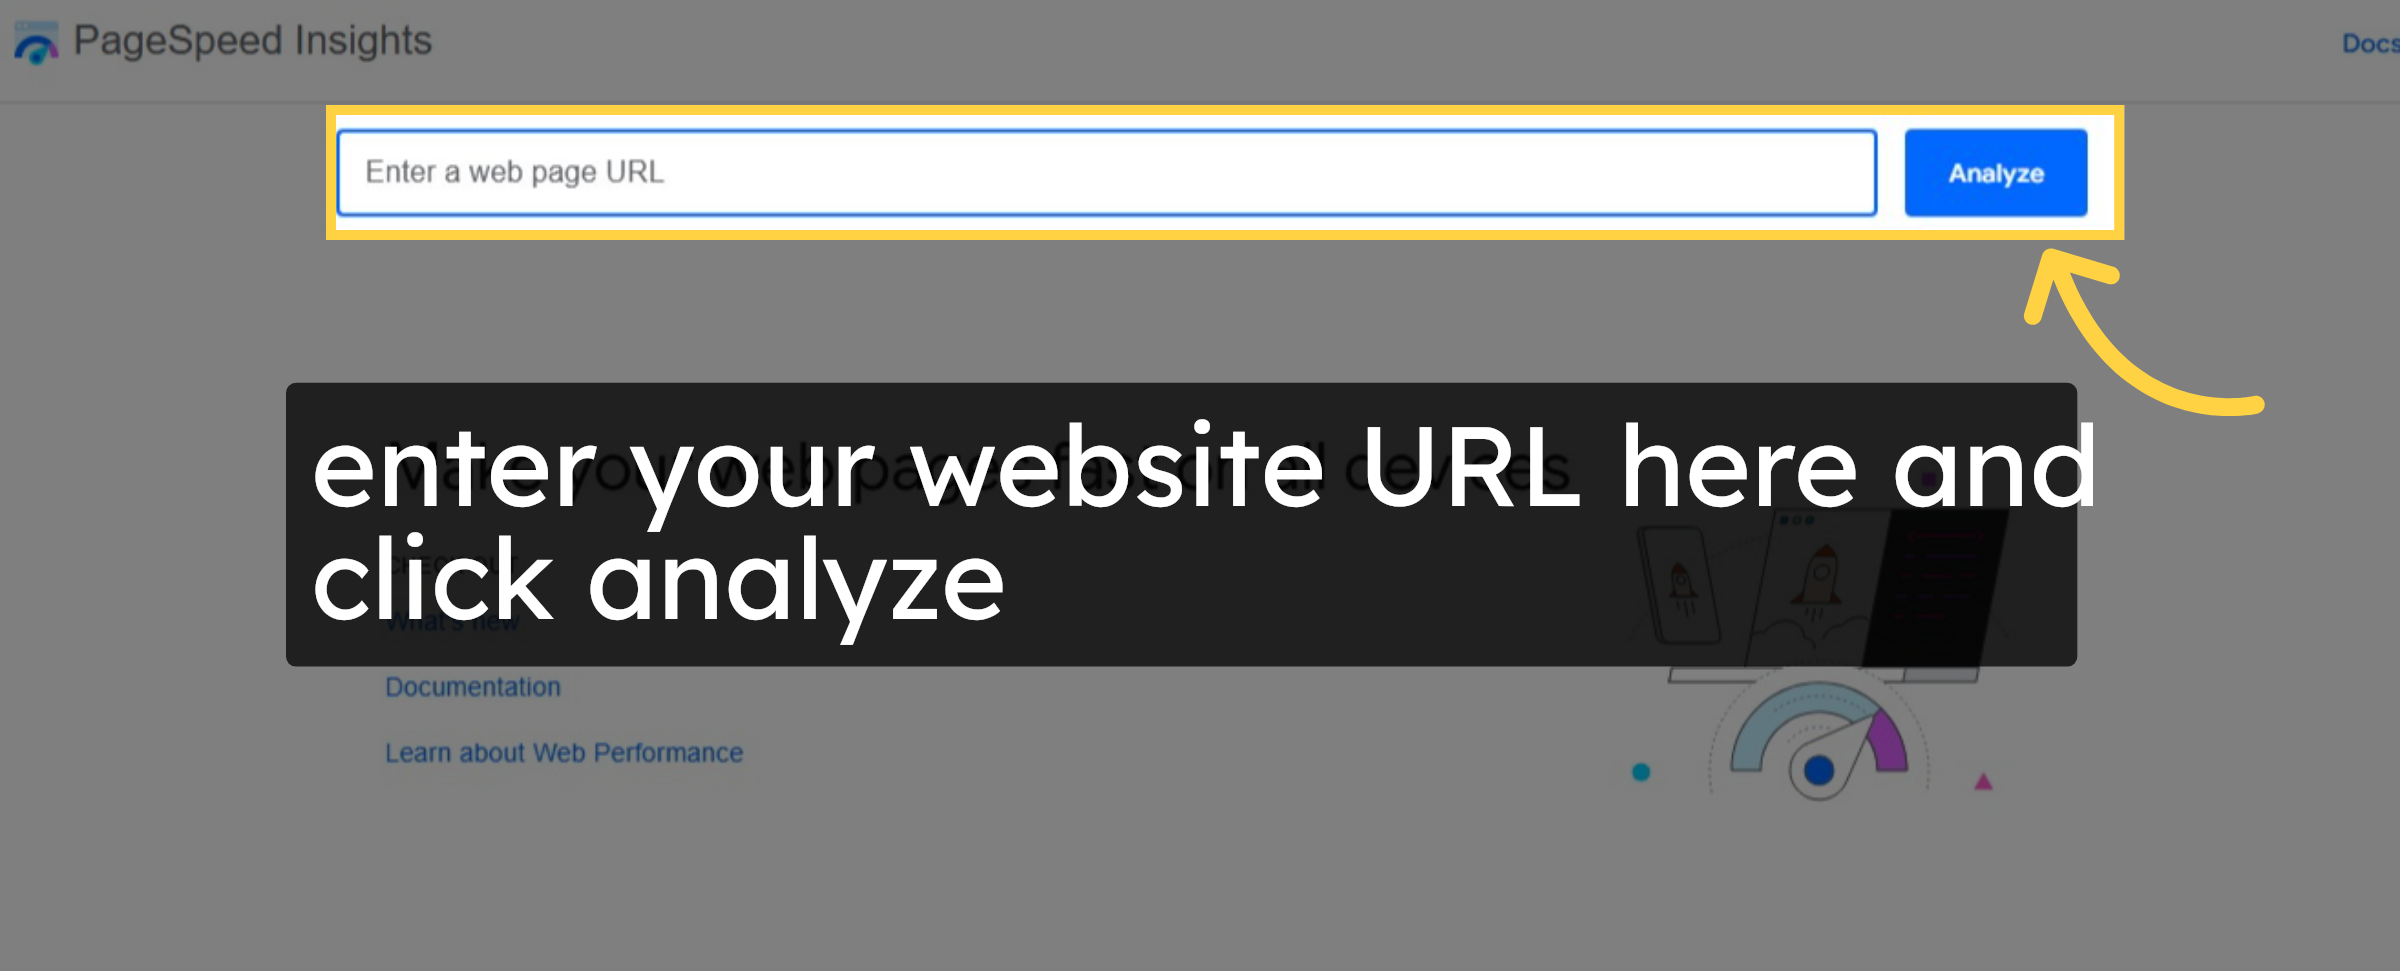
1. open speed test page and check your site performance.
Before fixing, evaluate your site health. goto (https://pagespeed.web.dev/)and paste your website URL and then click analyze

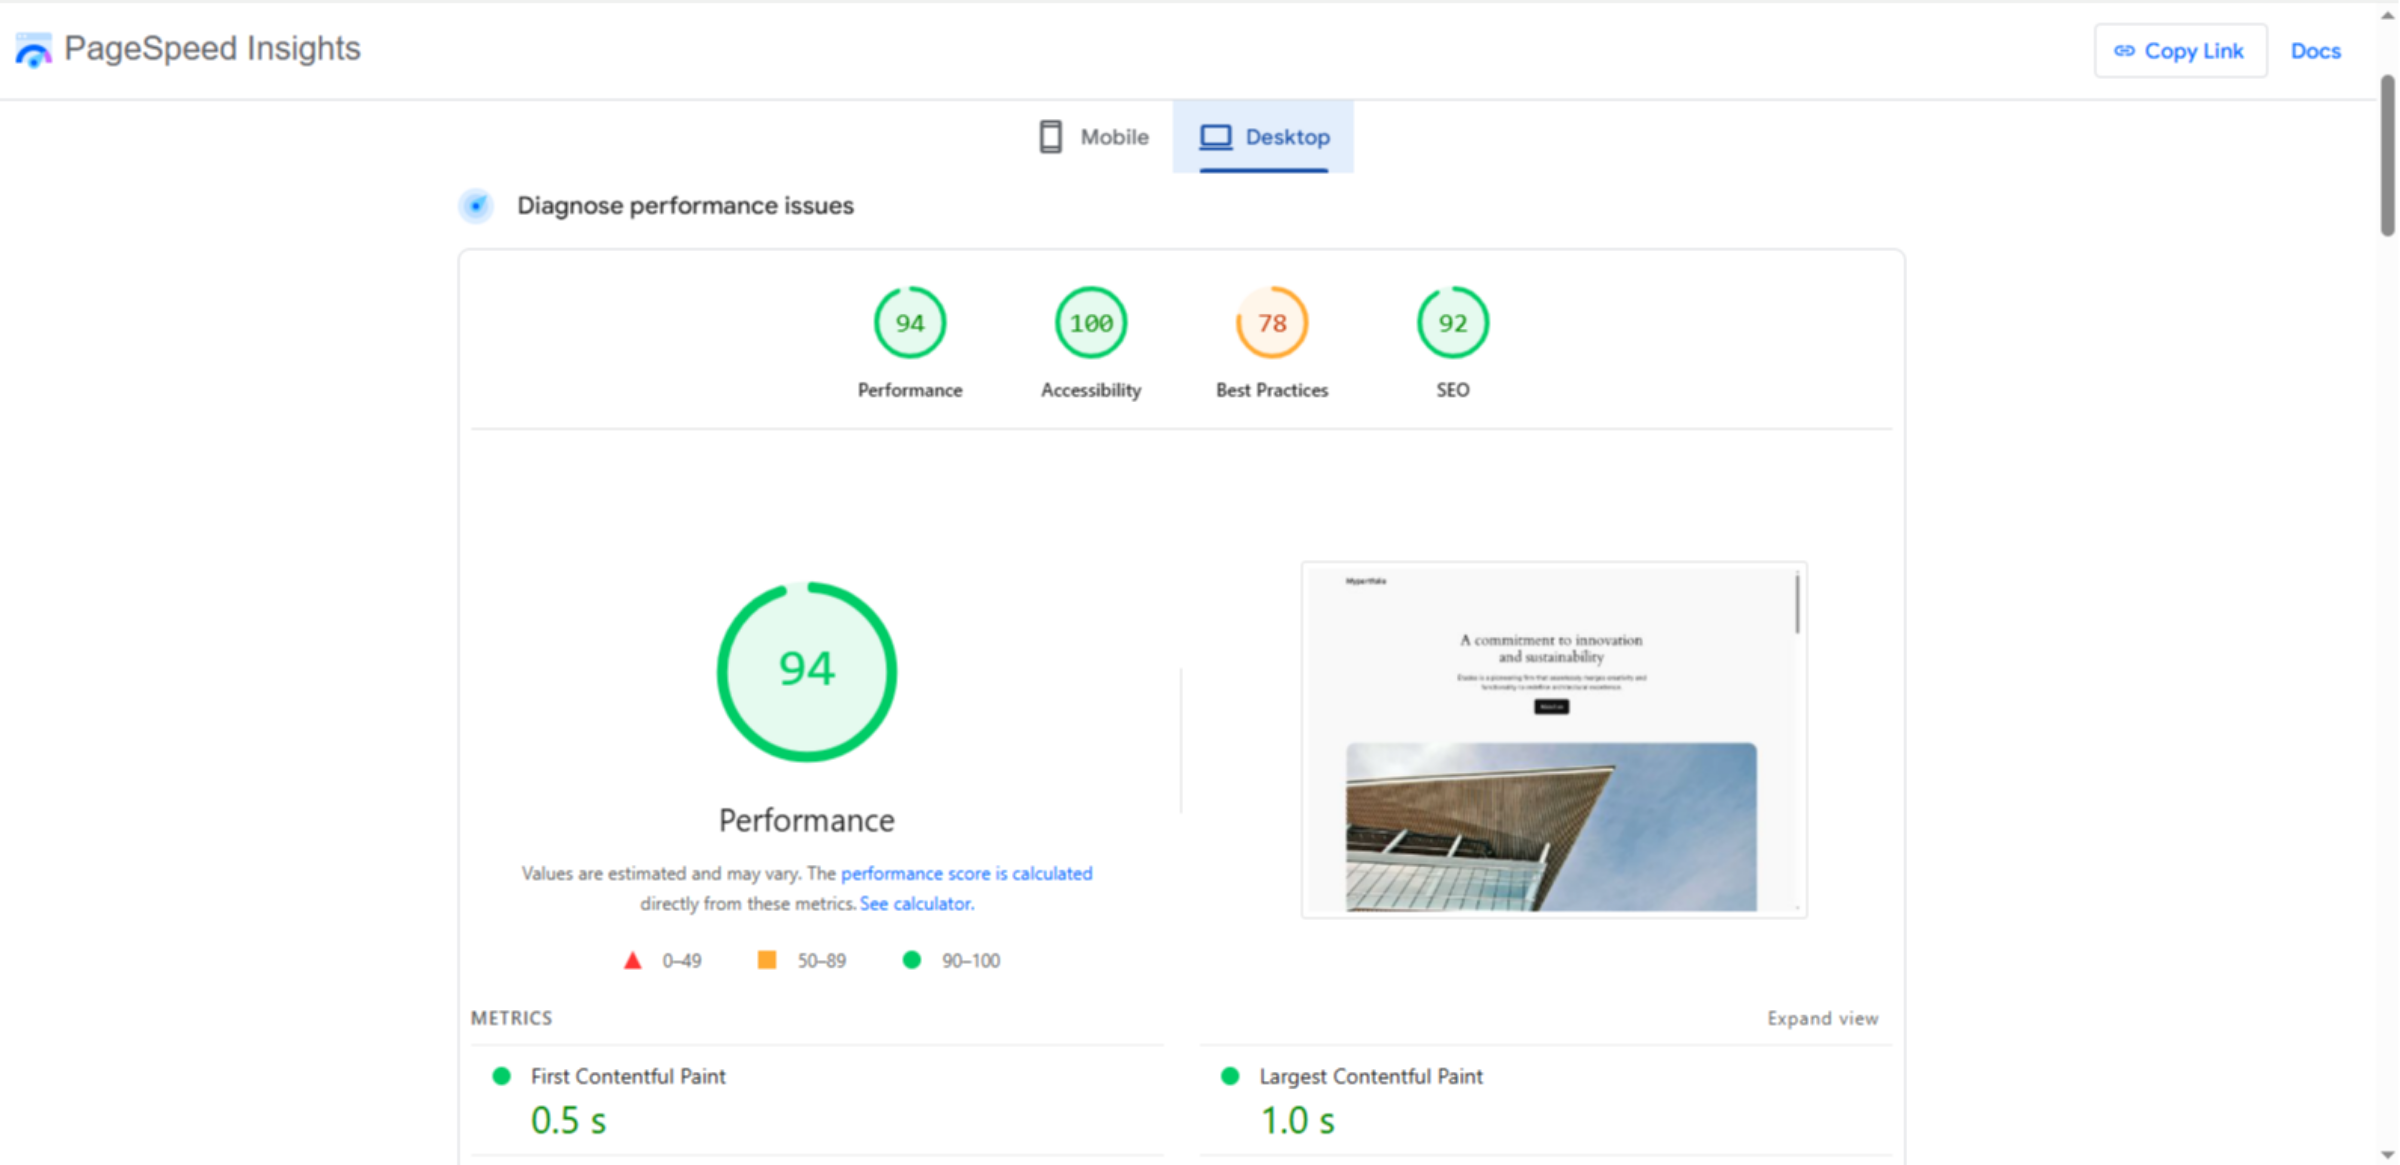
2. check your website performance
3. Evaluate Website Speed Before Speeding Up
4. login to hostinger panel
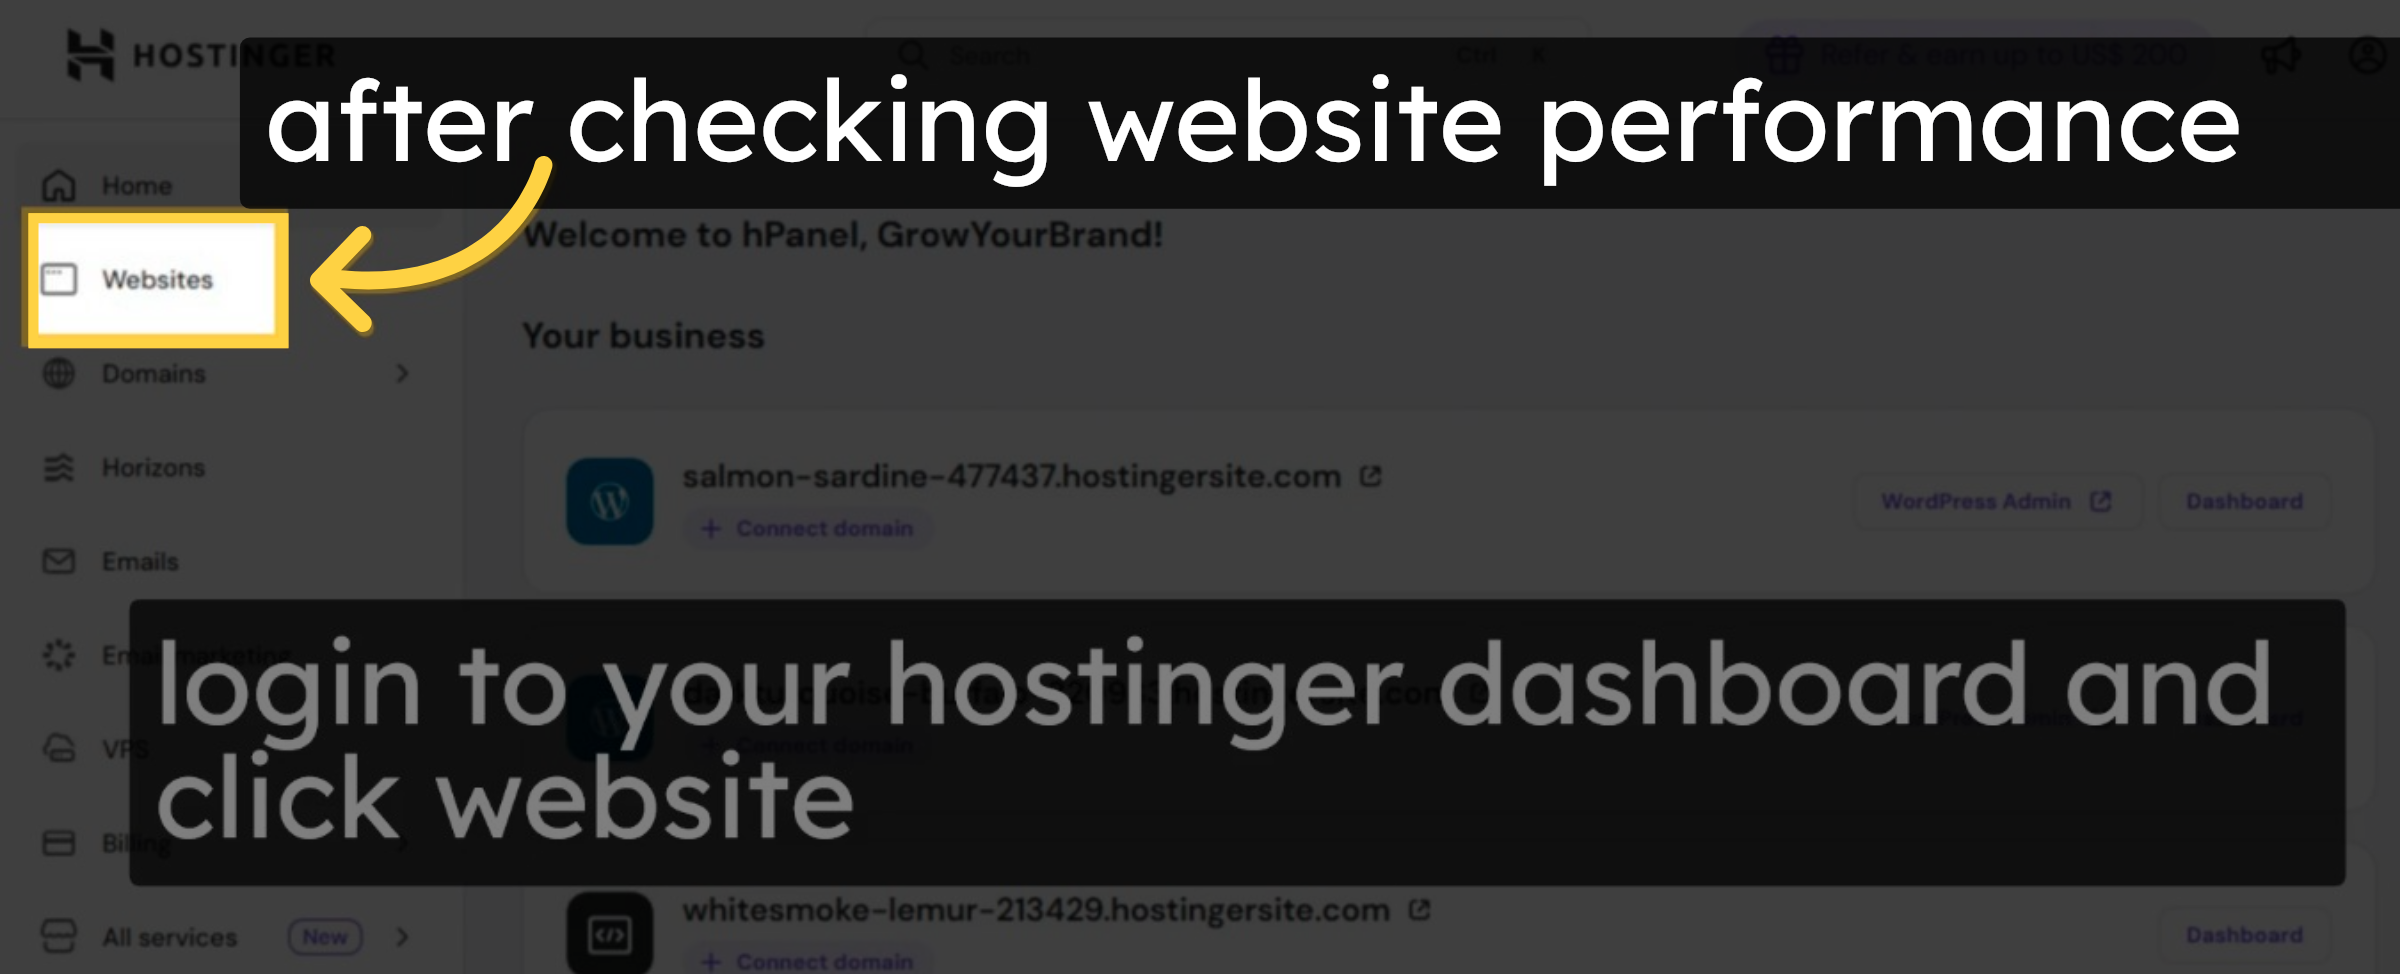
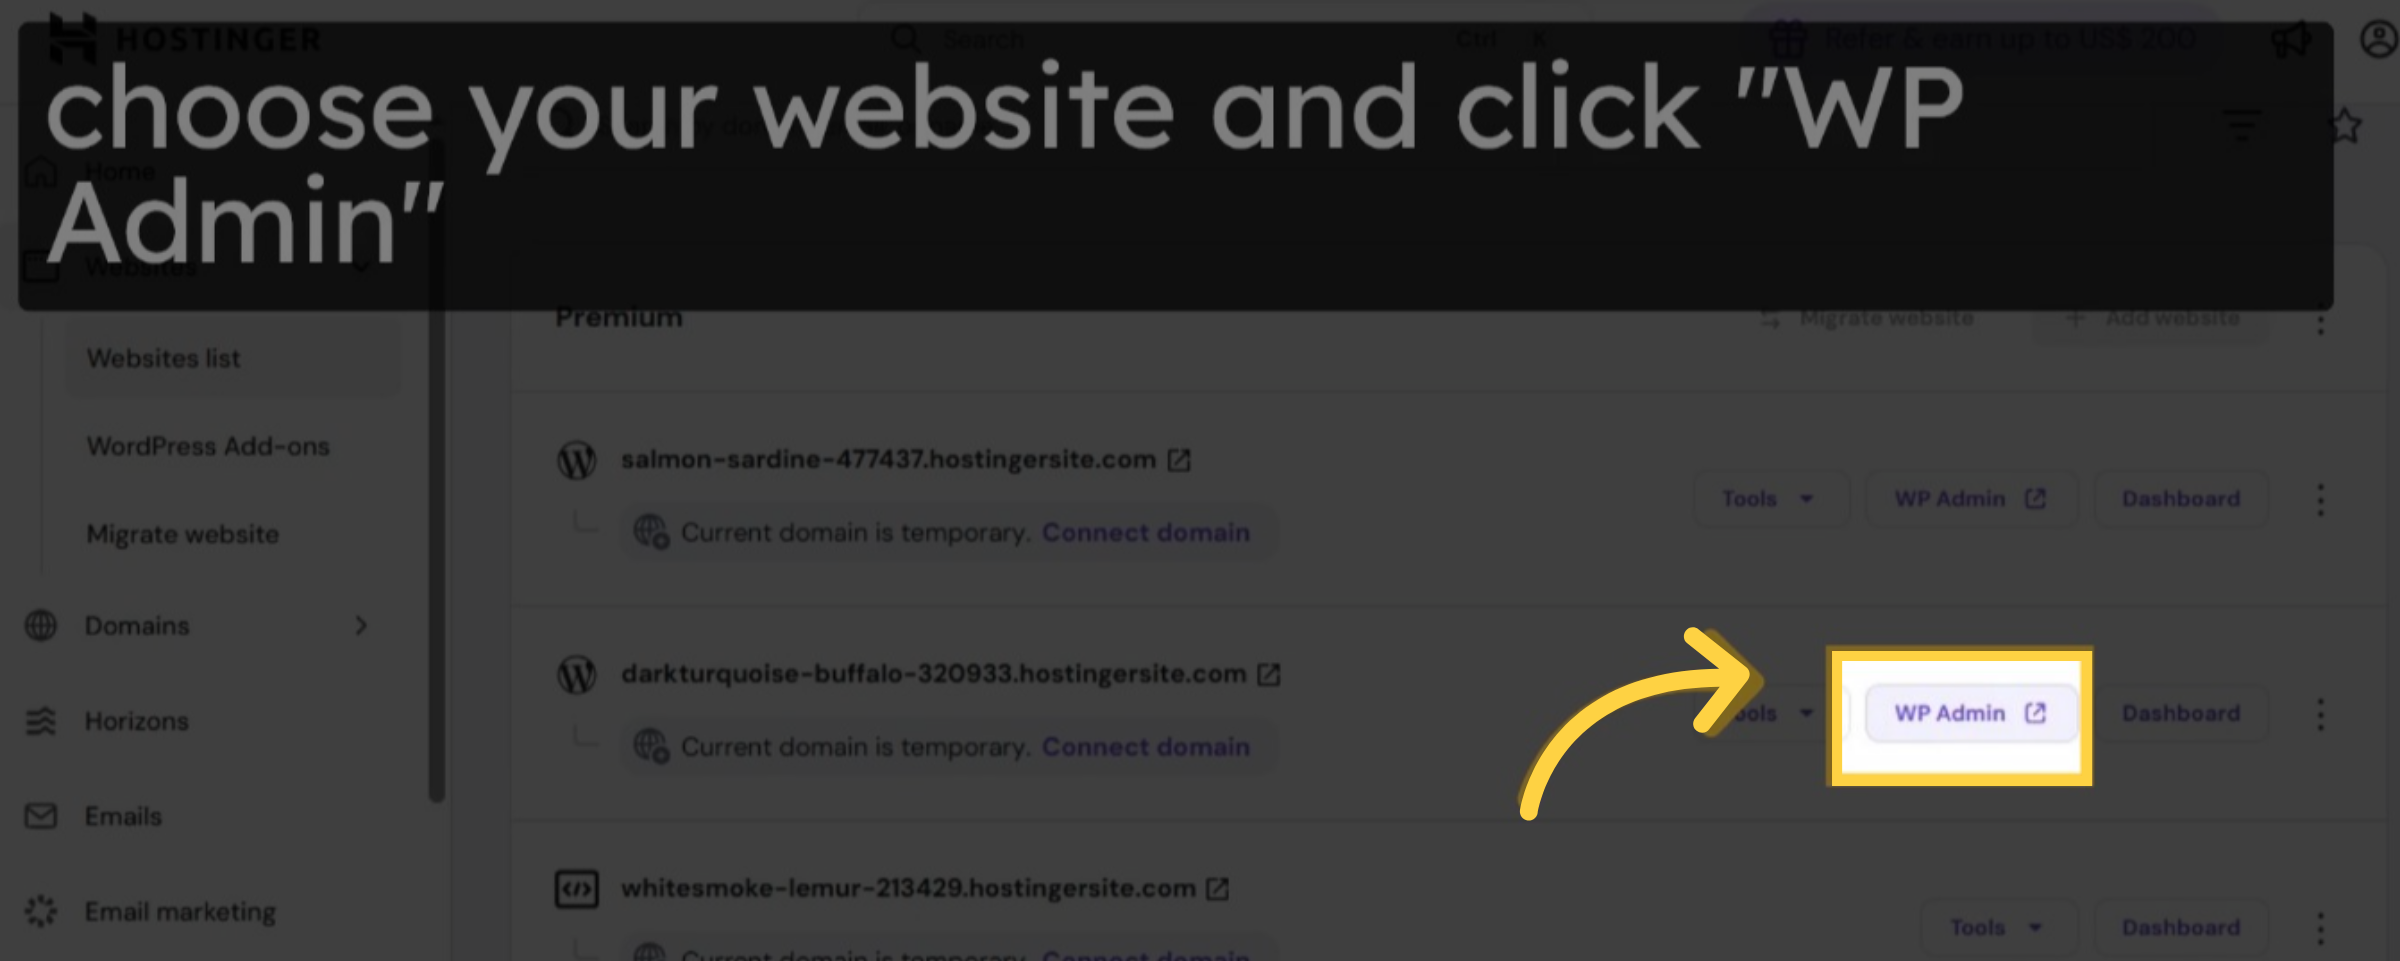
5. choose your website
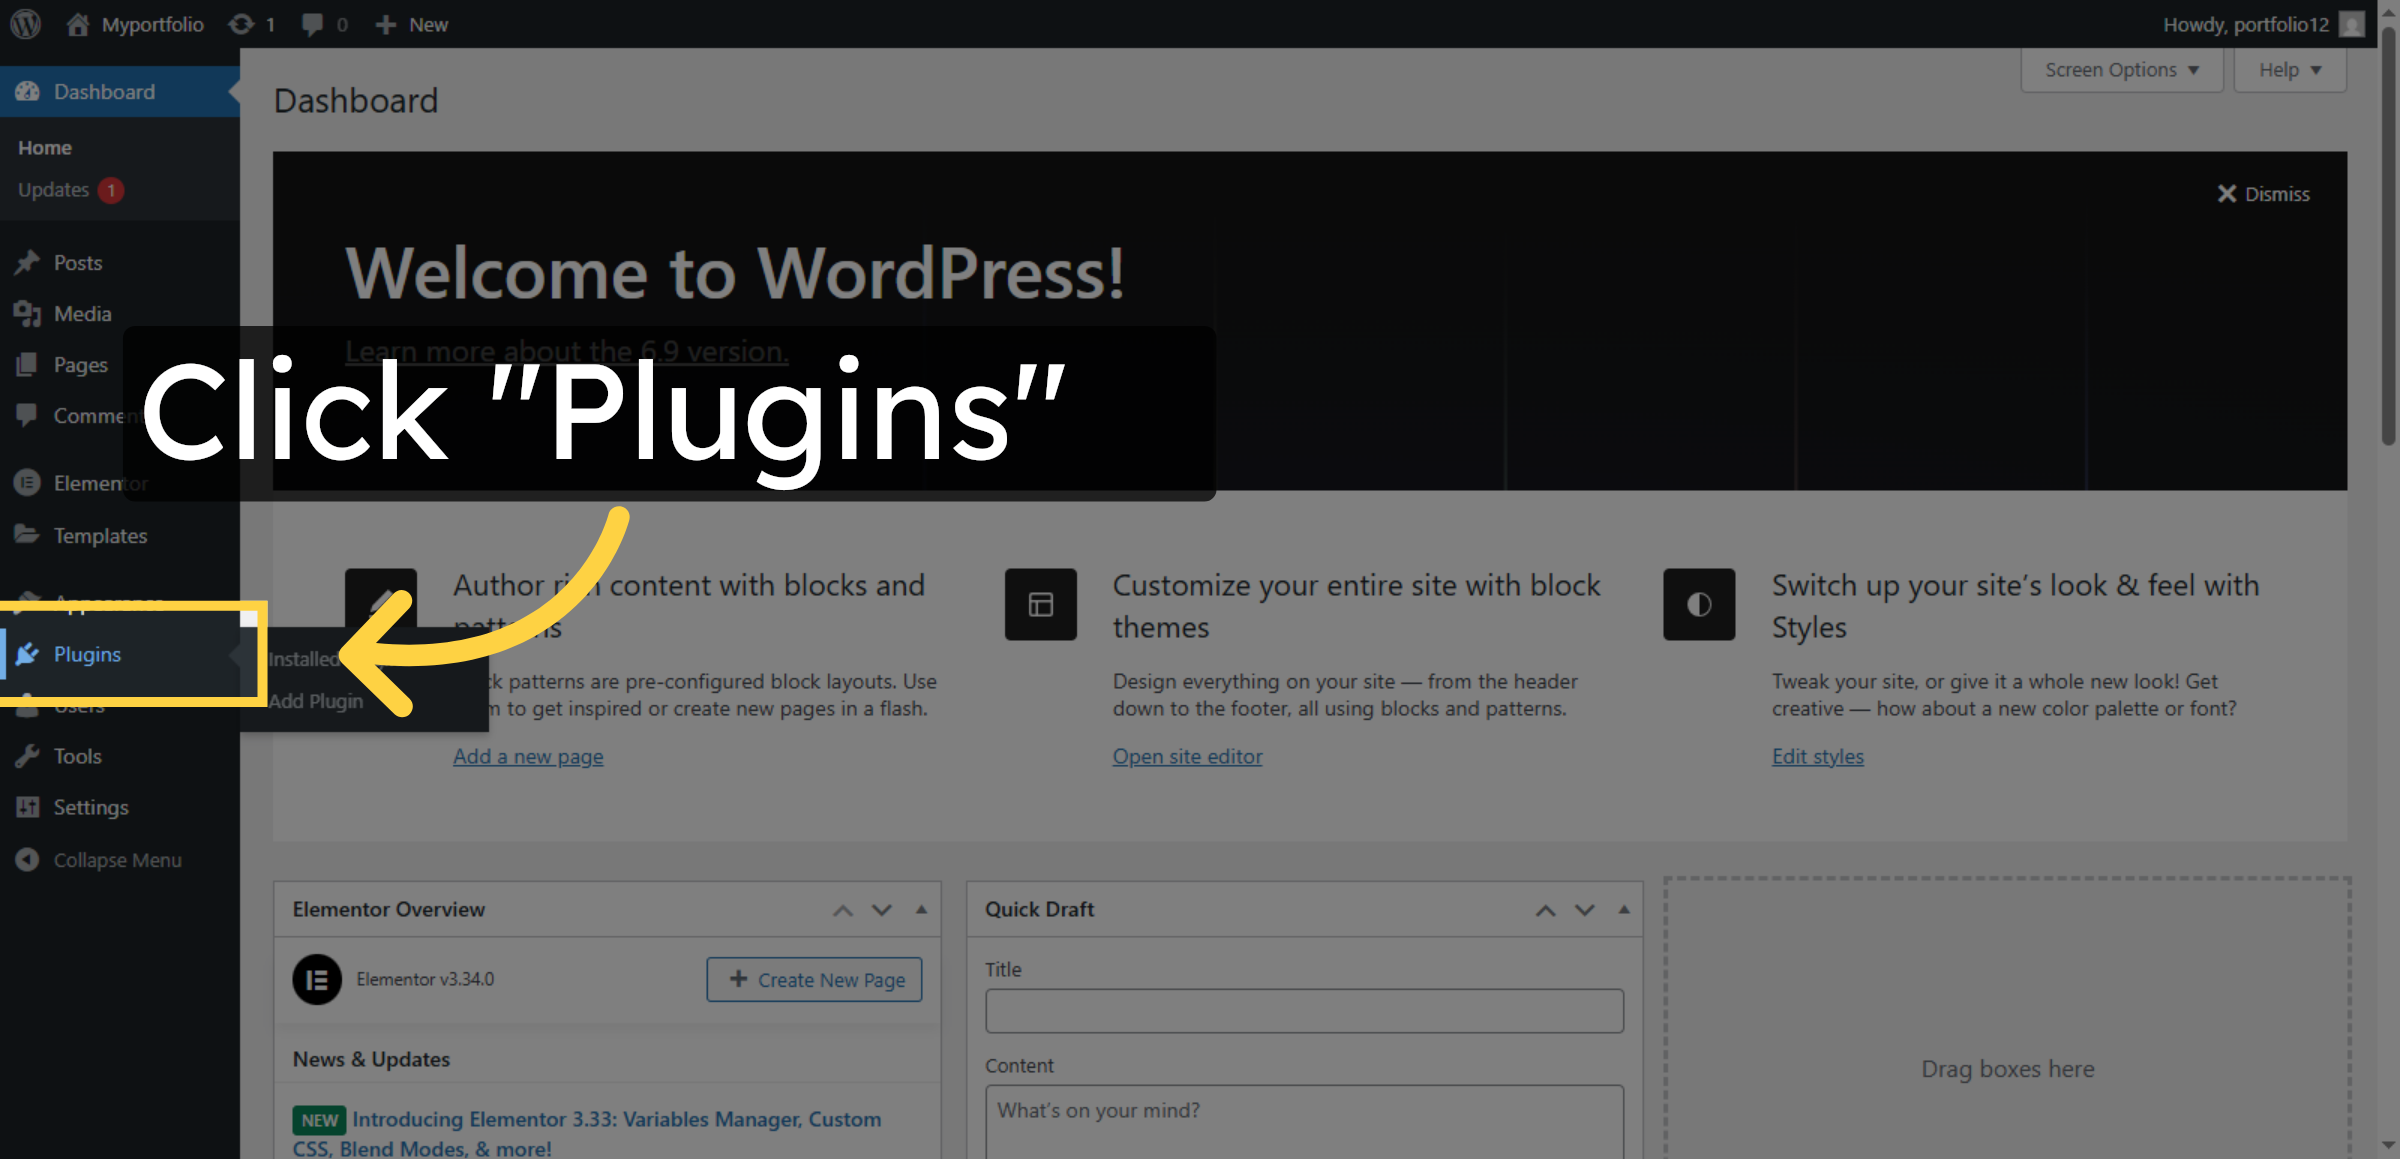
6. Open Plugins Section
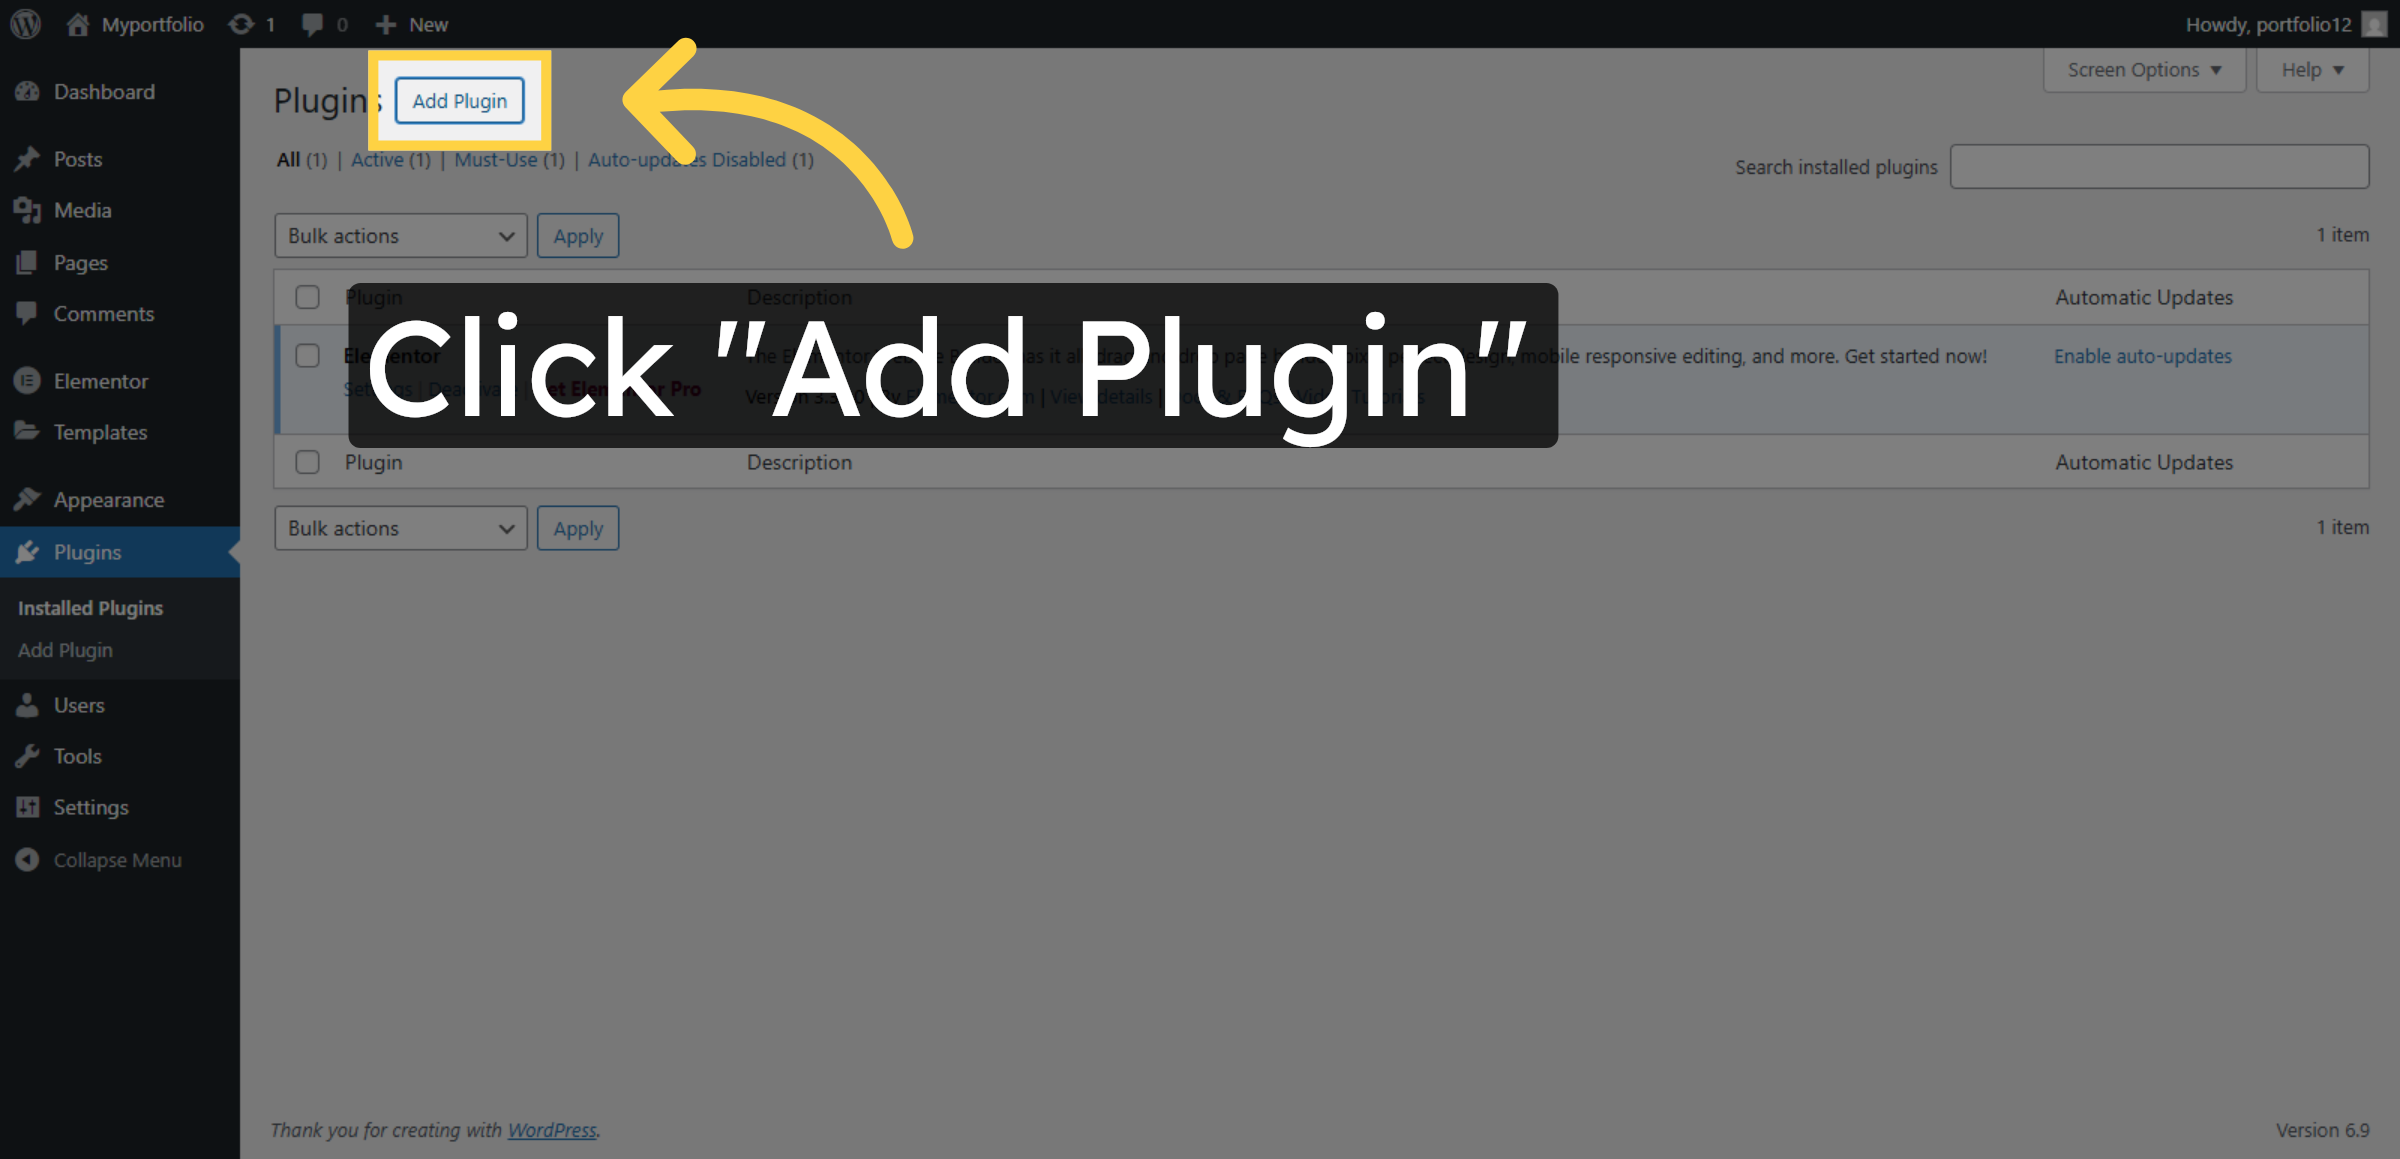
7. Add New Plugin
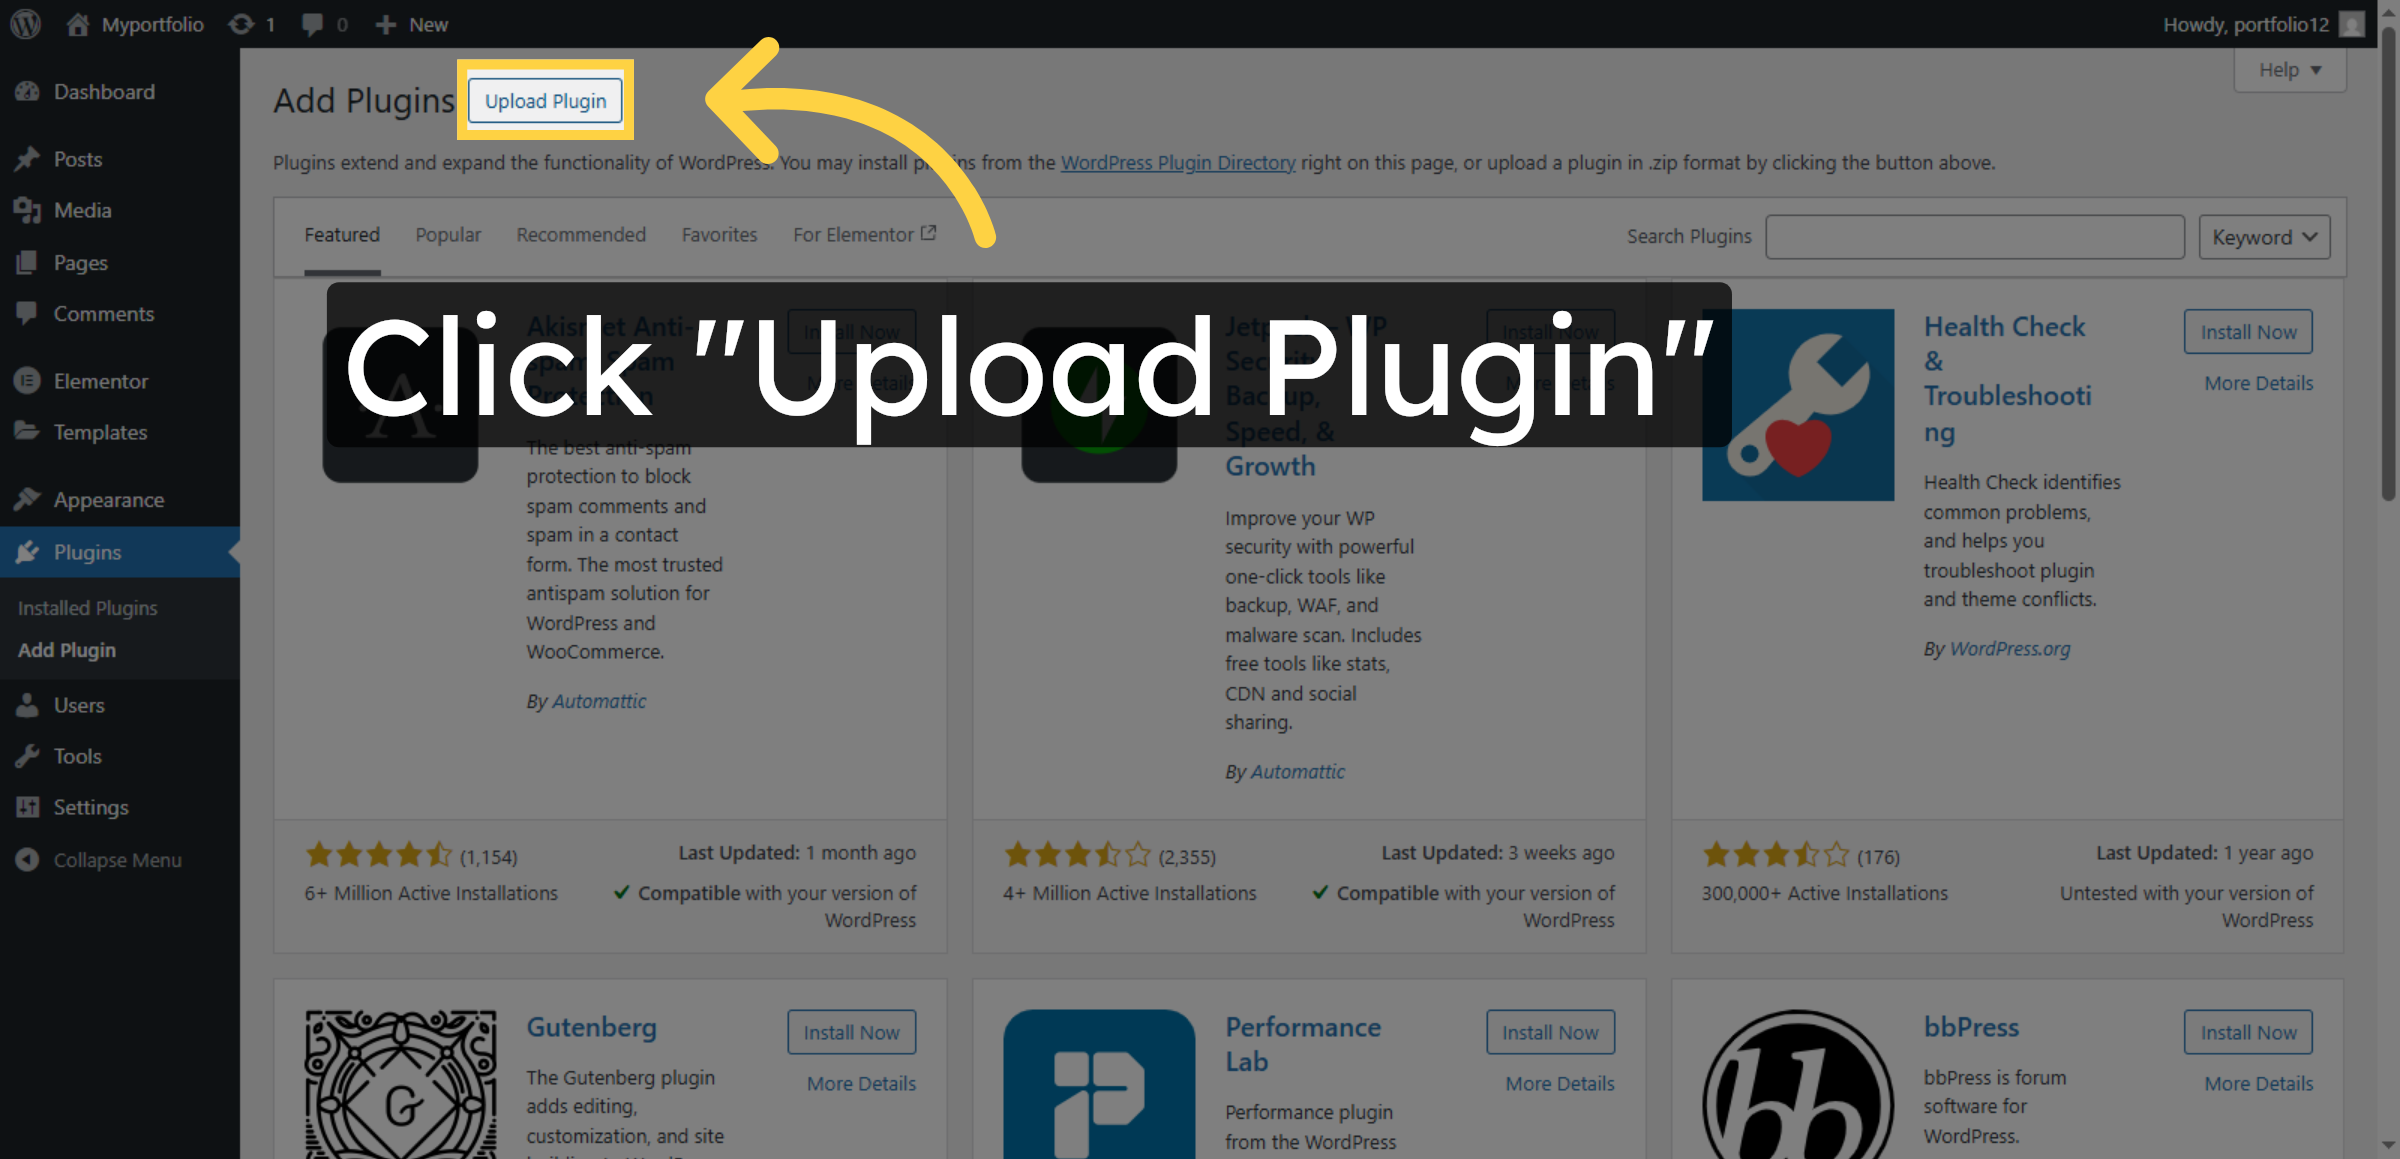
8. Select Upload Plugin
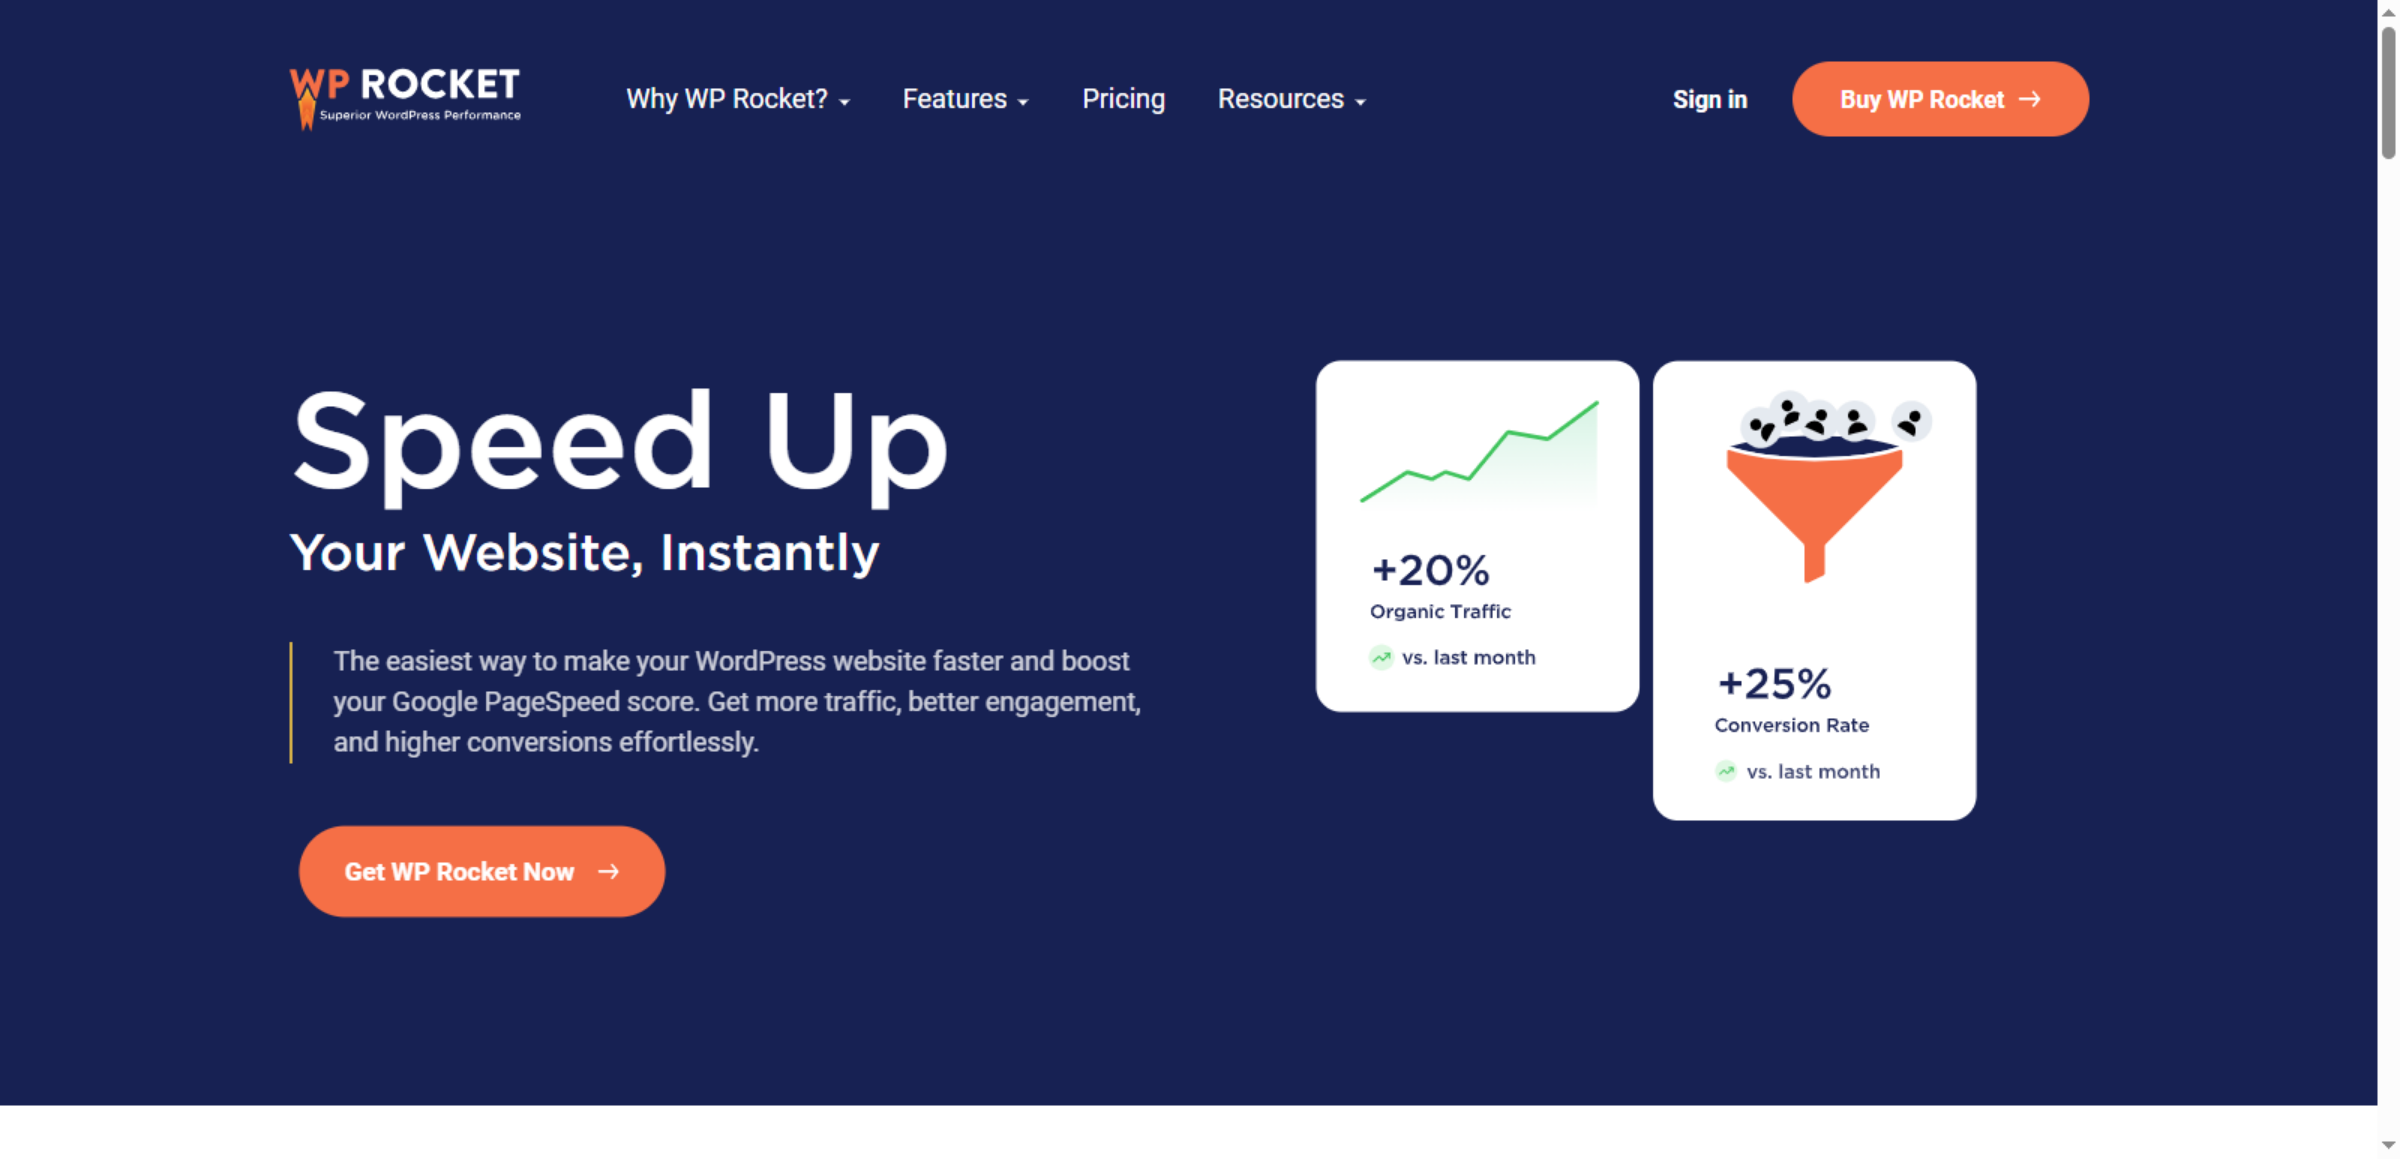
9. Navigate to WP Rocket Site
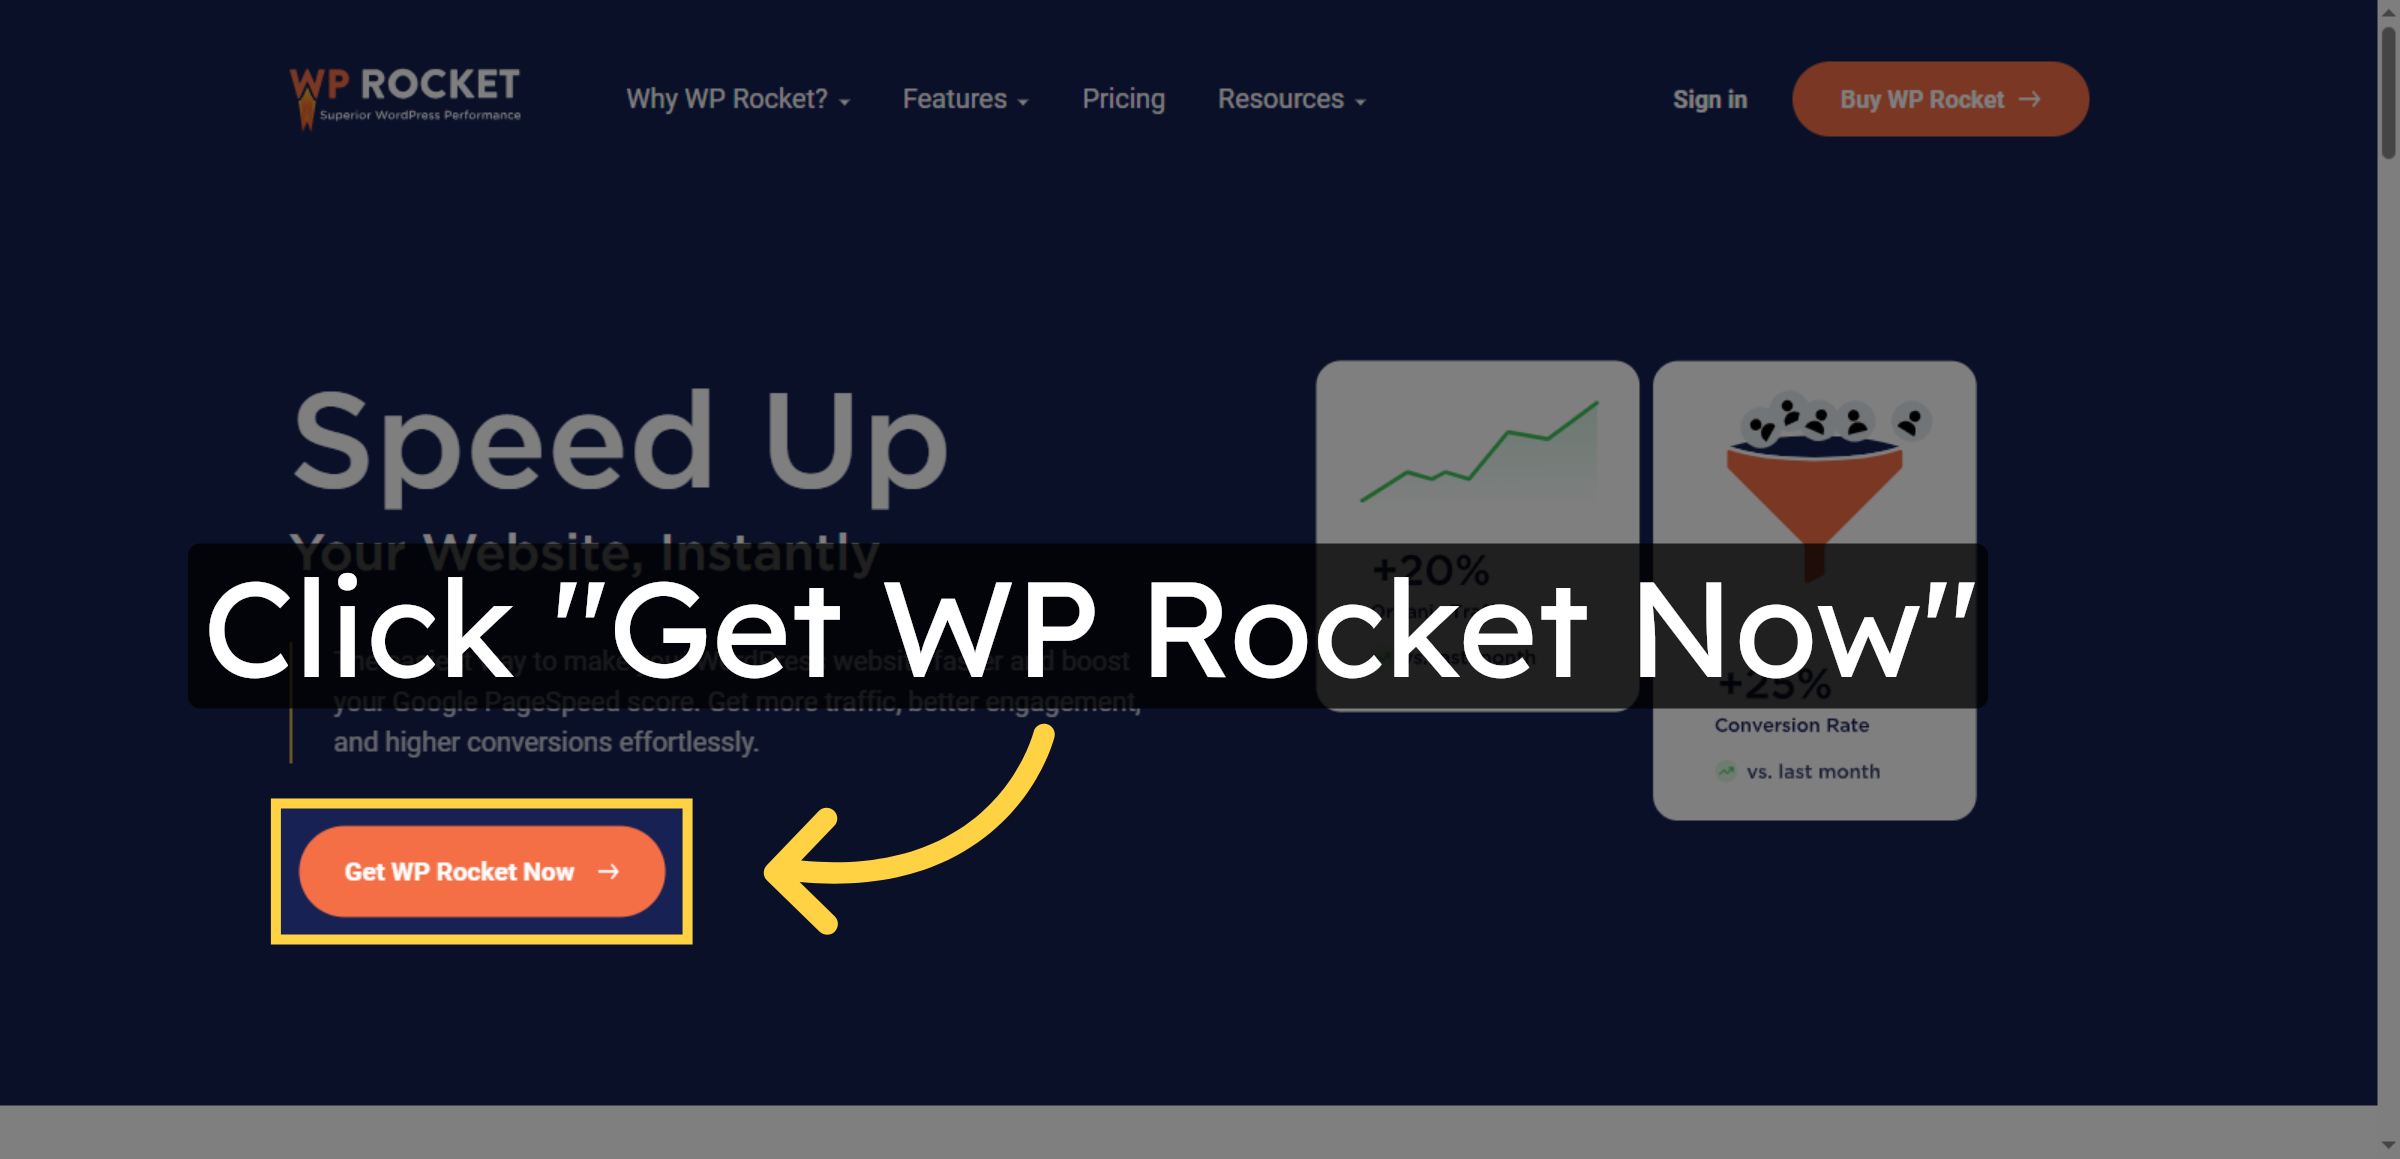
10. Access WP Rocket Purchase
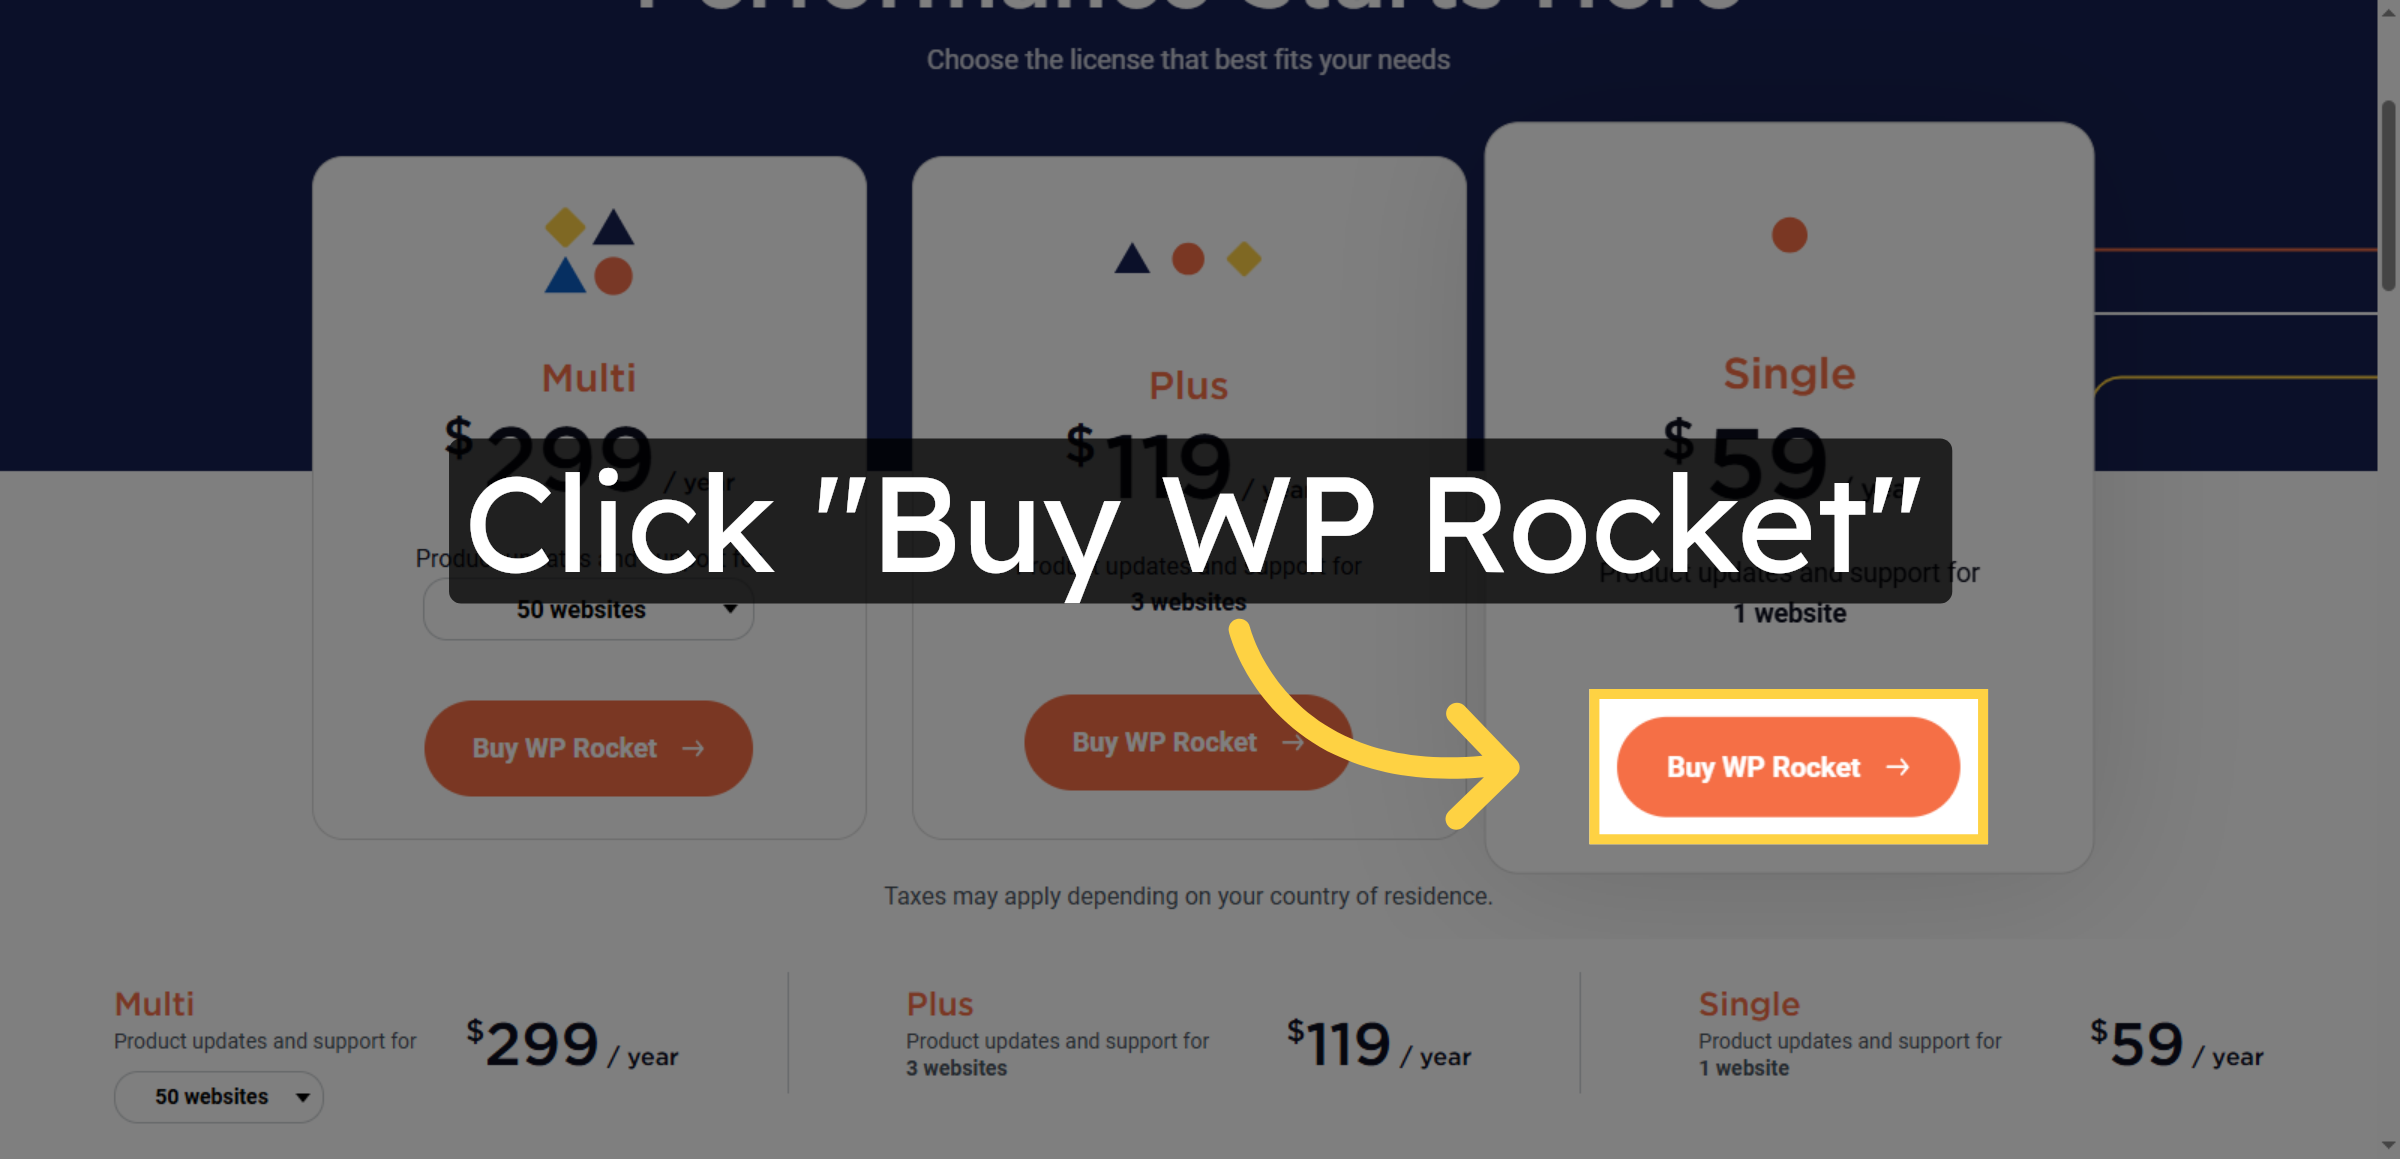
11. Proceed to Buy WP Rocket
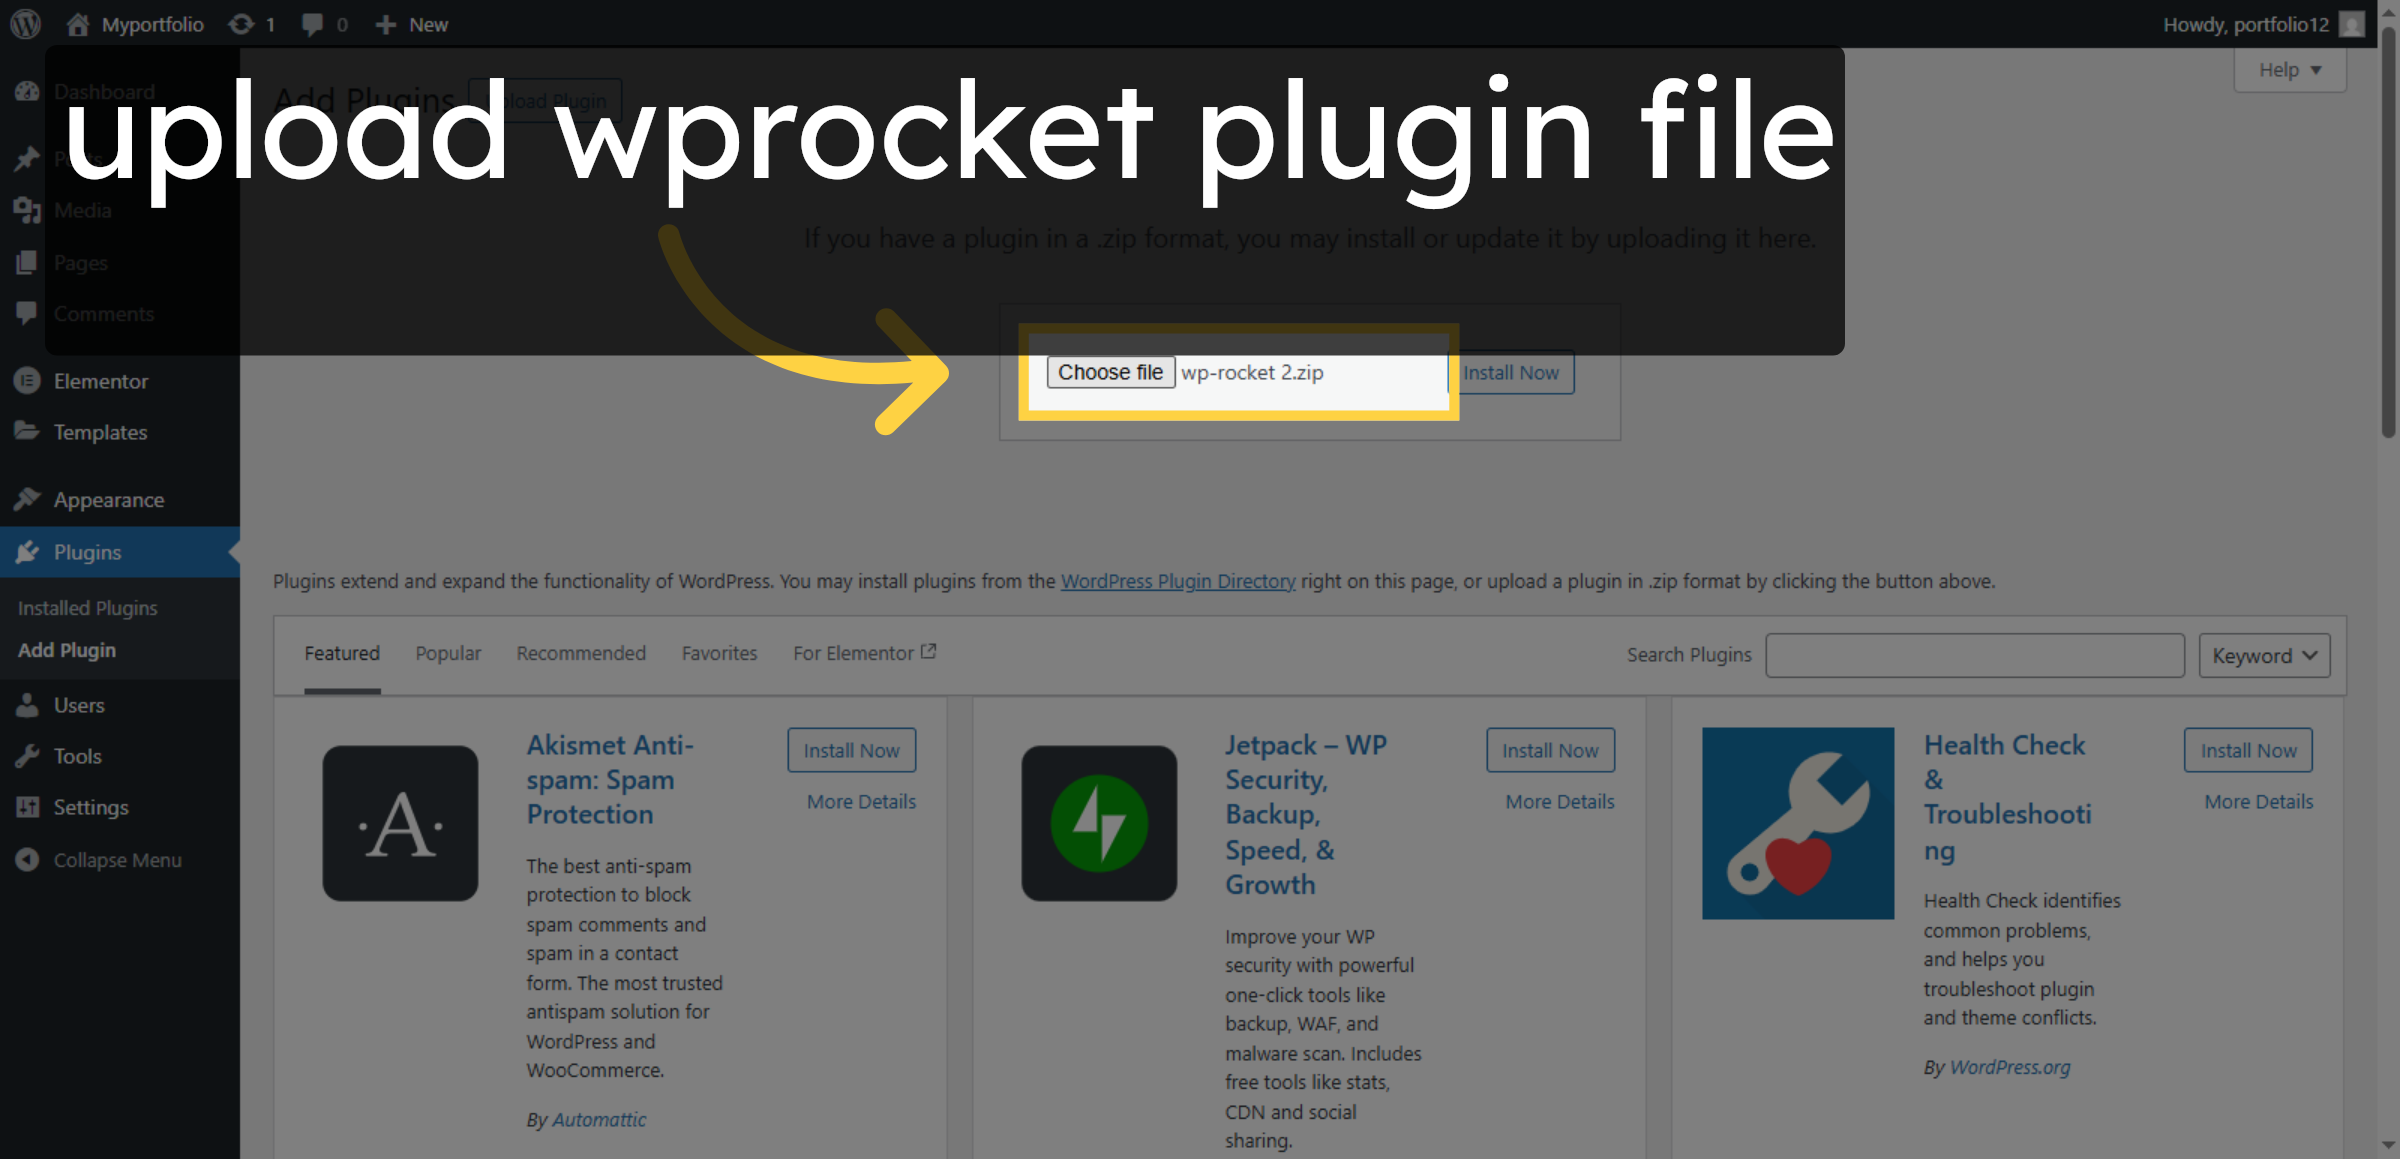
12. Choose Plugin Zip File

13. Enter Plugin File Path
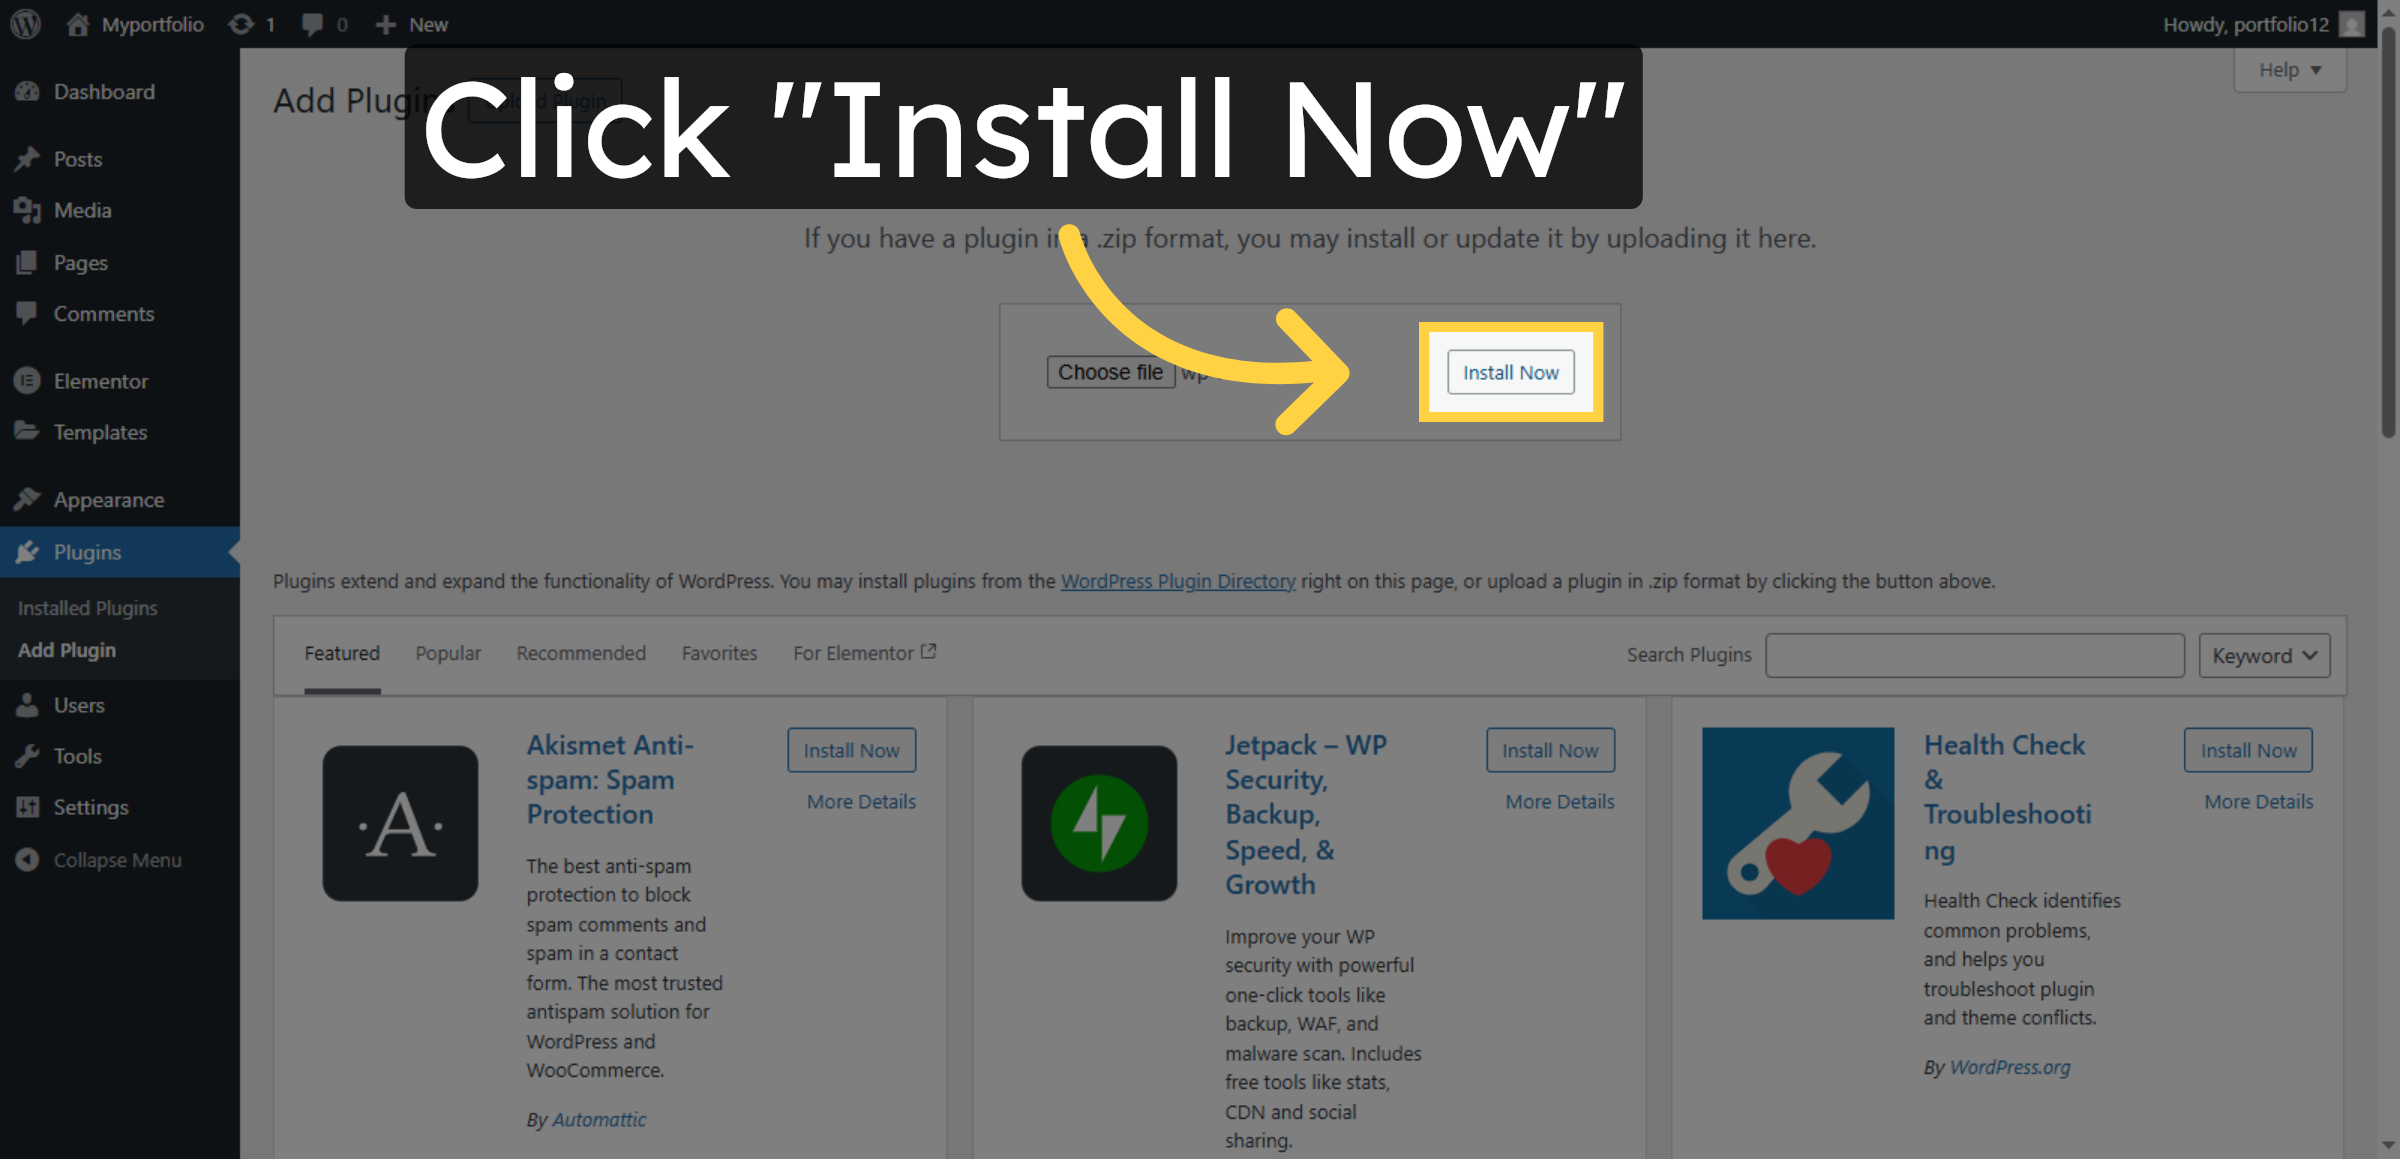
14. Install Plugin
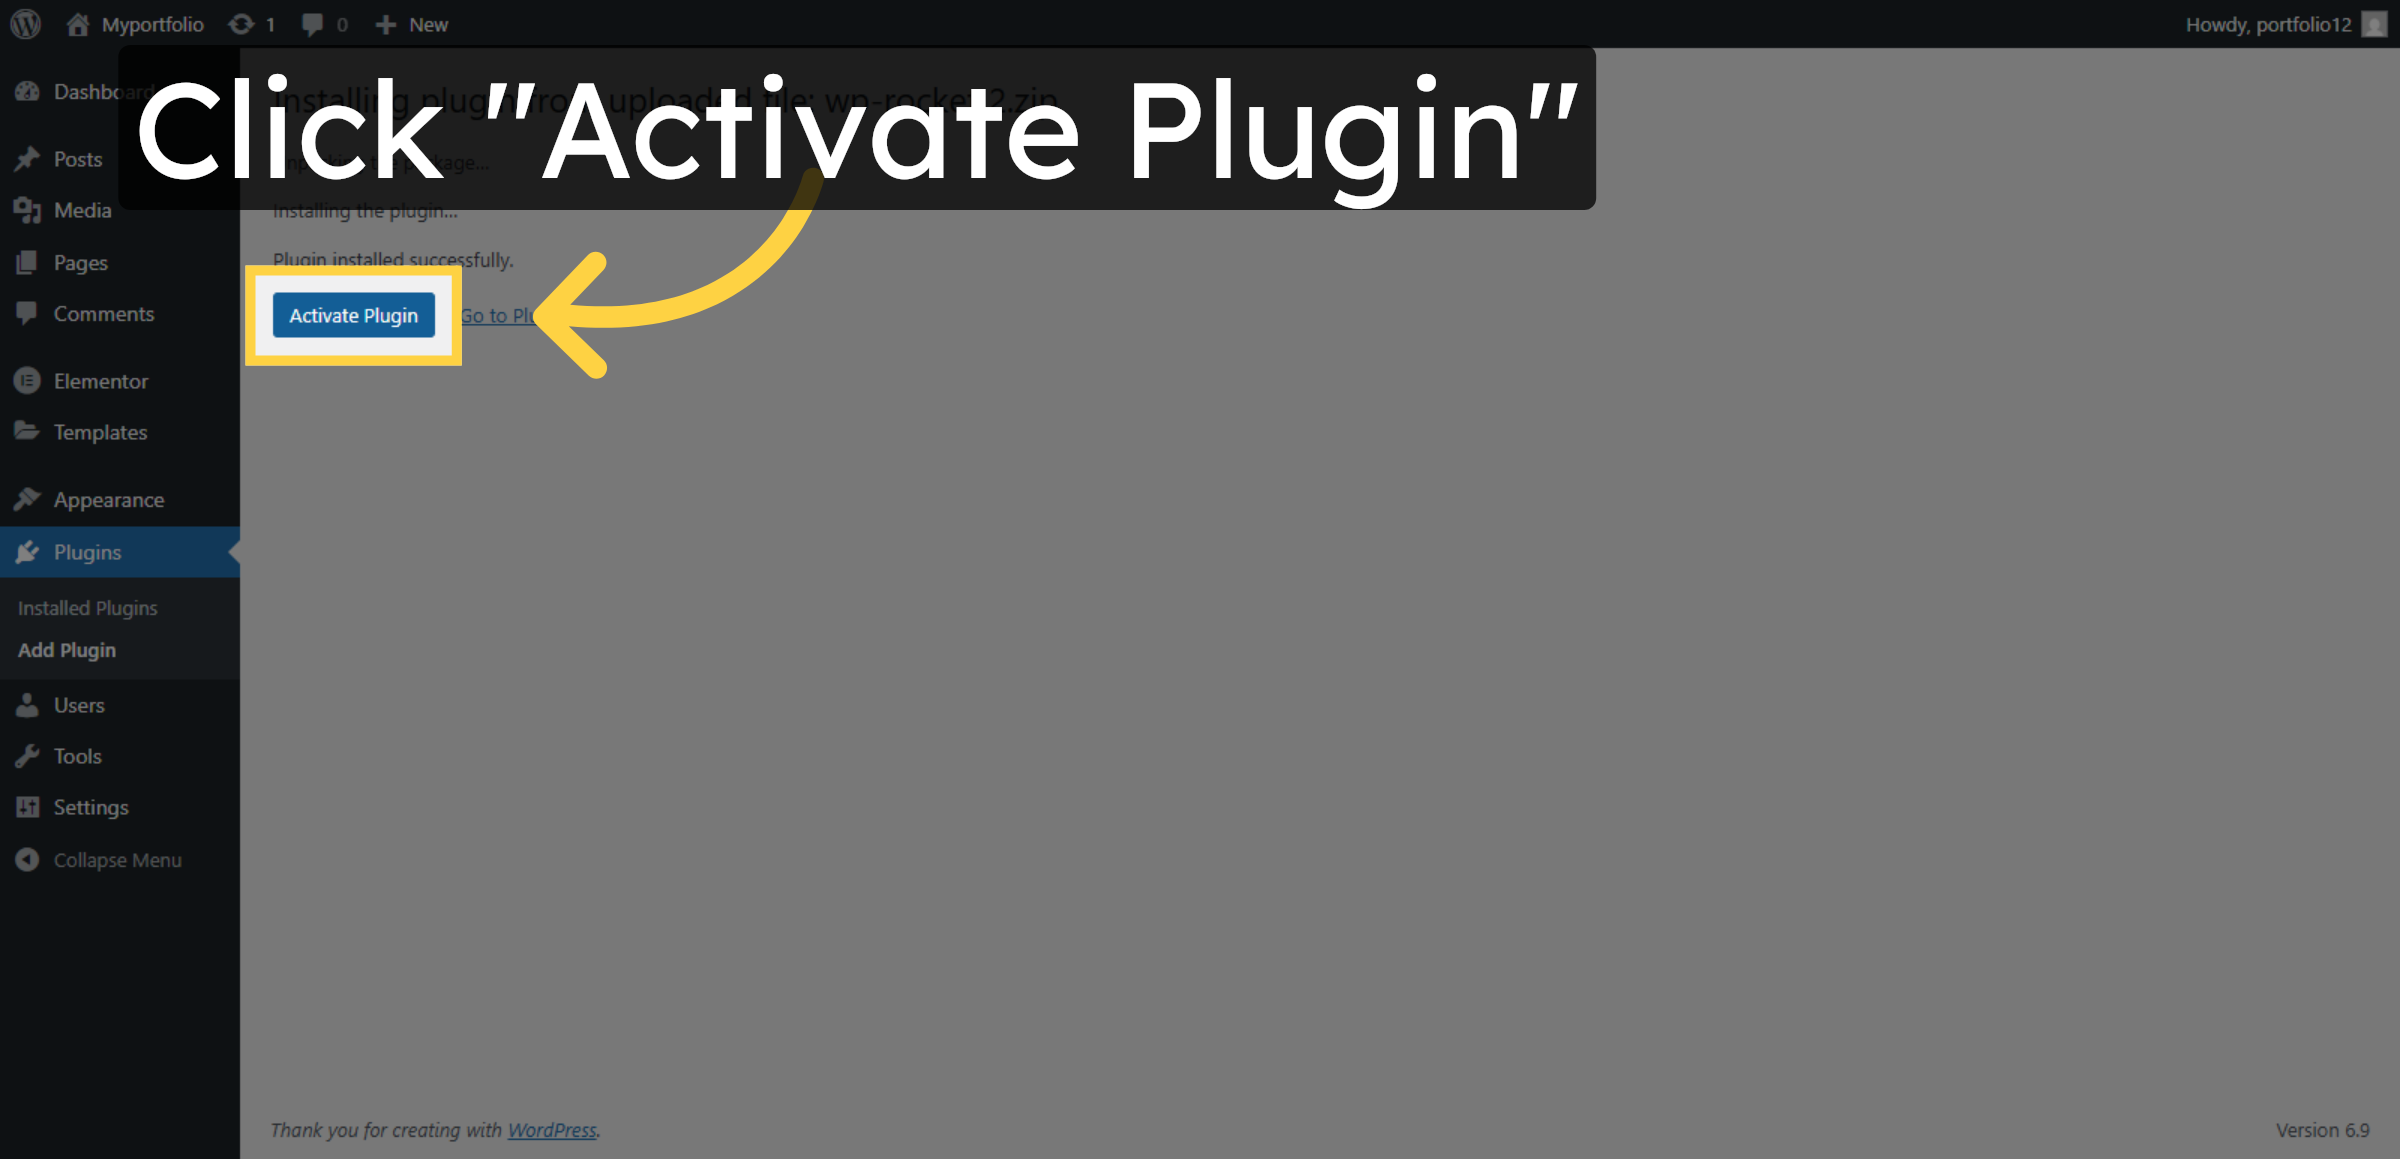
15. Activate Plugin
16. Open Plugin Settings
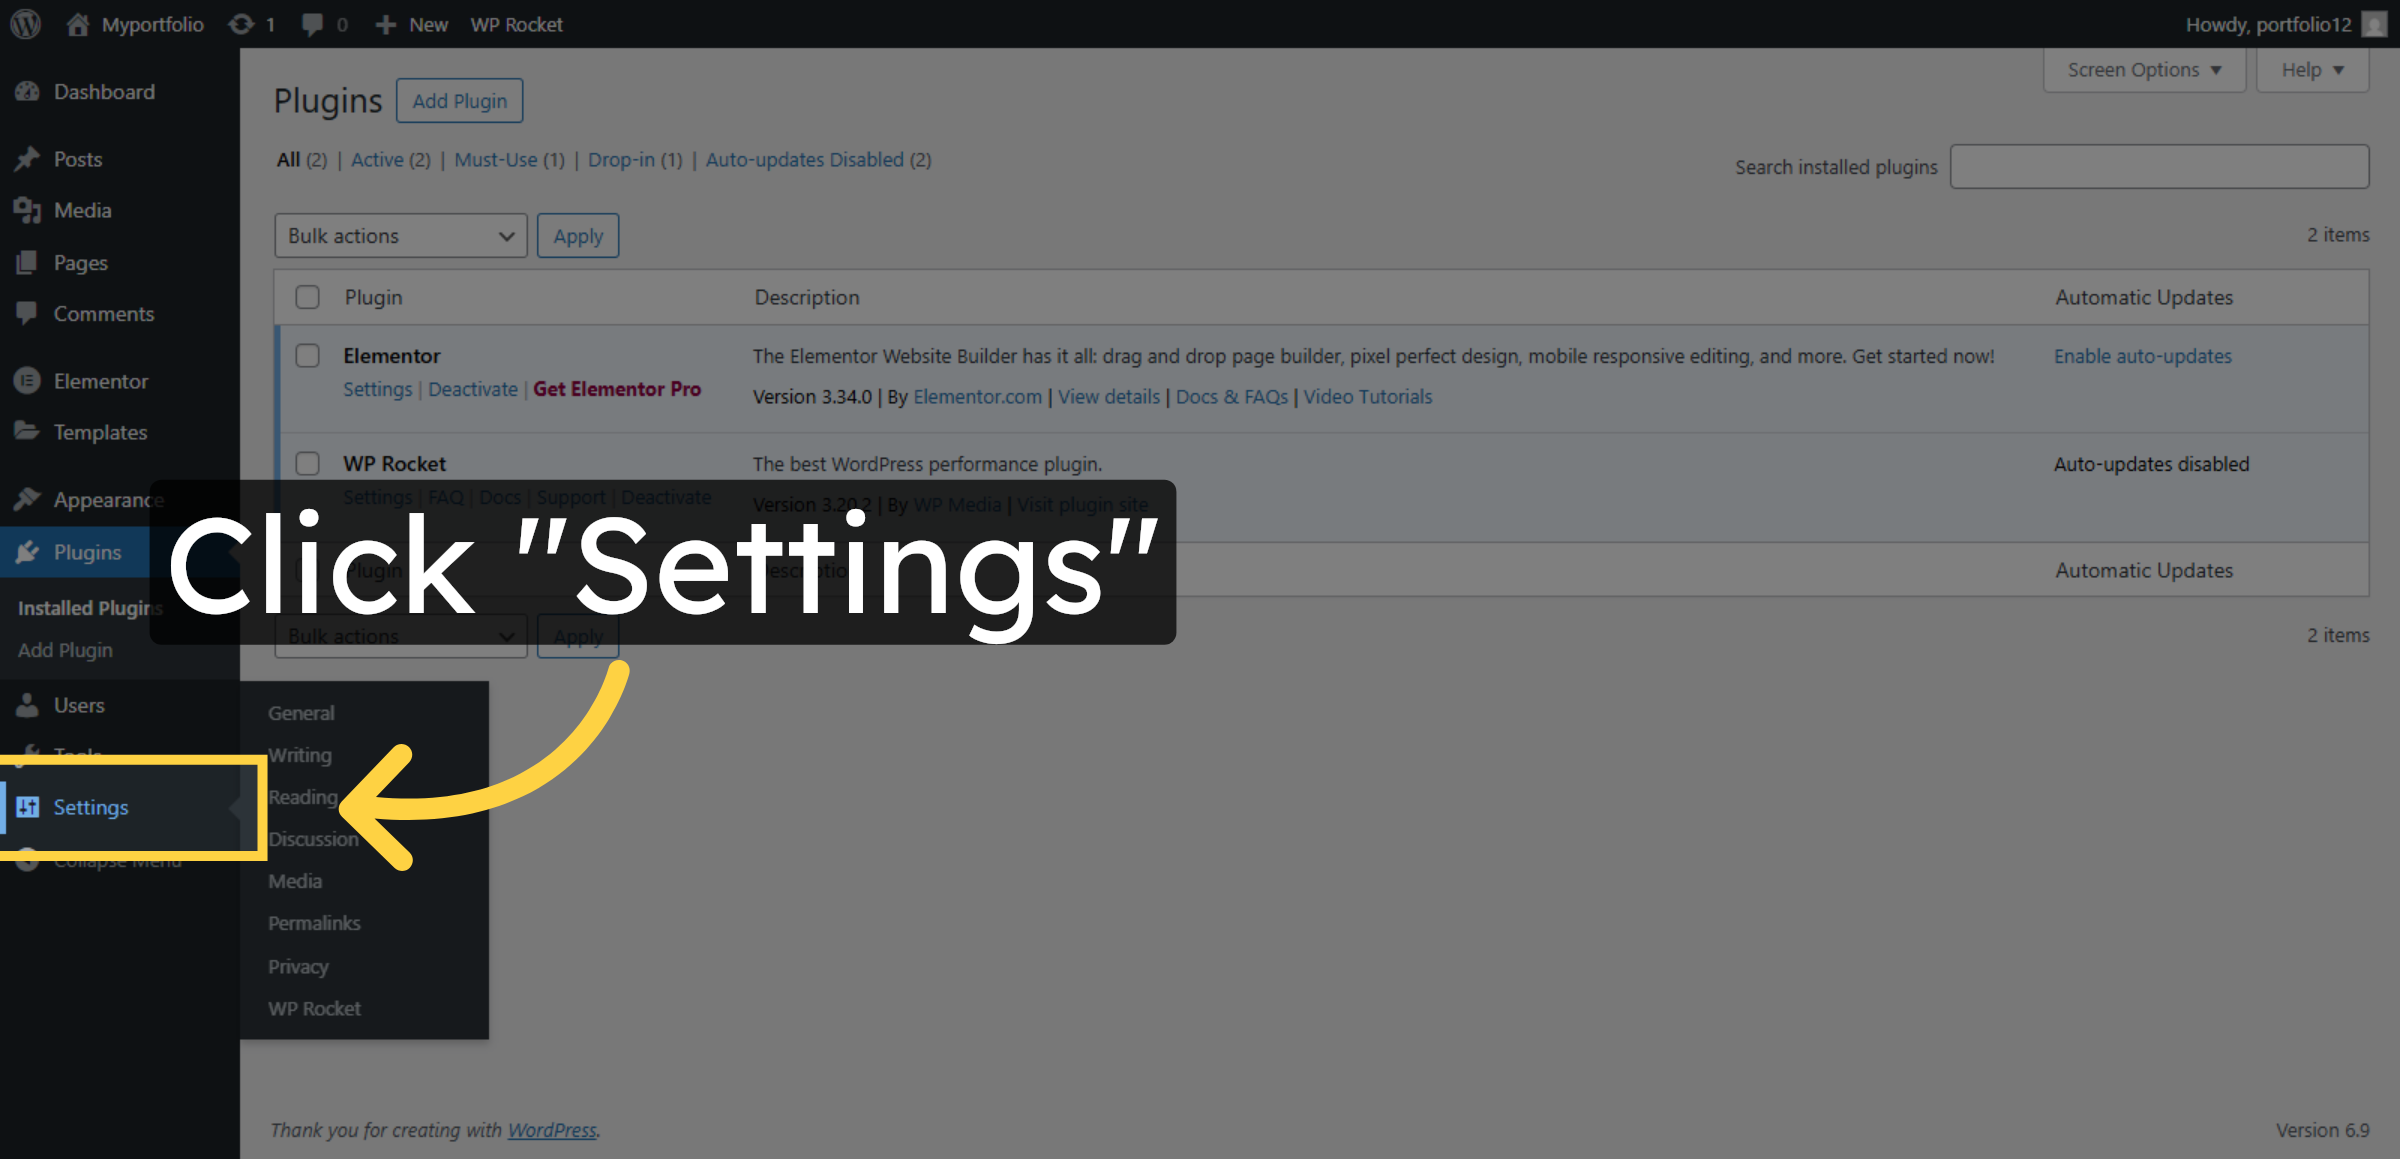
17. Select WP Rocket Settings

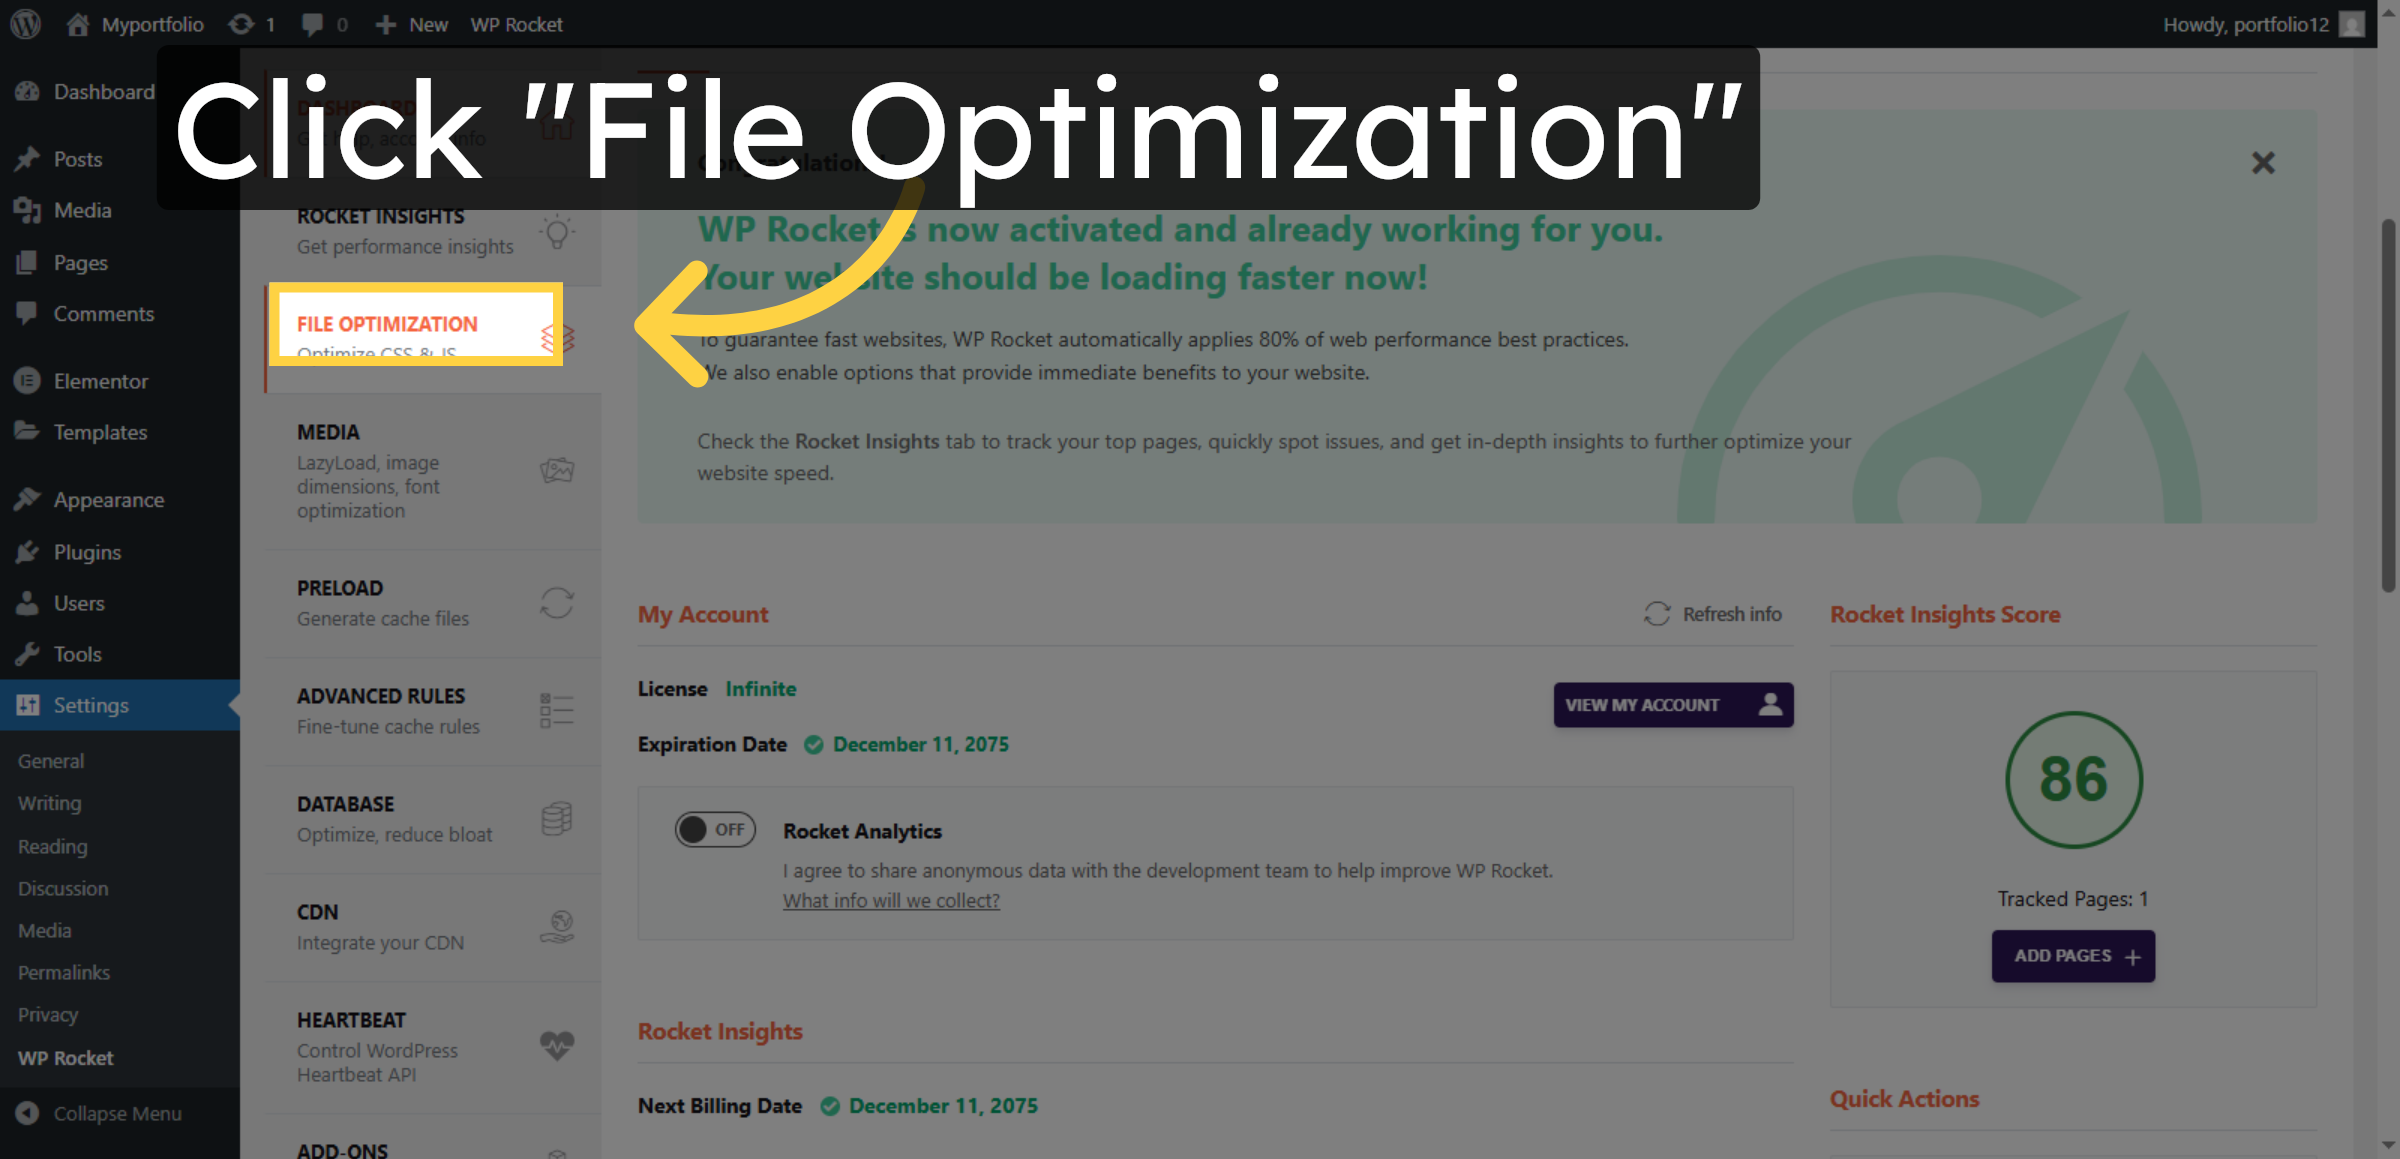
18. Access File Optimization
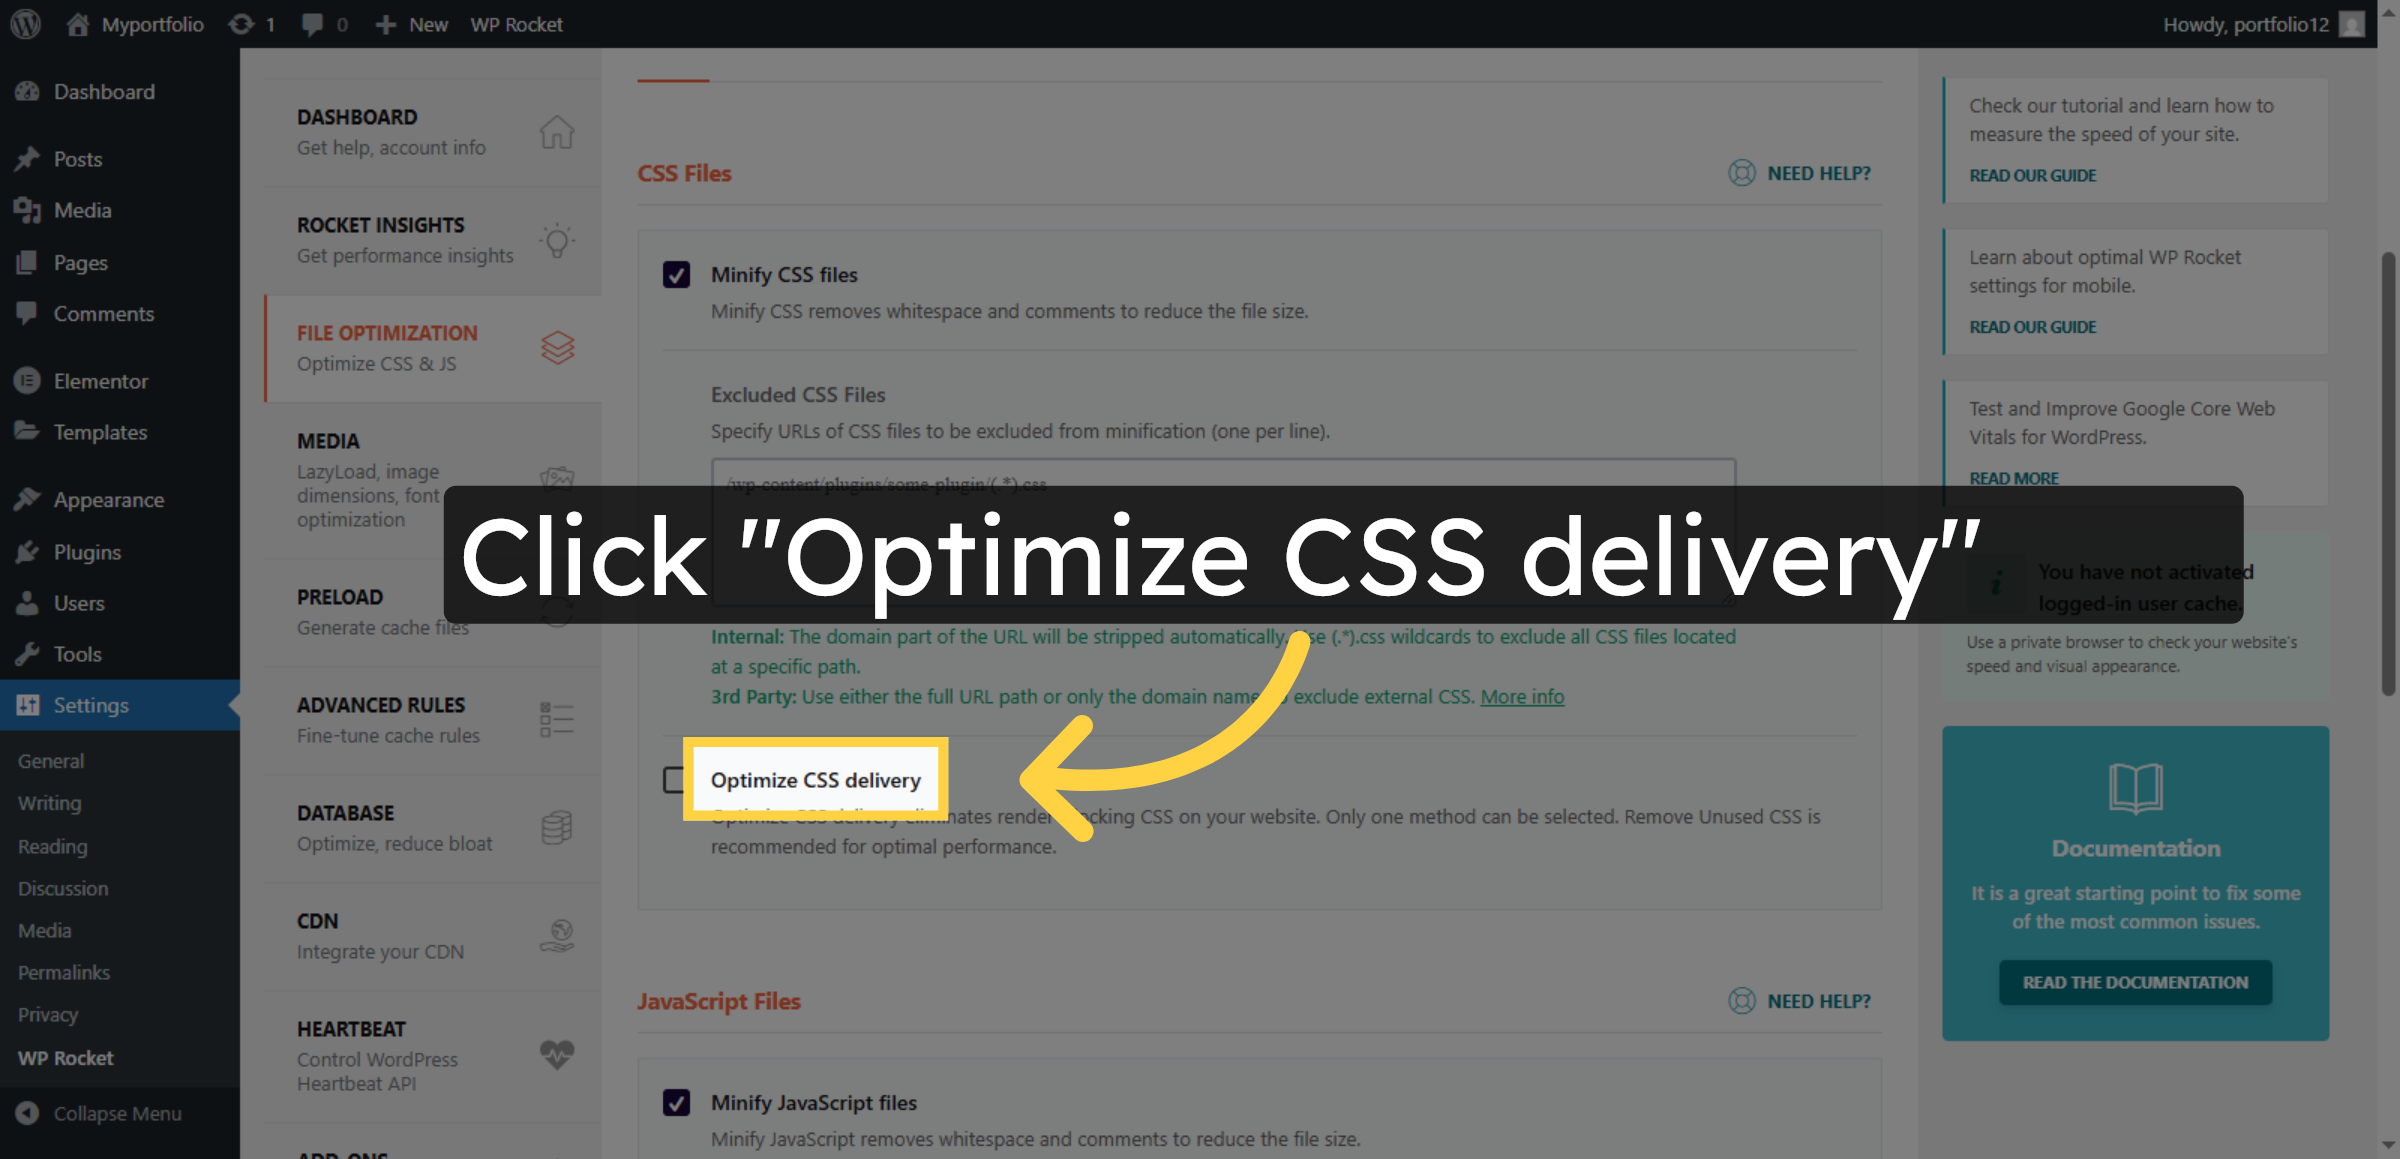
19. Enable CSS Delivery Optimization
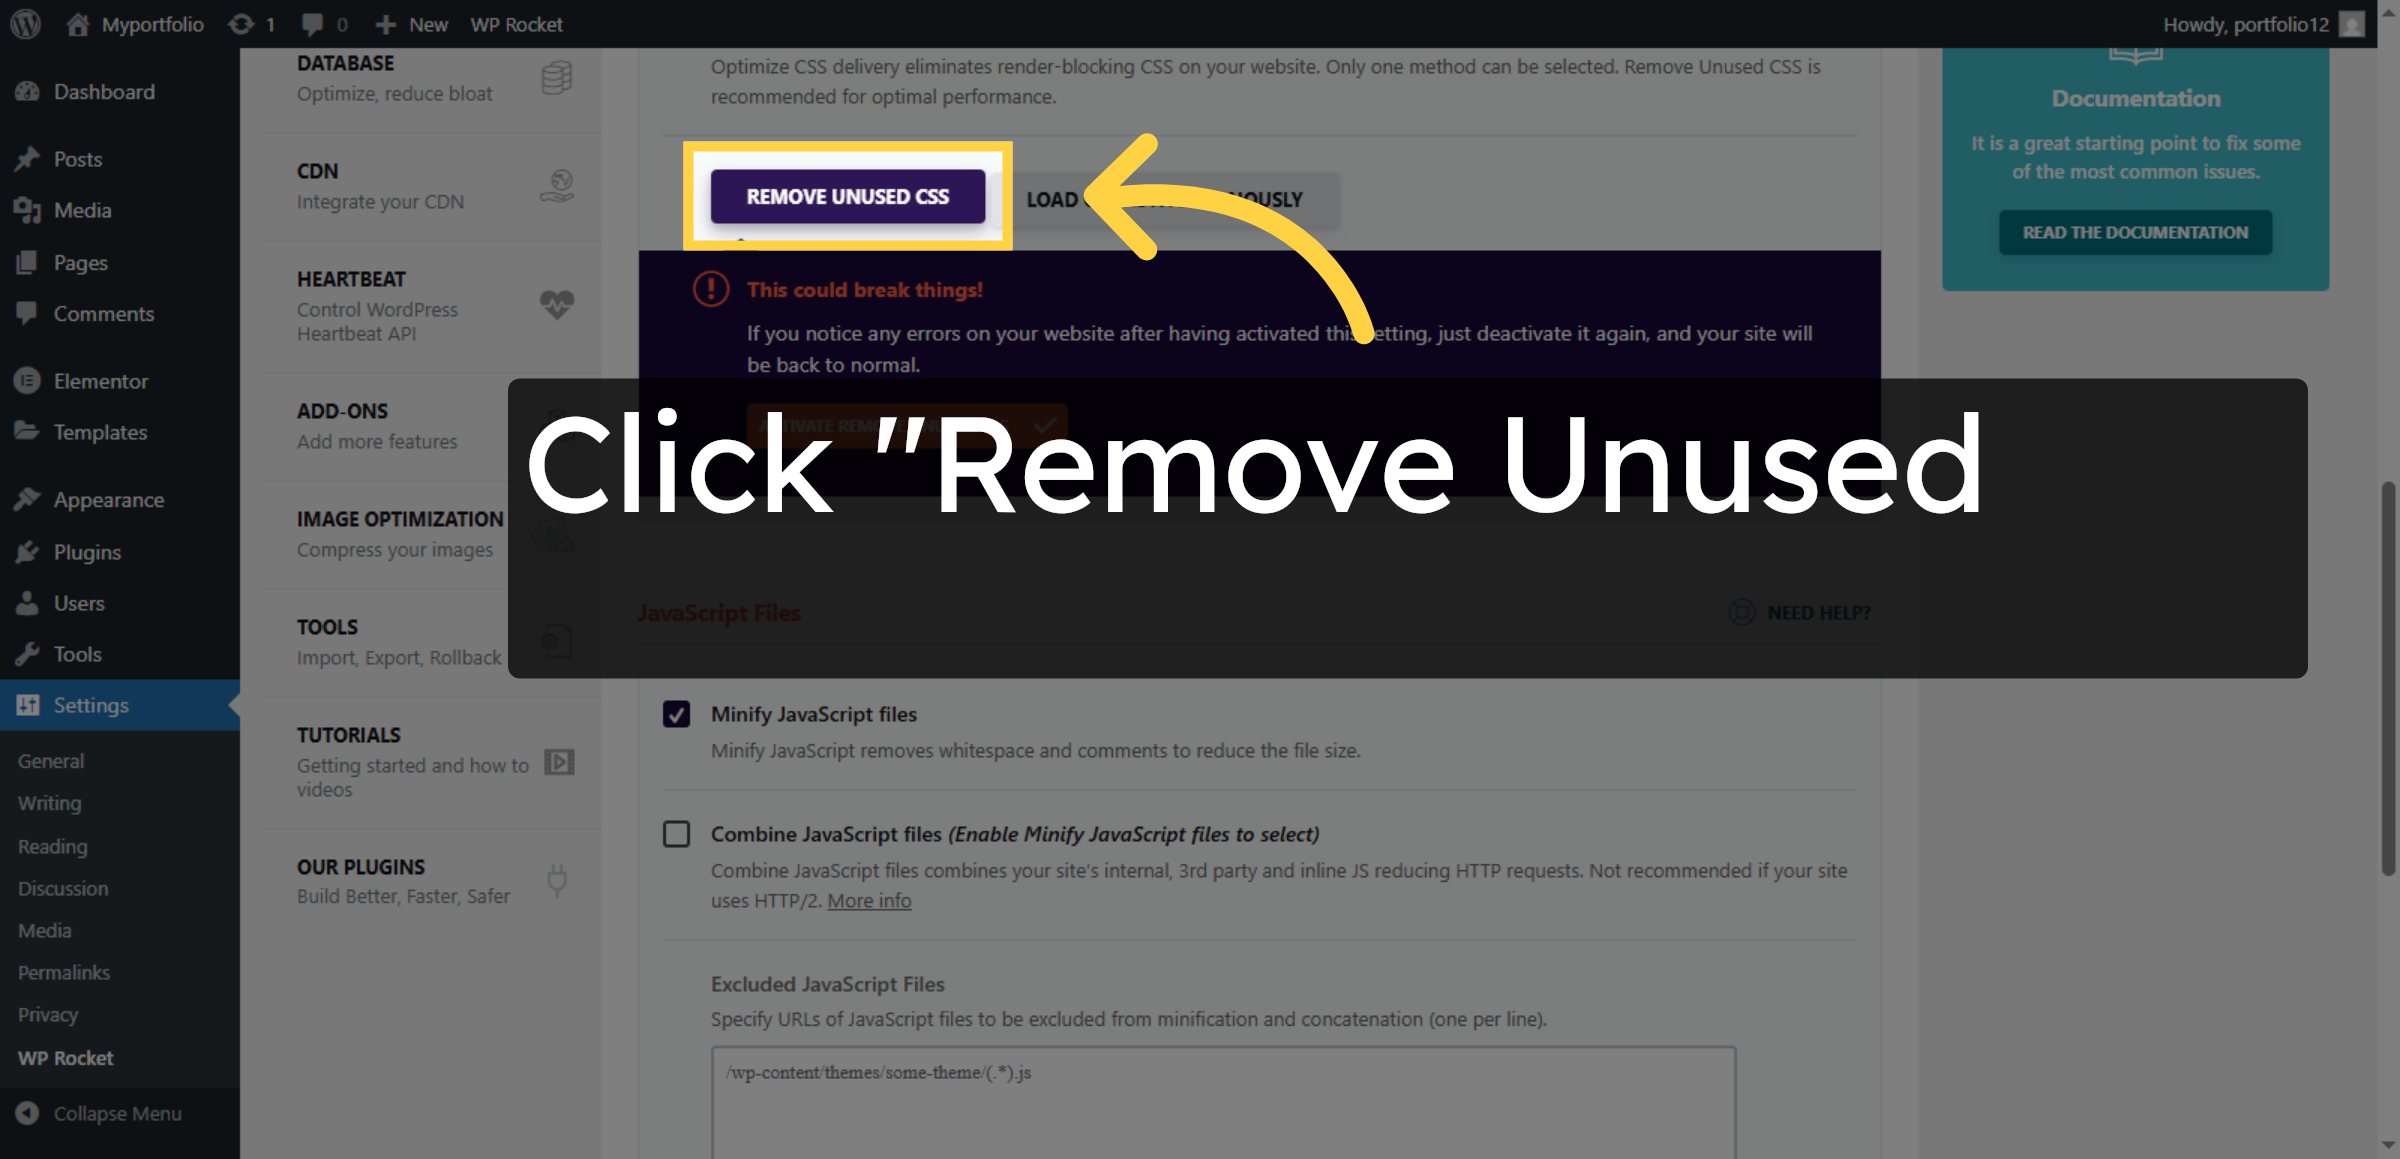
20. Enable Remove Unused CSS
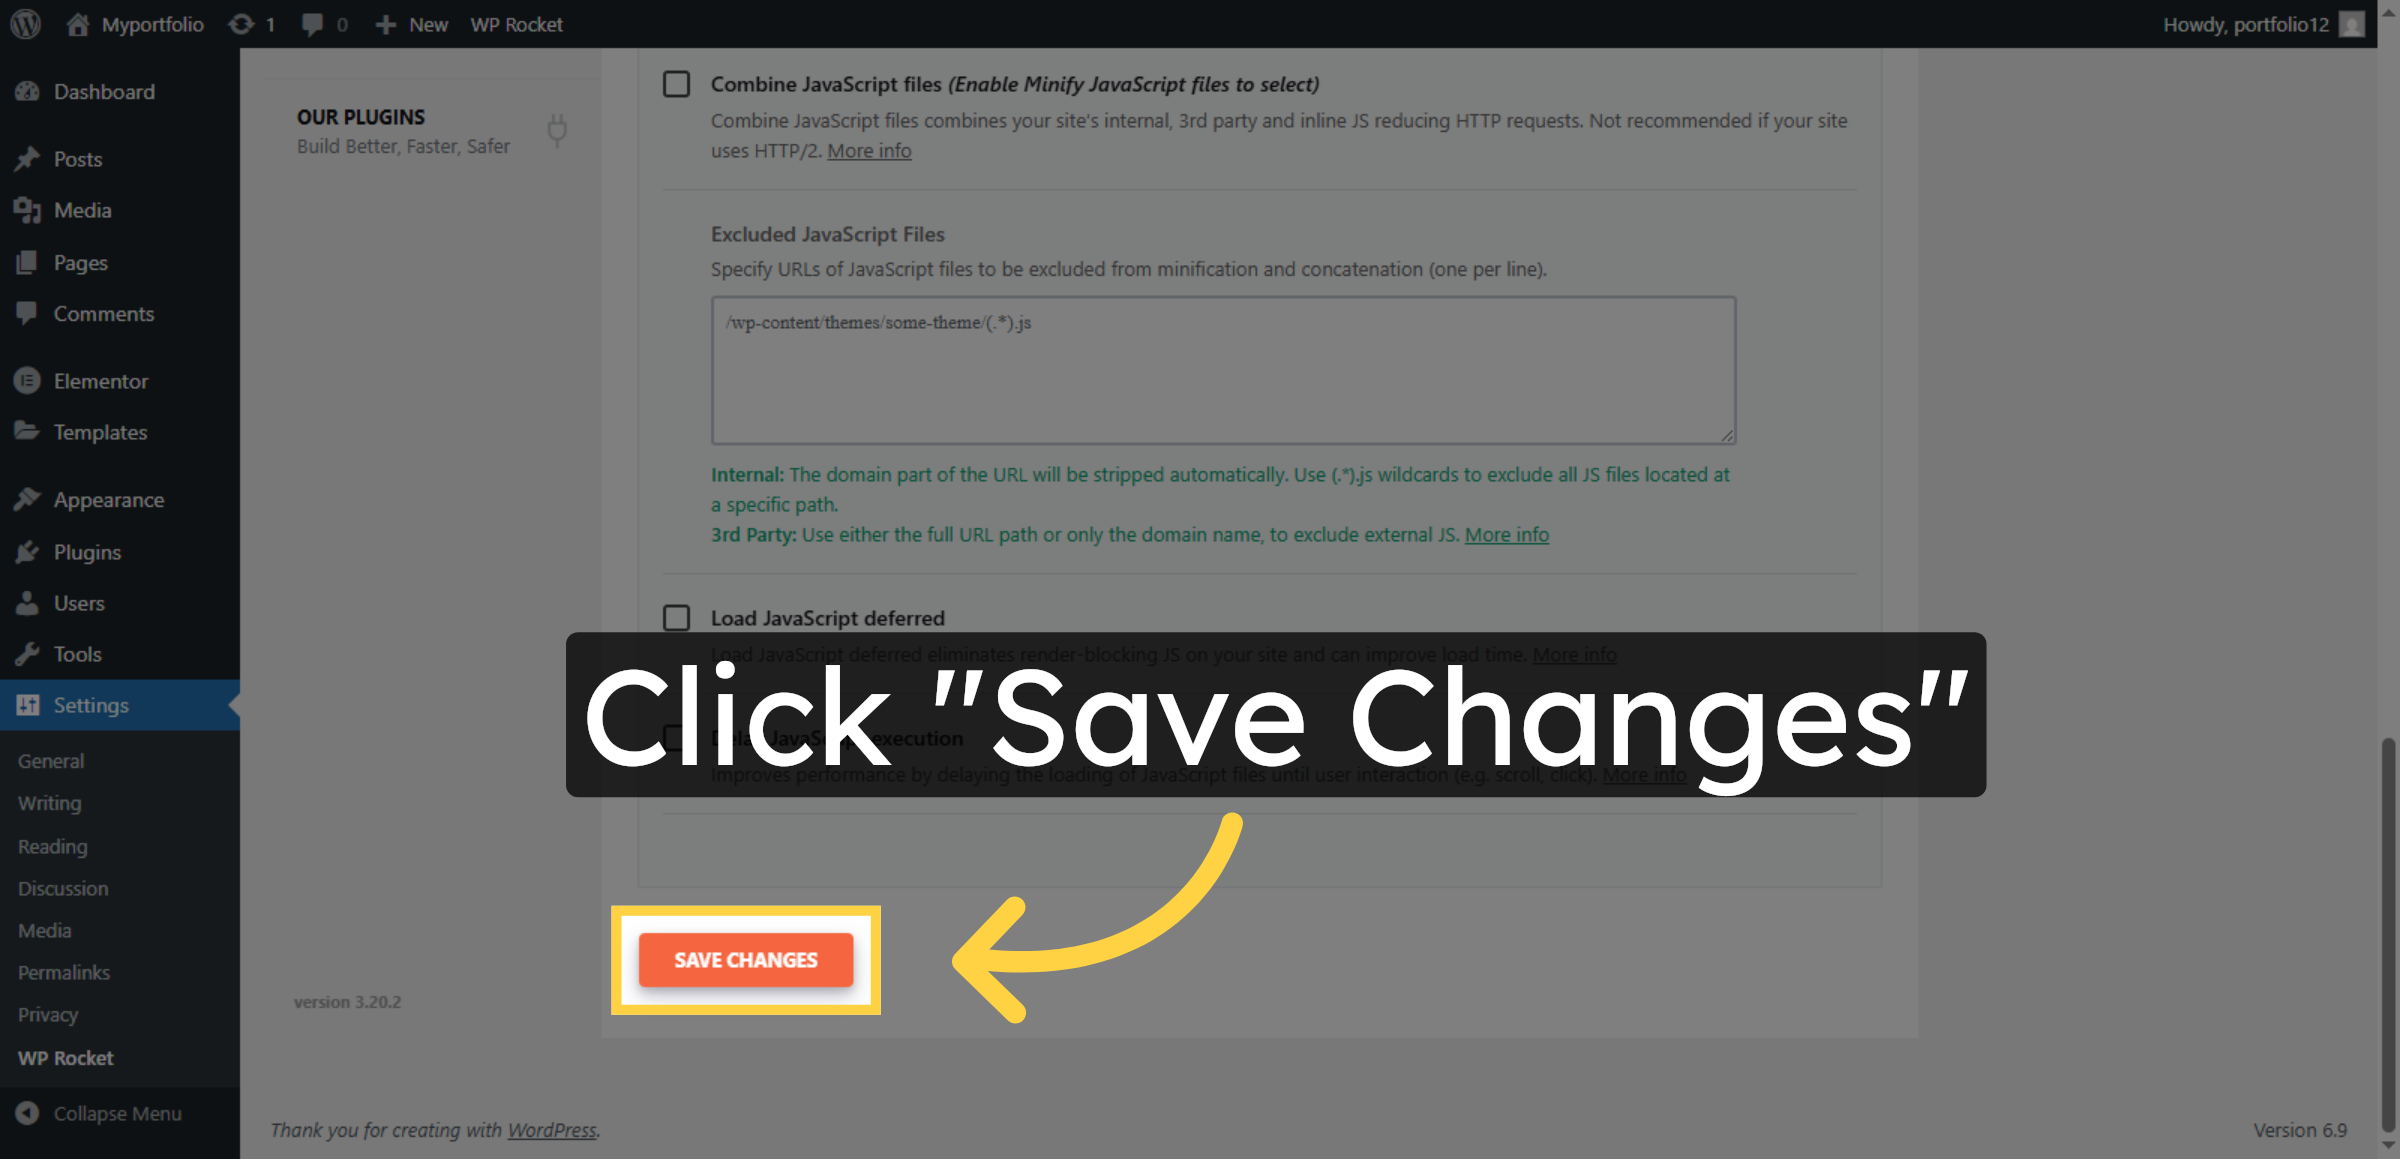
21. Save File Optimization Changes
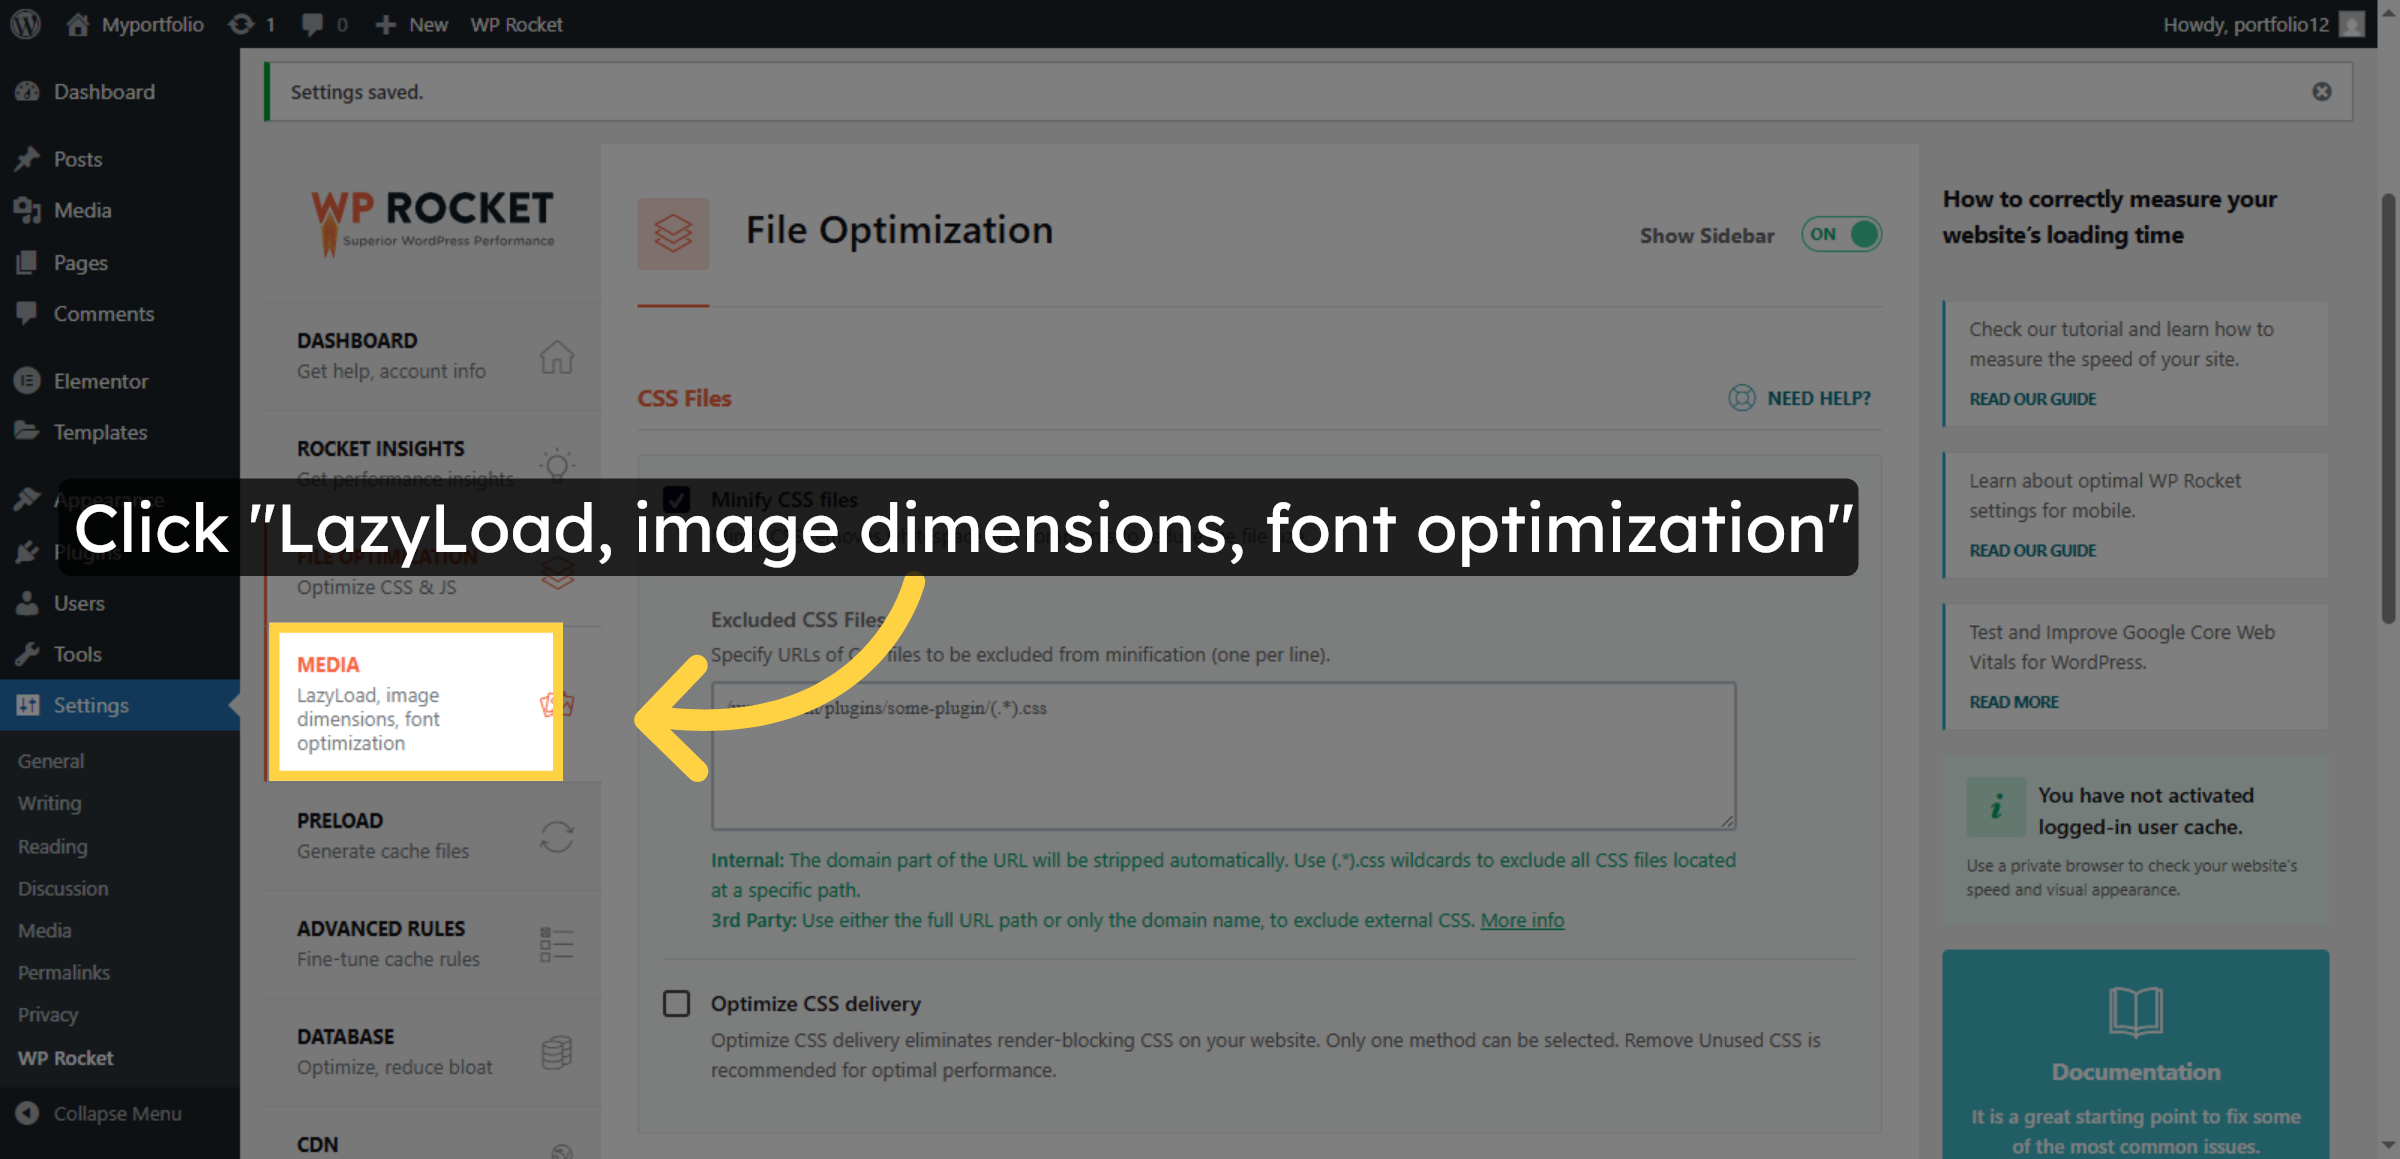
22. Open LazyLoad and Font Settings


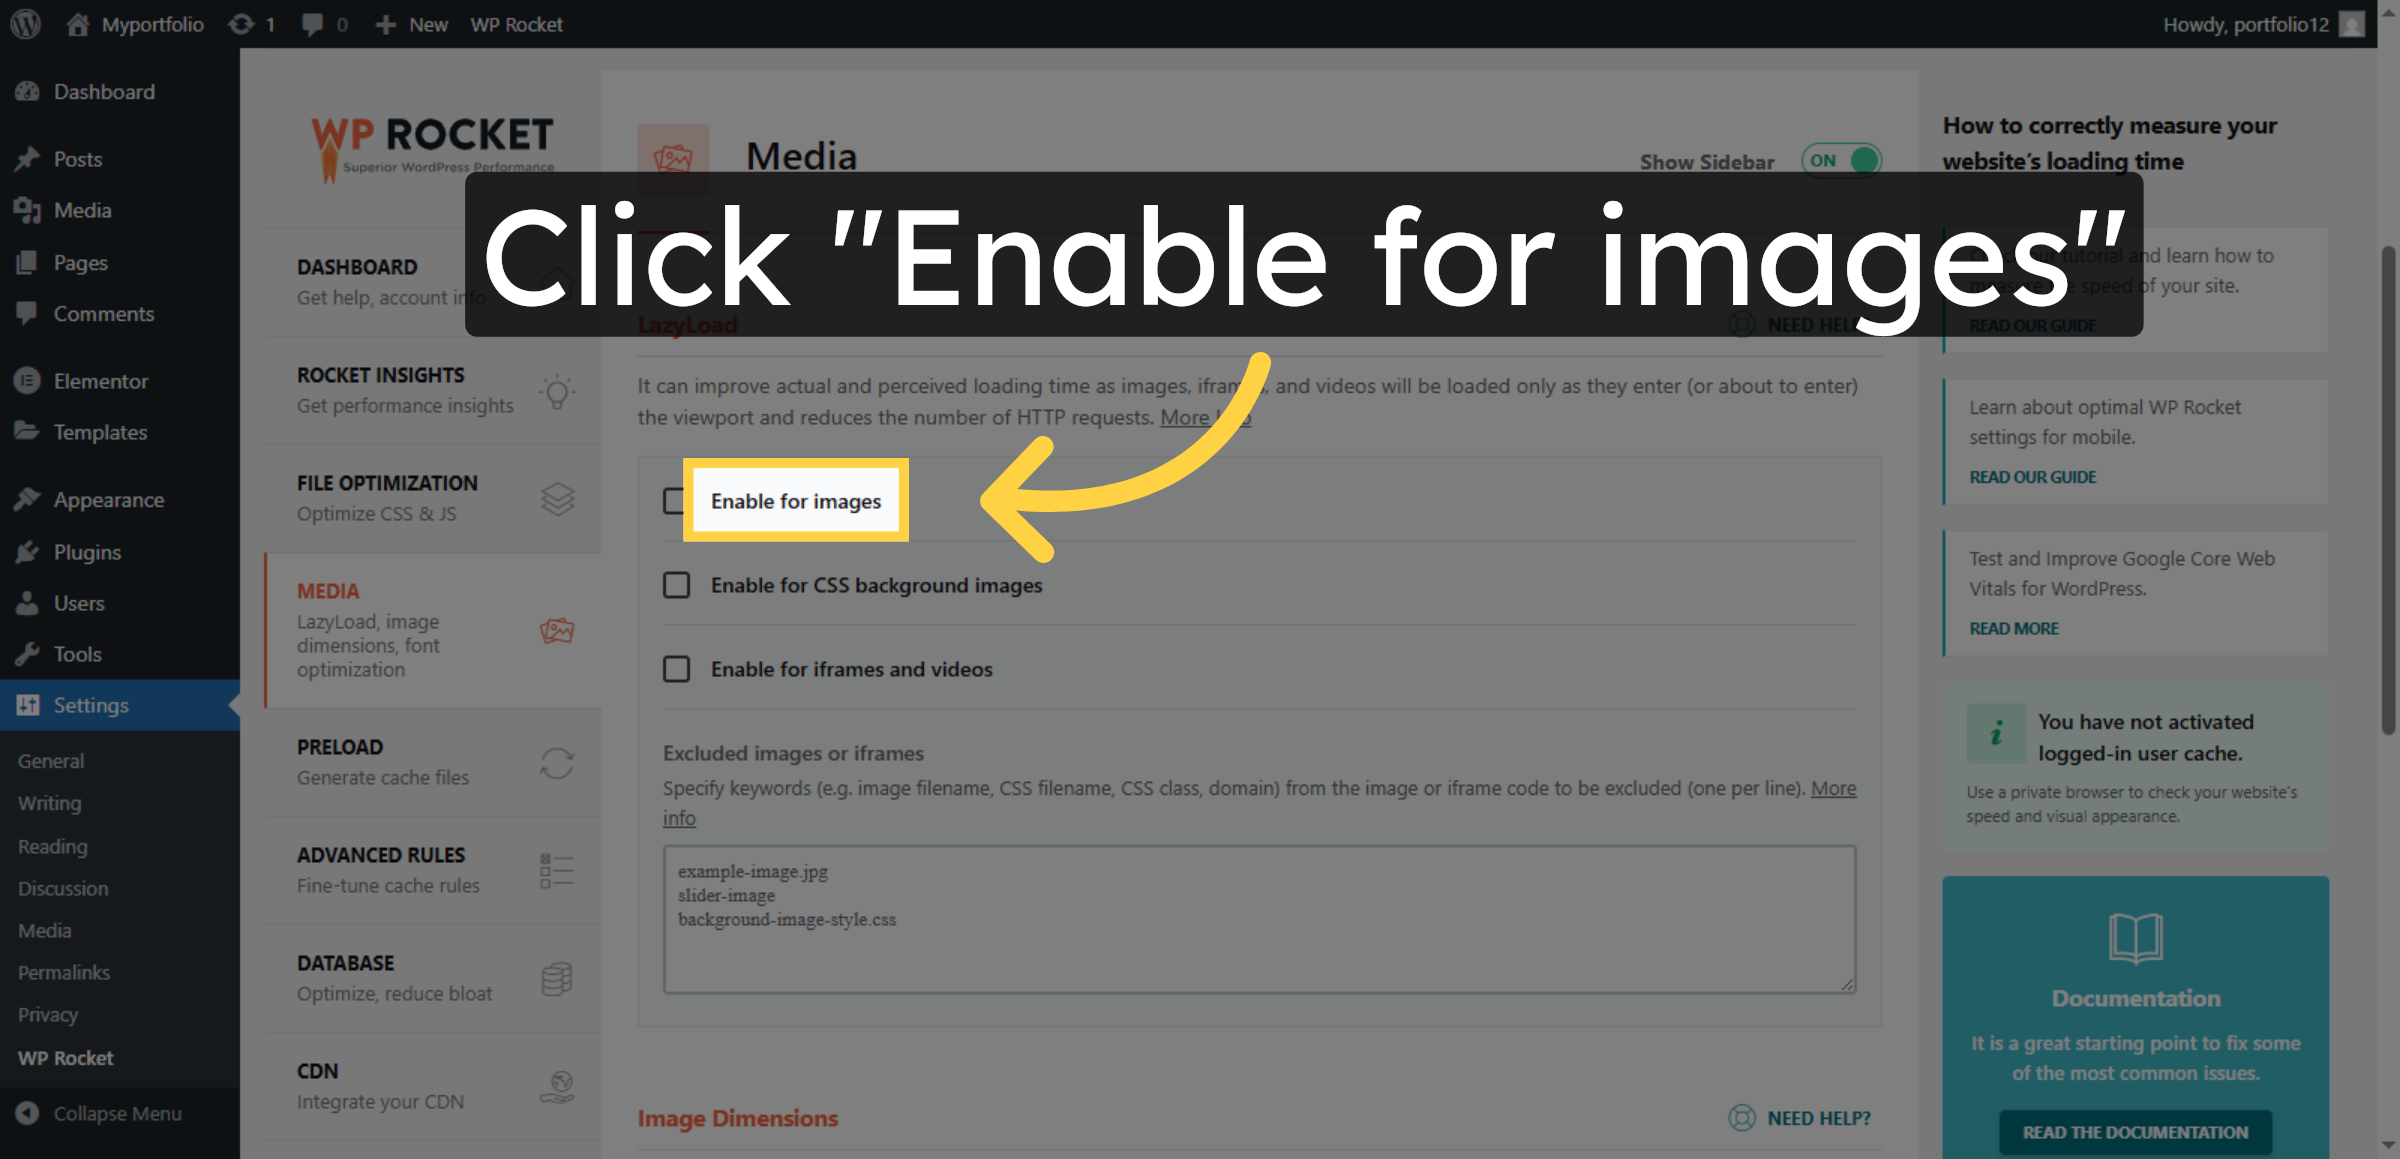
23. Enable LazyLoad for Images
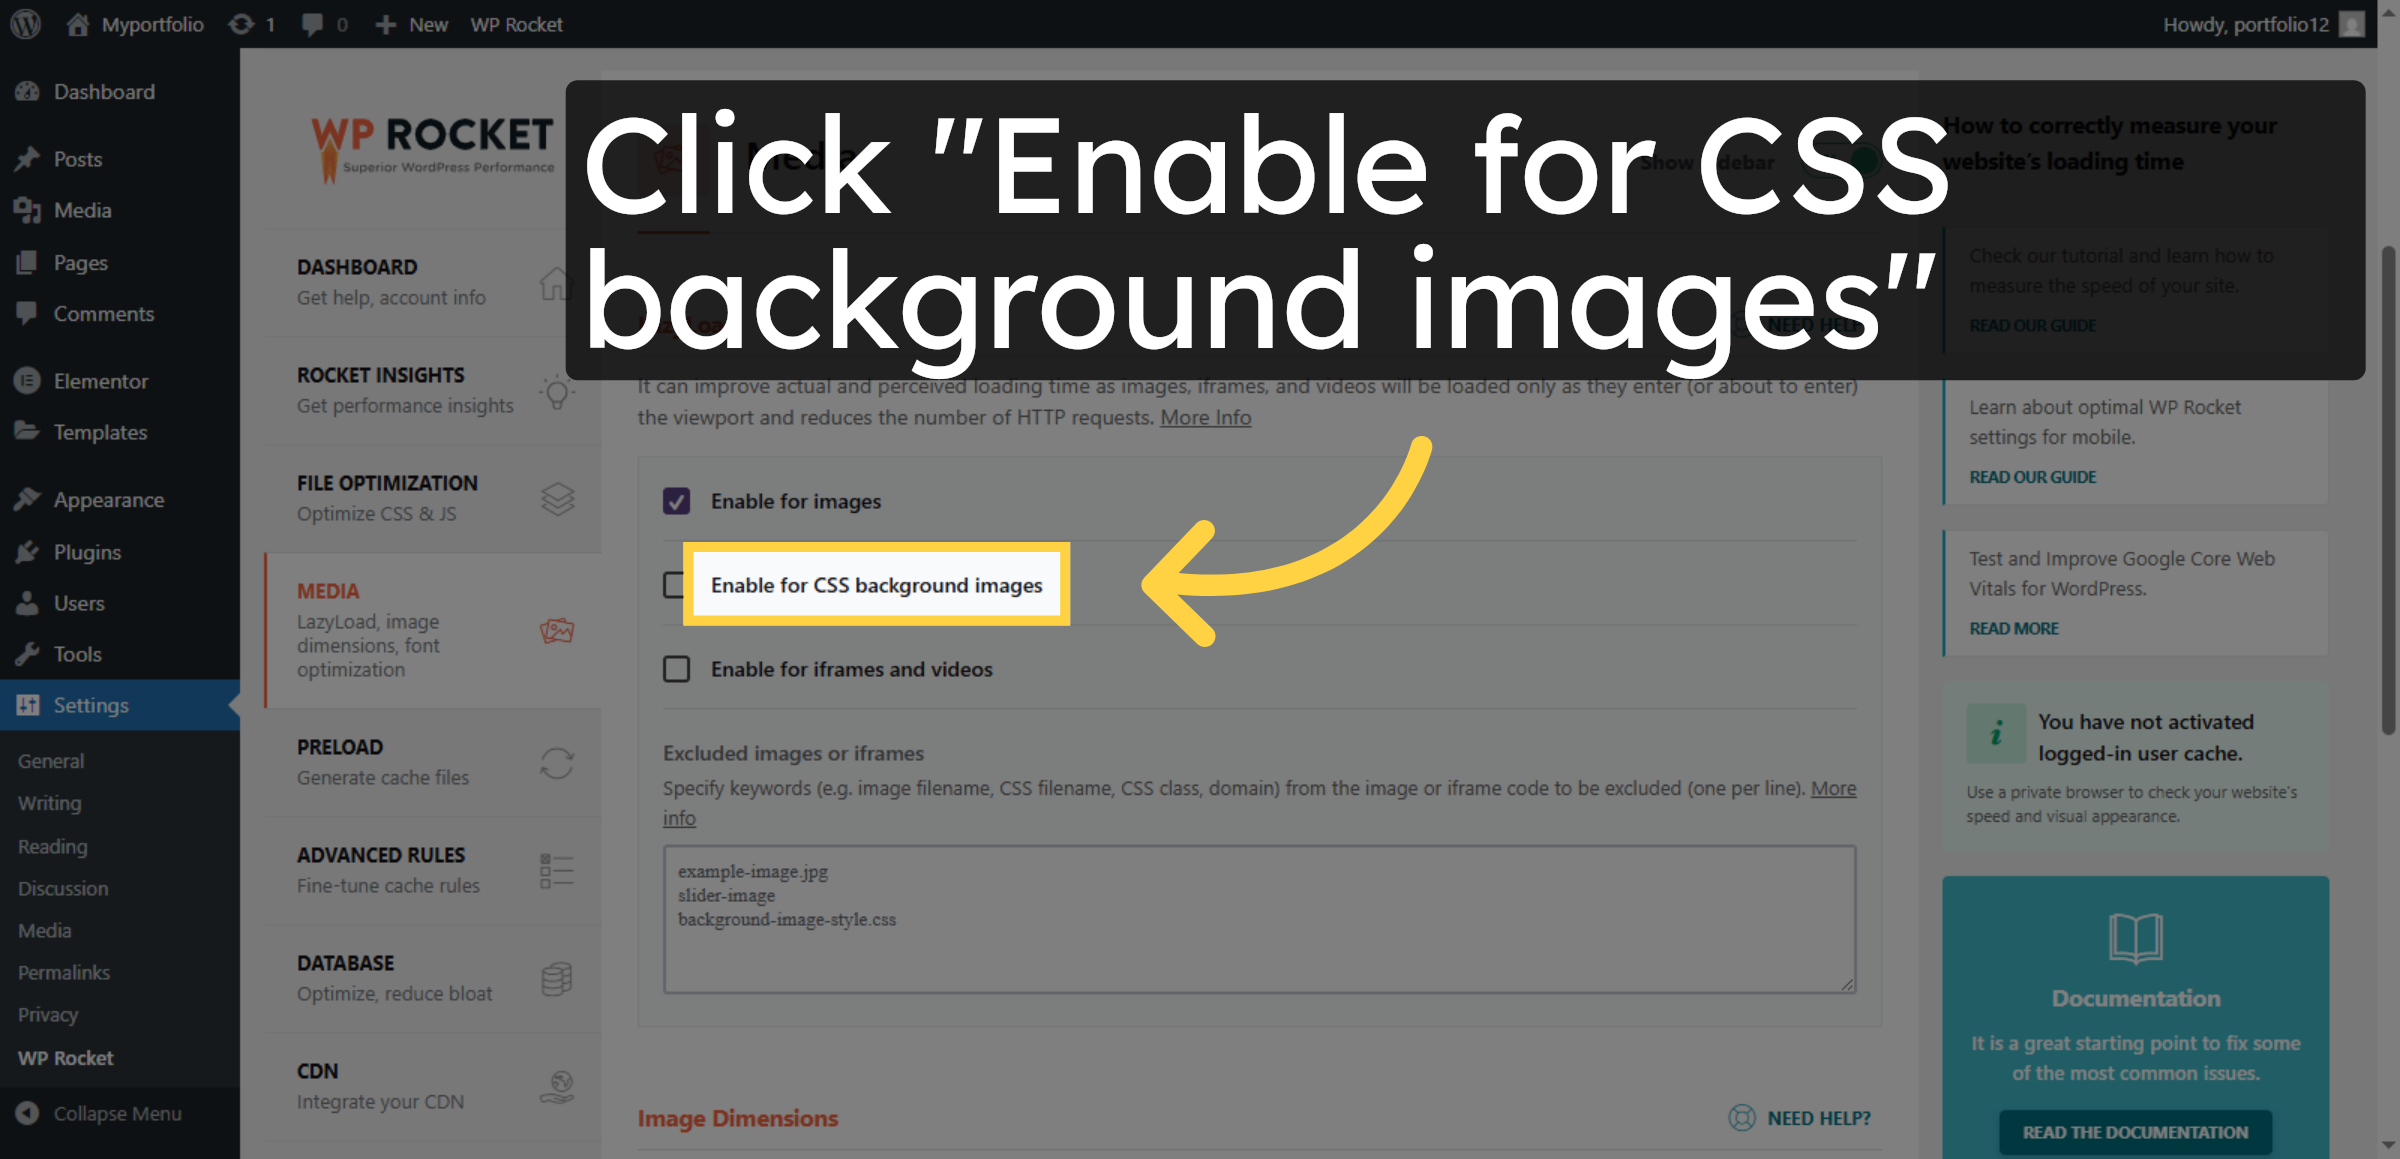
24. Enable LazyLoad for CSS Backgrounds
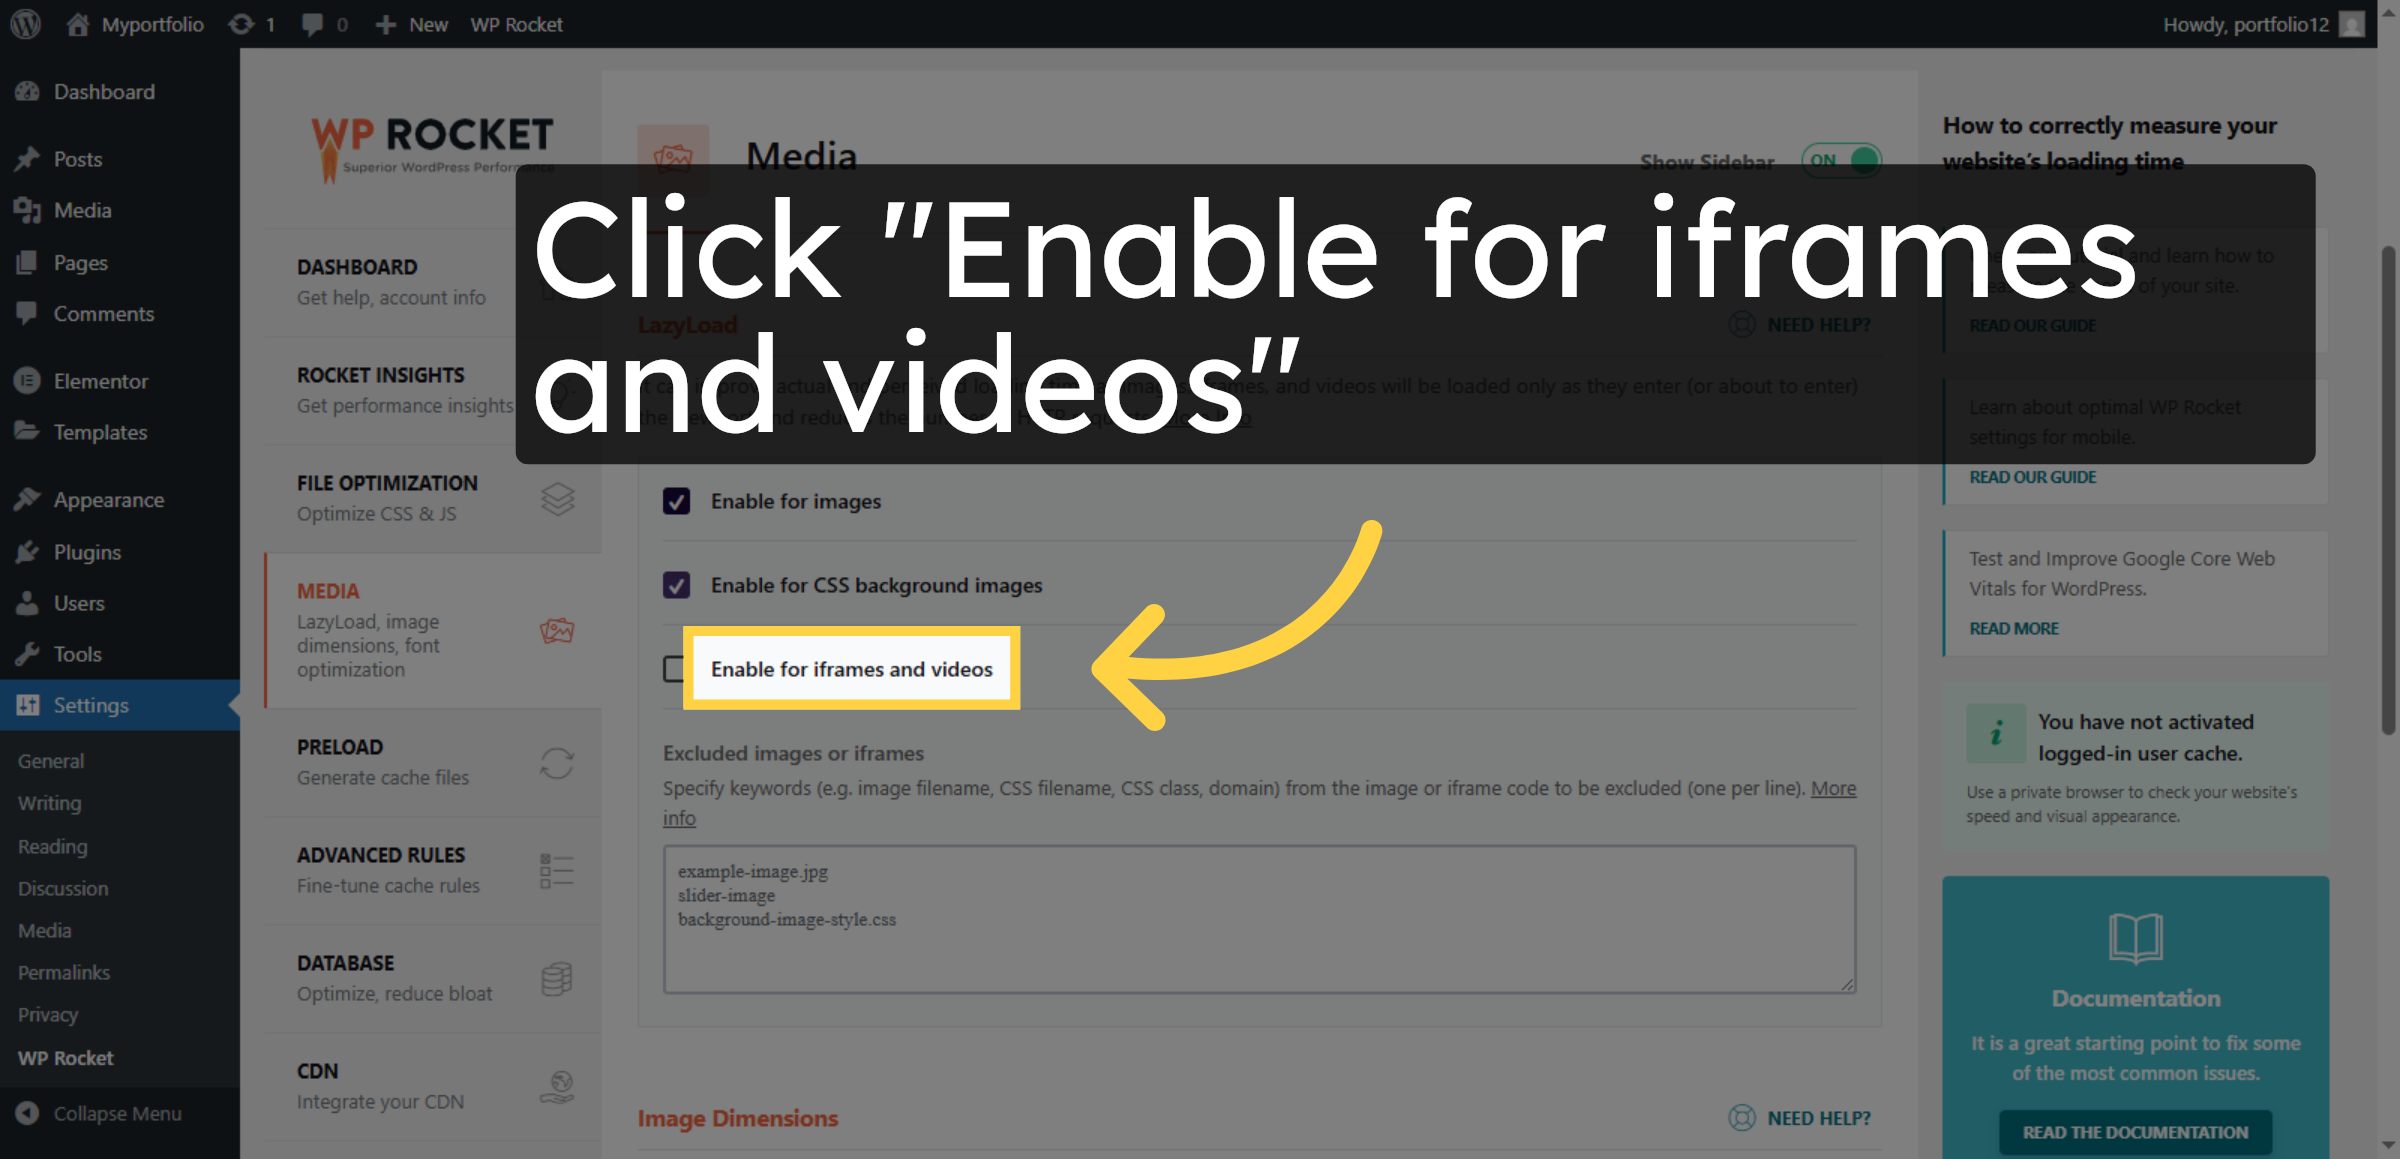
25. Enable LazyLoad for Iframes and Videos
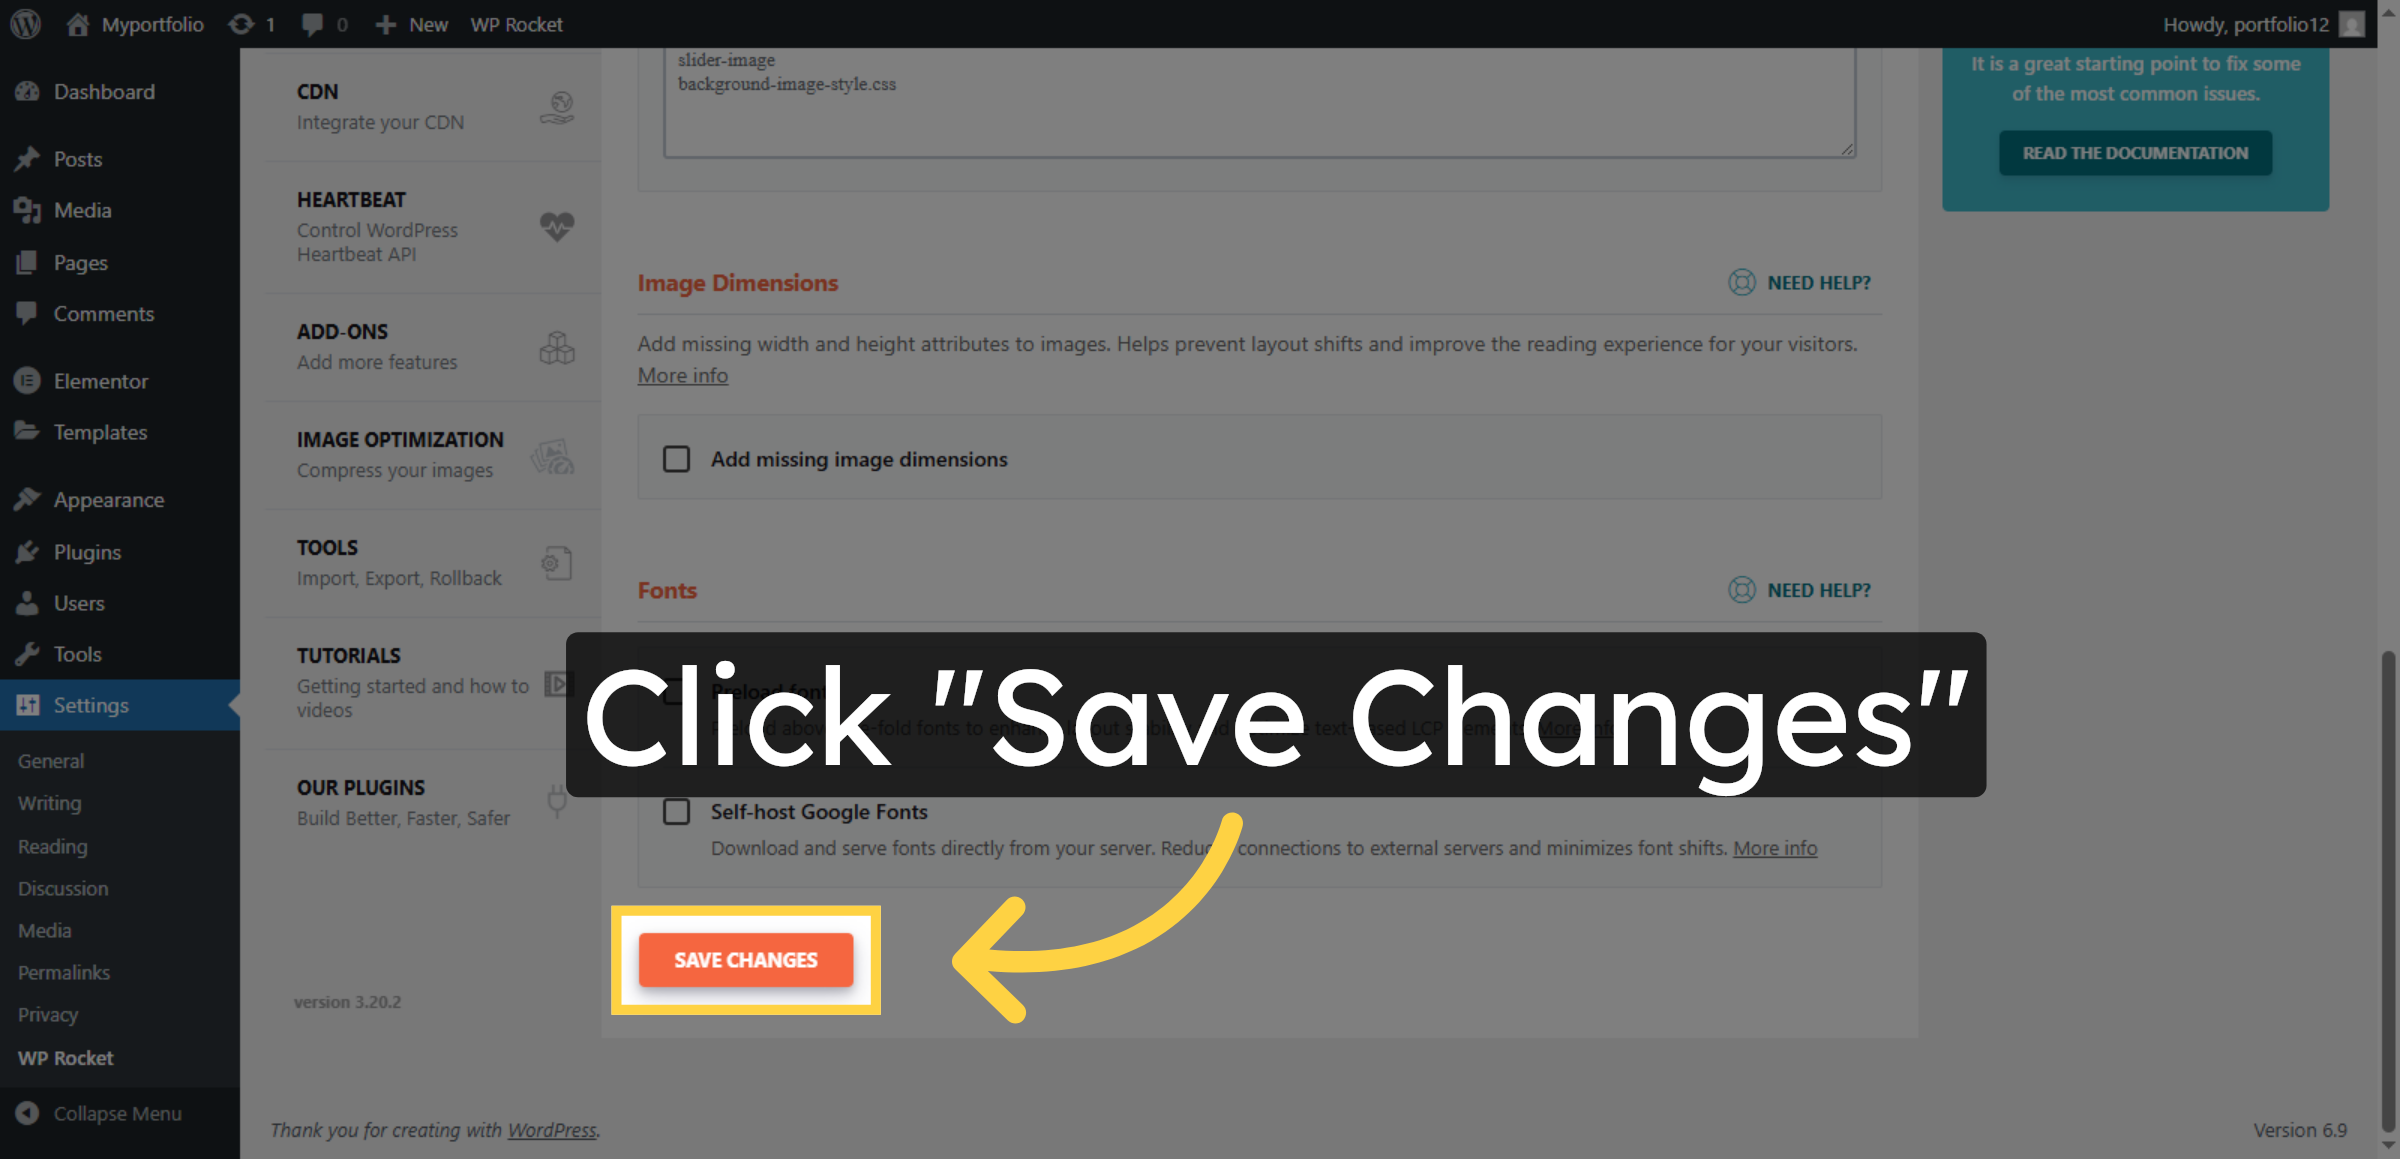
26. Save LazyLoad Settings
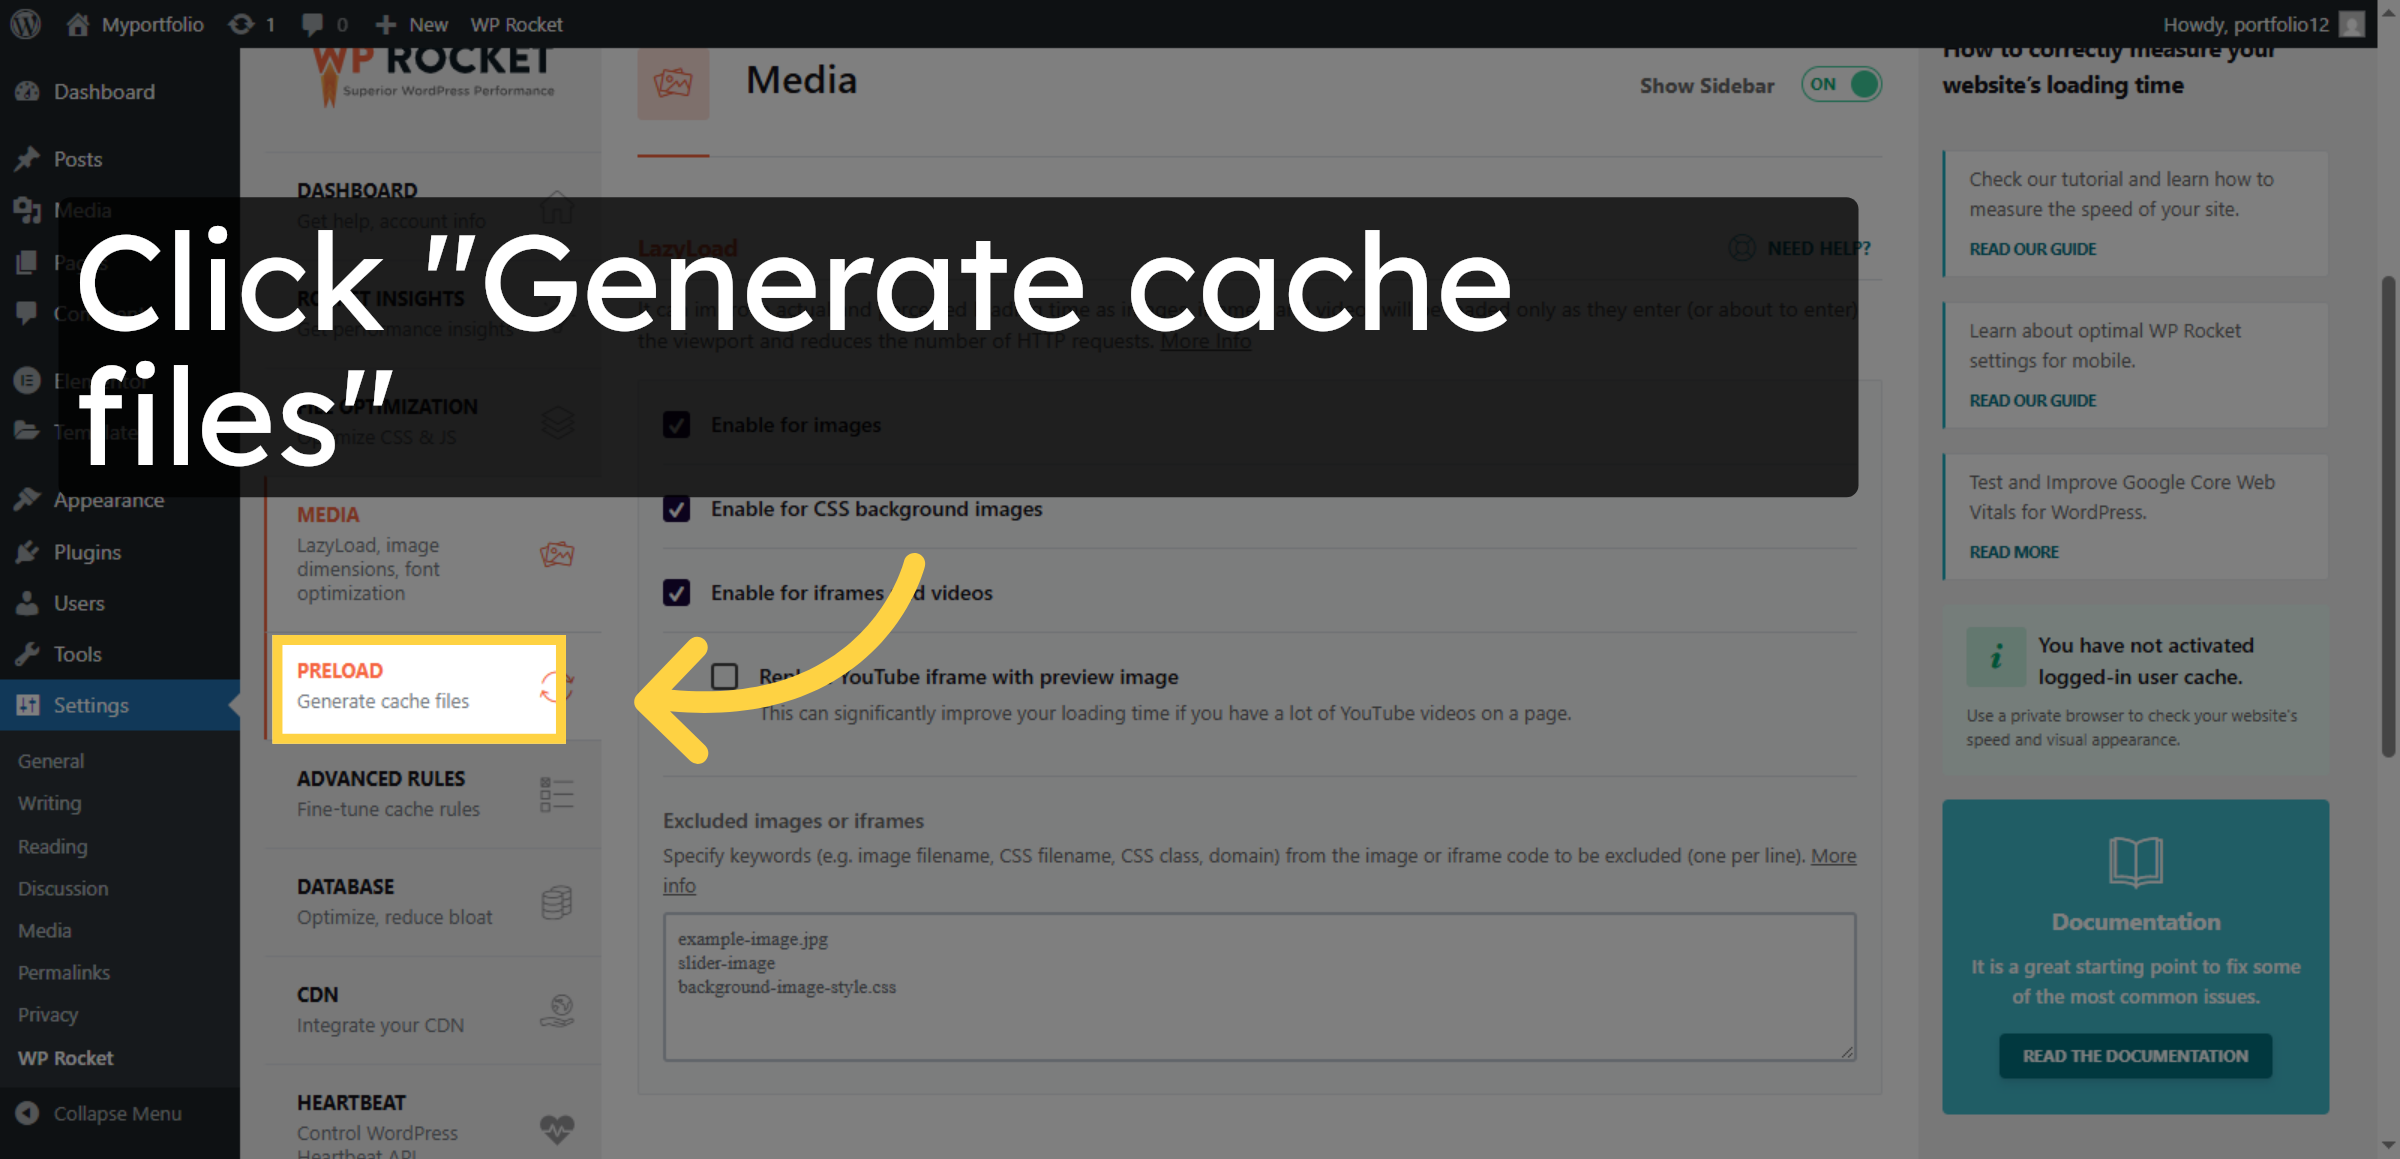
27. Generate Cache Files
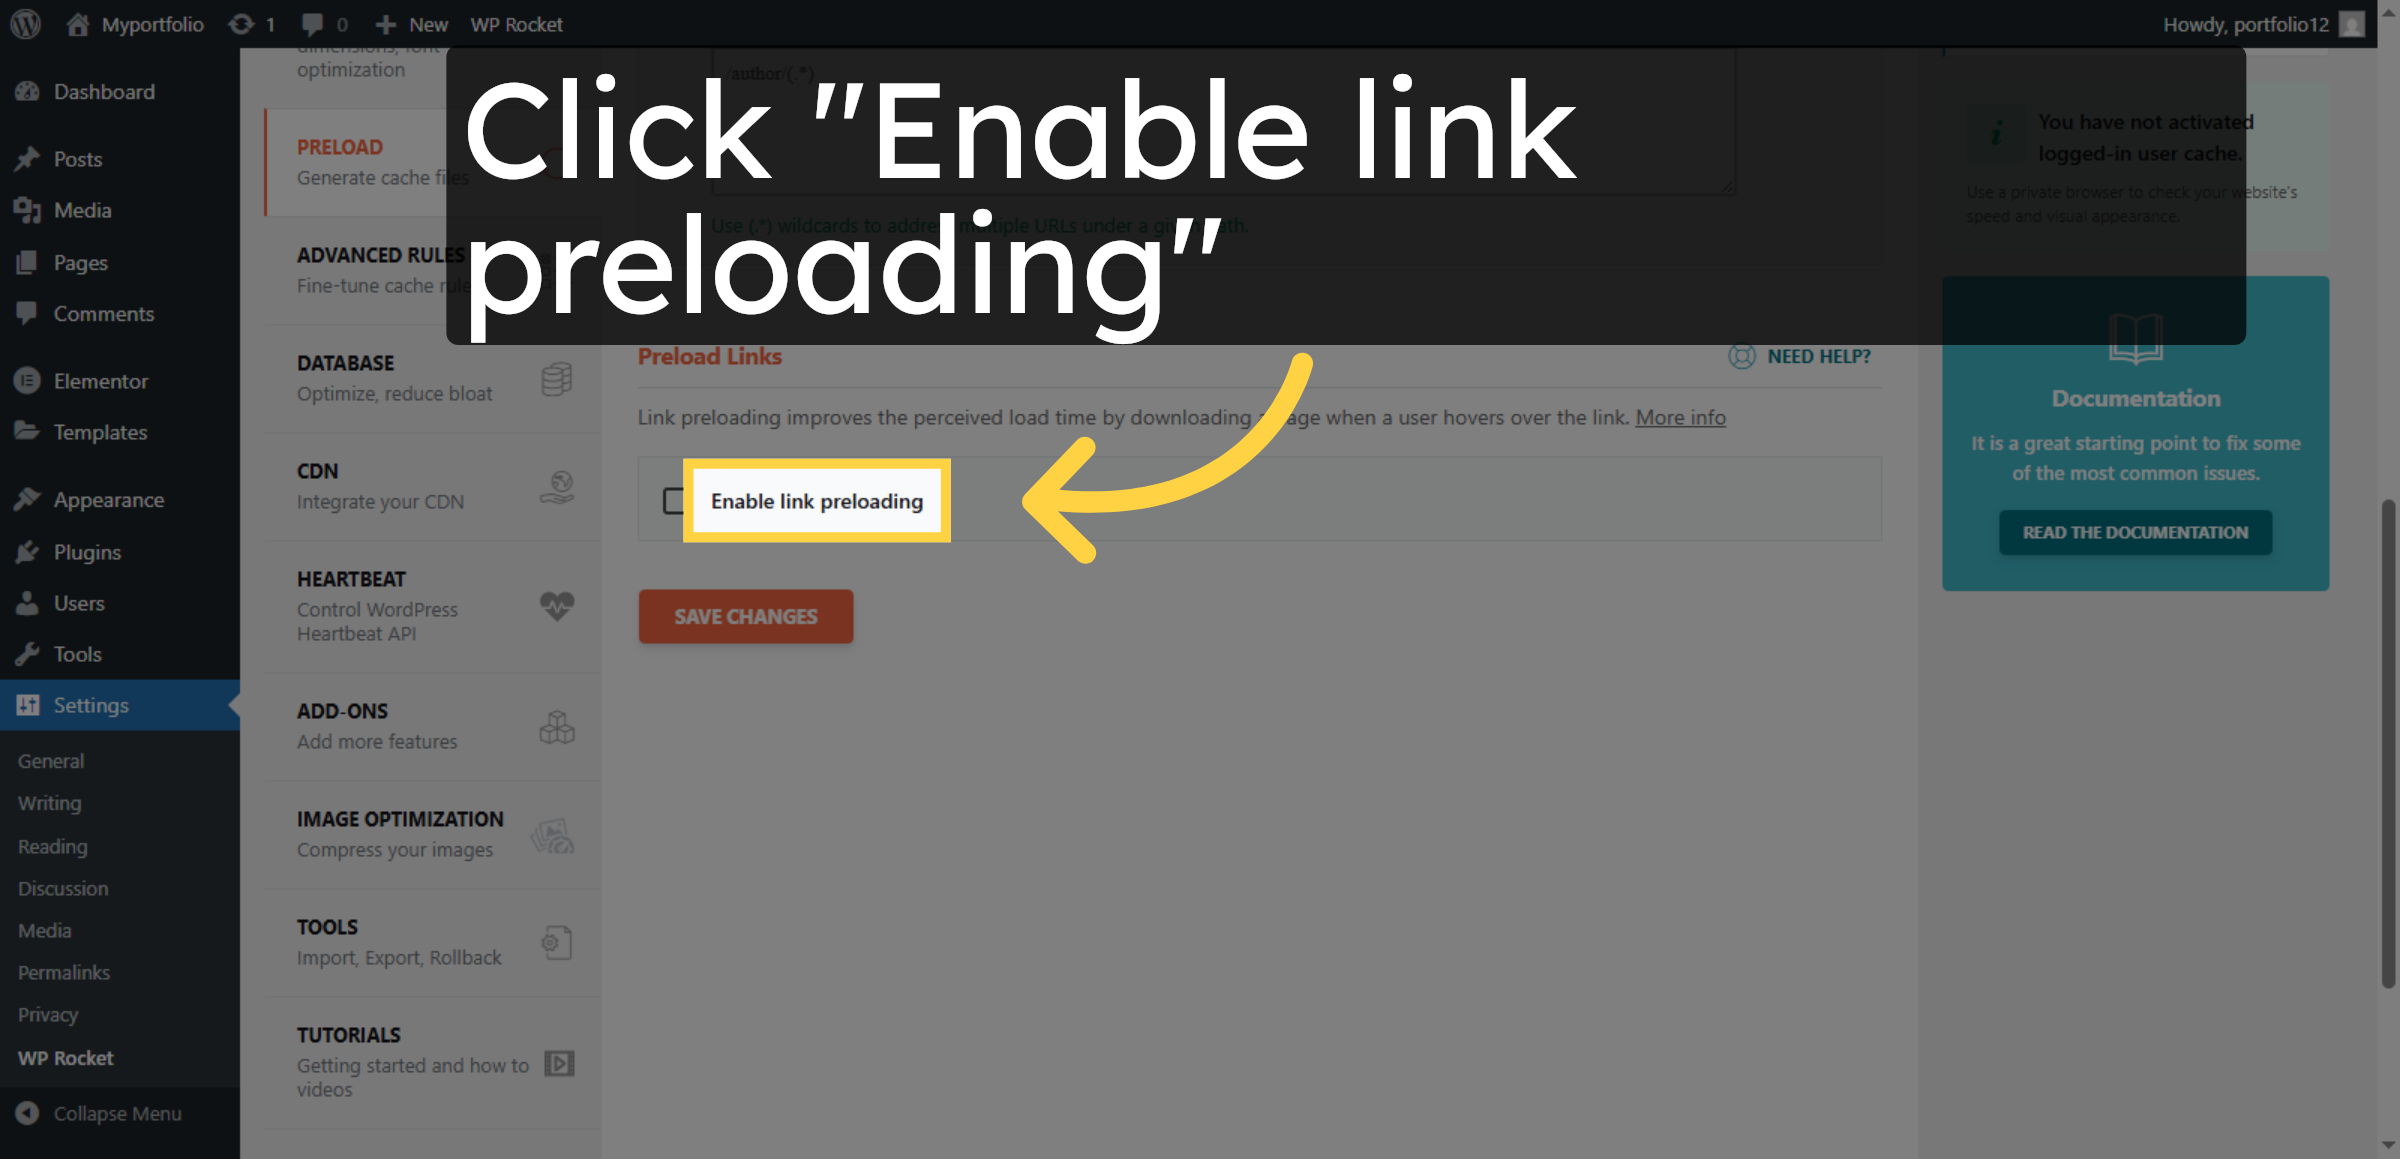
28. Enable Link Preloading
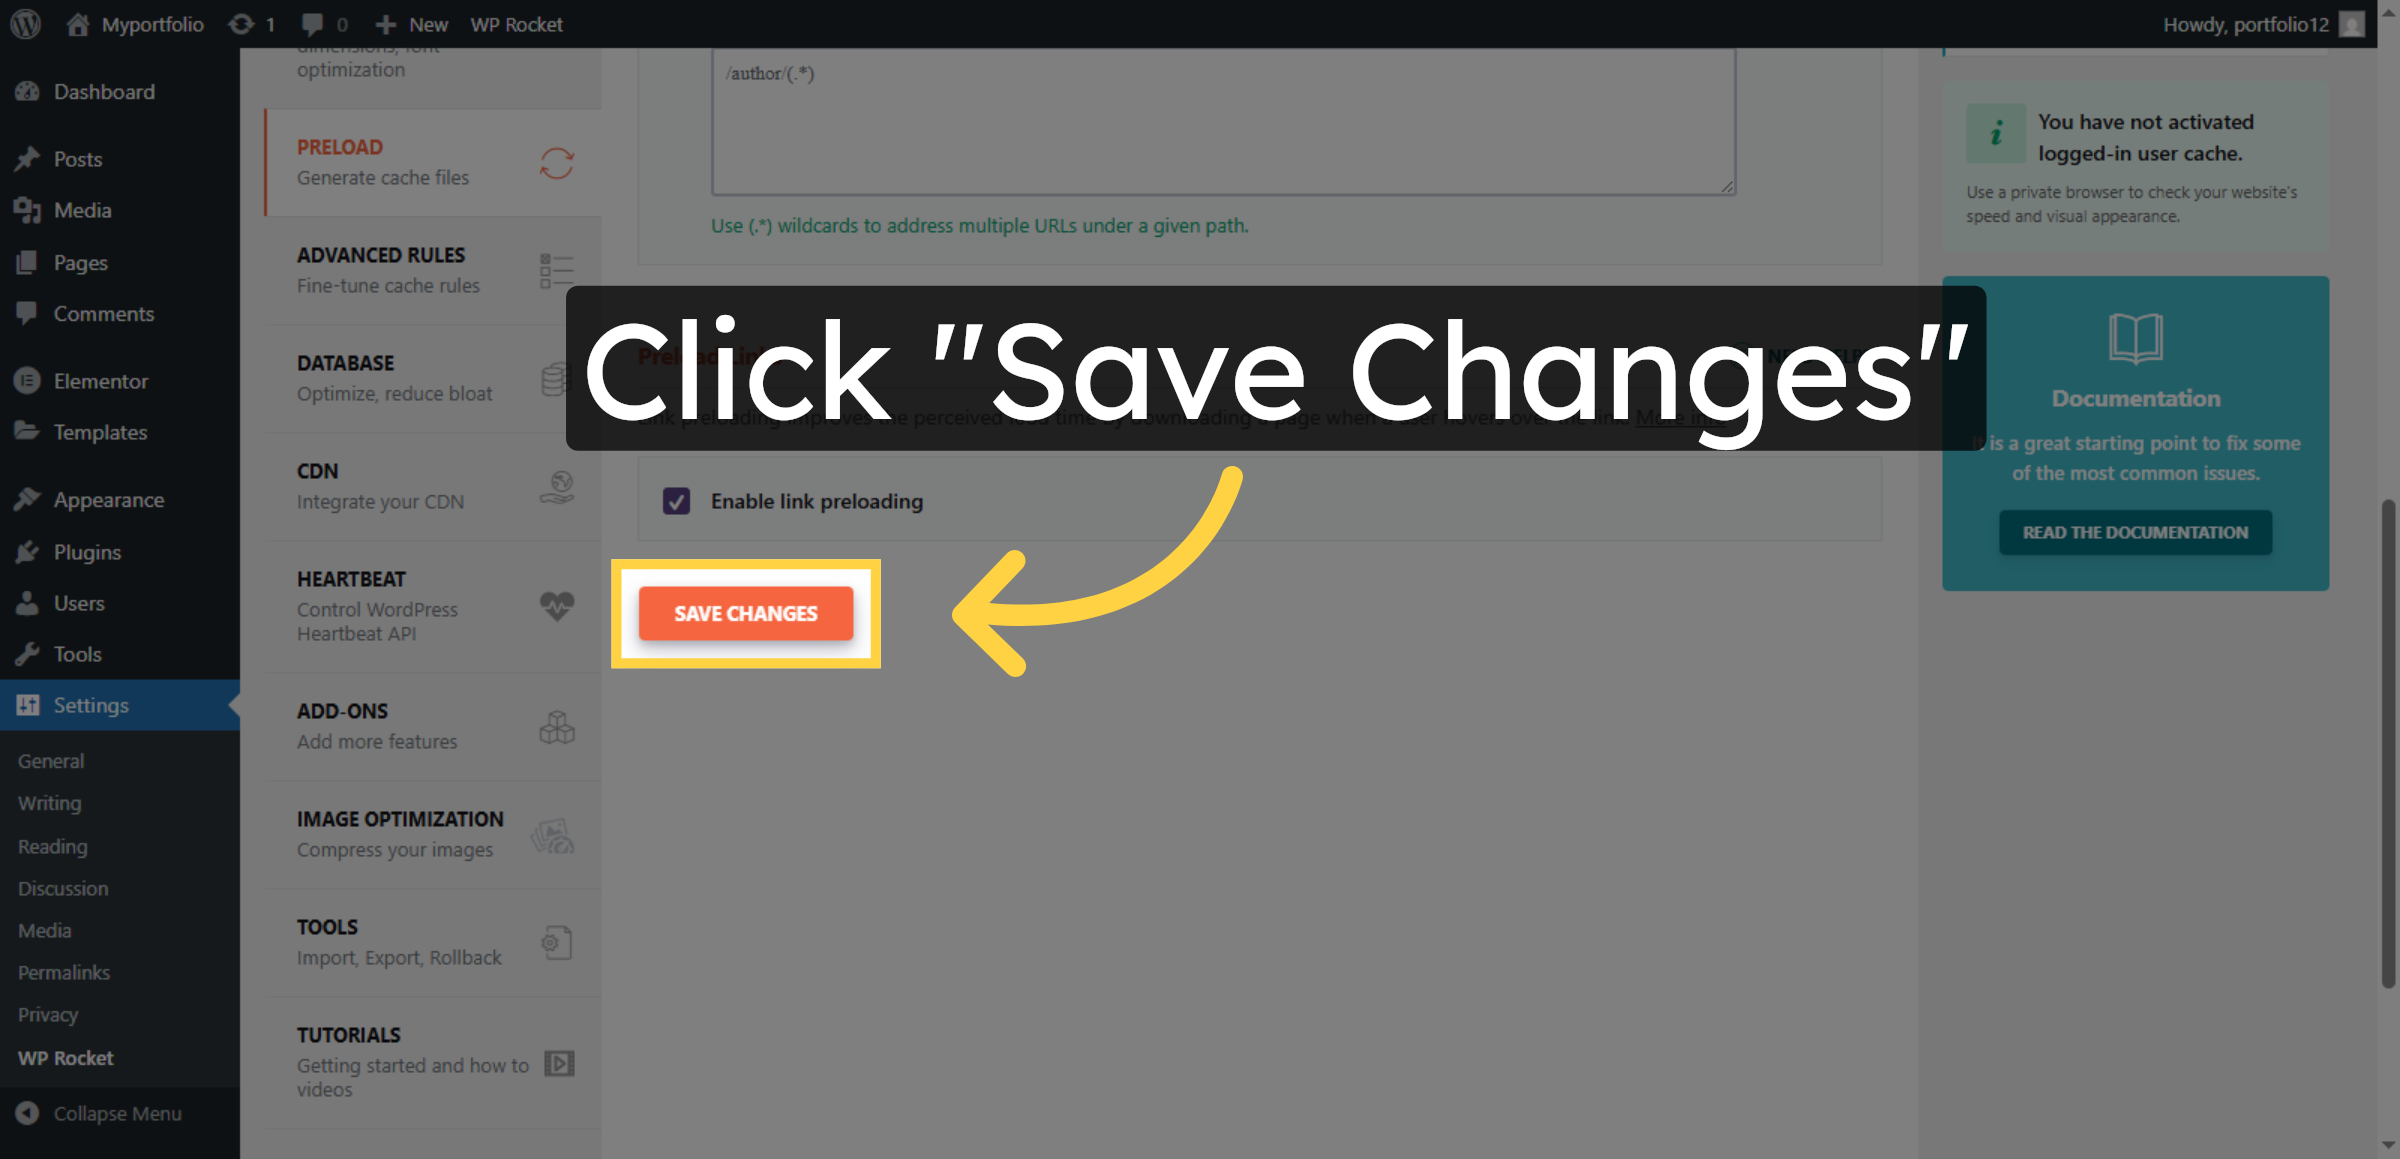
29. Save Link Preloading Settings
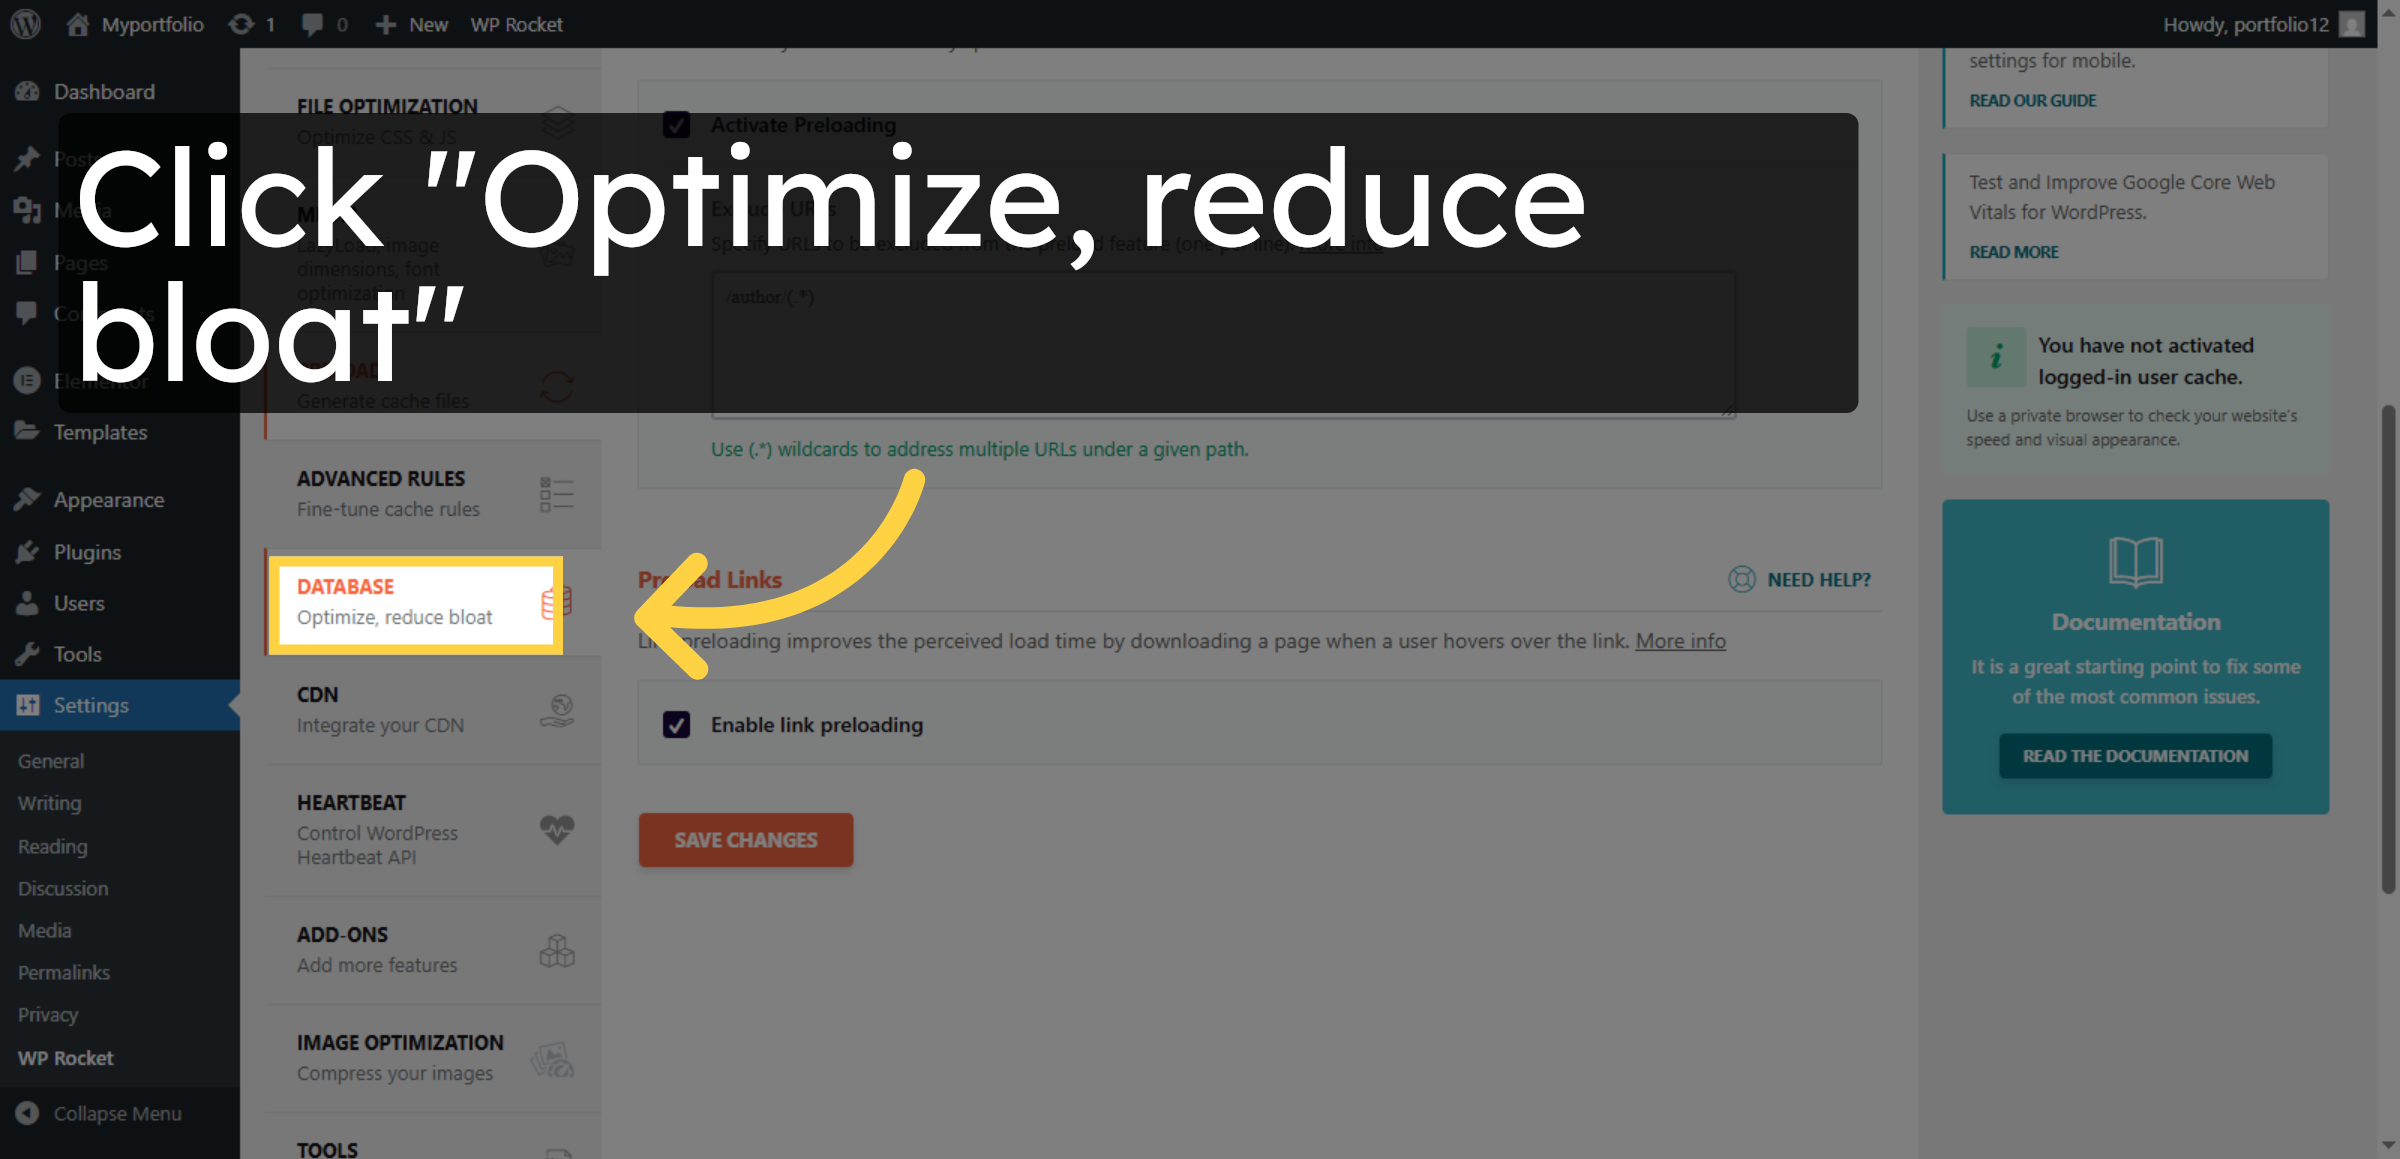
30. Open Optimization and Bloat Reduction
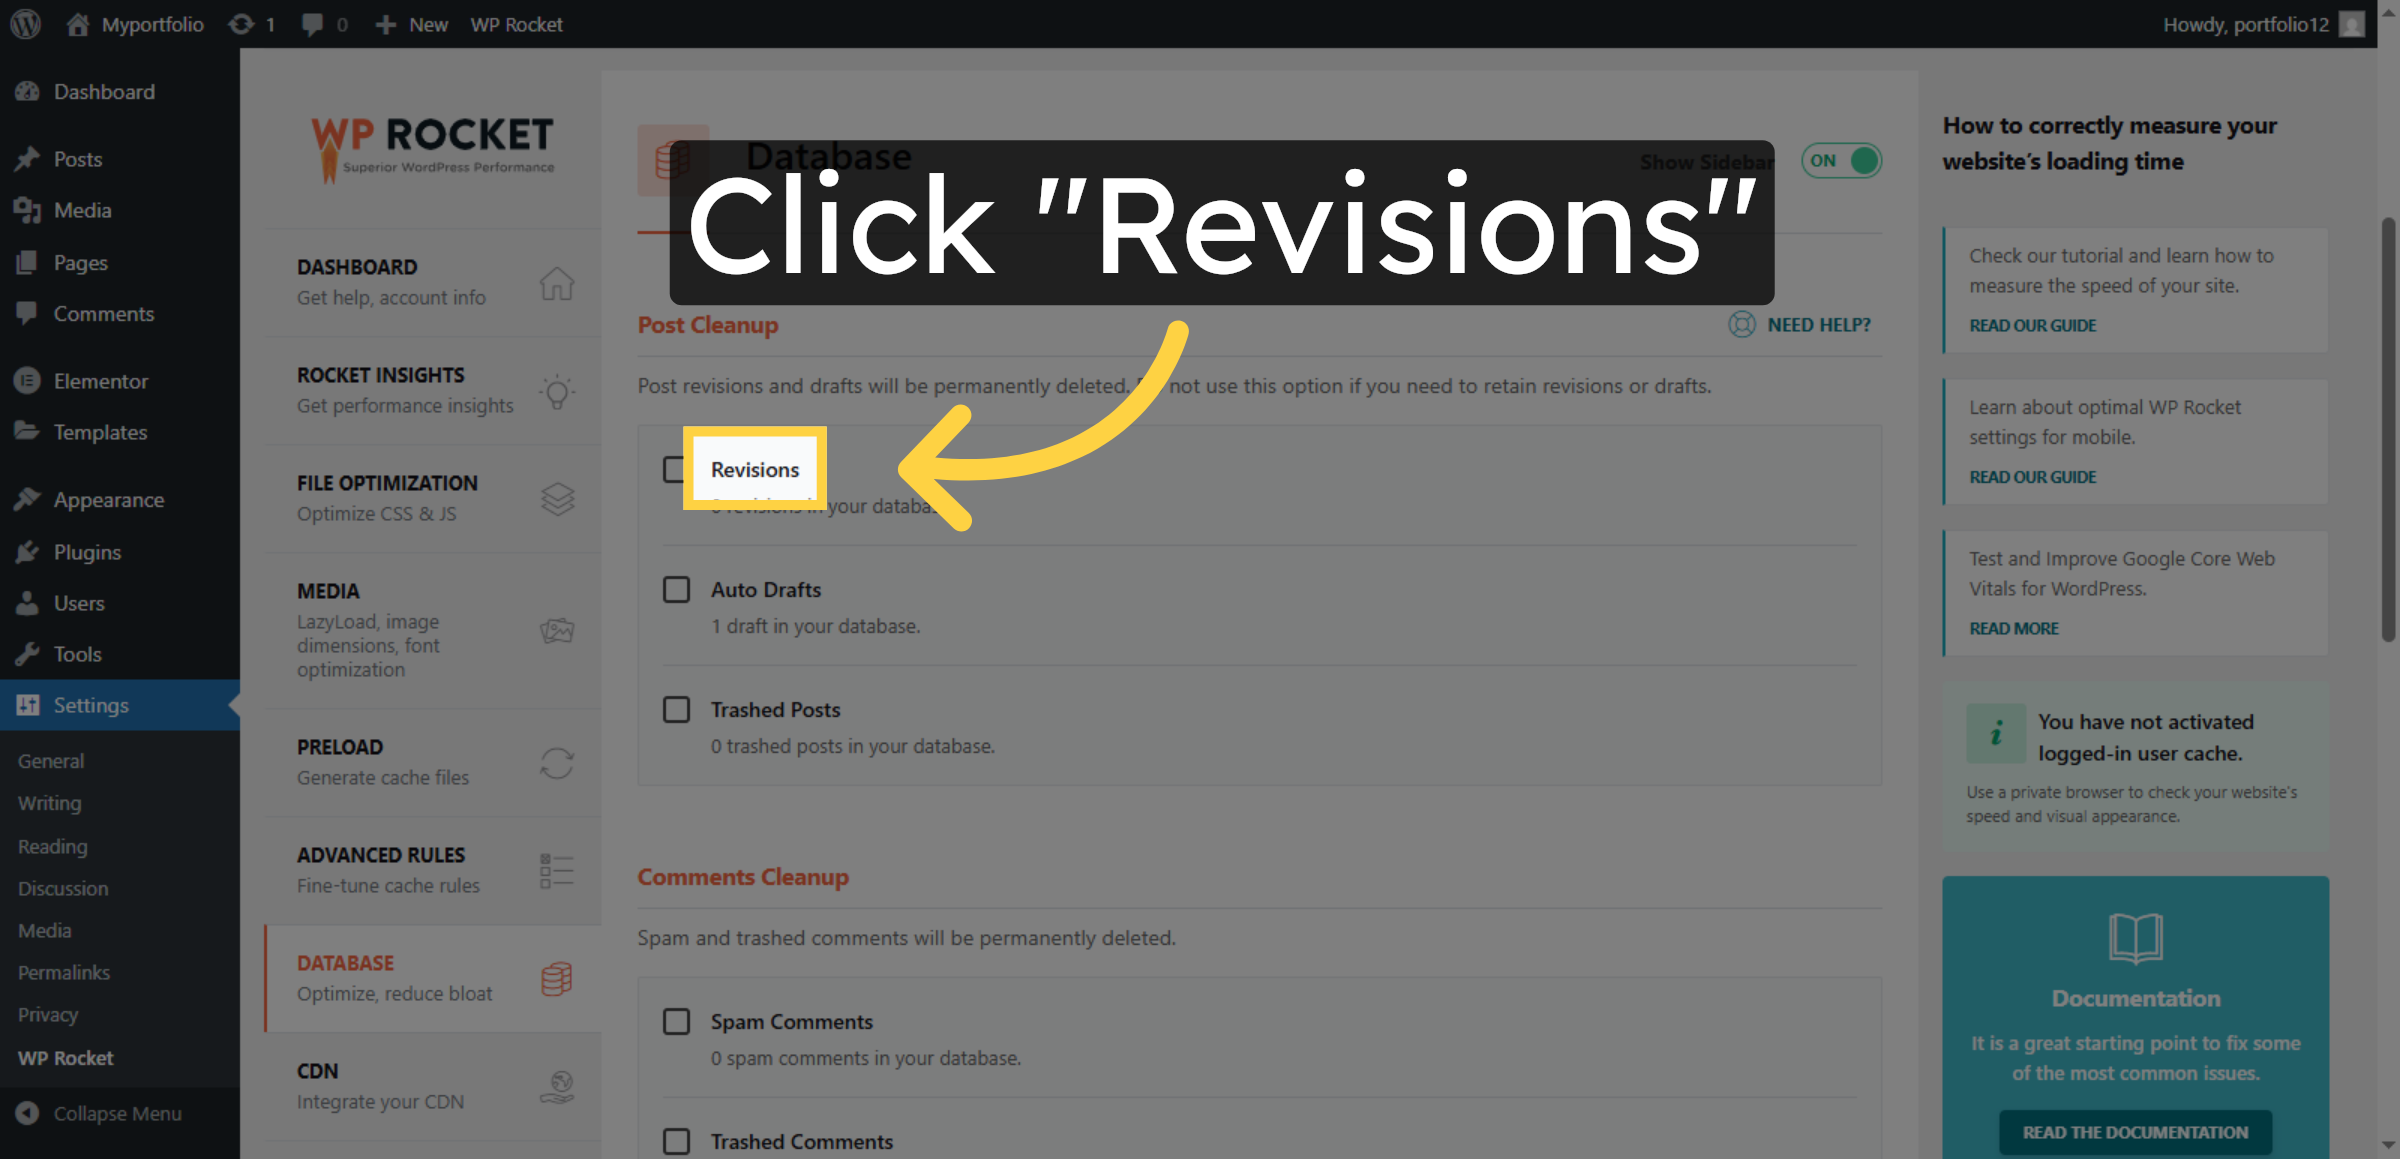
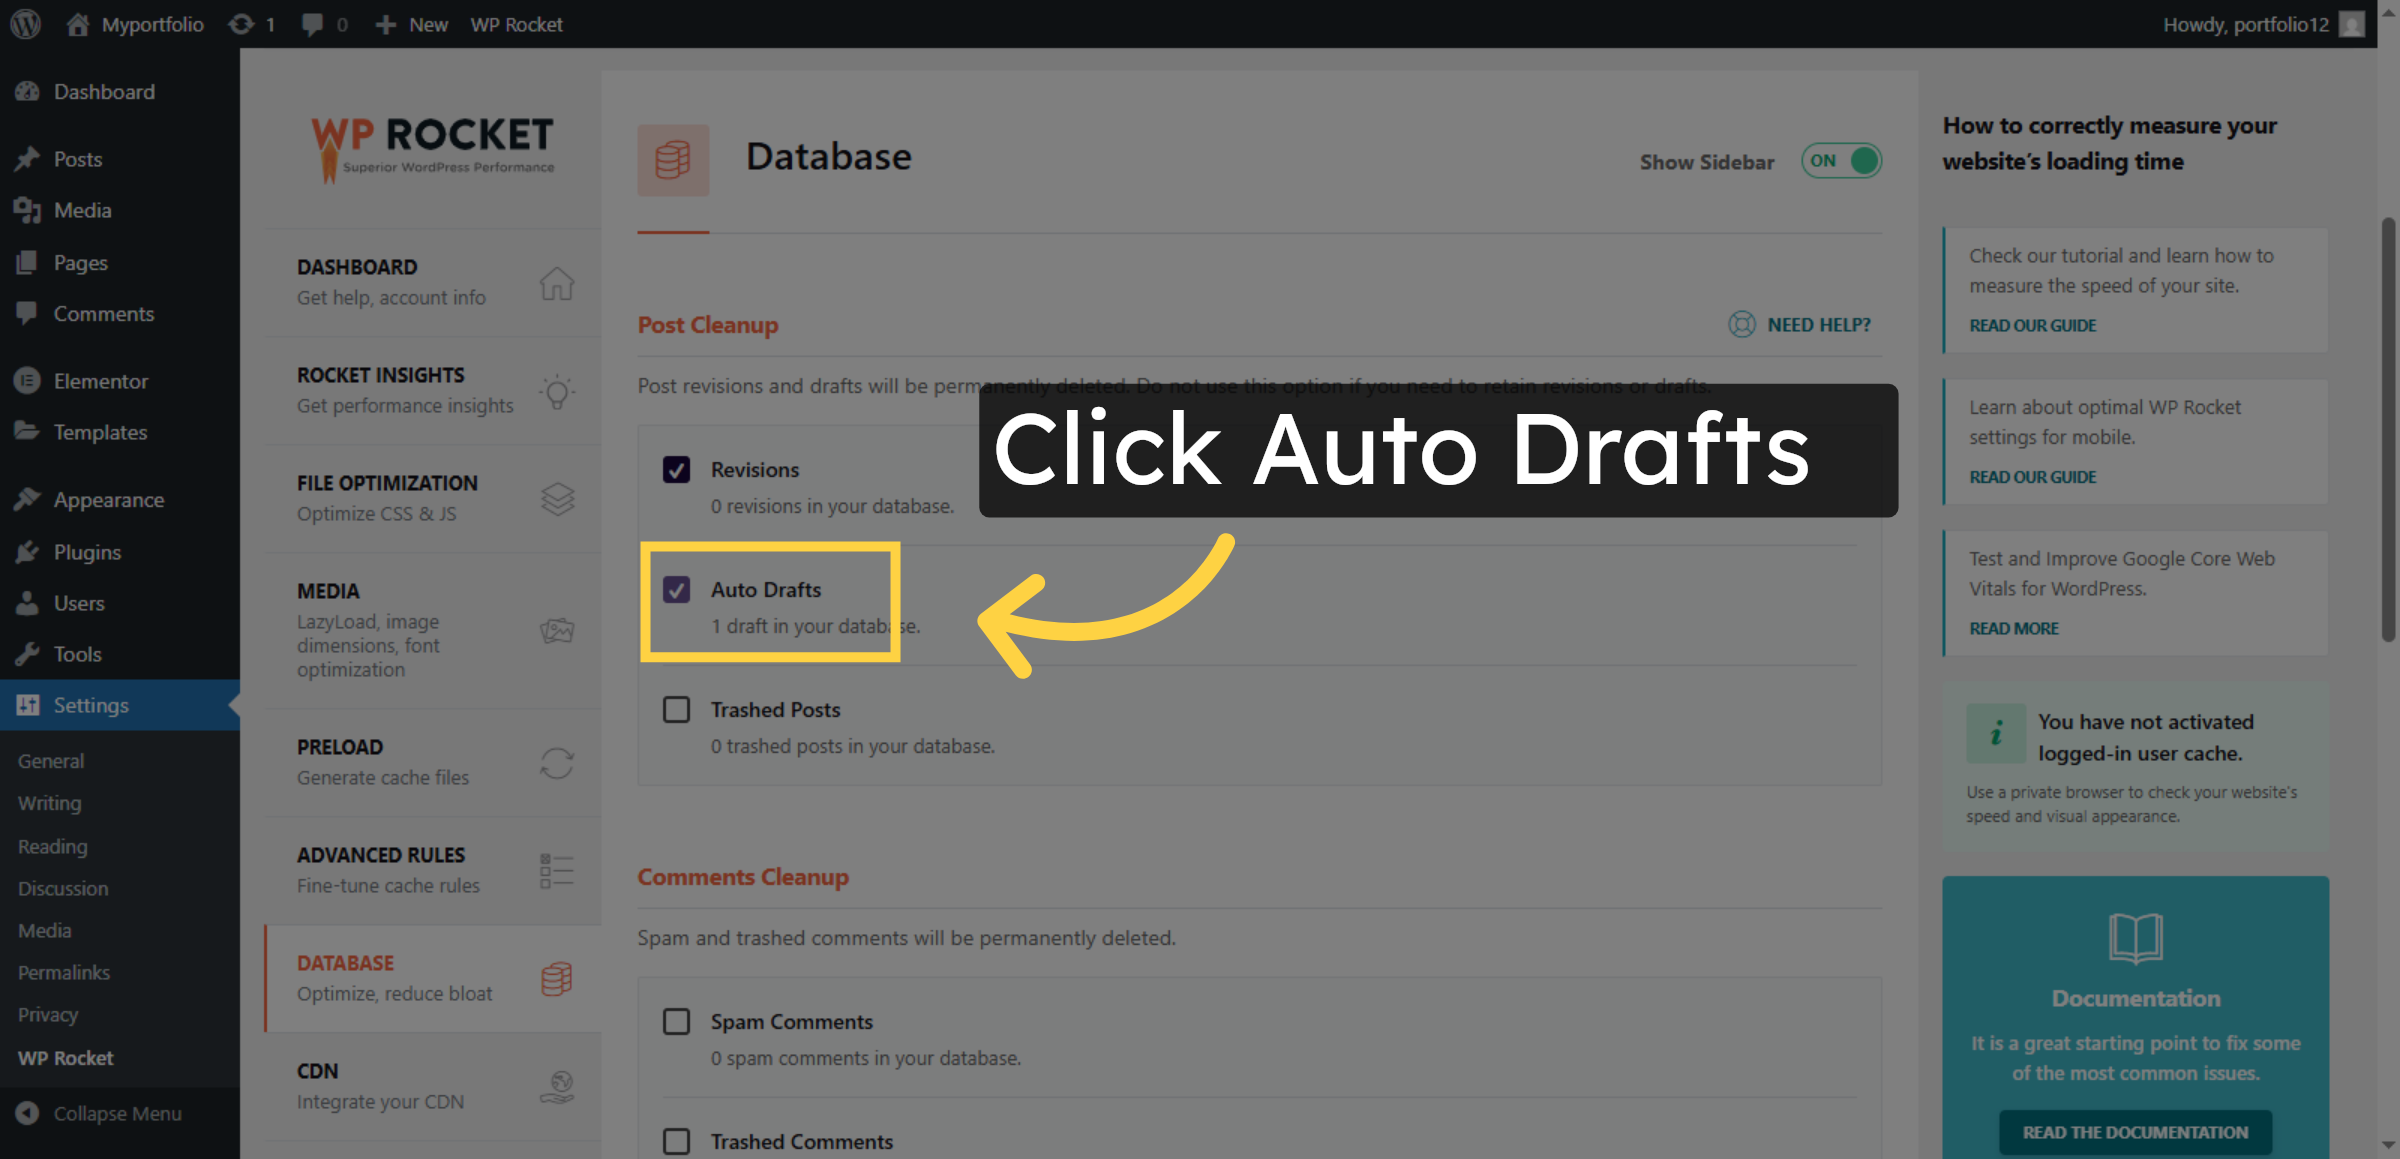
31. Access Revisions Settings
32. Set Autosave Interval
33. Manage Trashed Posts

34. click on database

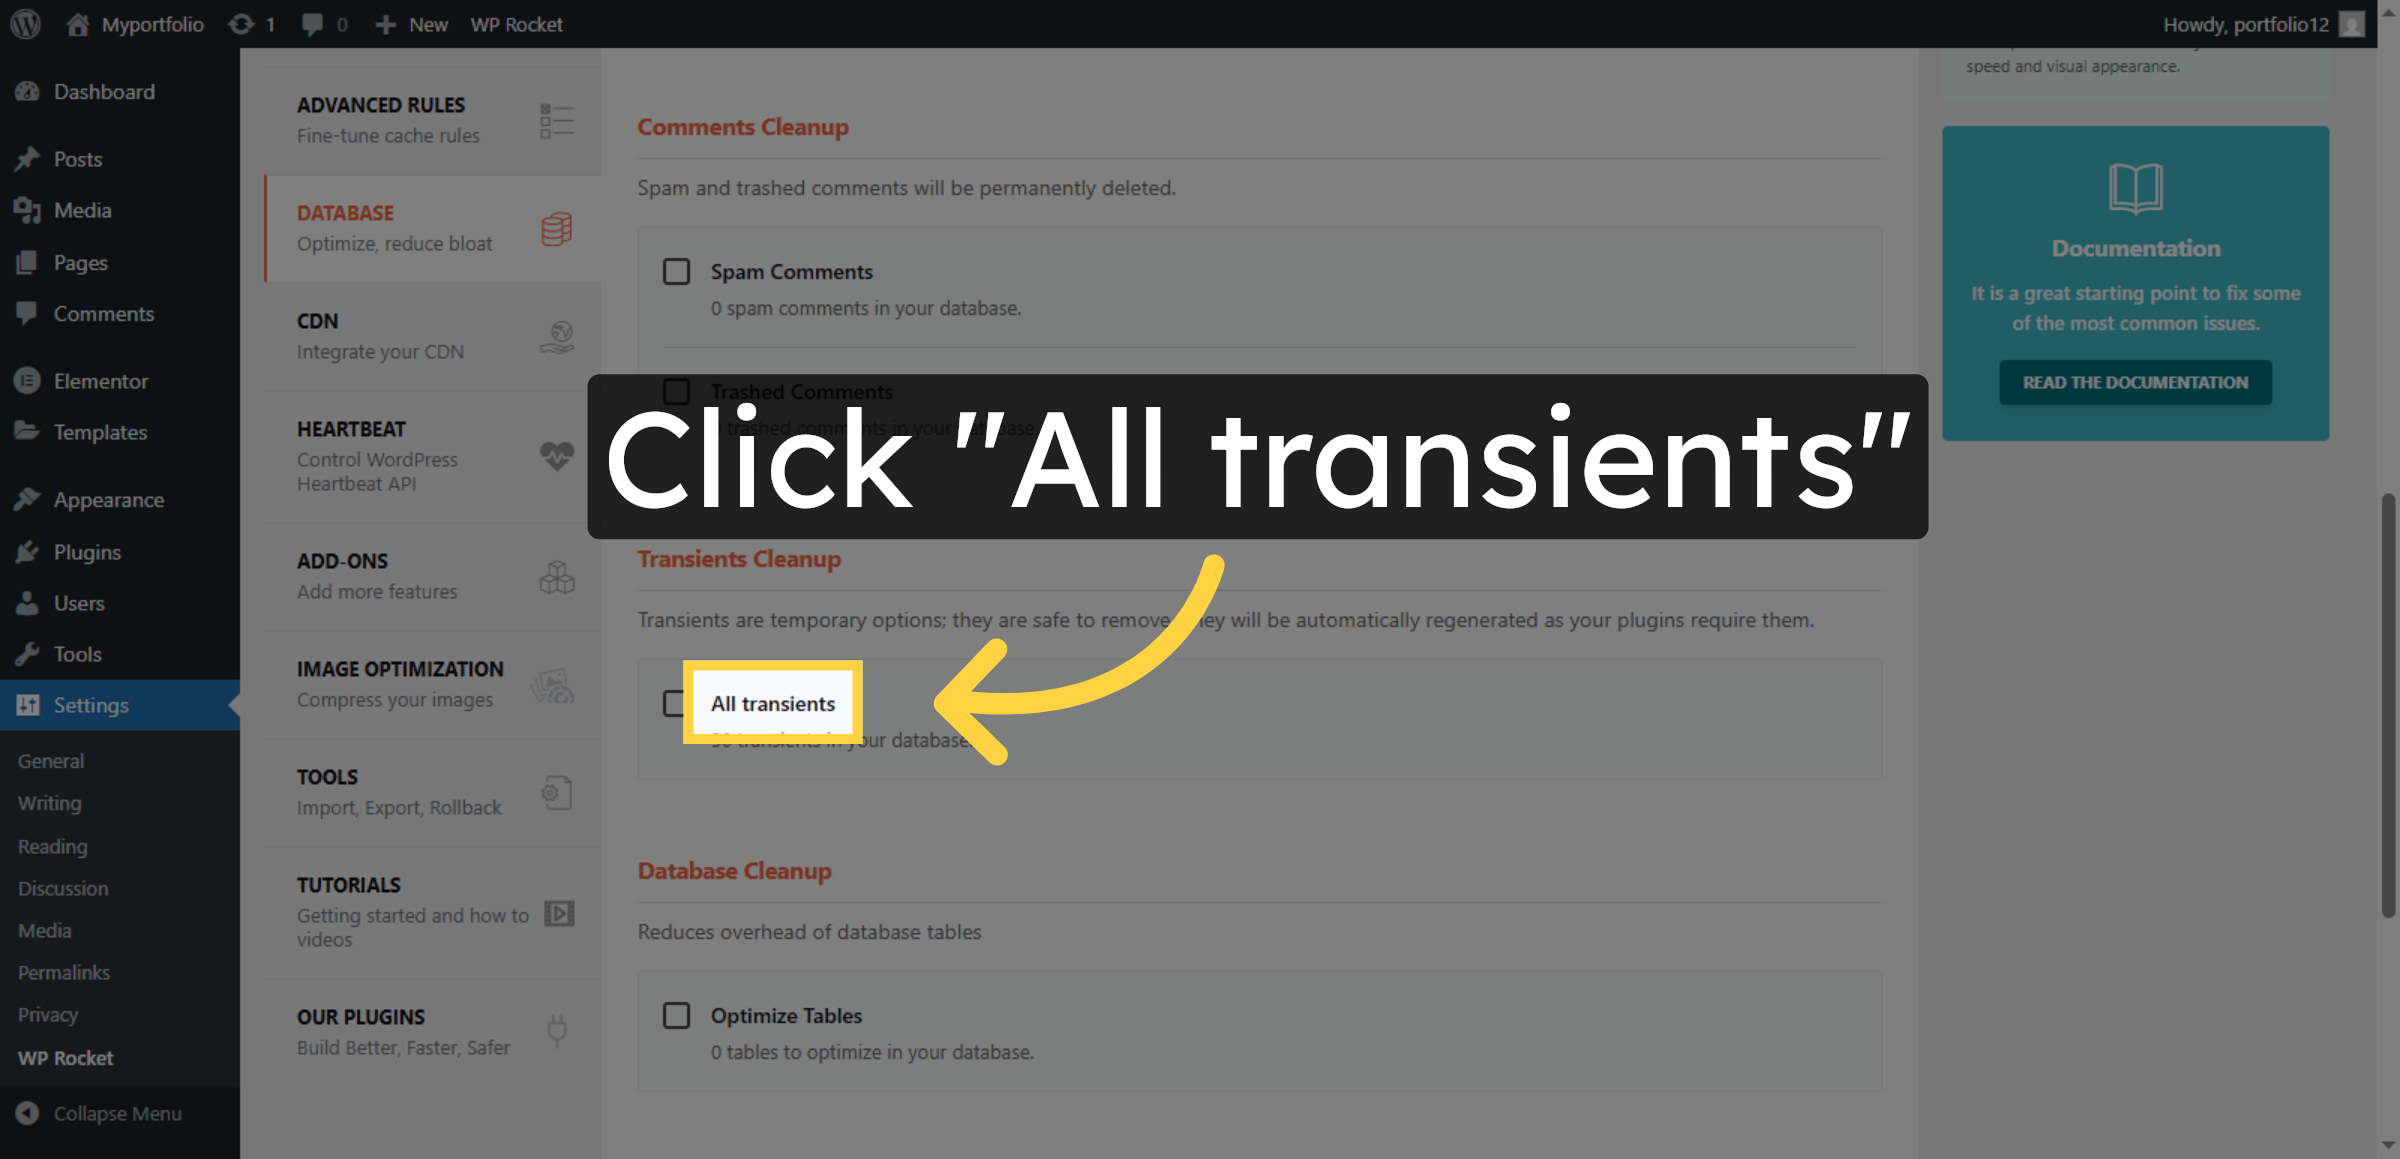
35. Manage All Transients
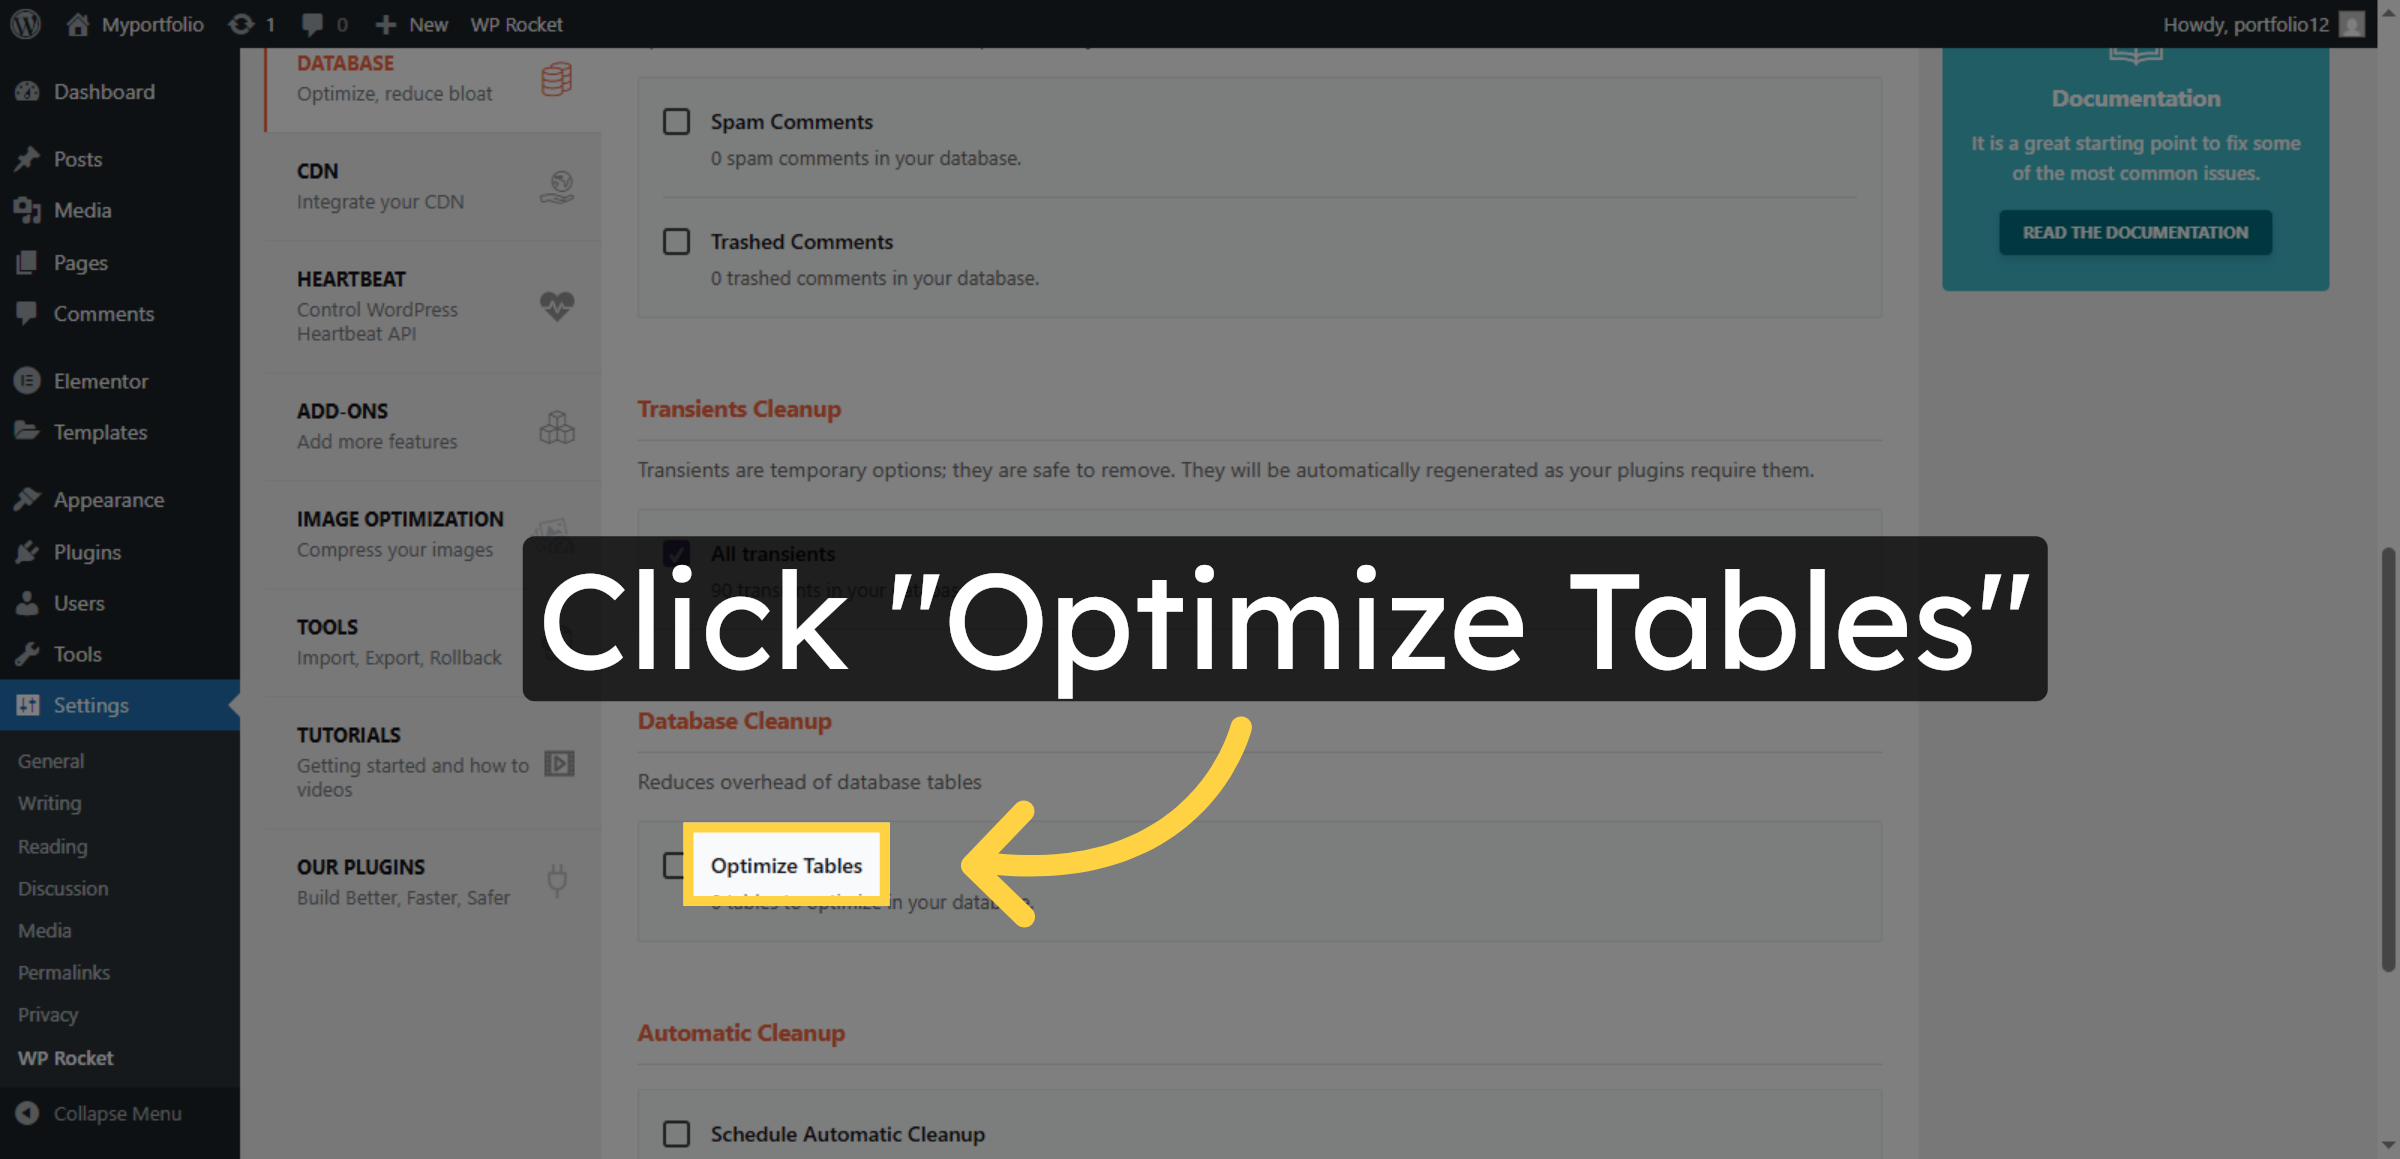
36. Enable Optimize Database Tables
37. Save changes

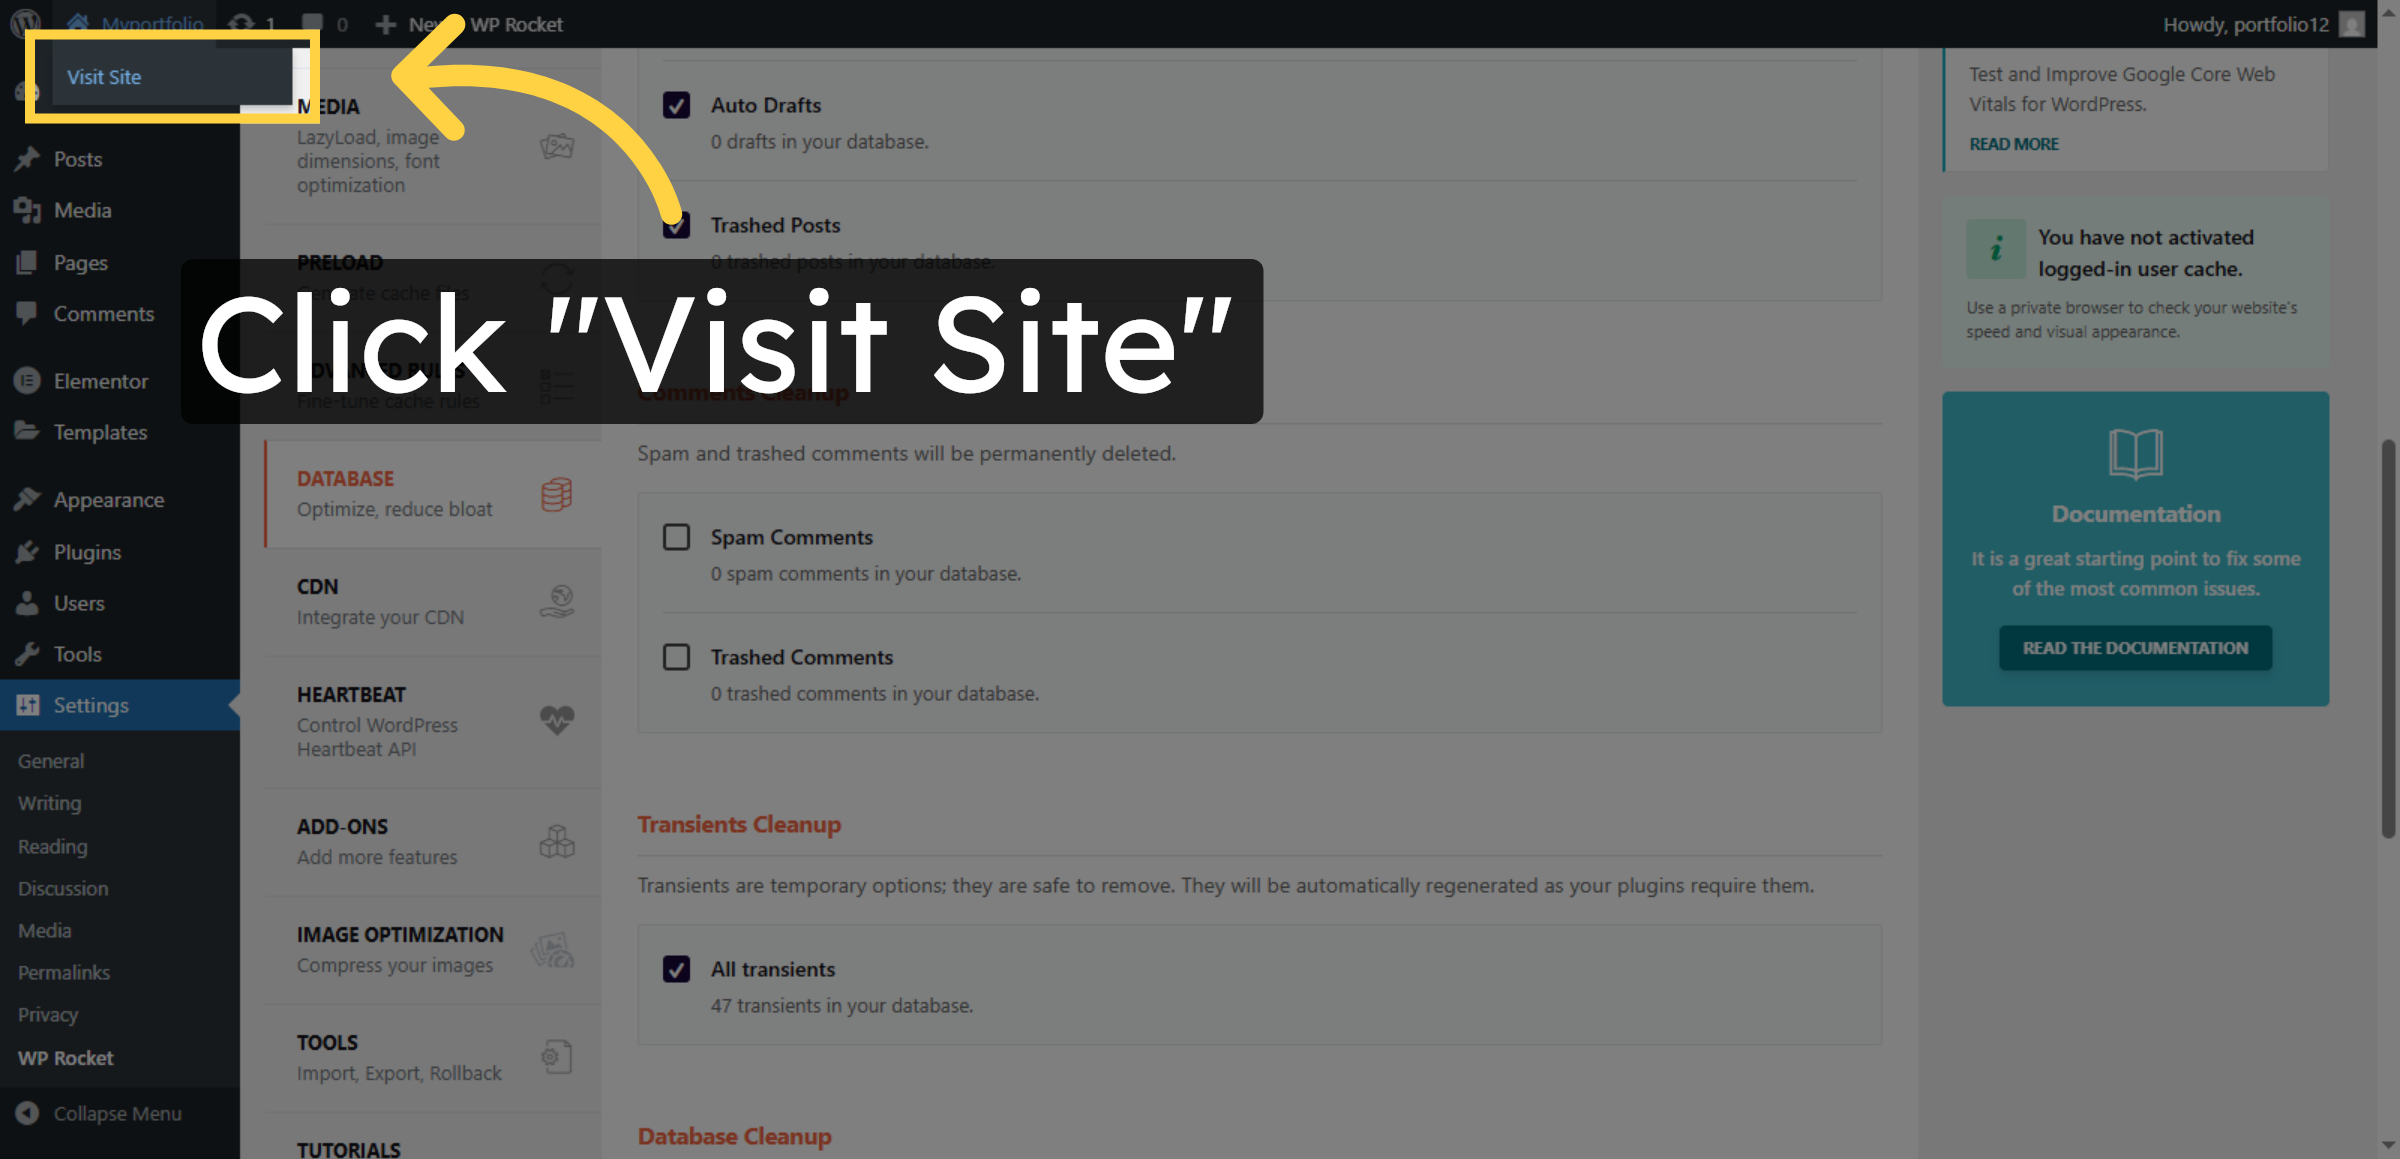
38. Visit Website
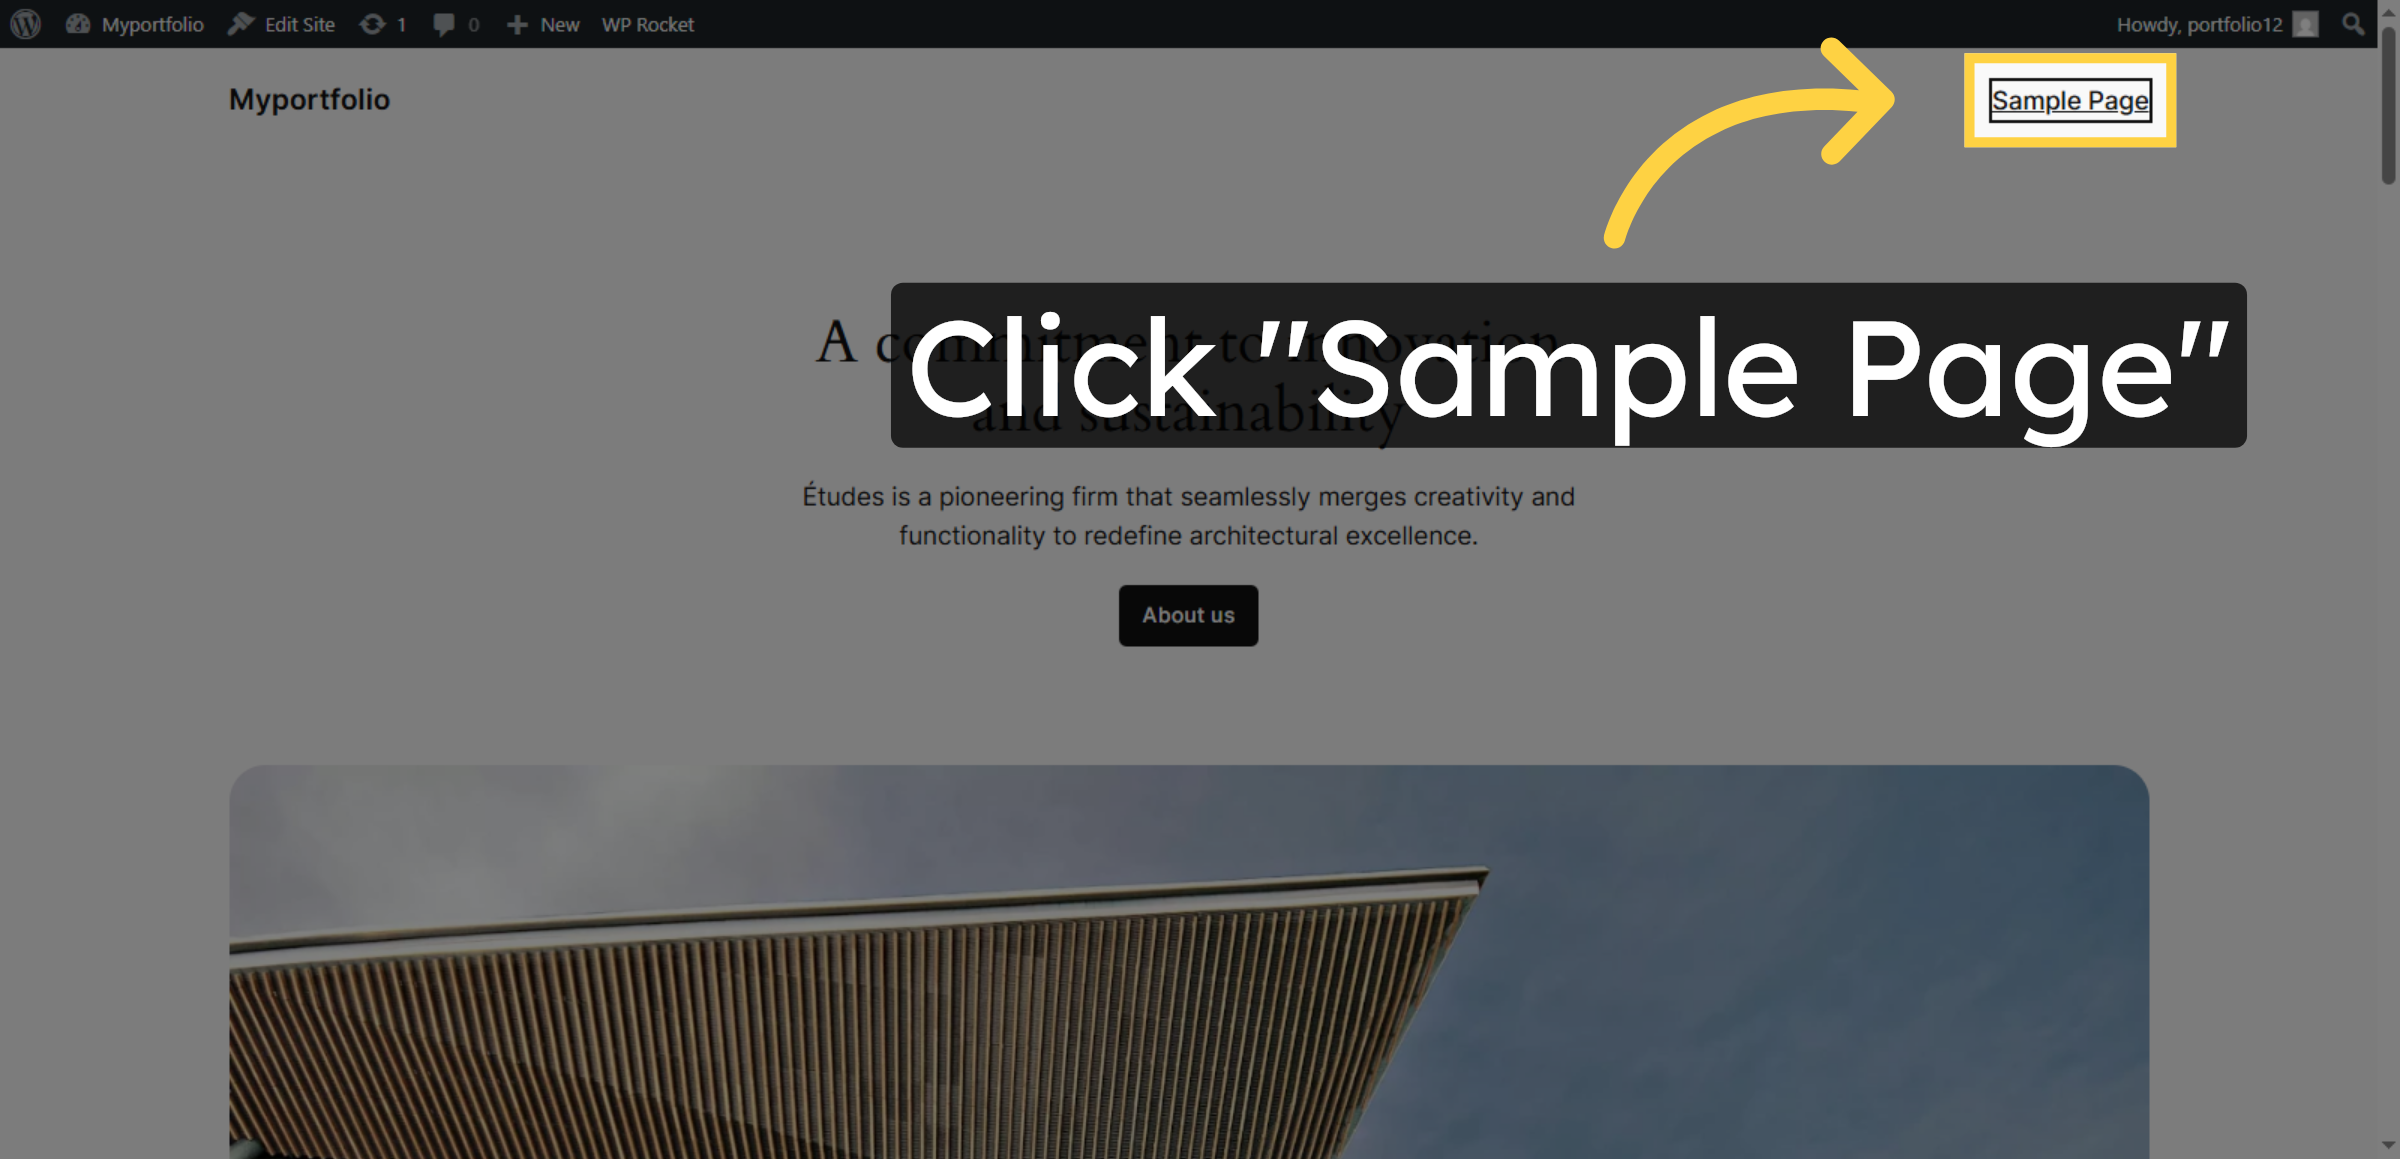
39. verify your changes
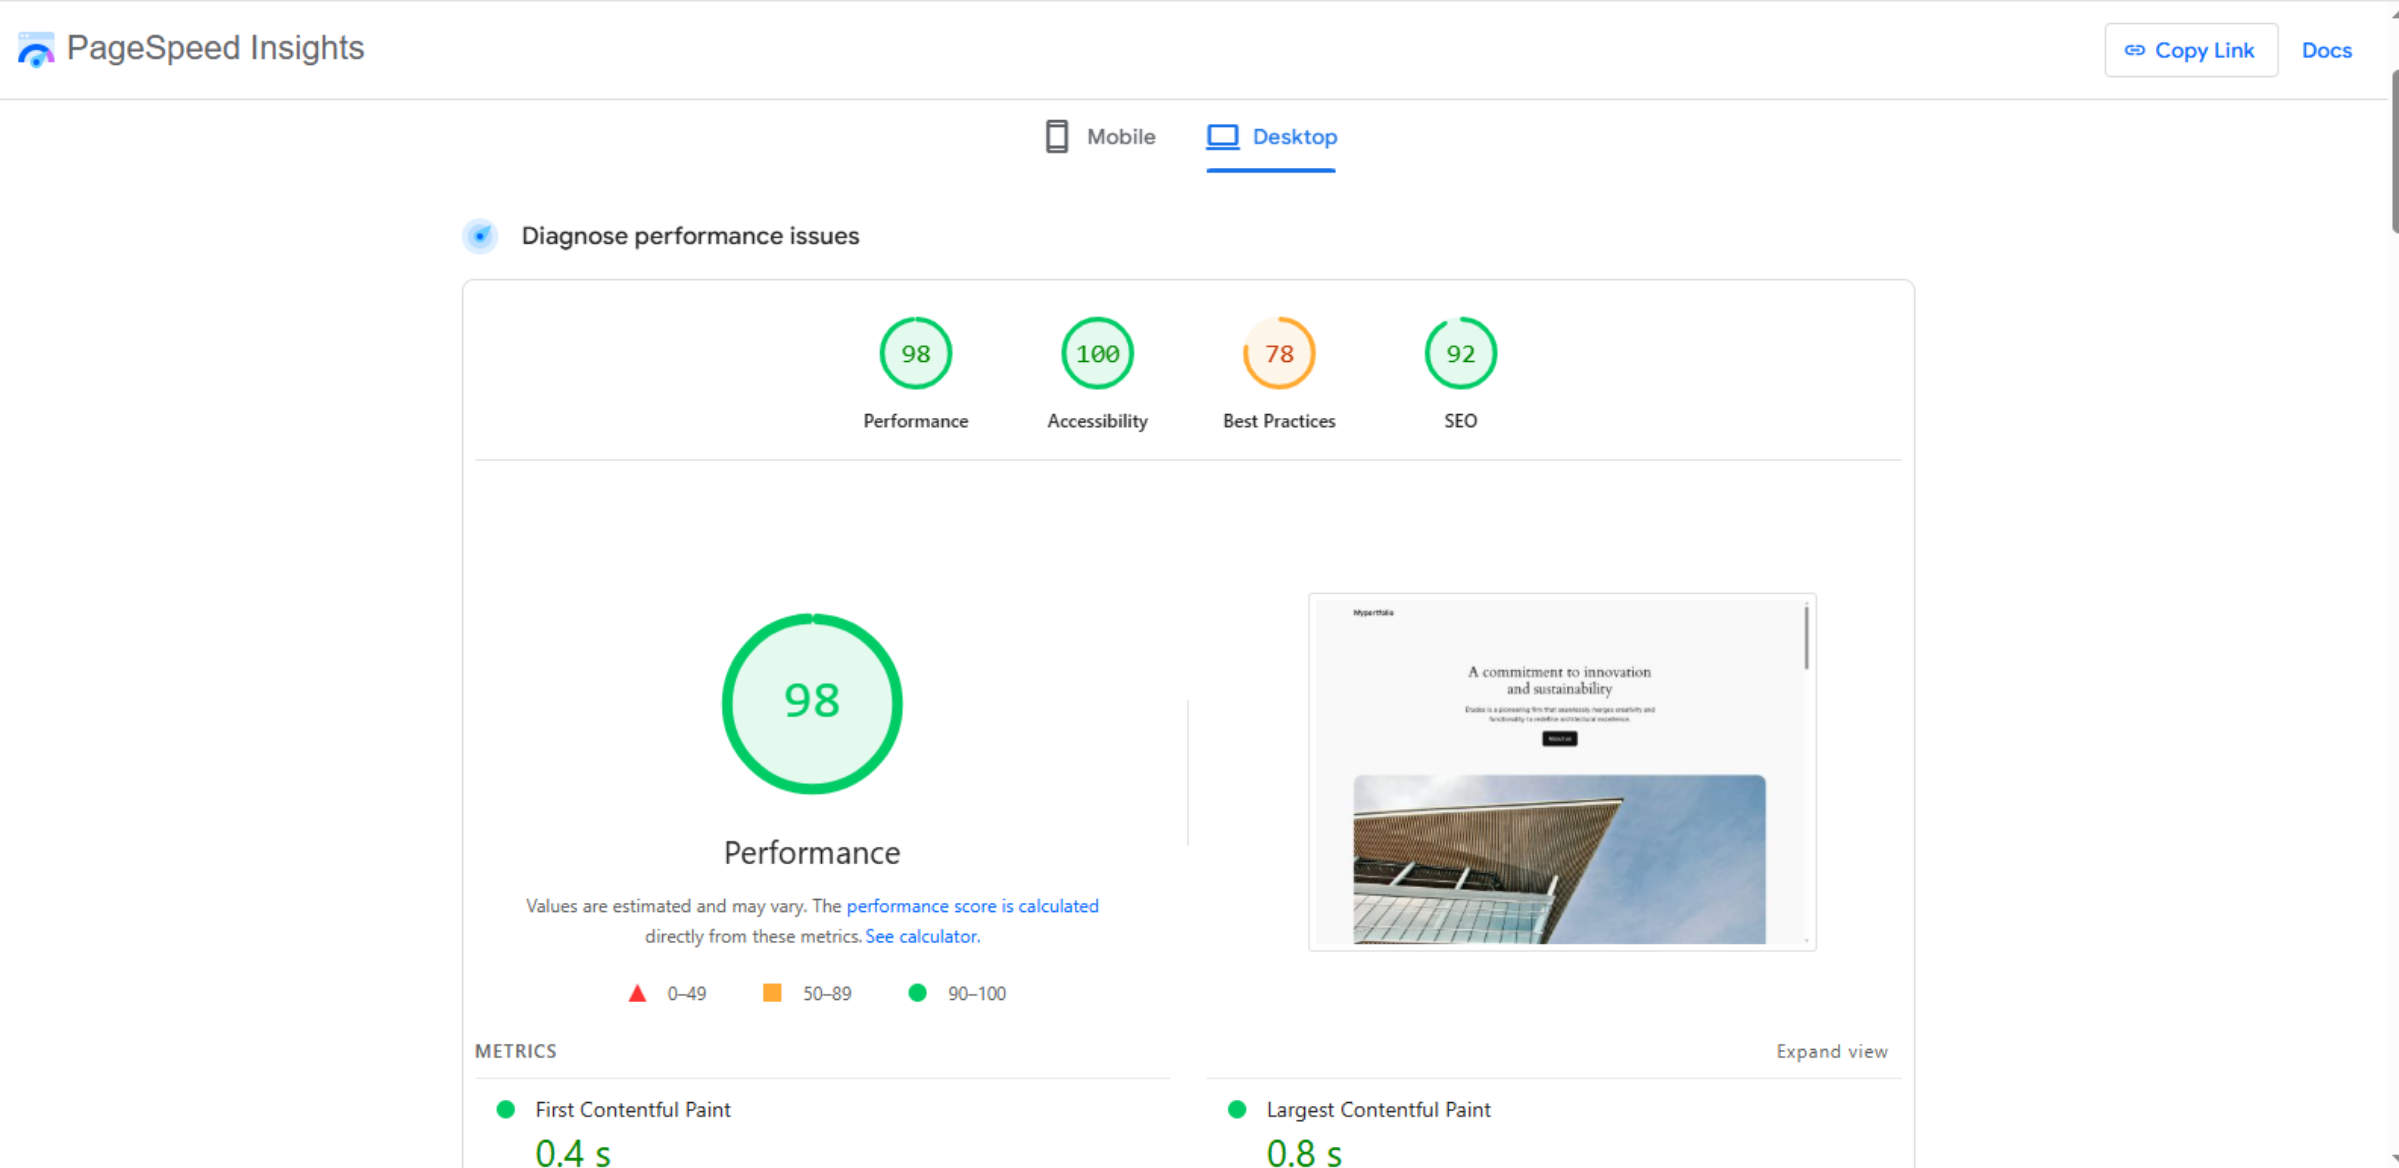
40. “After Speeding Up Your Website’s Performance”
Conclusion
By following the steps outlined in this guide, you can successfully improve your WordPress website’s performance using the WP Rocket plugin. Measuring site speed before optimization, applying file optimization, enabling lazy loading, generating cache files, and optimizing the database all contribute to faster loading times and a better user experience. Regular performance monitoring and optimization are best practices for maintaining a fast, efficient, and SEO-friendly WordPress website.
Visit: https://www.woohelpdesk.com
Call Us Toll-Free: +1 888 602 0119 (US & Canada)
Get professional support for WordPress configuration, hosting management, performance optimization, and troubleshooting.


