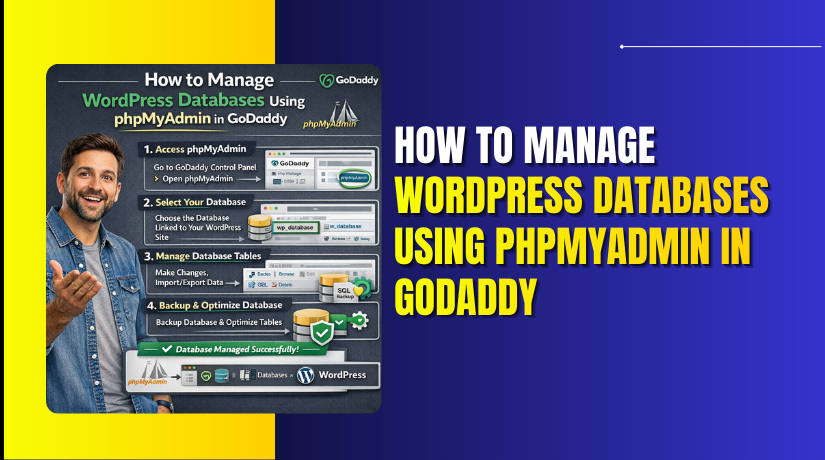
Introduction
Managing your WordPress database is essential for maintaining website performance, security, and data accuracy. The database stores critical information such as user accounts, posts, settings, and system configurations. GoDaddy provides access to phpMyAdmin through its hosting dashboard, allowing administrators to safely view, edit, insert, and delete database records. Proper database management helps prevent errors, improve site stability, and support troubleshooting tasks.
This guidde explains how to manage WordPress databases using phpMyAdmin in GoDaddy hosting. It covers accessing the hosting control panel, opening phpMyAdmin, running SQL queries, inserting new users, editing existing records, and removing unwanted data. By following this guide, users can efficiently manage backend data and maintain a healthy website database.
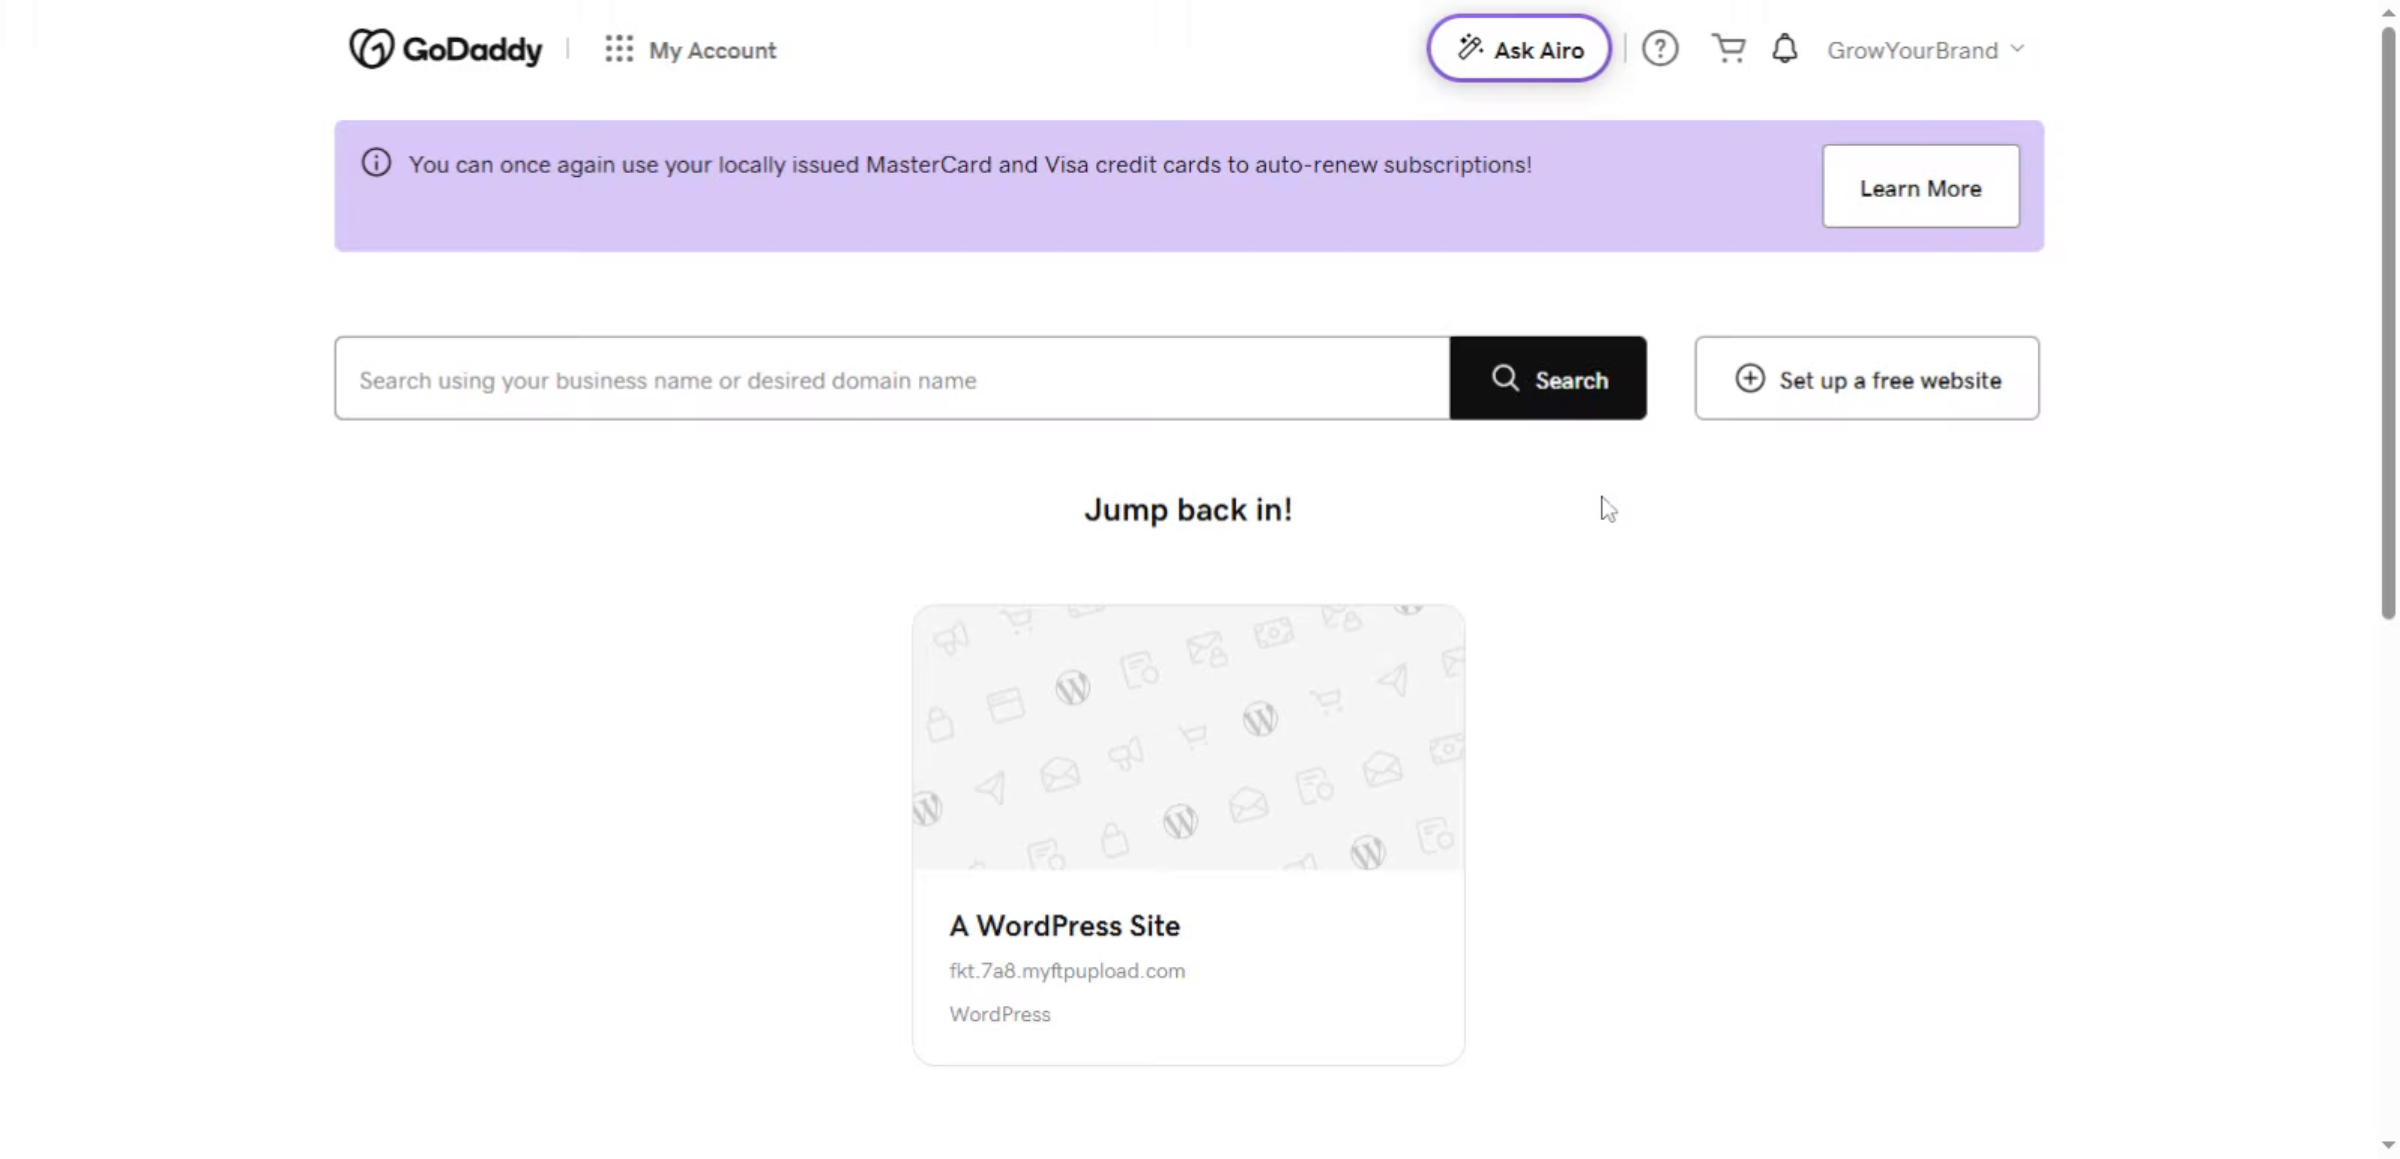
1. GoDaddy Account Dashboard
Manage WordPress databases using phpMyAdmin through the GoDaddy Account Dashboard, allowing users to view, edit, back up, and maintain website database tables efficiently.
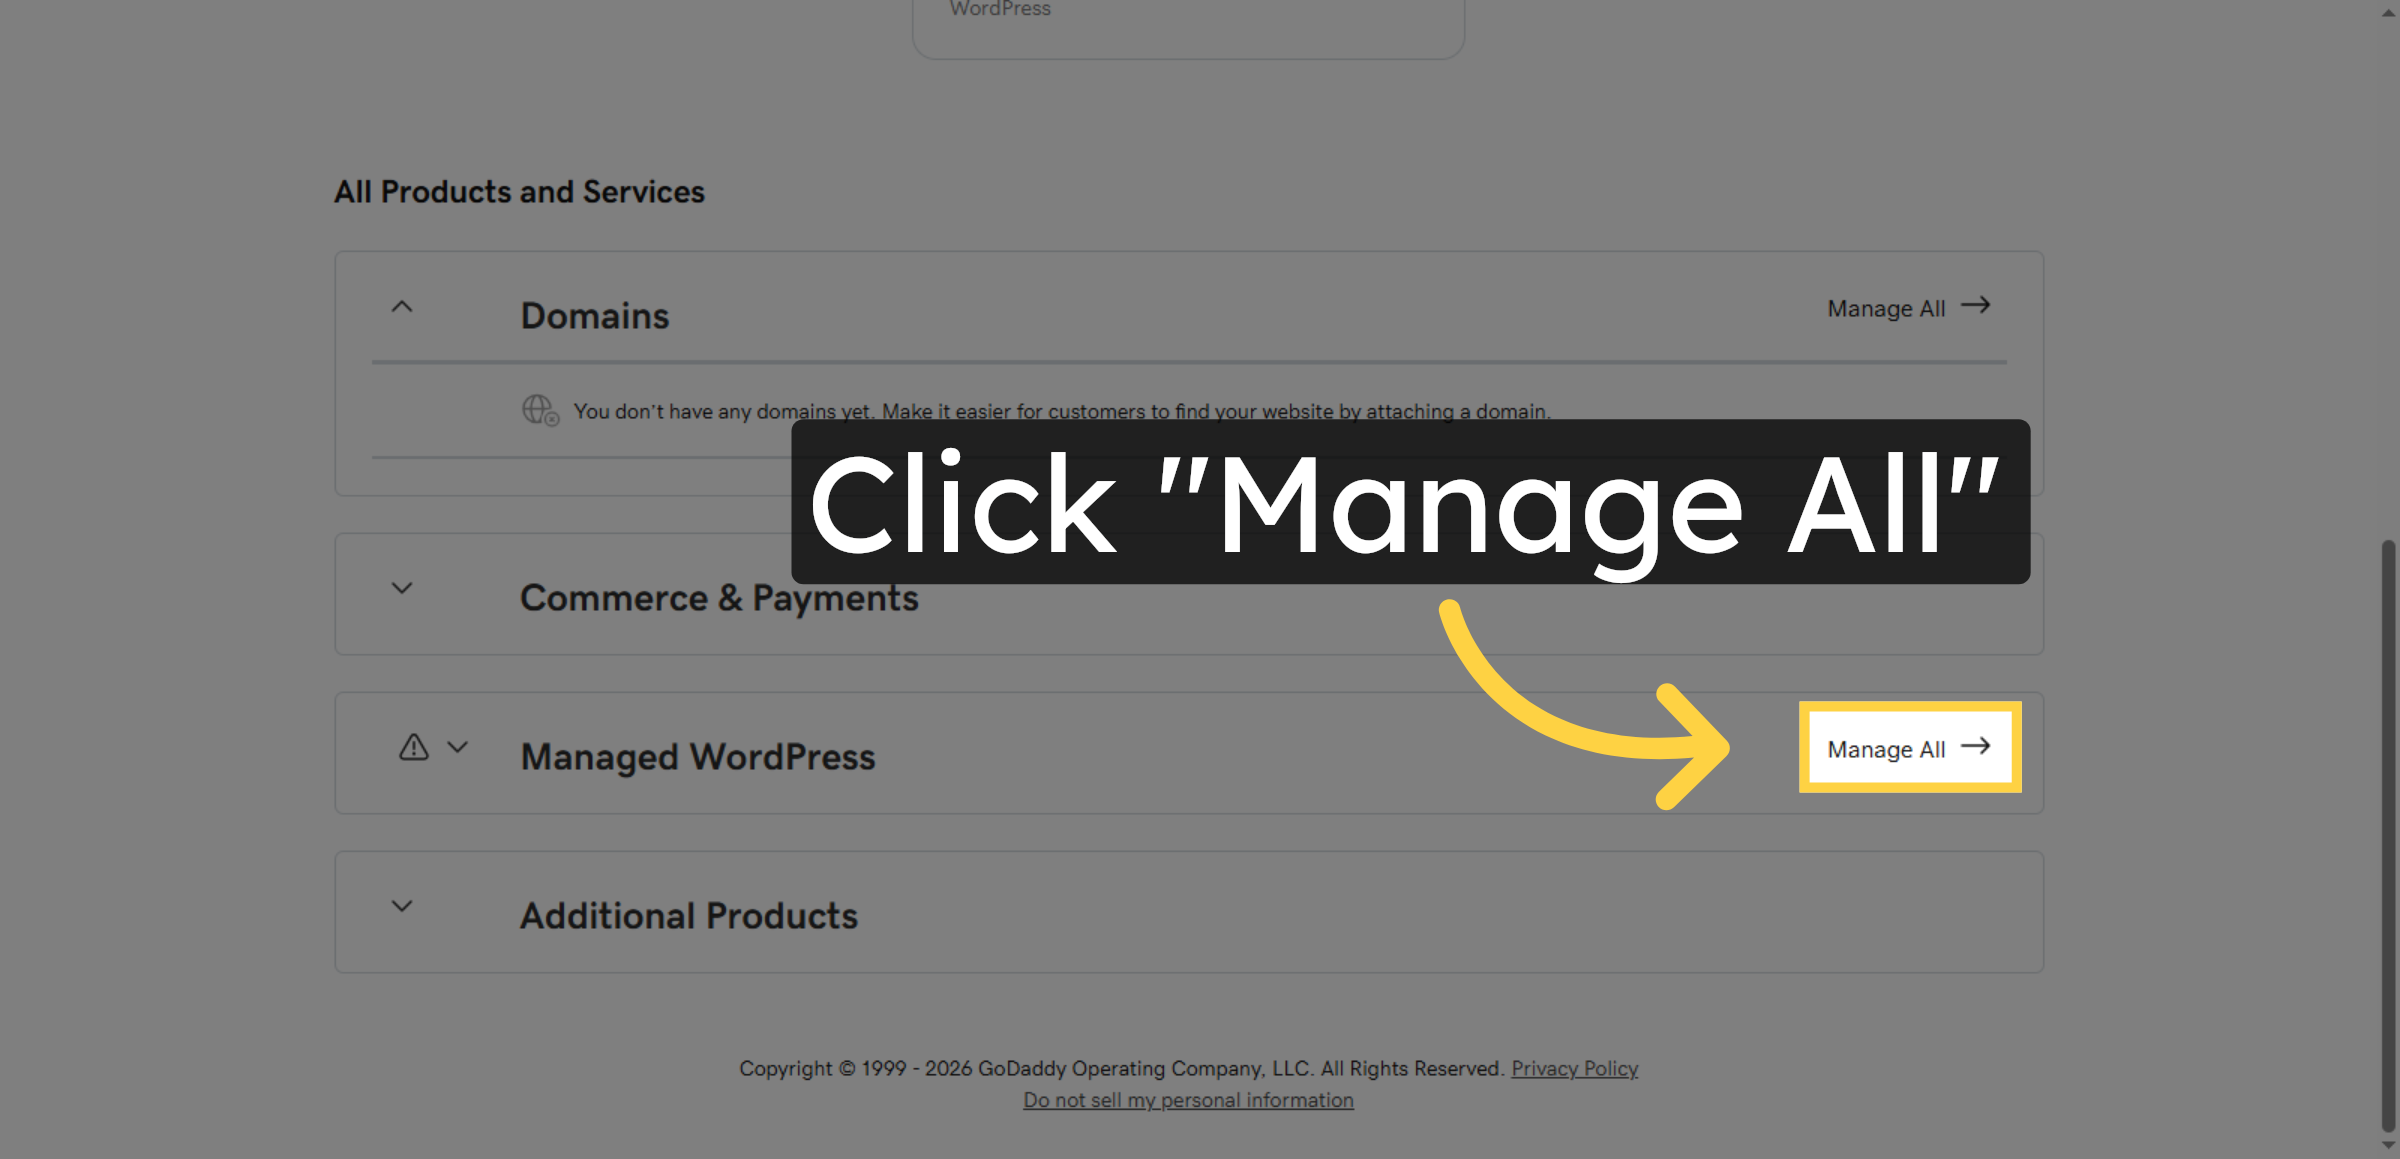
2. Open Manage All Section
Click “Manage All” to view all your GoDaddy products and services associated with your account.
3. Switch to Hosting Dashboard
Switch to the “host.godaddy.com” tab to access your hosting dashboard for managing your website hosting settings.
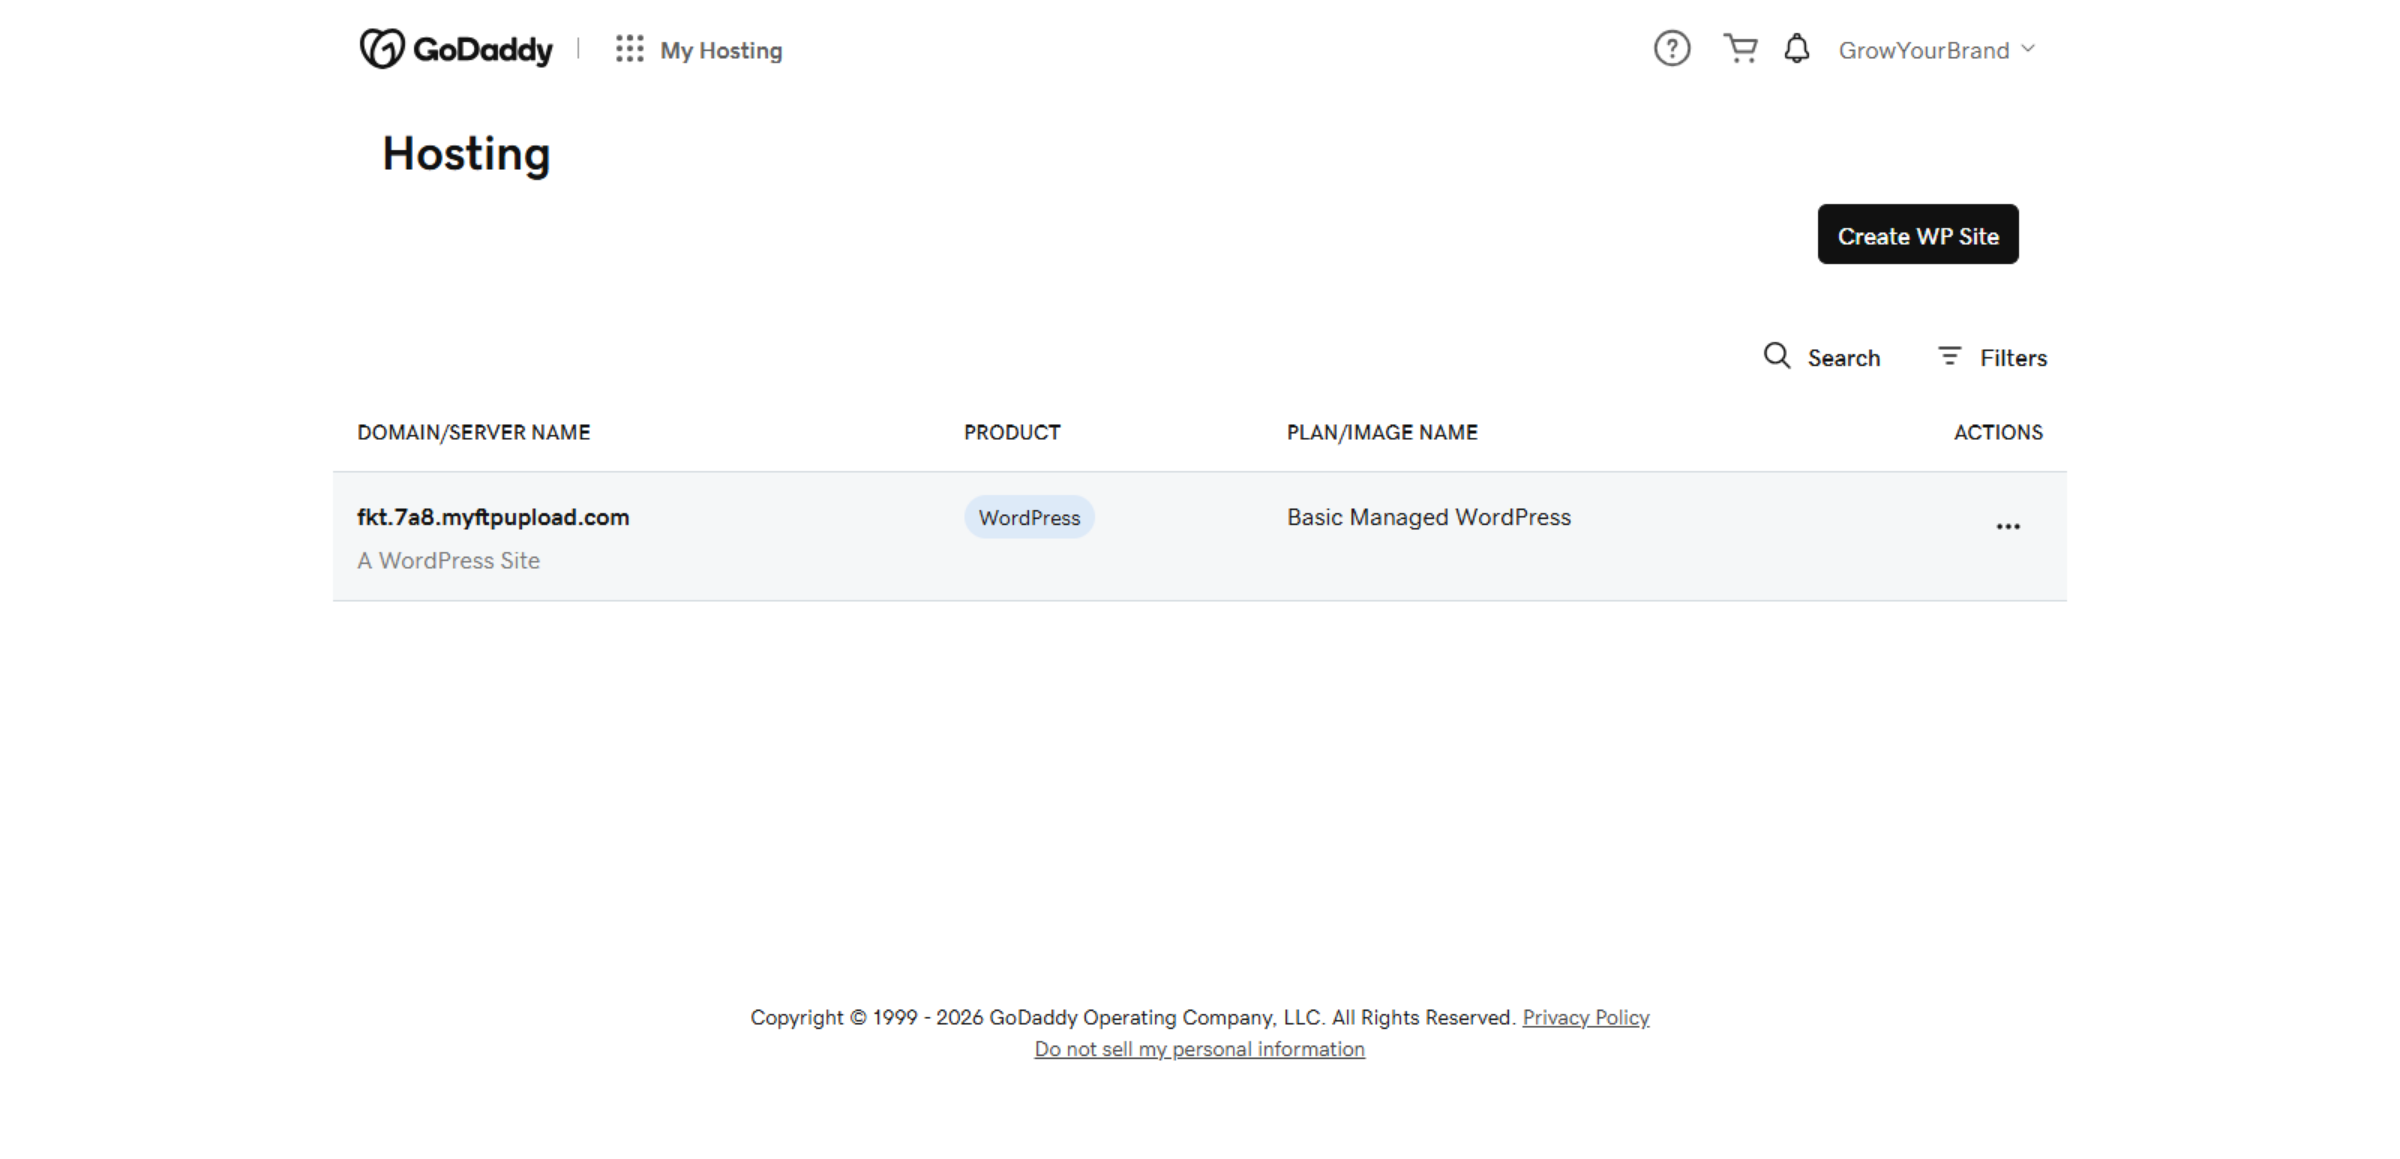
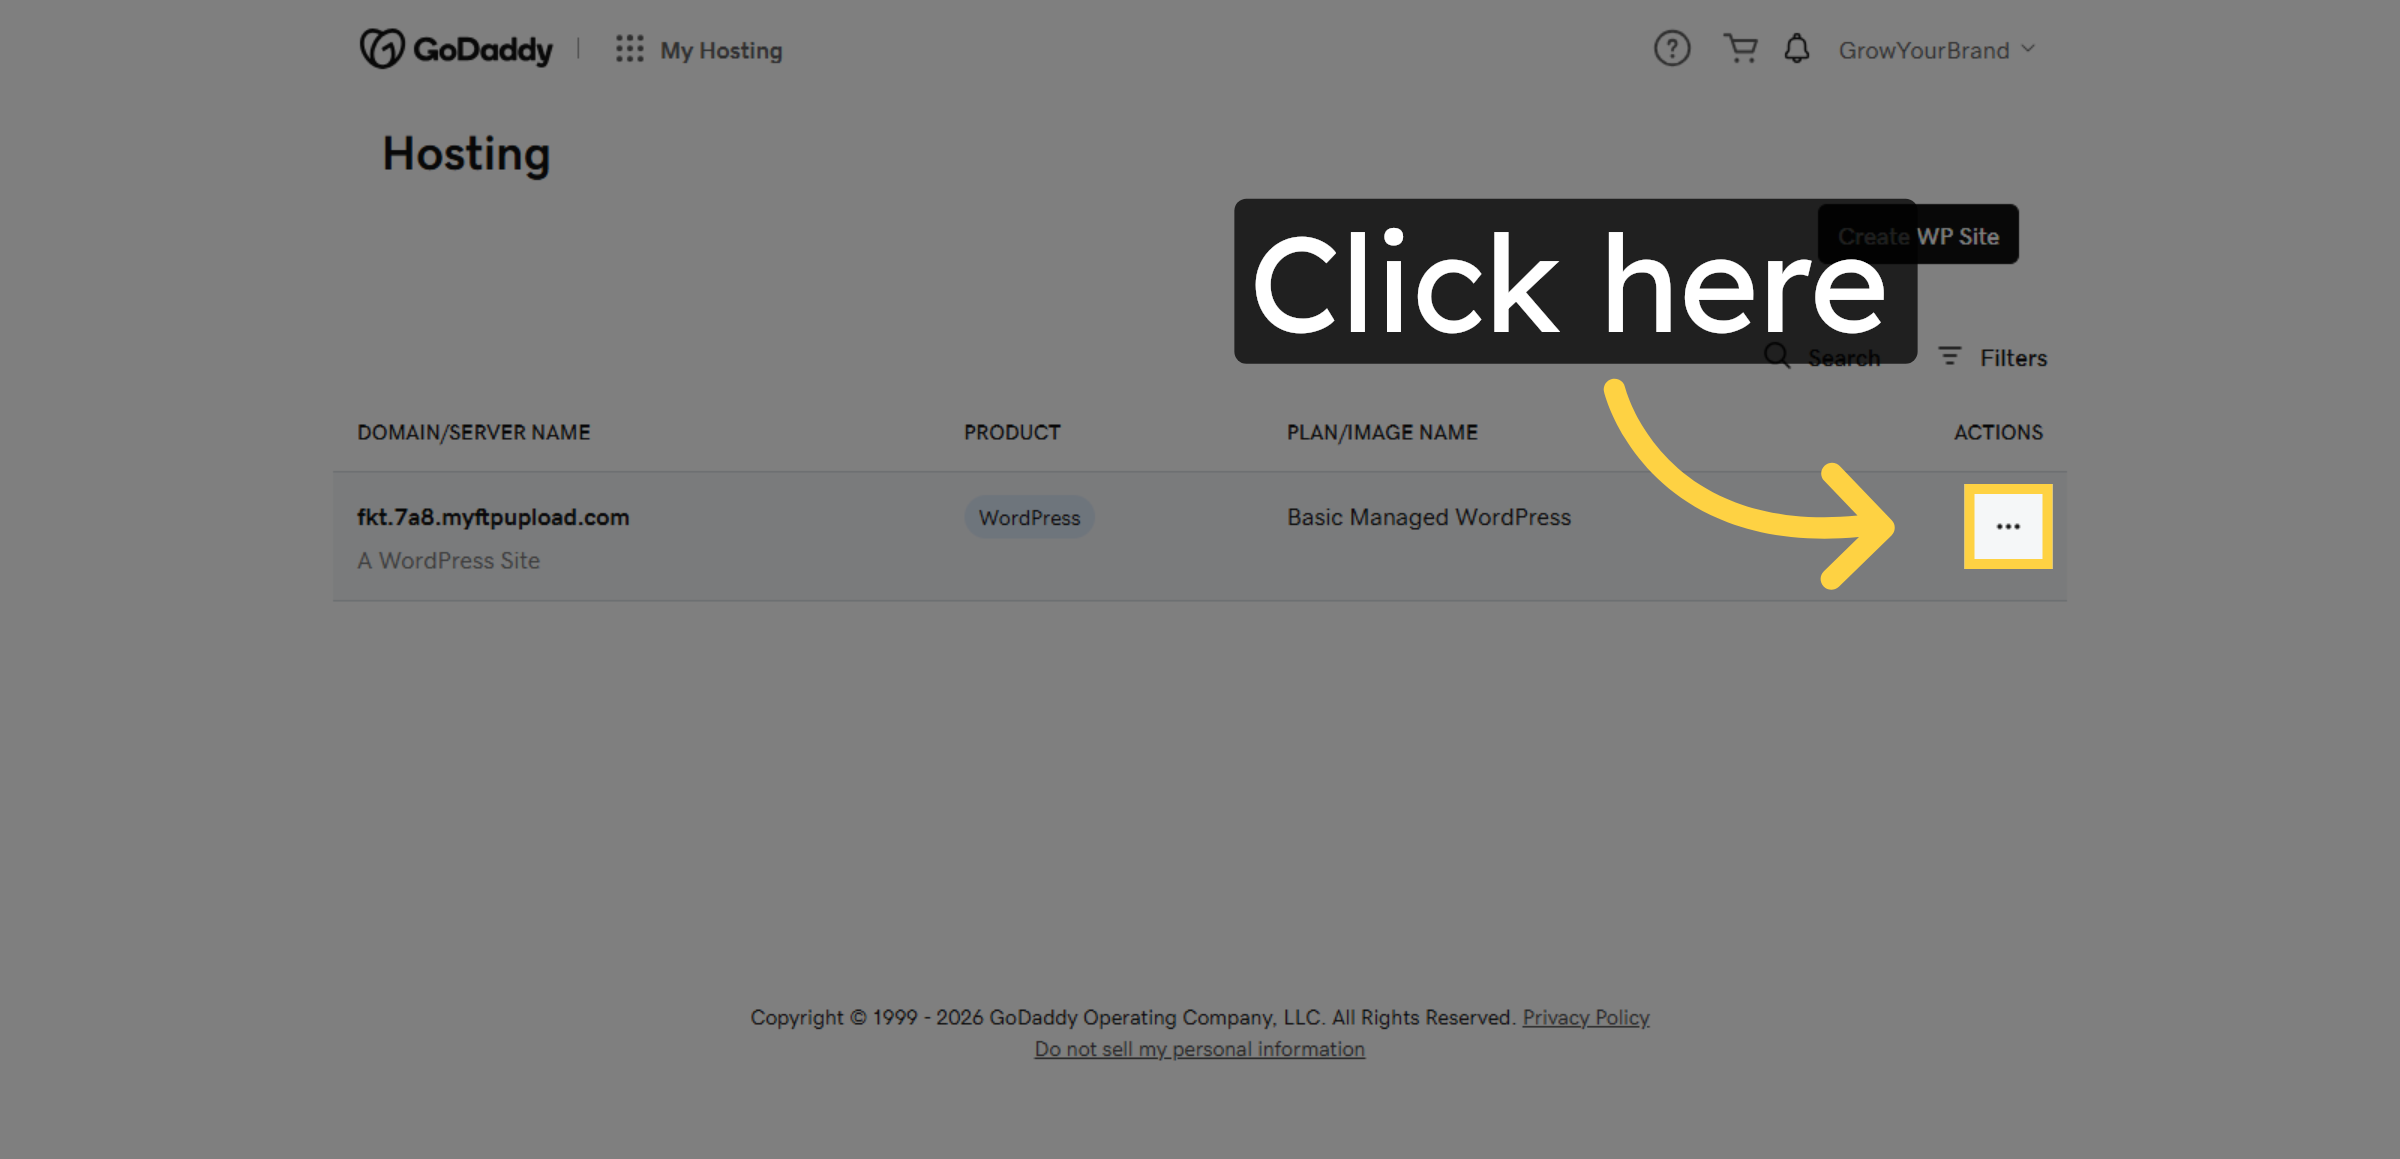
4. Open Hosting Options
Click the indicated area to open the hosting options available for your selected hosting account.
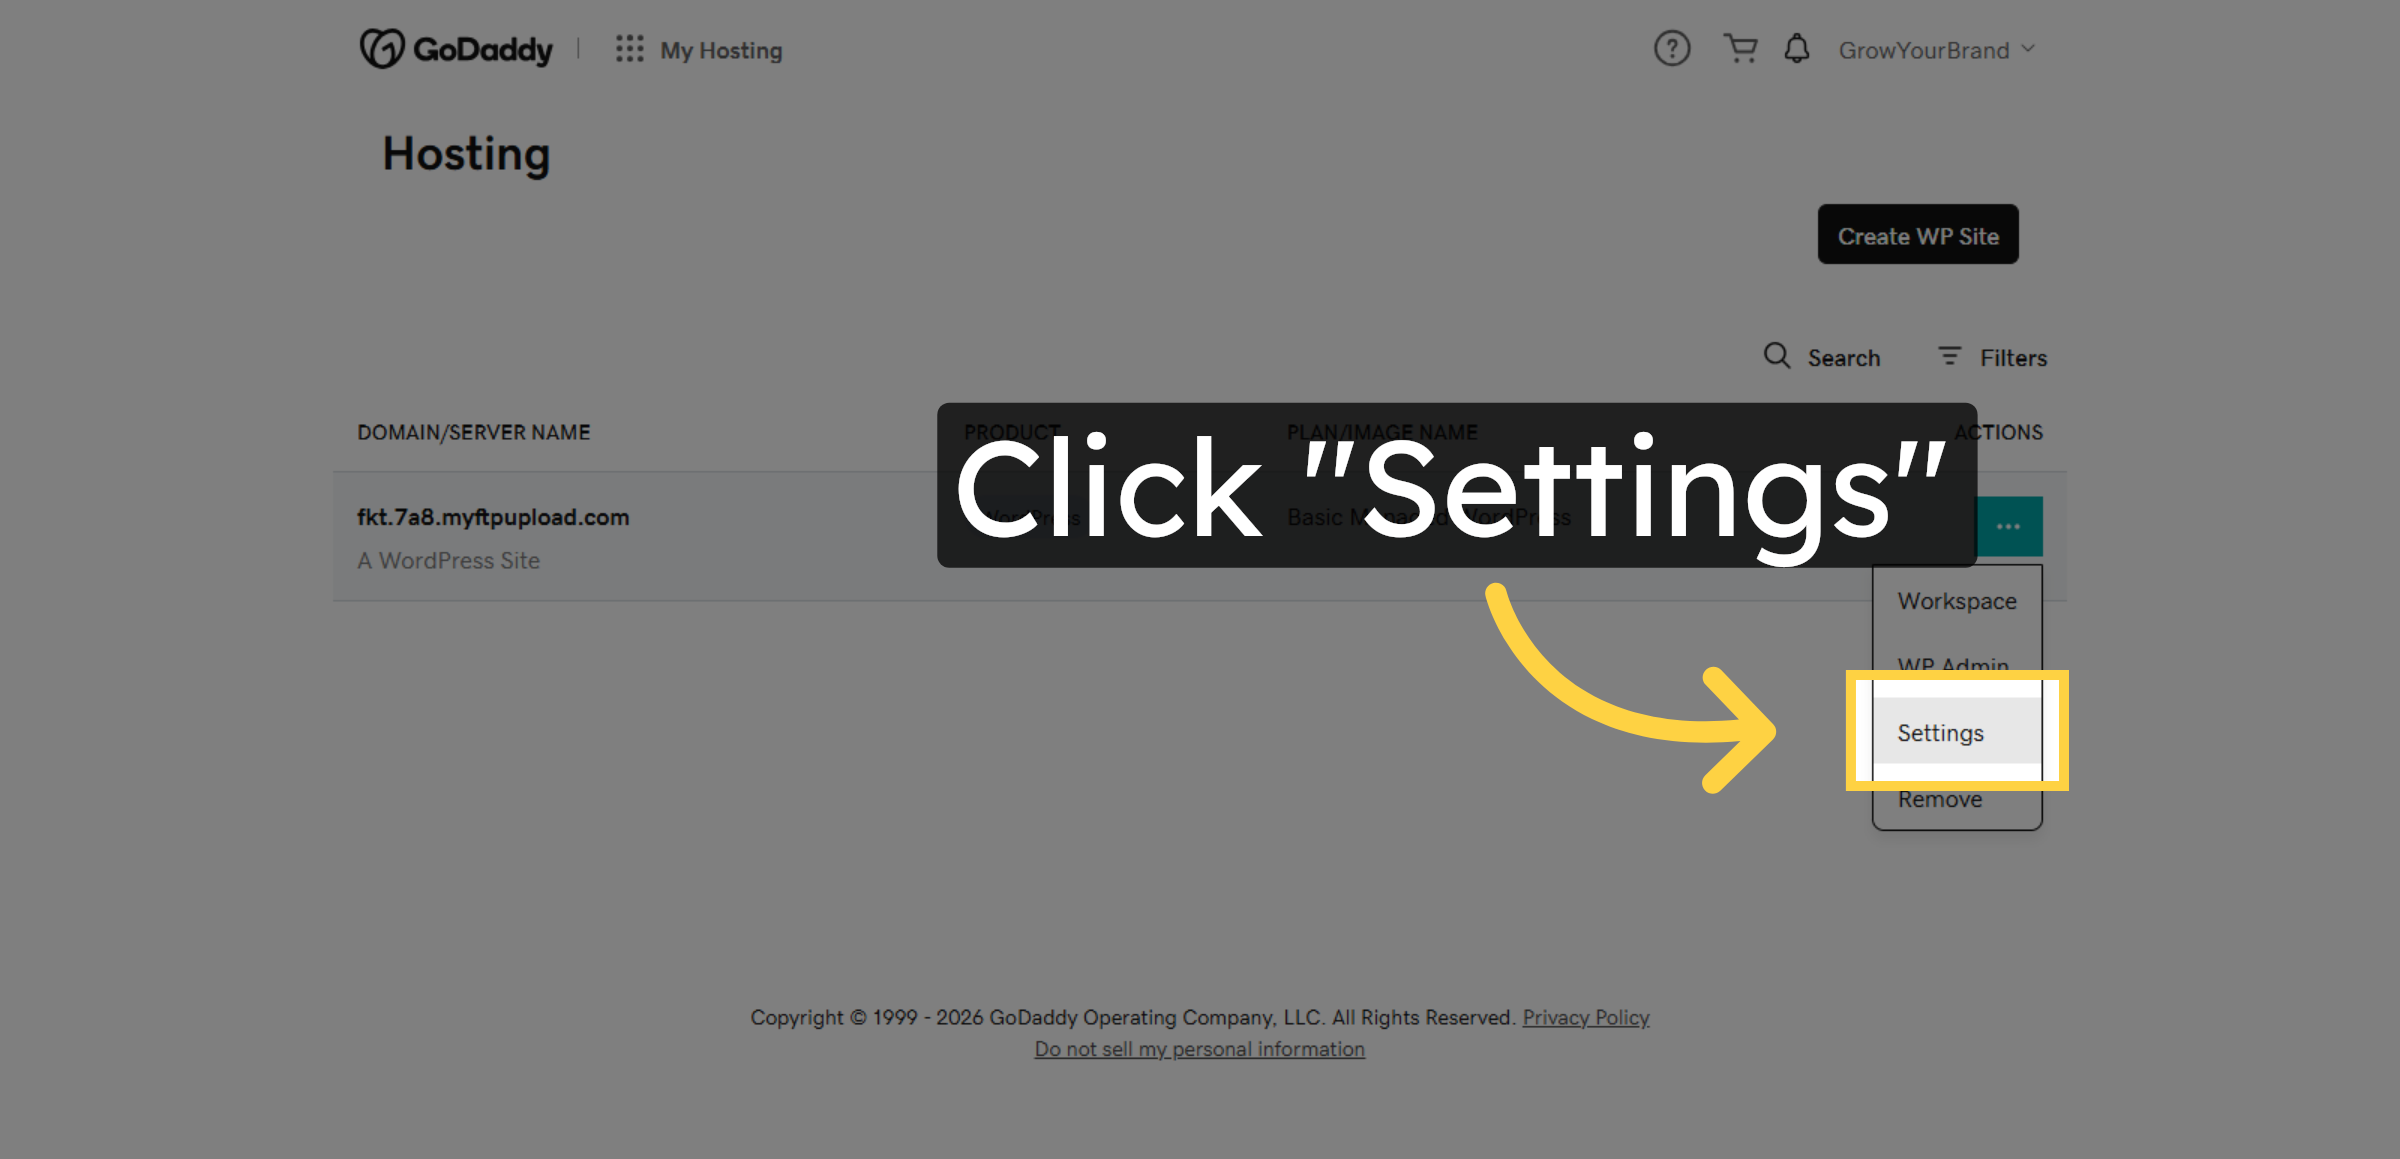
5. Access Hosting Settings
Click “Settings” to view and modify the configuration settings of your hosting environment.
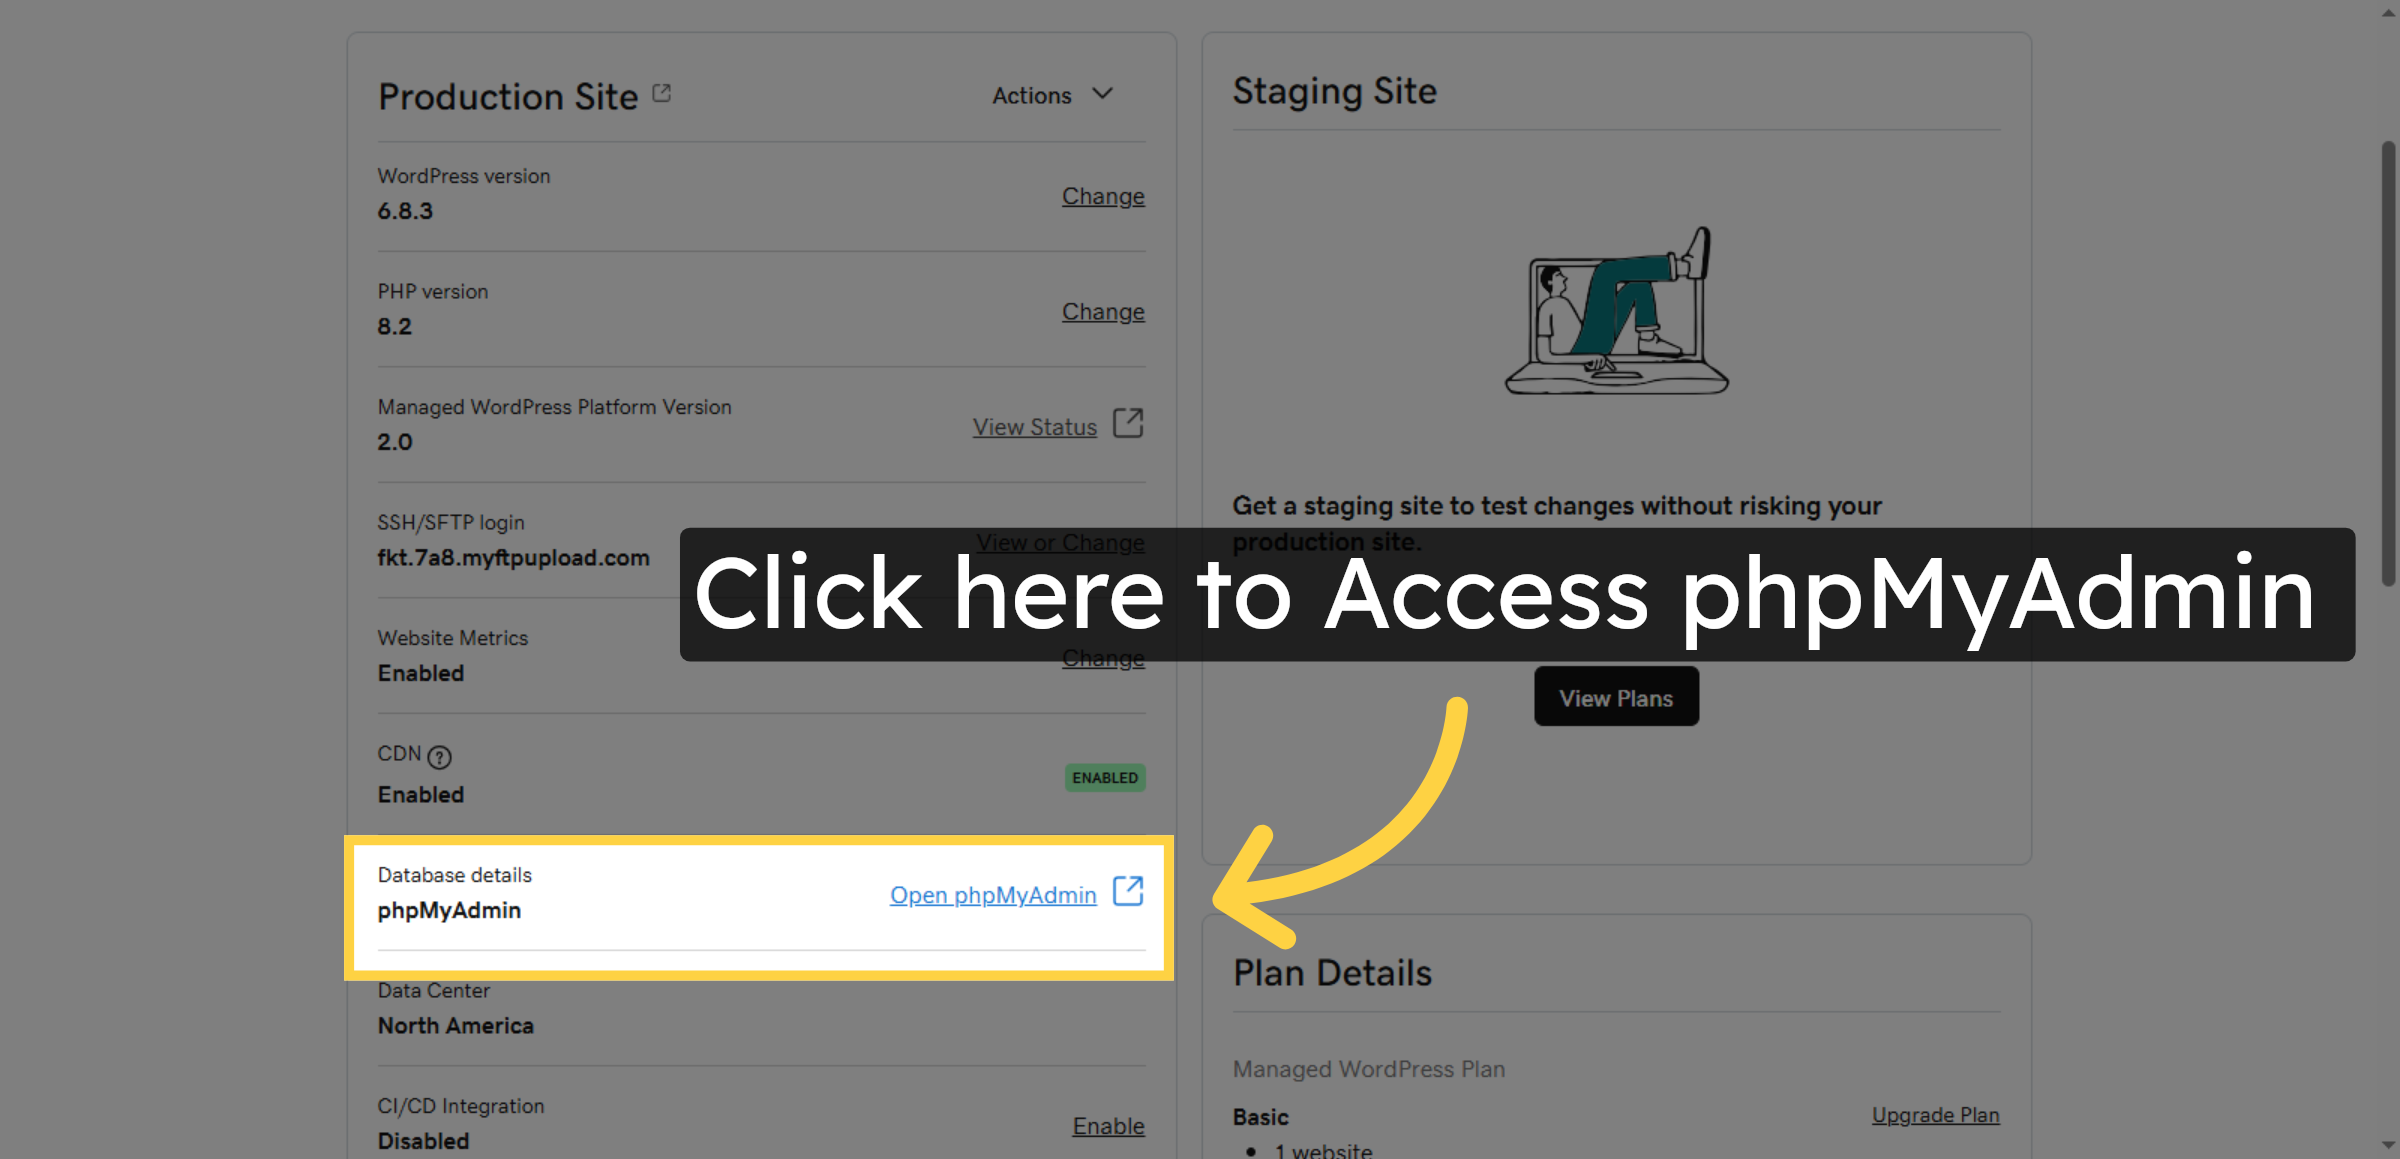
6. phpMyAdmin Access
Open phpMyAdmin to manage your WordPress database and perform database operations.
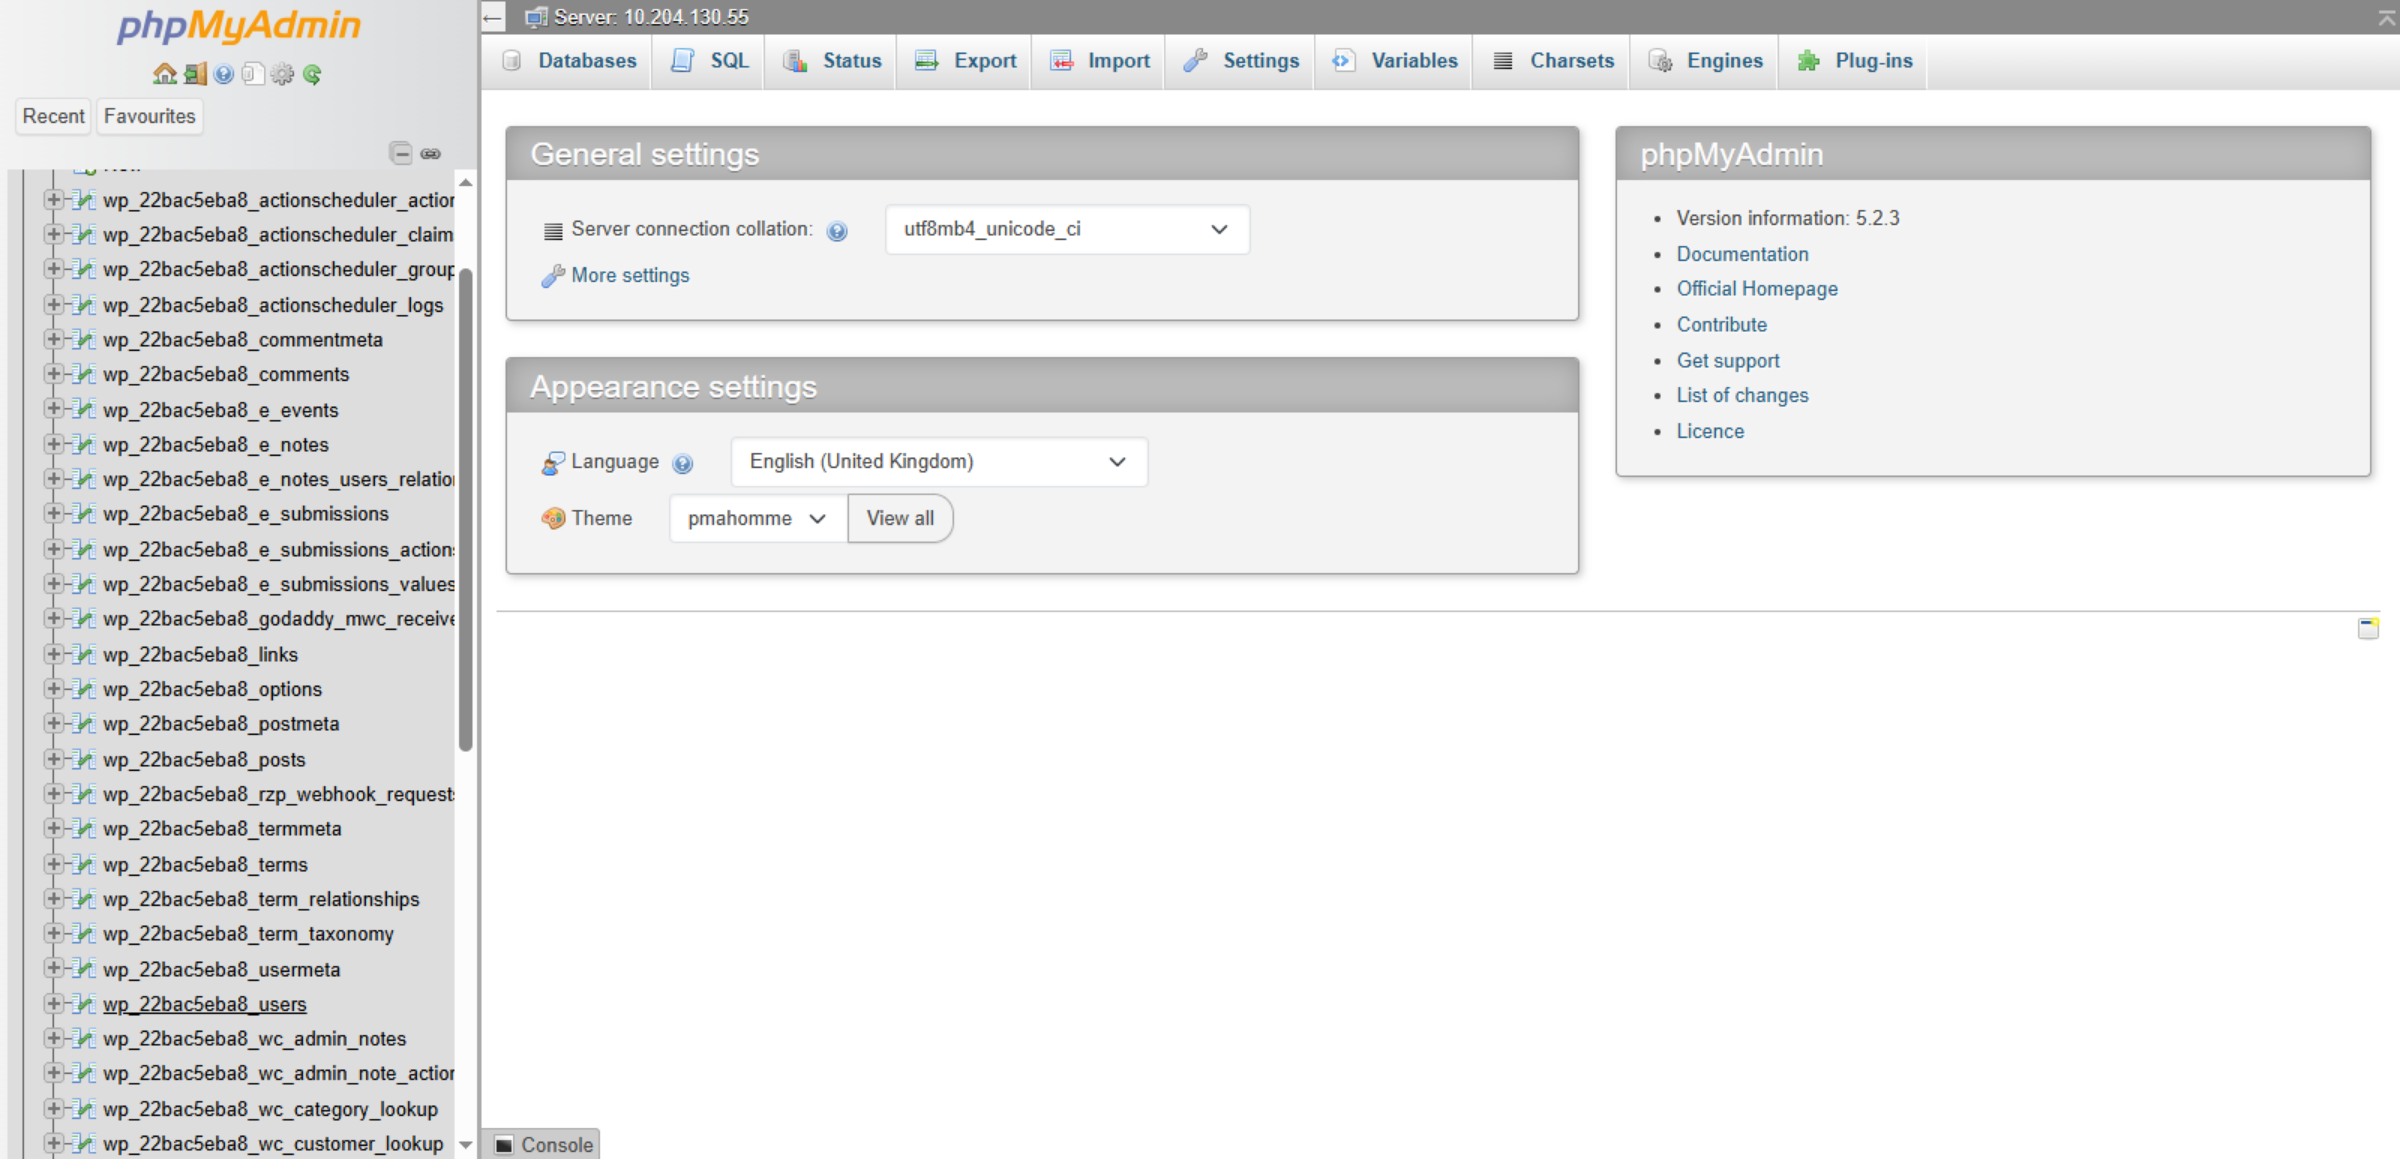
7. Navigate to phpMyAdmin
Switch to the phpMyAdmin URL to access the database management interface for your WordPress site.
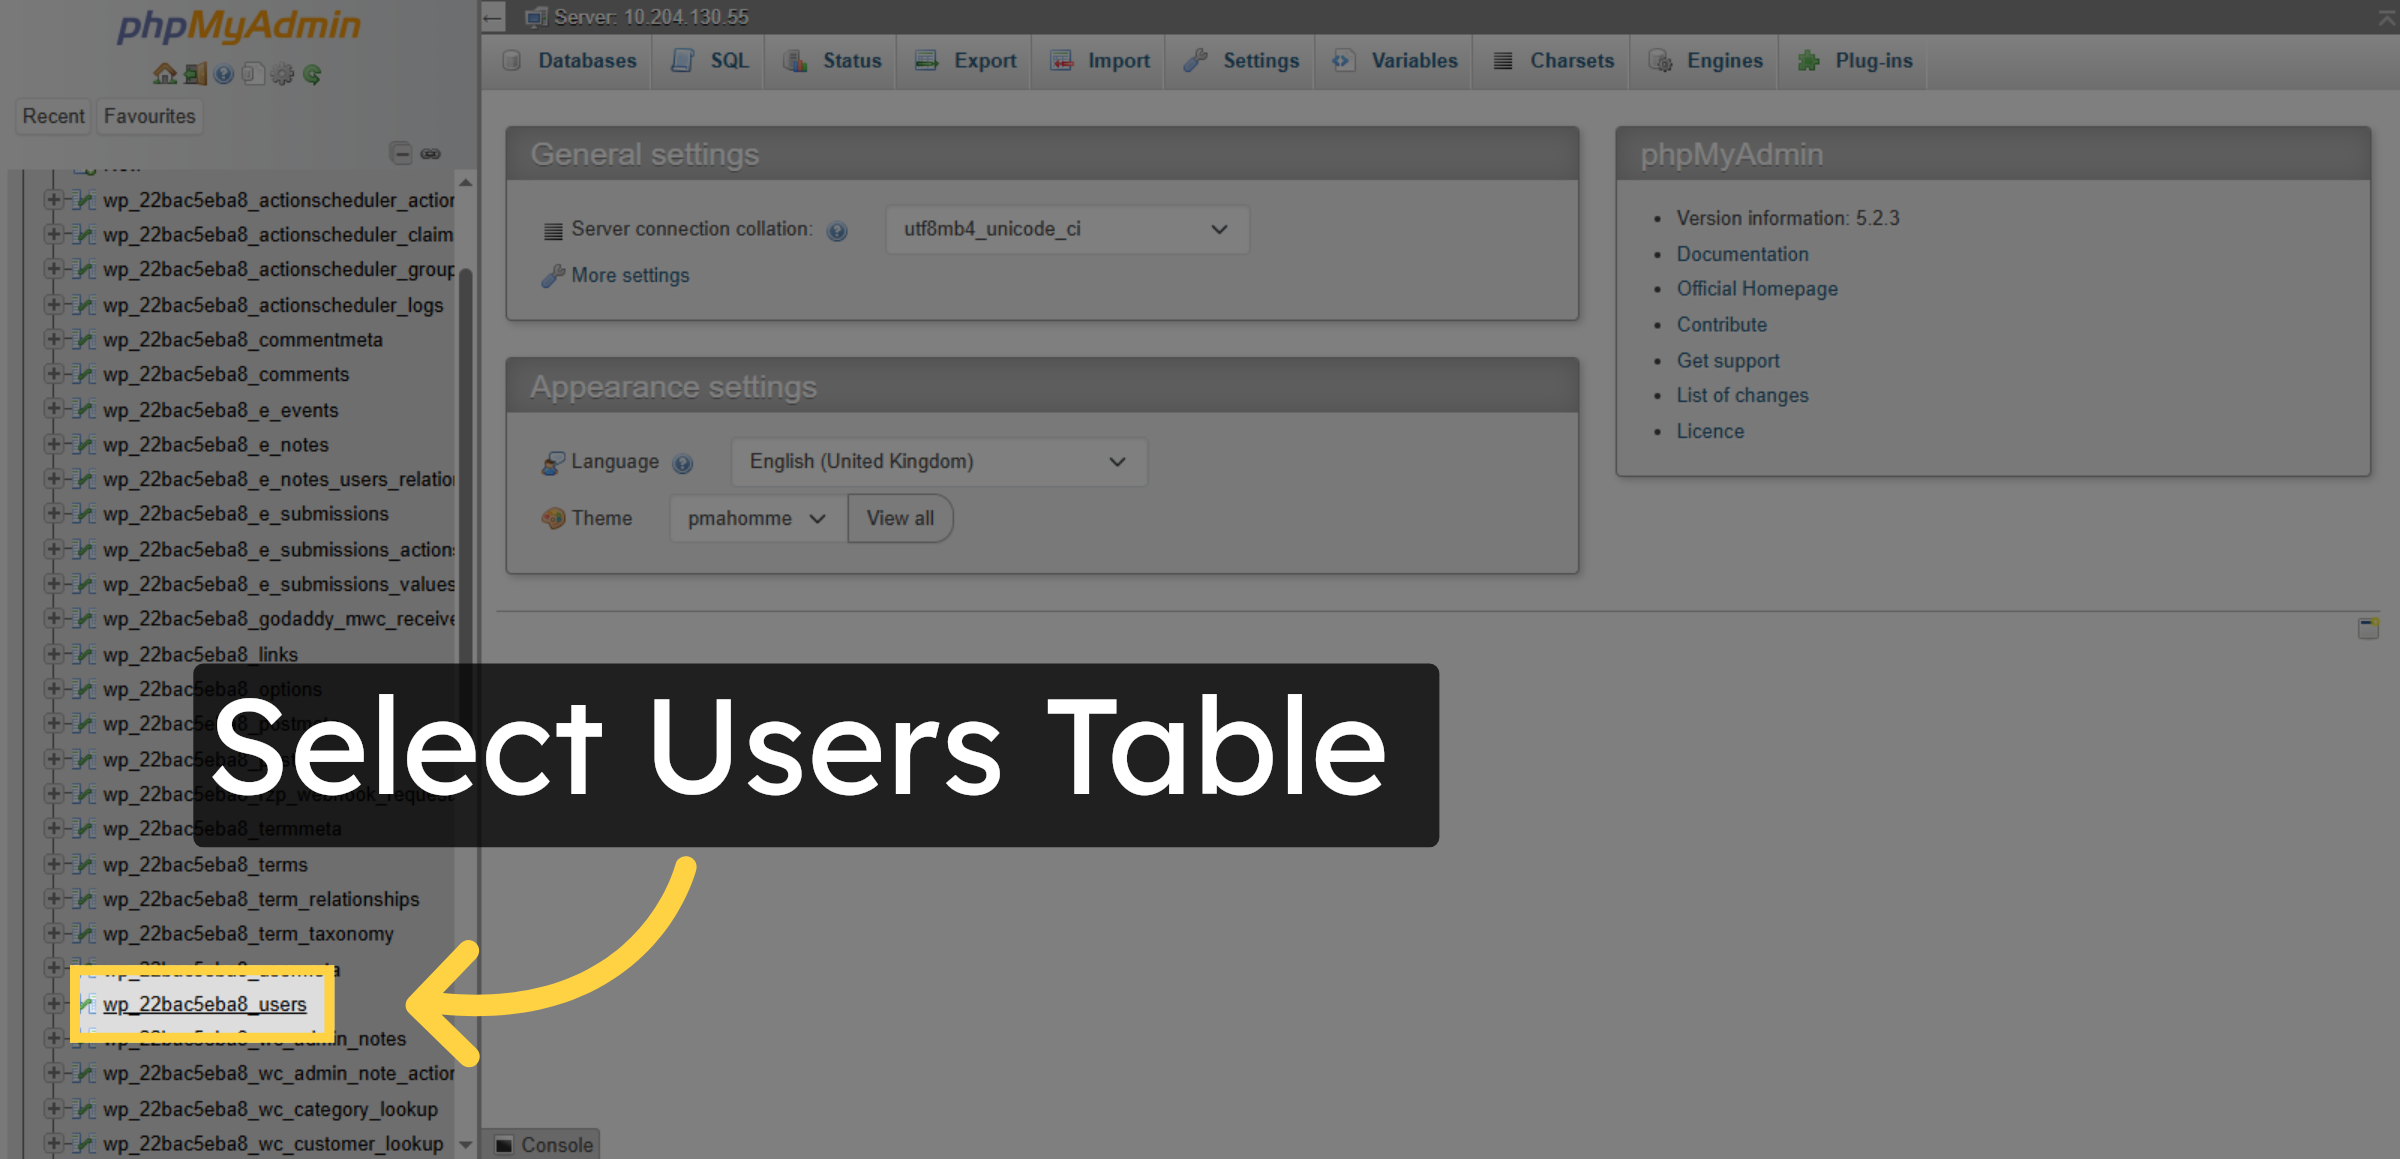
8. Select Users Table
Click “wp_22bac5eba8_users” to open the users table within your WordPress database.
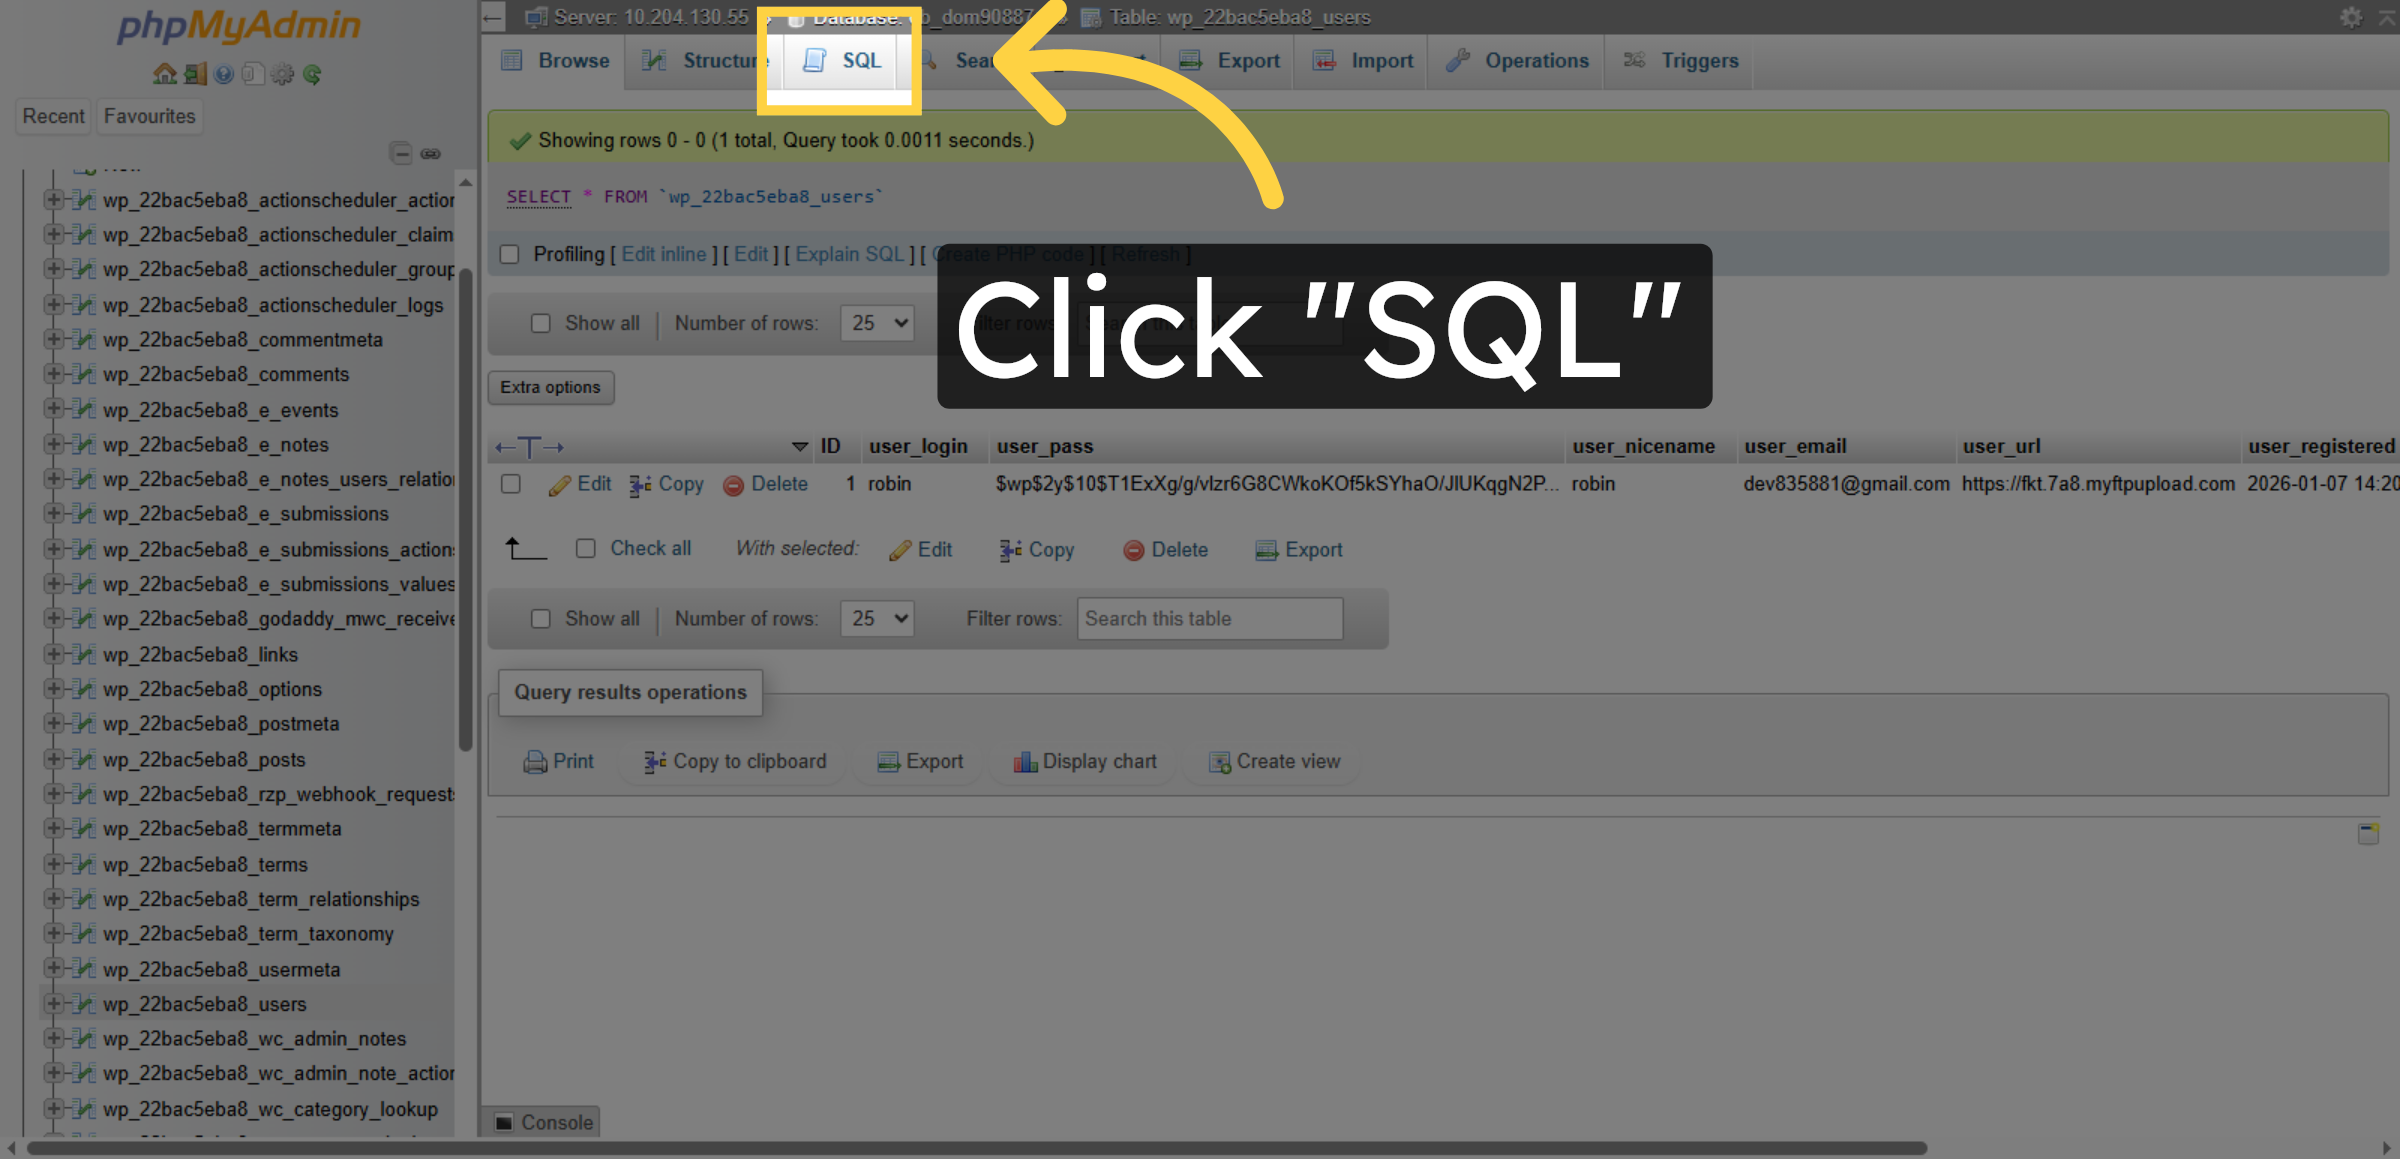
9. Open SQL Query Tab
Click “SQL” to open the SQL query interface where you can run custom database queries.
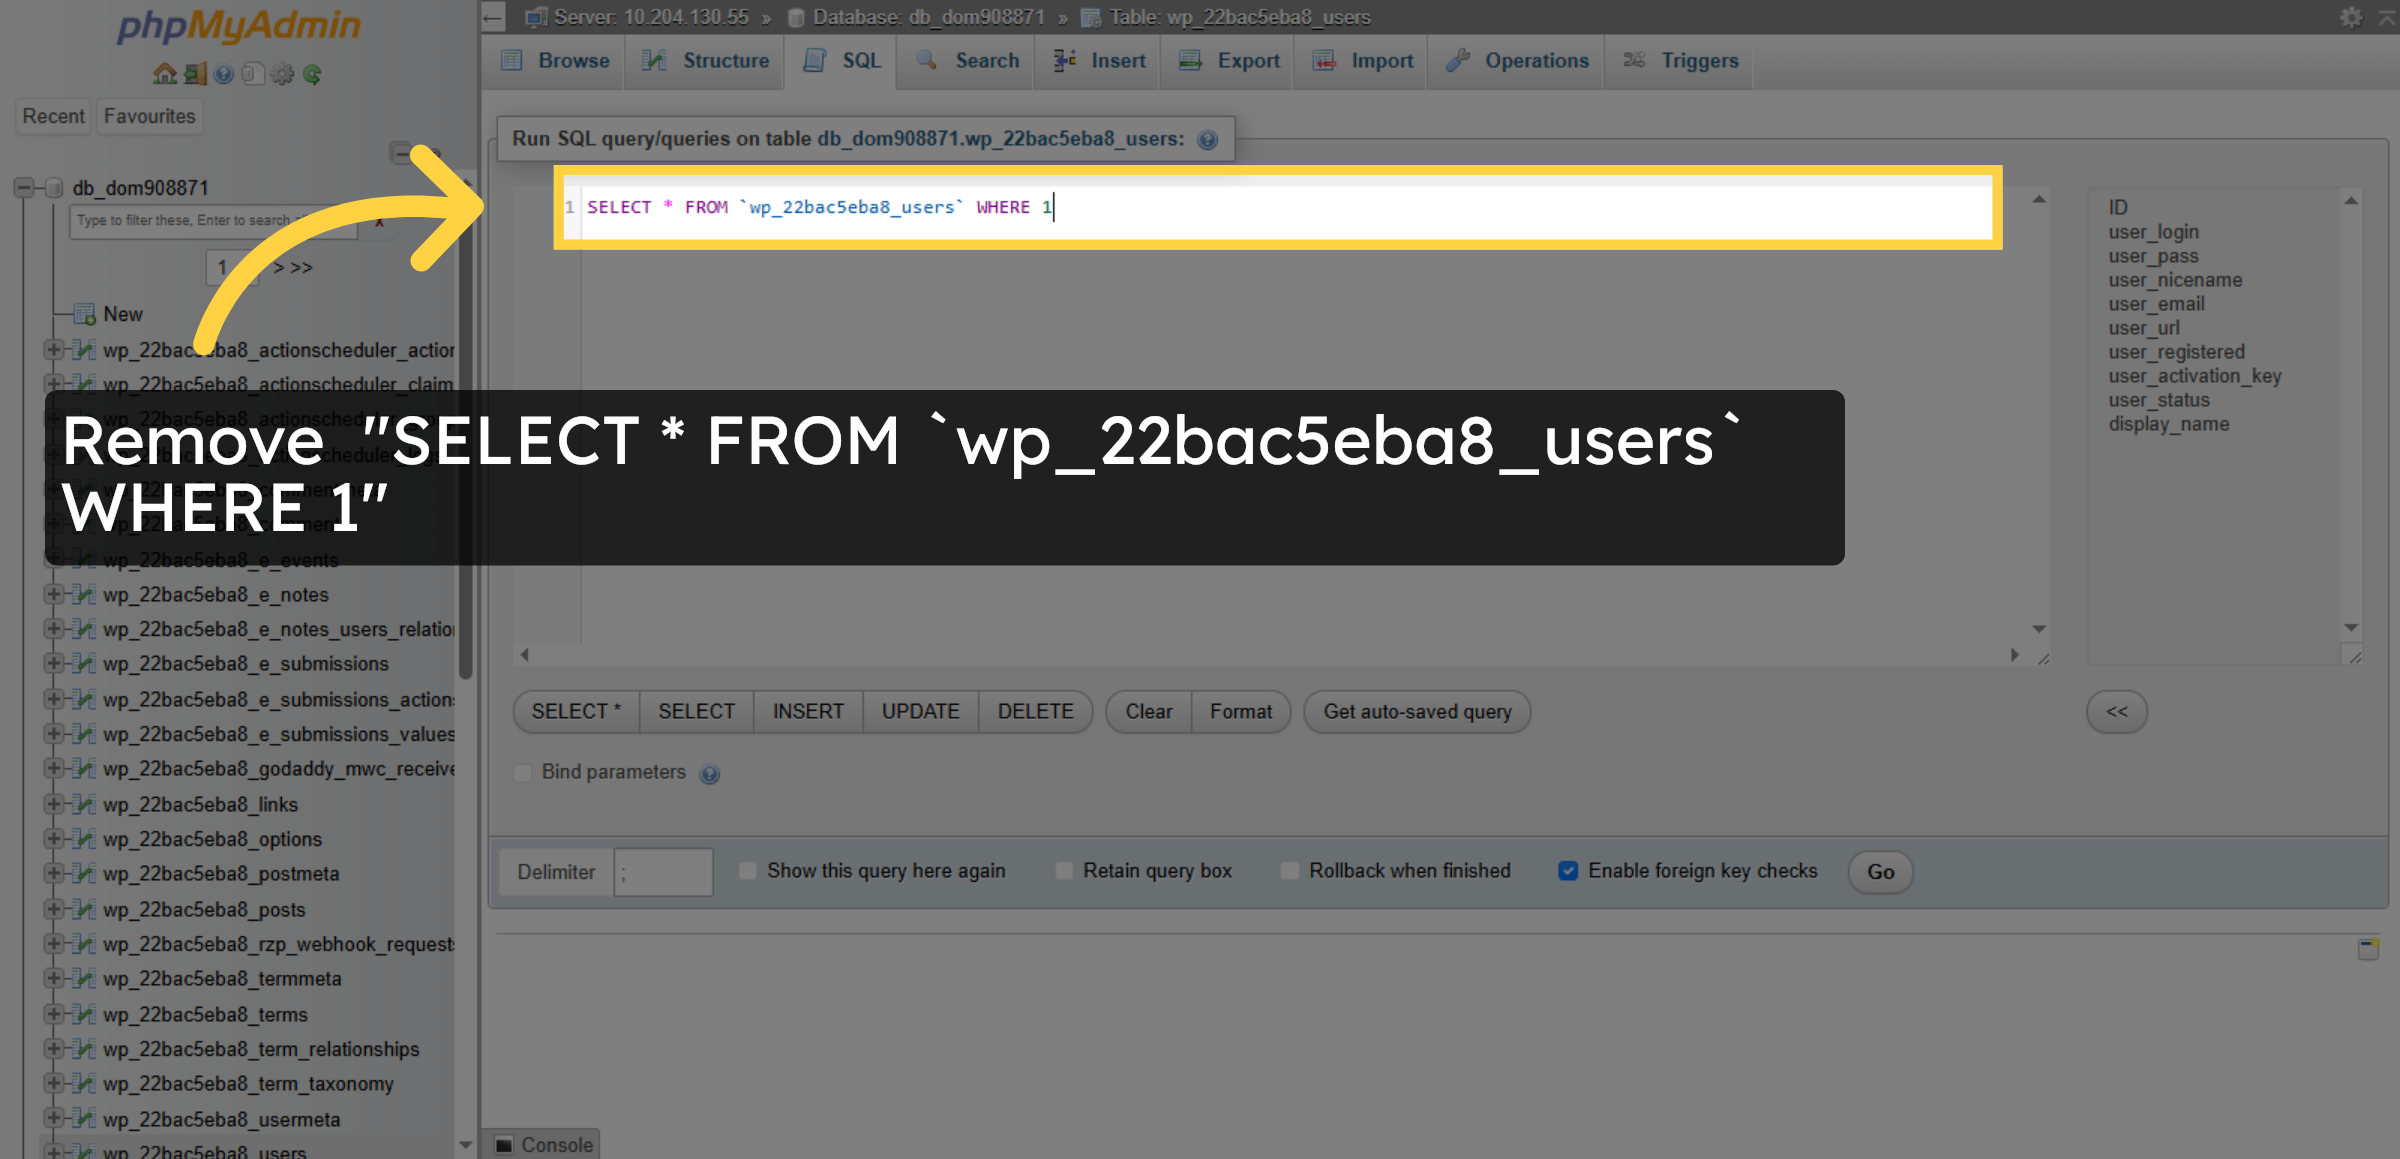
10. Remove All Users Query
Click “SELECT * FROM `wp_22bac5eba8_users` WHERE 1” to prepare a query that retrieves all user records.
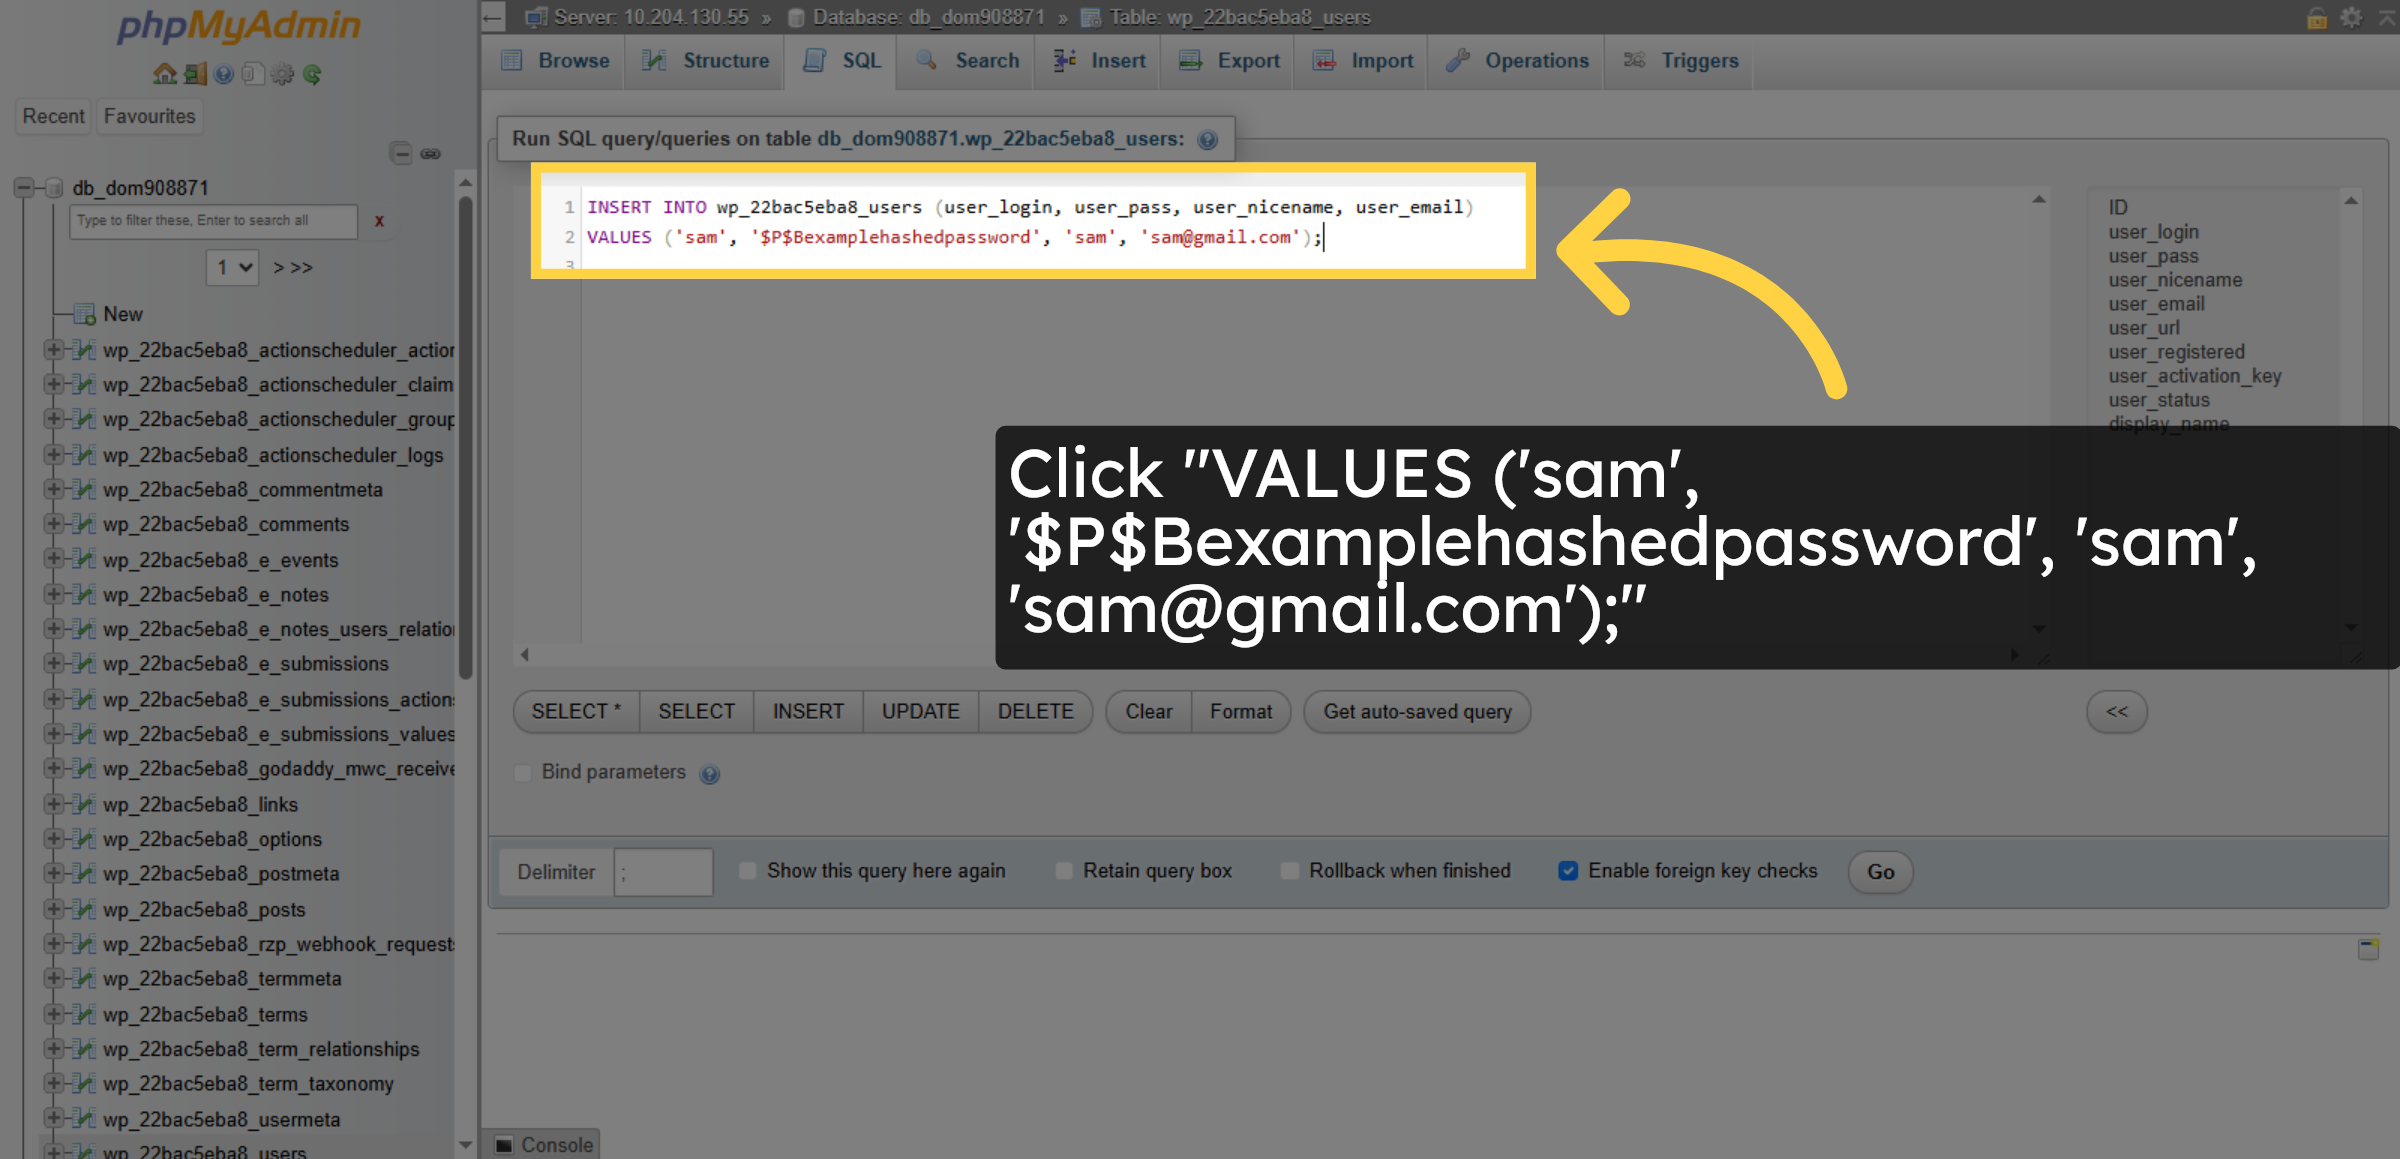
11. Insert User Data
Click “VALUES (‘sam’, ‘$P$Bexamplehashedpassword’, ‘sam’, ‘
[email protected]’);” to insert a new user record with placeholder data.
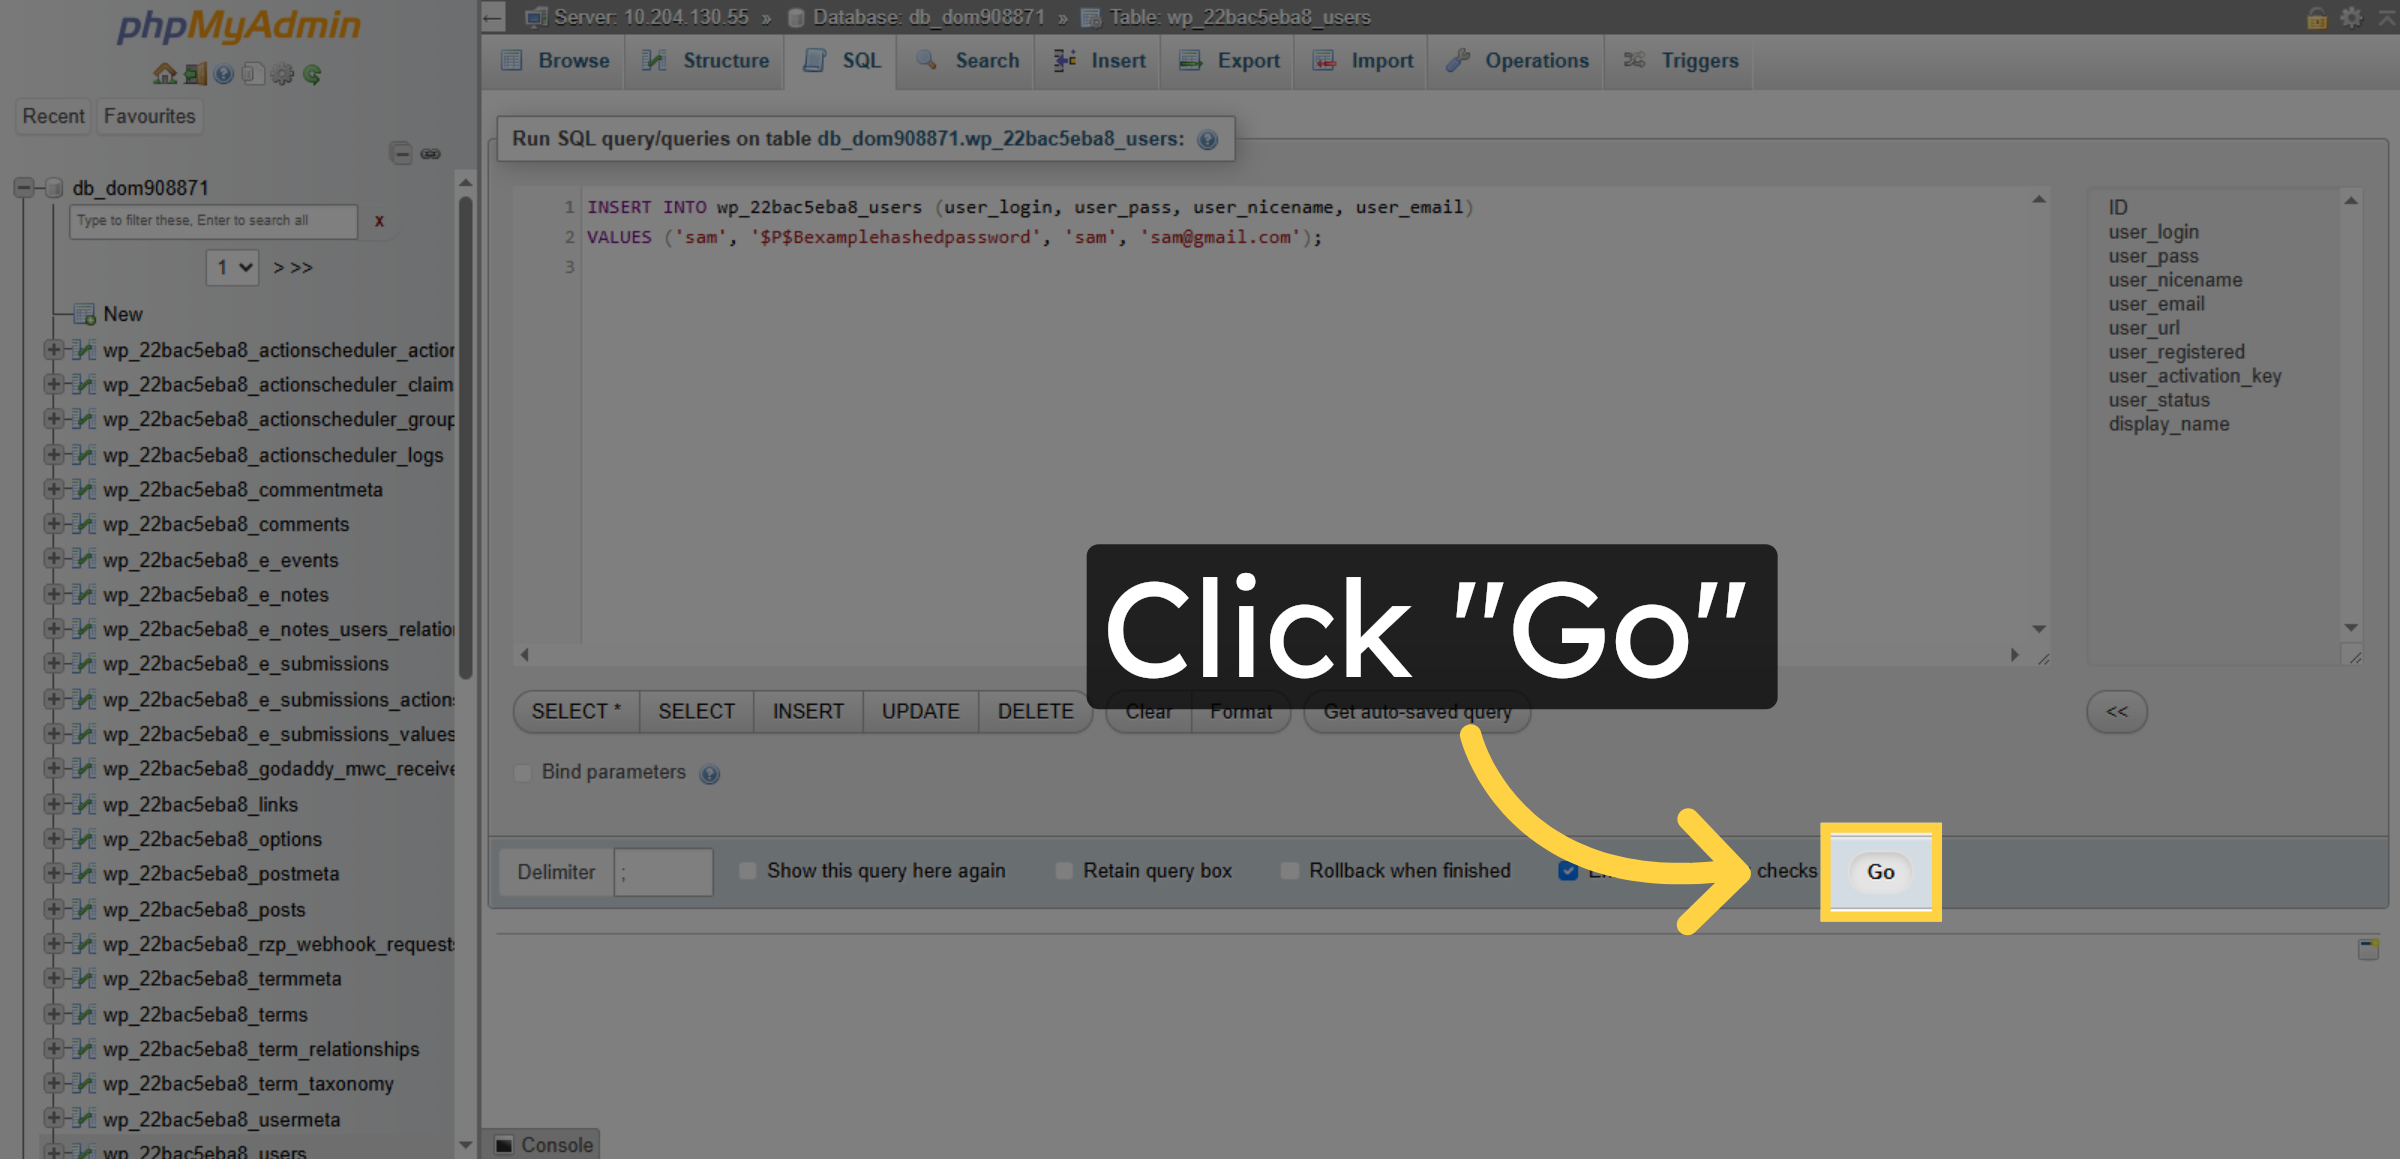
12. Submit Insert Query
Click “Go” to execute the insert query and add the new user to the database.
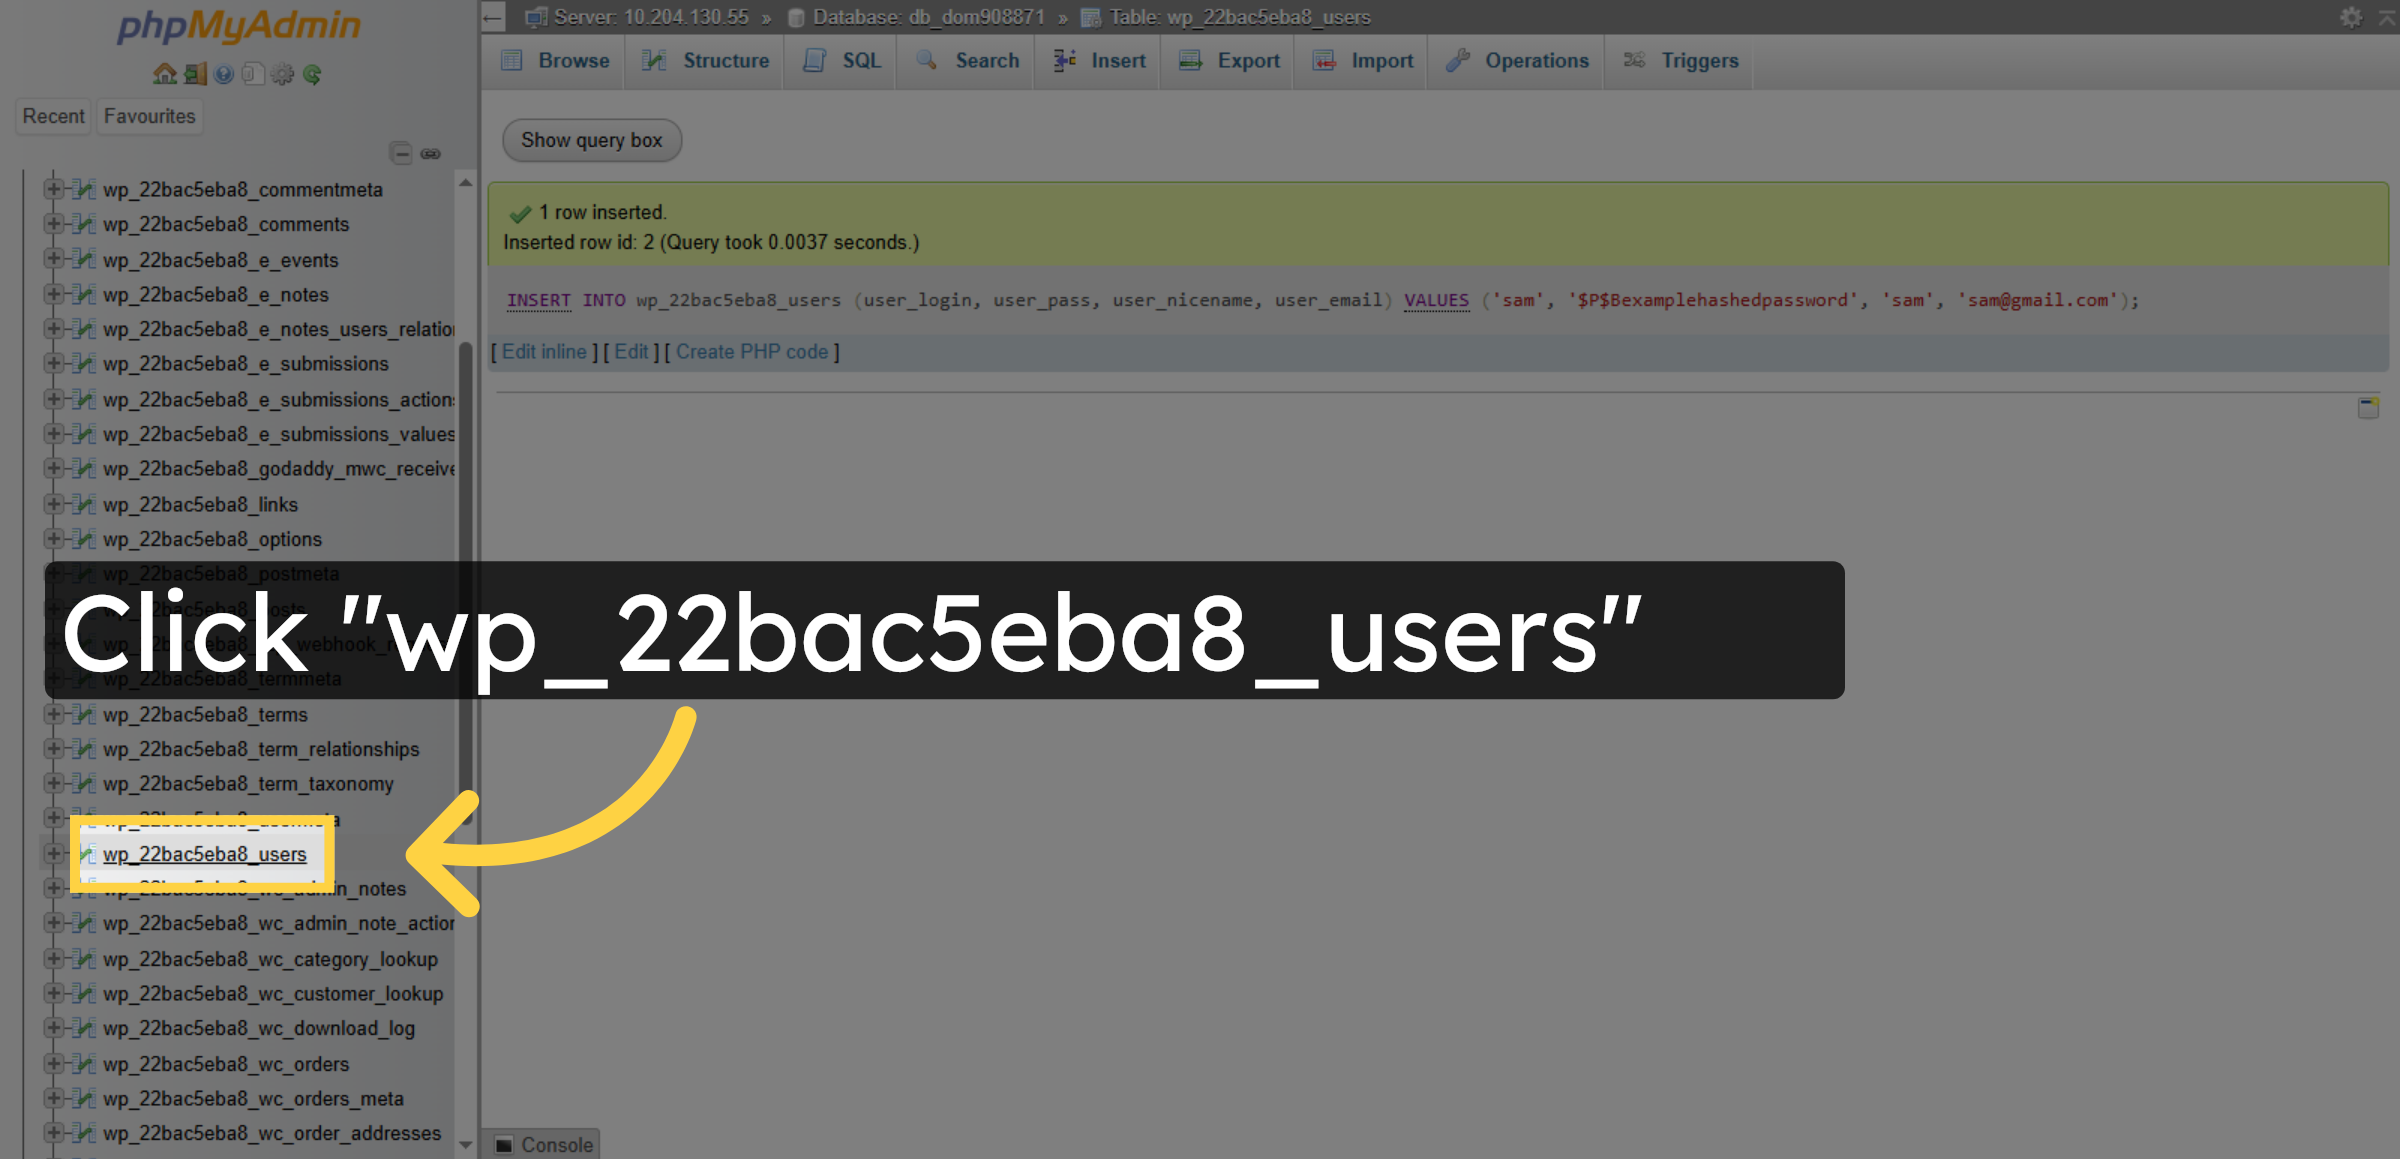
13. Reopen Users Table
Click “wp_22bac5eba8_users” to return to the users table view after the insertion.
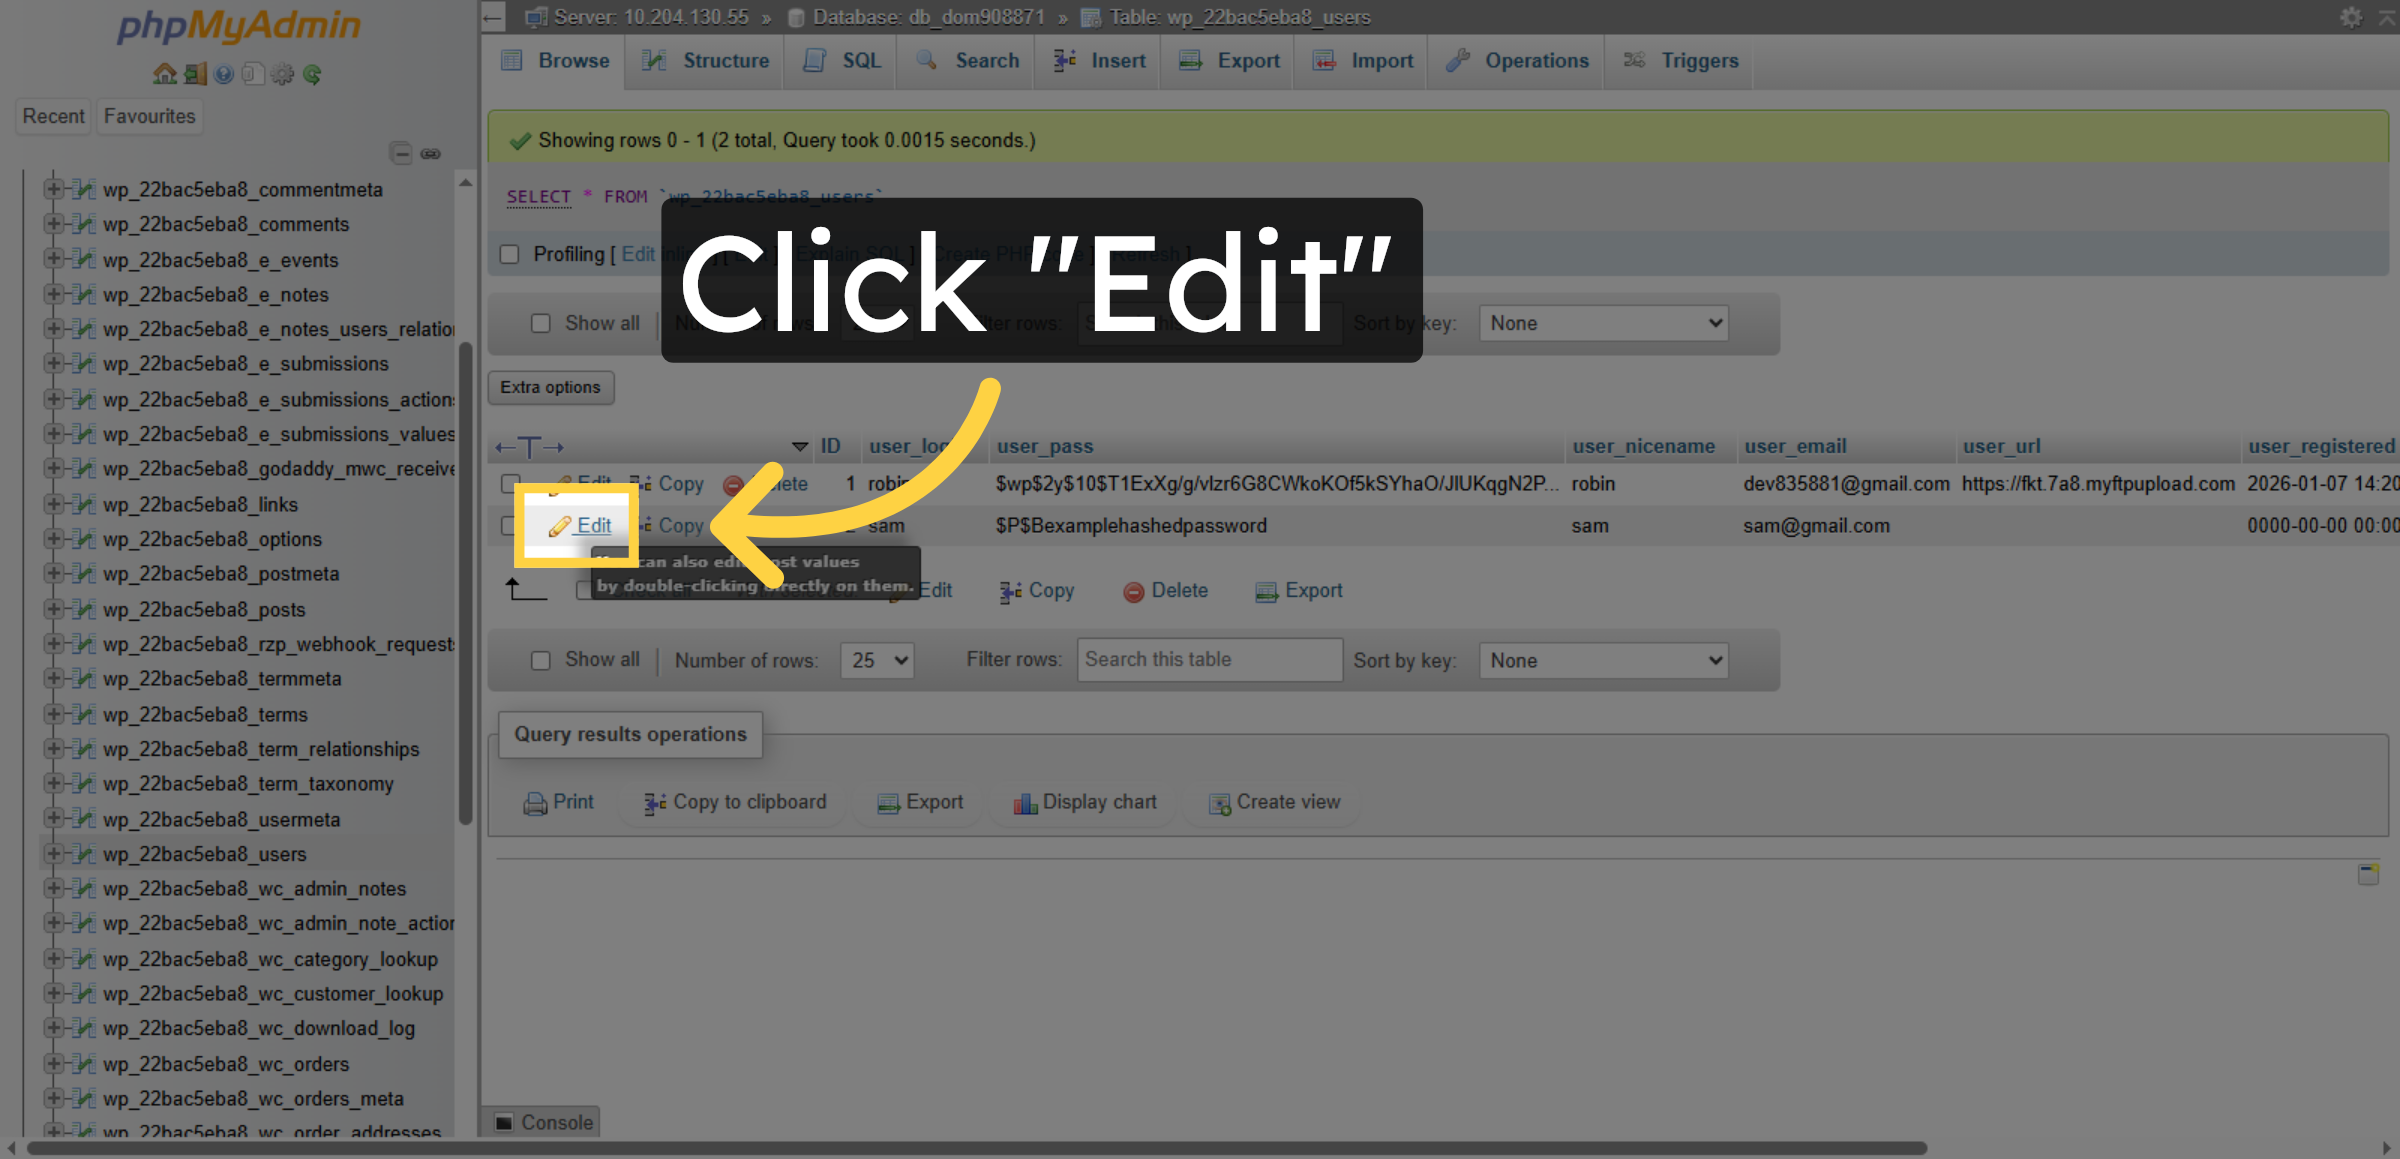
14. Edit User Record
Click “Edit” to modify an existing user record in the users table.
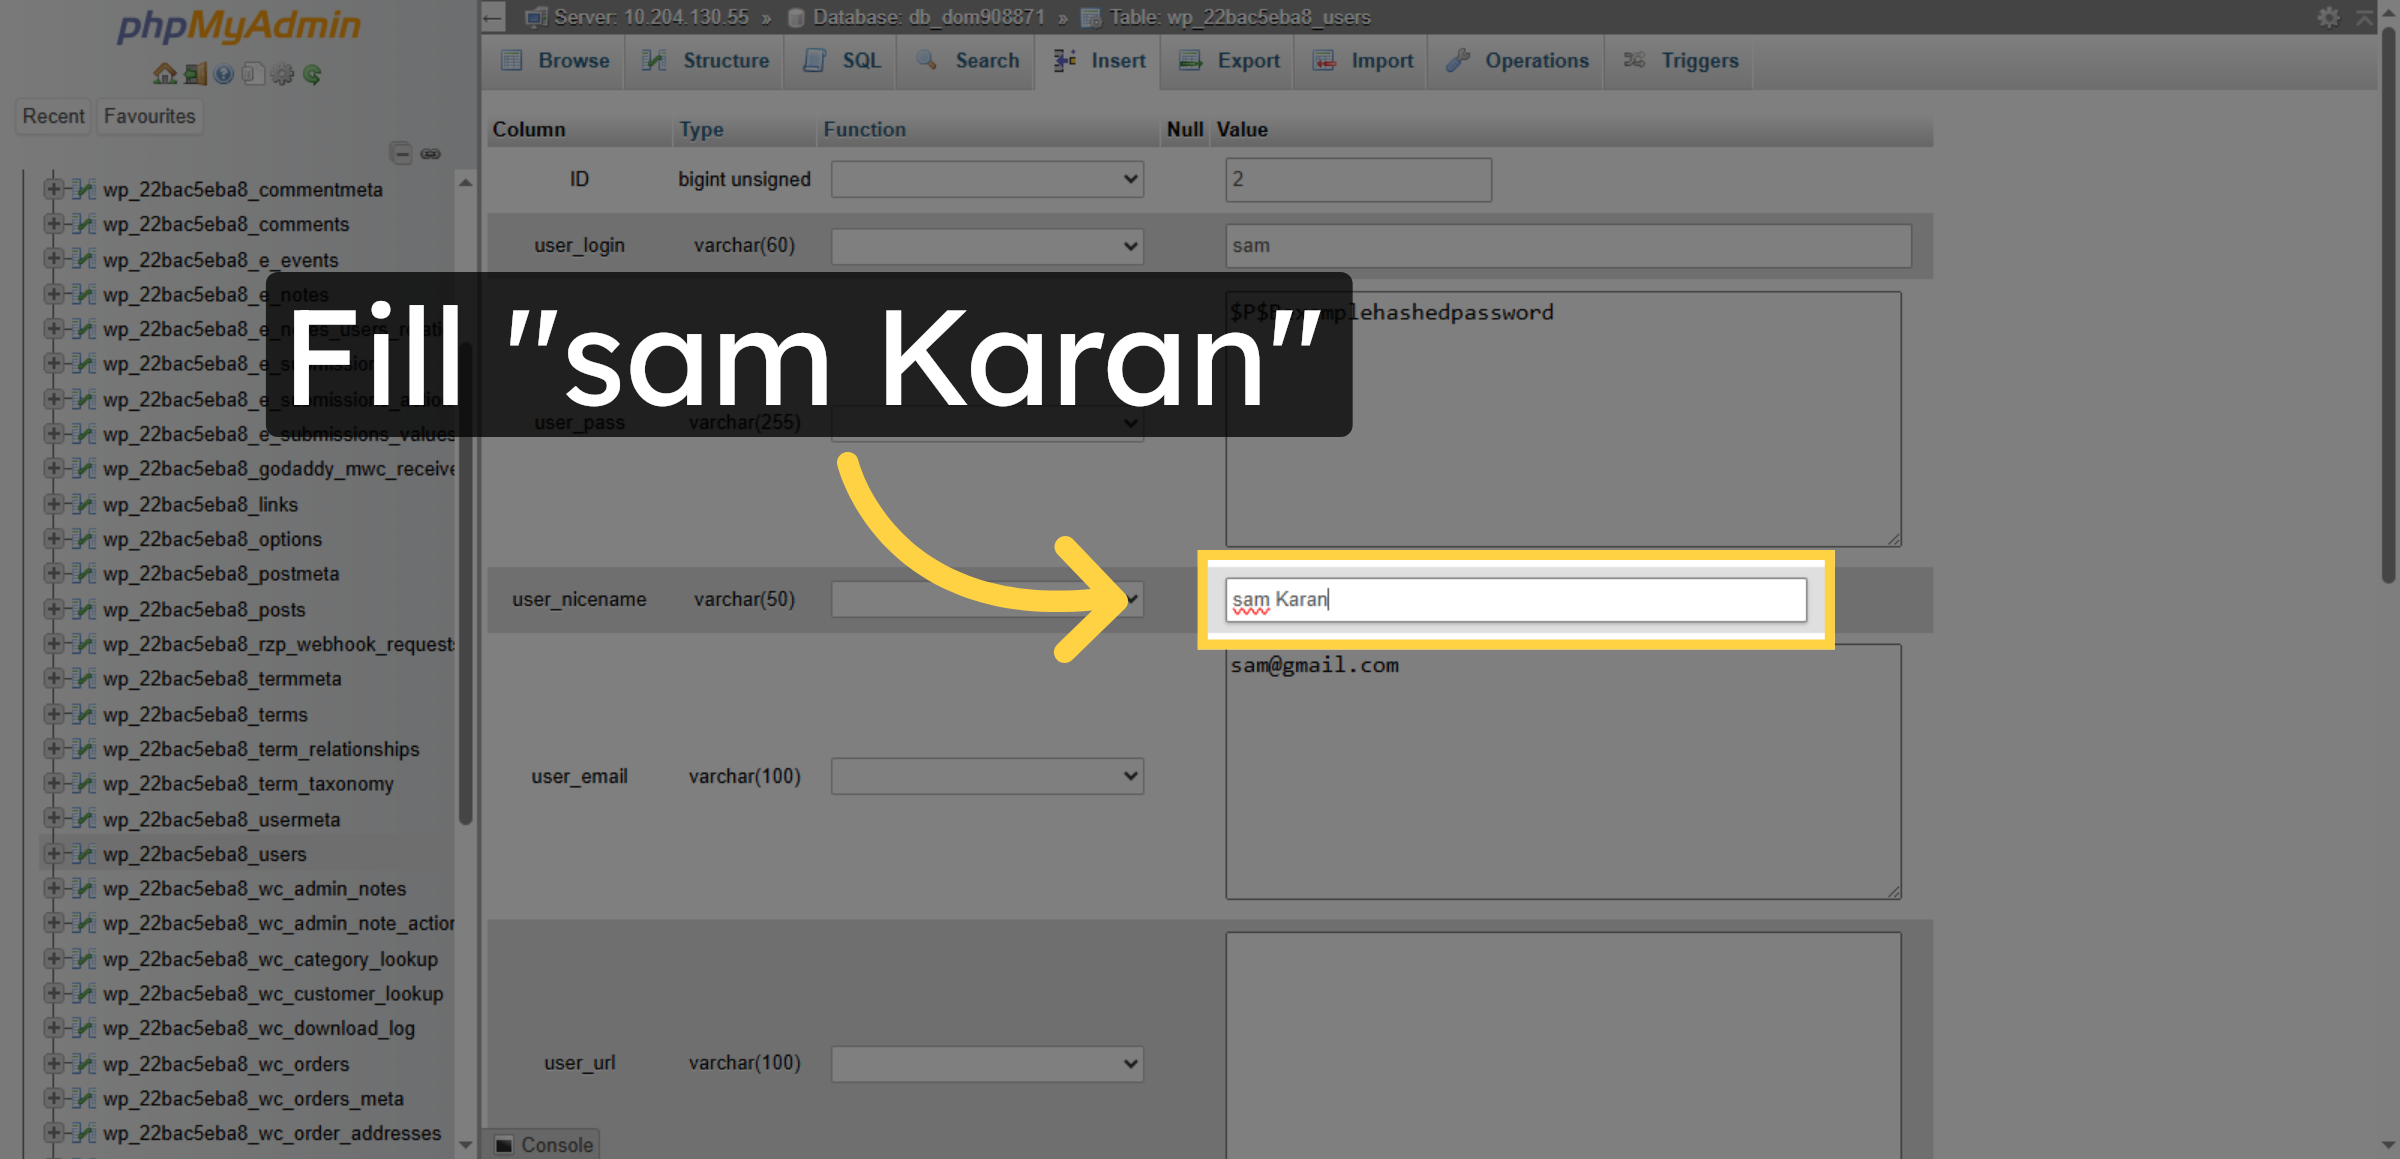
15. Update Display Name
Enter your full name in the display name field to update how the user is identified publicly.
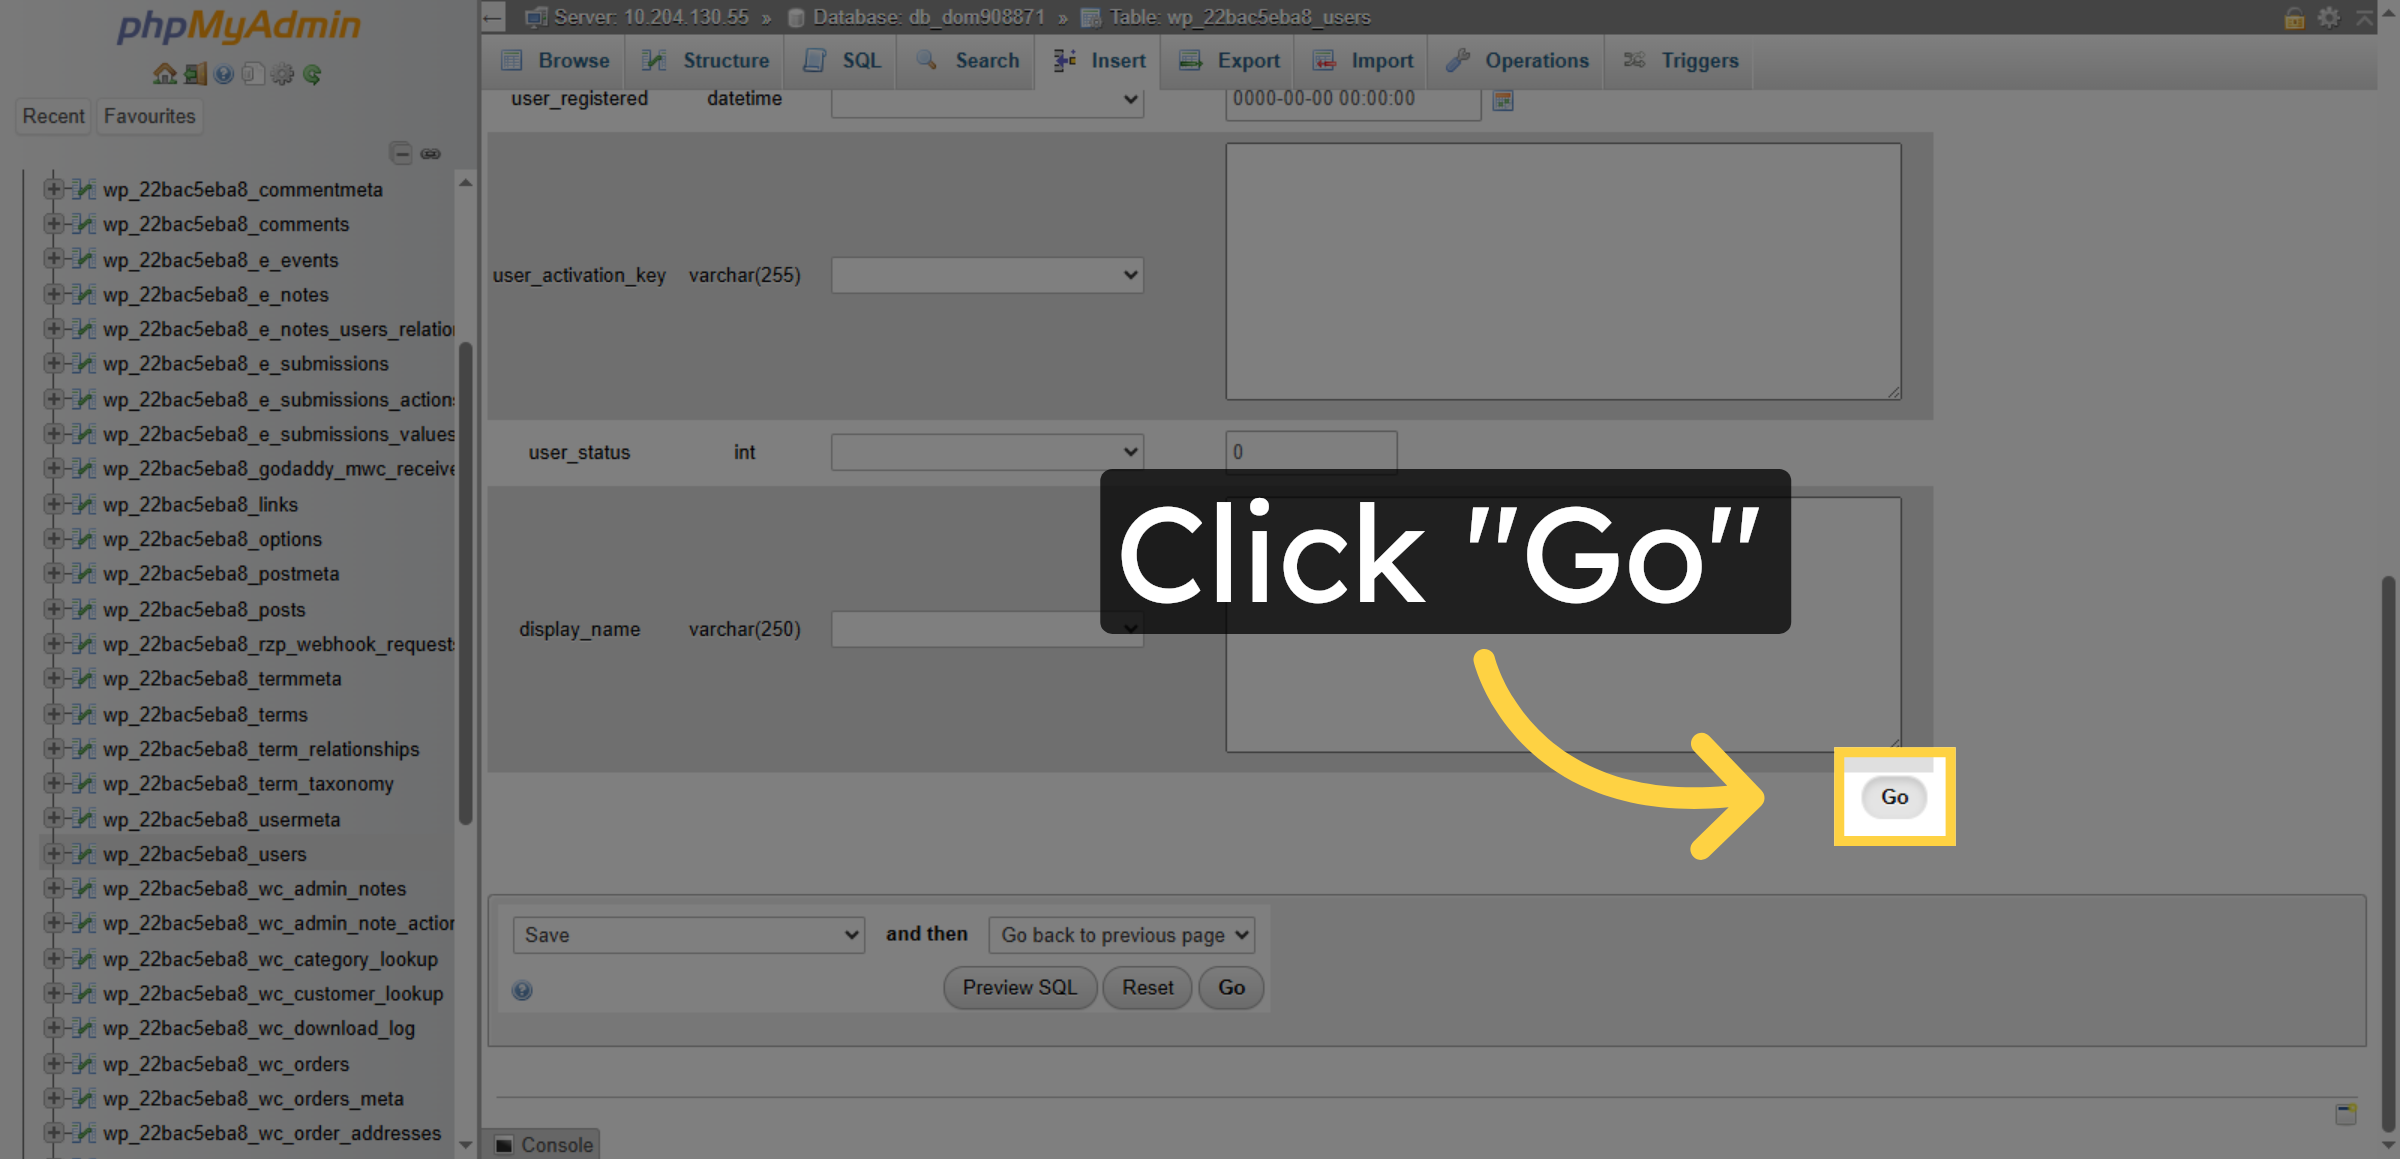
16. Save User Changes
Click “Go” to save the changes made to the user record in the database.
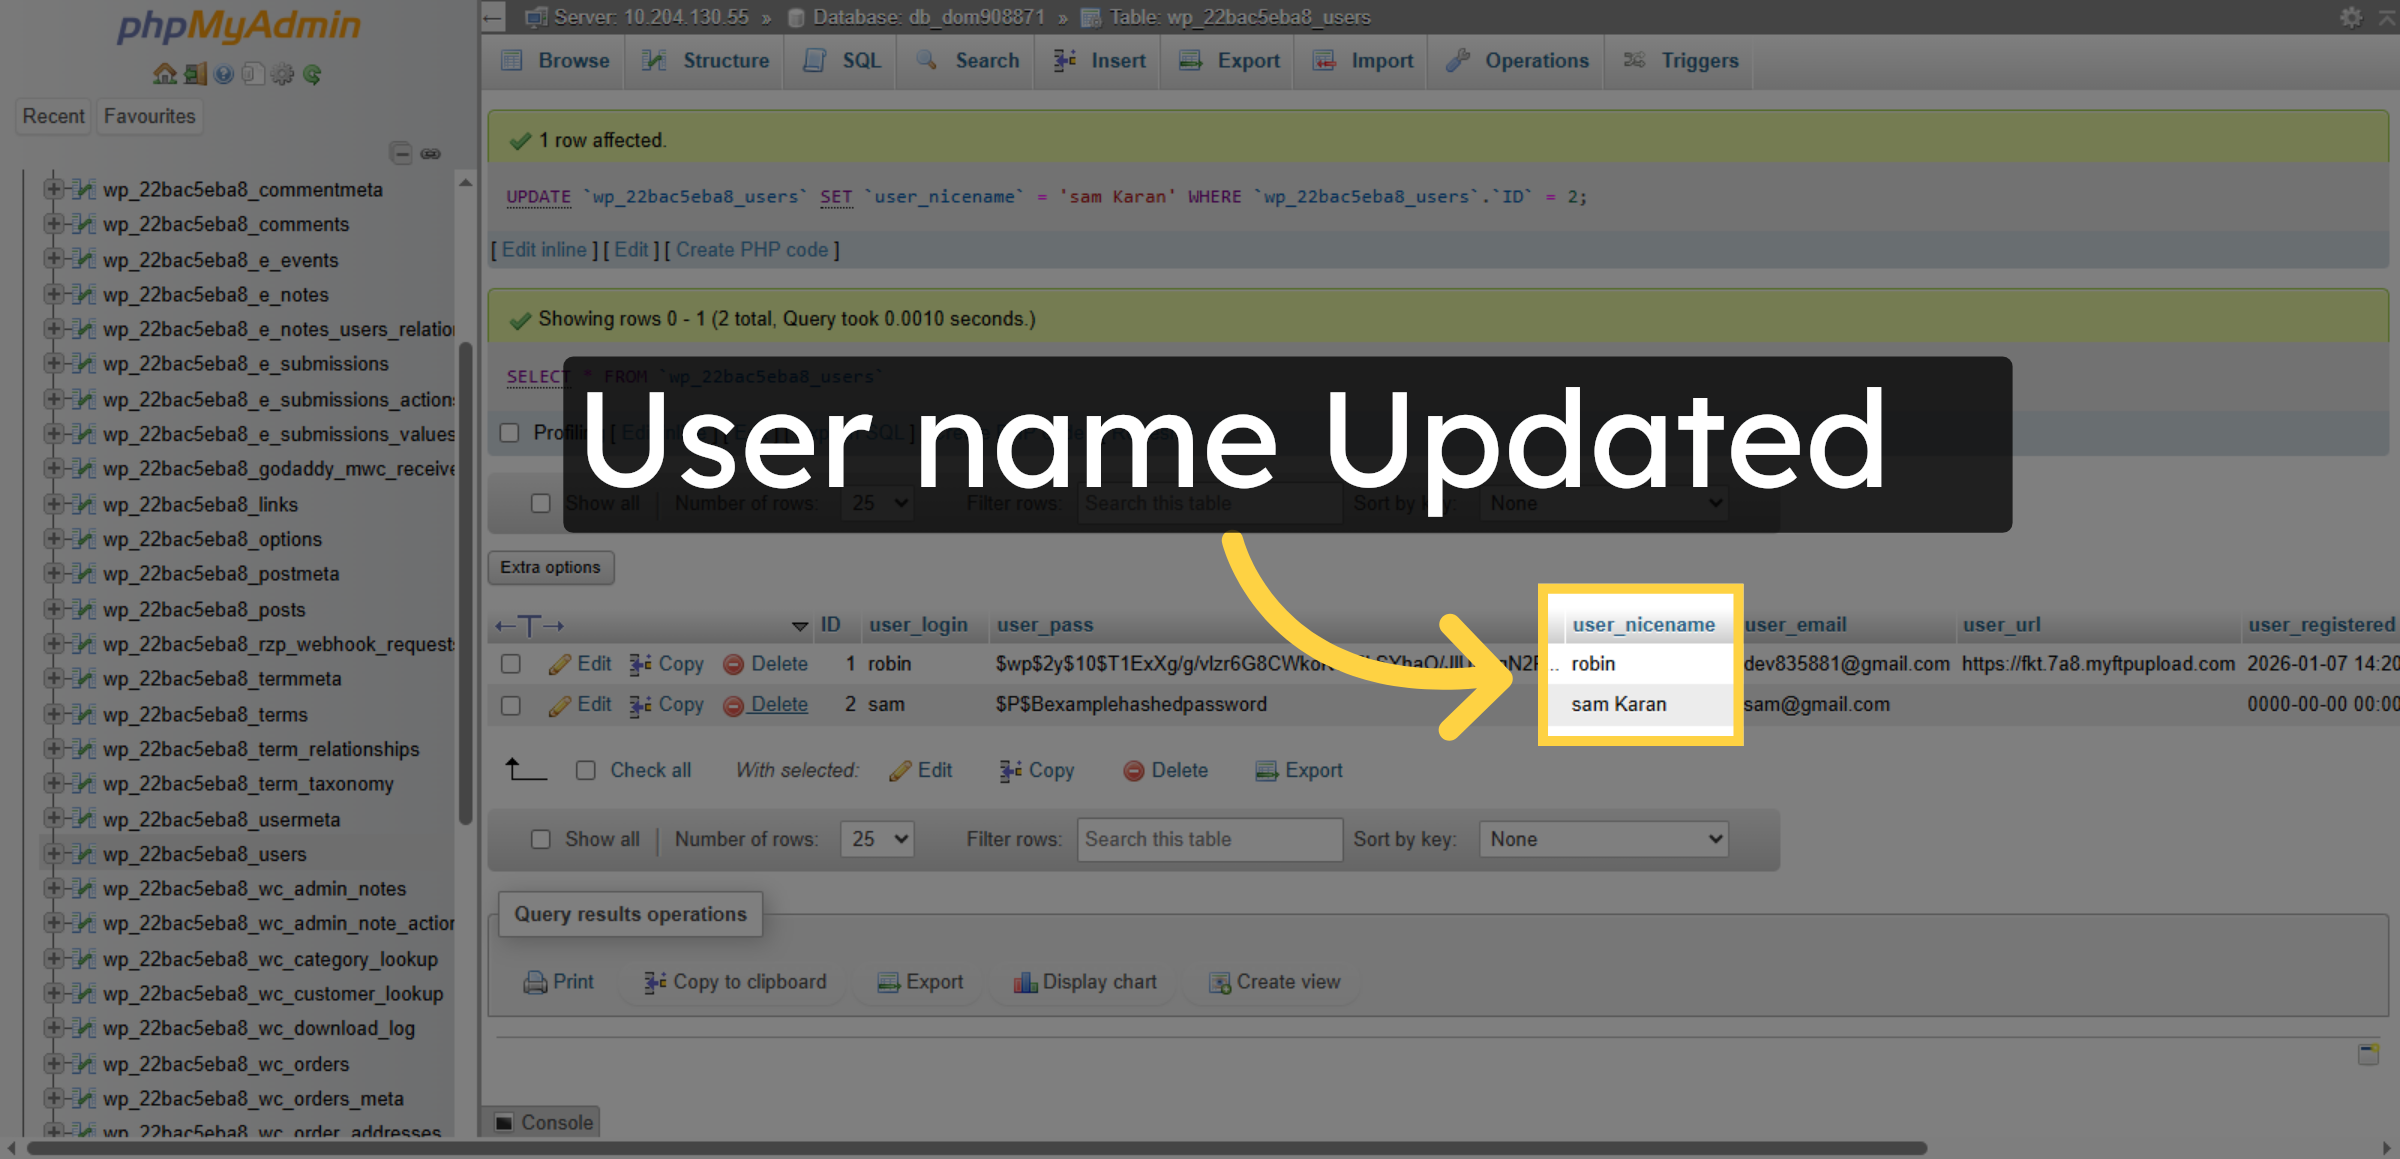
17. Updated Username
Click “Delete” to remove a user record from the users table permanently.
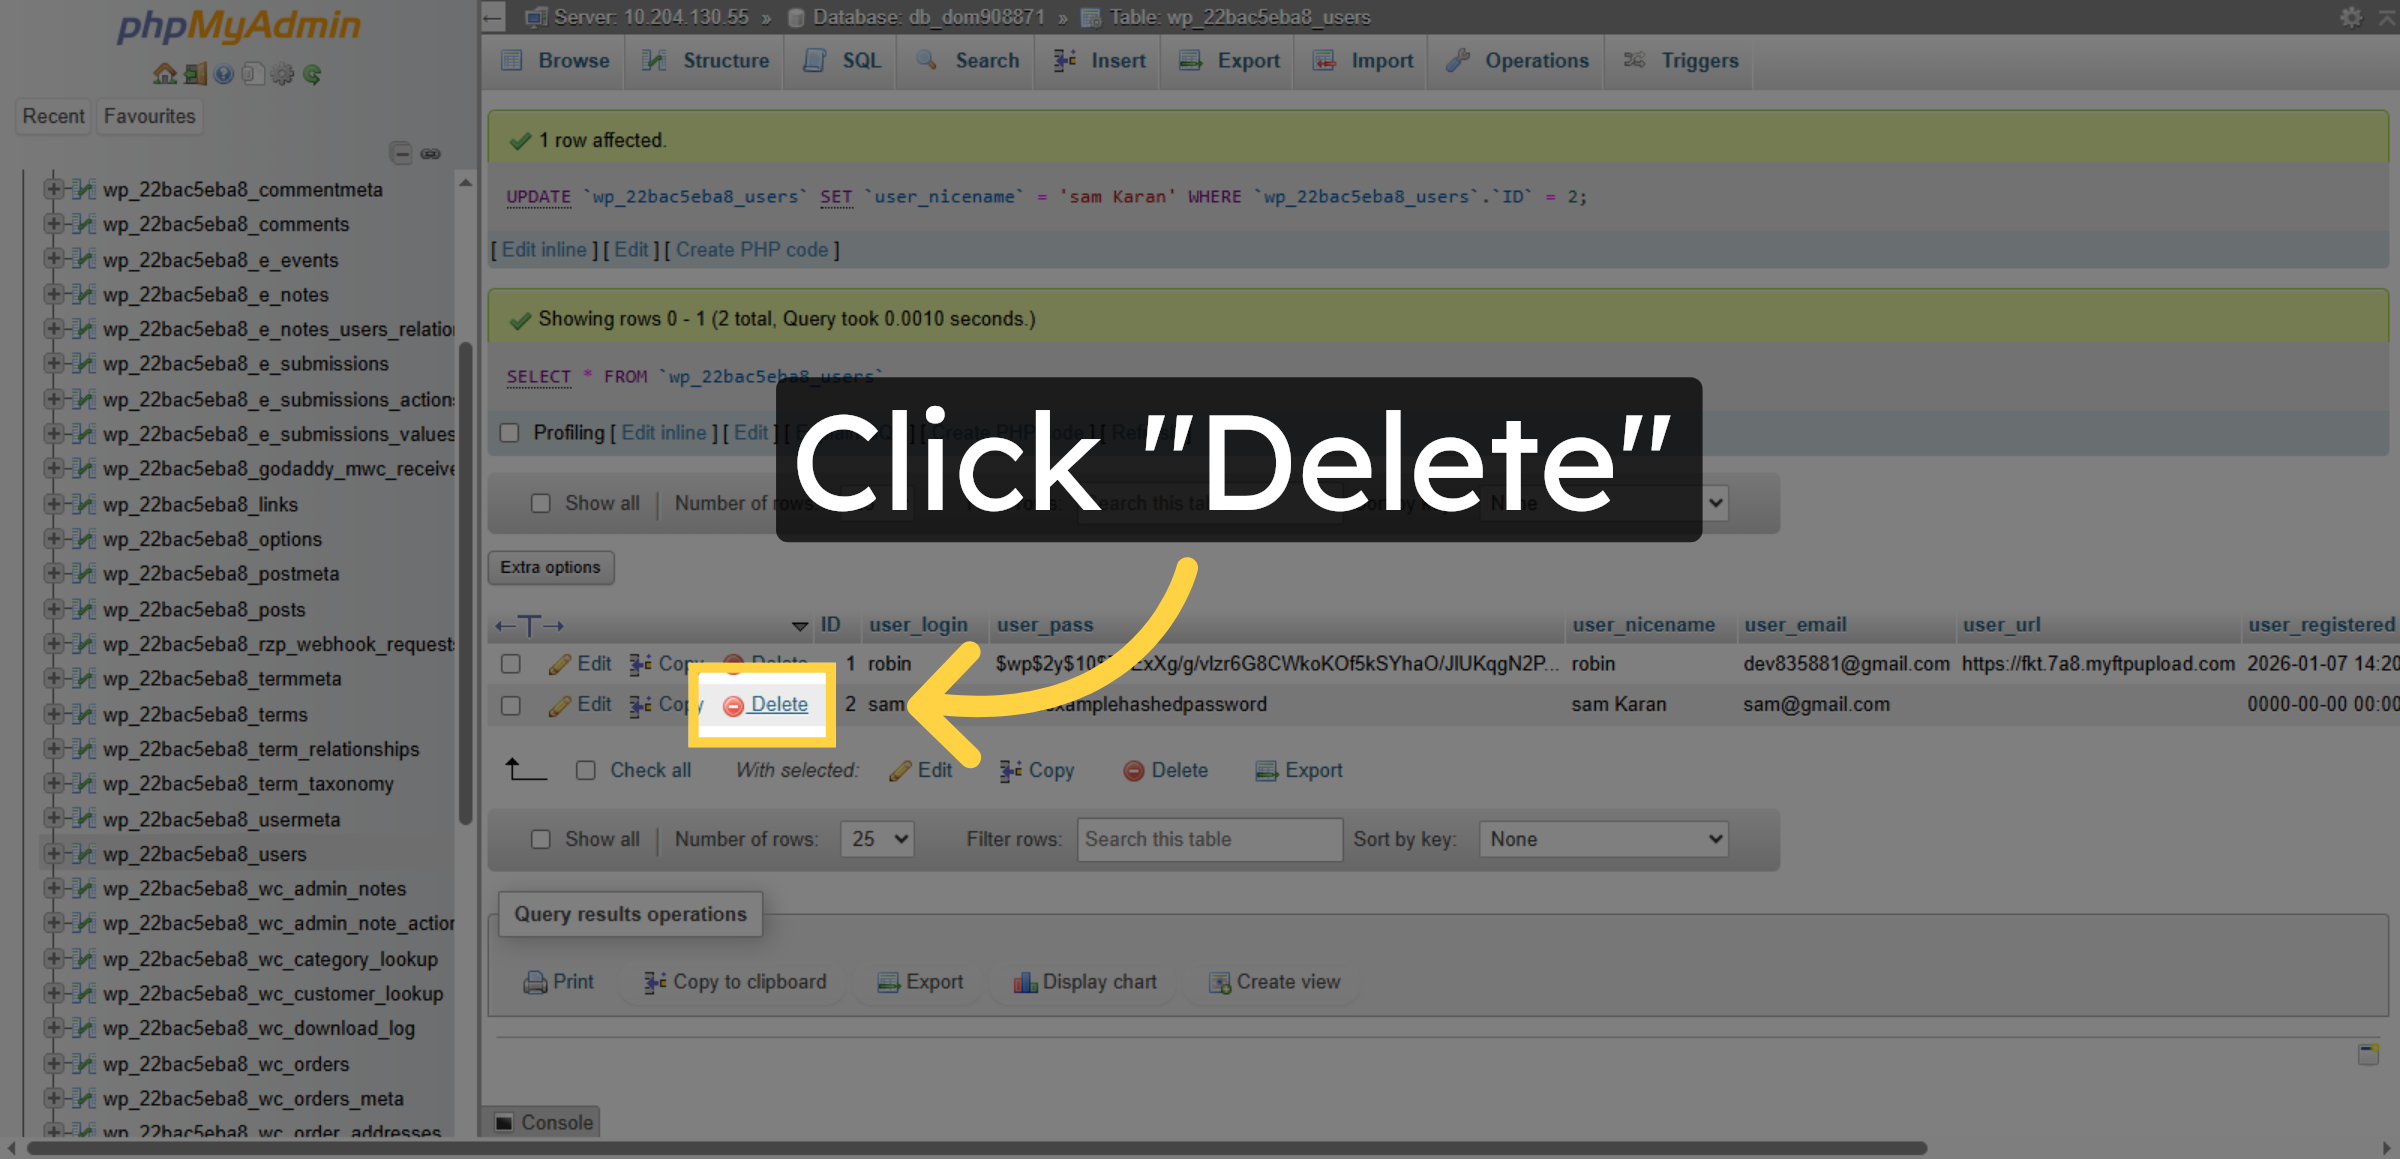
18. Delete User Record
Click “Delete” to remove a user record from the users table permanently.
19. Confirm Deletion
Click “OK” to confirm the deletion of the selected user record from the database.

Conclusion
By following this guide, you have successfully learned how to manage your WordPress database using phpMyAdmin on GoDaddy. You can now view tables, insert new records, update user information, and delete unnecessary entries with confidence. These practices help improve database organization, performance, and reliability.
To avoid data loss, always create backups before making major changes and verify queries carefully before execution. Regular database maintenance will help keep your website secure, optimized, and running smoothly.
WooHelpDesk Support
Need help with WordPress database management, backups, or troubleshooting? WooHelpDesk provides expert support to ensure your website data remains secure and well-maintained.
Visit: https://www.woohelpdesk.com
Call Us Toll-Free: +1 888 602 0119 (US & Canada)
Secure Management | Expert Support | Trusted Solutions