
How To Enable And Disable WordPress Debug Mode On GoDaddy Hosting
Introduction
Enabling WordPress debug mode is an essential step when diagnosing errors, warnings, or unexpected behavior on your website. On GoDaddy WordPress hosting, users can directly manage debugging by editing the wp-config.php file through the hosting dashboard’s File Manager. This method provides deeper visibility into PHP errors, database issues, and code-related problems that may not be visible on the frontend. In this guide, you’ll learn how to safely access your hosting settings, open the File Manager, and modify the wp-config.php file to enable or disable WordPress debug mode. This approach is especially useful for developers and site administrators who need precise error reporting while troubleshooting themes, plugins, or custom code. Following these steps ensures you can debug efficiently while maintaining control over your hosting environment.
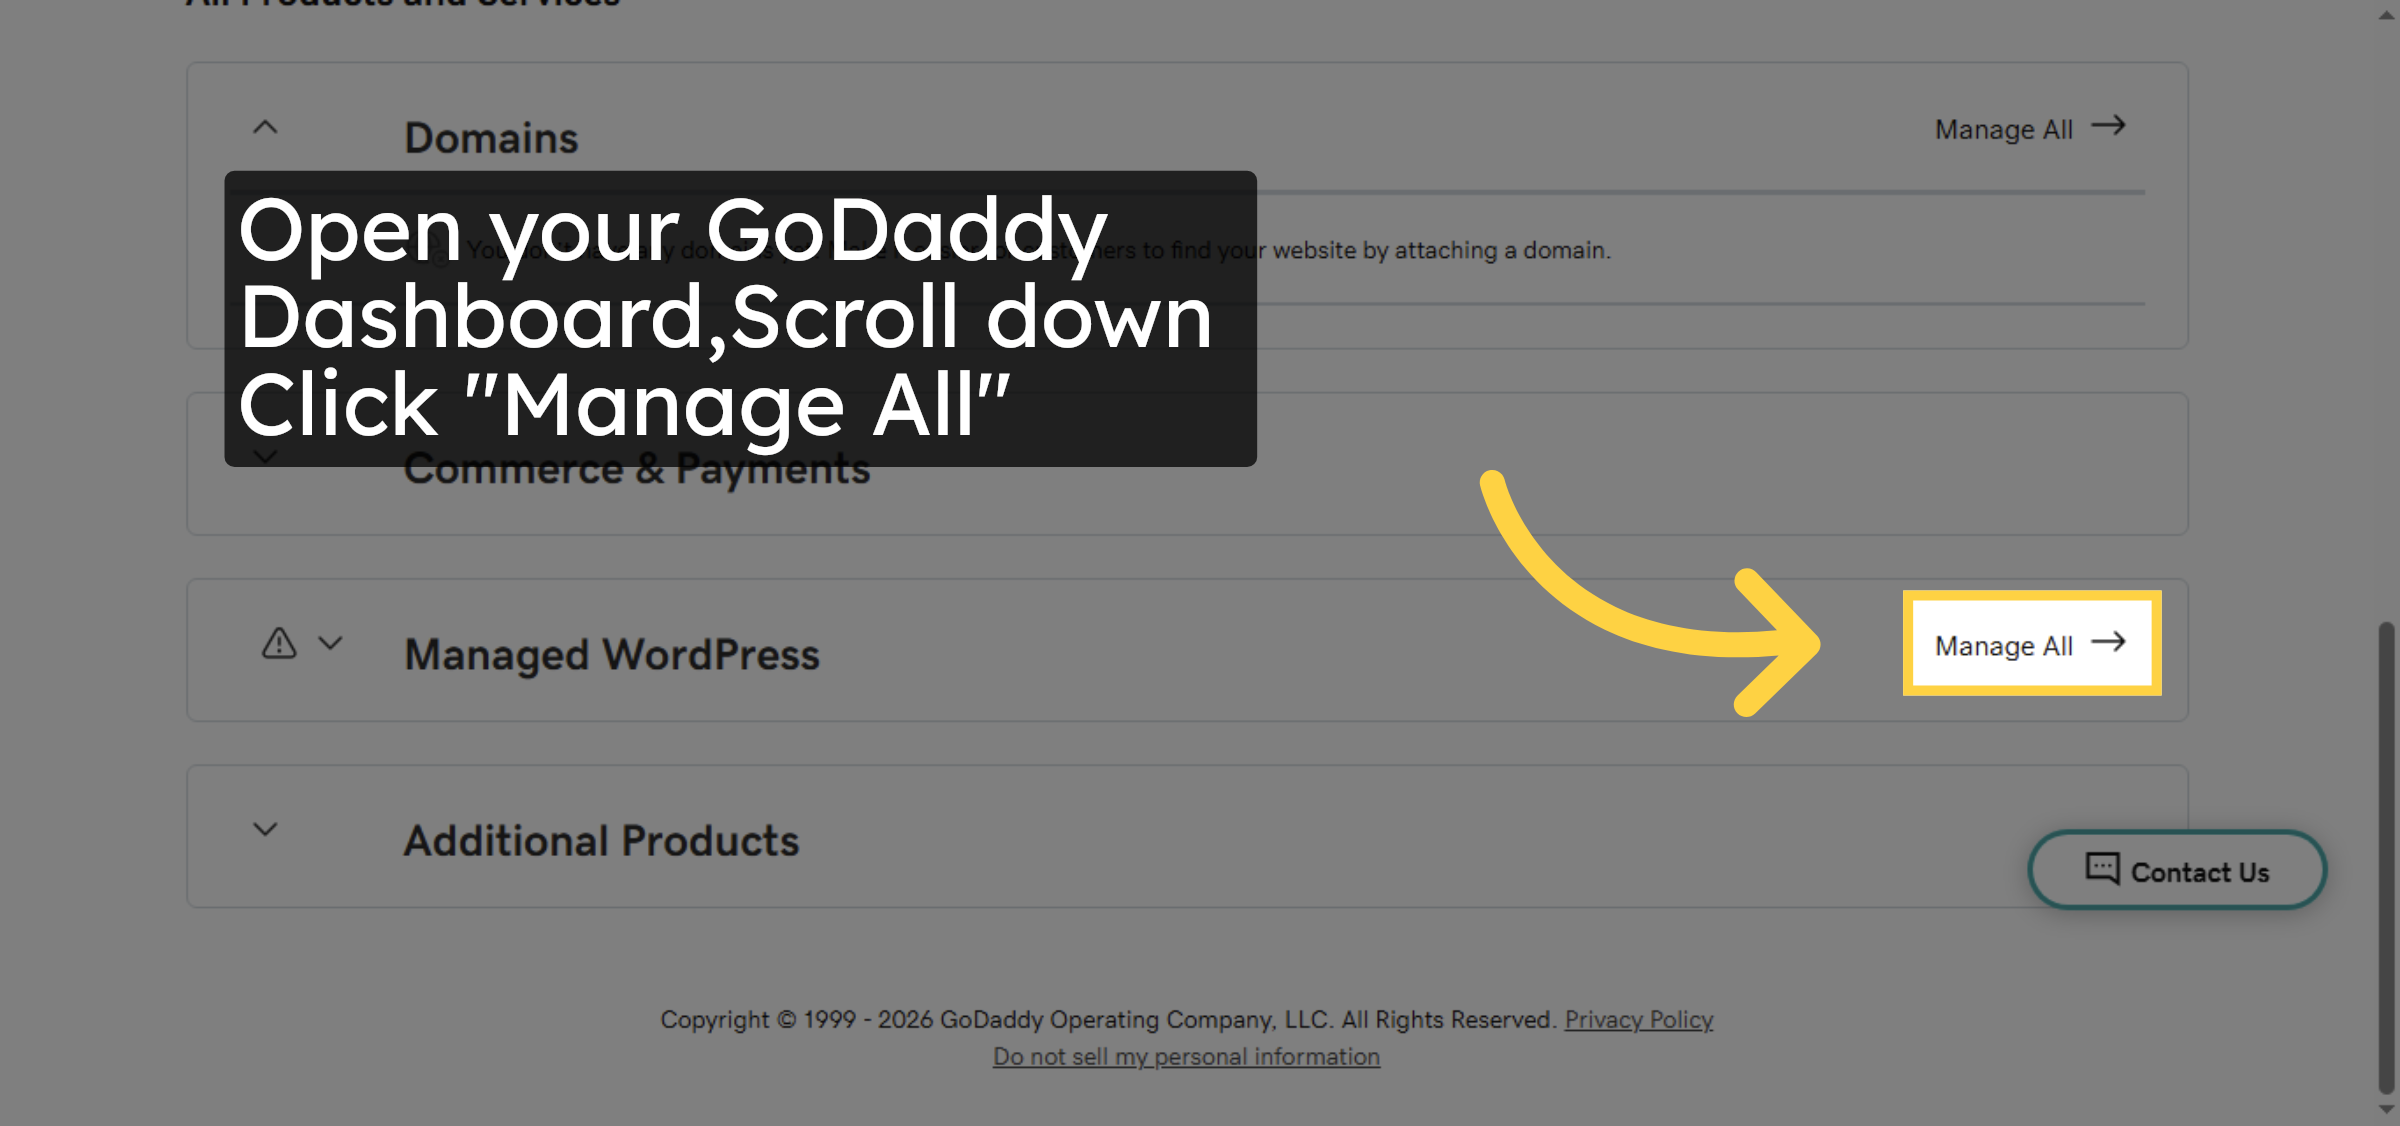
1. Click Manage All
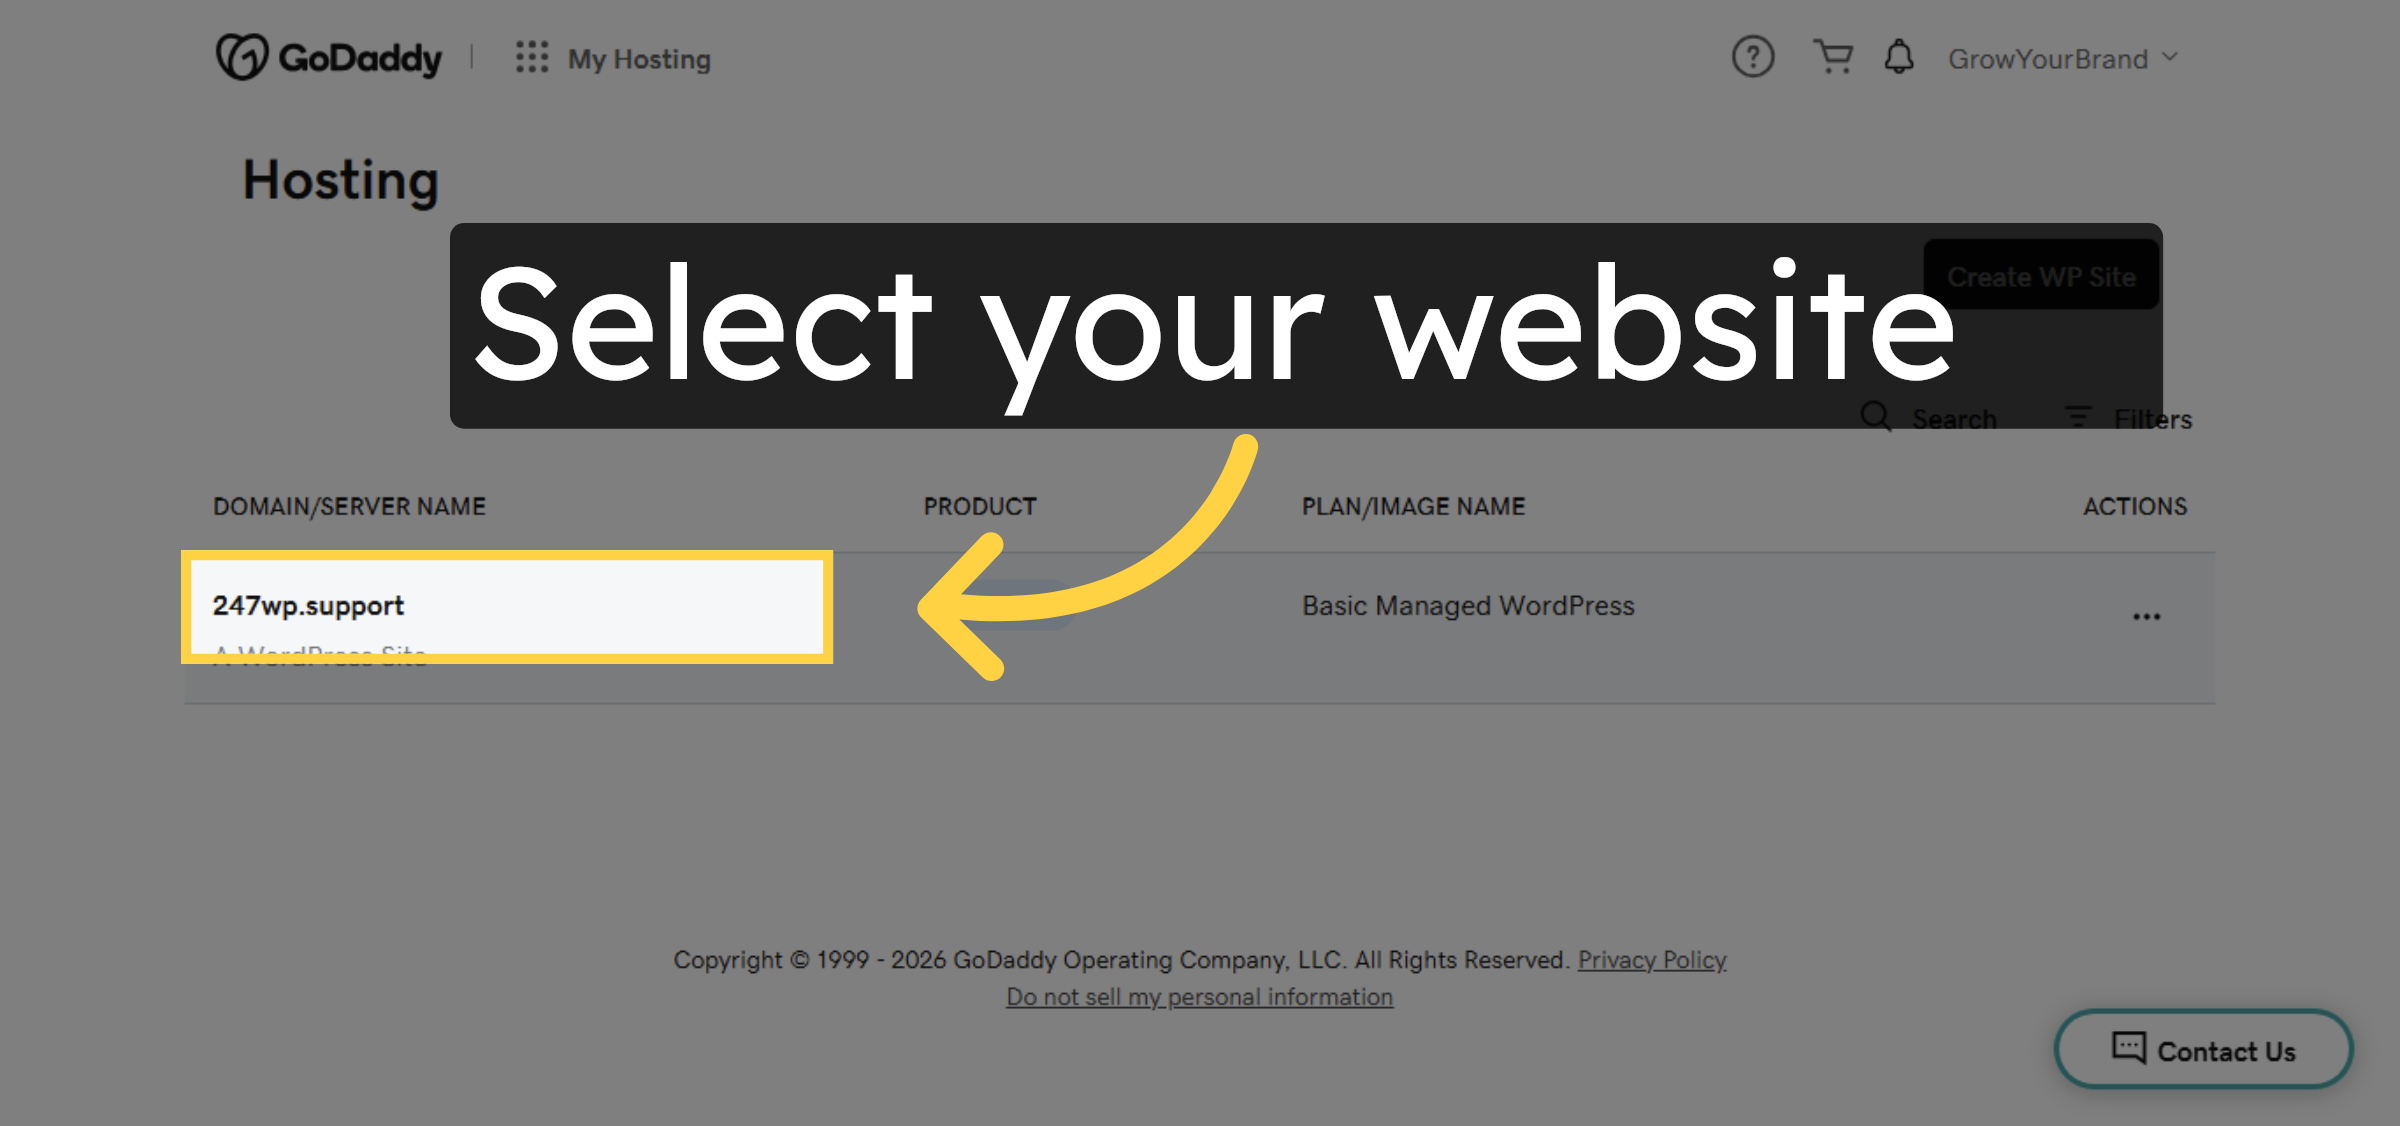
2. Select Your Hosting Account
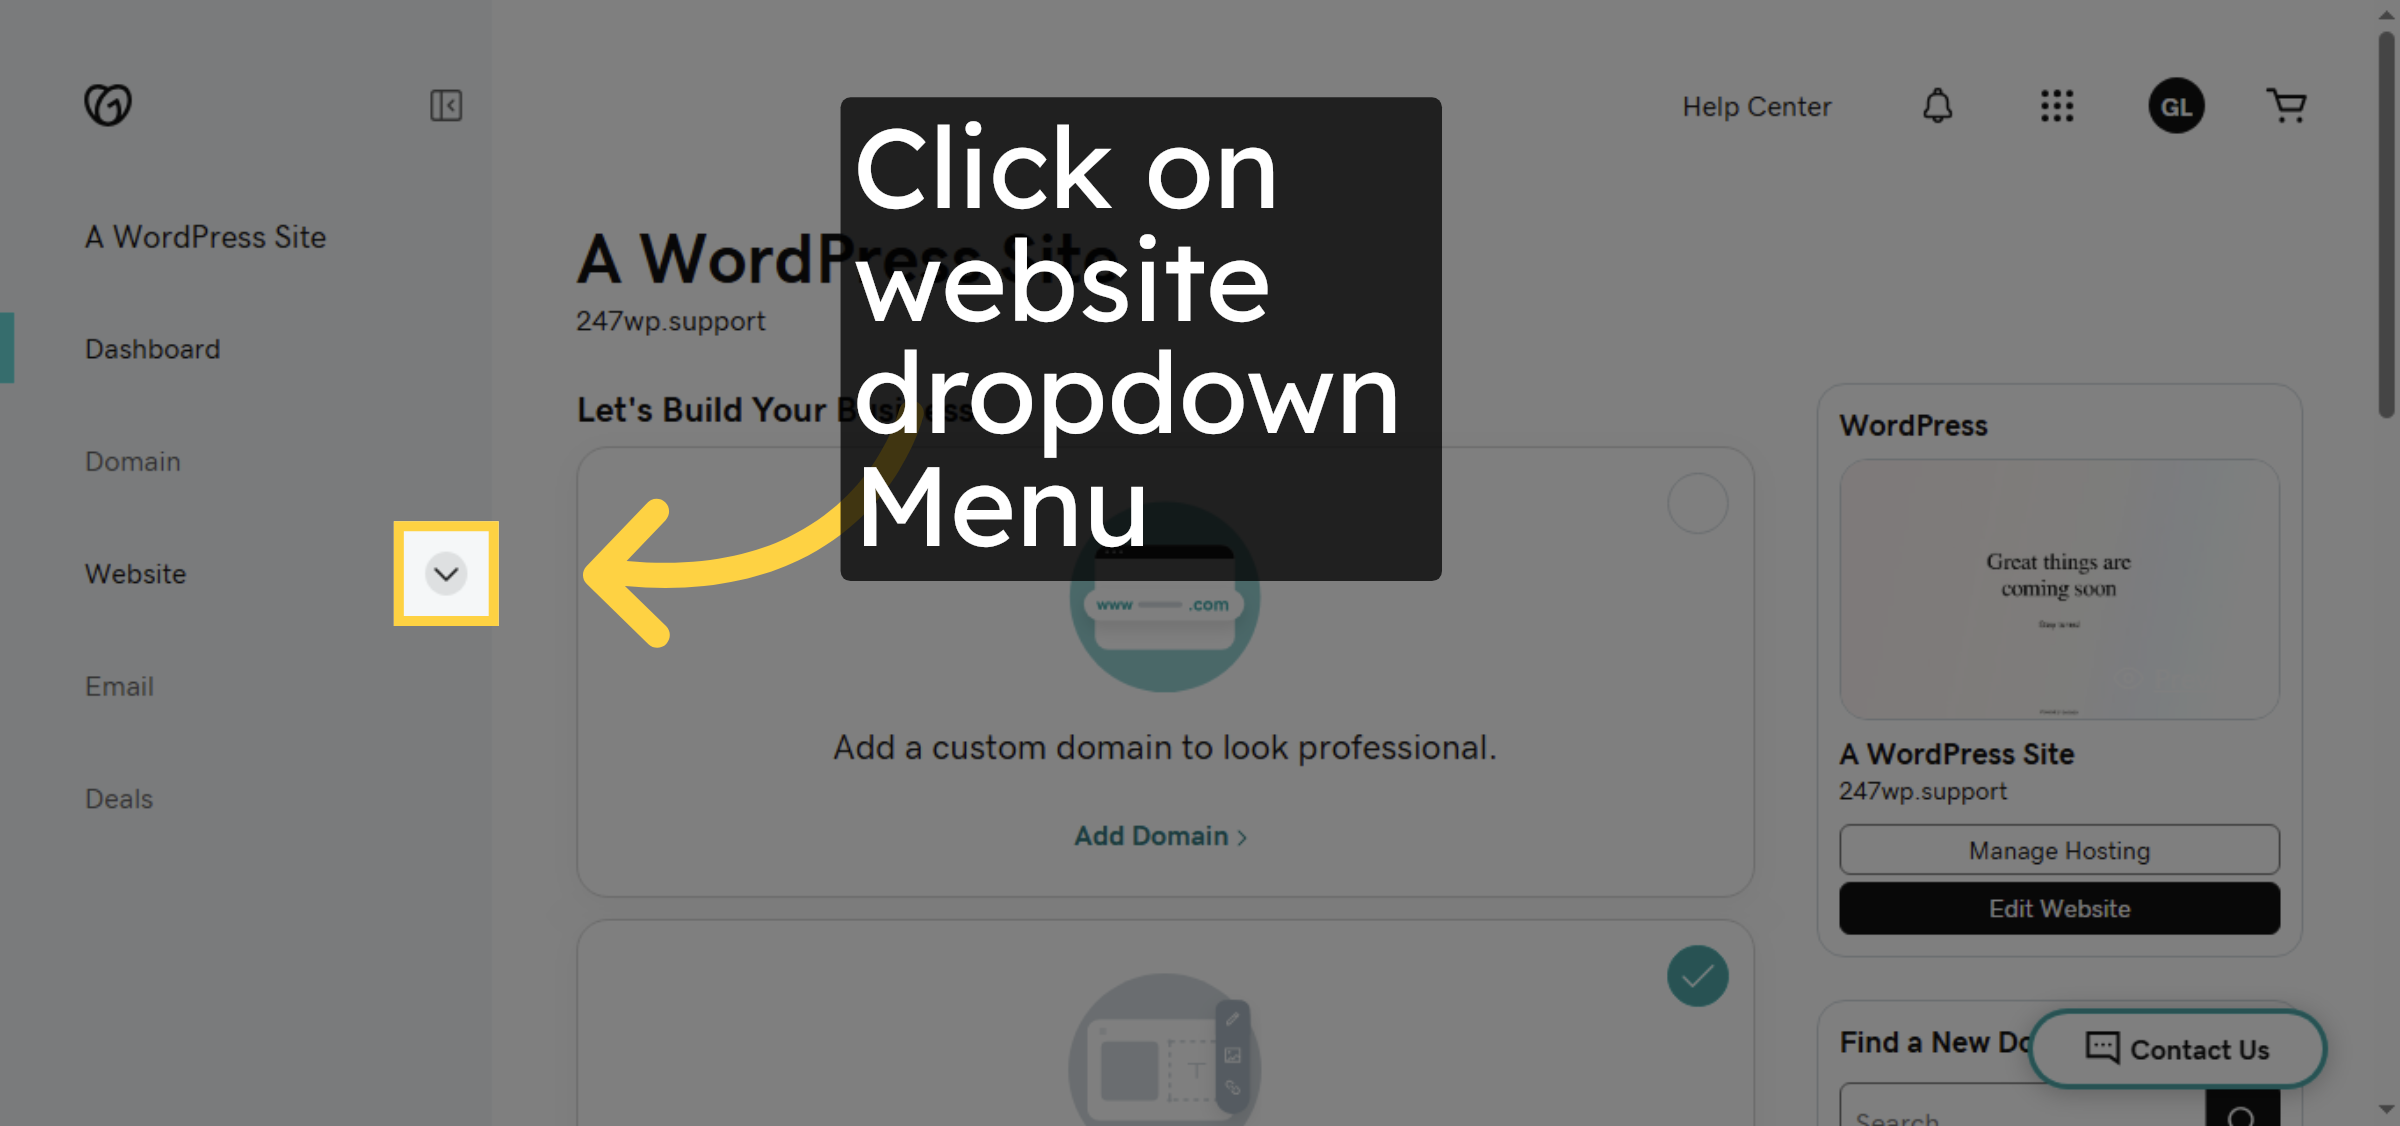
3. Access Hosting Options
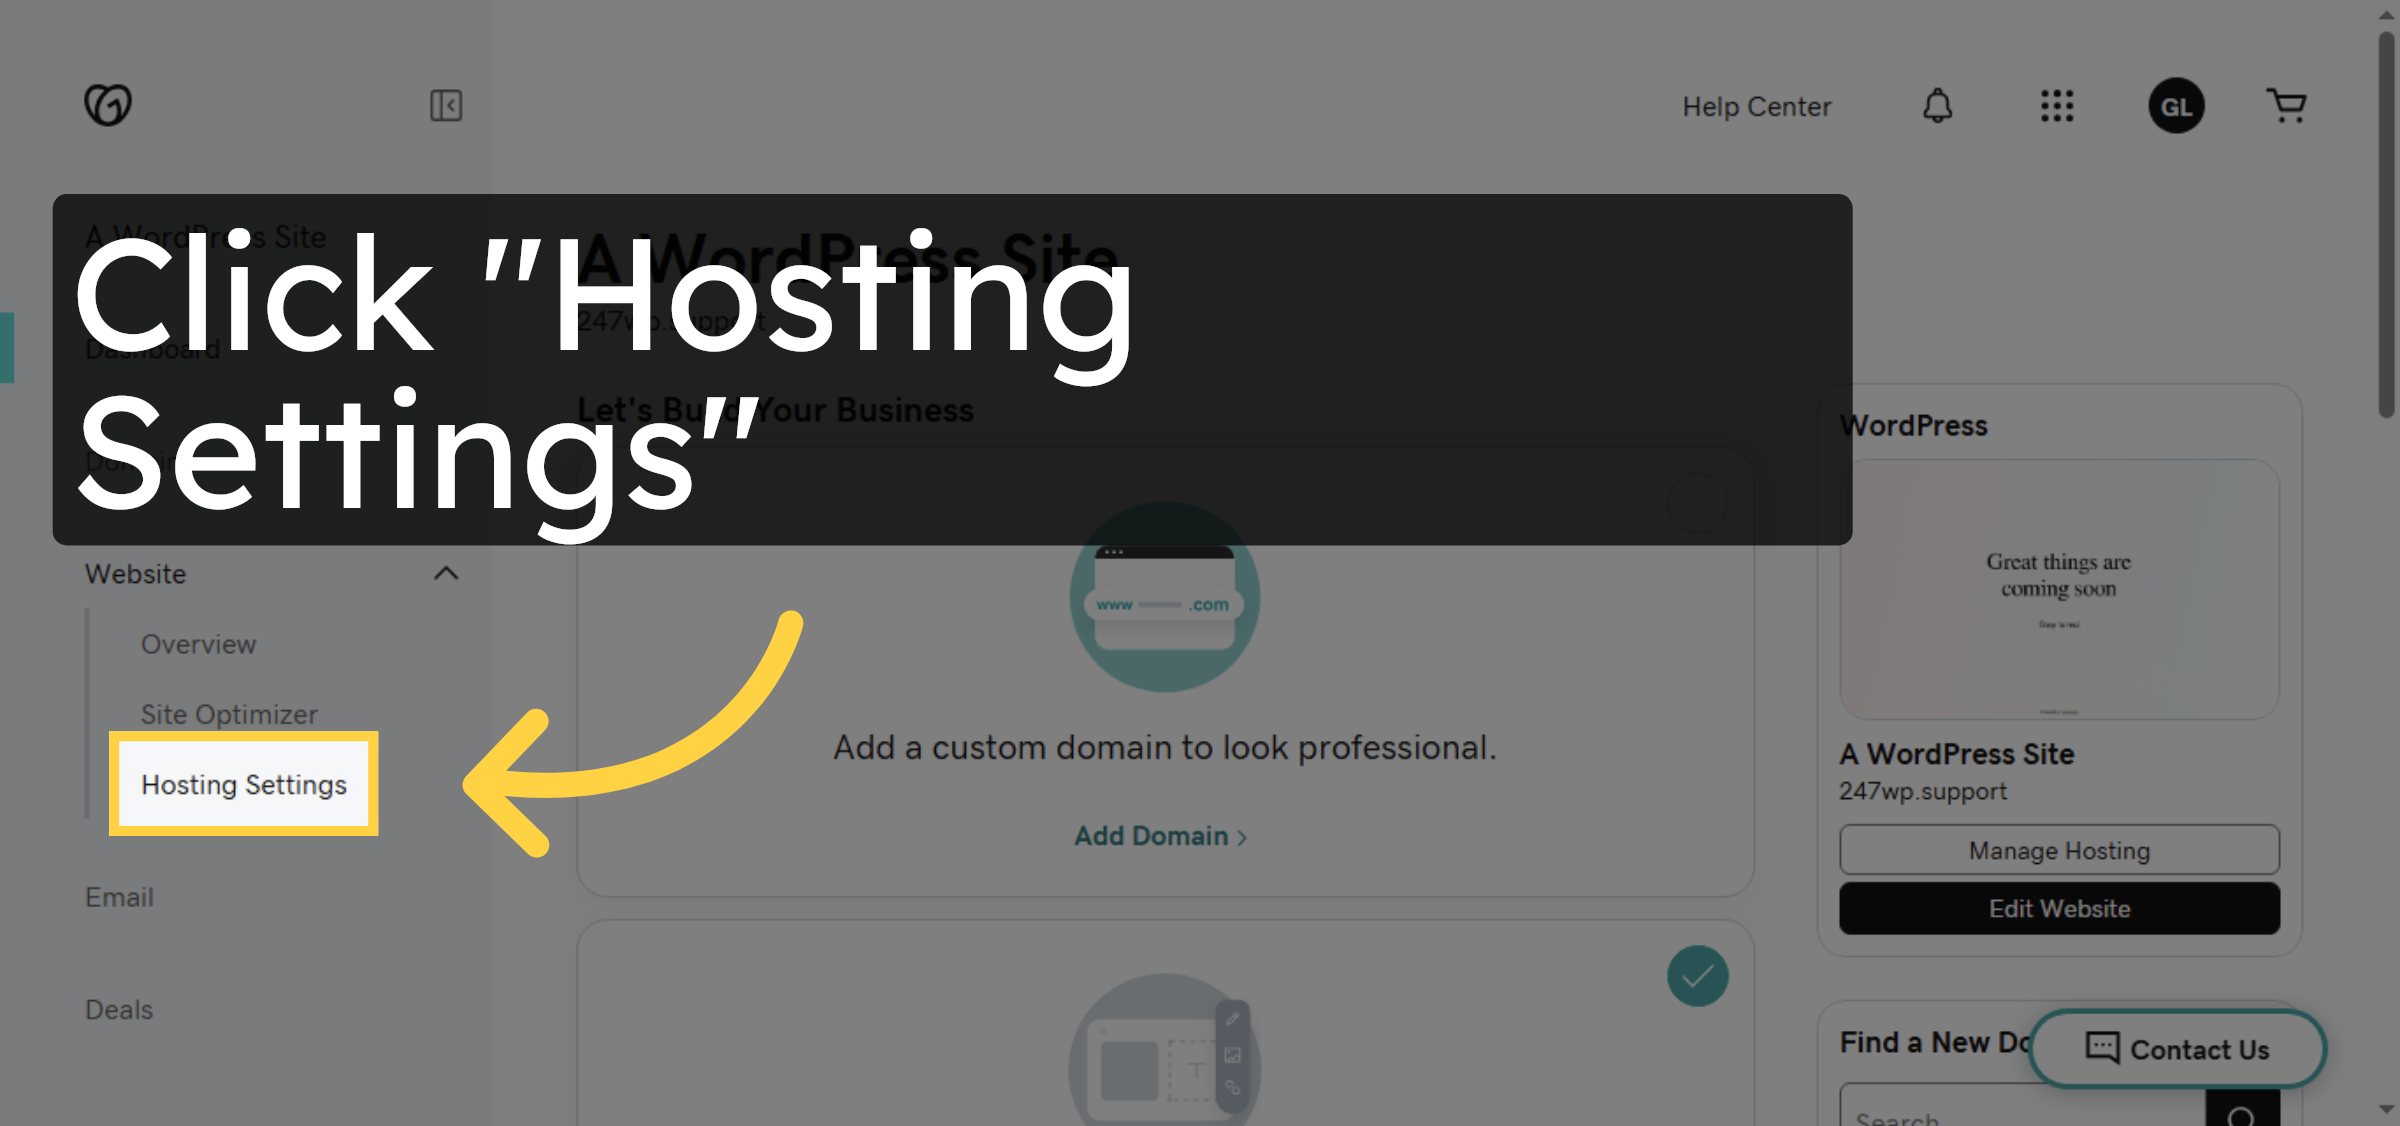
4. Open Hosting Settings
5. Access Additional Settings
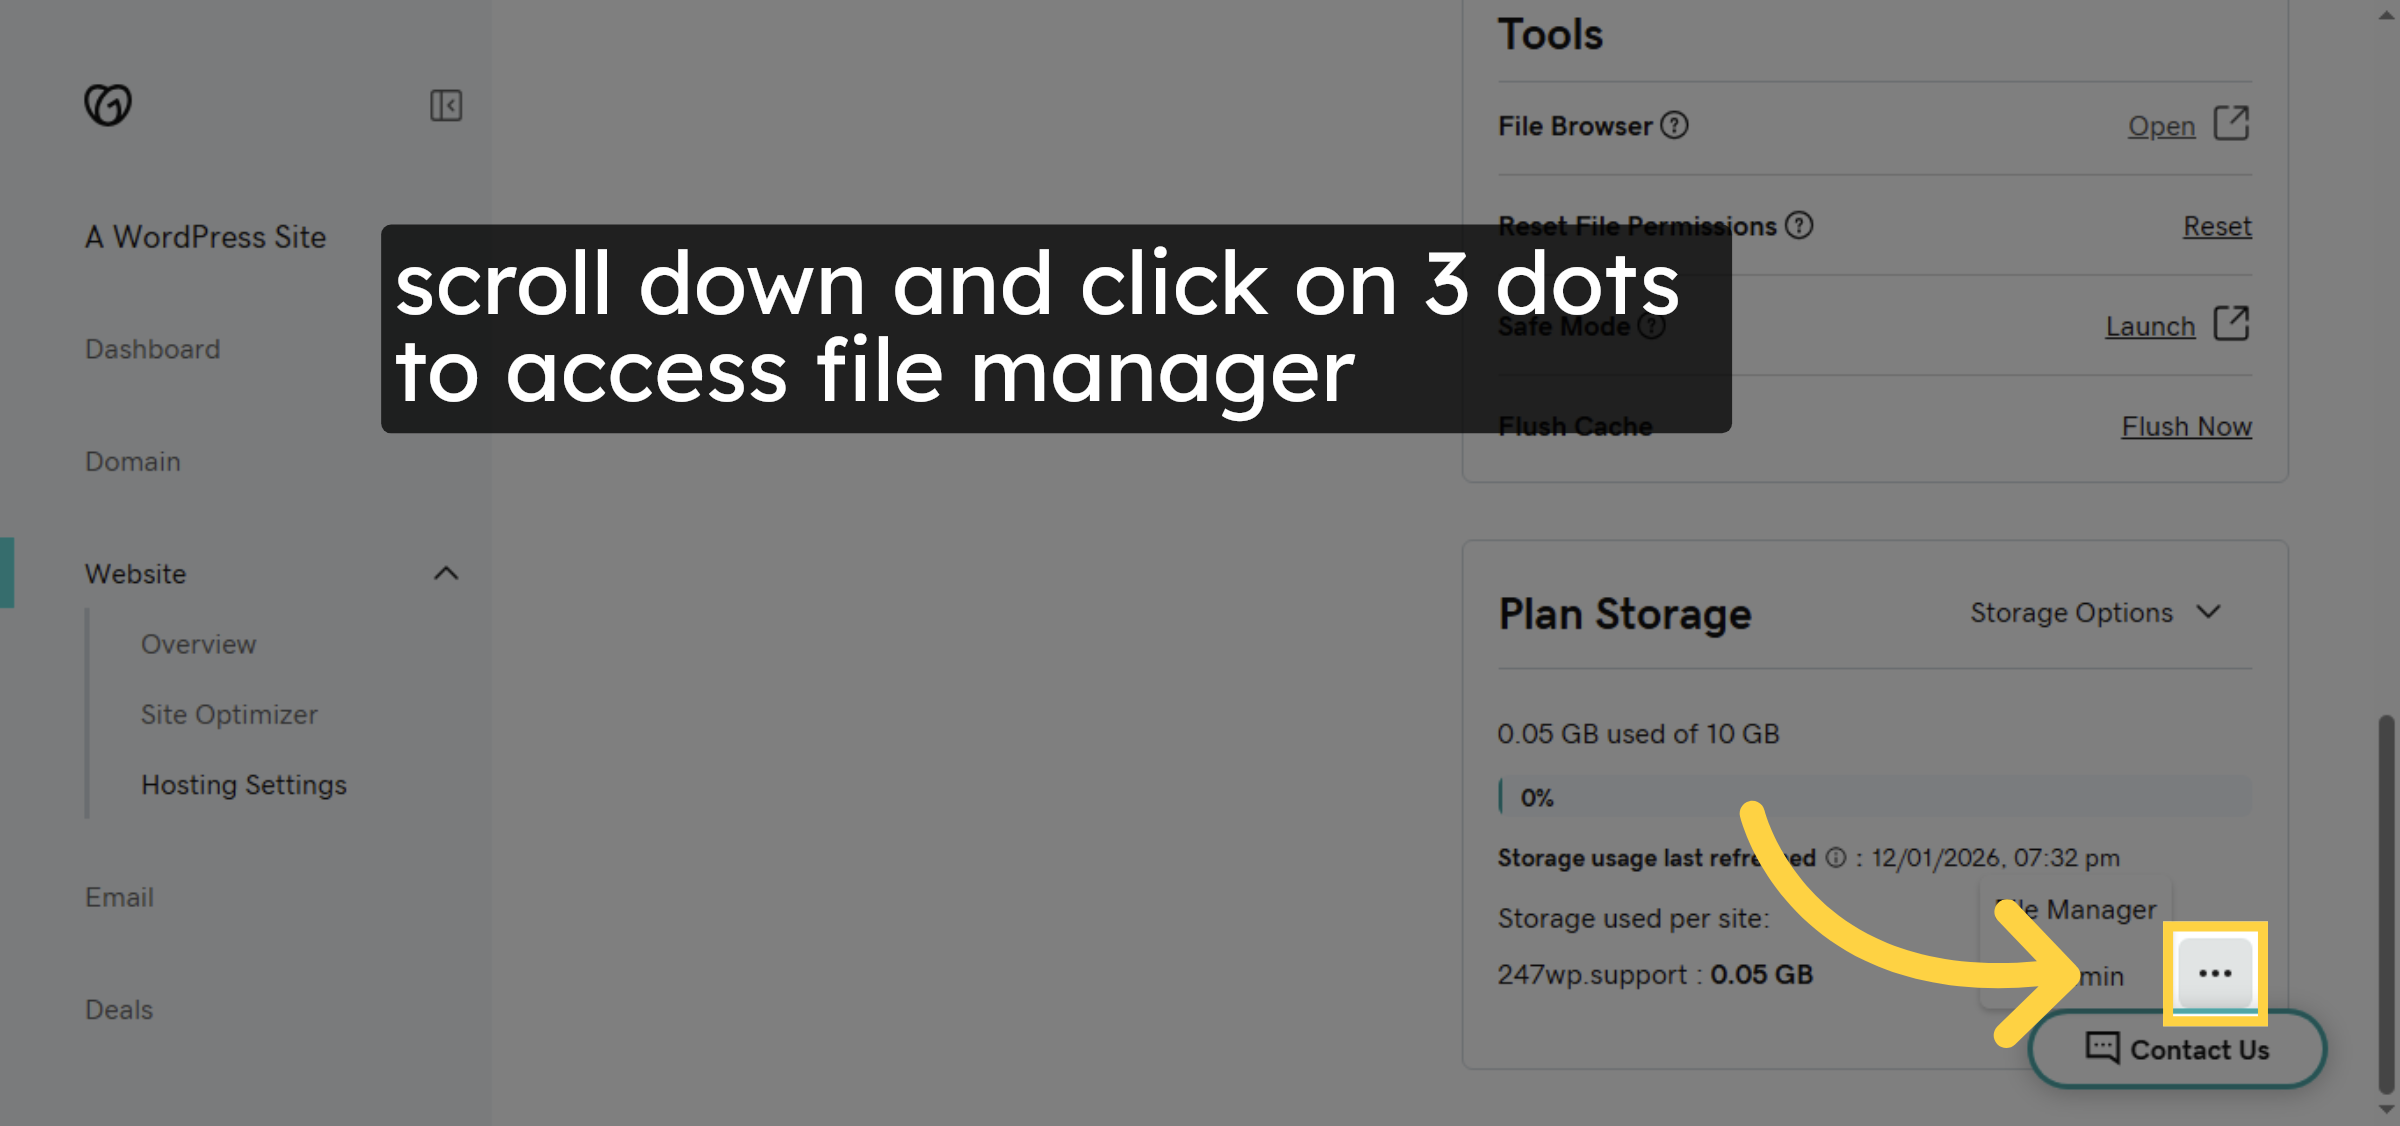
6. Open File Manager

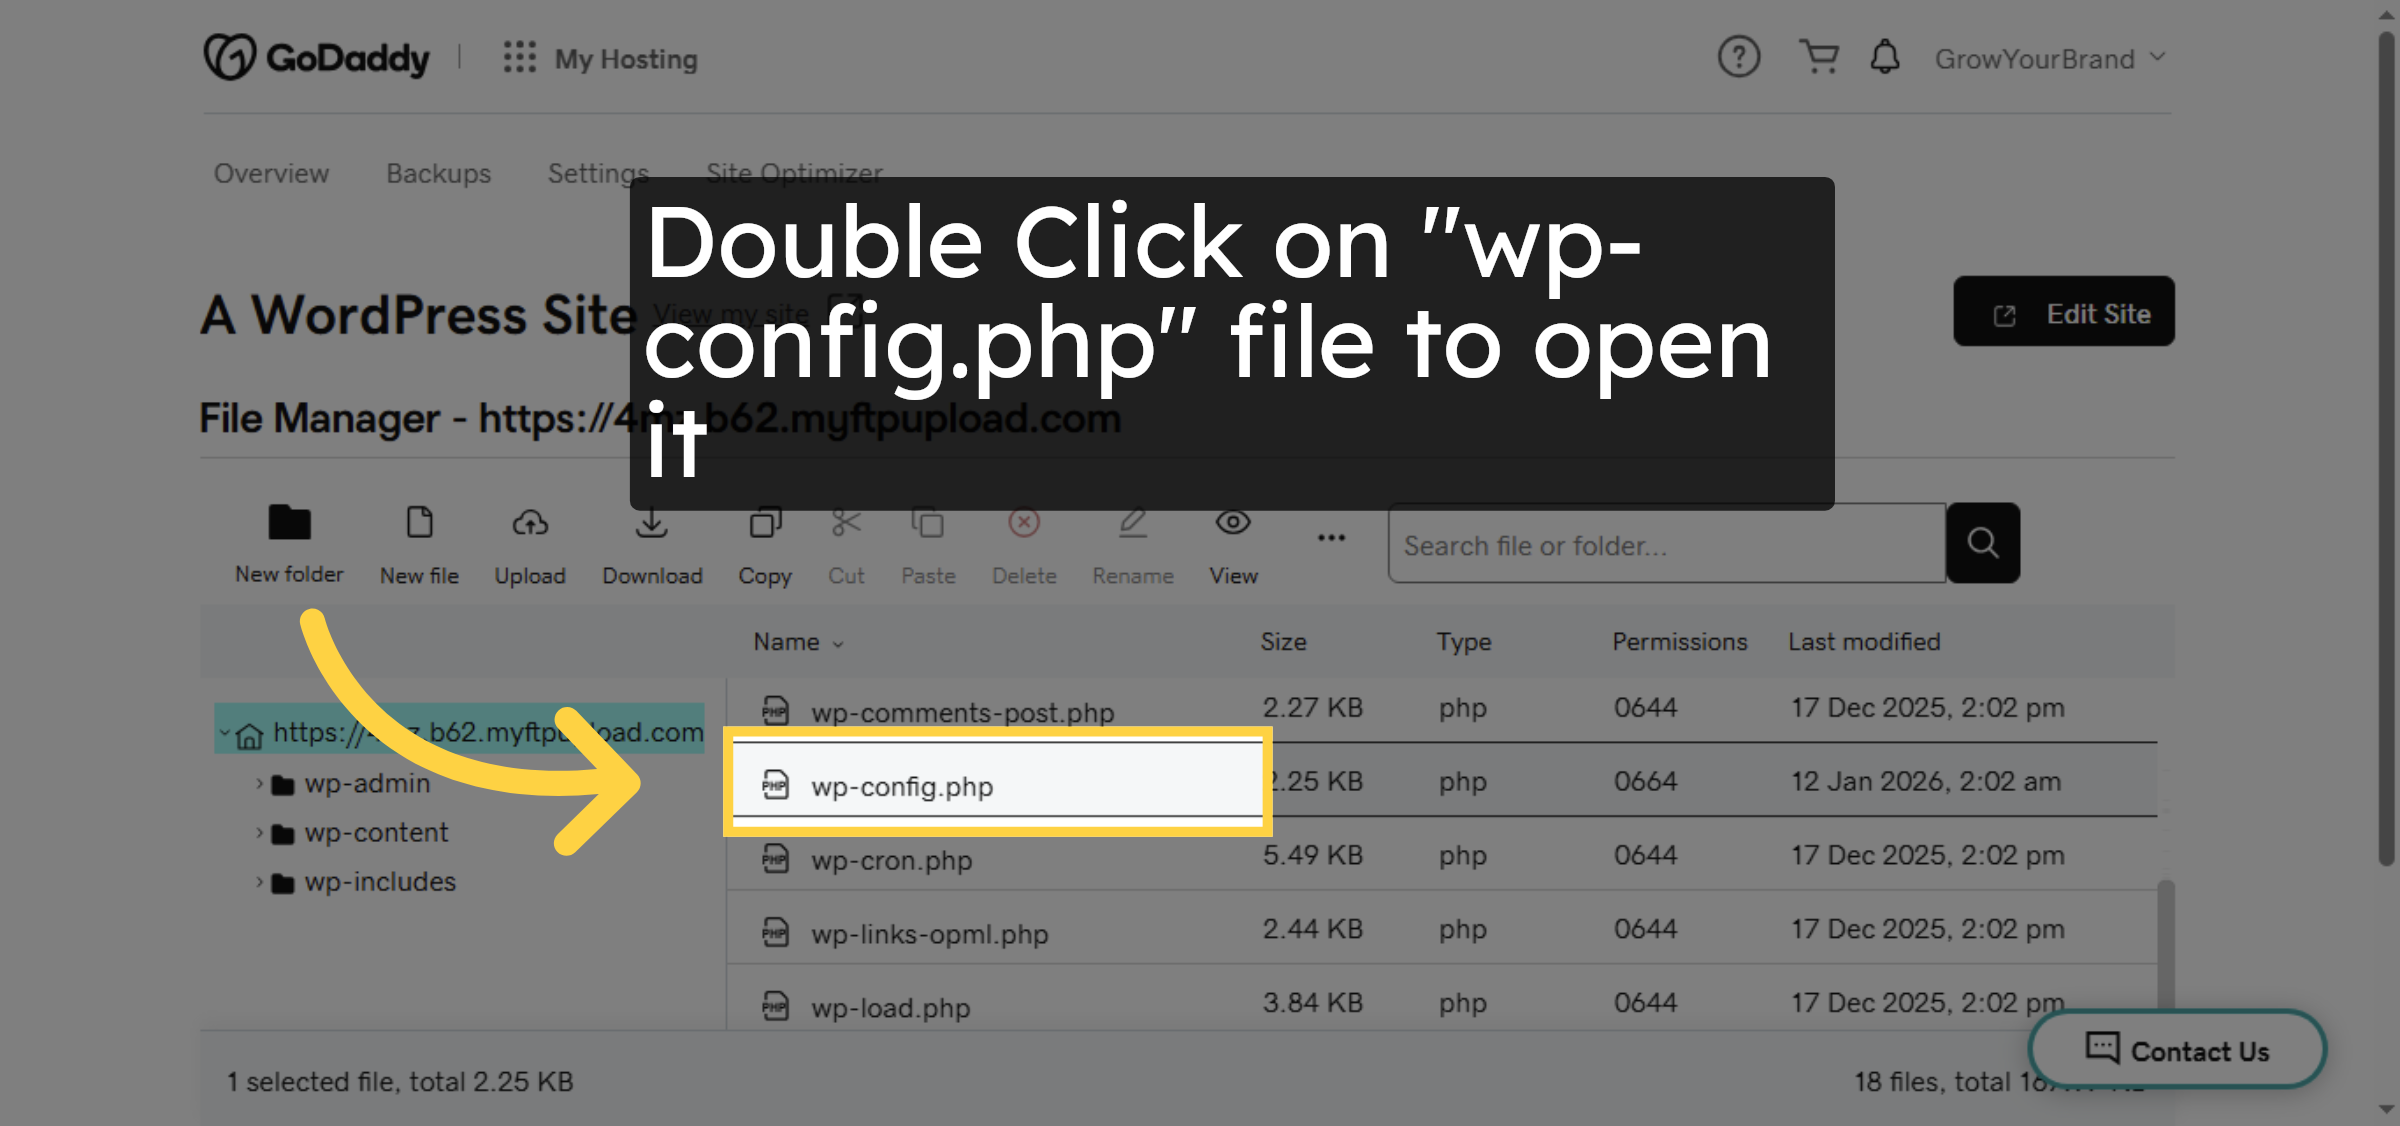
7. Open wp-config.php File


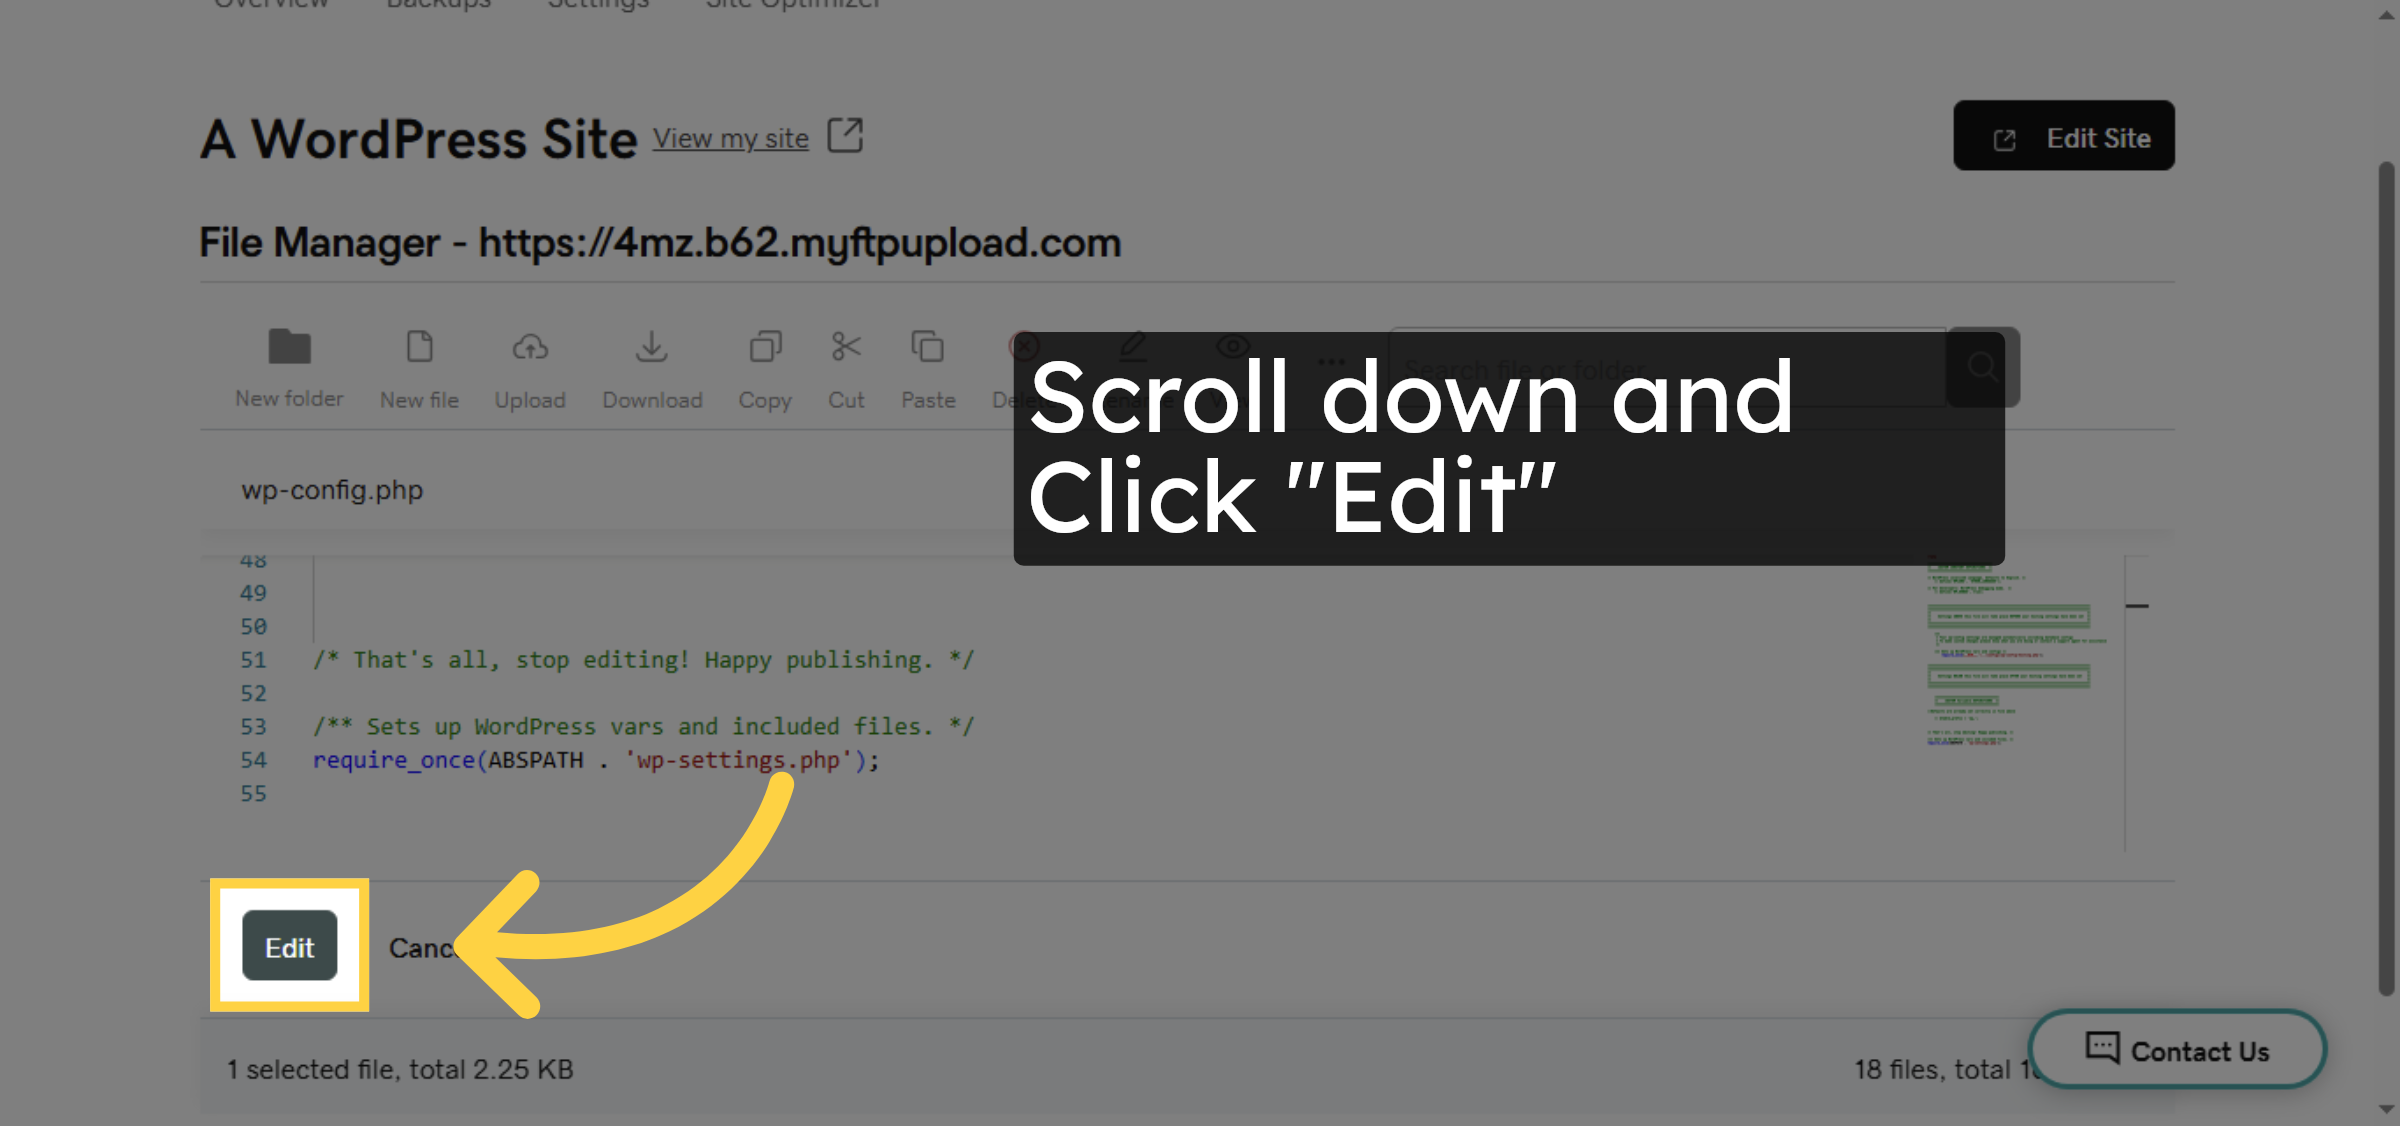
8. Click Edit Button
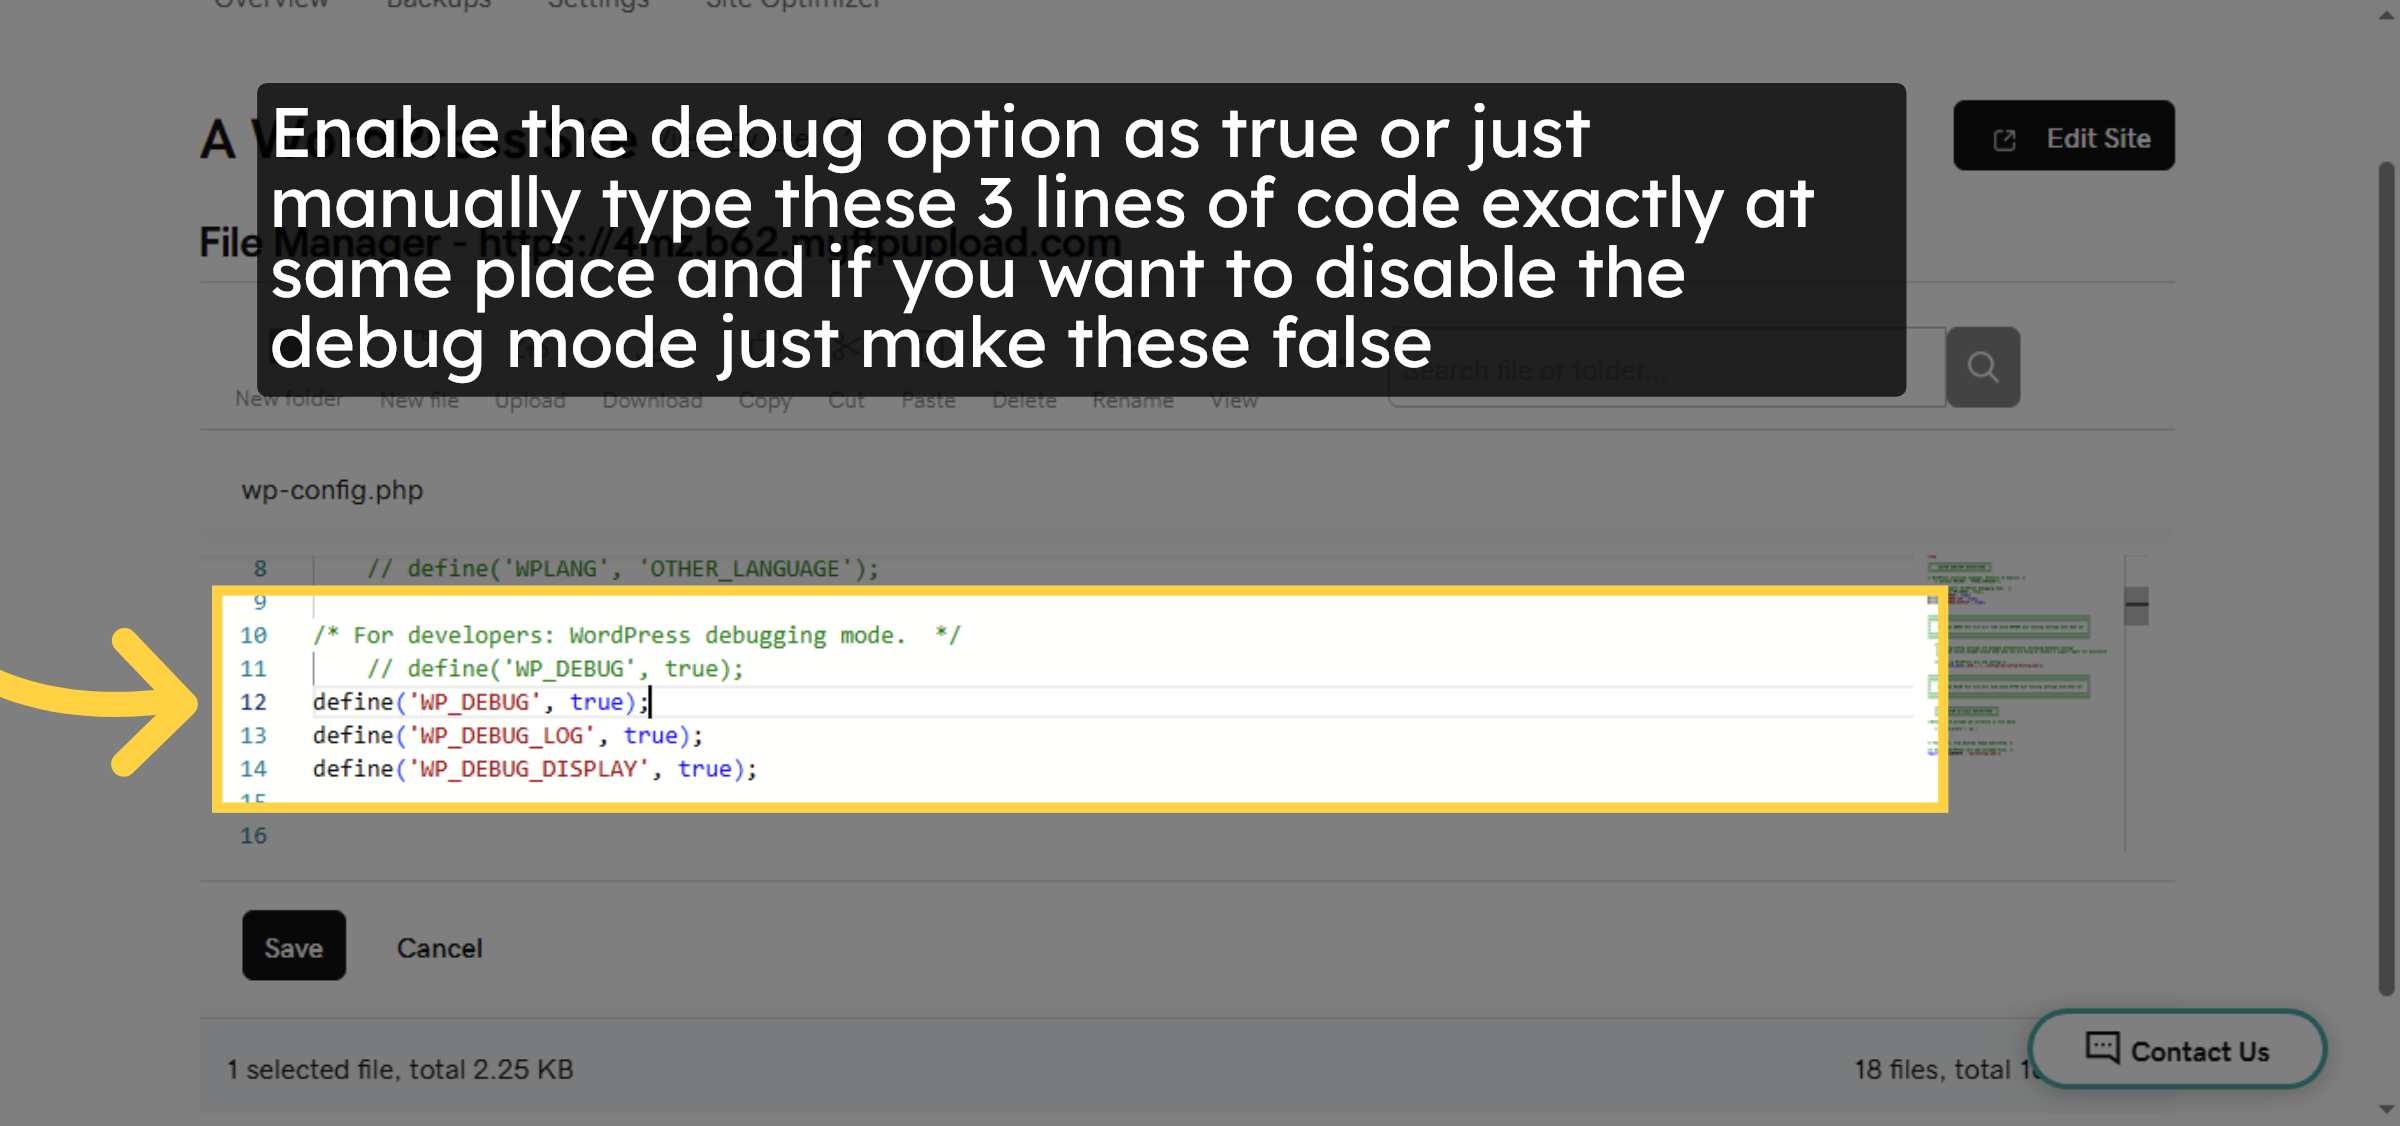
9. Enable Debug Mode
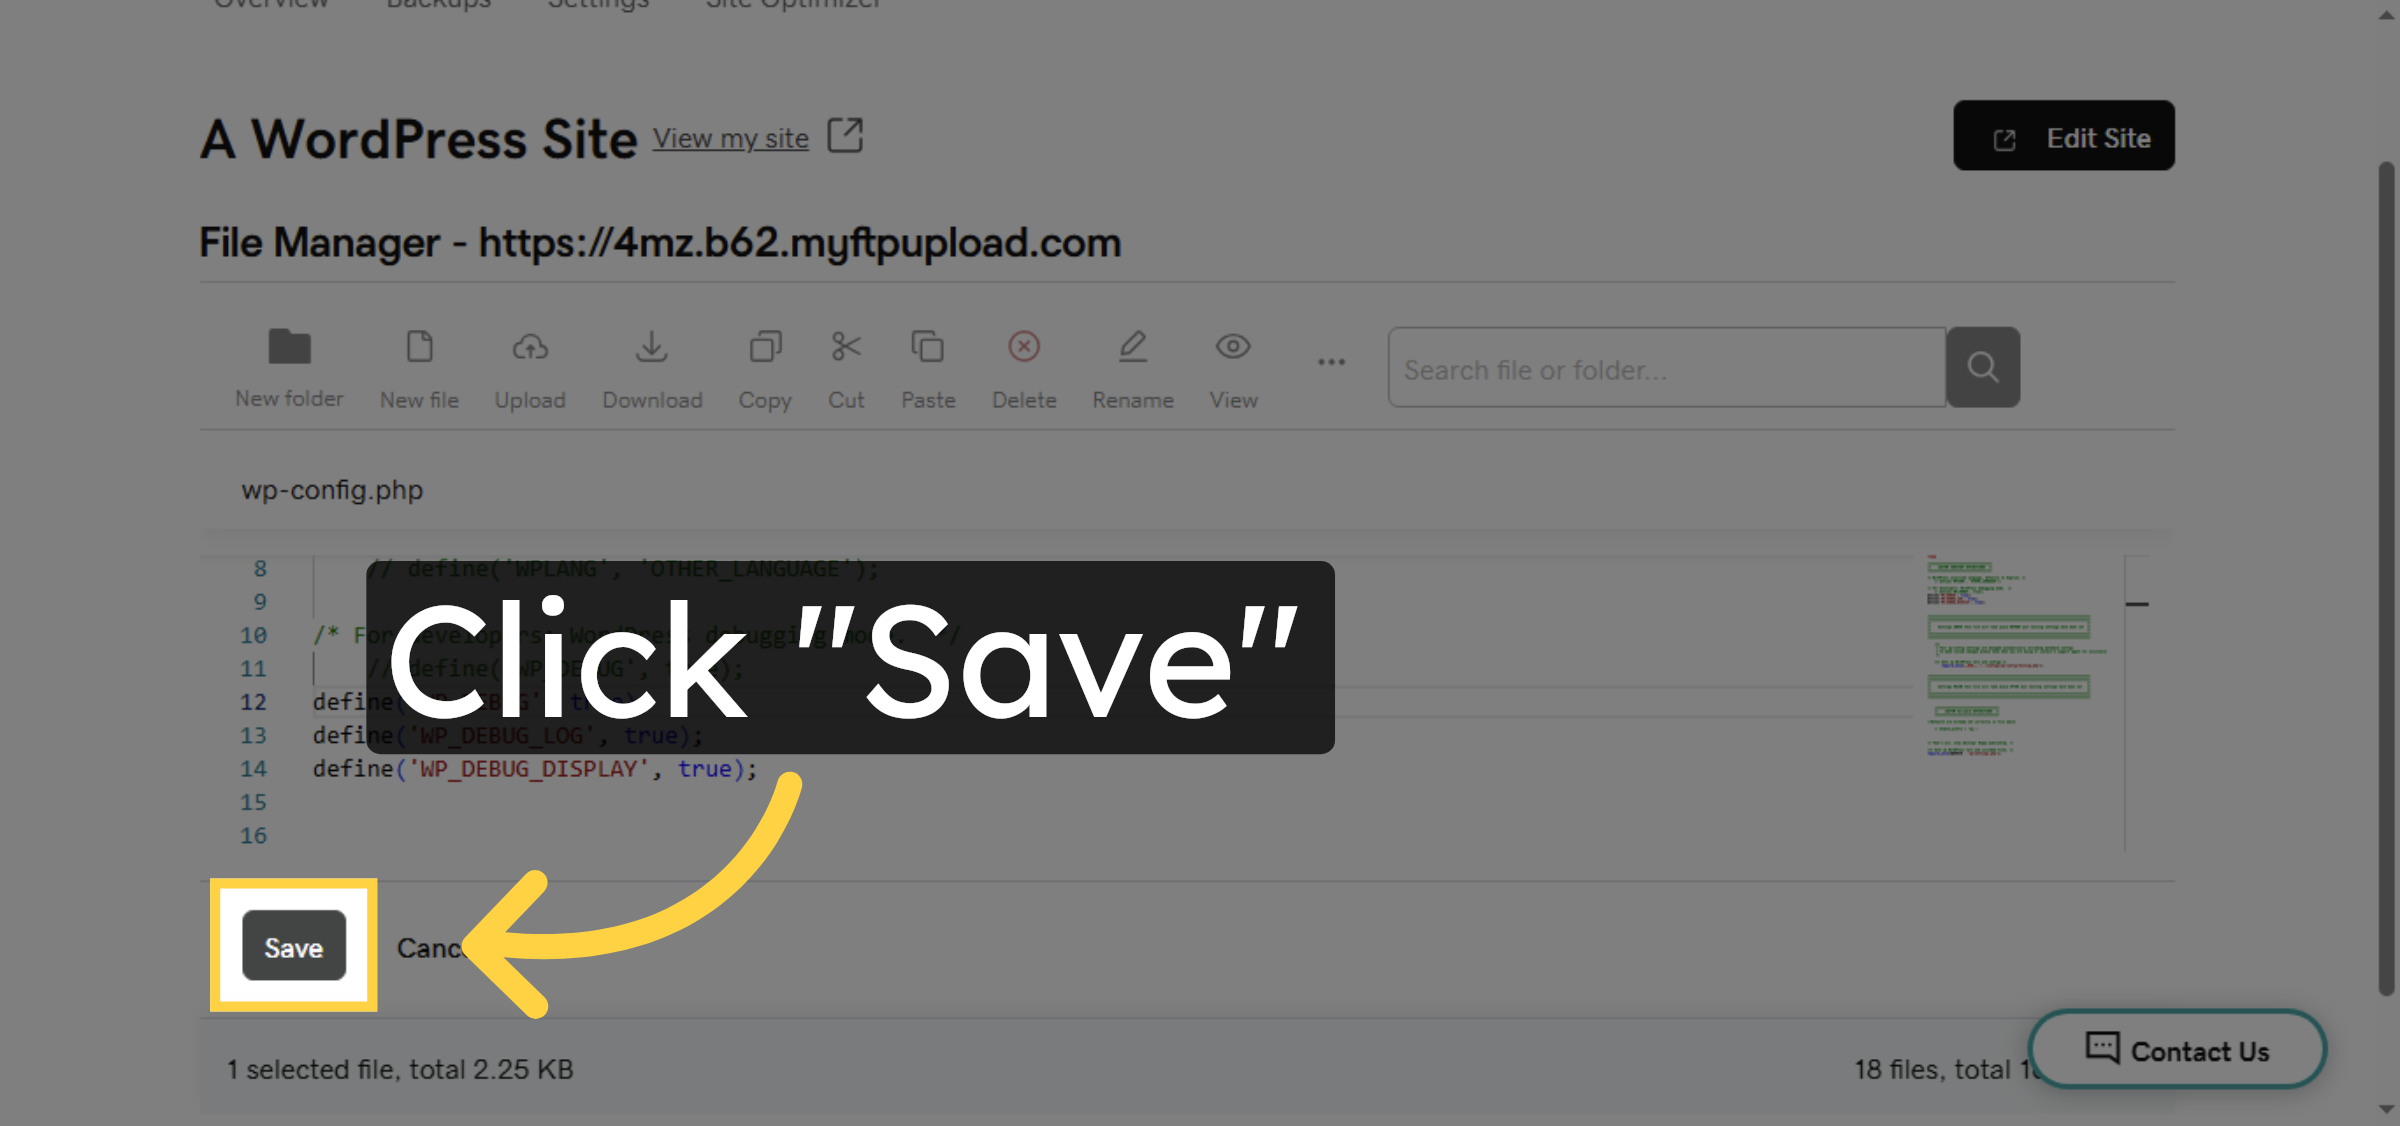
10. Save Configuration Changes
Conclusion
By following the steps outlined in this guide, you can successfully enable or disable WordPress debug mode on GoDaddy WordPress hosting by editing the wp-config.php file. Proper use of debug mode helps identify PHP errors, plugin conflicts, and configuration issues, making troubleshooting faster and more effective. Disabling debug mode after troubleshooting is a best practice to maintain site security and performance.
Visit: https://www.woohelpdesk.com
Call Us Toll-Free: +1 888 602 0119 (US & Canada)
Get professional support for WordPress configuration, hosting management, performance optimization, and troubleshooting.


