How To Enable And Disable WordPress Debug Mode On BlueHost Hosting
Introduction
Enabling WordPress debug mode is an important step when troubleshooting errors, plugin conflicts, or theme-related issues on your website. BlueHost allows you to easily access and modify core WordPress configuration files through its dashboard and file manager. This guide explains how to enable or disable WordPress debug mode by editing the wp-config.php file directly from the BlueHost hosting environment. By correctly updating the debug settings, you can view detailed error messages during development or turn them off once issues are resolved, helping you maintain a stable and well-functioning WordPress site.
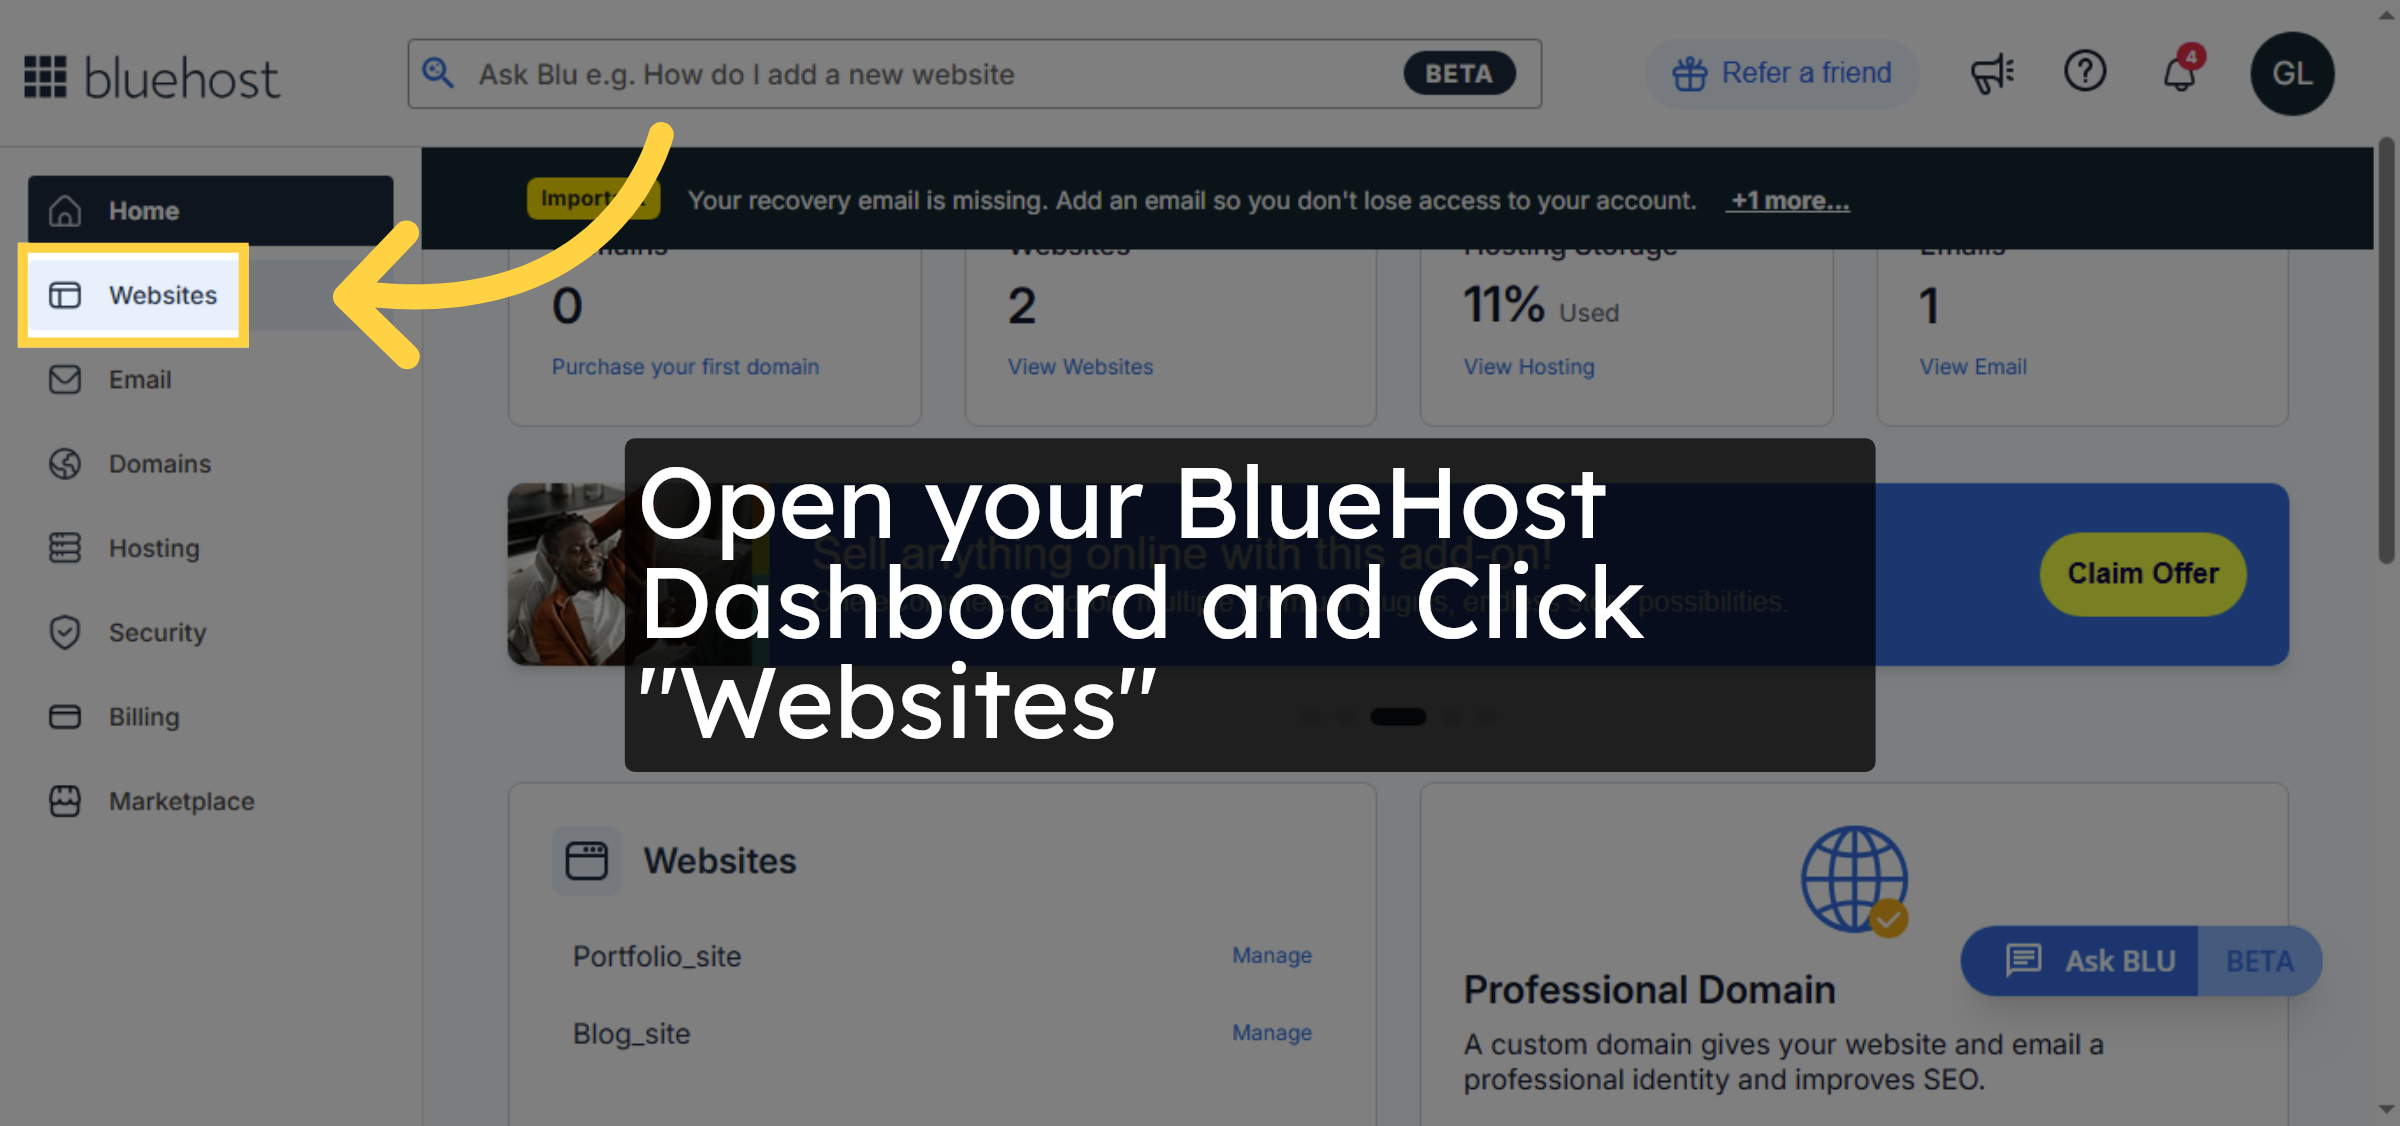
1. Navigate to Websites Section
Open your BlueHost Dashboard and Click “Websites”
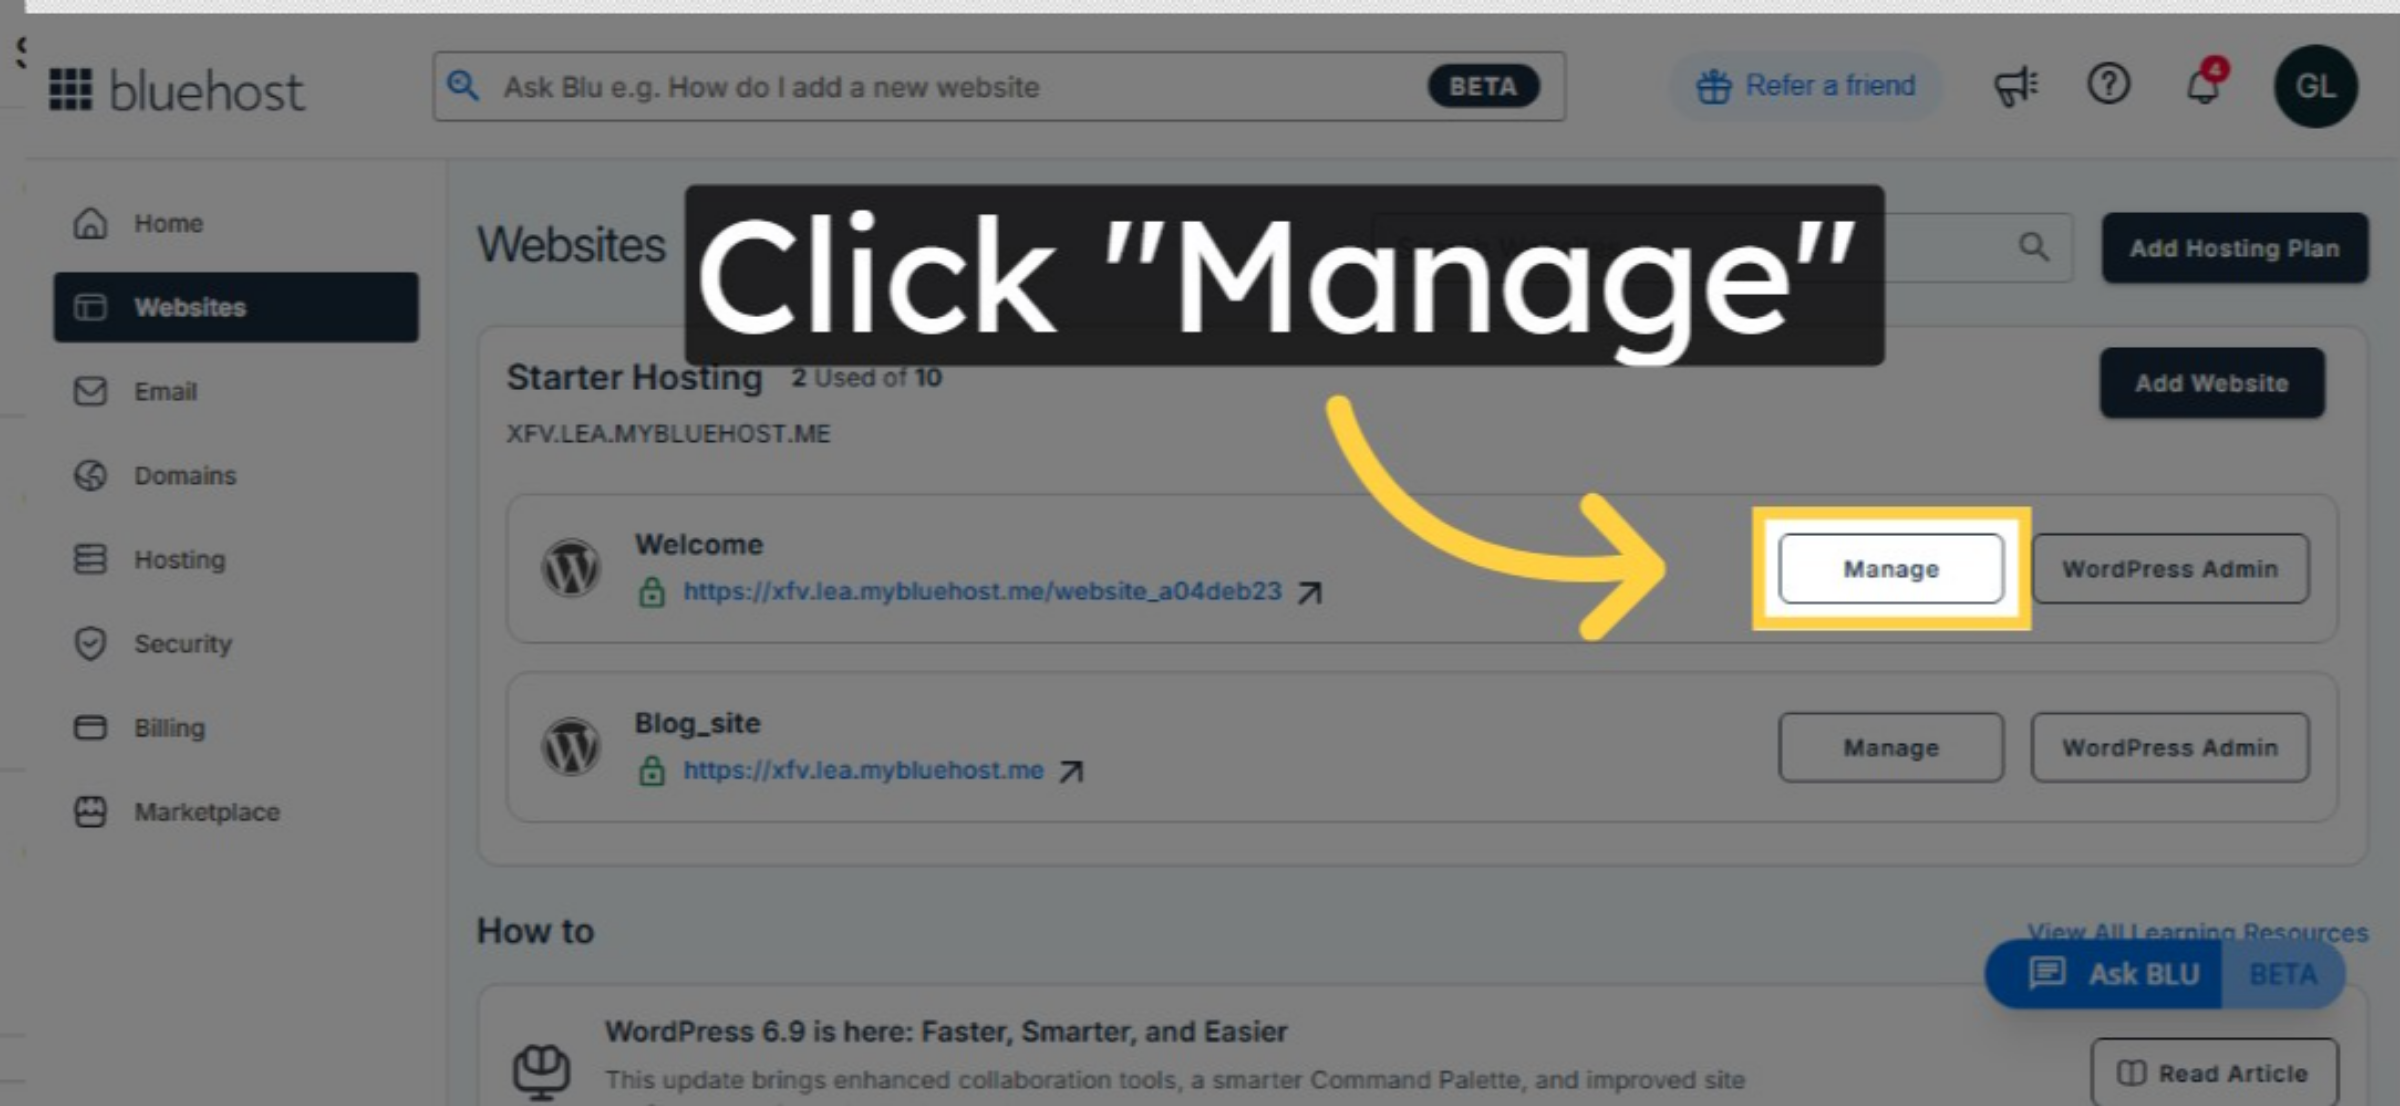
2. Choose your website
Select your website and click manage
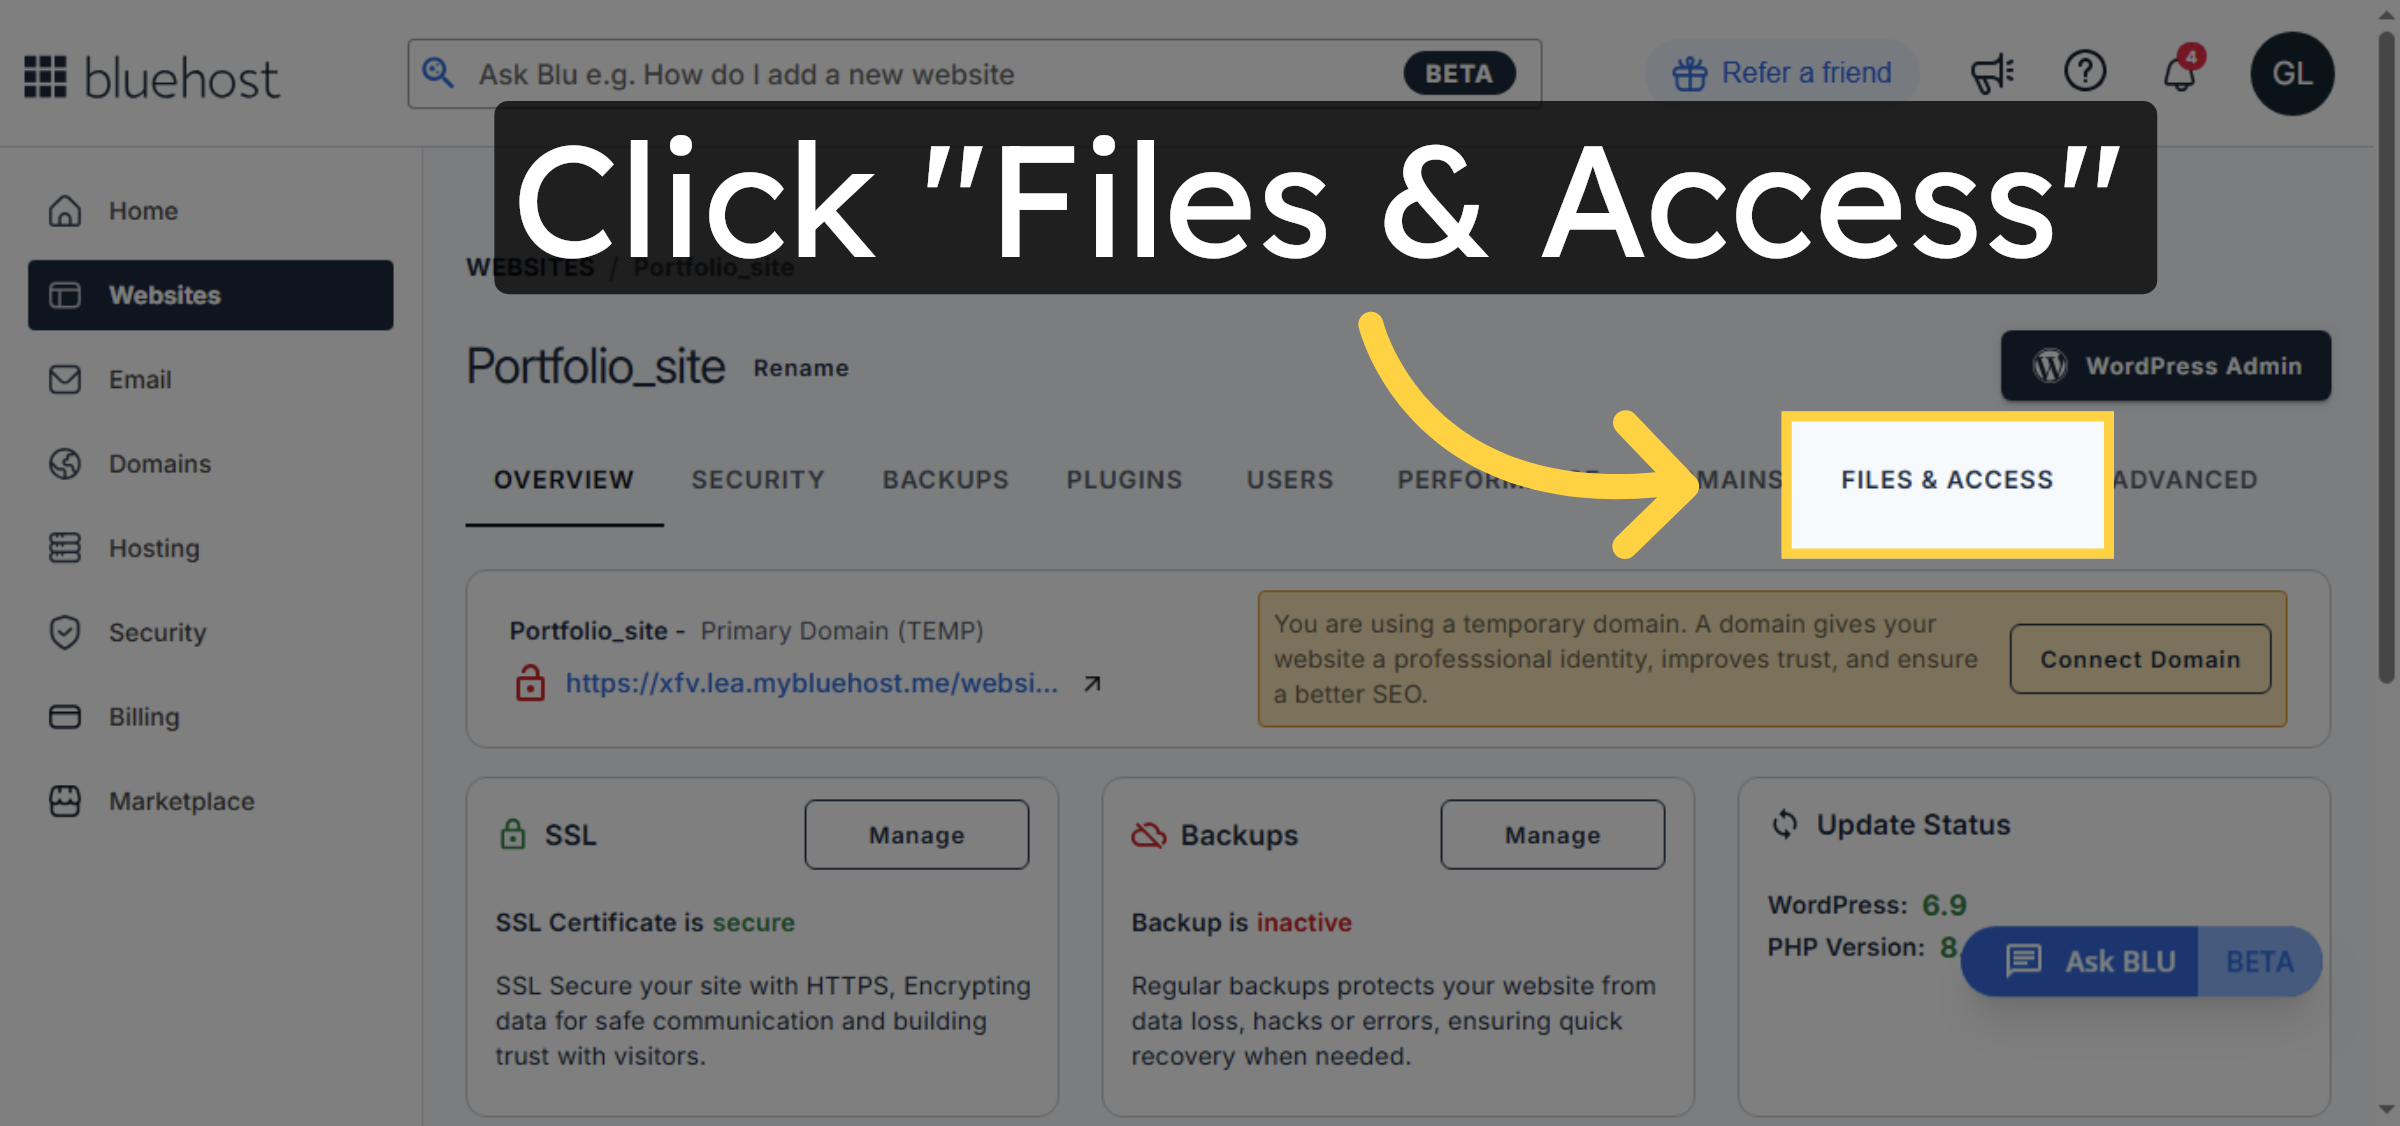
3. Open Files & Access Settings
Select the Files & Access option to access file management and permissions for your website.
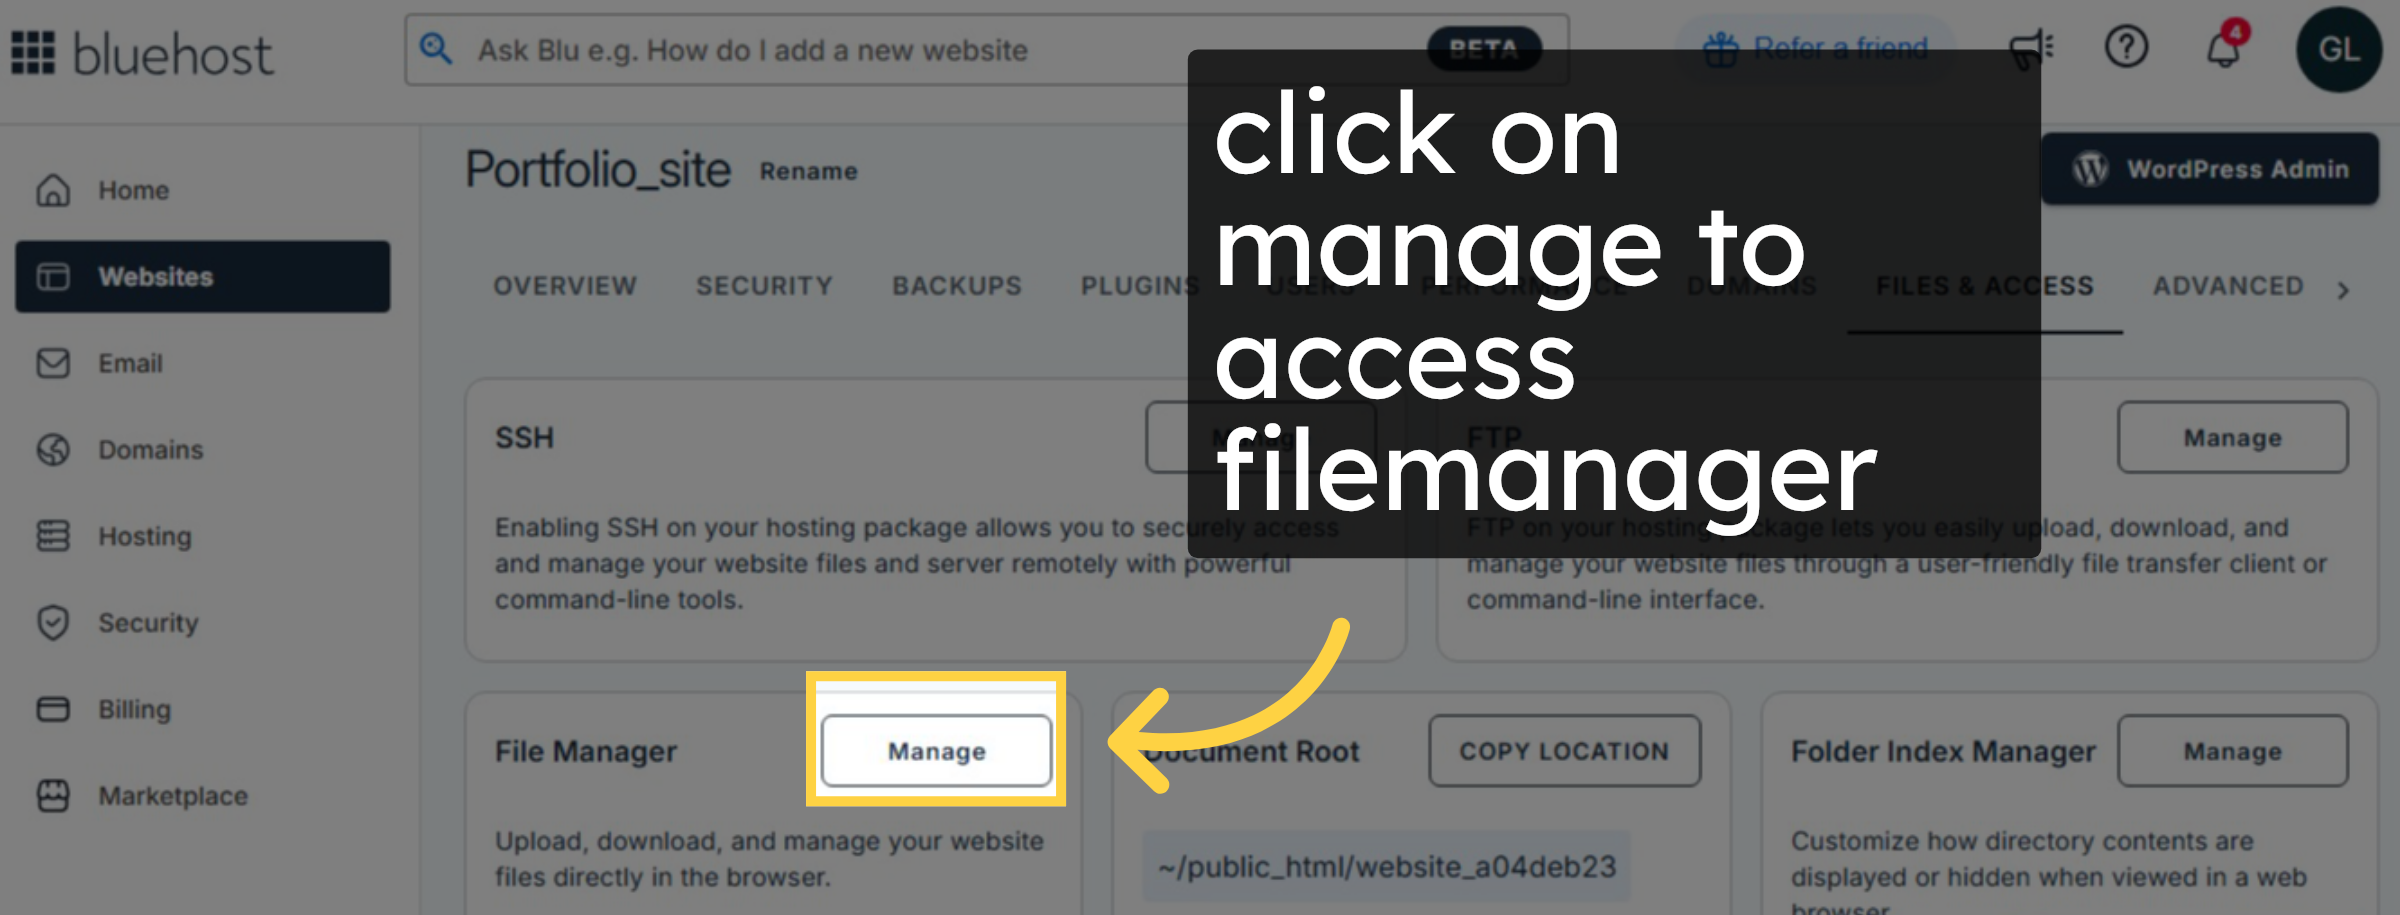
4. Access file manager
click on manage to access filemanager
5. Open config File.
Click the wp-config.php file in the root directory to edit WordPress configuration file.

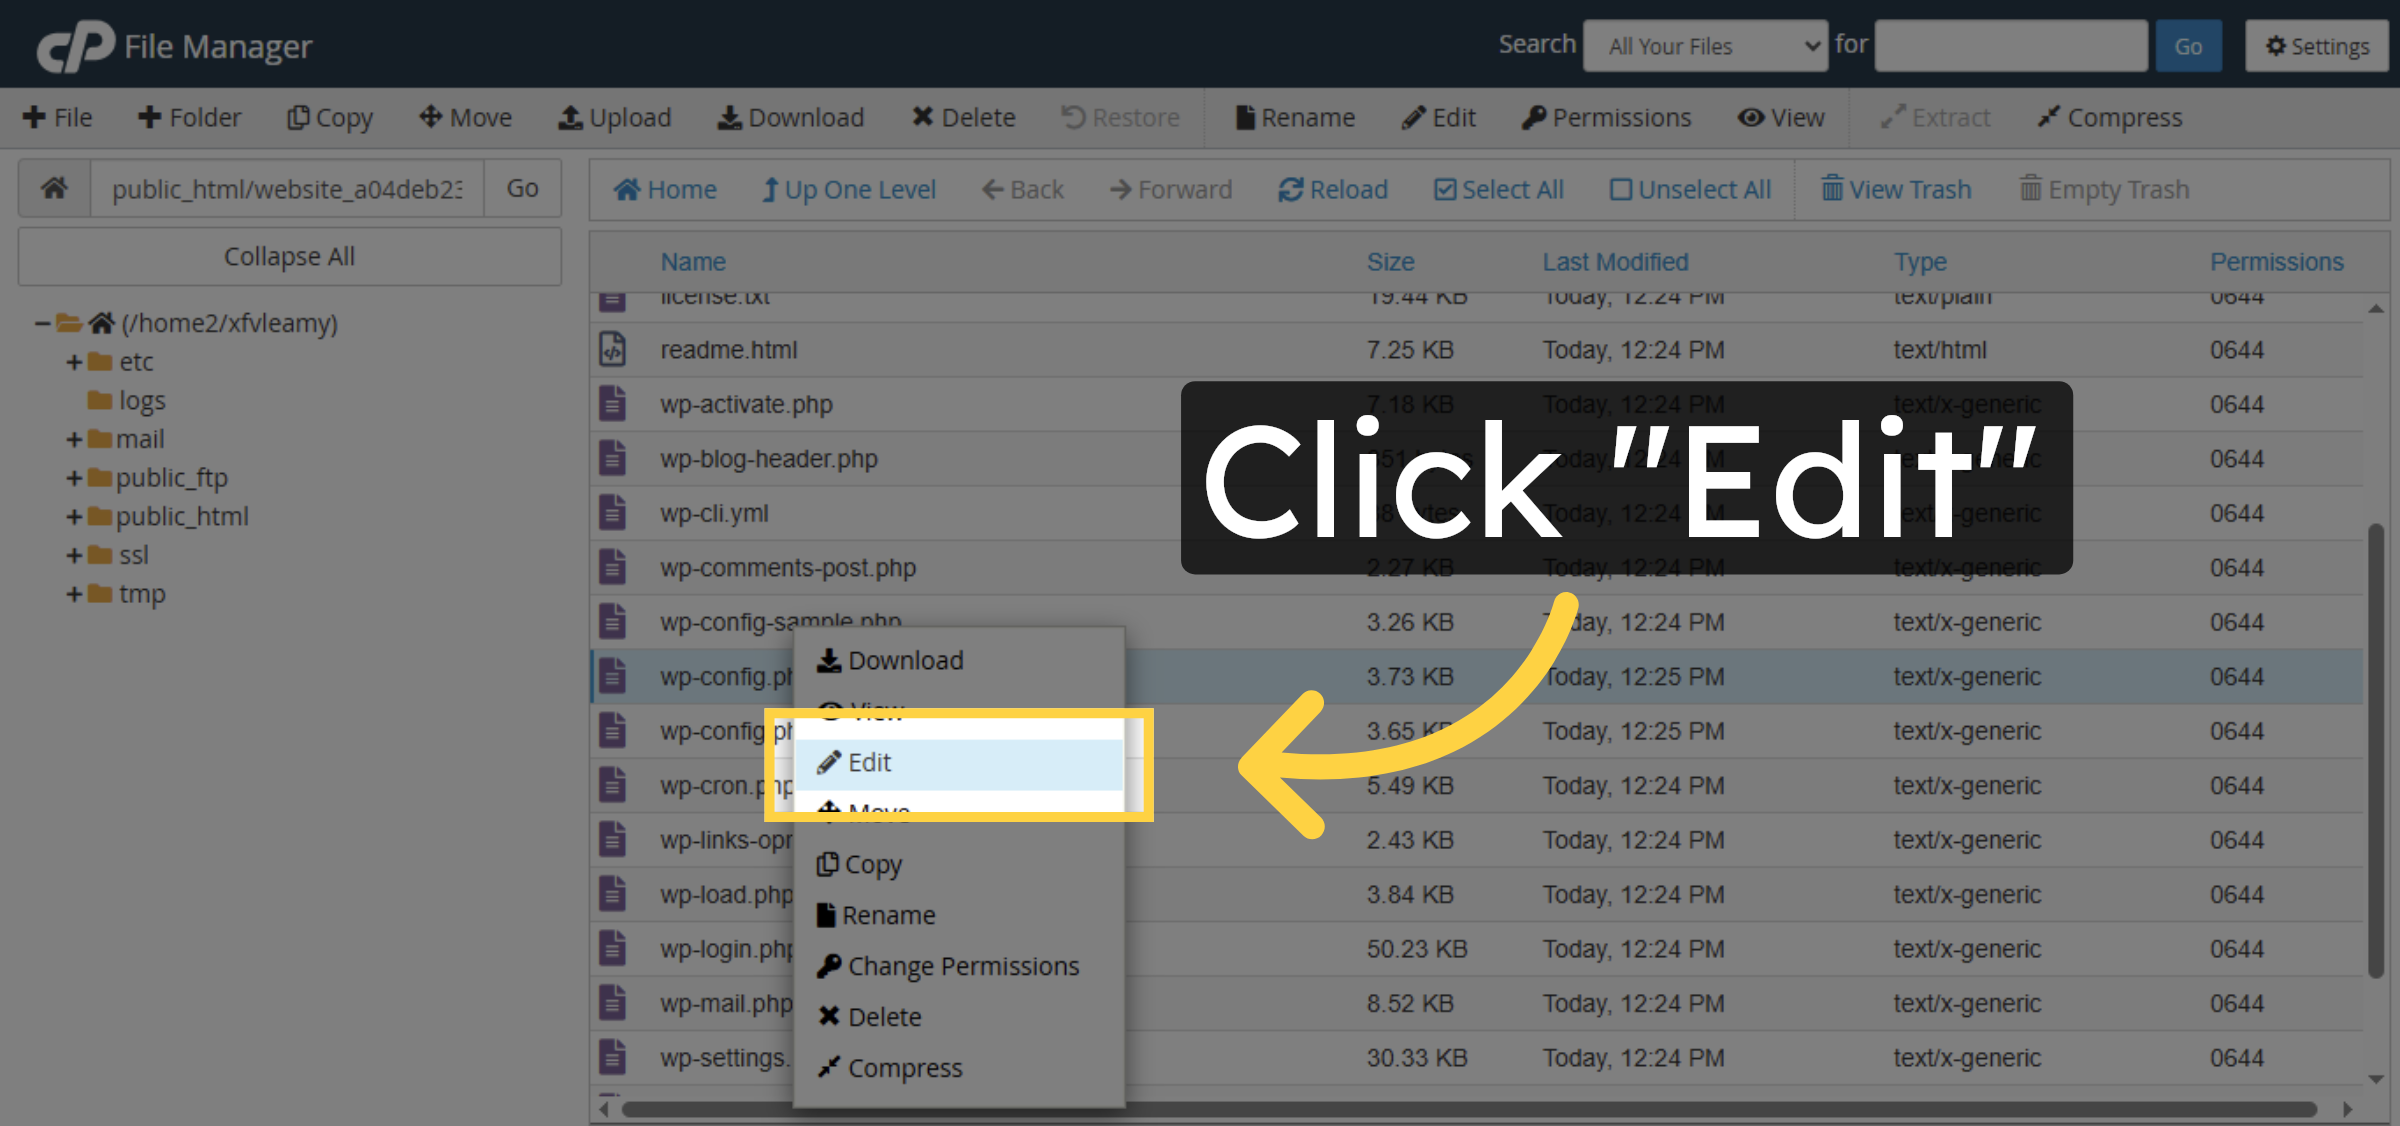
6. Open Edit Mode
Click the Edit button to open the wp-config.php file for editing within the file manager.
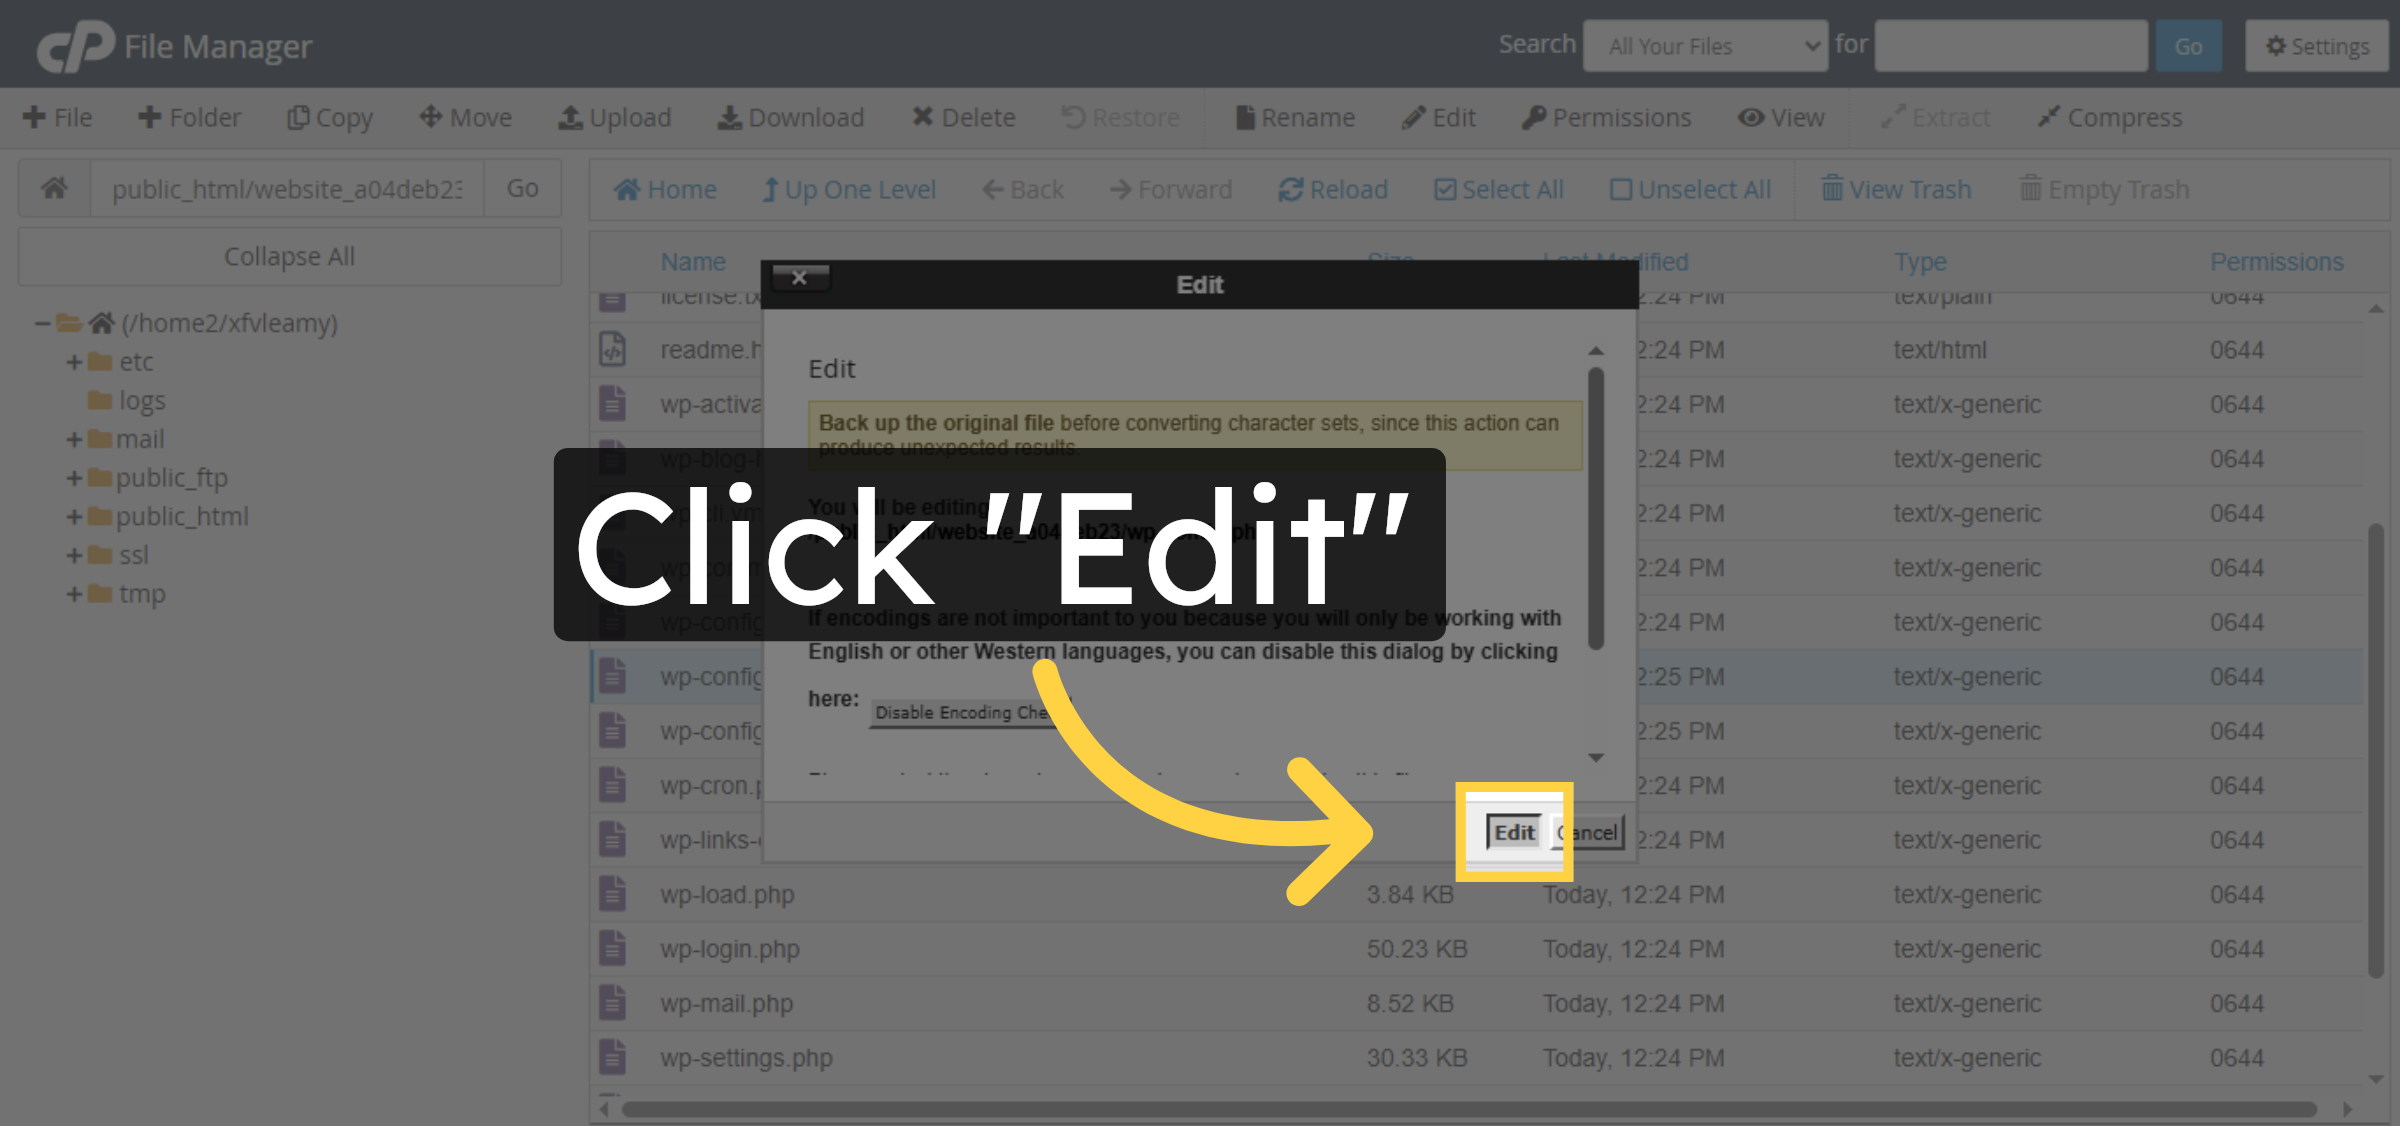
7. Confirm Edit Action
Click Edit again to confirm and proceed to the file editing interface.
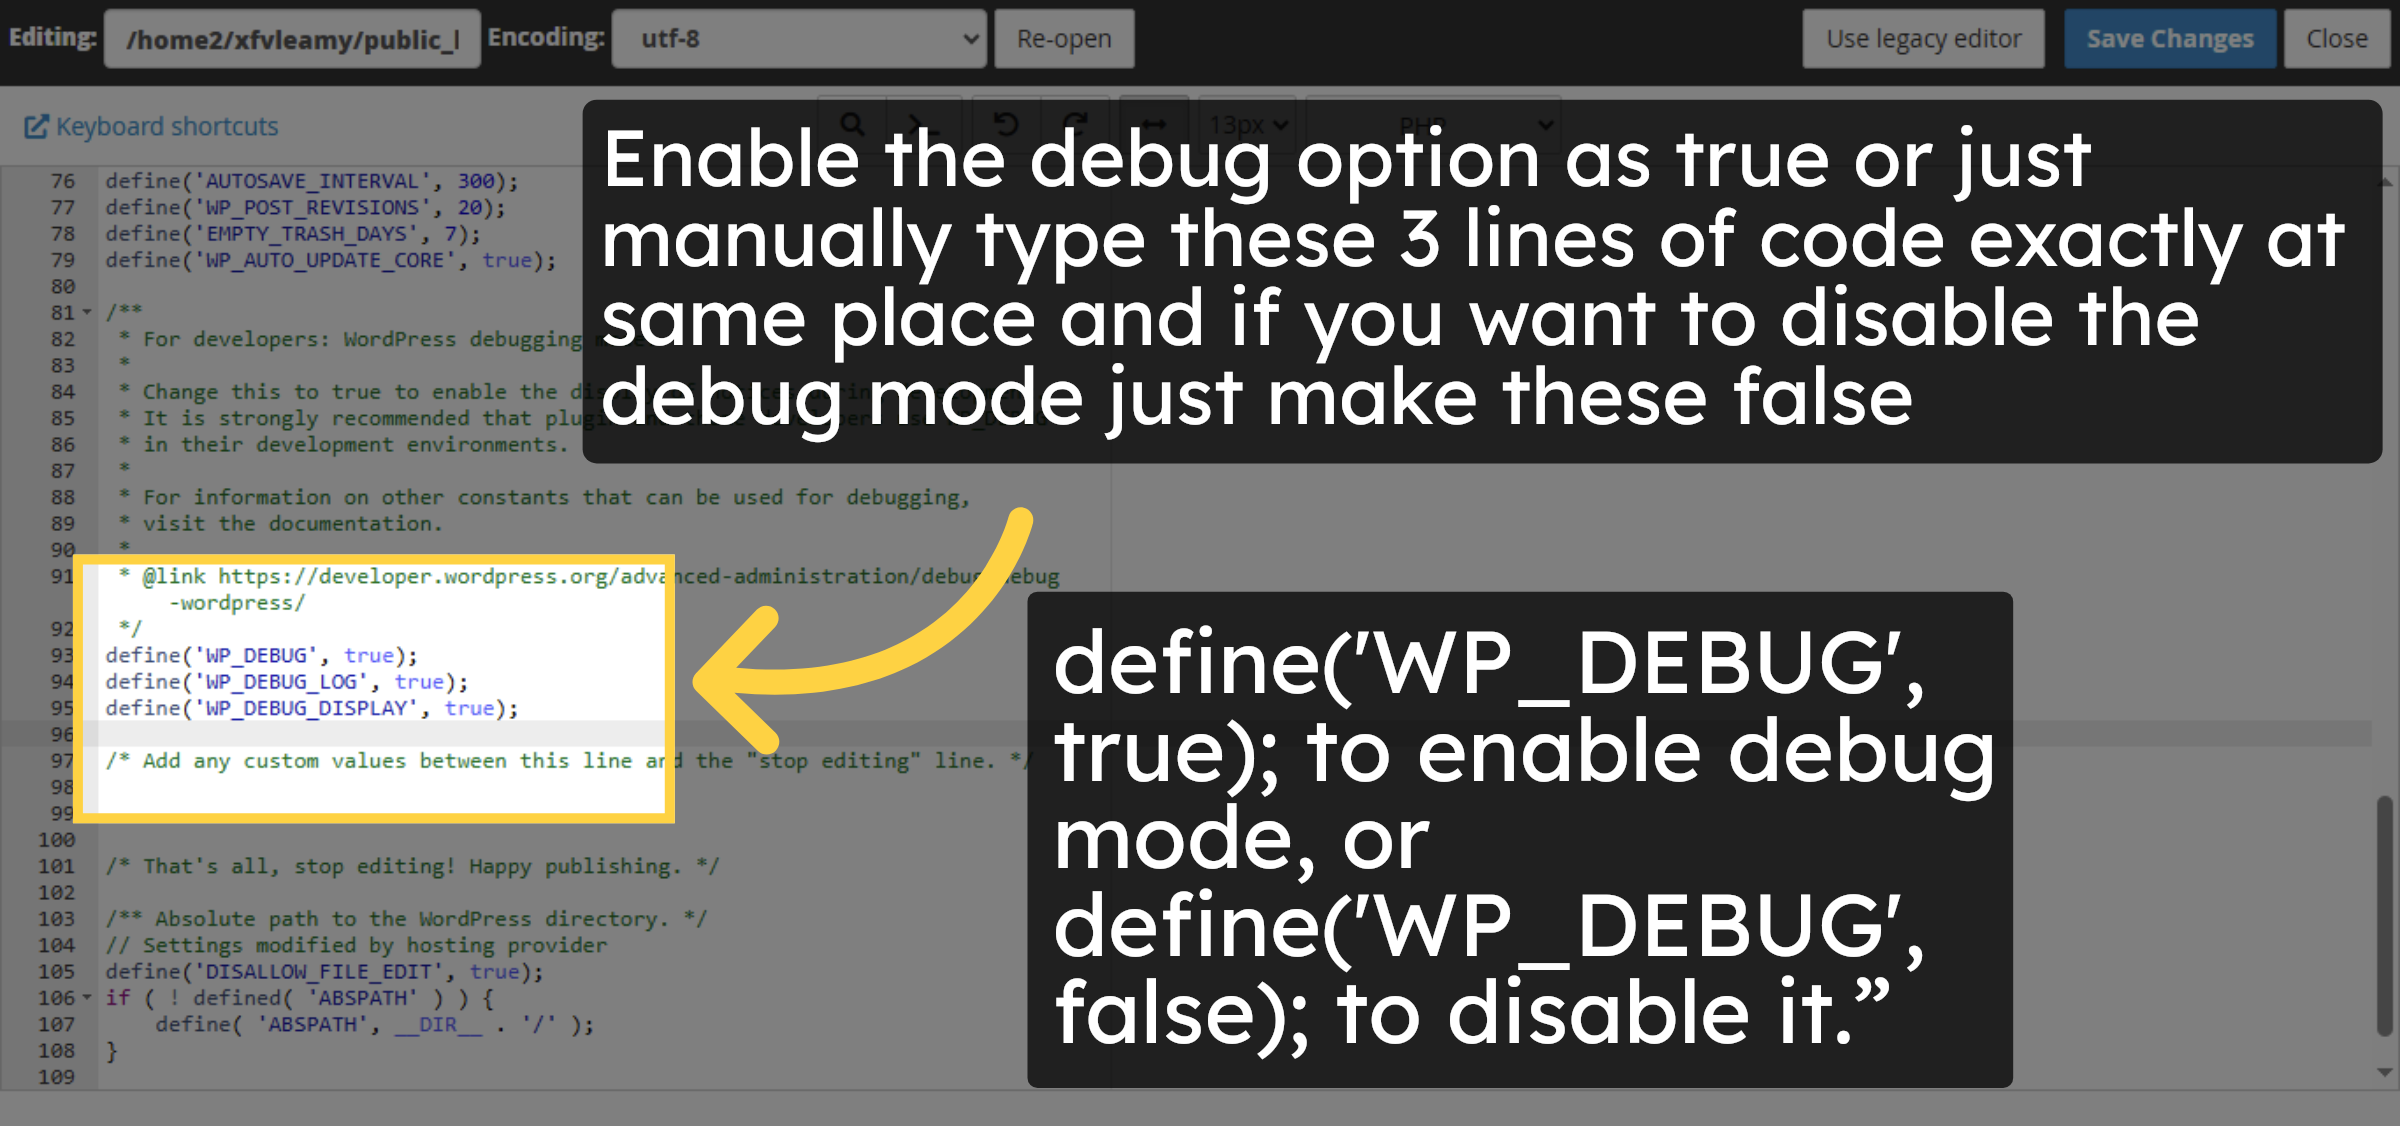
8. Verify Debug Mode Configuration
Enable the debug option as true or just manually type these 3 lines of code exactly at same place and if you want to disable the debug mode just make these false.


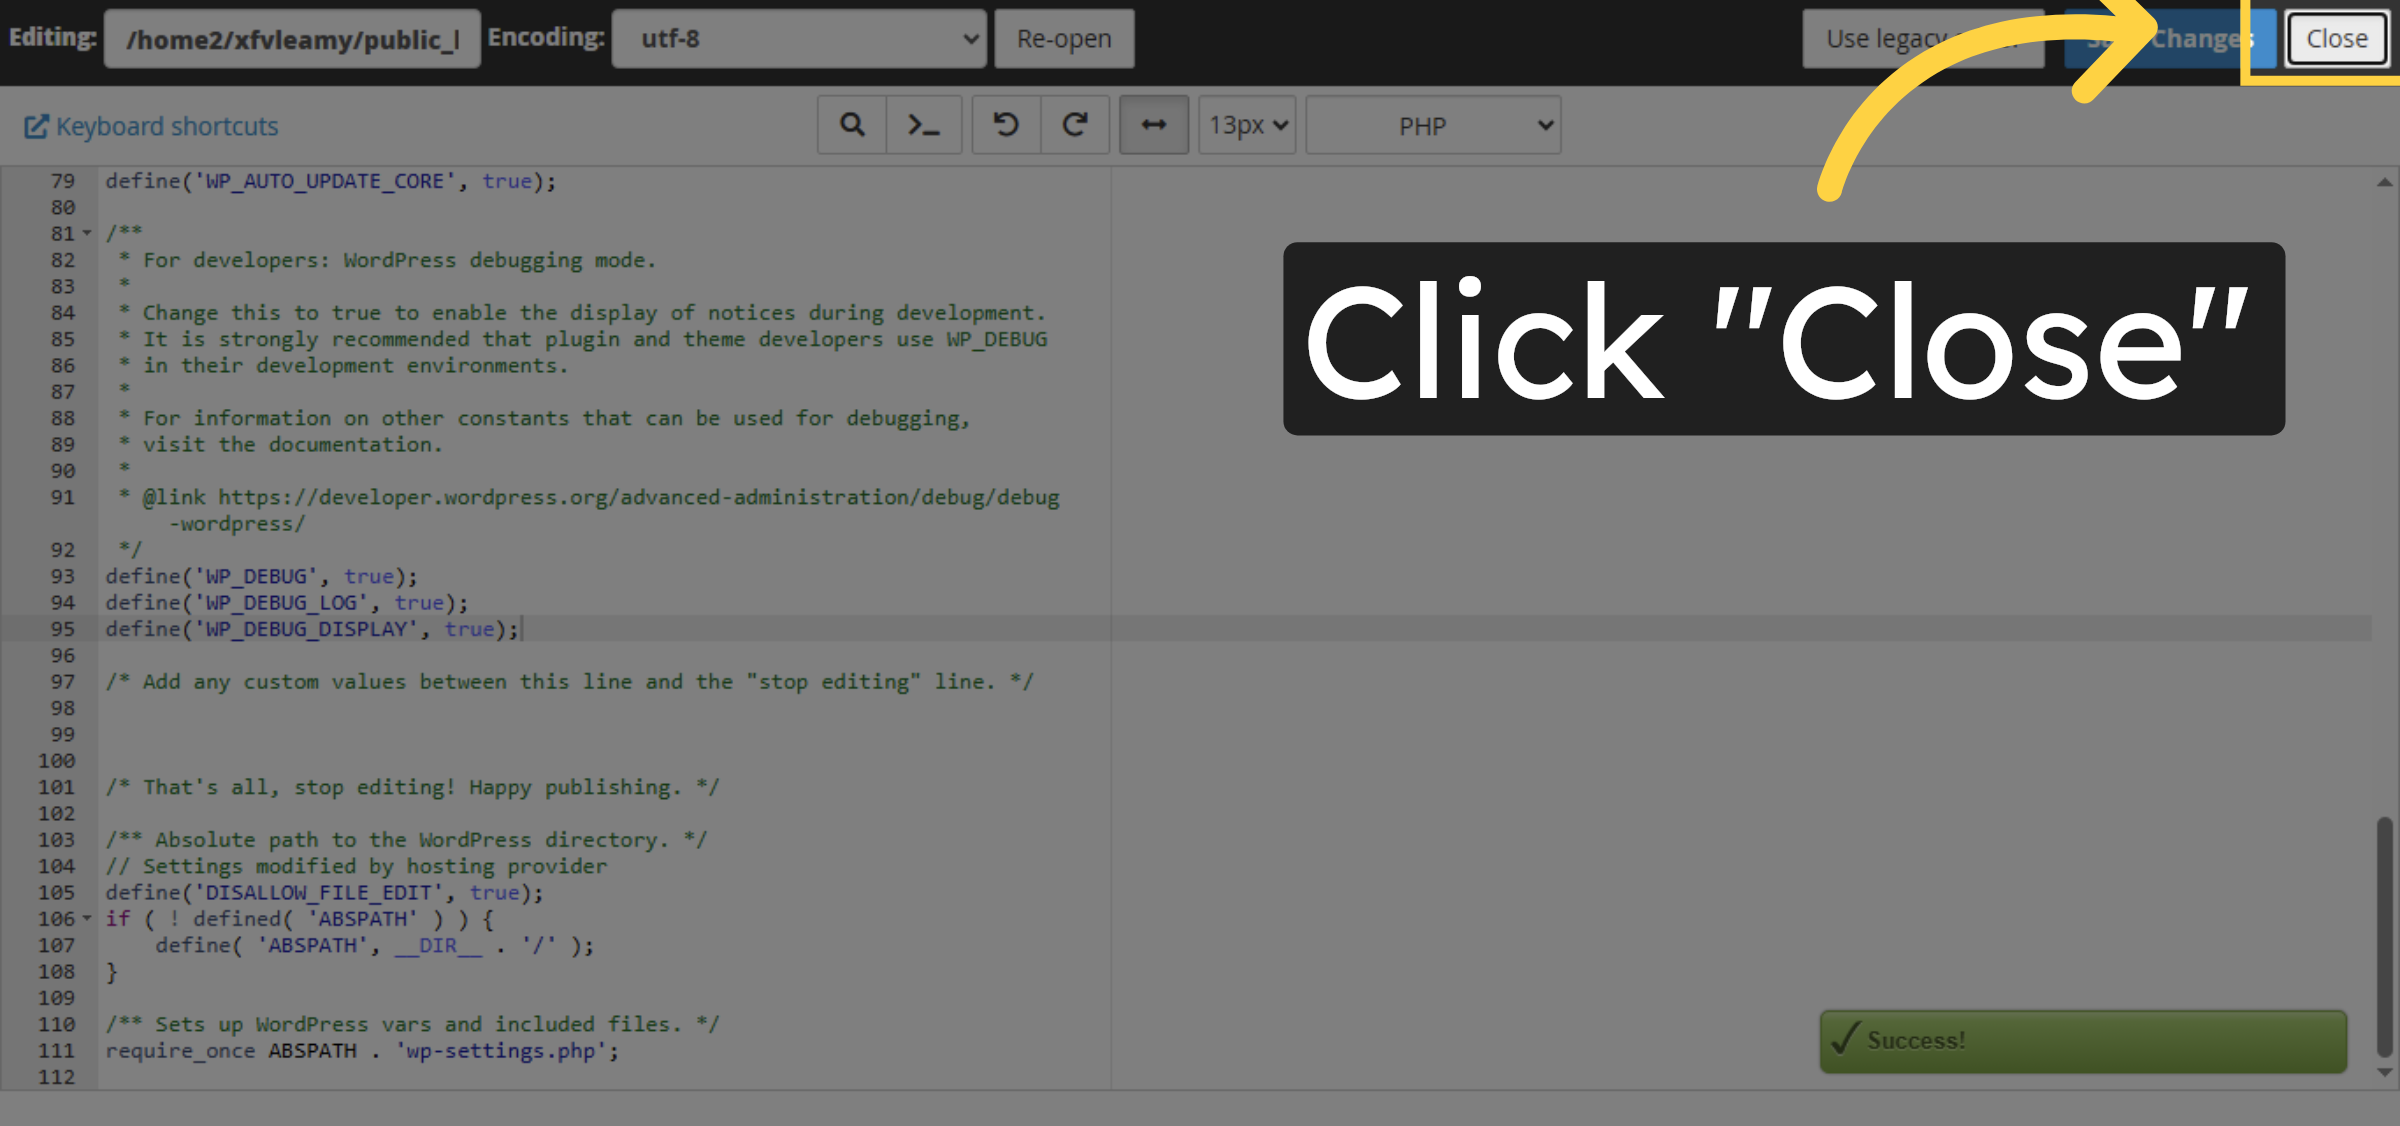
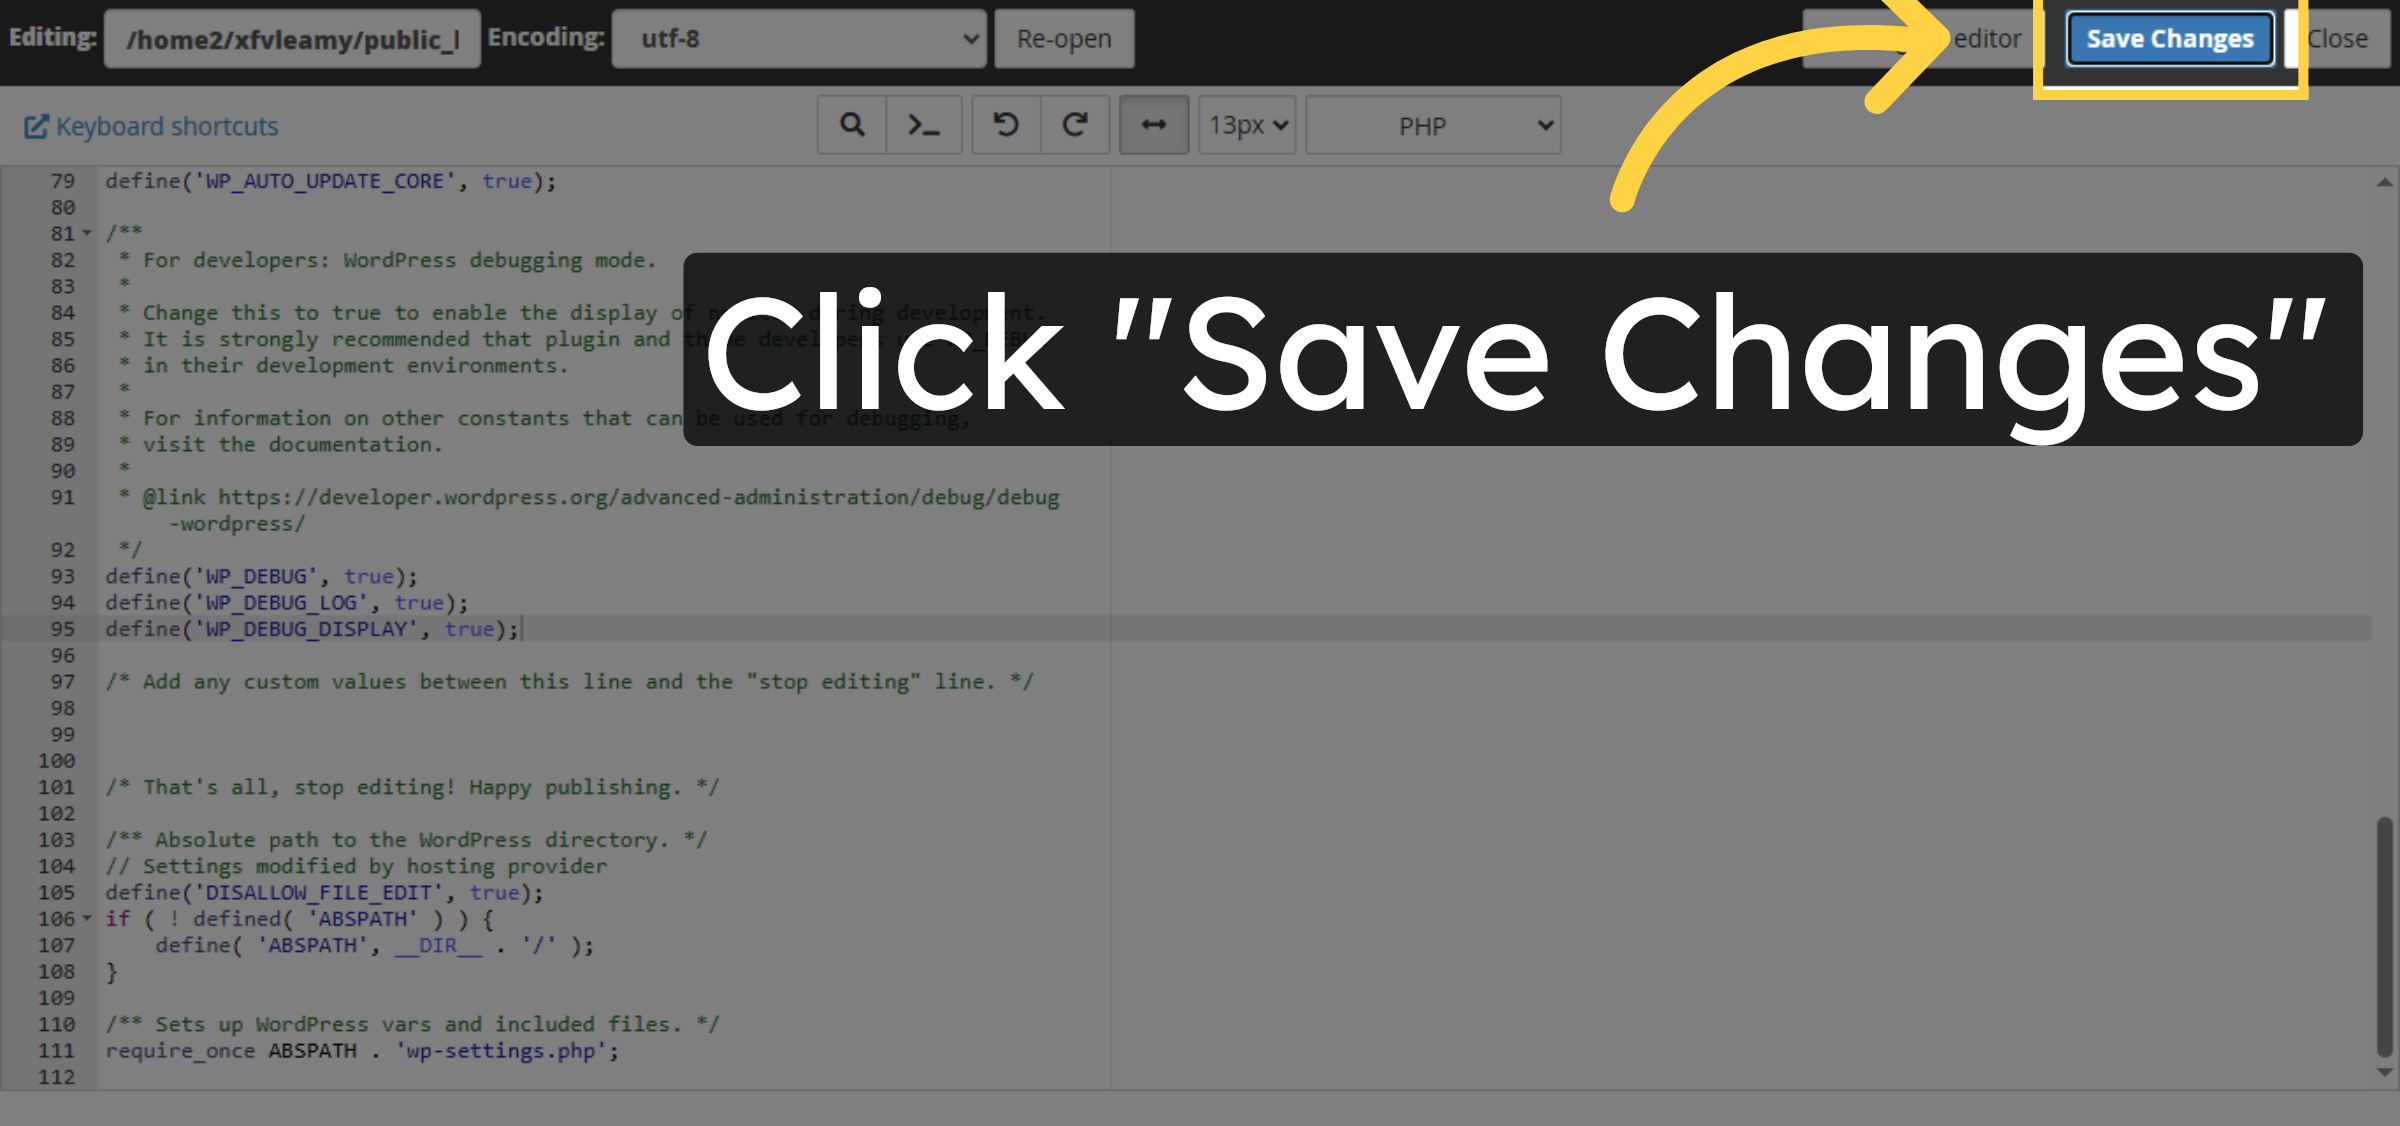
9. Save Configuration Changes
Click Save Changes to apply your edits to the wp-config.php file and update the debug mode setting.
10. Close File Editor
Click Close to exit the file editor and return to the file manager interface.