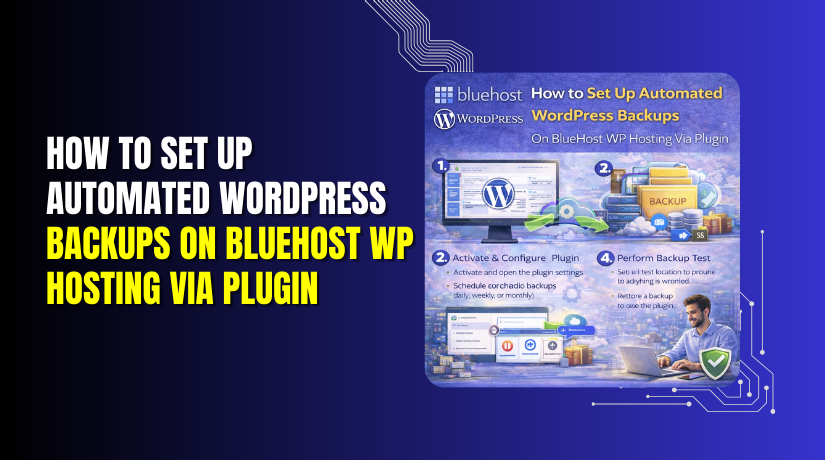
How to Set Up Automated WordPress Backups On BlueHost WP Hosting Via Plugin
Introduction
Scheduling automated backups is a critical step in protecting your WordPress website from unexpected data loss, security issues, or plugin and theme conflicts. Automated backups ensure that your site is regularly saved without requiring manual effort, allowing you to restore your website quickly if something goes wrong. This guide walks you through configuring scheduled backups on Bluehost using the UpdraftPlus plugin. It covers installing and activating the plugin, setting backup frequencies for files and databases, selecting the number of backups to retain, and enabling email notifications. By following these steps, you can ensure your website is backed up consistently and efficiently. Automated backups provide peace of mind and are an essential part of maintaining a stable, secure, and well-managed WordPress site.
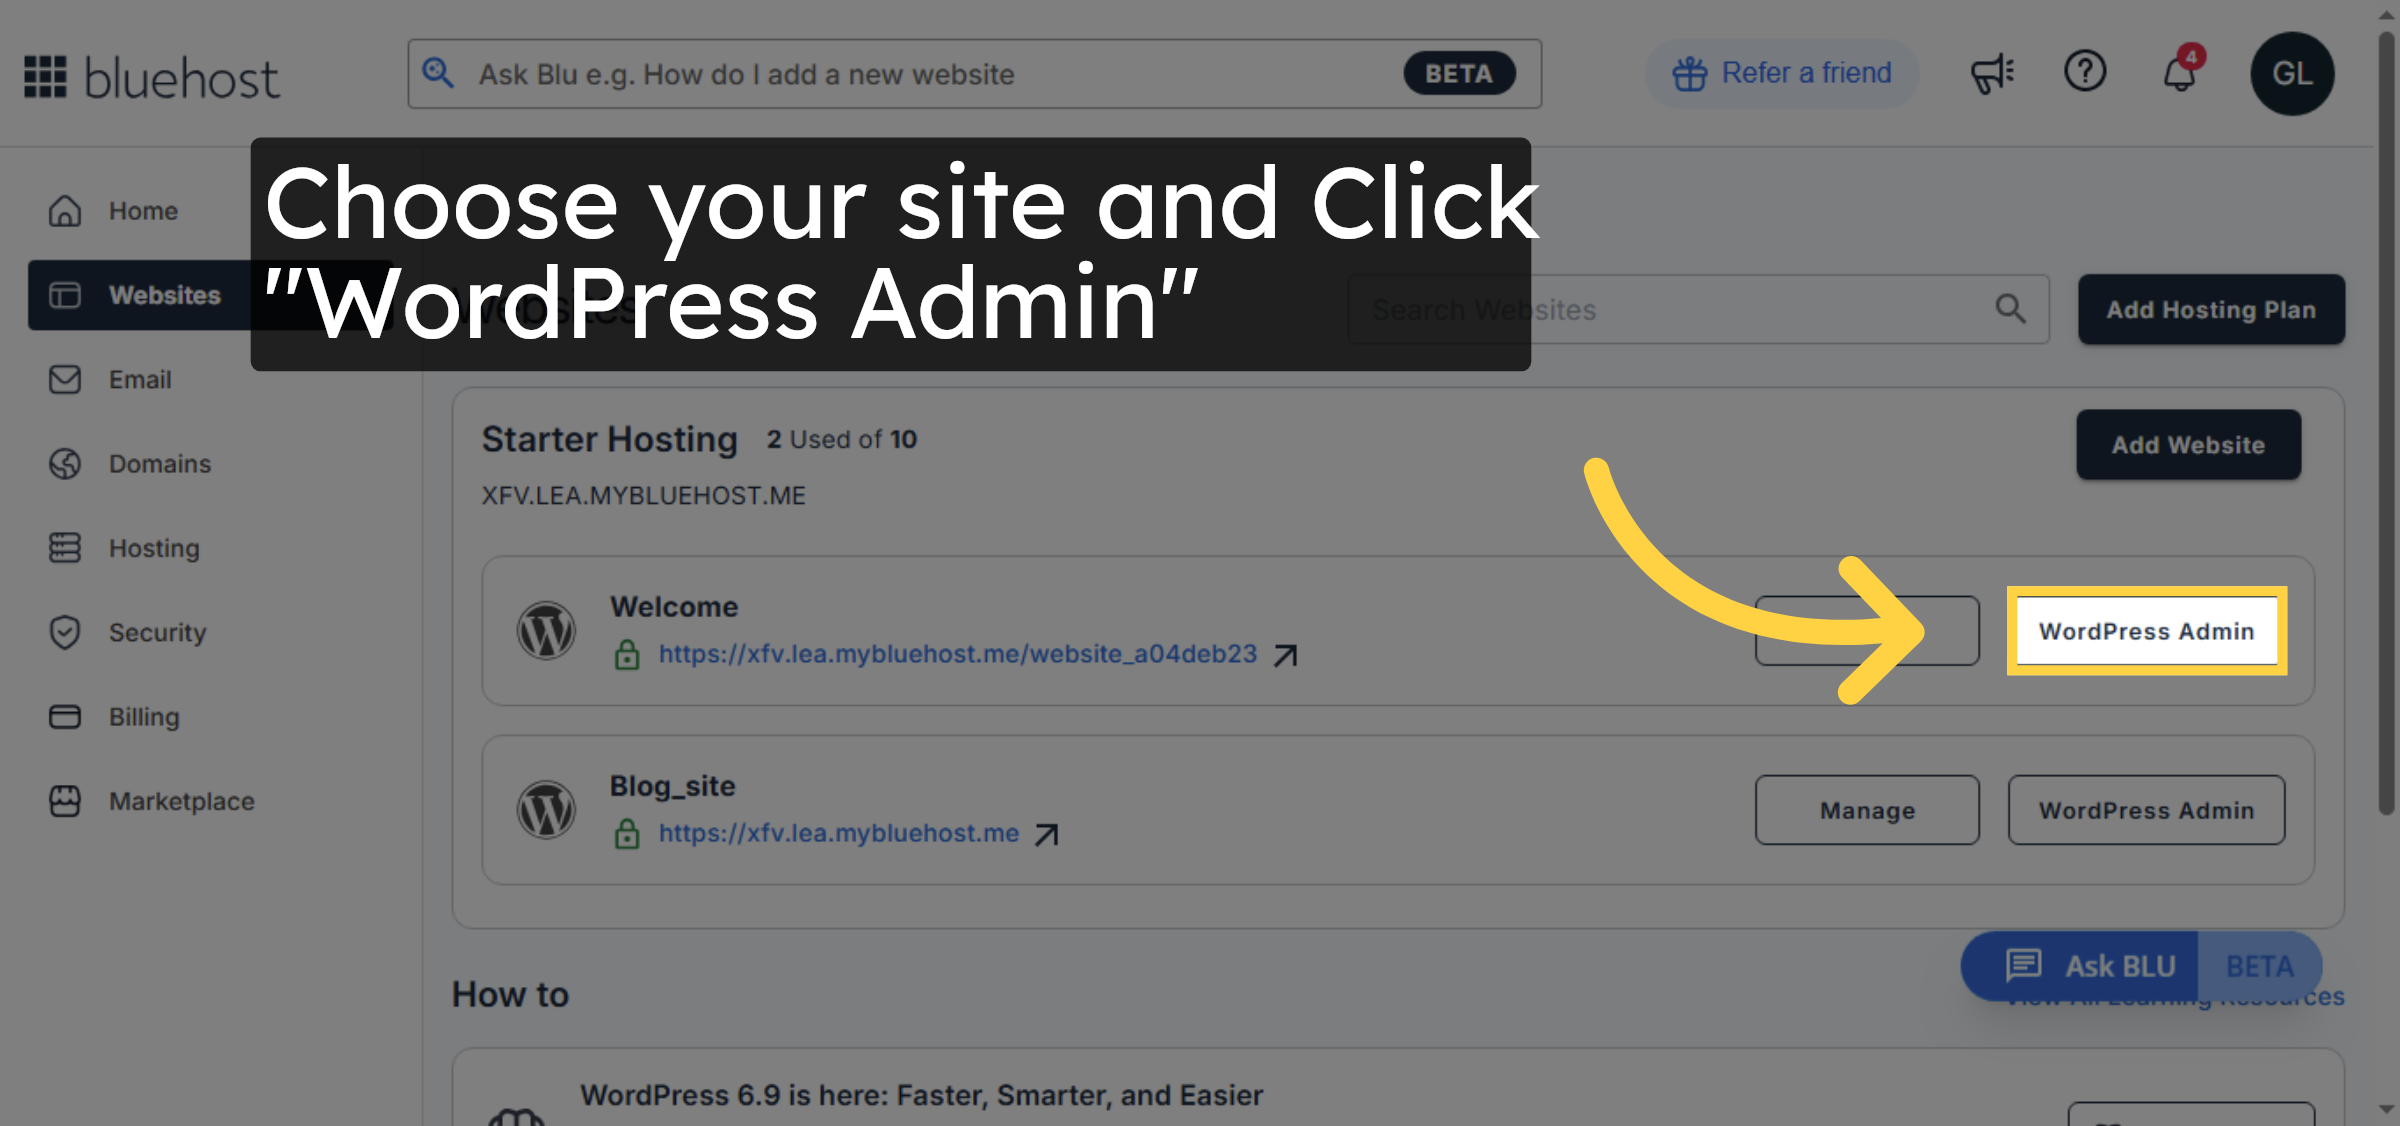
1. Navigate to Websites Section

2. Open WordPress Admin Panel
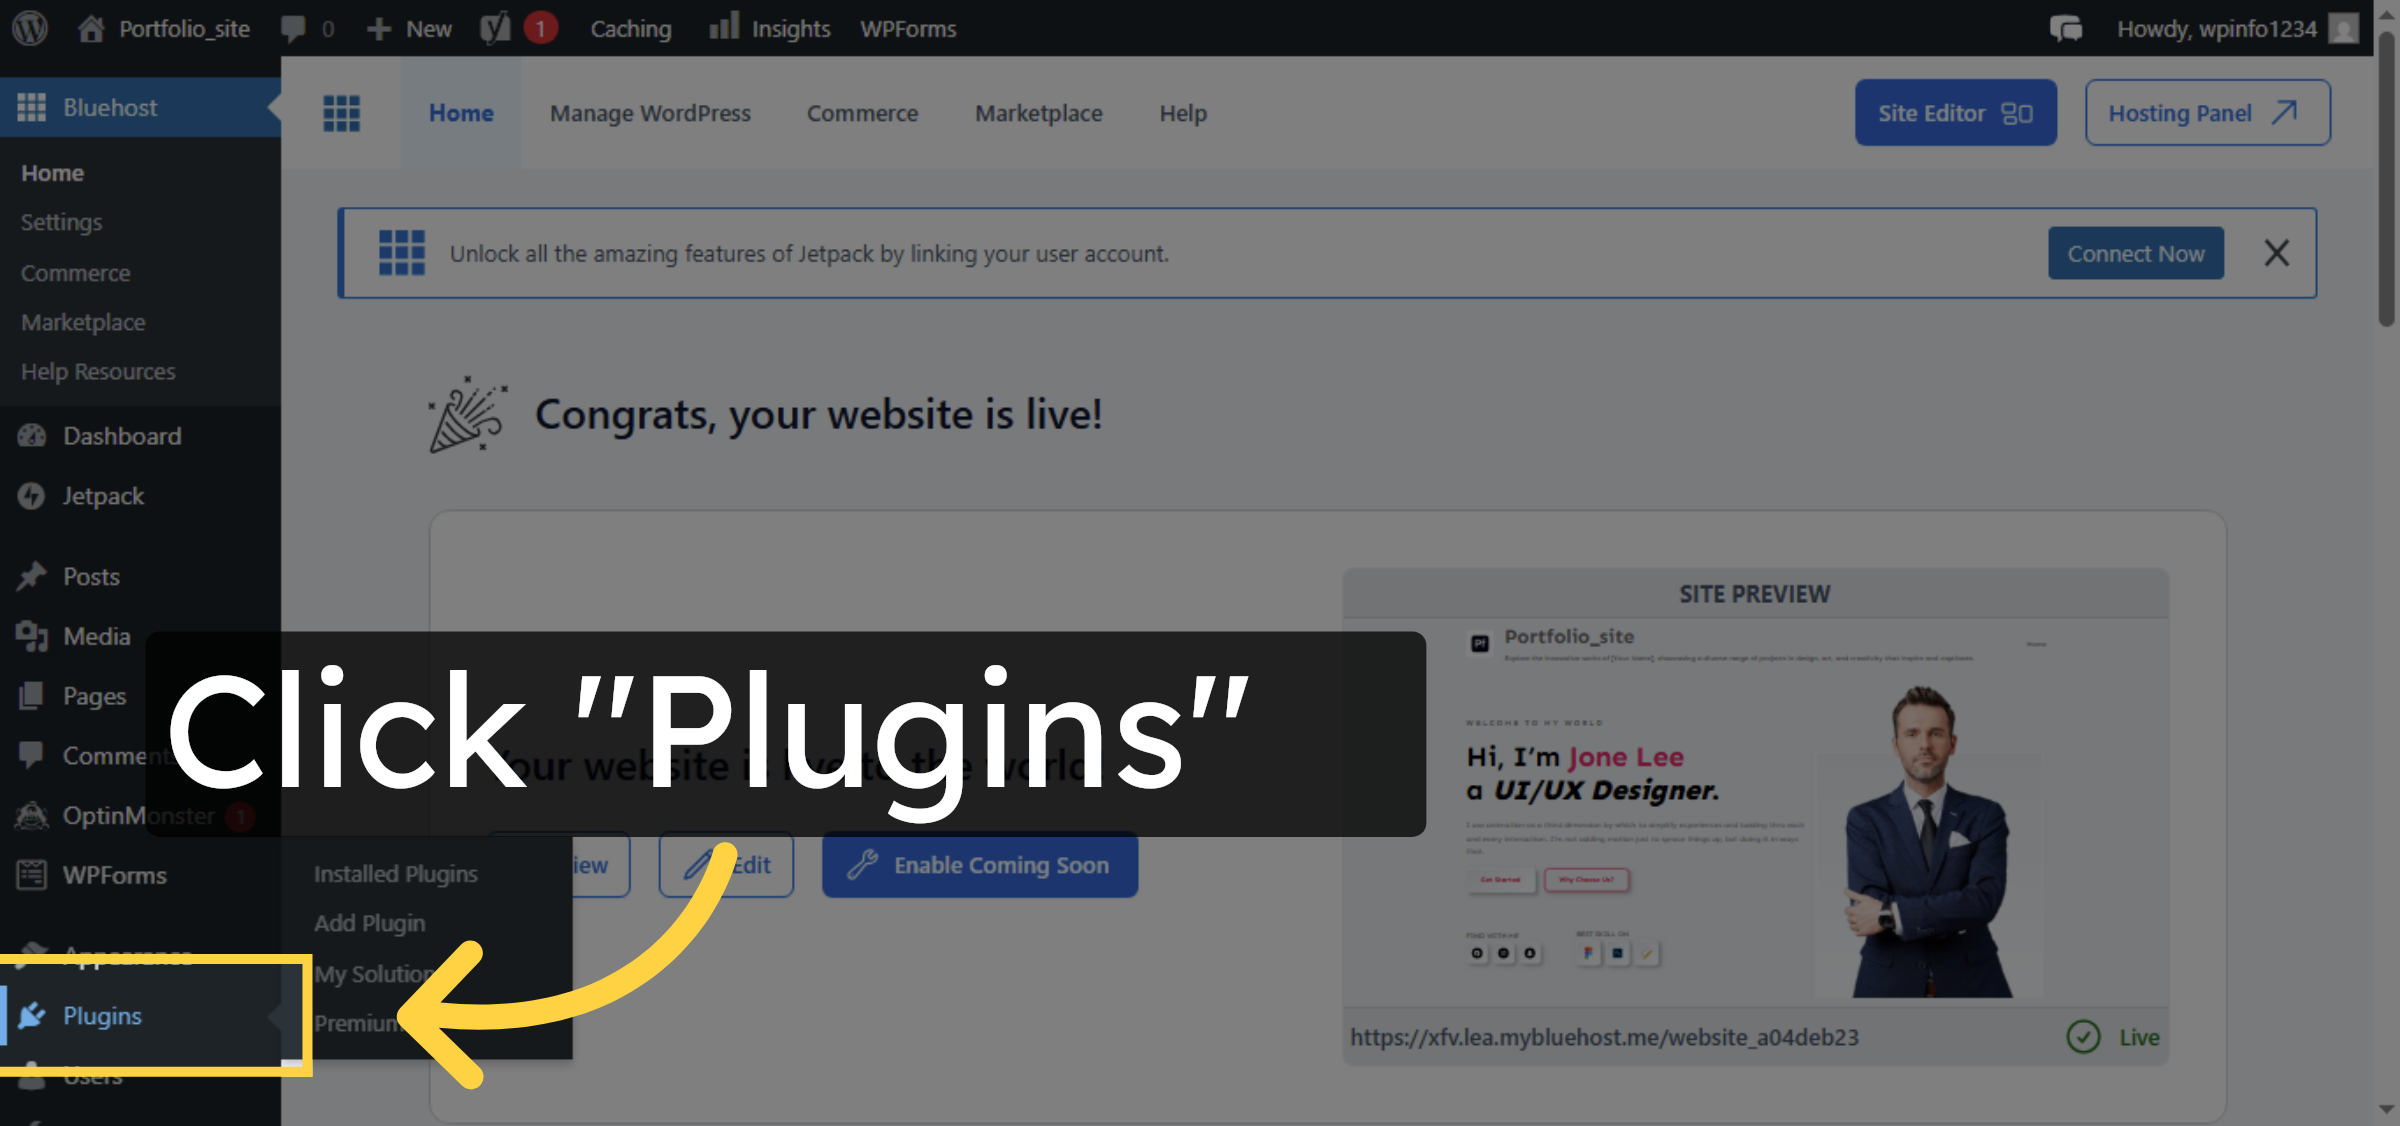
3. Access Plugins Menu
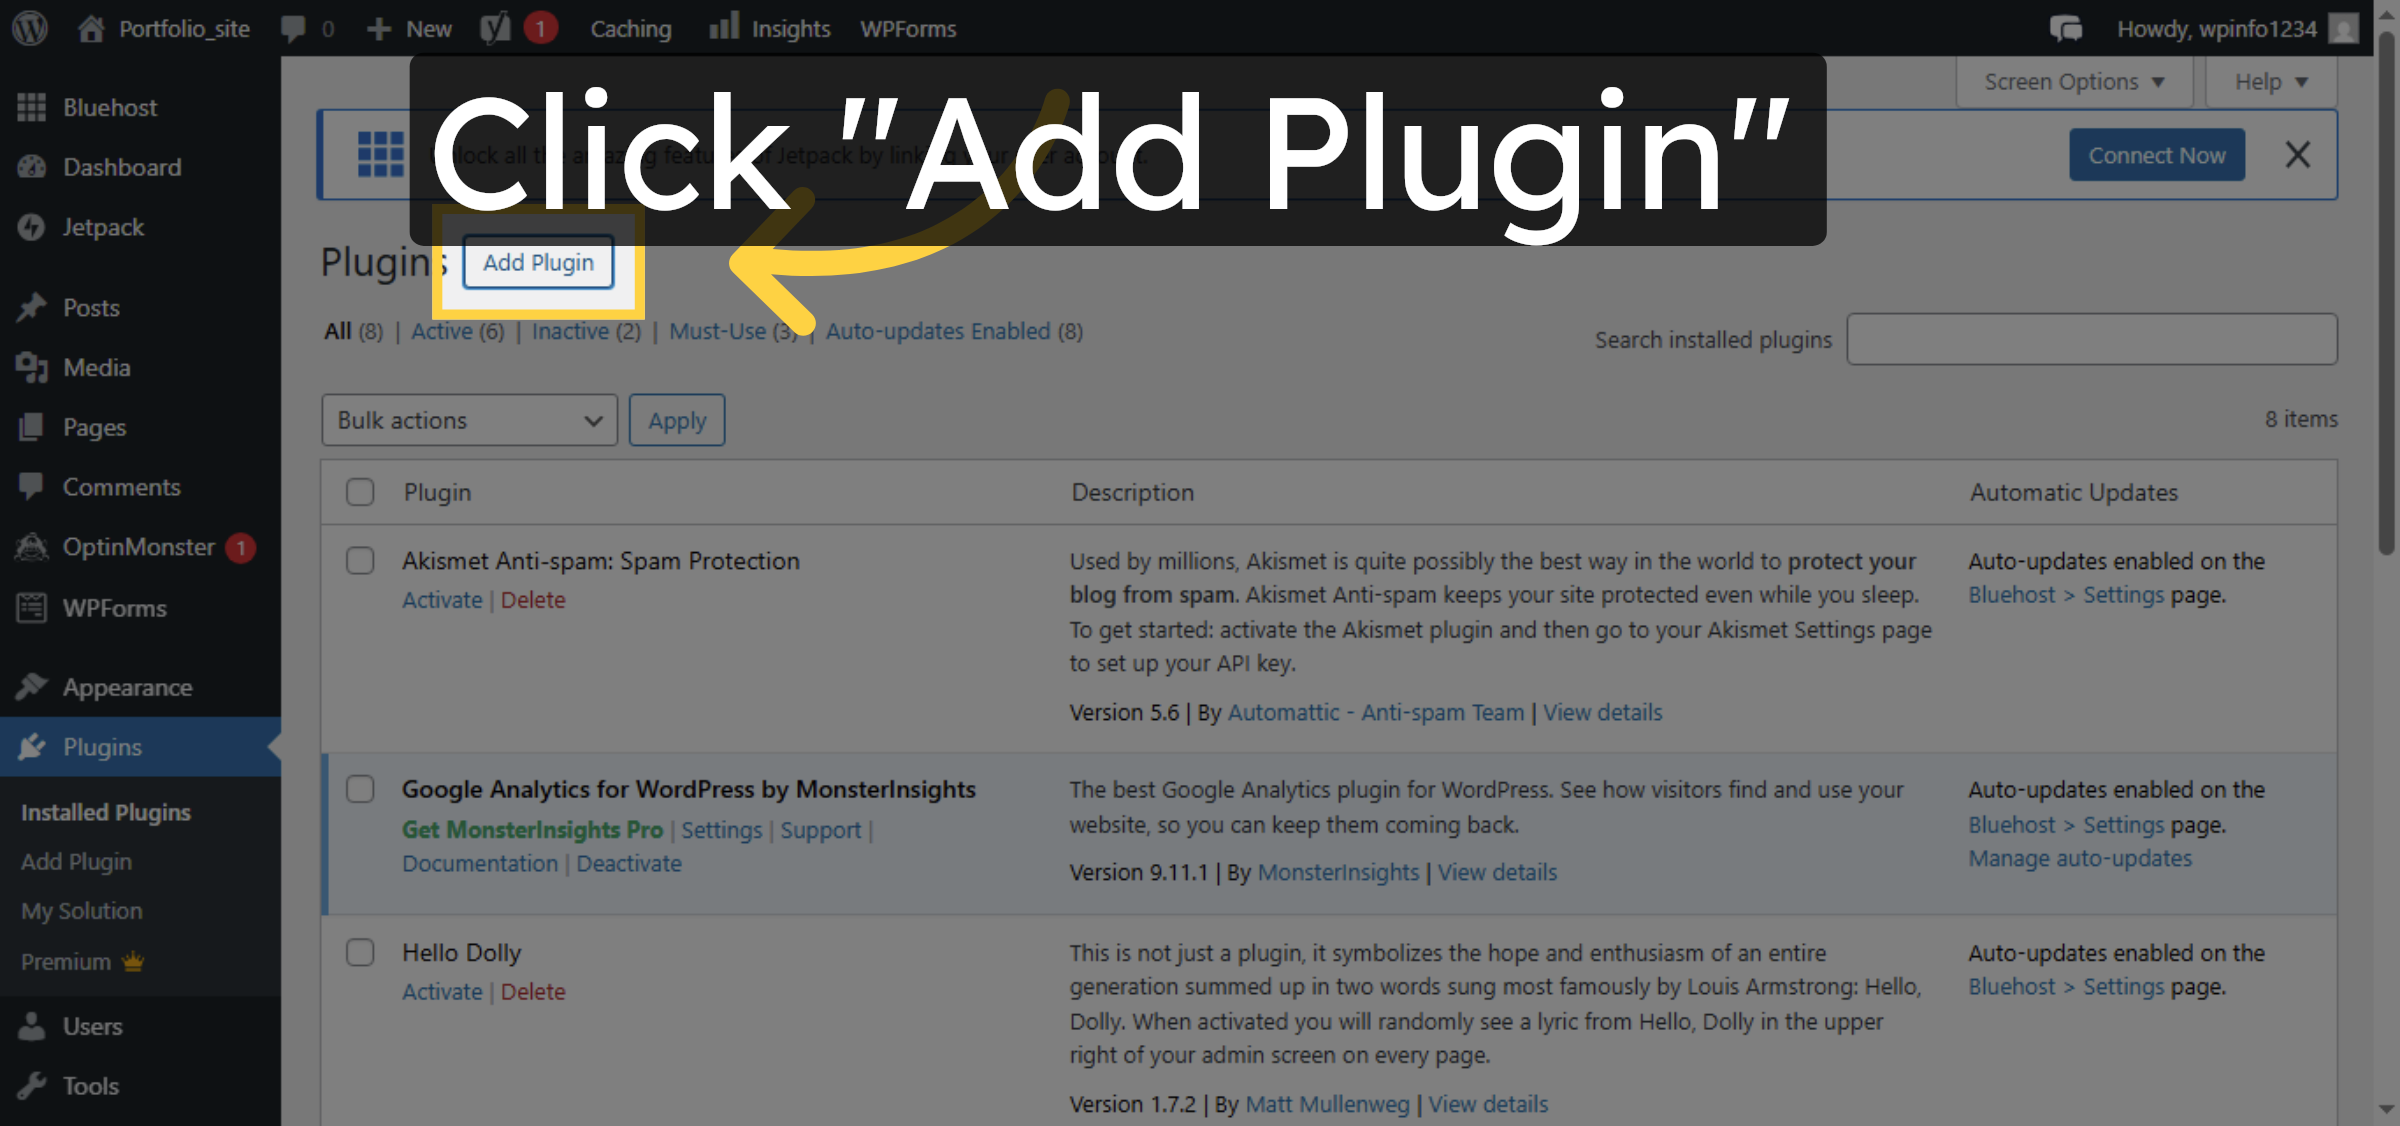
4. Add New Plugin
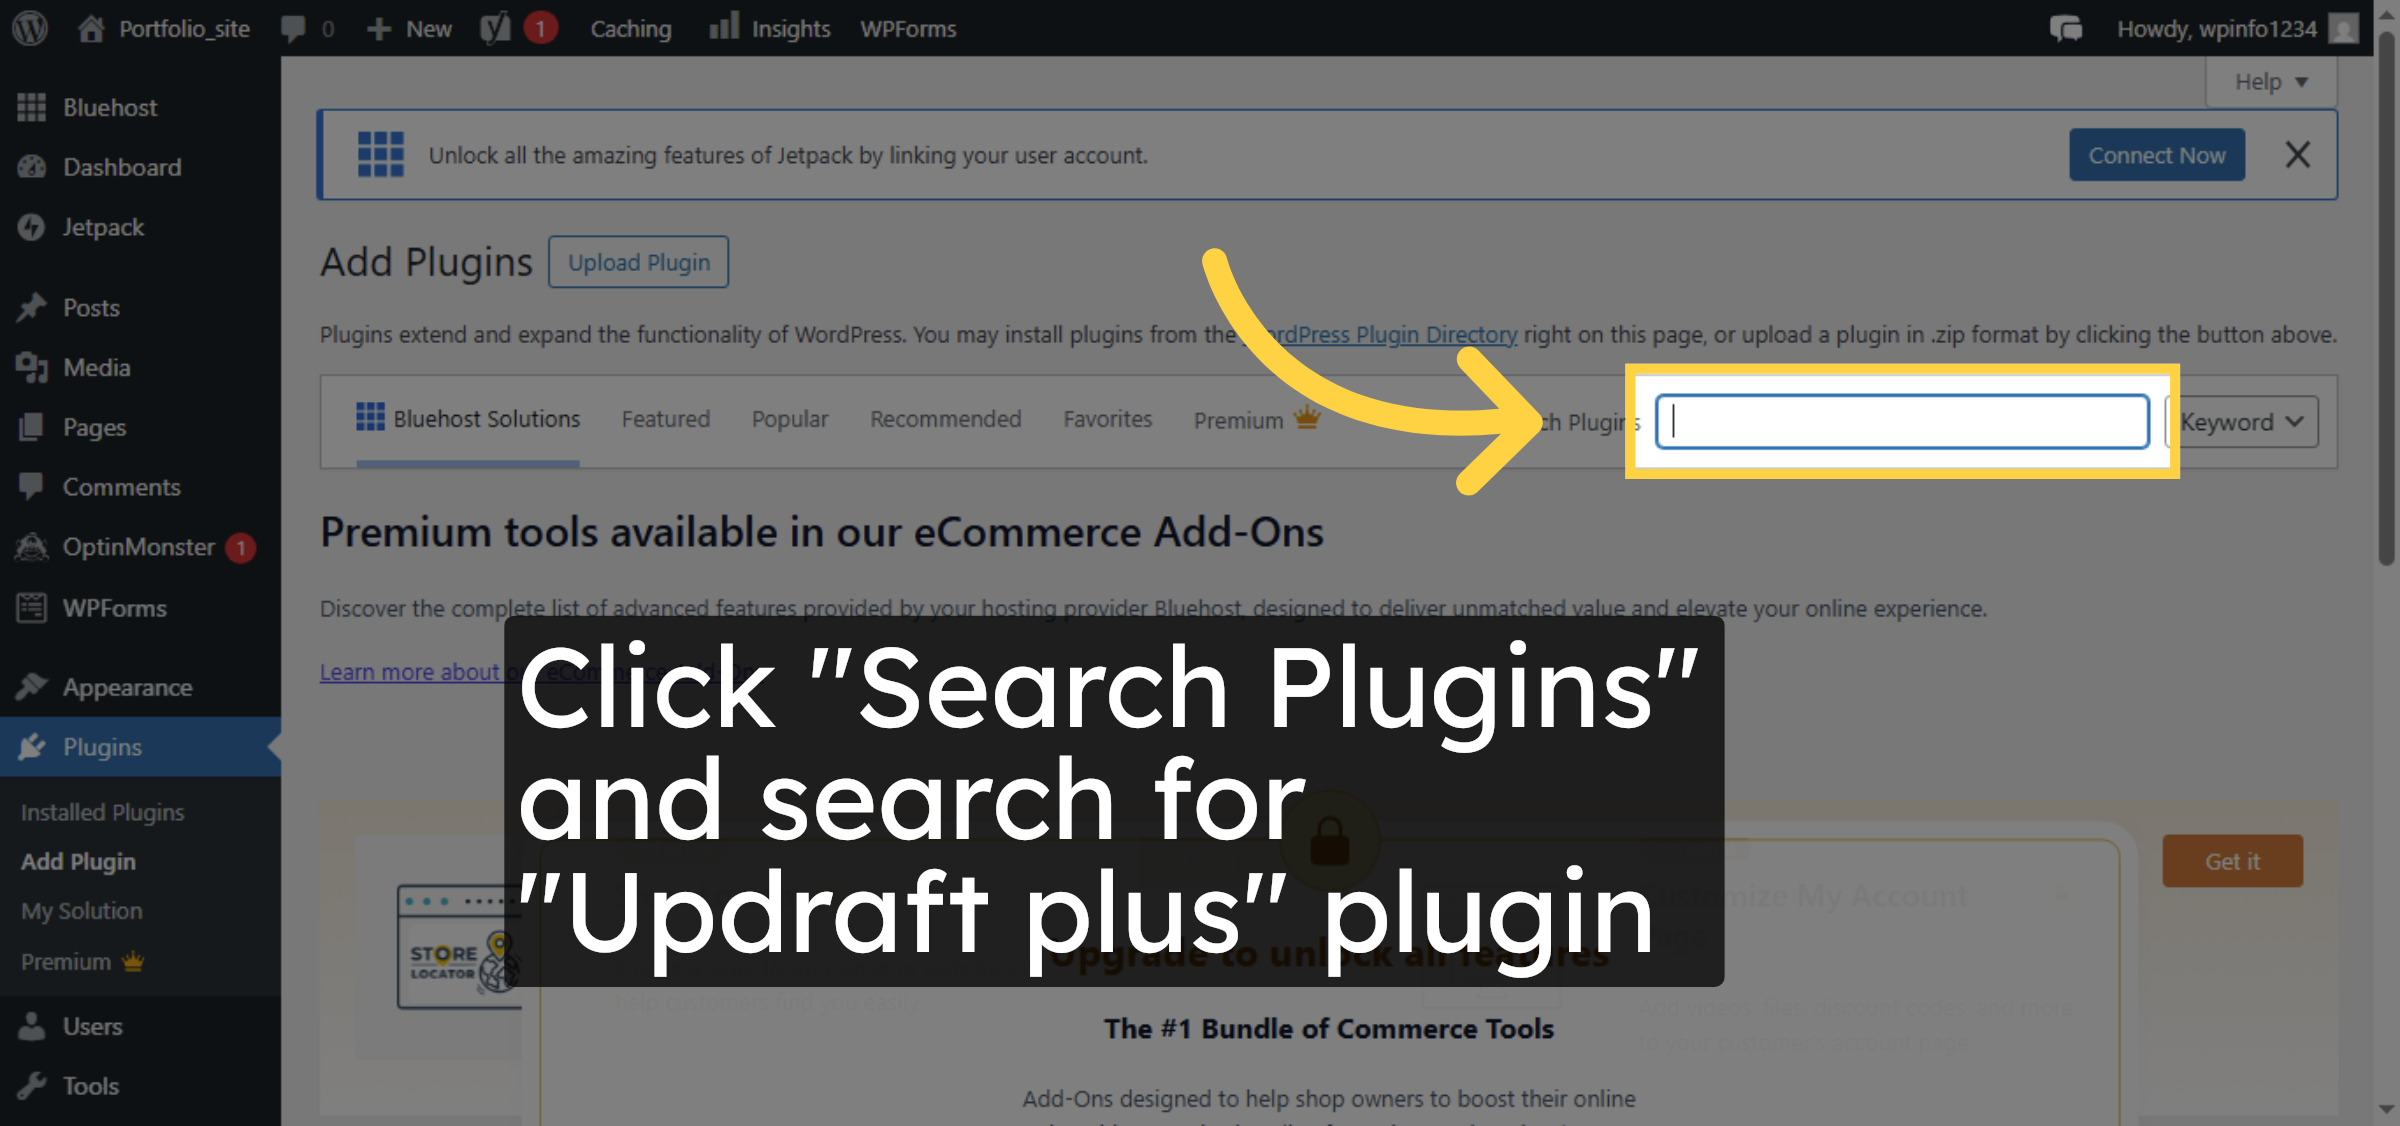
5. Search for Plugins
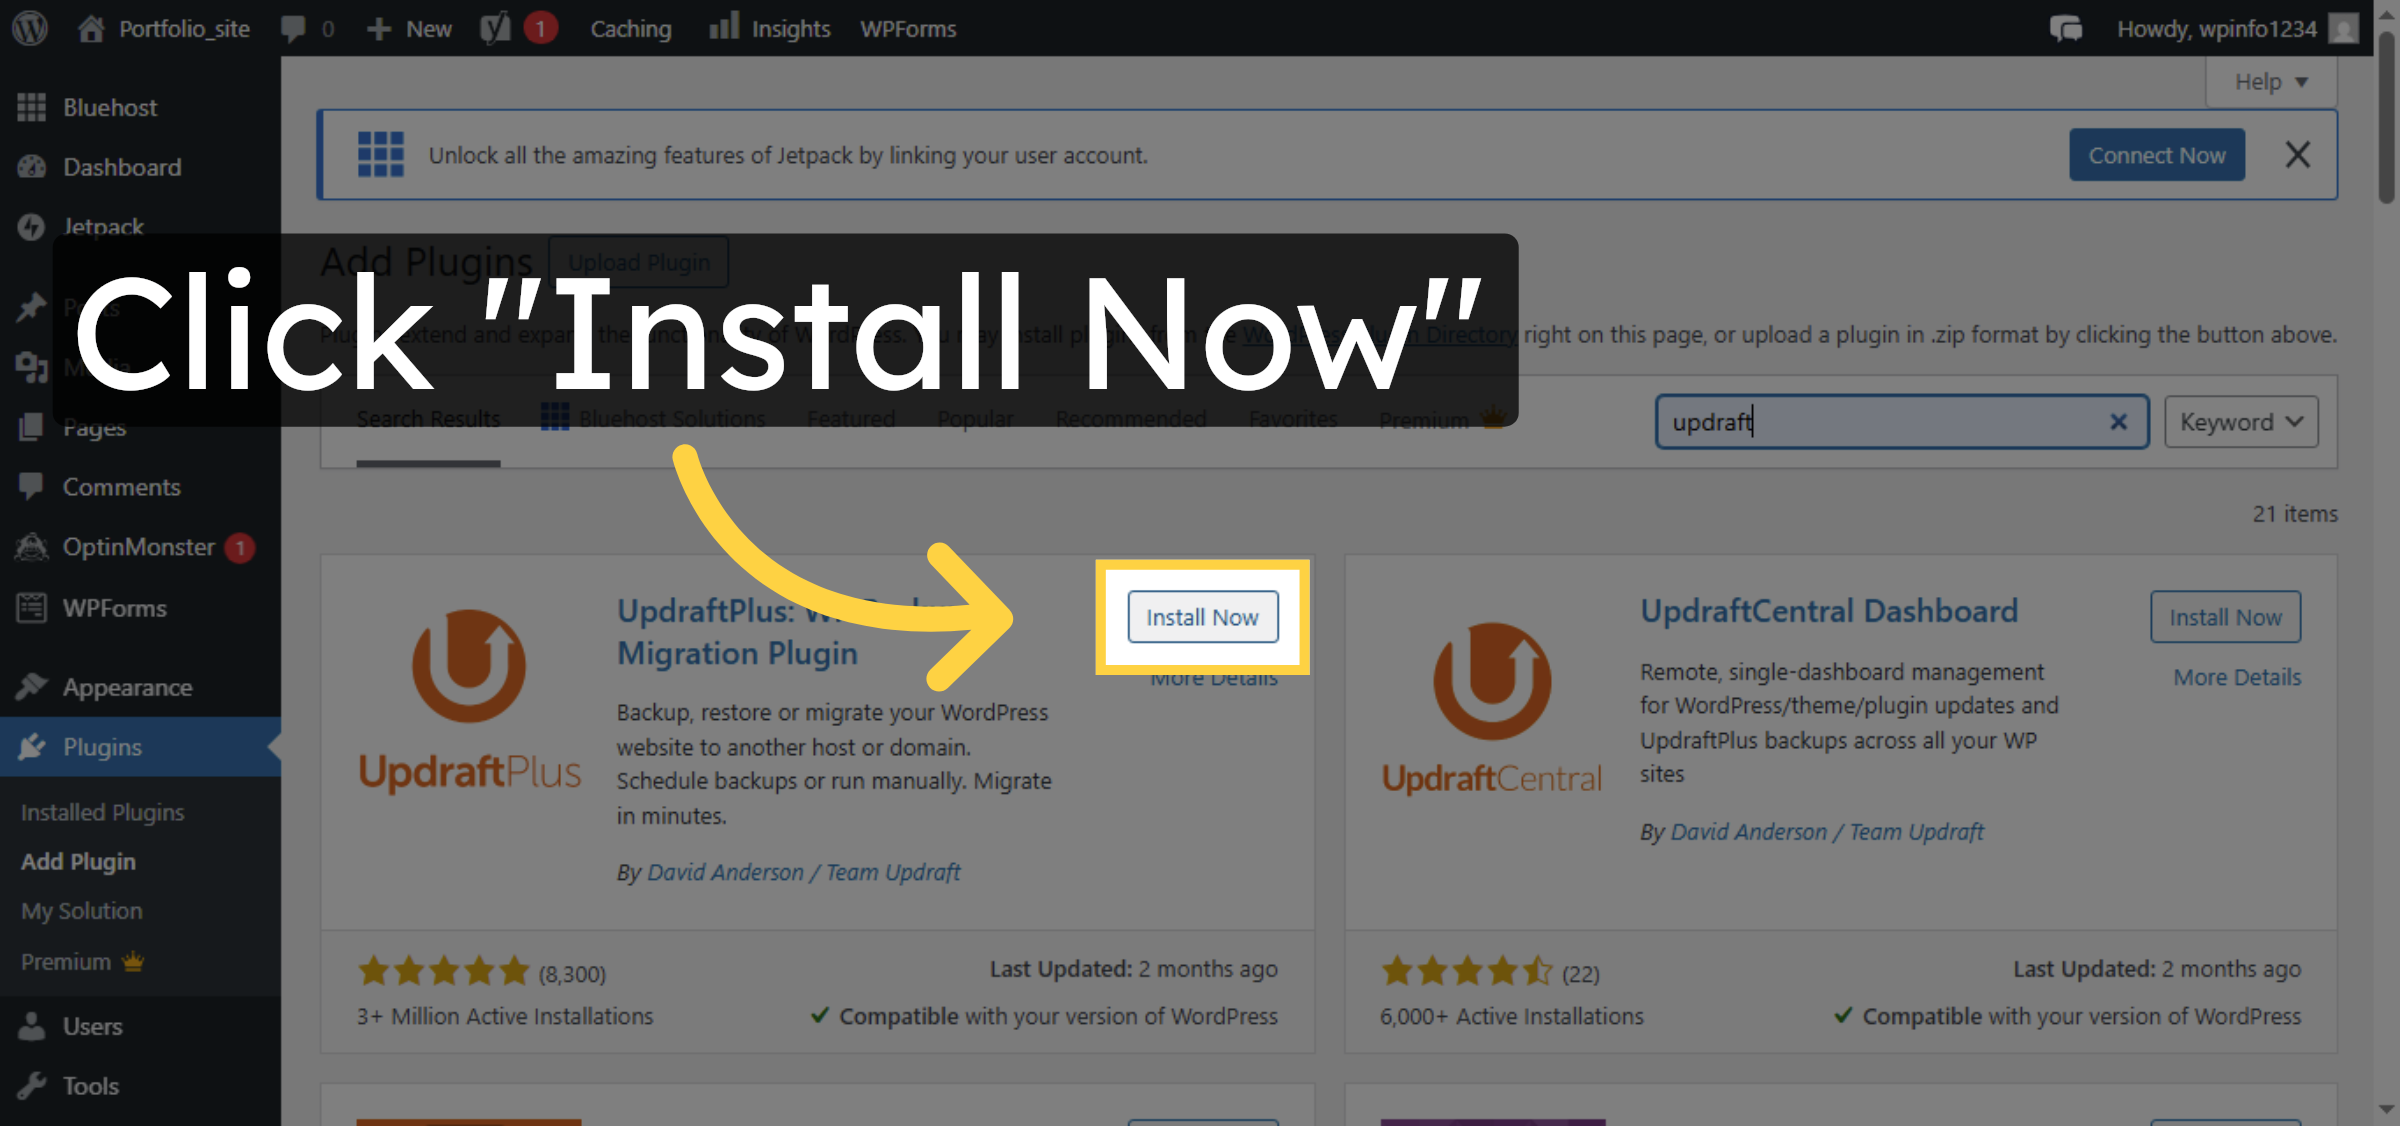
6. Install Backup Plugin
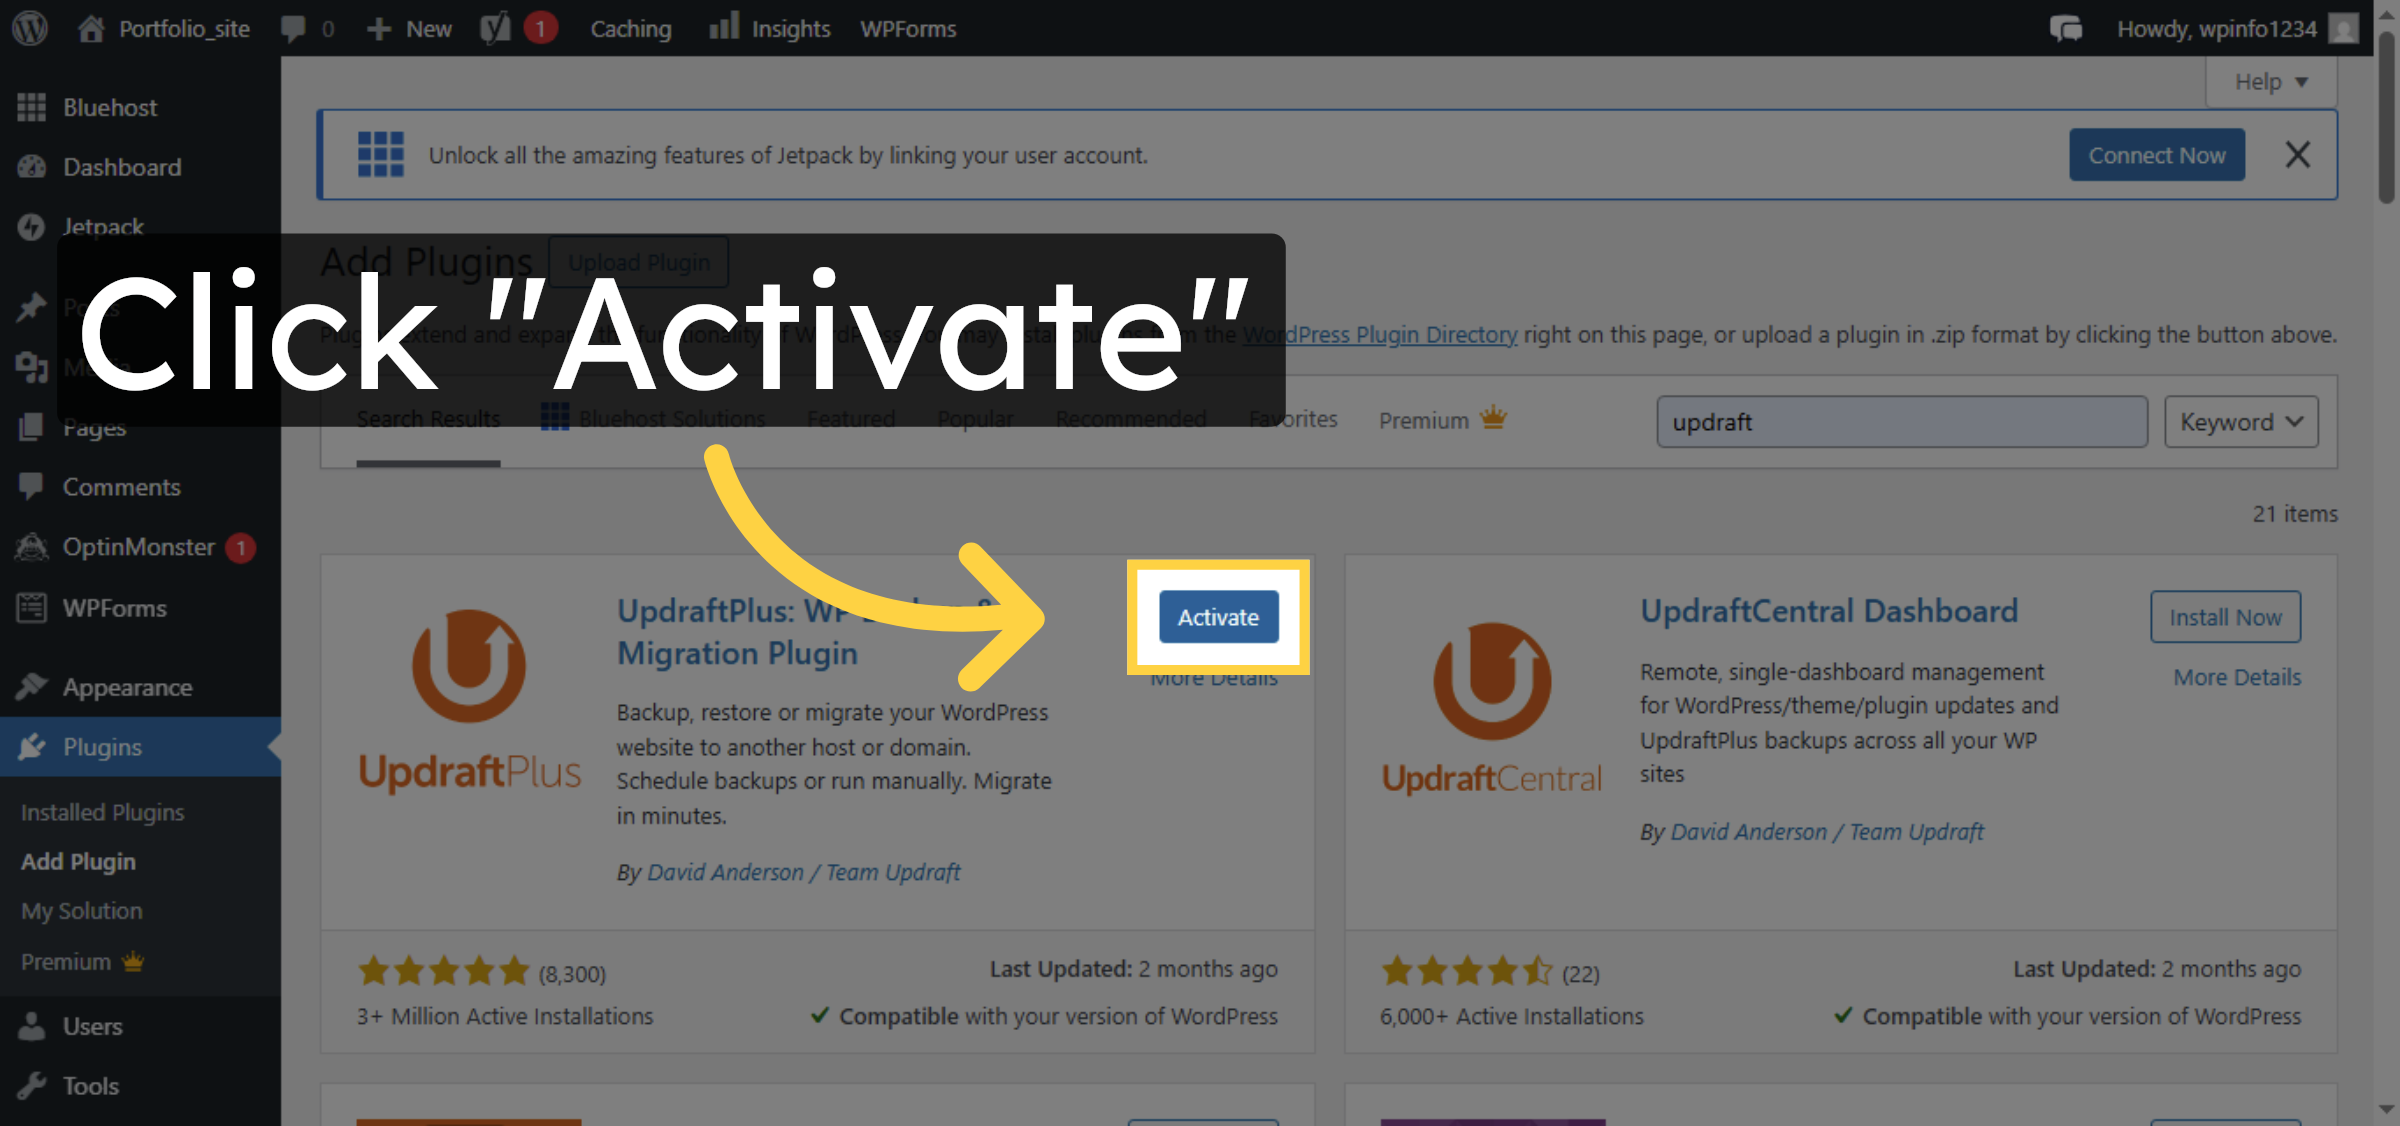
7. Activate Installed Plugin
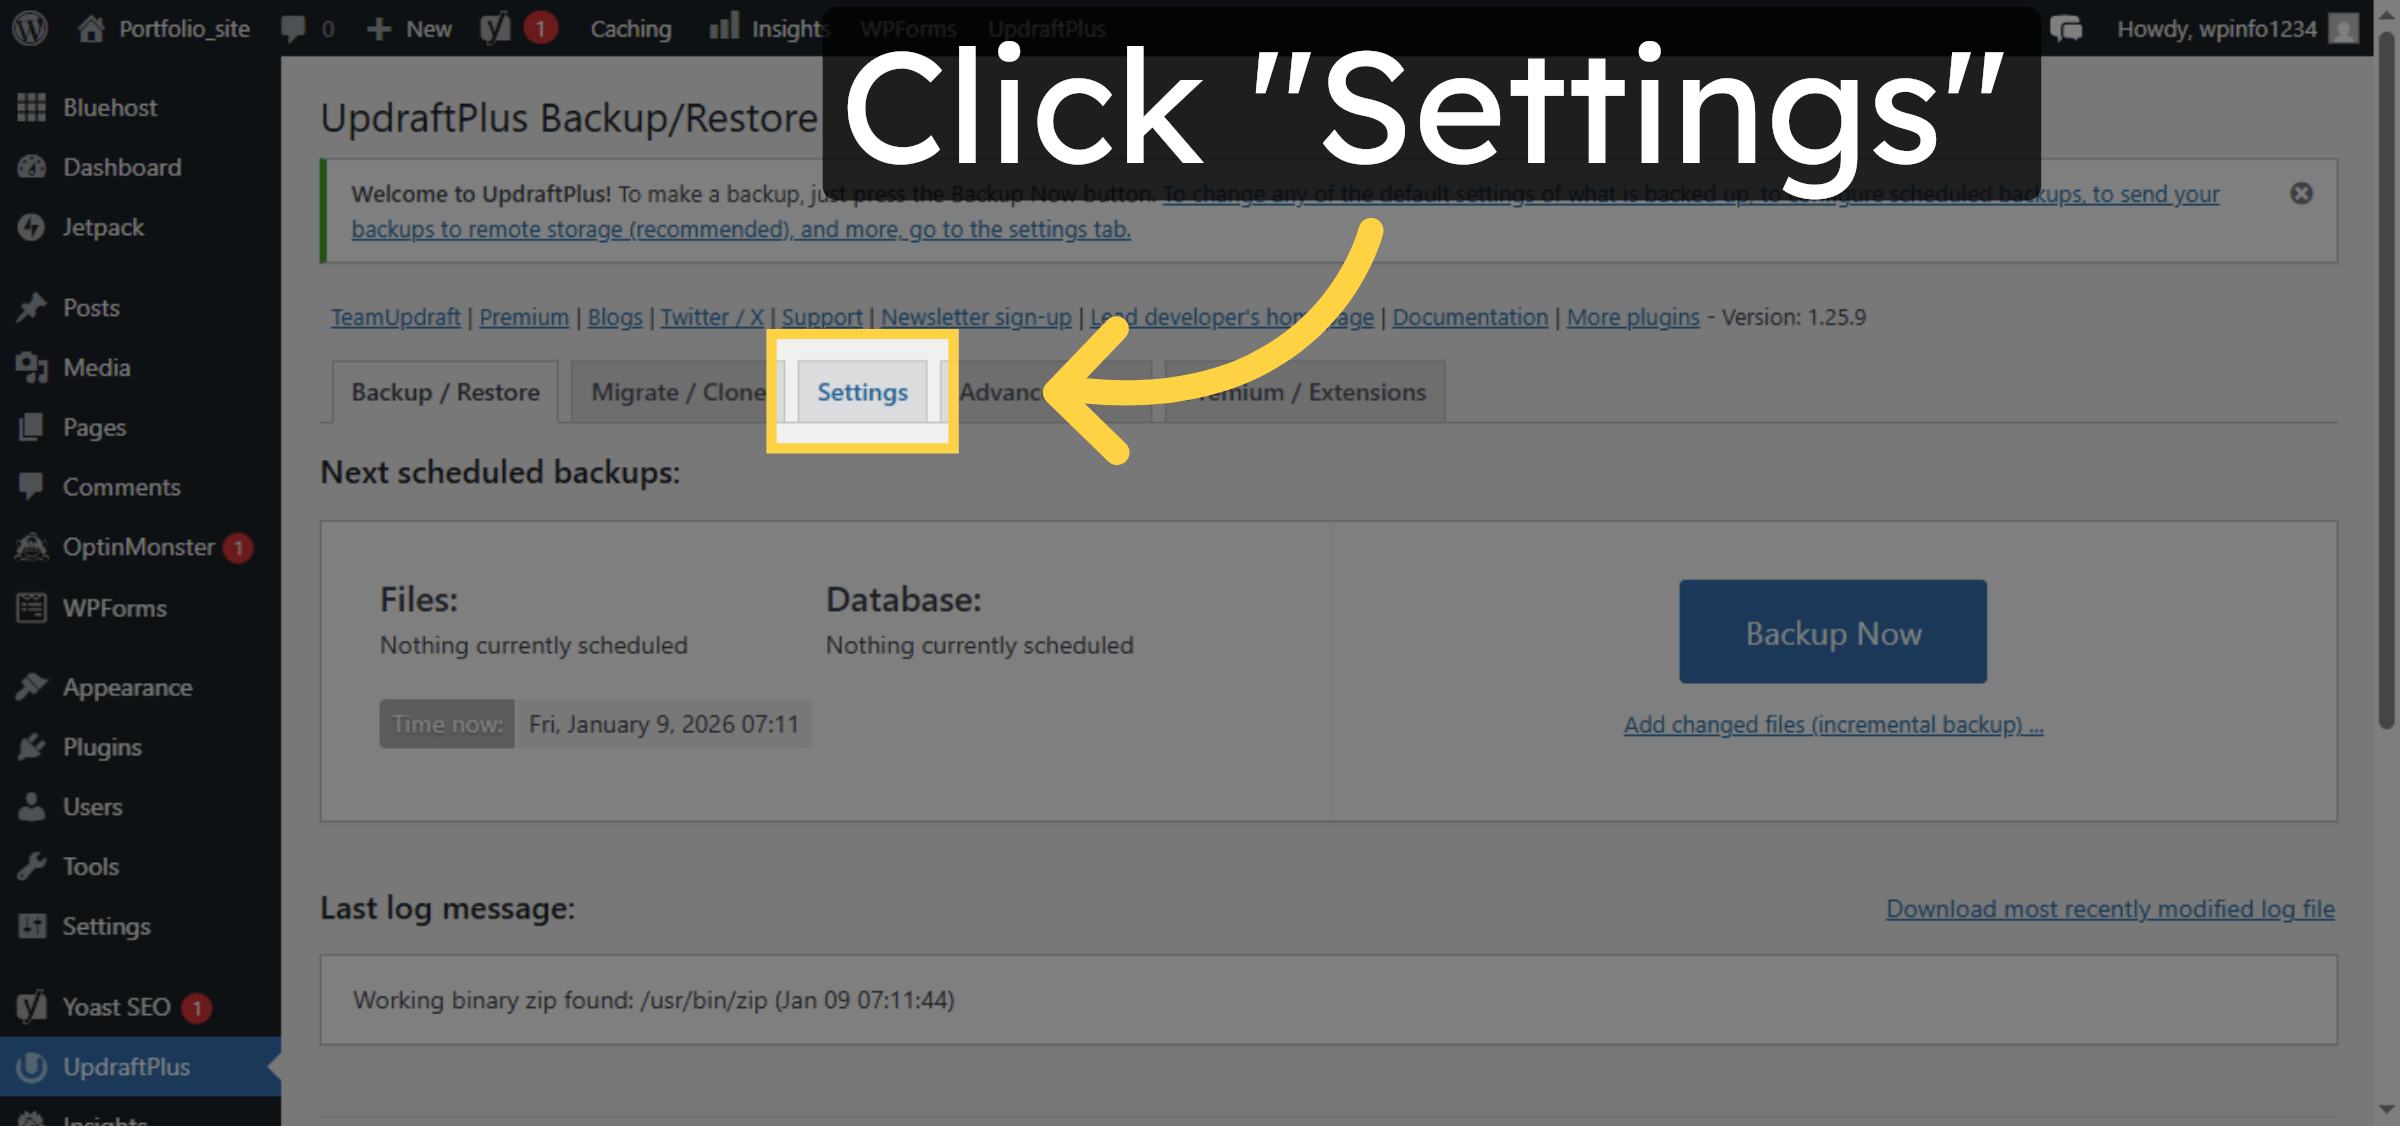
8. Open Plugin Settings

9. Access UpdraftPlus Settings
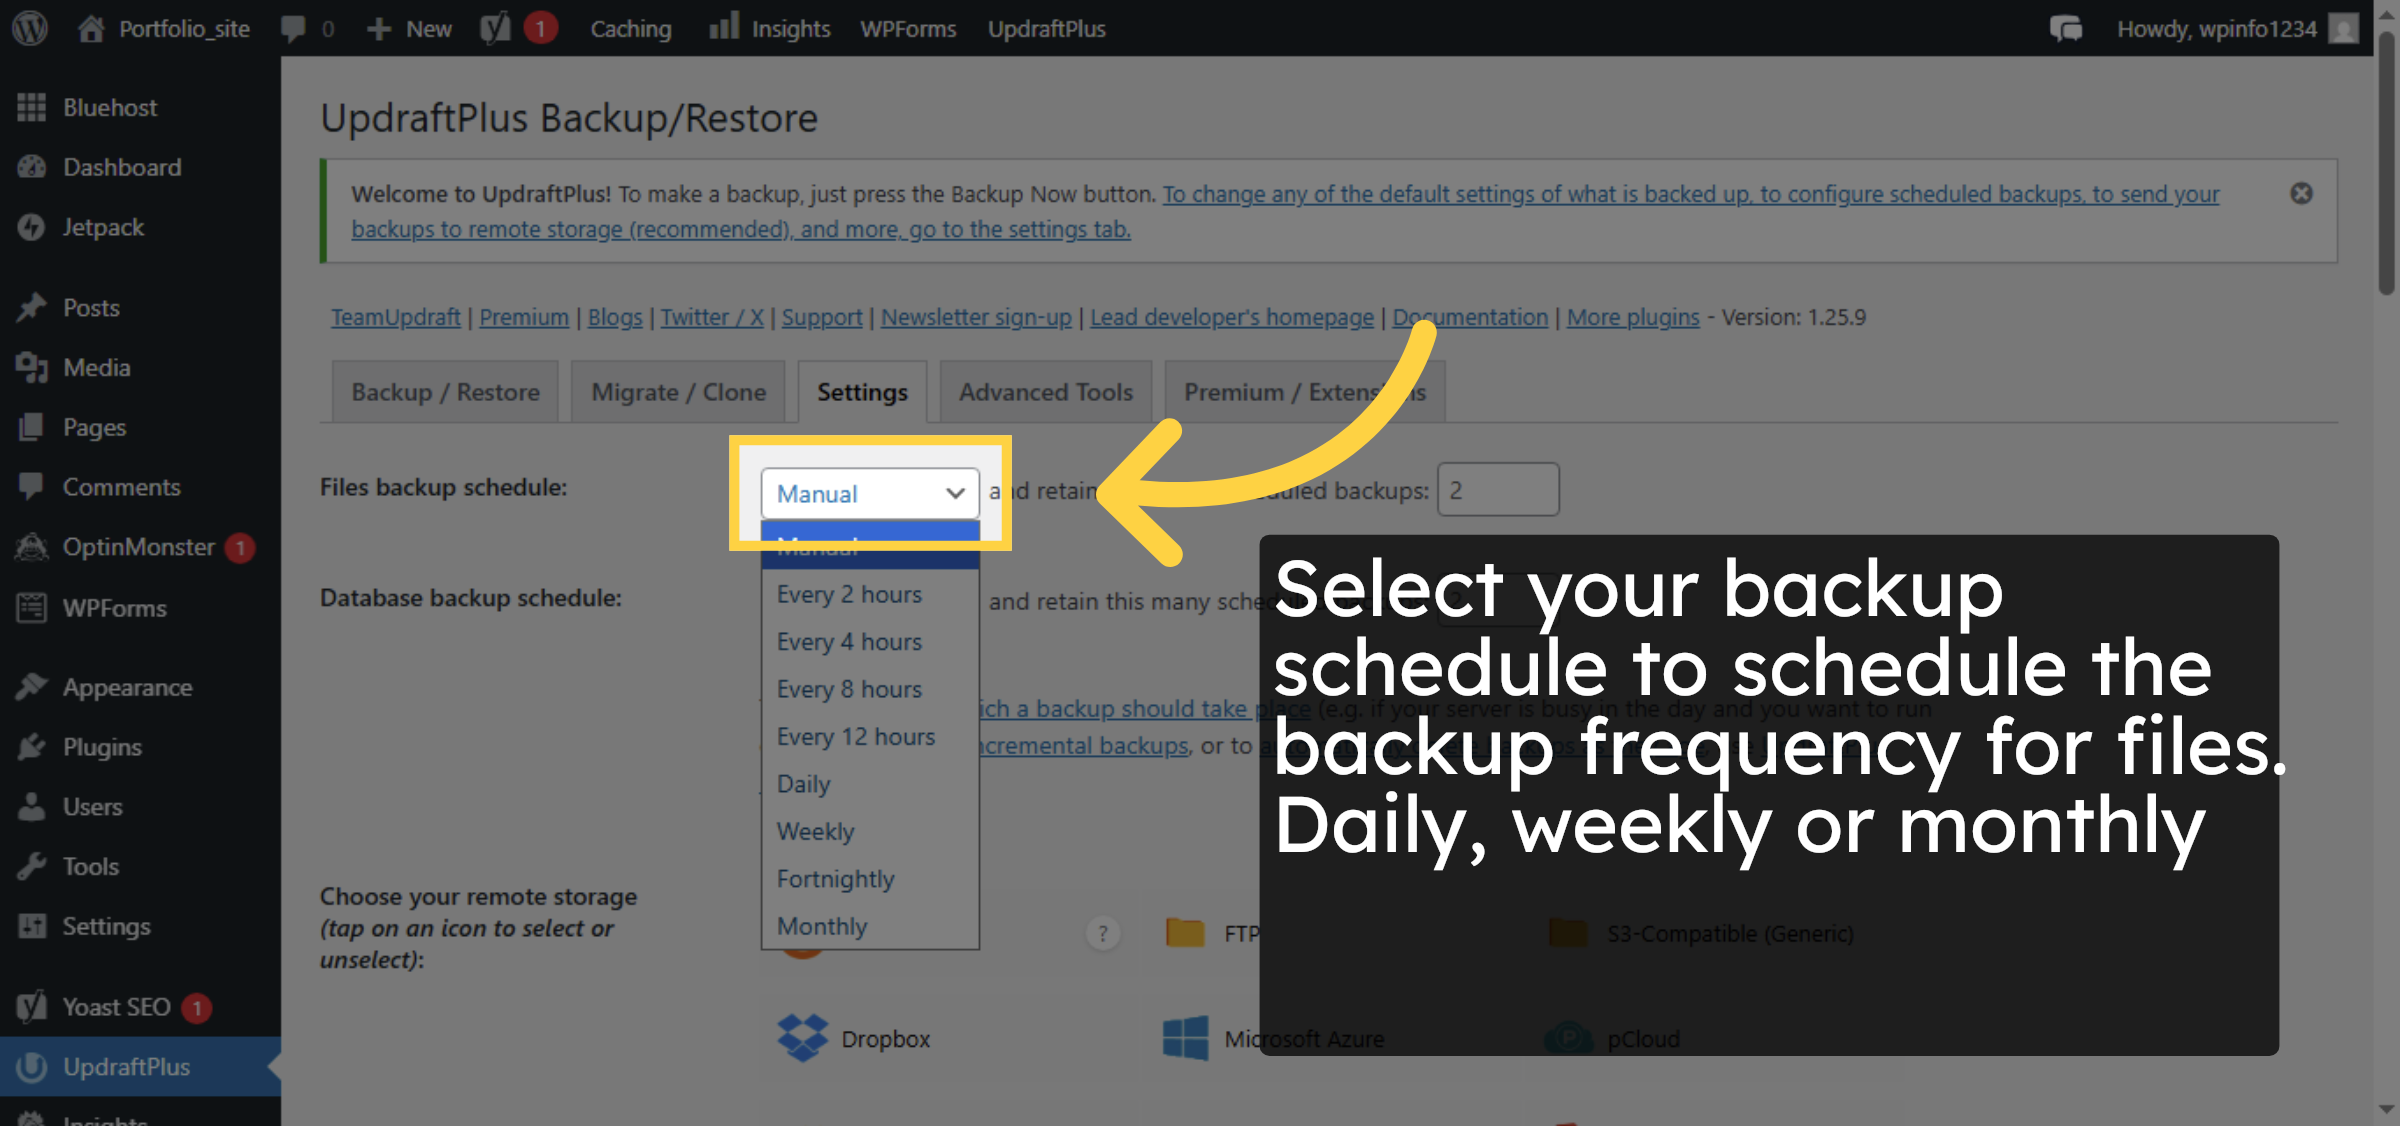
10. Open Backup Schedule Dropdown
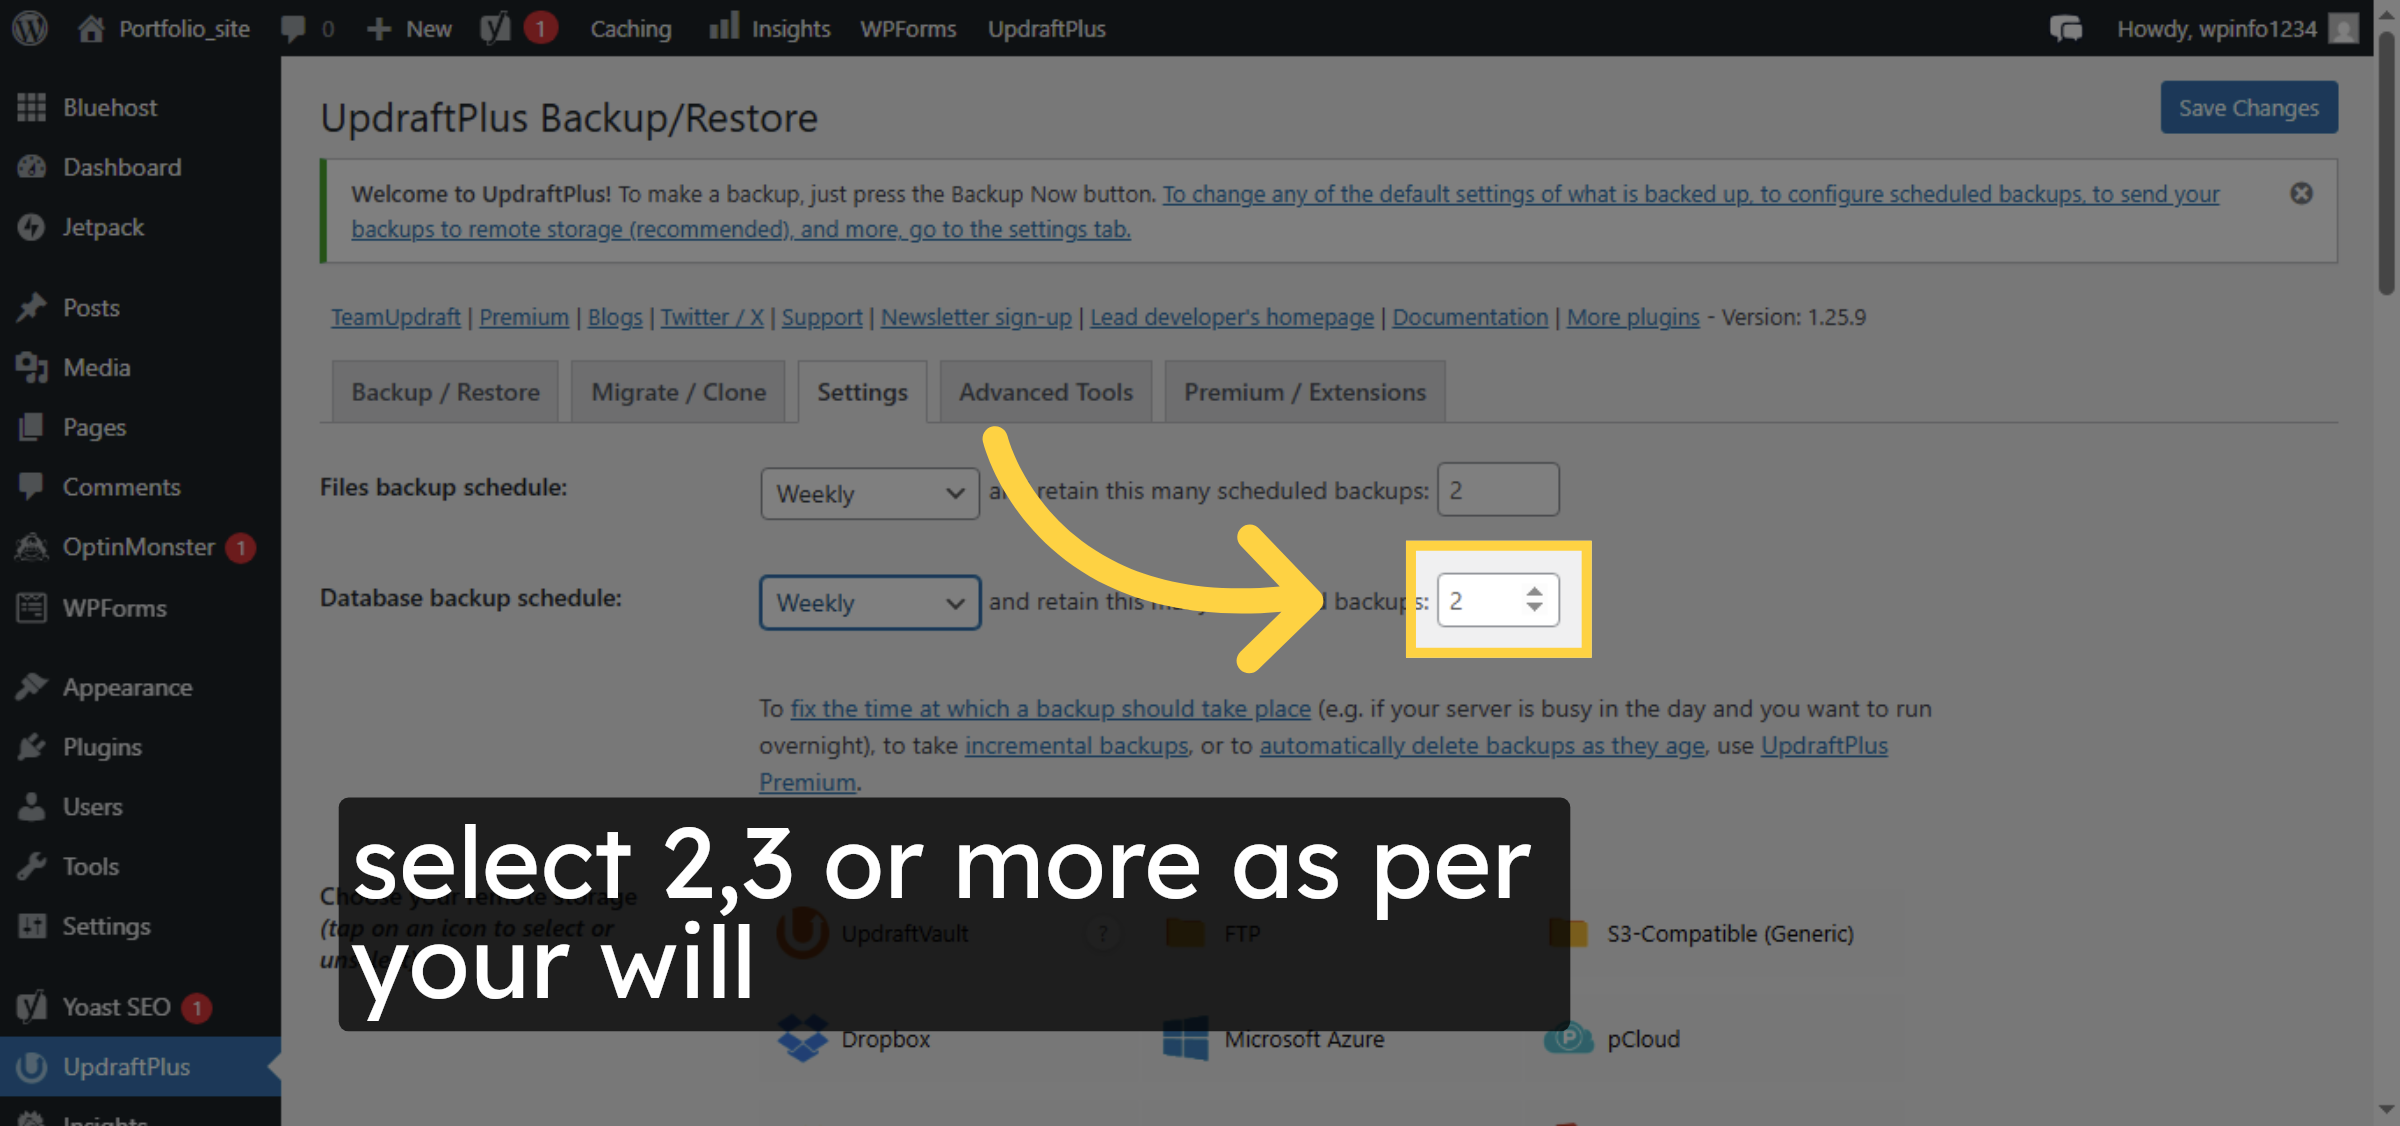
11. Set Number of Backups


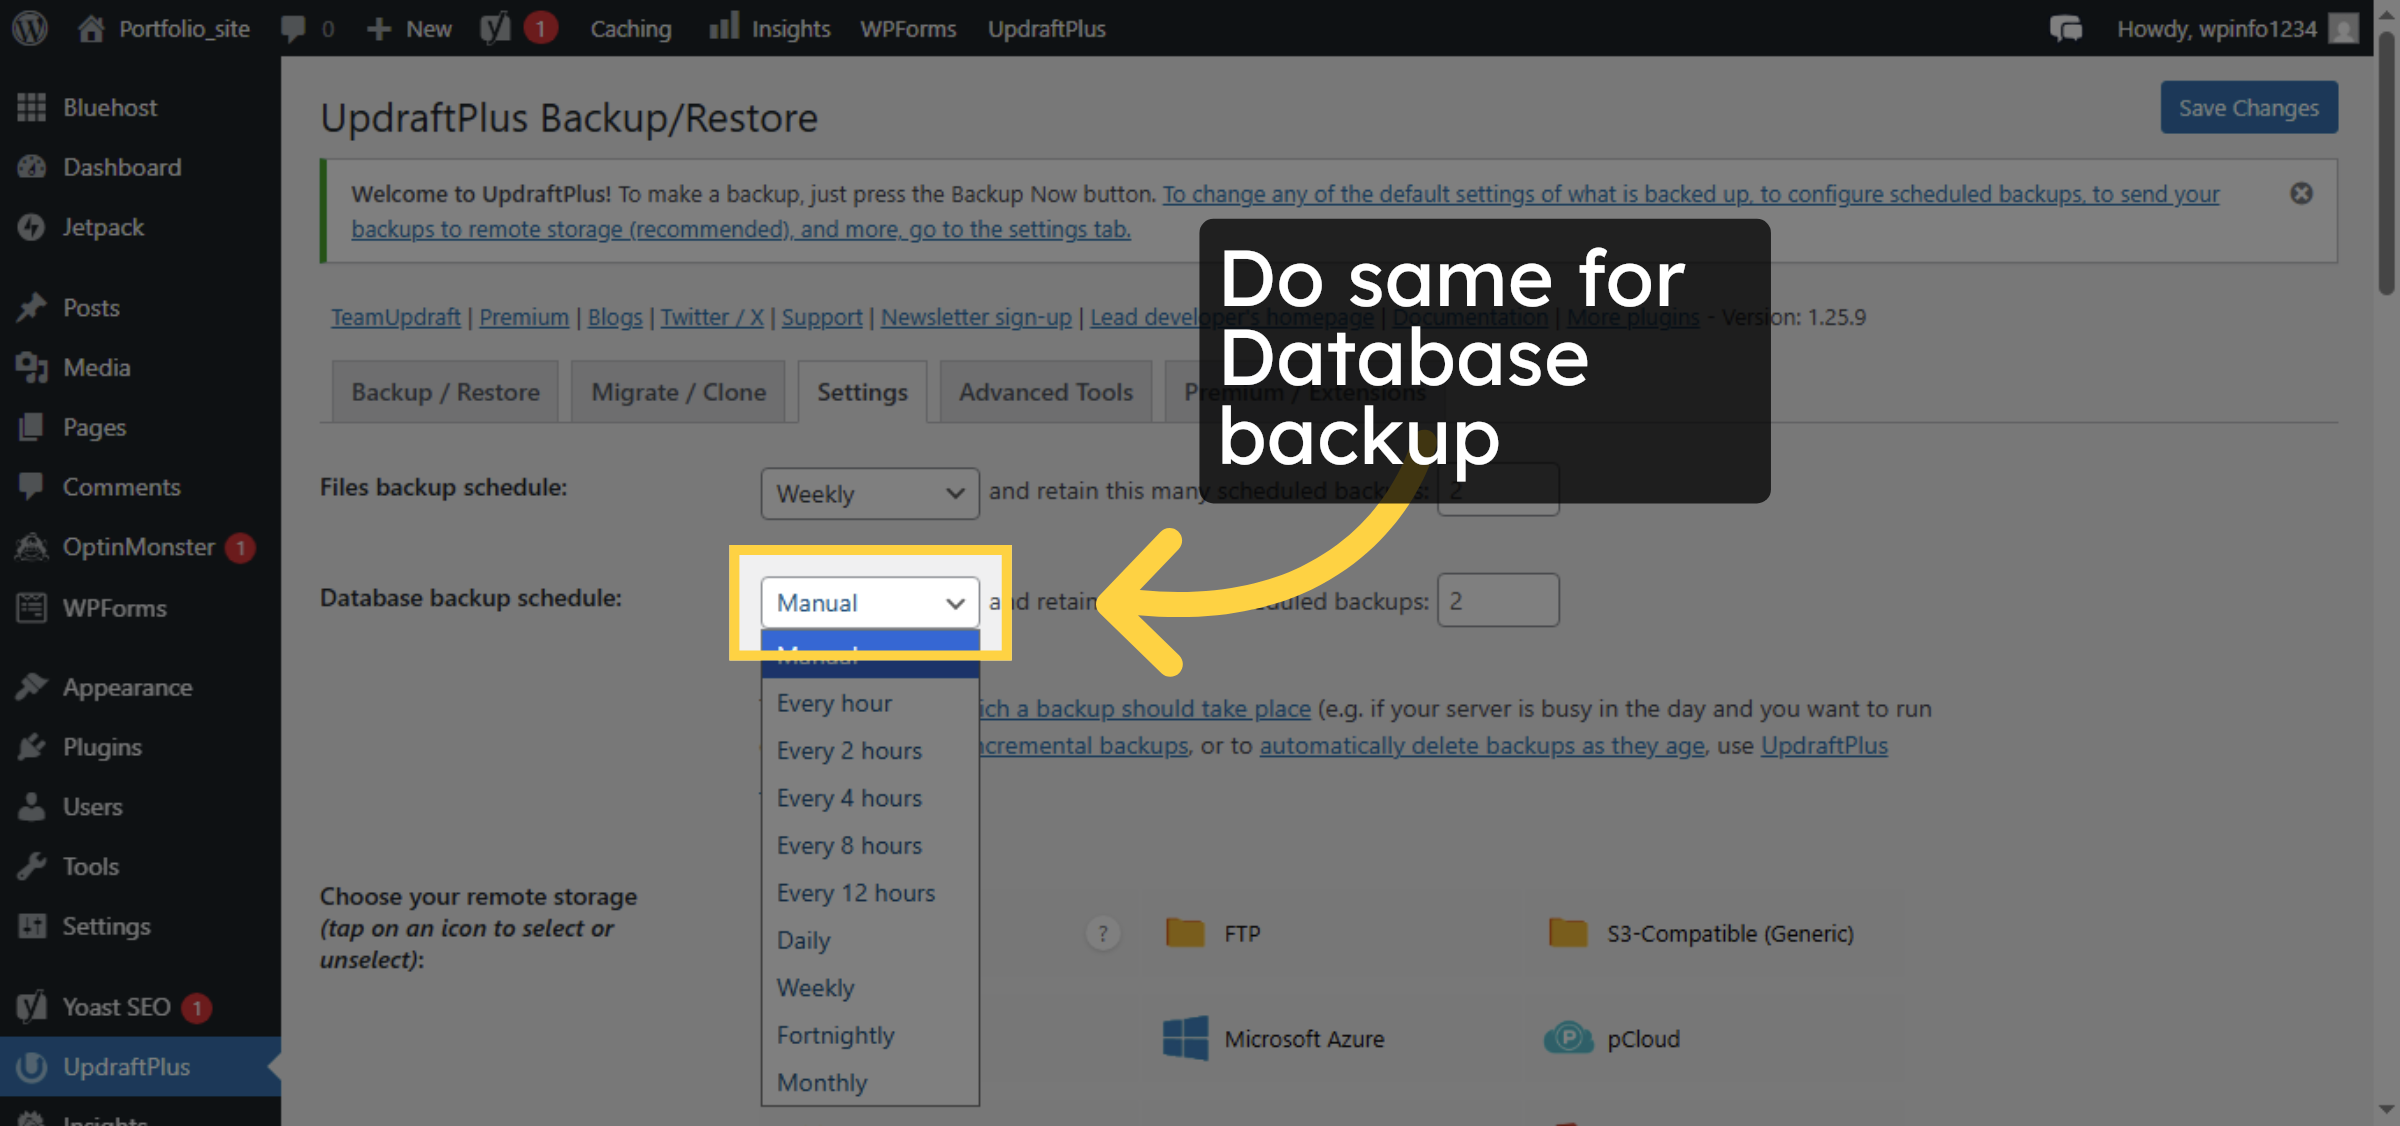
12. Database Backup
13. Choose Number of Database backups
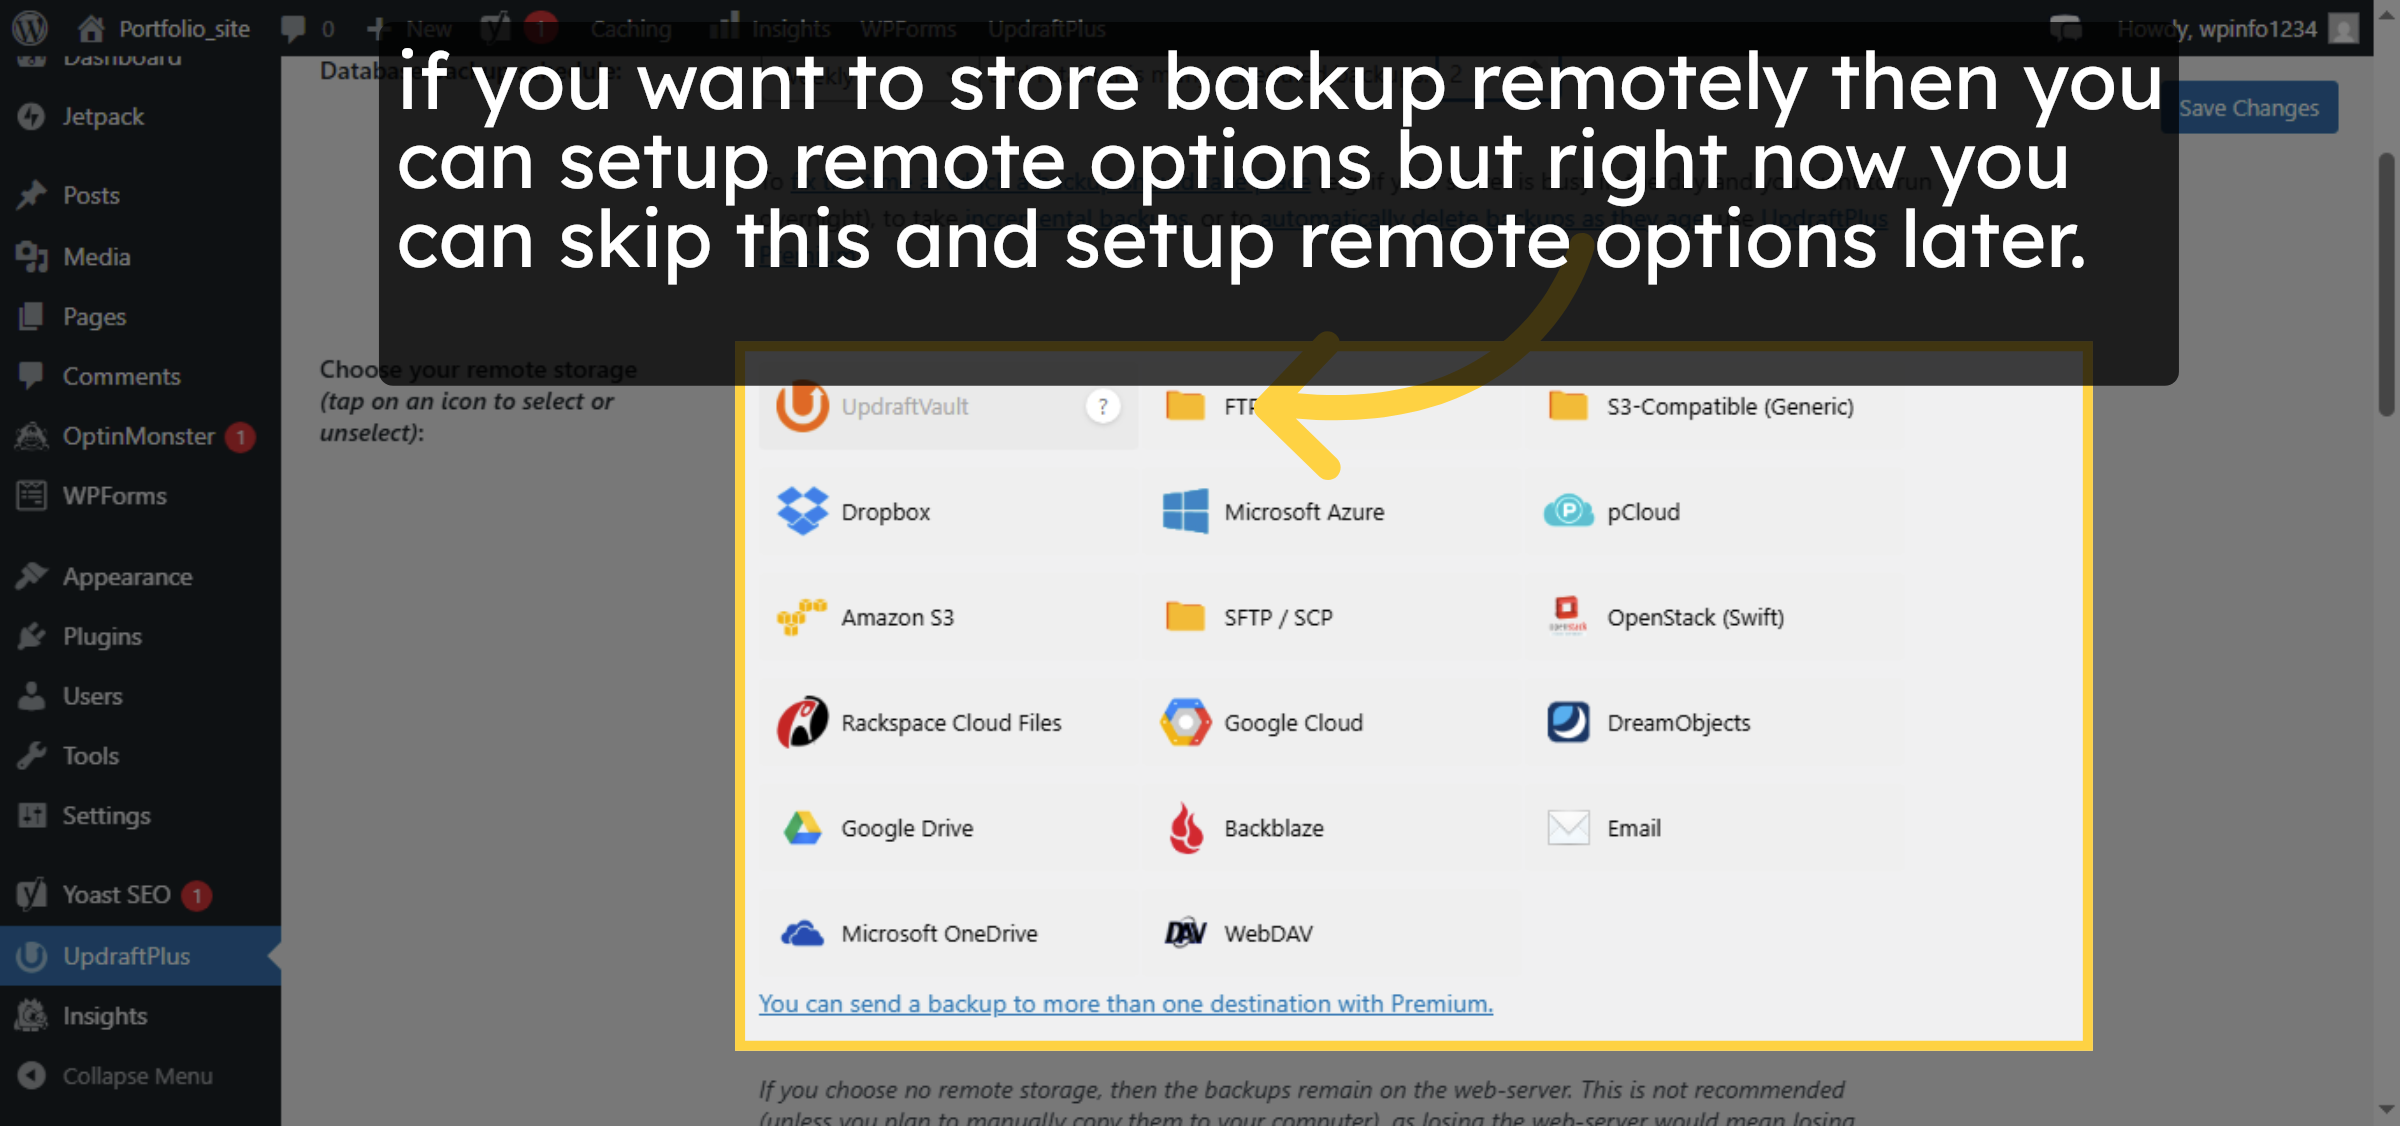
14. Explore Remote Storage Options
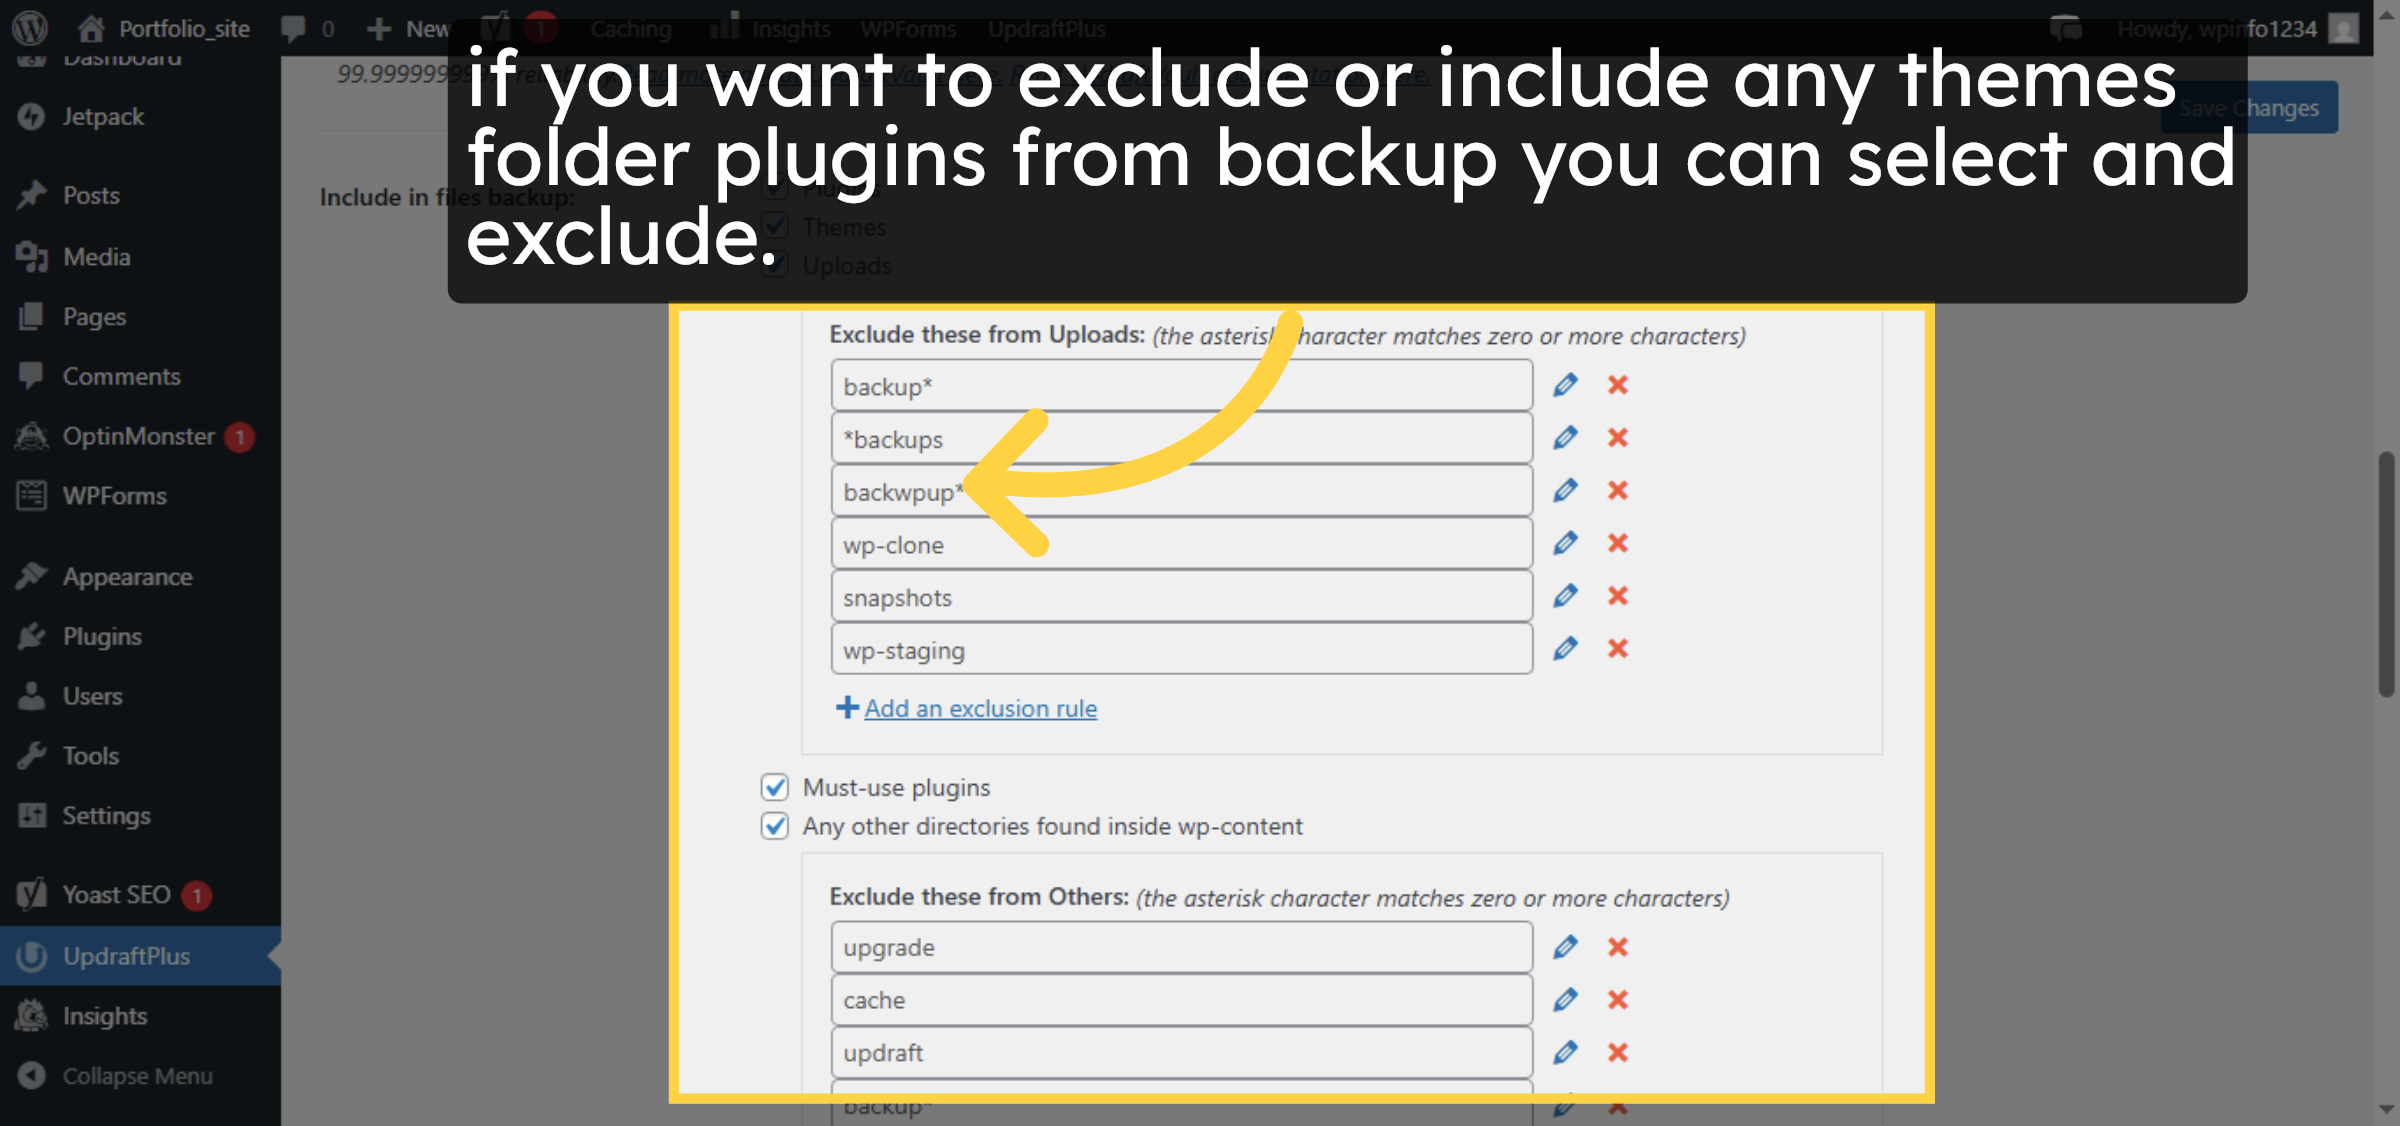
15. Exclode/Include thems or folder or plugins.
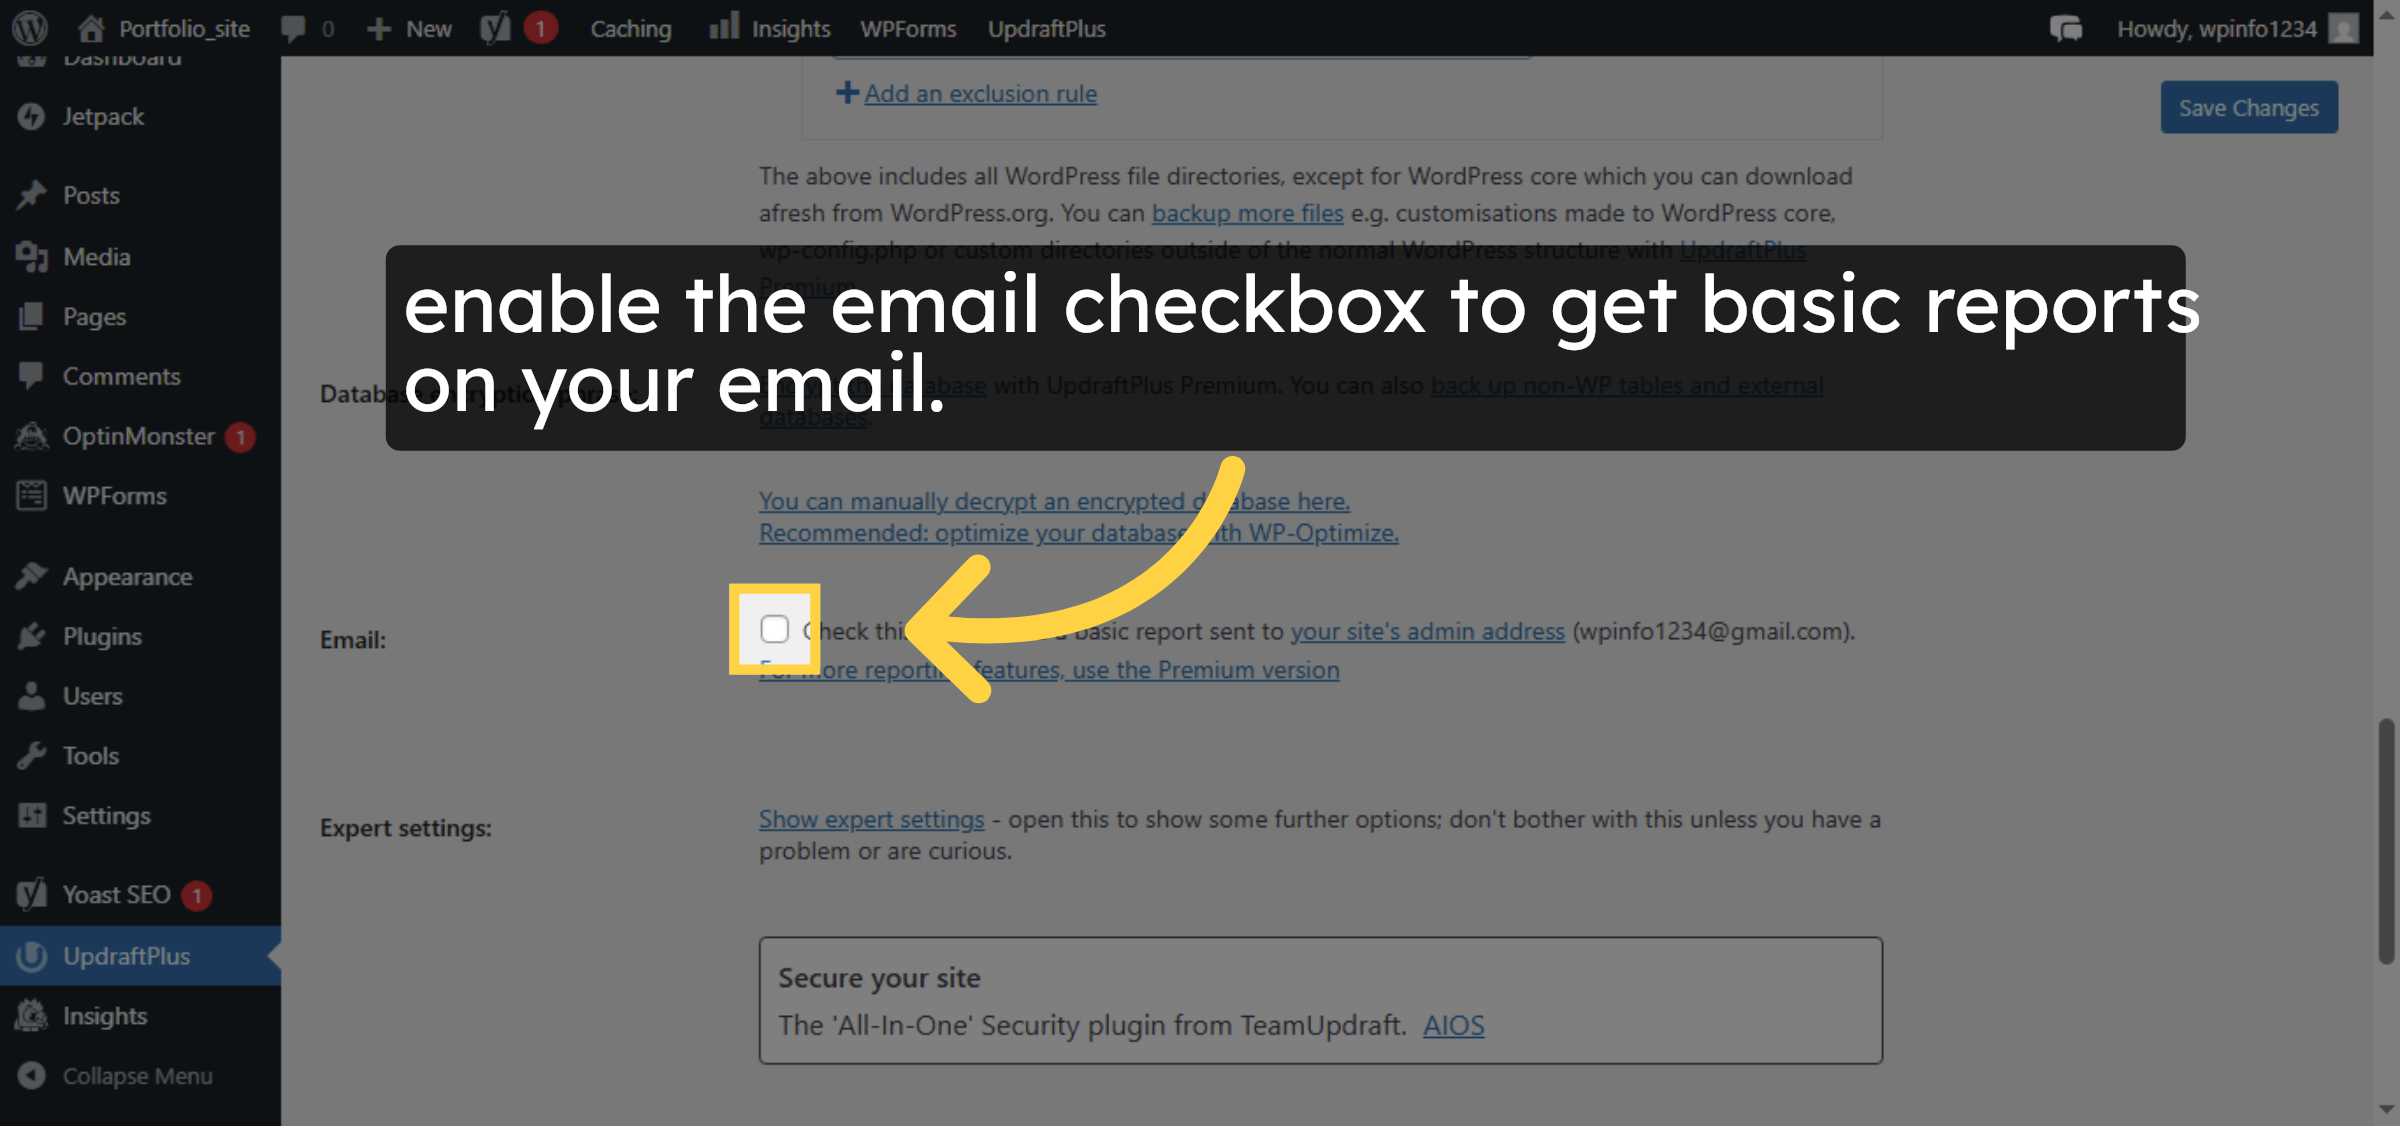
16. Enable Backup Reports
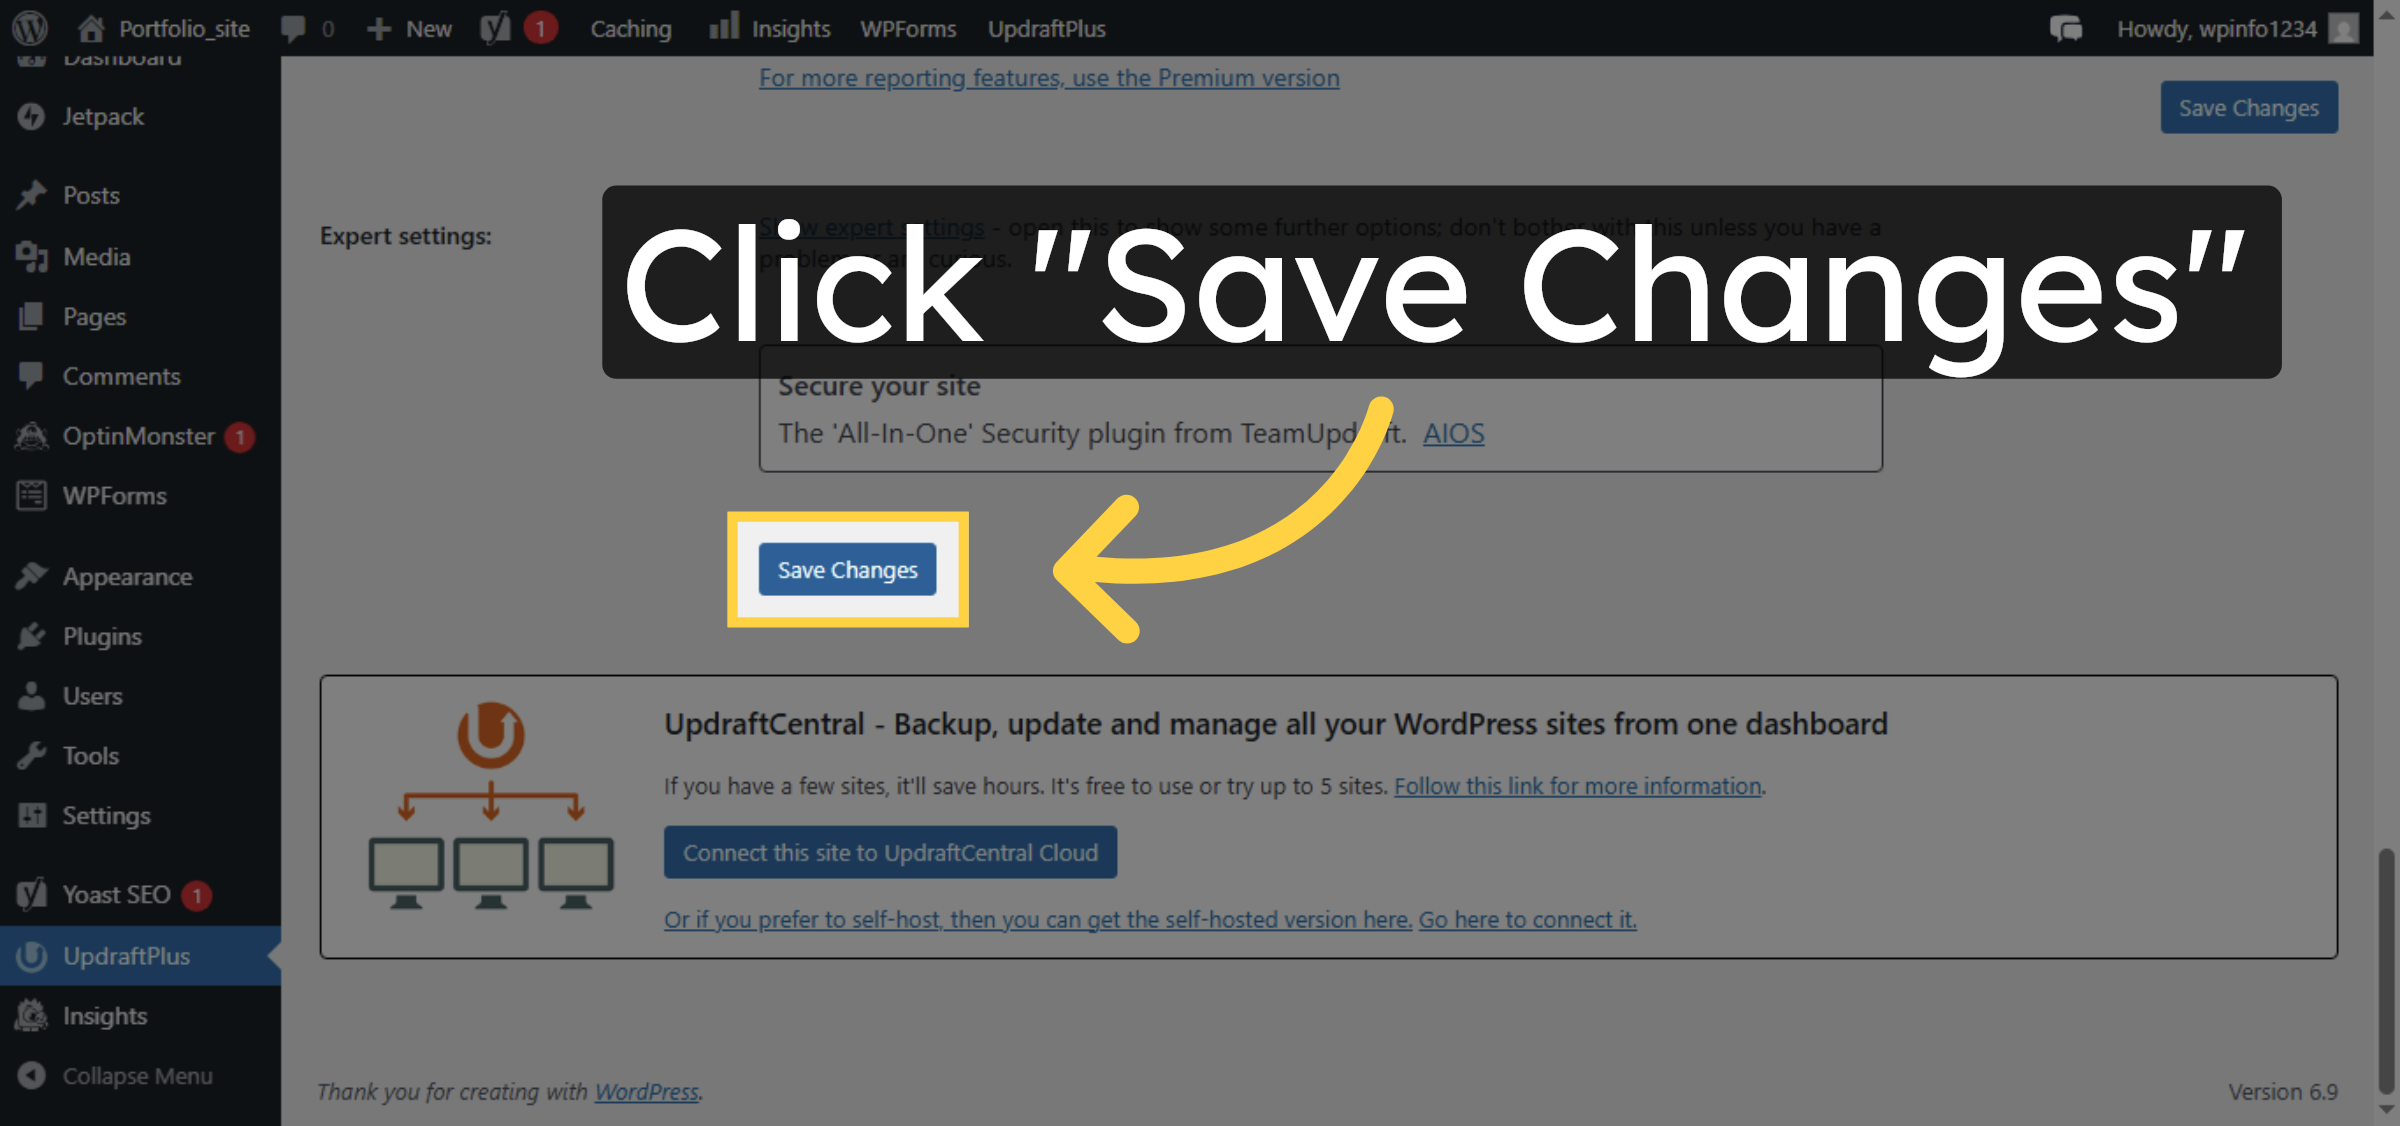
17. Save Backup Settings
Conclusion
By following the steps in this guide, you have successfully configured automated backups for your WordPress site on Bluehost using the UpdraftPlus plugin. Your website is now set to back up files and databases on a regular schedule, with backup retention and email notifications in place. This setup helps protect your site against data loss and ensures quick recovery when needed.
-
Visit: https://www.woohelpdesk.com
-
Call Us Toll-Free: +1 888 602 0119 (US & Canada)
-
Get professional support for WordPress backup automation, restoration, Bluehost hosting management, troubleshooting, and WooCommerce solutions


