
How To Create Professional Email Address on HostGator WP Hosting
Introduction
Creating a professional email address using HostGator WP Hosting allows you to manage business communications under your own domain name. Through the HostGator dashboard and cPanel, you can easily create, secure, and access custom email accounts associated with your website. This guide walks you through the process of navigating to cPanel, setting up a new email account, selecting a domain and username, and accessing the email inbox. Having a domain-based email address not only improves credibility but also helps streamline communication for businesses and website owners. By following these steps, you can quickly create and start using a professional email account without requiring advanced technical knowledge.
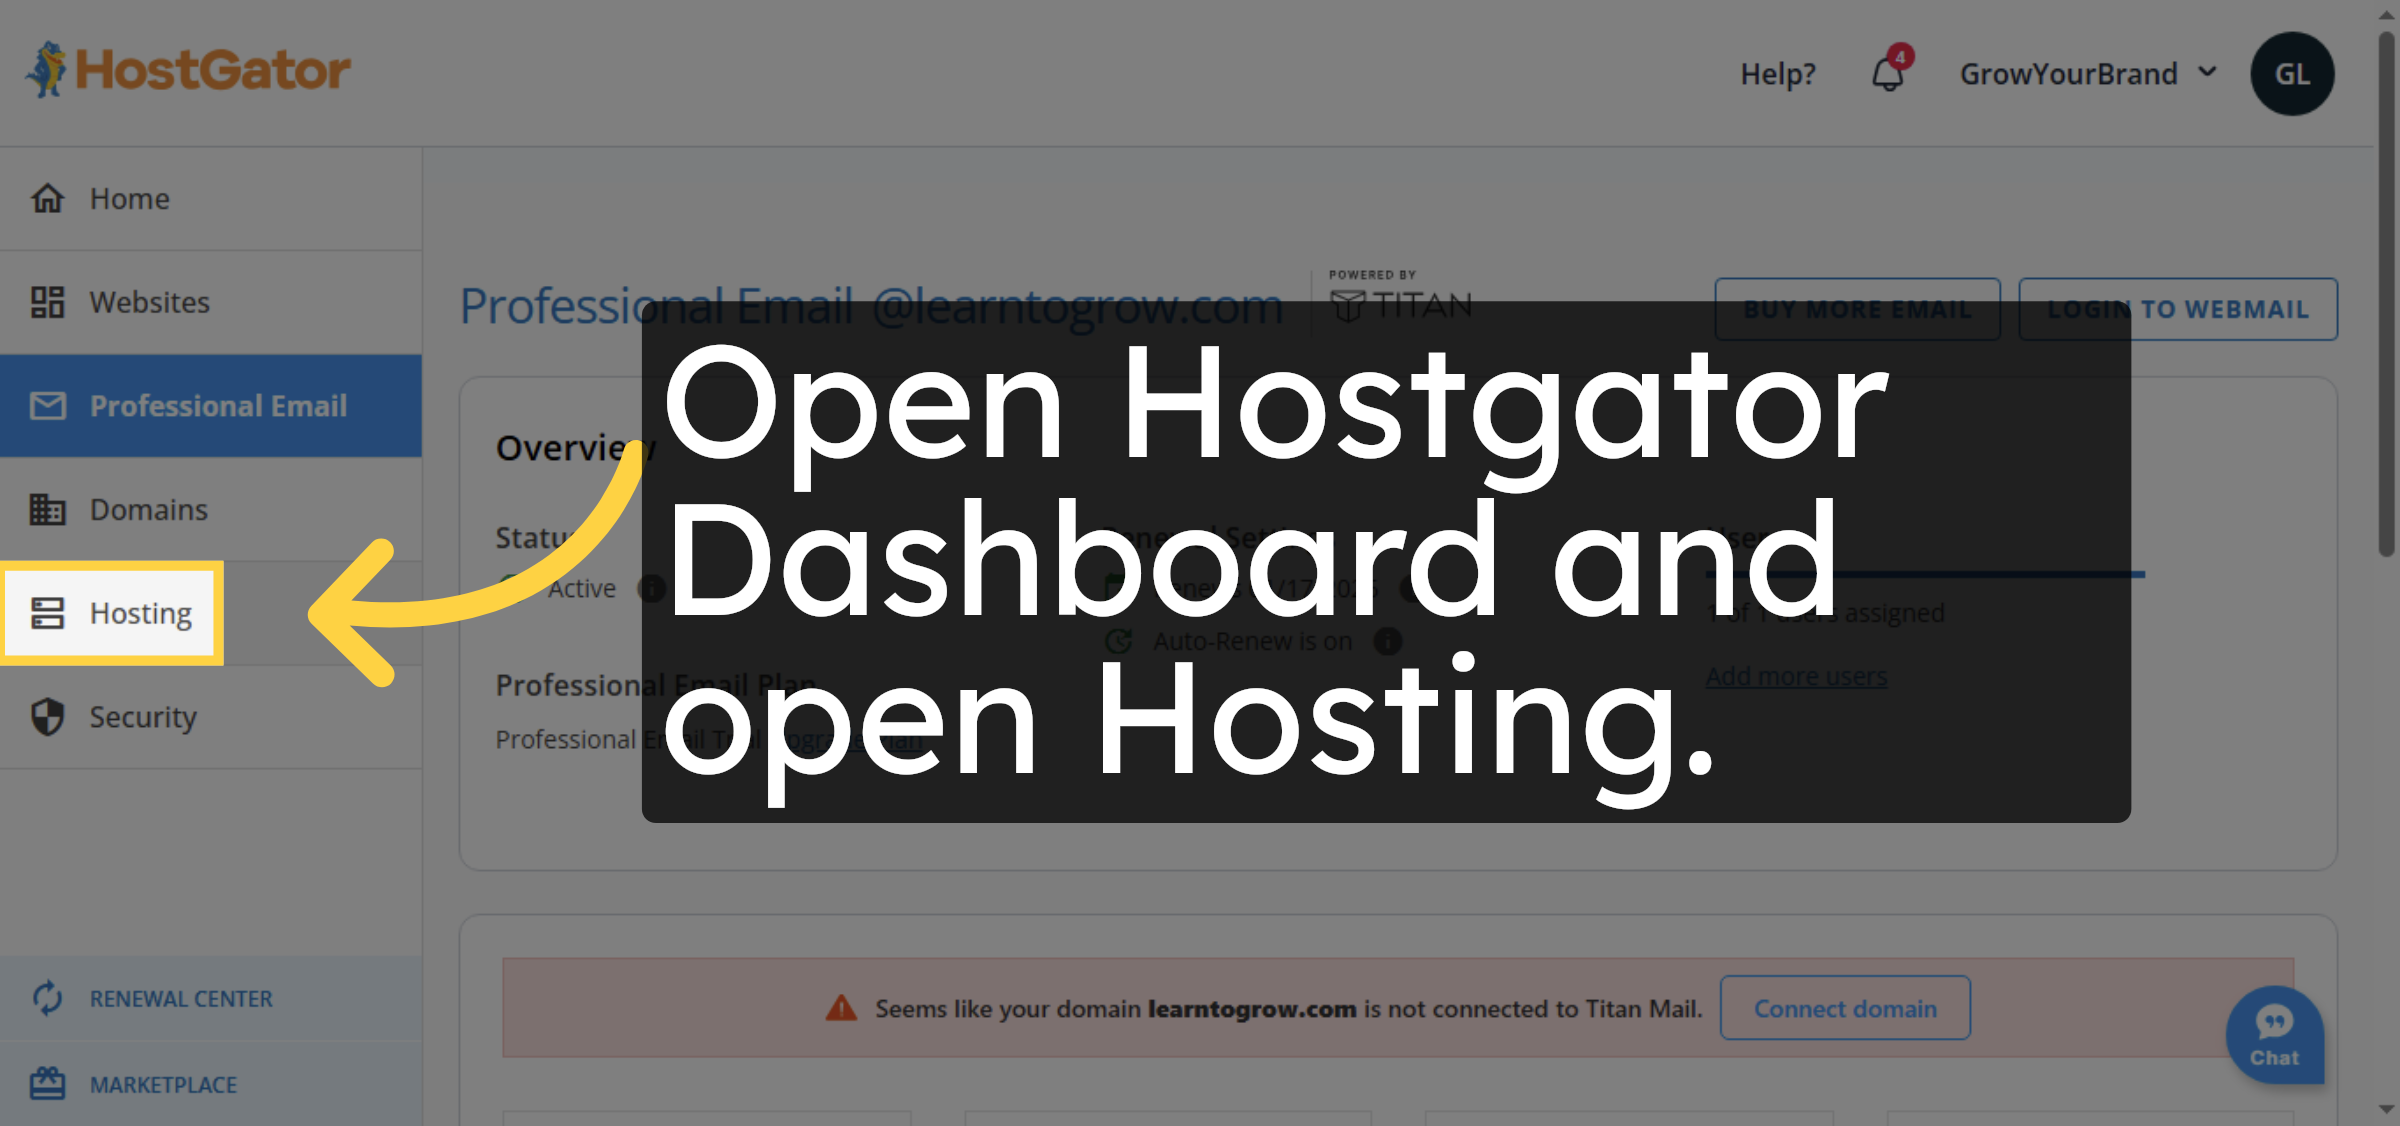
1. Open Hostgator Dashboard
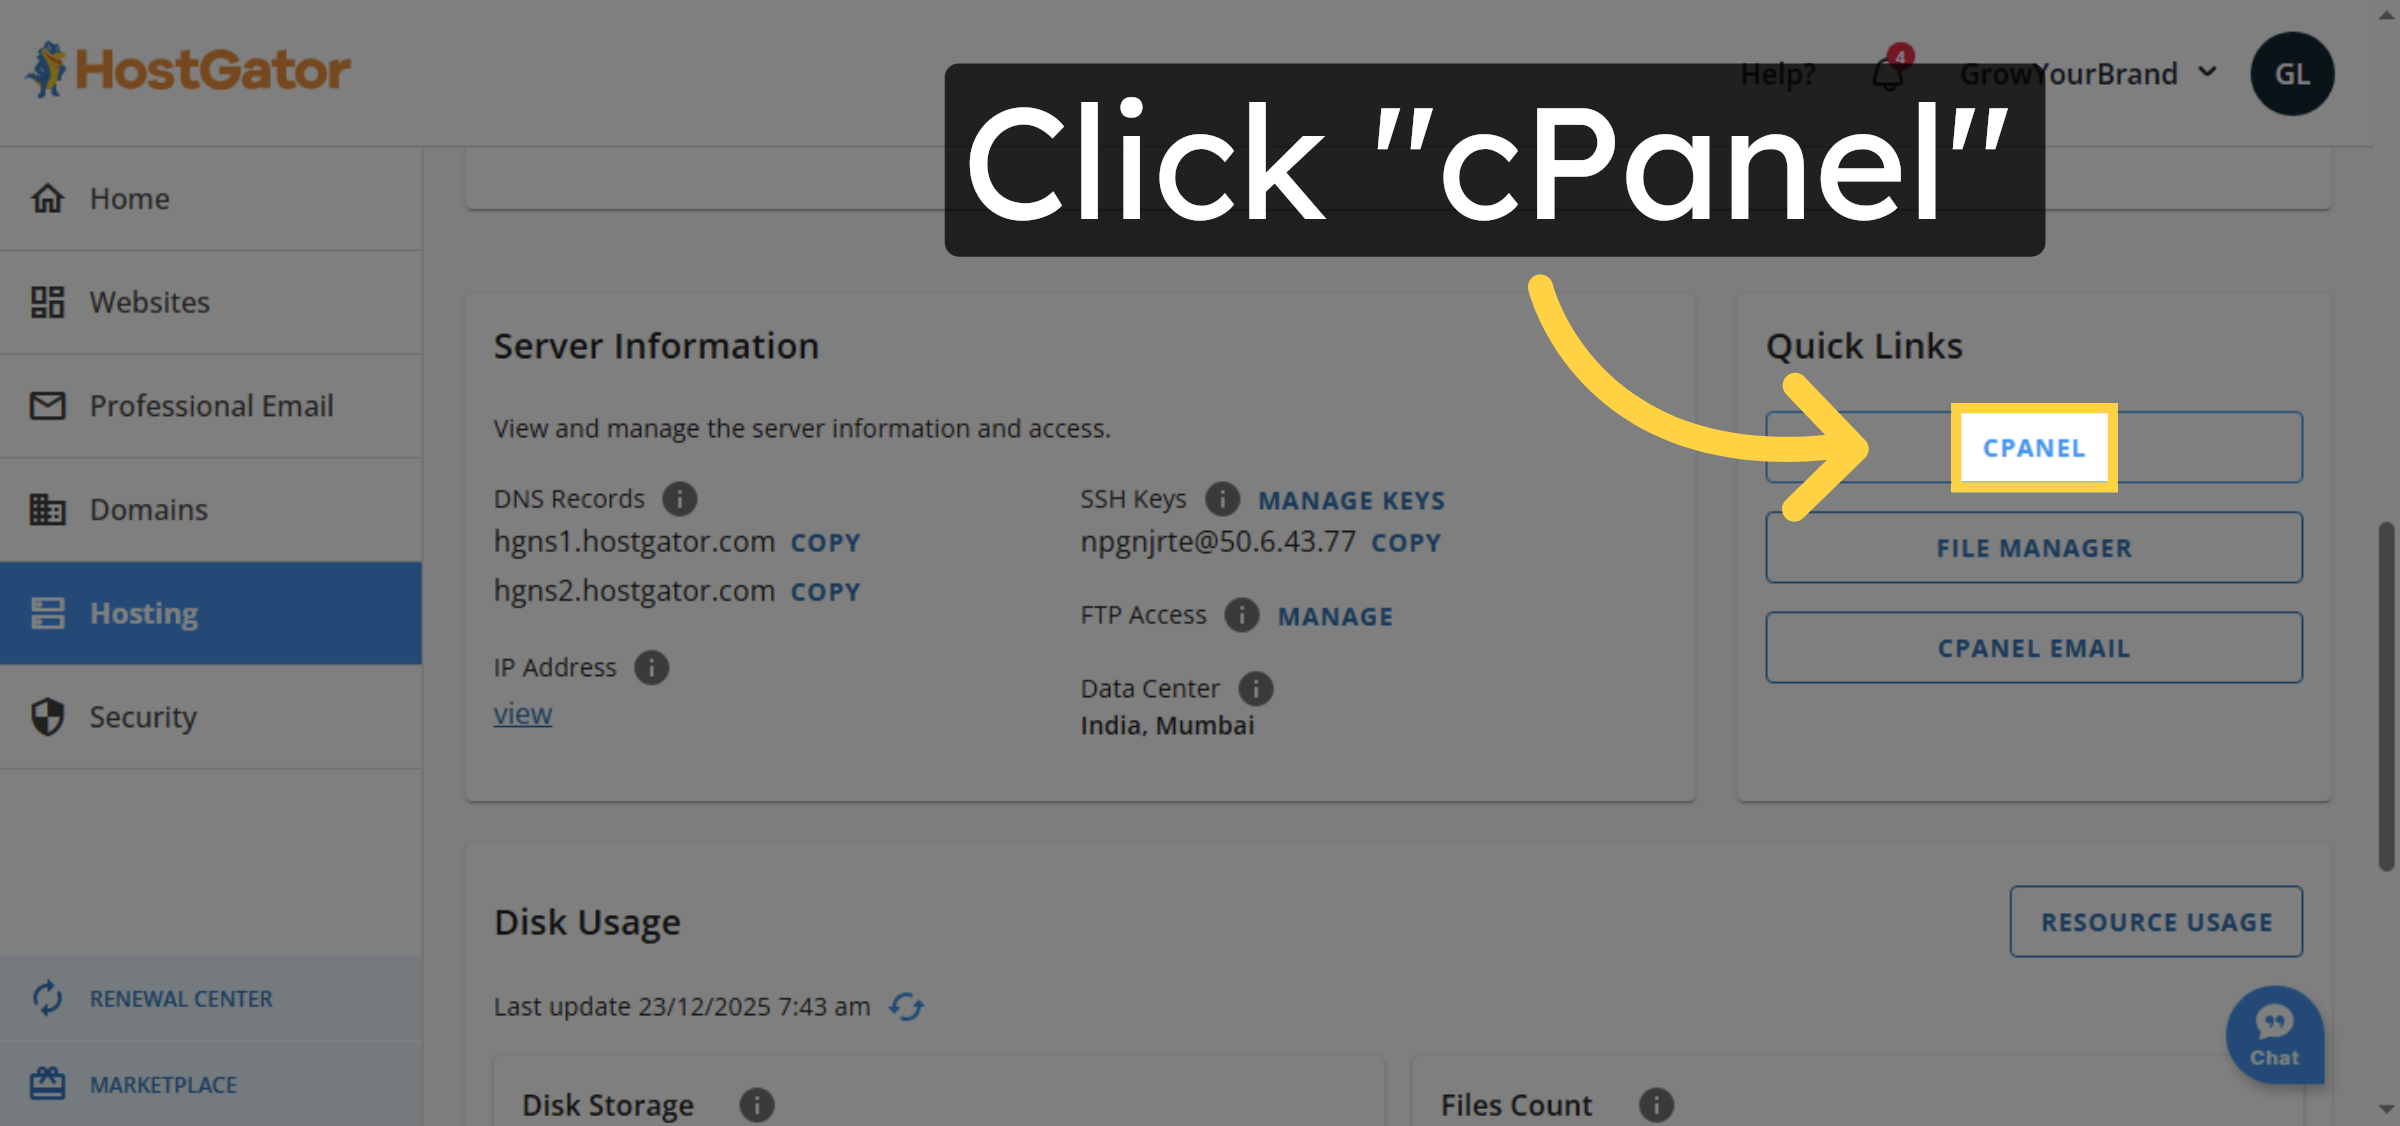
2. Navigate to cPanel
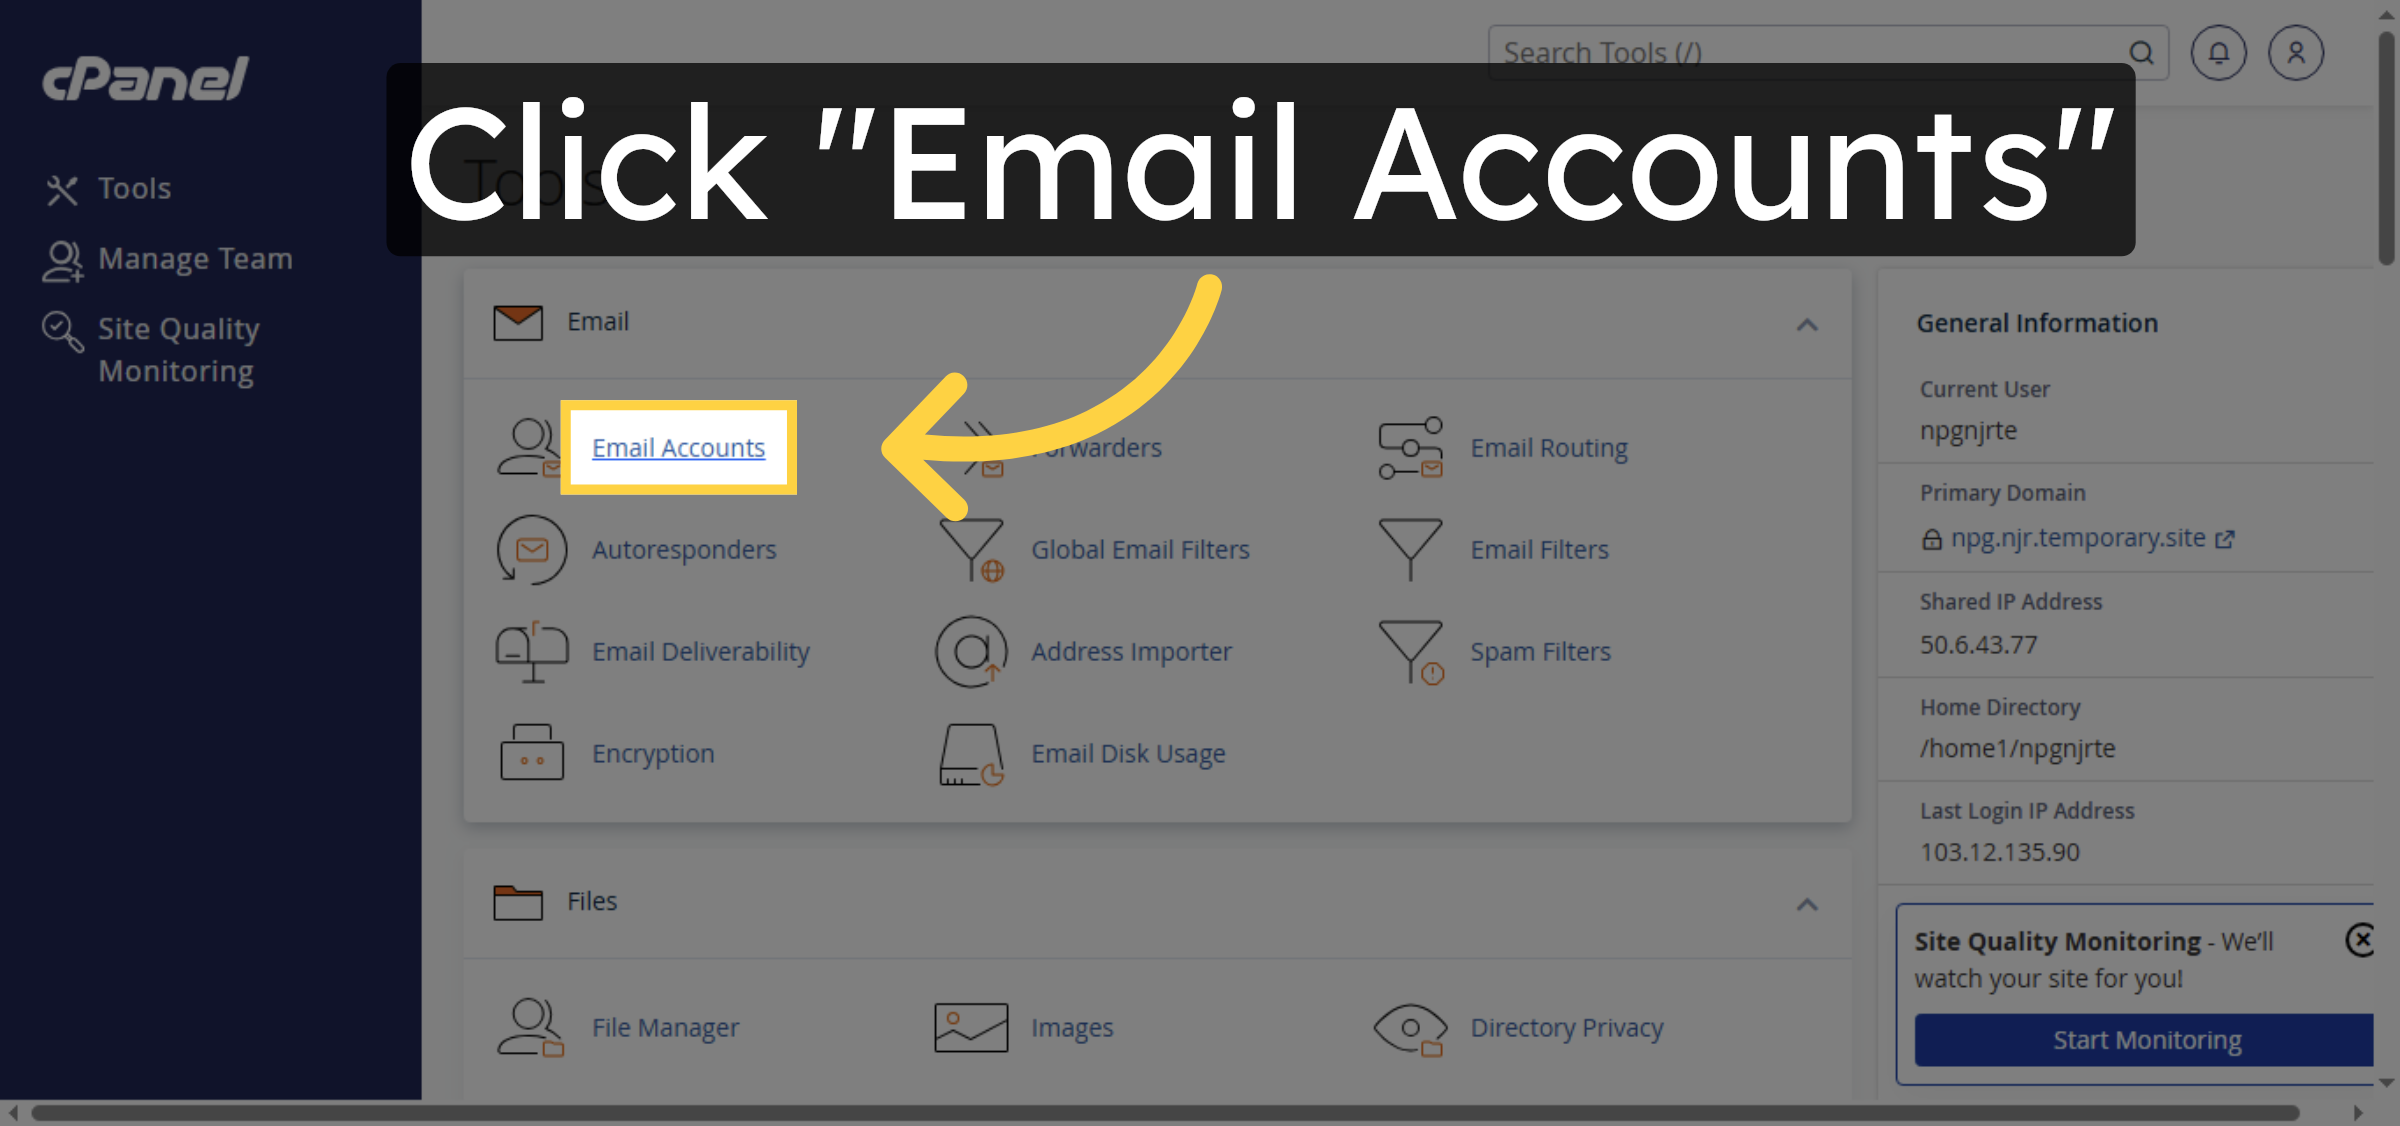
3. Open Email Accounts
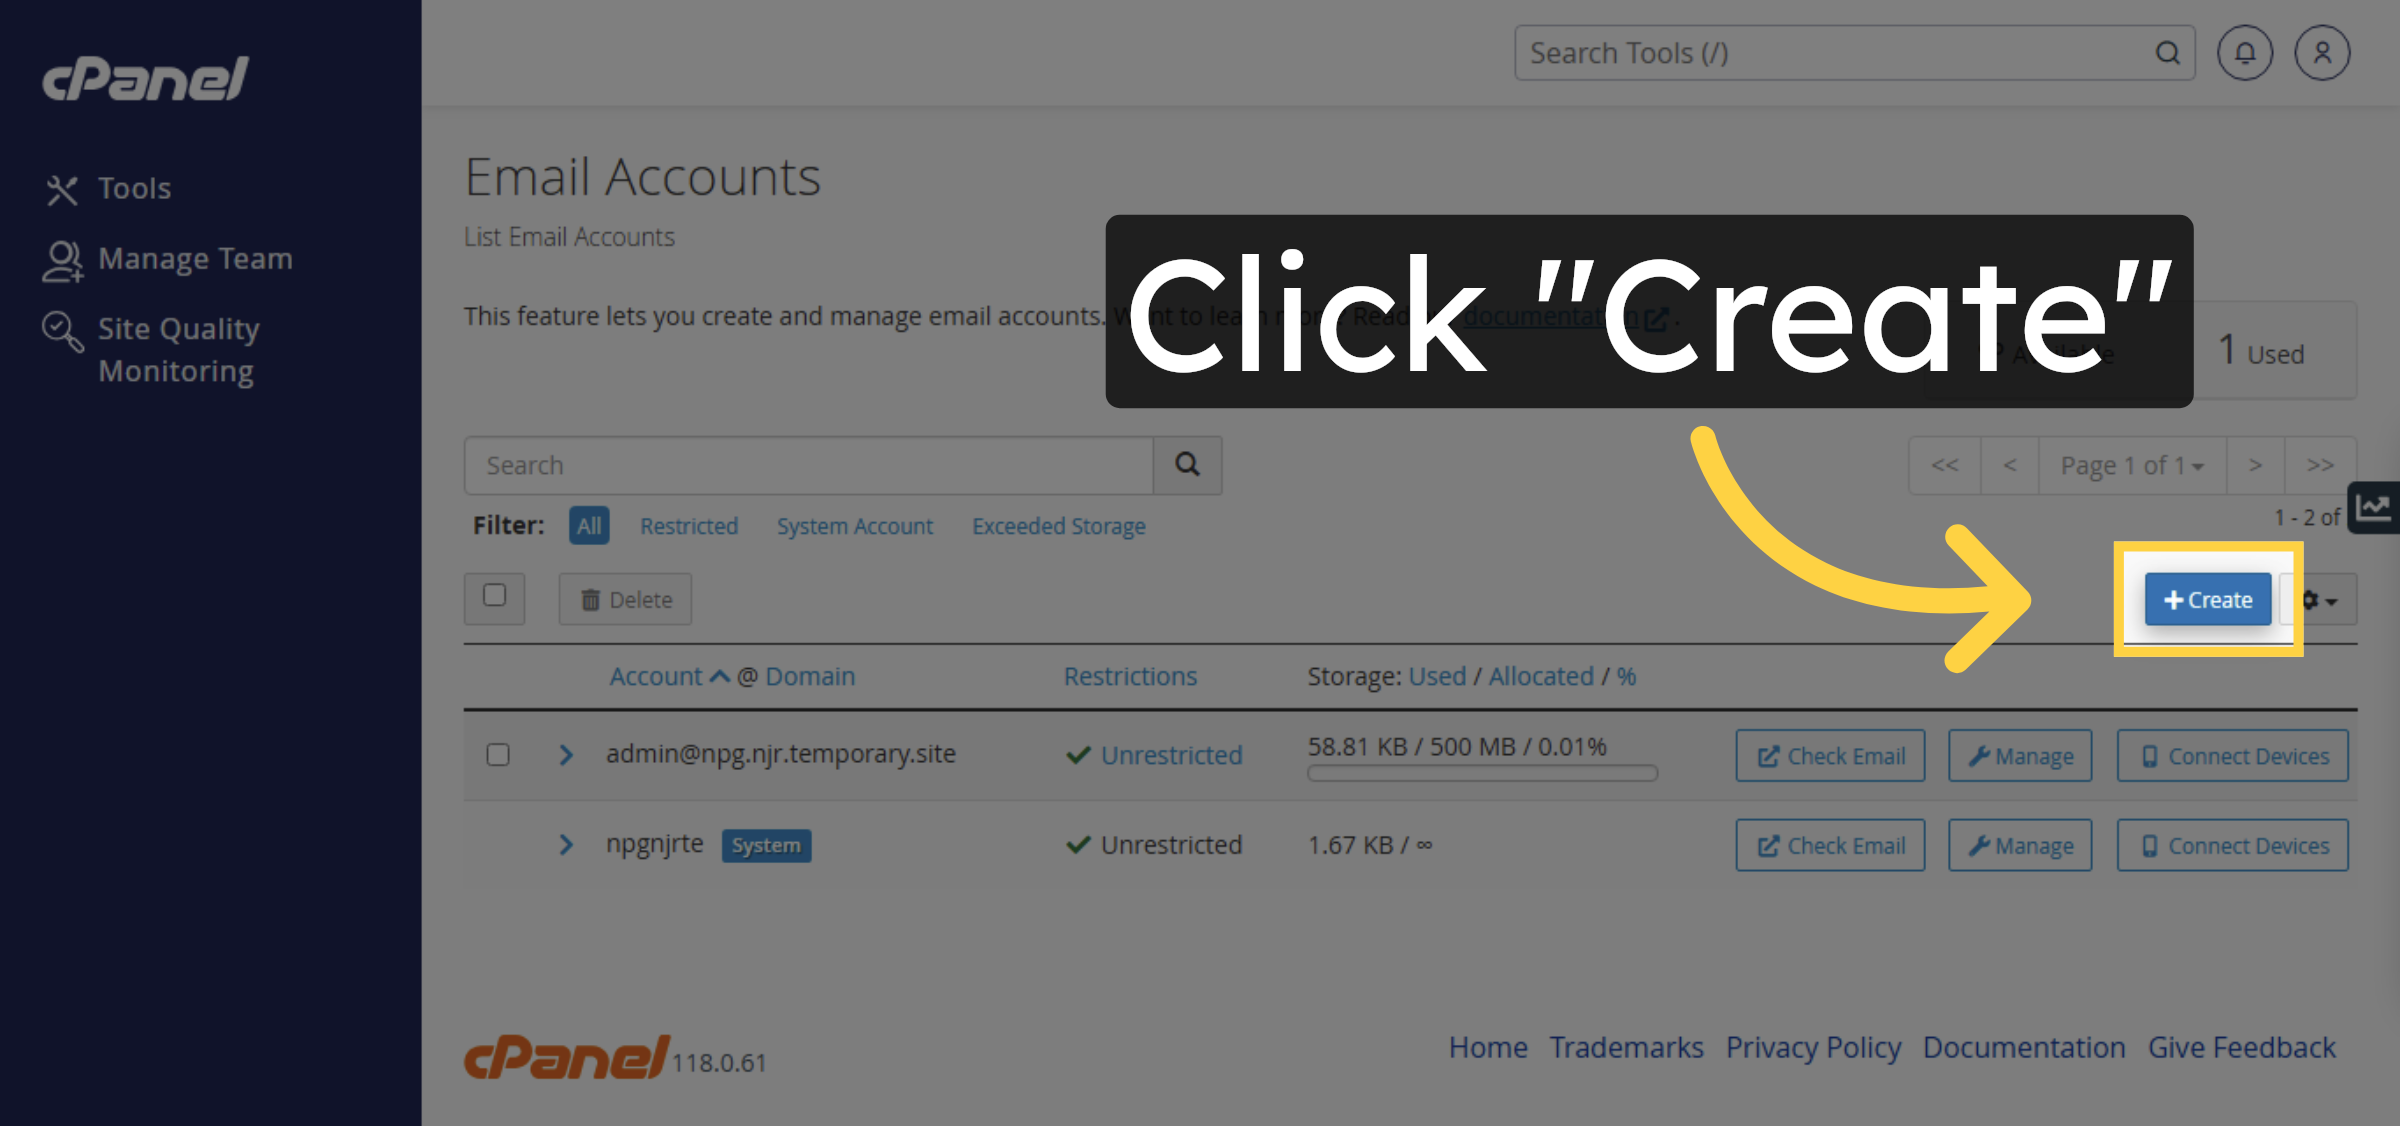
4. Initiate Email Account Creation
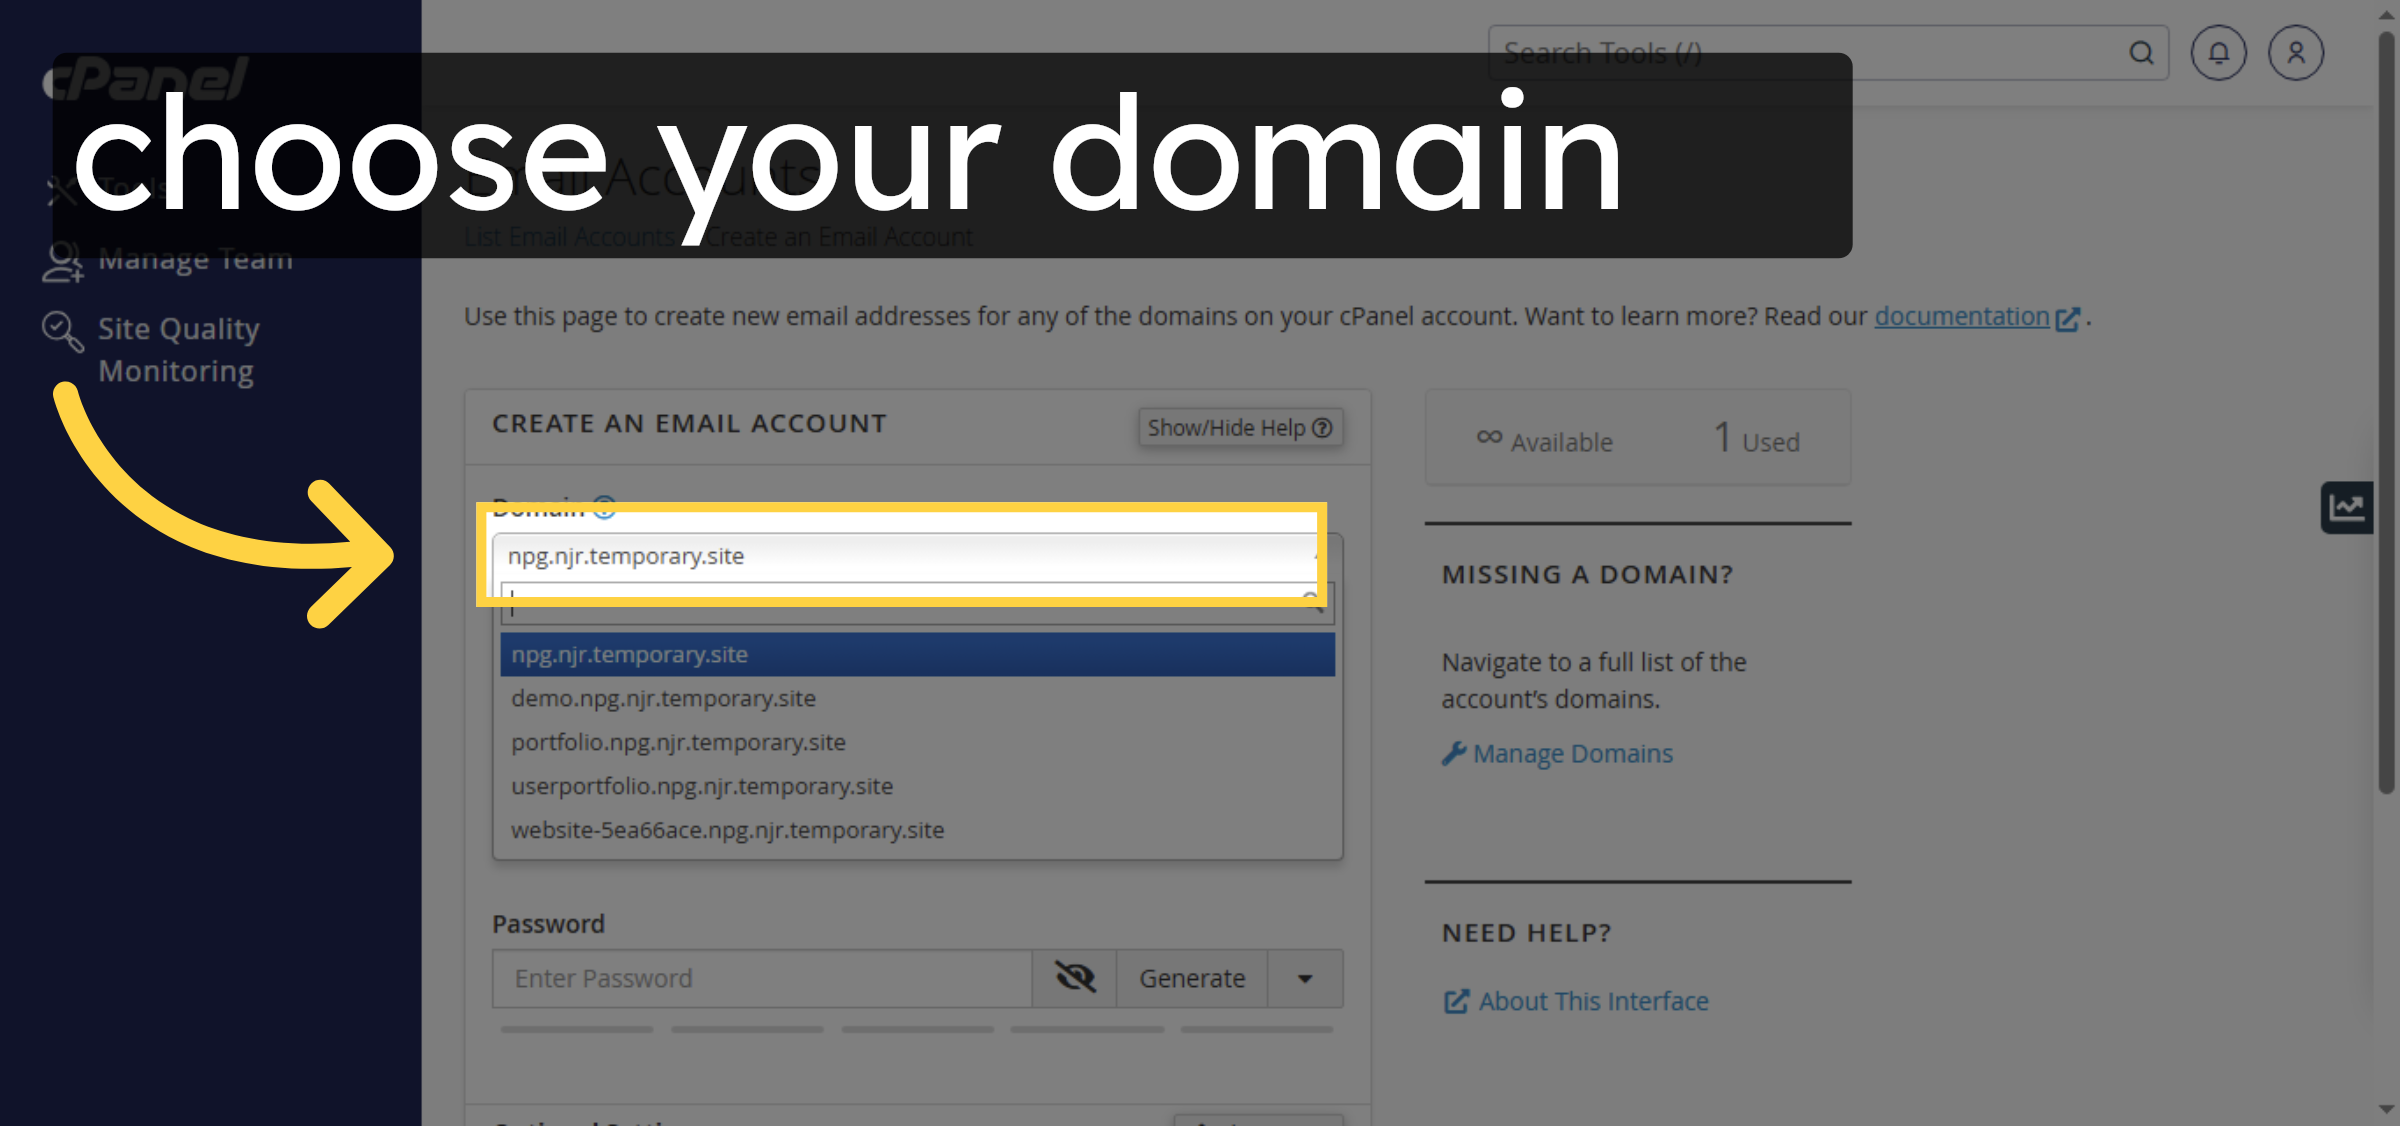
5. Select Domain for Email
6. Select Username Field
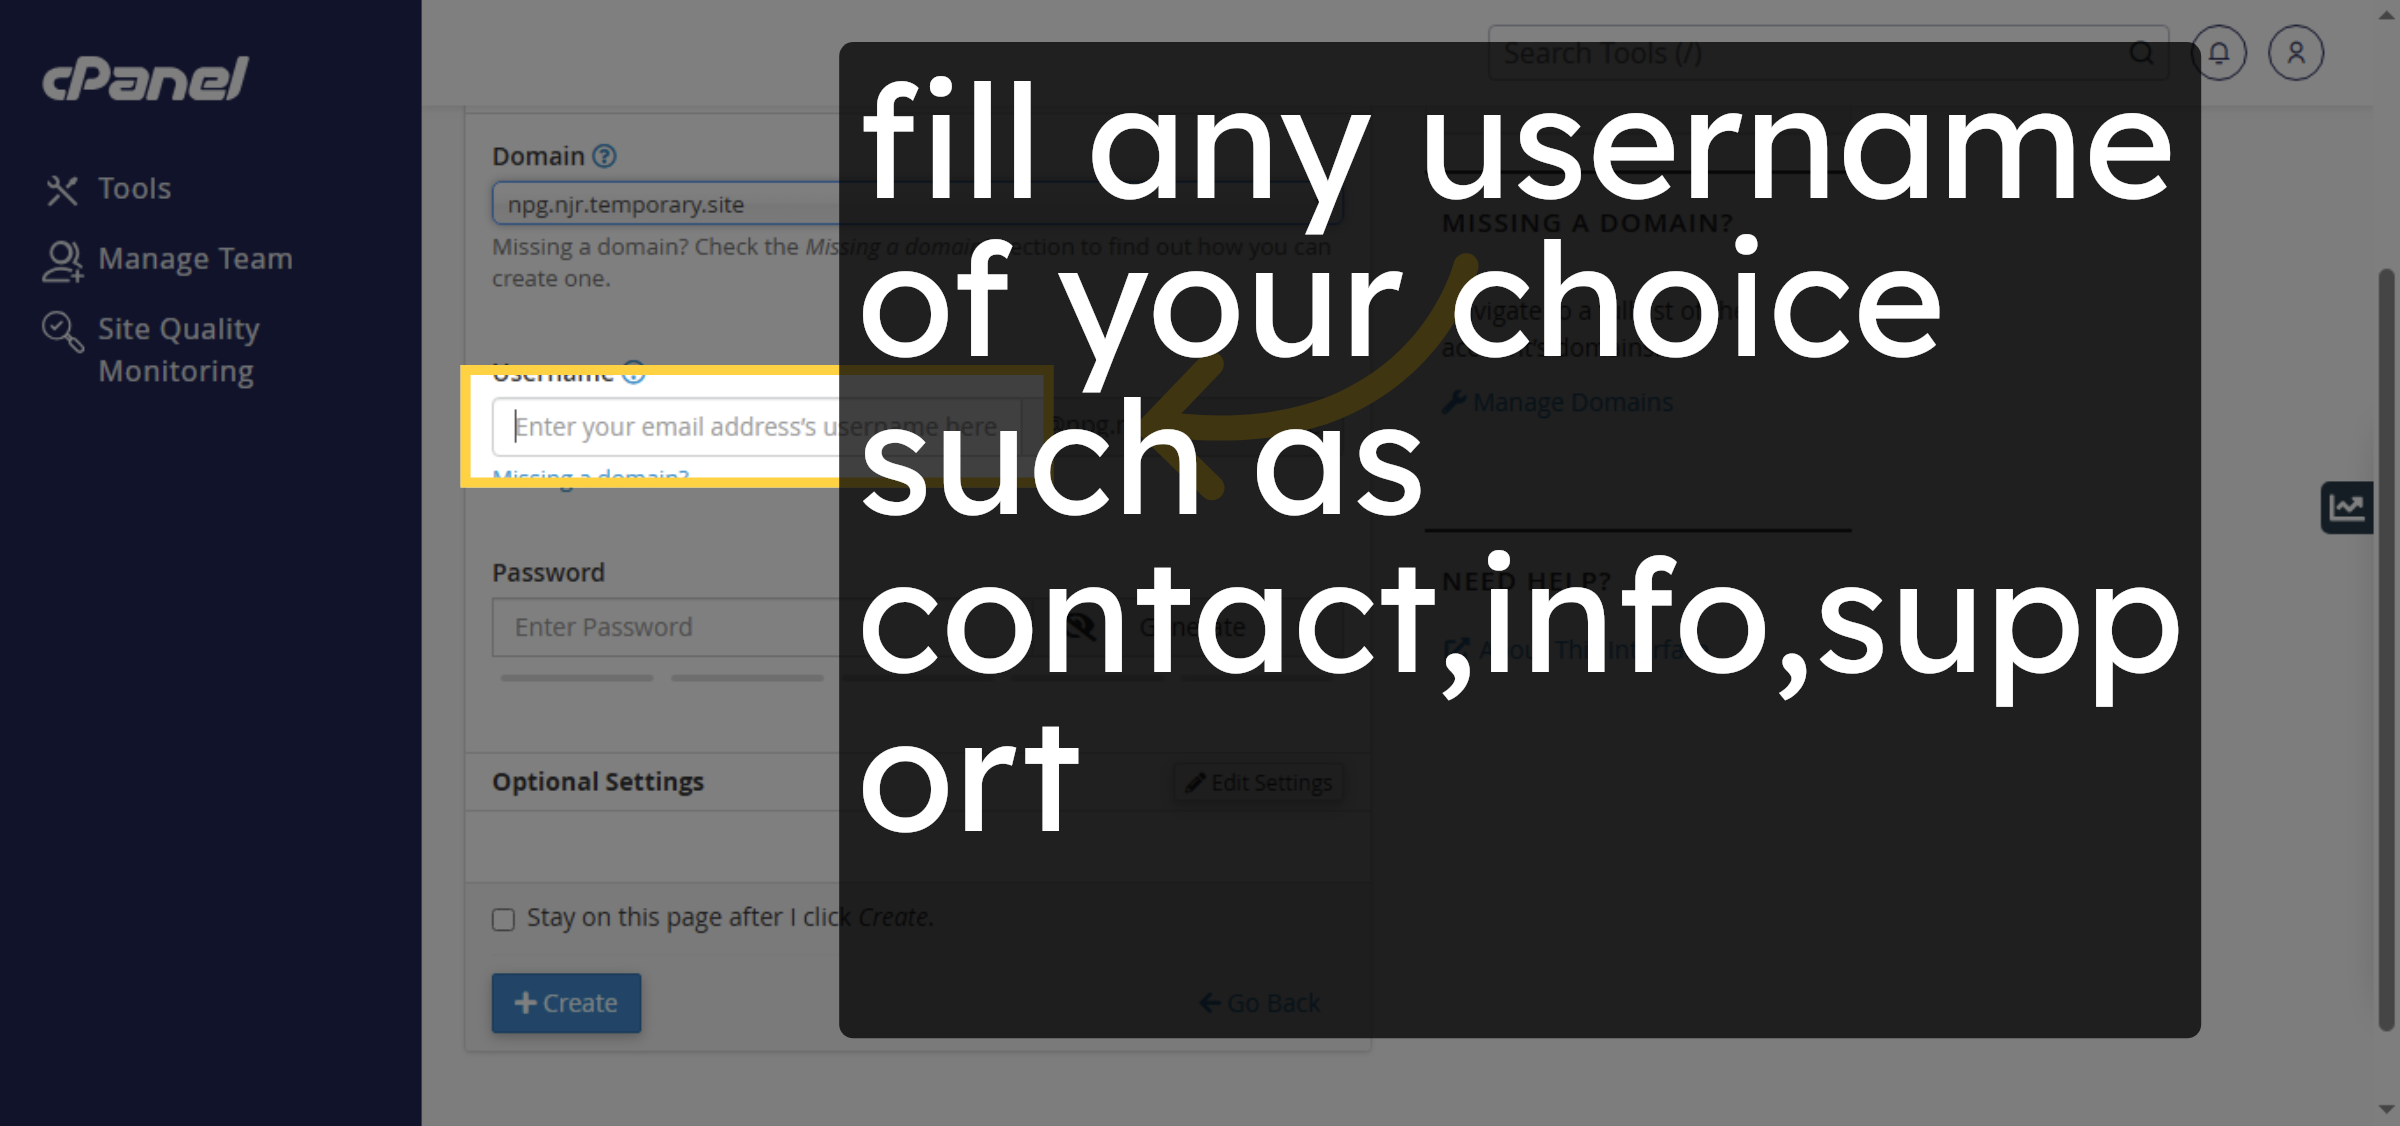
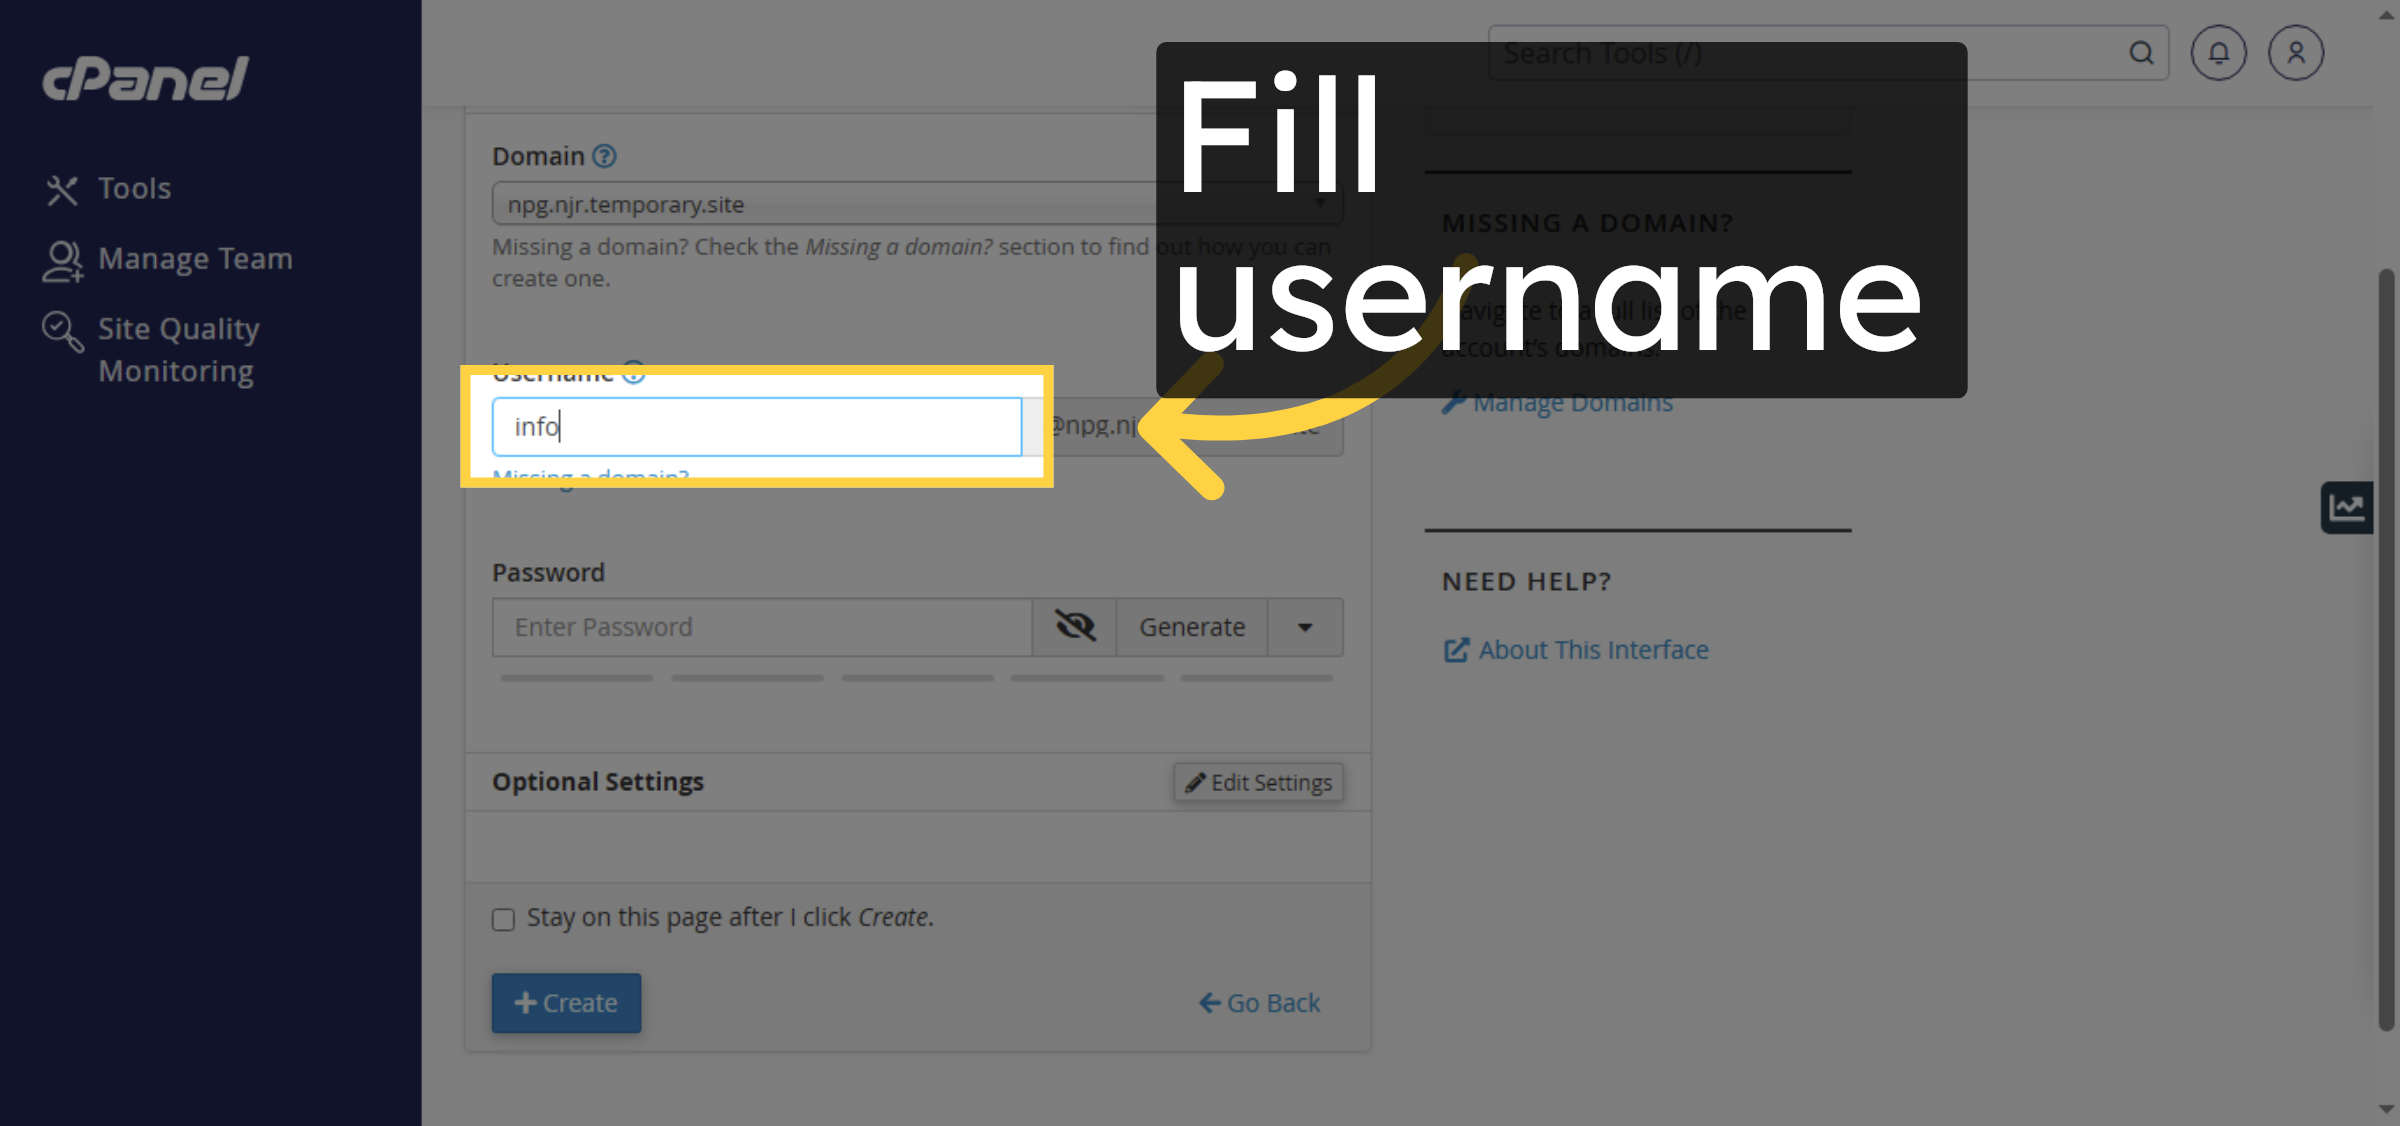
7. Enter Email Username
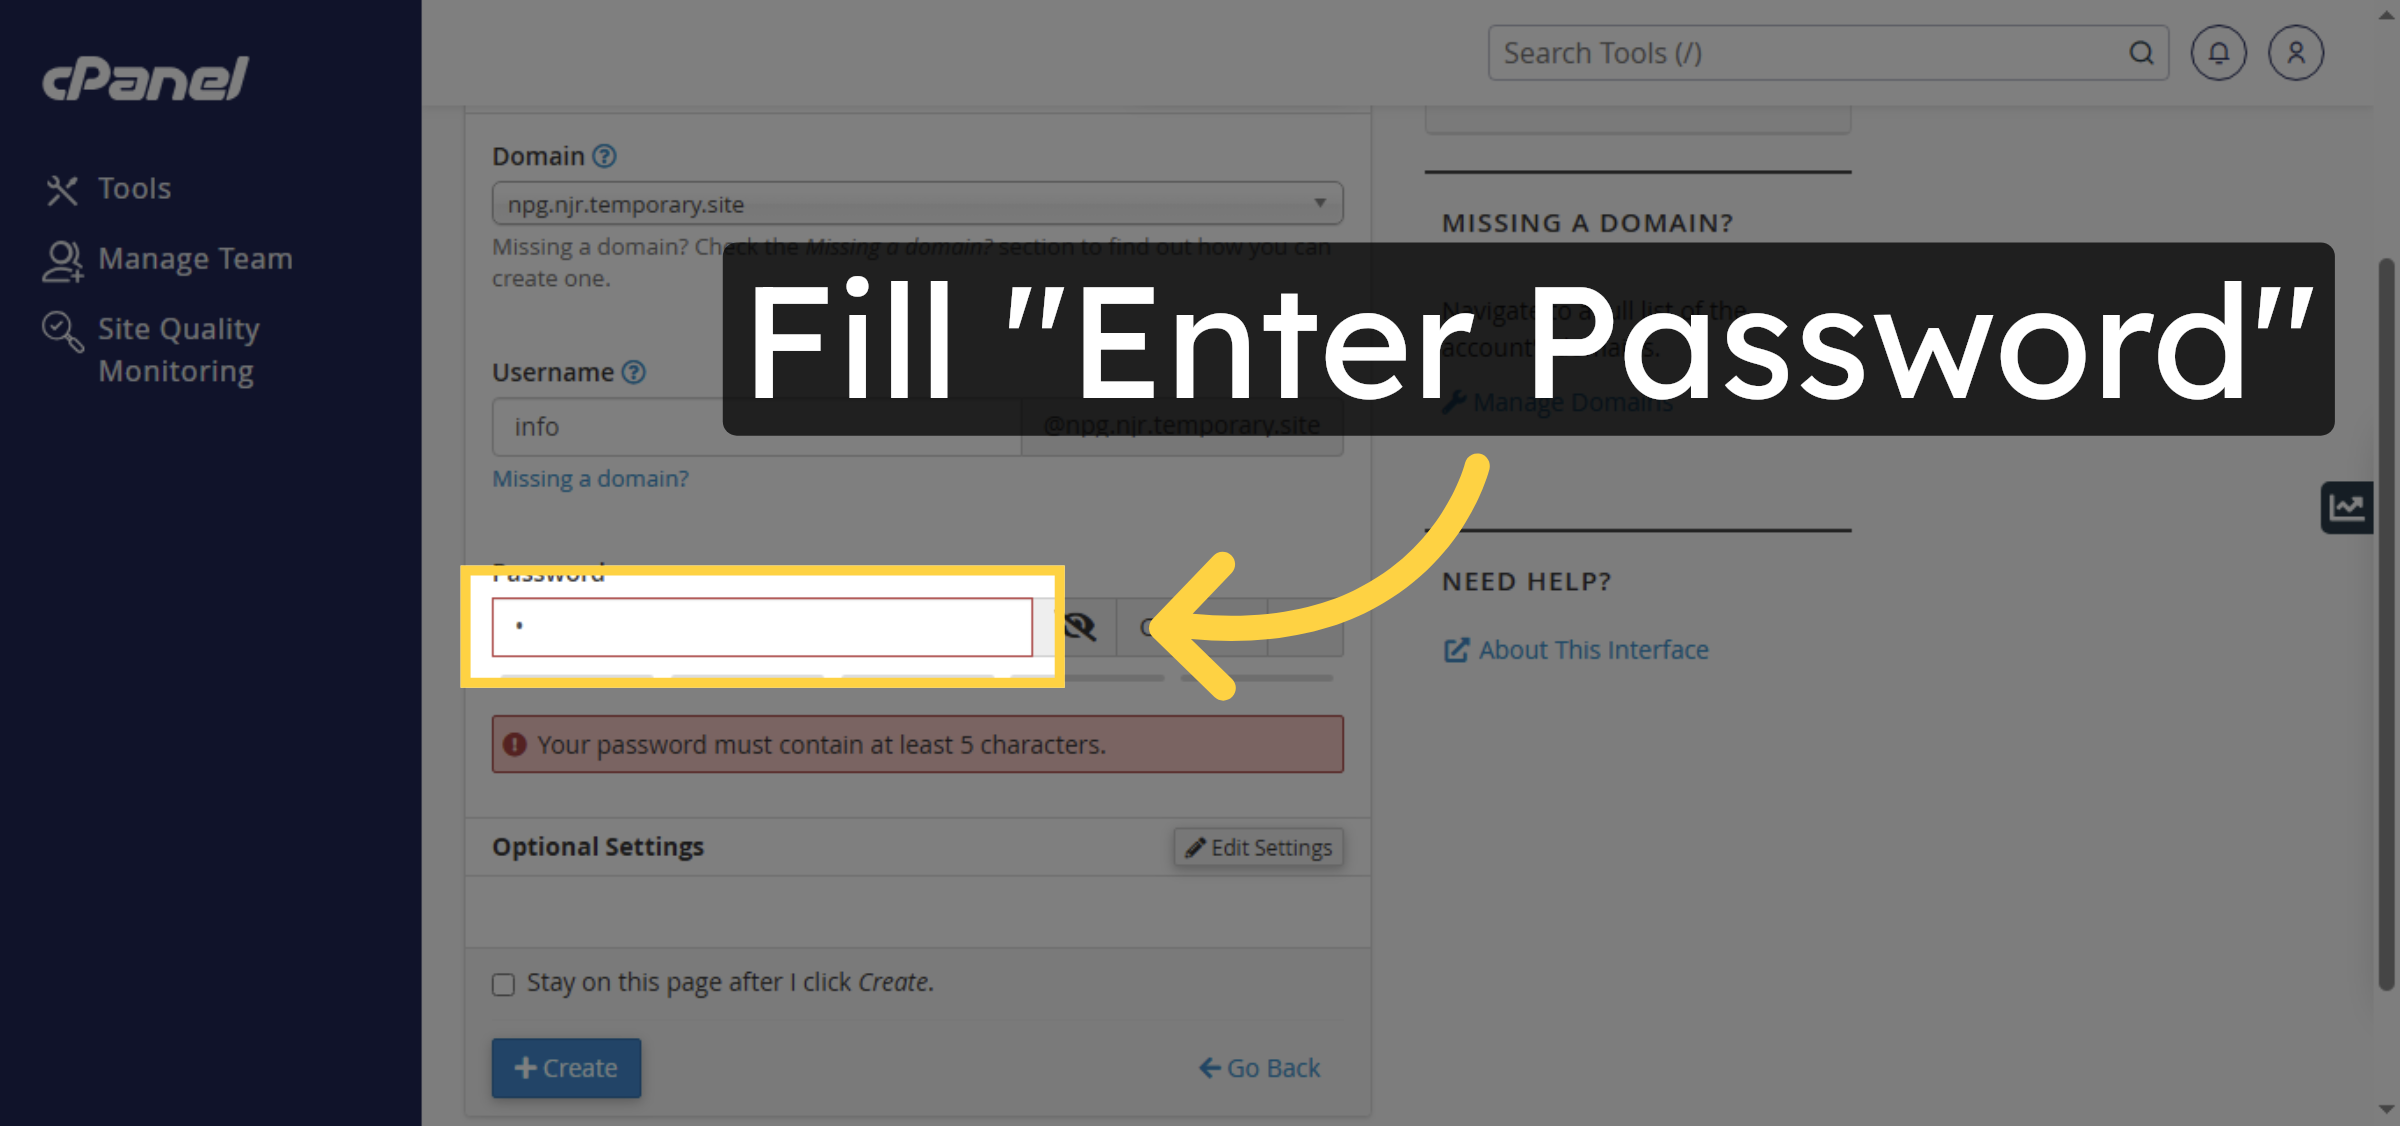
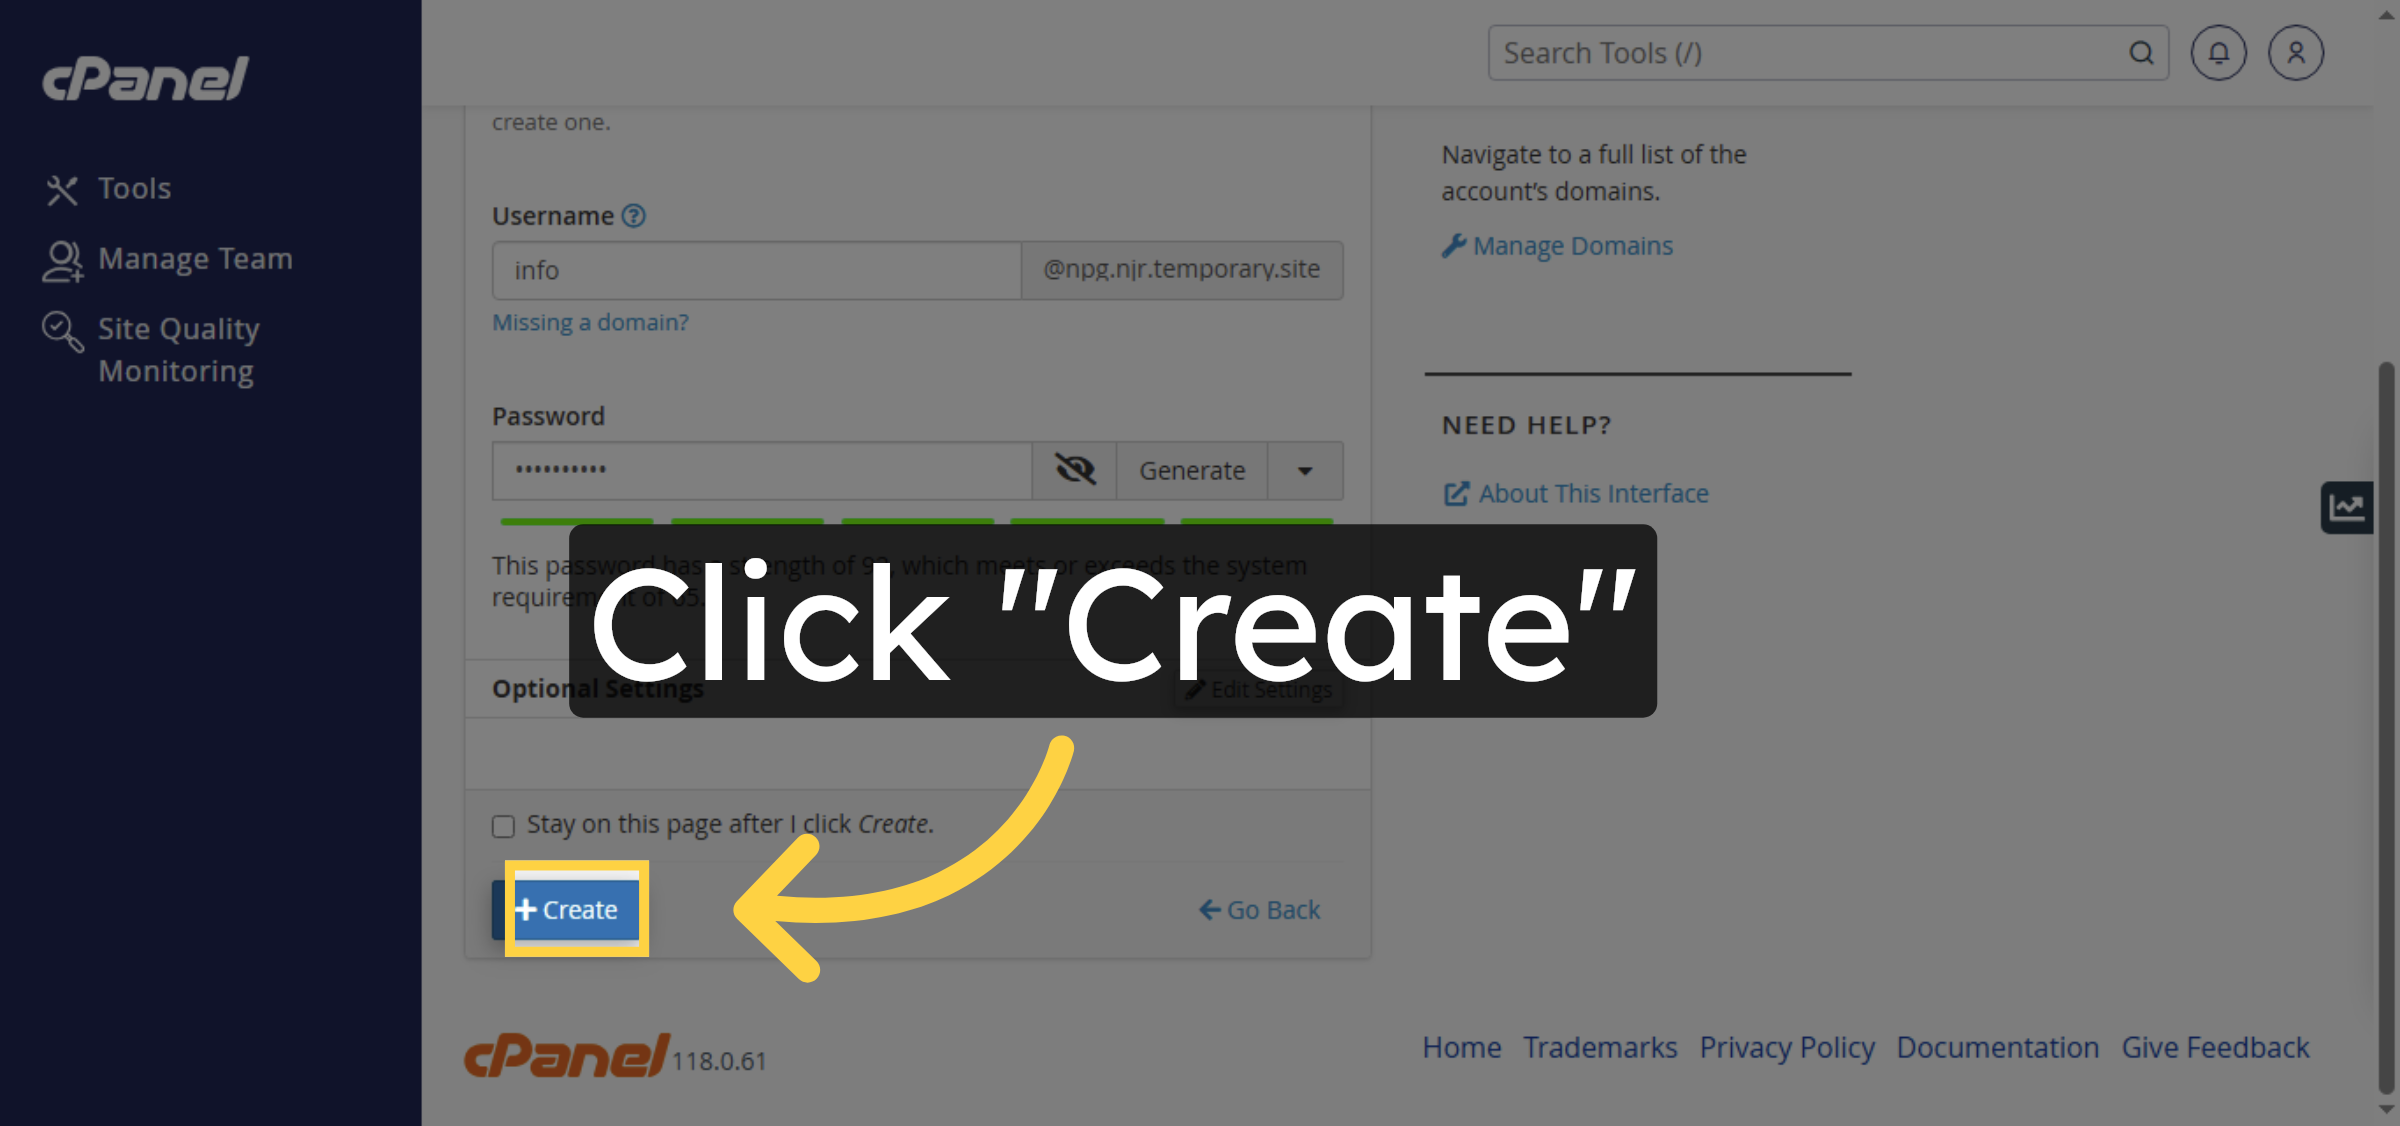
8. Enter Password
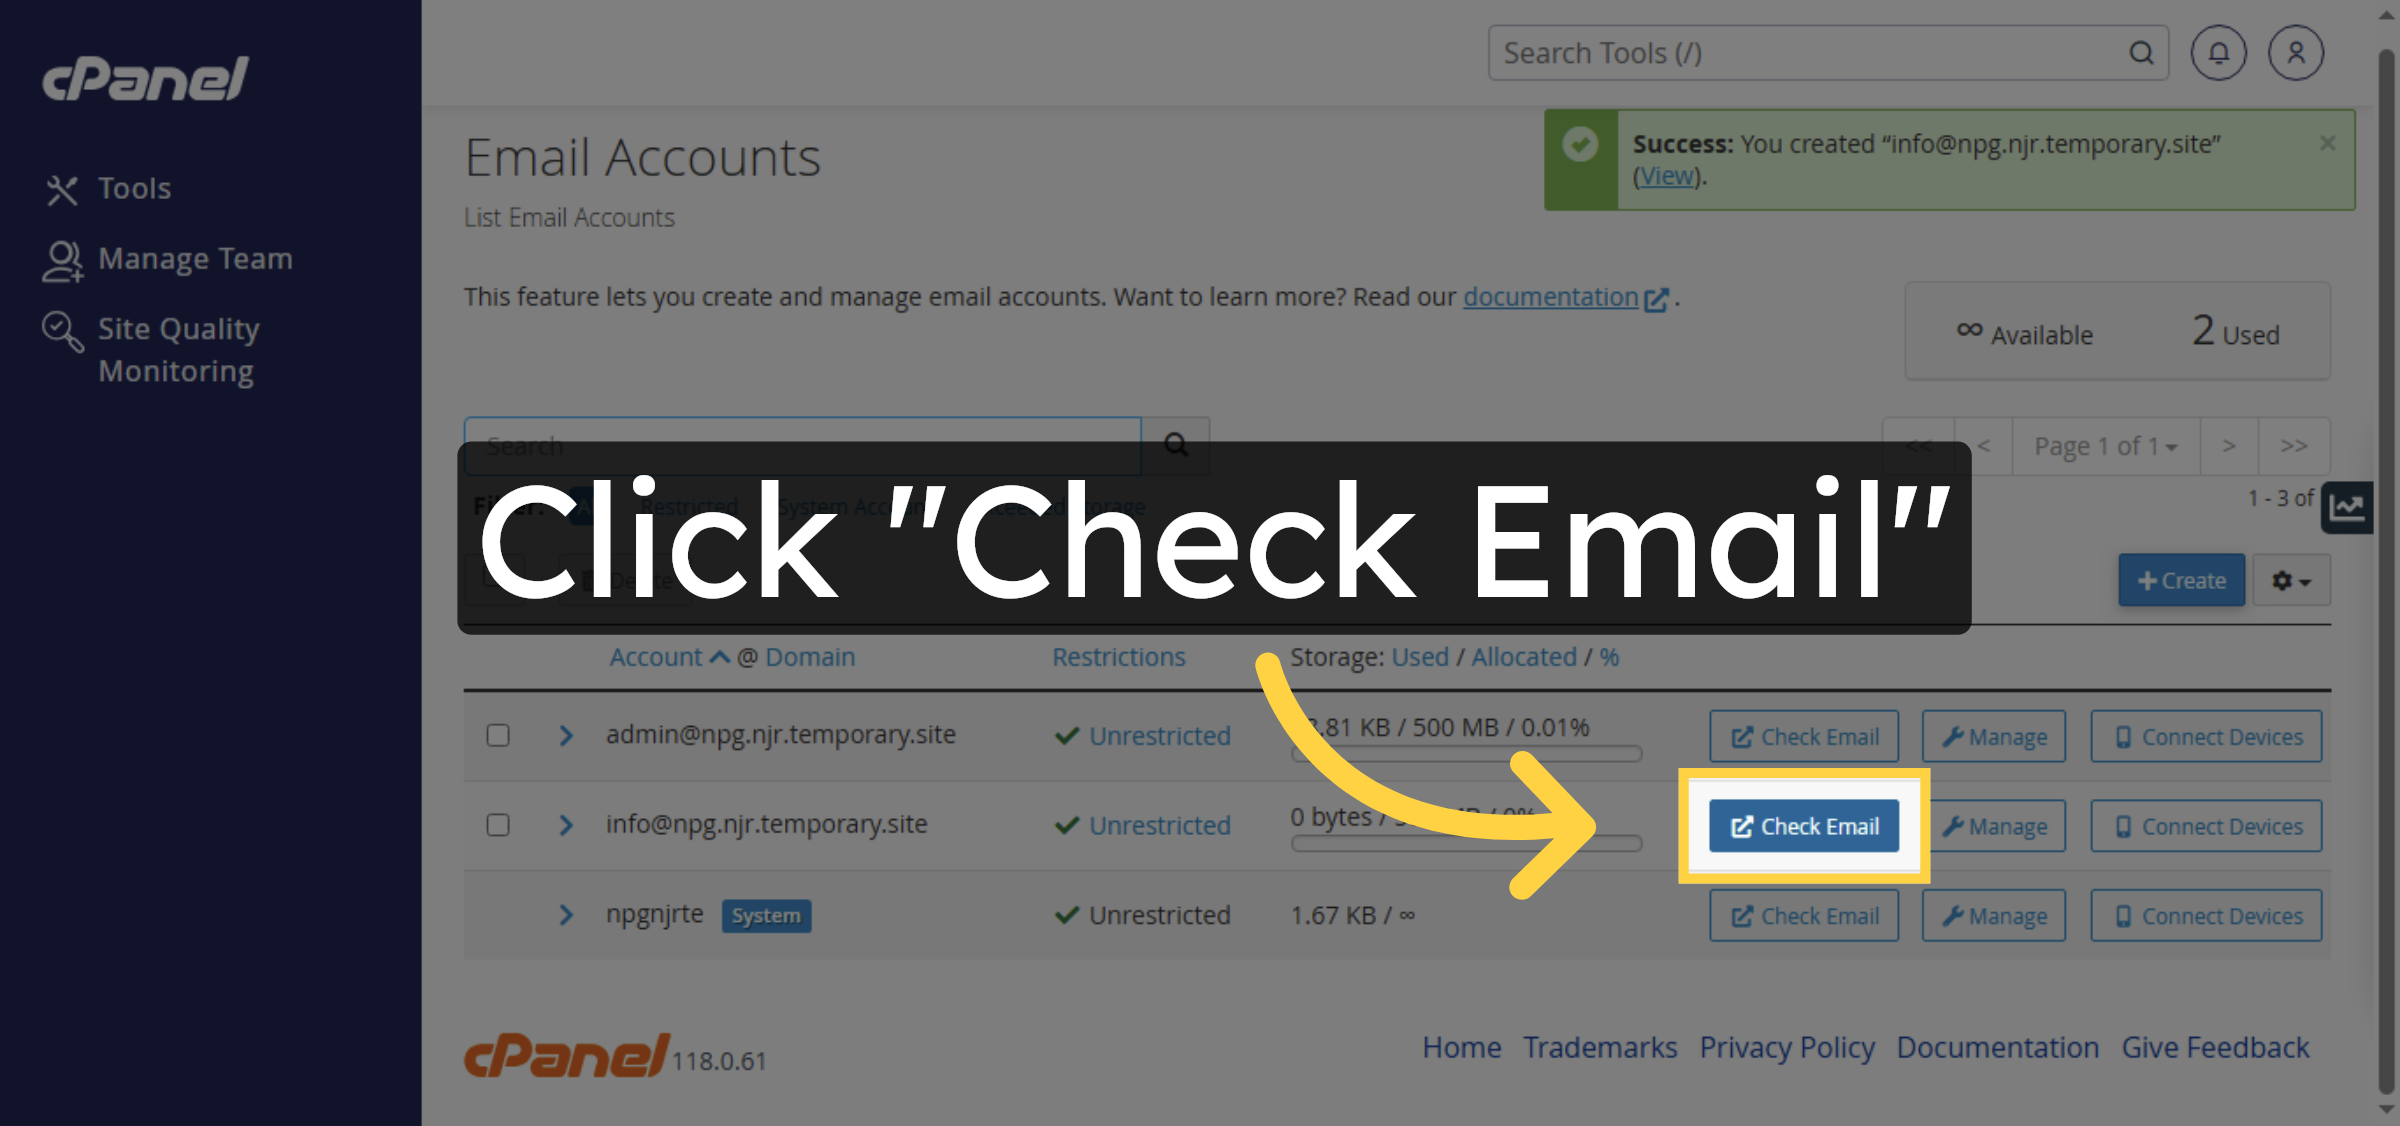
9. Create Email Account


10. Access Email Inbox
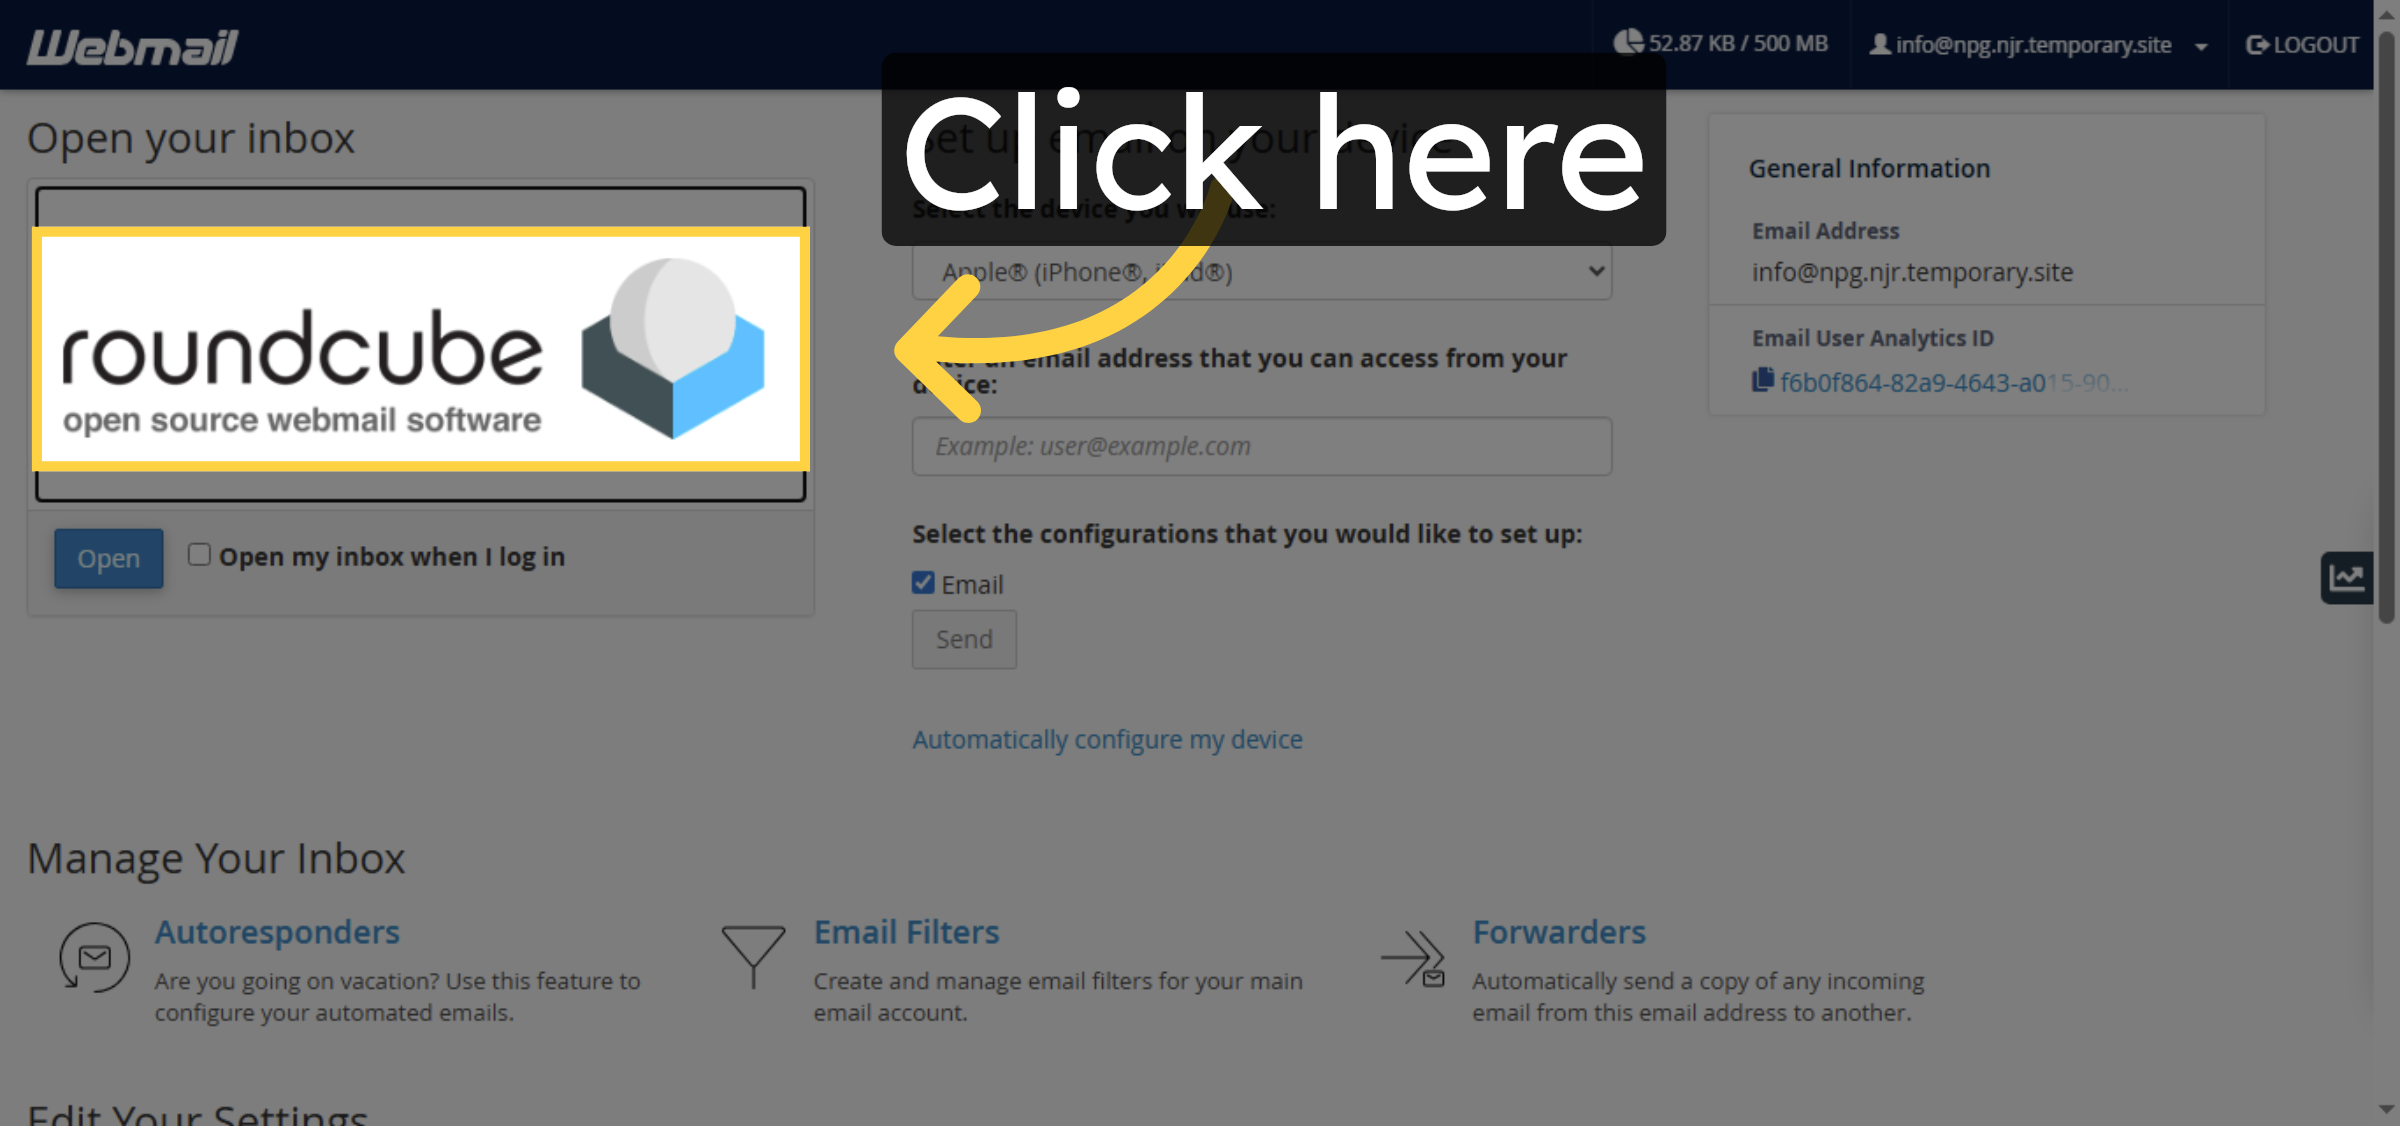
11. Open Client Configuration
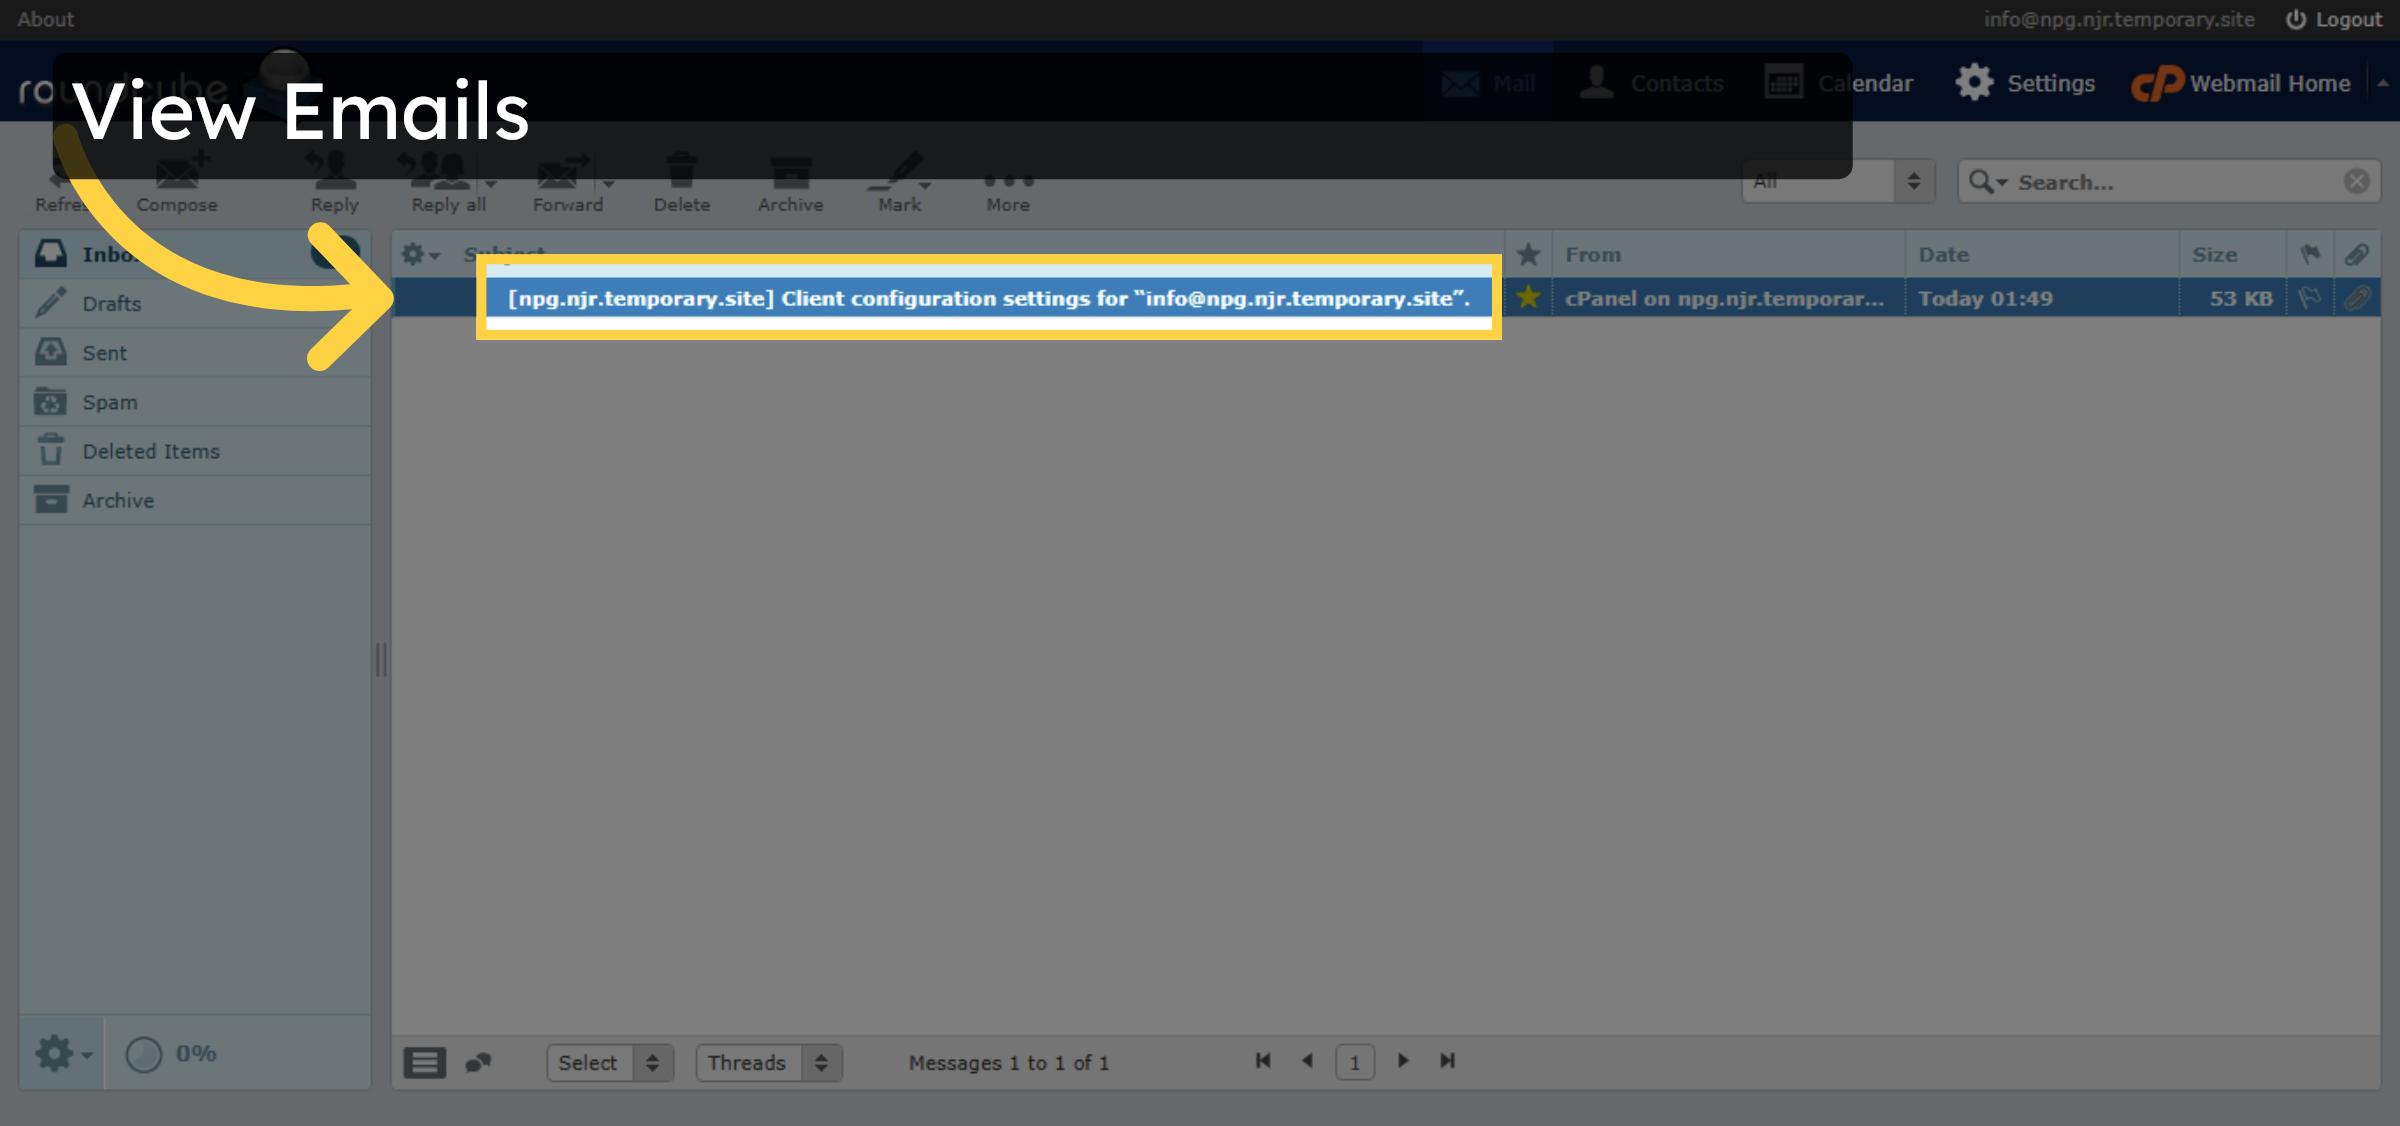
12. View Emails
Conclusion
By following the steps outlined in this guide, you can successfully create and access a professional email account on HostGator WP Hosting. Using the Email Accounts section in cPanel, you can define your email username, secure it with a password, and access the inbox immediately after creation. This setup enables efficient email communication and provides flexibility for managing multiple email accounts under your domain. Once configured, you can also use client configuration settings to connect your email account to desktop or mobile email applications.
-
Visit: https://www.woohelpdesk.com
-
Call Us Toll-Free: +1 888 602 0119 (US & Canada)
-
Get expert help with HostGator email setup, WordPress management, hosting configuration, and WooCommerce support


