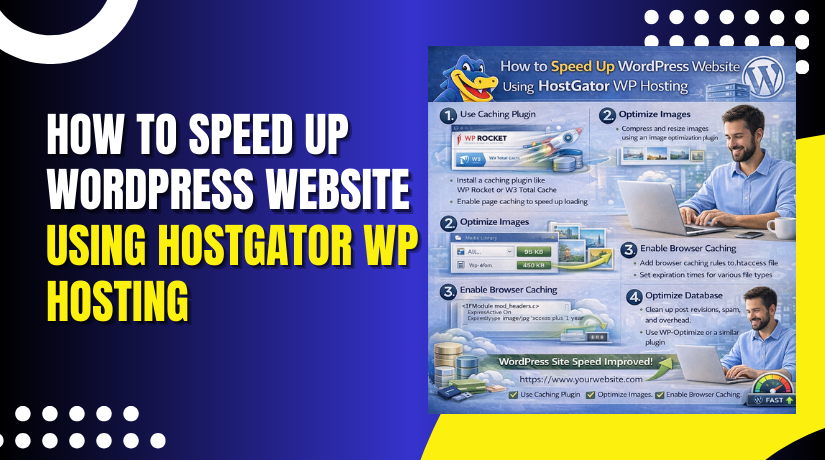
How to Speed Up WordPress Website Using HostGator WP Hosting
Introduction
Website performance plays a crucial role in user experience, search engine rankings, and overall business success. Slow-loading WordPress websites can lead to increased bounce rates, reduced customer engagement, and lower conversion rates. When hosting on platforms such as HostGator, optimizing website speed becomes essential to ensure consistent performance and reliability.
This guide provides a comprehensive, step-by-step approach to speeding up a WordPress website using HostGator WP Hosting and the WP Rocket optimization plugin. It covers essential performance techniques, including speed evaluation, plugin installation, file optimization, CSS delivery improvement, lazy loading configuration, cache preloading, database cleanup, and bloat reduction. By following this guide, website owners can enhance loading speed, improve website responsiveness, and deliver a seamless browsing experience to their visitors.
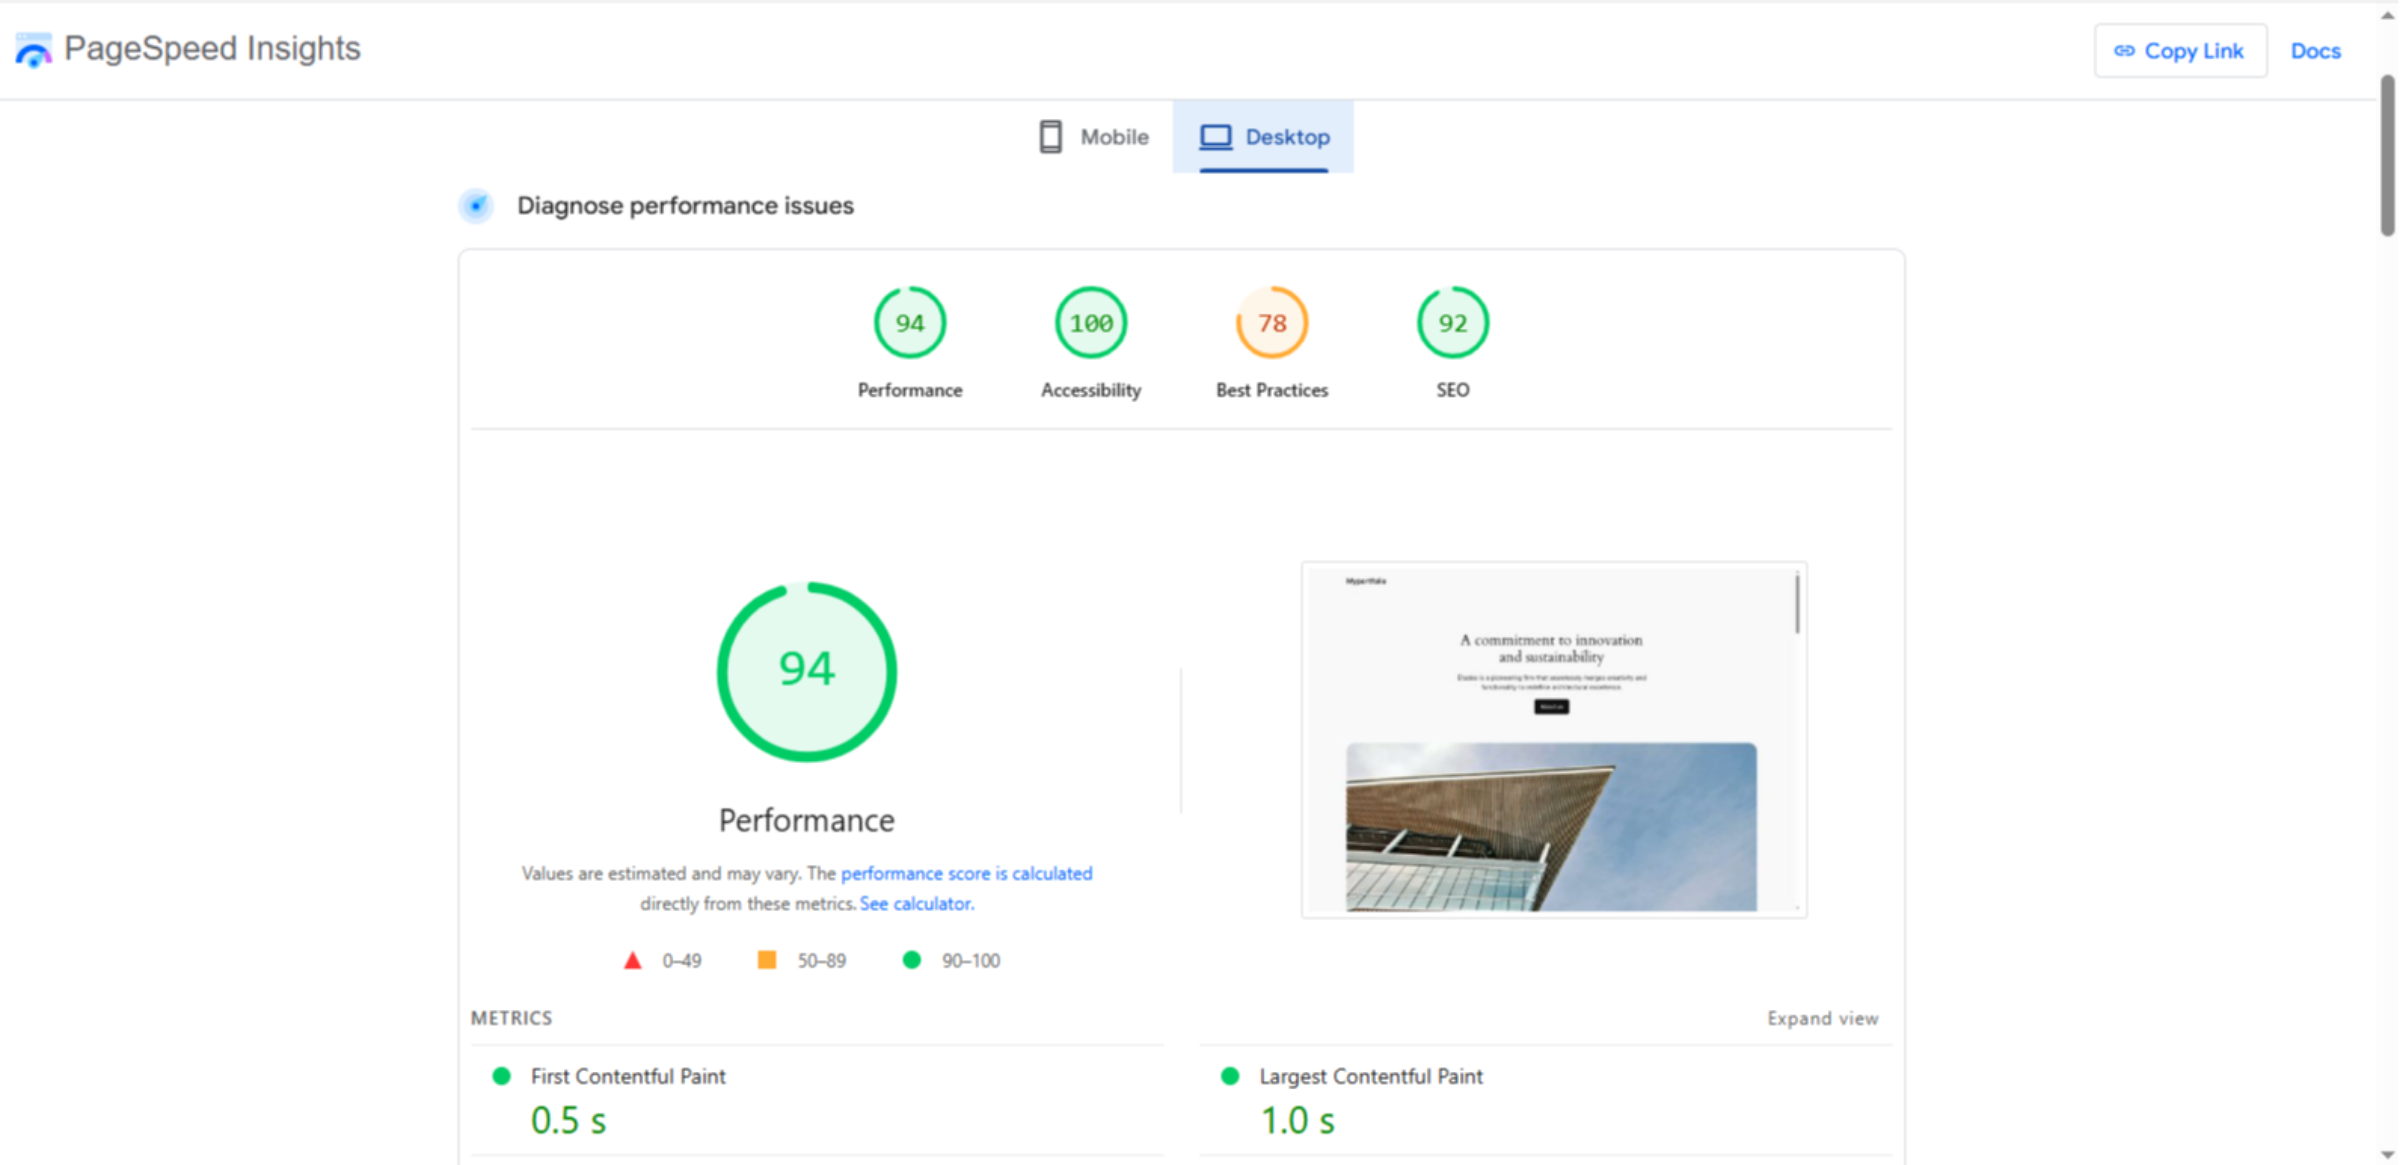
1. Evaluate Website Speed Before Speeding Up
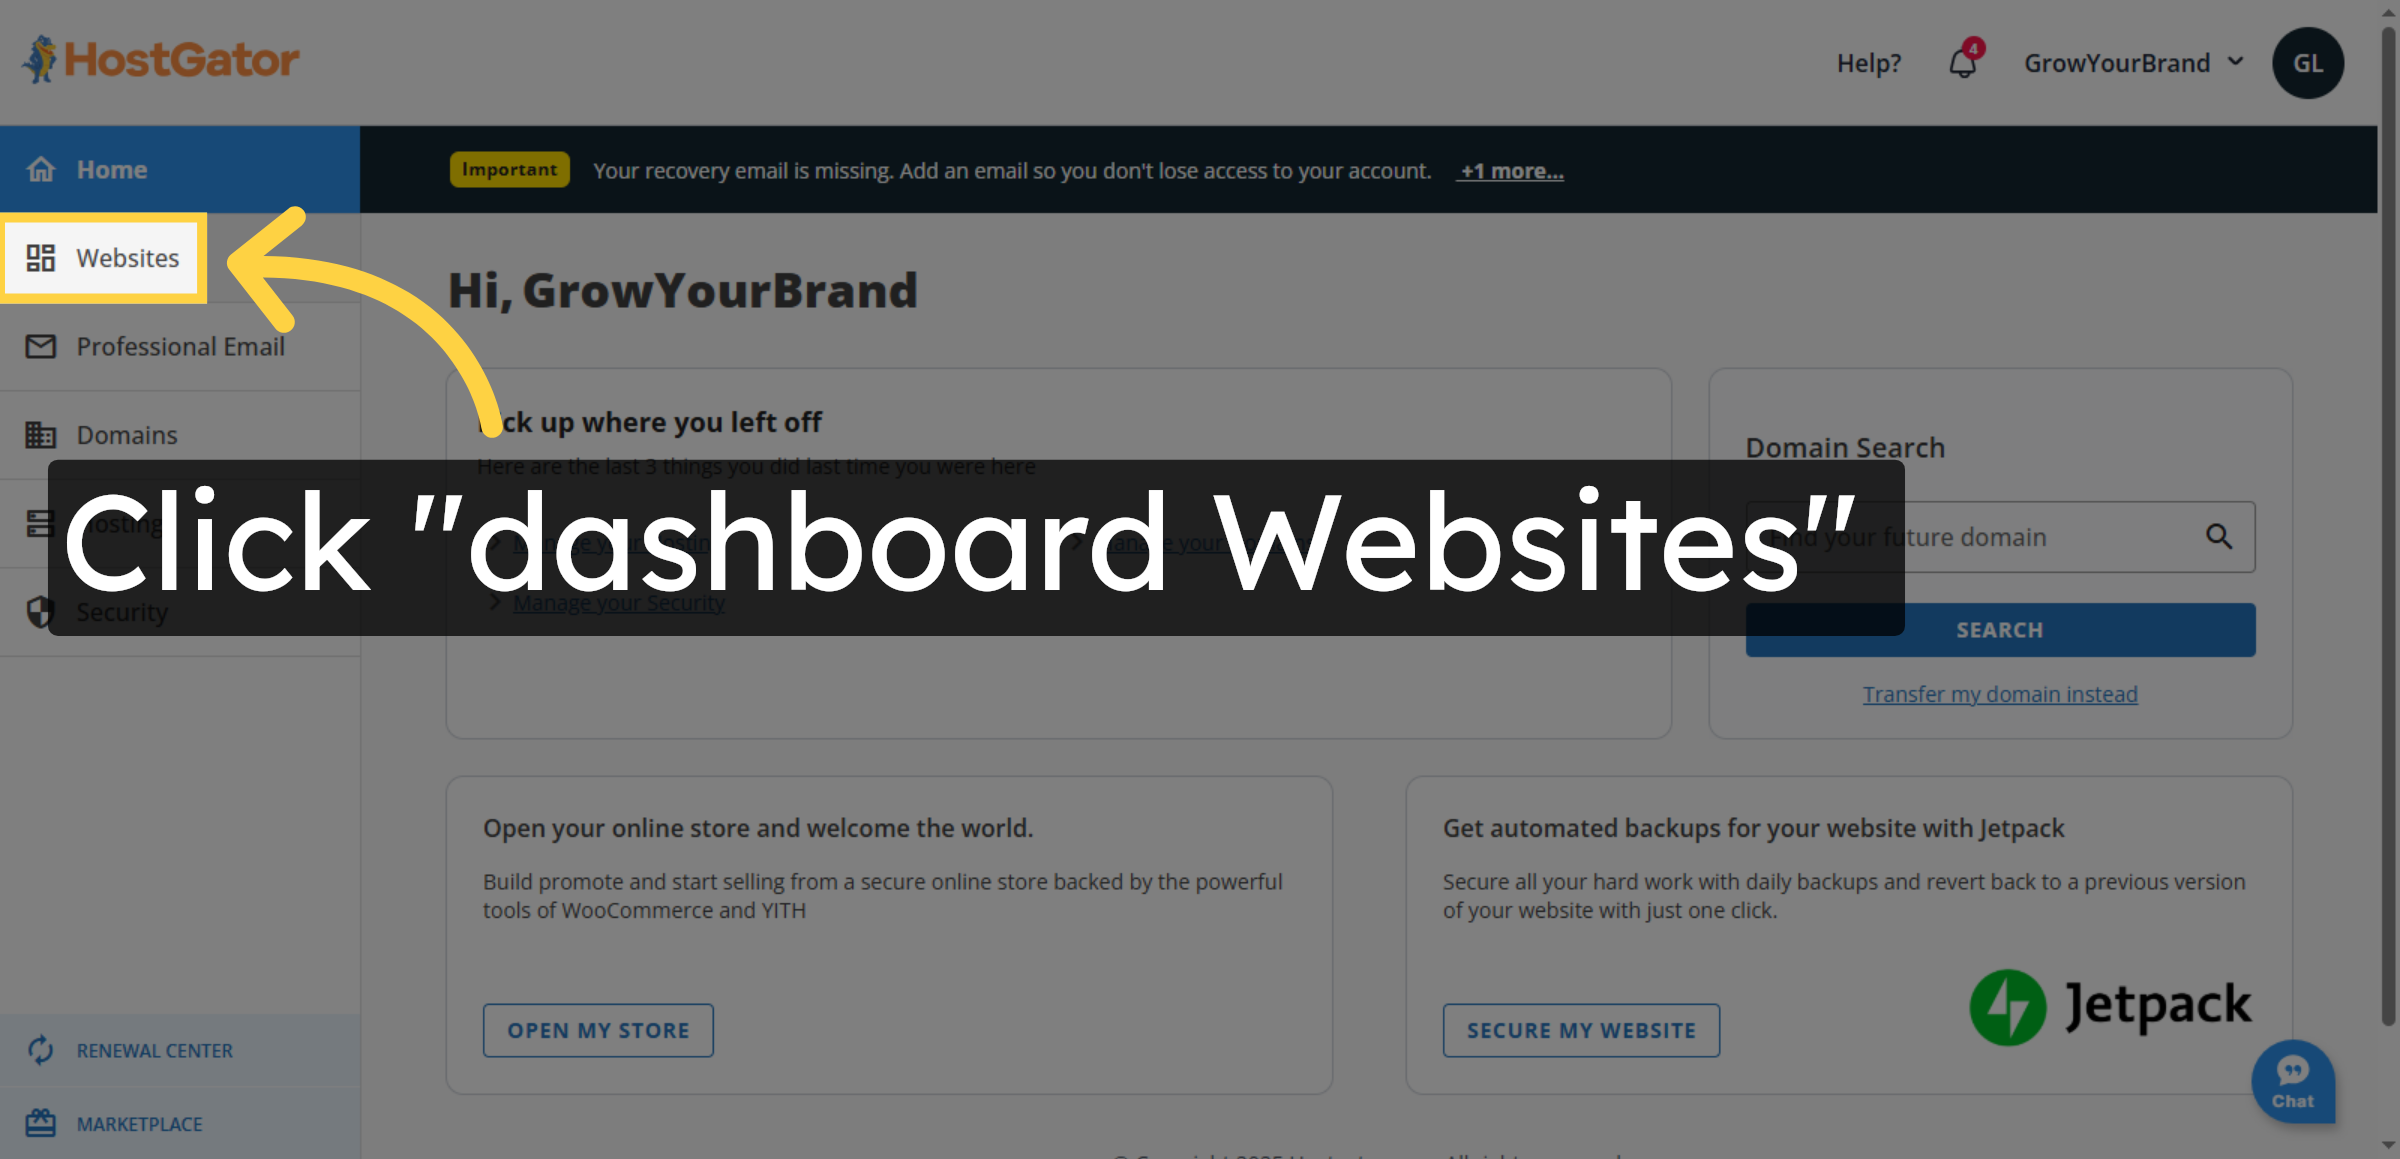
2. Access Dashboard Websites
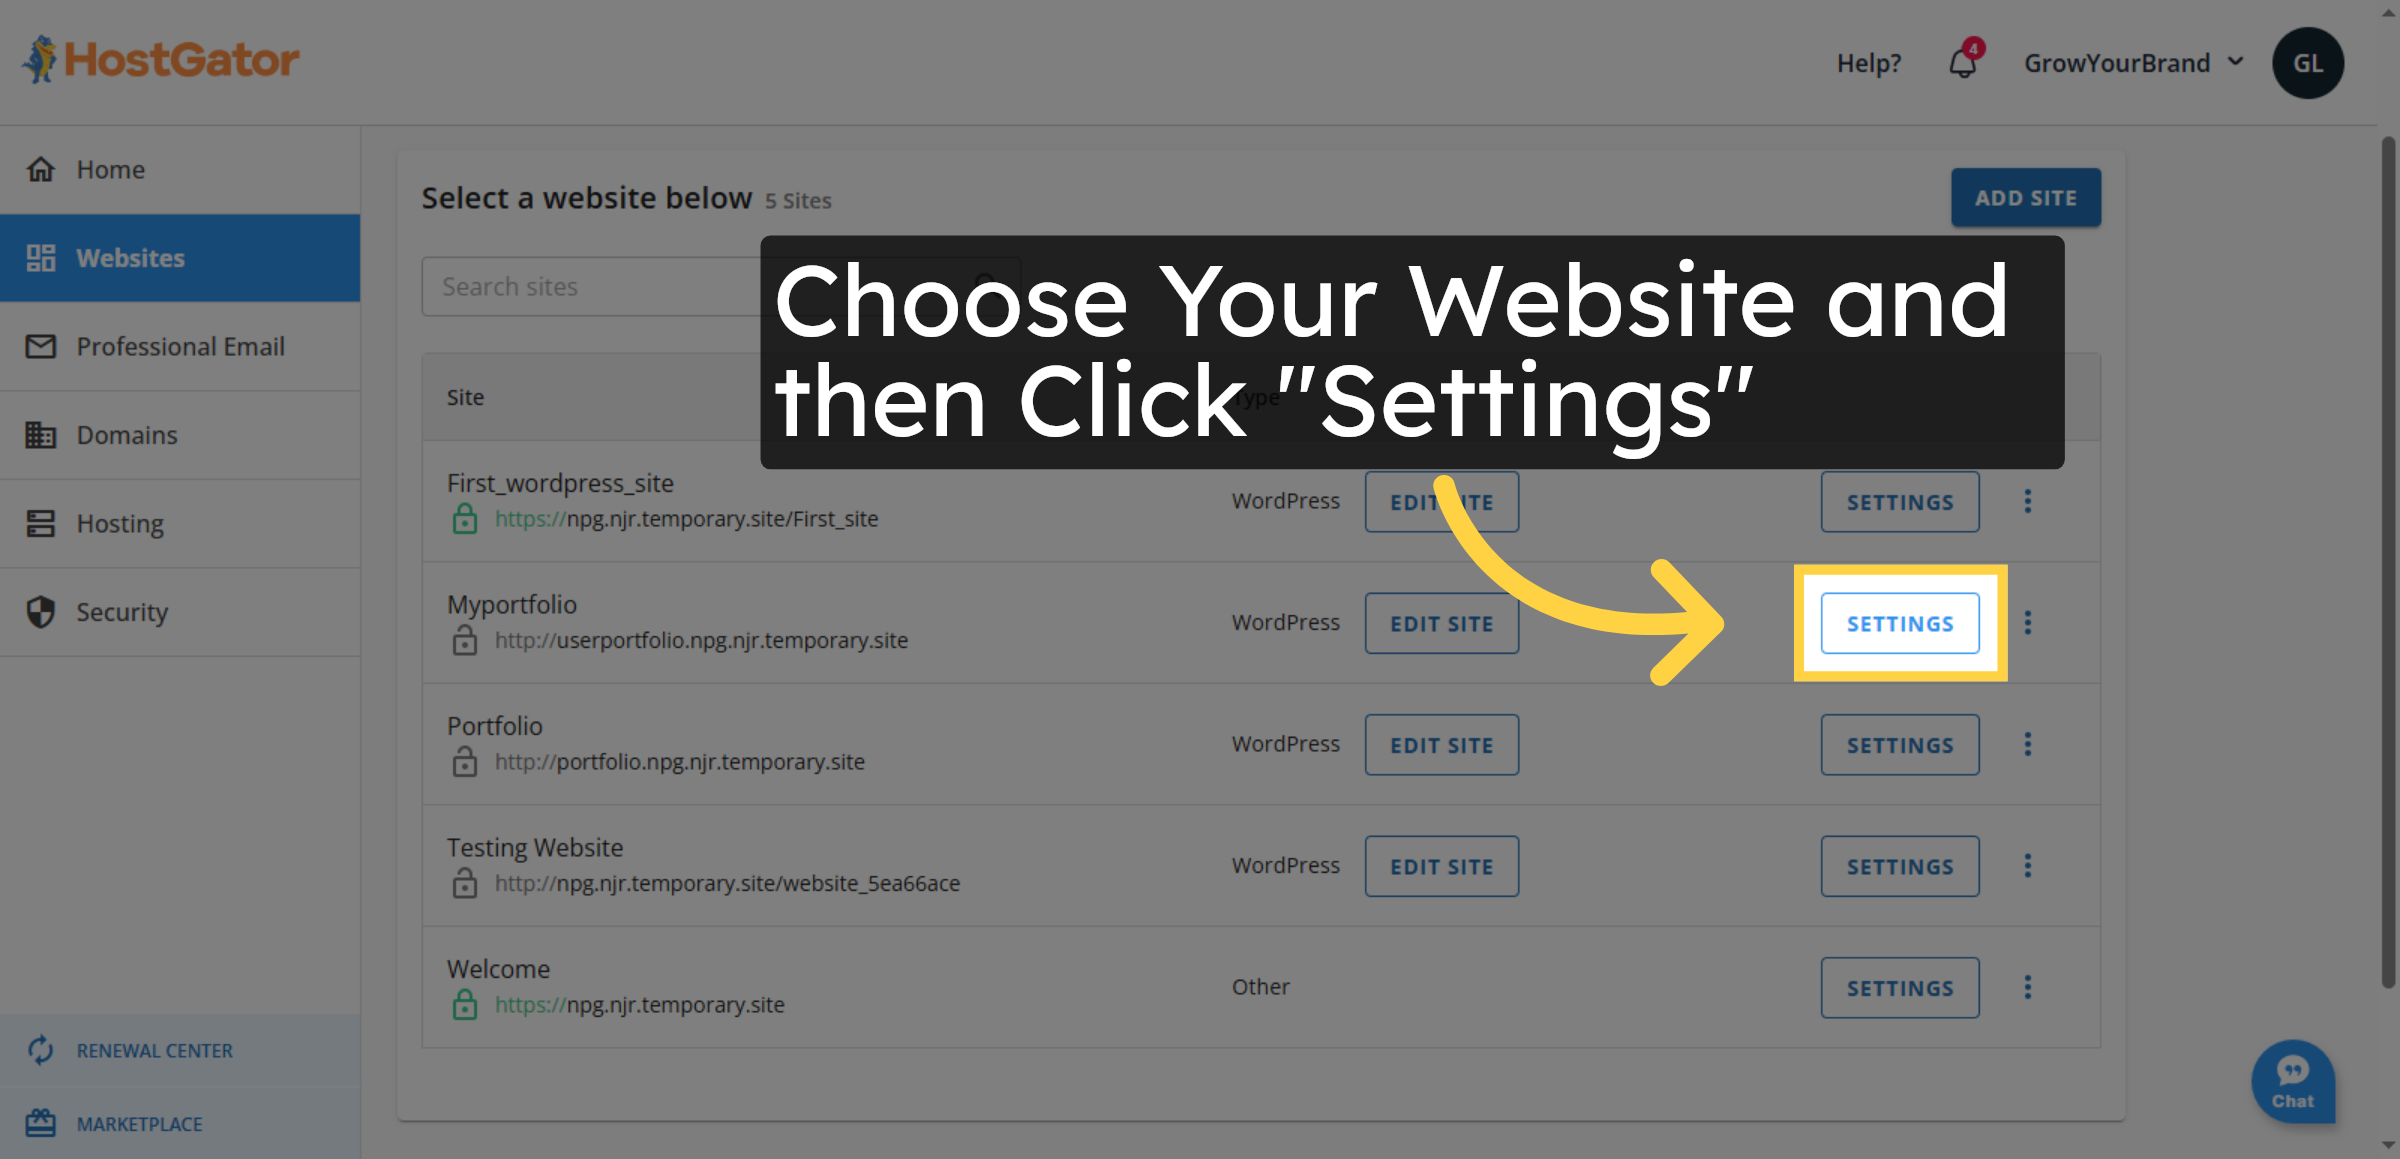
3. Open Settings Menu
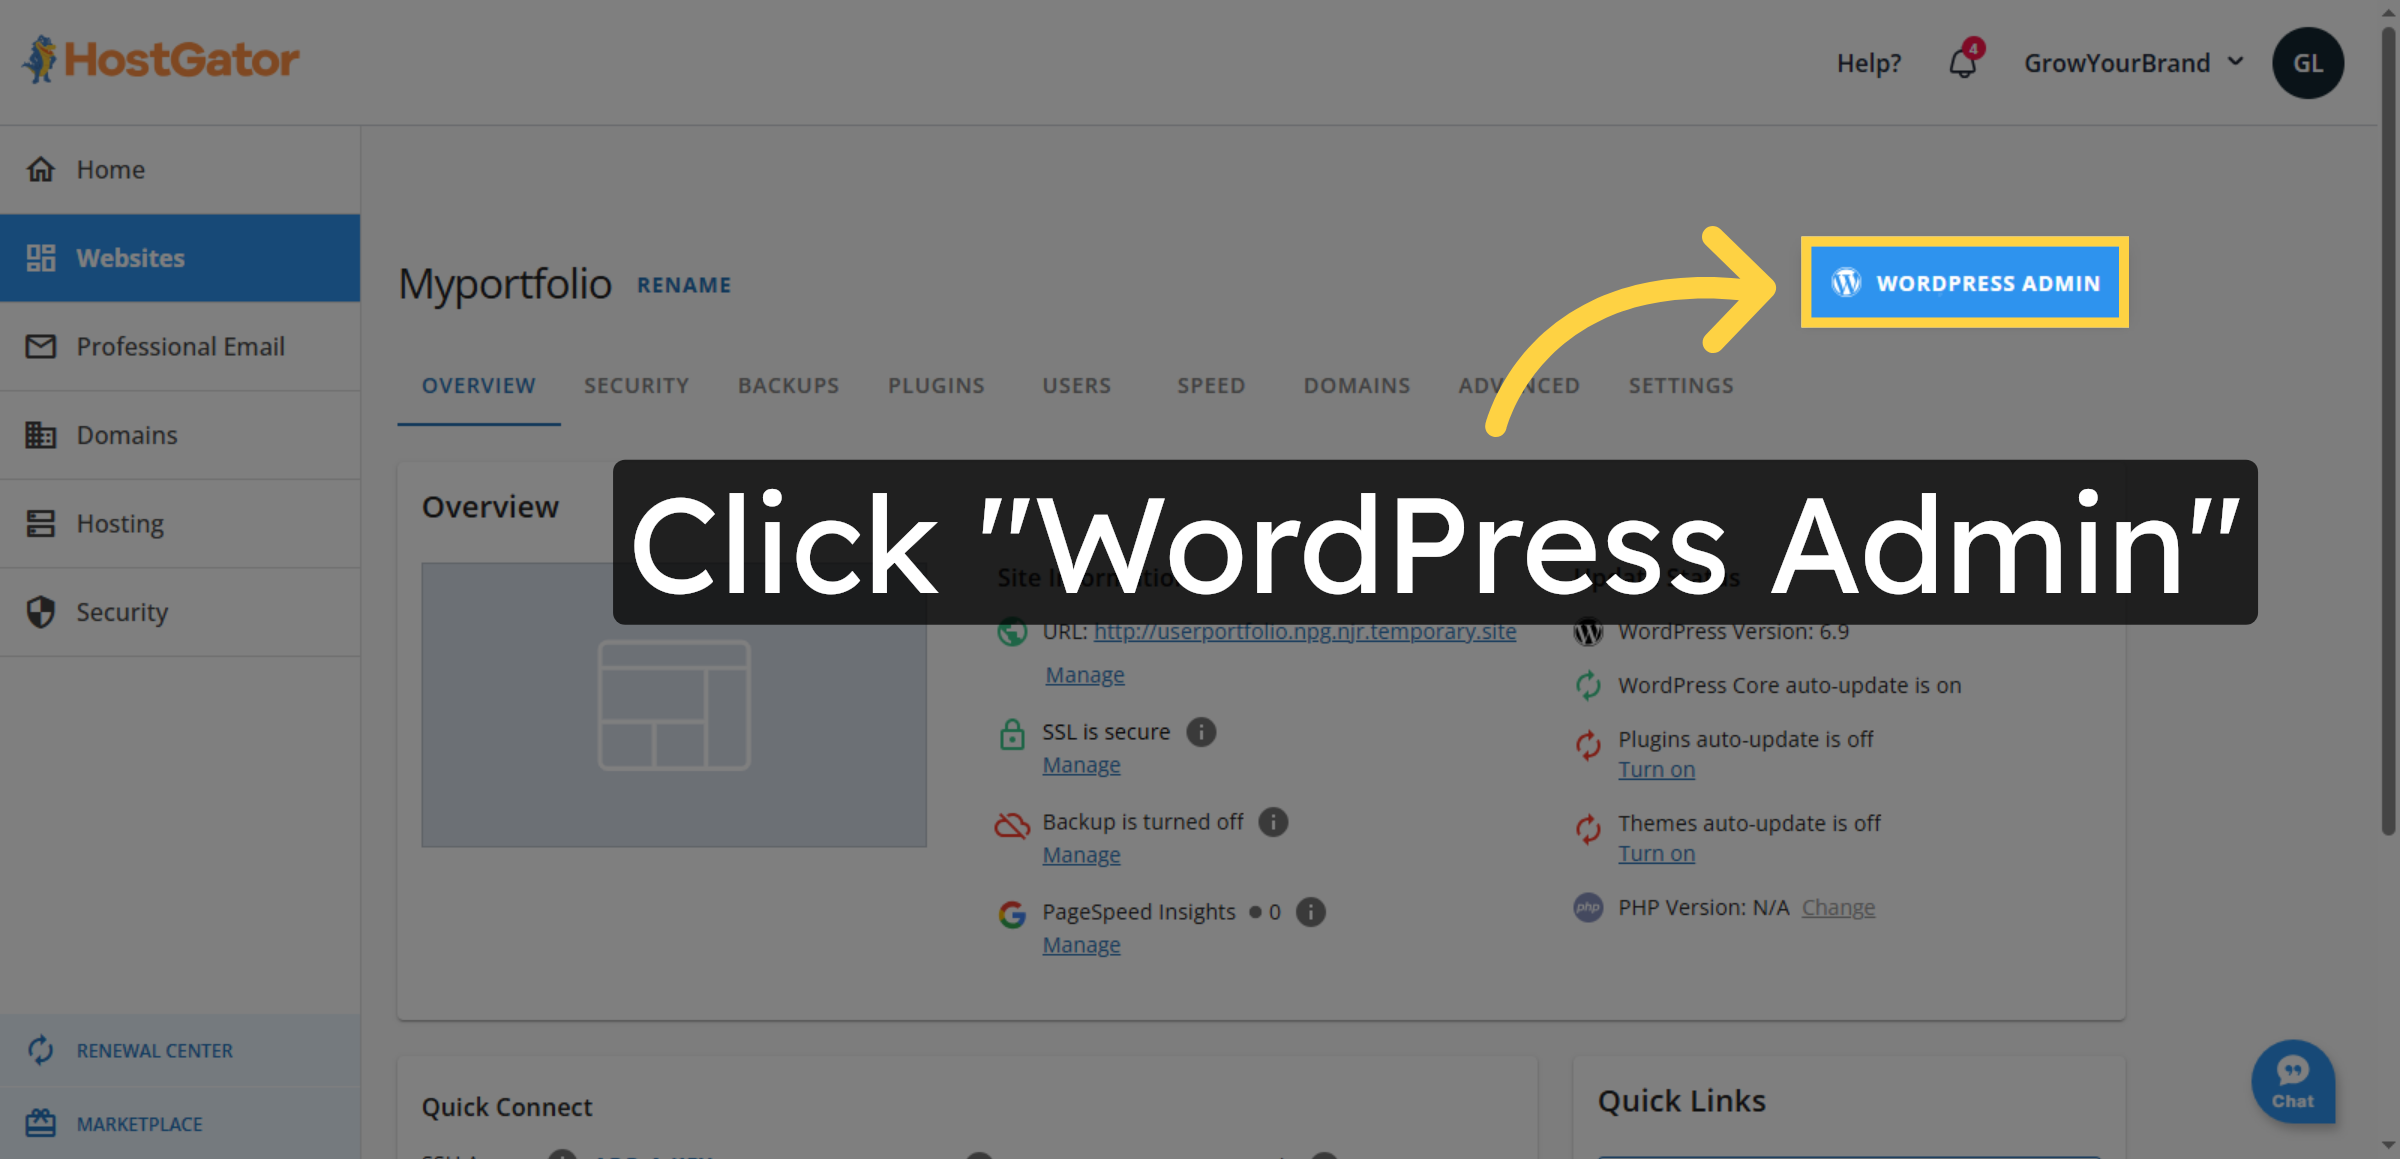
4. Enter WordPress Admin
5. Switch to Temporary Site
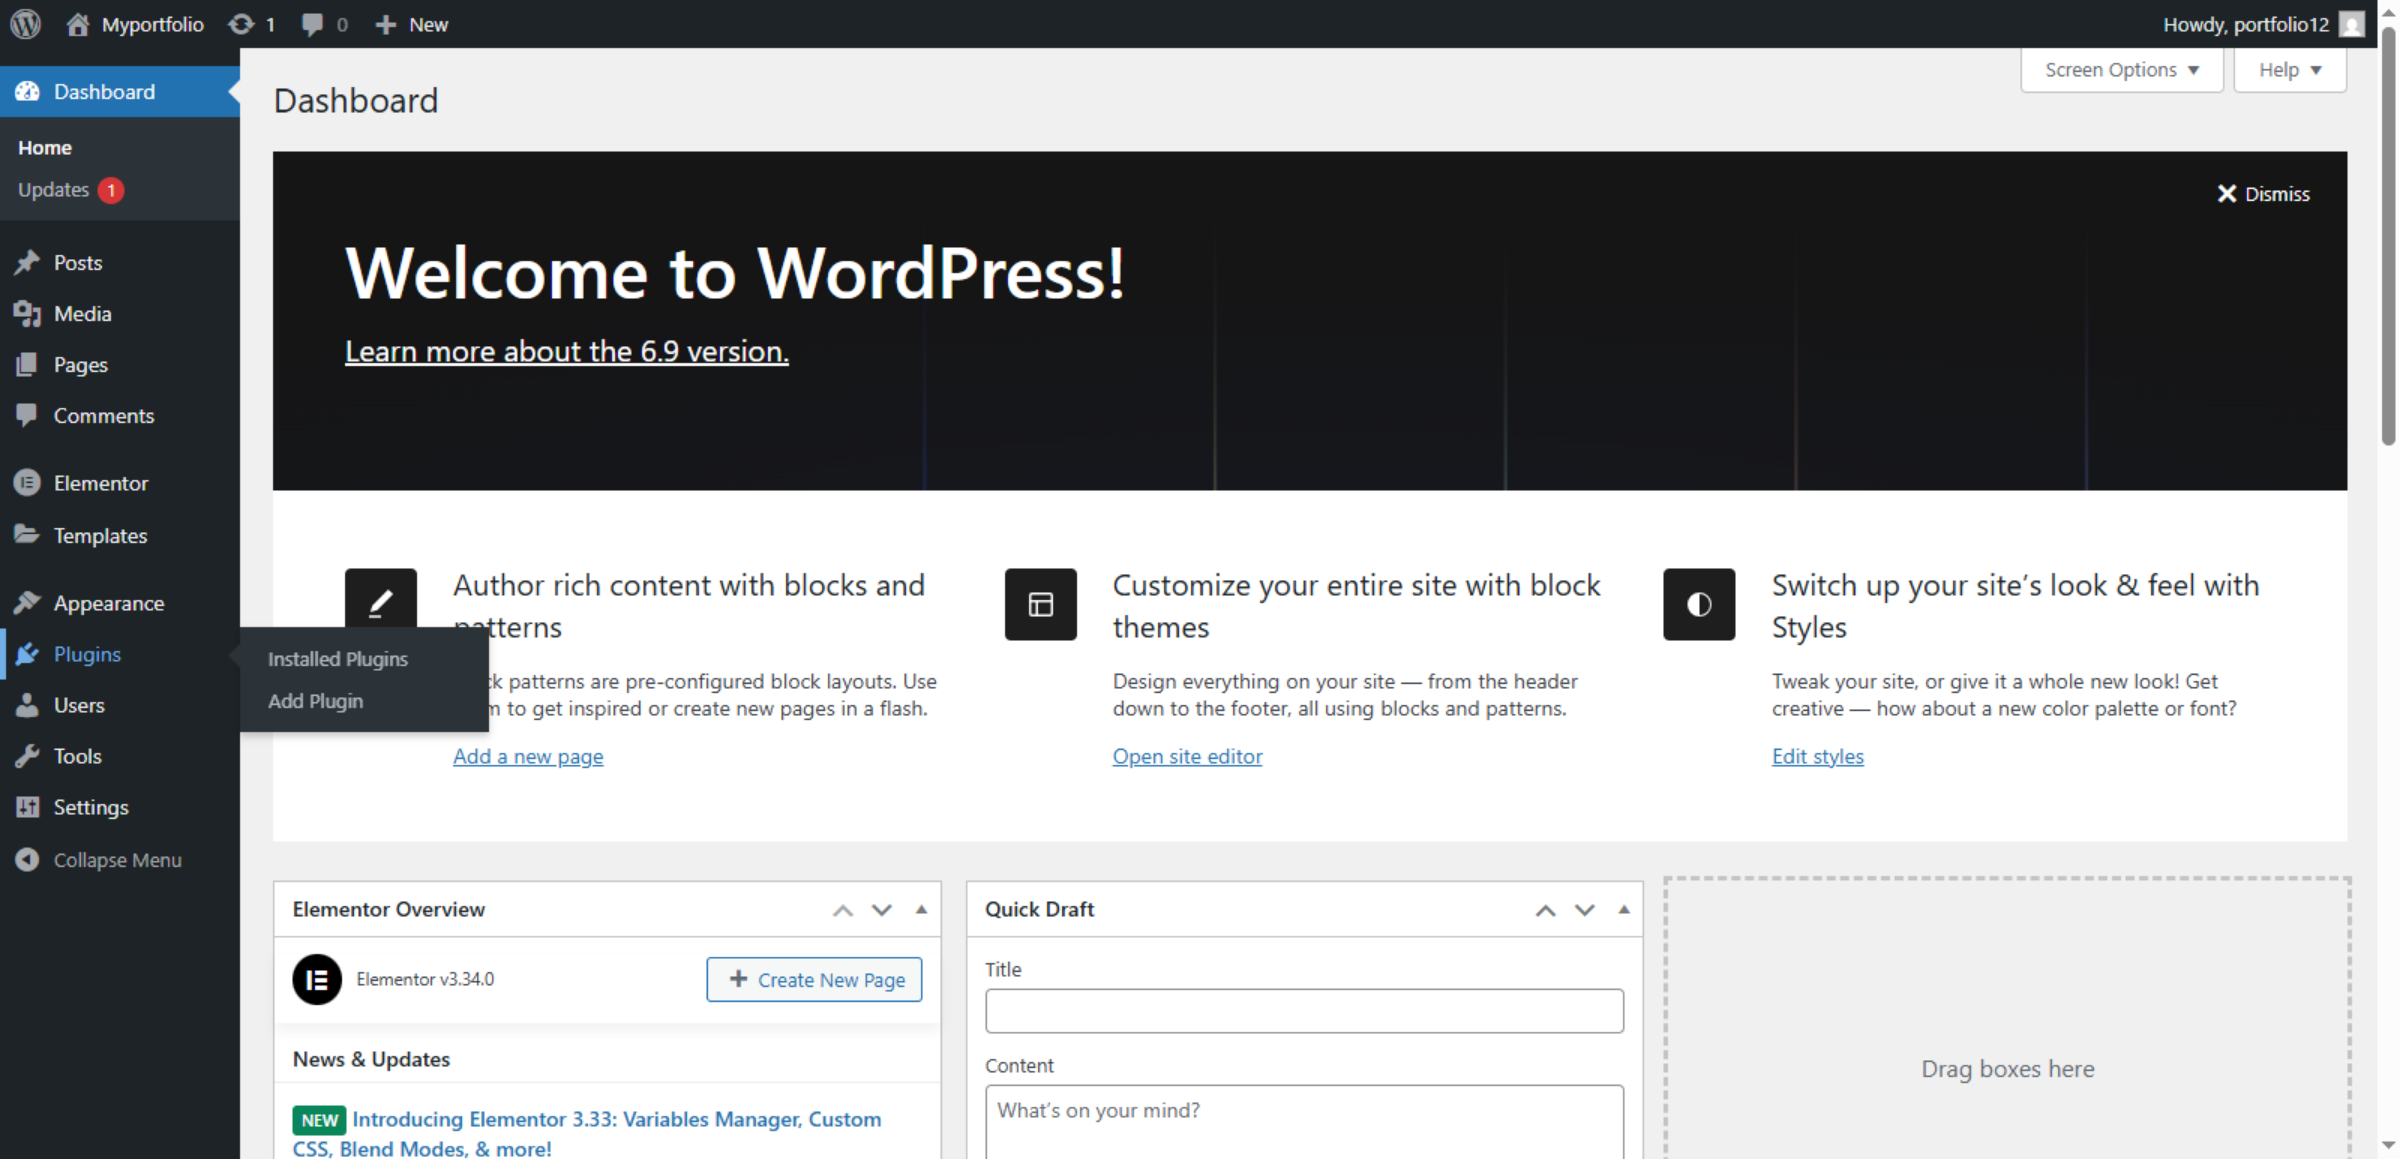
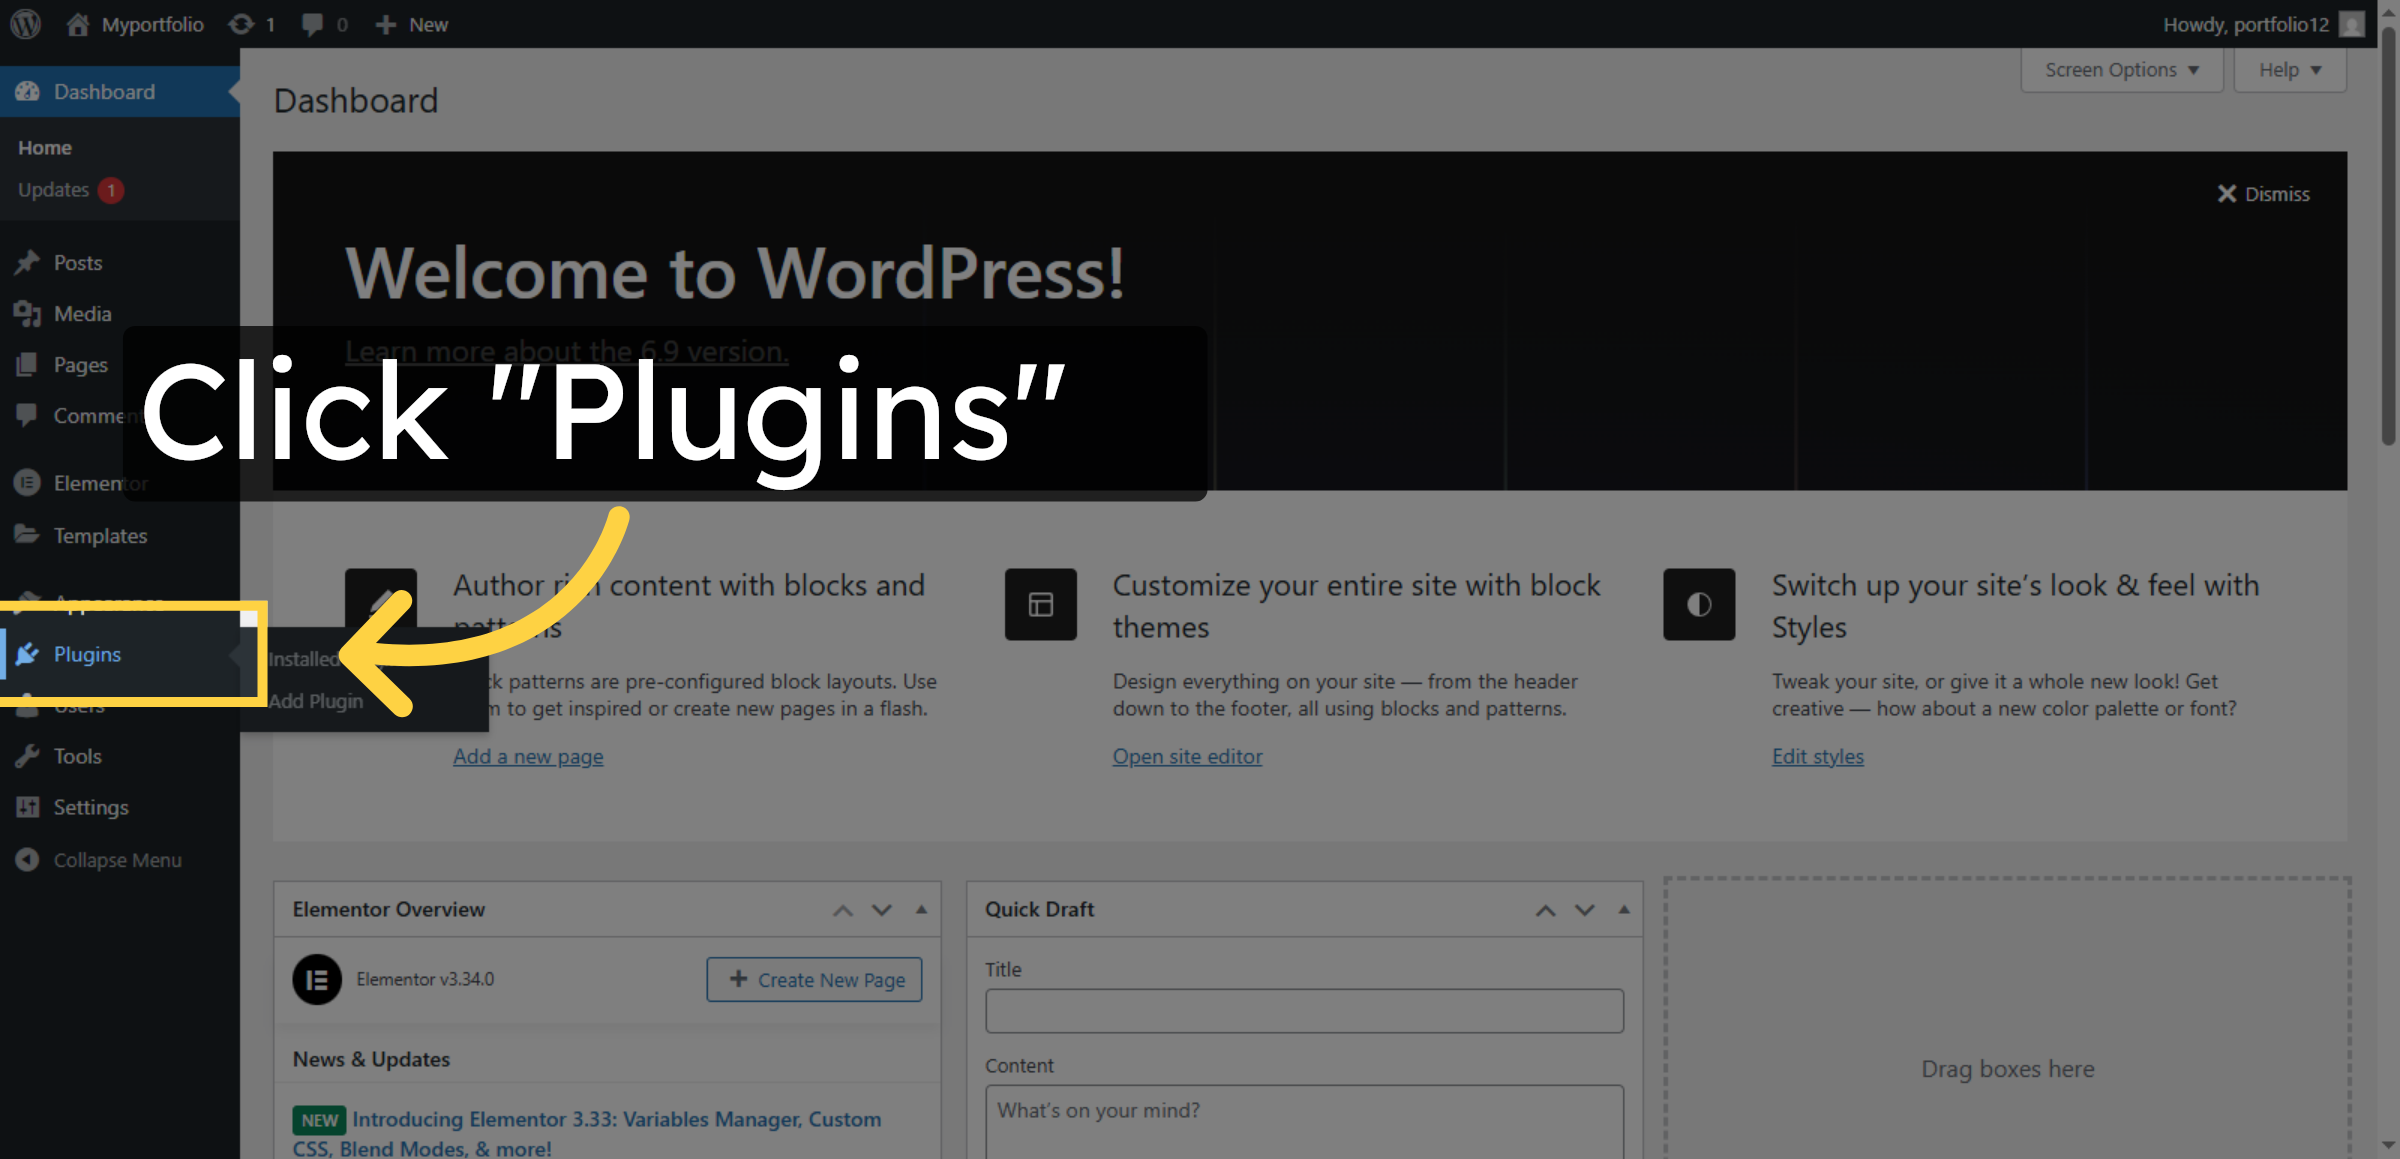
6. Open Plugins Section
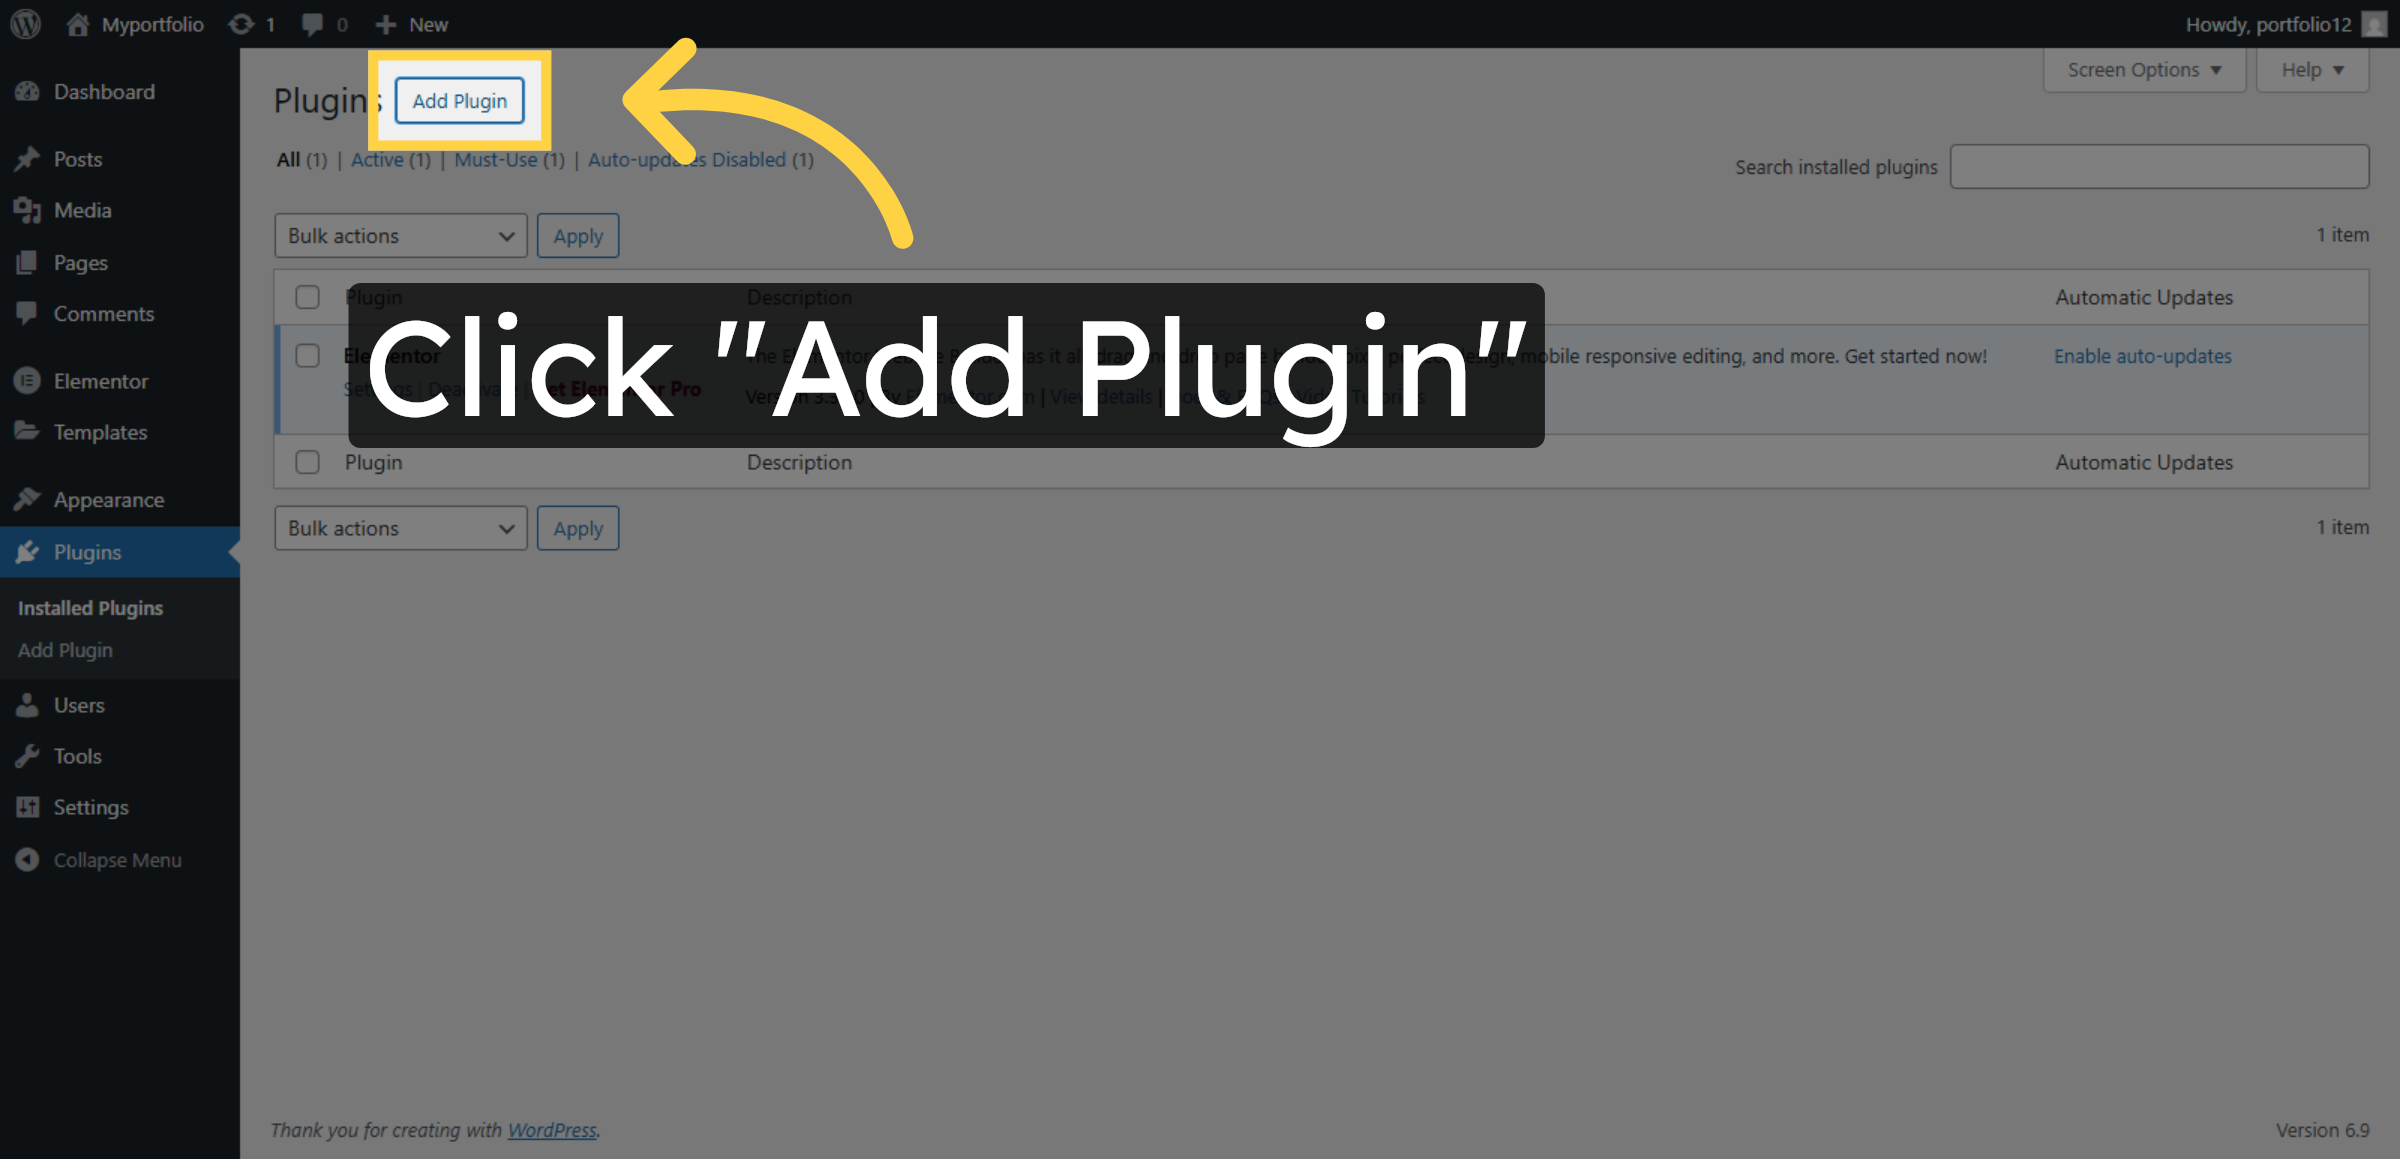
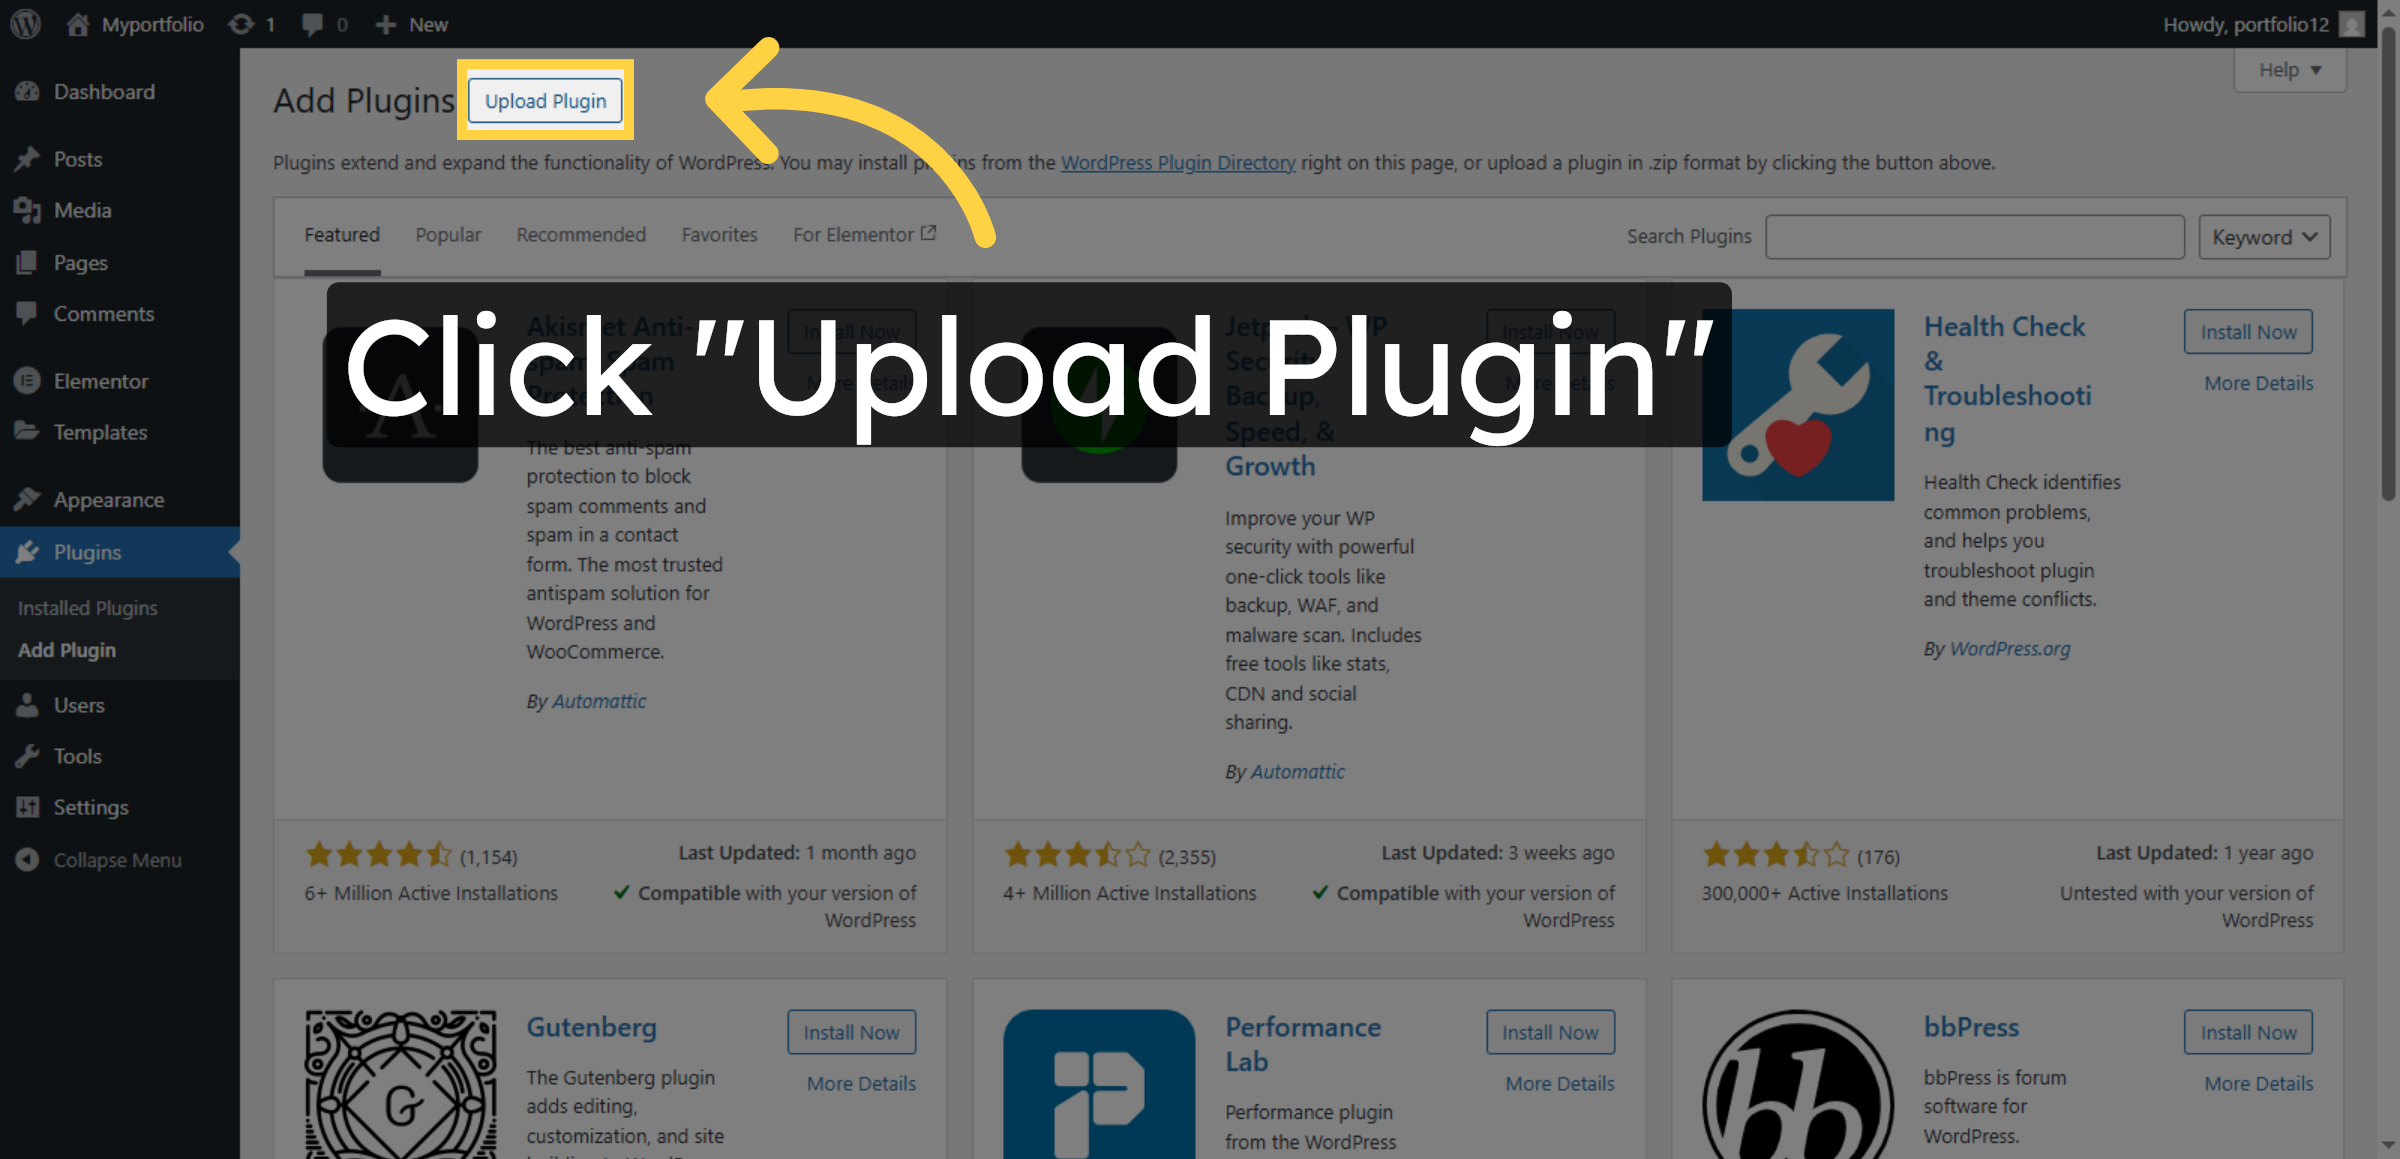
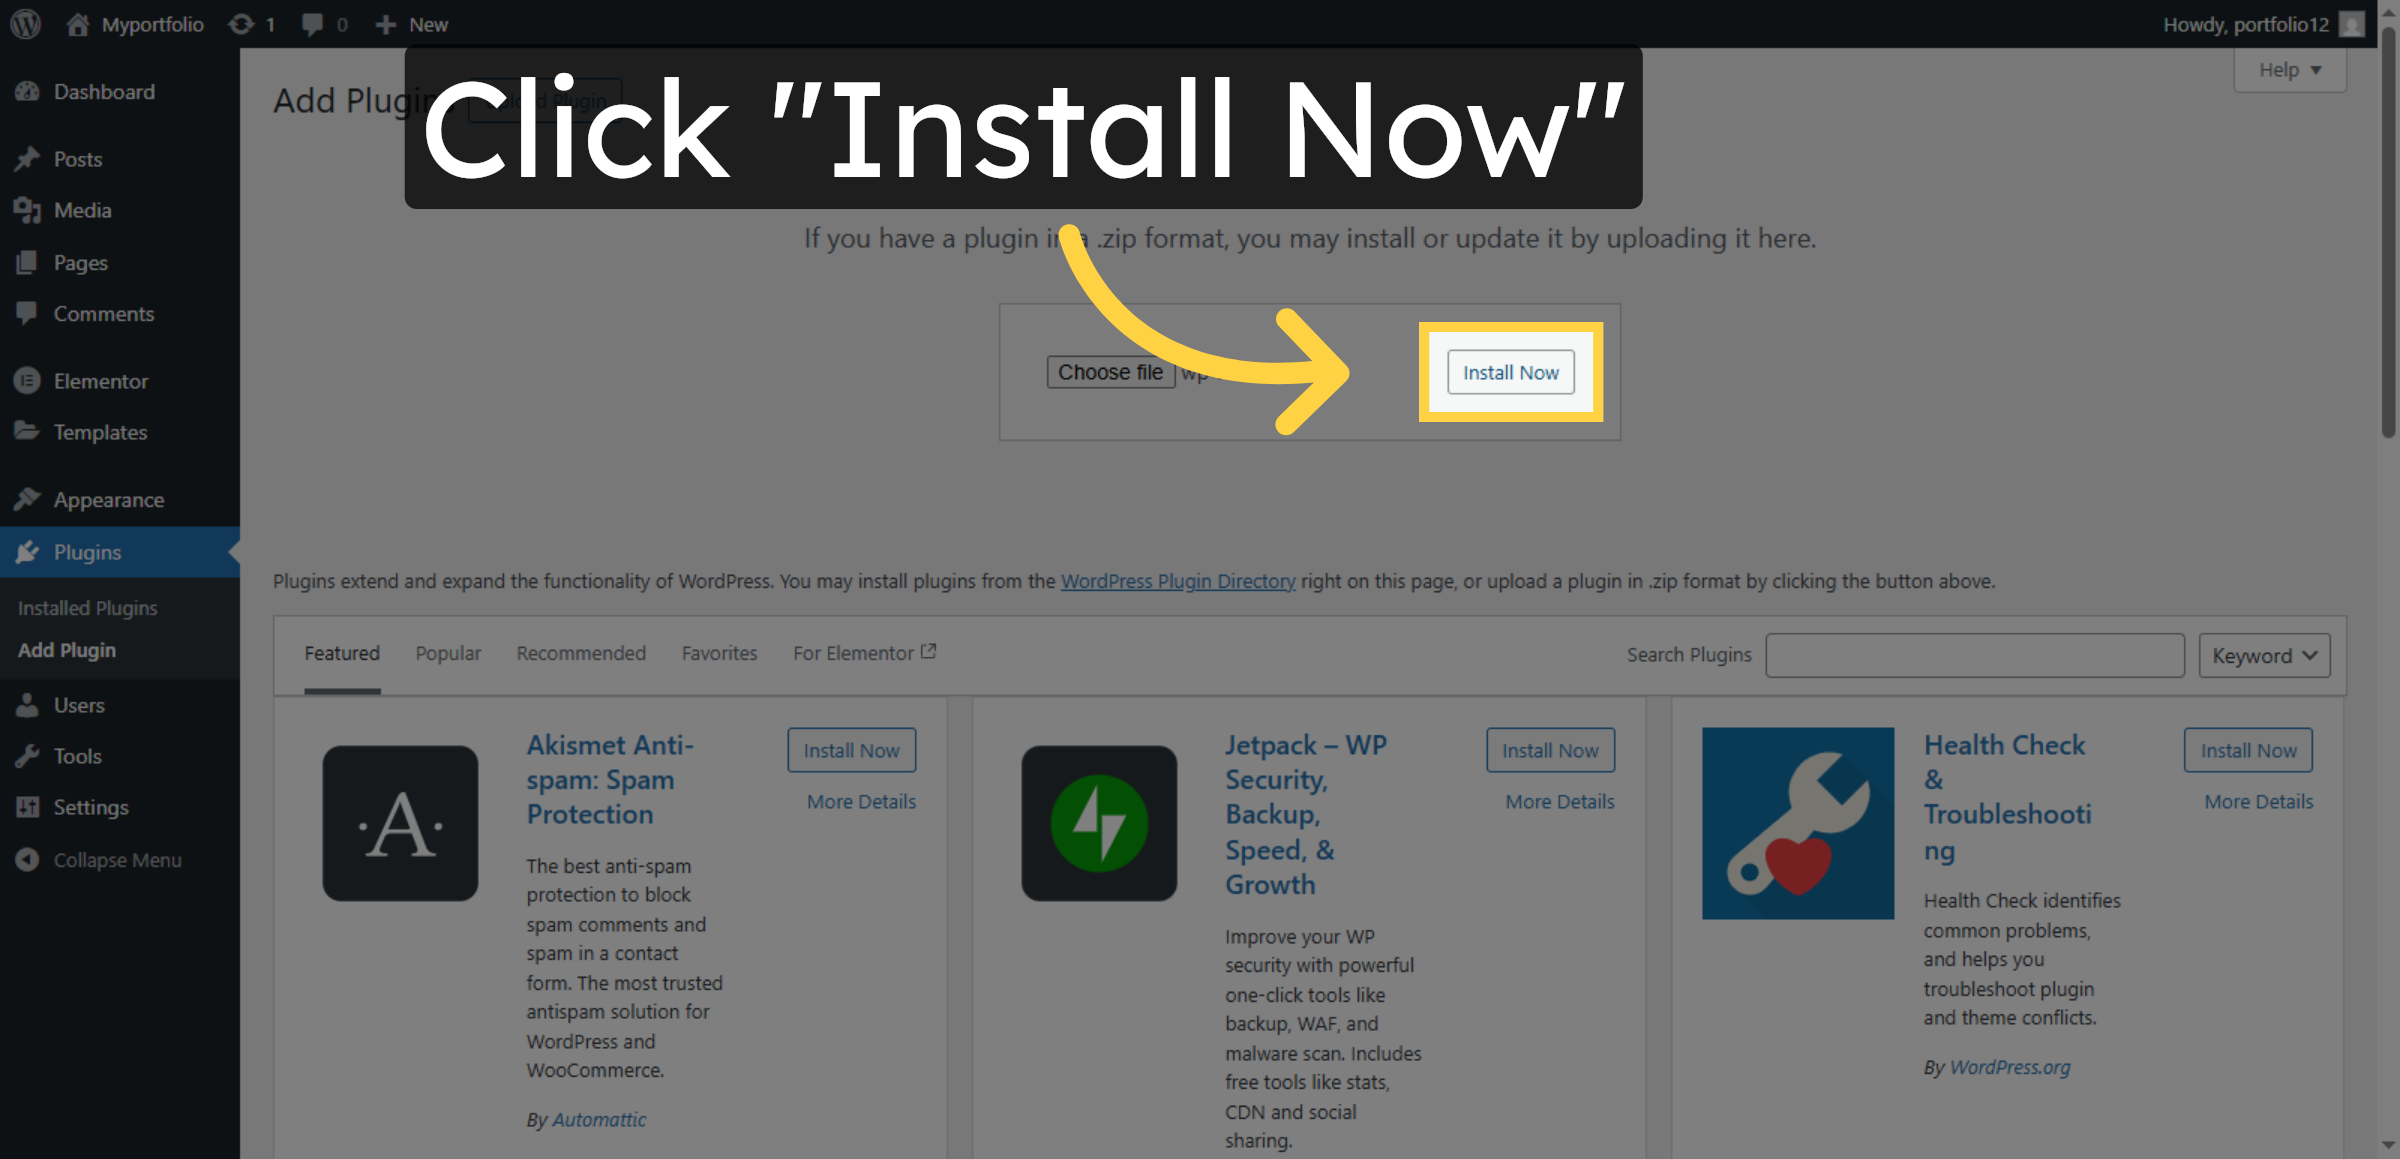
7. Add New Plugin
8. Select Upload Plugin
9. Navigate to WP Rocket Site
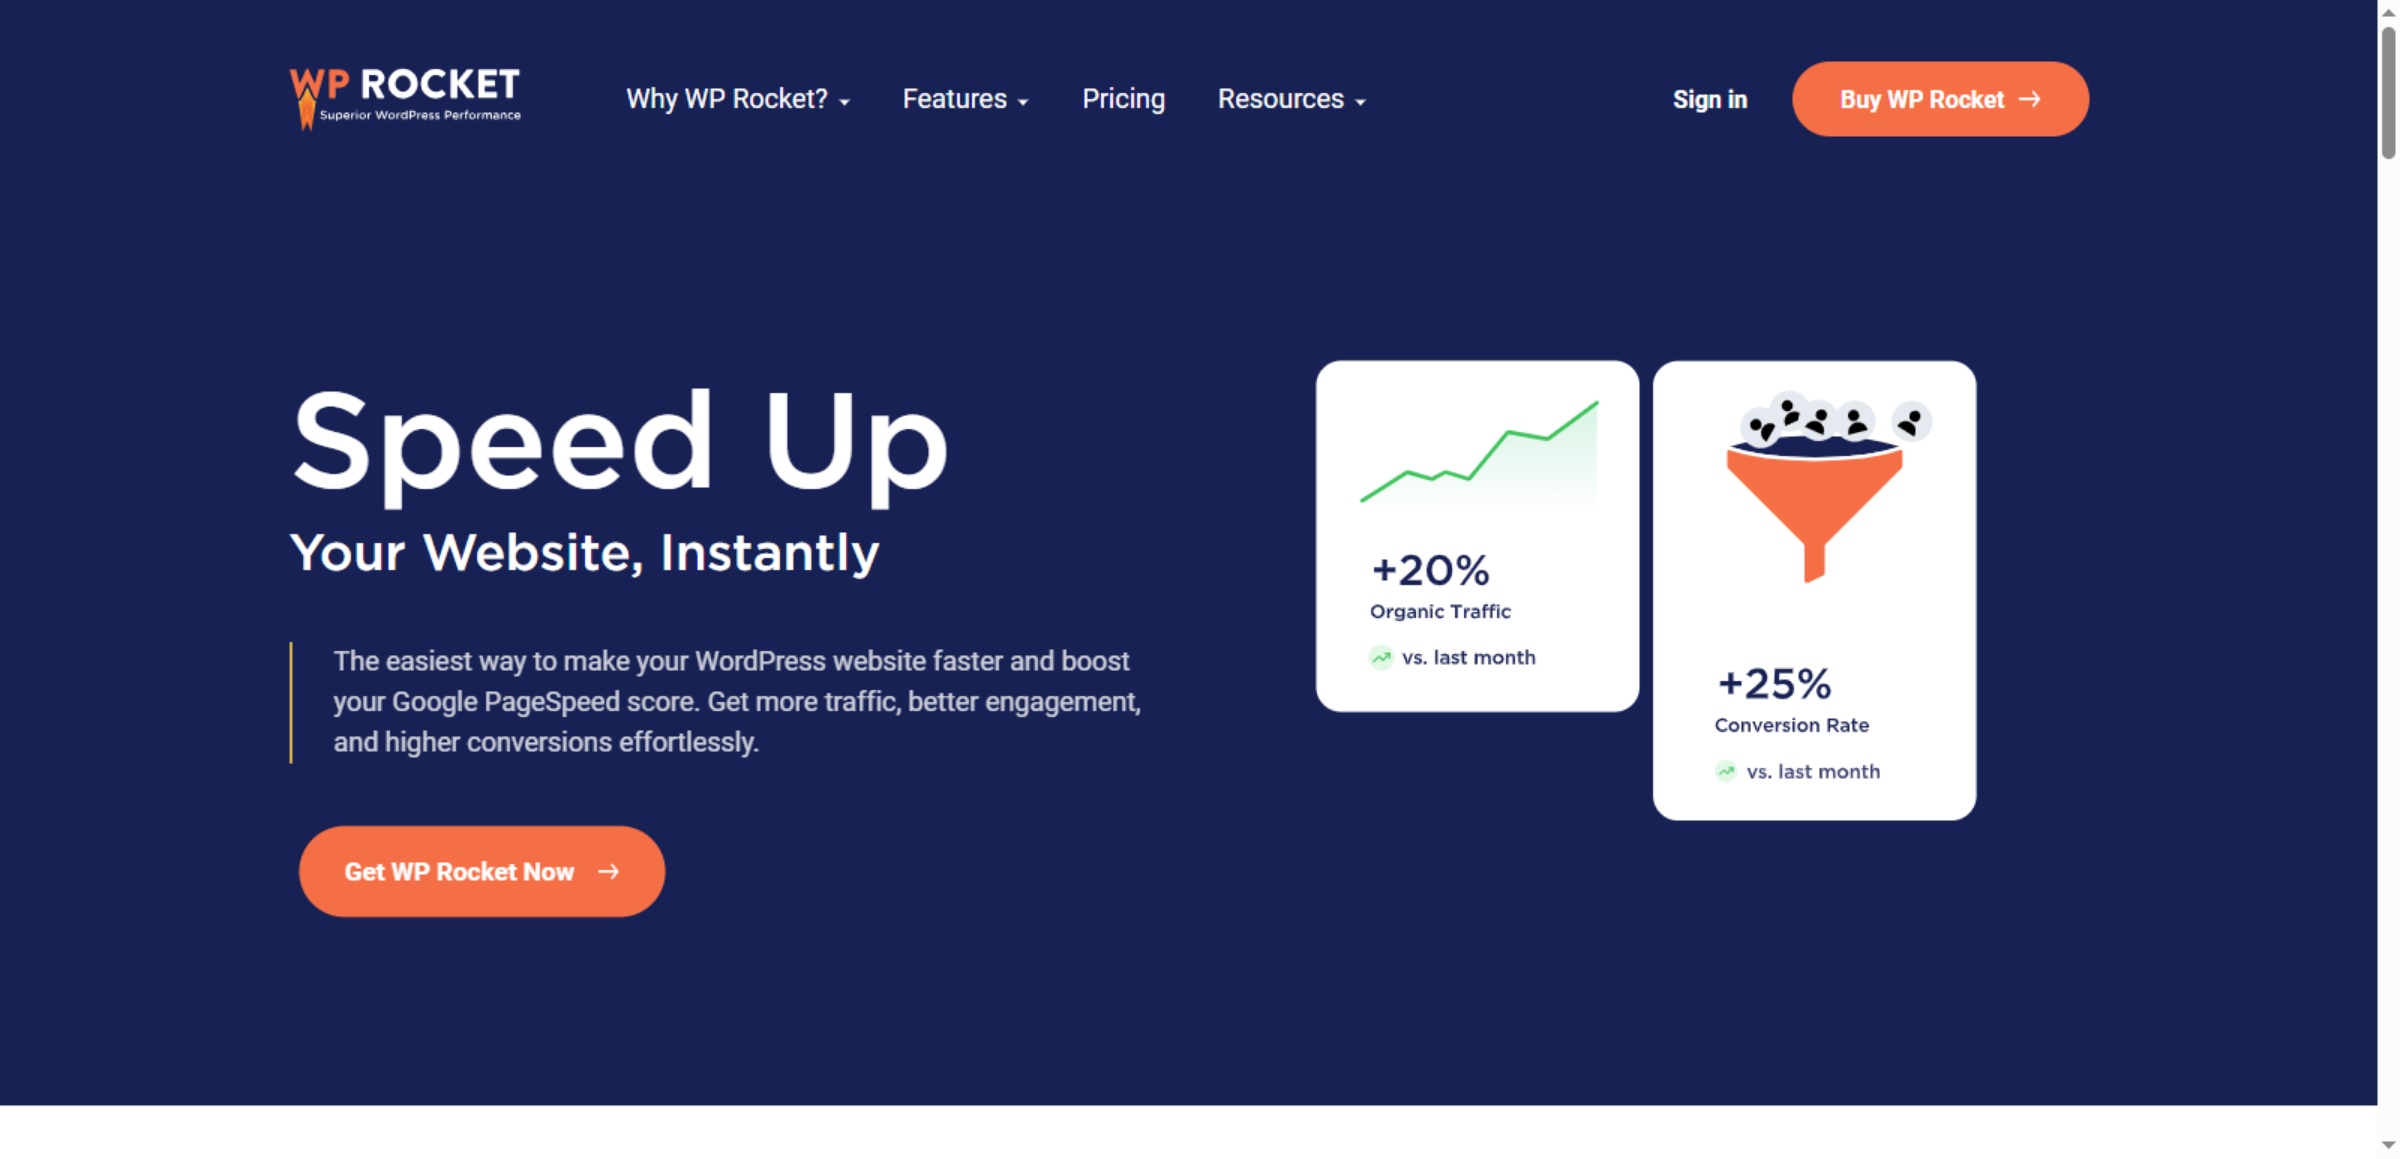
10. Access WP Rocket Purchase

11. Proceed to Buy WP Rocket

12. “After purchasing WP Rocket, locate the WP Rocket plugin file in your File Manager and upload it.”
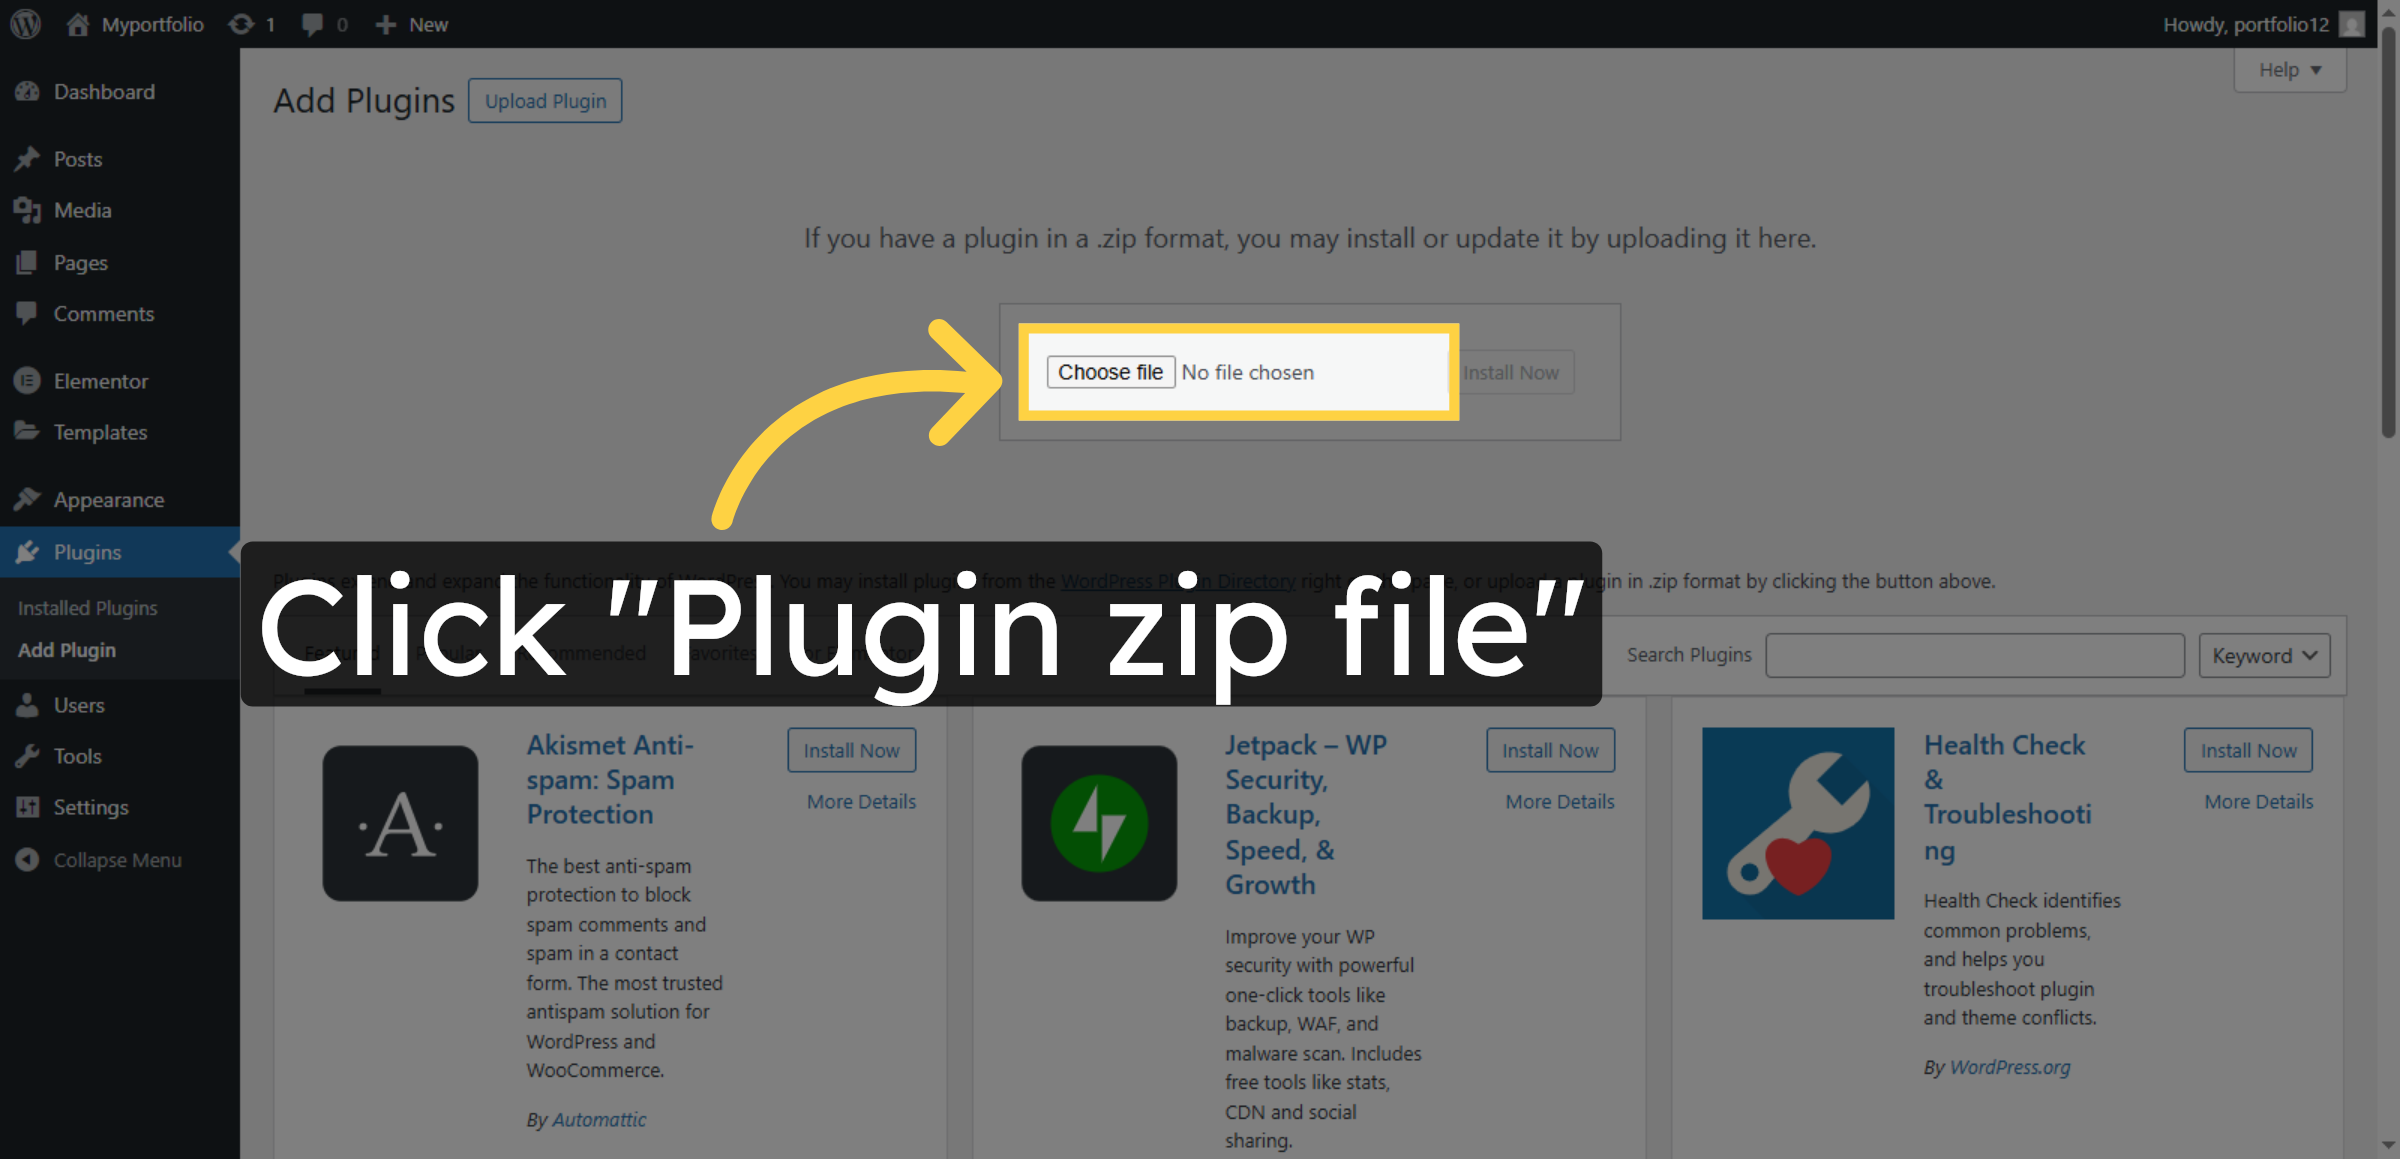
13. Choose Plugin Zip File
14. Install Plugin
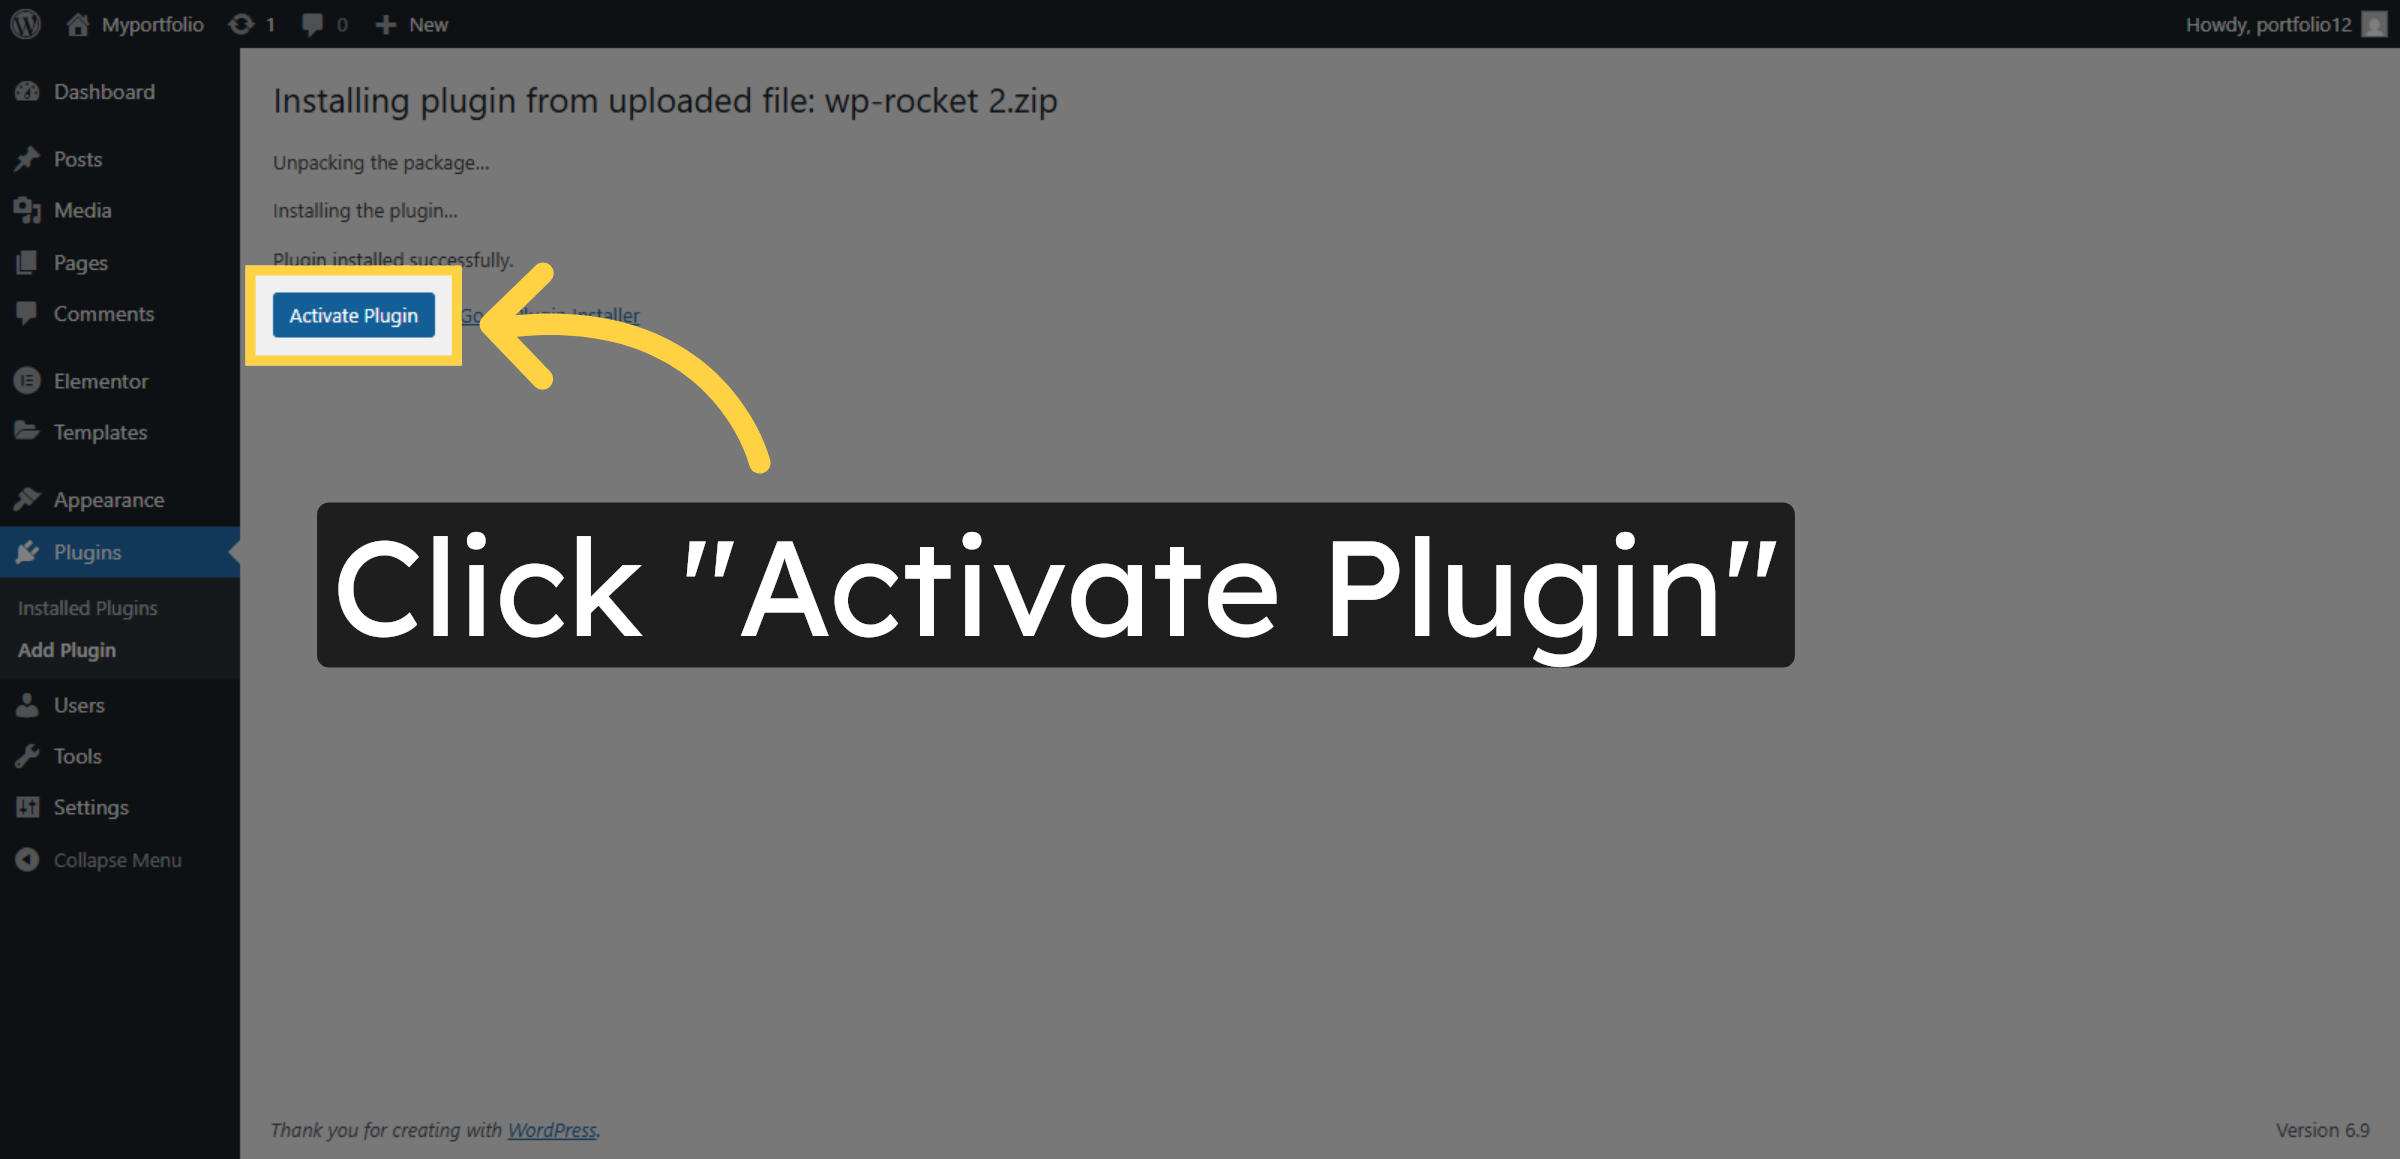
15. Activate Plugin
16. Open Plugin Settings
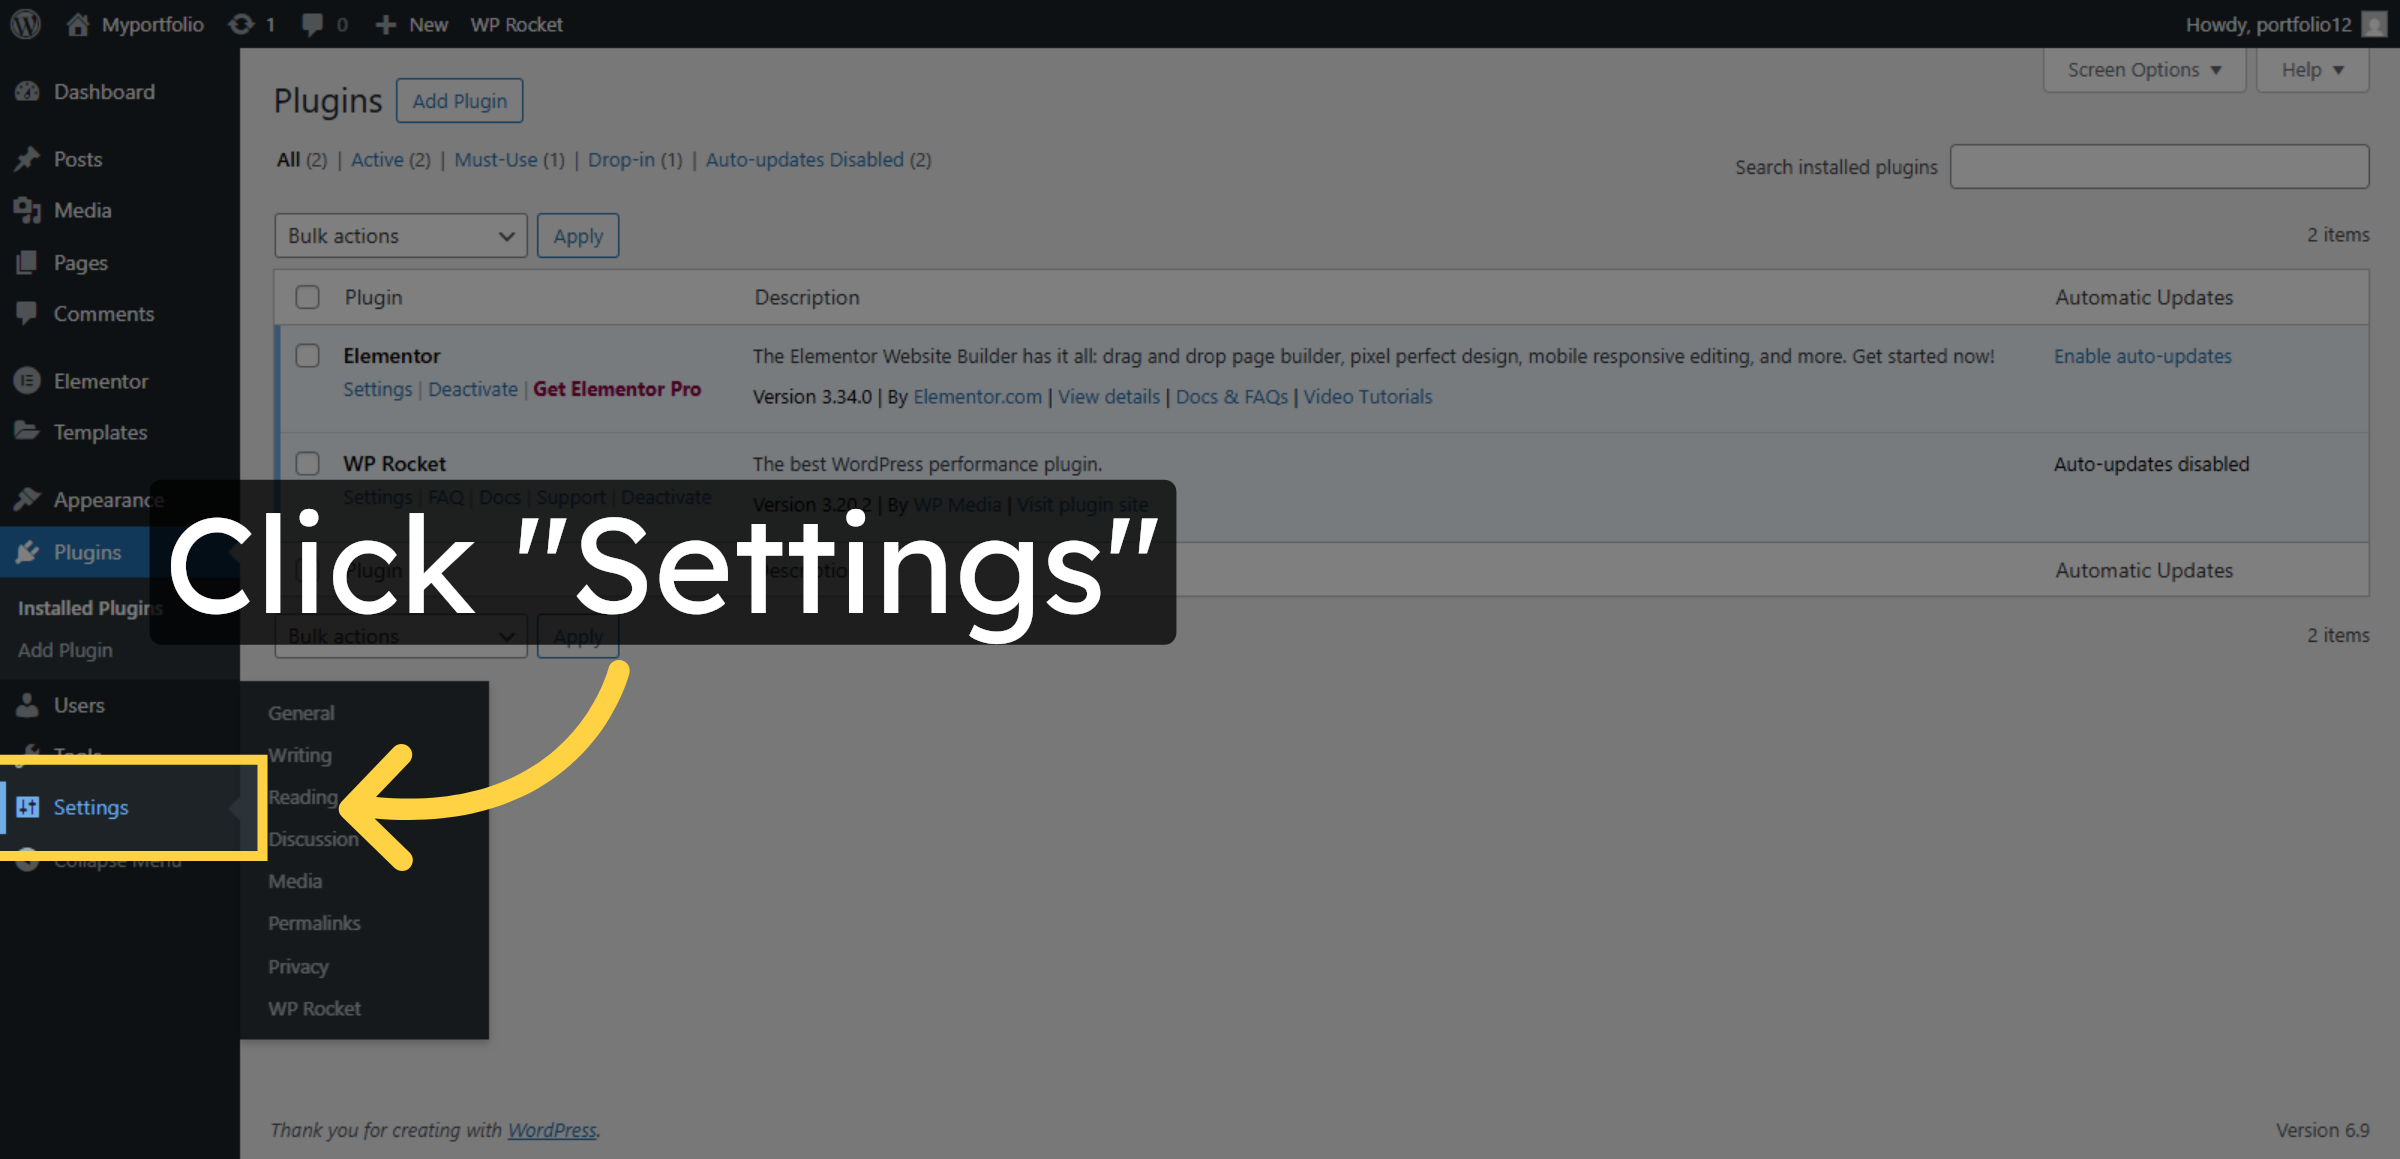
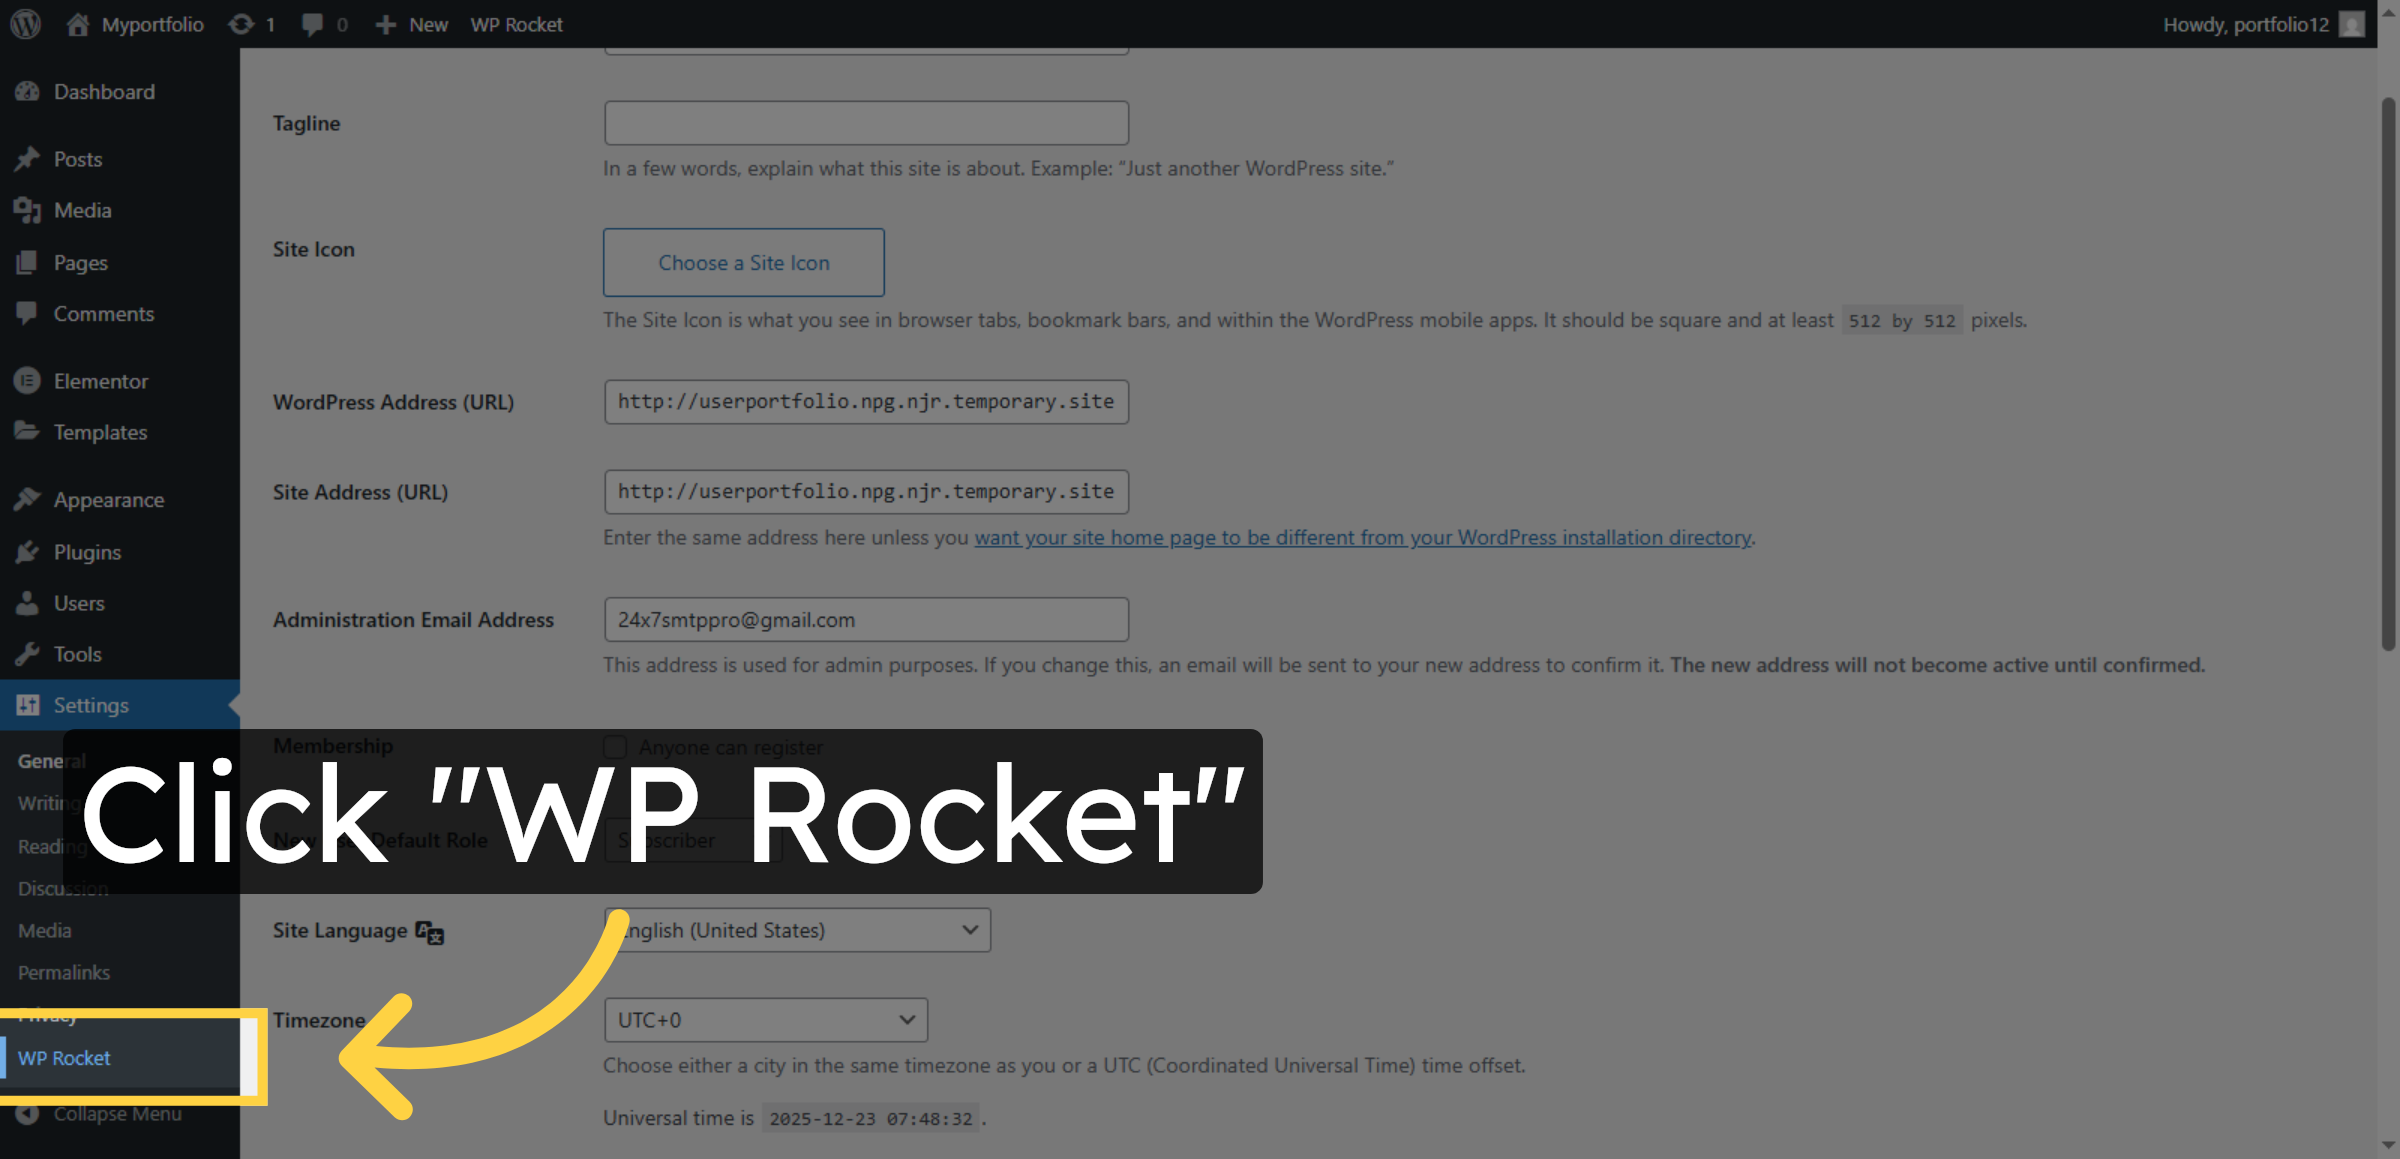
17. Select WP Rocket Settings
18. Access File Optimization

19. Enable CSS Delivery Optimization
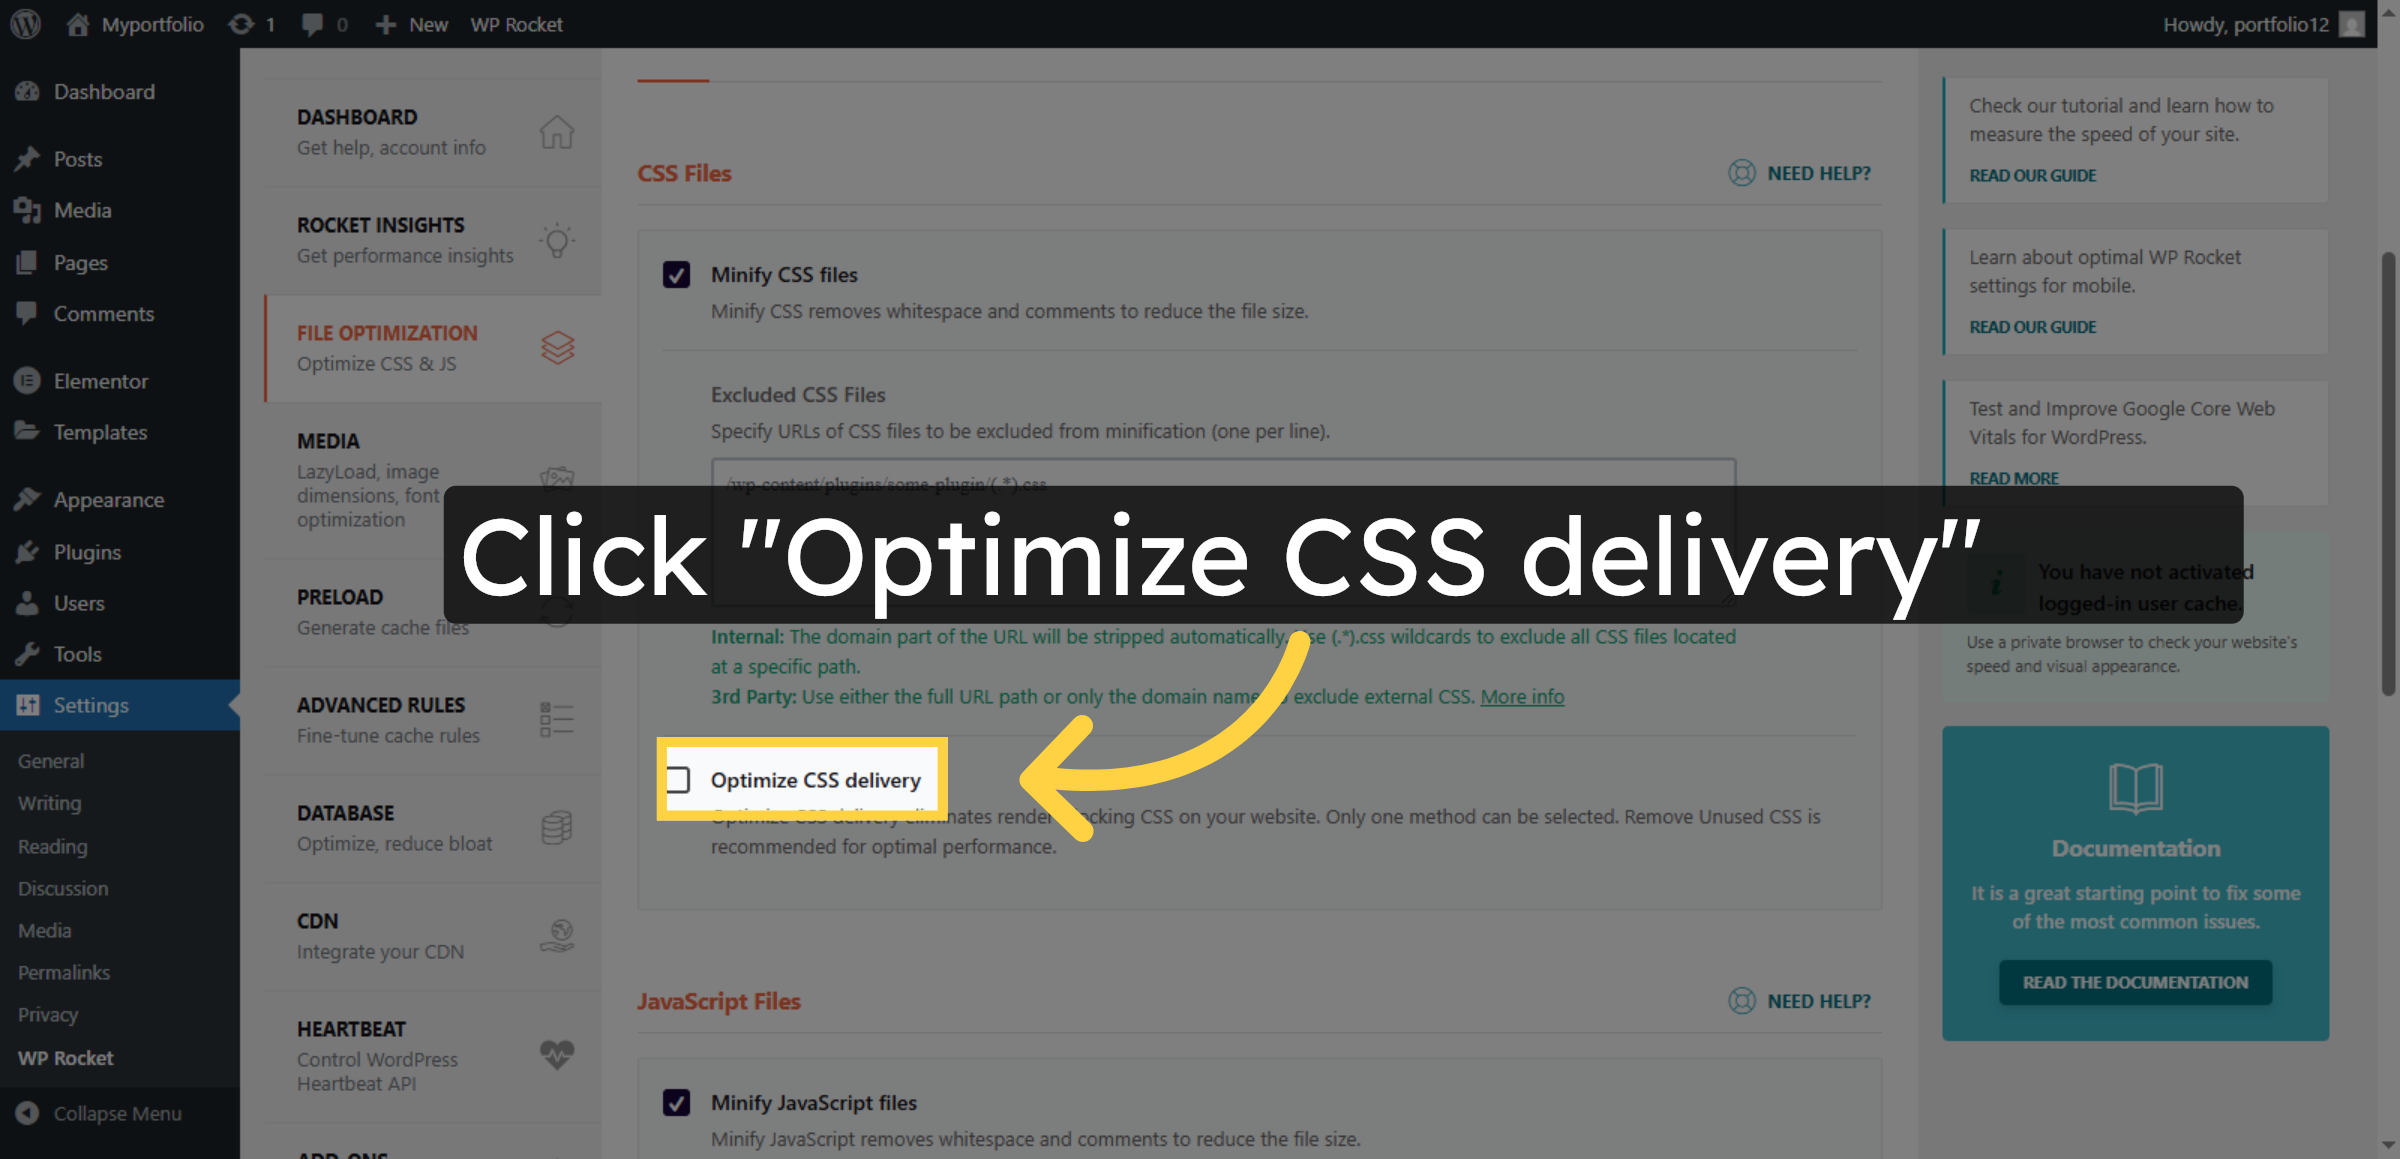
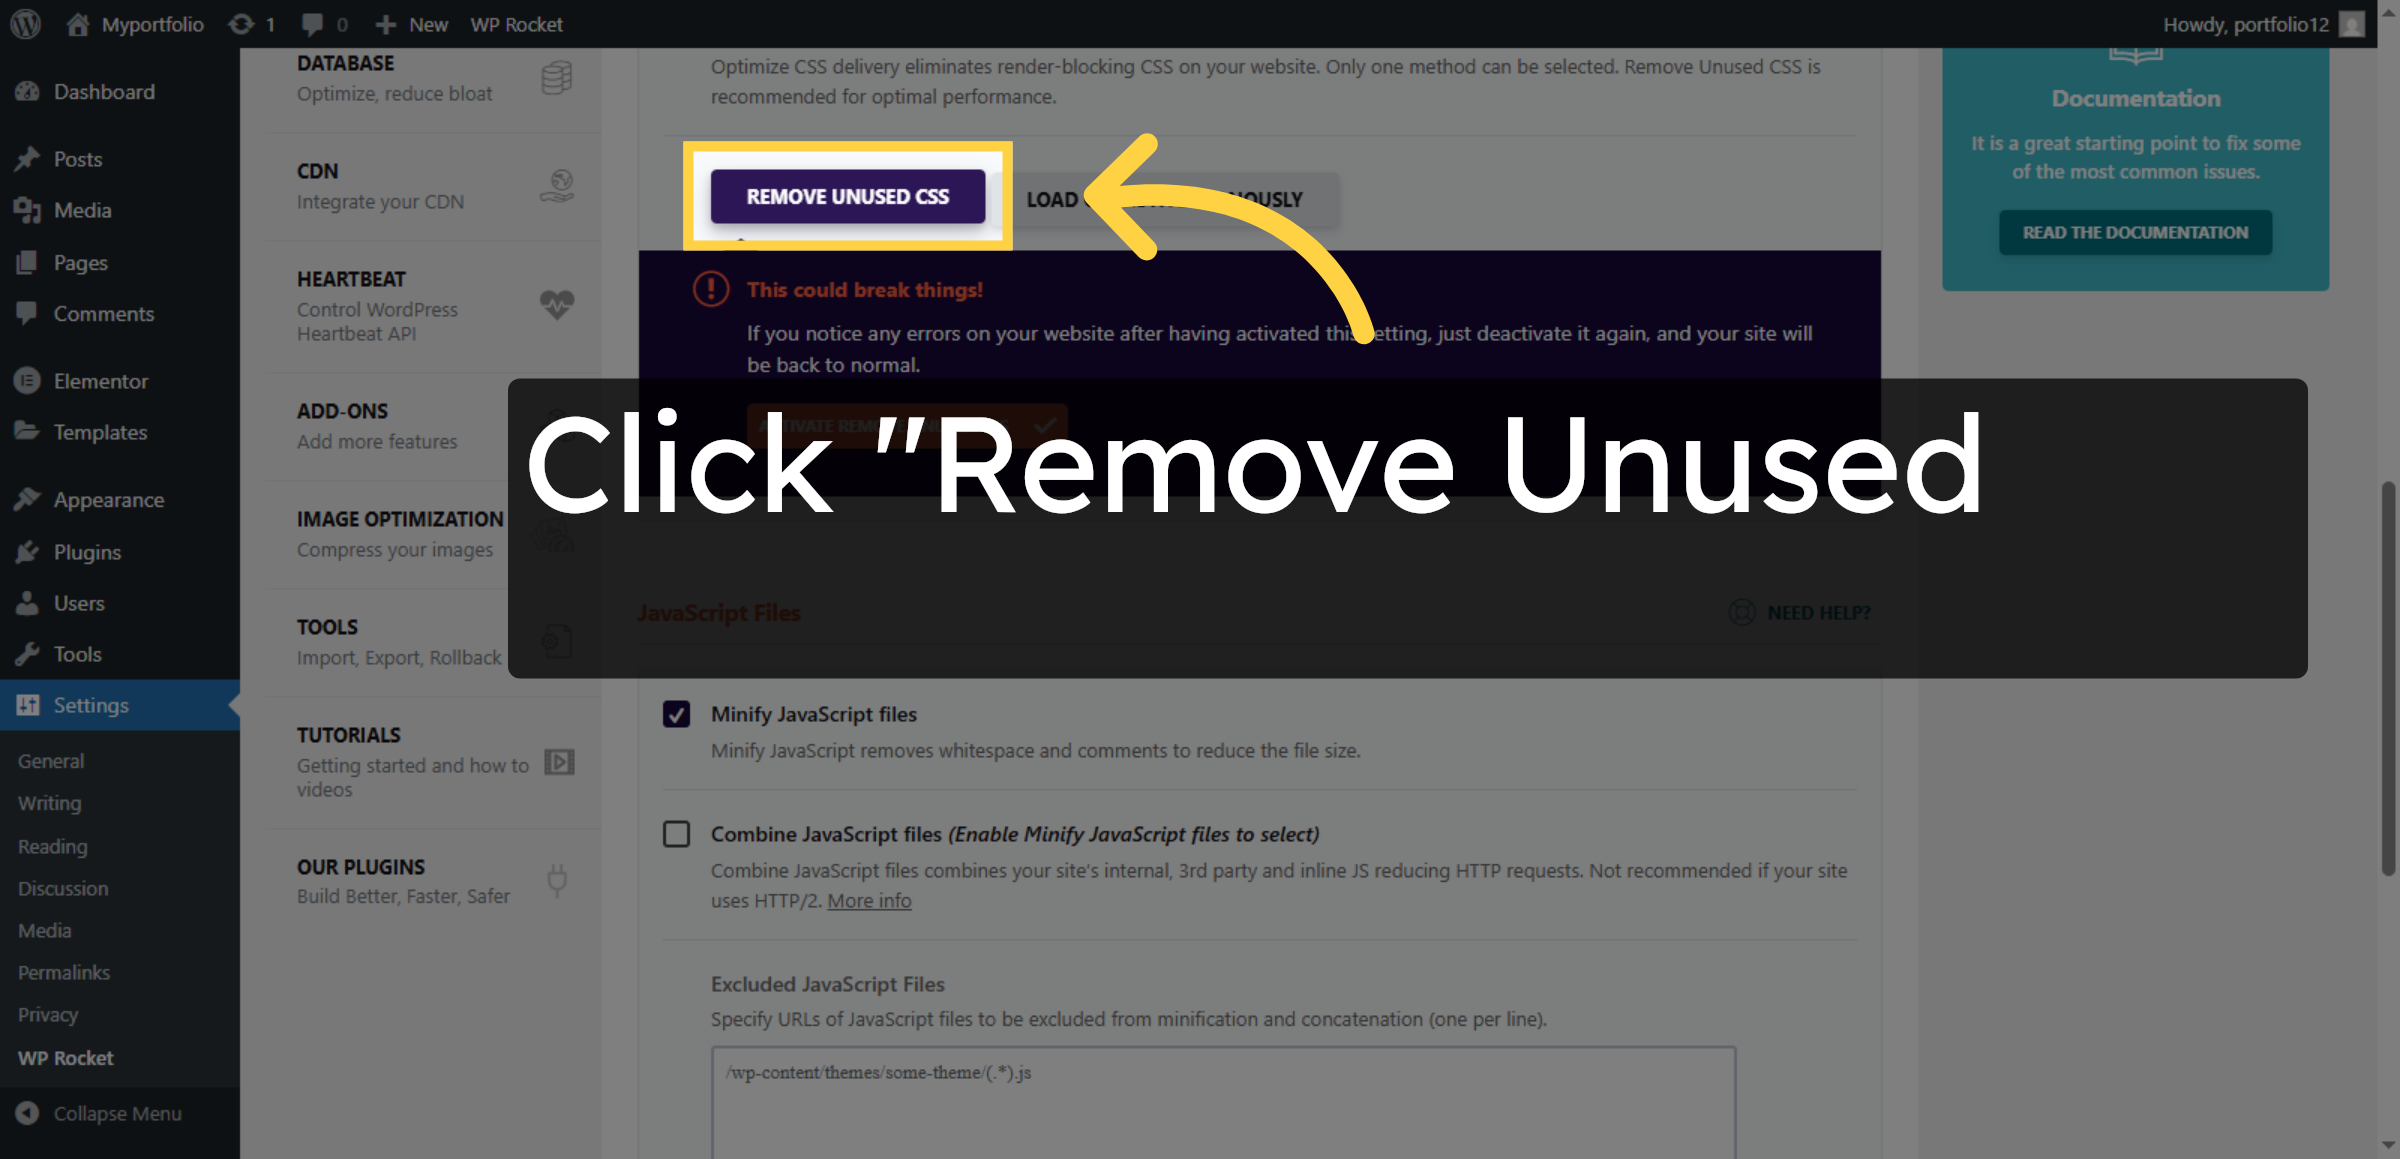
20. Enable Remove Unused CSS
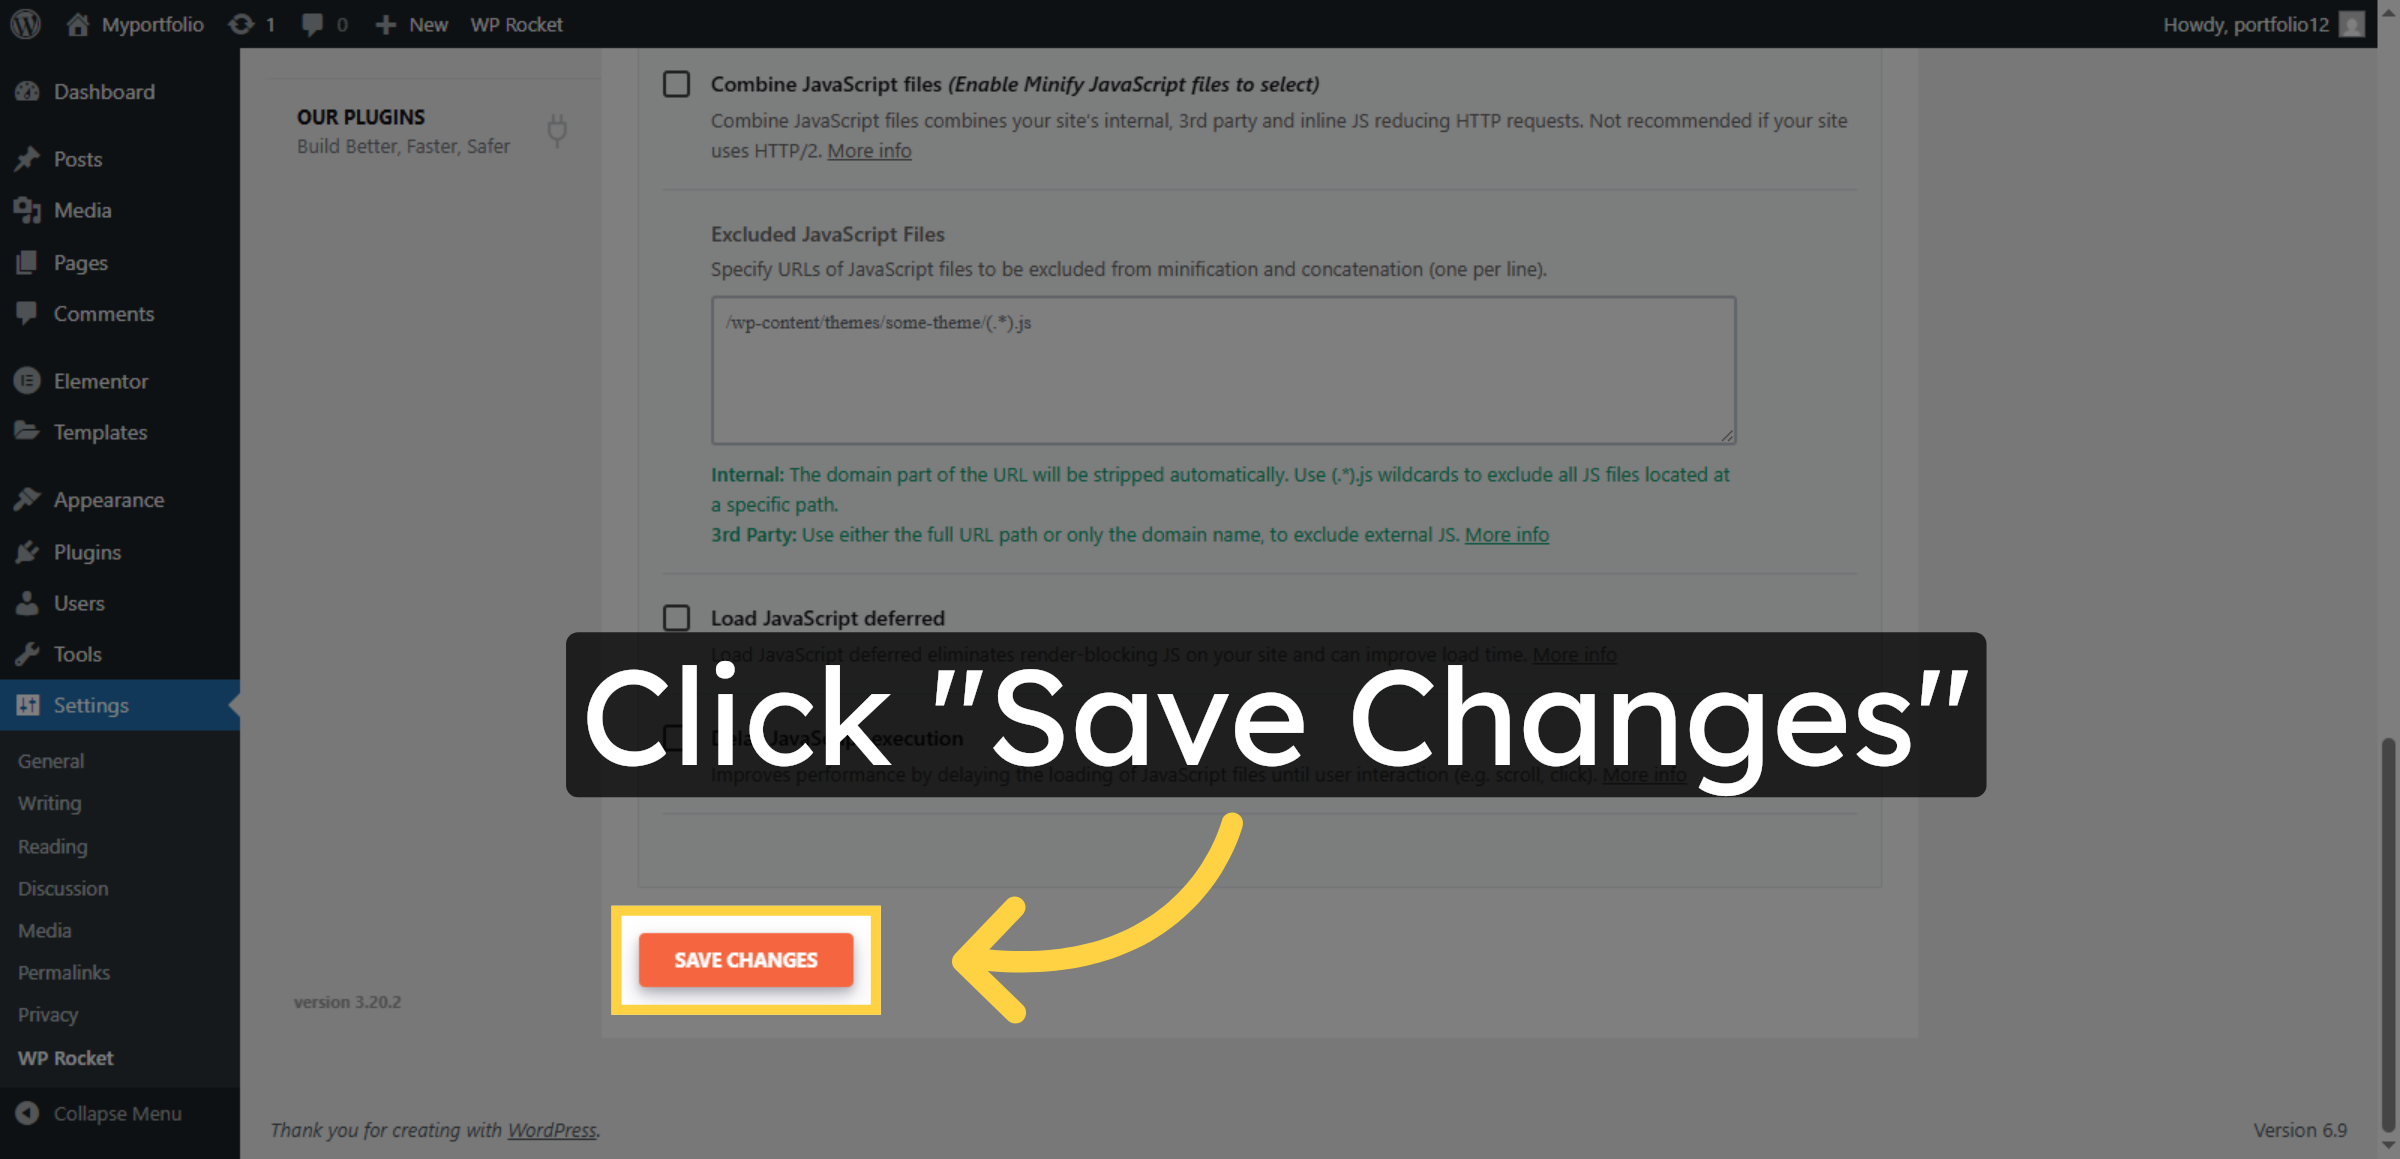
21. Save File Optimization Changes
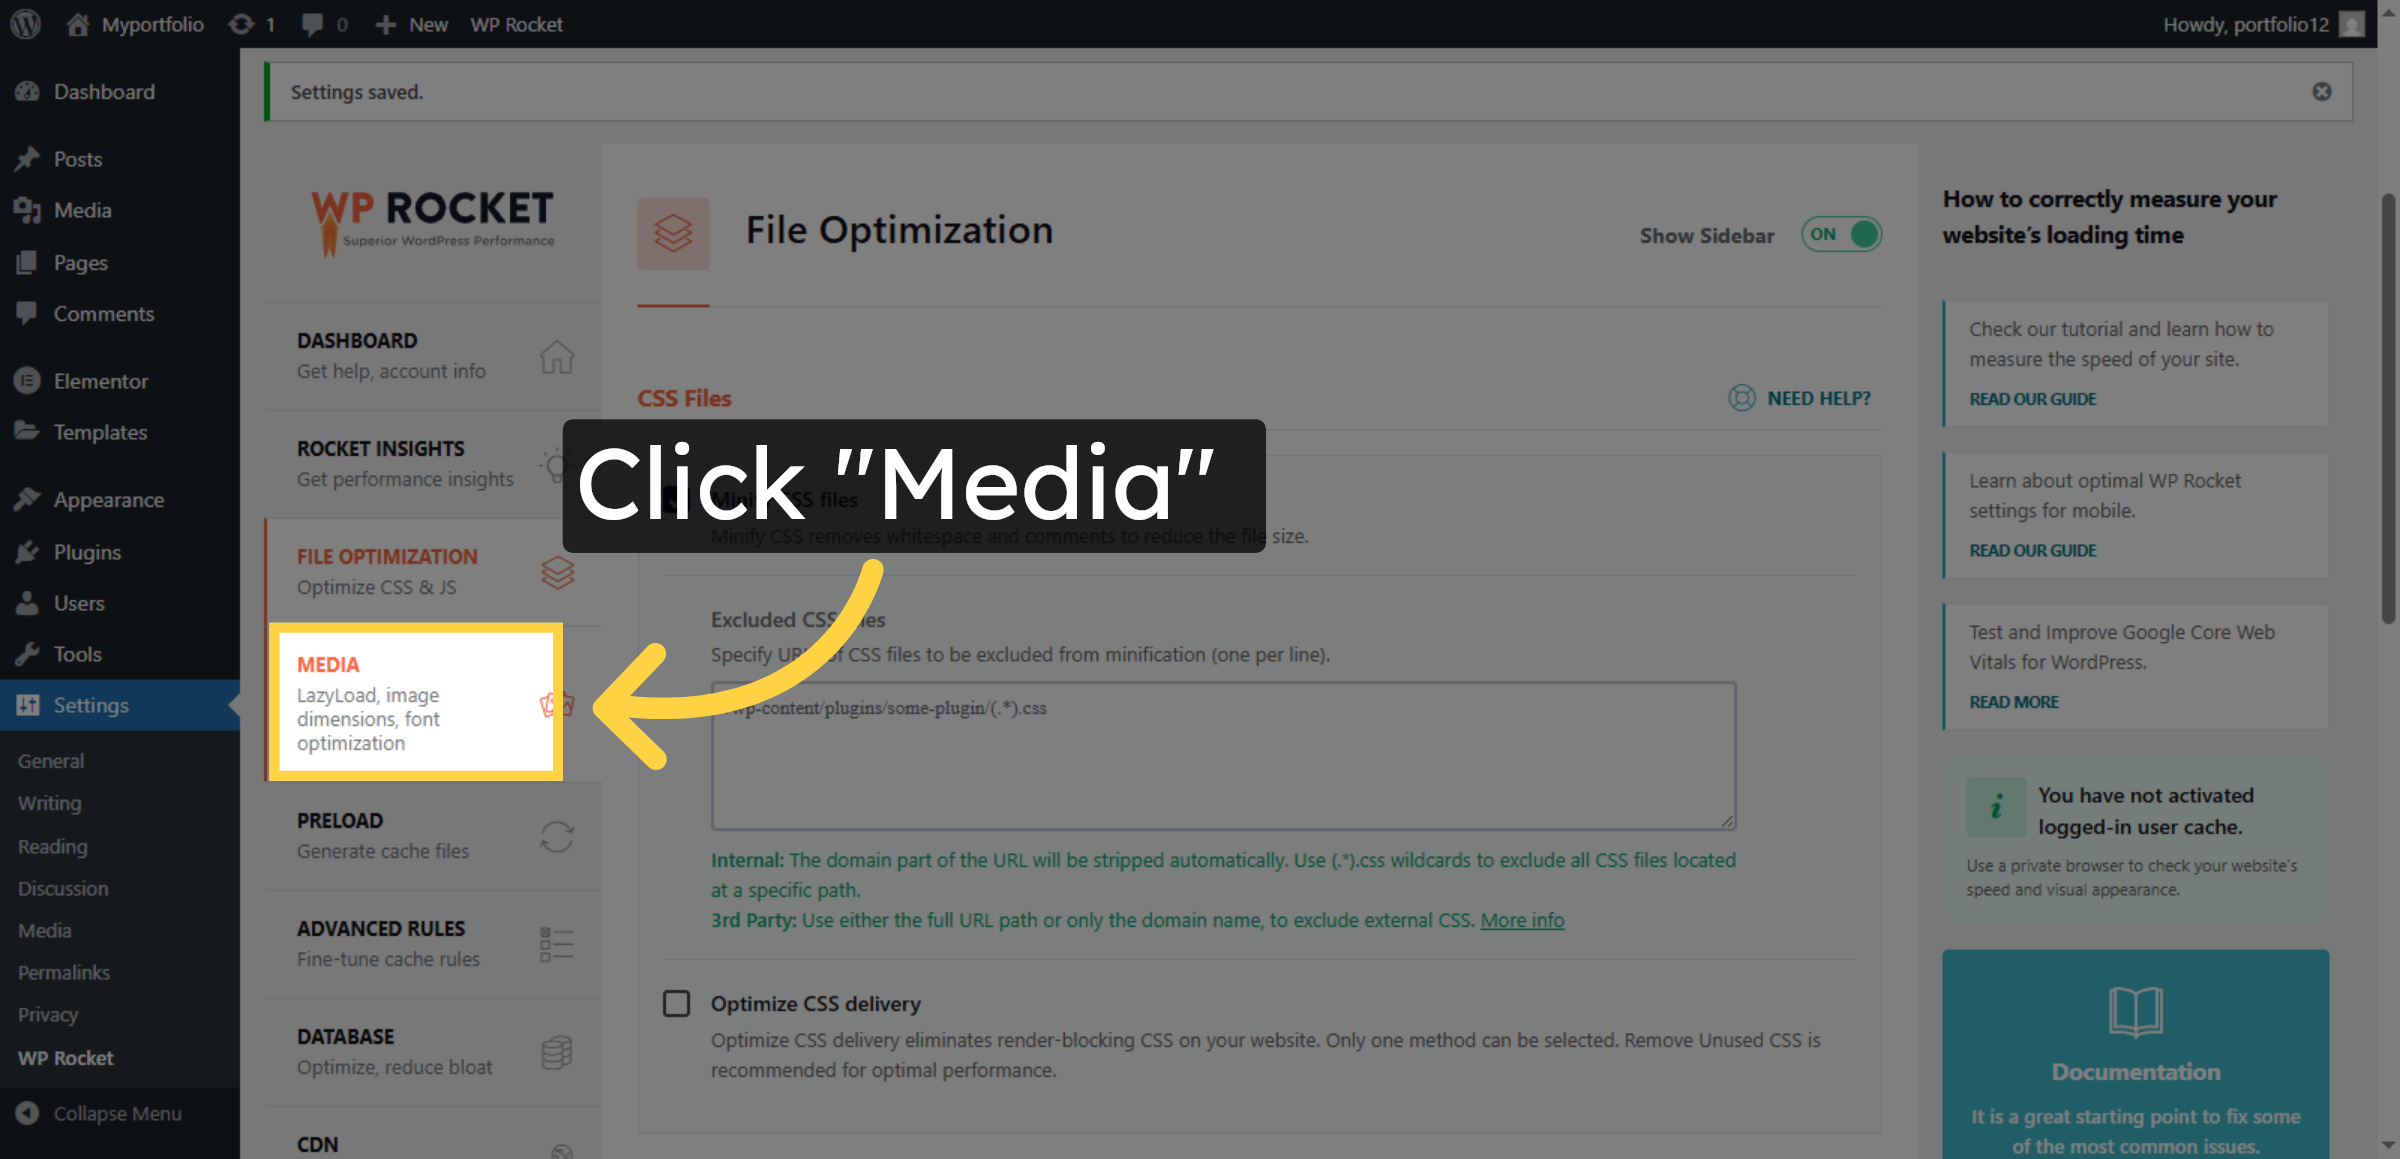
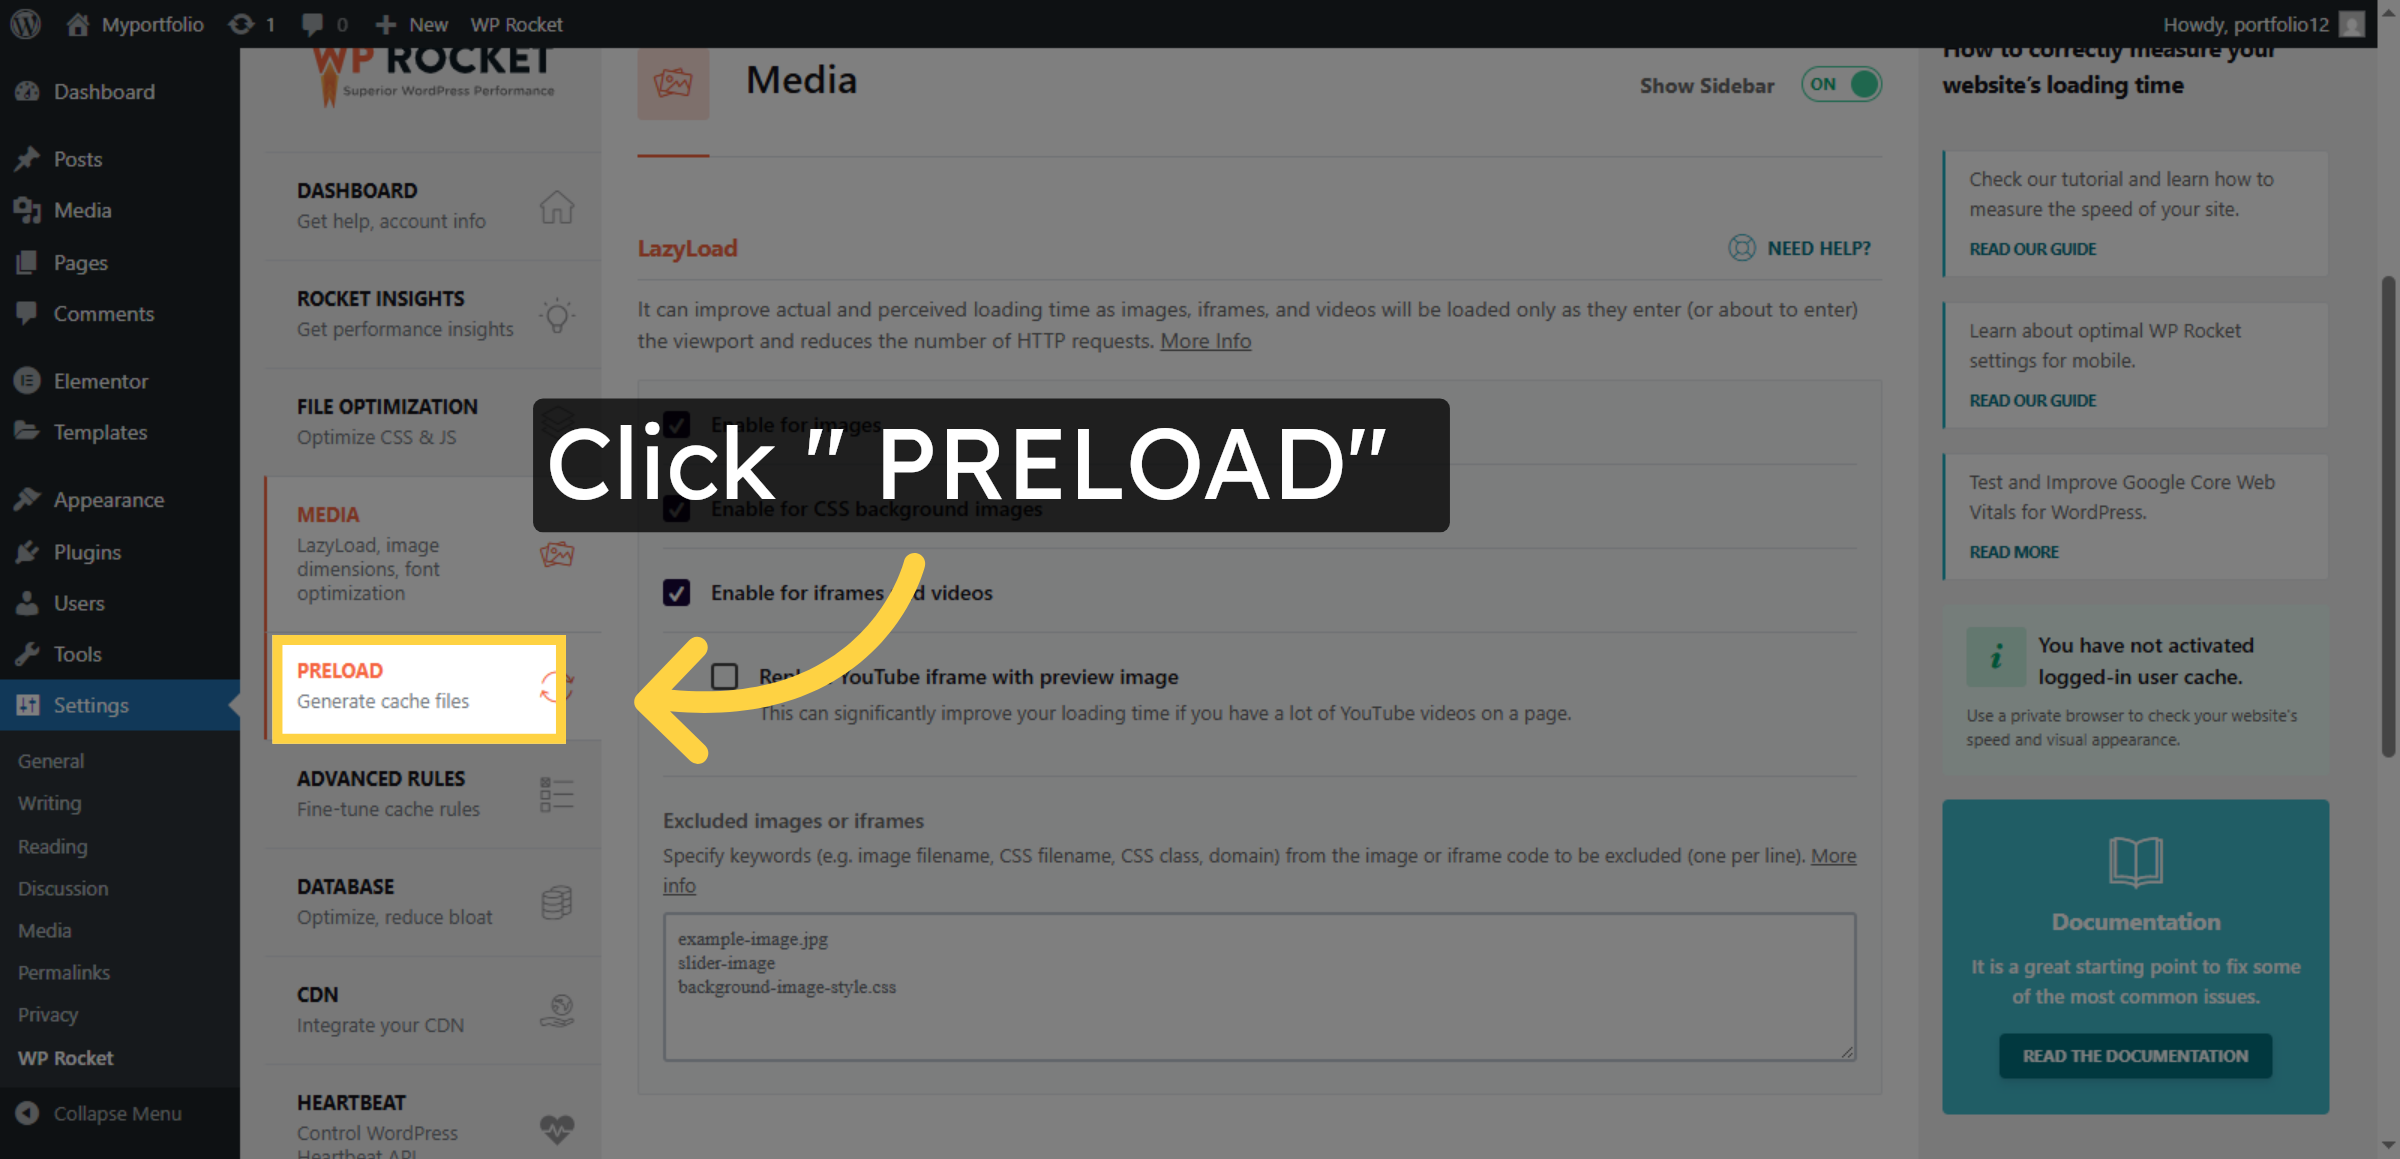
22. Click Media
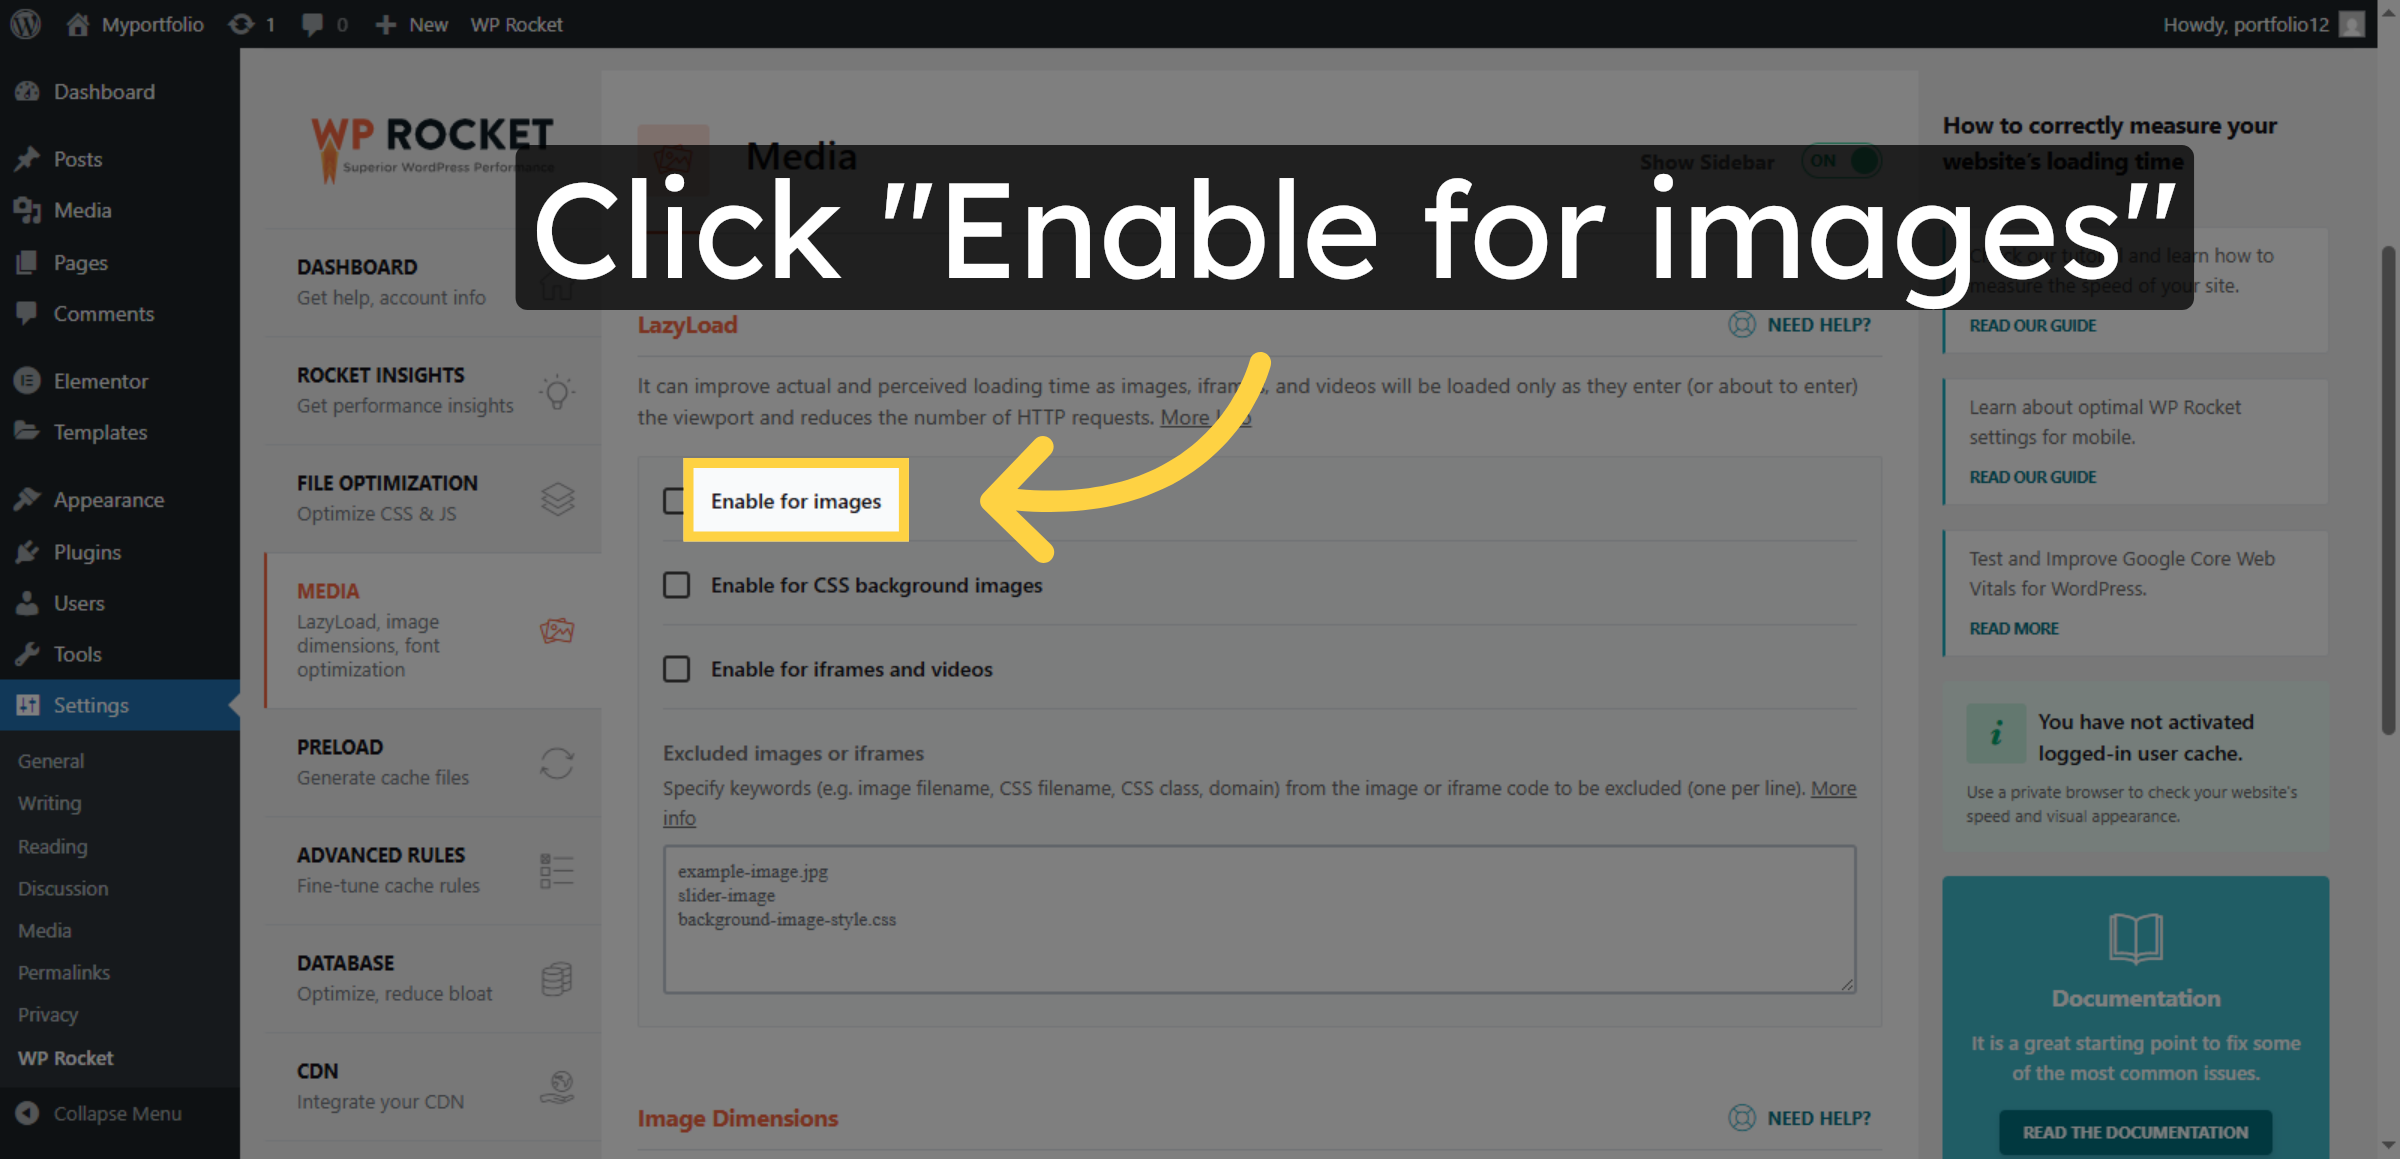
23. Enable LazyLoad for Images


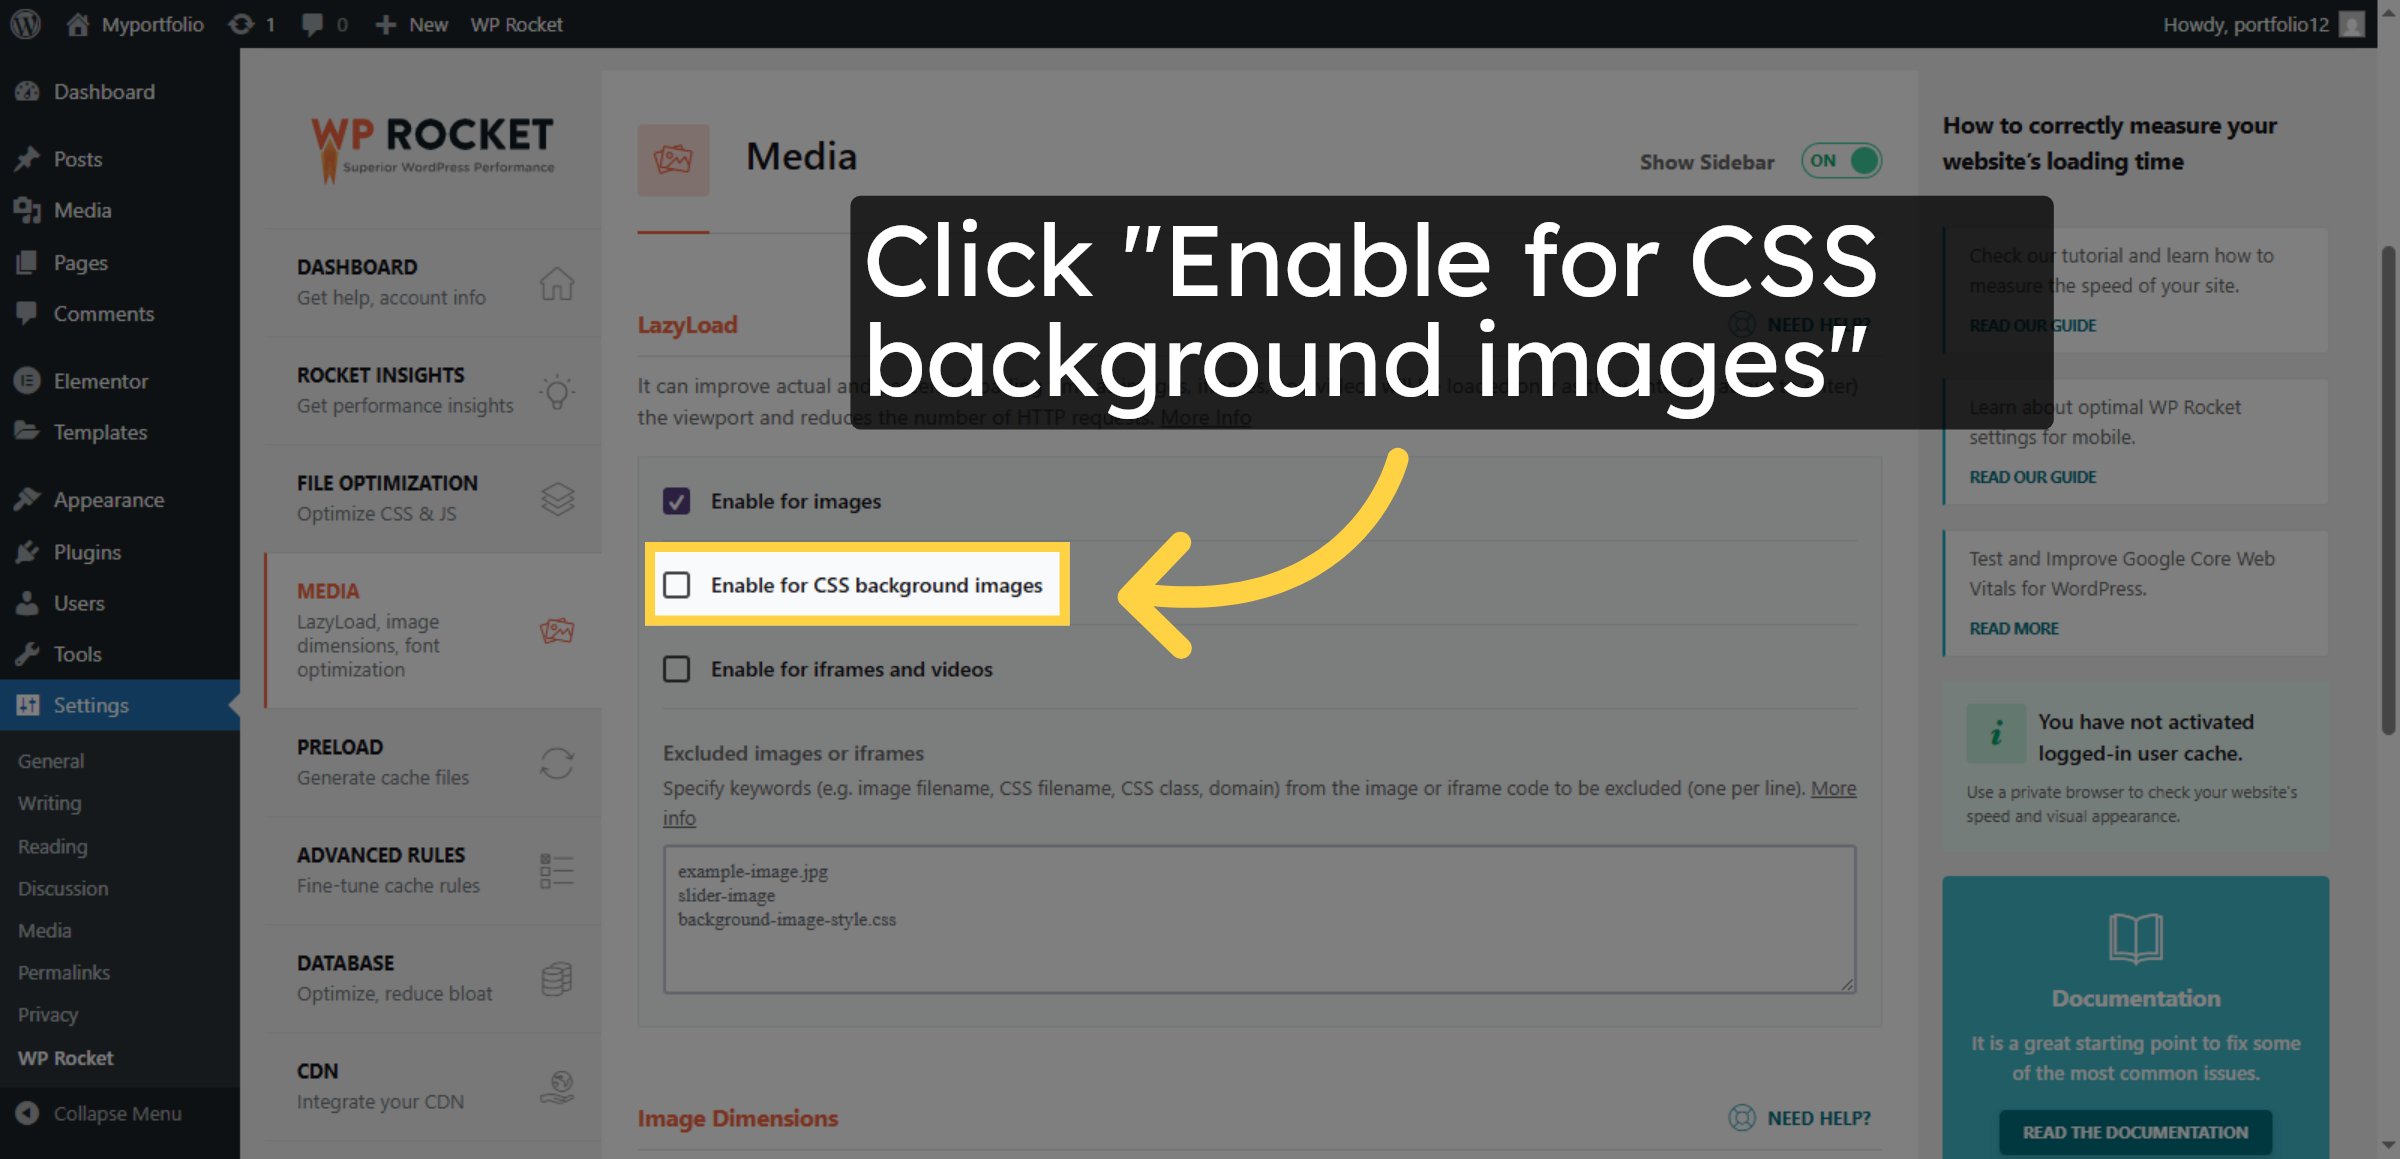
24. Enable LazyLoad for CSS Backgrounds
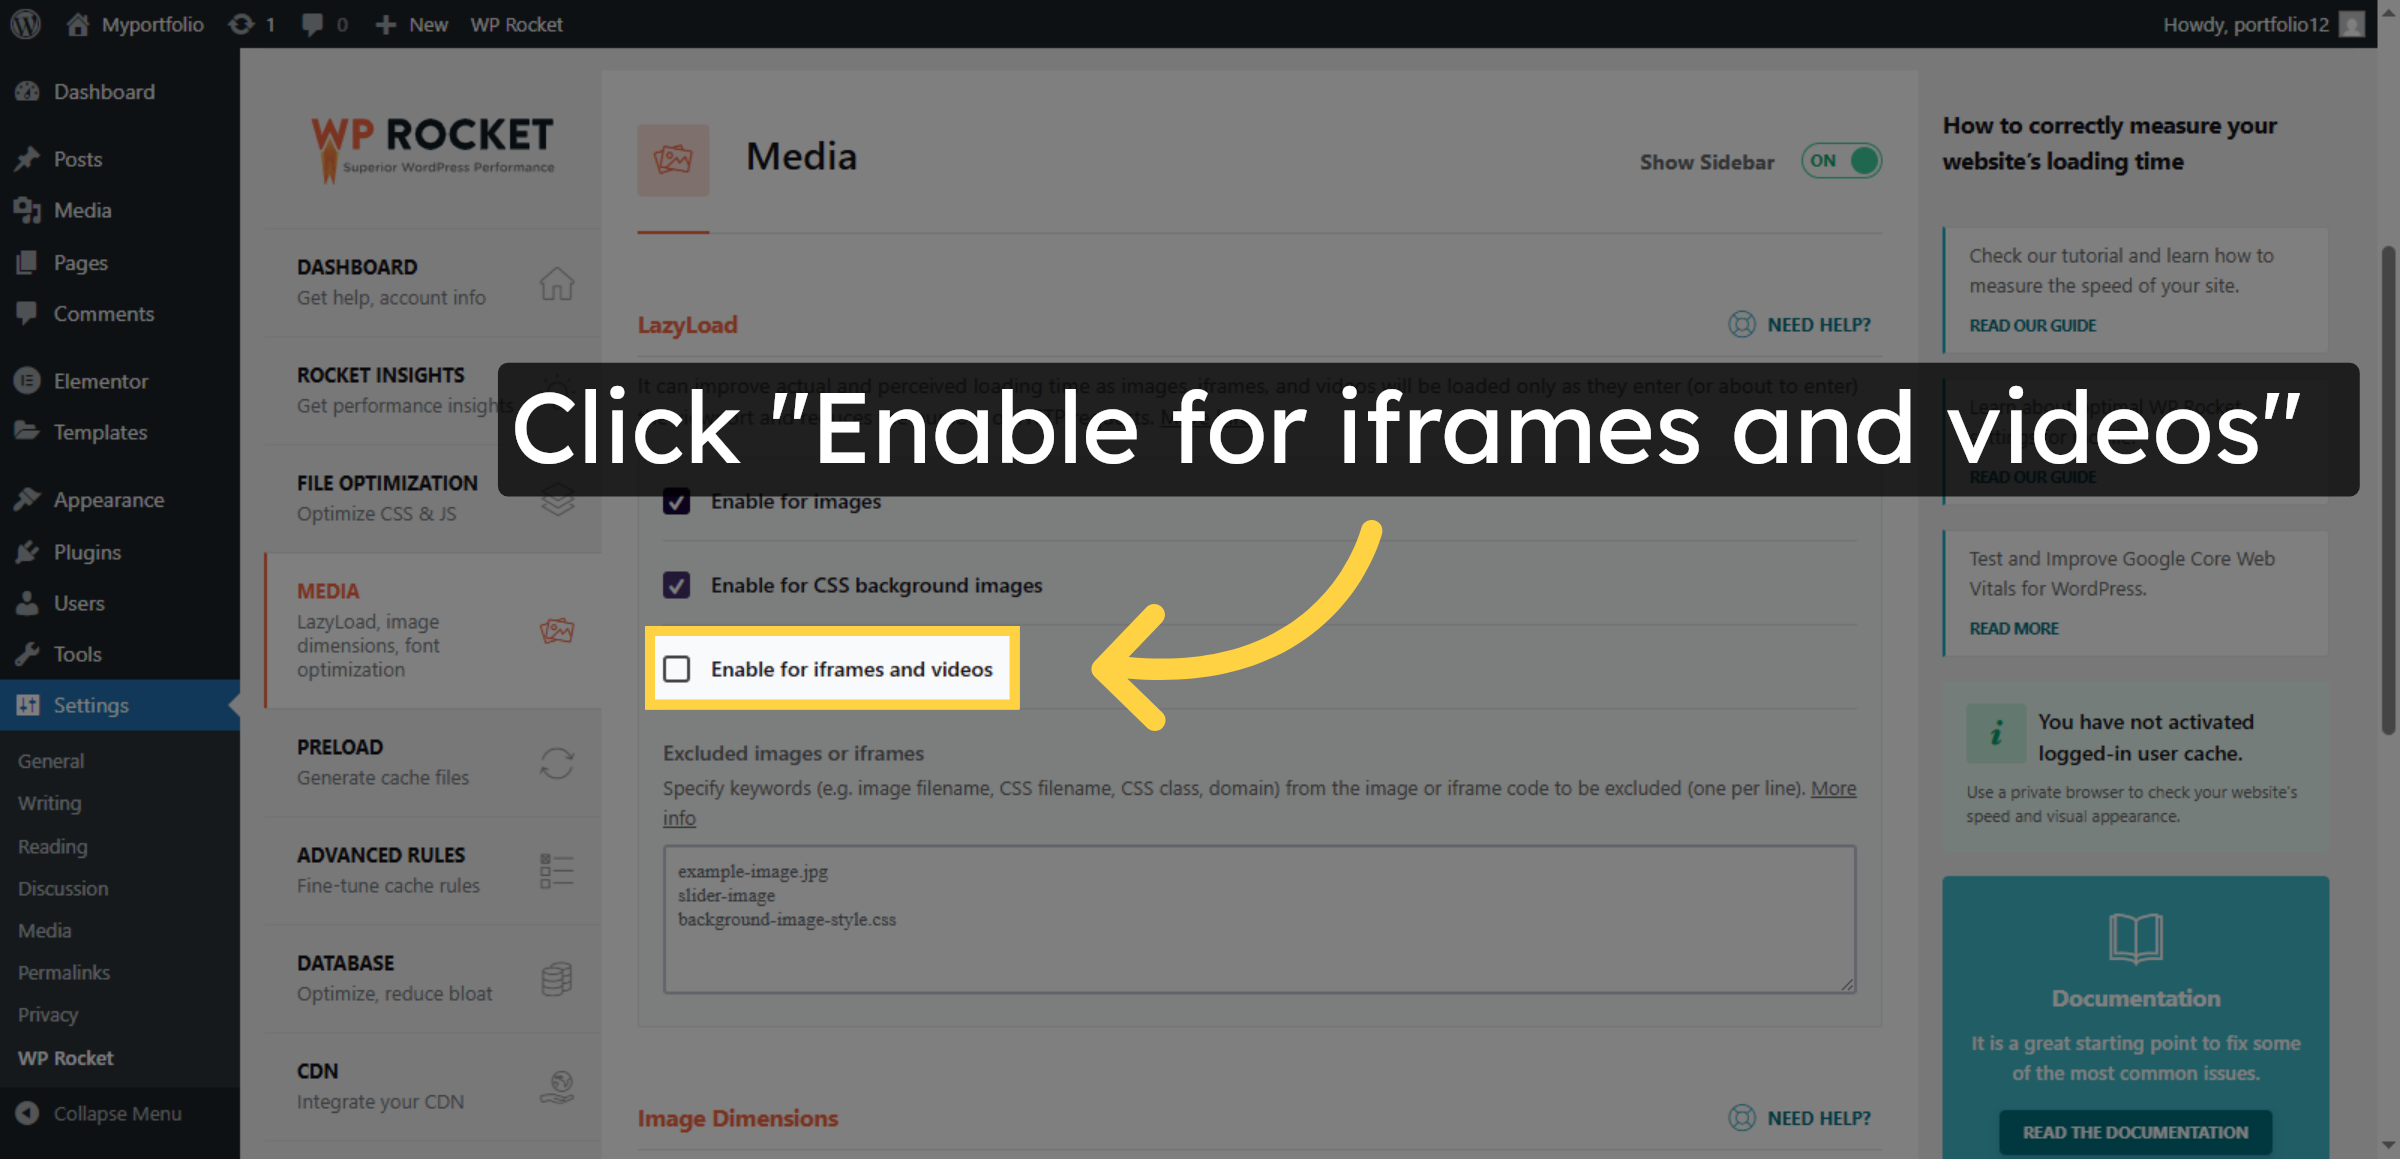
25. Enable LazyLoad for Iframes and Videos
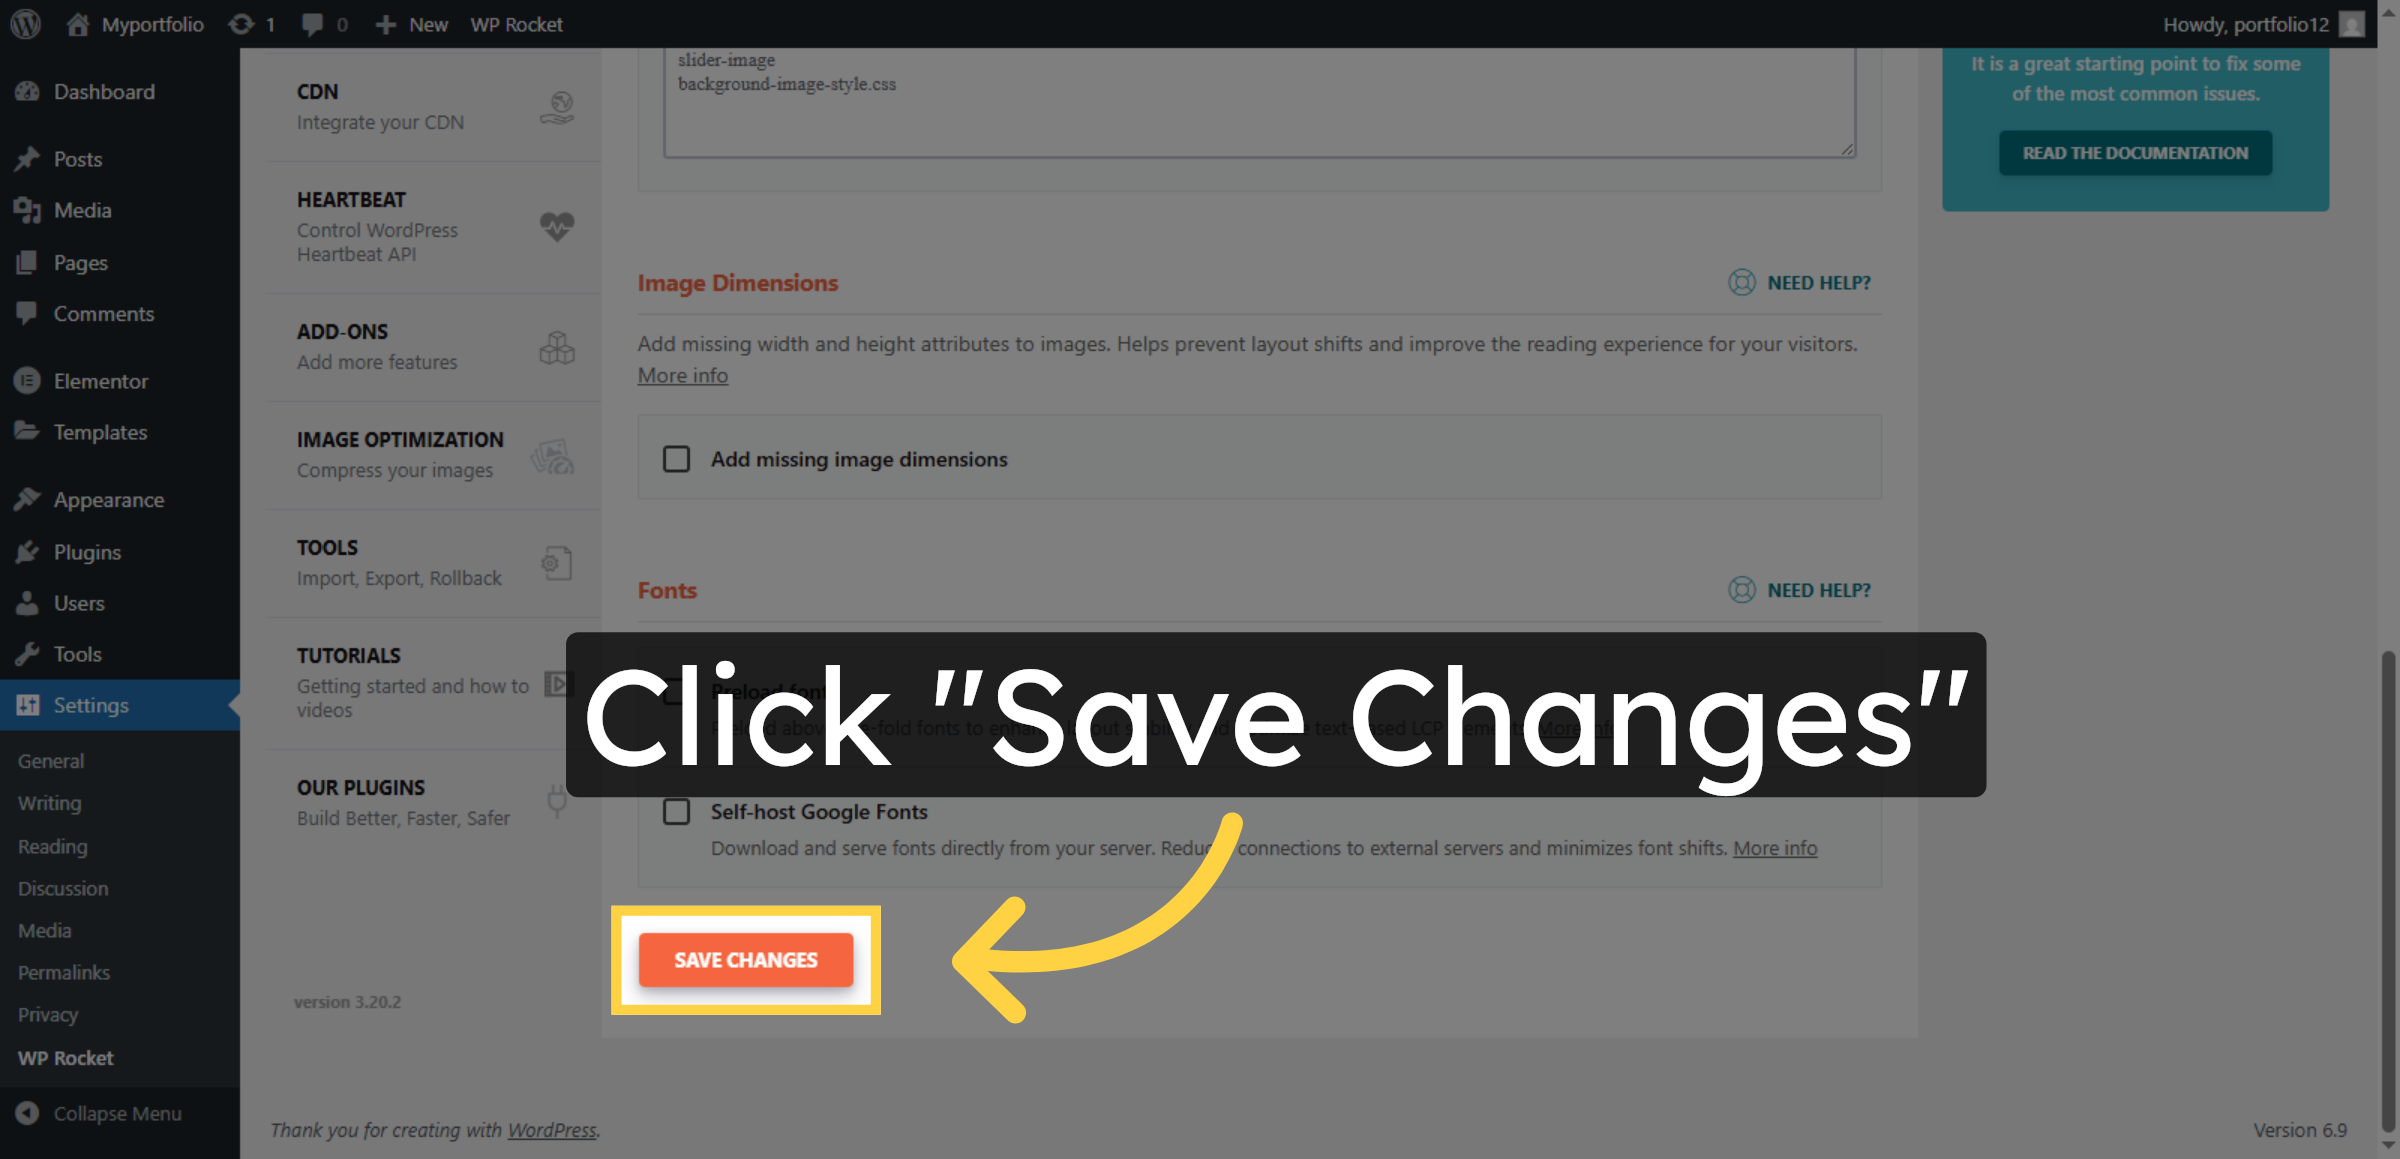
26. Save LazyLoad Settings
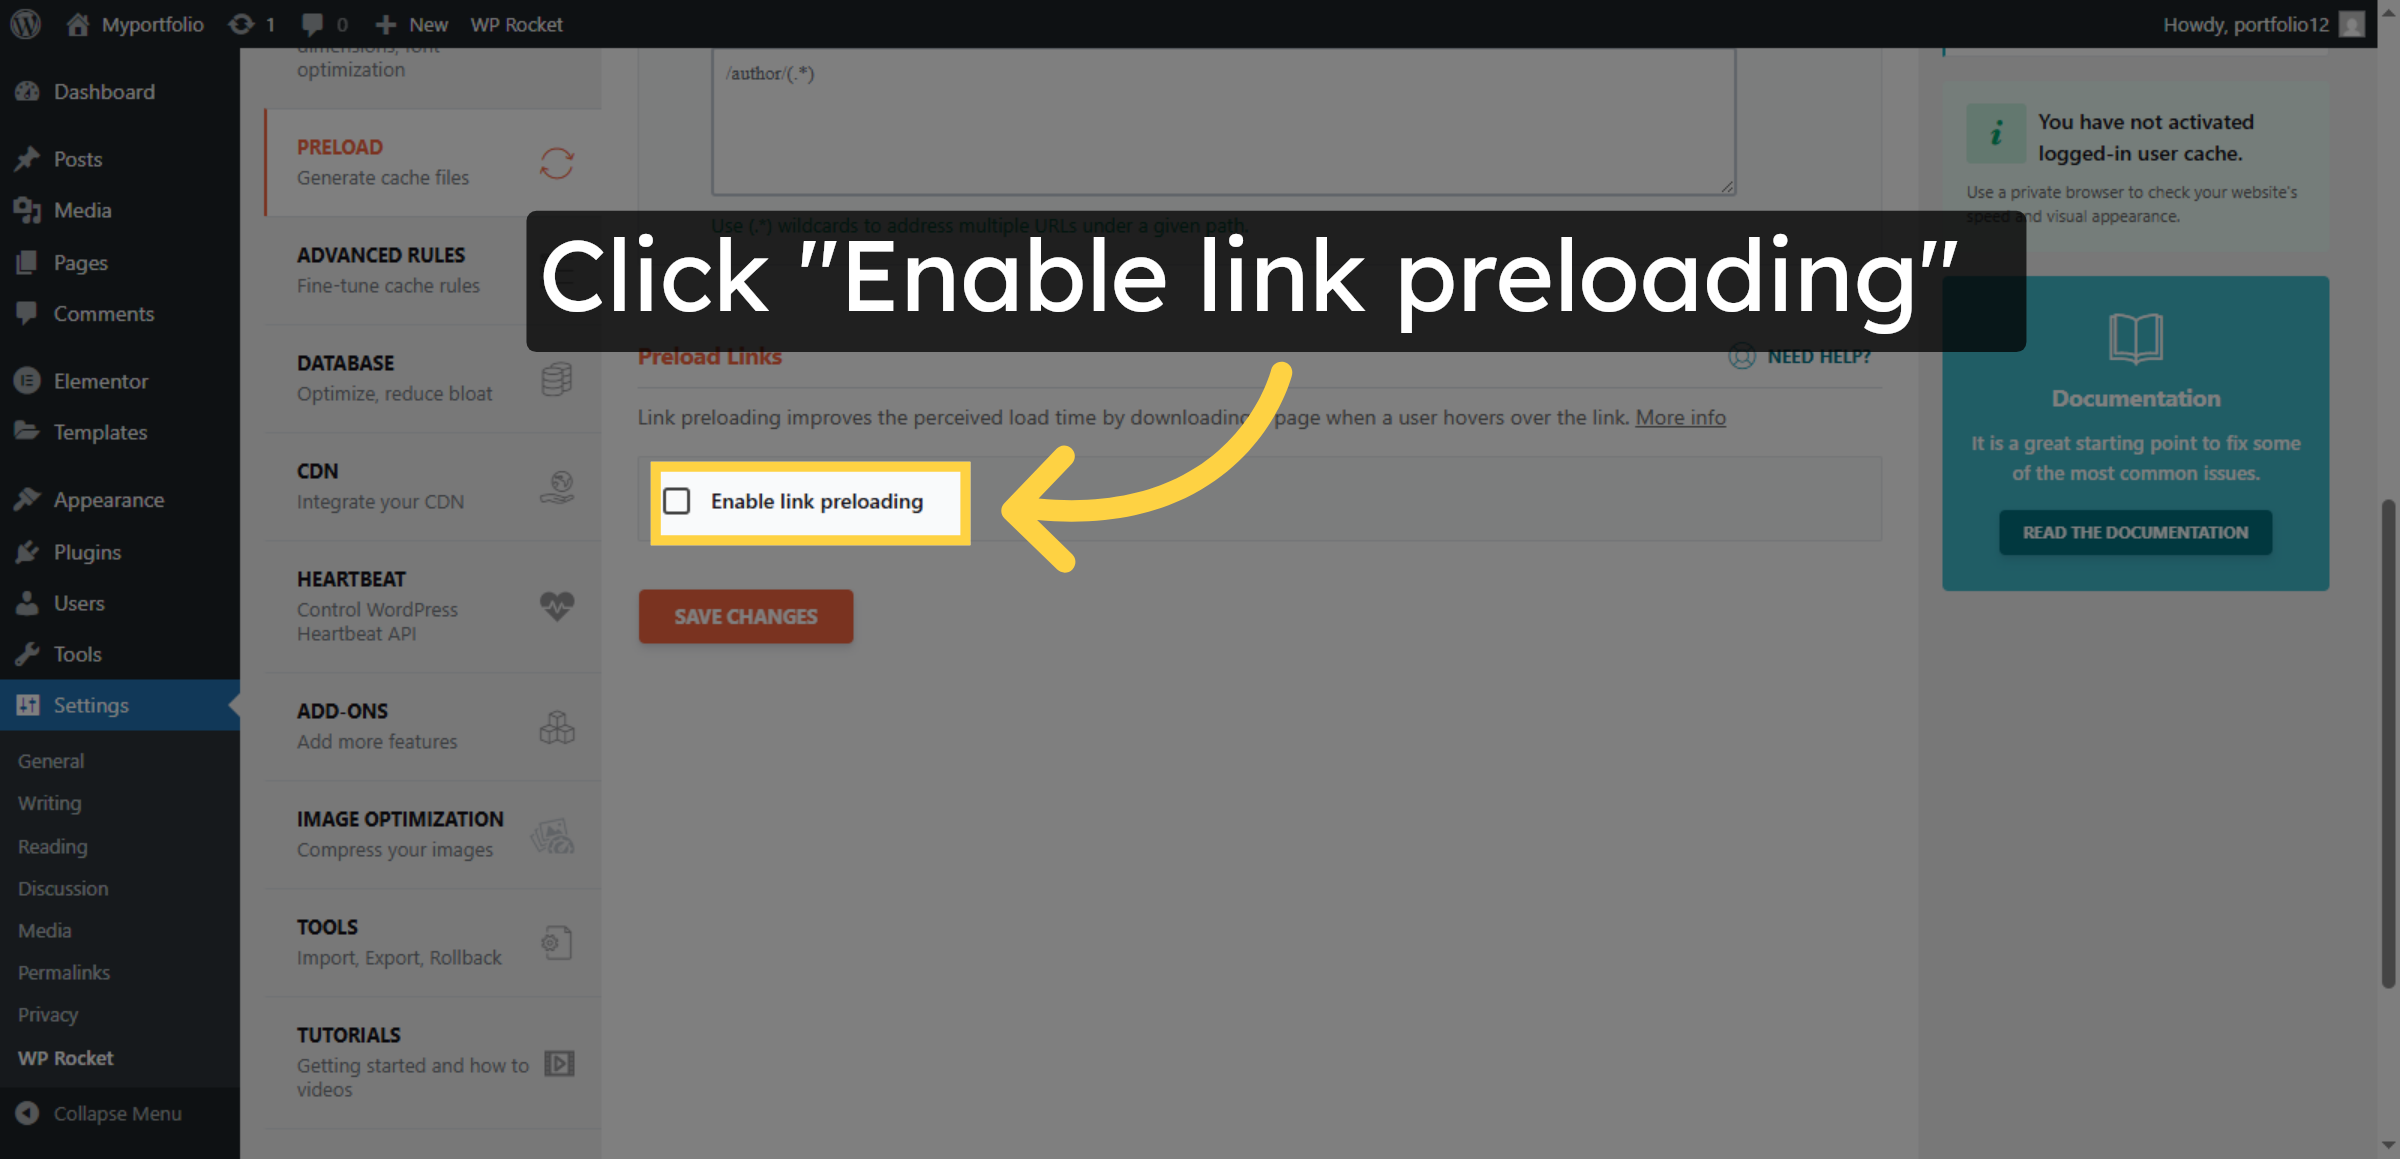
27. Click Preload
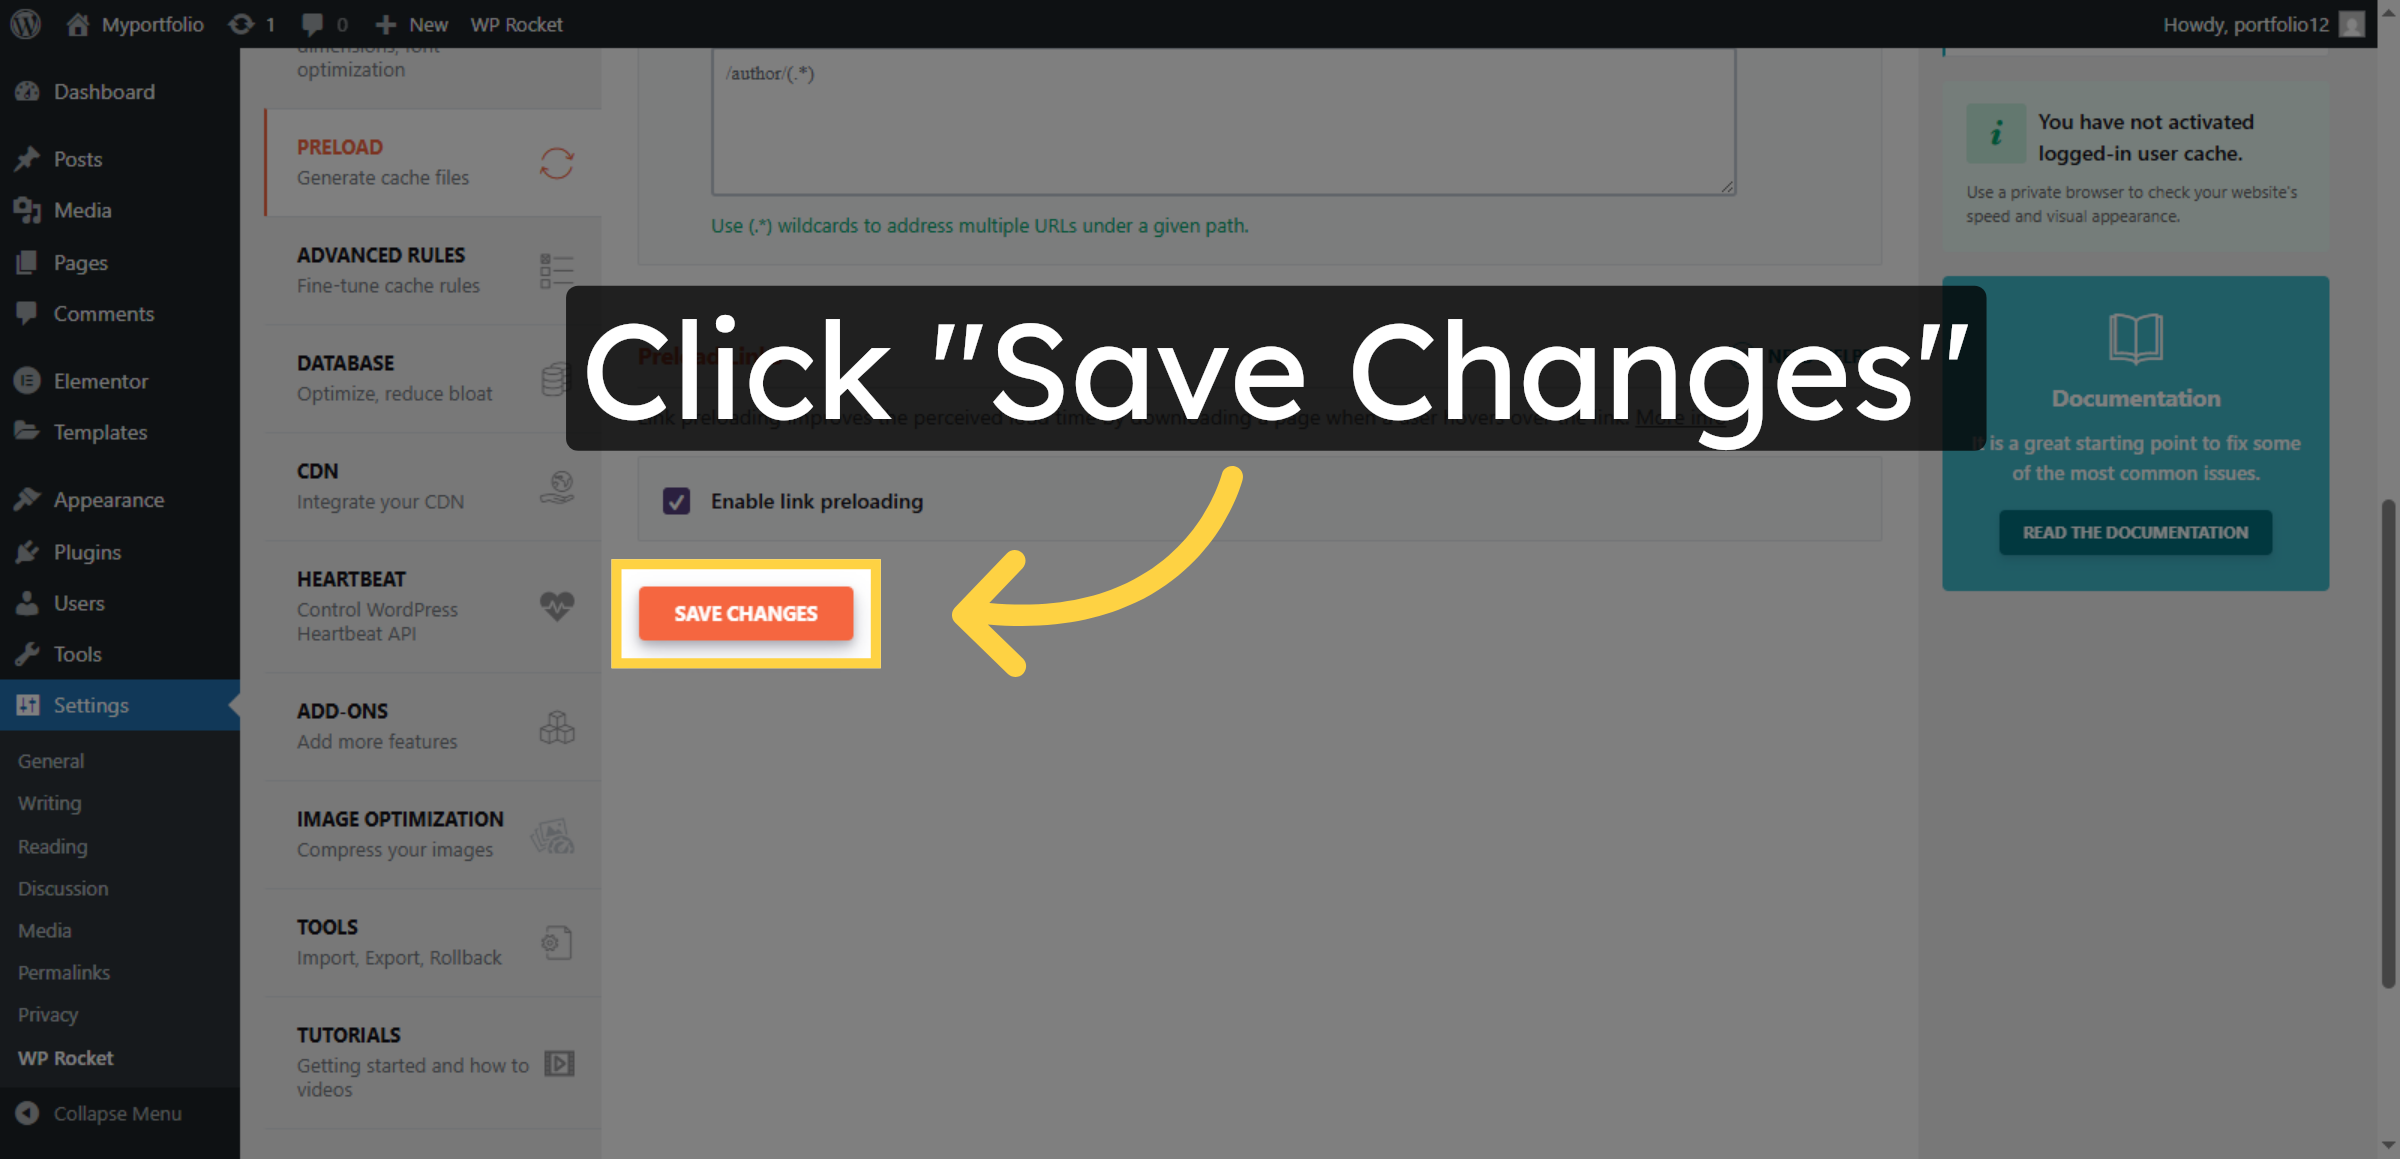
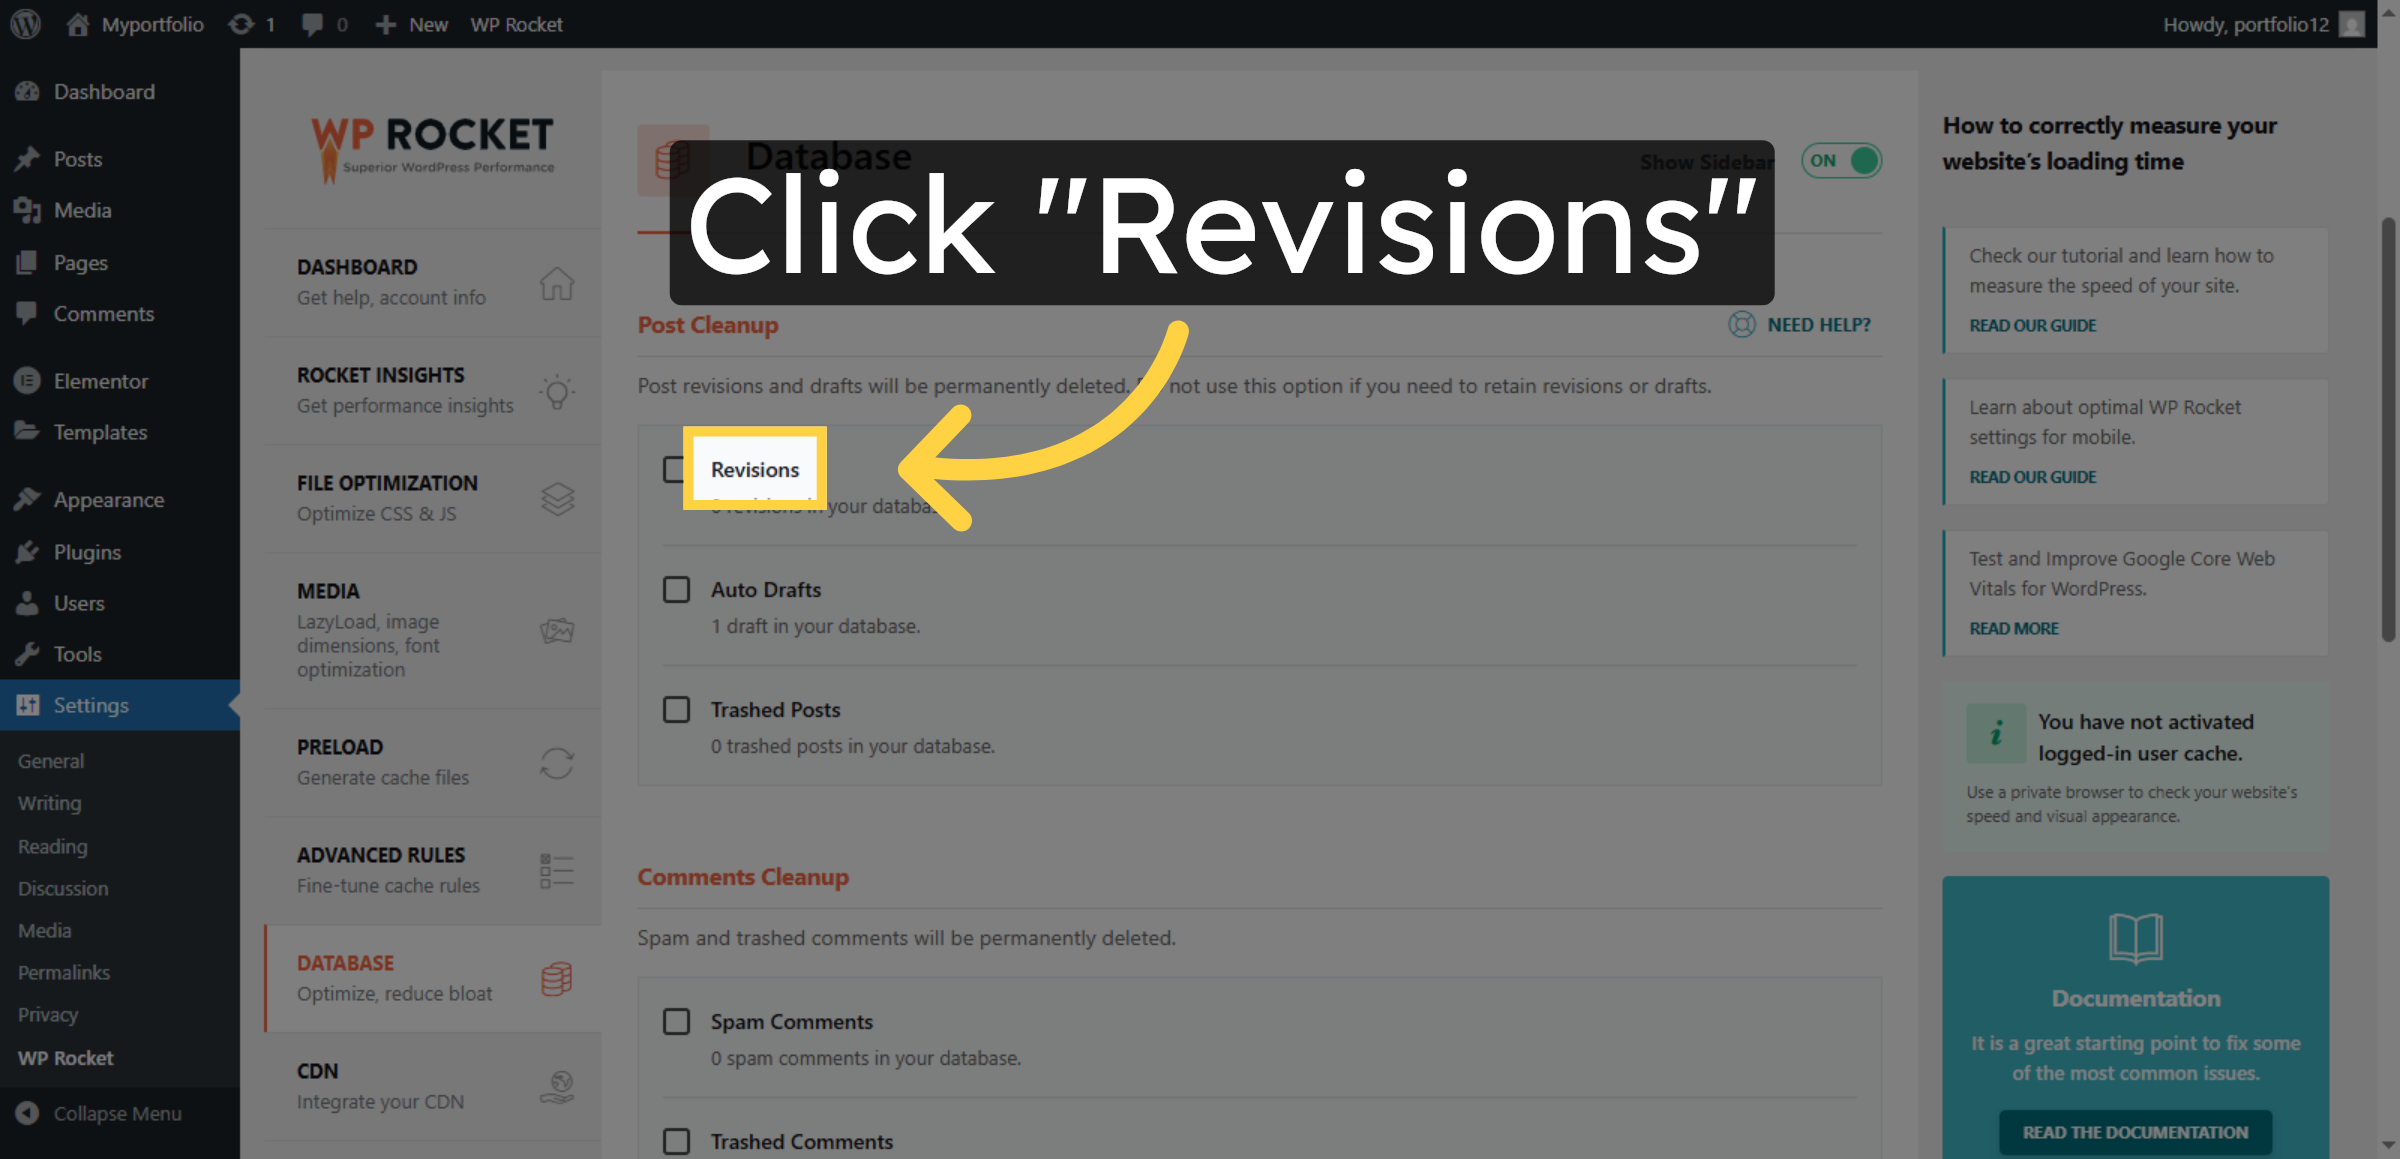
28. Enable Link Preloading
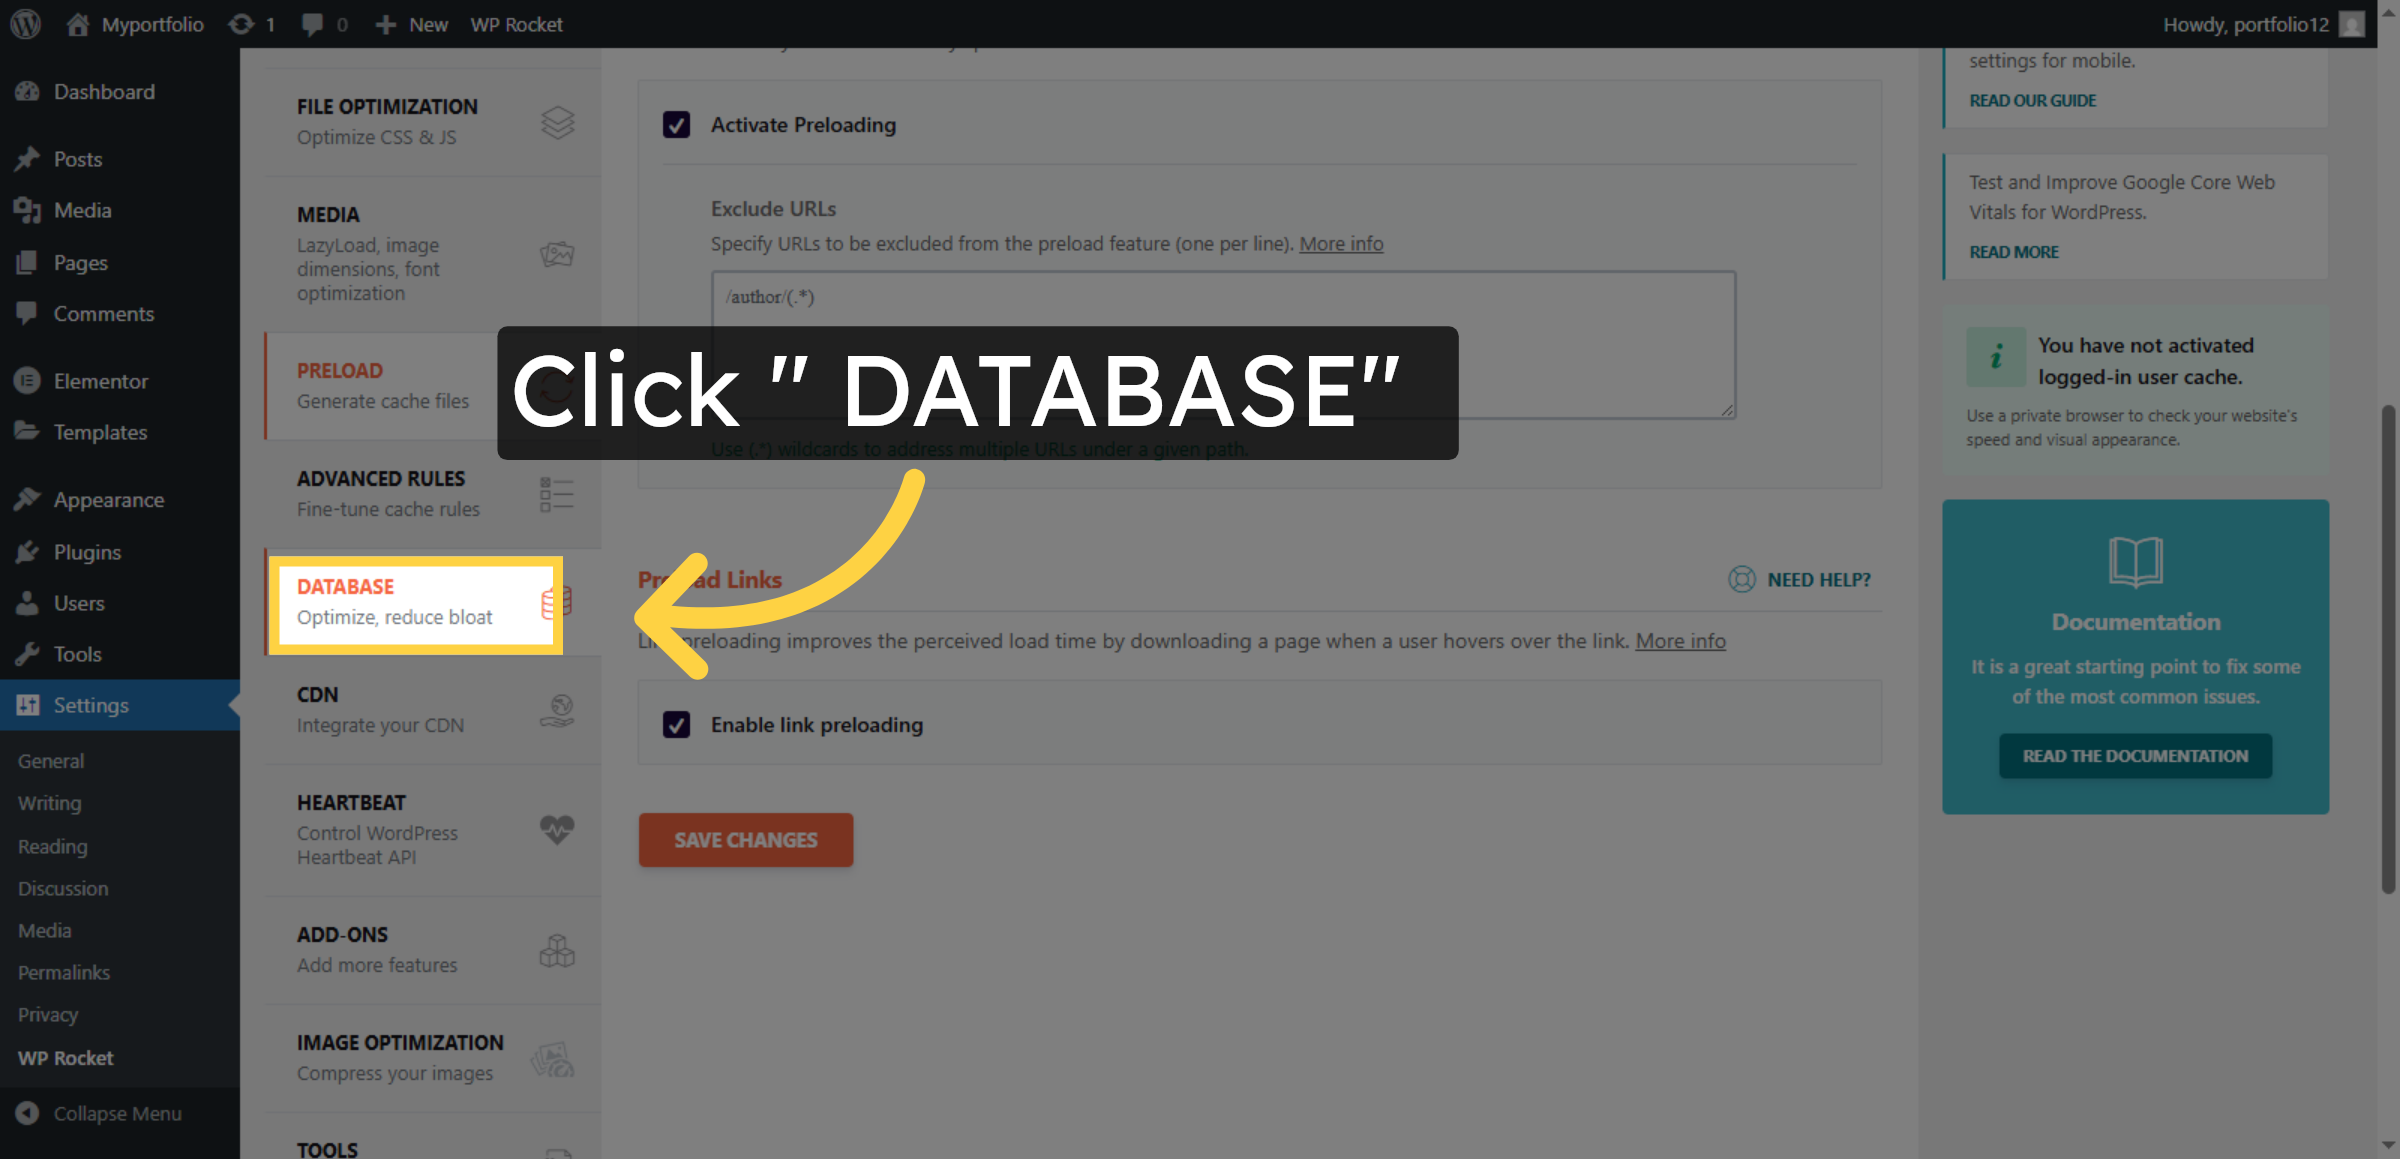
29. Save Link Preloading Settings
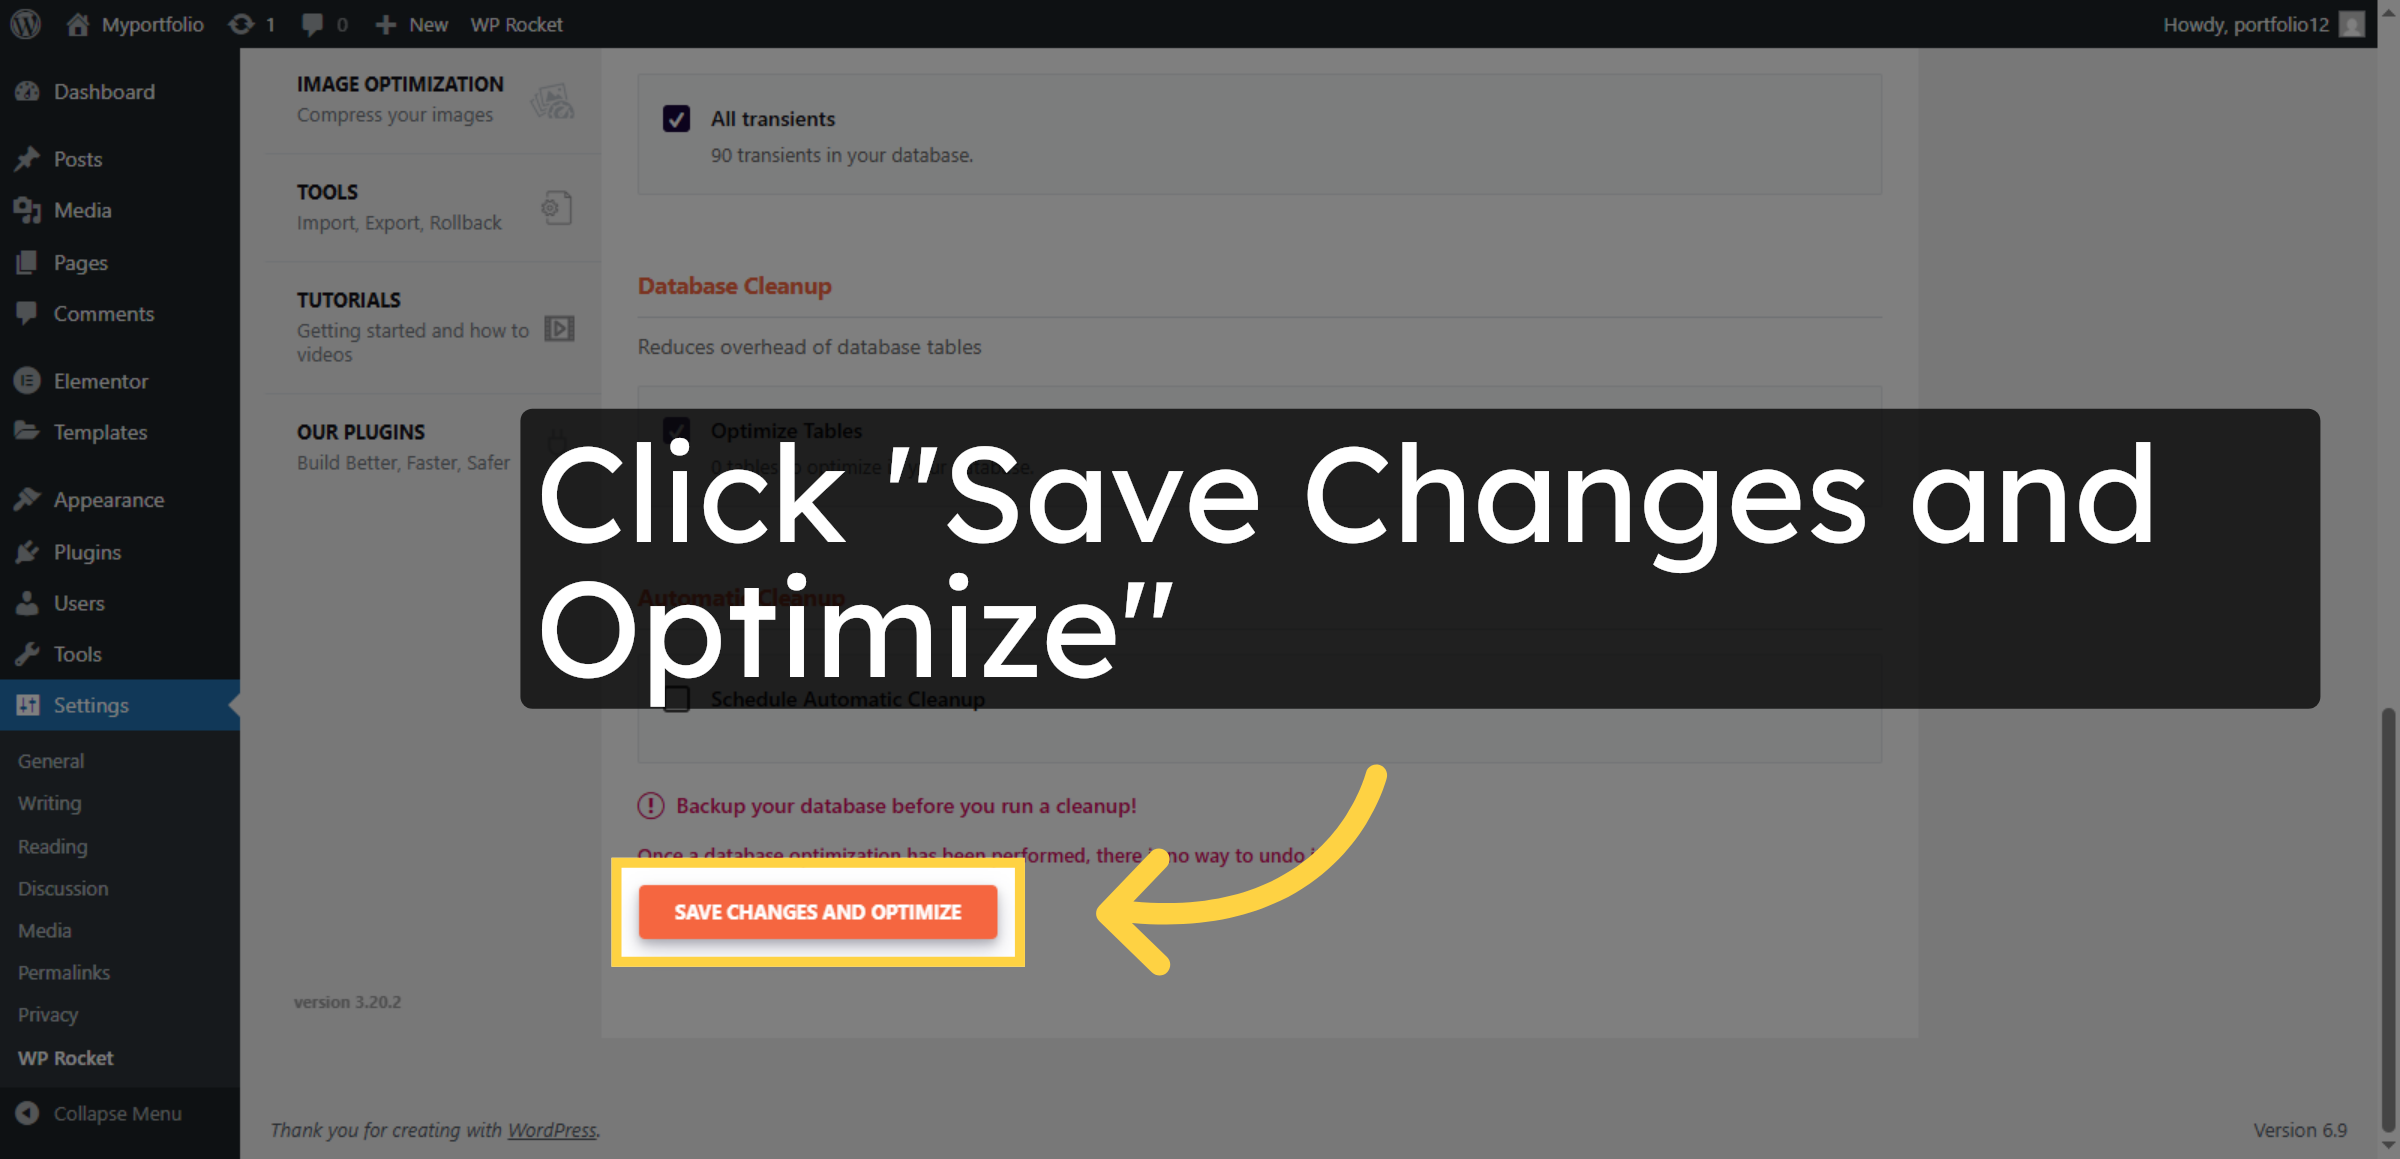
30. Open Optimization and Bloat Reduction
31. Access Revisions Settings
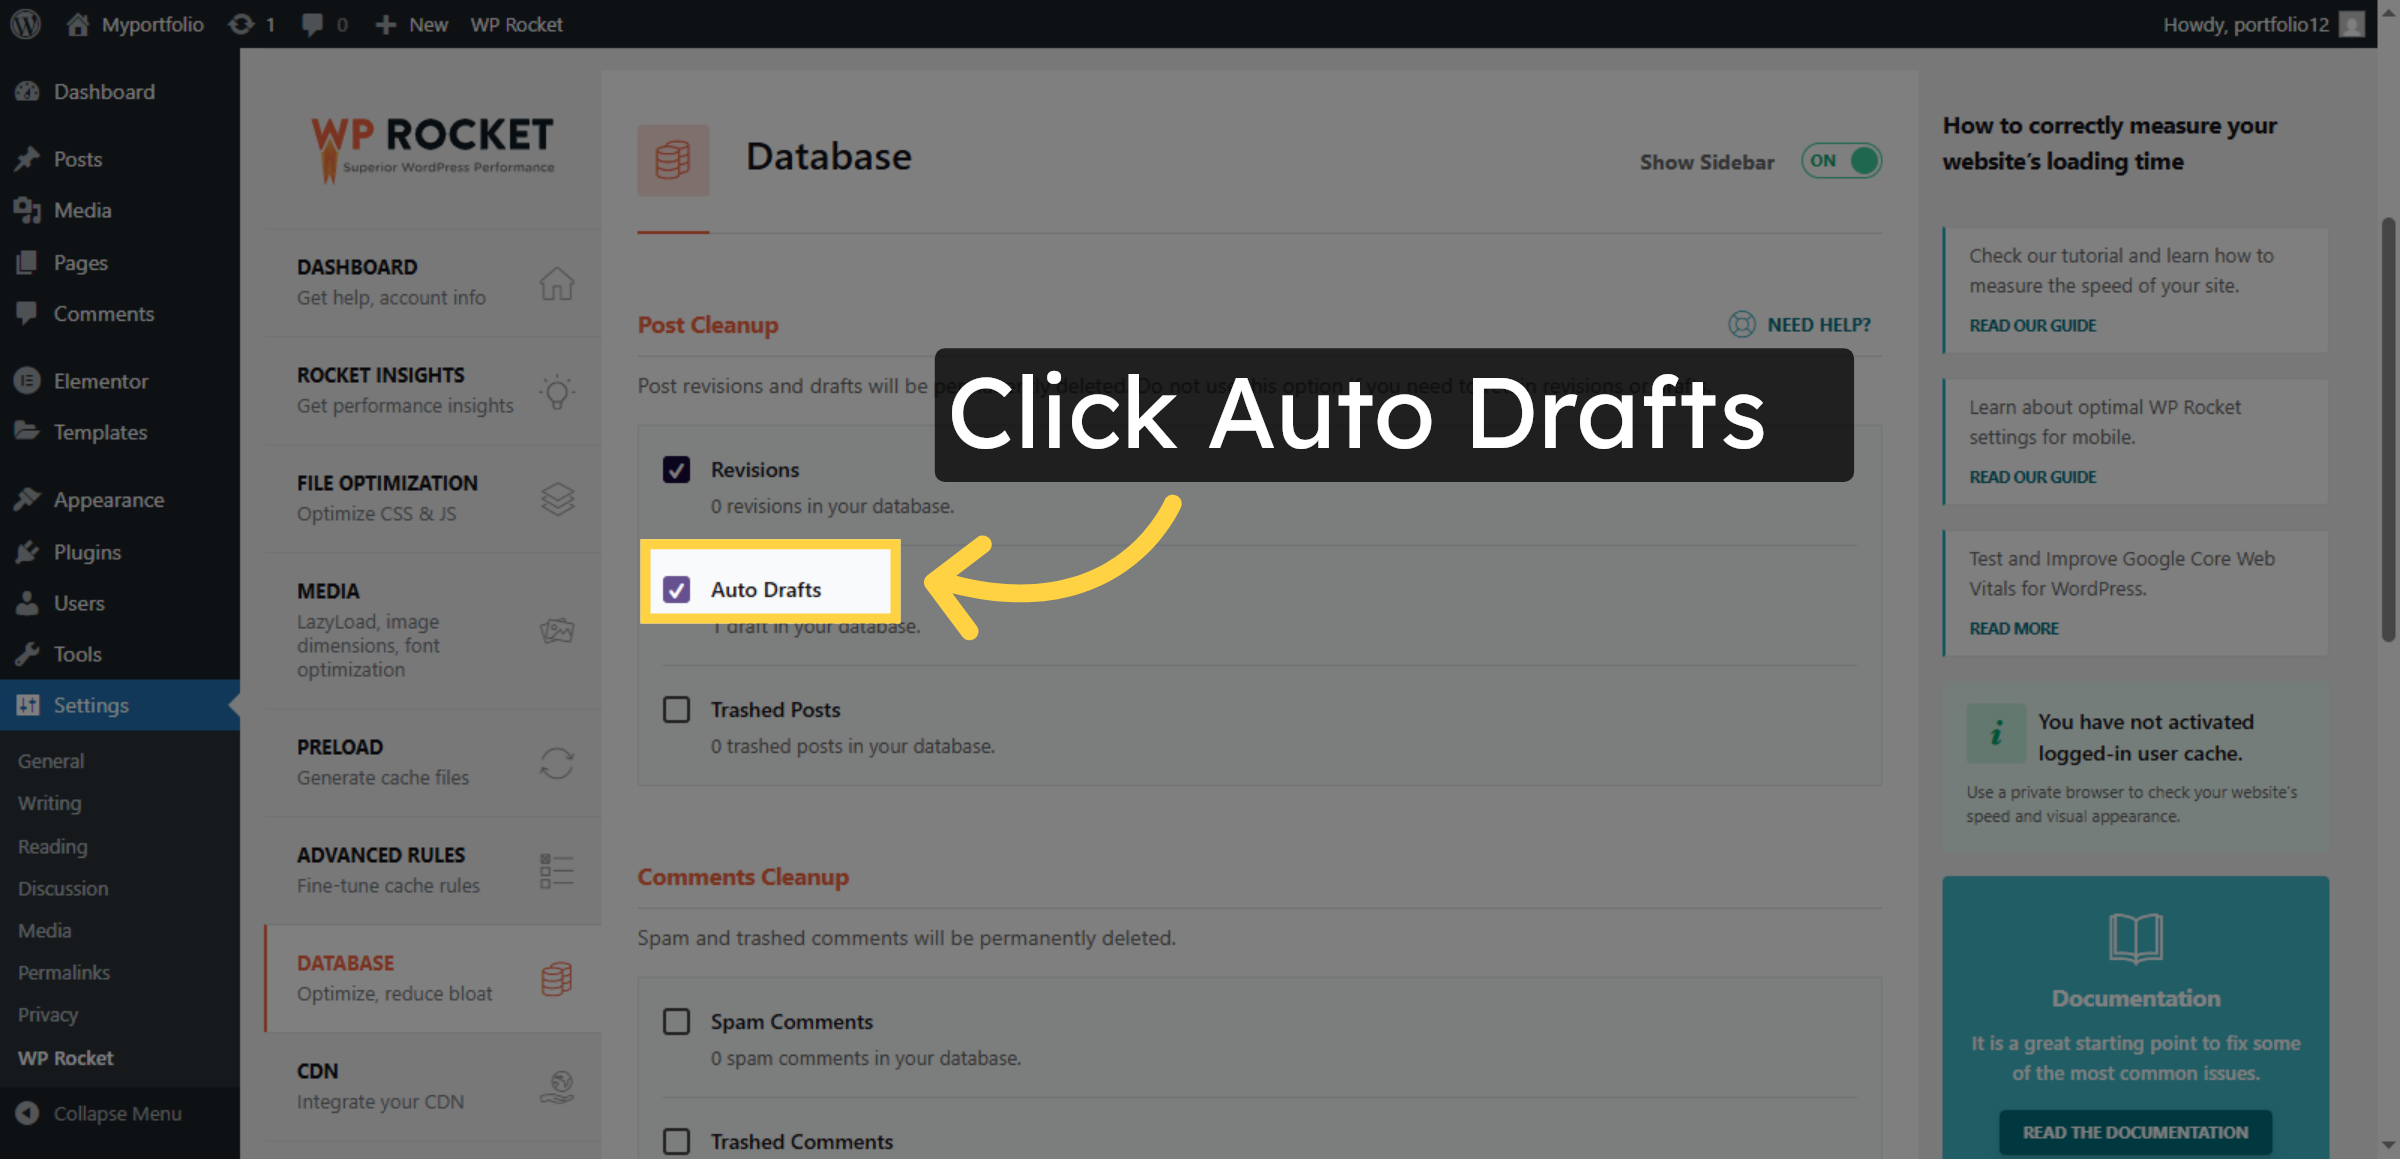
32. Enable Auto Drafts
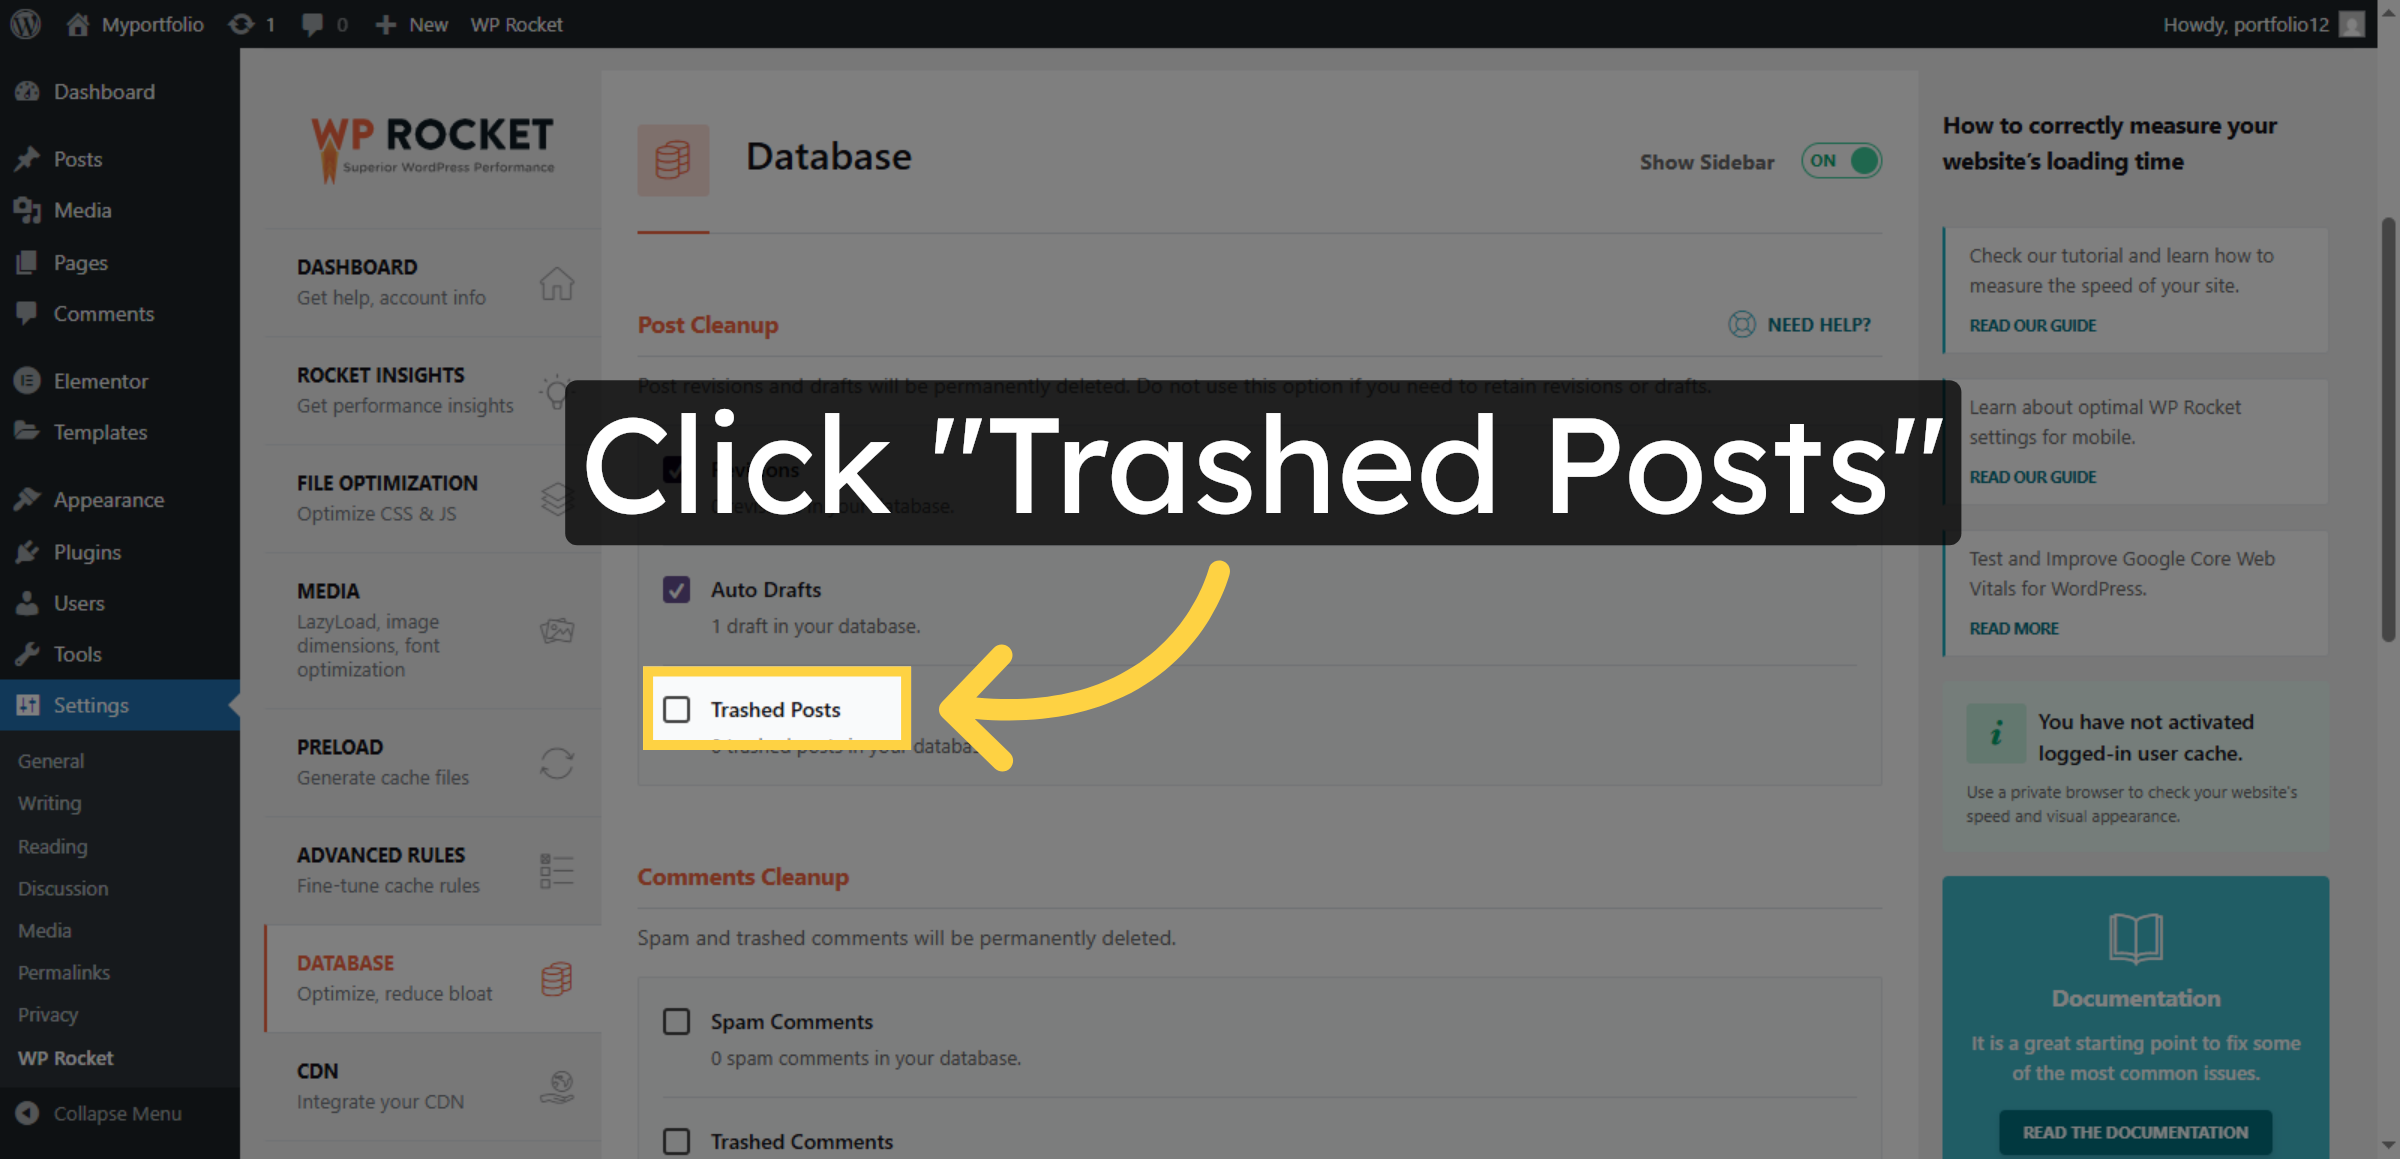
33. Manage Trashed Posts
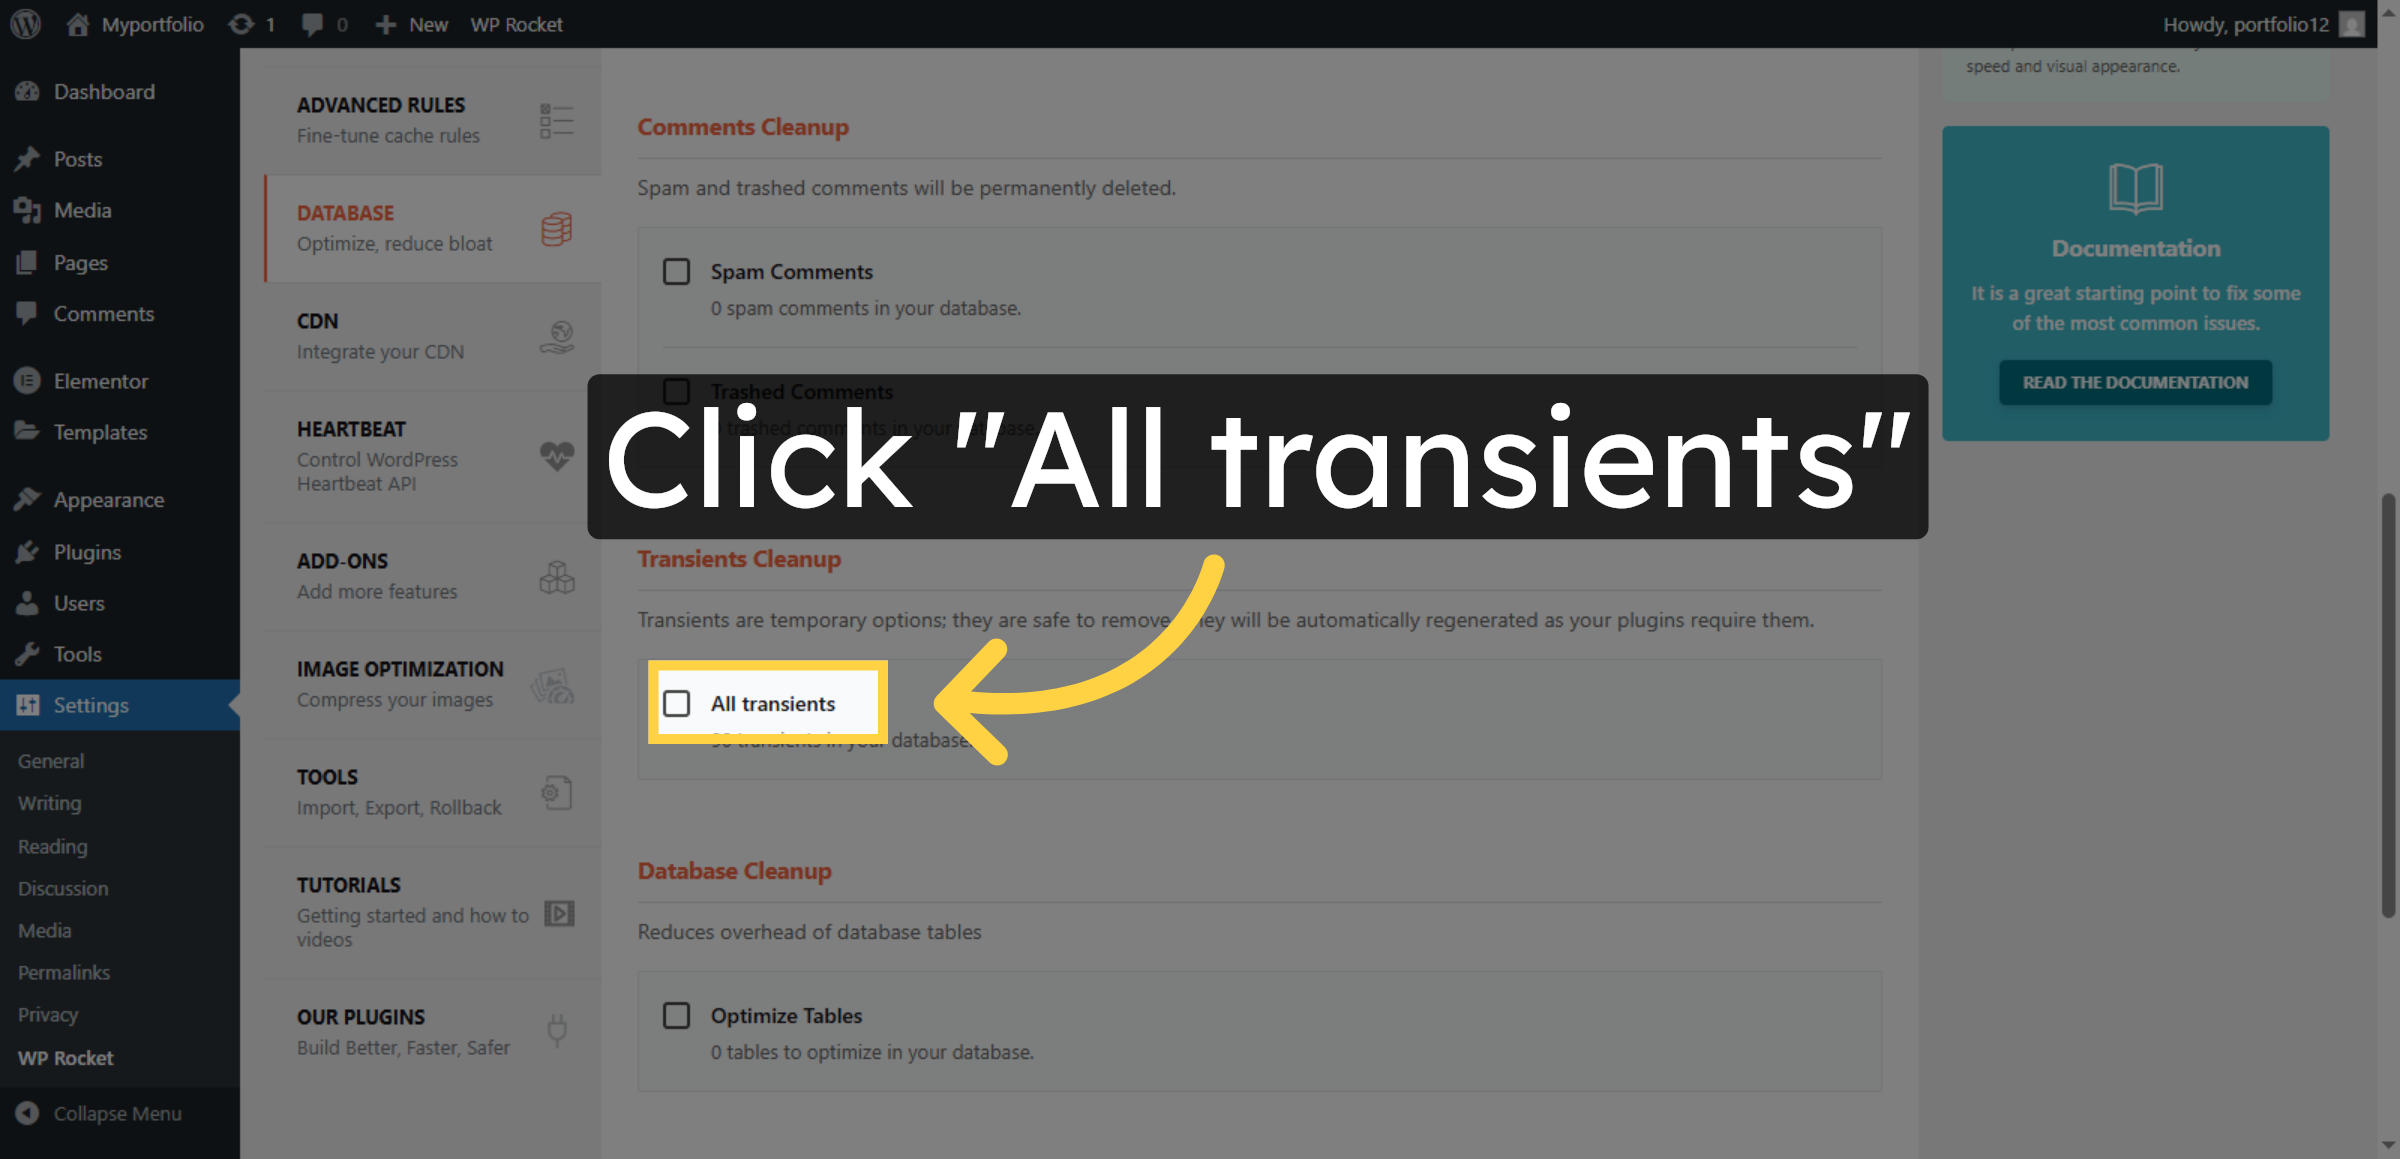
34. Manage All Transients
35. Optimize Database Tables

36. Save and Optimize Database
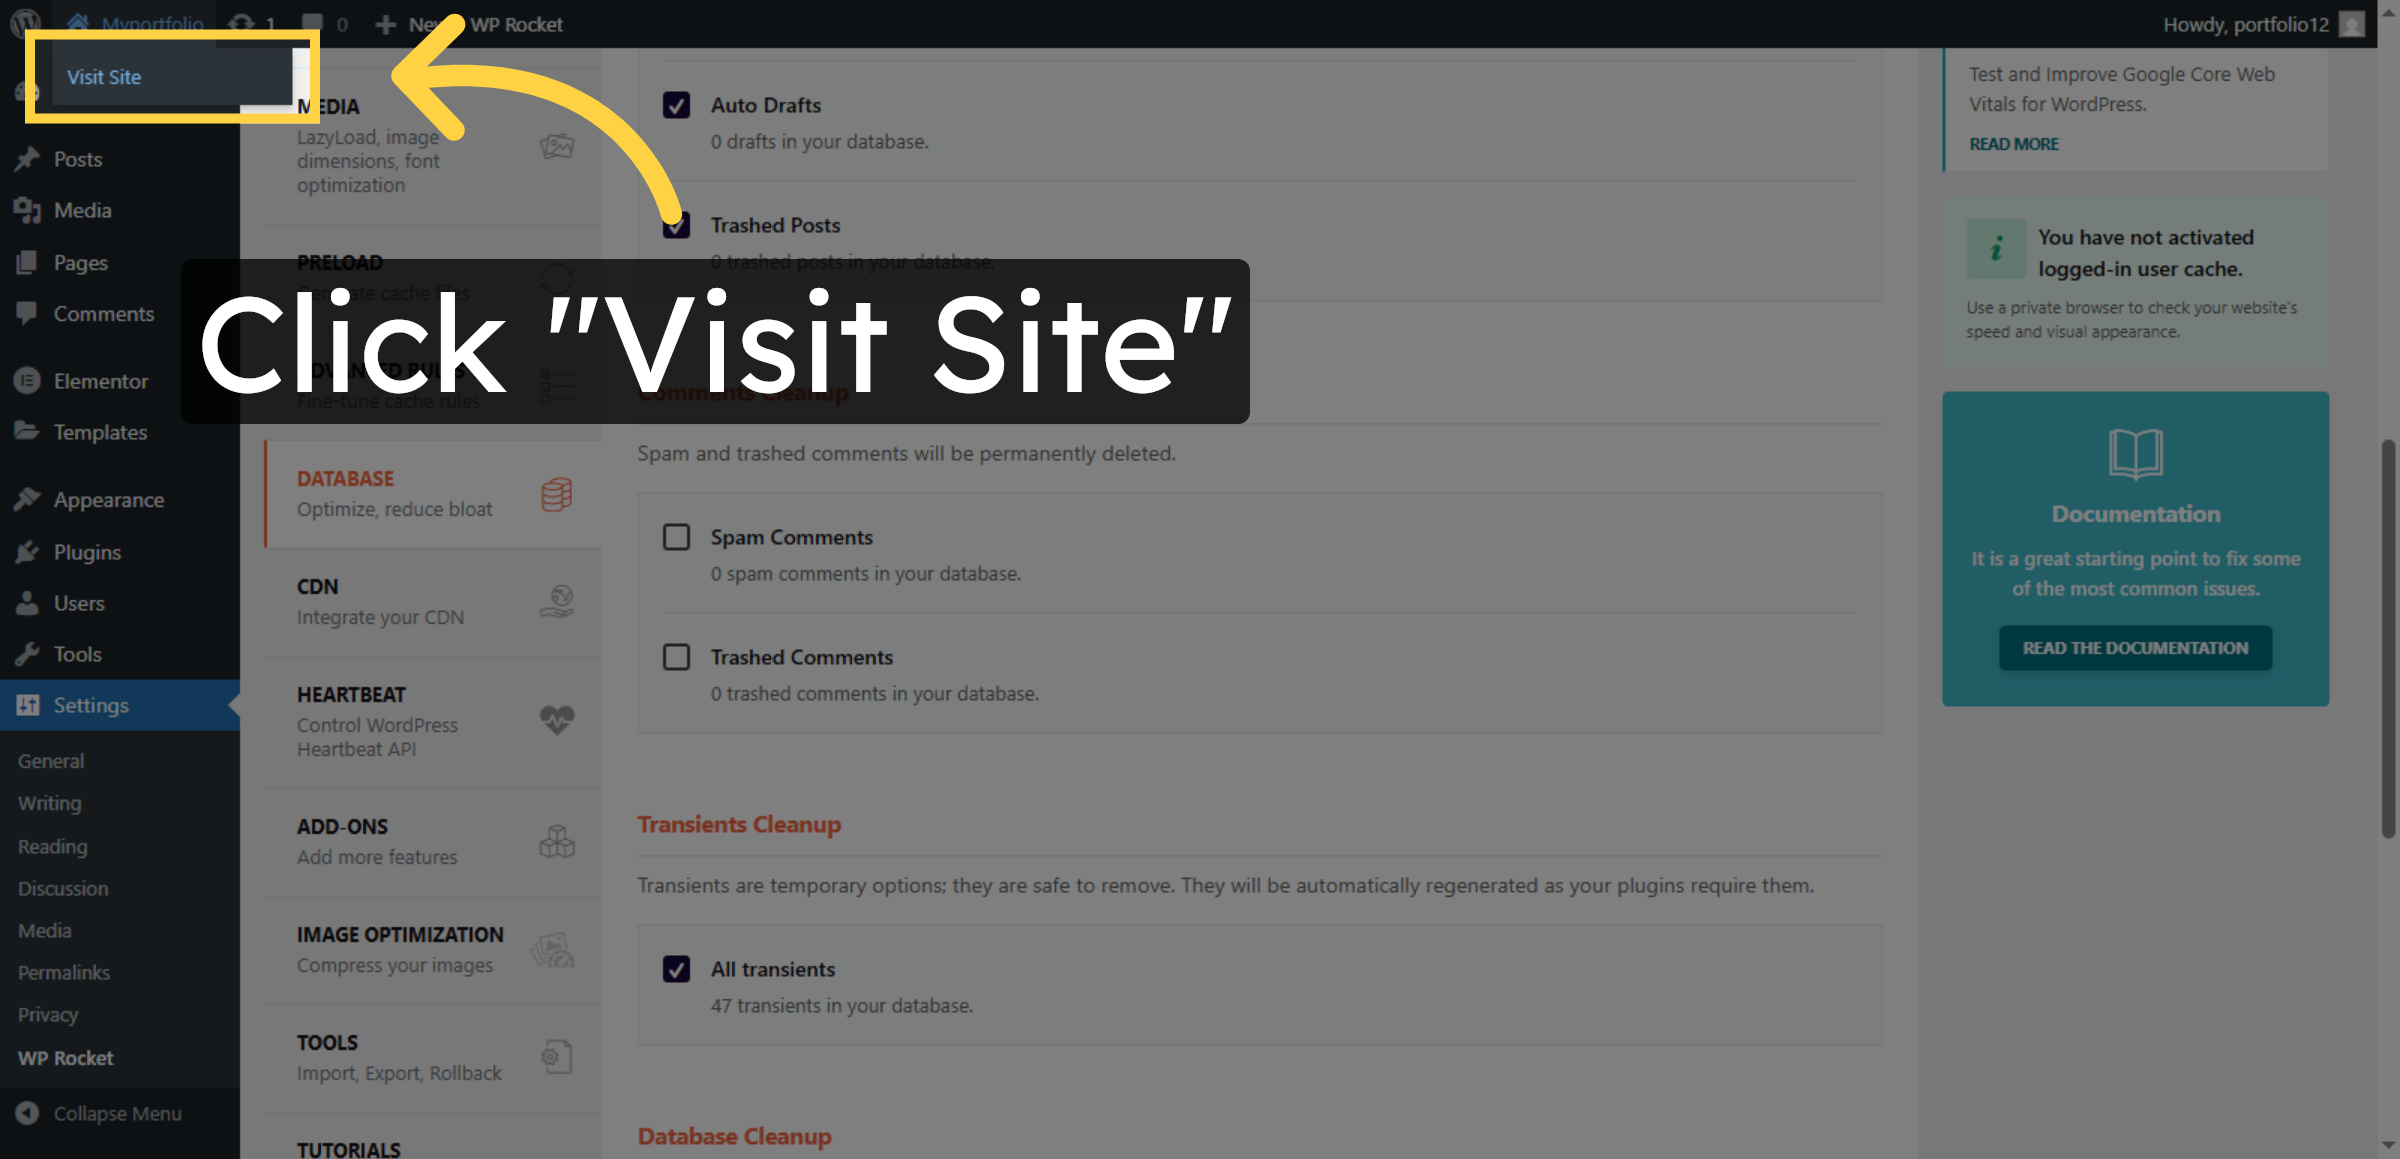
37. Visit Website
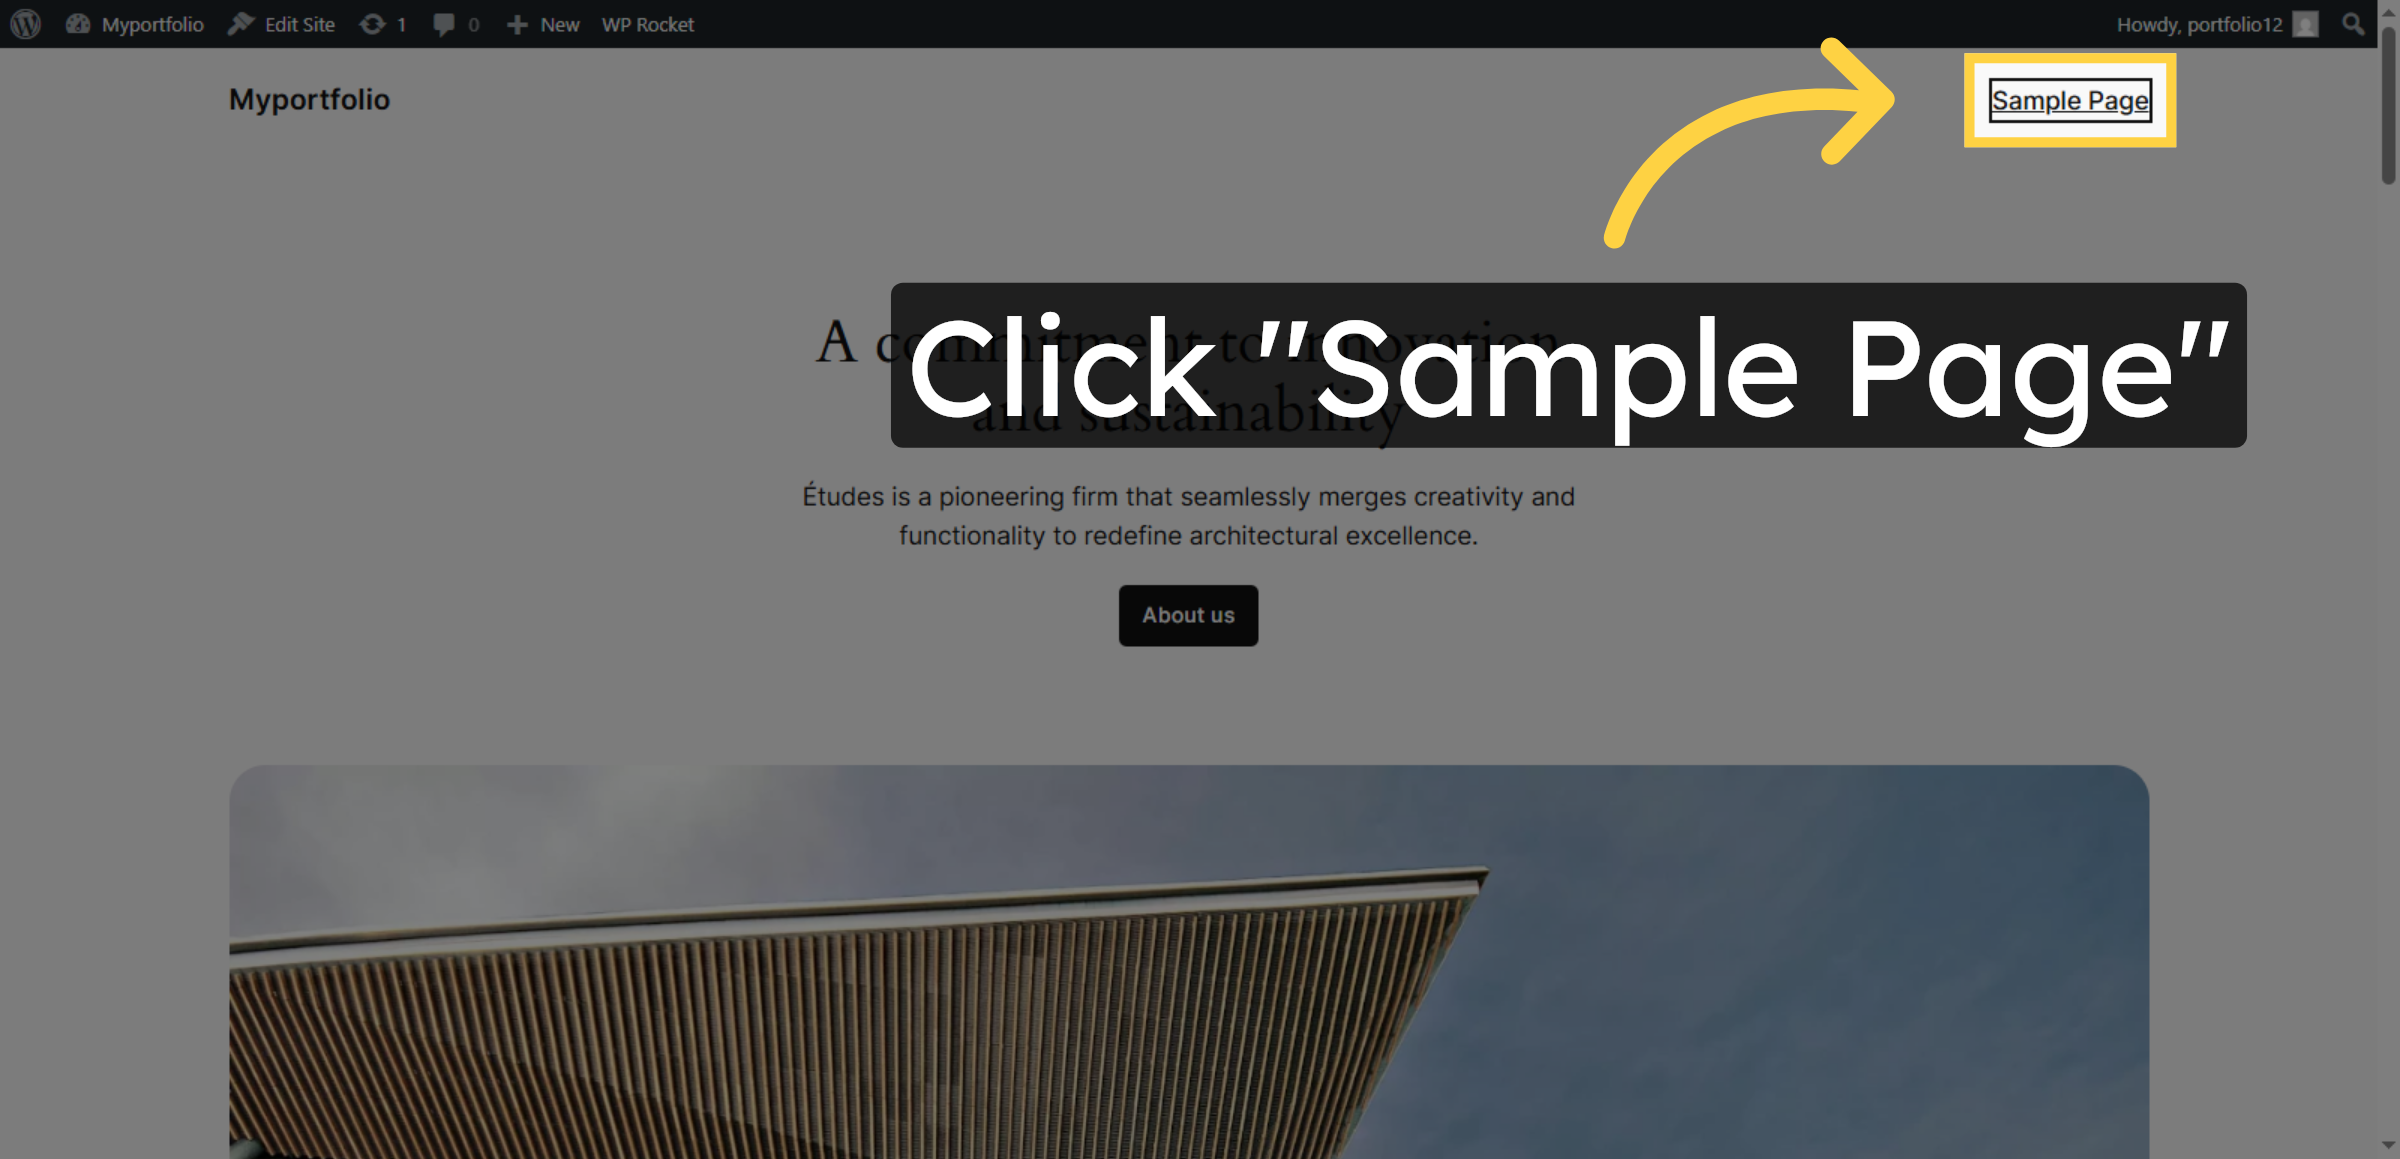
38. Open Sample Page
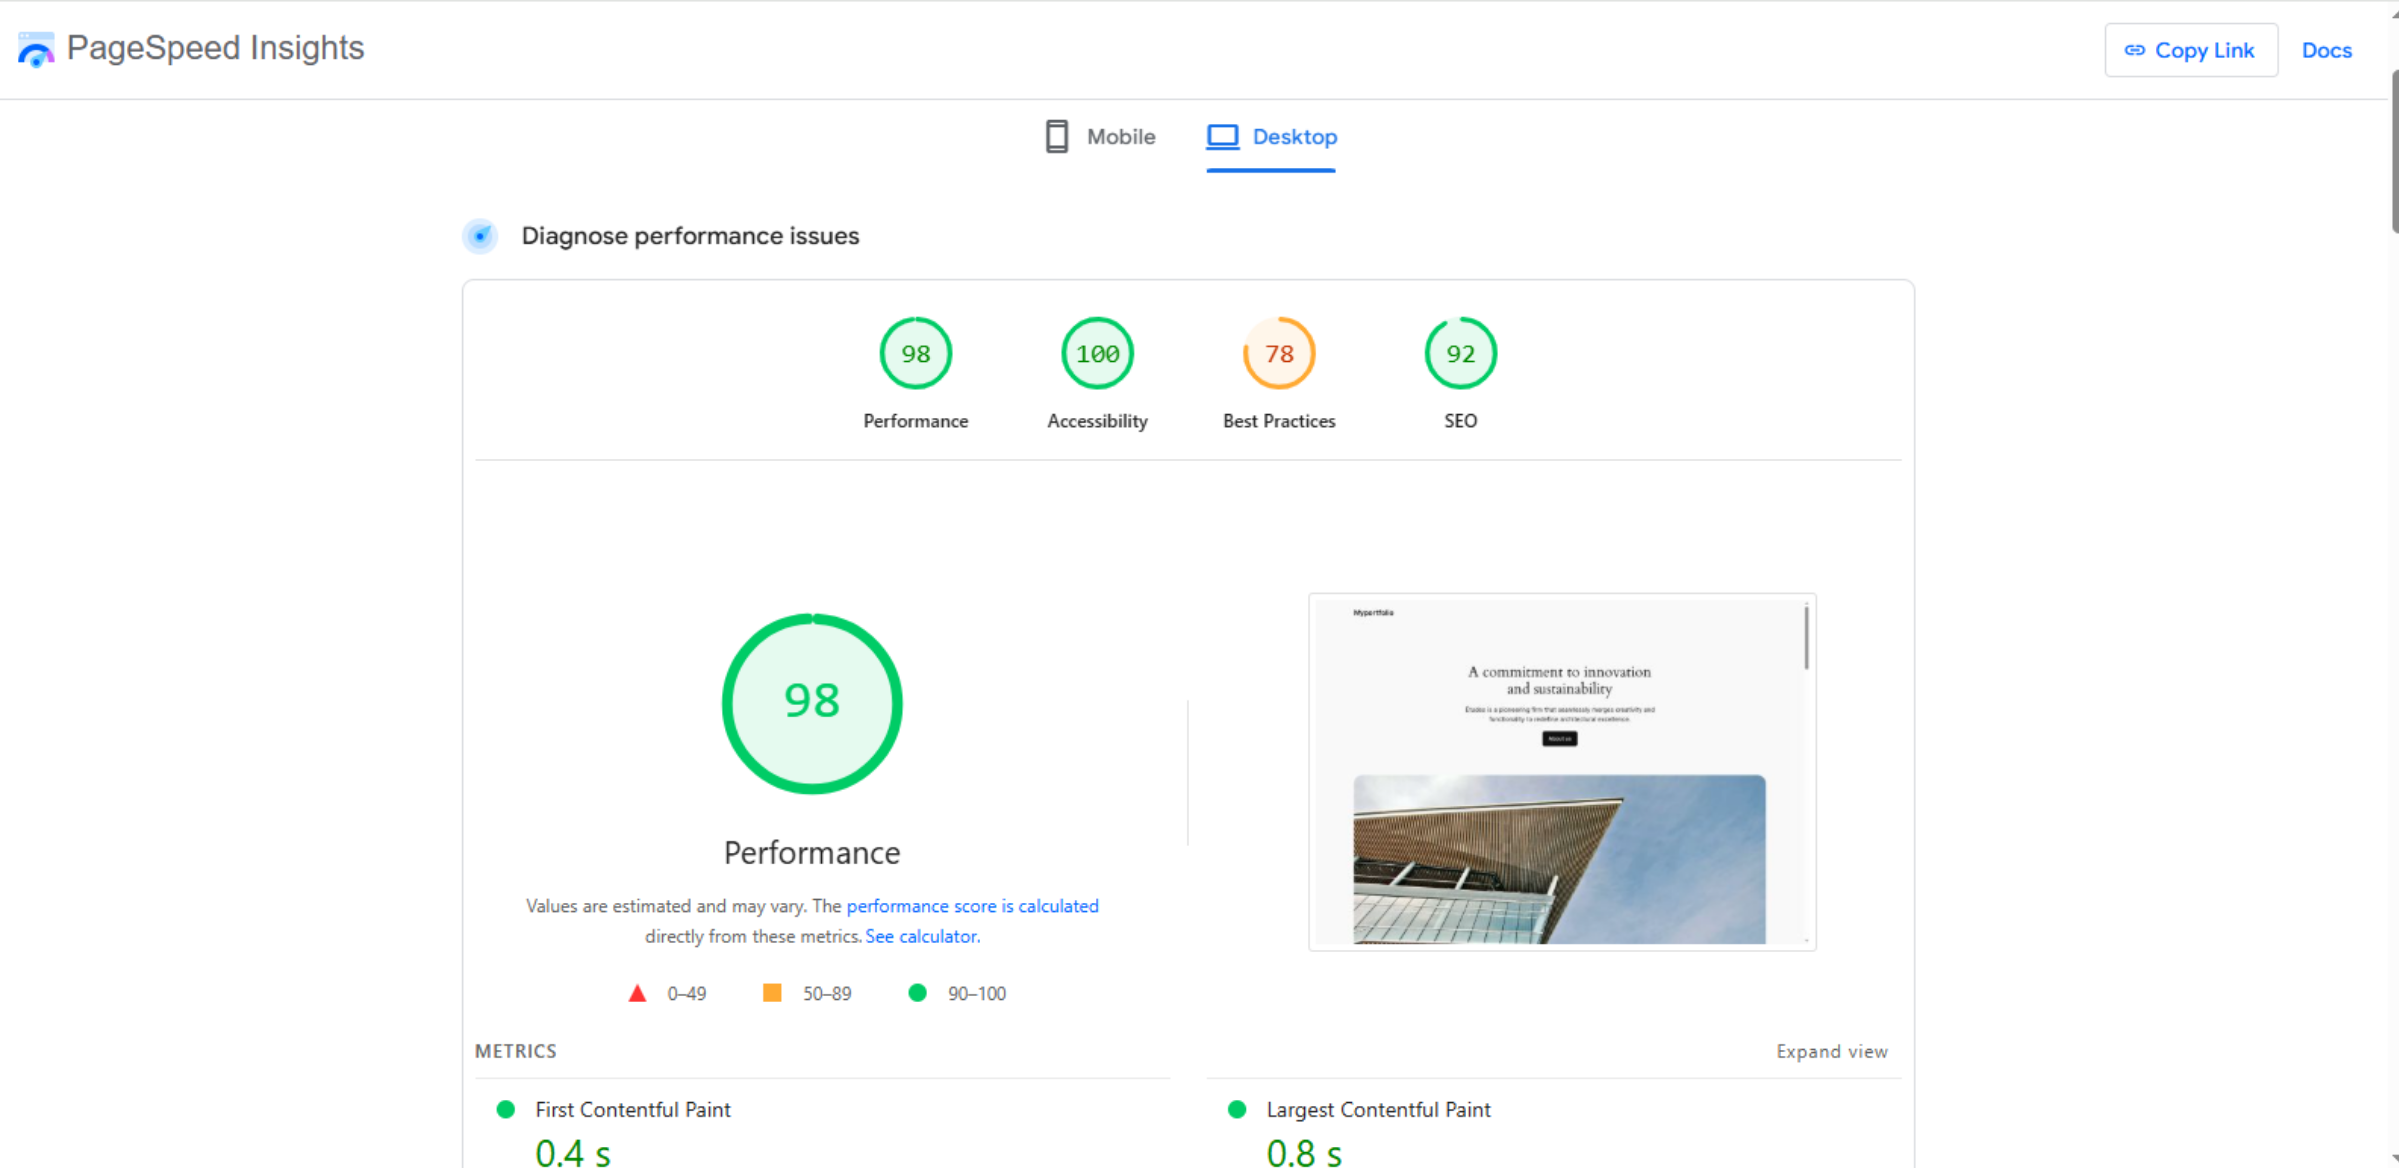
39. “After Speeding Up Your Website’s Performance”
Conclusion
Optimizing website speed is an ongoing process that requires proper configuration, monitoring, and maintenance. By completing the steps outlined in this guide, you have successfully installed and configured WP Rocket to improve your WordPress website’s performance on HostGator hosting. These optimizations help reduce page load times, minimize server requests, optimize media delivery, and clean unnecessary database records.
Regular performance monitoring, plugin updates, and database maintenance are recommended to sustain long-term speed improvements. Implementing these best practices ensures that your website remains fast, efficient, and competitive in today’s digital environment. With a well-optimized website, you can provide visitors with a smooth browsing experience while improving search visibility and user engagement.
WooHelpDesk Support
Need professional assistance with WordPress speed optimization, performance tuning, caching configuration, or website maintenance? WooHelpDesk offers expert technical support to help you maximize your website’s performance.
Visit: https://www.woohelpdesk.com
Call Us Toll-Free: +1 888 602 0119 (US & Canada)
Performance Experts | Reliable Support | Fast Optimization
Contact WooHelpDesk today to keep your WordPress website fast, responsive, and fully optimized.


