
How to Force HTTPS Redirect on Hostinger WordPress Hosting Using wp-config
Introduction
Securing your WordPress website with HTTPS is a critical step in protecting user information and maintaining trust. Even after enabling SSL, some websites may continue loading over HTTP, which can result in security warnings and reduced credibility. In this guide, you will learn how to force HTTPS redirection on your Hostinger WordPress hosting account by modifying configuration files and updating site settings. This method ensures that every visitor is automatically redirected to the secure version of your website, helping you create a safe and reliable online environment.
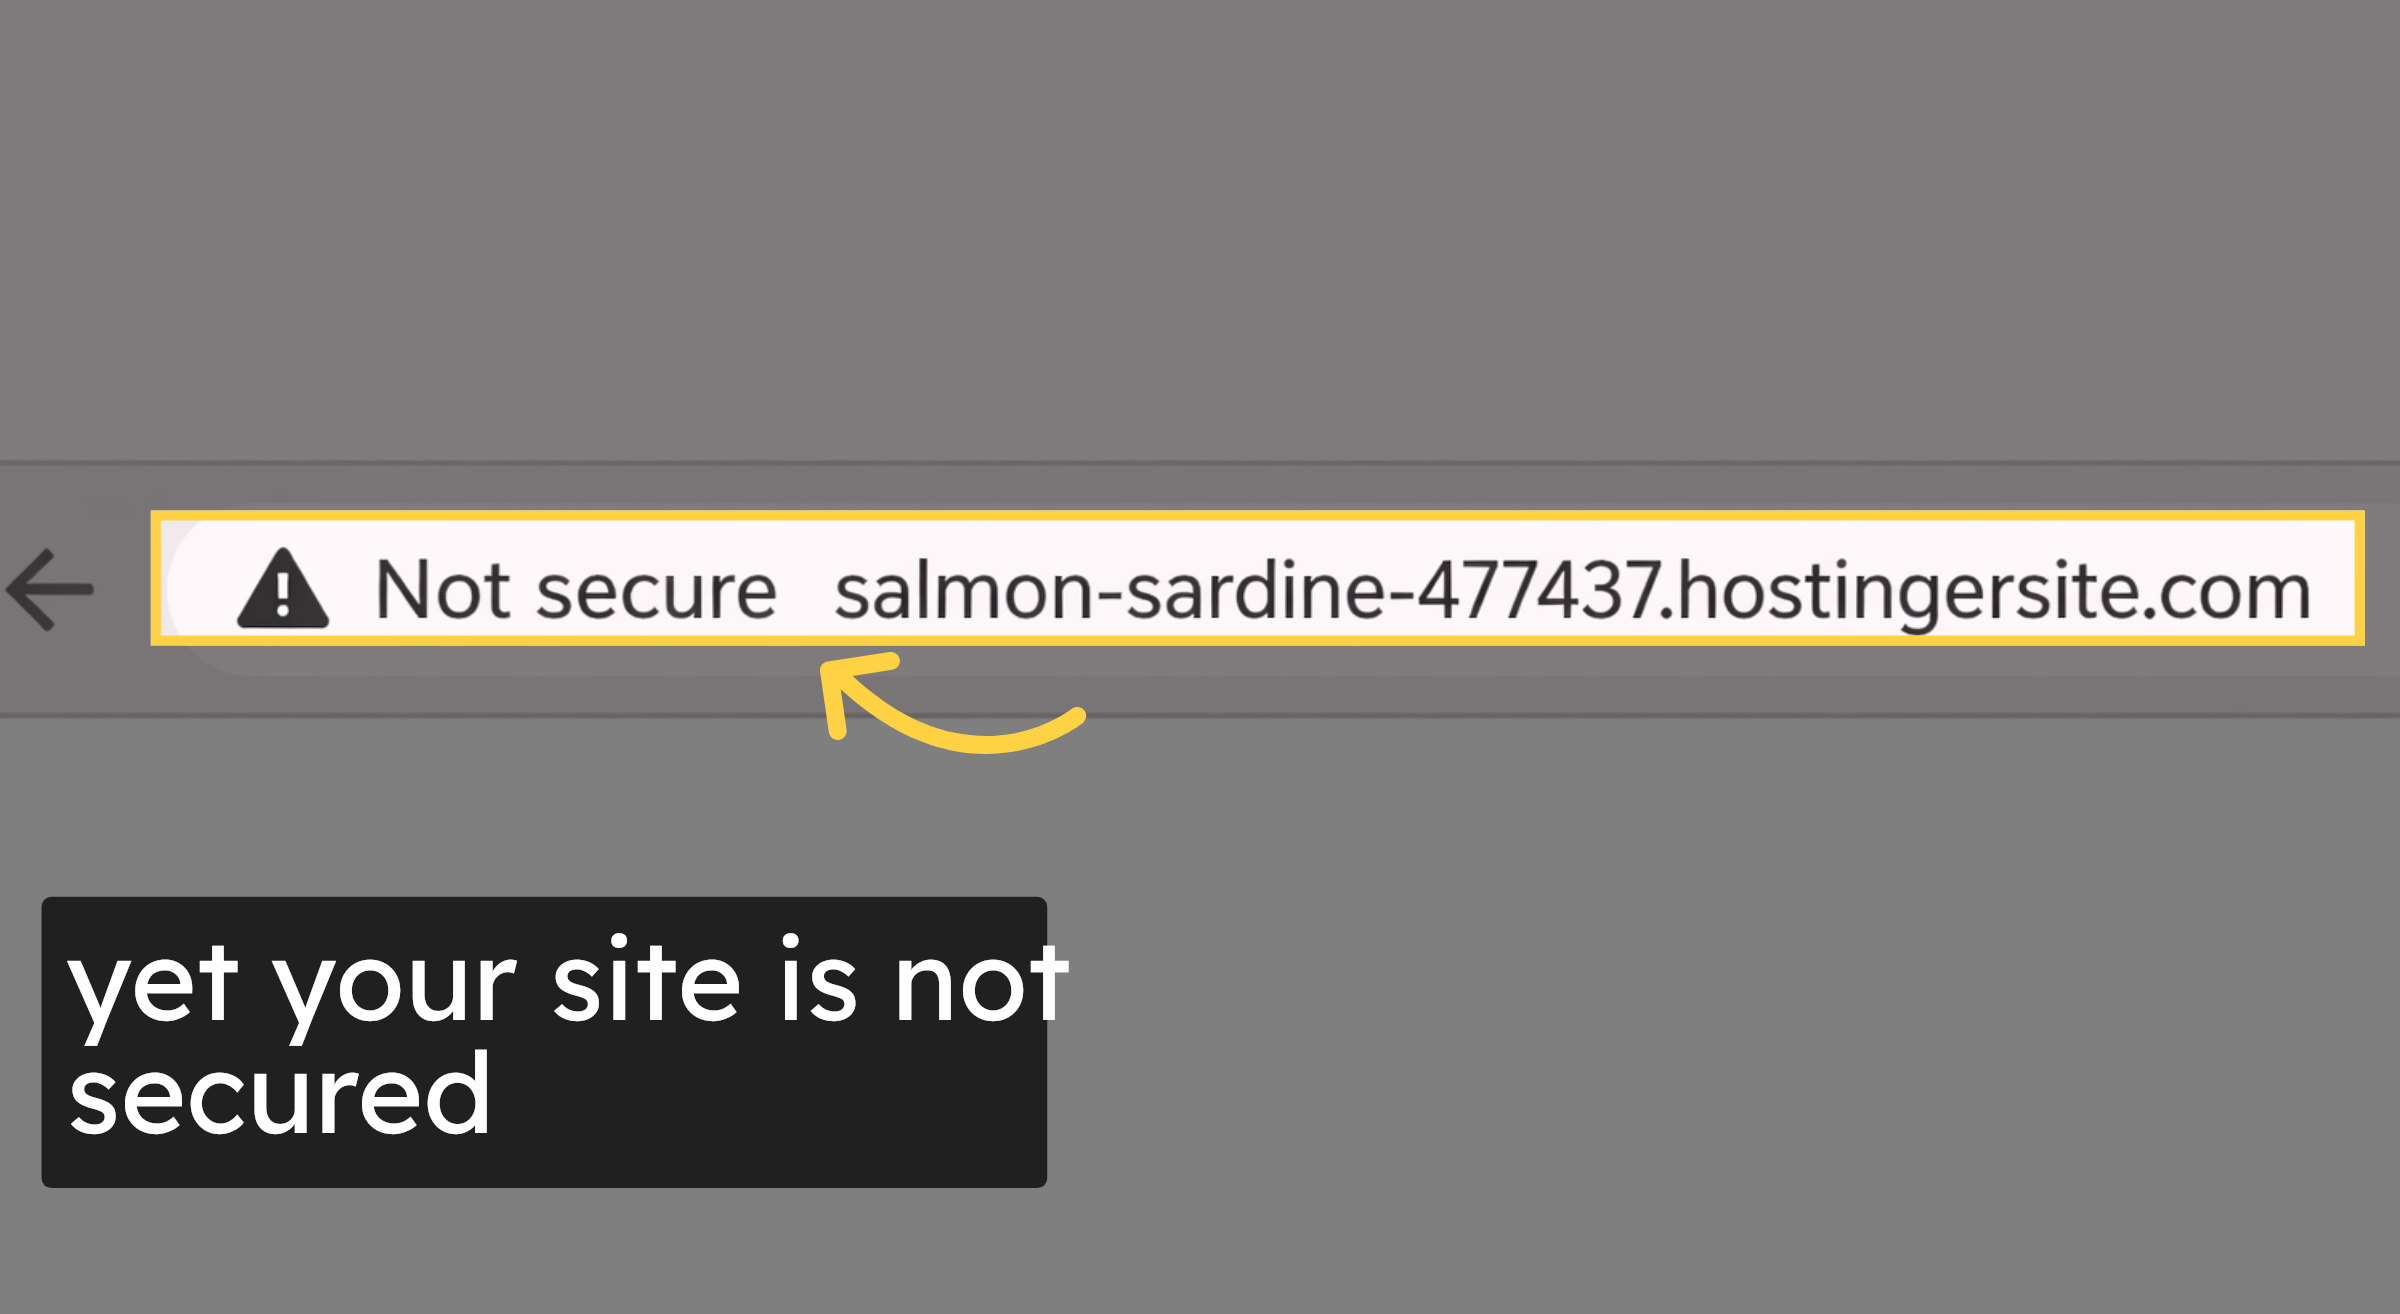
1. yet your site is not secured
2. Hostinger Dashboard
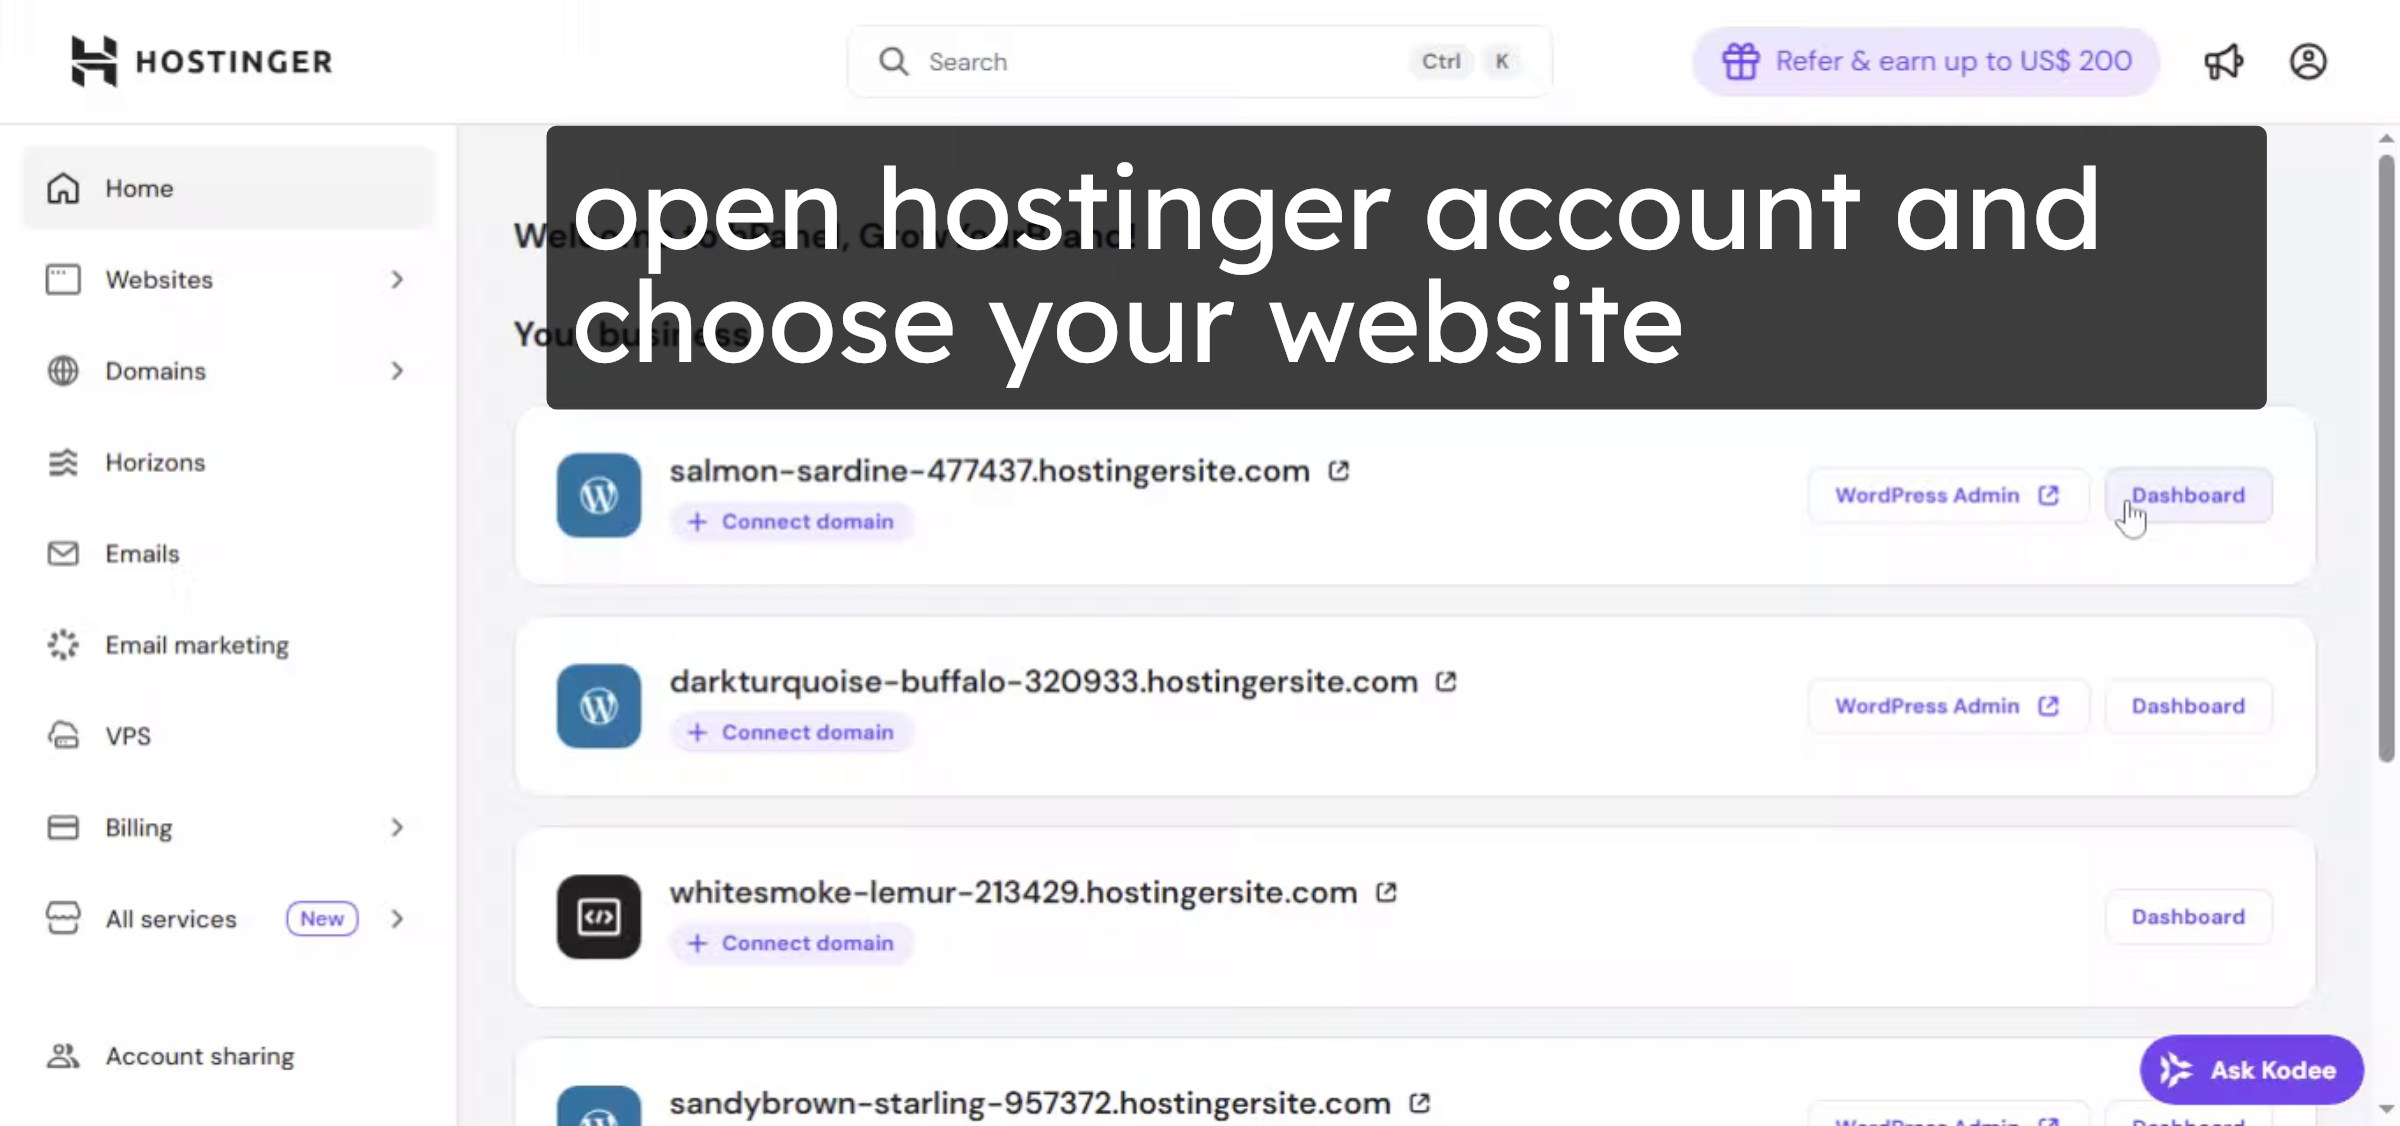
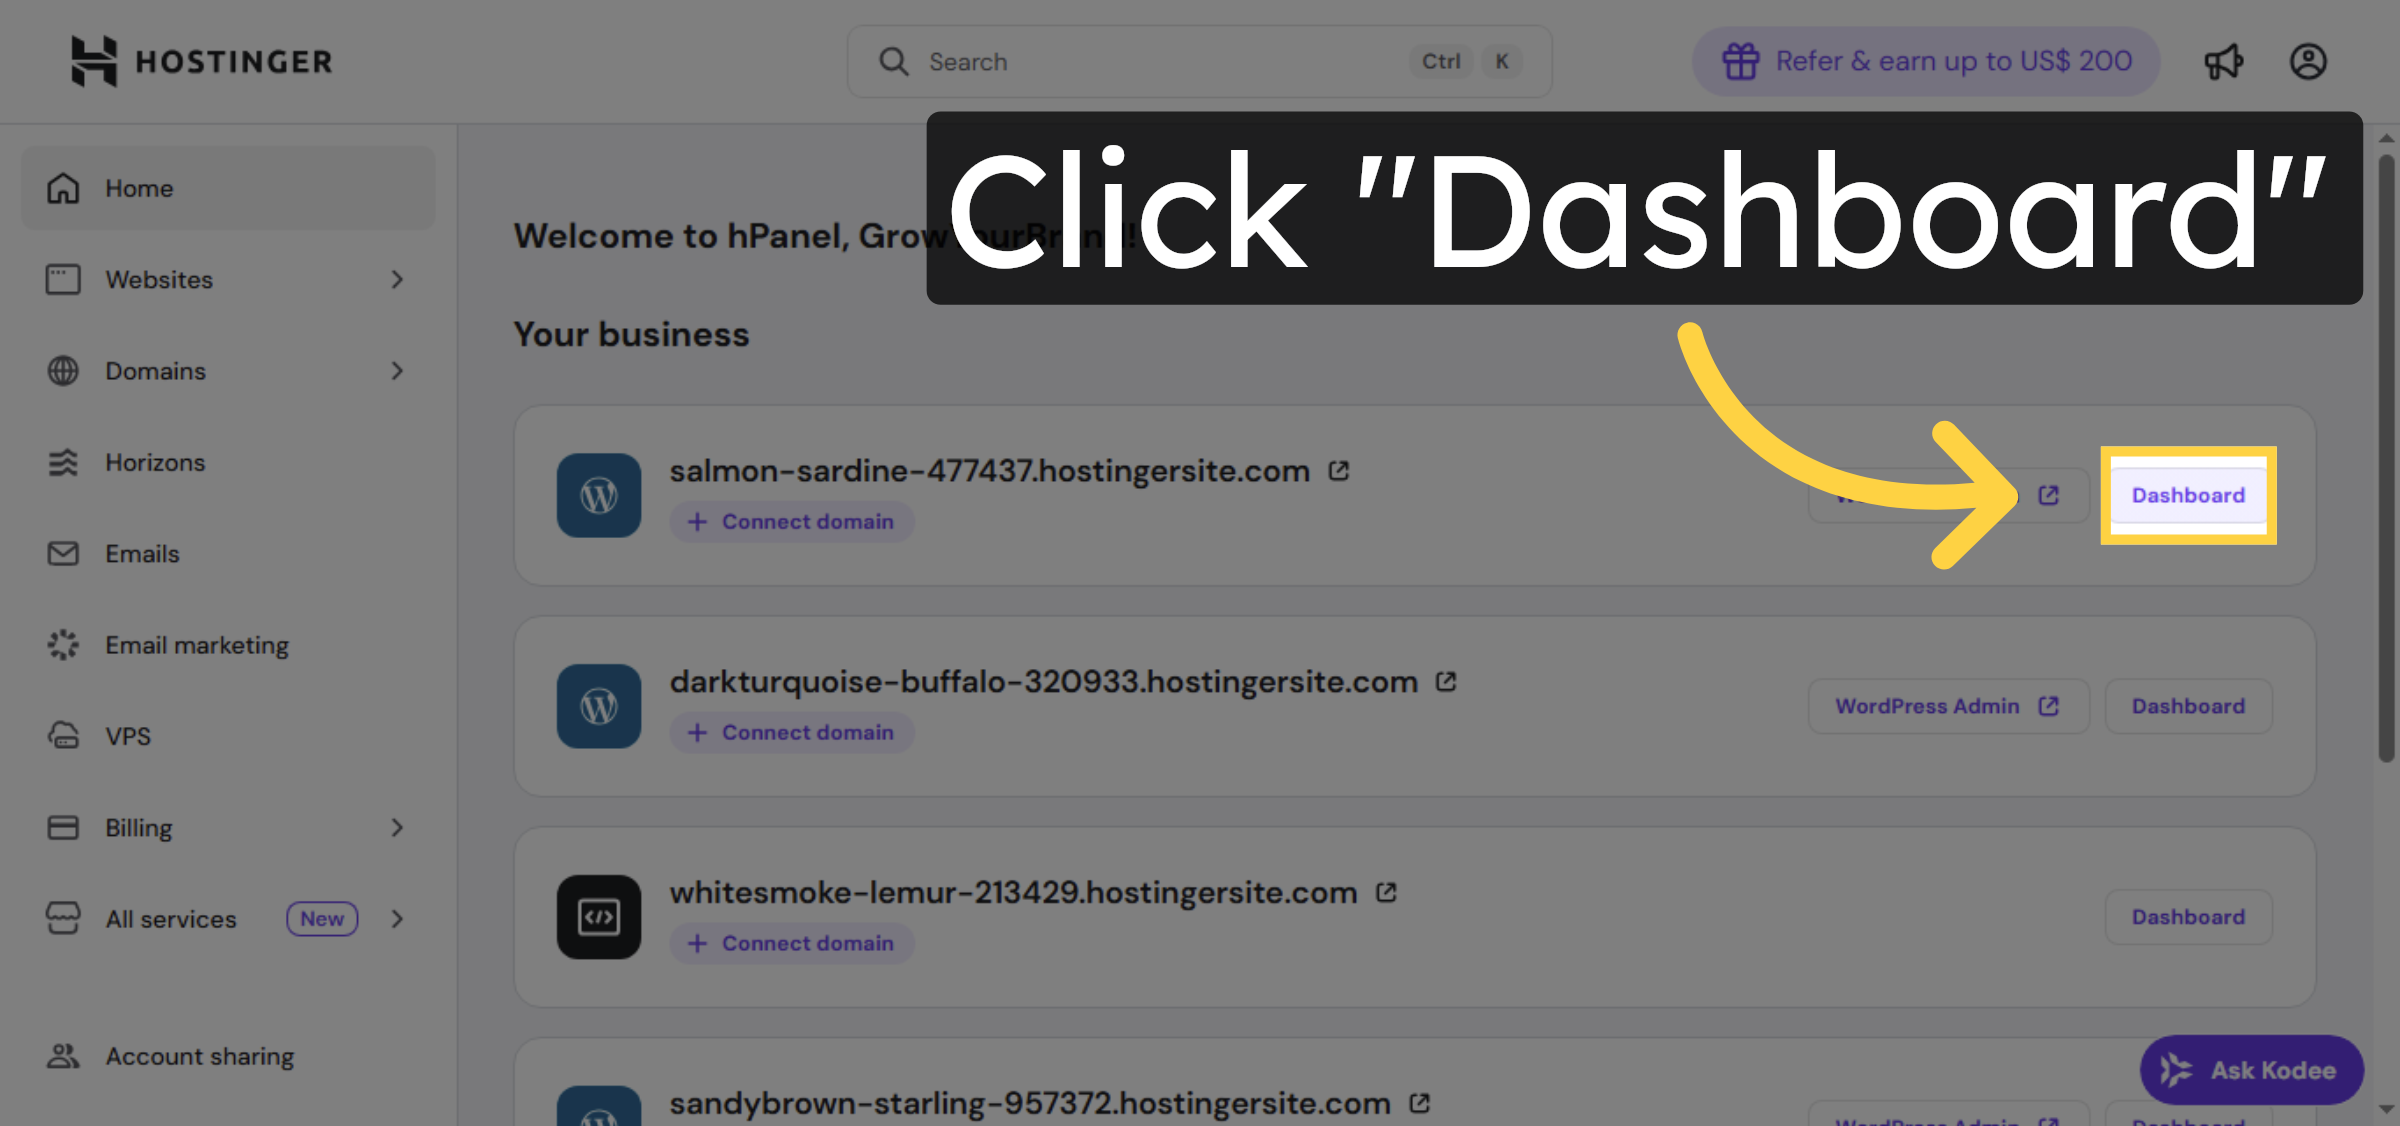
3. Navigate to Dashboard
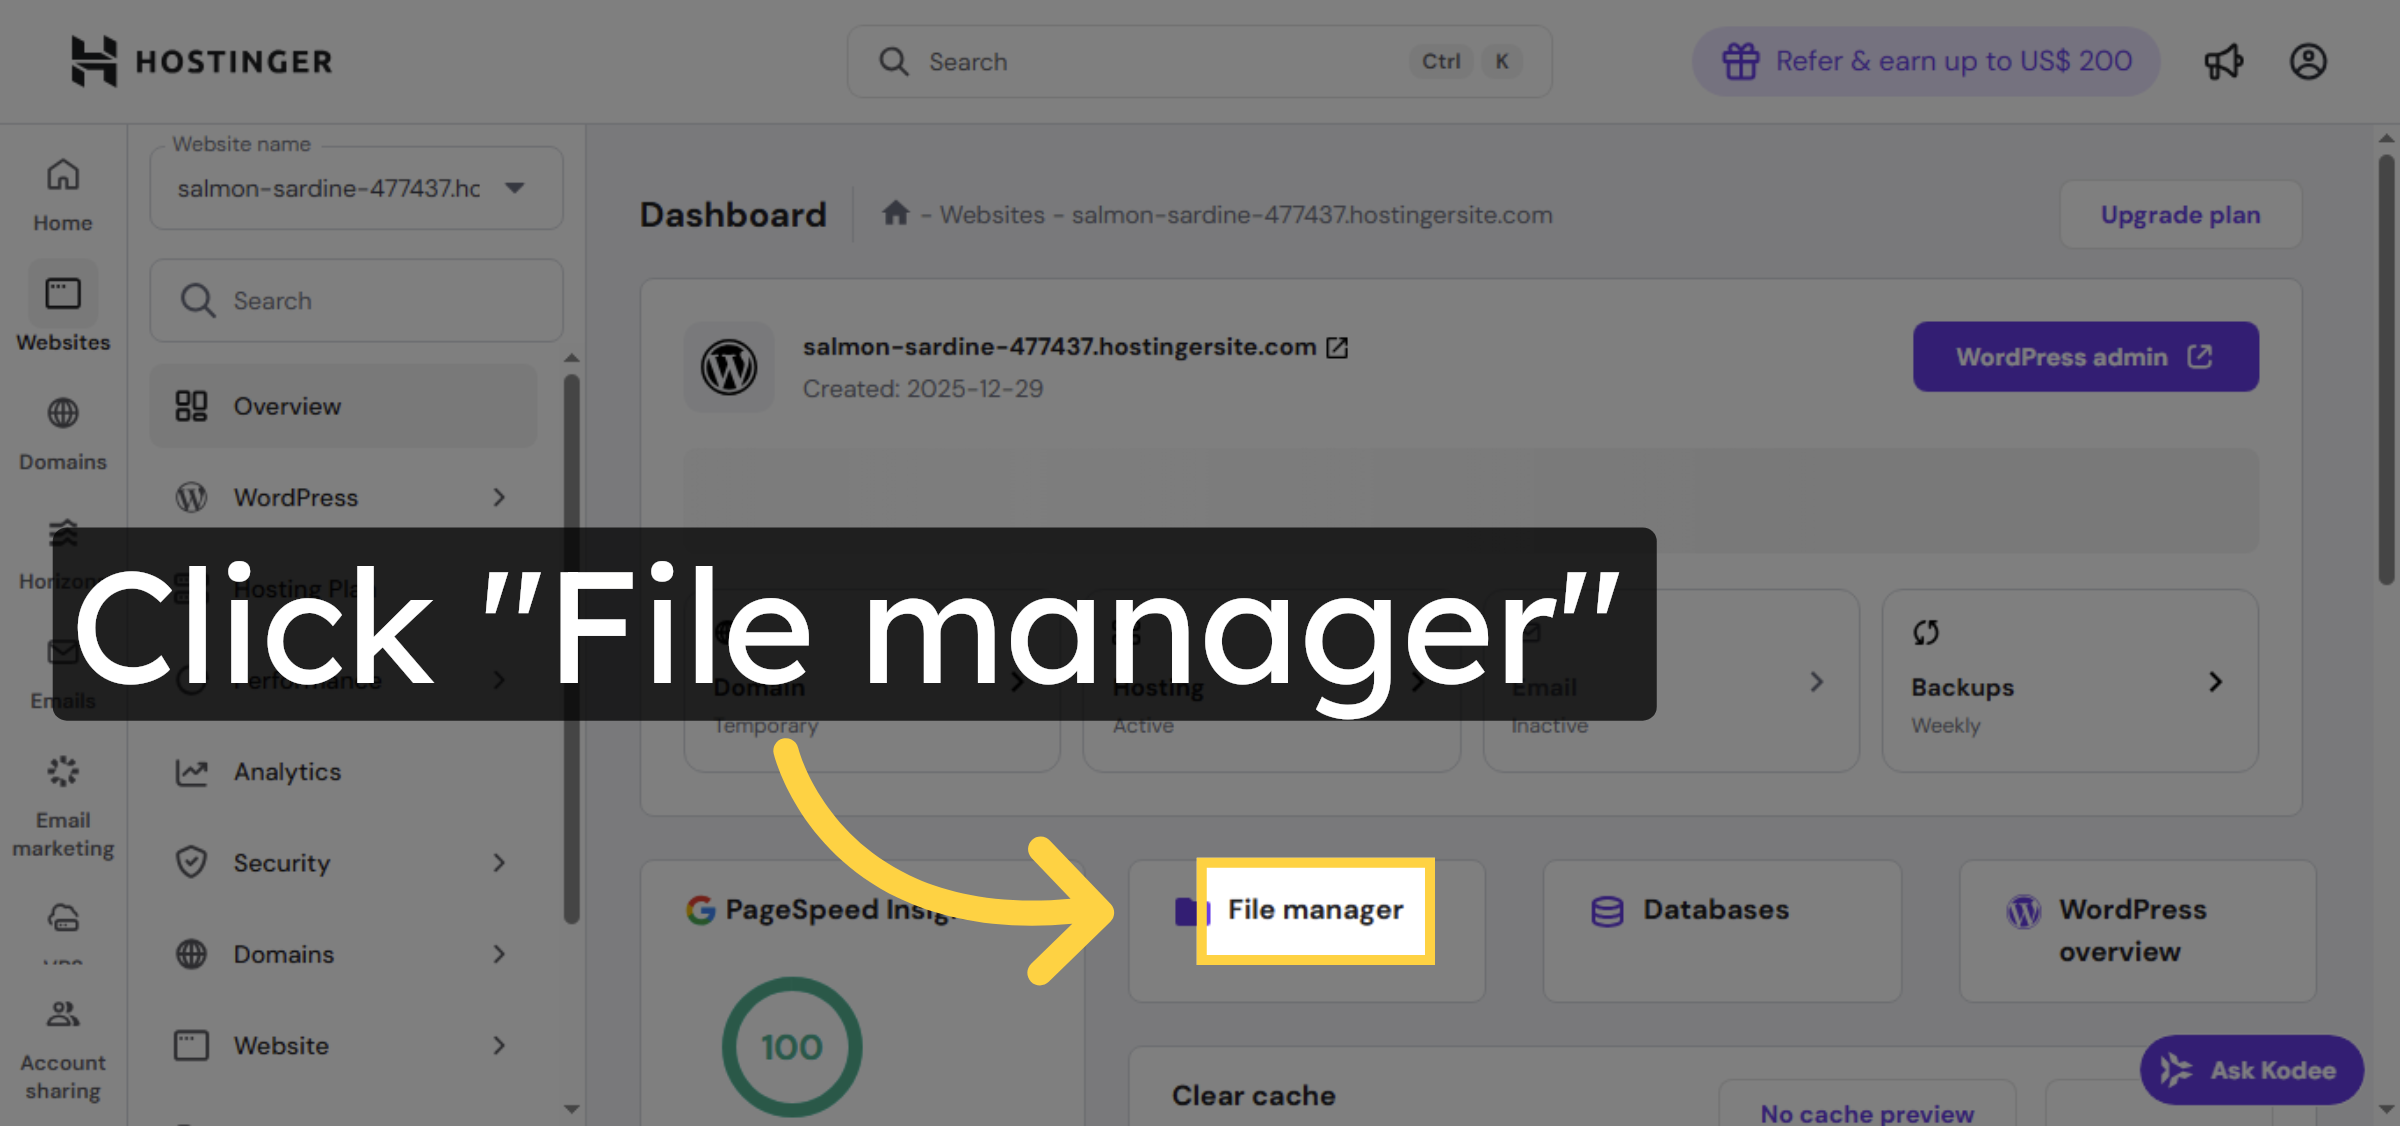
4. Open File Manager
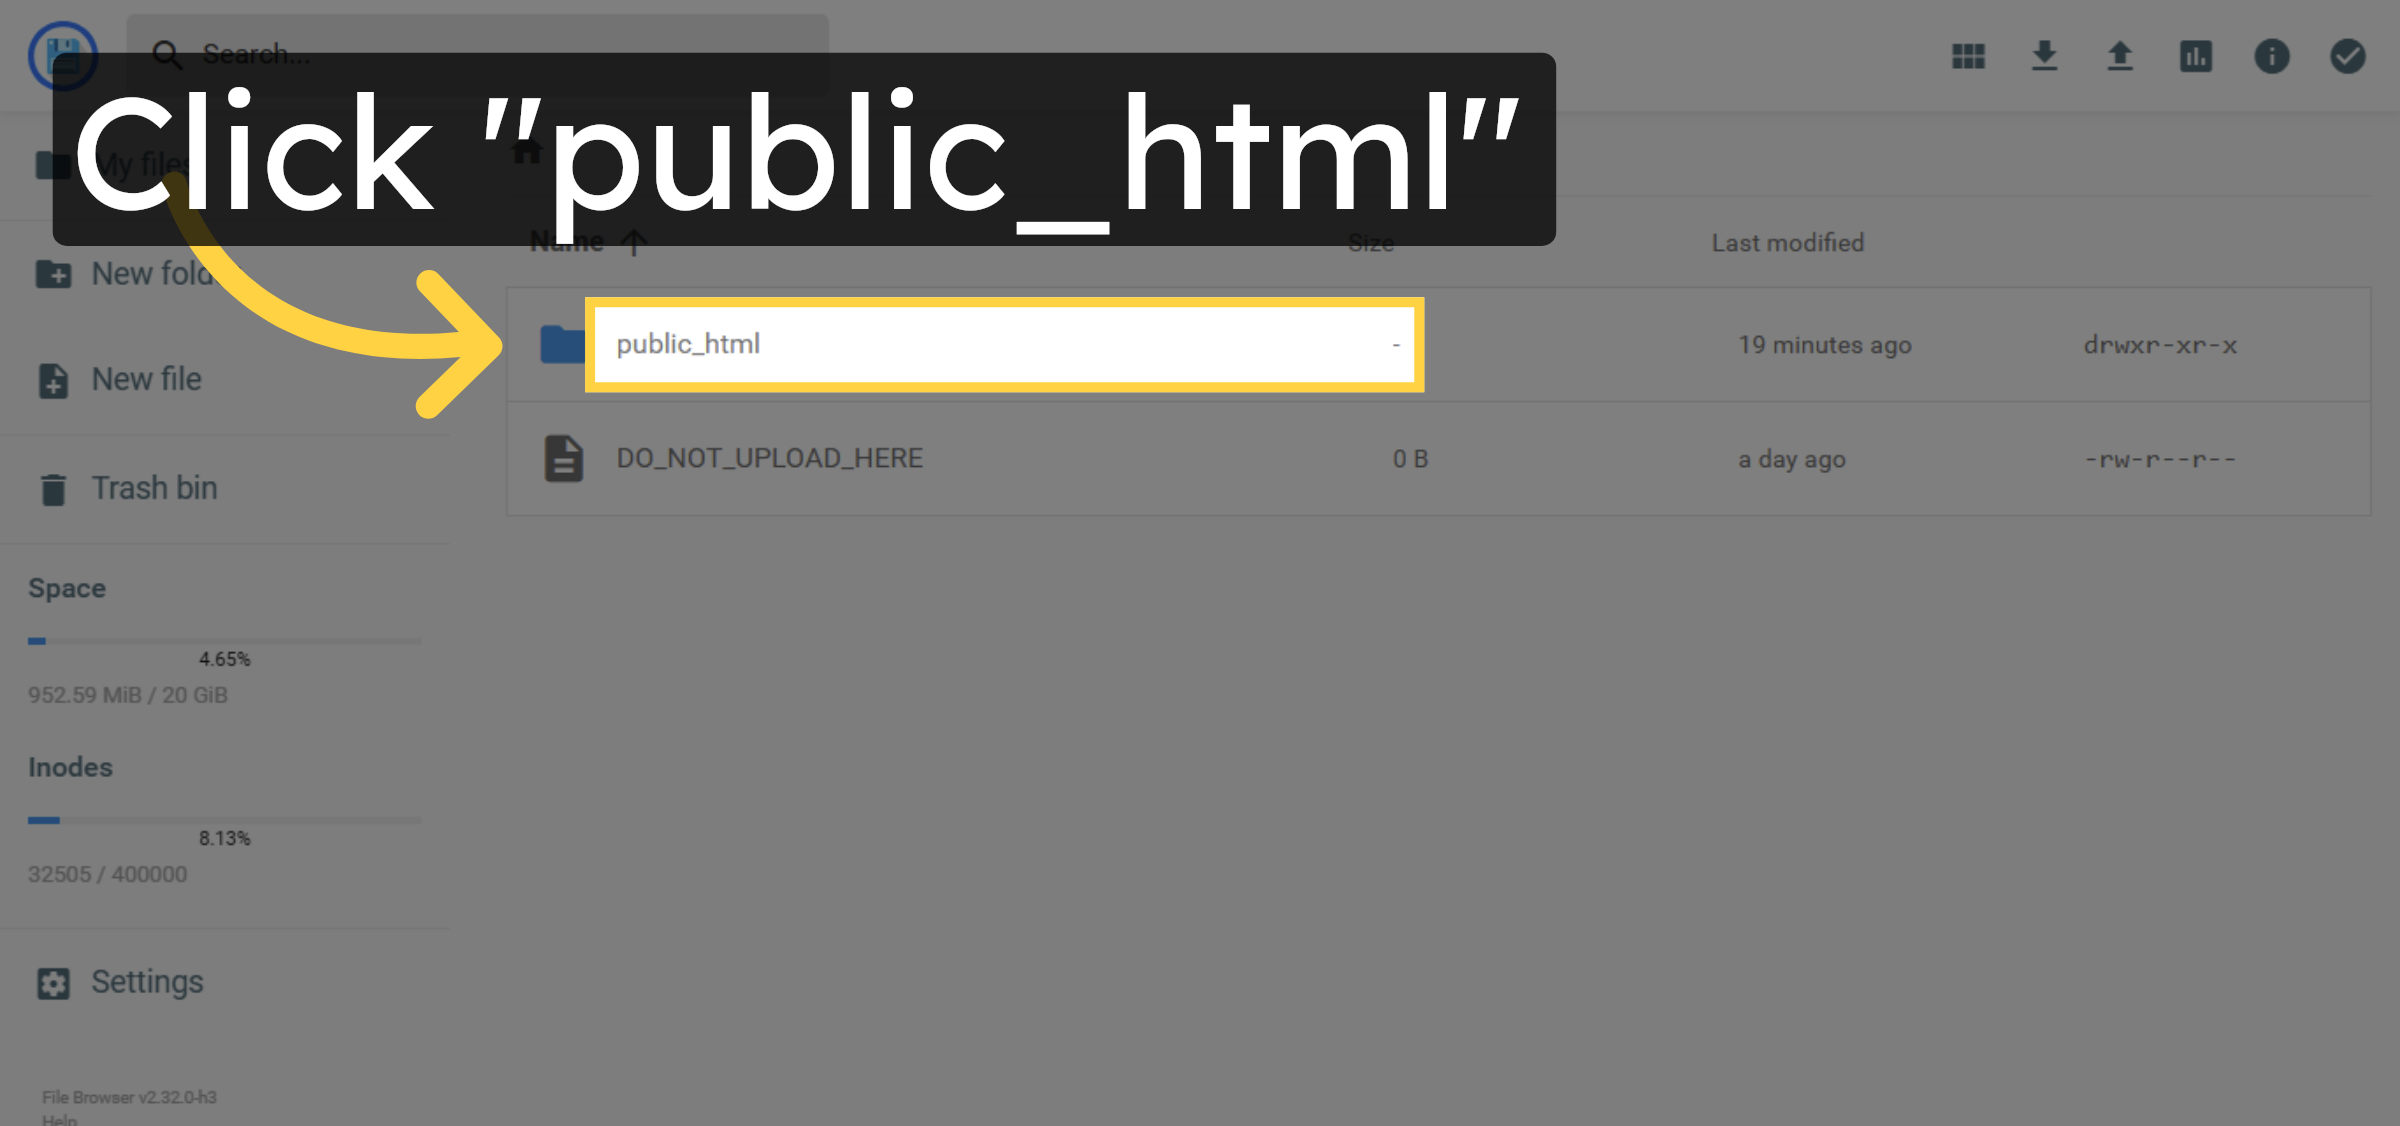
5. Open Public HTML Folder
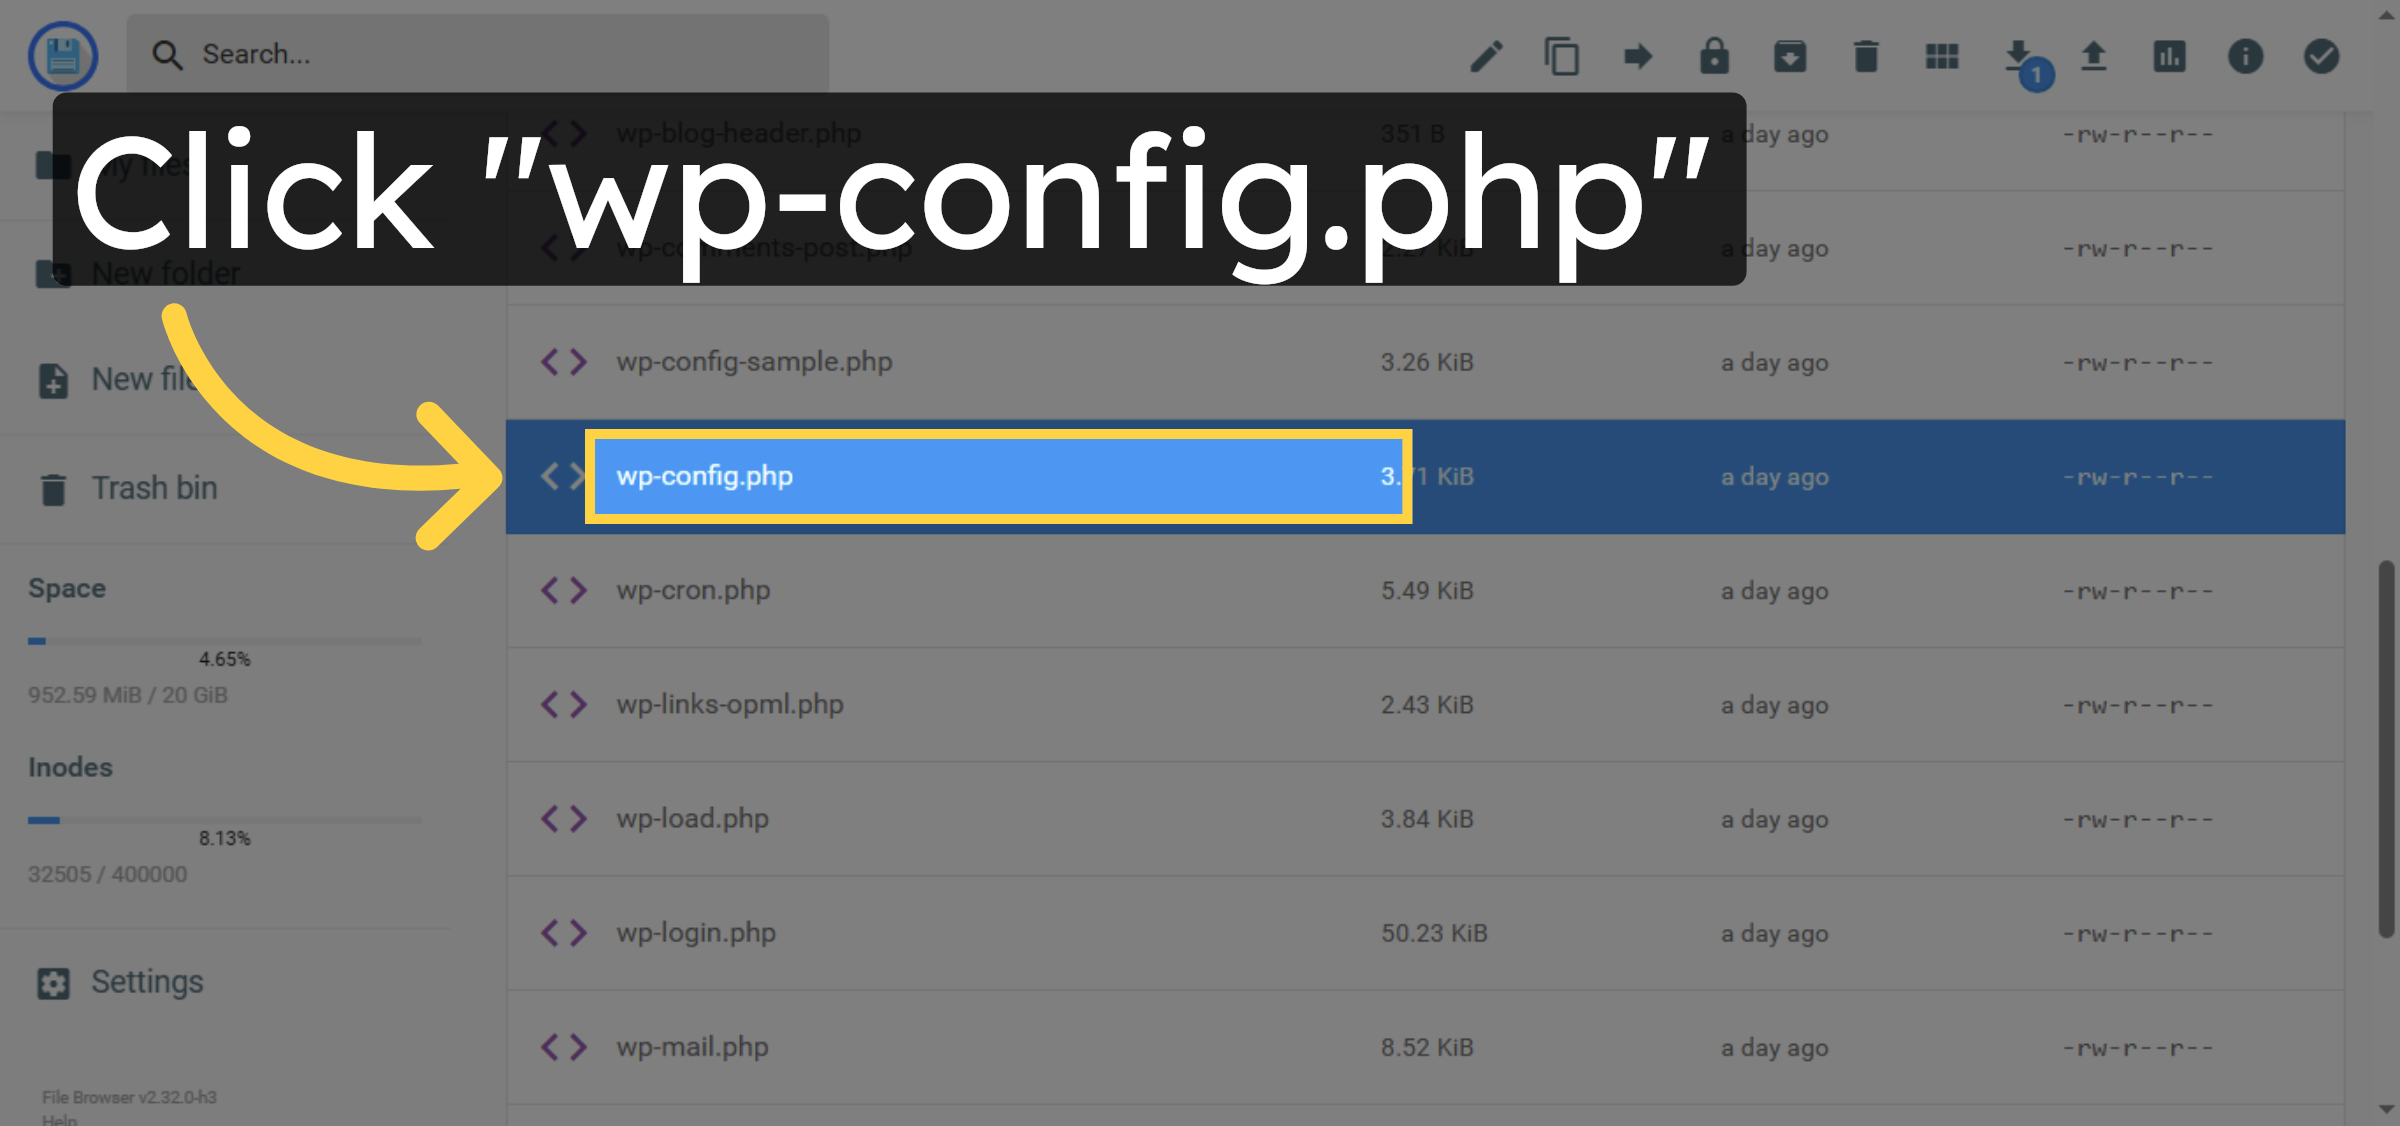
6. Open wp-config.php File
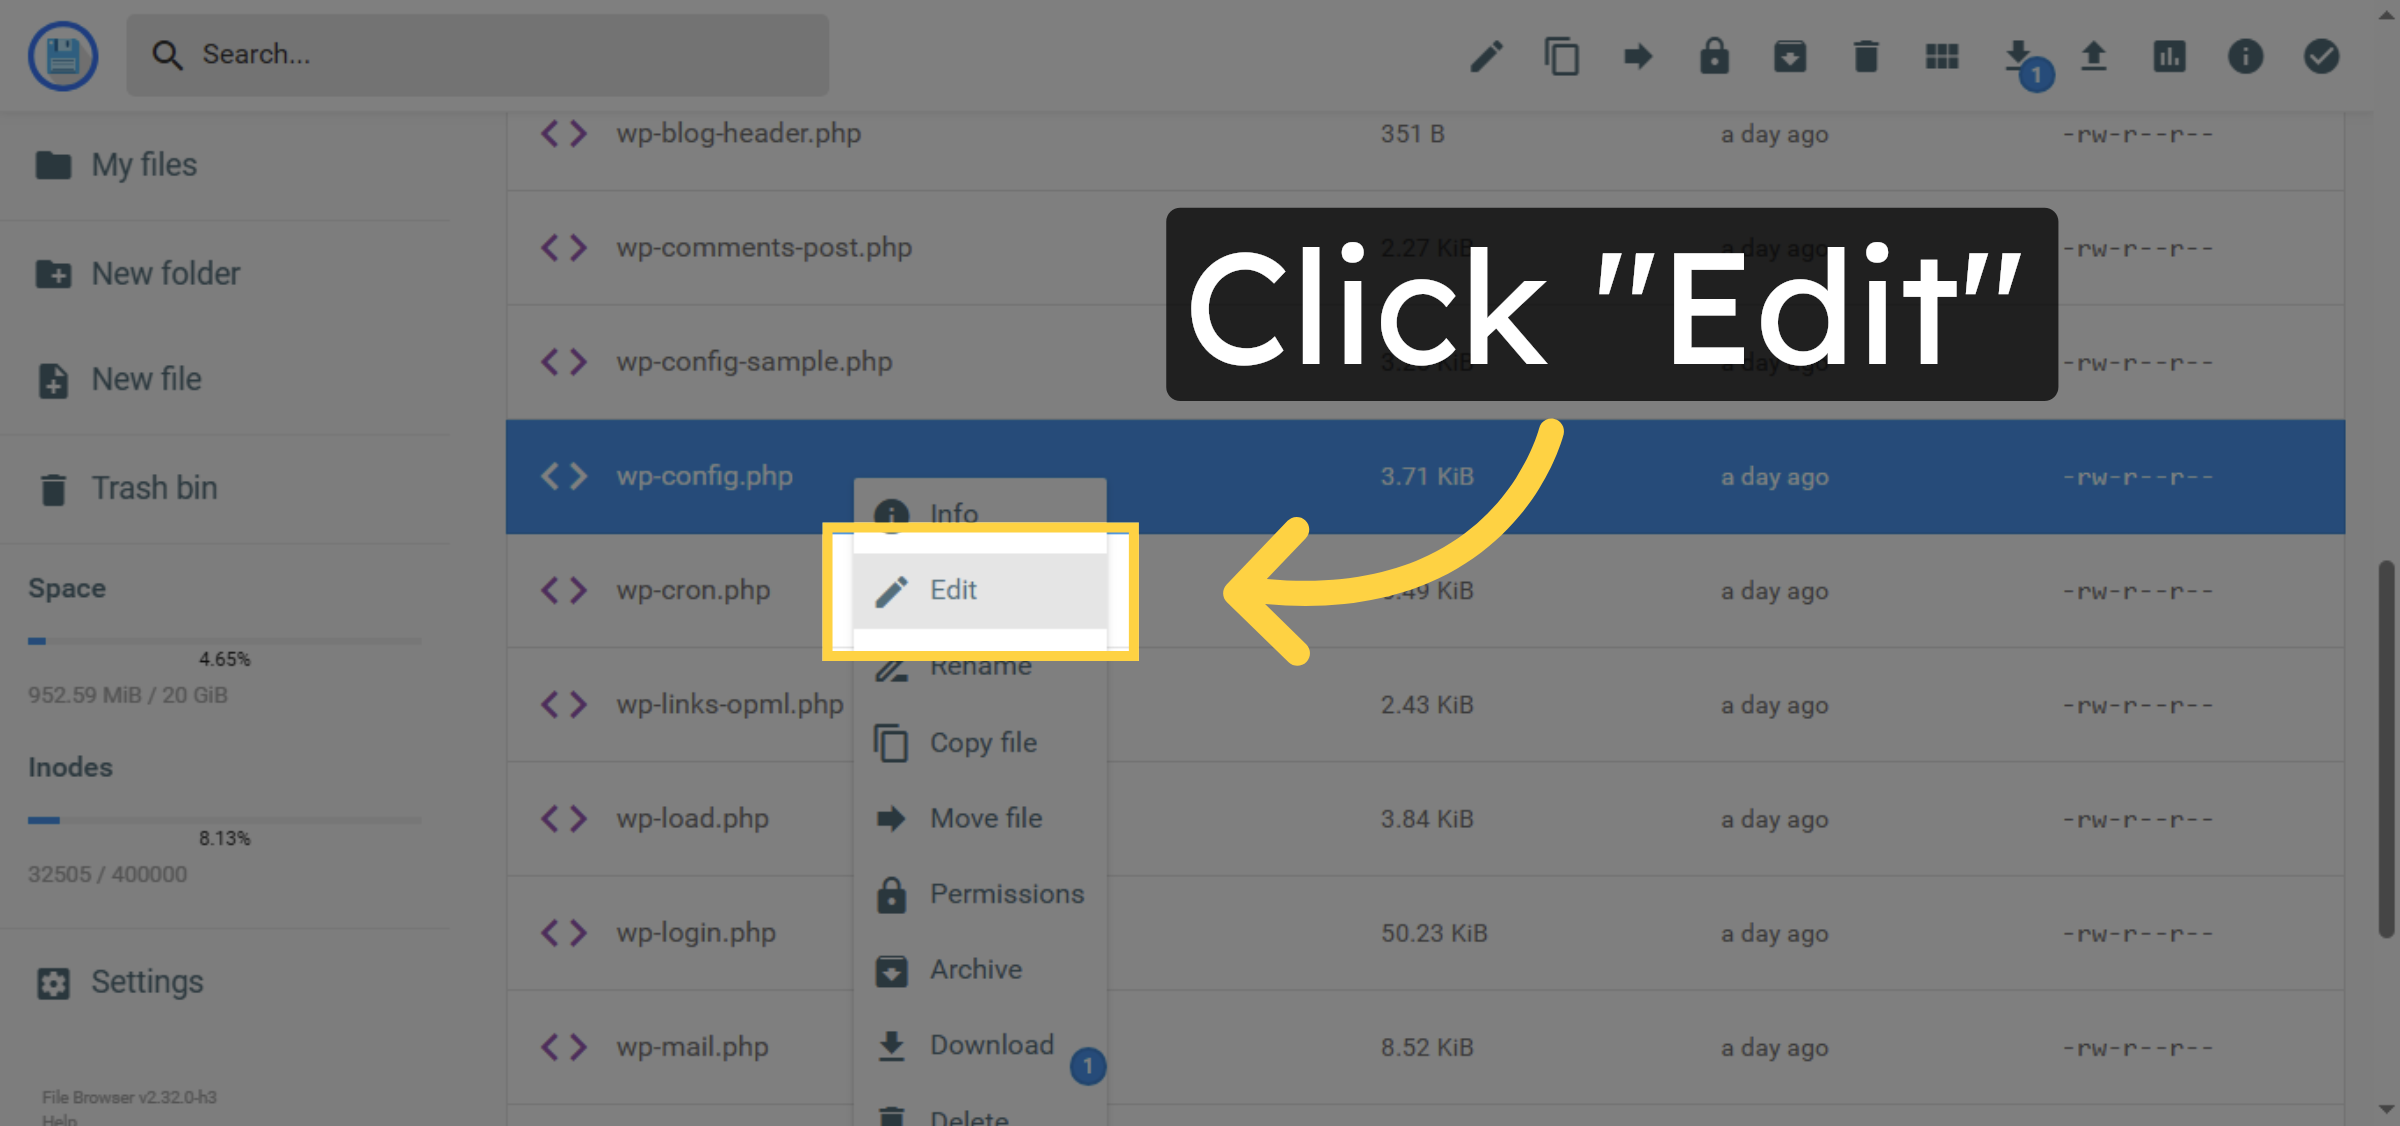
7. Edit wp-config.php File
8. Find Table Prefix Section
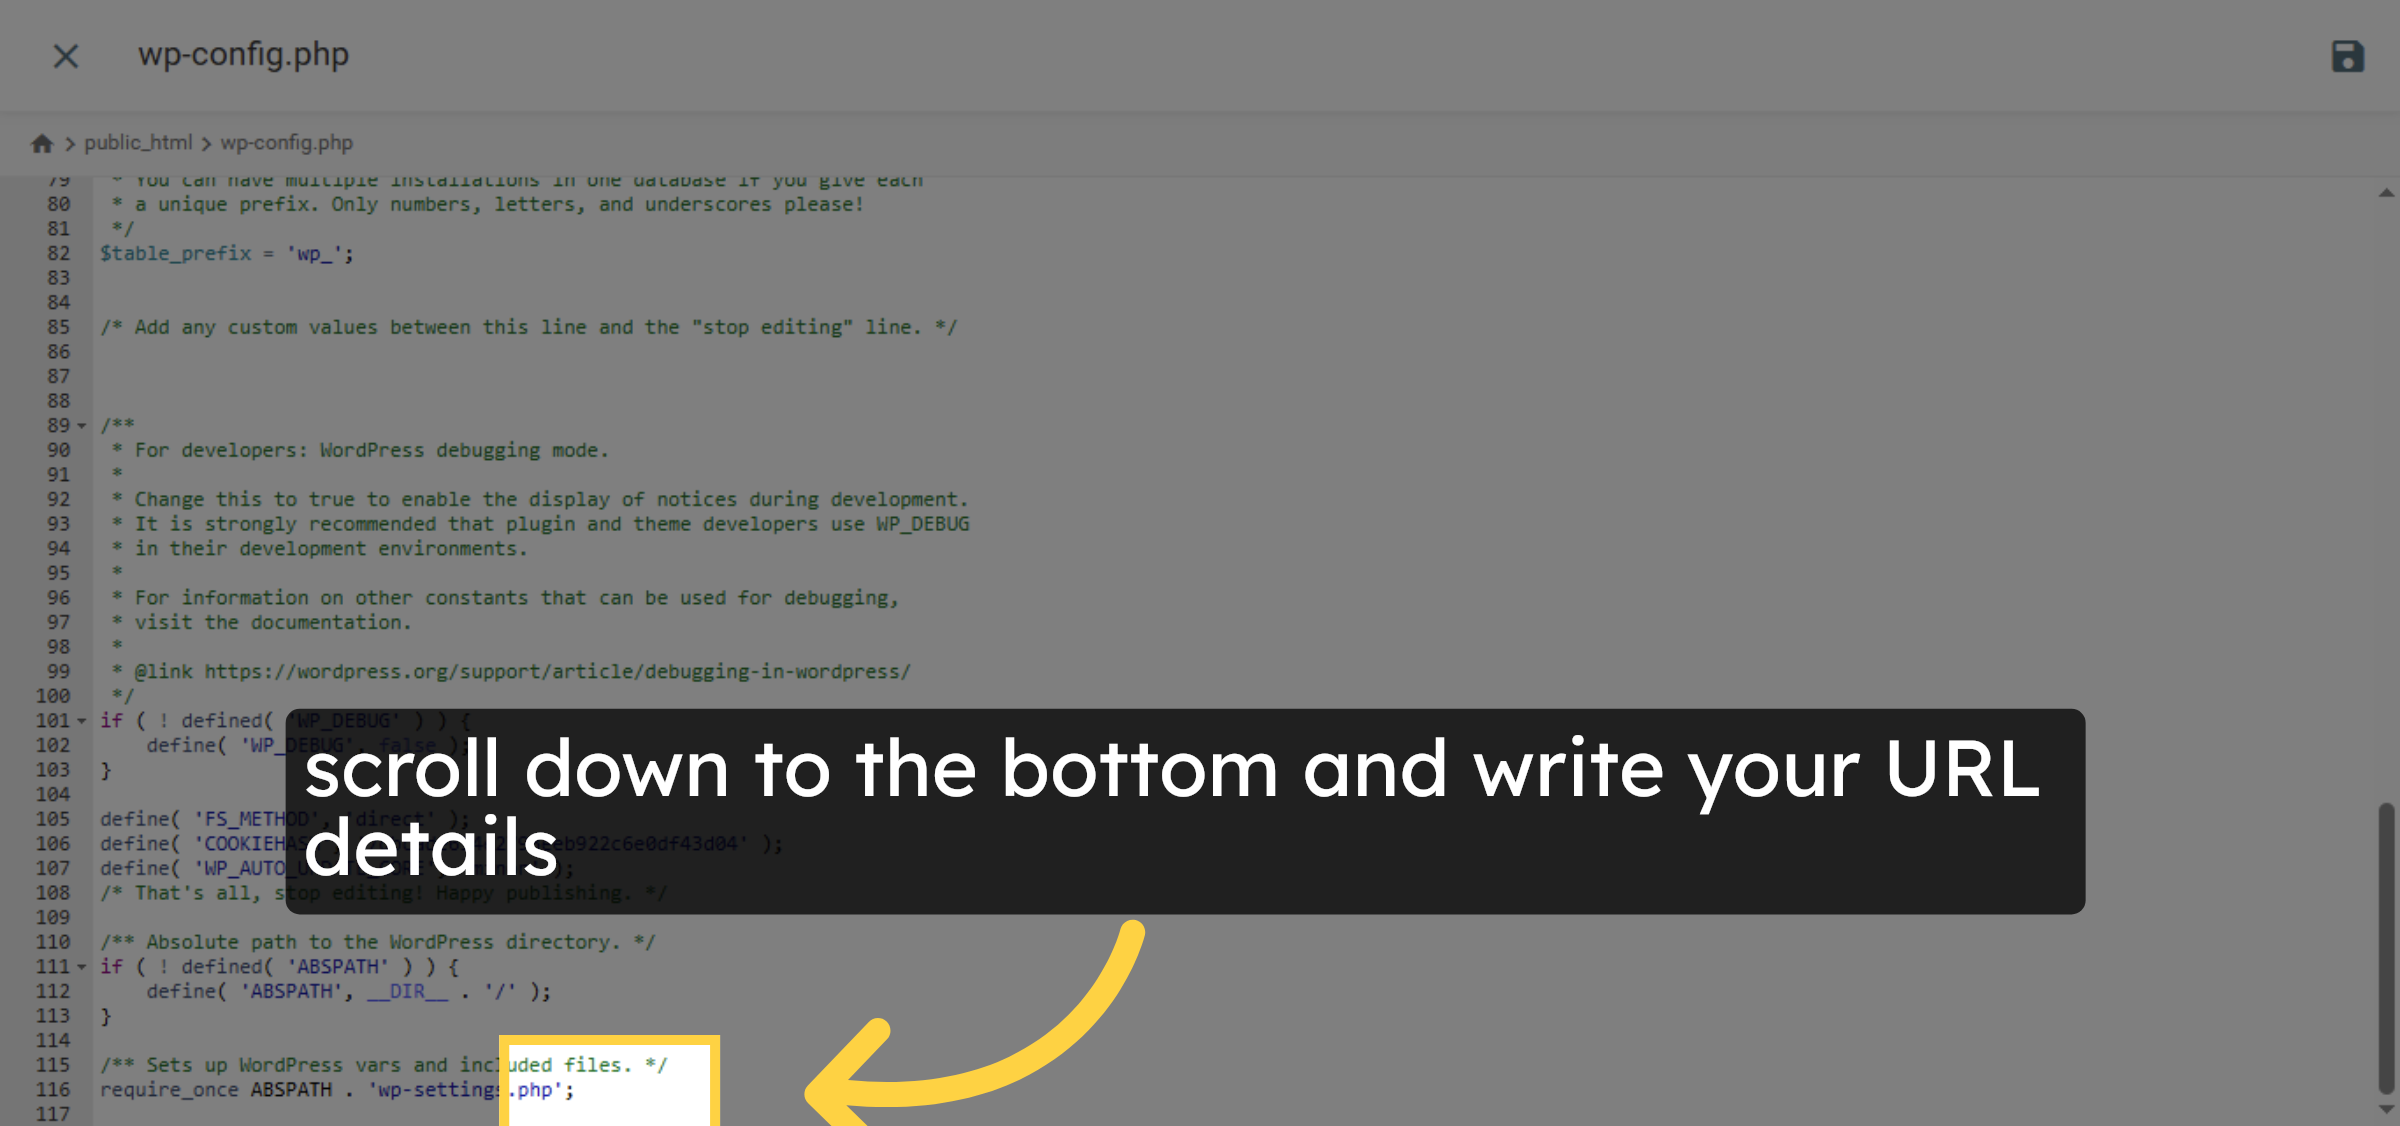
9. Insert HTTPS Redirect Code
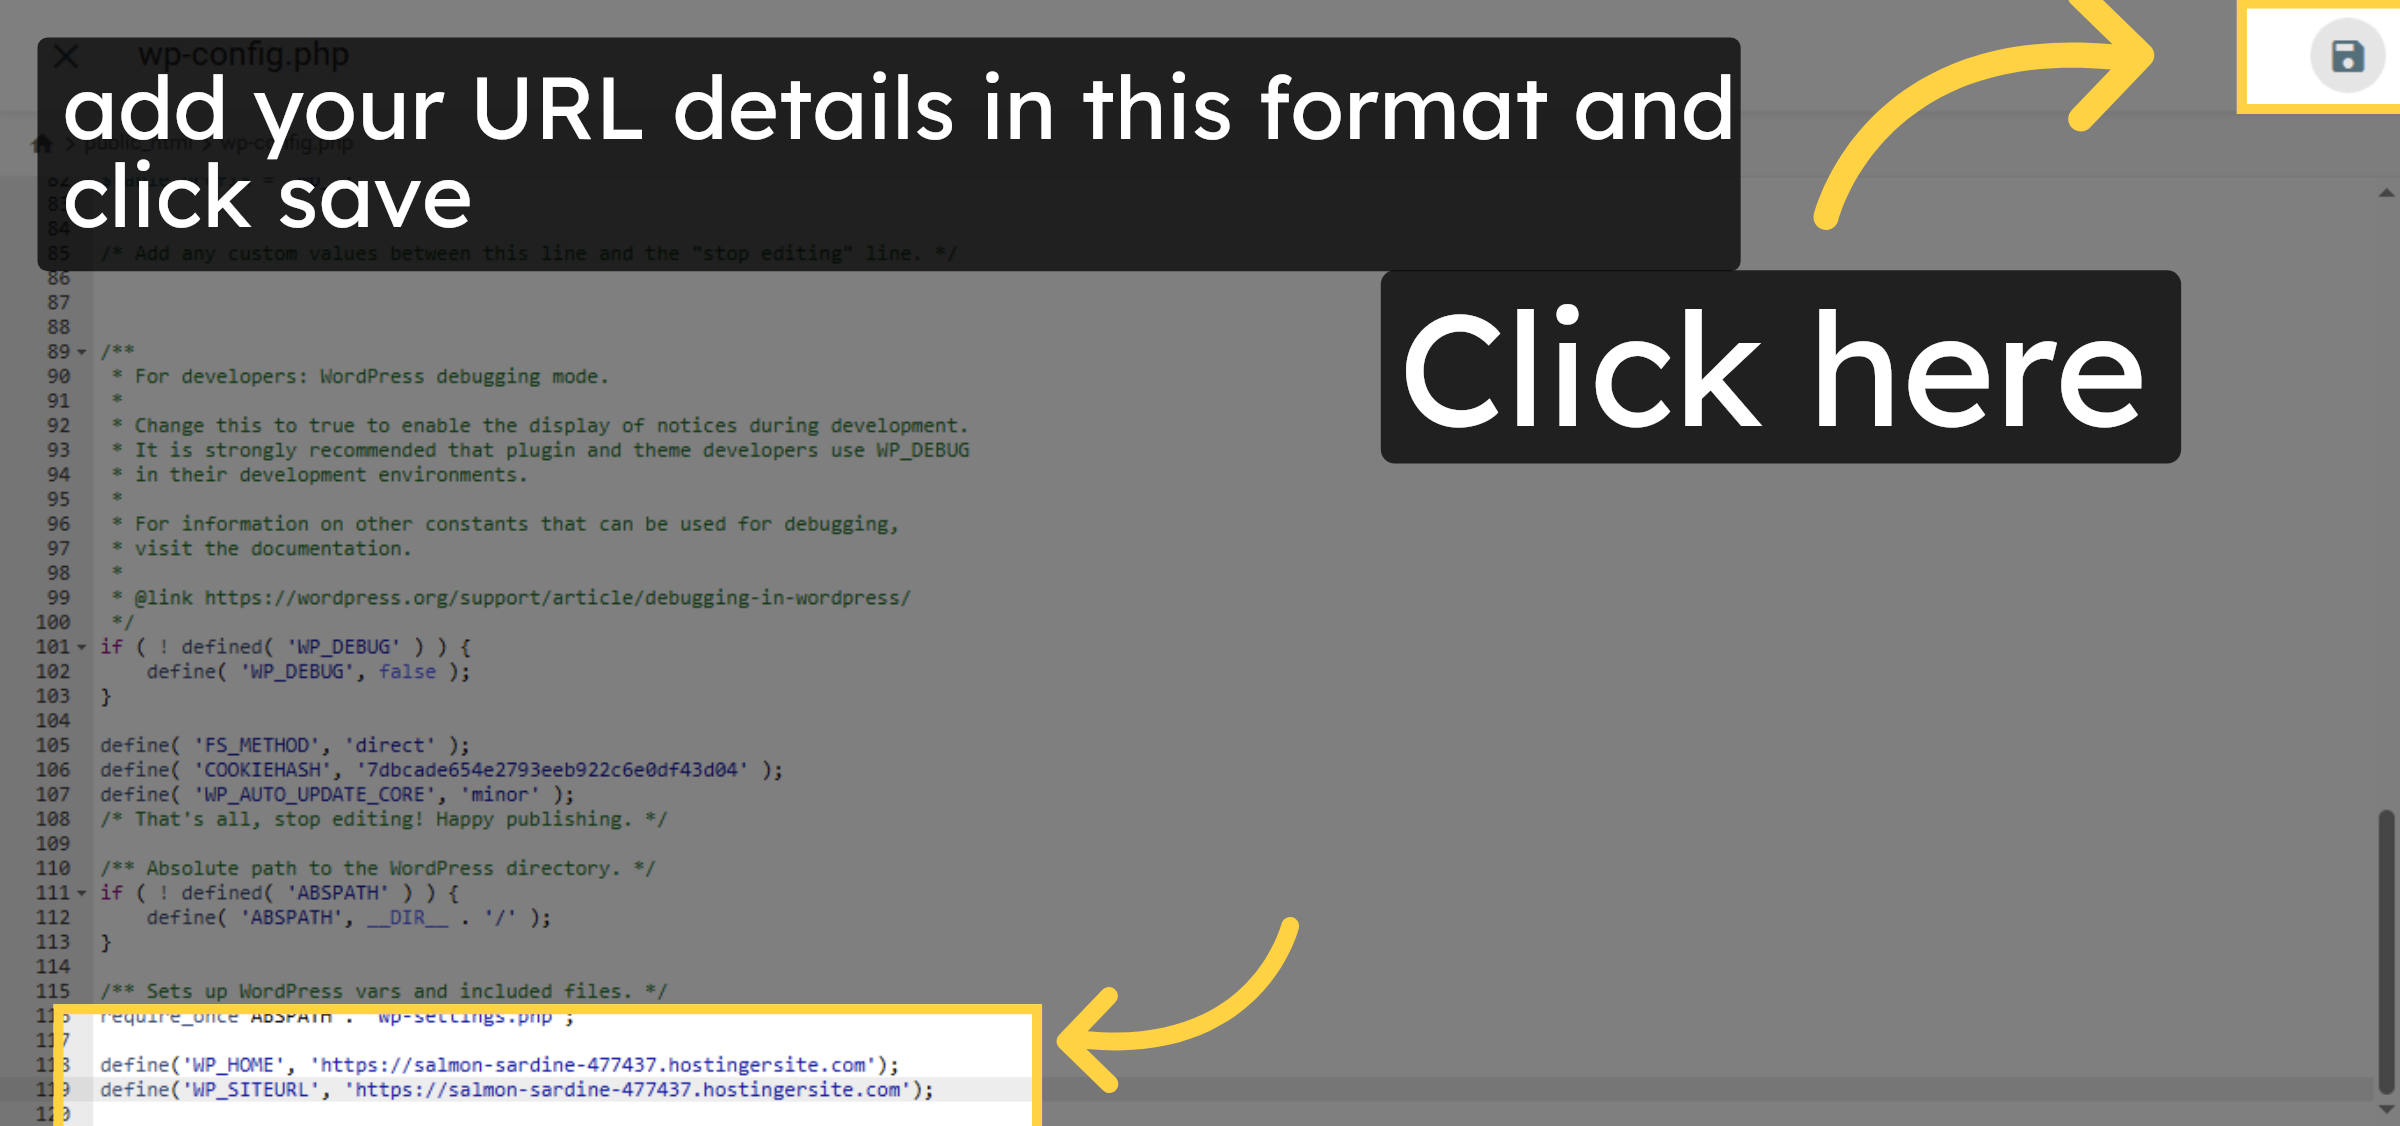
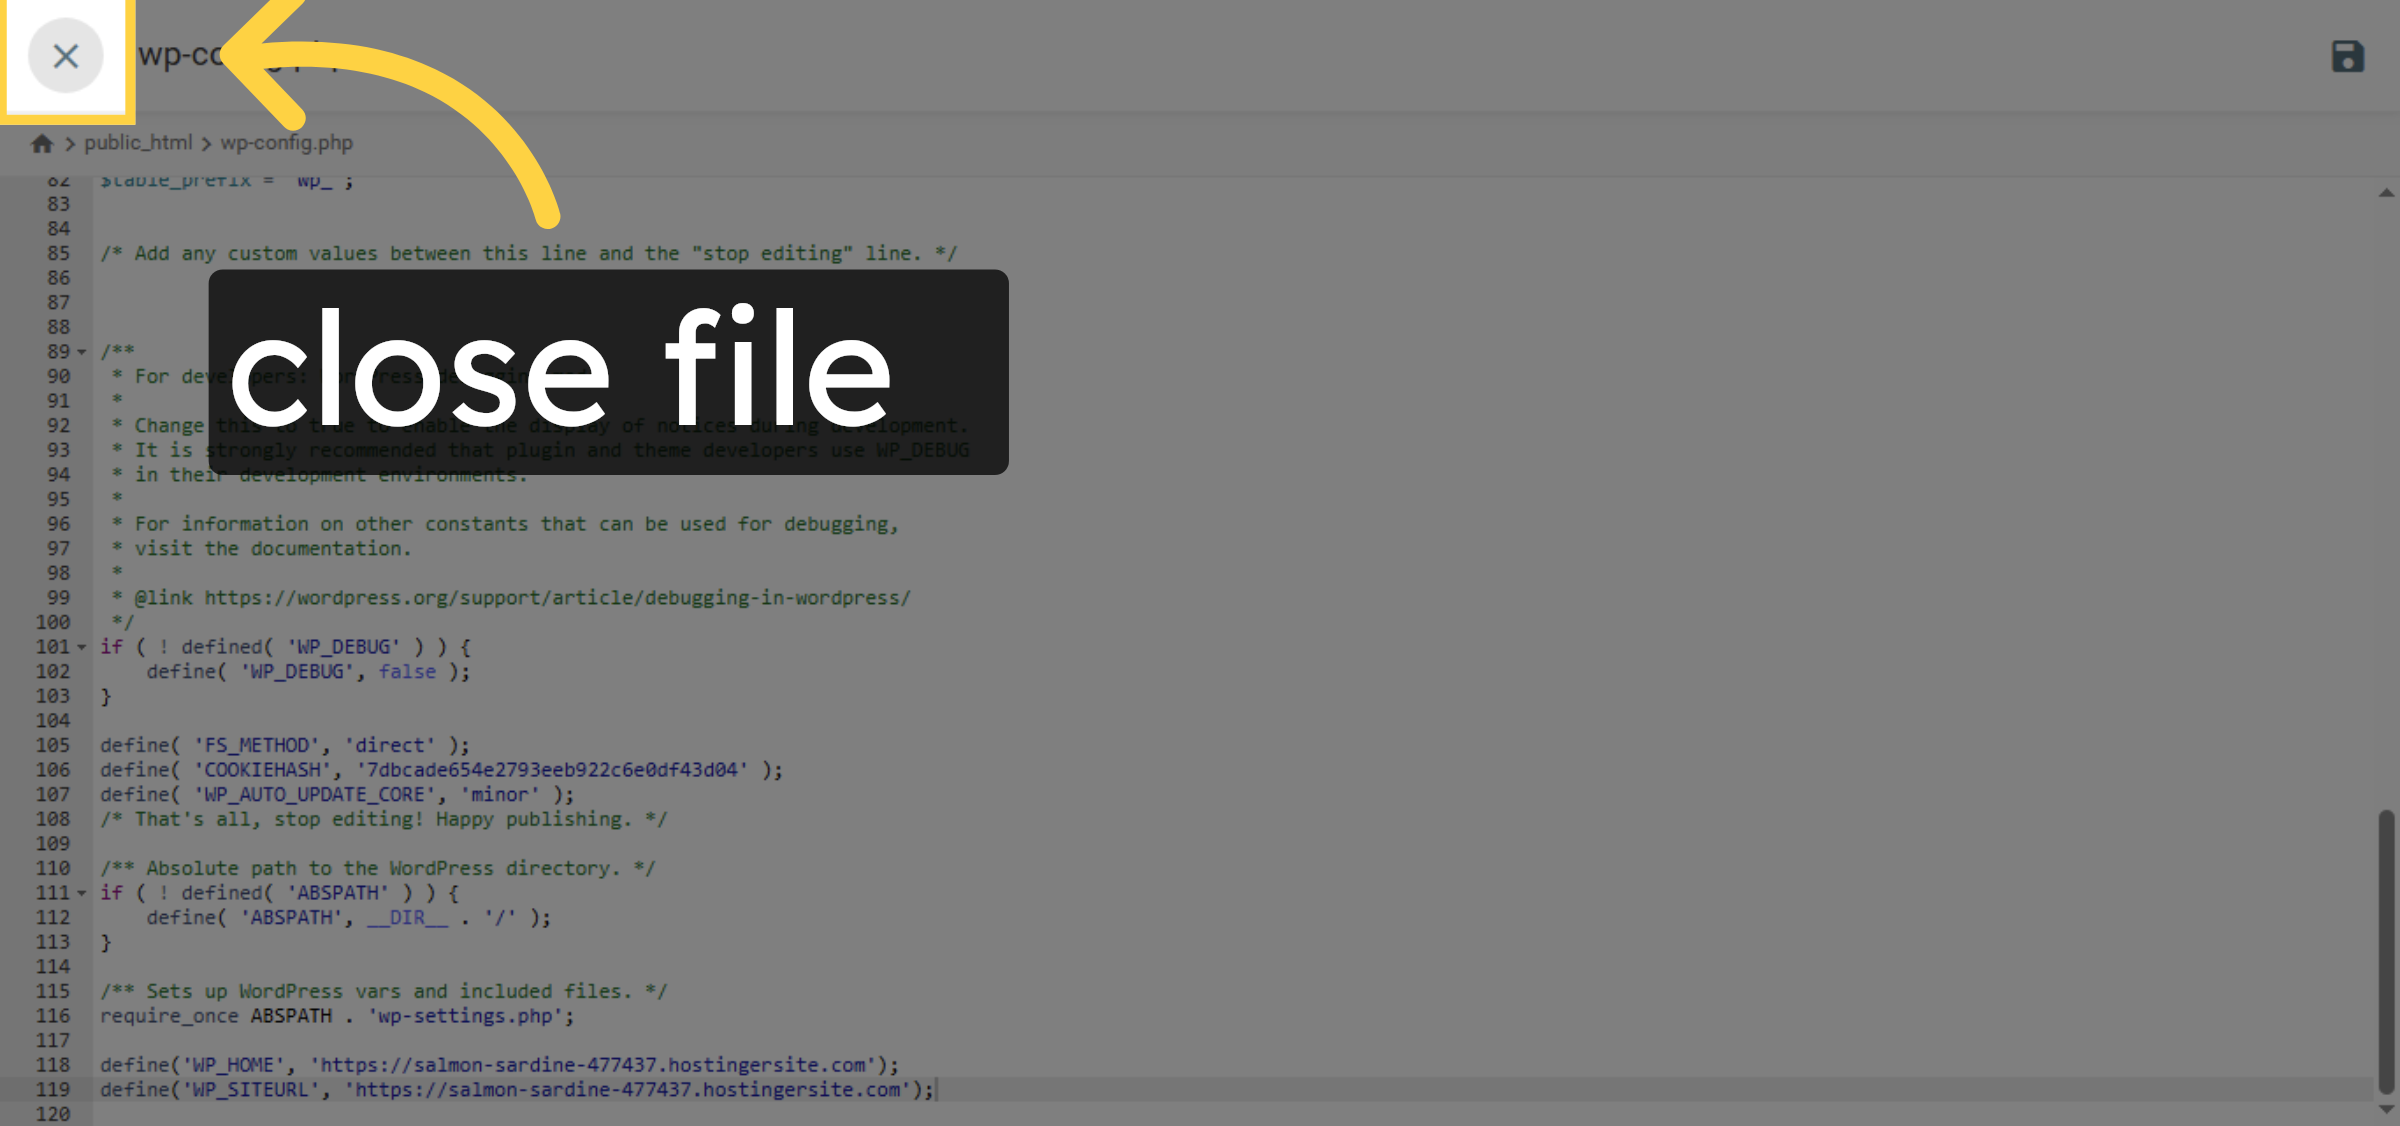
10. Save wp-config.php Changes
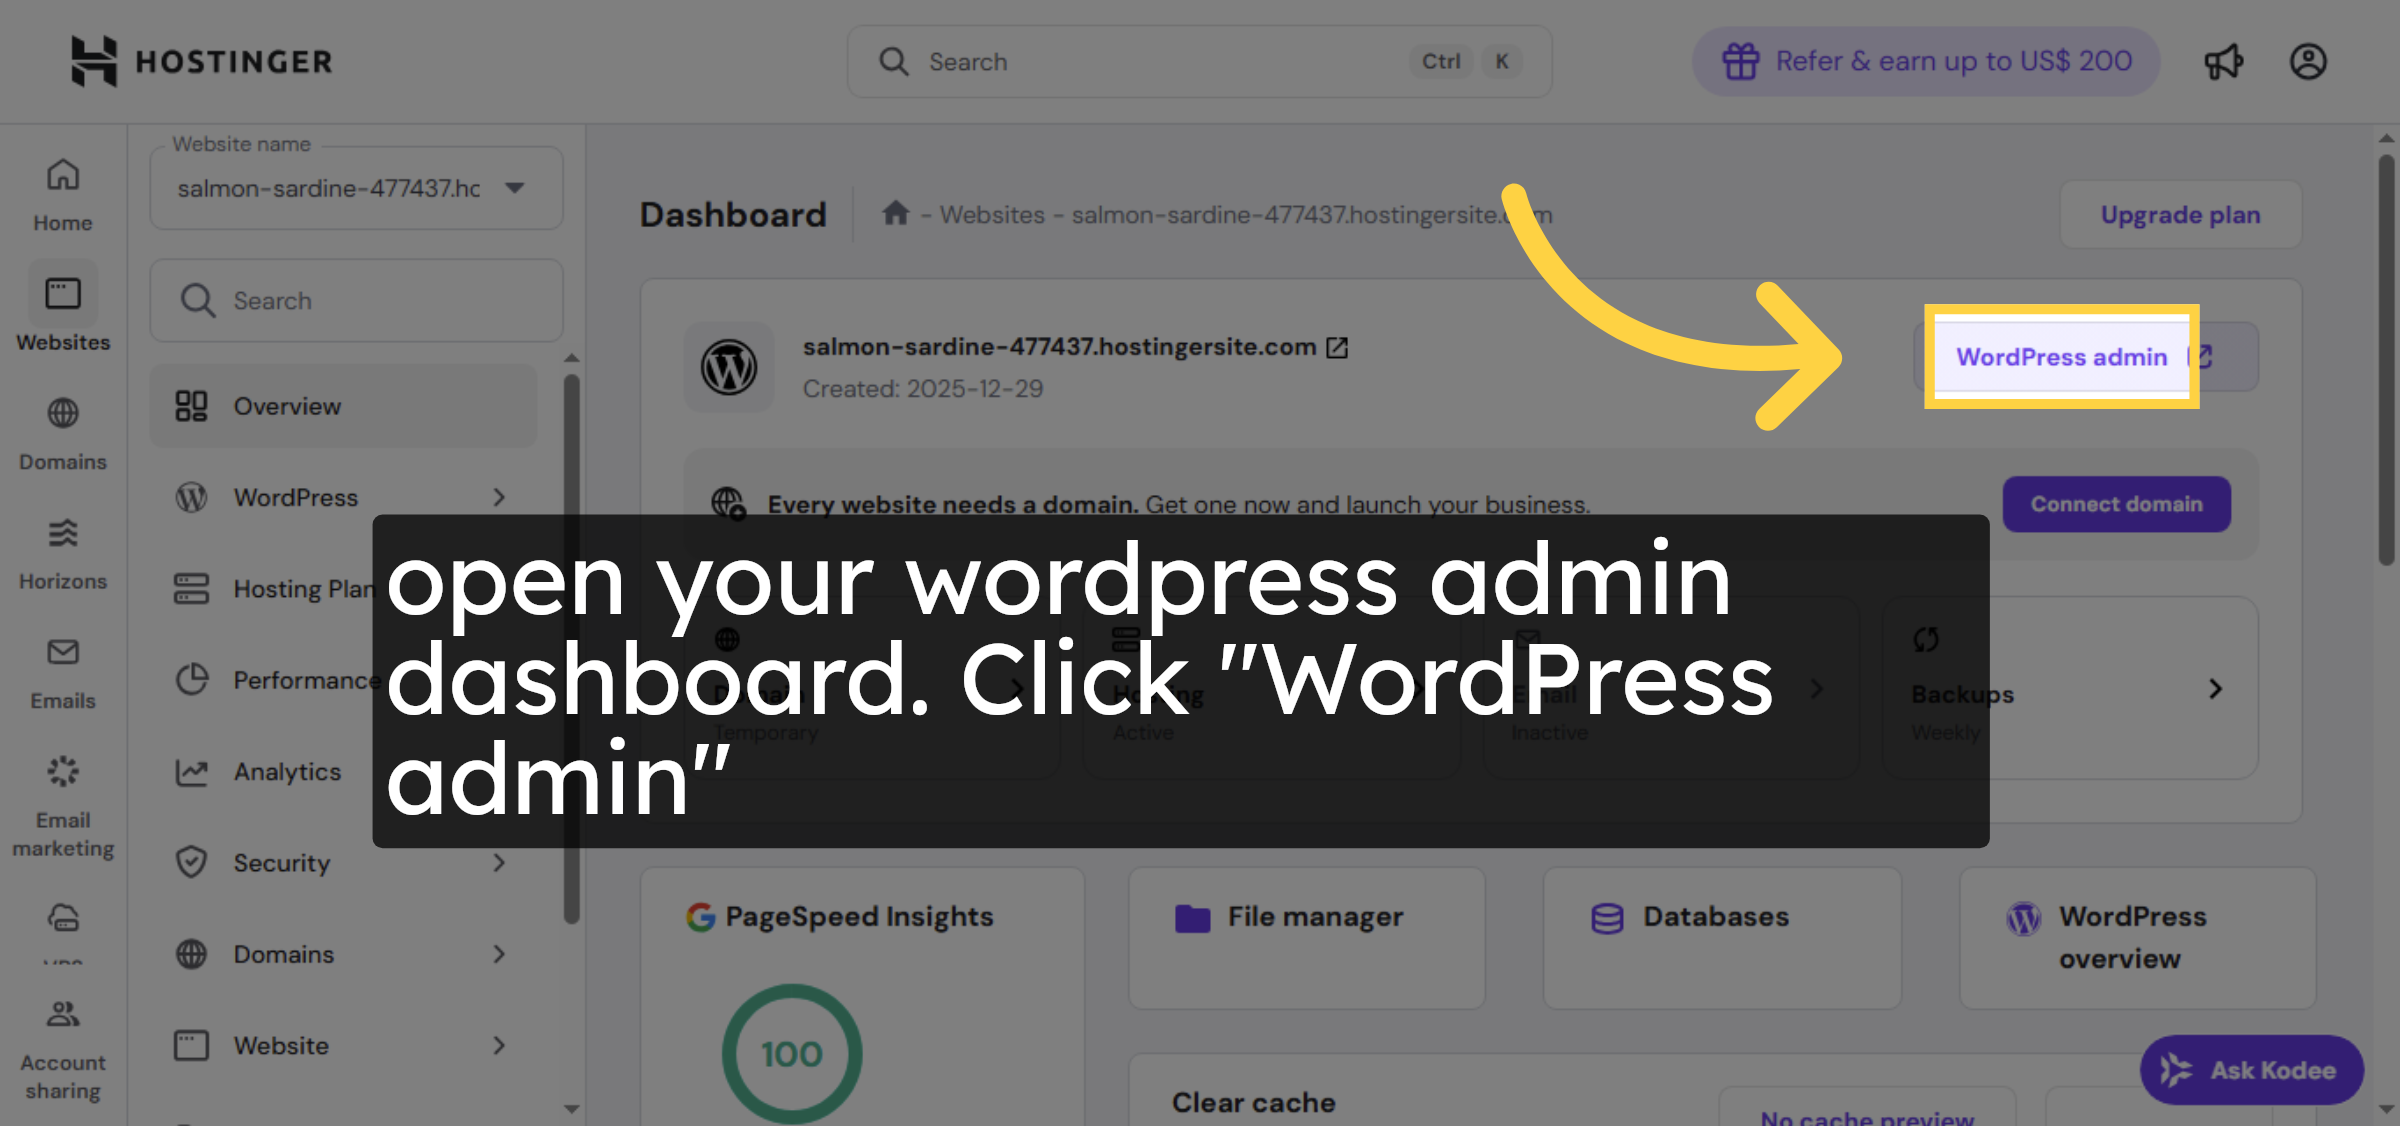
11. Access WordPress Admin


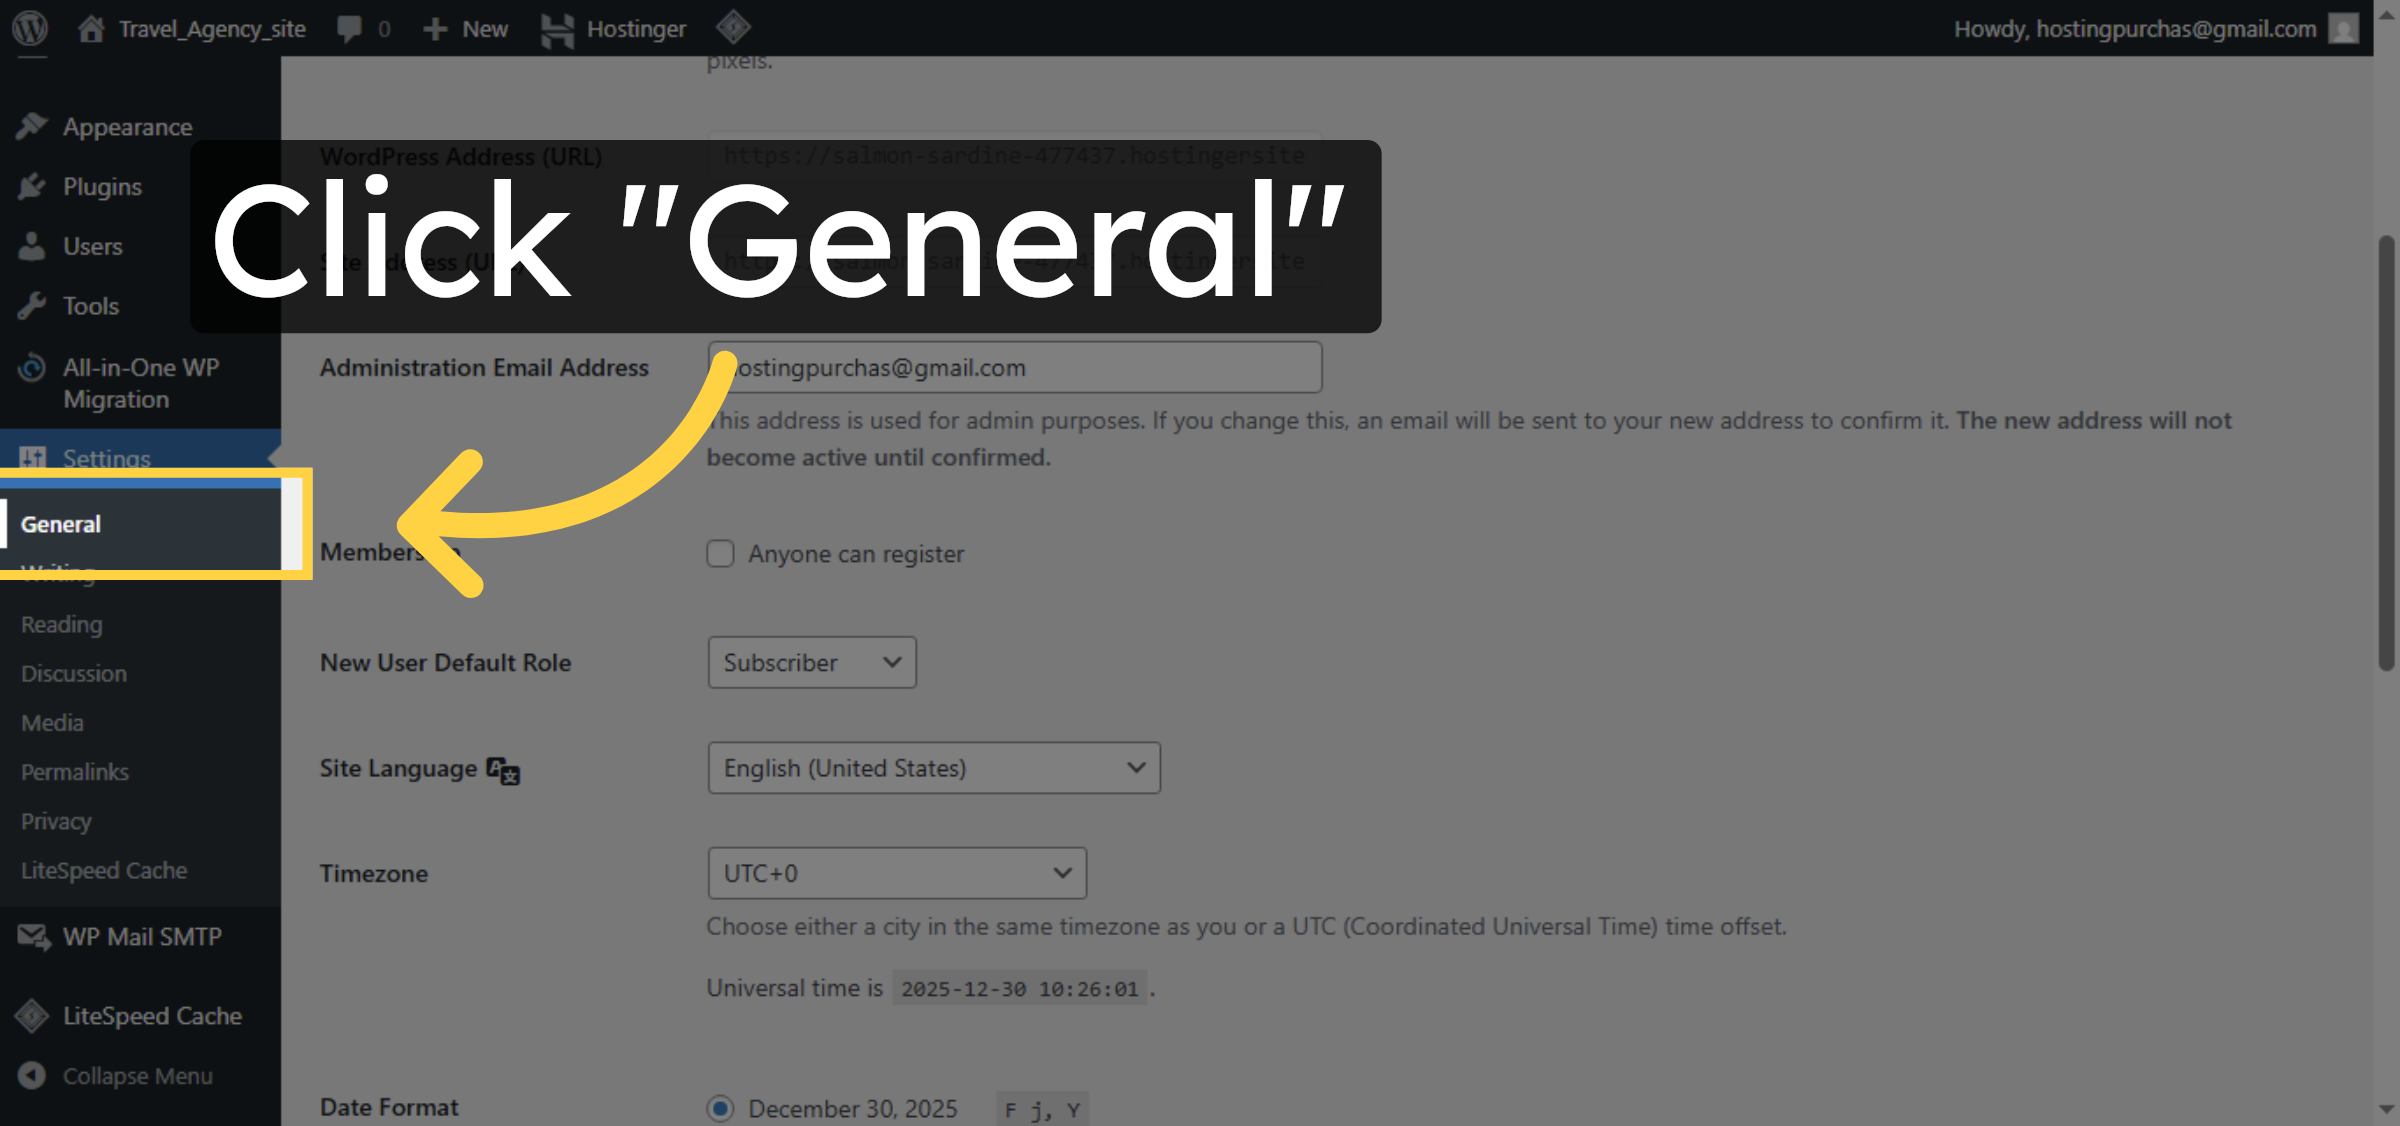
12. Open Settings Menu
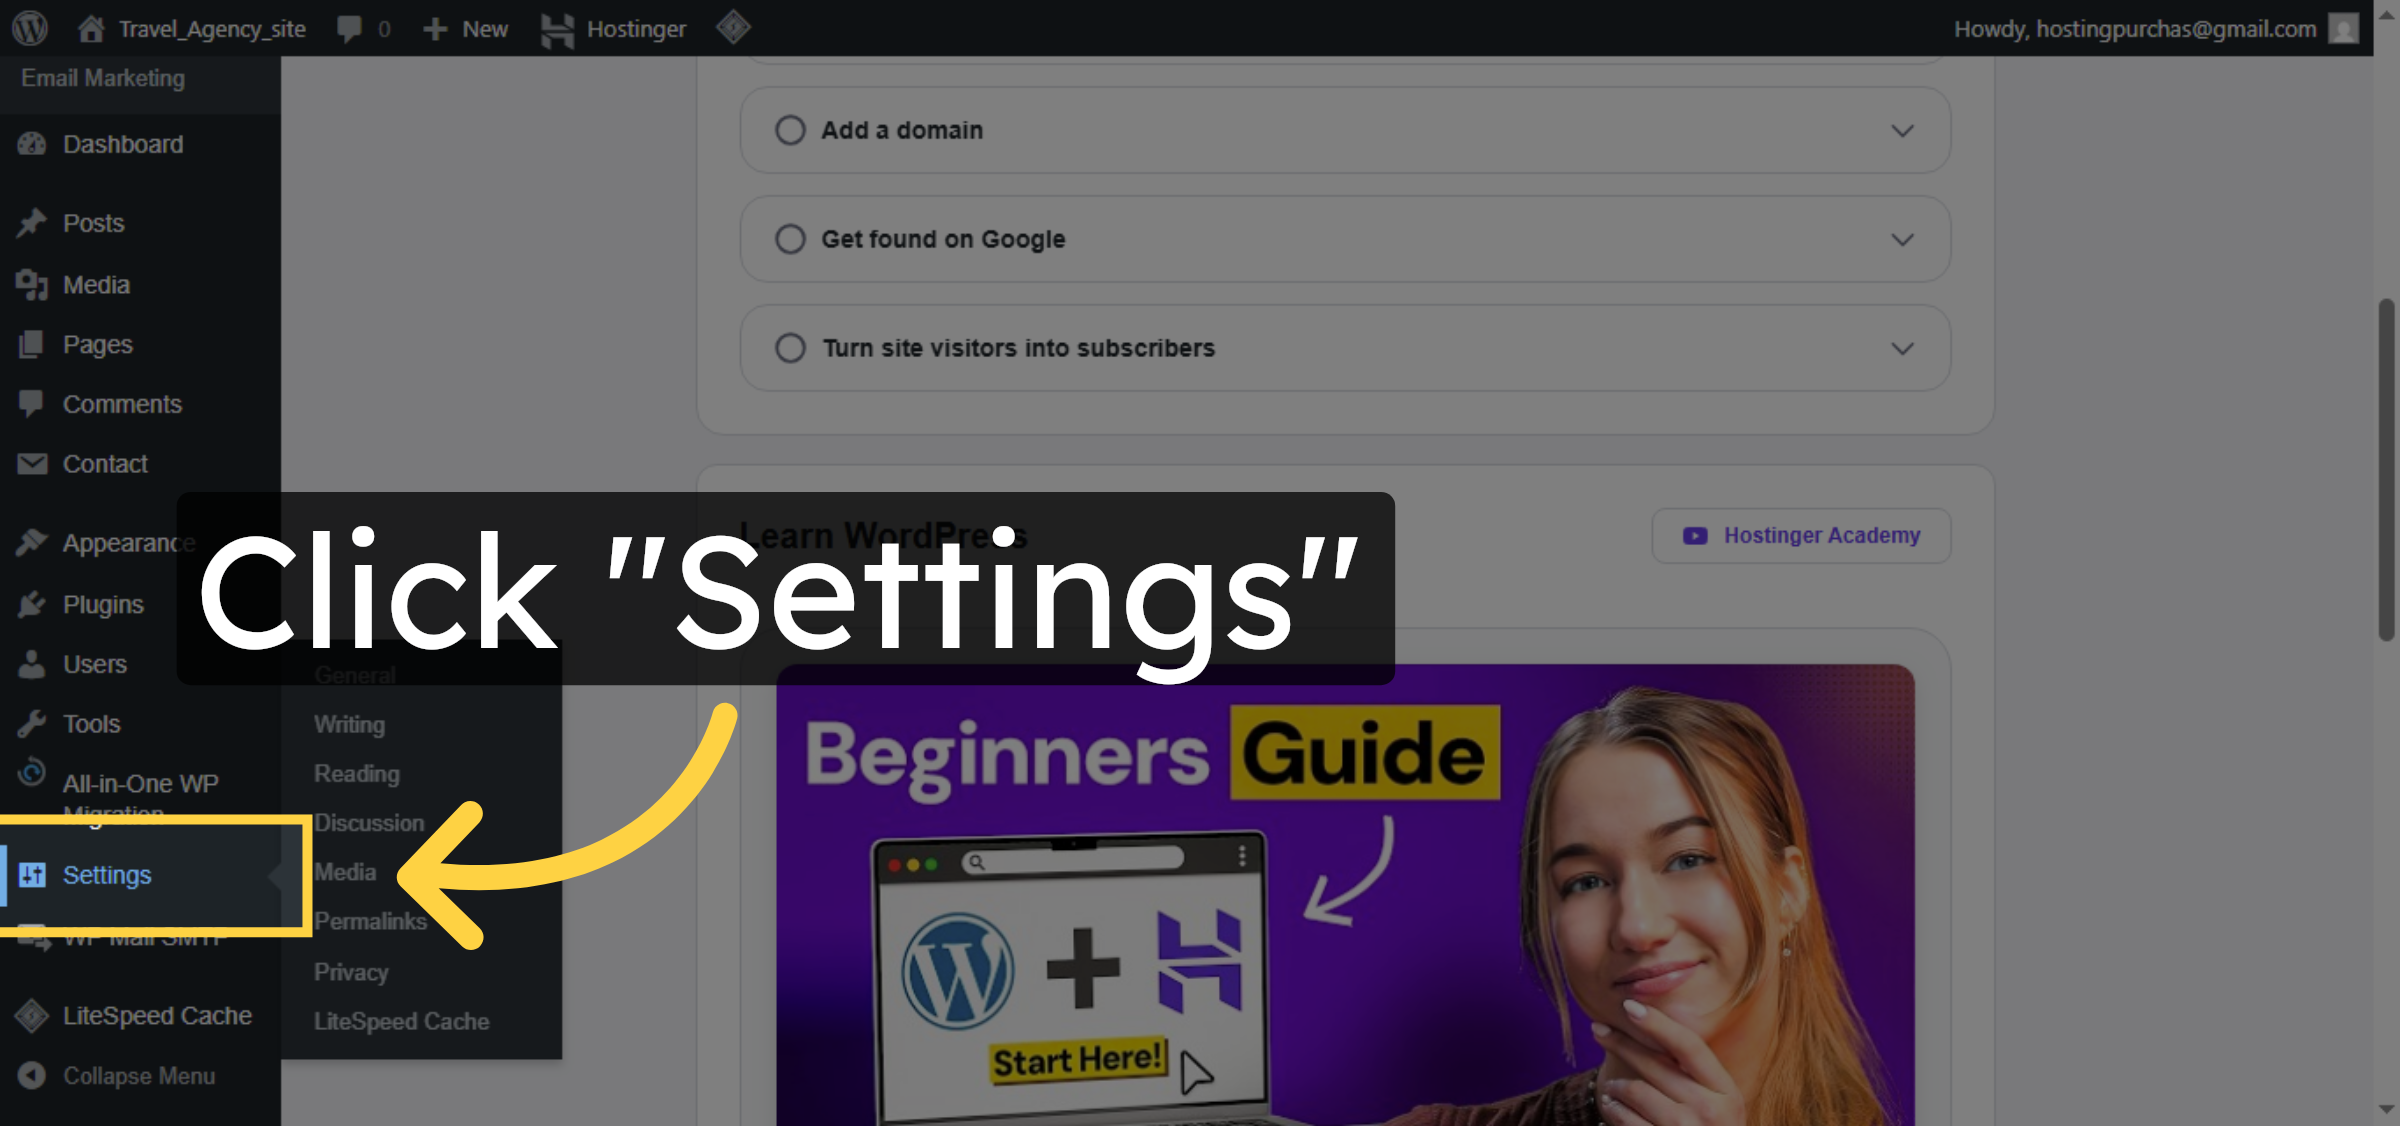
13. Select General Settings
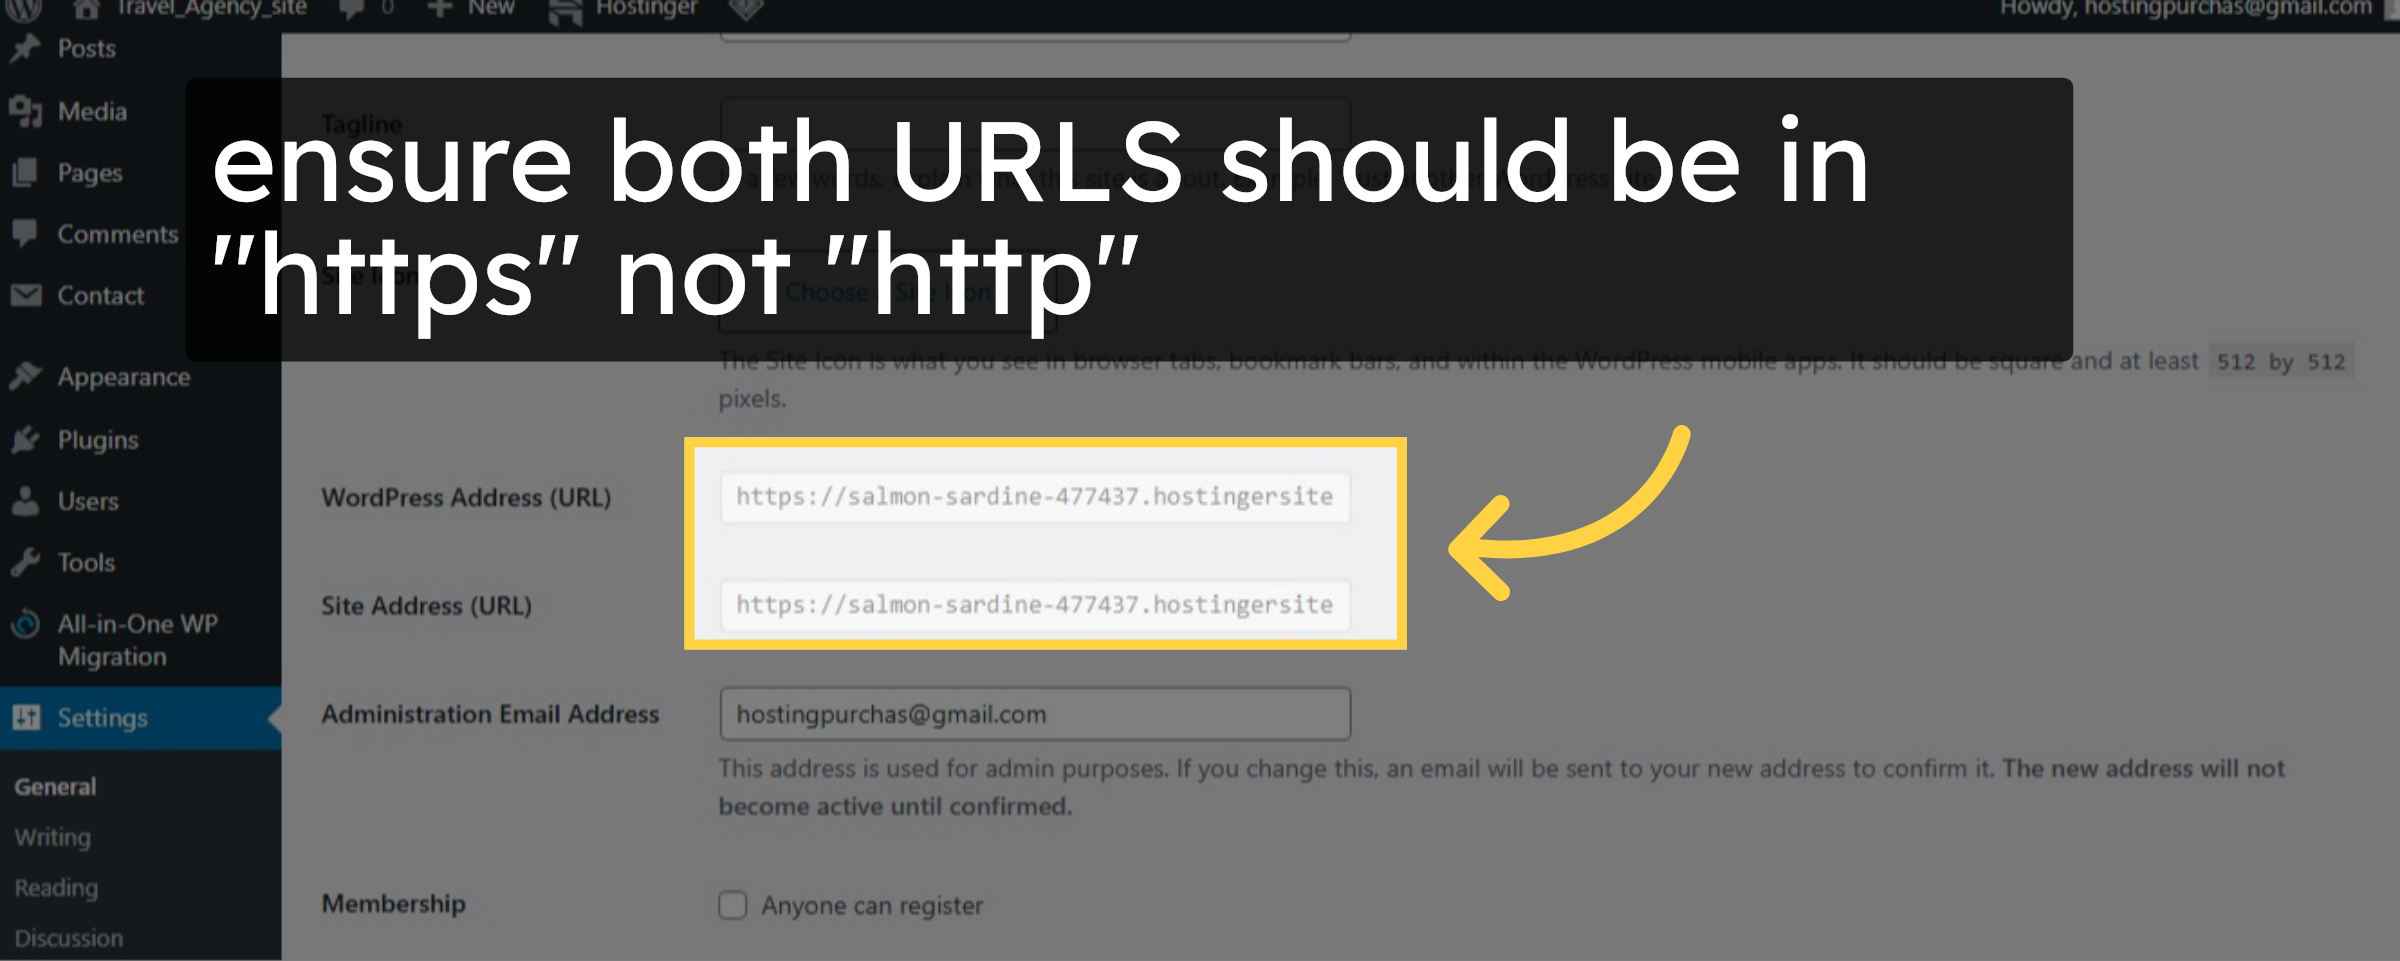
14. check urls format
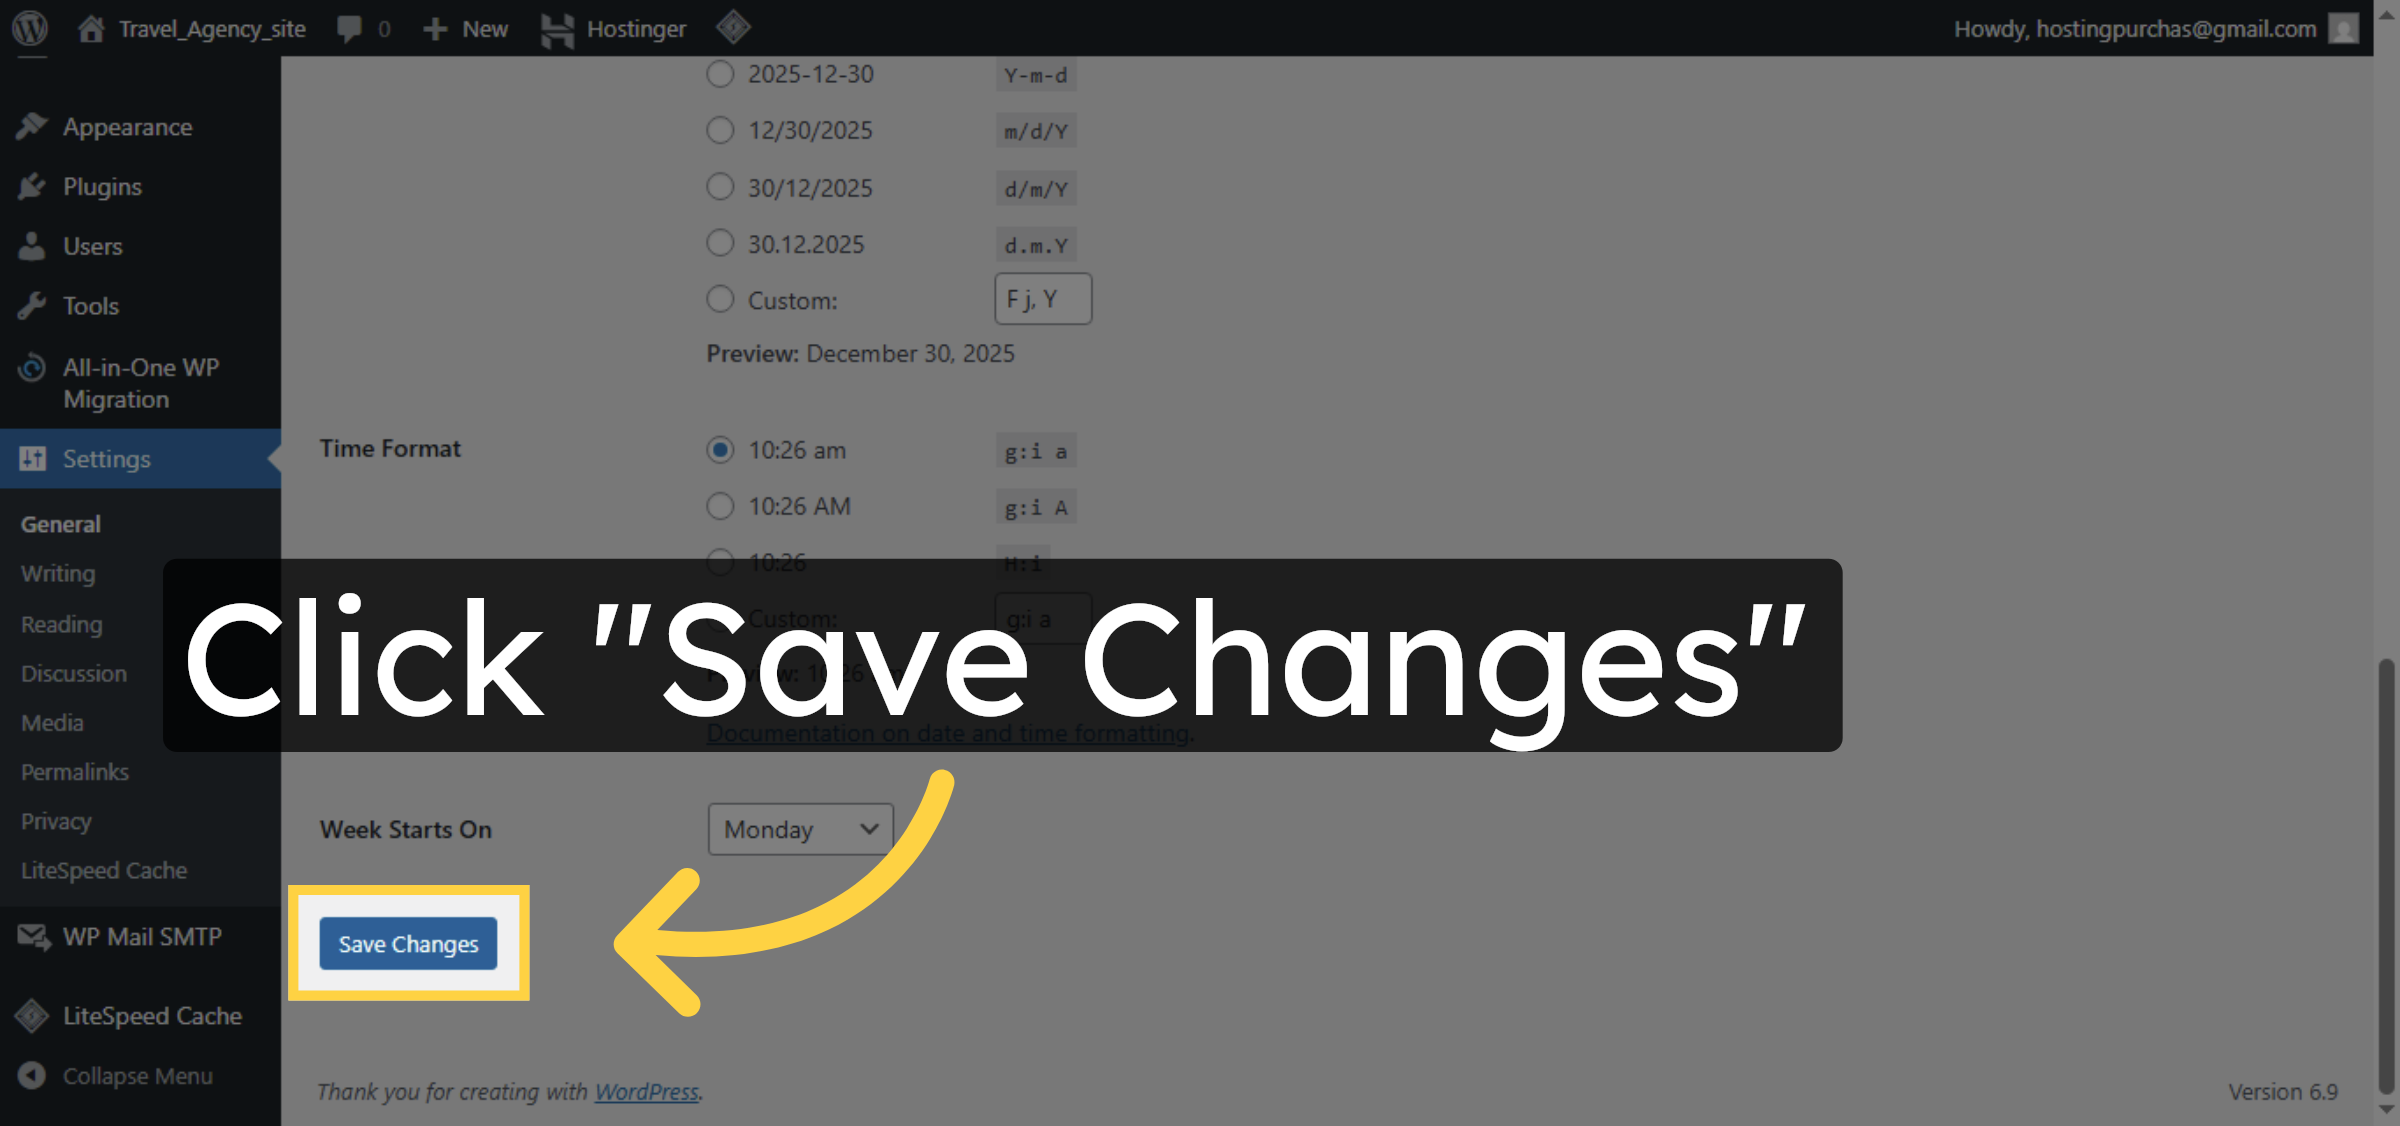
15. Save General Settings
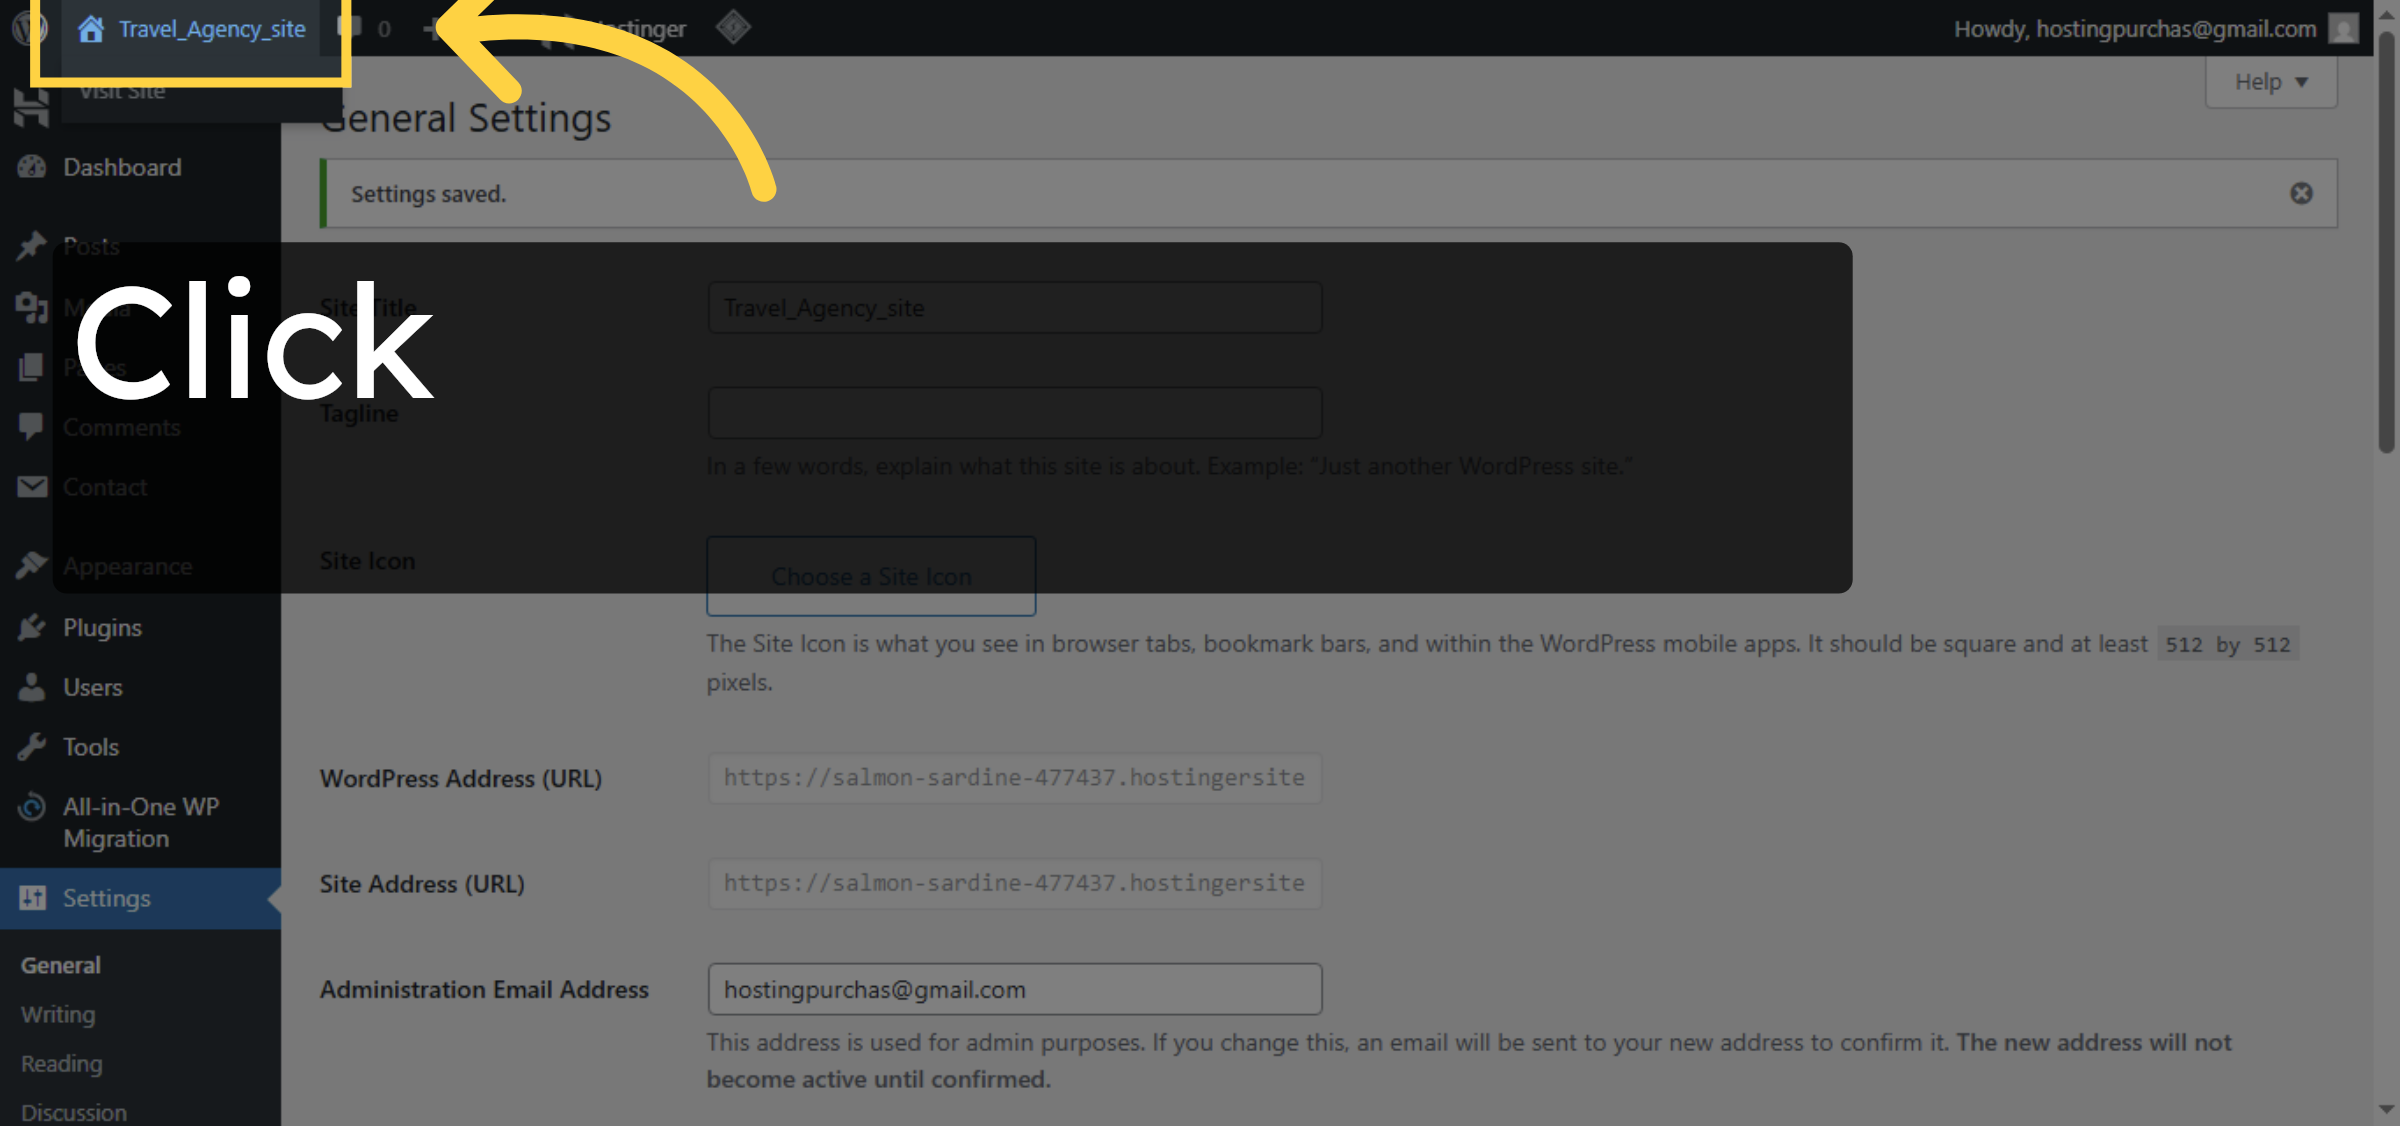
16. Return to Site Dashboard
17. check now your site is secured

Conclusion
After completing these steps, your Hostinger WordPress website is now fully configured to redirect all traffic to HTTPS. By editing the wp-config.php file and verifying URL settings in the WordPress dashboard, you have eliminated insecure access points and strengthened your site’s security. This improves website performance, protects sensitive data, and enhances search engine visibility. Regular maintenance and security checks will help ensure long-term stability and protection.
WooHelpDesk Support
Need expert assistance with WordPress security, SSL configuration, or website optimization?
Visit: https://www.woohelpdesk.com
Call Us Toll-Free: +1 888 602 0119 (US & Canada)
Contact WooHelpDesk today for reliable and professional WordPress support.


