How to connect external domain to Hostinger hosting?
3 mins read

How to connect external domain to Hostinger hosting?

Introduction

Connecting an external domain to your Hostinger hosting account allows you to use your custom domain name with your website, enhancing brand identity and online credibility. By properly configuring DNS and nameserver settings, you can ensure that your website loads correctly under your chosen domain. In this guide, you will learn how to connect an external domain to Hostinger using the hPanel dashboard, update nameservers, verify DNS settings, and complete the domain setup process smoothly.


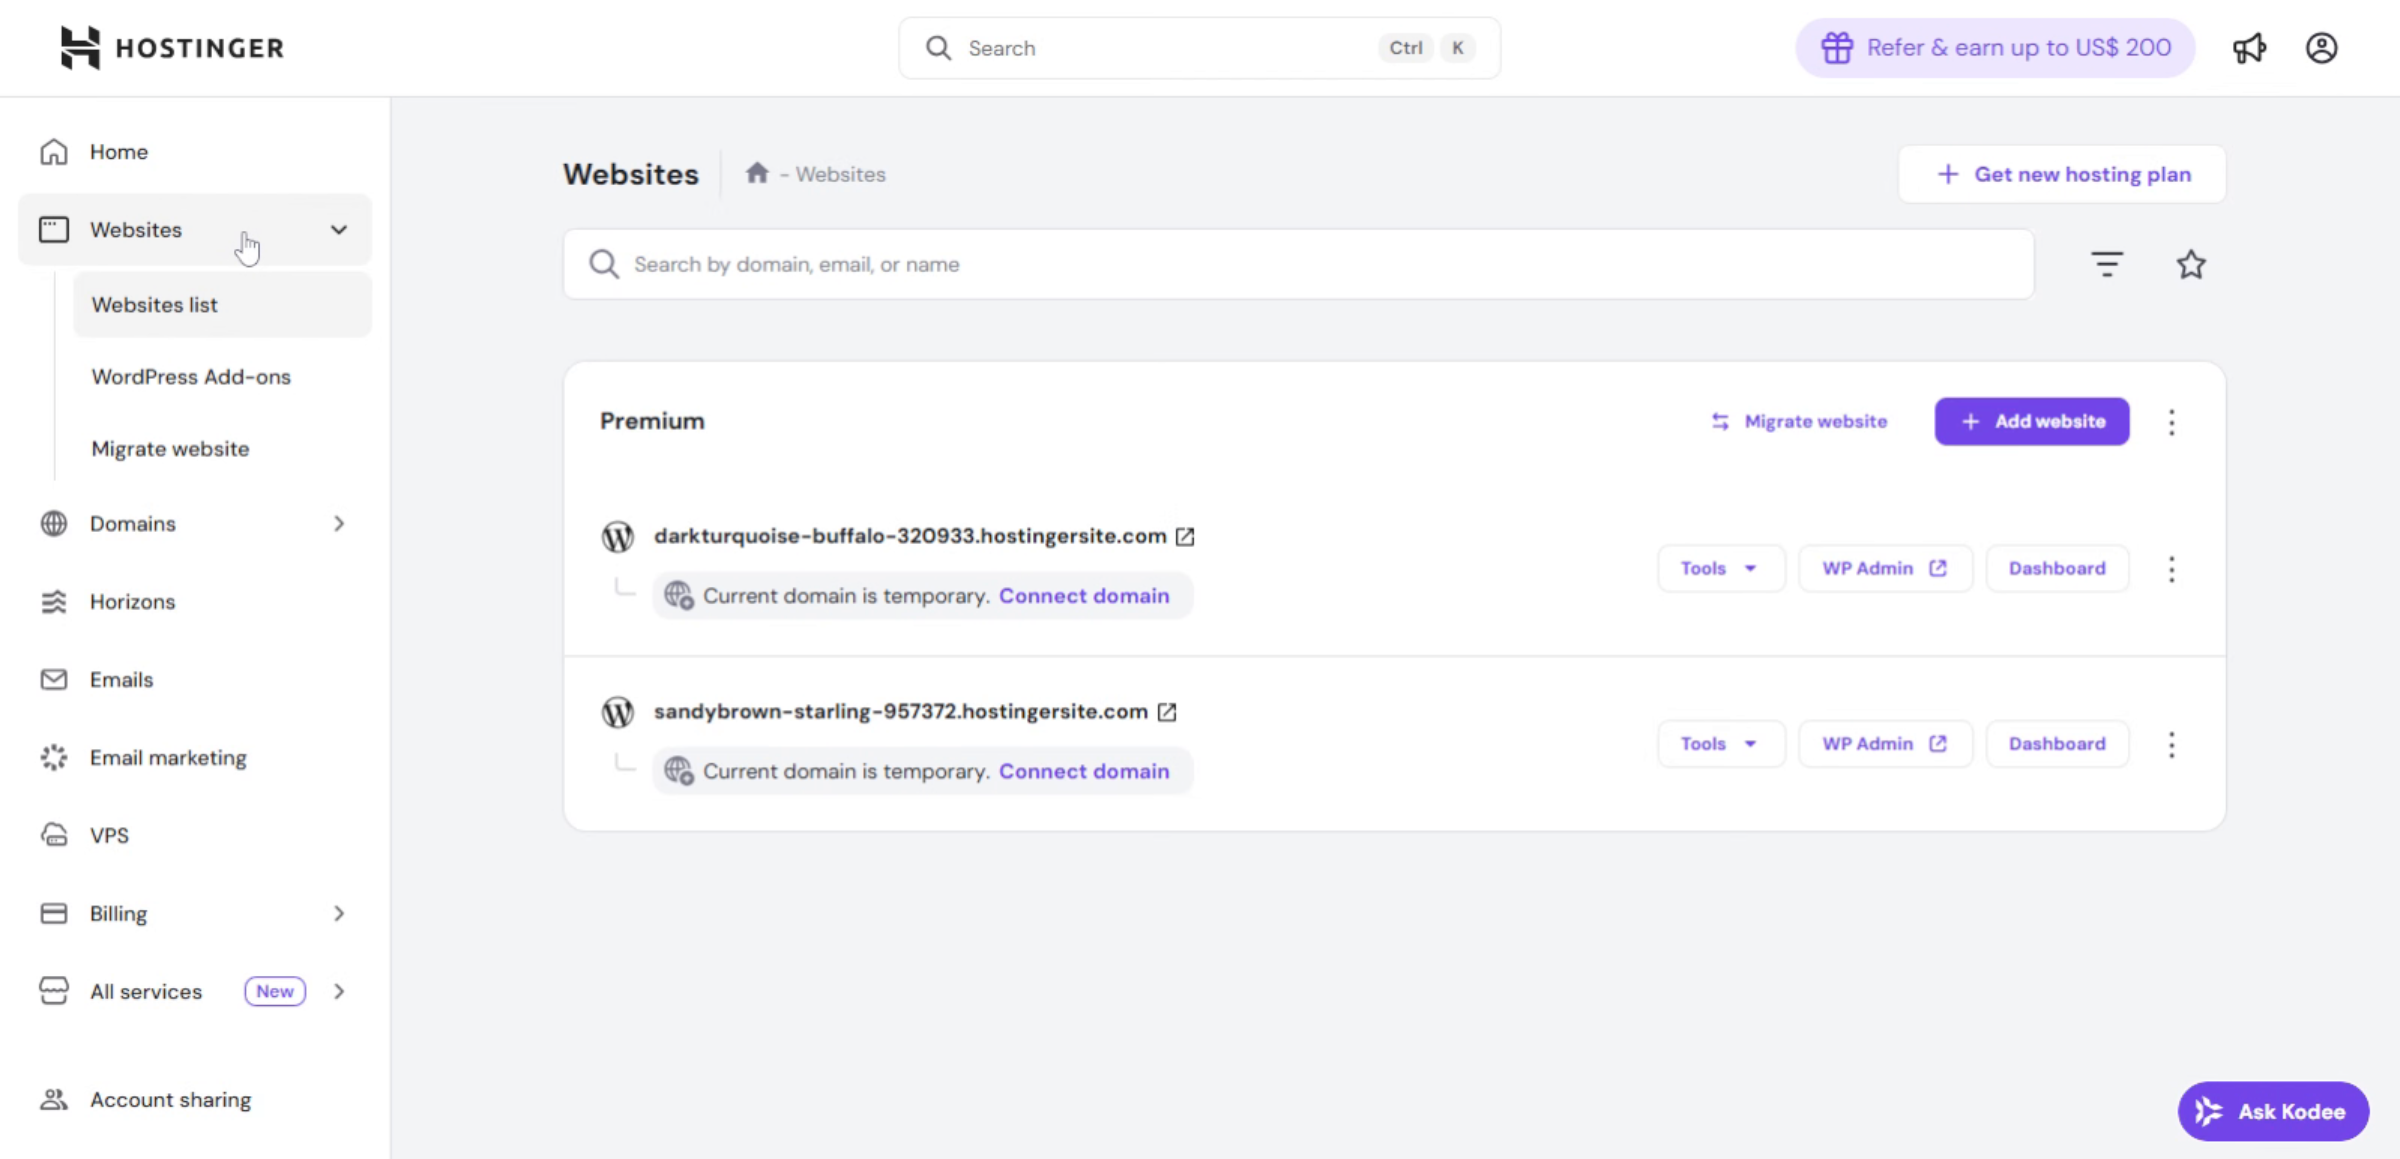
1. Website Management Dashboard

This option in the Hostinger dashboard is used to connect an external domain to your hosting and make the website live on that domain.

Website Management Dashboard

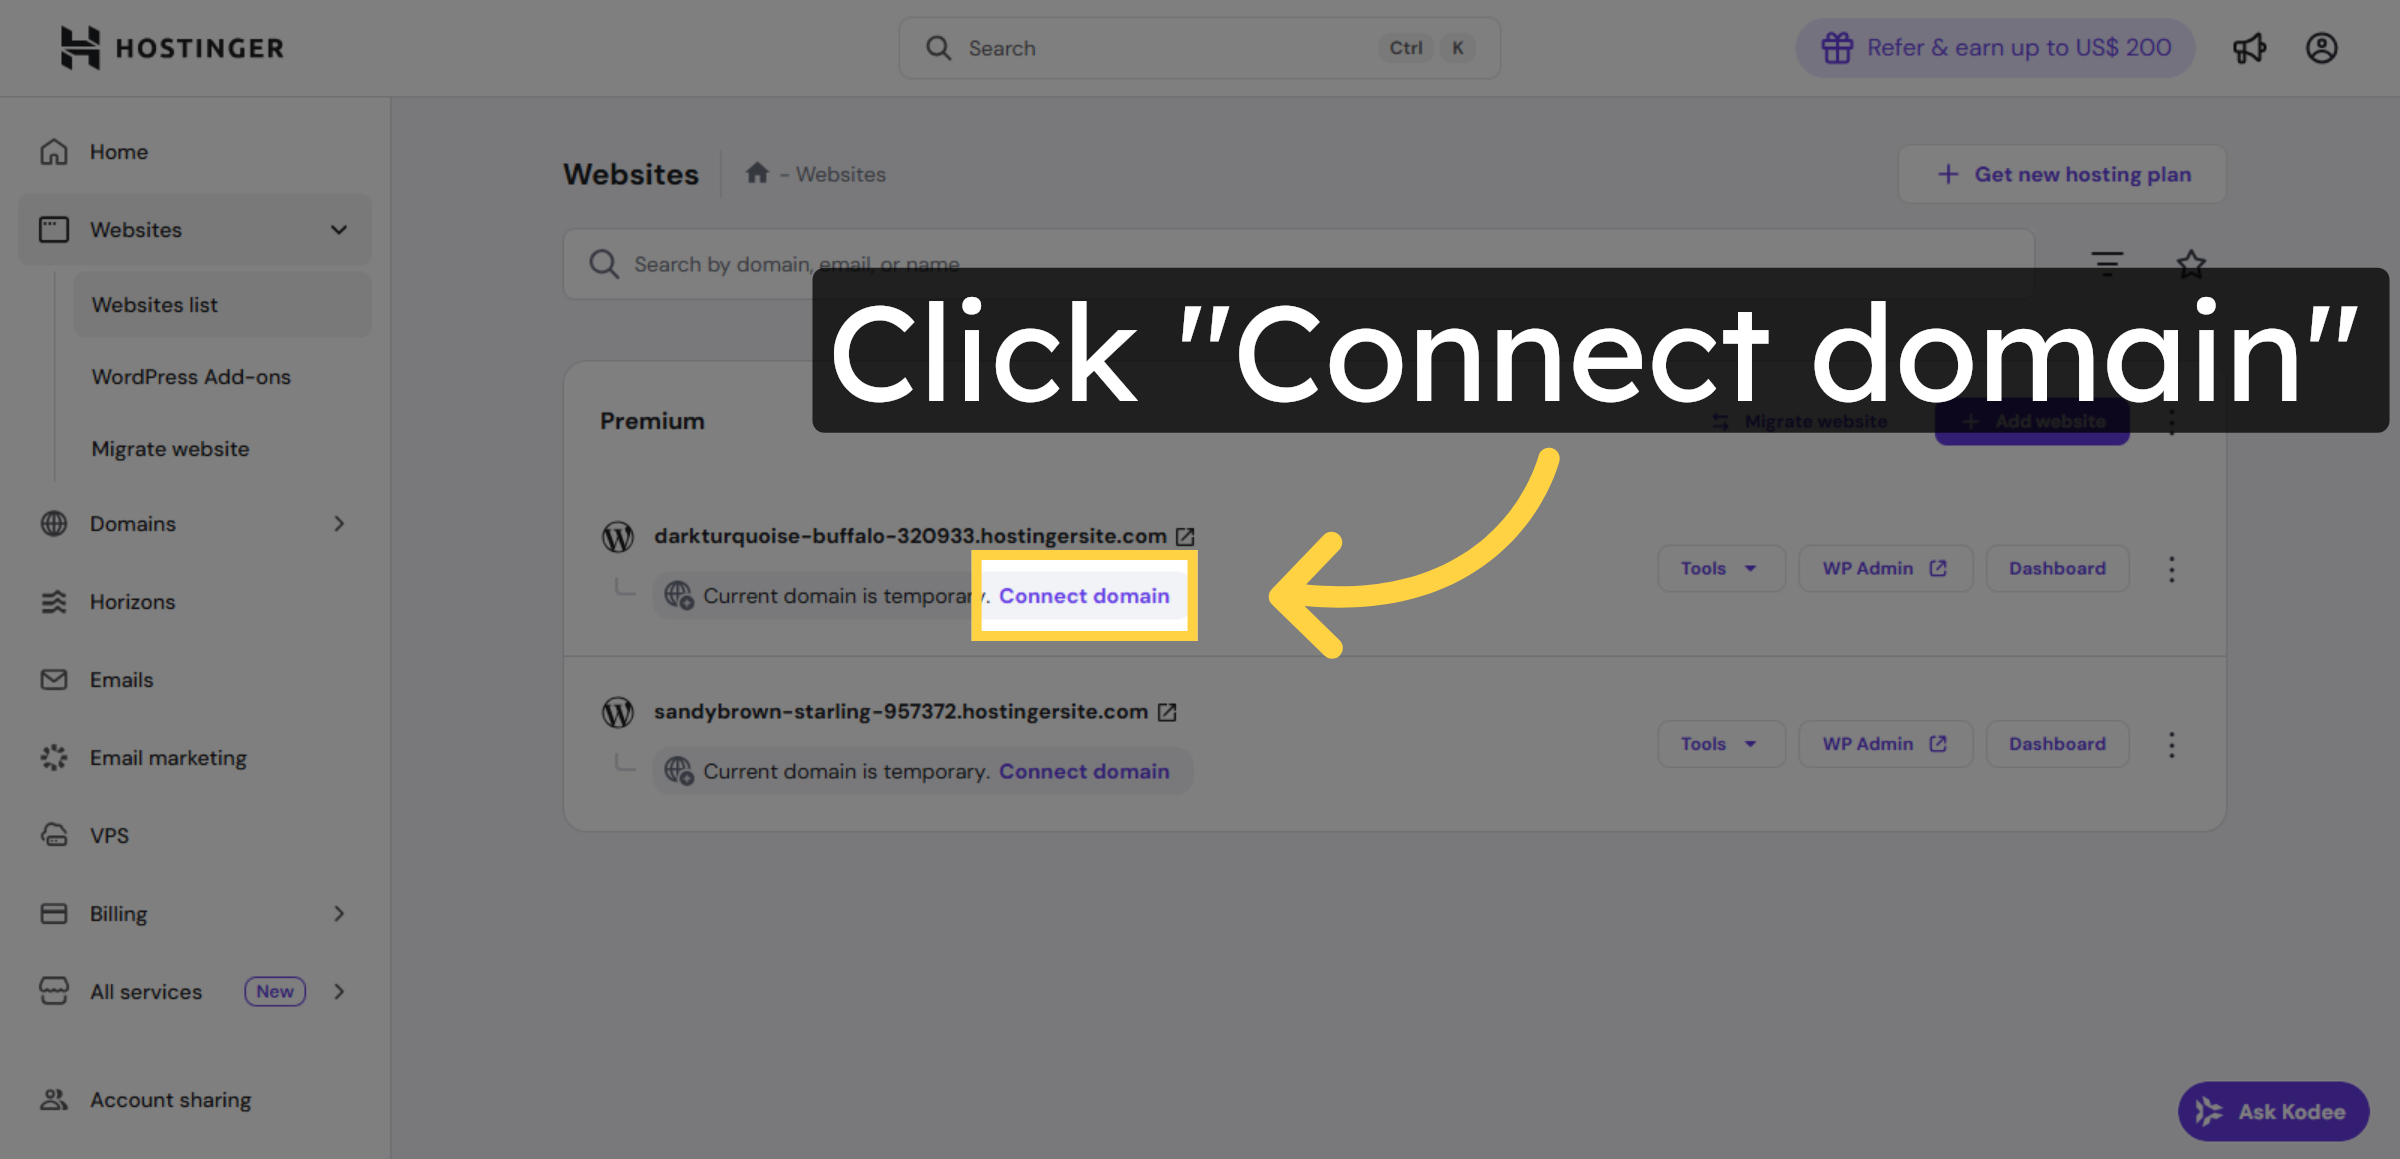
2. Click Connect Domain Button

Click the Connect domain button on your Hostinger Websites dashboard to start linking your external domain.

Click Connect Domain Button

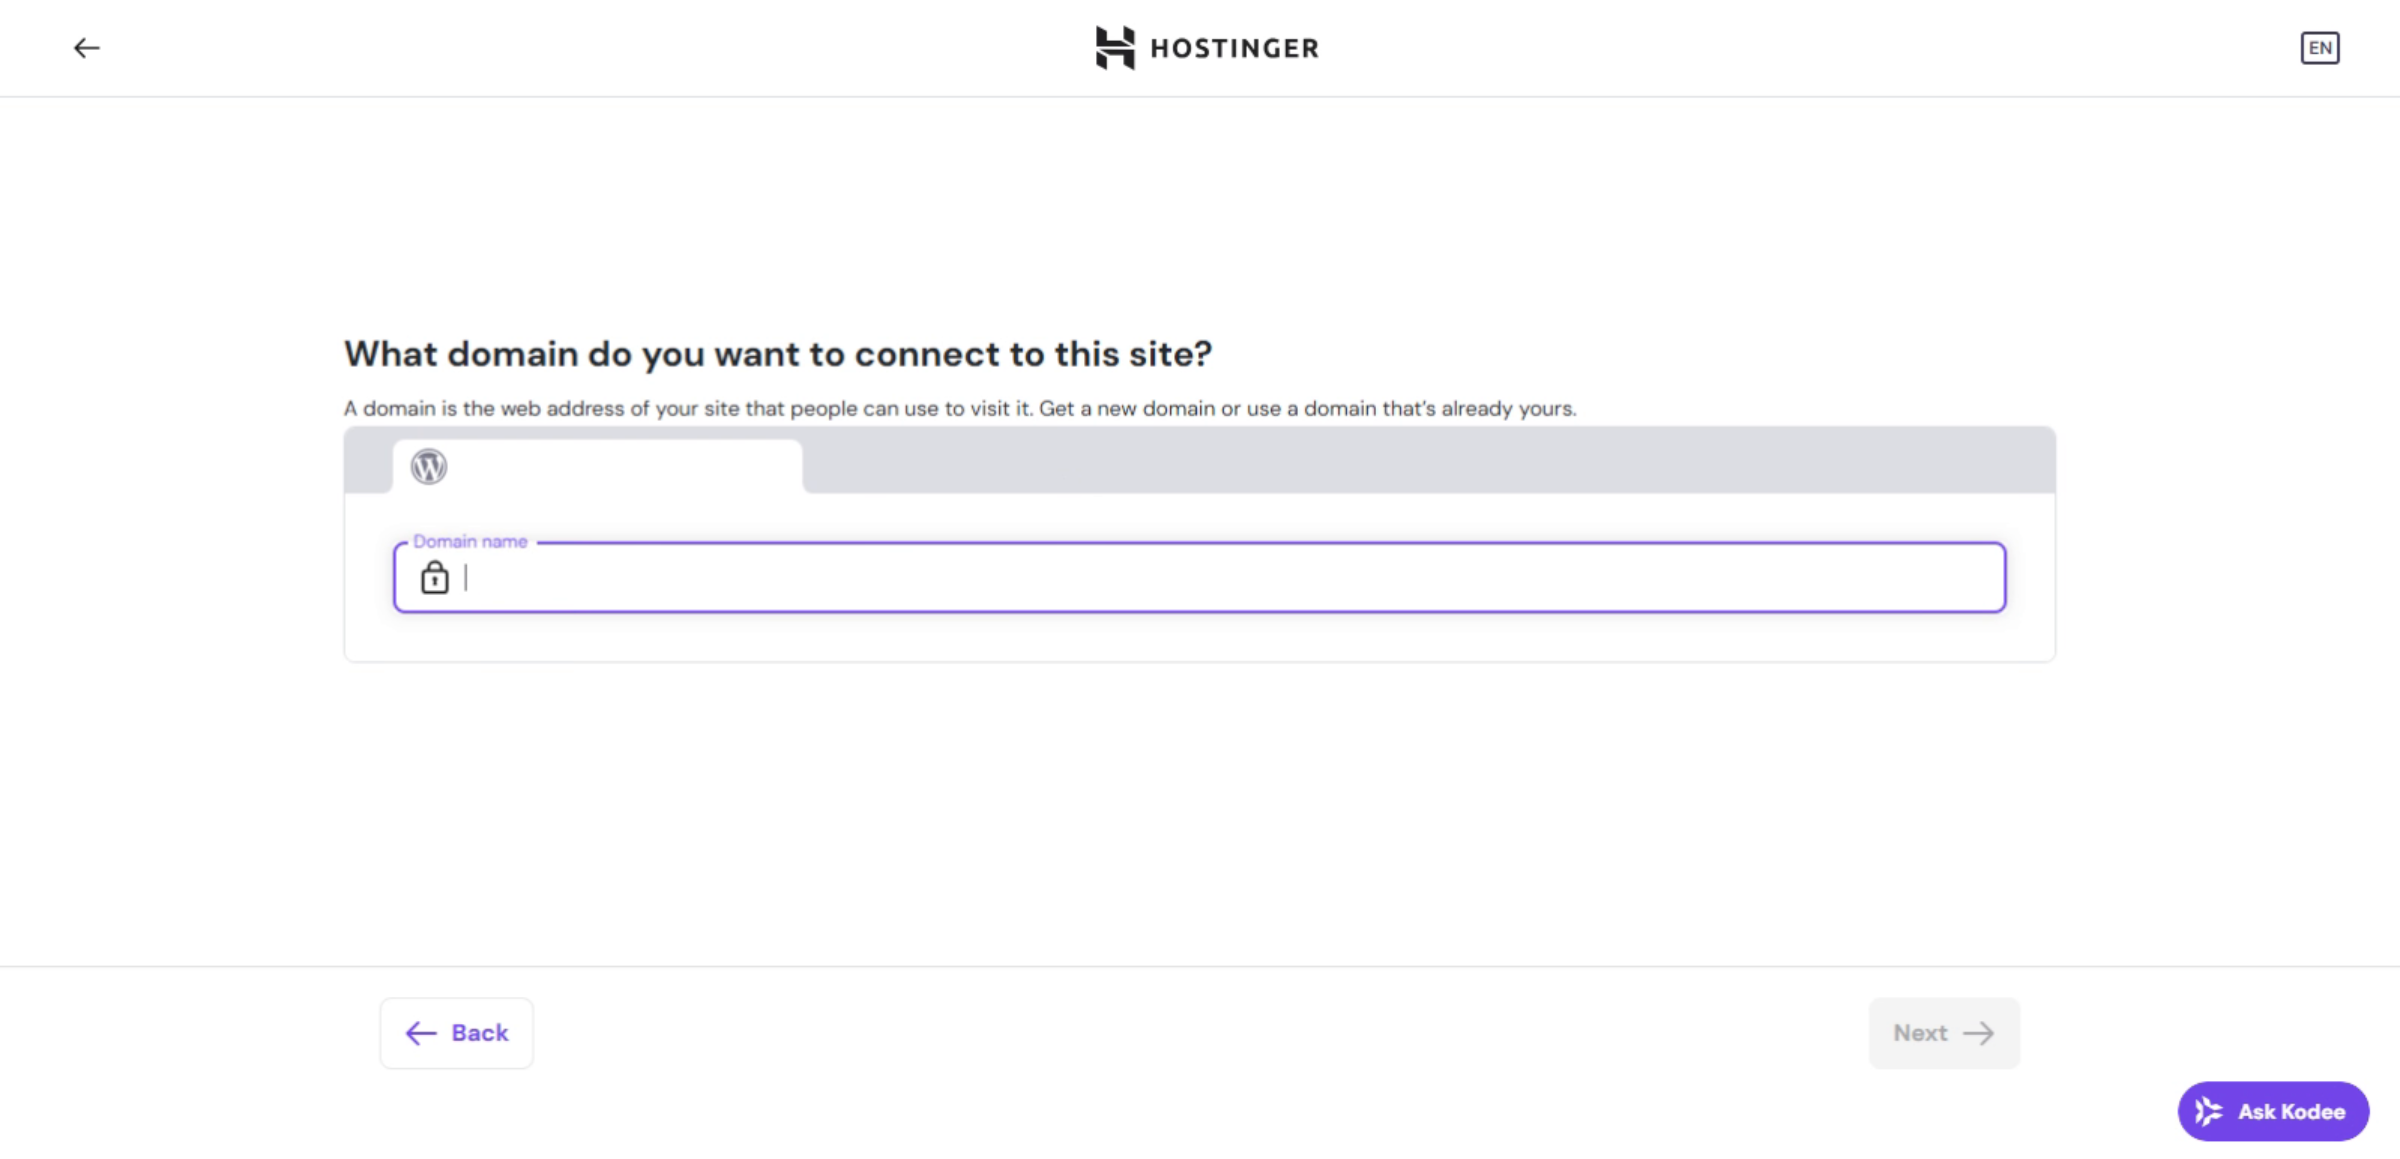
3. Enter Your Domain Name

Enter your domain name in the provided field to specify which external domain you want to connect.

Enter Your Domain Name

4. Select Your Domain

Select your domain from the list to proceed with the connection process.

Select Your Domain

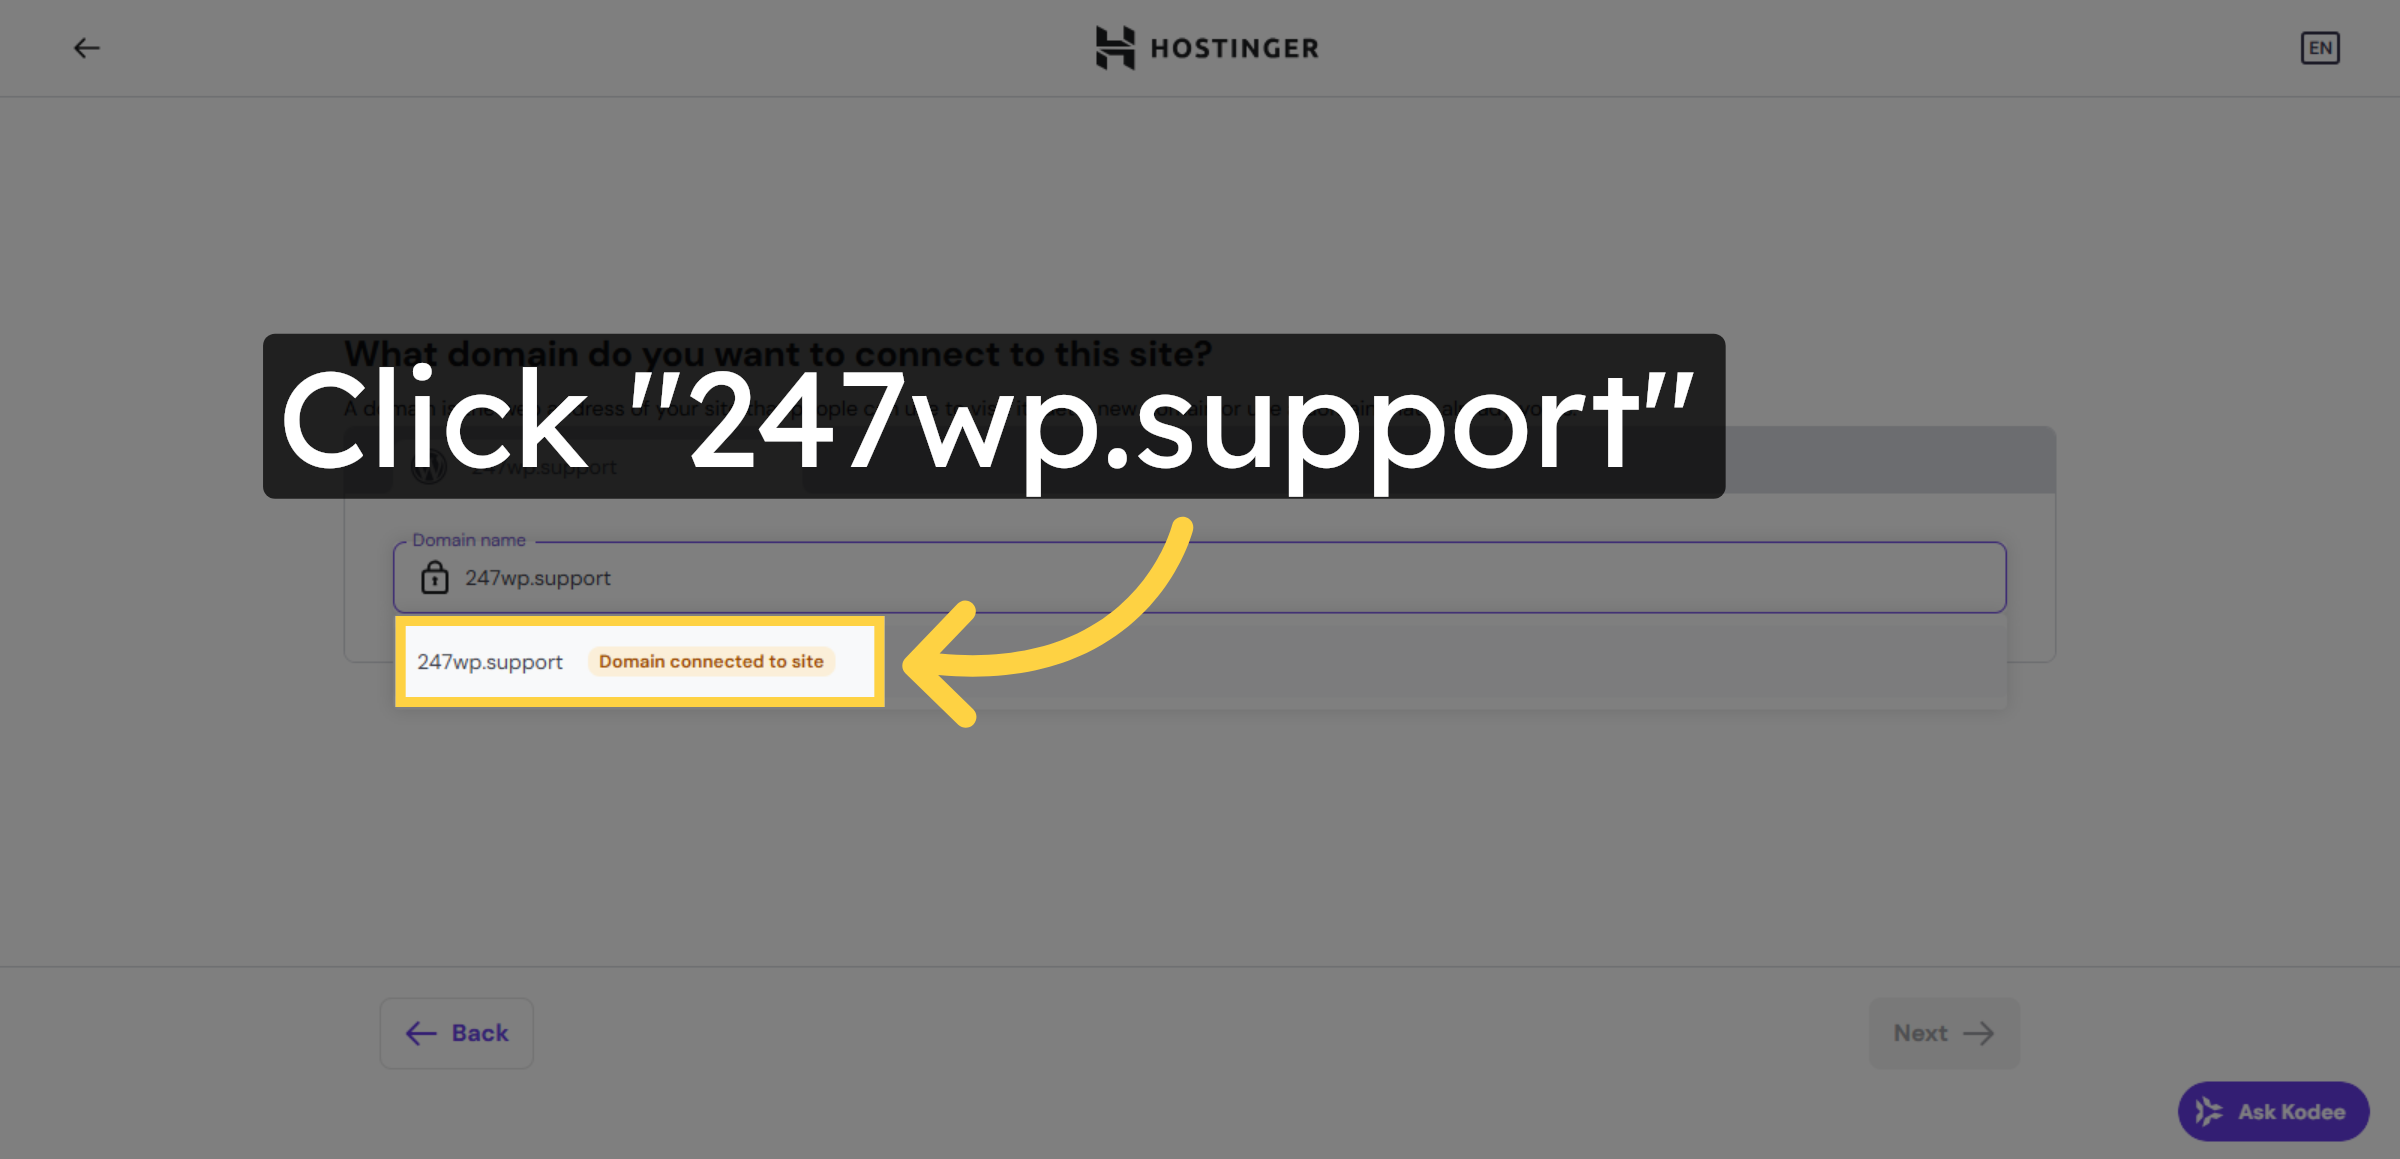
5. Select Domain and Continue Connection

This screen is used to proceed with connecting an external domain to Hostinger. Click Next to continue the domain connection process.

Select Domain and Continue Connection

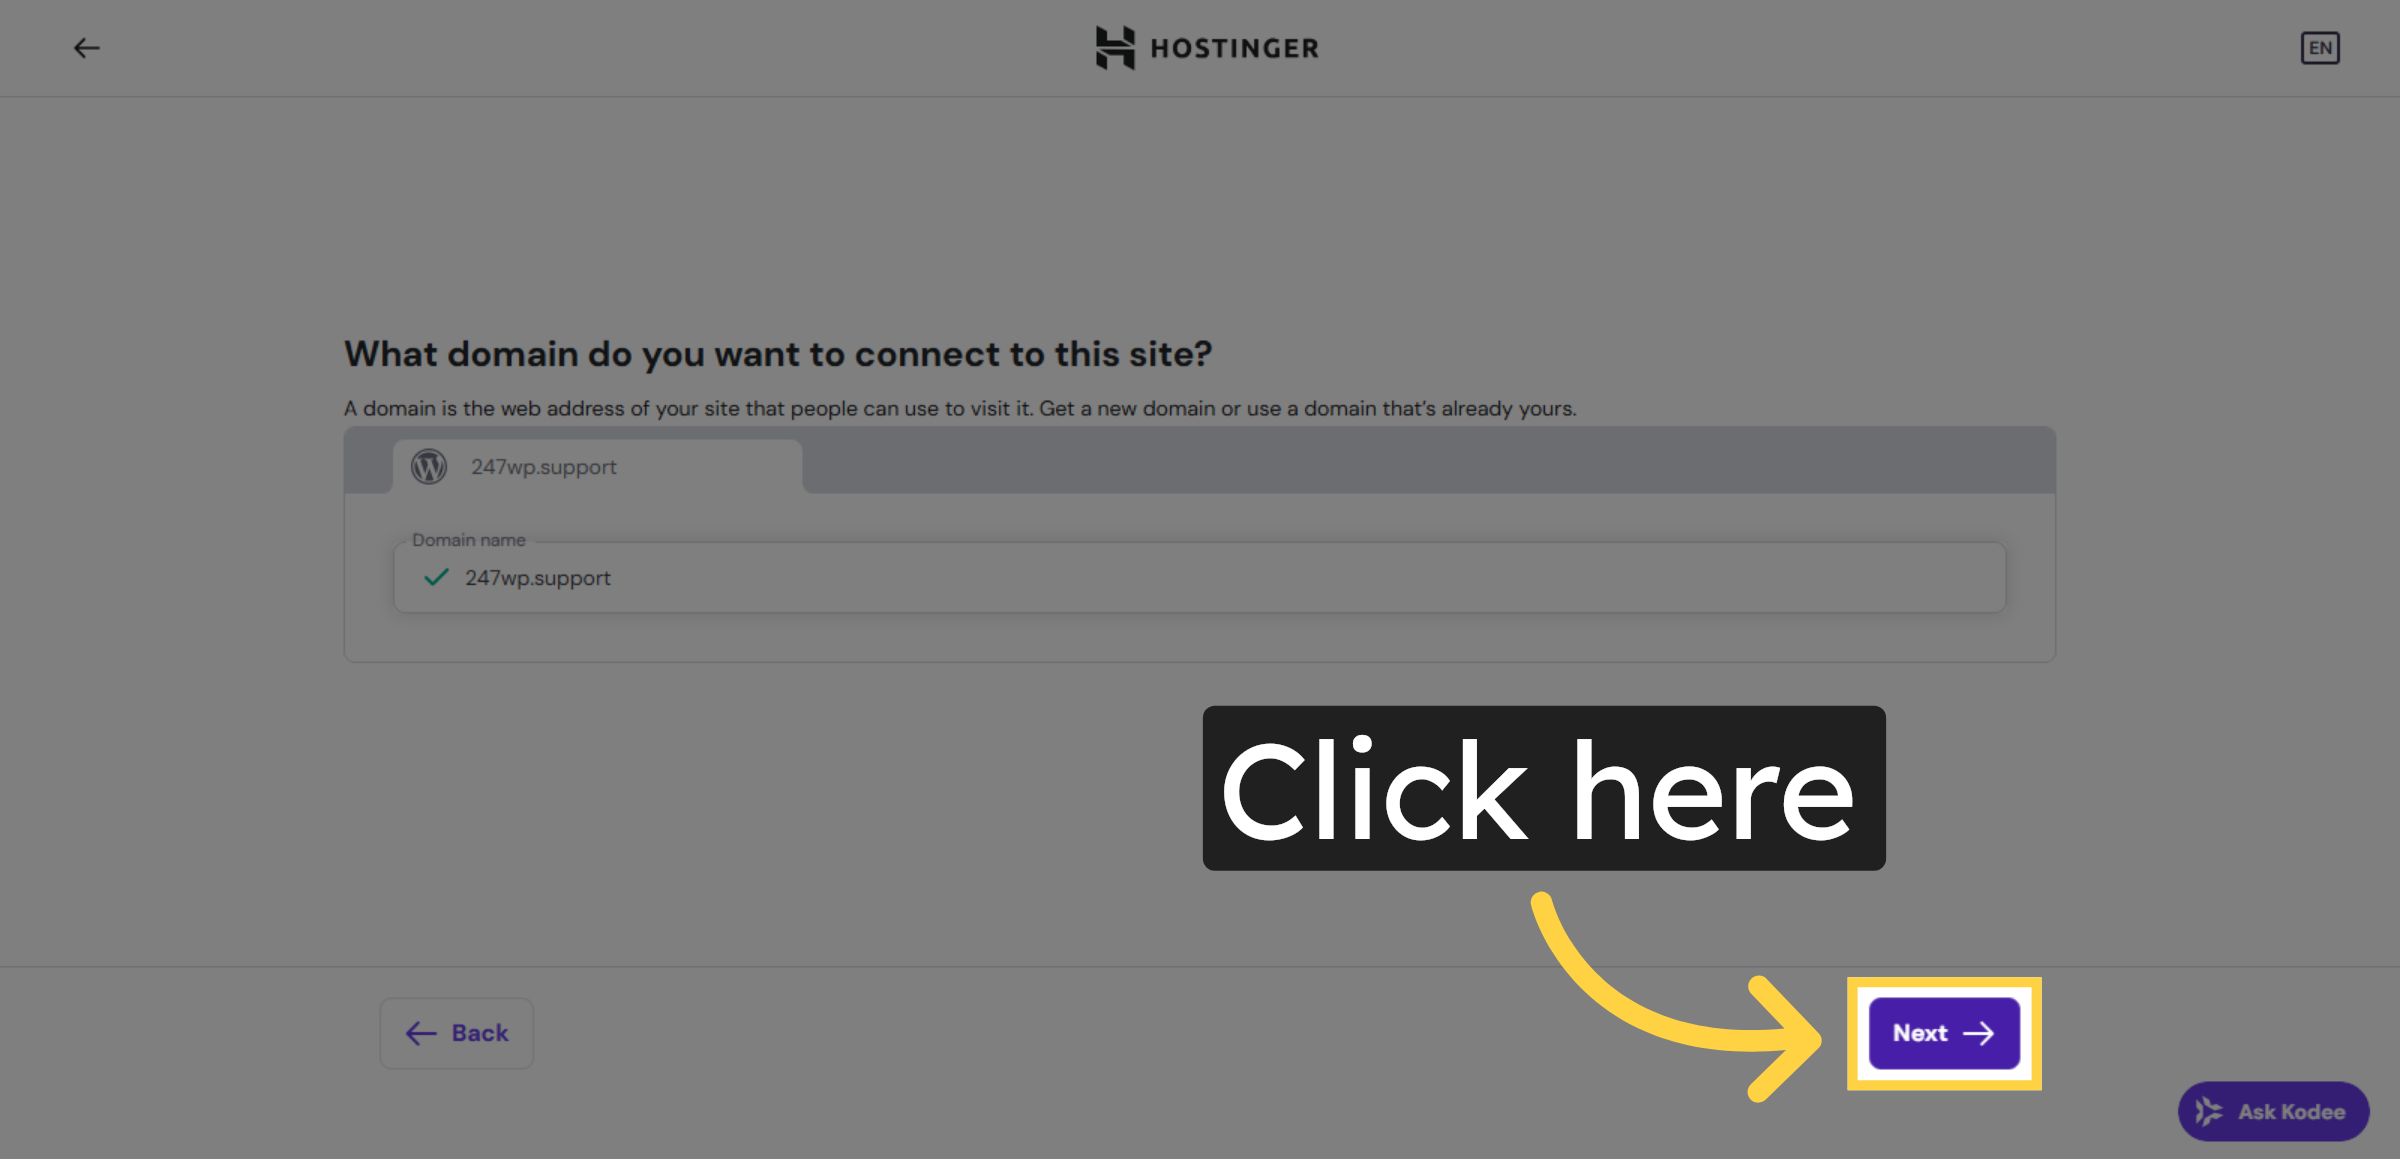
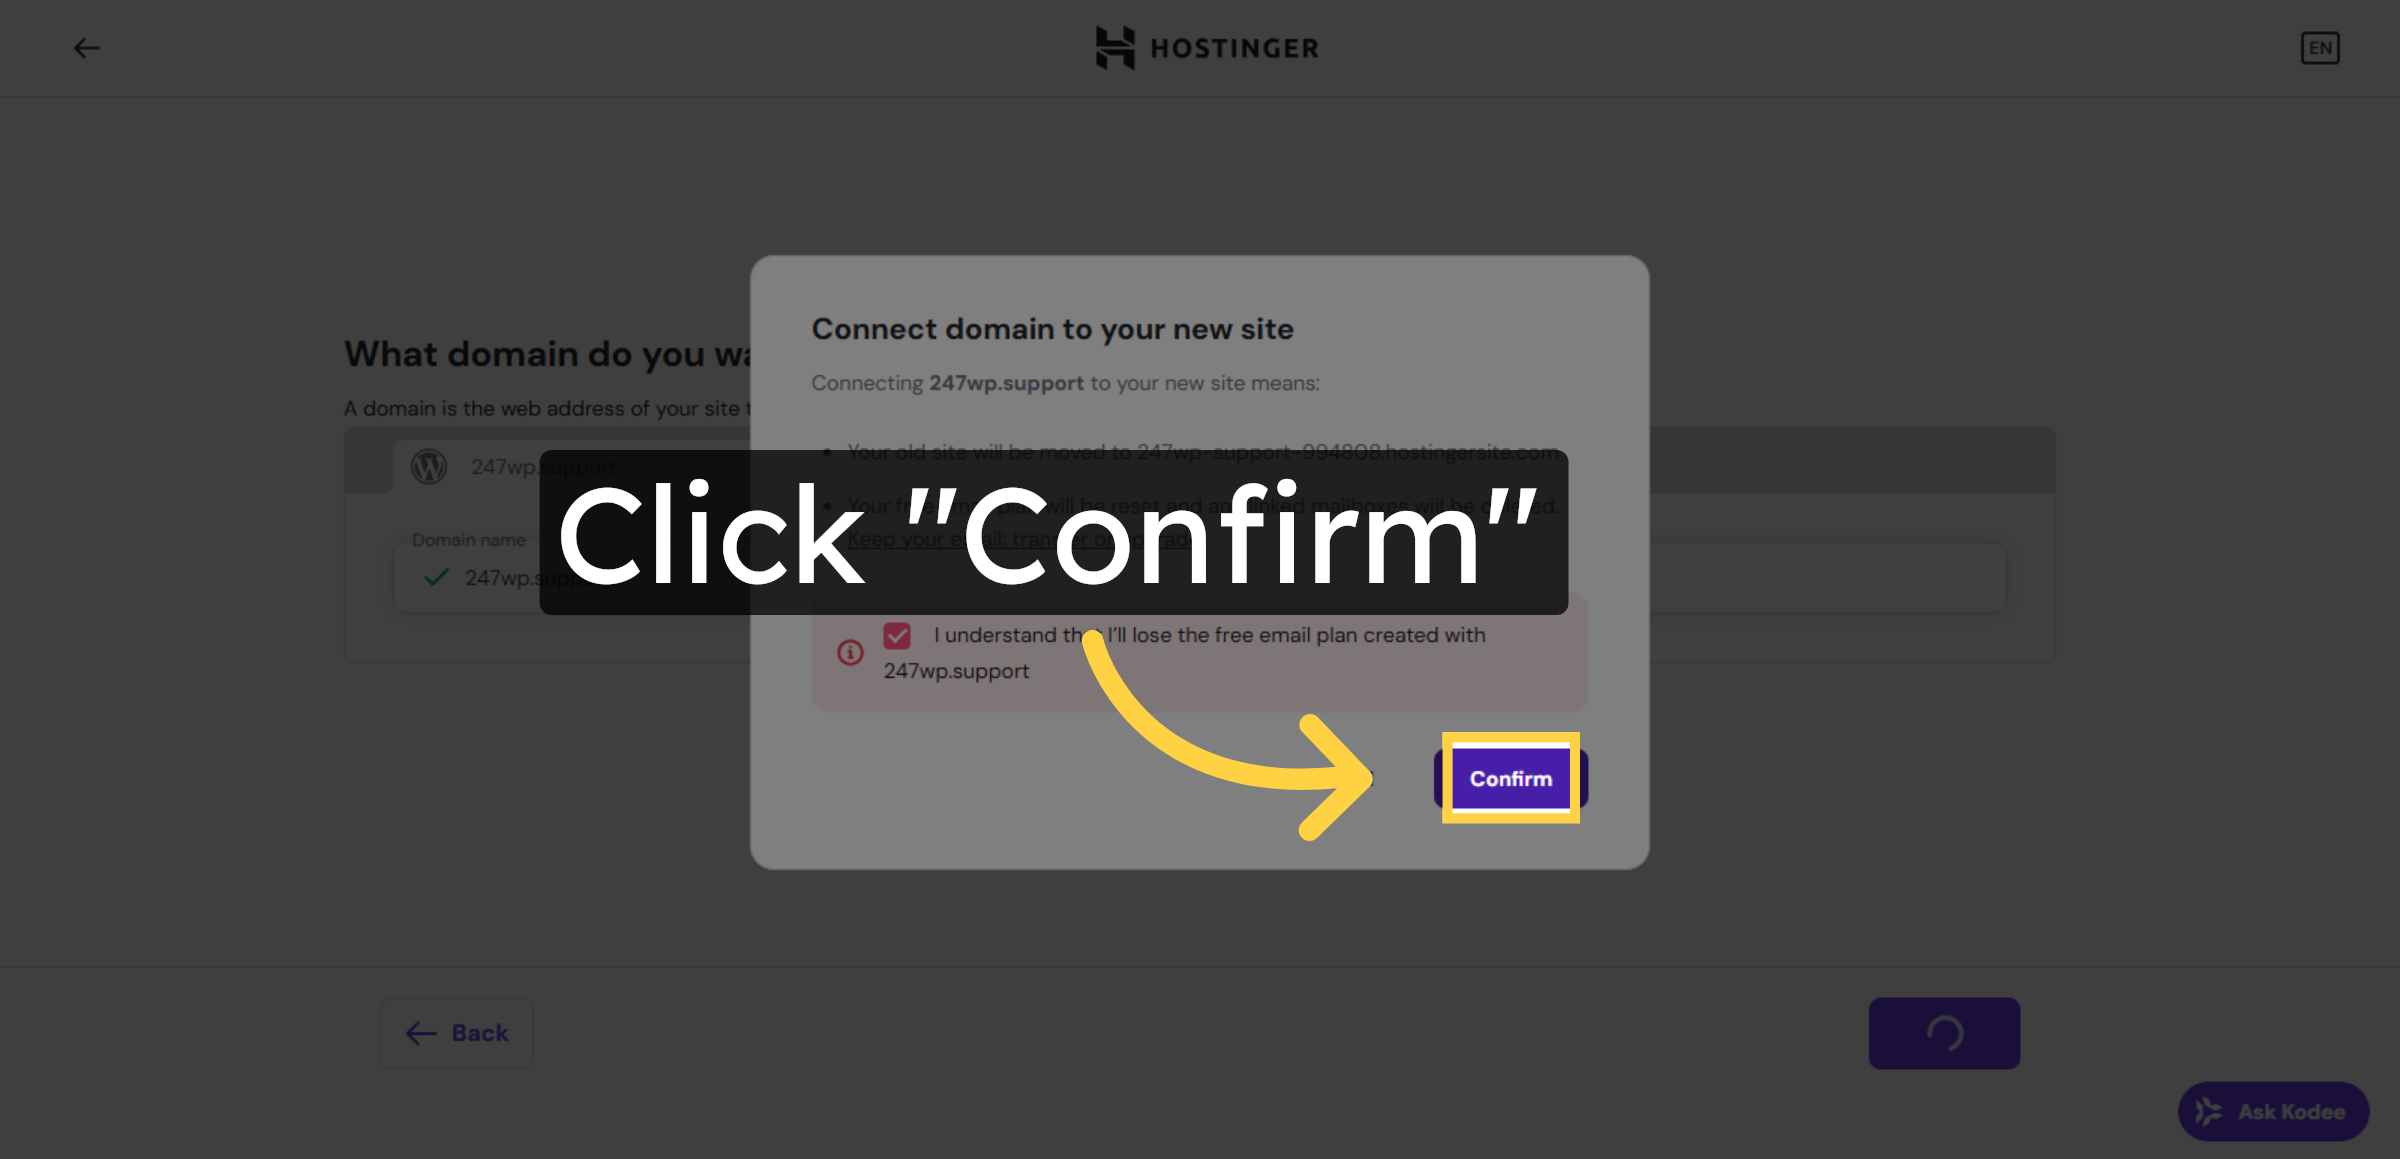
6. Confirm Domain Connection

Click the Confirm button to verify and save your domain connection settings.

Confirm Domain Connection

7. View Connection Guide

Click the Check guide button to access additional instructions and troubleshooting tips for your domain connection.

View Connection Guide

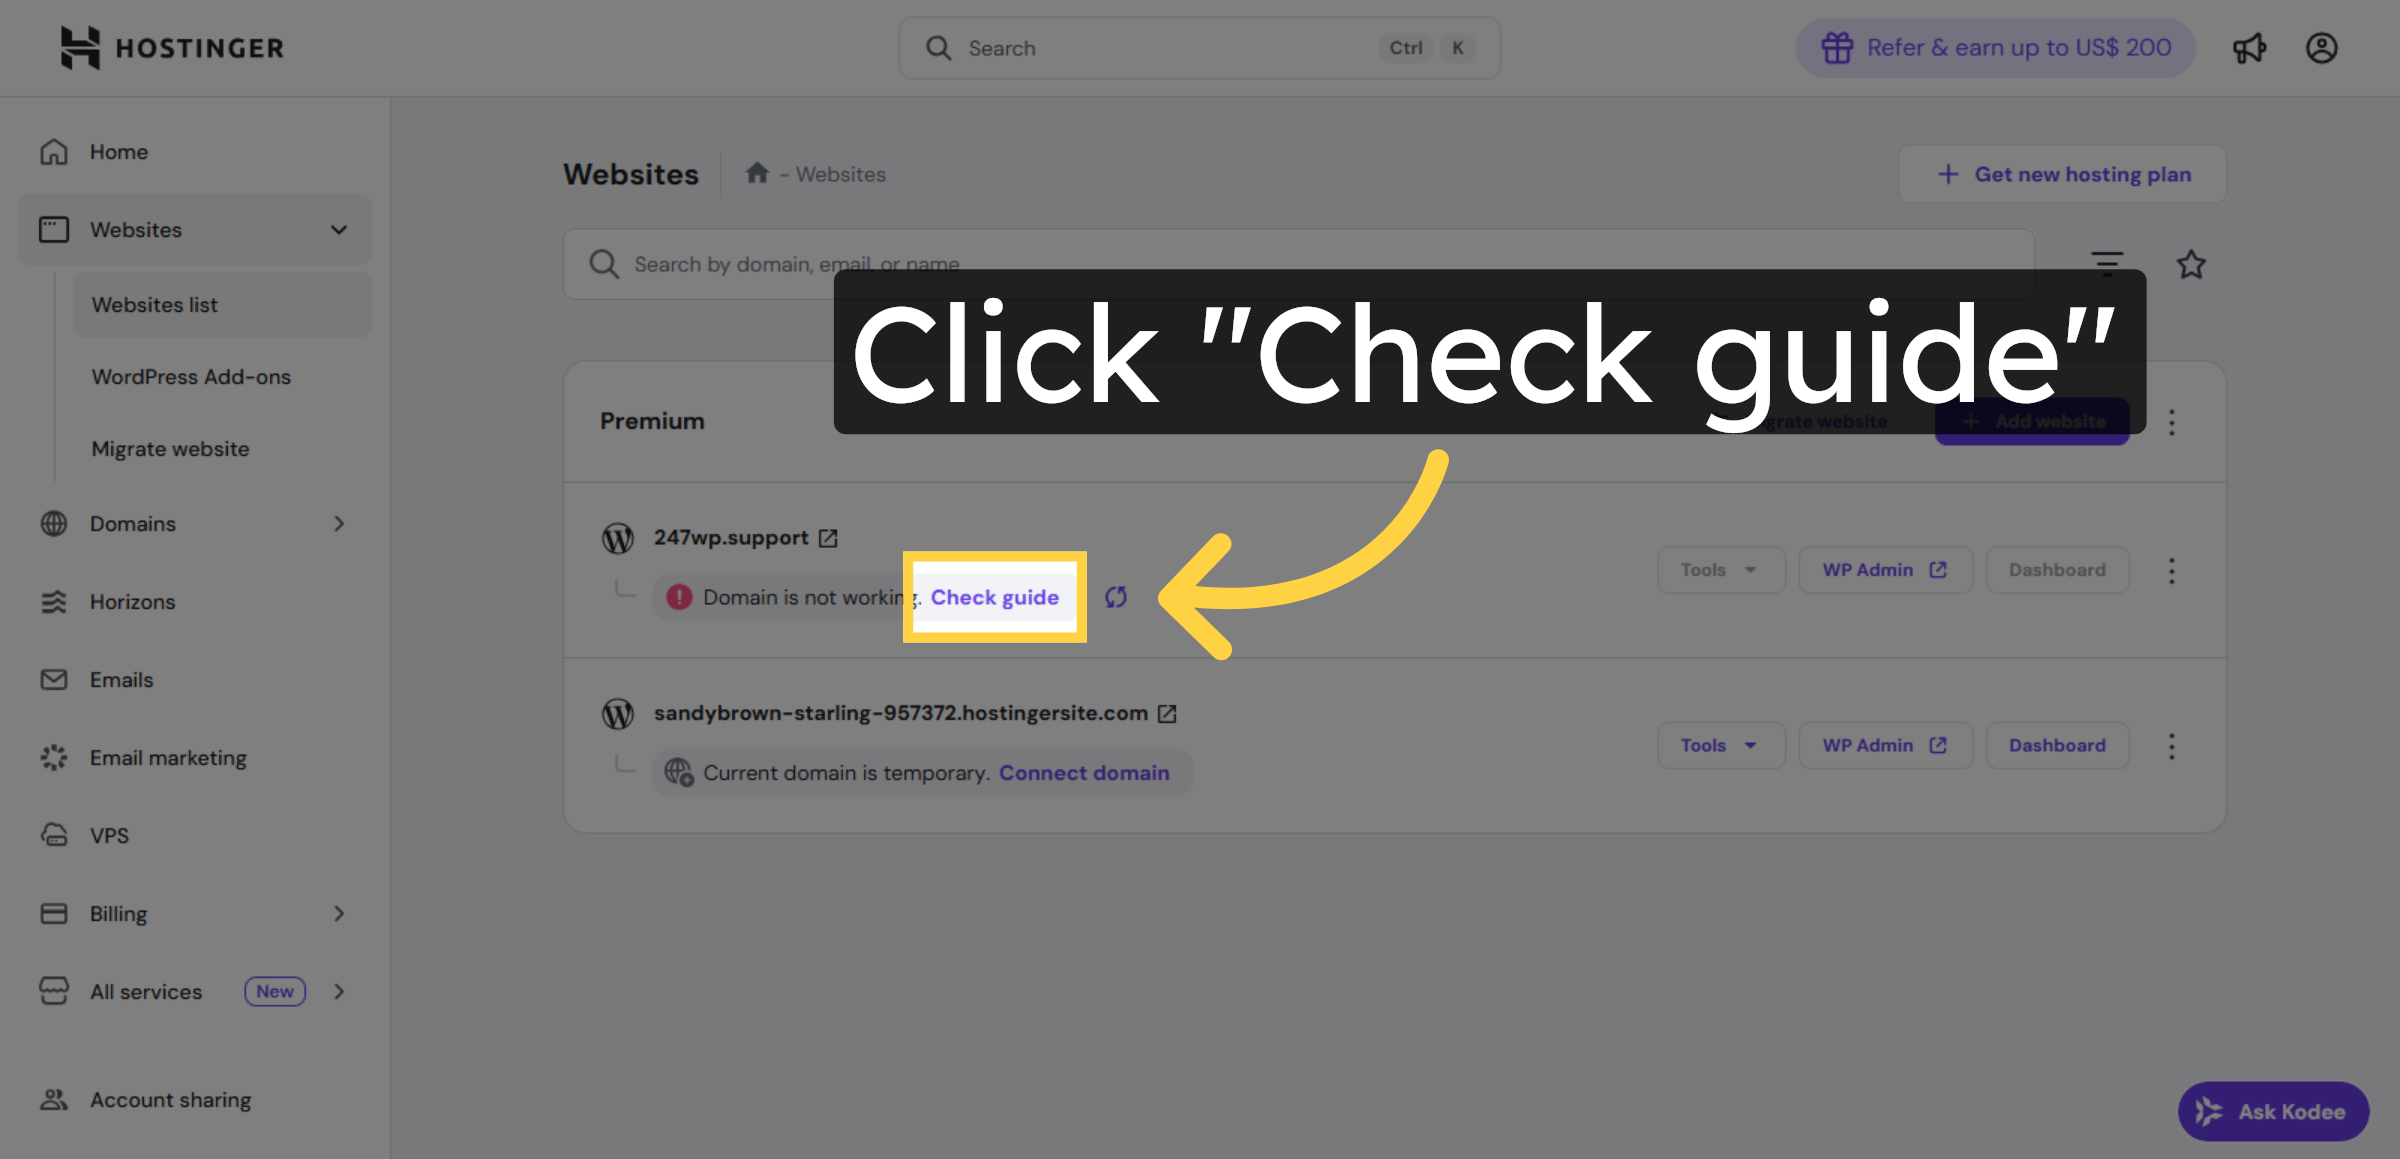
8. Connect Your Domain
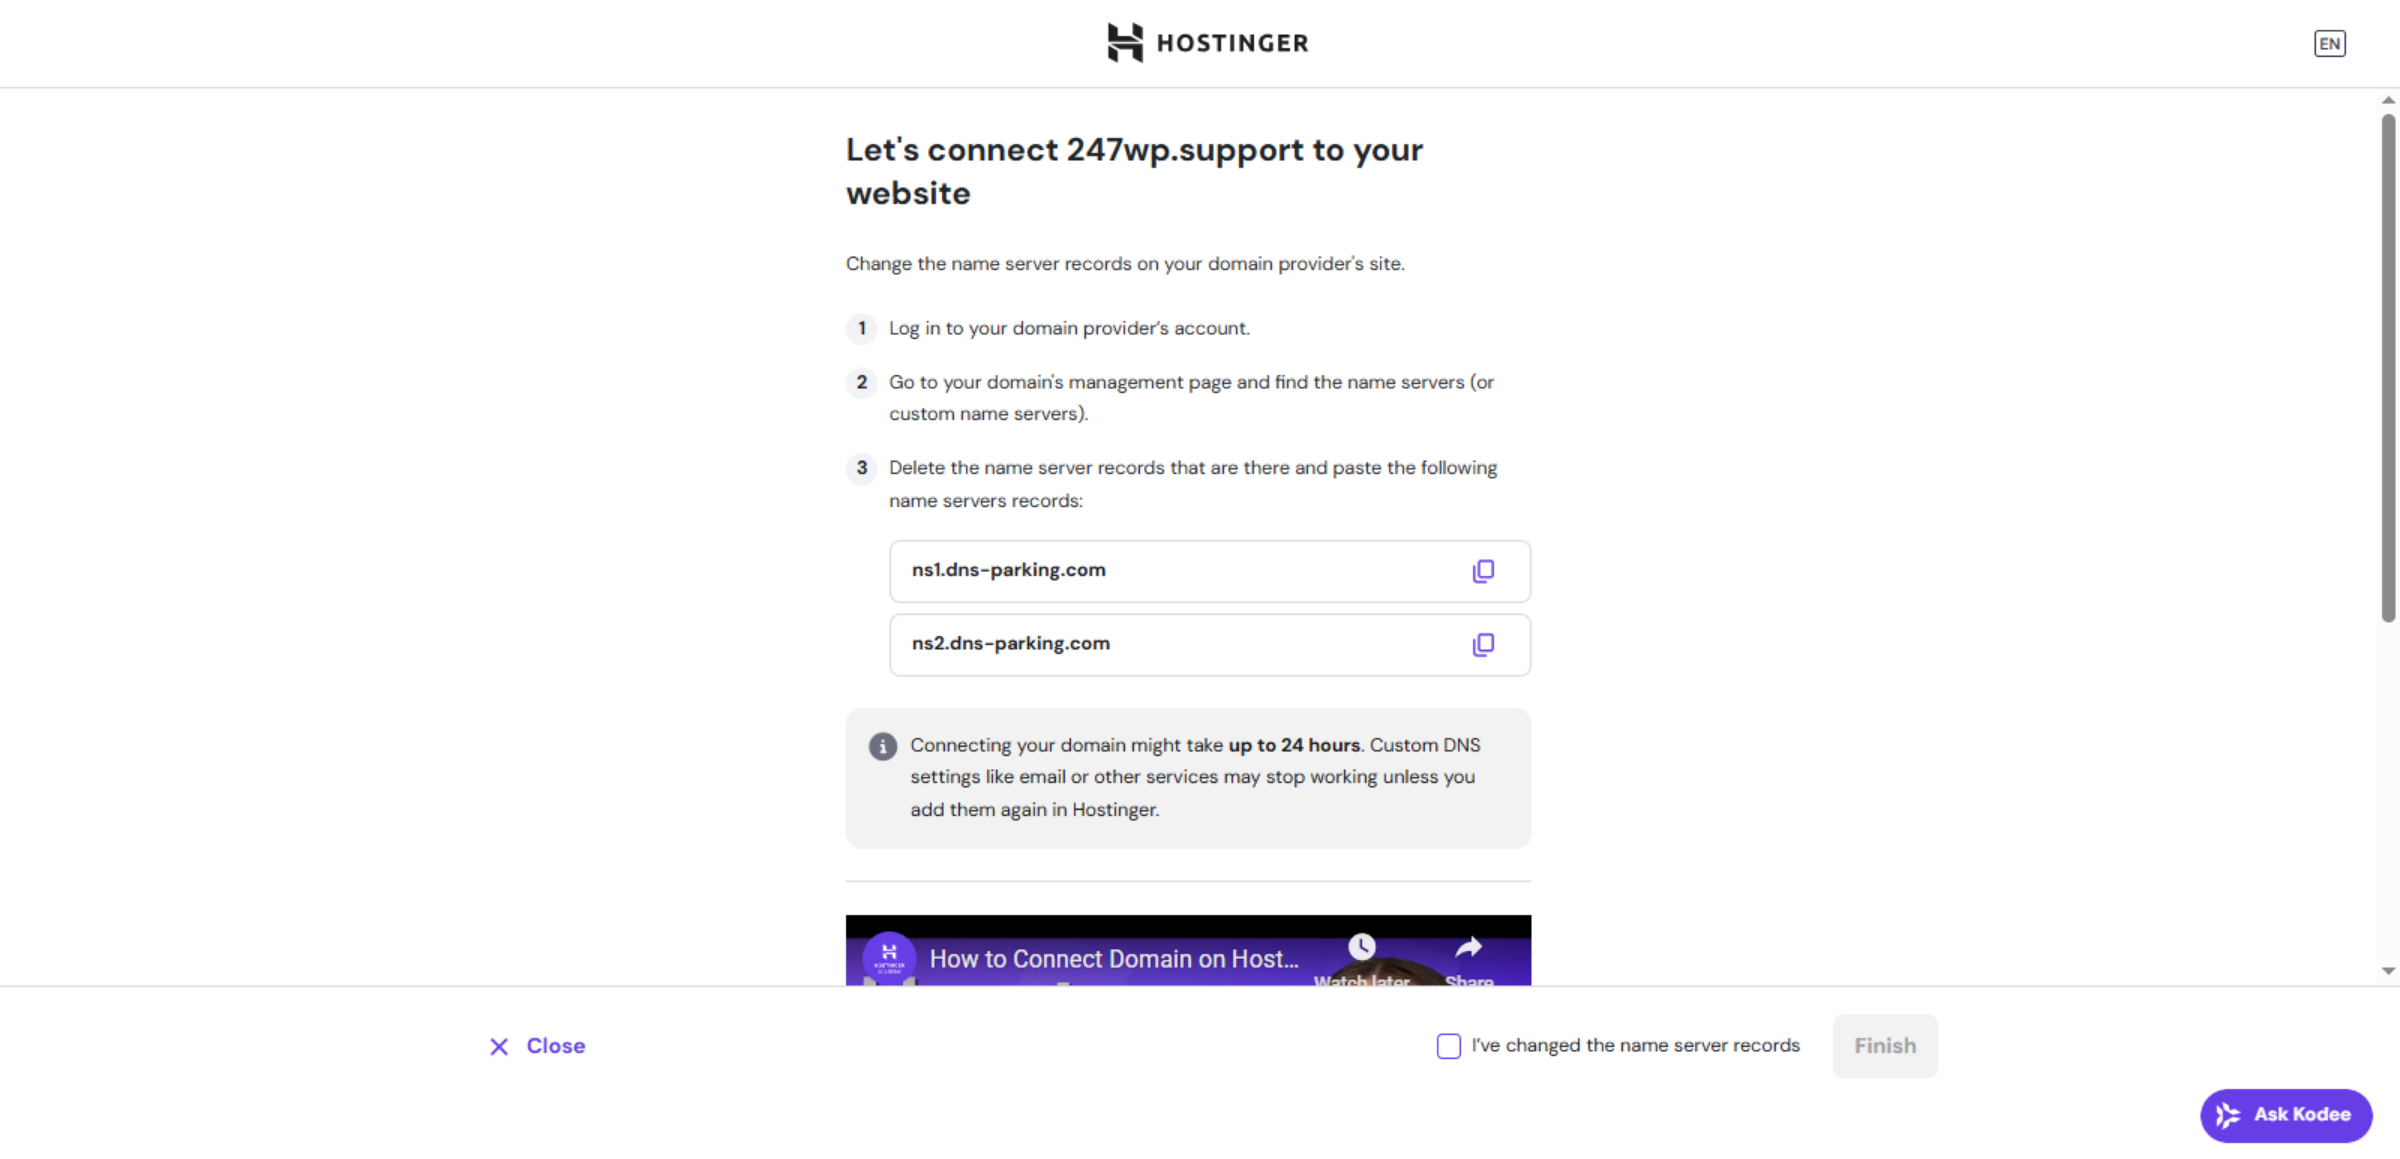
Update your domain’s name servers to ns1.dns-parking.com and ns2.dns-parking.com.Changes may take up to 24 hours to apply.

Connect Your Domain

9. Note

Note

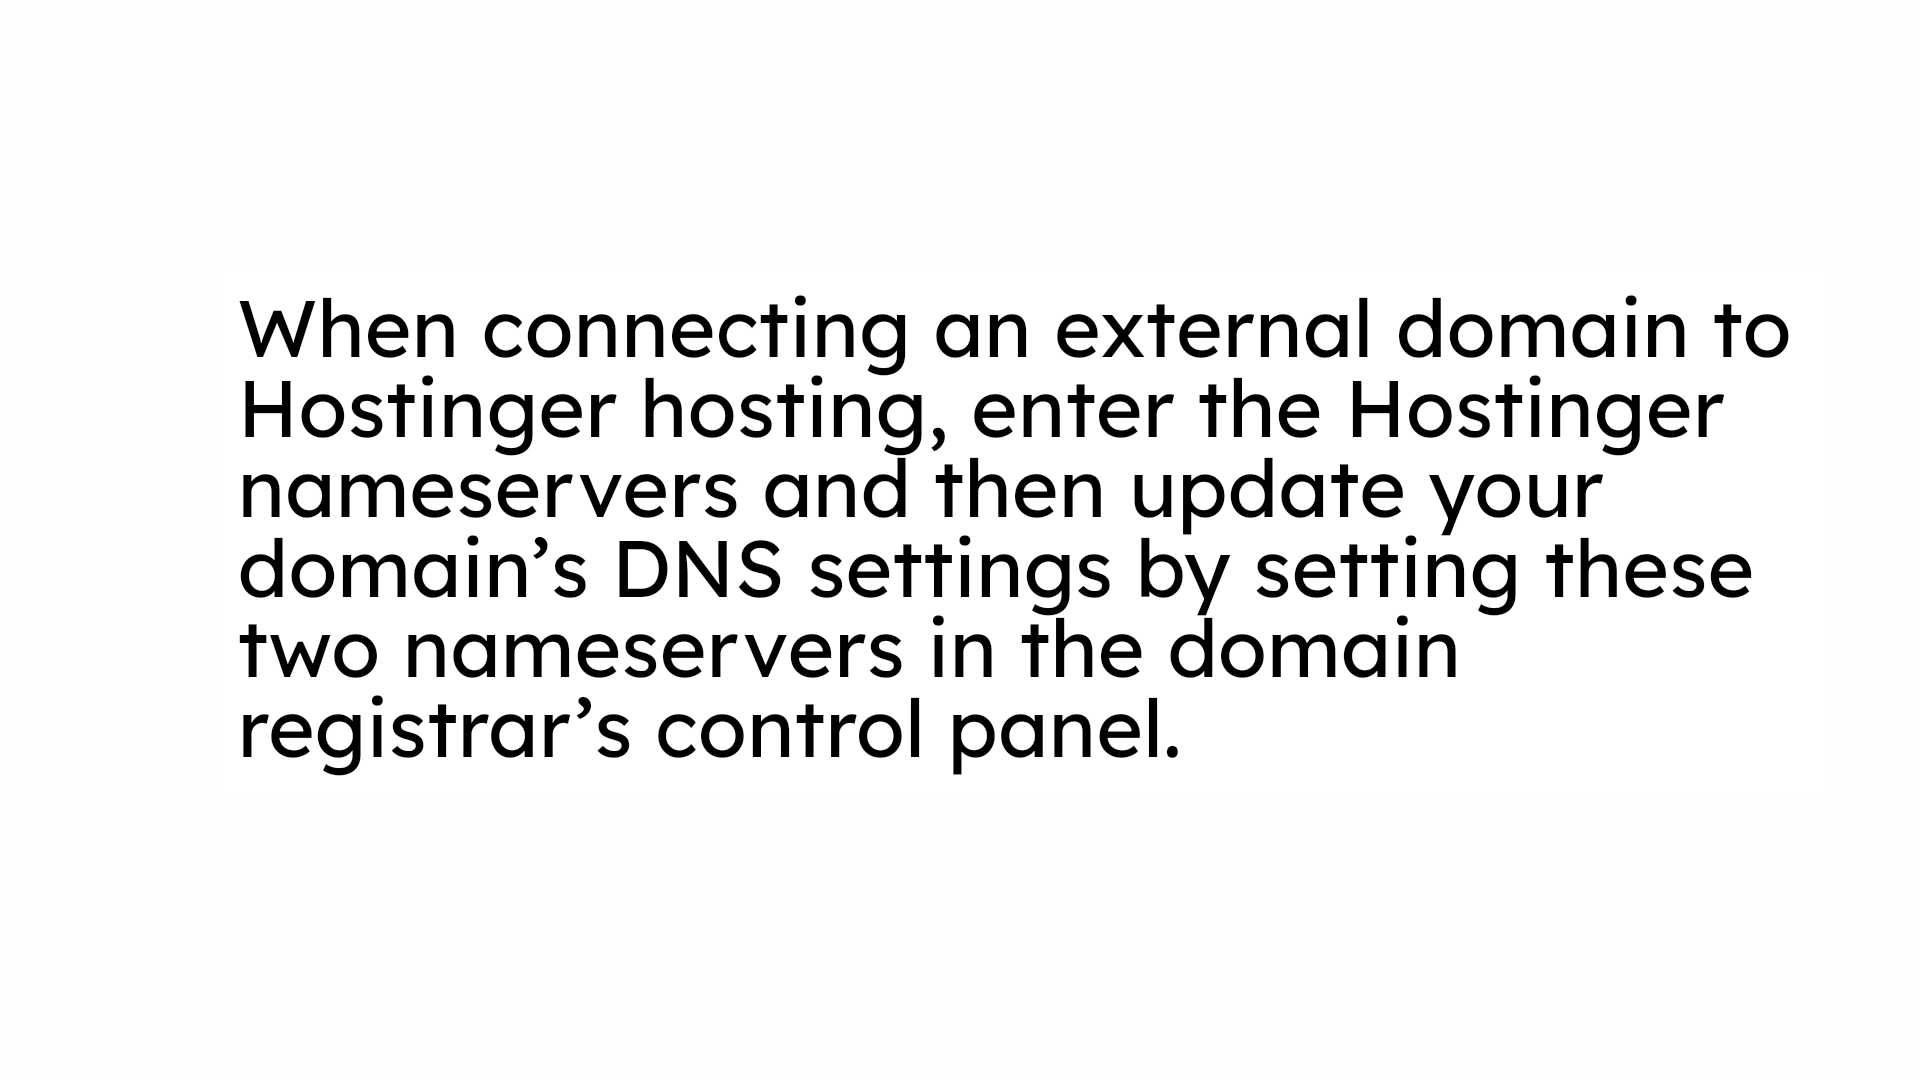
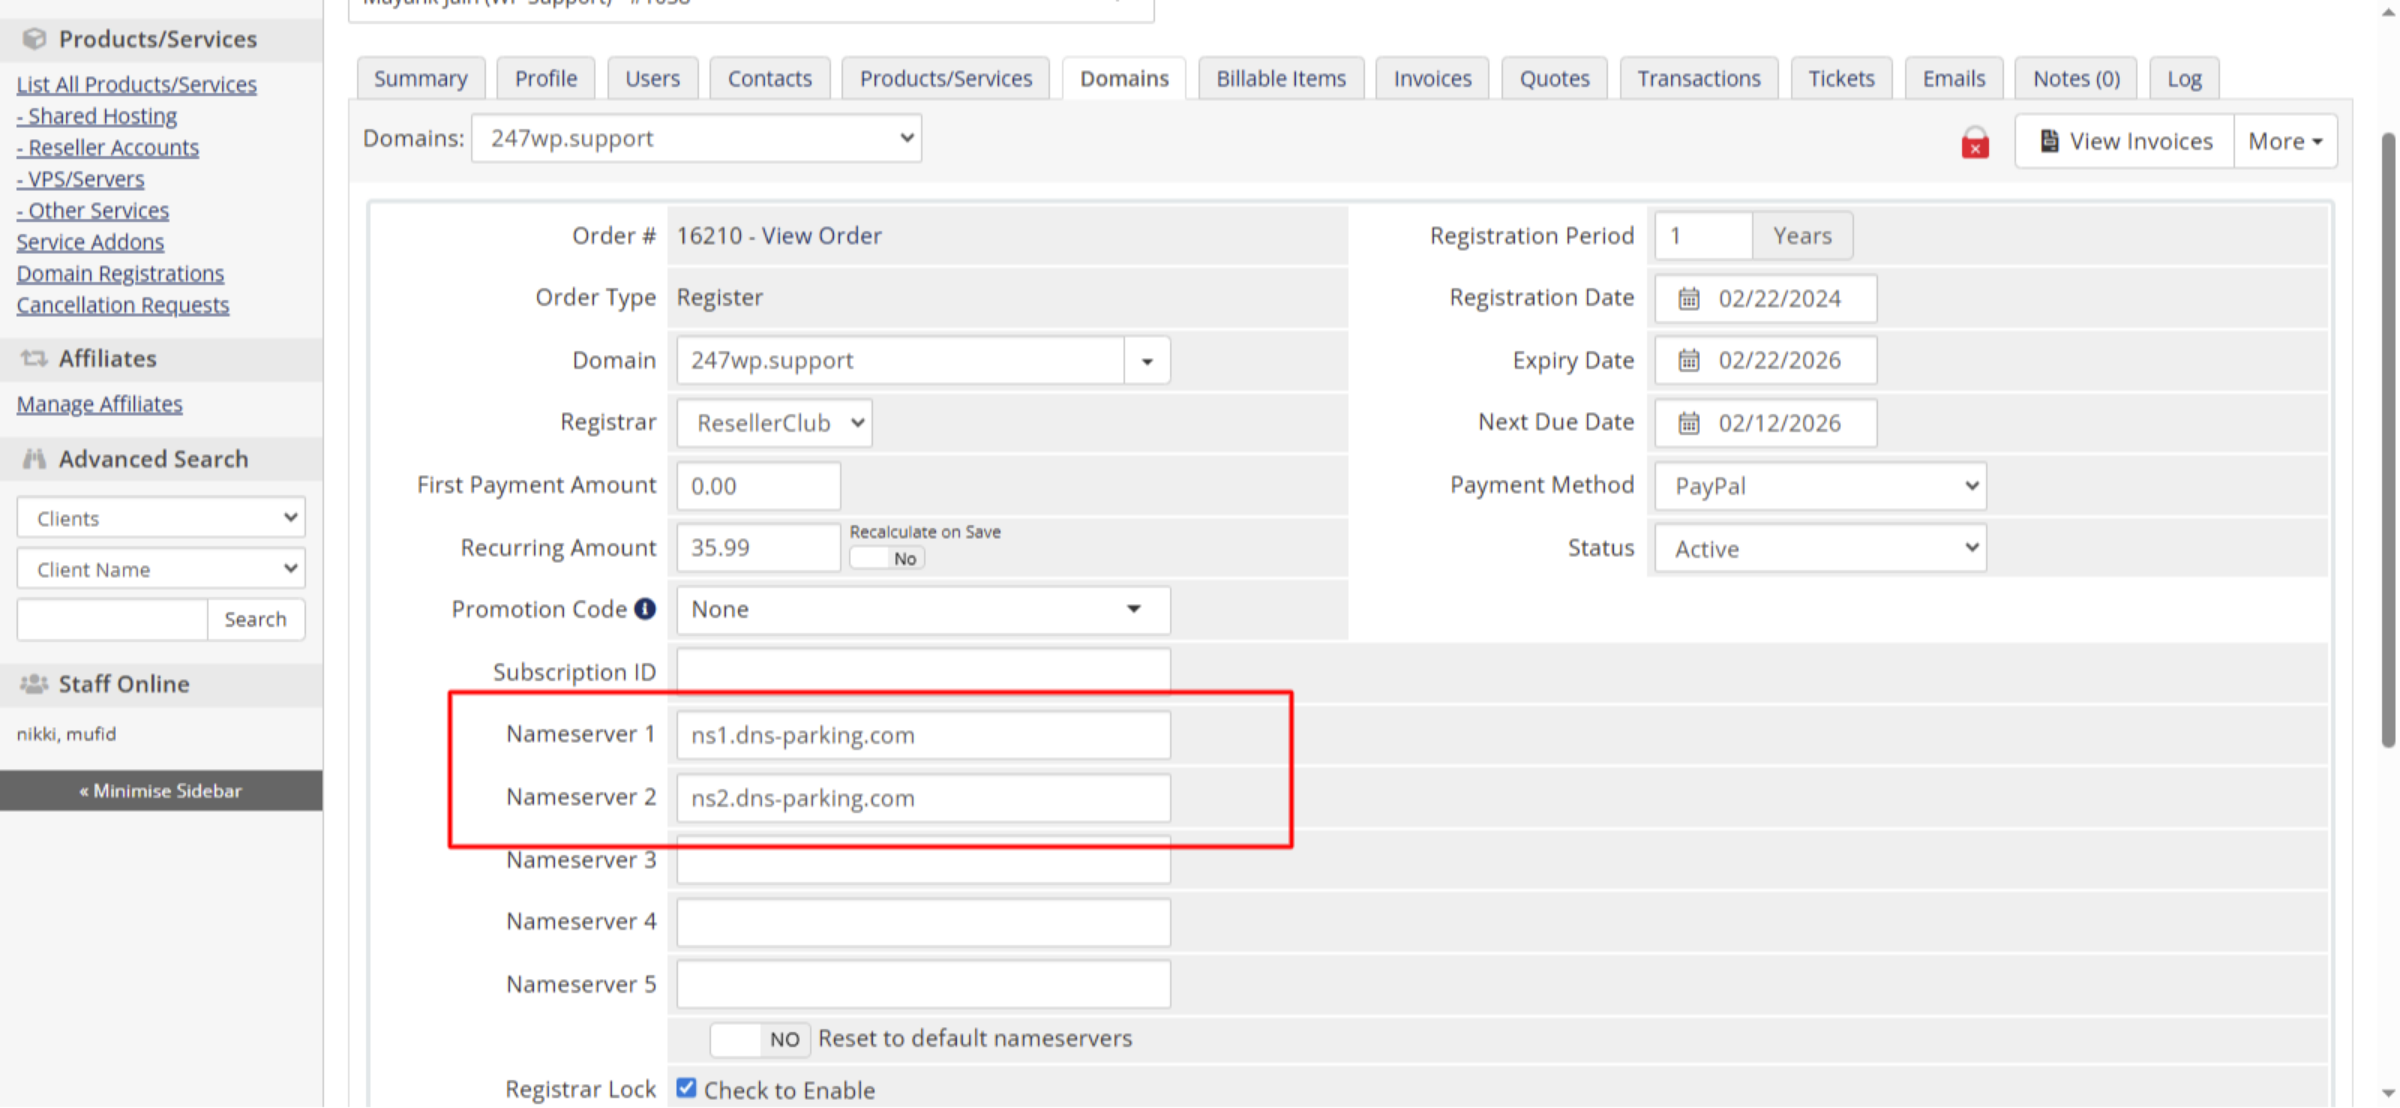
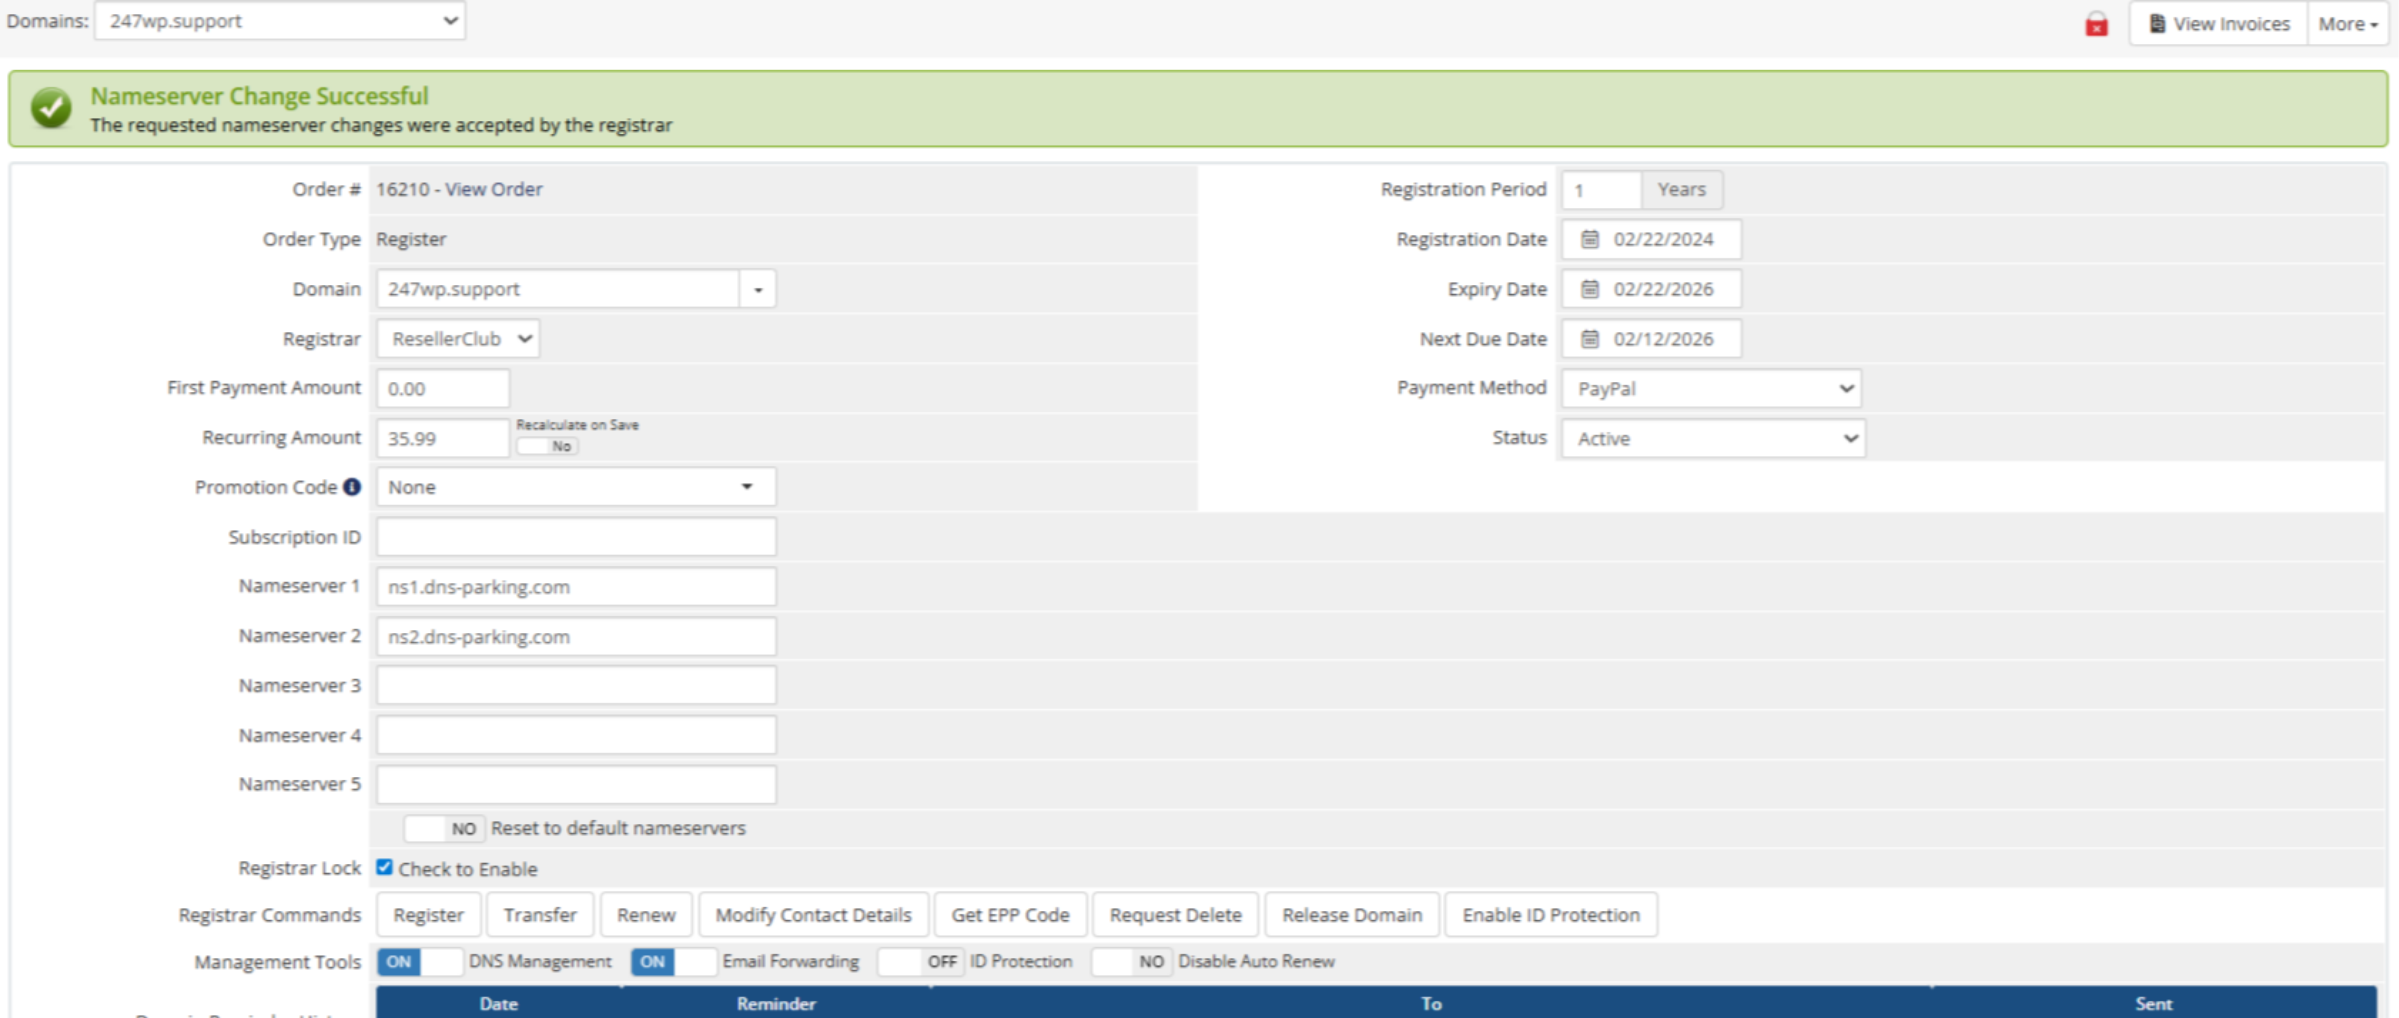
10. Setting Up Nameservers to Link Your Domain

Enter the Hostinger nameservers in your domain registrar’s DNS settings to link your domain to Hostinger hosting.

Setting Up Nameservers to Link Your Domain

Ad Banner

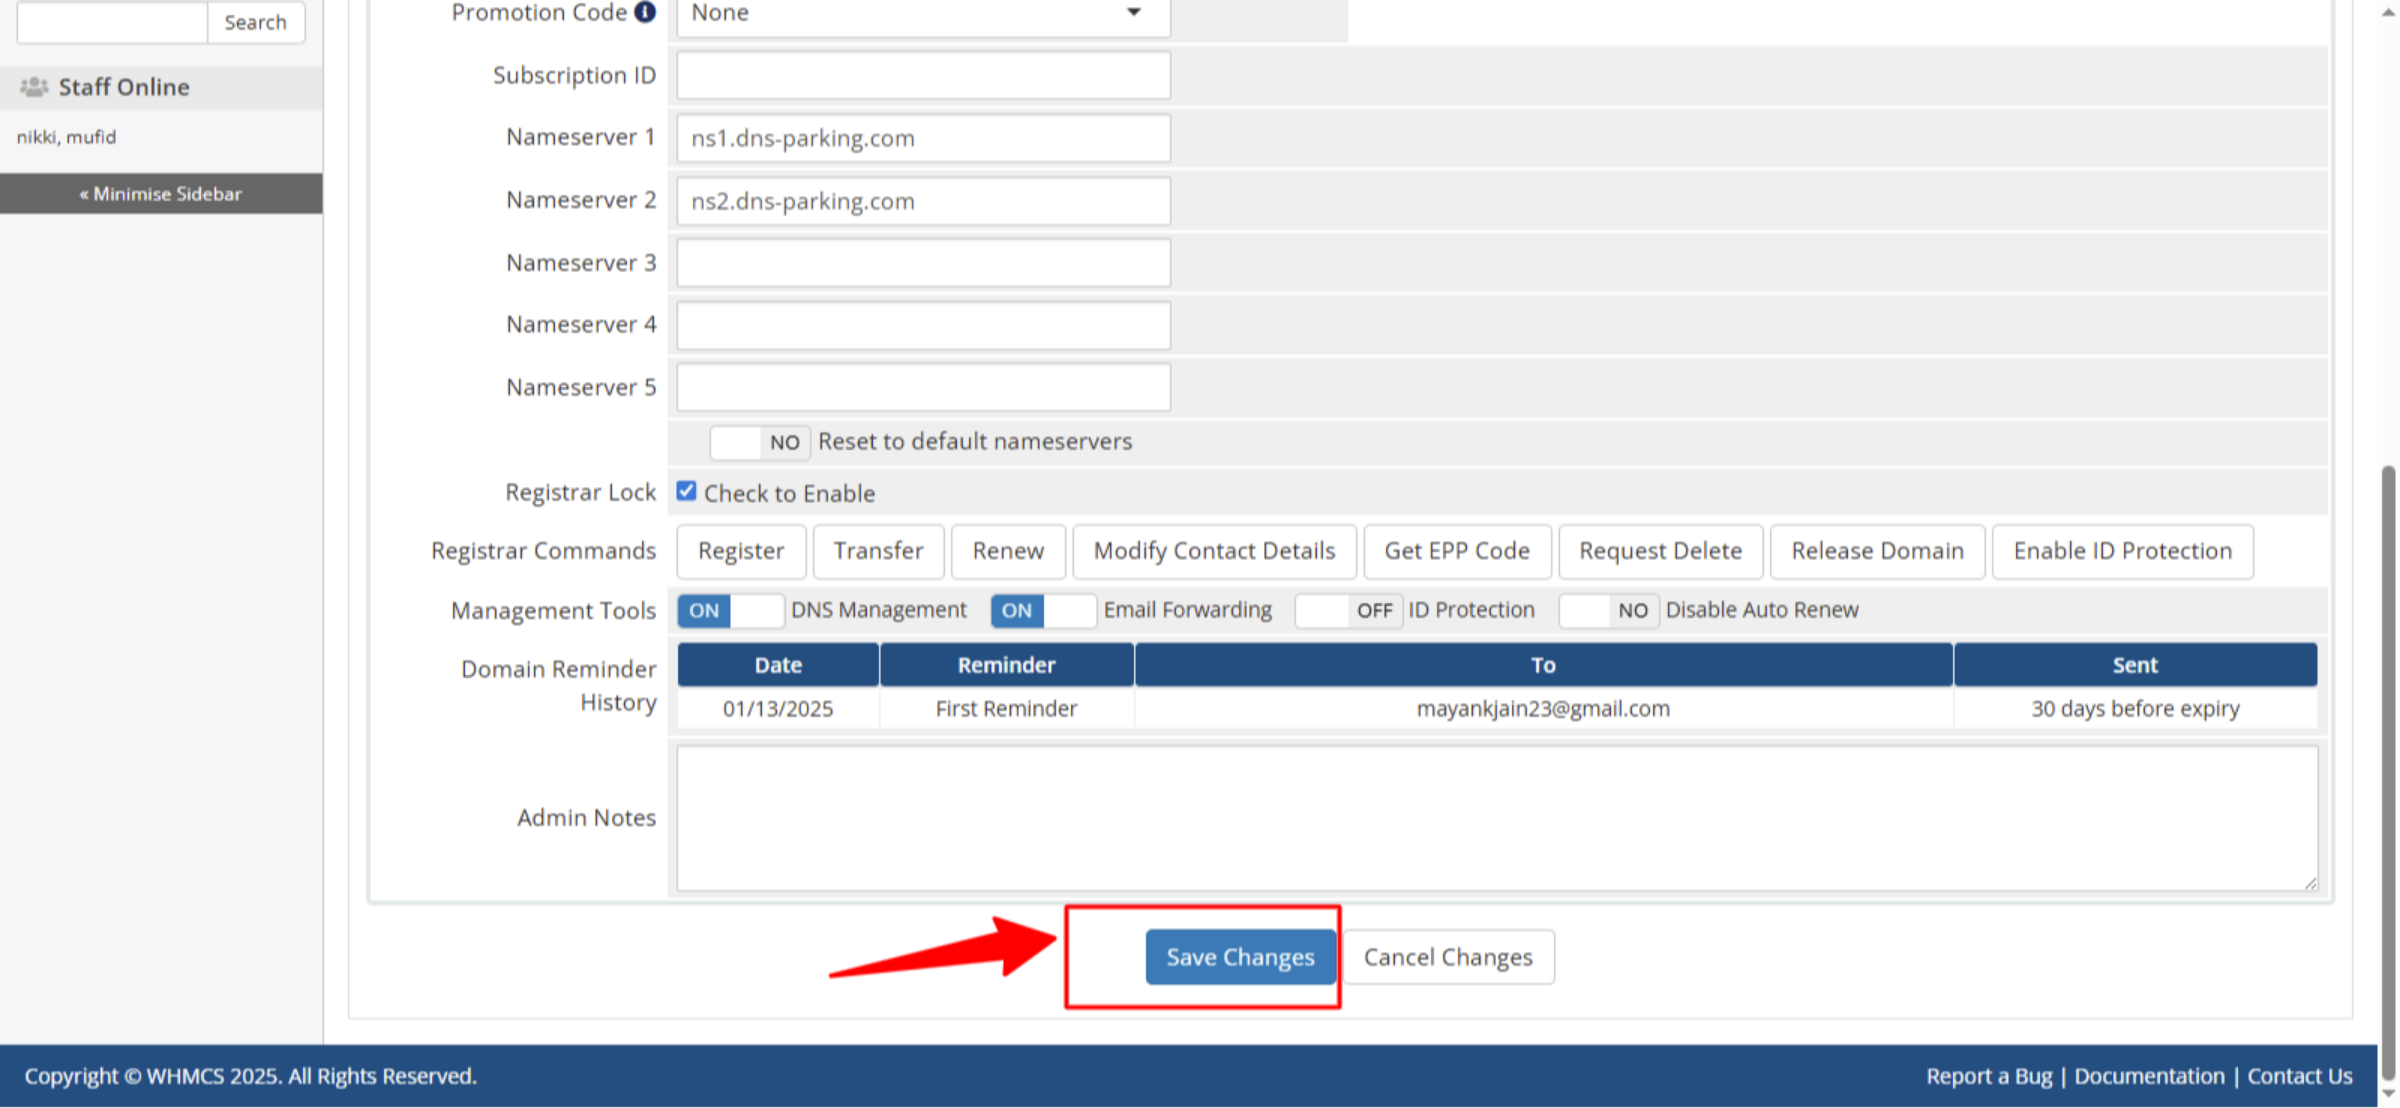
11. Click Save Changes

After successfully setting up the nameservers in your domain settings, your domain will be connected to Hostinger hosting.

Click Save Changes

12. Nameserver Changes Successful

The nameserver changes were successful, and your domain is now connected to Hostinger hosting.

Nameserver Changes Successful

13. Proceed with Domain Setup

Click the indicated link or button to continue with the domain connection setup within Hostinger’s interface.

Proceed with Domain Setup

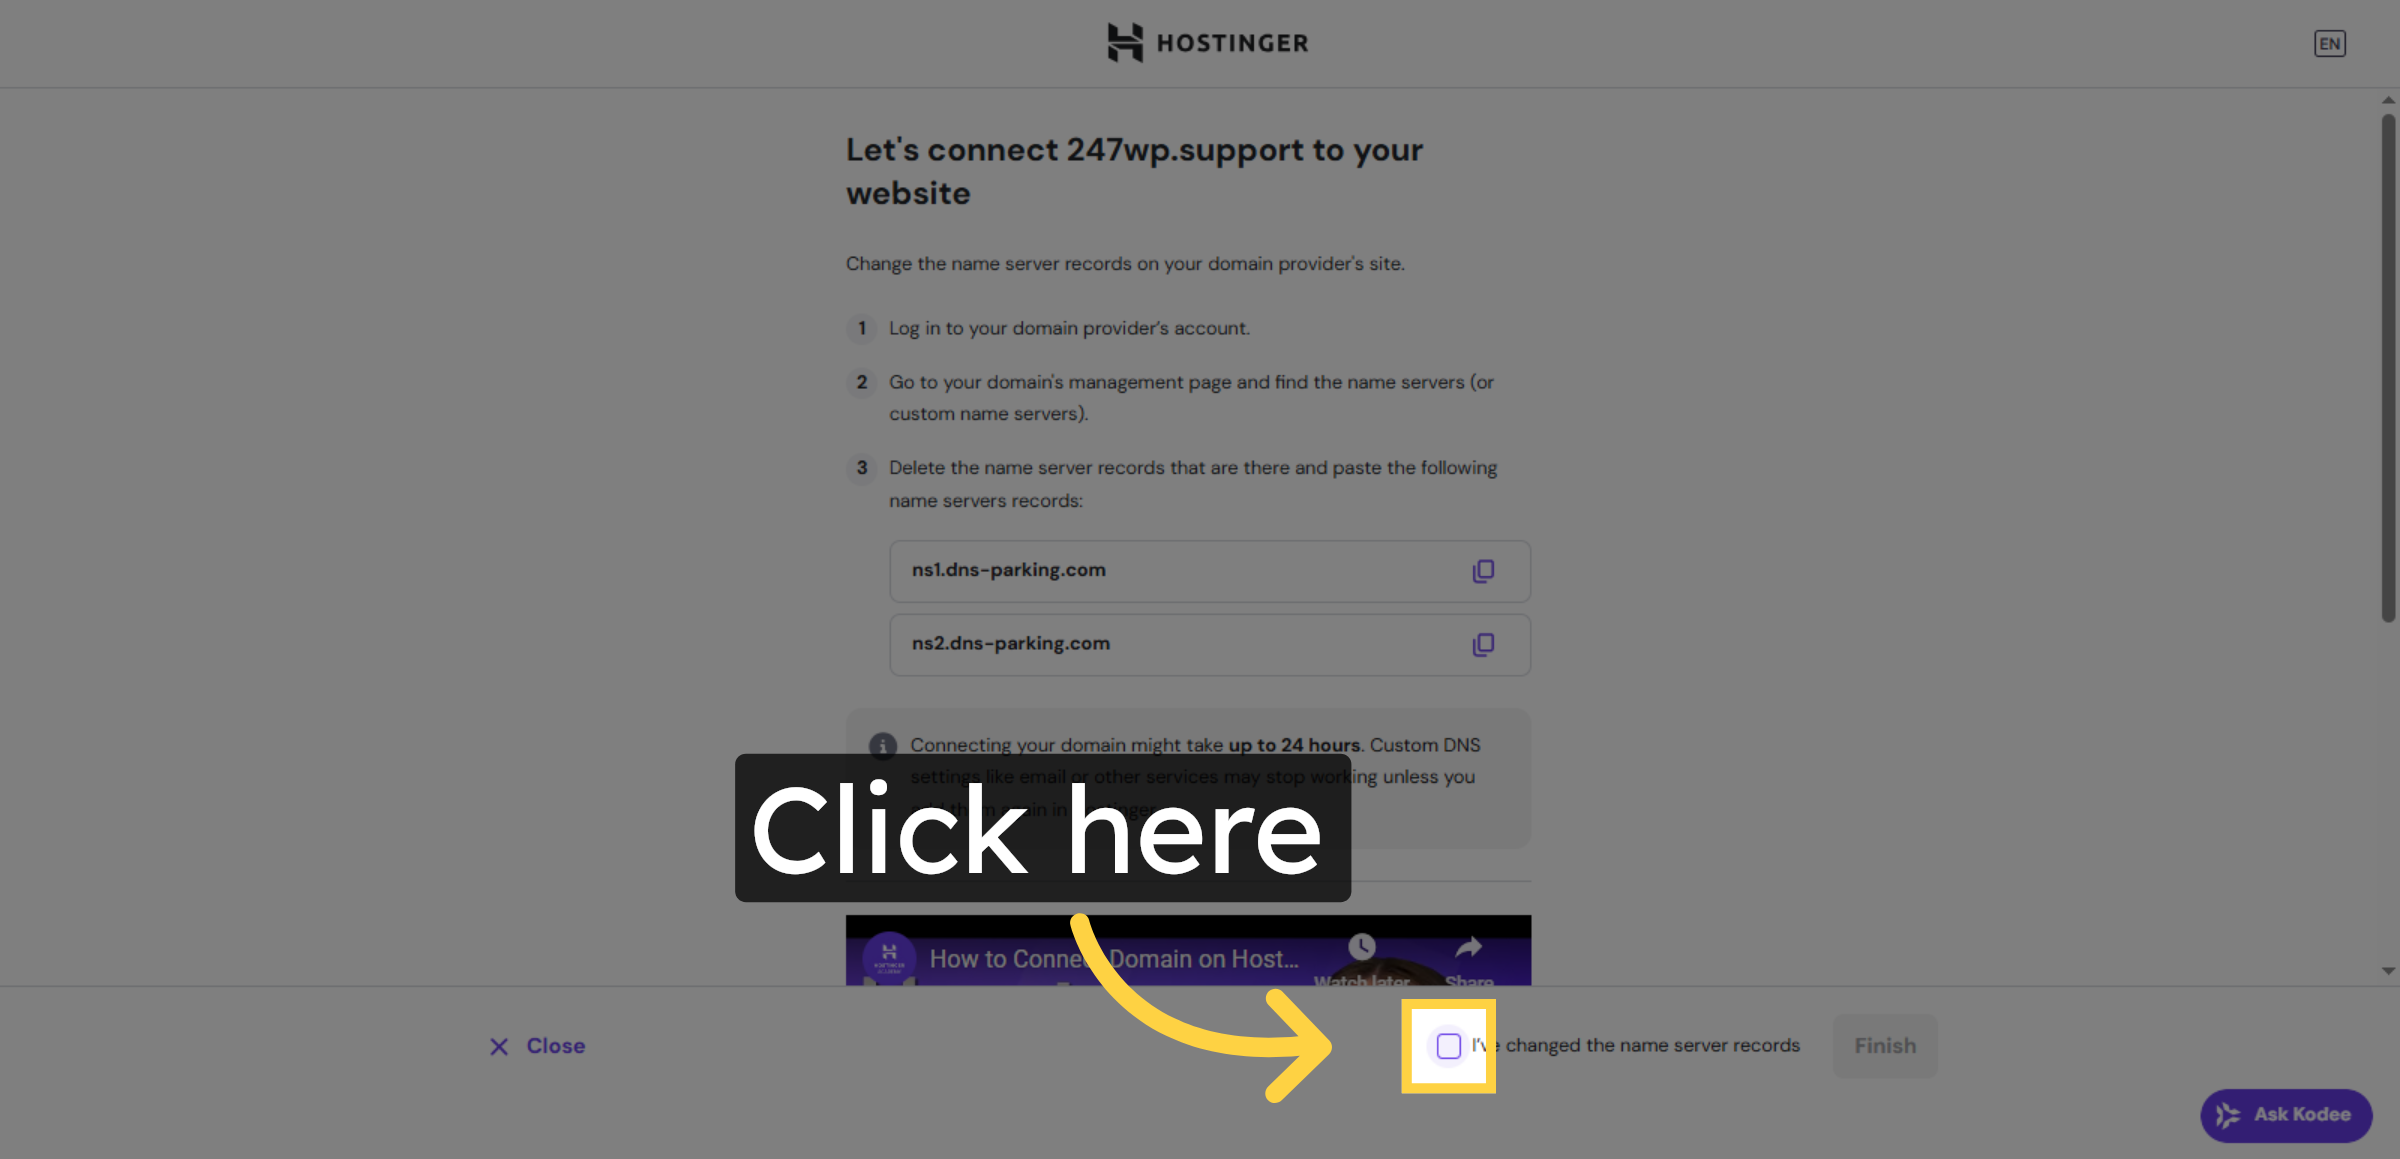
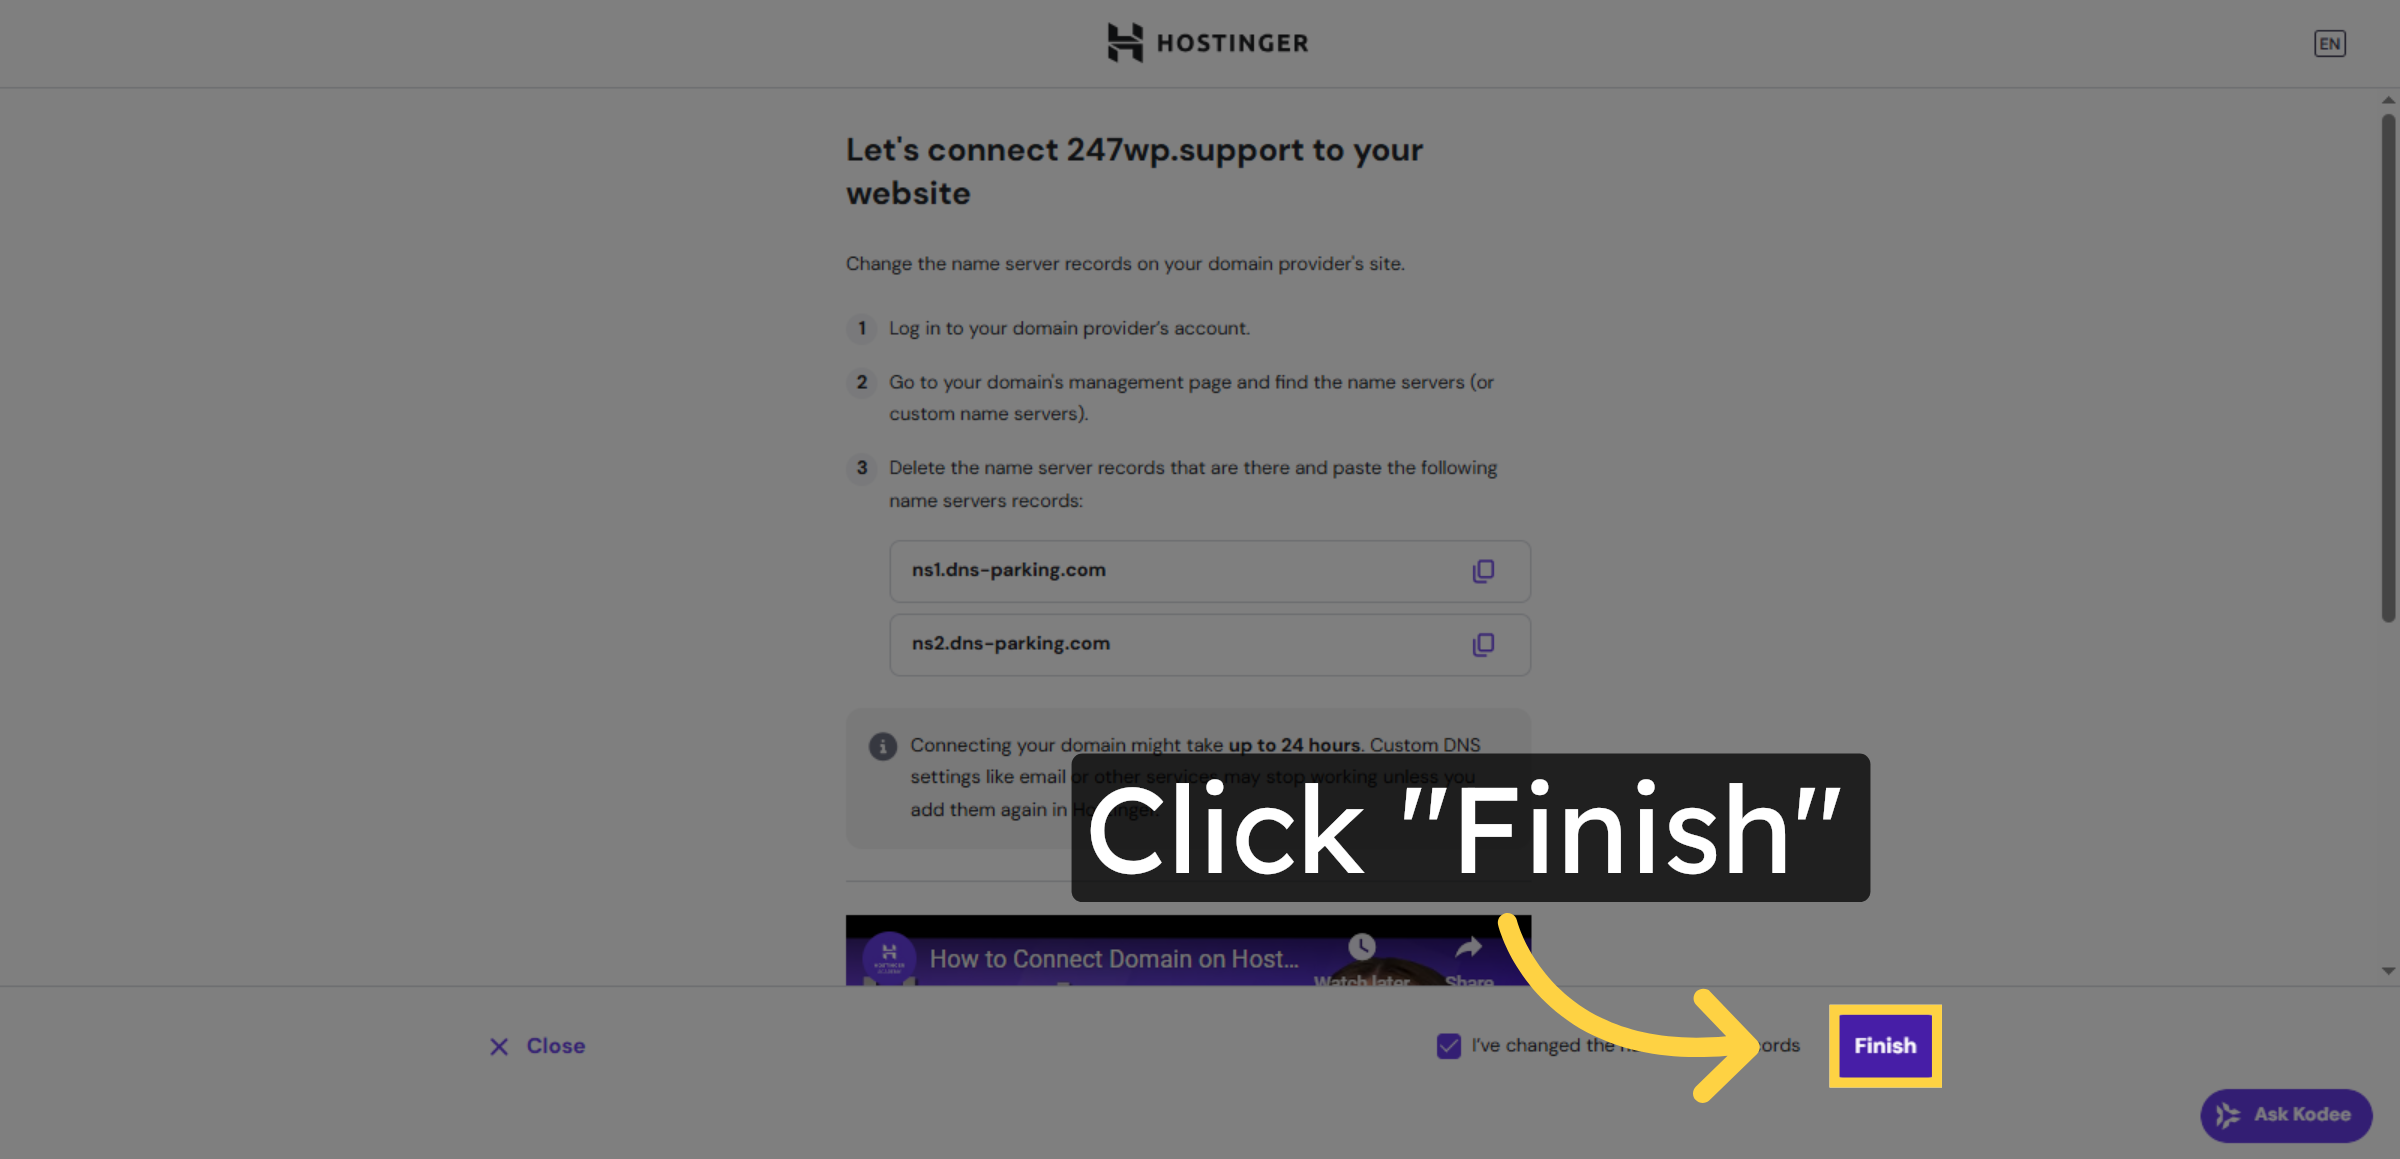
14. Complete Domain Connection

Click “Finish” to finalize the domain connection process and apply the changes you made to the name server records.

Complete Domain Connection

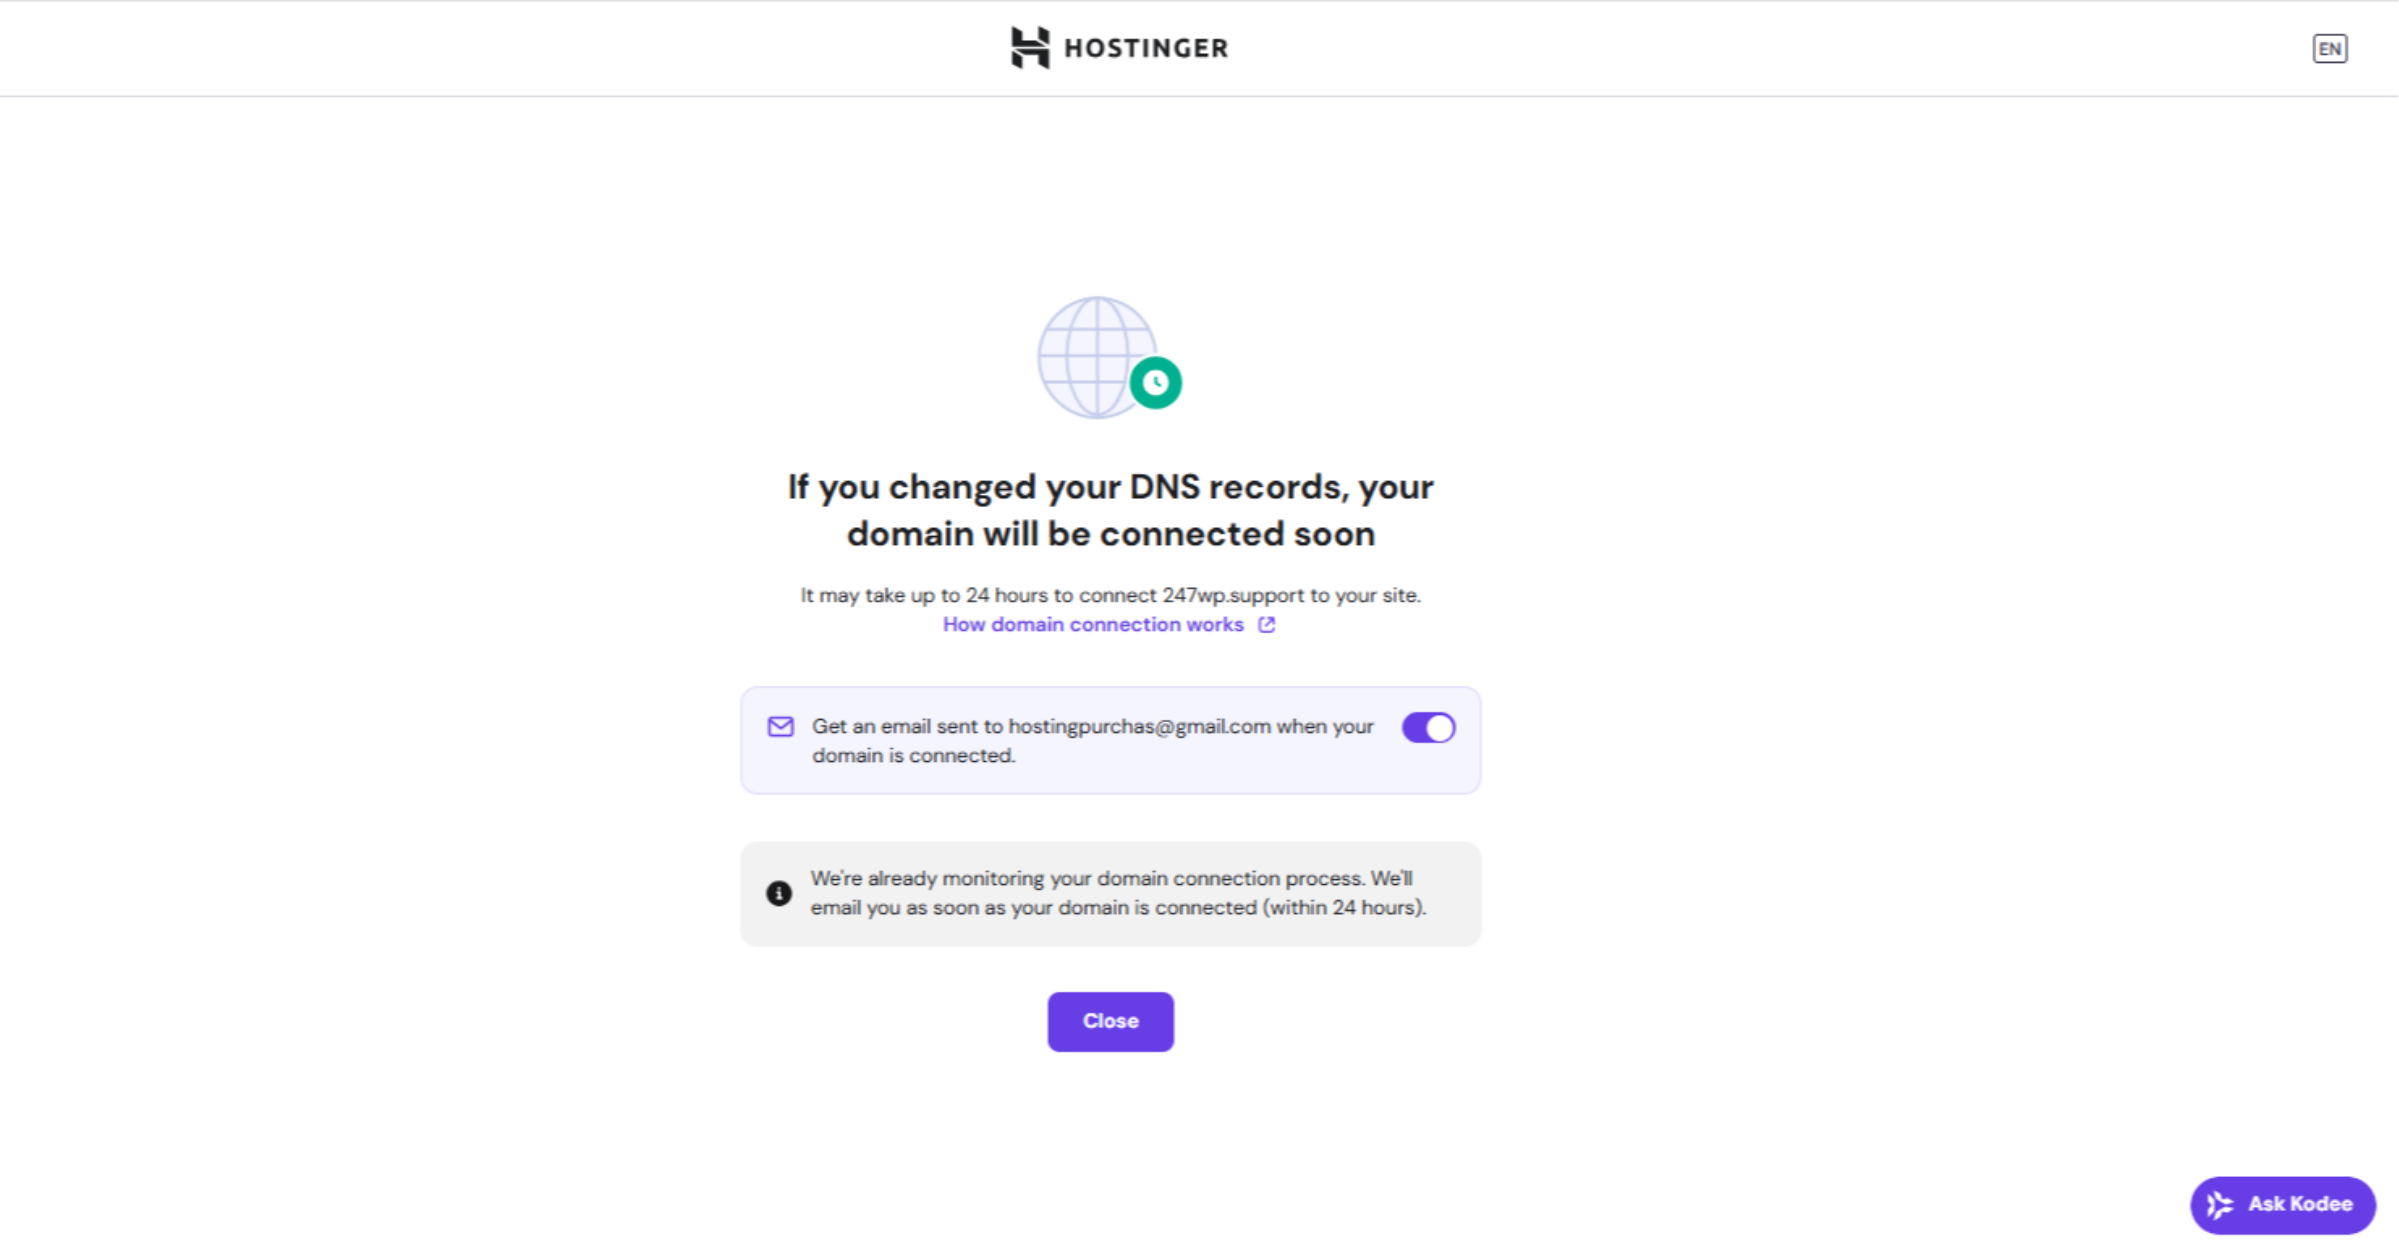
15. DNS Update in Progress

DNS Update in Progress

Conclusion

By following the steps outlined in this guide, you have successfully connected your external domain to your Hostinger hosting account. You learned how to link your domain through the Hostinger dashboard, configure nameservers, verify DNS changes, and finalize the setup. Proper domain configuration ensures reliable website access, improves search visibility, and provides a professional online presence. It is recommended to allow up to 24 hours for DNS propagation and verify your website after completion.

WooHelpDesk Support

Need professional help with domain connection, DNS configuration, or website setup?

 Visit: https://www.woohelpdesk.com
 Call Us Toll-Free: +1 888 602 0119 (US & Canada)

Our experts are ready to assist you in setting up and managing your website efficiently.


Leave a Reply

Your email address will not be published. Required fields are marked *

Leave a Reply

Your email address will not be published. Required fields are marked *