How to Add Different Shipping Costs for Products in WooCommerce
Table of Contents
- Introduction
- Understanding WooCommerce Shipping Basics: How WooCommerce Calculates Shipping
- How to Set Product-Wise Shipping Charges in WooCommerce
- Method 1: Product-Specific Shipping Using Shipping Classes
- Method 2: WooCommerce Shipping by Product Using Built-In Flat Rate Logic
- Method 3: Product Specific Shipping Using WooCommerce Plugins
- Plugin 1: WooCommerce Table Rate Shipping
- Plugin 2: YITH Product Shipping for WooCommerce
- Choosing the Right Method for Your Store
- Conclusion
Introduction
Shipping costs can change a buyer’s mind very quickly. Many stores sell items with different sizes and weights. A light item ships cheap, but a heavy item costs more. If you use one flat fee, profits can drop fast. If you overcharge, buyers may leave at checkout. That is why WooCommerce product-wise shipping matters for many stores. You want fair shipping that matches each product type. This guide explains how to set different shipping rates in WooCommerce.
We will focus on native WooCommerce options in this guide. You will learn how WooCommerce shipping by product can work. You will also learn WooCommerce shipping rates per product using classes. This approach supports different shipping rates for products in WooCommerce. It is also a strong base for product specific shipping WooCommerce rules later. If needed, some stores also use WooCommerce custom shipping rates. That is usually for complex shipping logic and edge cases.
Understanding WooCommerce Shipping Basics: How WooCommerce Calculates Shipping
WooCommerce calculates shipping using zones, methods, and settings. A shipping zone is a group of regions or countries. Each zone has one or more shipping methods. Common methods include Flat Rate, Free Shipping, and Local Pickup. WooCommerce checks the customer address during checkout. It matches the address to the best shipping zone. Then WooCommerce shows the shipping methods for that zone. Shipping costs depend on your method settings and rules. Some costs apply once per order, not per item. Some costs can scale by item count or class. This is where WooCommerce shipping by product starts to make sense. You are not changing the checkout process itself. You are changing how rates are calculated before checkout.
To set this up correctly, confirm these basics first. Create your shipping zones for your target regions. Add at least one shipping method inside each zone. Test a checkout address from each region you serve. Make sure the right zone matches every time. If the wrong zone matches, rates will look broken. If the zone is right, you can tune product rates next. This is the clean path for WooCommerce product-wise shipping.
How to Set Product-Wise Shipping Charges in WooCommerce
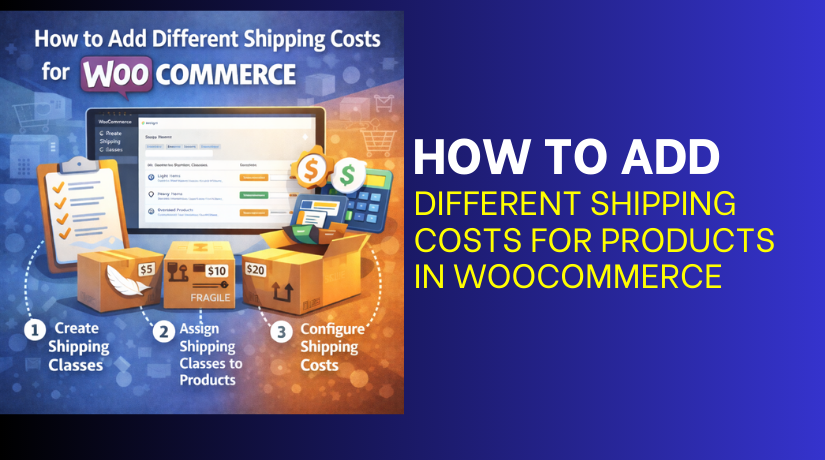
There are 3 main methods you can use to set product-wise shipping in WooCommerce. Each method works for a different store need.
Method 1: Product-Specific Shipping Using Shipping Classes
Shipping classes are a built-in WooCommerce feature. They help you group products by shipping cost type. You can create a class like “Heavy Items” or “Small Items”. Then you assign that class to the right products. After that, you set class costs in your Flat Rate method. WooCommerce adds those class costs during checkout. This is the most common way to set different shipping rates in WooCommerce without plugins. It also supports WooCommerce product-wise shipping at scale. You can manage many products with a few classes. This is a clean way to get WooCommerce shipping rates per product behavior.
Shipping classes work best when product shipping groups are clear. For example, “Fragile” items may need special packing. “Oversized” items may need a courier surcharge. “Light” items may ship at a lower fee. When your products match these groups, classes work well. When every product has a unique shipping cost, classes may feel limited. Still, for many stores, classes are the best start.
Ideal Use Cases
Shipping classes are ideal for simple, repeatable shipping patterns. They work great when you have product categories with clear shipping costs. They also work well when the same cost applies often. Here are common use cases that fit classes well.
- Heavy products vs light products in the same store.
- Fragile items needing extra packing and safer shipping.
- Oversized items with a courier surcharge and special labels.
- Cold items needing insulated packing and faster delivery.
- Bulk items where each unit adds extra shipping cost.
These patterns are common in real stores. They also match how carriers price shipments. Classes let you reflect those costs in checkout. This gives different shipping rates for products in WooCommerce in a stable way. It also supports product specific shipping WooCommerce pricing through grouping.
Setup Process
Follow these steps in the same order for best results.
Step 1: Make sure shipping zones are ready
- Go to WooCommerce → Settings → Shipping.
- Check that you have at least one Shipping Zone. If not, click “Add shipping zone” and create one for your main region.
Step 2: Create shipping classes
- Go to WooCommerce → Settings → Shipping → Shipping Classes.
- Click “Add shipping class”. Create 2 to 4 classes only, to stay simple. Use names like Light, Heavy, and Fragile. Click “Save changes”.
Step 3: Add a class to each product
- Go to Products → All Products and open a product.
- Scroll to Product data and open the Shipping tab. Find Shipping class and select the right class.
- Click “Update” to save. Repeat for other products.
Step 4: Add Flat Rate in your shipping zone
- Go to WooCommerce → Settings → Shipping → Shipping Zones.
- Click your zone name to edit it. Click “Add shipping method” and choose Flat Rate. Click “Add shipping method”.
Step 5: Add shipping costs for each class
- Click “Edit” under Flat Rate inside the zone.
- Set a base Cost if you want a starting fee. Scroll down to Shipping class costs. Enter a cost for each class you created.
- Click “Save changes”.
Step 6: Test on checkout
- Add one Light product to cart and check shipping.
- Then add one Heavy product and check again. Add both Light and Heavy together and check total.
- If totals look wrong, adjust class costs and retest.
This setup gives reliable WooCommerce shipping rates per product behavior. It also improves WooCommerce shipping by product without extra plugins.
Pros
- Shipping classes are built into WooCommerce, so they are stable. You do not need extra plugins to start.
- The setup works well for many small and medium stores.
- It supports clear WooCommerce shipping rates per product behavior.
- You can manage shipping in a simple and repeatable way.
- It is also easy to update when products change. You just change the class on the product once.
Cons
- Shipping classes are not truly unique per product always.
- They are group based, not item specific. If every product needs its own shipping fee, this can feel limiting. Complex rules like “if cart has X and Y” are hard.
- Advanced conditions often need a plugin solution.
- Some stores also need WooCommerce custom shipping rates for special cases. That usually means custom rules or custom code. Still, shipping classes are a strong base for most stores.
Method 2: WooCommerce Shipping by Product Using Built-In Flat Rate Logic
Flat Rate shipping is a core WooCommerce shipping method. It is simple, stable, and easy to test. Many stores use it as the first shipping option. By itself, Flat Rate is not product specific. It is a zone level method with one cost. Still, you can get WooCommerce shipping by product effects using settings. The key is to think about how costs apply. You can set a base cost and control how it scales. You can also combine Flat Rate with shipping classes. That class approach was Method 1 in this guide.
When store owners ask for product specific shipping WooCommerce rates, they often start here. They want a simple shipping fee that changes with cart content. Flat Rate can handle some of that with per-item logic. It will not handle complex cases, but it is useful. It is also a good step before plugins.
Best Use Cases
This method works best for stores with simple shipping pricing. It fits small catalogs where shipping costs do not vary much. It also fits stores where each item adds a small fee. Here are strong use cases for flat rate logic.
- Stores with similar product sizes and similar shipping costs.
- Stores that want a simple base fee per order.
- Stores that want a small fee added per item.
- Stores that sell bundles where item count matters.
- Stores that do not need advanced shipping conditions.
If you sell mixed heavy and light items, classes are better. If you sell many unique items, plugins may be better. Still, this method is a clean way to set different shipping rates in WooCommerce in a basic form. It can support WooCommerce product-wise shipping when product differences are small.
Setup Process
Step 1: Open your shipping zone
- Go to WooCommerce → Settings → Shipping → Shipping Zones.
- Choose the zone where you want the method. Click “Edit” for that zone.
Step 2: Add Flat Rate shipping
- Click “Add shipping method” and choose Flat Rate.
- Save it, then click “Edit” on Flat Rate.
Step 3: Set the base shipping cost
- Find the Cost field and enter your base fee.
- This base fee applies to the full order. It is the simplest flat rate model.
Step 4: Decide how costs scale with items
Some stores want the shipping to scale by item count. If you use class based setup, you can add class costs. If you keep it basic, use a small base fee and test totals. For item scaling, many stores rely on formulas or plugins. In pure core settings, keep your logic simple and clear.
Step 5: Save and test checkout
- Add one product to cart and test shipping at checkout.
- Then add two or three products and test again. Test different product types and quantities.
- Make sure shipping stays fair and not confusing. This testing step is critical for different shipping rates for products in WooCommerce.
Pros
- Flat Rate is built into WooCommerce and easy to use.
- It works well for simple stores and simple shipping needs.
- It is fast to set up and easy to maintain.
- It is also easy to explain to buyers at checkout.
- It gives a stable base for WooCommerce product-wise shipping.
- It can support basic WooCommerce shipping by product behavior when costs are similar.
Cons
- Flat Rate alone does not give true per-product shipping fees.
- It works at the zone level, not product level.
- If product shipping costs vary a lot, it can undercharge.
- It can also overcharge in mixed carts. For better control, shipping classes are often required.
- For advanced needs, plugins are often required. Some stores also move to WooCommerce custom shipping rates for special logic. That usually means plugin rules or custom code.
- If you need true WooCommerce shipping rates per product for each item, plugins are often the next step.
Method 3: Product Specific Shipping Using WooCommerce Plugins
Plugins help when core settings cannot match your shipping needs. Many stores need more control for mixed carts and special items. Plugins add rule builders, product targeting, and better rate handling. This is a reliable way to do WooCommerce product-wise shipping at scale.
Plugin 1: WooCommerce Table Rate Shipping
WooCommerce Table Rate Shipping lets you create shipping rules in tables. Each rule can use conditions like weight, price, or item count. You can also use shipping classes within table rules. This gives structured control for WooCommerce product-wise shipping. It is a strong option to set different shipping rates in WooCommerce using logic. It is best when your rates follow clear patterns.
Ideal Use Cases


This plugin fits stores with repeatable shipping pricing rules. It works great for catalogs with many products and categories. It is also useful when shipping must scale by cart size. These use cases usually fit table rate shipping well. Heavy and light products that follow weight slabs. Bulk orders where item count changes shipping totals. Order value ranges that trigger different carrier pricing. Zones where local and national rates differ often. Shipping classes like fragile or oversized with extra fees.
Setup Process
Use the steps below to keep setup clean and testable. Build one simple rule first, then expand gradually. This reduces mistakes and checkout confusion.
Step 1: Install and Activate the Plugin
- Go to Plugins → Add New, then install the table rate plugin.
- Activate it and confirm no errors appear on the dashboard.
- Keep other shipping plugins disabled during initial testing.
Step 2: Confirm Your Shipping Zones Are Correct
- Go to WooCommerce → Settings → Shipping → Shipping Zones.
- Open each zone and verify the regions are correct. Add missing regions now, before adding any new rules.
Step 3: Add Table Rate Shipping to a Zone
- Edit the target zone and click Add Shipping Method.
- Select Table Rate Shipping and save your changes. Open the method settings to start configuration.
Step 4: Set a Clear Method Name for Customers
- Set the method title like “Standard Shipping” or “Courier Shipping”.
- Avoid technical names that confuse customers at checkout. Keep it consistent across zones for clarity.
Step 5: Choose How Rates Combine in the Cart
- Find the calculation option inside the method settings.
- Choose per order if you want simpler totals. Choose per item if you need quantity-based totals. This choice affects mixed carts and final totals.
Step 6: Create Your First Rule Row
- Add a rule row using one condition like weight or item count.
- Set a simple range, like 0–1 kg or 1–2 items.
- Add a reasonable shipping cost for that range. Save settings after adding the first row.
Step 7: Add More Rule Rows for Real Ranges
- Add extra rows for the next ranges you commonly ship. Use ranges that match your courier pricing slabs closely.
- Keep ranges non-overlapping to avoid conflicts and surprises.
Step 8: Add Shipping Class Logic If You Use Classes
- If you already use shipping classes, map rules to classes. Add an extra charge for fragile or oversized classes.
- This improves WooCommerce shipping rates per product by grouping.
Step 9: Test With Real Cart Scenarios
- Test one light product, then one heavy product separately.
- Test a mixed cart with both items together. Test different quantities to confirm totals remain fair.
Step 10: Document Your Rule Plan for Future Updates
Create a short note for each rule and its purpose. Record which courier rate or slab it matches. This makes updates easier when shipping prices change later.
Pros
- It supports rule-based shipping that scales with store growth.
- It helps you manage different shipping rates for products in WooCommerce cleanly.
- It works well with zones and shipping classes together.
- It is strong for WooCommerce shipping by product using predictable tables.
Cons
- Rule tables can feel complex for first-time store owners.
- You must test mixed carts to avoid wrong totals.
- Too many rules can become hard to maintain over time.
- It is less ideal for unique fees per single product.
Plugin 2: YITH Product Shipping for WooCommerce
YITH Product Shipping focuses on product-level shipping control. It is designed for per-product fees and product targeting. This fits stores that want direct product shipping pricing. It supports product specific shipping WooCommerce in a straightforward way. It can also deliver WooCommerce shipping rates per product without large rule tables.
Ideal Use Cases
This plugin works best when products need fixed shipping fees. It is useful when each product has a stable shipping cost. It is also helpful when special handling applies per item. These use cases usually fit product shipping plugins well. One product needs a higher packing and courier surcharge. Variations need different shipping costs due to size changes. Some items ship from different suppliers or separate locations. Certain items need special packaging and careful handling. You want simple control without complex range tables.
Setup Process
Follow these steps to keep product rules consistent and predictable. Start with your top products first, then expand. This helps you spot issues early and fix quickly.
Step 1: Install and Activate the Plugin
- Install the YITH shipping plugin from Plugins → Add New.
- Activate it and confirm the plugin menu appears.
- If you see a YITH menu, open it to confirm settings.
Step 2: Review Global Plugin Settings First
- Open the plugin settings page from the dashboard menu.
- Look for options that control rate combining behavior. Check how the plugin handles mixed carts by default.
Step 3: Pick a Clear Shipping Fee Strategy
- Decide if fees should add per product or not. Decide if one highest fee should apply instead.
- This choice impacts mixed carts and customer trust.
Step 4: Set Shipping Cost on a Single Product First
- Open Products → All Products and edit one test product.
- Find the plugin’s shipping section inside product settings.
- Add a product shipping fee and update the product.
Step 5: Test Checkout With That Single Product
- Add the test product to cart and go to checkout.
- Confirm the shipping fee appears and matches your setting. Test with two quantities to confirm the total behavior.
Step 6: Apply the Same Pattern to Similar Products
- Update products that share the same shipping cost type.
- Use consistent fees for similar packaging and courier costs. This keeps checkout rates stable and easy to explain.
Step 7: Configure Variation Shipping If Needed
- If variations ship differently, open the variation settings.
- Set different fees where size or weight changes shipping cost. Test each variation in the cart to confirm totals.
Step 8: Test Mixed Carts With Two Different Products
- Add two products with different shipping fees to cart.
- Confirm how the plugin combines fees at checkout. Adjust settings if totals look too high or too low.
Step 9: Create a Simple Tracking Sheet for Shipping Fees
- Maintain a list of products and their shipping fees.
- Note the reason for higher fees, like oversized packing. This makes future updates much easier and faster.
Pros
- It offers direct control for WooCommerce shipping rates per product.
- It is easier for fixed product fee shipping models.
- It supports clear product specific shipping WooCommerce pricing.
- It helps when shipping classes feel too broad or limiting.
Cons
- Manual setup can take time for large product catalogs.
- Mixed cart behavior must be tested very carefully. In some stores, fees can stack and look expensive. For rare edge cases, stores may still consider WooCommerce custom shipping rates.
Choosing the Right Method for Your Store
Pick a method based on catalog size and shipping complexity. Flat rate is best for simple, similar product shipping. Shipping classes work best for grouped shipping needs. Plugins work best when rules or per-product control is required. Choose Table Rate Shipping for rule-based shipping by weight or range. It is great for structured pricing and scaling catalogs.
Choose YITH Product Shipping for direct per-product shipping fees. It is great when each product needs a fixed shipping cost. Both options help you set different shipping rates in WooCommerce effectively. Both support WooCommerce product-wise shipping with better control. Both help handle different shipping rates for products in WooCommerce in real carts.
Conclusion
Plugins make product-based shipping easier and more reliable. Table rate tools fit stores that ship by ranges and rules. Product shipping tools fit stores with fixed per-item shipping fees. The right choice depends on how your catalog ships daily. Always test single products, bulk quantities, and mixed carts.
This protects checkout trust and reduces support tickets. With the right setup, WooCommerce shipping by product becomes predictable. It also improves WooCommerce shipping rates per product for your store. If your business needs special logic later, consider WooCommerce custom shipping rates carefully. For most stores, classes and plugins handle shipping needs well.


