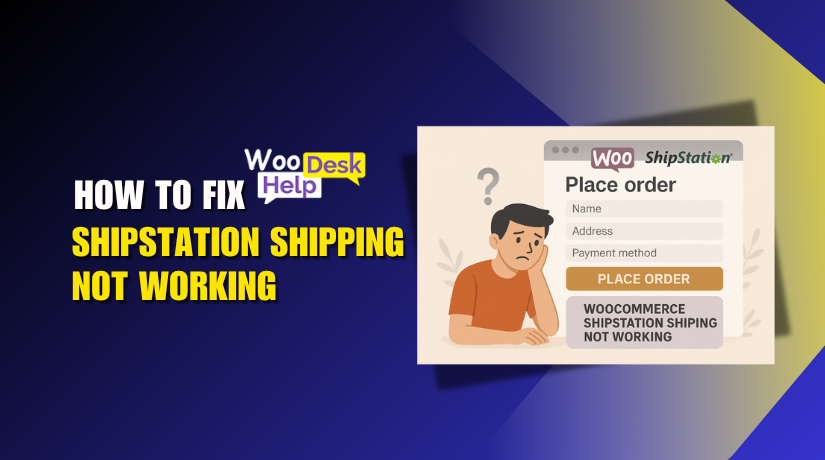
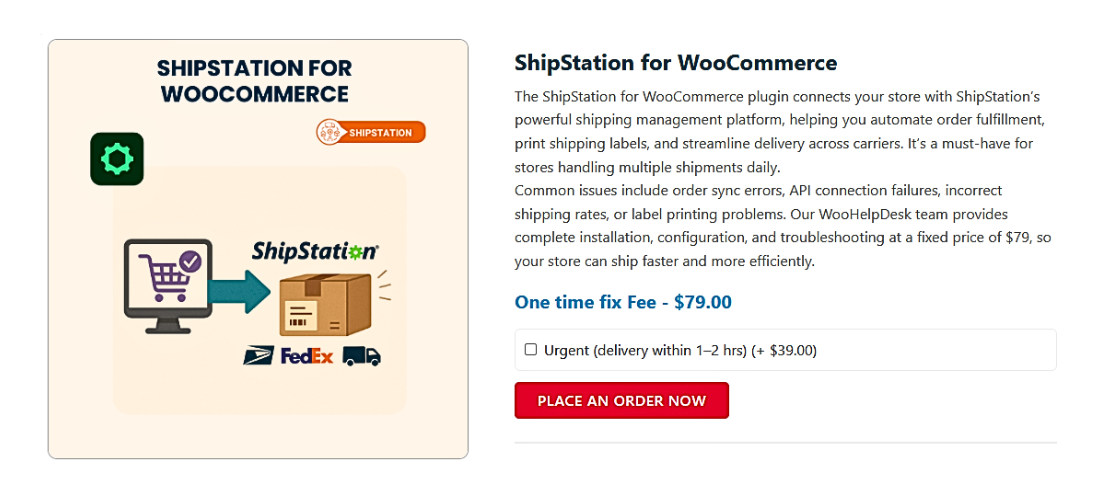
WooCommerce ShipStation Shipping Not Working? Complete Troubleshooting Guide
Table of Contents
- Introduction
- Why Use ShipStation with WooCommerce?
- Common WooCommerce ShipStation Sync & Connection Issues and How to Fix
- Tips to Prevent Future WooCommerce ShipStation Issues
- Conclusion
Introduction
Running an online store should be smooth. But sometimes, technology gets in the way. One common issue many U.S. store owners face is with WooCommerce and ShipStation. These two powerful tools are designed to make shipping and fulfillment easier. When they stop working together, it can cause real frustration.
WooCommerce powers thousands of online stores across the U.S. It lets store owners manage products, payments, and customer orders with ease. ShipStation helps by printing shipping labels, calculating rates, and syncing orders. Together, they create a complete eCommerce workflow.
But what happens when ShipStation does not work with WooCommerce? Problems like syncing failures or connection errors can bring your store to a halt. Your orders might not reach ShipStation. Shipping rates may not show up at checkout. Or worse, you might not be able to print labels at all.
These issues affect:
- Customer experience and satisfaction
- Order processing time
- Overall shipping accuracy
- Your ability to fulfill orders on time
Many U.S.-based sellers rely on fast shipping. Delays caused by these problems can lead to lost sales and unhappy buyers. Whether you’re using USPS, FedEx, or UPS through ShipStation, any breakdown can affect your service quality.
What makes things harder is the lack of clear solutions. Often, store owners don’t know if the problem lies in ShipStation or WooCommerce. It could be a plugin conflict, an outdated API key, or incorrect shipping settings.
Getting things back on track requires careful troubleshooting. You’ll need to check each part of the system step by step. It can seem overwhelming, but it’s possible to fix these problems.
If your ShipStation is not syncing or rates are missing, you’re not alone. Let’s understand what’s going wrong—and how to get it working again.
Why Use ShipStation with WooCommerce?
WooCommerce is a trusted platform for online stores. It lets you sell anything, from physical goods to digital products. But managing shipping manually can slow you down. That’s where ShipStation comes in.
ShipStation is built to handle shipping tasks quickly. It connects with major U.S. carriers like:
- USPS
- UPS
- FedEx
It pulls orders from WooCommerce and helps you print labels with ease. It also lets you compare shipping rates in real-time. This helps you choose the cheapest and fastest option.
Together, WooCommerce and ShipStation create a smart workflow. You save time, reduce errors, and keep customers happy. The benefits include:
- Automatic order syncing
- Bulk shipping label creation
- Real-time shipping rate display
- Reduced manual data entry
For store owners in the U.S., ShipStation makes shipping fast and simple. It supports domestic and international carriers. Whether you ship one order a day or hundreds, ShipStation scales with your store.
When ShipStation works well with WooCommerce, everything runs smoothly. Orders sync automatically. Labels print without delay. Customers get tracking numbers fast.
That’s why many businesses rely on this integration daily. But when this setup breaks, it can be frustrating. Fixing the connection is key to keeping your store on track.
Common WooCommerce ShipStation Sync & Connection Issues and How to Fix
When ShipStation fails to sync or connect with WooCommerce, everything slows down. Orders don’t appear. Shipping labels can’t be printed. Customers may not receive their items on time. Below are the most common sync and connection issues, along with step-by-step solutions.
-
ShipStation Not Syncing with WooCommerce
When ShipStation is not syncing with WooCommerce, order fulfillment slows down. Orders made in your WooCommerce store may not show up in ShipStation. This problem affects shipping, tracking, and overall workflow. It’s one of the most common issues for store owners using both platforms.
ShipStation is built to pull orders from WooCommerce automatically. But if syncing fails, it often means there’s a communication problem between the two systems. Fixing this issue quickly helps avoid late shipments and lost sales.
Possible Causes of Sync Failures
Several things can stop ShipStation from syncing correctly:
- Invalid or expired API keys in WooCommerce
- Webhooks are disabled or not working
- The ShipStation plugin is outdated or misconfigured
- The site URL entered in ShipStation is incorrect
- WooCommerce REST API is blocked or not responding
- Security plugins are interfering with web requests
- Your site is still set to “staging” or has limited access
Step-by-Step Fixes for ShipStation Sync Issues
You don’t need to be a developer to solve this. Follow these clear steps:
Step 1: Regenerate WooCommerce API Keys
API keys let ShipStation connect to your WooCommerce store. If the key is old, ShipStation may stop syncing.
- Go to WooCommerce > Settings > Advanced > REST API
- Click on the existing key and delete it
- Create a new key
- Give it a name (e.g., “ShipStation API”)
- Select a user with admin access
- Choose “Read/Write” permissions
- Save the key and copy both the Consumer Key and Consumer Secret
Now, use this new key in ShipStation to reconnect your store.
Step 2: Reconnect Your Store in ShipStation
Reconnecting helps refresh all API permissions and settings.
- Log in to your ShipStation account
- Go to Account Settings > Selling Channels > Store Setup
- Select your WooCommerce store
- Click Edit and enter the new API keys
- Make sure the store URL is correct (use https:// and avoid extra paths)
Once connected, ShipStation should begin syncing with your WooCommerce store.
Step 3: Re-enable and Test Webhooks
Webhooks send real-time order updates to ShipStation. If they’re off, syncing stops.
- In WooCommerce, go to Settings > Advanced > Webhooks
- Check if ShipStation webhooks are active
- If missing, reinstall the ShipStation plugin to reset them
- Create a test order and watch if it appears in ShipStation
This will confirm if the webhook is working properly.
Step 4: Update Your Plugins and WordPress
Outdated software often causes sync failures.
- Update the ShipStation plugin to the latest version
- Update WooCommerce and WordPress
- Check that your theme and other plugins don’t conflict
Always back up your site before updating.
Step 5: Disable Security and Caching Plugins Temporarily
Some security plugins block external requests or disable webhooks.
- Deactivate any firewall, anti-spam, or caching plugins
- Test the ShipStation sync again
- If it works, re-enable plugins one at a time to find the cause
You may need to whitelist ShipStation IPs in your firewall settings.
Step 6: Confirm Your Site is Not in Maintenance or Staging
ShipStation cannot sync with private or staging sites.
- Make sure your store is live and publicly accessible
- Remove password protection or IP blocks
- In ShipStation, verify that your store is marked as Live, not Test
Final Test
After applying all fixes:
- Place a test order on your WooCommerce store
- Wait a few minutes and check your ShipStation dashboard
- Confirm the new order appears correctly
If the order syncs, the issue is fixed. If not, recheck the webhook and API steps.
-
WooCommerce ShipStation Connection Error
A connection error between WooCommerce and ShipStation means they can’t communicate. This issue stops order syncing and shipping automation completely. Even if the store is working, ShipStation may not connect or pull data.
These errors are frustrating because they often appear without warning. Store owners see a message like “Connection failed” or “Could not connect to store.” Sometimes, no error shows at all—orders just don’t appear.
Common Causes of Connection Errors
Several issues can trigger a connection failure:
- Invalid or mismatched store URL in ShipStation
- No SSL (HTTPS) or expired SSL certificate
- Server firewall or host is blocking API requests
- Security plugins or rules are blocking webhooks
- Broken .htaccess or rewrite rules on your site
- REST API is disabled or blocked
Step-by-Step Fixes for ShipStation Connection Errors
Follow the steps below to troubleshoot the connection problem:
Step 1: Verify the Store URL in ShipStation
The store URL must be exact. Even small mistakes break the connection.
- Log in to your ShipStation account
- Go to Account Settings > Selling Channels > Store Setup
- Click on your WooCommerce store
- Make sure the URL matches your live website exactly
- It must include https:// and have no trailing slashes or folders
Correct Example:
https://yourstore.com
Wrong Example:
http://yourstore.com/wp-admin
If incorrect, update the URL and save settings.
Step 2: Check Your SSL Certificate
ShipStation requires a secure connection (HTTPS).
- Visit your site and confirm it shows “Secure” in the browser
- If not, install a valid SSL certificate from your hosting panel
- Test again after securing the connection
- Update WordPress to use HTTPS under Settings > General
Also, update URLs in your database if needed (use a plugin like Better Search Replace).
Step 3: Whitelist ShipStation IP Addresses
Your server may block outside requests for security.
- Contact your hosting provider
- Ask them to whitelist ShipStation’s IP addresses
- You can find the IP list in ShipStation’s Help Docs
- This ensures ShipStation can reach your WooCommerce REST API
Some firewalls block traffic by default. Whitelisting fixes this.
Step 4: Disable Security and Caching Plugins
Plugins can interfere with API access or break JSON responses.
- Temporarily disable plugins like:
- Wordfence
- iThemes Security
- WP Rocket
- Any other firewall or cache plugin
- Try reconnecting in ShipStation again
- If it works, re-enable plugins one by one to find the conflict
Once found, adjust that plugin’s settings to allow API traffic.
Step 5: Test the REST API Manually
ShipStation relies on WooCommerce’s REST API.
- Open your browser
- Go to:
https://yourdomain.com/wp-json/wc/v3/orders - You should see a list of recent orders or a login prompt
- If you see an error (403 or 500), the API is likely blocked
This tells you if the problem is with the API or with ShipStation.
Step 6: Review .htaccess or Redirect Rules
Improper redirect rules can block API paths.
- Access your site via FTP or file manager
- Open the .htaccess file
- Look for any custom redirects or “Deny from” rules
- Comment them out and test ShipStation again
Save a backup before editing this file.
Step 7: Switch to a Better Hosting Plan (if needed)
Some cheap shared hosting plans block API requests to save resources.
- Check with your hosting support about API limitations
- If needed, move to a WooCommerce-optimized host like:
- 24×7 WP Support
- Kinsta
- WP Engine
Better hosting improves API speed and connection reliability.
Final Test
After completing these steps:
- Go back to ShipStation > Store Setup
- Click Test Connection
- If successful, syncing should resume shortly
- Place a new test order to confirm it’s working
-
ShipStation Shipping Method Missing in WooCommerce
Sometimes, store owners find that shipping methods are not showing at checkout. This issue is confusing, especially when everything else seems to work fine. Orders may still sync. Labels may print. But customers don’t see any shipping options. That means they can’t complete their purchase.
This is often caused by a mismatch between WooCommerce settings and ShipStation configurations. When shipping methods disappear, you risk losing sales and frustrating buyers.
Main Causes of Shipping Method Issues
Shipping method errors usually happen for a few key reasons:
- Shipping zones are not configured correctly in WooCommerce
- The shipping carrier is not selected in ShipStation
- Services (like USPS or FedEx) are disabled or misconfigured
- Products have missing or incorrect weight and dimensions
- Rates are filtered or blocked by third-party plugins
- WooCommerce and ShipStation settings are not synced properly
Step-by-Step Fixes for Missing Shipping Methods
Let’s solve this issue using a clean and simple approach:
Step 1: Check Your WooCommerce Shipping Zones
Shipping zones decide which methods are available for each region.
- Go to WooCommerce > Settings > Shipping > Shipping Zones
- Make sure you have zones set up for your customers’ locations
- Each zone should include the right country, state, or zip code
- Add services (like Flat Rate, Free Shipping, or ShipStation) to each zone
If your customer’s location isn’t covered, no shipping will appear.
Step 2: Enable ShipStation Carrier Services
ShipStation must have active carriers selected for rate calculation.
- In ShipStation, go to Settings > Shipping > Carriers & Fulfillment
- Make sure carriers like USPS, UPS, and FedEx are active
- Click each carrier and confirm services (like Ground, Priority, etc.) are enabled
- Save your changes
Disabled services won’t show up during checkout.
Step 3: Review Product Weight and Dimensions
Missing weights or sizes can prevent shipping rates from generating.
- Go to Products > All Products in your WooCommerce dashboard
- Edit each product that has no shipping method
- Scroll to Product Data > Shipping
- Enter the correct weight and dimensions (length, width, height)
- Save the changes
Some carriers (especially real-time ones) require this info to calculate rates.
Step 4: Sync ShipStation with WooCommerce Again
If you recently changed settings, force a resync.
- In ShipStation, go to Selling Channels > Store Setup
- Select your WooCommerce store
- Click Update All Store Info or Reconfigure Connection
- This refreshes all shipping rules and carrier settings
Now test your checkout again.
Step 5: Test With a Known Address
Sometimes, the issue is tied to the test address used.
- Add a product to cart
- Proceed to checkout
- Use a U.S.-based test address (e.g., New York, 10001)
- Check if shipping methods appear now
This helps confirm if the issue is regional or global.
Step 6: Disable Conflicting Plugins
Some plugins interfere with how shipping is calculated.
- Temporarily disable plugins like:
- Table Rate Shipping
- Advanced Shipping Rules
- Multi-carrier shipping tools
- Clear your WooCommerce cache
- Retest checkout with a new order
If shipping methods now appear, one of the plugins is likely the cause.
Step 7: Review Shipping Method Names in ShipStation
WooCommerce and ShipStation sometimes use different names.
- In ShipStation > Settings > Shipping > Automation Rules, check rules
- Make sure no automation rule is hiding or overriding a method
- Also, check Shipping Presets for any issues
Fix or remove conflicting rules.
Final Test
After making these updates:
- Place a new test order with a real U.S. address
- Go through the checkout page
- Confirm that one or more shipping methods appear correctly
- Watch for them to carry through into the ShipStation order view
-
WooCommerce ShipStation API Not Working
ShipStation connects to WooCommerce using the REST API. This connection allows order syncing, label generation, and real-time updates. If the API stops working, ShipStation won’t receive new orders or update existing ones. You may not see any errors, but nothing works in the background.
This issue can be hard to spot at first. Orders may stop syncing silently. Labels won’t generate. You may even think ShipStation is broken—but the real problem is the WooCommerce API.
What Causes the WooCommerce API to Break?
Several issues can stop the REST API from working properly:


- API keys are invalid or expired
- API permissions are too limited (read-only instead of read/write)
- REST API is disabled in WordPress settings
- Web hosting blocks external API requests
- Security plugins block JSON or REST responses
- .htaccess file contains redirect or deny rules
- Broken permalinks or URL structure issues
These problems block ShipStation from reading orders or sending updates.
Step-by-Step Fixes for WooCommerce ShipStation API Issues
You can fix most API problems without any coding. Just follow these steps:
Step 1: Regenerate API Keys in WooCommerce
Broken or outdated API keys are the most common cause.
- Go to WooCommerce > Settings > Advanced > REST API
- Click “Revoke” on the old ShipStation API key
- Click “Add key” to generate a new one
- Use an admin-level user
- Choose “Read/Write” permissions (not just Read-only)
- Save and copy the Consumer Key and Secret
You’ll use these new keys to reconnect the store in ShipStation.
Step 2: Reconnect WooCommerce in ShipStation
After getting new API keys, reconnect your store.
- In ShipStation, go to Settings > Selling Channels > Store Setup
- Click your WooCommerce store
- Enter the new API keys
- Make sure the store URL is correct and starts with https://
- Click “Test Connection” to verify the API
This refreshes the API handshake between both platforms.
Step 3: Make Sure the REST API is Enabled
Sometimes the API is disabled accidentally by themes or plugins.
- Visit this URL in your browser:
https://yourdomain.com/wp-json/ - You should see a JSON response with site information
- If you see a 403 error, the API is blocked
- Check with your hosting provider if this is server-related
You can also test using the orders endpoint:
https://yourdomain.com/wp-json/wc/v3/orders
Step 4: Disable Blocking Plugins Temporarily
Some plugins block REST API calls or JSON outputs.
- Temporarily deactivate plugins like:
- Wordfence
- iThemes Security
- Disable REST API plugins
- Clear cache after deactivating
- Re-test the ShipStation sync
Once confirmed, re-enable each plugin one at a time to find the conflict.
Step 5: Reset or Fix .htaccess Rules
Misconfigured redirect rules can block API access.
- Connect via FTP or use your File Manager in cPanel
- Open the .htaccess file from your root directory
- Look for redirect rules or “deny” lines
- Comment out suspicious lines (start with # to disable)
- Save and test your API endpoint again
Back up the file before making changes.
Step 6: Refresh Permalinks in WordPress
Broken permalinks can stop REST API routes from loading.
- Go to Settings > Permalinks
- Choose your preferred structure (e.g., “Post name”)
- Click “Save Changes” even if nothing was changed
- This refreshes rewrite rules for the REST API
Then test ShipStation again to see if syncing resumes.
Step 7: Contact Your Hosting Provider
If nothing works, the issue may be server-level.
- Ask hosting support to check for blocked API requests
- Request a review of firewall or ModSecurity logs
- Ask if they’re limiting or rate-limiting external REST API calls
They can whitelist ShipStation’s requests or fix server misconfigurations.
Final Check
After completing these fixes:
- Go back to ShipStation and click Update All Store Info
- Place a new test order in WooCommerce
- Wait a few minutes to confirm the order appears in ShipStation
- Try generating a shipping label to confirm full API functionality
-
WooCommerce ShipStation Not Calculating Shipping Rates
Shipping rates are critical to the checkout process. If ShipStation fails to calculate them, customers won’t see delivery options. This can lead to confusion, abandoned carts, and lost sales. It also means you may have to set rates manually, which takes time and increases the chance of error.
This issue usually happens when there’s a problem with how ShipStation, WooCommerce, or your carrier settings are configured. Let’s break it down clearly.
What Causes Shipping Rates to Fail?
Rate issues are often caused by one or more of these problems:
- Missing product weights and dimensions
- Disabled or misconfigured carrier services in ShipStation
- Shipping zone or method not linked to ShipStation
- The customer’s address is outside of service coverage
- Plugin conflict blocking real-time rates
- API response failure or timeout from carrier
Let’s walk through how to fix each of these step by step.
Step-by-Step Fixes for ShipStation Shipping Rate Errors
Step 1: Make Sure All Products Have Weight and Dimensions
Most carriers use weight and size to calculate rates.
- Go to Products > All Products in WooCommerce
- Edit the product showing the issue
- Scroll to Product Data > Shipping
- Enter weight in lbs or oz
- Enter dimensions: length, width, and height
- Save changes
If these fields are blank, ShipStation may return $0 or no rate.
Step 2: Confirm Carriers Are Enabled in ShipStation
ShipStation must have active carriers to pull live rates.
- In ShipStation, go to Settings > Shipping > Carriers & Fulfillment
- Check that carriers like USPS, FedEx, and UPS are connected
- Click into each carrier and make sure services (Ground, Priority, etc.) are enabled
- Save any changes
Inactive or unverified carriers won’t return rates during checkout.
Step 3: Check ShipStation’s WooCommerce Store Settings
Ensure that rate fetching is turned on in the integration.
- In ShipStation, go to Settings > Selling Channels > Store Setup
- Select your WooCommerce store
- Make sure the option for “Get live rates at checkout” is enabled
- Click Save and retest your checkout page
If this is off, WooCommerce will not display ShipStation rates.
Step 4: Review WooCommerce Shipping Zones
Improper zone setup can block rate visibility.
- Go to WooCommerce > Settings > Shipping > Shipping Zones
- Make sure zones match your customers’ countries and zip codes
- For each zone, ensure that ShipStation or flat rate backup options are added
- Click into each method to verify no filters are applied (like weight limits)
Missing or misconfigured zones often cause “No shipping method available” errors.
Step 5: Test with a Valid U.S. Address
Some services are region-specific and won’t return global rates.
- Add a product to cart
- Proceed to checkout
- Use a common U.S. test address (e.g., 123 Main St, NY 10001)
- Check if rates now appear
If rates appear, the issue may be limited to international or remote zones.
Step 6: Disable Conflicting Shipping Plugins
Some advanced shipping plugins override ShipStation’s rate system.
- Temporarily disable plugins like:
- Table Rate Shipping
- Advanced Flat Rate Shipping
- Multi-carrier shipping plugins
- Clear your WooCommerce cache
- Try checking out again
If rates now show correctly, one of the plugins was blocking ShipStation.
Step 7: Re-sync Store Info in ShipStation
Syncing can refresh any stuck settings.
- Go to ShipStation > Store Setup
- Select your WooCommerce store
- Click Update All Store Info
- Save and test your checkout again
This helps if changes were made recently but not yet synced.
Final Test
After completing all steps:
- Add a test product with full shipping data
- Use a U.S. address and go to checkout
- Confirm that shipping rates appear accurately
- Check the order in ShipStation for correct carrier and rate
-
ShipStation Label Printing Issues or Label Errors
Shipping labels are one of the most important parts of order fulfillment. If you can’t print labels, you can’t ship products. When label errors happen in ShipStation, they delay processing, confuse staff, and impact delivery times.
These problems can appear at random or after a system update. Sometimes, ShipStation simply fails to print. Other times, it shows a vague message like “Label creation failed” or “Unknown error occurred.” In some cases, labels print blank or with missing information.
Why Do Label Errors Happen?
There are multiple reasons for label issues in ShipStation:
- Printer is not connected or set as default
- ShipStation Connect is not installed or outdated
- Carrier settings are incomplete or invalid
- Missing shipping information in the WooCommerce order
- API limits or timeouts when communicating with carriers
- Using unsupported formats like PDF instead of ZPL for thermal printers
Let’s look at how to fix them step by step.
Step-by-Step Fixes for ShipStation Label Issues
Step 1: Check Your Shipping Carrier Settings
Labels won’t generate without valid carrier credentials.
- In ShipStation, go to Settings > Shipping > Carriers & Fulfillment
- Click each carrier (e.g., USPS, FedEx)
- Make sure the account is active and verified
- Test the connection and save changes
If a carrier account is disconnected, you won’t be able to print labels.
Step 2: Confirm Order Has Complete Shipping Information
Missing details can block label creation.
- In WooCommerce, check the order’s shipping address
- Make sure the address includes:
- Street
- City
- State
- Zip code
- Also confirm the product has weight and dimensions
ShipStation needs this data to calculate the label accurately.
Step 3: Install or Reinstall ShipStation Connect
ShipStation Connect allows you to print directly to your printer.
- Download ShipStation Connect from https://www.shipstation.com/connect/
- Install it on the same computer where your printer is connected
- Open the app and log in with your ShipStation credentials
- Refresh your printer list in ShipStation
If the app isn’t running, label printing won’t work.
Step 4: Set the Right Printer and Format
Wrong format settings can cause blank or broken labels.
- Go to ShipStation > Settings > Printing > Printing Setup
- Select your printer (thermal or standard)
- Choose the correct format:
- ZPL for thermal label printers (e.g., Zebra)
- PDF for inkjet or laser printers
- Save and test by printing a sample label
If the format doesn’t match your printer type, labels may not print correctly.
Step 5: Clear Print Queue and Browser Cache
Print jobs can sometimes get stuck.
- Cancel any open label printing requests
- Close and reopen your browser
- Clear your browser cache
- Restart your computer and printer
Then, try printing the label again in ShipStation.
Step 6: Disable Browser Extensions and Pop-Up Blockers
Some browser tools interfere with label downloads.
- Disable extensions like ad blockers or PDF downloaders
- Temporarily turn off pop-up blockers
- Try using ShipStation in Incognito or Private mode
- Reprint the label
This ensures nothing is blocking the label from loading or printing.
Step 7: Use the “Print Preview” Option
If printing directly fails, try previewing the label first.
- In ShipStation, go to the order and click Label > Print Preview
- Save the label as a PDF
- Open it manually and print using your system’s print dialog
This bypasses browser and software-related issues temporarily.
Tips to Prevent Future WooCommerce ShipStation Issues
Fixing problems once is helpful. But preventing them from happening again is even better. A few simple steps can protect your store from future sync errors, API issues, and label printing problems. Let’s go through the best ways to keep WooCommerce and ShipStation running smoothly.
Keep Plugins and WooCommerce Updated
Outdated plugins often break connections and features. Always keep these updated:
- WooCommerce
- ShipStation Integration Plugin
- WordPress Core
- Active shipping and security plugins
Before updating, take a full site backup. Updates fix bugs, improve speed, and support the latest API changes.
Use a Staging Site for Testing Changes
Don’t test major updates on your live store. Instead:
- Create a staging site through your host
- Test plugin updates and new settings there
- Confirm ShipStation sync and label printing
- Apply changes to your live site only after testing
This prevents surprises during busy sales periods.
Set Regular API and Sync Health Checks
API keys can expire, and syncs may silently fail. Stay ahead with checks.
- Set calendar reminders to test ShipStation connection
- Create a test order monthly to verify sync
- Check for recent error logs or missing orders
Proactive monitoring saves time later.
Watch for Plugin Conflicts
Not all plugins work well together. Some can break shipping features.
- Avoid using multiple shipping rate plugins
- Disable new plugins one by one if errors appear
- Keep only what’s needed for your workflow
Simpler setups usually work better.
Monitor Site Speed and Server Resources
A slow server can break API calls and label generation.
- Choose a WooCommerce-optimized host
- Use caching plugins (but avoid aggressive settings)
- Ask your host to monitor error logs
Fast, healthy servers improve both sync and shipping reliability.
By following these tips, you reduce the risk of shipping errors, lost orders, and customer complaints. A little maintenance goes a long way in keeping WooCommerce and ShipStation working together without issues.
Conclusion
Shipping problems can hurt your business if not solved fast. Whether it’s syncing delays, missing rates, or label issues, small errors can cause big headaches. Don’t let technical issues slow down your store. If you’re still facing problems with ShipStation and WooCommerce, expert help is just a click away.
At WooHelpDesk, we specialize in fixing WooCommerce shipping and integration issues. Our team understands the tools you use every day—and we solve problems quickly, so you don’t lose sales.
Need help now? Contact WooHelpDesk and get your shipping back on track. We’re here to support your store, so you can focus on growing your business.