WooCommerce Checkout Validation Issues Explained: What You Need to Know
Table of Contents
-
- What is WooCommerce Checkout Validation?
- Why is WooCommerce Checkout Validation Important?
- Does WooCommerce Validate Checkout Fields by Default?
- Switch to Multi-Step Checkout with Smooth Inline Validation for a Seamless Experience!
- How to Validate Specific Fields in WooCommerce Checkout
- Best Practices and Recommendations for Checkout Validation
- Using a Plugin for Checkout Validation
- Contact WooCommerce Support
- Conclusion
What is WooCommerce Checkout Validation?
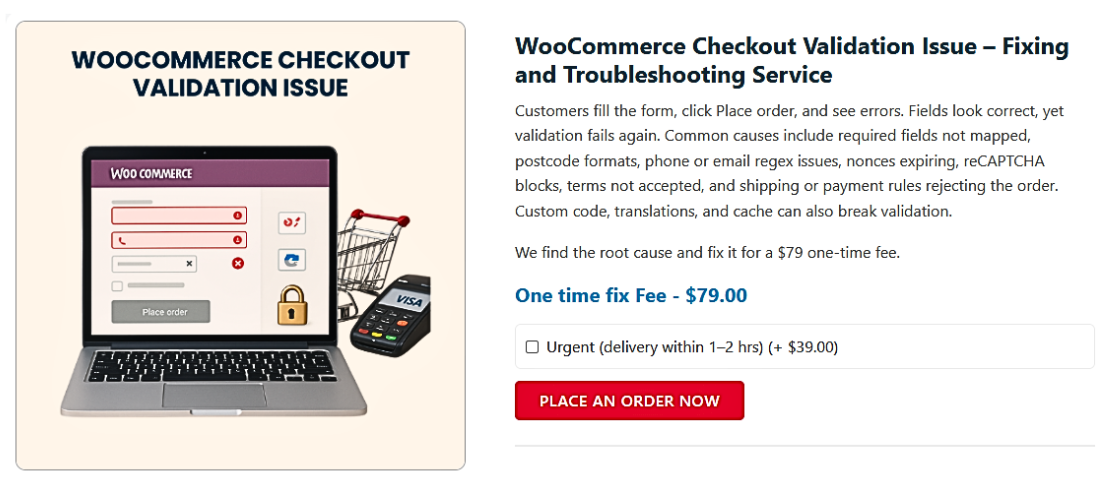
WooCommerce checkout validation ensures customer information is accurate before completing a purchase. It checks the entered data, like email, phone, and ZIP code, to ensure it’s correct. If a required field is empty or contains the wrong format, validation will stop the checkout process. This system helps prevent incomplete orders and keeps your store running smoothly.
Why is WooCommerce Checkout Validation Important?
Validation ensures all the necessary data is in place. If key fields like email addresses or phone numbers are wrong, you risk losing contact with your customers. Moreover, accurate data allows for smoother order fulfillment, reduces errors, and prevents delivery problems. Without proper validation, you may end up with incorrect shipping addresses or invalid payment details. By implementing strong validation measures, you’re ensuring every order is complete and accurate.
Does WooCommerce Validate Checkout Fields by Default
WooCommerce does include some built-in validation rules by default. For example, it checks required fields and basic formatting for emails and phone numbers. But these default checks are often basic and may not catch all errors. If you need advanced rules, you’ll have to add custom code or use a plugin. By default, WooCommerce aims to handle the most common issues, but it’s up to you to strengthen the validation if your store has special needs.
Switch to Multi-Step Checkout with Smooth Inline Validation for a Seamless Experience
Multi-step checkout breaks the checkout process into smaller, easier steps. Instead of overwhelming the customer with all fields at once, each step focuses on a single section. Inline validation highlights errors immediately as customers type. This real-time feedback helps fix mistakes before moving to the next step. A multi-step approach with inline validation creates a smoother, faster checkout experience. It also reduces confusion and helps customers feel more confident about their purchase.

How to Validate Specific Fields in WooCommerce Checkout
Validation ensures the accuracy of customer-provided information, making checkout smoother. By validating fields like phone numbers or custom inputs, you improve data reliability and prevent errors. Here’s how to do it step-by-step.
Validating the Phone Field
Phone field validation helps you collect proper contact information. Without it, customers may input incomplete or invalid numbers, causing communication and shipping issues. Here’s how to implement phone number validation effectively:
Step 1: Create a Store Checkout
Make sure your WooCommerce setup includes a functioning checkout page. This page will serve as the base for adding phone field validation. If the page isn’t set up correctly, customers might never reach the fields you need to validate.
Step 2: Add the Phone Field
Check if the phone field already exists. If not, add it. In WooCommerce settings, navigate to the checkout fields and ensure the phone field is active. If you want to make it mandatory, adjust the field properties accordingly.
Step 3: Enable Inline Validation
Inline validation helps customers by providing instant feedback as they type. For example, if someone enters an invalid format, a message appears right away. This immediate guidance encourages quick fixes and reduces confusion, leading to a smoother checkout experience.
Step 4: Enable Enhanced Phone Field
Consider using a plugin that adds country-specific formatting. With enhanced phone field plugins, customers can select their country and input their number in the correct format. This approach improves accuracy, avoids format errors, and ensures you get valid phone data.
Step 5: Activate the Store Checkout
After making changes, activate the checkout process to test the new settings. This step ensures that all the adjustments, including the phone field validation, are live and functioning as intended.
Step 6: Test the Phone Field Validation
Test various scenarios to confirm that the phone field works correctly. For instance, try entering an invalid number and ensure that the error message appears. Then, input a valid number to verify that the validation allows it. Keep testing until you’re confident that it’s working perfectly.
Validating Custom Fields
Custom fields can collect additional information that’s important for your business. Validating these fields helps maintain the quality of data collected at checkout. Here’s how to approach it:
Step 1: Add a Custom Field
You can create custom fields via WooCommerce’s settings or a dedicated plugin. Ensure that the field appears on the checkout page so customers can interact with it. This step lays the foundation for further validation.
Step 2: Add Validation to the Custom Field
Define specific rules for the field. For example, set minimum and maximum character limits, or enforce a particular format. Use custom code or a plugin that allows you to apply these rules easily.
Step 3: Test the Custom Field Validation
Thoroughly test the custom field with different inputs. Enter incorrect data to see if the validation catches the error, and then try correct data to ensure it’s accepted. Repeat the process until you’re confident that the field works as intended.
Best Practices and Recommendations for Checkout Validation
Ensuring a smooth checkout experience is crucial for customer satisfaction. Implementing proper WooCommerce checkout validation reduces errors, increases conversions, and keeps your customers happy. Below are four best practices for effective field validation.
- Keep Error Messages Clear and Informative
Clear error messages help customers correct mistakes easily. Instead of generic phrases like “Invalid entry,” specify the issue. For example, say, “Please enter a valid email address” or “Phone number must include the area code.” Clear guidance prevents confusion and reduces cart abandonment. - Use Real-Time (Inline) Validation
Real-time validation notifies users of errors immediately. As they fill in fields, any mistake is flagged right away. For example, if a customer types an invalid ZIP code, a warning appears before they proceed. This approach streamlines the checkout process and improves the overall user experience. - Test All Scenarios Regularly
Testing ensures that your validation rules work as intended. Check for various scenarios—missing fields, incorrect formats, or exceeding character limits. Conduct testing every time you update WooCommerce or your theme. By regularly verifying the functionality, you catch potential issues early. - Ensure Mobile and Desktop Compatibility
Many customers shop on their phones. Validation must work seamlessly on mobile and desktop devices. Make sure error messages are readable, fields are accessible, and validation works on touchscreens. A mobile-friendly checkout process leads to higher conversions and better user satisfaction.
Putting It All Together
By following these best practices, you create a hassle-free checkout experience. Customers encounter fewer errors, complete their orders quickly, and leave with a positive impression. Implementing strong WooCommerce field validation helps boost sales, enhance customer trust, and keep your store running smoothly.
Choosing the Right Validation Method
When deciding how to handle WooCommerce checkout field validation, you have two main approaches: using a plugin or writing custom code. Each has its own benefits and drawbacks. Let’s dive into these options so you can determine which best suits your needs.
Using a Plugin for Checkout Validation
A plugin is often the easiest way to implement validation. Many popular WooCommerce plugins offer built-in field validation features. These tools provide an intuitive interface, allowing you to set rules without coding. For example, you can enable inline validation for phone numbers or email addresses, and some plugins even support country-specific formatting.
- Advantages:
- No coding experience required.
- Regular updates from developers ensure compatibility.
- Pre-configured rules save time and reduce errors.
- Disadvantages:
- Additional costs for premium plugins.
- Limited customization compared to writing code.
- Dependency on third-party developers for updates.
Best WooCommerce Checkout Validation Plugin
One standout option is Checkout Field Editor for WooCommerce. It offers a user-friendly interface and robust field validation features. With this plugin, you can:
- Add or edit checkout fields effortlessly.
- Enable inline validation for fields like ZIP codes or phone numbers.
- Customize error messages for improved clarity.
- Implement conditional logic to show or hide fields based on user input.
This plugin is frequently updated, compatible with popular themes, and supported by an active development team.
Using Custom Code for Advanced Validation
Custom code offers complete control over your checkout validation. You can define unique rules tailored to your store’s specific needs. For example, you might add a custom field for a gift message and enforce a maximum character limit.
- Advantages:
- Full flexibility to create custom rules.
- No ongoing subscription fees.
- Can be optimized for performance.
- Disadvantages:
- Requires coding knowledge.
- Manual updates needed for WooCommerce changes.
- Increased chance of errors if not coded carefully.
When to Use a Plugin
Choose a plugin if you want a simple, quick solution. Plugins are ideal for stores with common validation needs and limited technical resources. They allow you to set up validation in minutes, ensuring that fields like ZIP codes or phone numbers meet your requirements. Plugins are also great for small stores without a dedicated developer.
When to Use Custom Code
Use custom code if your validation requirements are highly specific. If you need unique rules that plugins don’t offer, coding might be the better choice. This approach is well-suited for large stores or businesses with in-house developers. It gives you control over the validation logic, ensuring every field behaves exactly as needed.
Making the Final Choice
Consider your technical skills, time, and budget. A plugin is often best for quick, straightforward implementations. If you need maximum control and customization, custom code is the way to go. Whichever path you choose, remember to test thoroughly. This ensures that your checkout runs smoothly and that customers can complete their purchases without confusion.
Contact WooCommerce Support
If you’ve tried all other steps and are still facing issues with WooCommerce checkout validation, it’s time to reach out for professional support.
How to Fix:
- Call WooHelpDesk support at +1 888 602 0119 (US & Canada) for expert guidance.
- Visit WooHelpDesk.com and open a support ticket.
- Describe the validation issues clearly and list the solutions you’ve tried.
- Follow the troubleshooting advice provided by their experienced team.
WooHelpDesk’s support experts can quickly identify and resolve your WooCommerce checkout validation problems, ensuring a smoother shopping experience for your customers.
In conclusion
Ensuring WooCommerce checkout validation creates a smooth, seamless user experience. By following best practices, using the right tools, and thoroughly testing all scenarios, you can reduce errors, boost customer confidence, and increase conversion rates. Whether you use a plugin or custom code, regular checks and updates are crucial. For unresolved issues, consulting an expert team like WooHelpDesk can provide the necessary guidance to fix problems quickly and keep your store running smoothly.


