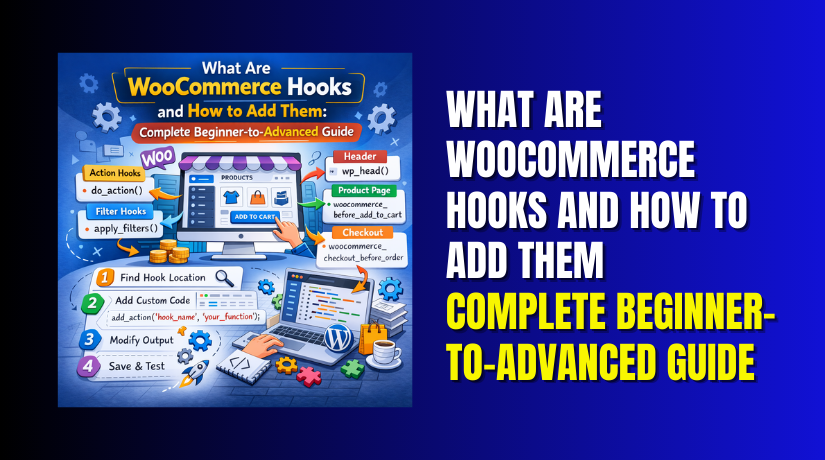
What Are WooCommerce Hooks and How to Add Them: Complete Beginner-to-Advanced Guide
Table of Contents
- Introduction
- What Are Hooks in WooCommerce and Why They Exist
- Types of WooCommerce Hooks Explained with Clear Differences
- Common Places Where WooCommerce Hooks Are Used on Store Pages
- Product Page Hooks Where Most WooCommerce Customization Happens
- Shop and Category Page Hooks for Product Listing Control
- How to Find the Right WooCommerce Hook Without Guesswork
- How to Add WooCommerce Hooks Step By Step Using Safe Methods
- How to Add an Action Hook for Custom Output (Step By Step)
- How to Add a Filter Hook to Modify WooCommerce Output (Step By Step)
- Troubleshooting When WooCommerce Hooks Don’t Work in Your Store
- Best Practices to Avoid Breaking Your Store When Using Hooks
- Conclusion
Introduction
Every WooCommerce store needs small changes over time. You may want to add trust text below price. You may want to move the add to cart button. You may want to change labels on checkout fields. Doing these changes by editing plugin files is risky. One update can remove your changes in seconds.
This is where WooCommerce hooks become very useful. In this WooCommerce hooks tutorial, you will learn the basics first. You will understand what WooCommerce hooks are and why they matter. You will also learn how hooks control output and actions safely. This guide is made for store owners and developers. It keeps things simple, clear, and easy to follow.
What Are Hooks in WooCommerce and Why They Exist
What are WooCommerce hooks in simple words? Hooks are fixed “spots” inside WooCommerce code. These spots let you add or change things safely. WooCommerce calls these spots while loading pages. Your code can run at those exact points. That is why hooks are powerful for customization.
Hooks help you avoid editing core WooCommerce files. They also help you keep updates safe and clean. When WooCommerce updates, your hook code still works. You only need to confirm hook names still exist. Most hook names stay stable across versions and themes.
Types of WooCommerce Hooks Explained with Clear Differences
WooCommerce uses hooks to let you customize without core edits. These hooks are like fixed connection points in pages. When WooCommerce reaches a hook point, it triggers code. Your custom code can run at that exact moment. This is why WooCommerce hooks are safer than file changes. A good WooCommerce hooks tutorial always starts with hook types.
Understanding hook types saves you from wrong placements later. It also helps you pick the right tool for each change. WooCommerce mainly uses two hook types for customization. These are WooCommerce action hooks and WooCommerce filter hooks. Both work differently, even when names look similar. You can also create WooCommerce custom hooks in your own code. That helps when you build reusable custom features.
WooCommerce Action Hooks Used to Add Something at a Hook Point
WooCommerce action hooks help you add new output or run logic. They run your function at a specific place in the page. They do not change existing values by returning data. They simply execute the code you attach to them. This is done using WooCommerce add action in your code. You connect your function to a hook name and priority. When WooCommerce hits that hook, your function runs.
This is perfect for adding new content on the frontend. It is also useful for running tasks in the background. You can add banners, trust badges, and custom messages easily. You can show custom fields near the add to cart area. You can add extra information below the product price too. You can also trigger actions after an order is placed.
WooCommerce Filter Hooks Used to Change an Existing Value
WooCommerce filter hooks help you modify an existing value. They work before WooCommerce shows output to the user. Instead of printing content, filters change data first. Your function receives a value as an input argument. You modify it and then return the updated value. This return part is the key rule for filters. If you do not return, your output may break.
Filter hooks are added using WooCommerce add filters in code. You attach a function to a filter hook name. WooCommerce passes the original value into your function. Your function returns the new value back to WooCommerce. This is ideal for changing text and labels. Filters help you control output in a clean way. They keep your changes stable and update-friendly.
Why This Hook Type Knowledge Helps You Work Faster
When you know hook types, you choose the right method fast. You stop guessing where code should go in files. You avoid breaking output due to missing return values. You also reduce plugin conflicts caused by wrong usage. This makes hook customization safer for live stores. It also makes your work easier when WooCommerce updates. Once you master these types, everything becomes simpler. Your next step is learning where hooks exist on pages. Then you can learn how to add hooks in WooCommerce safely.
Common Places Where WooCommerce Hooks Are Used on Store Pages
WooCommerce pages are built using sections and templates. Hooks are placed inside these sections at key points. This means you can add or change content without core edits. Once you know hook locations, customization becomes much easier. In this WooCommerce hooks tutorial, this part explains common hook areas. You will understand where WooCommerce hooks run on each page. You will also learn what type of changes fit each area best.
Product Page Hooks Where Most WooCommerce Customization Happens
The single product page has many hook points by default. These hook points control the product layout and order. This is why product pages are best for learning hooks first. Most WooCommerce hook examples are based on product pages.
Hooks Around the Product Title and Rating Area
You can add content before or after the product title. You can show short text, icons, or custom notices. You can add a brand label or product code text. You can also display a limited offer message near the title. These changes are best done using WooCommerce action hooks.
Hooks Around the Price and Stock Information Section
Price and stock details are shown inside the product summary. You can add a custom message below price for clarity. You can show shipping estimate text near stock status. You can also add a small return policy line near price. This area is commonly used for trust and clarity messages. It is a great place for simple action-based custom output.
Hooks Around the Add to Cart Button and Quantity Area
The add to cart block has multiple hook spots too. You can add trust badges under the add to cart button. You can add delivery info text near the quantity selector. You can add a size guide link for certain categories. Many stores use hooks here to increase conversions. These are common WooCommerce action hooks use cases.
Hooks Inside the Product Summary and Tabs Area
The product summary contains many elements like excerpt and meta. You can add custom content inside the summary section. You can show extra details like warranty or support contact. You can also add a small FAQ block under short description. Product tabs also offer hook points for custom tab content. You can add a new tab for shipping or care details. You can also change tab titles using WooCommerce filter hooks.
Shop and Category Page Hooks for Product Listing Control
Shop and category pages use a product loop to display items. WooCommerce adds hooks before and after this loop. These hooks are useful for banners, sorting, and extra text.
Hooks Before the Product Loop for Notices and Filters
Before the loop, WooCommerce shows notices and sorting dropdowns. You can add a category banner above product listings. You can add a short category description in a styled block. You can add a custom filter notice for specific categories. This is usually done using WooCommerce action hooks.
Hooks Inside Each Product Card in the Loop
Each product item has hook points for image and title areas. You can add badges like “Best Seller” on product cards. You can show custom labels like “Free Shipping” for some items. You can add short feature text under product title. These are popular WooCommerce hook examples for shop pages.
Hooks After the Product Loop for Extra Content
After the loop, you can add helpful text or links. You can add a size guide link for apparel categories. You can show a custom promotion message below the listings. You can also add SEO-friendly content after the products for users. This helps pages look complete and more helpful.
How to Find the Right WooCommerce Hook Without Guesswork
Finding the right hook is the most important step. If the hook is wrong, nothing will show up. You need a clear method to locate correct hook names. This is where the next section becomes important.
Use WooCommerce Template Files to Locate Hook Names
WooCommerce templates include hook calls inside them. You can look for the hook calls inside template files. The hook calls are easy to identify in code. You will usually see do_action() for actions. You will usually see apply_filters() for filters. These show you the hook name and its location. This method is reliable and works for most stores.
Search for do_action and apply_filters in WooCommerce Templates
A fast way is using code search in your editor. Search for do_action( to find action hook points. Search for apply_filters( to find filter hook points. This gives you quick results without guesswork. It also helps you confirm exact hook names easily.
Use Hook Visualizer Plugins to See Hook Positions
Hook visualizer plugins display hook names on pages. They show hook positions in real time on frontend. This helps beginners learn hook locations faster. It also helps you confirm hook placement without code search. You can use this method for product and checkout pages.
Confirm Hook Placement with a Small Test Output
The easiest test is printing a small line of text. Add a short message using an action hook first. If the message appears at the right location, you are correct. Then you can replace the test message with real content. This reduces mistakes and makes changes safer. It also saves time during debugging and testing.
How to Add WooCommerce Hooks Step By Step Using Safe Methods
Now you know where WooCommerce hooks appear on store pages. The next step is adding hooks the right way. This part of the WooCommerce hooks tutorial explains safe setup methods. You will learn how to add hooks in WooCommerce without breaking pages. You will also learn when to use actions and filters correctly. This section uses clear steps and practical WooCommerce hook examples.
Choose the Best Place to Add Your WooCommerce Hook Code
Before adding any hook, choose where your code will live. This decision affects updates, stability, and portability. The goal is keeping changes safe during theme updates. It also helps you disable code quickly if needed.
Use Child Theme functions.php for Theme Based Custom Changes
A child theme is a safe way to store hook code. It keeps your changes separate from the main theme. When the parent theme updates, your code stays active. This is useful for design related hook changes. It is also good for custom content additions on pages. If you switch themes later, you must move code again. That is why it is best for theme-linked customizations.
Use a Custom Plugin for Long Term and Portable Customization
A custom plugin is the best long-term option. It keeps your hook code independent from theme files. Your customization stays active even after theme changes. This is ideal for stores with frequent design updates. It also keeps custom logic organized and reusable. If you manage multiple stores, plugins scale well. This approach is great for advanced custom workflows too.
Use Code Snippets Plugin for Quick and Safer Hook Testing


Code Snippets are helpful for quick changes and testing. You can enable or disable snippets in one click. This reduces risk when you are trying new hook placements. It also avoids direct file editing in live sites. Many beginners start with snippets for small changes. Later they move stable code into a custom plugin.
How to Add an Action Hook for Custom Output (Step By Step)
Action hooks tell WooCommerce to run your function at a point. You attach your function using WooCommerce add action. This is perfect for adding text, HTML, or blocks. Follow these steps to avoid mistakes and placement issues.
Step 1 Pick the Correct Action Hook Name for Your Location
- Start by choosing the correct hook for your target page.
- If it is a product page, pick a product hook. If it is a checkout, pick a checkout hook.
- Make sure the hook exists in your theme output. Some themes override layouts and change hook visibility.
- Confirm the hook using template search or a hook viewer.
Step 2 Create a Custom Function That Outputs Your Content
- Create a function that will run at the hook point. Inside it, add your HTML or text output.
- Keep the output simple at first for testing. Add only one message line for initial confirmation.
- After placement is confirmed, add real content and styling.
- This makes testing easy and reduces confusion.
Step 3 Attach the Function to the Hook Using WooCommerce add action
- Now attach your function to the hook using WooCommerce add action.
- This connects your code to the hook point.
- Your function will run when WooCommerce triggers that hook. You can also set a priority value in the hook call.
- Priority controls the order of multiple hooked functions. Lower priority runs earlier than higher priority.
Step 4 Test the Hook Output on the Frontend Page
- Open the page and confirm your message location.
- If the output shows at the right position, you are done.
- Replace the test message with your real content. If it does not show, check hook name and page type.
- Also check if caching is hiding recent changes.
- Disable cache and test again for accurate results.
Step 5 Use Priority to Adjust Placement Within the Same Section
- Sometimes the output shows but not in the best order. This is where priority becomes useful for adjustment.
- If you want output earlier, use a lower priority number.
- If you want output later, use a higher priority number.
- This helps when multiple plugins add content to the same spot.
- It also helps you keep the layout clean and readable.
How to Add a Filter Hook to Modify WooCommerce Output (Step By Step)
Filter hooks are used when you want to change a value. You attach your function using WooCommerce add filter. Filters always accept a value and must return a value. This return rule is critical for stable output. Follow these steps to apply filters safely in your store.
Step 1 Choose the Filter Hook That Matches Your Target Output
- Pick the filter based on what you want to change.
- For button text, choose a button text filter.
- For a price display, choose a price filter. For checkout fields, choose the checkout fields filter.
- Confirm the filter name is correct before writing code.
- Filters often have similar names, so double check carefully.
Step 2 Create a Function That Accepts the Value and Modifies It
- Your function should accept the original value as input.
- Then update the value based on your requirement.
- Keep changes simple and predictable for user experience.
- Always keep the output clean and easy to read.
- Do not add extra text that can confuse users.
- Filters should improve clarity, not add noise.
Step 3 Return the Updated Value Without Breaking the Output
- After editing the value, return the final value.
- This is the most important filter rule for success.
- If you forget to return, WooCommerce may show blank output.
- It can also cause layout issues in some themes.
- Always return the value even if unchanged in conditions. This keeps the output safe and stable.
Step 4 Attach the Function Using WooCommerce add filter and Test
- Attach your function using WooCommerce add filter.
- Then open the page where the value appears.
- Confirm the text or value changed correctly. If it changes, your filter is working as expected.
- If not, recheck filter name, priority, and conditions.
- Also confirm the correct page template is being used.
Troubleshooting When WooCommerce Hooks Don’t Work in Your Store
Sometimes your hook code looks correct, but nothing shows. This is common for beginners and advanced users too. The good news is the reasons are usually simple. You just need a clear checklist to fix it. This section covers the most common problems with WooCommerce hooks. It will help you debug quickly and avoid wasting time. It also includes simple ways to confirm your hook is running.
The Hook Name Is Wrong or Not Used on That Page
This is the most common reason hooks do not work. A small spelling issue can stop everything from loading. Some hooks only run on specific templates and pages. A product hook will not work on the cart page. A checkout hook will not work on the shop page. Always confirm the hook name from the template file. You can also check a reliable WooCommerce hooks tutorial reference. Once the hook name matches, your output should appear.
Your Theme Overrides WooCommerce Templates and Changes Hook Output
Many themes override WooCommerce templates to change layouts. When this happens, some default hooks may be moved or removed. This can make your hook code appear like it is not working. Check if your theme has a woocommerce folder inside it. If it does, template overrides may be active. In that case, you must confirm hook locations in theme templates. Hook visualizer plugins also help confirm if hooks exist.
Another Plugin or Theme Code Removed the Hook
Some plugins remove WooCommerce hooks to change layouts. Themes also remove hooks to build custom product templates. If a hook is removed, your code will never run there. This happens when code uses remove_action or remove_filter. If you suspect this, temporarily disable related plugins. Switch to a default theme for a quick test if possible. If the hook works there, your theme is the cause.
Your Hook Priority Is Causing Placement or Output Issues
Priority controls when your function runs in the hook order. If many functions run on the same hook, order matters. Your content may be added but placed in a different spot. It may also be pushed below another block and look missing. Try changing the priority number to test placement. Lower numbers run earlier, higher numbers run later. This is a simple fix for many placement issues.
Your Function Has a PHP Error and Stops the Page Output
A small PHP error can stop hook code from running. It can also stop the full page from loading correctly. Check for missing semicolons, brackets, or wrong function names. If you can, check your server error log for details. You can also enable WordPress debug logging for testing. Fixing the PHP error usually brings the hook back instantly.
Cache and Minification Is Hiding Your Hook Changes
Caching plugins can show old versions of pages. Minification can also delay changes in HTML output. If your hook change is not visible, clear all caches. Clear page cache, object cache, and CDN cache if used. Disable minify for quick testing if needed. Then reload the page in an incognito window. Many hook issues are only caching problems.
You Used a Filter Hook but Forgot to Return the Value
This issue is common with WooCommerce filter hooks. Filters must always return the updated value. If you do not return, the output may become blank. The page can also show broken text or missing labels. Always return the value even when conditions fail. This is the key rule for using WooCommerce add filters safely.
You Used an Action Hook but Expected It to Modify Existing Text
WooCommerce action hooks add new output or logic. They do not modify existing values automatically. If you want to change existing text, you need a filter. For example, changing button text needs a filter hook. Adding text below the button needs an action hook. Use the right hook type for the right result. This avoids confusion and wrong expectations.
Best Practices to Avoid Breaking Your Store When Using Hooks
Hooks are safe, but bad setup can still cause issues. These best practices keep your store stable and update-friendly. Follow them every time you add WooCommerce hooks or custom code.
Always Test Hook Changes on a Staging Site First
A staging site lets you test without risk. You can try hook placement and output freely. If something breaks, your live store stays safe. Once everything works, move the code to live site. This is the best habit for long term stability.
Never Edit WooCommerce Core Plugin Files for Customization
Core file edits will be removed on WooCommerce updates. They also make debugging much harder later. Hooks avoid this issue and keep upgrades smooth. Use hooks, snippets, or a custom plugin instead. This keeps your store update-ready and secure.
Keep Hook Code Small and Focused for Easy Control
Write small snippets for one purpose only. Do not add many features in one function. Small code is easier to test and easier to roll back. It also reduces chances of hidden errors on checkout pages. Clean code keeps your store fast and reliable.
Comment Your Hook Code for Future Updates and Fixes
Add simple comments above each hook function. Mention what it does and where it appears. Mention the hook name and the page location too. This makes later fixes much faster and less stressful. It is also useful if another developer works later.
Use Conditions So Hooks Run Only Where Needed
Do not run every hook on every page. Target by product, category, or user role when needed. This improves performance and avoids unwanted changes. It also prevents confusing messages on the wrong pages. Conditions make your customization more professional.
Keep a Quick Rollback Plan if Something Goes Wrong
If you use Code Snippets, you can disable it fast. If you use a custom plugin, keep an easy toggle. If you use functions.php, keep FTP access ready. Always know how to disable custom code quickly. This is critical for checkout and payment pages.
Recheck Hook Customizations After Theme and Plugin Updates
Updates can change layouts and hook placement in some themes. After updates, test product, cart, and checkout pages. Confirm your custom output still looks correct. This prevents small layout issues from hurting conversions later. Regular checks keep the store stable and clean.
Conclusion
Now you understand WooCommerce hooks clearly. You learned how actions and filters work in real use. You also learned how to debug hook issues quickly. You learned best practices to keep your store safe. If you want clean customization without breaking checkout, hooks are ideal. If you need help with complex hooks and custom layouts, we can help. Contact WooHelpDesk for expert WooCommerce customization support. We will add hooks safely and keep your store stable.