User Registration for WooCommerce: Complete Guide to Custom Fields, Roles, and Approval
Table of Contents
- Introduction
- Why Custom Registration Is Important This plugin is excellent for a wide variety of WooCommerce store types.
- Common Use Cases
- Features of the User Registration for WooCommerce Plugin
- Step-by-Step Setup Process for User Registration for WooCommerce plugin
- Best Use Cases
- Conclusion
Introduction
The default WooCommerce registration form is simple but limited. It only asks for a few basic details. This might work for small stores, but not for growing businesses. If you’re managing wholesale buyers, VIPs, or different customer types, you need more control.
Many store owners want to collect more information during sign-up. But WooCommerce doesn’t support custom registration fields by default. That’s where the User Registration for WooCommerce plugin helps.
You may personalize your WooCommerce registration form with this plugin. You can build forms with custom fields and control user roles. You can also automate approvals and send notifications. It’s a complete solution for better user onboarding.
Why Custom Registration is Important This plugin is excellent for a wide variety of WooCommerce store types.
A one-size-fits-all form may confuse your users. Different customers need different fields. For example:
- B2B buyers may need company name or tax ID
- VIP customers might enter a referral code
- Vendors may upload business documents
By adding these fields, you make the process smoother for each group. It also aids in the initial collection of accurate data.
Common Use Cases
This plugin works great for many types of WooCommerce stores. It’s perfect if you:
- Run a wholesale or B2B store
- Offer memberships or subscriptions
- Sell restricted or exclusive products
- Want to approve or reject new sign-ups manually
- Need to group users by role and show/hide content
Features of the User Registration for WooCommerce Plugin
The User Registration for WooCommerce plugin offers powerful tools to manage user sign-ups. It helps you create custom registration forms with advanced fields and settings. You can build different forms for different user types. You can also automate tasks like approvals, role assignments, and notifications.
Let’s go through all the key features this plugin provides.
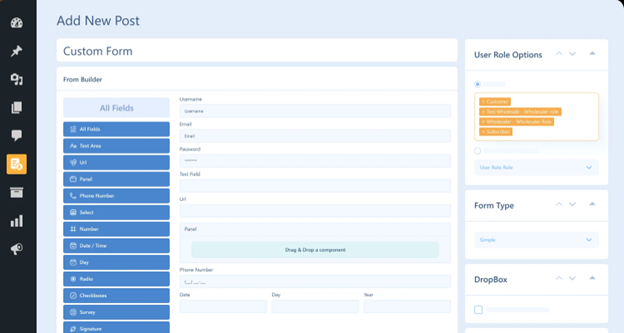
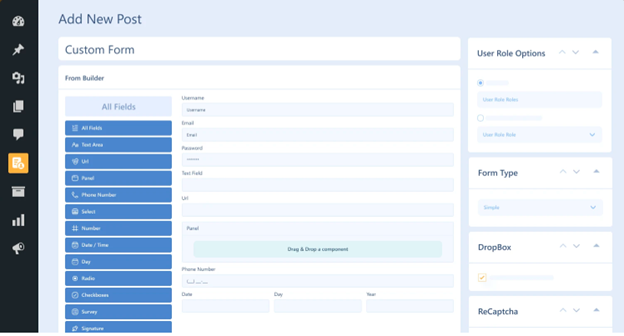
Custom Form Builder with Drag-and-Drop Support
To create forms, you don’t need to know how to code. A drag-and-drop builder included with the plugin makes creating forms simple. You can design forms in minutes.
You can add over 25+ field types, such as:
- Text input fields
- Dropdown menus
- Checkboxes and radio buttons
- File uploads
- Date pickers
- Survey fields
- Signature fields
It is possible to make each field mandatory or optional. You can also control where the fields appear—on registration, checkout, or My Account pages.

Add Custom Fields to WooCommerce Registration
Custom fields can be added to the WooCommerce registration form using the plugin. This helps you collect more information during sign-up. You can show fields like:
- Company name
- Tax number
- User interests
- Referral code
- Upload documents
You can also include WooCommerce billing and shipping fields. These fields help gather important data before checkout. You can mark fields as required or leave them optional.
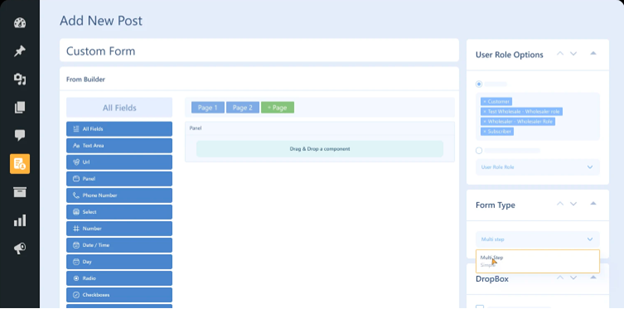
Multi-Step Form Layout for Better User Experience
Long forms can be boring or confusing. This plugin lets you split the form into steps. Users fill out one section at a time, which makes it easier.
Benefits of multi-step forms:
- Cleaner layout
- Higher form completion rate
- Better user engagement
You can label each step and customize the progress bar.
Role-Based Registration Forms
You can build different forms for different user roles. For example, one form for retailers and another for wholesalers. Each form can assign a role automatically once the user registers.
Features include:
- Set default user roles
- Show user role dropdown on the form
- Manually or automatically assign roles
- Restrict users from accessing certain pages
This helps control who sees what in your store.
Approval System with Whitelist and Blacklist
Sometimes you don’t want to auto-approve all users. You have complete control thanks to this plugin.
You can:
- Approve or reject user requests manually
- Auto-approve users from trusted email domains (whitelist)
- Auto-reject users from unwanted domains (blacklist)
- Show custom messages for each status (approved, pending, rejected)
You’ll receive notifications when new users sign up. You can also send emails to inform users about their status.
Invitation Codes for Exclusive Registrations
Want to control who signs up? Use invitation codes.
You can:
- Create codes either automatically or manually.
- Set expiry dates and usage limits
- Import codes via CSV file
- Send codes by email with a direct registration link
- Make the code field optional or required
This is great for private or invite-only stores.
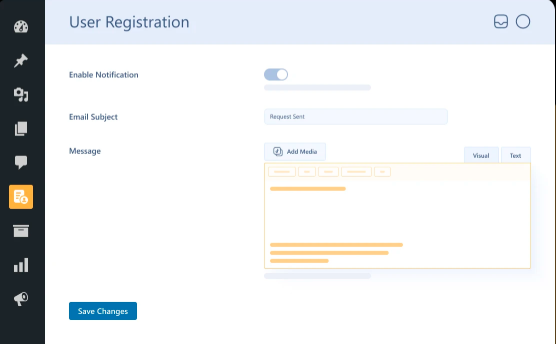
Email Notifications for Admins and Users
You can create personalized email alerts using the plugin. These are sent automatically based on the user’s status.
You can notify:
- Admins about new requests
- Users when their account is approved
- Users when their request is rejected
- Users when their status is pending
You can also choose which admin receives alerts. This helps you stay informed without checking the dashboard all the time.
Dropbox, ReCAPTCHA, Twilio, and VAT Integrations
The plugin supports useful integrations:
- Dropbox – Users can upload files during sign-up. Files are saved directly to your Dropbox account.
- Google reCAPTCHA – Prevents spam or fake registrations with “I’m not a robot” check.
- Twilio OTP – Sends SMS verification codes to users during registration.
- VAT (VIES) – Validates VAT numbers for B2B registrations.
Each of these features adds more trust and control to your registration process.
Styling and Design Options
You can match the form to your store’s theme. To change colors, spacing, or fonts, use custom CSS.
Other UI features include:
- Enable password visibility toggle
- Add confirm password field
- Show password strength meter
- Choose between Flat or Round form styles
The user experience is significantly impacted by these minor details.
Benefits for User Registration for WooCommerce


With this plugin, you can:
- Build custom WooCommerce registration forms
- Add advanced fields without coding
- Assign roles to users and limit their access
- Configure either automatic or manual approvals
- Send email alerts automatically
- Secure the process with OTP, reCAPTCHA, and invitation codes
- Match forms to your brand using CSS
It’s among the most comprehensive ways to personalize the WooCommerce user registration process.
Step-by-Step Setup Process for User Registration for WooCommerce plugin
Setting up the User Registration for WooCommerce plugin is simple. You don’t need coding knowledge to get started. To install, customize, and design custom registration forms that meet the demands of your store, simply follow these steps.
Step 1: Install the Plugin
The plugin must first be downloaded and installed.
- Go to your WordPress dashboard
- Navigate to Plugins → Add New
- Click Upload Plugin at the top
- Select the plugin .zip file and click Install Now
- Once installed, click Activate
The plugin must first be downloaded and installed.
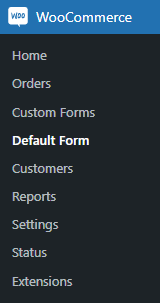
Step 2: Access Plugin Settings
After activation, you’ll see a new tab inside WooCommerce settings.
- Go to WooCommerce → Settings → User Registration
- This tab has all your configuration options
- It includes sub-tabs for General, User Roles, Notifications, Display, Integrations, and more
Each tab lets you control a specific part of the registration flow.
Step 3: Create Your First Registration Form
You can now build your custom form.
- Go to WooCommerce → Default Form or Custom Forms
- Use the drag-and-drop builder to add fields
- Choose from 25+ field types like text, dropdown, date, checkbox, file upload, and more
You can place fields in the order you want. Fields can also be made required or optional.
After creating your form, make a duplicate of the given shortcode. Then:
- Go to Pages → Add New
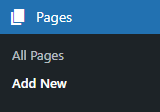
- Add a title (like “Register”)
- Paste the shortcode into a Shortcode block
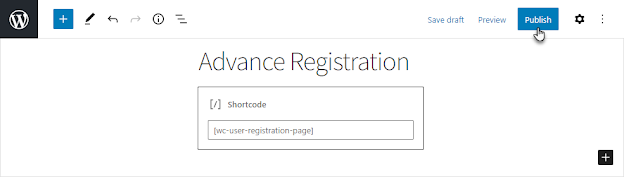
- Click Publish
Your custom registration page is now live.
Step 4: Add Custom Fields
You can include extra fields for more user info.
- Billing and shipping fields
- File upload fields
- Survey, signature, or company info fields
To enable these:
- Go to WooCommerce → Default Form → Extra Fields tab
- Add the fields and click Save Changes
You can also show these fields on:
- Registration form
- My Account page
- Checkout page
This helps you collect the right info at the right time.
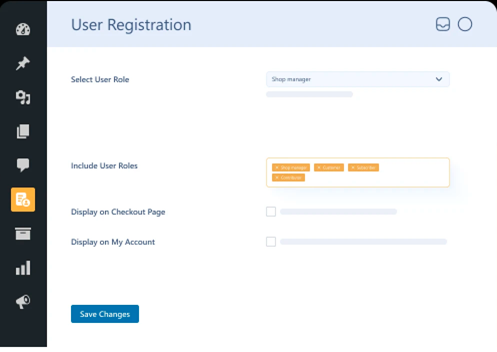
Step 5: Assign and Manage User Roles
Create roles for different user types like wholesalers or VIPs.
- Go to Users → User Roles → Add New
- Enter a name, slug, and description
- Save the role
Now assign roles to forms. You can:
- Set a default user role
- Show a role dropdown on the registration form
- Auto-assign roles after approval
- Restrict roles from accessing specific pages
This helps control access to content or pricing based on role.
Step 6: Set Up Invitation Codes (Optional)
If you want exclusive registration access, use invitation codes.
- Go to WooCommerce → Invitation Code
- Codes can be generated automatically or manually.
- Set usage limits and expiry dates
- Import codes via CSV
- Send codes by email with a registration link
You can make the invitation code field required or optional. This is great for private stores or pre-approved users.
Step 7: Configure Approvals and Notifications
Control who gets approved and how they’re notified.
- Go to User Registration → User Approval
- Choose between manual or auto-approval
- Use a whitelist to approve trusted domains automatically
- Add a blacklist to block unwanted domains
Next, set up email notifications:
- Notify admins of new requests
- Notify users when approved or rejected
- Customize email subject lines and messages
This keeps everyone informed during the sign-up process.
Step 8: Enable Extra Security and Verifications
You can protect your form with:
- Google reCAPTCHA
- Twilio OTP (SMS verification)
- Email verification
- VAT number validation (via VIES)
To enable these, go to the Integrations or Verification tabs in the plugin settings. Enter the required API keys or settings, and click Save.
Step 9: Test the Form
Before going live, test your form:
- Register a test user
- Check field visibility and layout
- Ensure role assignment works
- Try approval and email notifications
- Use an invitation code (if required)
This ensures everything runs smoothly for your real users.
Best Use Cases
This plugin is a perfect fit for:
- Wholesale or B2B stores needing detailed customer info
- Membership websites requiring approvals or exclusive access
- Digital product sellers looking to verify customer identities
- Event or service providers who want secure sign-ups
- Multi-role stores needing different forms for different users
If you want a smarter, more flexible registration system—this is it.
Conclusion
Creating a custom user registration process in WooCommerce doesn’t have to be difficult. With the User Registration for WooCommerce plugin, you get all the tools you need to build flexible, powerful, and user-friendly forms. From custom fields to role-based forms and secure verification, everything is built to enhance your customer experience and streamline your workflow.
This plugin is ideal if you want to enhance the sign-up procedure in your store. It’s full with features that increase engagement and save time, and it’s simple to set up.
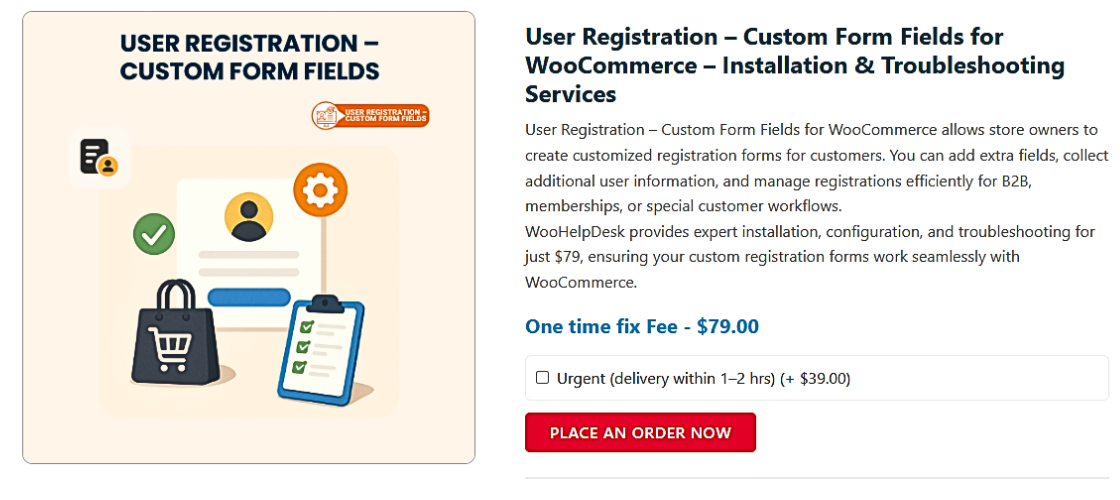
Need help with setup, customization, or any WooCommerce or WordPress issue?
👉 Contact WooHelpDesk today for expert support at
📞 +1 888 602 0119 (US & Canada)— We’re here to help you succeed.
Let’s make your WooCommerce store work smarter, not harder.