MailPoet WooCommerce Integration: Automate Emails & Increase Conversions
Table of Contents
- Overview of MailPoet
- Why Choose MailPoet Over Other WooCommerce Email Marketing Plugins?
- Key Benefits of Using MailPoet for WooCommerce
- Setting Up MailPoet in WooCommerce
- Email Automation and Campaigns in MailPoet
- Growing Your Email List with MailPoet
- Segmenting Email Lists for Personalization
- Analyzing and Optimizing Email Performance
- Final Thoughts
Overview of MailPoet
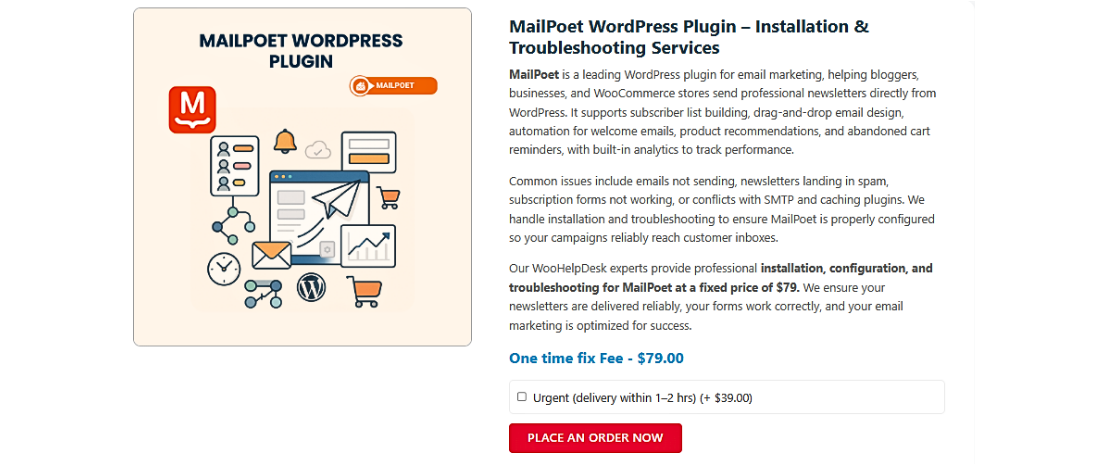
MailPoet is a powerful email marketing plugin designed for WooCommerce stores. It allows store owners to send newsletters, promotional emails, and automated messages. With MailPoet, you can manage everything directly from your WordPress dashboard. Unlike external email platforms, it works seamlessly within WooCommerce.
For eCommerce to succeed, email marketing is crucial. It improves engagement, raises sales, and keeps customers. MailPoet simplifies this process with easy-to-use tools for creating and sending emails. MailPoet makes it simple to send follow-ups, order confirmations, and reminders about abandoned carts.
Why Choose MailPoet Over Other WooCommerce Email Marketing Plugins?
There are many email marketing plugins for WooCommerce, but MailPoet stands out. Here’s why:
- Built for WooCommerce
Specifically, MailPoet is made for WooCommerce stores. It integrates seamlessly with your site. Unlike third-party email services, there’s no need to switch between platforms. Everything is controllable from your WordPress dashboard.
- No Technical Knowledge Required
Setting up MailPoet is simple and beginner-friendly. You don’t need coding skills or complex configurations. With its drag-and-drop email editor, creating emails is quick and easy.
- Automates WooCommerce Emails
MailPoet allows you to automate important emails. Order follow-ups, abandoned cart reminders, and welcome emails are all possible. These emails help improve customer engagement and increase sales.
- High Email Deliverability
One common issue with email marketing is emails landing in spam. MailPoet solves this by offering a built-in email sending service. This ensures your emails reach customer inboxes, not spam folders.
Key Benefits of Using MailPoet for WooCommerce
MailPoet is the greatest option for WooCommerce stores because it provides a number of benefits.:
- Automates email marketing to save time and effort.
- Customizes WooCommerce transactional emails to match your brand.
- Recovers lost sales with abandoned cart emails.
- Grows your email list with signup forms and checkout opt-ins.
- Improves email open rates with optimized delivery.
- Tracks email performance with detailed analytics.
MailPoet makes email marketing simple and effective for WooCommerce users.
Setting Up MailPoet in WooCommerce
MailPoet is easy to install and configure on your WooCommerce store. It does not require technical skills or complex settings. To install, configure, and set up MailPoet for email marketing, follow these instructions.
Step 1: Installing and Activating MailPoet
- Install MailPoet from the WordPress Plugin Directory
-
- Access your WordPress dashboard by logging in.
- From Plugins, select Add New.
- Search for MailPoet – Newsletters, Email Marketing, and Automation.
- Activate the plugin after selecting Install Now.
- Install MailPoet from WooCommerce Marketplace (For Paid Version)
-
- Visit the MailPoet product page.
- Purchase a MailPoet premium plan if needed.
- Download the plugin ZIP file after purchase.
- In WordPress, go to Plugins > Add New > Upload Plugin.
- After selecting a file and uploading the ZIP file, click Install Now.
- After installing the plugin, activate it.
After activation, you will see a new MailPoet tab in your WordPress dashboard.
Step 2: Configuring MailPoet Settings
Once installed, you need to configure MailPoet for optimal performance.
- Set Up Sender Details
-
- Go to MailPoet > Settings > Basics.
- Enter the From Name (e.g., your store name).
- Enter the From Email (use a professional domain email).
- Set a Reply-to Email if different from the sender email.
Using a domain-based email (e.g., [email protected]) improves email deliverability. Avoid using Gmail or Yahoo addresses.
- Configure Email Sending Frequency
-
- Go to MailPoet > Settings > Send With
- Set the email sending limit (to avoid spam detection).
- Choose how often to send emails (immediate or scheduled).
MailPoet automatically manages email queueing, ensuring smooth delivery.
Step 3: Choosing an Email Sending Method
MailPoet allows you to send emails using different methods. The right choice affects email deliverability and performance.
- Using the MailPoet Sending Service (Recommended)
MailPoet provides a built-in email-sending service for better inbox placement.
Steps to Enable MailPoet Sending Service:
-
- Go to MailPoet > Settings > Send With
- Select MailPoet Sending Service.
- Click Activate MailPoet Sending Service.
- Follow the verification process (confirm your domain).
- Using Your Own SMTP Provider (Alternative Option)
If you prefer, you can send emails through SMTP services. These include SendGrid, Amazon SES, and Mailgun.
Steps to Use an SMTP Provider:
-
- Install a plugin for SMTP, such as WP Mail SMTP.
- Set up SMTP credentials from your email provider.
- Go to MailPoet > Settings > Send With
- Select Other (SMTP) and enter your SMTP details.
- Click Save Settings and test your email delivery.
Using an SMTP provider gives you more control but requires technical setup.
Step 4: Enabling WooCommerce Email Automation
MailPoet allows you to automate key WooCommerce emails. These include order confirmations, abandoned cart emails, and follow-ups.
- Enable WooCommerce Emails in MailPoet
-
- Go to MailPoet > Settings > WooCommerce.
- Enable WooCommerce email features.
- Select which emails you want to automate.
- Set Up Automated Emails
-
- Go to MailPoet > Emails > Add New.
- Choose an automation type:
- Welcome emails for new customers.
- Abandoned cart emails for recovering lost sales.
- Transactional emails (order confirmations, shipping updates).
- Pick a pre-designed email template or create a custom design.
- Use the drag-and-drop editor to personalize the email’s content.
- Set email triggers (e.g., send email 24 hours after cart abandonment).
- To begin the automation, click Activate.
Automating WooCommerce enhances client interaction and saves time.
Step 5: Customizing WooCommerce Transactional Emails
WooCommerce default emails are basic and lack branding. MailPoet allows you to customize these emails for better engagement.
- Edit WooCommerce Email Templates
-
- Go to MailPoet > Emails > Add New.
- Choose Transactional Emails for WooCommerce.
- Select an already-made template or begin from scratch.
- Add Branding Elements
-
- Insert your store logo at the top.
- Make the color palette more consistent with your brand.
- Modify the email footer to include social links or legal disclaimers.
- Personalize Email Content
-
- Add dynamic content like customer name and order details.
- Write a friendly and engaging email message.
- Ensure a clear call to action (e.g., “Track Your Order”).
- Save and Test Your Emails
-
- Click Save Email.
- Send a test email to check formatting.
- Adjust any design issues before enabling.
Customizing WooCommerce emails improves customer experience and reduces confusion.
Step 6: Setting Up a Newsletter Subscription Form
Long-term success depends on expanding your number of email subscribers. You can make visually appealing signup forms with MailPoet.
- Create a New Subscription Form
-
- Go to MailPoet > Forms.
- Click Add New Form.
- Choose a form type:
- Pop-up form (appears after a few seconds).
- Slide-in form (shows at the bottom of the screen).
- Fixed bar form (stays at the top of the page).
- Checkout opt-in form (adds a subscribe option at checkout).
- Customize the Form Design
-
- Add an attention-grabbing headline.
- Write a short and clear description.
- Use a strong call-to-action (e.g., “Join our VIP list!”).
- Select a form placement (homepage, product pages, or checkout).
- Enable Double Opt-In (Recommended)
-
- Double opt-in ensures higher quality subscribers.
- Customers confirm their email before being added to the list.
- Save and Publish the Form
-
- Click Save and preview the form.
- Test the form display and functionality.
- Publish it on your WooCommerce store.
Subscription forms increase your email list and boost marketing efforts.
Email Automation and Campaigns in MailPoet
MailPoet makes email automation easy for WooCommerce stores. You can send targeted emails to improve engagement and increase sales. Automating emails saves time and ensures customers receive timely messages. In this section, we’ll cover how to create email campaigns, automate WooCommerce emails, and personalize messages for better results.
Creating Automated Emails for WooCommerce
Automated emails increase conversions and preserve client connections. Emails can be sent in response to consumer behaviors such as purchases, sign-ups, or inactivity.


- Setting Up Welcome Emails for New Subscribers
An excellent first impression is produced with a welcome email. It establishes credibility and presents your brand.
Steps to Create a Welcome Email:
-
- Go to MailPoet > Emails > Add New.
- Choose Welcome Email.
- Choose an already-made template or make your own.
- Personalize the email’s content and subject line.
- Add a call to action (e.g., “Start Shopping Now”).
- Schedule the email immediately or after a delay.
- Click Save and Activate.
A well-crafted welcome email increases customer engagement and encourages first-time purchases.
Abandoned Cart Emails in MailPoet
A lot of consumers put items in their carts but abandon the checkout process. You may recoup lost sales by sending abandoned cart emails with MailPoet.
- Why Abandoned Cart Emails Matter
-
- Reminds clients of the items they still have in their cart.
- Increases conversion rates by encouraging checkout completion.
- Creates urgency with limited-time offers or discounts.
- Setting Up Abandoned Cart Emails
-
- Go to MailPoet > Emails > Add New.
- Navigate to WooCommerce > Email Abandoned Cart.
- Choose an already-made template or create your own.
- Customize the subject line and email content.
- Set up email triggers (e.g., send after 1, 6, or 24 hours).
- Add a discount code to encourage purchases.
- Click Save and Activate.
MailPoet automatically stops emails if the customer completes the purchase. This ensures a seamless experience without unnecessary reminders.
Customizing WooCommerce Transactional Emails
WooCommerce default emails are plain and lack branding. MailPoet allows you to customize these emails to match your store’s identity.
- Why Customize WooCommerce Transactional Emails?
-
- Improves the coherence of colors and logos for the brand.
- Improves customer trust with a professional email design.
- Adds extra information like product recommendations and social links.
- Editing WooCommerce Transactional Emails
-
- Go to MailPoet > Emails > Add New.
- Select WooCommerce > Transactional Email.
- Pick an email type (order confirmation, shipping update, etc.).
- Choose a pre-designed template or create one from scratch.
- Customize the email layout, fonts, and colors.
- Add a personalized message for customers.
- Click Save and Activate.
- Personalizing WooCommerce Emails
-
- Use customer first names in subject lines.
- Add order details and tracking links for better communication.
- Include upsell offers to increase revenue.
Customized transactional emails improve customer experience and build long-term relationships.
Creating Promotional Email Campaigns
Promotional emails help you announce sales, product launches, and special events. You can design compelling campaigns with MailPoet in a matter of minutes.
- Setting Up a Promotional Email
-
- Go to MailPoet > Emails > Add New.
- Select a promotional email or a newsletter.
- Choose a template or begin with an empty design.
- Add a catchy subject line (e.g., “Exclusive Offer: 20% Off Today!”).
- Add product links, pictures, and calls to action (CTAs).
- Choose your target audience (all customers or specific segments).
- Schedule the email immediately or for a later time.
- Click Save and Send.
- Best Practices for Promotional Emails
-
- Keep the design simple and mobile-friendly.
- Use a clear CTA (e.g., “Shop Now” or “Claim Your Discount”).
- For higher open rates, send emails in the morning or evening.
- See what works best by experimenting with different subject lines.
Frequent promotional mailings increase sales and consumer engagement.
Segmenting Customers for Targeted Email Campaigns
It is inefficient to send every consumer the identical email. MailPoet allows you to segment customers based on behavior and preferences.
- Why Customer Segmentation Matters
-
- Sending pertinent material raises email open rates.
- Reduces unsubscribe rates by avoiding unnecessary emails.
- Boosts sales with personalized recommendations.
- Creating Customer Segments in MailPoet
-
- Go to MailPoet > Subscribers > Segments.
- Click Create New Segment.
- Choose segmentation criteria:
- Total spent (e.g., high-value customers).
- Number of orders (e.g., repeat buyers).
- Last purchase date (e.g., inactive customers).
- Customer location (e.g., country or region-based campaigns).
- Save the segment and use it in email campaigns.
Segmented emails increase engagement and result in higher conversions.
Scheduling Automated Emails in MailPoet
MailPoet allows you to schedule emails in advance. This keeps your email marketing consistent.
- How to Schedule Emails in MailPoet
-
- Create an email campaign in MailPoet > Emails.
- Design the email using the drag-and-drop editor.
- Click Schedule instead of Send Now.
- Choose a date and time for the email to go out.
- Click Save and Activate.
- Best Times to Send Emails
-
- Morning (8-10 AM) – High open rates as people check emails.
- Evening (6-8 PM) – Customers are more active online.
- Weekends – Good for promotions and special offers.
Scheduling emails ensures better engagement and reduces manual effort.
Growing Your Email List with MailPoet
Creating an email list is crucial to success in the long run. A strong subscriber base helps drive sales, retain customers, and increase engagement. MailPoet provides easy-to-use tools to collect email addresses and manage subscribers effectively.
This section will cover how to set up subscription forms, segment email lists, and improve email deliverability.
Setting Up Subscription Forms
MailPoet allows you to create beautiful signup forms for collecting emails. You can place these forms on different parts of your website.
- Creating a New Subscription Form
-
- Go to MailPoet > Forms.
- Click Add New Form.
- Choose a form type:
- Pop-up form (appears after a few seconds).
- Slide-in form (shows at the bottom of the page).
- Fixed bar form (stays at the top of the screen).
- Below post form (appears under blog articles).
- Checkout opt-in form (allows users to subscribe during checkout).
- Customizing the Form Design
-
- Add a strong headline that encourages sign-ups.
- Write a short description explaining the benefits of subscribing.
- Use a clear call-to-action like “Get Exclusive Deals!”.
- Match the form colors and fonts to your brand.
- Placing the Form in High-Visibility Areas
-
- Homepage: Grab attention when visitors first arrive.
- Product pages: Offer special deals for signing up.
- Checkout page: Convert buyers into long-term subscribers.
- Blog posts: Capture leads from informative content.
MailPoet’s drag-and-drop form builder makes customization simple.
Segmenting Email Lists for Personalization
Email list segmentation enables you to deliver relevant and individualized emails, whereas sending the same email to all subscribers is unproductive.
- Benefits of Email List Segmentation
-
- Sends customized content to increase email open rates.
- Boosts sales with personalized product recommendations.
- Reduces unsubscribe rates by avoiding irrelevant emails.
- Creating Customer Segments in MailPoet
-
- Go to MailPoet > Subscribers > Segments.
- Click Create New Segment.
- Choose segmentation criteria, such as:
- Total spent (e.g., VIP customers).
- Number of orders (e.g., repeat buyers).
- Last purchase date (e.g., inactive customers).
- Location (e.g., country-specific promotions).
- Email engagement (e.g., active vs. inactive subscribers).
- Save the segment and use it in email campaigns.
Segmenting emails improves engagement and increases conversions.
Ensuring High Email Deliverability
Emails must reach the inbox to be effective. Poor deliverability lowers engagement and reduces conversions. MailPoet provides tools to improve email deliverability.
- Use a Professional Email Address
-
- Steer clear of free email services like Gmail and Yahoo.
- Use a domain-based email (e.g., [email protected]).
- This improves credibility and reduces spam issues.
- Enable Double Opt-In
-
- Before enrolling, subscribers must validate their email address.
- Prevents fake sign-ups and spam complaints.
- Ensures a high-quality email list.
- Monitor Email Engagement
-
- Track open rates and click-through rates in MailPoet.
- To enhance performance, eliminate inactive subscribers.
- Re-engage inactive users using emails.
MailPoet’s built-in sending service also ensures high deliverability rates.
Analyzing and Optimizing Email Performance
Tracking email performance is essential for improving engagement and conversions. MailPoet provides built-in analytics to help store owners measure email success. Your email marketing approach can be improved by examining open rates, click-through rates, and revenue earned.
This section explains how to track email performance, optimize campaigns, and boost results.
Tracking Email Campaign Performance
MailPoet’s analytics feature helps you understand how emails perform. To make future campaigns better, you can monitor a variety of indicators.
- Accessing MailPoet Email Analytics
-
- Go to MailPoet > Emails.
- Click on Statistics next to a sent email.
- View detailed performance data.
- Key Metrics to Track
-
- Open Rate: Percentage of recipients who clicked through to the email.
- Click-Through Rate (CTR): Percentage of visitors that clicked on the internal links.
- Unsubscribe Rate: Number of recipients of emails who choose to opt out.
- Bounce Rate: Emails that were not received by the receivers.
- Revenue Generated: Sales linked to email marketing campaigns.
Keeping an eye on these indicators helps in determining your strategy’s advantages and disadvantages.
Using Analytics to Improve Future Campaigns
MailPoet’s insights allow you to adjust and optimize email marketing efforts.
- Optimize Subject Lines for Higher Open Rates
-
- Use short, engaging subject lines (e.g., “Exclusive Deal Inside!”).
- Avoid spammy words like “Free,” “Limited Time,” or “Urgent.”
- Test different phrases and styles for better performance.
- Improve Email Content for Better Engagement
-
- Keep messages clear and to the point.
- Use personalization (e.g., “Hi [Customer Name]!”).
- Include strong call-to-action (CTA) buttons.
- Test different layouts and images.
- Send Emails at the Right Time
-
- Morning (8-10 AM) – Good for workday engagement.
- Evening (6-8 PM) – Best for personal browsing time.
- Weekends – Ideal for promotional emails.
Adjusting send times can increase open rates significantly.
Final Thoughts
Successful email marketing requires constant testing and optimization. With MailPoet, you can track results, refine strategies, and boost engagement.
Best Practices to Follow:
- Monitor performance regularly using MailPoet analytics.
- Divide up your clientele to send more individualized emails.
- Check send timings, layouts, and subject lines
- Keep content simple, engaging, and action-driven.
By following these steps, you can maximize email marketing success. MailPoet helps WooCommerce store owners send better emails and drive more sales.
This concludes our guide on MailPoet. Start optimizing your emails today! Need help? Chat with our experts!