How to Use the WooCommerce Booking Plugin to Accept Online Appointments
Table of Contents
- Introduction
- What Are the Main Uses of a WooCommerce Booking Plugin for Stores
- How to Choose the Right WooCommerce Booking Plugin
- How to Use the WooCommerce Booking Plugin (Step by Step)
- Best Practices for Better Sales and Fewer Support Tickets in Booking Stores
- Conclusion
Introduction
A WooCommerce booking plugin helps you sell time-based bookings online. It turns your store into a booking-ready service website. Many owners want a clear WooCommerce booking system for daily bookings. This guide helps you set it up without confusion. You can sell appointments, rentals, and sessions using WooCommerce. You can also control time slots and avoid double bookings.
If you are new, this guide is a safe starting point. It focuses on clean setup steps and real store needs. You will also learn what the plugin is best used for. After this, you can start your WooCommerce booking setup confidently.
What Are the Main Uses of a WooCommerce Booking Plugin for Stores
A strong WooCommerce booking plugin is useful for many business types. It works well for service sellers and product renters. It also fits stores that take paid sessions and bookings. Below are the most common uses store owners choose.
Sell Time Slot Services Using a WooCommerce Appointment Booking Flow
Many service businesses sell time slots, not physical products. A WooCommerce appointment booking setup makes this very easy. Customers can pick a date and choose a time slot. They can then pay online and get confirmation by email. This reduces phone calls and booking messages daily. It also keeps your schedule clean and organized. You can set working hours and block unavailable days. This makes your WooCommerce booking system more reliable for customers.
Rent Products by Date or Time With Clear Booking Rules
Some stores rent items for a few hours or days. A WooCommerce booking plugin supports date-based or time-based rentals. Customers can select start and end dates during checkout. They can also pick time slots for short rentals. This works for bikes, tools, and event rental items. You can also add buffer time for pickup and return. This keeps your schedule safe and avoids overlapping bookings. It also supports a smooth WooCommerce booking setup for rentals.
Take Class and Session Bookings for Groups and Batches
Classes need seats, time slots, and a booking limit. A WooCommerce booking system helps you manage class sessions easily. Customers can choose a class date and secure their seat. You can set limits for each session or batch. This helps reduce crowding and last-minute confusion. You can also create different sessions for different days. With a WooCommerce booking plugin, you keep class booking simple. This is useful for yoga, training, and workshops.
Manage Capacity and People Limits Without Manual Tracking
Many bookings depend on people count and capacity. A booking tool can allow bookings by number of people. This is helpful for tours, events, and group services. You can set a minimum and maximum booking size. You can also charge per person when needed. This makes pricing fair and clear for each booking. It also reduces support questions about booking limits. This improves your WooCommerce booking setup for busy stores.
Control Availability and Reduce Double Bookings Automatically
Availability rules are the core of any booking tool. A WooCommerce booking plugin helps block dates and time slots. You can set working days and working hours in minutes. You can also add breaks between bookings for rest time. Holidays and closed days can be blocked in settings. This prevents customers from booking unavailable slots. It also reduces double bookings in your WooCommerce booking system. This saves time and avoids customer frustration.
Add Staff, Rooms, or Resources When You Need Advanced Control
Some businesses need staff-based booking control. Others need room-based or equipment-based booking options. Many tools support resources within the booking product settings. You can assign staff, rooms, or tools to each booking. You can also limit availability per resource or staff member. This is useful for salons and rental studios too. It makes WooCommerce appointment booking more flexible for teams. It also keeps your schedule accurate and easy to manage.
How to Choose the Right WooCommerce Booking Plugin
Choosing the right WooCommerce booking plugin decides how smooth bookings feel. The wrong tool creates limits, errors, and more support requests. A good WooCommerce booking system matches your business workflow from day one. Before you buy anything, map your booking type clearly first. Then compare features, compatibility, and the setup experience carefully. This approach makes your WooCommerce booking setup faster and more stable.
Identify Your Booking Type First So You Buy the Correct Plugin
Start by listing what customers actually book on your site. Some stores need time slots for short service sessions. This is common for WooCommerce appointment booking and consultations. Other stores need date ranges for rentals and stays. This is common for equipment rentals and hotel-style bookings. Some stores need fixed events with limited seats. This is common for workshops, batches, and class sessions. Your booking type controls which plugin will work best. It also affects pricing, capacity, and calendar rules later. Choose the plugin that supports your exact booking format. This prevents a painful plugin switch after launch.
Must-Have Features to Check Before Selecting Any Booking Plugin
First, confirm the plugin supports your availability rules. You should set working days, hours, and blocked dates easily. Buffer time should be available for gaps between bookings. Lead time should exist to stop last-minute bookings. Next, check capacity and people settings for group bookings. You should set minimum and maximum people per booking. You should also support per-person pricing when your business needs it. If you offer choices, check resources or staff support. This matters for rooms, equipment, and team scheduling control. If you need partial payments, check deposits support clearly. Many stores need deposits for rentals and high-value services. Calendar sync is also important for many service providers. It helps avoid conflicts in your daily schedule planning. Pricing rules should support weekends, seasons, and peak hours. This makes your WooCommerce booking system more flexible and profitable. Finally, check email notifications for customers and admins. Clear emails reduce questions and save support time daily.


Compatibility Checks That Prevent Errors During WooCommerce Booking Setup
Compatibility decides if your booking pages work without issues. First, confirm the plugin supports your WooCommerce checkout flow. Some plugins break carts when themes are not compatible. Next, check if it works with your page builder setup. If you use builders, product templates must render correctly. Also check if it supports your payment gateway properly. A broken gateway can stop your WooCommerce booking setup completely. Speed is another key factor for booking product pages. A heavy calendar can slow pages and reduce conversions. Mobile experience must be clean and easy to use. Customers often book services using phones during busy hours. Also check support quality and update frequency carefully. Regular updates reduce bugs and improve security over time. If possible, test on a staging site before going live. This reduces risk for your store and customers.
How to Use the WooCommerce Booking Plugin (Step by Step)
A clean setup makes your booking flow smooth and reliable. Follow these steps in order for a stable WooCommerce booking setup.
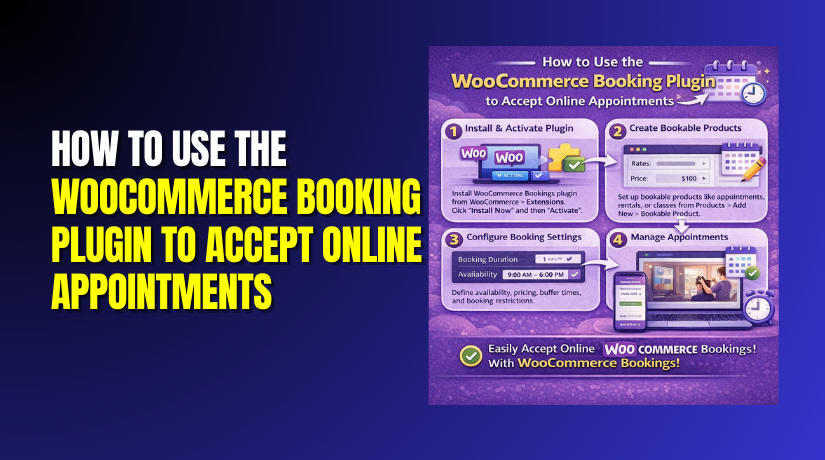
Step 1: Install and Activate the Booking Plugin Correctly
- Go to your WordPress dashboard and open Plugins > Add New.
- Upload the ZIP file or search and click Install Now.
- After install, click Activate to enable the WooCommerce booking plugin.
- Check that a booking settings tab appears in your dashboard.
Step 2: Set Core WooCommerce Store Settings Before Booking Rules
- Go to Settings and confirm your store address is correct.
- Set your timezone to match your real working location.
- Check your currency and tax settings for correct checkout totals.
- Set payment methods so customers can pay during booking. This builds a stable base for your WooCommerce booking system.
Step 3: Configure Global Booking Settings for Better Control
- Open the plugin settings and find the main booking options.
- Set the booking window for how far ahead bookings work.
- Add minimum notice time to block last minute bookings. Add buffer time to create gaps between each booking slot.
- Choose manual or auto confirmation for each booking request.
- Add cancellation rules so customers know what is allowed. This improves trust in your WooCommerce booking system immediately.
Step 4: Create Your First Bookable Product in WooCommerce
- Go to Products and click Add New for a booking product.
- Choose the Bookable product type in product settings options.
- Add a clear title, short details, and strong product images.
- Set categories and visibility so customers can find it easily.
- This is the base for WooCommerce appointment booking and rentals.
Step 5: Set Booking Duration and Slot Format the Right Way
- Choose a fixed duration like thirty minutes or one hour.
- Select slot intervals so customers only see valid start times. Decide if bookings use time slots or date range selection.
- Keep slot options simple to reduce booking confusion for users.
- This step is critical for smooth WooCommerce booking setup performance.
Step 6: Set Availability Rules to Prevent Booking Conflicts
- Select working days and set working hours for those days.
- Block holidays and closed dates using blackout date settings.
- Add break times so slots do not overlap during gaps. Set limits per slot to prevent double bookings from happening.
- Customers will trust your WooCommerce booking system when slots stay accurate.
Step 7: Add Capacity and People Settings for Group Bookings
- Set minimum people to stop bookings that are too small. Set maximum people to protect your service and time limits. Enable per person pricing if you charge by attendees count. These settings help WooCommerce appointment booking work for groups too.
Step 8: Add Staff or Resources When Your Booking Needs It
- Create resources like staff, rooms, or equipment for each booking.
- Assign availability for each resource to avoid schedule overlap issues.
- Set different prices per resource if your business needs it.
- This makes your WooCommerce booking plugin more flexible for real use.
Step 9: Set Pricing Rules That Match Your Service Value
- Open the booking product and go to booking cost settings.
- Add a base price that covers your normal booking charge. Add price per block if you charge per hour or day.
- Create weekend pricing if weekends cost more for your service.
- Add seasonal pricing for peak months and high demand periods.
- If you use resources, set different prices for each option.
- Keep pricing rules simple to reduce customer confusion during checkout. This makes your WooCommerce booking plugin easier to manage long term.
Step 10: Set Notifications and Emails to Reduce Customer Questions
- Go to booking settings and enable admin booking notifications first.
- Enable customer confirmation emails for every successful booking order.
- Add email text that clearly shows date, time, and booking details.
- Include reschedule and cancellation rules in short and clear lines. If reminders are supported, enable one reminder before booking time.
- This reduces no shows and improves customer trust quickly. A clear email flow strengthens your WooCommerce booking system daily.
Step 11: Test the Full Booking Flow Before You Go Live
- Open the booking product page and test the calendar display first.
- Select a date and pick a time slot like a real buyer. Confirm the price updates correctly for your chosen booking settings.
- Add the booking to cart and go to checkout page. Complete a test order using a safe test payment method.
- Check that the booking appears in the admin bookings list. Confirm that customer and admin emails are received properly.
- Test on mobile to confirm the calendar is easy to use. This testing makes your WooCommerce booking setup stable and reliable.
Step 12: Manage Bookings After Launch Like a Real Workflow
- Open the bookings area and review all upcoming bookings daily.
- Approve bookings if you use manual confirmation settings.
- Edit bookings when customers request changes in schedule.
- Cancel bookings when rules allow and update order status properly.
- Reschedule by changing date and time inside the booking details page.
- Add internal notes for staff so work stays organized daily.
- This workflow keeps your WooCommerce booking system clean and trackable.
Best Practices for Better Sales and Fewer Support Tickets in Booking Stores
Keep booking options simple and easy for first time customers. Limit the number of slot choices to reduce decision stress. Show the total price early on the booking product page. Add clear service details using short lines and simple words. Display cancellation and reschedule rules near the booking calendar.
Add buffer time to protect your schedule from late sessions. Use reminder emails to reduce missed WooCommerce appointment booking visits. Add a short FAQ section under every booking product page. Keep your plugin updated to avoid bugs and checkout issues. Test booking flow after theme updates and plugin updates. This keeps your WooCommerce booking plugin running without surprises.
Conclusion
You now know how to complete a full booking product setup. Your WooCommerce booking setup includes pricing, emails, and testing steps. Your store can now take bookings without manual scheduling work. Keep rules clear and keep the booking page simple for users. If you want expert help, we can set everything for you. We can configure your WooCommerce booking system and test every step. Contact woohelpdesk today and launch bookings with confidence.