How To Use Bluehost File Manager To Edit WordPress Files
Introduction
The Bluehost File Manager provides a convenient way to manage and edit WordPress files directly from your hosting dashboard without using FTP software. It allows you to create new files, modify existing ones, rename files, and delete unnecessary files with just a few clicks. This guide walks you through accessing the File Manager from the Bluehost dashboard and performing essential file operations such as creating a PHP file, editing its content, renaming files, and safely deleting them. By following these steps, you can make quick updates to your WordPress site, test custom code, or troubleshoot issues directly on the server. Using the File Manager is especially useful for minor changes or when FTP access is unavailable, giving you flexibility and control over your website’s file structure.
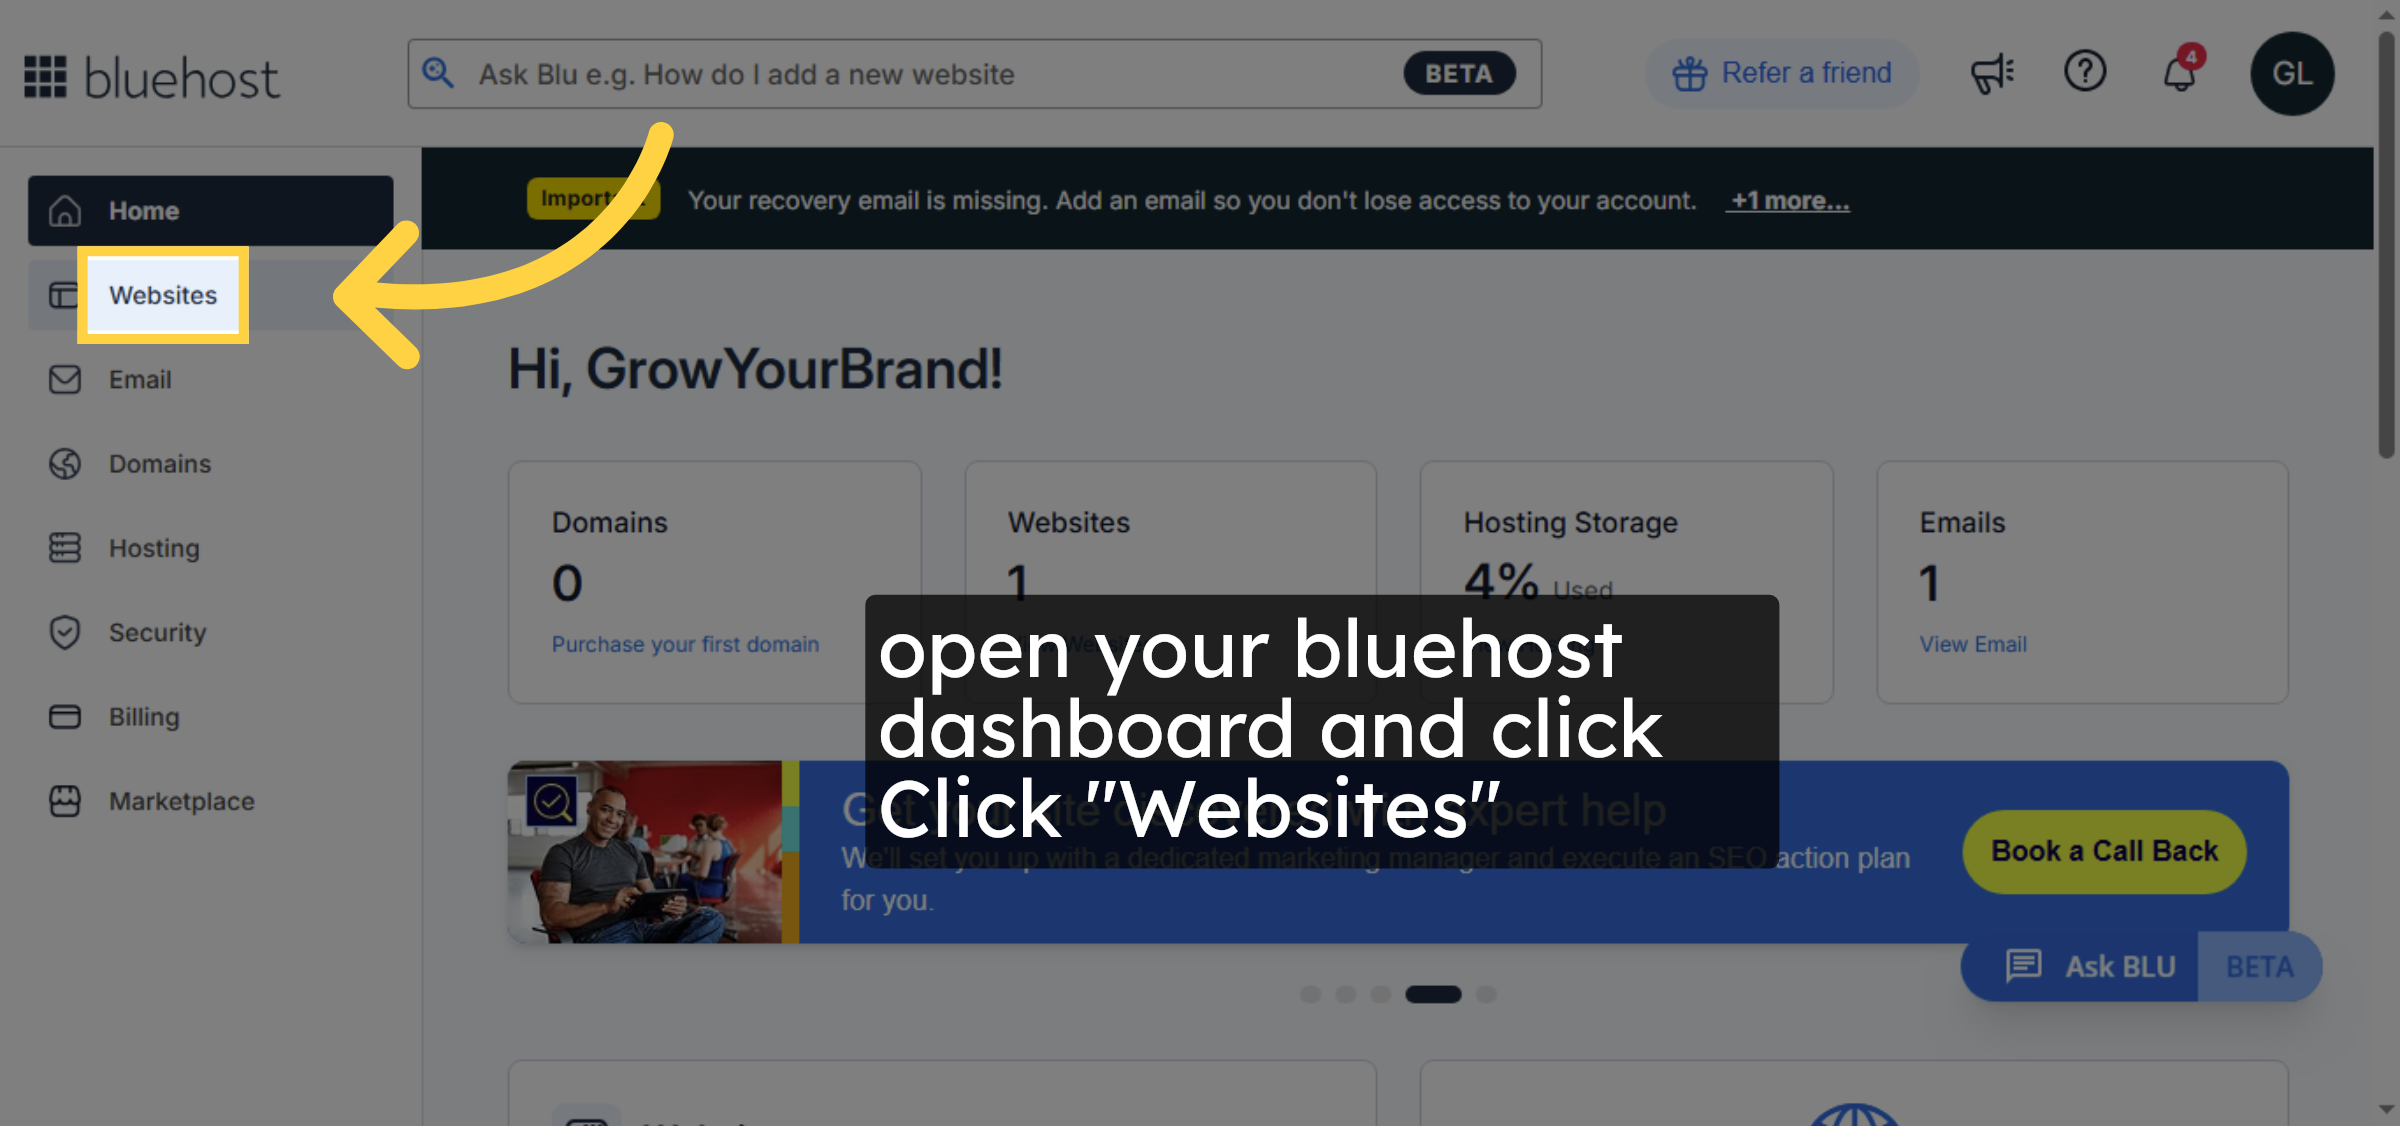
1. Navigate to Websites Section
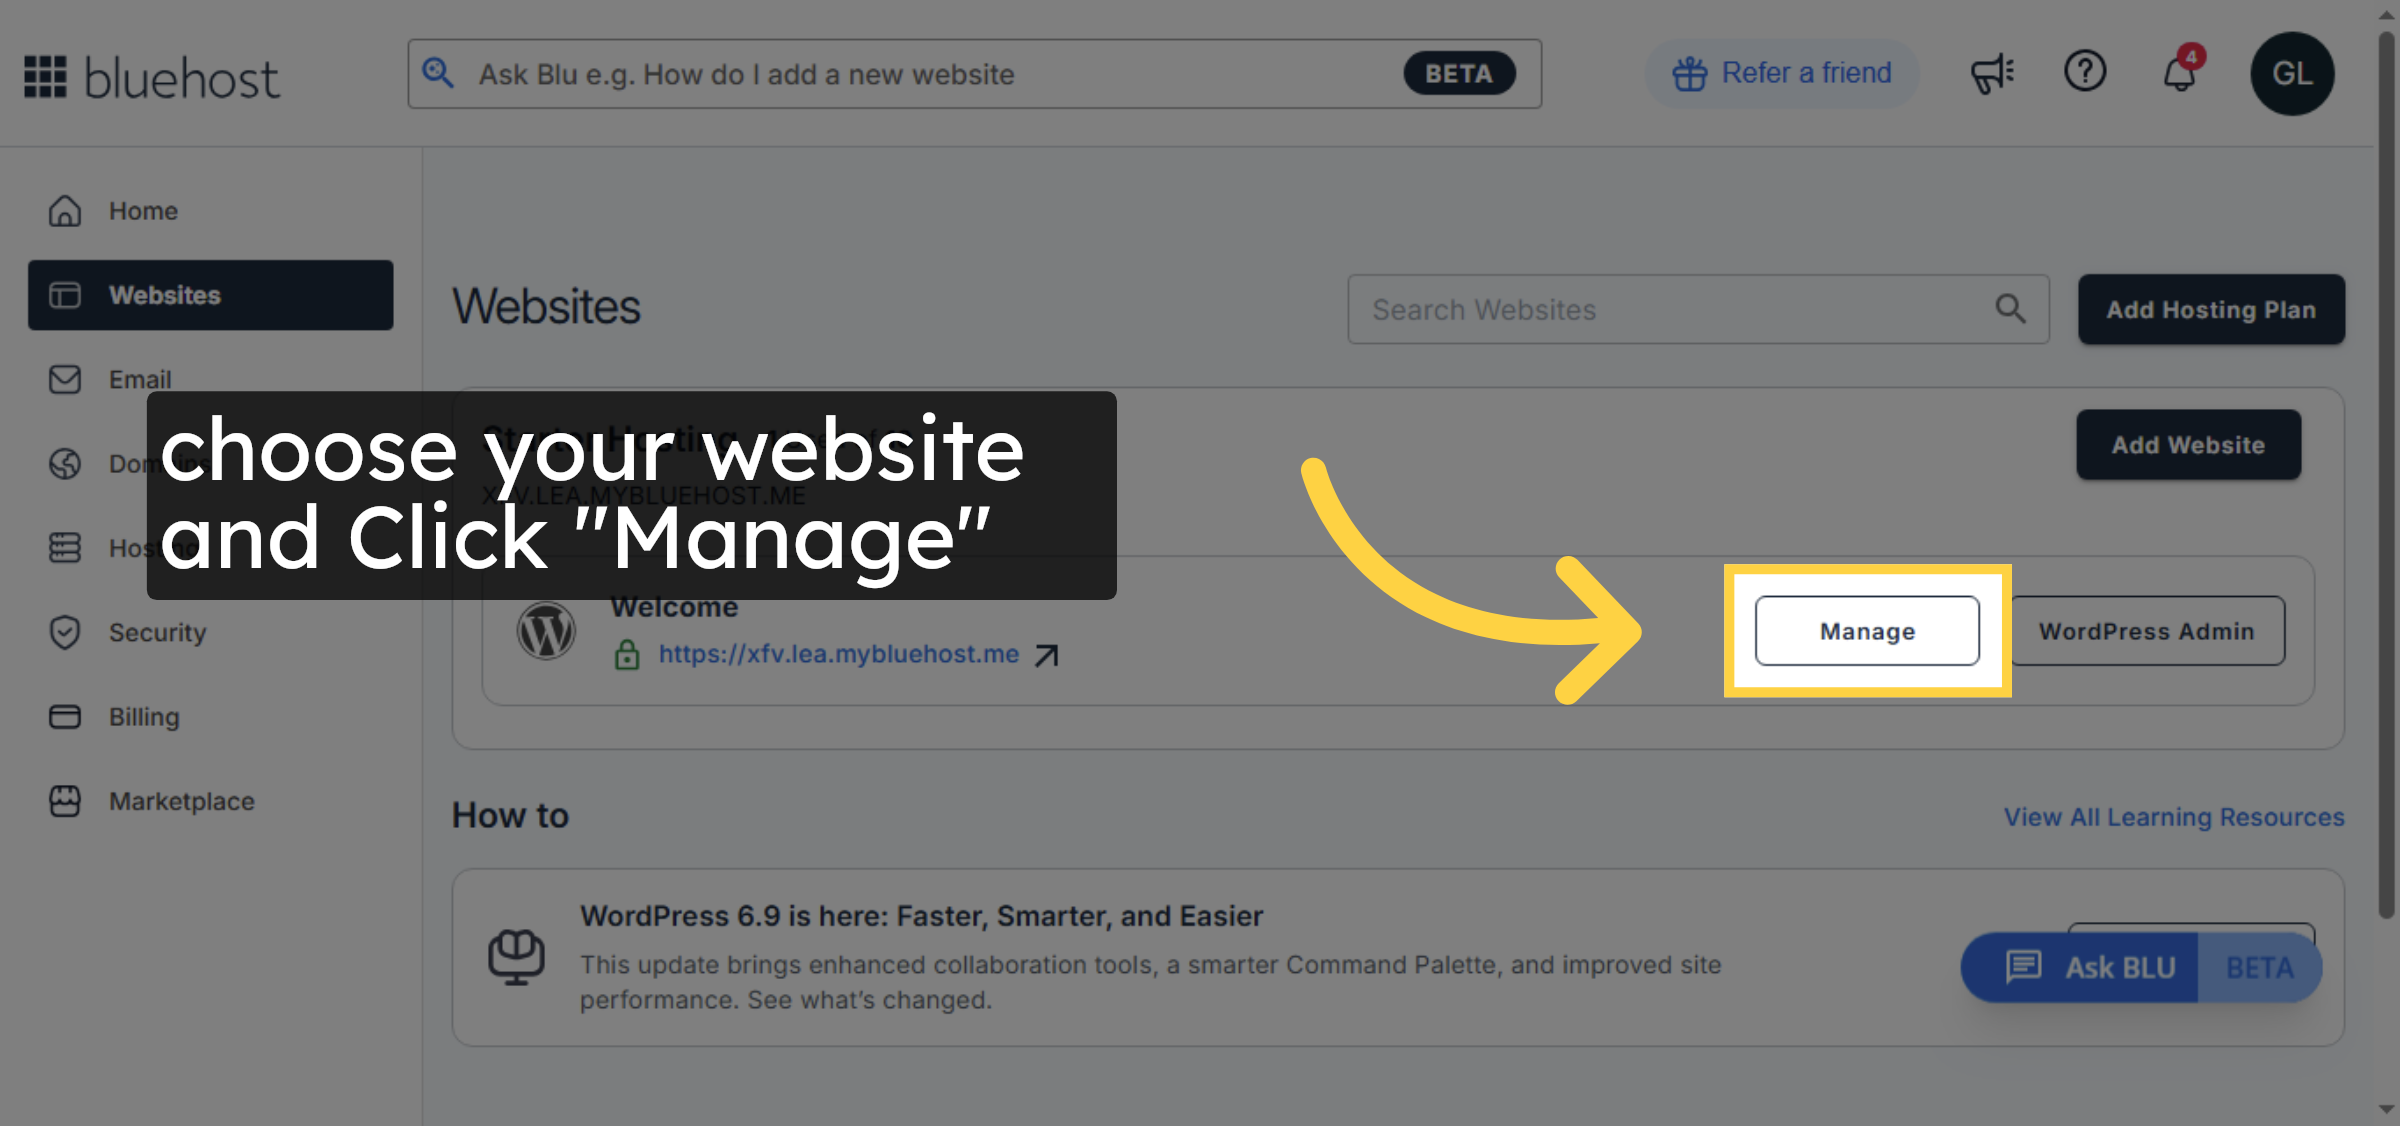
2. Select your website
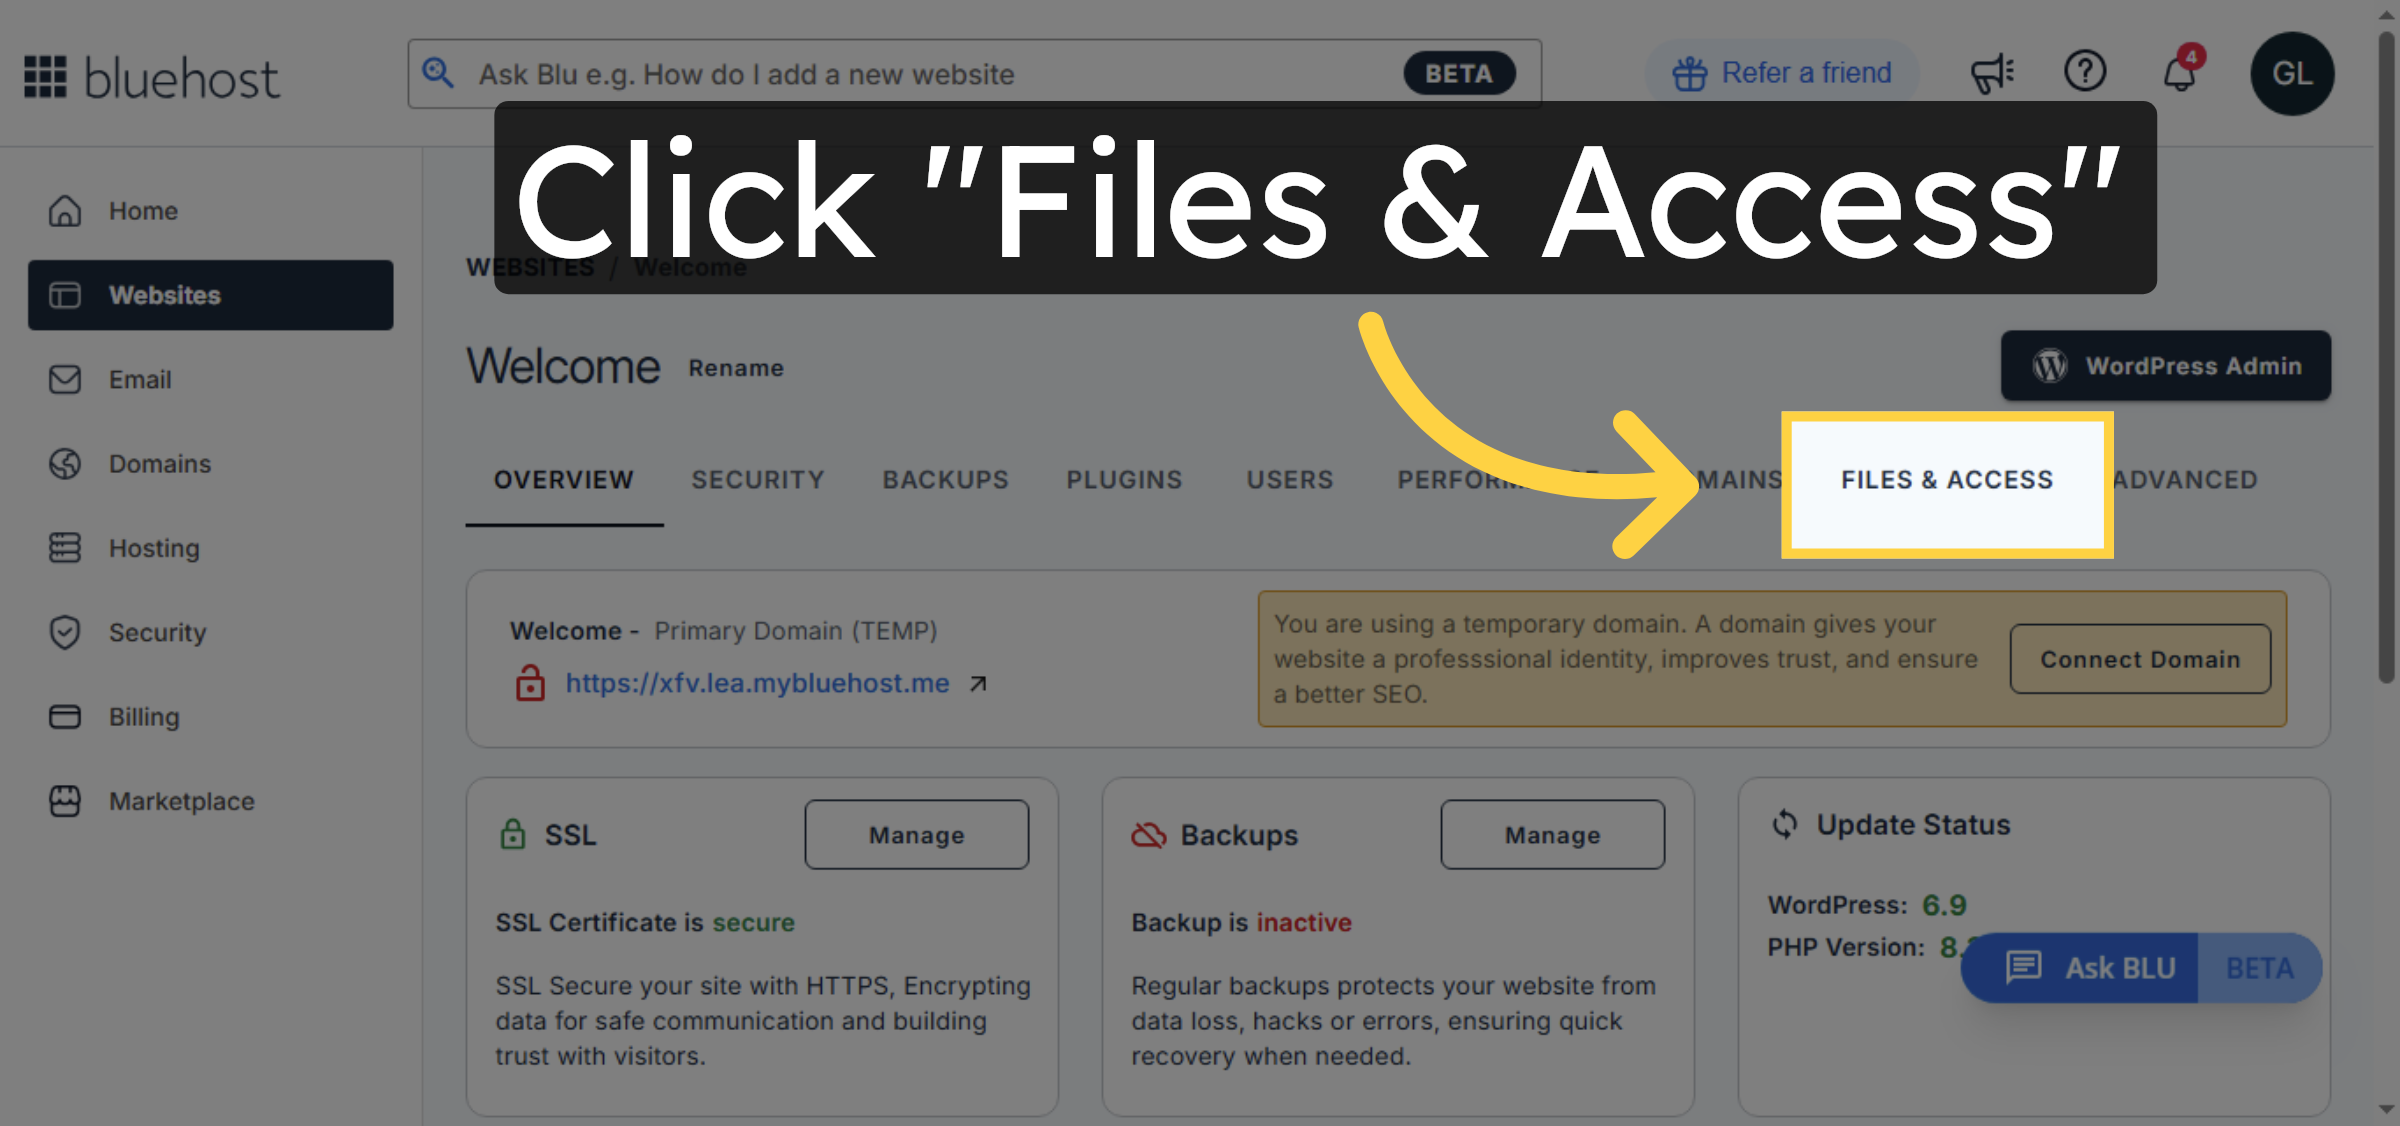
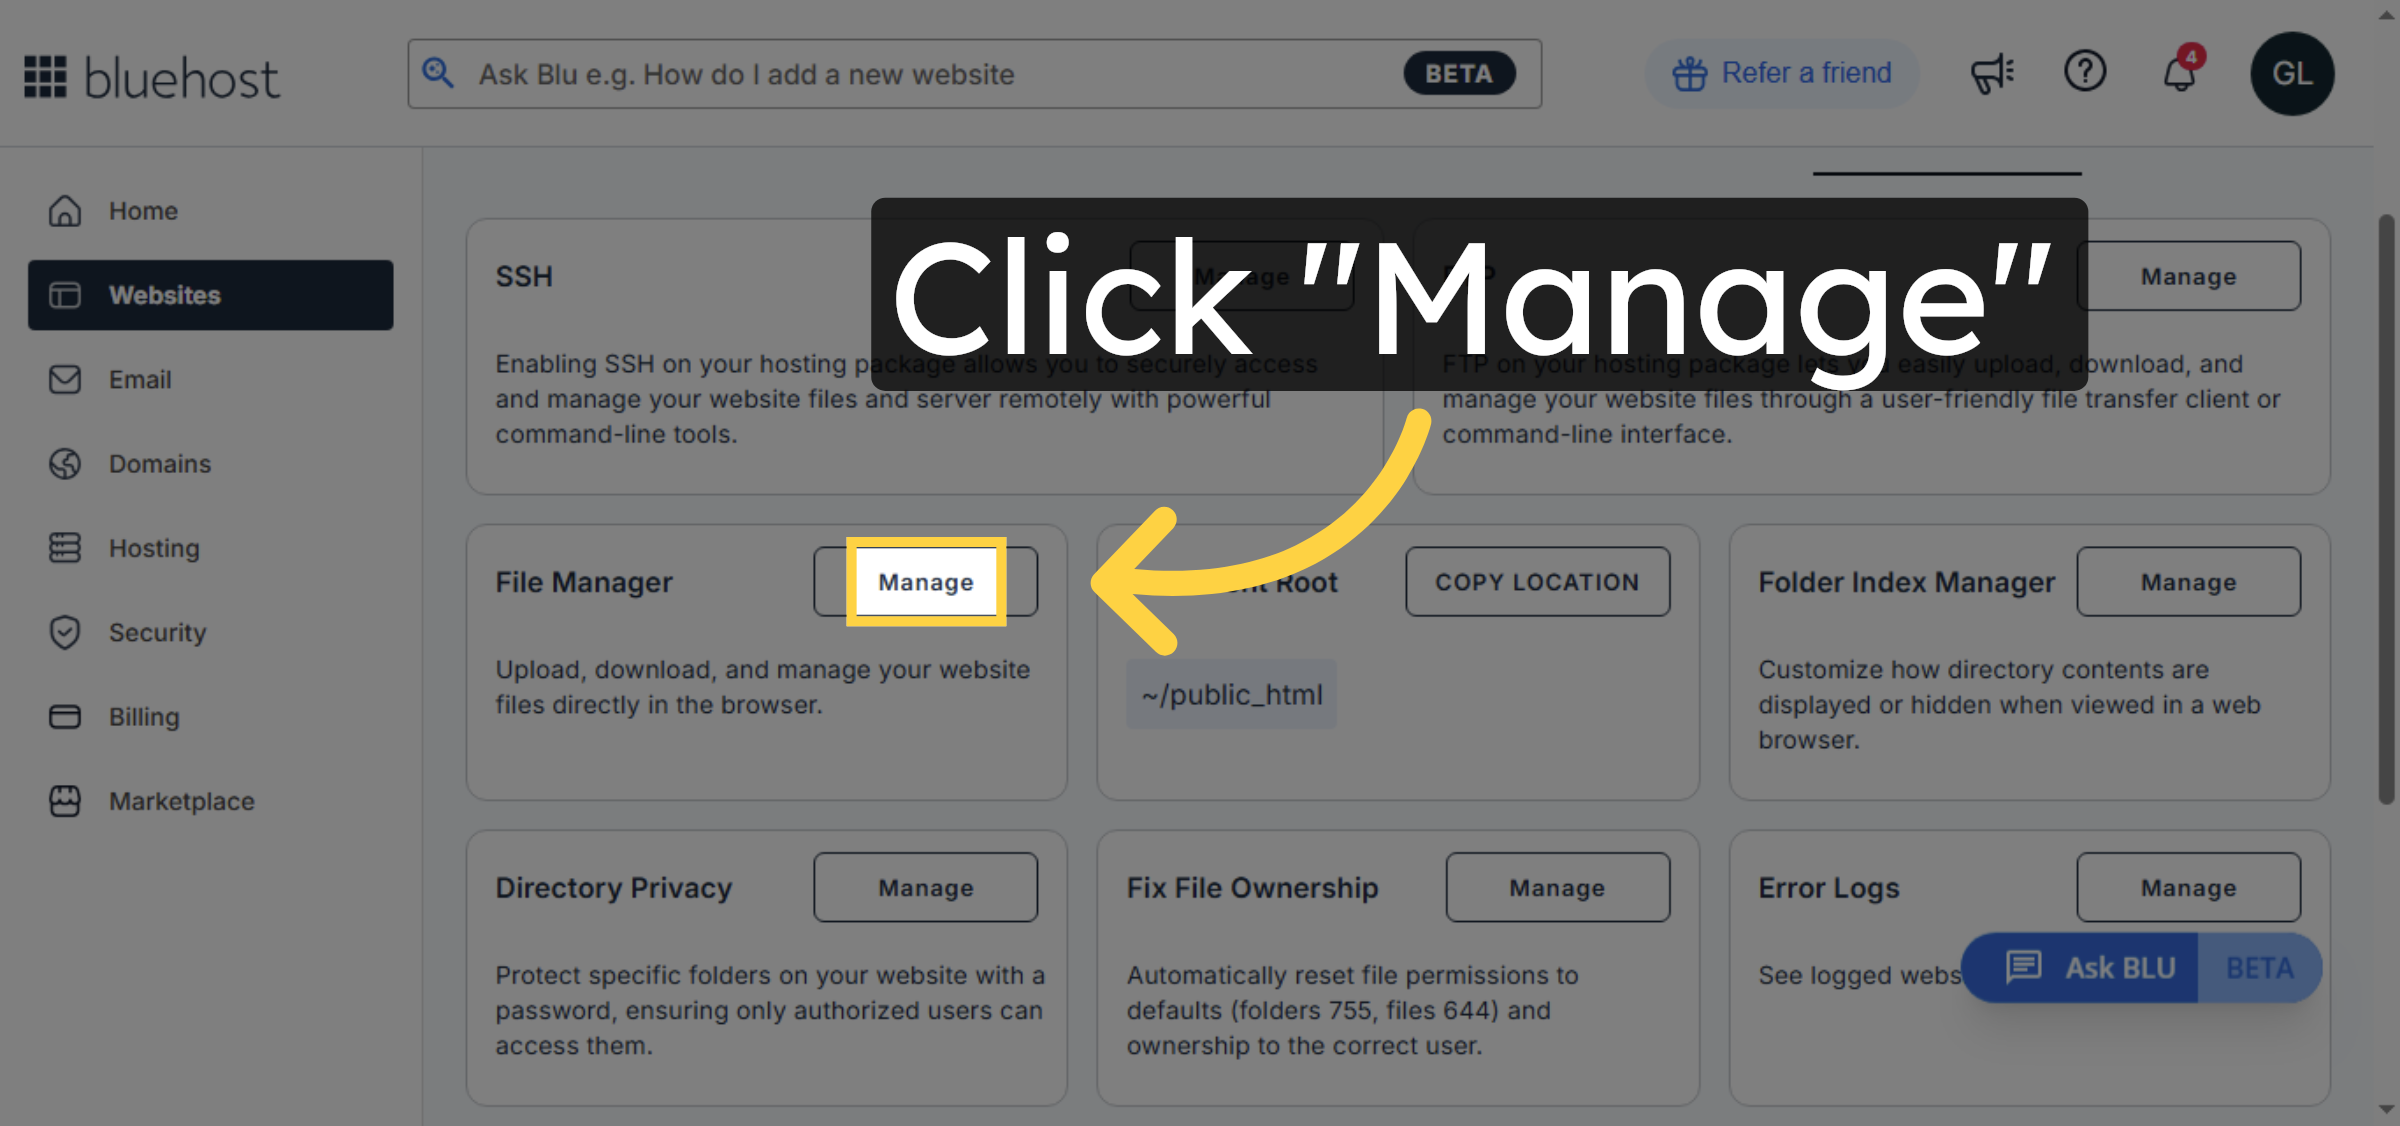
3. Access Files and Access Settings
4. Open File Manager
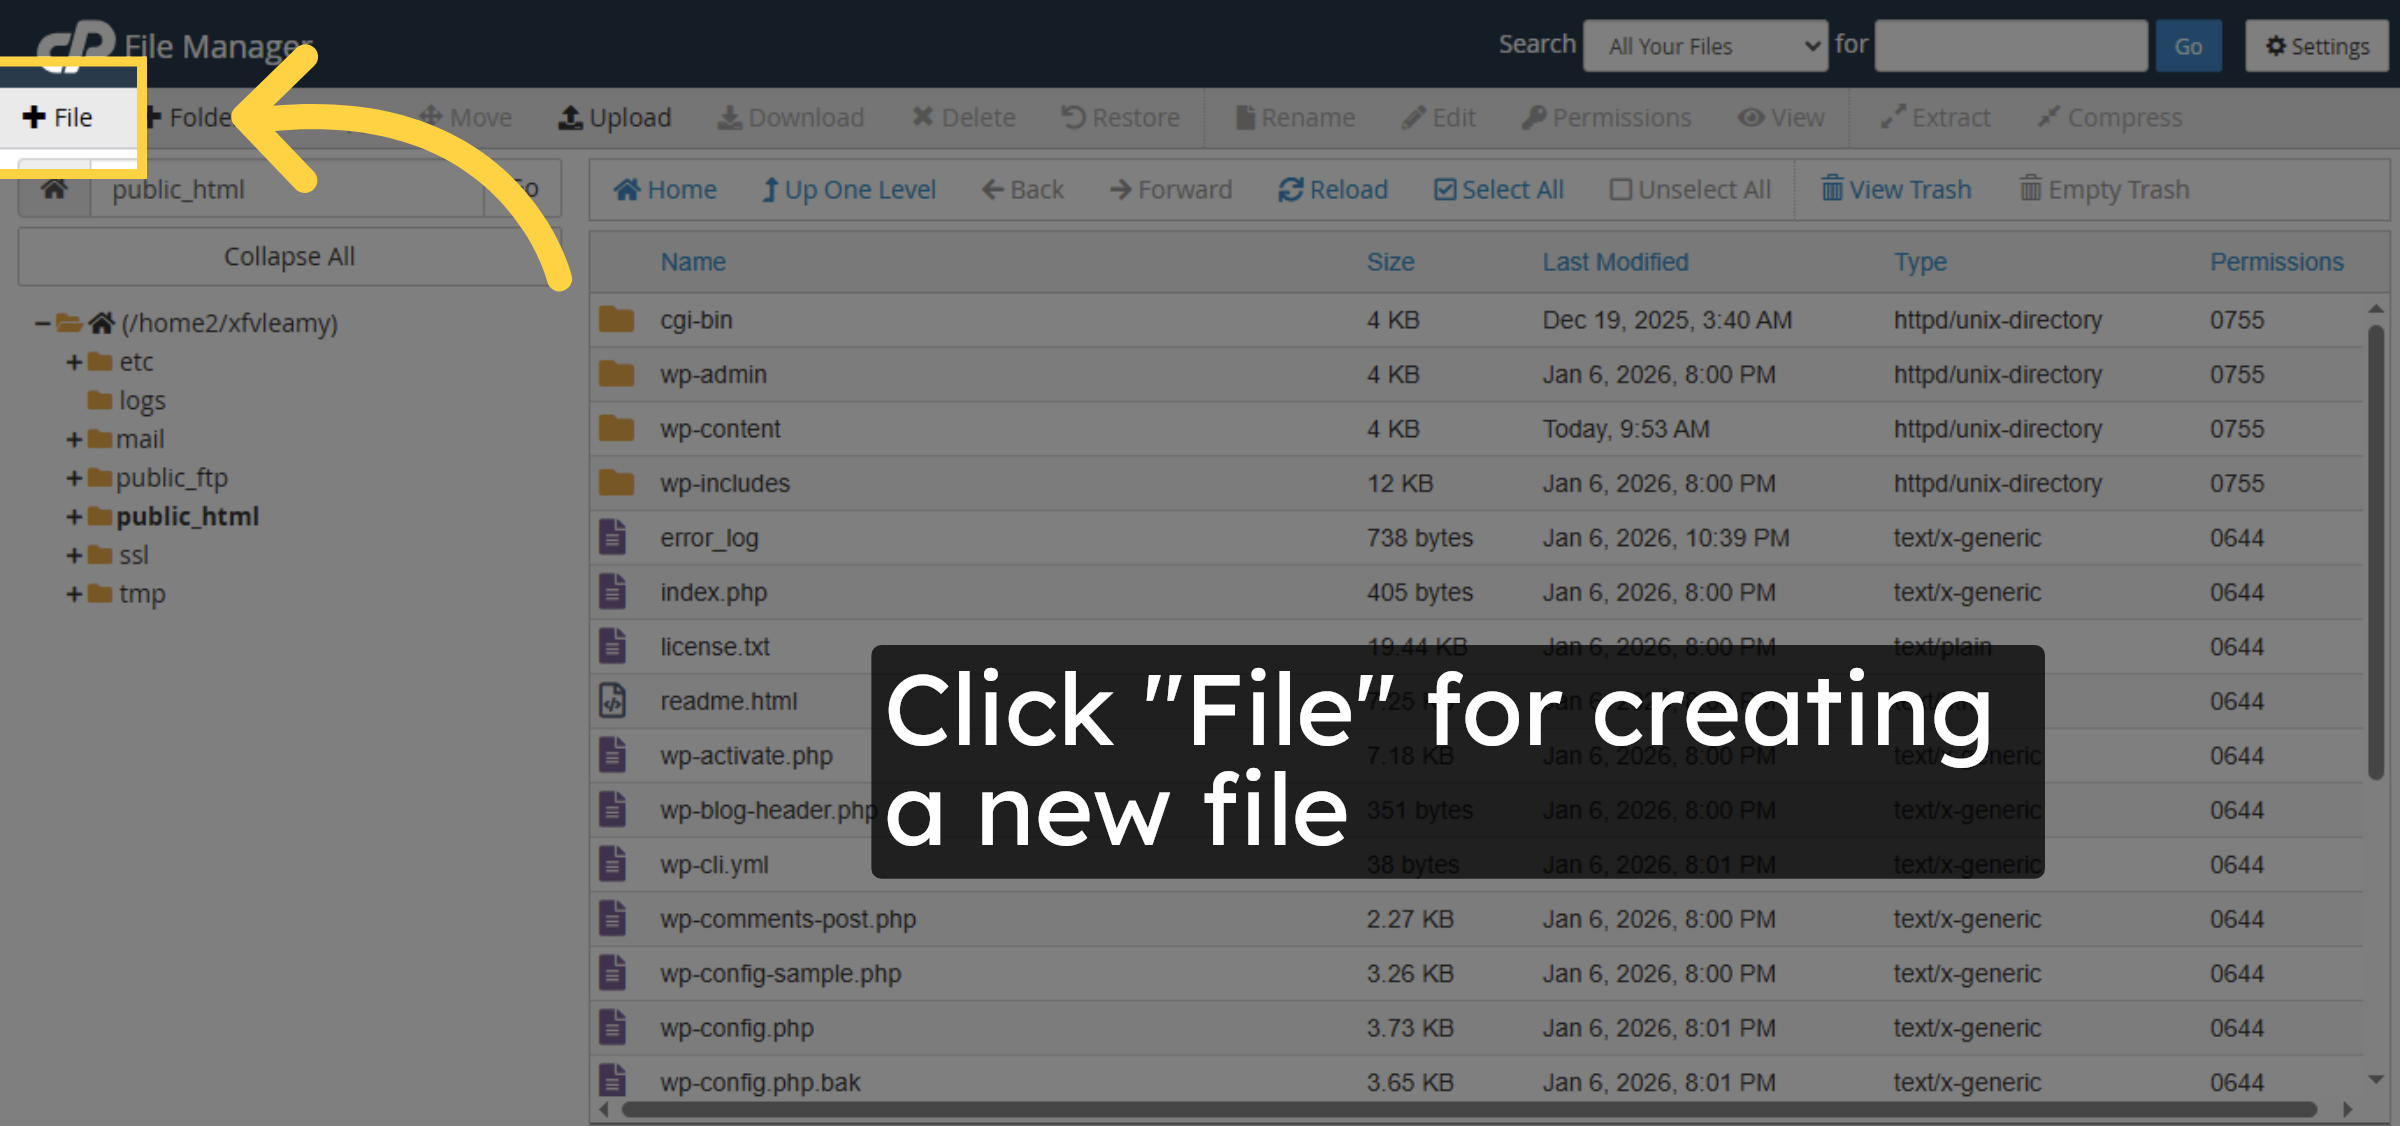
5. File creation
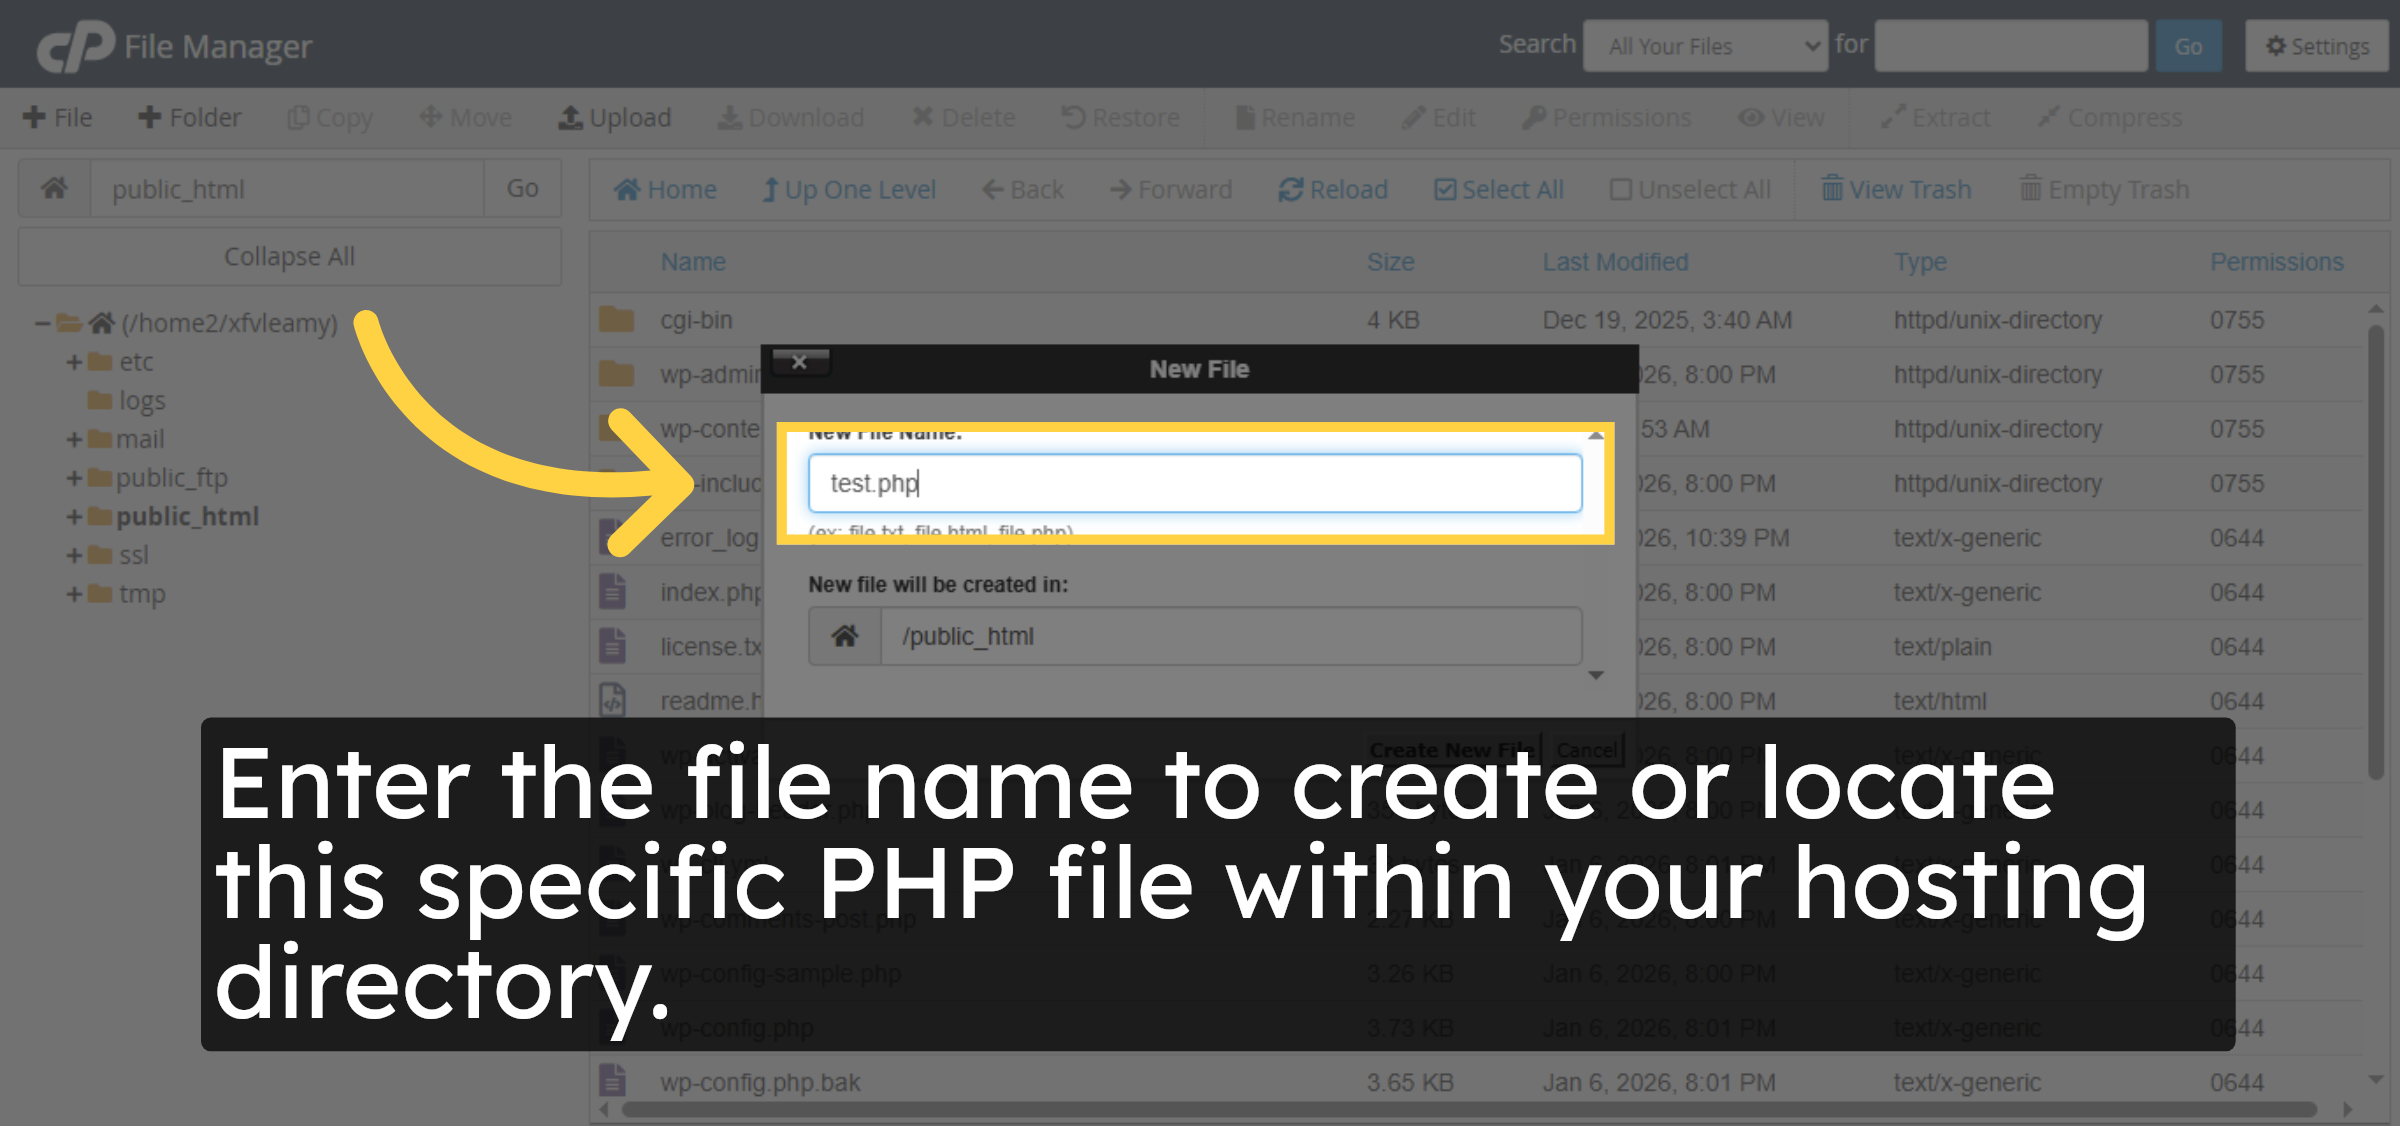
6. Enter File Name
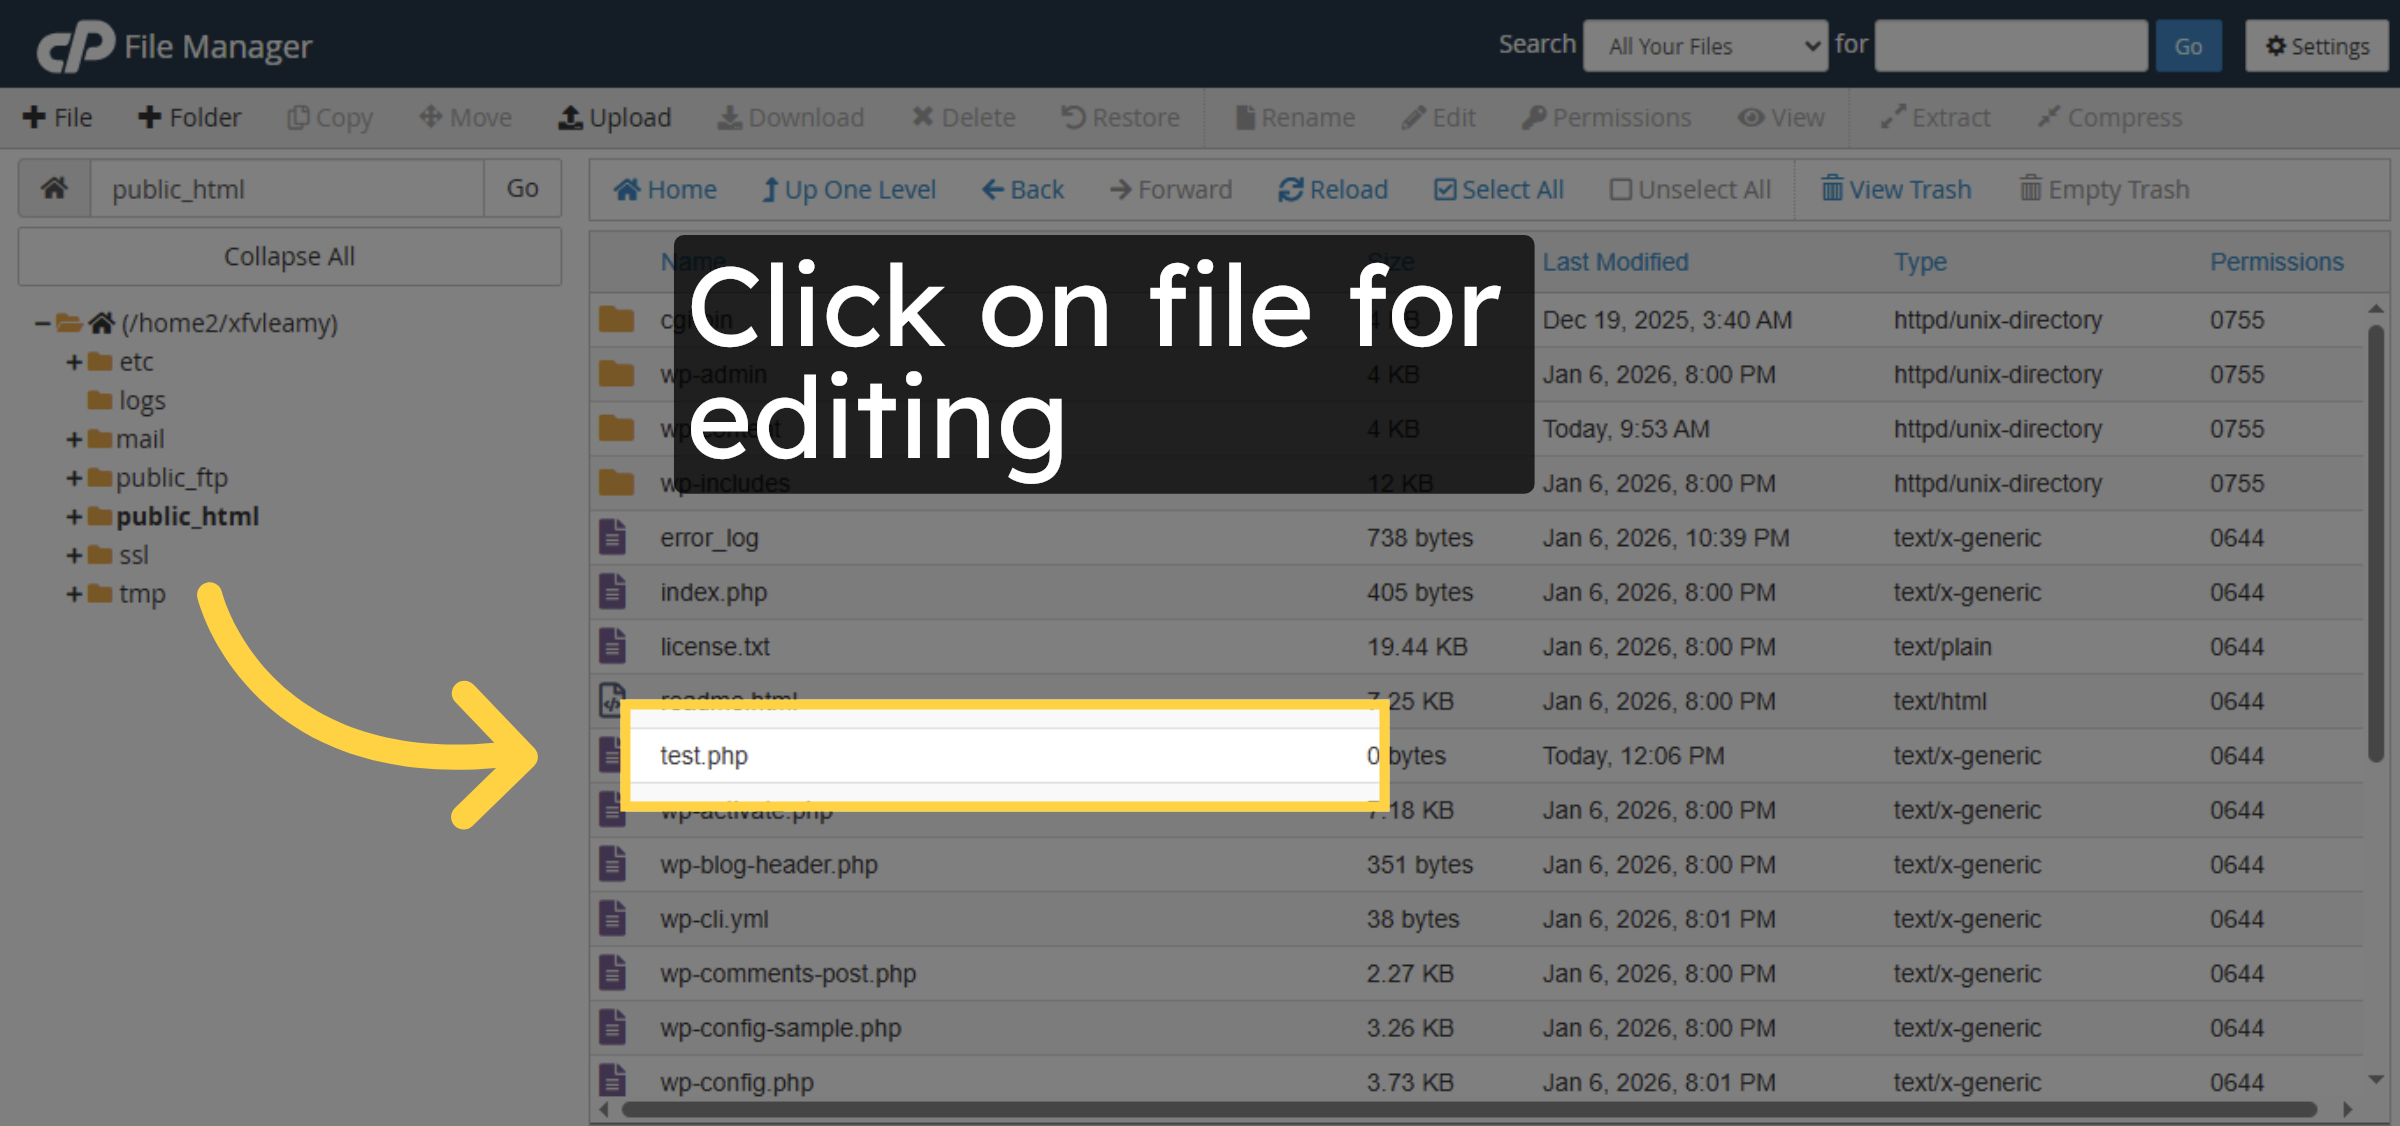
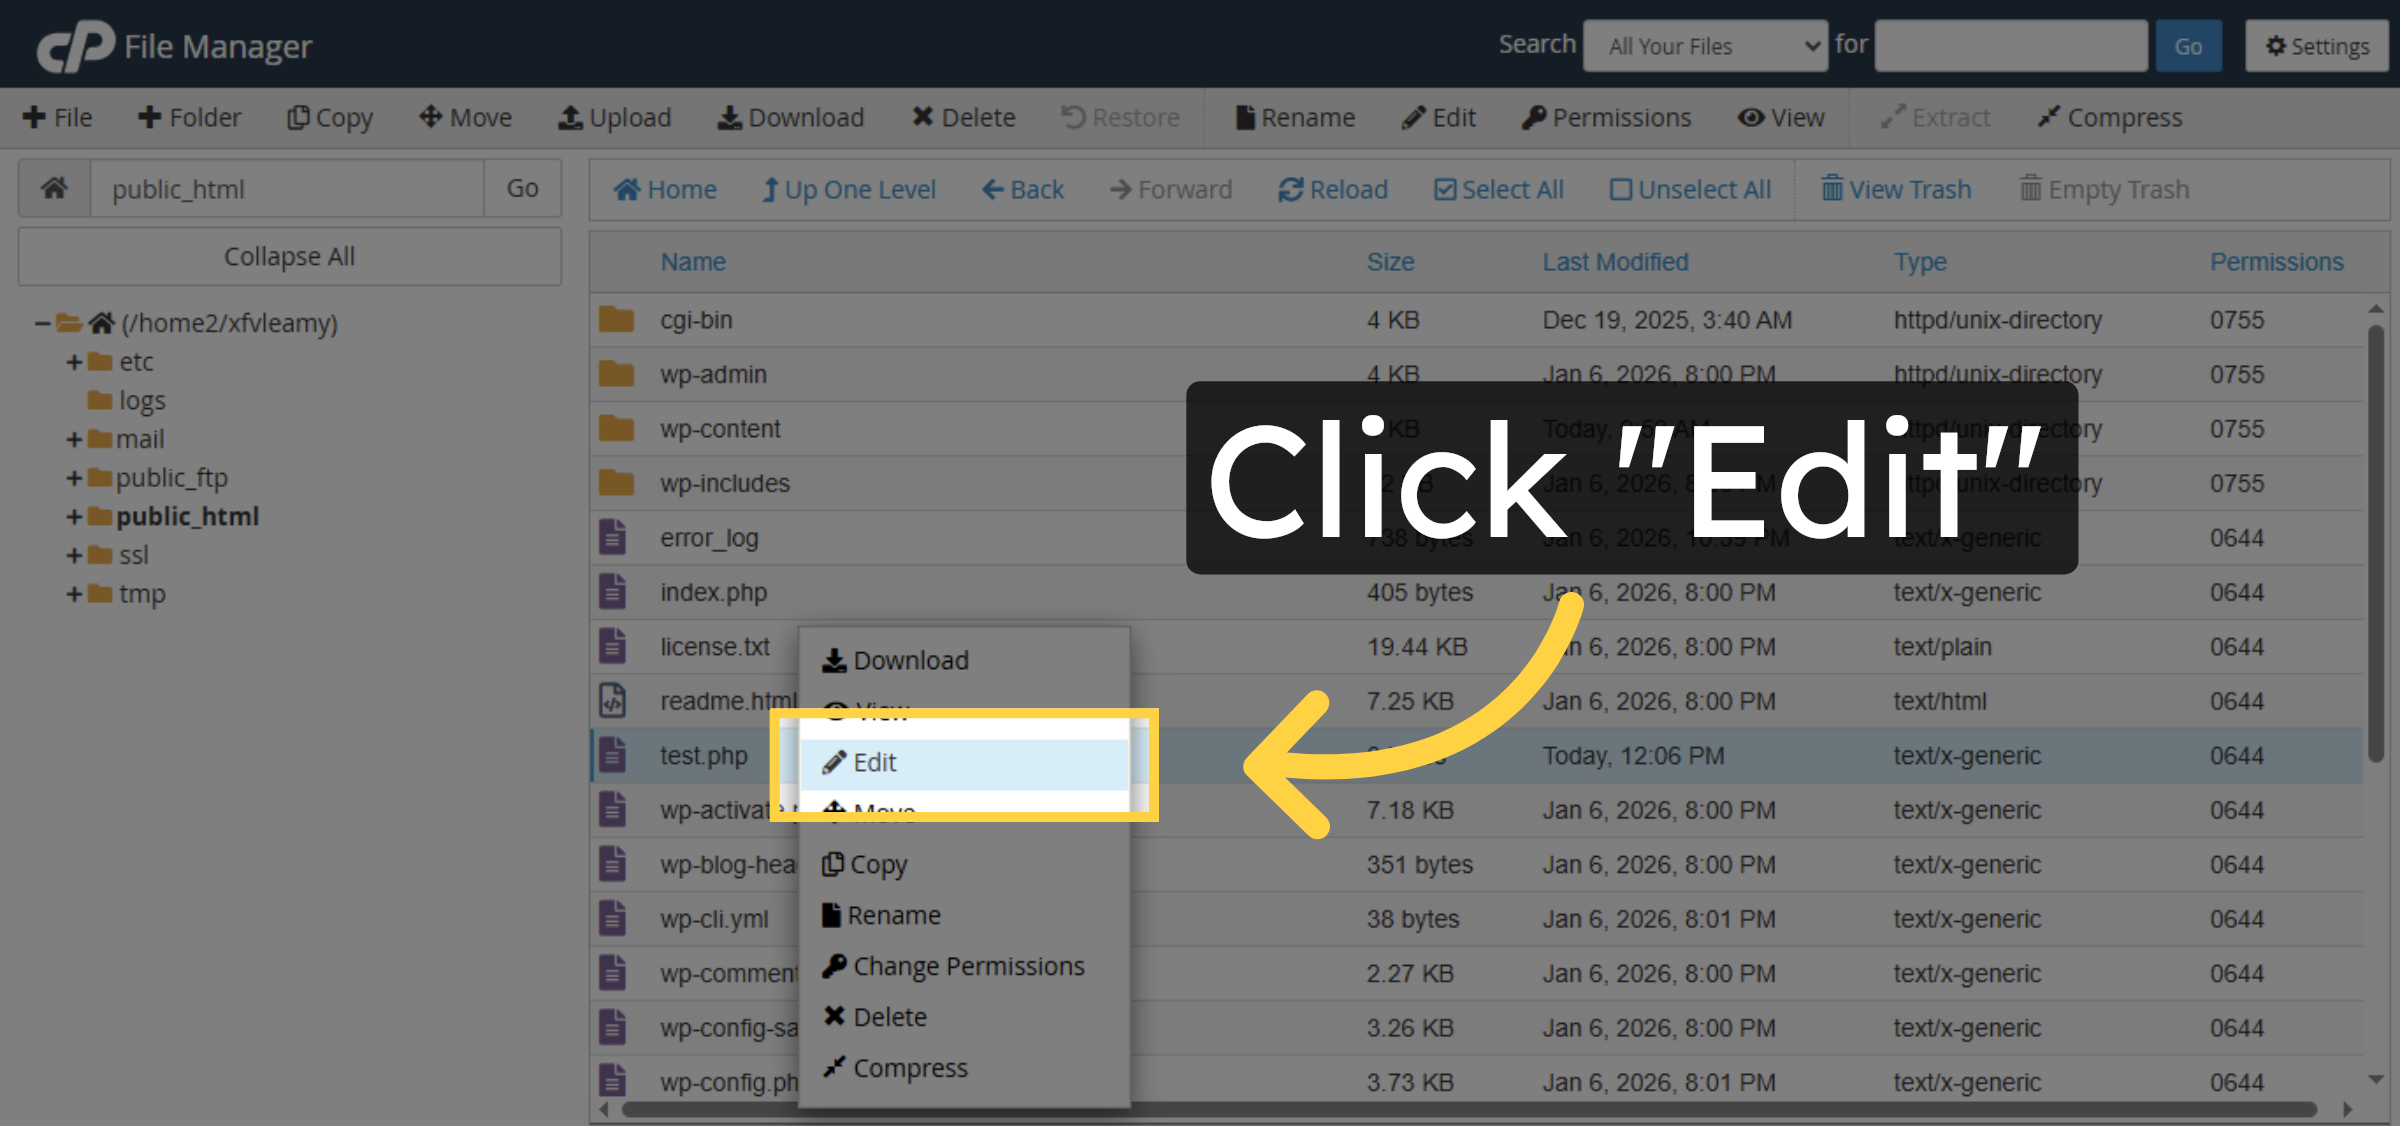
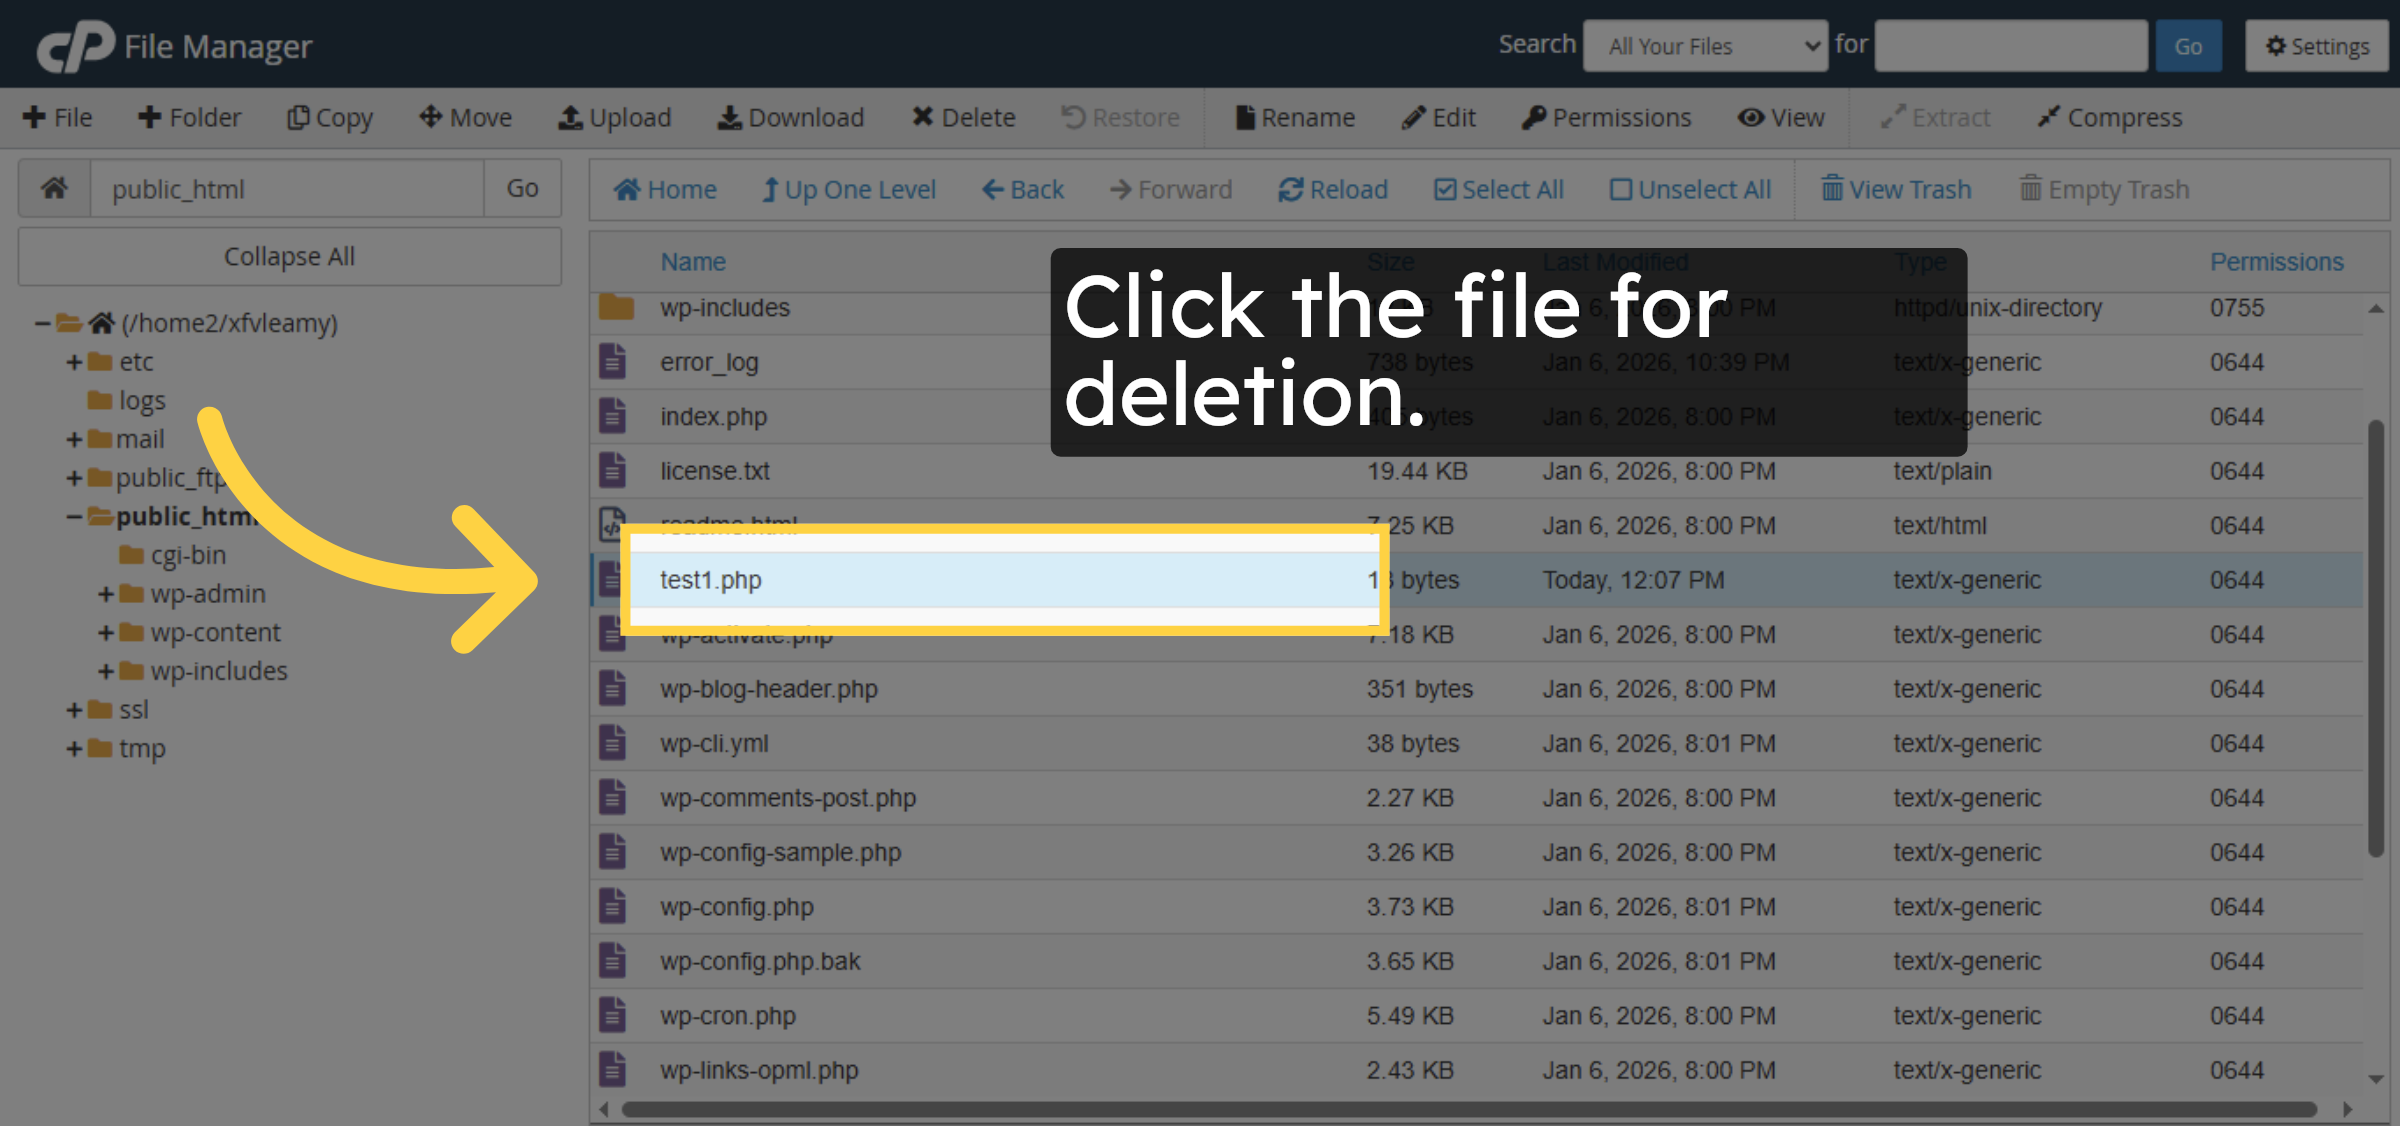
7. Select File For Editing
8. Initiate Edit Mode
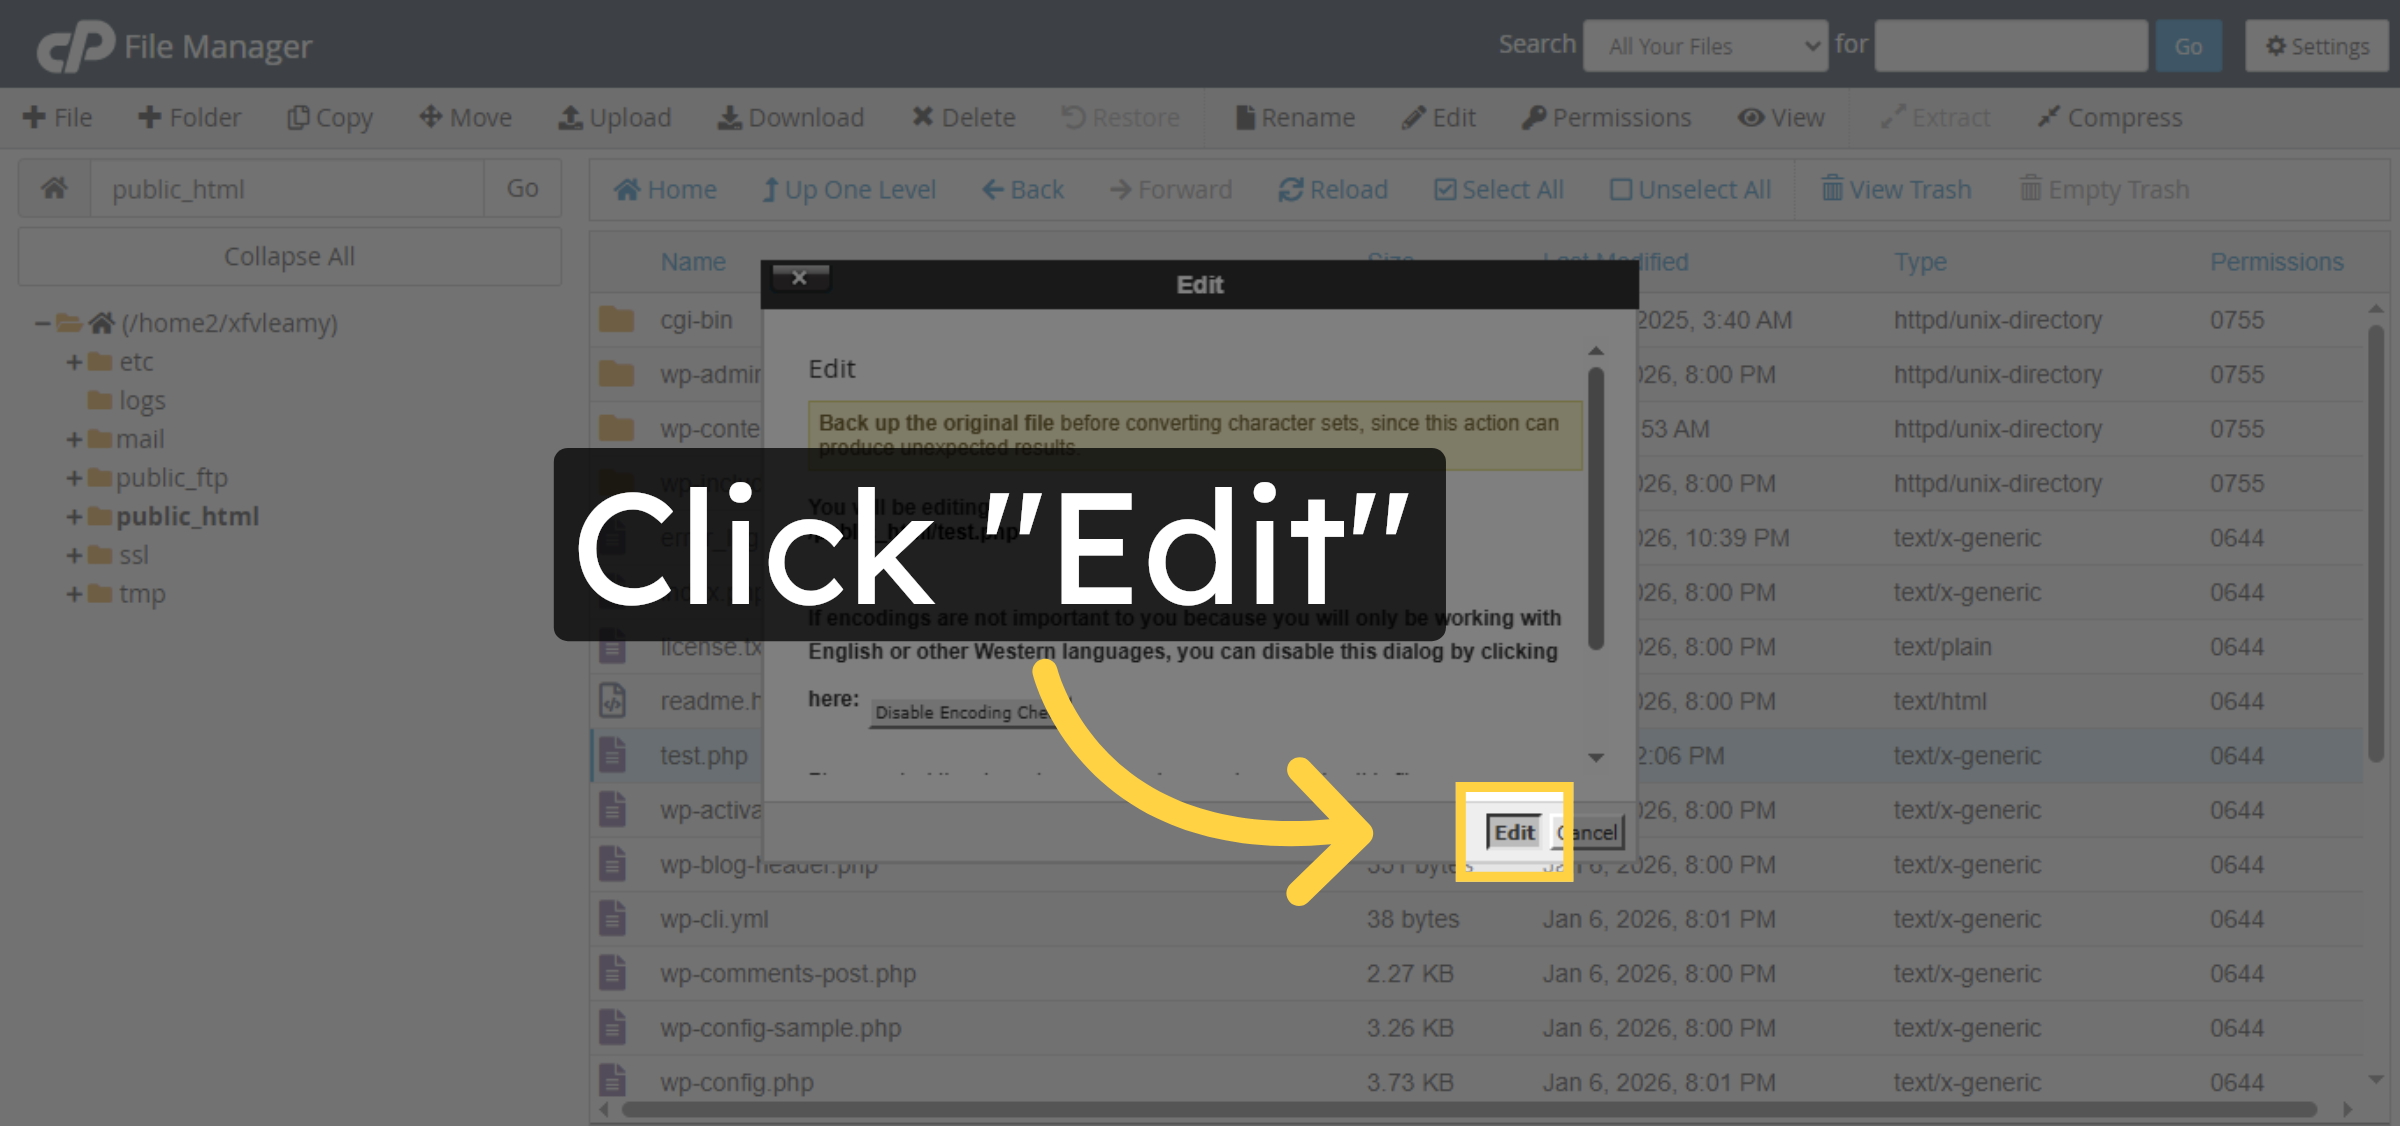
9. Confirm Edit Action
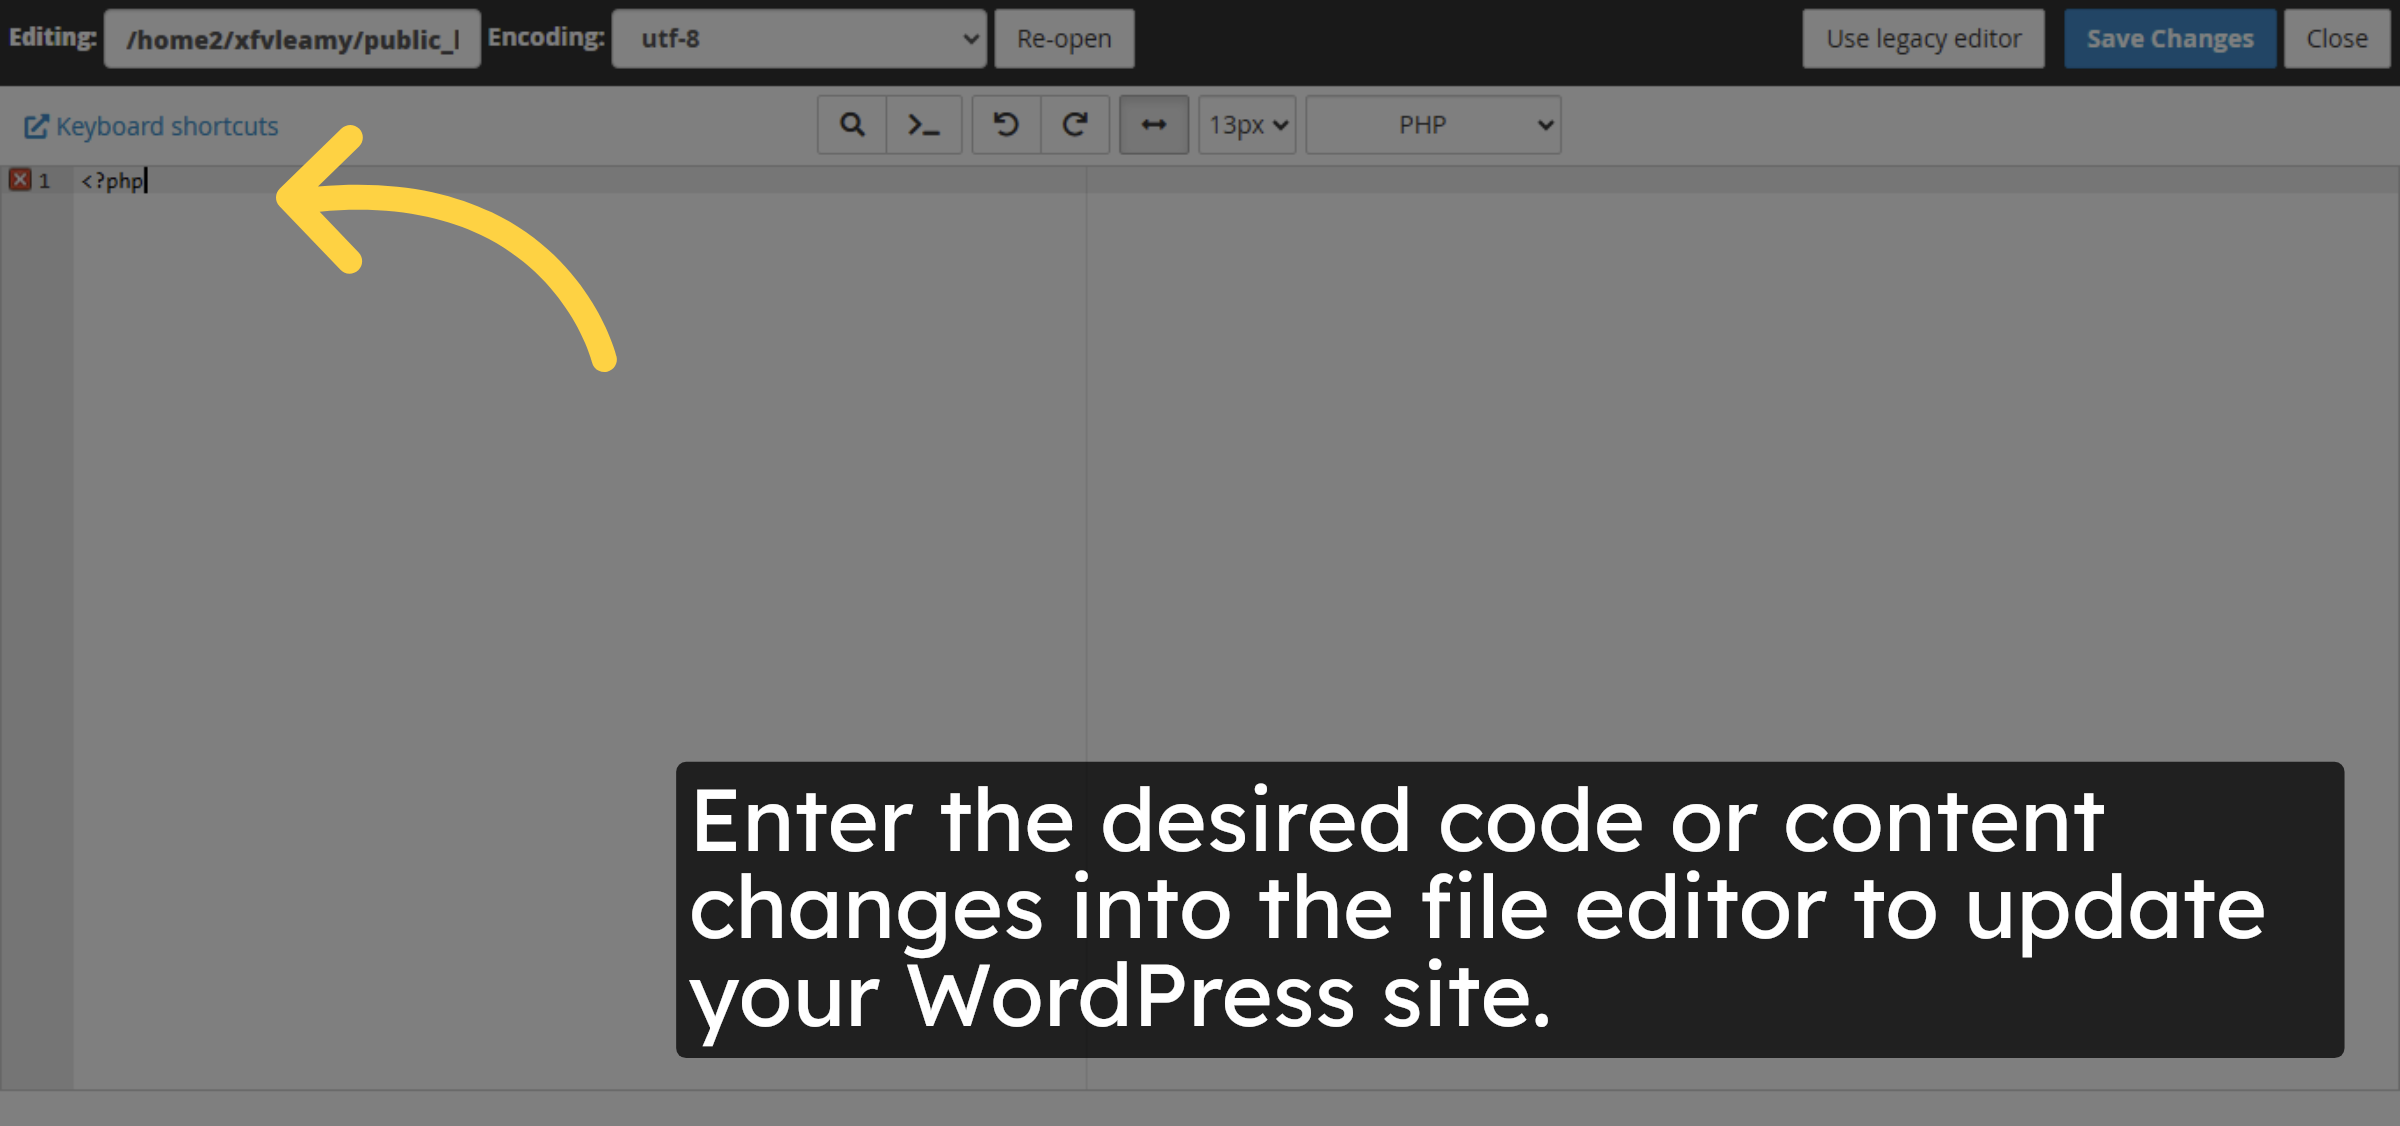
10. Modify File Content
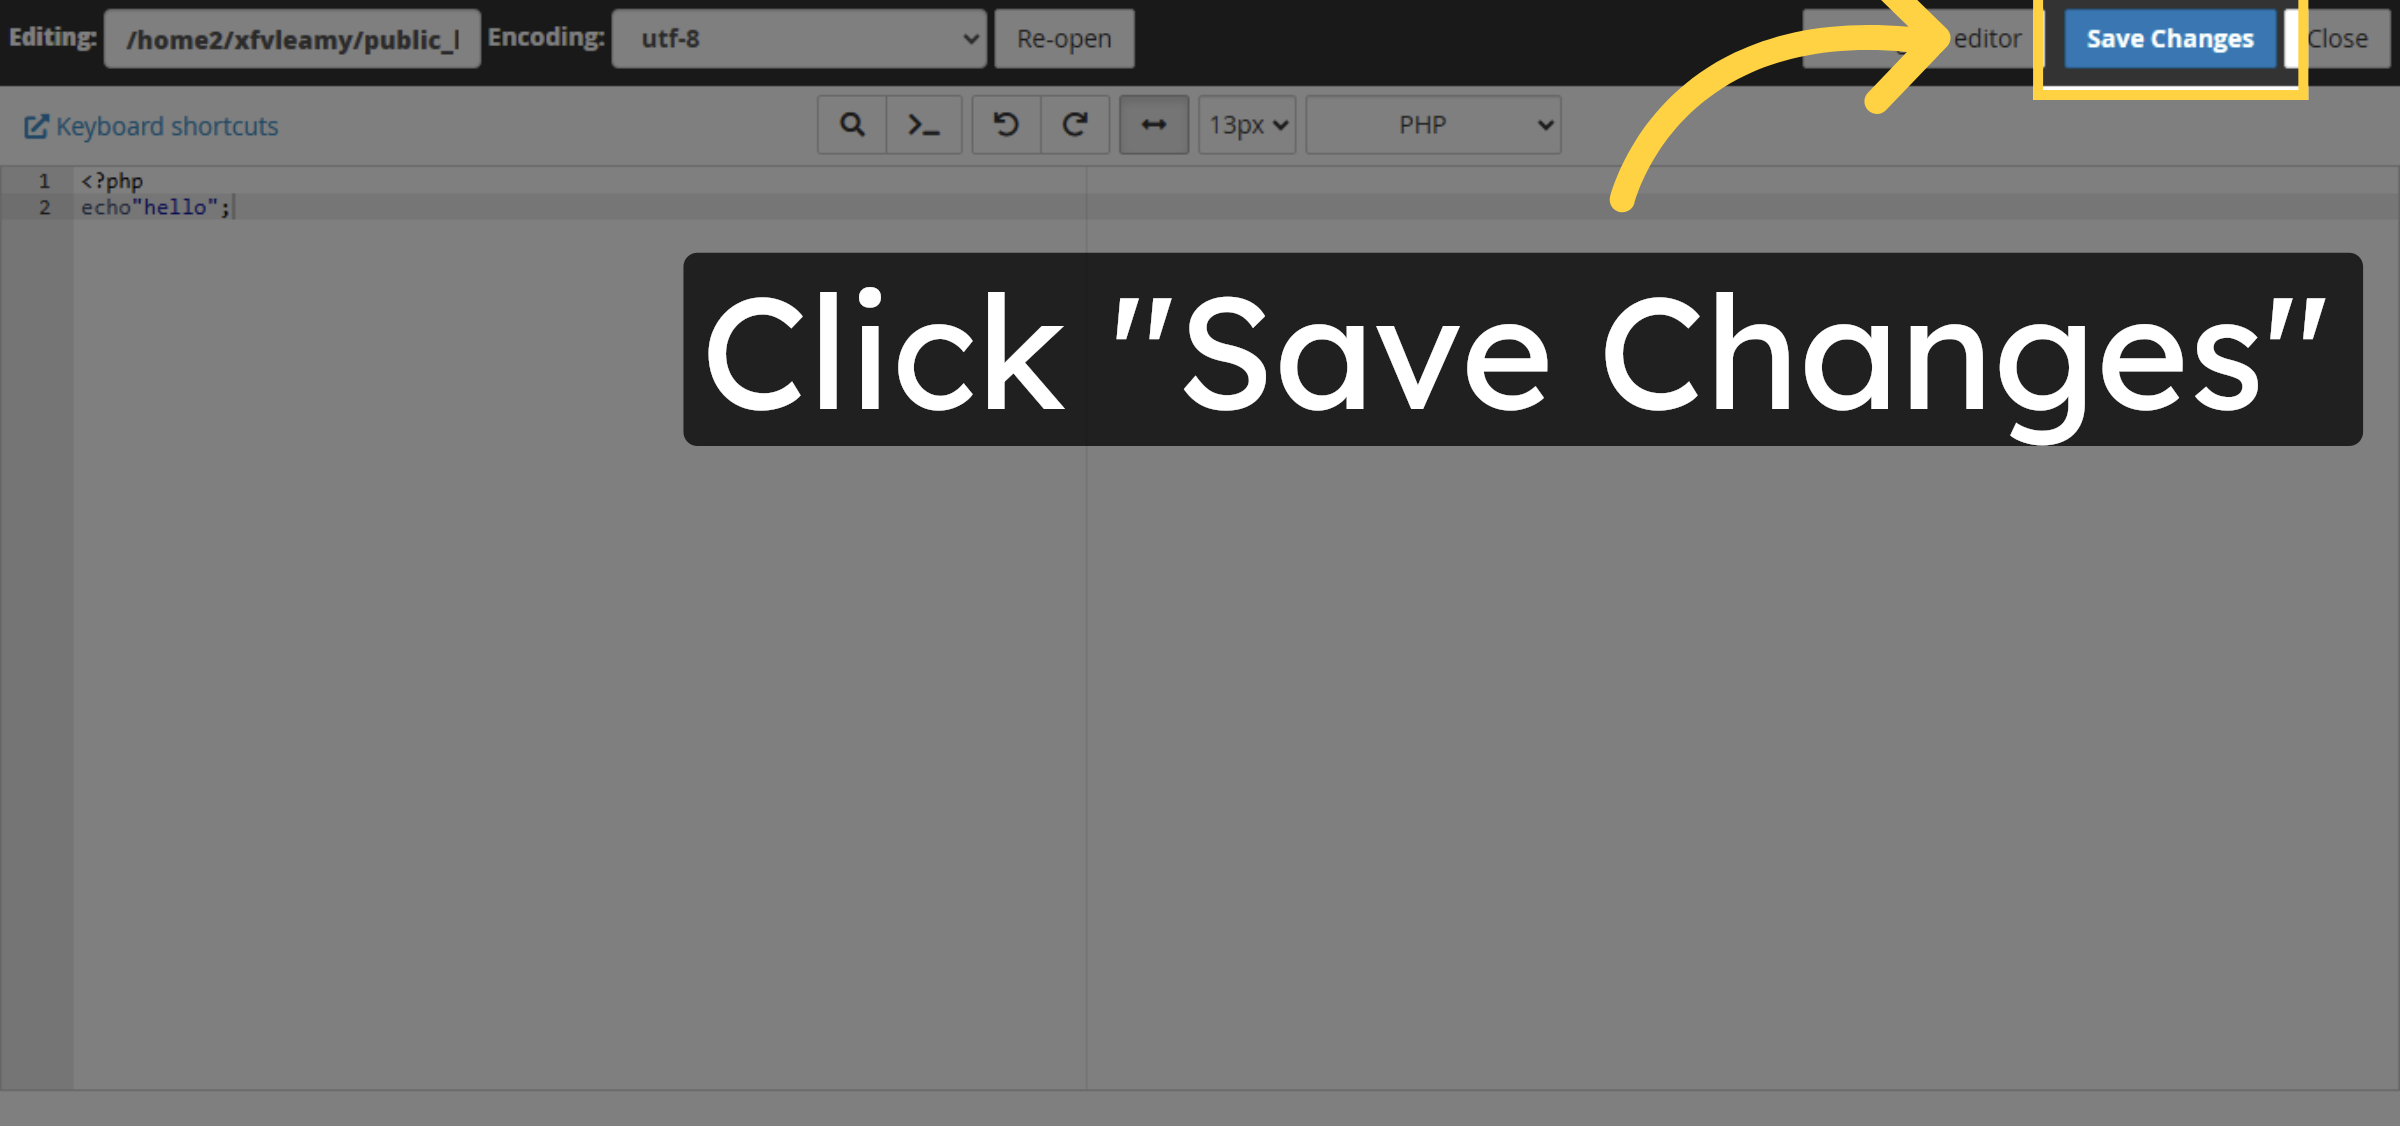
11. Save File Changes
12. Close Editor


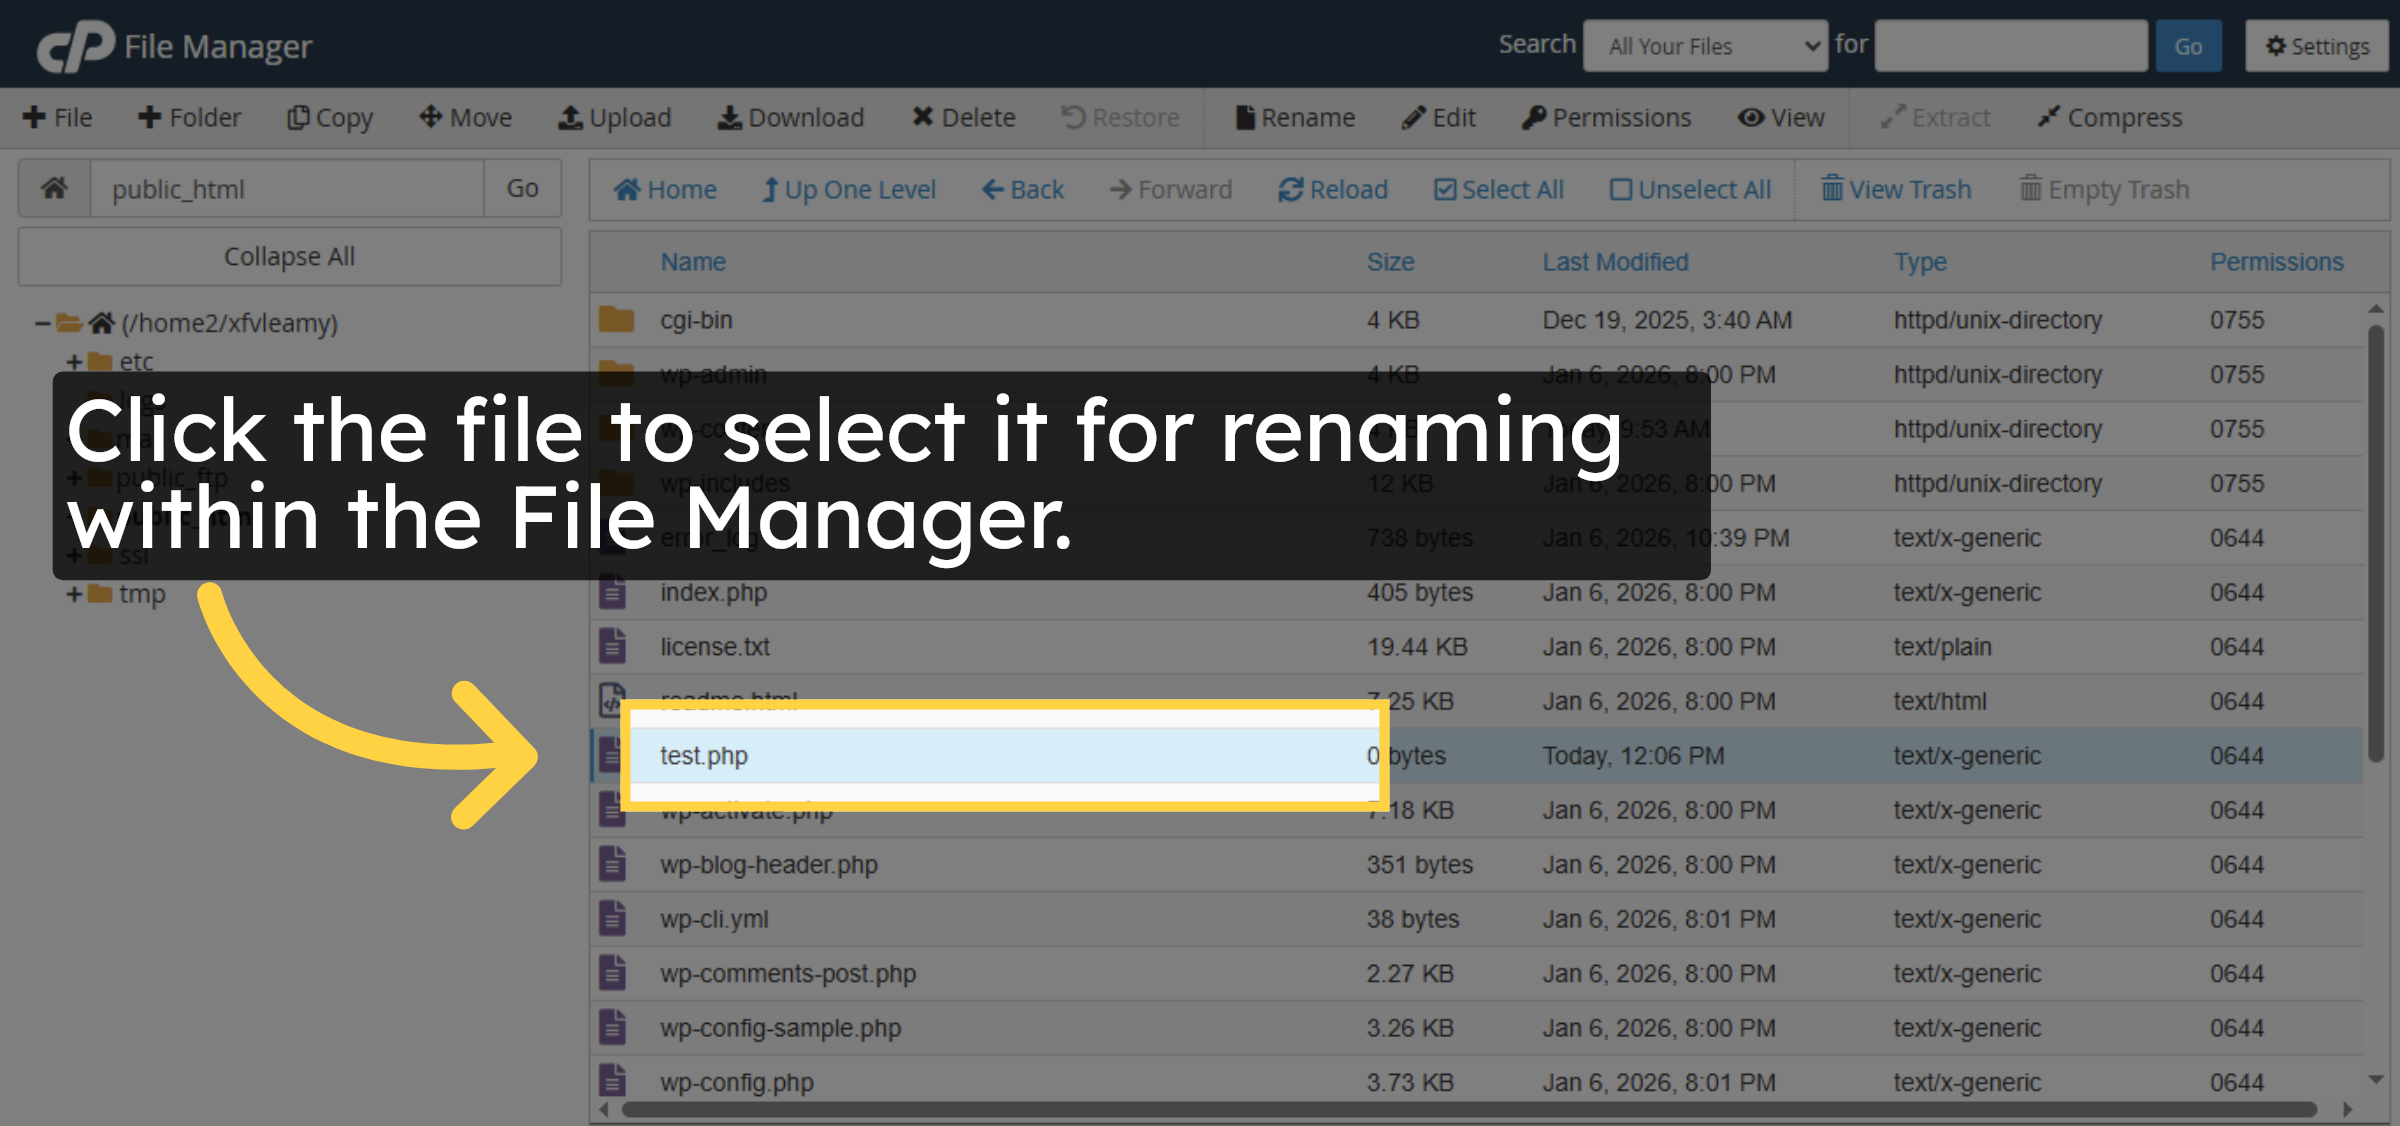
13. Select File For Rename
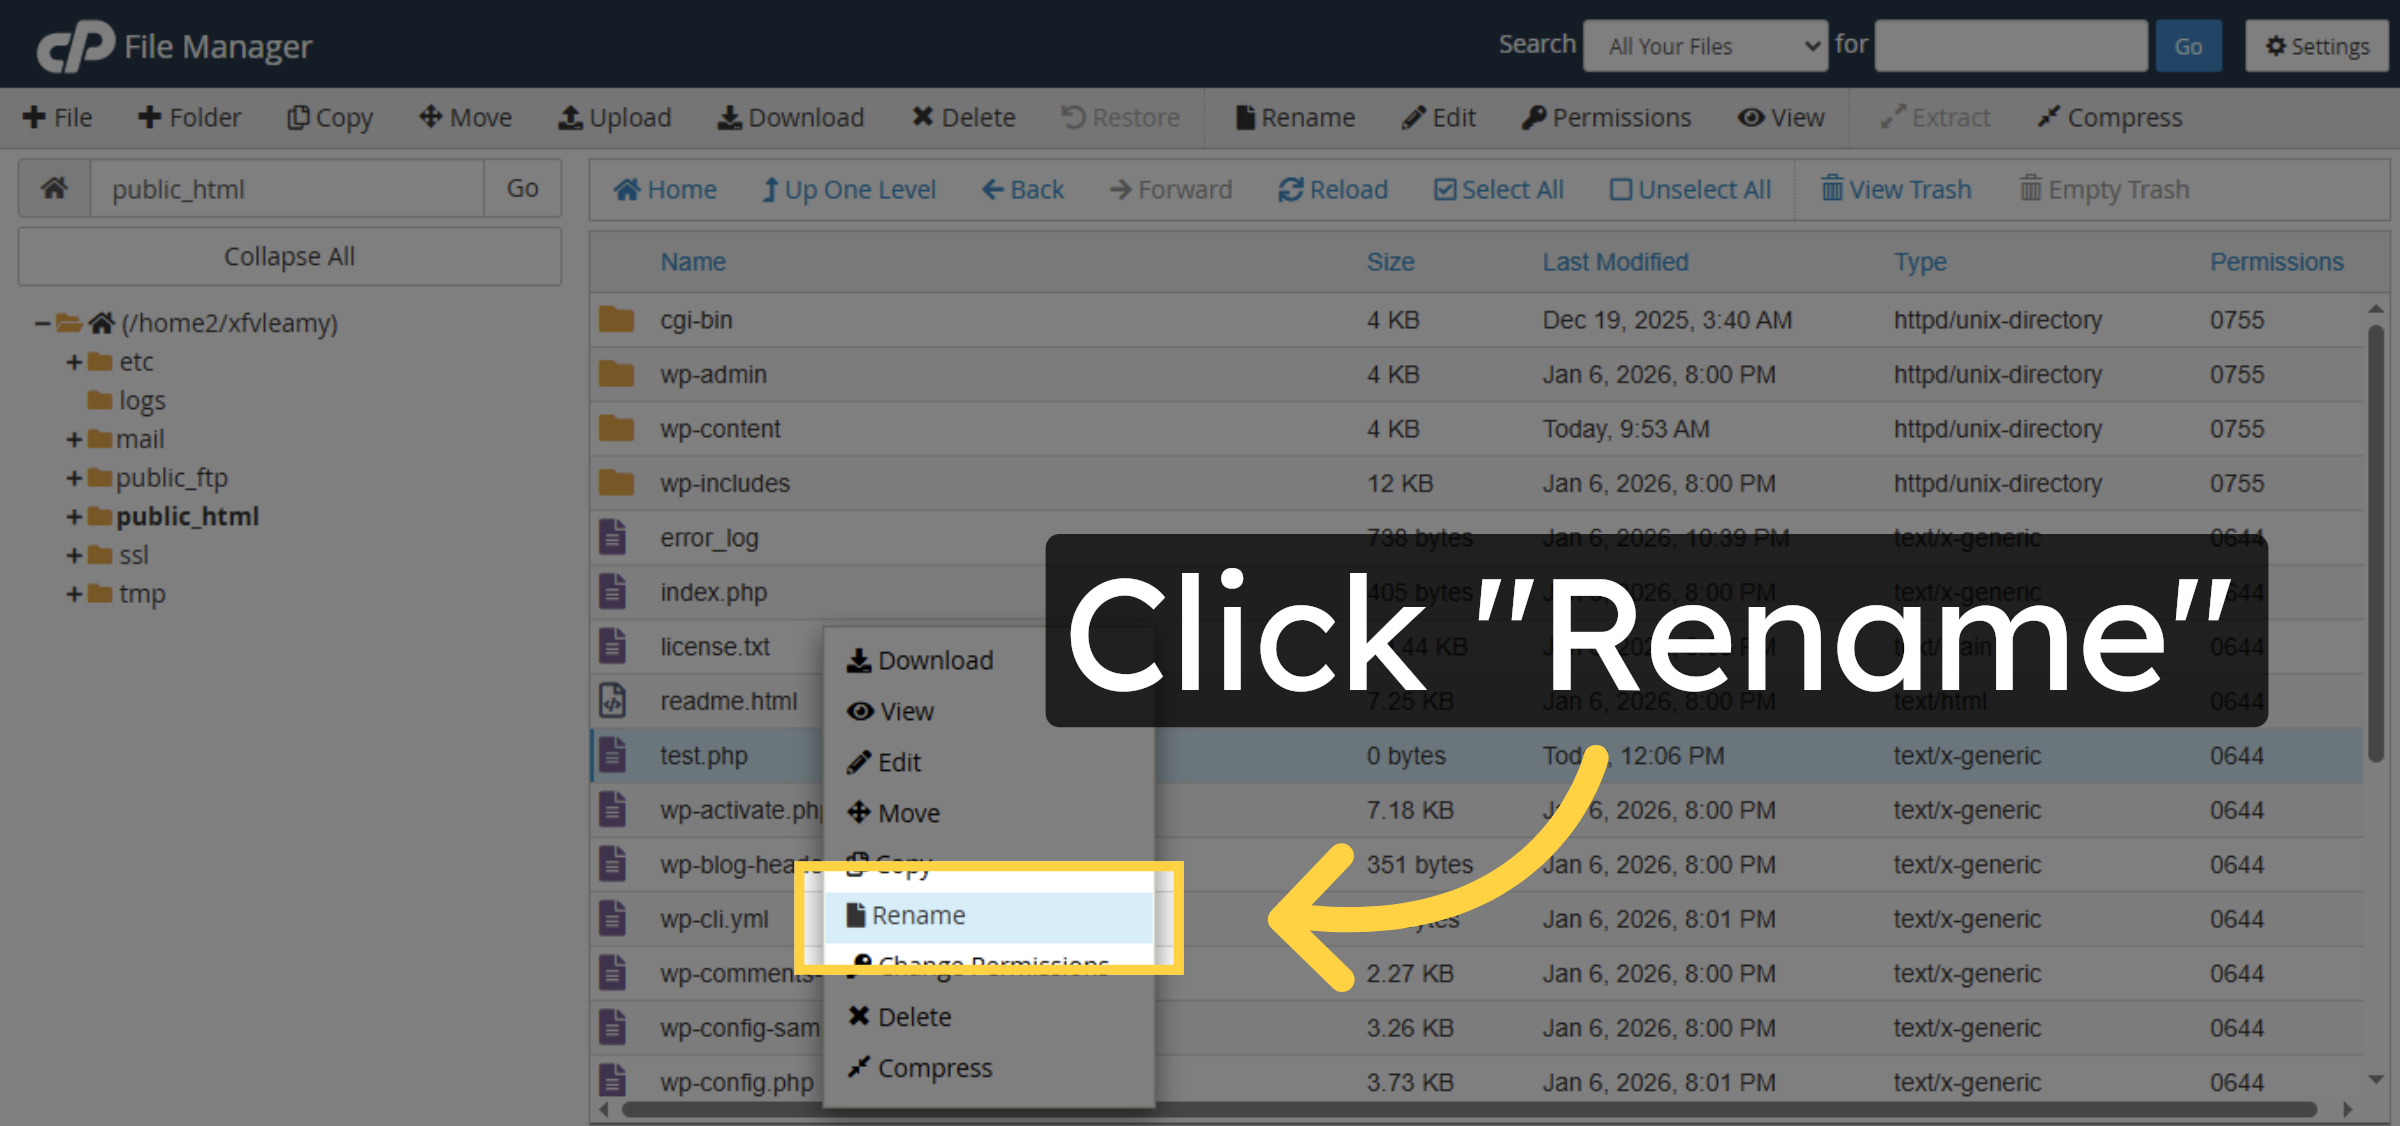
14. Open Rename Option
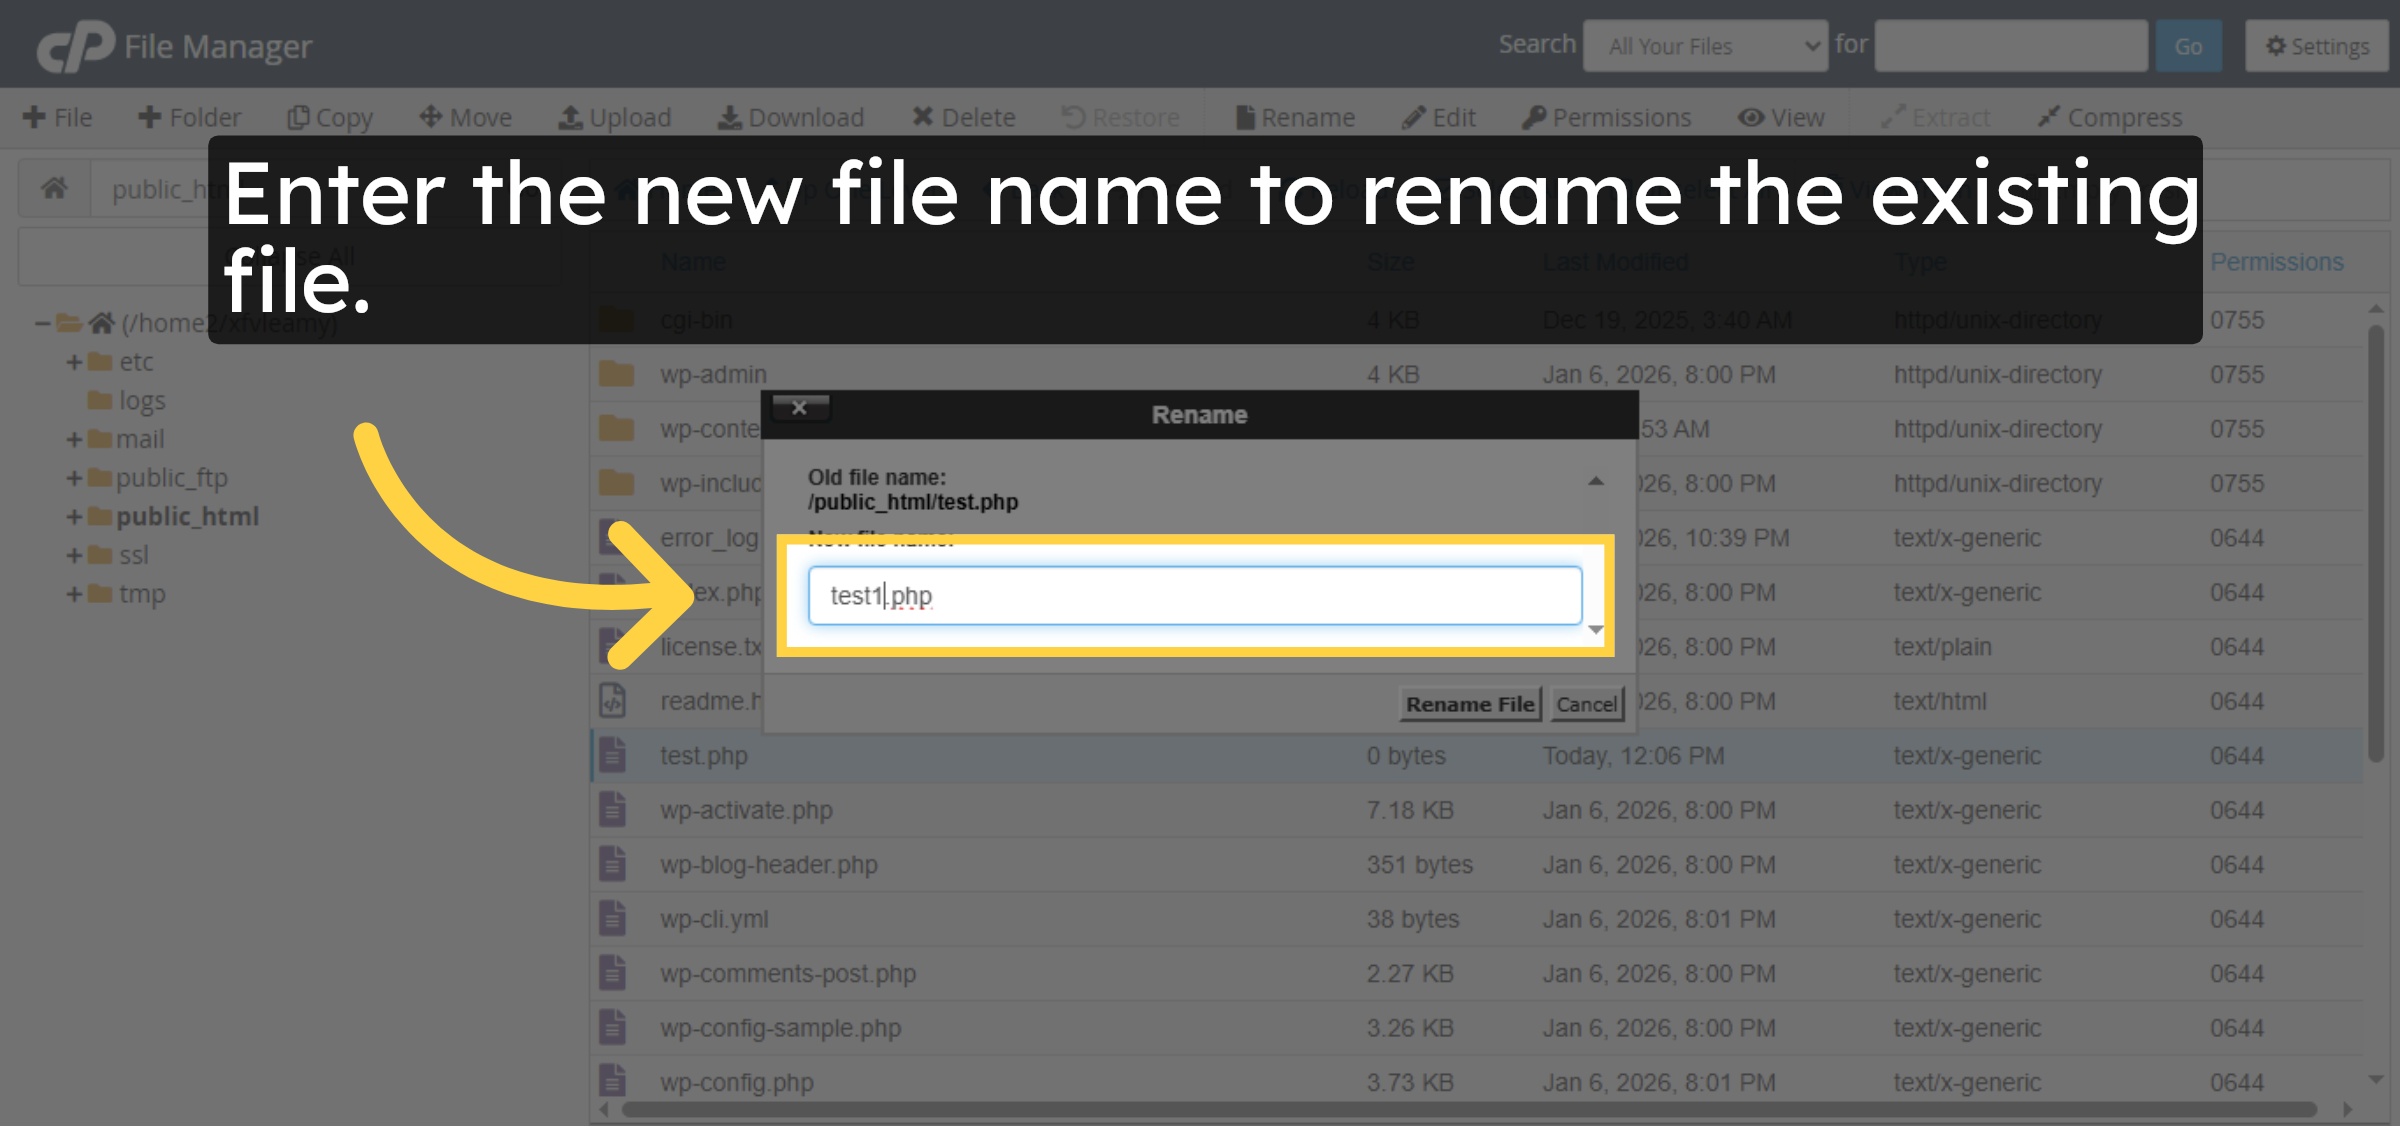
15. Enter New File Name
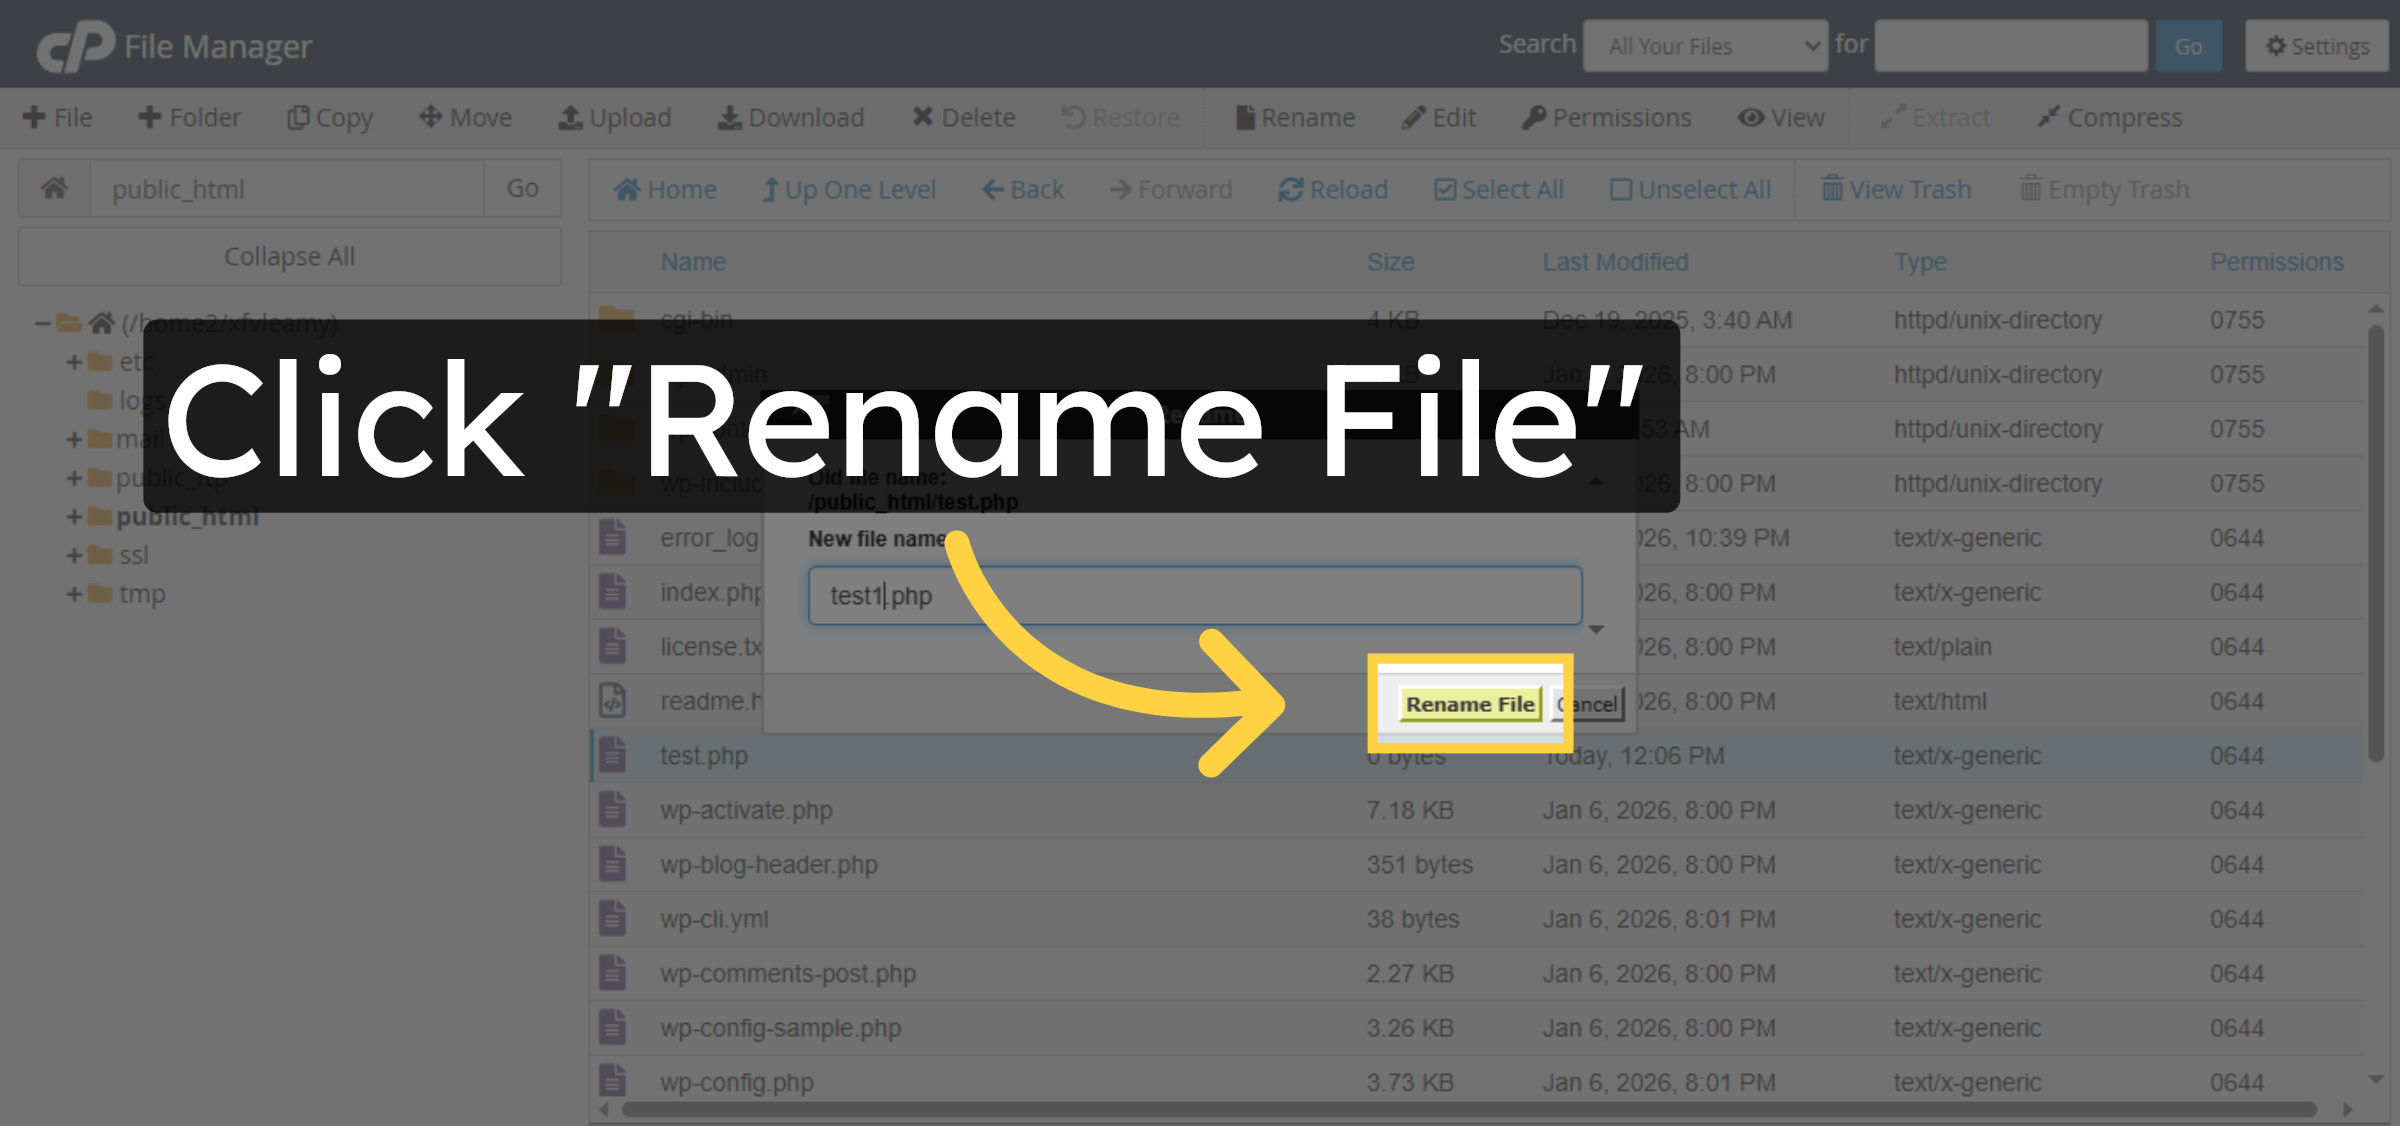
16. Confirm File Rename
17. File deletion
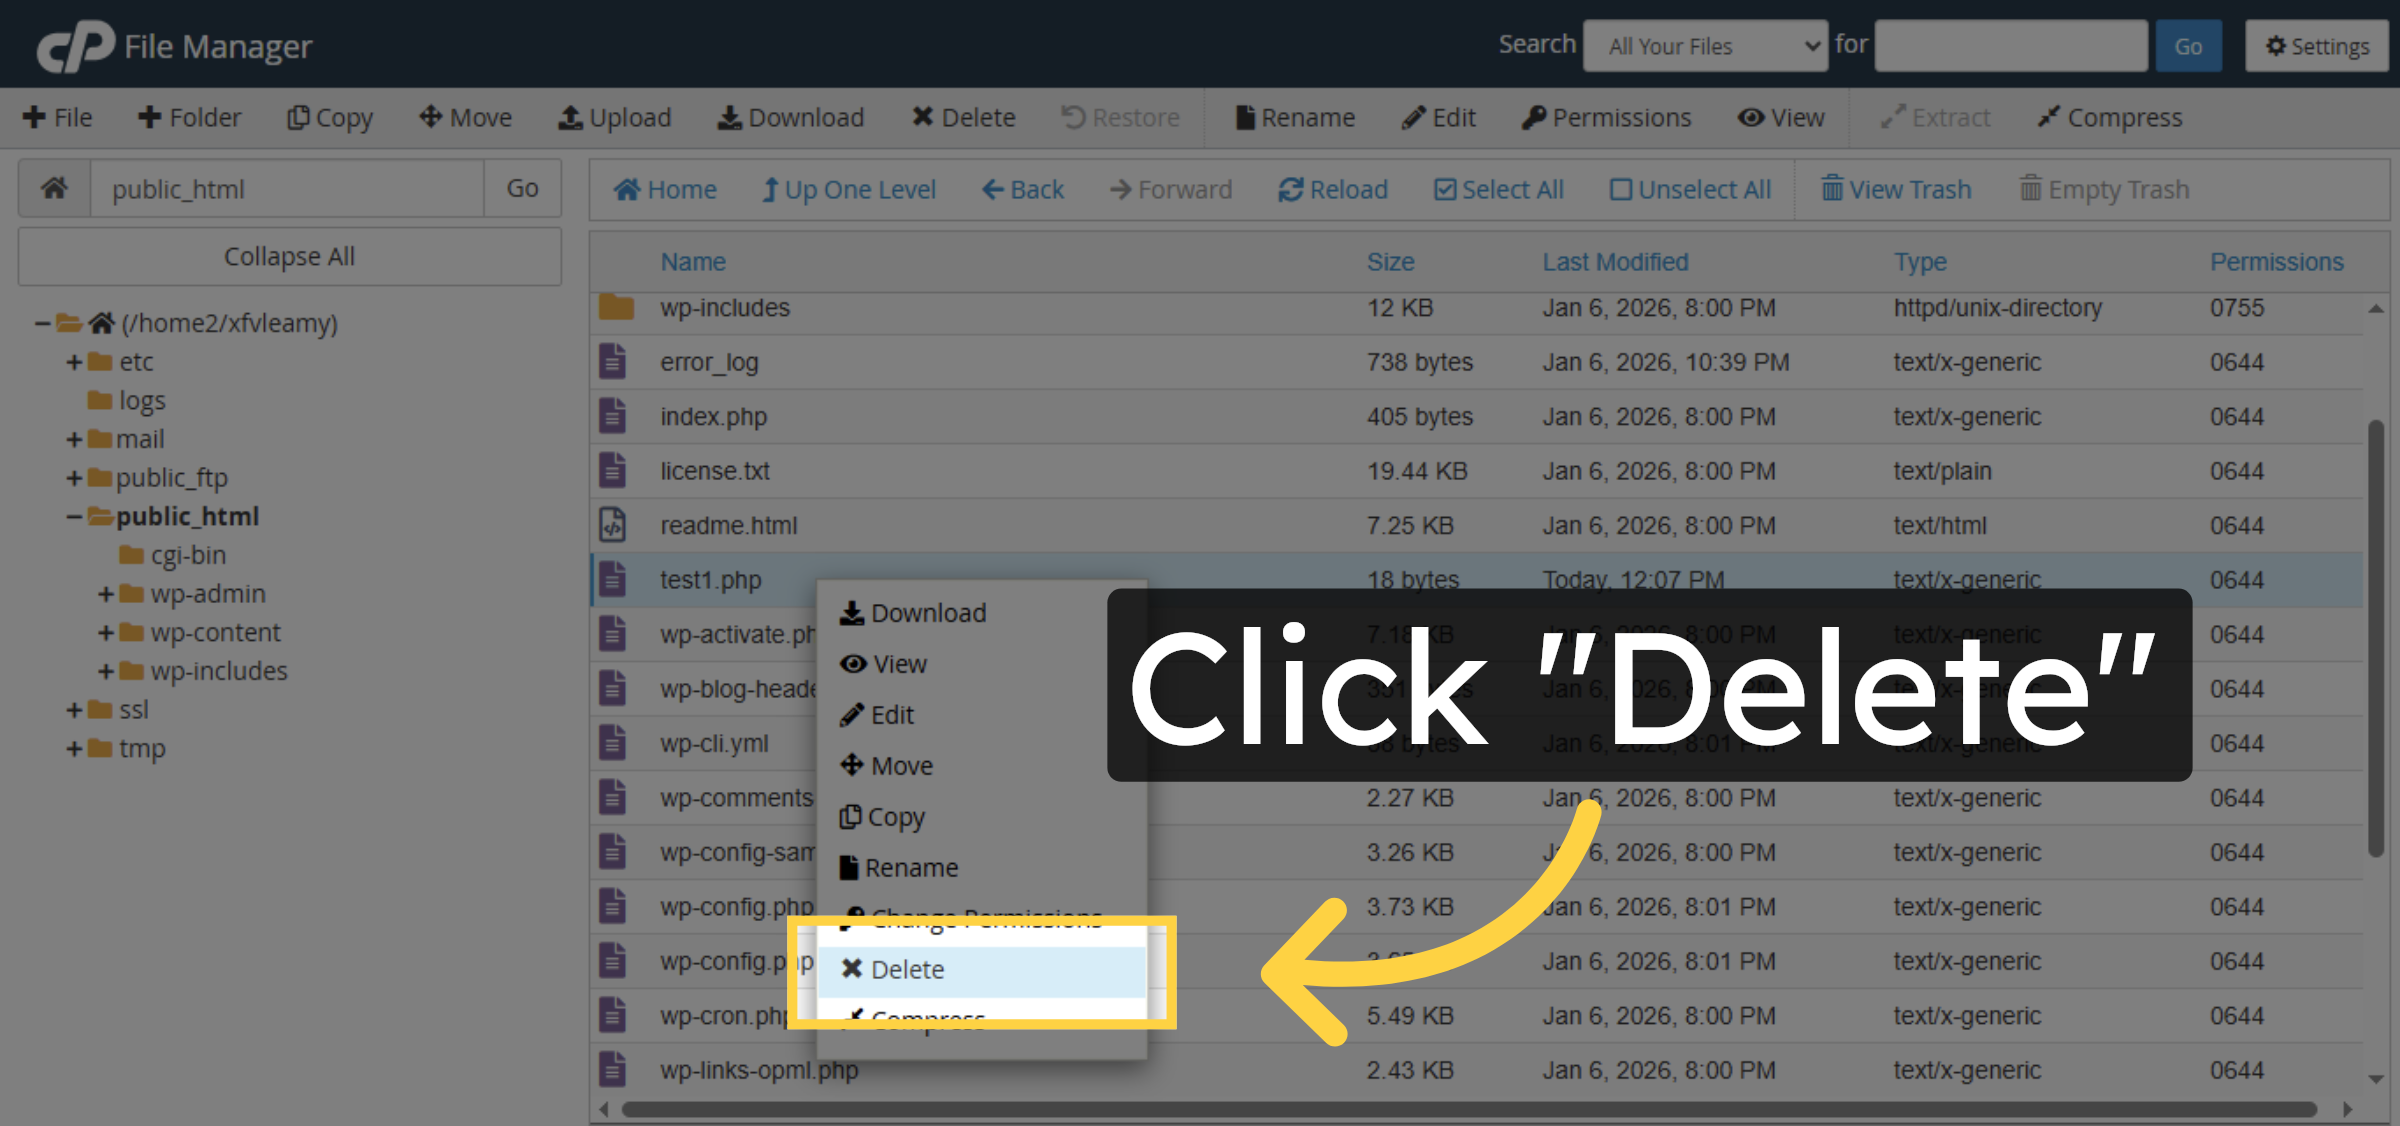
18. Delete File
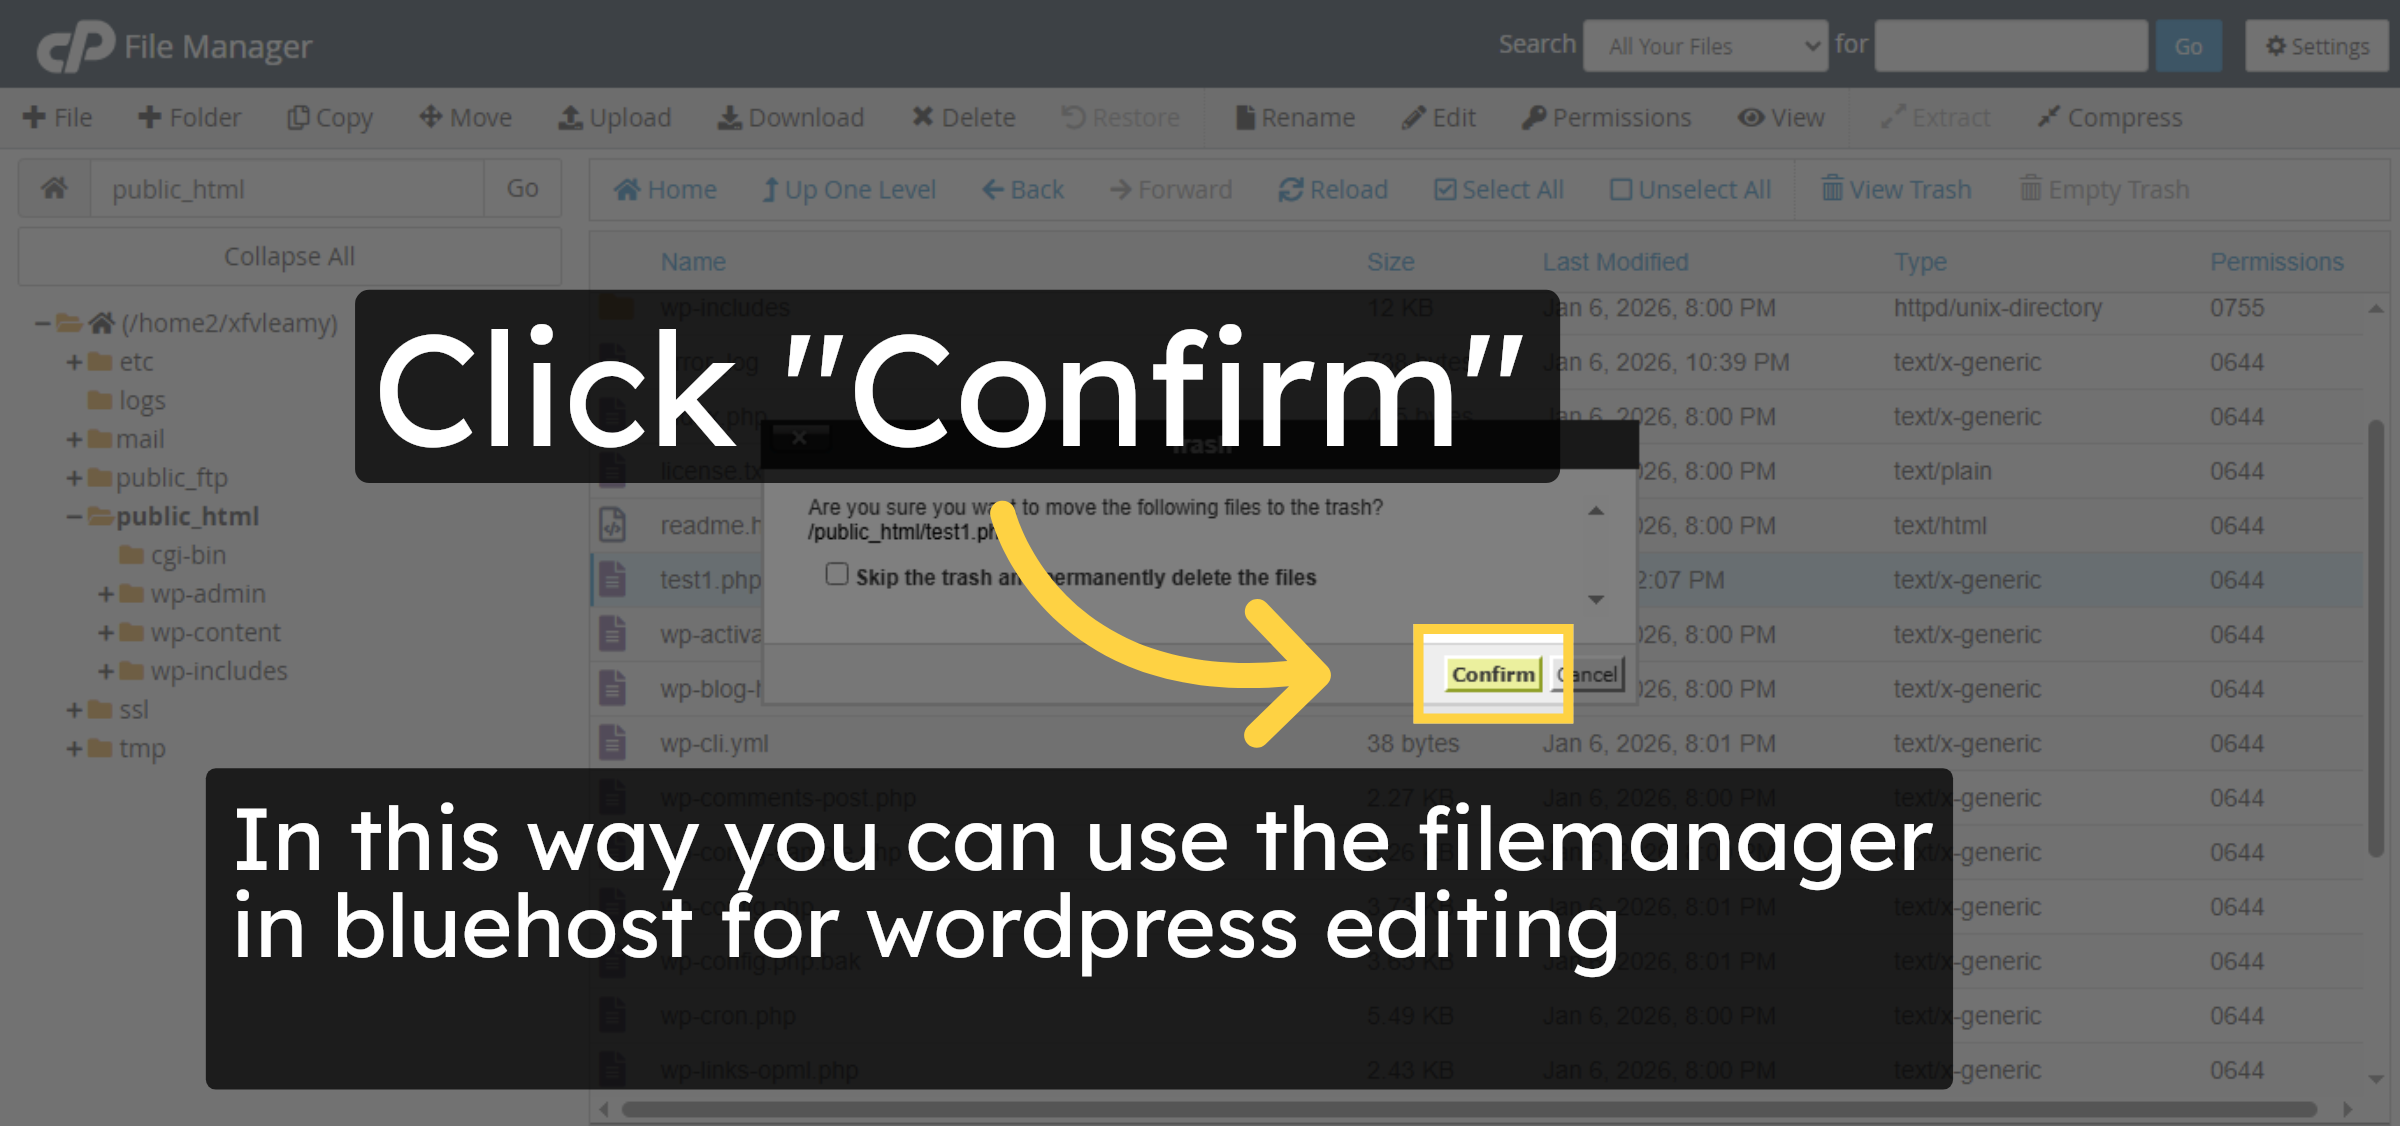
19. Confirm File Deletion
Conclusion
By completing the steps in this guide, you have successfully used the Bluehost File Manager to create, edit, rename, and delete WordPress files. This method allows you to manage your site’s files efficiently without relying on external tools, making it ideal for quick edits and basic maintenance tasks. Proper file management helps maintain a clean directory structure and ensures smoother WordPress site operation.
-
Visit: https://www.woohelpdesk.com
-
Call Us Toll-Free: +1 888 602 0119 (US & Canada)
-
Get professional support for WordPress file editing, Bluehost hosting management, troubleshooting, security updates, and WooCommerce solutions


