How to Turn On the Shipping Calculator in WooCommerce Step by Step?
Table of Contents
- Introduction
- When should you enable the WooCommerce shipping calculator?
- What is a Shipping Calculator in WooCommerce?
- What are the Key Features of Shipping Calculator in WooCommerce?
- What are the Benefits of Adding Shipping Calculator in WooCommerce?
- How to Turn On the Shipping Calculator in WooCommerce Step by Step?
- How to show shipping calculator WooCommerce on Cart Block sites?
- How to Enable WooCommerce’s Shipping Calculator for Classic Cart Shortcode?
- How to Troubleshoot When the Shipping Calculator Still is Not Showing?
- Final Verdict
Introduction
Customers want to know shipping costs before they reach checkout. A visible calculator reduces doubt and improves buying confidence. This is why the WooCommerce shipping calculator matters for stores. It lets customers estimate shipping using their location and cart data. It also helps you reduce cart abandonment caused by surprises.
Many shoppers leave when shipping appears too late in checkout. When you show the WooCommerce shipping calculator on cart, trust improves fast. It also reduces support questions about delivery cost and zones.
This guide explains how to Enable shipping calculator WooCommerce correctly. You will learn how to turn on the shipping calculator in WooCommerce step by step. You will also learn which WooCommerce shipping settings must be correct first. We will cover common issues that stop the calculator from showing. We will also cover best practices for accurate calculation results.
The shipping calculator usually appears on the Cart page. It can show under shipping totals depending on theme layout. Some stores also show it on mini carts using custom code. Most stores keep it on Cart for clean user flow. Cart based estimation helps customers decide before checkout. It also helps customers change addresses and see updated totals. This feature is useful for multi-zone and multi-method shipping setups.
When should you enable the WooCommerce shipping calculator?
- You should enable it when shipping differs by location or zone.
- You should enable it when you offer multiple shipping methods.
- You should enable it when you sell across states or countries.
- You should enable it when you use flat rate and free shipping rules.
- You should enable it when customers often ask shipping cost questions.
- You can skip it only when shipping is always free.
- You can also skip it when shipping is fixed worldwide..
What is a Shipping Calculator in WooCommerce?
A shipping calculator is a cart tool that estimates delivery cost. It uses the customer address and your shipping zone rules. It shows shipping options and totals before checkout begins. It helps customers calculate shipping using postcode and country. It can also use state and city based matching. It works only when shipping zones and methods exist. It also depends on enabled shipping destinations in settings. If shipping is disabled, the calculator will not show correctly. If no method matches, it may show no options. When configured correctly, it improves transparency and conversion.
- The WooCommerce shipping calculator estimates shipping on the Cart page.
Customers enter location details and see updated shipping totals. - It uses your shipping zones, methods, and rate rules to calculate.
WooCommerce checks zones first, then applies matching methods. - It helps customers see shipping costs before moving to checkout.
Early visibility reduces abandonment and improves trust quickly. - It works only when shipping settings and methods are configured.
Missing zones or methods cause empty or hidden calculators.
Shipping rates are the rules you configure in admin settings. The shipping calculator is the frontend tool that shows those rates. The calculator does not create rates by itself. It only displays results based on your setup. If your rates are wrong, calculator output will be wrong too. If your zones are missing, the calculator will show no shipping methods. This is why rate setup must be completed first.
What are the Key Features of Shipping Calculator in WooCommerce?
The shipping calculator has features that support better checkout decisions. It updates totals based on address input and cart changes. It also works with most shipping methods and zone rules. It supports country, state, and postcode based estimation. It also supports free shipping rules based on thresholds. It can display multiple methods for customers to choose. It can also update taxes depending on shipping tax settings. These features make WooCommerce shipping settings more customer friendly.
1. Location based shipping estimation
- Customers can enter country and state for zone matching.
Zone matching ensures correct methods display for that region. - Customers can enter a postcode for more accurate rate selection.
Postcodes help when zones use postcode ranges and rules. - Customers can update addresses and recalculate shipping quickly.
Recalculation helps customers compare totals for different locations.
2. Works with common WooCommerce shipping methods
- It works with flat rate shipping methods by default.
Flat rate rules show instantly when the address matches the zone. - It works with free shipping methods when conditions are met.
Threshold based free shipping shows when the cart meets minimum. - It works with local pickup when pickup is enabled in the zone.
Pickup appears as an option and reduces delivery cost confusion.
3. Updates cart totals with shipping changes
- Shipping totals update when customers select a different method.
Method selection changes the final total and helps decision making. - Taxes can be updated if your store taxes depend on shipping address.
Some regions apply tax based on destination, not store base. - Total cost becomes clear before checkout, reducing surprise fees.
Clear totals improve trust and reduce checkout drop-offs.
4. Supports multi-zone stores and international shipping
- Stores with many zones can show correct methods per destination.
WooCommerce checks the zone list and matches the customer location. - International customers can see rates based on their country selection.
Country selection helps global stores reduce checkout confusion. - You can restrict shipping to specific countries and still use a calculator.
Restrictions reduce shipping issues and reduce support workload.
5. Helps with cart based free shipping strategies
- Customers can see a free shipping unlock message after recalculation.
This motivates customers to add more items to cart. - Customers can estimate shipping while increasing cart value gradually.
Gradual estimation improves upsells and improves AOV. - It reduces coupon and shipping rule confusion for buyers.
Clear method display reduces failed checkout expectations.
What are the Benefits of Adding Shipping Calculator in WooCommerce?
The calculator improves shopping experience and reduces hesitation. It also reduces support workload for shipping questions. It supports better conversion by reducing surprise costs. It also supports better decision making for multi-zone delivery. These benefits improve store performance over time.
1. Reduces cart abandonment caused by shipping surprises
- Customers see shipping cost earlier and feel more confident.
Early totals reduce doubt and reduce fear of hidden costs. - Customers can check shipping to their area before checkout.
This prevents wasted checkout attempts and frustration later. - Customers leave less often when shipping rules are transparent.
Transparency increases trust and improves conversion steadily.
2. Improves customer trust and reduces refund risk
- Customers understand the total cost before they pay.
Clear totals reduce disputes and reduce chargeback complaints. - Customers can choose a shipping option that matches budget and speed.
Options reduce complaints about delivery price and timelines. - Customers feel the store is professional and well managed.
Professional checkout experience improves brand confidence quickly.
3. Reduces support tickets about shipping rates
- Customers stop asking basic shipping cost questions often.
Calculator answers common questions without support involvement. - Customers can change postcode to see updated shipping results.
This prevents support requests for different address scenarios. - The support team can focus on complex delivery and order issues.
Less repetitive support increases efficiency and response time.
4. Supports free shipping marketing strategies
- Customers can see when free shipping applies to their cart.
Free shipping visibility increases upsells and cart size. - Customers can calculate how much more to add for free shipping.
This encourages add-ons and increases average order value. - Customers understand coupon based free shipping conditions clearly.
Clear conditions reduce frustration and coupon abuse.
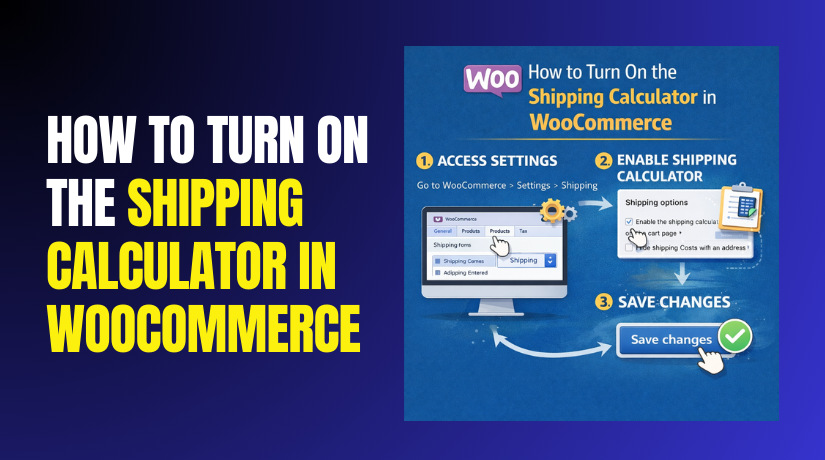
How to Turn On the Shipping Calculator in WooCommerce Step by Step?
This section shows how to Enable shipping calculator WooCommerce properly. You will use WooCommerce settings and cart page configuration. You will also verify cart type and theme behavior. Keep changes small and test after each step. Follow the steps in the same order for stability.
Step 1: Confirm shipping is enabled in WooCommerce shipping settings
The shipping calculator depends on shipping being enabled for your store. You must confirm that WooCommerce shipping is turned on. You must also confirm destination countries are allowed.
WordPress Dashboard → WooCommerce → Settings → General
WordPress Dashboard → WooCommerce → Settings → Shipping
- Open General settings and confirm the selling location is correct.
Selling location affects taxes and some shipping behaviors too. - Set Shipping location to ship to all countries you sell.
If the destination is restricted, the calculator may not show options. - Save changes and confirm no warning messages appear.
Saving ensures your shipping destination rules apply correctly.
Step 2: Create or confirm shipping zones and shipping methods exist
The calculator shows rates only when zones and methods exist. You must create at least one zone and add a method. This is the core WooCommerce shipping settings setup.
WordPress Dashboard → WooCommerce → Settings → Shipping → Shipping zones
WordPress Dashboard → WooCommerce → Settings → Shipping → Shipping zones → Add zone
- Create a zone for your main shipping region first.
Main zones cover most customers and reduce incorrect matches. - Add region rules like country, state, or postcodes carefully.
Correct matching ensures customers see correct shipping methods. - Add at least one method like Flat rate or Free shipping.
The calculator needs an active method to display estimated shipping. - Save the zone and test the zone list ordering.
Zone order impacts which zone matches the address first.
Step 3: Ensure Cart page is set and working correctly
The shipping calculator is normally shown on the Cart page. If your cart page is broken, the calculator will not show. You must confirm WooCommerce pages are correct.
WordPress Dashboard → WooCommerce → Settings → Advanced → Page setup
WordPress Dashboard → Pages → All Pages → Cart
- Confirm Cart page is selected inside WooCommerce page setup.
Wrong mapping can break cart template and shipping display. - Open Cart page and confirm it loads cart contents correctly.
Empty cart template or broken layout hides calculator sections. - Confirm cart page uses WooCommerce Cart block or shortcode.
Cart block and shortcode control how shipping appears on cart.
Step 4: Turn on shipping calculator from WooCommerce settings
WooCommerce has a setting to show shipping calculator on cart. You must enable it to make the calculator visible. Some themes still override this display, so test after enabling.
WordPress Dashboard → WooCommerce → Settings → Shipping → Shipping options
- Enable the option to show a shipping calculator on the cart page.
This is the main toggle for the WooCommerce shipping calculator. - Enable shipping debug mode only when troubleshooting issues.
Debug helps identify missing zone matches and rate failures. - Save changes and clear cache if the caching plugin is active.
Cache can hide dynamic cart sections and shipping updates.
Step 5: Confirm your cart uses classic template or cart block layout
Cart blocks can behave differently than classic templates. Your calculator display depends on cart implementation and theme. You must confirm which cart type your store uses.
WordPress Dashboard → Pages → All Pages → Cart → Edit
WordPress Dashboard → Appearance → Theme File Editor → cart template
- If the Cart page uses blocks, check Cart block settings and layout.
Some block patterns place shipping estimator in a different area. - If the Cart page uses shortcode, confirm the shortcode is not inside columns.
Complex builder wrappers can break shipping form rendering. - Avoid hiding the shipping section using theme CSS or builder settings.
CSS hiding makes the calculator invisible though it is enabled.
Step 6: Configure the fields shown in the shipping calculator
Shipping calculator fields depend on your store and destination rules. You can control whether postcodes and cities are required. Correct field rules improve accuracy and reduce errors.
WordPress Dashboard → WooCommerce → Settings → General → Default customer location
WordPress Dashboard → WooCommerce → Settings → General → Shipping destination
- Set default customer location to geolocate or base address carefully.
Default location affects early shipping estimates and tax display. - Ensure the postcode field is available for accurate zone matching.
Postcode based zones need postcode input to calculate properly. - Ensure state and country fields match your shipping destination setup.
Wrong field rules can prevent zone matching and method display.
Step 7: Test the shipping calculator on the cart page like a buyer
Testing confirms the calculator works for real addresses. You should test multiple postcodes and regions. You should also test free shipping thresholds and flat rates.
Website Frontend → Shop → Add product → Cart
Cart page → Shipping section → Calculate shipping
- Enter a valid country, state, and postcode and recalculate shipping.
Recalculation confirms zone matching and rate display is working. - Switch between methods and confirm totals update correctly.
Method switching must update totals without errors or reload issues. - Test a different postcode to confirm zone rules change correctly.
This confirms your zone and postcode matching is accurate. - Test mobile view and confirm calculator fields remain usable.
Mobile usability matters because many carts happen on phones.
How to show shipping calculator WooCommerce on Cart Block sites?
Many new stores use the Cart Block, not the classic shortcode cart. The shipping estimator can appear in a different position on blocks. You must keep the cart layout clean and avoid heavy wrappers. Follow these steps to show the shipping calculator WooCommerce correctly on block carts.
Step 1: Confirm the Cart page uses the Cart block
The block cart has different markup and settings behavior. You must confirm you are editing the real Cart page. You must also confirm the cart block is not duplicated.
WordPress Dashboard → Pages → All Pages → Cart → Edit


- Confirm the page contains the Cart block inside the editor.
Cart block renders WooCommerce cart with dynamic sections. - Remove duplicate cart blocks if you added them by mistake.
Duplicates can cause layout bugs and missing estimators. - Save the page and clear cache before testing on frontend.
Cached pages can hide recent block layout changes.
Step 2: Avoid page builders around the Cart block
Some builders wrap blocks inside extra containers and scripts. This can break shipping estimator interactions. Keep the cart page simple and clean.
- Avoid adding heavy columns and nested groups around cart blocks.
Too many wrappers can break responsive layout and forms. - Avoid adding sliders, tabs, and popups on the cart page.
Scripts can conflict with cart AJAX and estimator updates. - Use only basic sections like heading and short message blocks.
Simple blocks keep the cart stable and reduce conflicts.
Step 3: Confirm your theme supports WooCommerce blocks
Some older themes are not fully compatible with cart blocks. This can hide shipping sections or break totals. Theme compatibility is critical for estimator visibility.
WordPress Dashboard → Appearance → Themes → Customize
WordPress Dashboard → WooCommerce → Status
- Switch to a WooCommerce supported theme for testing quickly.
Testing isolates theme issues from WooCommerce configuration issues. - Check WooCommerce Status for template and block compatibility warnings.
Warnings can explain missing elements and layout overrides. - Update theme and WooCommerce to stable versions before retesting.
Updates fix block bugs and improve cart estimator stability.
How to Enable WooCommerce’s Shipping Calculator for Classic Cart Shortcode?
Some sites still use the classic cart shortcode system. In that case, the calculator relies on classic templates and hooks. Shortcode pages are usually more stable with older themes.
Step 1: Confirm the Cart page contains the cart shortcode
WooCommerce classic cart needs the correct shortcode in content. Without it, cart and estimator will not render.
WordPress Dashboard → Pages → All Pages → Cart → Edit
- Confirm you see the cart shortcode or classic cart content structure.
Shortcodes trigger WooCommerce cart template rendering. - Avoid placing the shortcode inside tabs or accordion builders.
Builders can delay rendering and break dynamic forms. - Keep shortcodes on a clean page with minimal extra content.
Simple pages reduce conflicts with shipping calculator scripts.
Step 2: Confirm the shipping calculator option is enabled
Even classic carts need the WooCommerce setting toggle enabled. You must confirm the toggle is turned on correctly.
WordPress Dashboard → WooCommerce → Settings → Shipping → Shipping options
- Enable the shipping calculator display option on the cart page.
This turns on the estimator section in the cart template. - Save changes and purge cache from your caching plugin.
Cache can prevent cart template changes from appearing. - Retest cart page in a private browser window for accuracy.
The private window avoids old sessions and cached assets.
How to Troubleshoot When the Shipping Calculator Still is Not Showing?
Sometimes the calculator setting is enabled but nothing appears. Use these troubleshooting steps in the same order. Each step isolates one common cause quickly.
Step 1: Confirm shipping methods show at checkout
If the checkout shows no shipping methods, cart calculator will fail too. You must fix zones and methods first.
Website Frontend → Add product → Cart → Checkout
- Check if any shipping method appears on the checkout shipping section.
No method usually means zone mismatch or disabled shipping. - Enter a different postcode and retest method visibility.
Postcodes determine zone matching and method availability often. - The Confirm Rest of World zone includes a flat rate method.
Fallback zone ensures something always displays at checkout.
Step 2: Confirm “Ship to billing address” settings are not confusing tests
Some stores hide shipping address fields based on configuration. This can confuse your tests and cause wrong location input. Always test with clear address fields.
WordPress Dashboard → WooCommerce → Settings → Shipping → Shipping options
- Enable shipping to customer address for normal shipping stores.
Customer destination is required for accurate estimator results. - Ensure shipping destination rules match your selling regions.
Destination restrictions can hide calculator fields and methods. - Test with a full address including state and postcode always.
Partial address can fail zone matching and hide rates.
Step 3: Check if your theme hides the cart shipping section
Many themes customize cart layout and hide estimator sections. You must test with a default theme to confirm quickly.
WordPress Dashboard → Appearance → Themes → Add New → Install Storefront → Activate
Website Frontend → Cart
- Switch to Storefront theme for a quick compatibility test.
Storefront is stable and shows default WooCommerce cart behavior. - If the calculator appears, your theme is the root cause.
Theme templates or CSS is hiding the calculator section. - Restore your theme and fix cart template overrides next.
You can remove overrides or adjust theme settings safely.
Step 4: Disable conflicting plugins and retest the cart page
Plugins can break cart scripts and prevent shipping recalculation. Disable plugins in a safe testing environment when possible.
WordPress Dashboard → Plugins → Installed Plugins → Deactivate non essential plugins
- Disable caching and optimization plugins first for testing.
Minification and defer scripts can break WooCommerce AJAX. - Disable cart drawer and checkout customizer plugins temporarily.
These plugins often override cart templates and shipping sections. - Retest cart calculator in private window after each disable.
Step testing helps you find the exact plugin conflict quickly.
Step 5: Clear caches and regenerate WooCommerce cart fragments
Cart fragments store mini cart and cart updates in WooCommerce. Broken fragments can cause shipping calculator update failures. Cache purge often fixes it quickly.
WordPress Dashboard → WooCommerce → Status → Tools
WordPress Dashboard → Cache Plugin → Purge All Cache
- Clear WooCommerce transients using the WooCommerce tools screen.
Old transients can store stale shipping rate and cart data. - Clear all site caches and CDN caches if used.
CDN caches can serve old cart markup and scripts. - Retest shipping calculator recalculation after cache clearing.
Fresh assets often restore estimator updates immediately.
Final Verdict
The WooCommerce shipping calculator helps customers estimate shipping early. It reduces abandoned carts caused by unclear delivery costs. It also reduces support tickets and improves checkout trust.
To Enable shipping calculator WooCommerce, you must configure zones and methods first. You must also ensure Cart page mapping and templates are correct. After you turn on the shipping calculator in WooCommerce, you must test multiple addresses. You should clear cache and confirm theme compatibility after changes.
When done correctly, you can show the WooCommerce shipping calculator reliably. This creates a smoother cart experience and better conversions.
Have questions before starting with WooCommerce & WordPress? Get support here at WooHelpDesk.