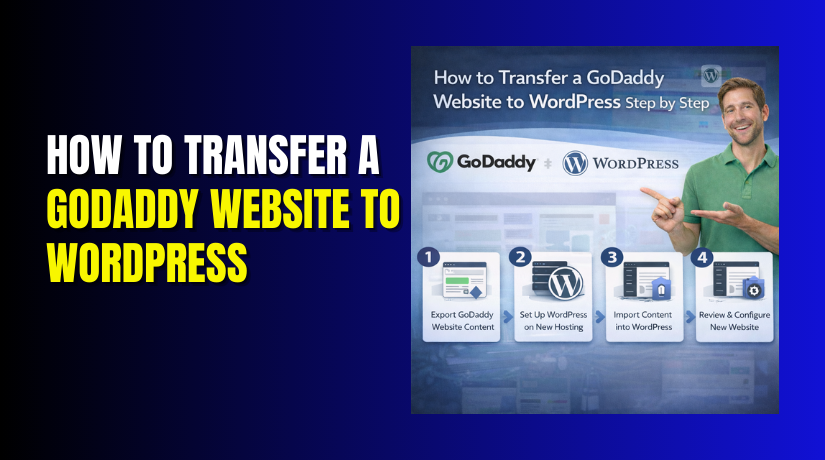
How to Transfer a GoDaddy Website to WordPress Step by Step
Table of Contents
- Introduction: What “Transfer” Really Means
- Pre-Migration Checklist: Decide Your Starting Point
- Method Options: Pick the Best Path for Your GoDaddy Site
- GoDaddy Hosting to WordPress Migration
- GoDaddy Website Builder to WordPress Migration
- SEO-Safe Migration: Keep Rankings and Traffic Stable
- Common Problems and Fixes After Migration
- Conclusion
Introduction: What “Transfer” Really Means
Many people build their first site using GoDaddy tools. It feels quick and simple at first. Later, you may want more control and features. That is where WordPress becomes a smart choice.
When you transfer GoDaddy website to WordPress, you are doing more than copying pages. You are moving your content, media, and site structure. You are also setting up hosting and pointing your domain correctly. This process can be smooth with the right plan.
Some users want to switch from GoDaddy to WordPress for better design options. Others want faster SEO work and more plugins. Many also want easier blogging and page editing. WordPress supports all these goals very well.
Before you begin, you must know one key detail. Your GoDaddy website can be built in two ways. Each option needs a different migration method. That is why planning comes first.
Pre-Migration Checklist: Decide Your Starting Point
1) Identify what you are using on GoDaddy
First, confirm how your current website was created. This step saves hours later. In your GoDaddy dashboard, check your product or site editor.
Your site usually fits into one of these types:
- GoDaddy hosting with website files and database access
- GoDaddy builder site, made in a drag-and-drop editor
If it is a builder site, you may rebuild layout in WordPress. If it is hosting, you can migrate files and database. This decision controls your next steps.
You are not only moving a design. You are planning a full GoDaddy to WordPress migration with less risk.
2) Get WordPress ready before you move anything
Set up WordPress on your new hosting first. Do this before making DNS changes. You can test the new site without downtime.
Make sure you have these ready:
- A WordPress hosting plan and a working login
- A fresh WordPress install with admin access
- A temporary URL or staging option for testing
- Access to your GoDaddy hosting or builder account
This setup helps you migrate GoDaddy website to WordPress safely. It also reduces live site errors.
3) Collect content and SEO details early
Do not start migration without a content list. Write down your main pages and blog posts. Save images, logos, and important files too.
Create a simple list of:
- All important page URLs and menu items
- Contact forms, galleries, and special sections
- Top pages that bring traffic from Google
- Meta titles and descriptions from key pages
This planning makes it easier to move content cleanly. It also helps you keep SEO stable after migration. When you switch from GoDaddy to WordPress, structure matters a lot.
Method Options: Pick the Best Path for Your GoDaddy Site
Before you start moving anything, choose the correct method. This decision protects your time, budget, and SEO. A GoDaddy to WordPress migration can be simple or complex. It depends on how your current site was built.
Your GoDaddy website usually falls into one of three cases. Each case needs a different moving plan. When you migrate GoDaddy website to WordPress, use the method that matches your setup.
1) If your site is on GoDaddy hosting
This is the most direct migration path for most users. You usually have access to hosting files and a database. That means you can move the full site content faster.
This method is best when:
- You can access cPanel, FTP, or File Manager
- Your site has files, folders, and a database backup
- You want to keep the same design and page structure
In this case, you can move GoDaddy site to WordPress by migrating files and database. You then test the site on the new host. After testing, you update DNS to go live.
2) If your site uses the GoDaddy website builder
A builder site works differently than normal hosting. It uses a closed editor with limited export. You usually cannot download a full working site package.
This method is best when:
- Your site is made using drag-and-drop builder tools
- You cannot access full site files or database
- You want a clean rebuild with better control
Here, you follow a rebuild migration approach. You recreate the design in WordPress and move content carefully. This is the right path for GoDaddy Website Builder to WordPress moves. You can copy text, download images, and rebuild pages cleanly.
3) If WordPress already exists on GoDaddy
Some users already run WordPress on GoDaddy hosting. In that case, your site is already WordPress. You may only need a host change or domain change.
This method is best when:
- You already use WordPress admin and plugins
- You want faster hosting or better support
- You need a cleaner setup for future growth
You can still transfer GoDaddy website to WordPress hosting elsewhere. You may also switch from GoDaddy to WordPress hosting without redesigning anything. The right method depends on your goal and access.
GoDaddy Hosting to WordPress Migration
Step 1: Create a Full Backup on GoDaddy
Before you move anything, make a complete backup first. This protects you if something breaks during transfer. A safe backup is the base of every GoDaddy to WordPress migration.
Your backup should include two main items:
- Website files, like themes, images, and core folders
- Website database, which stores pages, posts, and settings
If you use GoDaddy hosting, you can usually access File Manager. You can also use FTP if it is enabled in hosting. Download your full site folder to your computer. Keep the folder structure exactly the same.
Next, export your database using phpMyAdmin, if available. Choose the correct database from your hosting panel. Export it as an SQL file and store it safely.
Before you move on, check these backup points:
- Files download completes without missing folders
- Database export completes without errors
- You saved any custom code snippets used on the site
This step makes it easier to transfer GoDaddy website to WordPress without risk.
Step 2: Set Up WordPress on Your New Host
Now you need a working WordPress setup on your new host. Do not change your domain yet. First, build and test your new WordPress space.
Install WordPress from your hosting dashboard if possible. Many hosts offer a one-click installer. After installation, log in to your WordPress admin panel. Confirm you can reach the dashboard without errors.
Then, create a database if your host requires manual setup. Many hosts create it automatically during install. Still, you should confirm database details are ready.
At this stage, make sure you have:
- WordPress installed in the correct root folder
- Admin login details saved safely
- A clean site loading on a temporary URL or staging link
This staging setup helps you migrate GoDaddy website to WordPress without downtime.
Step 3: Move Your Website Files to the New Host
Now you will upload your GoDaddy site files to the new host. This is the main part where many users make small mistakes. Go slow and keep file structure correct.
If your GoDaddy site is already WordPress, you will have folders like:
- wp-content
- wp-includes
- wp-admin
You will also have files like wp-config.php and .htaccess. Upload all files to the correct site directory on your new host. This is usually public_html or a domain folder.
Use one of these upload options:
- FTP client upload for large file sets
- Hosting File Manager upload for small file sets
Important file handling tips:
- Do not rename folders while uploading
- Do not skip hidden files like .htaccess
- Do not overwrite a new host file without checking
After upload, confirm files are in the right place. This step is key when you move GoDaddy site to WordPress hosting elsewhere.
Step 4: Import the Database on the New Host
Your site database carries your content and settings. Without it, your pages will not load correctly. This database import step is essential for a successful GoDaddy to WordPress migration.
First, create a new database on your new host if needed. Then create a database user and assign full permissions. Save these details because you will need them later.
Now open phpMyAdmin on the new host. Select the new database from the left menu. Use the import option and choose your SQL file from Step 1. Start the import and wait for completion.
If your database is large, the import may fail due to limits. In that case, you can:
- Compress the SQL file and import again
- Increase import limits in hosting settings
- Import using a tool supported by your host
After import, confirm these checks:
- Tables appear in the new database
- Table count looks close to your old database
- No import error messages appear on screen
Once these steps are done, you are halfway through. You have moved files and moved the database.
Step 5: Update wp-config.php and Fix Database Connection
Now your files and database are in the new host. Next, you must connect WordPress to the new database. This is the step that completes your GoDaddy to WordPress migration setup.
Open the wp-config.php file in your site root folder. Update these values with new host details:
- Database name
- Database username
- Database password
- Database host, if your host uses a custom value
If the site shows a database connection error, stay calm. Most issues come from one wrong character in credentials. Recheck spelling, spaces, and user permissions in the database panel.
Quick checks that often fix connection problems:
- Confirm database user has “All Privileges” enabled
- Confirm you selected the correct database during import
- Confirm DB_HOST matches your hosting provider value
Once this works, you are ready to move GoDaddy site to WordPress properly.
Step 6: Update Site URLs and Run a Safe Search Replace


Your site may still point to the old domain or old server paths. This can break images, menus, and internal links. Fixing URLs is a key part of transfer GoDaddy website to WordPress without issues.
First, check your WordPress settings:
- WordPress Address (URL)
- Site Address (URL)
If you are still testing on staging, keep staging URL active. If you are ready for the final domain, use your live domain.
Next, update old links inside the database using a safe method. Many sites store links inside content and settings. A safe search replace updates those links without breaking data.
Common items that need URL updates:
- Image URLs inside posts and pages
- Internal links in menus and buttons
- Plugin settings that store full site paths
After updates, open a few pages and confirm images load. This step keeps your GoDaddy to WordPress migration clean and stable.
Step 7: Point Your Domain to the New WordPress Host (DNS)
Now it is time to connect your domain to the new host. This step makes your new WordPress site visible for everyone. It is also the step where many users worry about downtime.
You can update DNS in two main ways:
- Update the A record to your new host IP
- Change nameservers to your new hosting provider
In most cases, updating the A record is safer. It keeps other services like email stable. If your email is still with GoDaddy, avoid nameserver changes.
Before changing DNS, confirm these are ready:
- Your new WordPress site works on staging
- SSL can be installed after the domain points correctly
- You know where GoDaddy DNS settings are located
DNS changes may take some time to spread across networks. During this time, some users may see the old site. Others may see the new site. This is normal during a switch from GoDaddy to WordPress move.
Step 8: Install SSL and Force HTTPS
After DNS points to the new host, enable SSL quickly. SSL keeps data secure and builds trust for visitors. It also helps SEO for USA websites.
Most WordPress hosts offer free SSL in the dashboard. Activate it and wait until it shows active. Then update WordPress settings to use HTTPS.
After SSL, check these items:
- Site loads with HTTPS without warnings
- No mixed content errors on key pages
- All internal links use secure URLs
If you see mixed content issues, it usually means old HTTP links remain. A safe search replace can fix these in many cases. This helps your migrate GoDaddy website to WordPress process stay professional.
Step 9: Final Testing Before You Go Fully Live
Now you must test the site like a real visitor. Testing prevents support issues after your migration is complete. It also helps you protect SEO and user experience.
Use this final testing checklist:
- Open top pages and confirm layout looks correct
- Check images, sliders, and videos on key pages
- Test forms, including contact and quote forms
- Check menus on mobile and desktop devices
- Click important buttons and confirm they work
- Check 404 errors and fix missing pages fast
If your site has a shop, test checkout carefully. Confirm cart, payment, and email flows work properly. If it is a service site, test call buttons and contact pages.
Once testing is complete, your GoDaddy to WordPress migration is ready. Your site is connected, secure, and working as expected.
GoDaddy Website Builder to WordPress Migration
Why Website Builder Migration Works Differently
A GoDaddy builder site is not like normal web hosting. It uses a closed drag-and-drop editor system. That system does not give you full site files. It also does not provide a full database export. Because of this, the best method is a rebuild.
So, GoDaddy Website Builder to WordPress migration means this. You move content, images, and structure into WordPress. You rebuild the design using a WordPress theme or builder. You keep important pages and URLs as close as possible. This approach is clean, stable, and easier to manage later.
This is still a real GoDaddy to WordPress migration, just with a rebuild plan.
Step 1: Export What You Can From the Builder Site
Start by collecting everything you already own. Your content and images are your main assets. Get them ready before you create WordPress pages.
Save these items first:
- Page text for Home, About, Services, and Contact
- Blog posts, if your builder site has a blog section
- Images, icons, logos, and banner graphics
- PDFs, menus, price lists, and downloadable files
Also, make a simple page list to avoid missing pages. Open each page and copy the URL. Save the page title with its URL for later.
This list helps you transfer GoDaddy website to WordPress with less confusion.
Step 2: Build the Same Site Structure in WordPress
Now set up the same structure inside WordPress. Start with your main pages and navigation. Do not try to perfect the design at this stage. First, create the full site framework.
Create your core pages first:
- Home
- About
- Services
- Contact
- Blog, if you need regular content
Then set your menus to match the old site layout. Keep page names similar for user familiarity. If you can keep the same slugs, do it. This reduces redirect work later.
This step is key when you switch from GoDaddy to WordPress smoothly.
Step 3: Recreate the Design Using WordPress Tools
Once structure is ready, start design rebuilding. Choose a theme that matches your business style. Many themes support simple layouts and fast loading. You can also use a page builder if needed.
Focus on repeating these design elements:
- Header, logo placement, and menu style
- Fonts, button styles, and brand colors
- Homepage sections and service boxes
- Footer links, business info, and social icons
Keep your design simple and clean for better speed. USA users often expect quick loading pages. WordPress makes this easier when your theme is lightweight.
This rebuild approach is the best way to migrate GoDaddy website to WordPress from a builder.
Step 4: Recreate Key Features and Add SEO Basics
Builder sites often include basic features that you must rebuild. Do this step carefully because missing features reduce leads.
Common items to rebuild in WordPress:
- Contact forms with email notifications
- Maps, directions, and business location blocks
- Image galleries and sliders for services
- Call buttons and sticky contact sections
Now add basic SEO settings in WordPress:
- Set page titles and meta descriptions for key pages
- Add alt text to important images
- Keep headings clean and in the right order
If your URLs change, plan redirects later. This keeps your GoDaddy to WordPress migration SEO-safe.
Step 5: Preview on Staging, Then Switch DNS
Before you go live, preview everything on a staging link. Check pages, mobile view, and form sending. Fix issues before you change your domain settings.
Final checks before DNS changes:
- Every page loads without missing images
- Menu links work on mobile and desktop
- Forms send emails to the right address
- Important URLs match the old site when possible
Once ready, point your domain to WordPress hosting. This completes the move GoDaddy site to WordPress process for builder users.
SEO-Safe Migration: Keep Rankings and Traffic Stable
A clean GoDaddy to WordPress migration should not ruin your rankings. Most ranking drops happen due to broken URLs and missing redirects. Some drops also happen due to noindex settings or slow pages.
Start by keeping your page slugs the same where possible. If you must change URLs, create 301 redirects quickly. Redirects tell Google your page moved to a new address. This protects your traffic during the transfer GoDaddy website to WordPress process.
Do these SEO steps right after your move:
- Keep the same page titles for top traffic pages
- Add 301 redirects for every changed URL
- Submit your new sitemap in Google Search Console
- Check robots settings and remove any noindex blocks
- Fix internal links that still point to old URLs
After you switch from GoDaddy to WordPress, monitor your top pages. Check search clicks and impressions for at least two weeks. Small changes are normal during this period.
Common Problems and Fixes After Migration
Even a careful move can create small issues. Most problems are simple and easy to fix. The key is knowing what to check first.
Here are common issues after you migrate GoDaddy website to WordPress:
- Database connection error due to wrong wp-config values
- Permalinks not working due to missing rewrite settings
- Images not loading due to old paths or HTTP links
- Mixed content warnings due to HTTP assets on HTTPS pages
- DNS still showing old site due to slow propagation
- Missing pages due to incomplete content transfer
Quick fixes you can try:
- Recheck database credentials and user permissions
- Save permalinks again in WordPress settings
- Run a safe search replace for old domain links
- Force HTTPS and remove old HTTP image links
- Wait and recheck DNS from another network
These checks help you move GoDaddy site to WordPress without long delays.
Final Checklist Before You Announce It’s Live
Before you share your new site, run a final check. This prevents support issues and builds user trust. It also improves SEO and conversion rates for USA visitors.
Use this final go-live checklist:
- SSL is active and HTTPS works everywhere
- Forms send emails and store entries correctly
- Top pages load fast on mobile devices
- 301 redirects work for changed URLs
- Backups are enabled on the new host
- Security basics are active and updated
- Analytics tracking is installed and tested
This checklist completes a safe GoDaddy to WordPress migration.
Conclusion
Now you know how to transfer GoDaddy website to WordPress step by step. You also learned how to handle builder sites safely. A planned move protects your design, traffic, and leads. If you want expert help, WooHelpDesk can handle the full migration for you. We can move your site, protect SEO, and test everything before launch.