How to Set Up WooCommerce Multisite & Does WooCommerce Support Multisite?
Table of Contents
- Introduction
- What is WooCommerce Multisite?
- What are the Key Features of WooCommerce Multisite?
- Does WooCommerce Support Multisite?
- What are the Benefits of WooCommerce Multisite?
- Who Should Use WooCommerce Multisite?
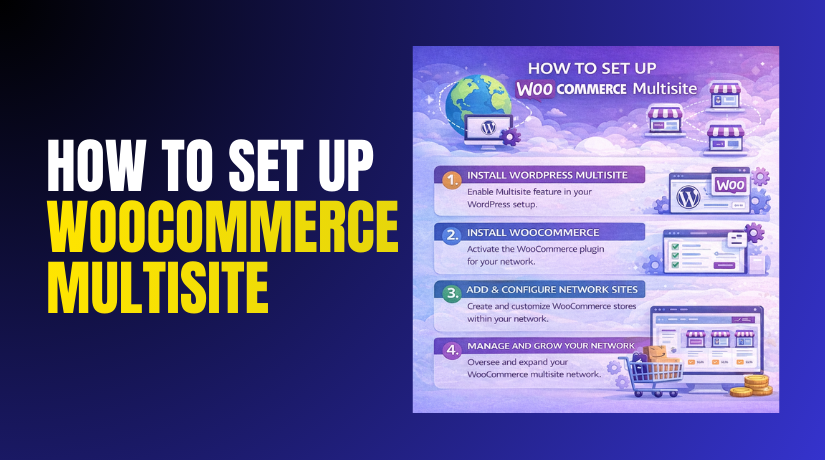
- How to Set Up WooCommerce Multisite Step by Step?
- What are the Top 3 Best Plugins for WooCommerce Multisite?
- Final Verdict
Introduction
WooCommerce multisite is a powerful setup for managing multiple stores. It lets you run many WooCommerce sites under one WordPress install. This approach is common for franchises, multi brand sellers, and agencies. It is also useful for country based stores with separate catalogs.
A single network can host many sites with different themes. Each site can also have separate products, customers, and orders. However, multisite adds complexity in updates and maintenance. You must plan structure, domains, plugins, and roles carefully. You must also plan performance and security at the network level.
Many store owners ask one key question before starting. Does WooCommerce multisite support exist officially and reliably. The answer is yes, but with important limitations and rules. WooCommerce can run on multisite, but each site acts like a separate store. You must decide whether you want shared inventory and shared customers. Most multisite stores do not share those things by default. That is why planning matters before any install work begins.
This WordPress multisite WooCommerce tutorial will guide you step by step. It will also explain the best workflow for WooCommerce network setup. You will learn benefits, key features, and setup steps with clear paths. You will also learn plugin choices that reduce manual work later.
What is WooCommerce Multisite?
WooCommerce multisite means running WooCommerce inside a WordPress multisite network. WordPress multisite is a feature that creates multiple sites. These sites share the same WordPress core and server resources. They also share network level user accounts and settings.
Each site still has its own database tables for content. WooCommerce adds store features like products, cart, checkout, and orders. In multisite, WooCommerce data stays per site, not network wide. That means each store has its own products and orders.
Each store can also have its own payment gateways configured. Each store can also have its own shipping zones and tax rules. This makes multisite good for separate independent stores. It also makes multisite harder for unified store behavior.
If you want one global catalog, you need extra tools. If you want shared customers across stores, you need extra tools. Most multisite use cases accept store separation as a benefit. This is why WooCommerce network setup is often used for multi store management. It is also used by agencies hosting many client stores.
What are the Key Features of WooCommerce Multisite?
WooCommerce multisite includes features from WordPress multisite plus WooCommerce per site. Together they enable centralized admin control with separate stores. These features help teams manage many shops without many installs.
However, some features require careful governance at network level. You should understand these features before you set up WooCommerce multisite.
One WordPress core with multiple store sites
A multisite network runs one WordPress core install. Each store becomes a site within the same network. Updates to WordPress affect the whole network together. This reduces repeated update work across many separate installs.
- One core update covers every store site in the network. You save time and maintain consistent security patches.
- Network settings control global behavior and site registrations. Global control reduces misconfiguration across multiple stores.
- One hosting environment supports all stores under one server. You manage backups, caching, and security centrally.
Separate WooCommerce products, orders, and settings per site
Each site runs its own WooCommerce store data separately. Products, orders, coupons, and tax settings stay site specific. This is the default behavior and it is a key reason multisite works.
- Each site has its own product catalog and categories. This supports different brands and different product strategies.
- Each site has its own order history and customer purchases. Order management stays separate and clean per store.
- Each site has its own shipping zones and tax rules. This supports region compliance and local business rules.
Shared network users with site based roles
Users exist at the network level in multisite. You can assign users to one site or many sites. You can also give different roles per site for one user. This supports agencies and multi store staff operations.
- One login can access multiple stores when permitted. Staff work faster without separate user accounts per store.
- Roles can be different per store for the same user. A manager in one store can be an editor in another.
- Super Admin controls network wide settings and plugin access. This prevents unauthorized changes across the network.
Network activated plugins and consistent feature sets
Plugins can be activated network wide for all sites. This helps ensure every store has required tools installed. It also reduces plugin management effort and version drift issues.
- Network activation ensures plugins run on every store site. This is useful for security, caching, and SEO plugins.
- You can restrict some plugins to selected sites only. This keeps stores lightweight when features are not needed.
- Central plugin updates reduce maintenance overhead across stores. Fewer update steps mean fewer missed security patches.
Domain mapping and multi domain brand structure
Many multisite networks map each site to its own domain. This allows each store to look like a standalone website. It supports branding, SEO, and customer trust for each store.
- Each store can use a separate domain for branding clarity. Customers trust a clean domain aligned to the brand.
- Each store can still share one WordPress network backend. Admin control stays centralized while branding stays separate.
- SSL and DNS must be configured correctly for each domain. Incorrect mapping causes redirect loops and SSL warnings.
Does WooCommerce Support Multisite?
Yes, WooCommerce multisite support exists and WooCommerce can run on WordPress multisite. It works because WooCommerce is a WordPress plugin and multisite supports plugins.
Each site in the network can run its own WooCommerce store. Each store has its own products, cart, checkout, orders, and settings. This is the core principle you must understand before setup.
WooCommerce does not turn a multisite network into one combined store. It creates multiple separate stores under one WordPress network. That is why many people succeed with multisite for multi brand setups. That is also why some people fail when they expect shared inventory. WooCommerce also depends on themes, gateways, and extensions.
Some WooCommerce extensions are not multisite friendly in real usage. Some extensions assume a single site install for licensing and settings. That is why testing and planning matters before going live.
You can still set up WooCommerce multisite safely with the right workflow. You must validate compatibility for your theme and core plugins first. You must also choose a hosting plan that supports network traffic spikes. A network problem can impact all stores in the network together. That is why WooCommerce multisite is powerful but high responsibility.
What are the Benefits of WooCommerce Multisite?
The benefits of WooCommerce multisite are strongest for multi store operations. It reduces repeated WordPress installs across many stores. It centralizes maintenance, updates, and security policies. It also supports separate branding for each store site. It can also support region based domain strategies under one team.
Agencies also benefit by hosting many client stores centrally. A single login can manage many store dashboards with permissions. Network level plugin updates save time and reduce missed updates. You can also standardize SEO, security, and caching tools network wide.
However, benefits only apply when separation is acceptable. If you need one unified store, multisite is not the best path.
Centralized maintenance and faster updates
One WordPress core and shared plugin management reduces work. Updates can be applied consistently across all stores quickly. Security patches become easier to enforce for the full network.
- One update process covers WordPress core for all stores. This reduces update labor and improves security consistency.
- Network activated plugins reduce repeated installations per store. You keep tools consistent without manual repetition.
- Central backups and monitoring protect all stores together. A good backup strategy reduces risk across the network.
Separate branding and separate catalogs per site
Each site can have its own domain, theme, and product list. This supports brands that must look and feel different. It also supports product sets that vary by region and market.
- Each store can have its own theme and design system. Branding stays independent without extra WordPress installs.
- Each store can sell different products with different pricing. This supports brand level strategy and market needs.
- Each store can use different tax and shipping structures. This supports region compliance and logistics differences.
Role based staff access across many stores
Multisite makes it easier to manage staff across stores. One user can get access to multiple sites with different roles. This reduces credential management and onboarding complexity.
- One login can access multiple stores if permissions allow. Staff work faster and support becomes easier to manage.
- Role assignments can differ per store for the same user. This supports multi store teams with clean governance.
- Super Admin can restrict plugin changes across the network. This prevents accidental changes that break checkouts.
Scalable structure for franchise and region expansion
Many brands expand by adding new store sites over time. Multisite makes adding a new site faster than new installs. You can clone patterns, plugins, and base pages easily.
- You can create new stores quickly inside the same network. This speeds up expansion and reduces setup repetition.
- You can standardize core plugins and security rules network wide. Standards reduce bugs and improve long term stability.
- You can map domains for each store for regional SEO strategy. Domains can align with region based marketing campaigns.
Who Should Use WooCommerce Multisite?
WooCommerce multisite is best for brands with multiple distinct stores. It is also best for agencies managing many separate client sites. It is also helpful for region based stores with separate taxes. It is not best for one shared cart store model.
- Franchises and multi location brands with separate store rules. Each location store can manage its own catalog and orders.
- Agencies hosting many client stores under one management layer. Central updates reduce overhead and missed patch risk.
- International sellers needing region specific shipping and tax setups. Each site can match its region requirements cleanly.
How to Set Up WooCommerce Multisite Step by Step?
You can set up WooCommerce multisite using a safe and repeatable workflow. The goal is to enable WordPress multisite first and then add stores. You should also confirm plugin and theme compatibility before scaling. A careful setup avoids broken checkouts and network level errors. Follow each step in the same order for stability.
Step 1: Confirm hosting and server requirements for a network
Multisite needs stable hosting because one server runs many stores. You need enough memory, CPU, and database performance for peak traffic. You also need working SSL and correct PHP limits for WooCommerce.
Hosting Panel → PHP Settings → Increase limits
WordPress Dashboard → Tools → Site Health
- Confirm PHP version and memory limit meet WooCommerce needs. Low memory causes admin errors and checkout failures.
- Confirm HTTPS is active for login, cart, and checkout pages. SSL is required for safe payments and user trust.
- Confirm backups exist and can restore databases and files. Restores protect you during network setup mistakes.
Step 2: Back up your site before enabling multisite
Multisite changes core configuration files and database settings. A full backup lets you roll back if anything goes wrong. This step is mandatory before network changes.
Hosting Panel → Backup Wizard → Full Backup
Or Backup Plugin → Create New Backup
- Create a full backup of files and the database together. WooCommerce data and settings must be restored as one unit.
- Download a copy of the backup outside the server. External copies protect you from server level issues.
- Note current plugin list and active theme for later checks. This helps you troubleshoot if something breaks later.
Step 3: Disable caching and security blocks temporarily during setup
Some caching and firewall rules can block multisite rewrite updates. They can also block site creation steps in the network. Disable them temporarily to avoid false errors.
WordPress Dashboard → Plugins → Installed Plugins
Security Plugin → Firewall Settings → Pause
Caching Plugin → Disable Cache
- Pause page caching until multisite rewrite rules are saved. Cached pages can show old URLs and wrong redirects.
- Pause firewall rules that block wp-admin network actions. Some firewalls block admin AJAX and site creation calls.
- Re-enable security tools after setup and testing is complete. You must restore protection after network changes finish.
Step 4: Enable WordPress multisite in wp-config.php
You must enable multisite support before network installation can begin. This is done by adding one constant to wp-config.php. Do not add extra code that you do not understand.
Hosting File Manager → public_html → wp-config.php
Or FTP → Download wp-config.php → Edit → Upload
- Add the multisite constant line above the stop editing line. WordPress must read it early to show network options.
- Save the file and reload your WordPress admin dashboard. The network setup menu appears after this change.
- Avoid spaces and typo errors because wp-config is sensitive. One typo can break the entire site instantly.
Step 5: Run the WordPress network setup wizard
Now you will set the network type and network details. You will choose subdomains or subdirectories based on your plan. This choice affects URL structure and DNS configuration.
WordPress Dashboard → Tools → Network Setup
- Choose subdomains if you want store1.domain.com structure. Subdomains work well for many stores and domain mapping.
- Choose subdirectories if you want domain.com/store1 structure. Subdirectories are simpler but less flexible for branding.
- Set network title and admin email for network notifications. This helps with system emails and network management.
Step 6: Add the generated code to wp-config.php and .htaccess
After network setup, WordPress provides code snippets. You must copy them exactly into wp-config.php and .htaccess. These rules enable routing for network sites correctly.
Network Setup Screen → Copy Code
Hosting File Manager → wp-config.php
Hosting File Manager → .htaccess
- Paste the wp-config.php lines exactly as shown by WordPress. These lines enable multisite constants and network IDs.
- Replace .htaccess rules with the provided multisite rewrite block. Rewrite rules route requests to correct network sites.
- Save files and log in again when WordPress asks you. Re login refreshes network permissions and admin menus.
Step 7: Open Network Admin and confirm network is working
After enabling multisite, you will see Network Admin menus. You must confirm network settings are available and stable. This step confirms the network setup succeeded.
WordPress Dashboard → My Sites → Network Admin → Dashboard
- Confirm Network Admin menus appear and load without errors. Missing menus can indicate failed configuration changes.
- Open Network Settings and confirm registration settings are correct. Registration controls who can create new sites later.
- Confirm Super Admin access works and your account is listed. Super Admin permissions are required for network control.
Step 8: Install and network activate WooCommerce carefully
Now you will add WooCommerce to the network environment. You can network activate it or activate per site. Most networks use network activation for consistency. Some networks activate per site for flexibility and licensing control.
Network Admin → Plugins → Add New → Search “WooCommerce” → Install
Network Admin → Plugins → Installed Plugins → Network Activate
- The network activates WooCommerce when you want every store to use it. This ensures consistent store functionality across all sites.
- Activate WooCommerce per site when stores need different tools. This reduces overhead when some sites are not stores.
- Update WooCommerce to a stable version before adding store sites. Updated core reduces setup bugs and template conflicts.
Step 9: Create a new store site inside the network
Now you will create additional sites that will become stores. Each site is its own WordPress site inside the network. Each site will have its own WooCommerce pages and settings.
Network Admin → Sites → Add New
- Add site address, site title, and admin email carefully. These values control login and initial site identity.
- Create one test store first before creating many stores. Testing prevents repeating mistakes across all stores.
- Open the new site dashboard and confirm it loads properly. Each store must load admin and frontend without errors.
Step 10: Run WooCommerce setup wizard inside each store site
WooCommerce must be configured per site because settings are per store. You should run the setup wizard to create pages and defaults. This keeps checkout and tax settings consistent per store.
My Sites → Your Store Site → Dashboard
WooCommerce → Home → Setup Wizard
- Run the wizard to create default pages and basic settings. Pages like cart and checkout are required for store flow.
- Set currency, location, shipping, and tax rules per store. Each store can follow local rules and market needs.
- Add a test product and test checkout with a dummy gateway. Testing confirms pages and endpoints work correctly.
Step 11: Configure themes and templates per store for branding
Each multisite store can use a different theme if needed. You can also use one theme and different branding settings. Consistency reduces maintenance but branding flexibility supports different markets.
Network Admin → Themes → Install Themes → Network Enable
Store Site Dashboard → Appearance → Themes → Activate
- Network enable themes you want available for store sites. Network enable controls which themes stores can use.
- Activate the chosen theme inside each store site dashboard. Activation applies the theme to that store only.
- Test shop page, product page, cart, and checkout templates. Theme issues often show first during checkout steps.
Step 12: Map domains if you want separate domains for each store
Domain mapping helps each store look like a standalone website. Many networks map each site to its own domain. This improves branding and region based SEO strategies.


Domain Registrar → DNS Settings
Hosting Panel → Add Domain → SSL
Network Admin → Sites → Edit Site Settings
- Point domain DNS records to your hosting server IP. DNS must resolve correctly for domain mapping to work.
- Add SSL for each mapped domain and test HTTPS redirects. SSL ensures secure checkout and avoids browser warnings.
- Confirm site URLs are correct and no redirect loops happen. Wrong mapping can cause infinite redirect issues quickly.
What are the Top 3 Best Plugins for WooCommerce Multisite?
The right plugins make WooCommerce multisite easier to manage at scale. They help with domain mapping, store cloning, and network level control. They also reduce repetitive configuration work across many stores.
You should pick plugins that are stable, updated, and widely used. You should also avoid overlapping plugins that do the same job. Overlap creates conflicts and unpredictable network behavior.
The plugins below support a cleaner WooCommerce network setup workflow. They also fit well inside a WordPress multisite WooCommerce tutorial approach.
1. NS Cloner
NS Cloner is a WordPress multisite plugin that duplicates one site into another site inside the same network. It is designed for multisite networks, where you manage many sites from one WordPress installation. It helps you copy a working site setup instead of building every new site from scratch.
Key Features of NS Cloner
- Clone a site to create a new store with the same structure
- This feature copies your selected source site into a new site in the network. It duplicates core site structure like pages, navigation menus, widgets, theme settings, and basic content. This gives you a ready to use store foundation in minutes.
- Copy WooCommerce pages, products, and basic store settings
NS Cloner can copy WooCommerce related site content and settings that are stored per site. This includes shop pages, cart page, checkout page, my account page, and often product catalog structure. It can also copy some WooCommerce configuration depending on what you choose.
- Select what to clone and what to skip for cleaner results
This feature gives you control over what gets copied into the new site. You can clone structure without cloning user data, orders, or unnecessary content. This selection control is important because store data should usually stay unique per store.
Pros of NS Cloner
- Saves time when launching many similar WooCommerce store sites
Building a WooCommerce store site manually involves many steps, theme setup, menu setup, page creation, plugin configuration, and basic testing. If you repeat this work for ten stores, it consumes a lot of hours. NS Cloner compresses that repeated effort into a simple cloning workflow.
- Reduces human errors during repeated store setup tasks
Manual setup creates small mistakes that cause big issues later. Examples include missing checkout pages, wrong shop page mapping, incorrect permalinks, or incomplete menu links. Cloning a working template reduces these risks because your base store already has correct settings.
- Helps build a reusable template store inside the network
A template store acts like your master store blueprint. You maintain the template over time with new design improvements and updated plugins. When you need a new store, you clone the updated template. This makes your network scalable and keeps store quality consistent across launches.
Cons of NS Cloner
- Cloning can copy unwanted settings if not configured carefully
If you clone everything without selection, you may copy content that should not exist in the new store. This can include test pages, old forms, sample products, or internal links pointing to the source site. This creates confusion and can break customer journeys.
- Some complex plugin data may not clone perfectly every time
Some plugins store data in special custom database tables. Some plugins also store settings outside the WordPress database or require API keys and webhooks. These tools might not clone as expected, even if the site structure clones correctly.
- Large stores can take longer to clone and may need testing
A store with thousands of products, many images, and large database tables takes more time to copy. It also increases server load during the cloning process. If your host has low resources, cloning can time out or fail partially.
Download Link: NS Cloner – Site Copier
2. WP Ultimo
WP Ultimo is a WordPress multisite plugin that helps you run a “site selling” platform. It turns your multisite network into a system where users can create their own sites. It also adds plans, subscriptions, onboarding, and automated provisioning. This is why it is popular for agencies and SaaS style businesses.
Key Features of WP Ultimo
- Automated site creation with templates and onboarding flows
WP Ultimo can automatically create new sites inside your network. It can assign a template site so the new store starts ready. It can also run an onboarding flow that collects basic business information. This can include brand name, store logo, contact email, and more.
- Membership and billing system for multisite customers and plans
WP Ultimo can manage customer accounts, plans, and subscriptions. It can charge recurring fees for the site access and features. It can also control what users can do based on plan level. This supports a SaaS model for hosting WooCommerce stores.
- Site templates for repeatable store builds and consistent structure
WP Ultimo lets you create template sites that act like blueprints. New stores can be created using those templates automatically. This includes pages, theme settings, layouts, and core store structure. Templates make every store launch consistent and predictable.
Pros of WP Ultimo
- Excellent for agencies offering store creation as a packaged service
If you sell WooCommerce stores as a product, you need repeatable delivery. WP Ultimo helps you sell plans, create stores, and manage users. This reduces manual admin time and helps you scale faster. It also improves customer experience because onboarding feels structured.
- Automates site provisioning and reduces manual network admin work
Without automation, every new store needs manual steps. That includes adding a site, assigning a theme, adding plugins, and configuring basics. WP Ultimo reduces those steps using provisioning workflows. This saves time and reduces setup mistakes across many customers.
- Supports templates and structured onboarding for multiple stores
Onboarding helps users set up correctly from day one. It can guide them to choose a plan and fill required details. It also helps you standardize logos, site names, and initial settings. Standardization makes network support and maintenance simpler later.
Cons of WP Ultimo
- More complex than basic multisite tools for small networks
WP Ultimo includes many features like plans, billing, onboarding, and automation. If you only manage a small network, you may not need that complexity. Complexity also means more settings to configure and more testing to do.
- May require careful configuration to match WooCommerce workflows
WooCommerce stores need correct pages, checkout setup, payment rules, and shipping logic. Your templates must include those items properly. You must also ensure each store has unique gateway keys and webhook URLs. If templates copy wrong settings, checkouts can fail.
- Not necessary if you only manage a few internal stores
If your network has only a few stores, manual site creation is manageable. You might prefer a simple cloning tool instead. WP Ultimo is strongest when you need customer billing and automation. Without those goals, it can feel too heavy.
Download Link: Ultimo WP
3. Domain Mapping in WooCommerce Multisite
Domain mapping connects each multisite site to its own domain or subdomain. Instead of showing a network URL like domain.com/store1, your store can show store1.com. This makes each store feel like a separate standalone website. It is a core part of many WooCommerce multisite networks that run multiple brands or regions.
Key Features of Domain Mapping Tools in Multisite
- Map each site to its own custom domain or subdomain
This feature allows a store site in the network to display its own domain. Your customers see a separate brand domain, not a shared network path. Each store can have a unique identity, unique email branding, and unique marketing URLs.
- Supports SSL and clean redirects when configured correctly
Domain mapping setups support HTTPS SSL for each mapped domain. They also support clean redirects that push visitors to the correct secure version. This prevents warnings like “Not Secure” and avoids mixed content issues.
- Helps separate branding and region targeting across store sites
This feature supports region based domains and brand specific domains. Each store can target a region with localized content and pricing. Each store can also run region focused ads without confusing landing page URLs.
Pros of Domain Mapping in WooCommerce Multisite
- Improves branding because each store has its own domain
A unique domain makes the store feel separate and professional. It also reduces confusion when multiple brands exist in one network. Customers remember and trust a clean brand domain more easily. This helps repeat purchases and direct traffic growth over time.
- Supports region based SEO strategies and separate marketing channels
Regional domains help you build a separate SEO presence for each market. They also help you run local promotions and local ad campaigns. You can tailor content, shipping details, and policies by region. This improves conversion because the store feels relevant and local.
- Creates a professional feel for each store in the network
Many users judge a store by how clean the domain looks. A mapped domain looks like a full independent store, not a sub site. This helps trust during checkout, account creation, and payment steps. It also helps reduce support questions about store authenticity.
Cons of Domain Mapping in WooCommerce Multisite
- Requires correct DNS and SSL setup to avoid redirect loops
Redirect loops happen when DNS points wrong or SSL is incomplete. Loops also happen when HTTP to HTTPS rules conflict with multisite rules. A small misconfiguration can break access to one store or even multiple stores.
- Can be harder to troubleshoot when multiple domains are involved
With many domains, problems can vary by store. One domain might have DNS issues while others work fine. Another might have an SSL mismatch while others are secure. This creates more troubleshooting time and more places where errors can appear.
- Hosting support quality matters a lot for stable domain mapping
Domain mapping needs correct server routing and SSL handling. Some hosts handle multisite domains smoothly, others struggle. If hosting support is weak, fixing DNS and SSL issues becomes slower. This can lead to downtime and delayed store launches.
Download Link: Domain Mapping System | Create Microsites with Multiple Alias Domains
Final Verdict
WooCommerce multisite is a strong solution when you need many separate stores. It works well for multi brand businesses, franchises, and agencies. It also works well for region based stores with different rules.
WooCommerce multisite support is real, but it is site based. Each store site has its own products, orders, and checkout flow. That is why planning is the most important success factor. If you expect one shared cart and one shared inventory, multisite will disappoint. If you want separate stores with centralized control, multisite fits well.
Your WooCommerce network setup should focus on stability first, then scale. You should build one perfect template store and then expand. You should use cloning and templates to reduce manual configuration work. You should also test every store checkout flow before going live.
Have questions before starting with WooCommerce & WordPress? Get support here at WooHelpDesk.