How to Set Up Taxes in WooCommerce (Step-by-Step Guide)
Table of Contents
- Introduction
- What You Need to Prepare Before Configuring Taxes in WooCommerce
- How to Enable Taxes in WooCommerce Settings (Step-by-Step)
- How Do I Set Up Taxes in WooCommerce Manually (Complete Guide)
- Testing Checklist: Confirm Your WooCommerce Taxes Work Before Going Live
- Common WooCommerce Tax Problems and How to Fix Them Easily
- Conclusion
Introduction
Taxes affect your prices, checkout totals, and customer trust. If taxes are wrong, buyers may leave your checkout. They may also open refunds or chargebacks later. That is why tax setup must be clear. This guide helps you Set Up Taxes in WooCommerce step by step. You will learn the basics before touching any settings. You will also avoid common mistakes that break tax totals.
Good WooCommerce tax settings save time during busy sales. They also reduce confusion when you check order totals later. Many stores need WooCommerce sales tax setup for US customers. Many stores also need WooCommerce GST setup for GST regions. WooCommerce can handle both with the right choices. You just need the correct setup plan first. We will start with the tax basics in plain words. Then you will be ready for a clean WooCommerce tax configuration later.
What You Need to Prepare Before Configuring Taxes in WooCommerce
Confirm Your Store Address and Business Location First
Your store address sets the base for many tax rules. WooCommerce uses it for default location checks. Add the correct country, state, city, and postcode. A wrong address can break your WooCommerce tax configuration. It can also apply the wrong rate during checkout tests. This step supports accurate WooCommerce sales tax setup from day one.
Define Your Selling Locations and Shipping Locations Clearly
Selling locations decide where customers can place orders. Shipping locations decide where you deliver products. If these are not set, taxes may not trigger properly. Confirm them in WooCommerce general settings and shipping zones. Clean location settings improve your WooCommerce tax settings accuracy. They also keep your WooCommerce tax rates setup stable across regions.
List the Regions Where You Must Collect Tax
Write down the states, countries, or provinces where you charge tax. This prevents random rate entries and guesswork later. It also helps you plan your tax table quickly. A clear list keeps Set Up Taxes in WooCommerce simple and clean. It also makes Configure tax in WooCommerce much faster.
Separate Product Types and Their Tax Needs
Not all products follow the same tax rules. Physical products often use shipping address based tax rules. Digital products often use billing address based rules instead. Services can vary based on your local needs and rules. This planning helps you choose tax classes correctly. It also improves long term WooCommerce tax configuration management.
Decide Whether Shipping Should Be Taxable in Your Store
Many stores forget to plan shipping tax rules early. Some regions require tax on shipping charges. Some regions do not tax shipping at all. If you decide this early, checkout totals stay consistent. It also prevents surprises in WooCommerce sales tax setup testing. This choice is important for correct final totals.
Keep Your Tax Rates and Rules Ready Before Setup
Collect the exact tax percentages you must charge by region. For the US, keep your state rates ready if needed. For GST regions, keep your GST rate ready for rules. This makes WooCommerce GST setup smooth and fast. It also reduces mistakes during WooCommerce tax rates setup.
Plan for Special Tax Cases Before You Start
Some products may be zero-rated or tax free. Some products may fall under reduced tax categories. Some customers may be tax exempt for B2B reasons. You do not need to build all cases on day one. But you should know which cases apply to your store. This helps your WooCommerce tax configuration stay future proof.
Check Caching and Checkout Tools That Can Hide Tax Changes
Cache plugins can show old cart totals after changes. Some checkout plugins can override WooCommerce tax logic. Clear cache before testing and after each big change. Disable conflict tools during testing if totals look wrong. This keeps your WooCommerce tax settings results accurate. It also helps you Configure tax in WooCommerce with confidence.
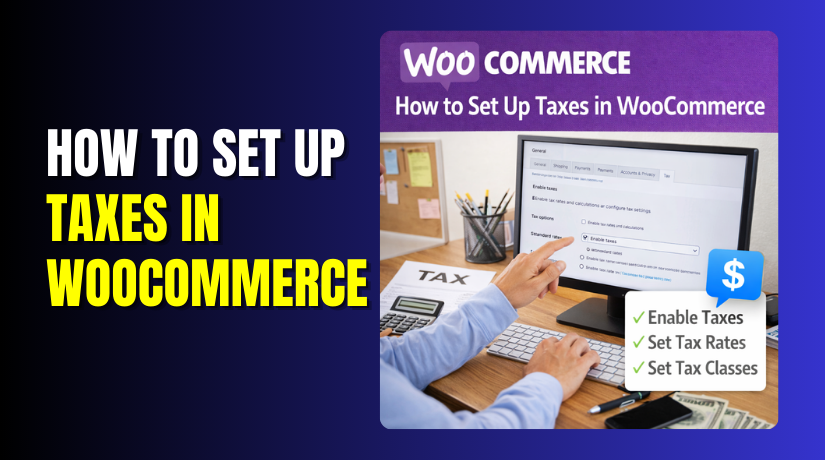
How to Enable Taxes in WooCommerce Settings (Step-by-Step)
Once your prep is ready, you can enable taxes safely. This is the first real step to Set Up Taxes in WooCommerce. You will turn on the tax tab and tax options. Then you can begin proper WooCommerce tax configuration in later steps.
Step 1: Open WooCommerce General Settings and Check Store Address
- Go to your WordPress dashboard and open WooCommerce settings.
- Click the General tab to view store details.
- Check the Store Address line by line carefully.
- Confirm the country and state match your real business.
- Confirm the city and postcode are correct as well.
- This address supports many WooCommerce tax settings defaults.
- It also helps WooCommerce set base region rules correctly.
Step 2: Confirm Selling Locations and Shipping Locations
- Stay on the same General settings page for this step.
- Find the Selling Location setting and confirm your target regions.
- Choose the right option for your store model and reach.
- Then check Shipping Locations and confirm allowed shipping areas.
- These settings impact which customers can even reach the checkout.
- They also affect how you later configure tax in WooCommerce. If locations are wrong, taxes may not trigger properly.
Step 3: Enable the WooCommerce Tax Option in General Settings
- Scroll down on the General settings page carefully.
- Look for the option that enables tax calculation.
- Enable the checkbox for taxes and calculations in WooCommerce.
- This single switch unlocks the tax settings area.
- It is required for every WooCommerce sales tax setup approach.
- It also supports every WooCommerce GST setup method you may use.
Step 4: Save Changes and Confirm the Tax Tab Appears
- Click the Save changes button at the bottom.
- After saving, check the WooCommerce settings tabs again.
- You should now see a Tax tab in the menu.
- If it does not appear, refresh the page once.
- Also check if a security plugin blocks settings updates.
- The Tax tab is the gateway to WooCommerce tax configuration. Without it, you cannot add rates or rules.
Step 5: Open the Tax Tab and Review the Main Tax Options
- Click the Tax tab to open the tax settings screen.
- You will see a Tax options section at the top.
- This section controls how taxes are calculated and shown.
- It also controls rounding and display behavior in totals.
- These choices shape your overall WooCommerce tax settings logic.
- They also affect how customers feel at checkout. You will fine tune these options in the next part.
Step 6: Understand the Tax Rate Tables You Will Use Later
- Scroll further down and notice the tax rate table area.
- You will see Standard rates as the main default table.
- You may also see Reduced rate and Zero rate sections.
- These are tax classes used for different product needs.
- Each table is where your rates will be stored.
- This is the heart of WooCommerce tax rates set up later. It is also where location rules like states and postcodes live.
Step 7: Quick Checks Before You Start Adding Any Tax Rates
- Before adding rates, do two quick checks for safety.
- First, confirm your timezone and currency match your store region.
- Second, confirm your checkout page loads without cache issues.
- If you use caching, clear it before testing taxes.
- This avoids confusing results during Configure tax in WooCommerce steps. Clean checks now save hours of troubleshooting later.
How Do I Set Up Taxes in WooCommerce Manually (Complete Guide)
Manual tax setup gives you full control over every checkout total. It works great when you sell in limited regions. It also helps when you already know your local rates. This section shows the safest way to Set Up Taxes in WooCommerce manually. You will adjust key options first, then add rates carefully. After that, you will assign tax classes to products correctly. This approach keeps your WooCommerce tax configuration stable for long periods.
Step 1: Confirm Your Store Address and Selling Locations
- Go to WordPress Dashboard → WooCommerce → Settings → General.
- Check Store Address, City, State, and Postcode for accuracy.
- Set Selling Location and Shipping Location for your target regions.
- Click Save changes to store the correct base details.
Step 2: Enable Taxes in WooCommerce Settings
- In WooCommerce → Settings → General, find the tax option.
- Enable “Enable tax rates and calculations” in the settings.
- Click Save changes and refresh the settings page once.
- Open the new Tax tab that appears after saving.
Step 3: Configure Main WooCommerce Tax Options
- Go to WooCommerce → Settings → Tax → Tax options.
- Set Prices entered with tax as Yes or No.
- Set Calculate tax based on Shipping or Billing address.
- Set Shipping tax class as “Based on cart items” usually.
- Choose a rounding method that keeps totals clean and consistent.
- Select display options for shop, cart, and checkout totals.
- Click Save changes to lock your tax behavior.
Step 4: Create Tax Classes If You Need Them


- Stay in Tax → Tax options and find Additional tax classes.
- Add class names like Reduced Rate and Zero Rate.
- Put each class on a new line for clean tax tabs.
- Click Save changes to create the new tax class tabs.
Step 5: Add Standard Tax Rates in the Tax Table
- Go to WooCommerce → Settings → Tax → Standard rates.
- Click Insert row to add your first tax rule.
- Fill Country code and State code for your tax region.
- Add Rate %, Tax name, and Priority for clear rule order.
- Tick Shipping only if shipping should be taxable there.
- Click Save changes to store your tax rule rows.
Step 6: Add Reduced or Zero Rates If Required
- Open the Reduced rate or Zero rate tax tab.
- Click Insert row and add location and rate values.
- Keep specific rules above general rules for safer matching.
- Click Save changes after every rate table update.
Step 7: Assign Tax Status and Tax Class to Products
- Go to Products → Edit any product → Product data → General.
- Set Tax status as Taxable, Shipping only, or None.
- Set Tax class as Standard, Reduced, or Zero.
- Update the product and repeat for other product types.
Step 8: Set Shipping Tax Behavior for Real Checkouts
- Go to WooCommerce → Settings → Tax → Tax options.
- Confirm Shipping tax class matches your local tax rule.
- Recheck your tax rate rows and shipping checkbox setting.
- Test one shipping method to confirm correct tax totals.
Step 9: Test Tax Calculations Before Going Live
- Add one taxable product and go to the checkout page.
- Test with a local address and confirm tax applies correctly.
- Test with another region address and confirm rate changes.
- Test shipping methods and coupons to confirm stable totals.
- Check order emails and admin order totals for tax lines.
Step 10: Fix Common Tax Issues Fast
- If tax shows zero, confirm product Tax status is Taxable.
- If rates look wrong, check State codes and rule priority.
- If totals look odd, recheck inclusive or exclusive pricing.
- Clear cache plugins and server cache before retesting totals.
- Disable conflicting checkout plugins and test taxes again.
Testing Checklist: Confirm Your WooCommerce Taxes Work Before Going Live
Testing is the safest way to catch tax mistakes early. It confirms your WooCommerce tax settings match real checkout behavior. Use these steps after you Set Up Taxes in WooCommerce manually.
Check Tax Applies on a Simple Taxable Product
- Add one taxable product to the cart and open the checkout.
- Enter a valid address where taxes should apply correctly.
- Confirm a tax line appears with the correct tax amount.
- Place a test order and review totals in the admin order.
Check Tax Changes With a Different Customer Location
- Repeat the test with a different state or region address.
- Confirm the rate changes based on your location rules.
- Verify your WooCommerce tax configuration uses the right address type.
- If rates stay the same, recheck your tax rule priority order.
Check Shipping Tax Behavior With Real Shipping Methods
- Add a shipping method like Flat Rate and open checkout.
- Confirm shipping is taxed only if your region requires it.
- If shipping tax looks wrong, review the shipping checkbox settings.
- Verify “Shipping tax class” matches your intended tax setup.
Check Mixed Carts With Taxable and Non-Taxable Products
- Add one taxable product and one non-taxable product together.
- Confirm tax applies only to the taxable product total.
- If both get taxed, fix product tax status and tax class.
- This step validates your WooCommerce tax rates setup logic.
Check Coupon Discounts With Taxes
- Apply a coupon and review the tax total changes.
- Confirm discount reduces the taxable amount as you expect.
- If totals look odd, recheck inclusive and exclusive price settings.
- Test one percent coupon and one fixed cart coupon.
Check Emails and Reports for Correct Tax Totals
- Open the order email and confirm tax lines are correct.
- Check WooCommerce order details for tax name and amount.
- Review WooCommerce reports to confirm taxes show in totals.
- This confirms your WooCommerce sales tax setup is reporting properly.
Common WooCommerce Tax Problems and How to Fix Them Easily
Tax issues usually come from one wrong setting or rule. Use these quick fixes to Configure tax in WooCommerce correctly.
Taxes Are Not Showing on Cart or Checkout
This usually happens when tax is not enabled globally. It also happens when products are set as non-taxable.
- Go to WooCommerce → Settings → General and confirm taxes enabled.
- Go to Tax options and confirm tax calculation is turned on.
- Edit the product and set Tax status to Taxable.
- Clear cache and test again with a fresh browser session.
Wrong Tax Rate Applies for a Customer Location
This often happens due to wrong state codes or rule order. It can also happen when priority is not set properly.
- Open Standard rates and confirm country and state codes.
- Move specific postcode rules above broad country rules.
- Check Priority values when two rows match the same address.
- Save changes and retest using the same sample address.
Shipping Tax Is Incorrect or Missing
This happens when shipping settings and rate rows conflict. It also happens when shipping is not checked in rates.
- Confirm the Shipping checkbox is enabled in the rate row.
- Recheck “Shipping tax class” inside Tax options settings.
- Test Flat Rate and Free Shipping to confirm tax behavior.
- If you use shipping plugins, disable and test temporarily.
Prices Look Higher or Lower After Enabling Taxes
This happens when inclusive and exclusive pricing is mismatched. It can also happen due to display settings differences.
- Check “Prices entered with tax” matches your pricing method.
- Check display settings for shop and checkout price display.
- Update one product price and confirm totals match expected results.
- Retest with one product only, then test larger carts.
Taxes Work for Guests but Fail for Logged Users
This is often caused by saved addresses in user profiles. It can also be caused by old checkout fields data.
- Ask the user to update billing and shipping addresses correctly.
- Test with a new customer account and a fresh address entry.
- Disable address auto-fill plugins and retest checkout totals.
- Confirm your tax base address setting matches your store needs.
Taxes Break After Installing a New Plugin
Some checkout and multi-currency plugins change tax logic. Caching plugins can also show old totals during testing.
- Clear all cache layers and test again after changes.
- Temporarily disable the new plugin and run the same tests.
- Re-save tax settings and shipping settings to refresh rules.
- For expert help, WooHelpDesk can assist.
Conclusion
Setting taxes in WooCommerce becomes easy with a clear process. First, enable taxes and review your core tax options. Next, add the right tax rates for your selling regions. Then assign the correct tax class to every product type. Finally, test checkout totals with real addresses and shipping methods. This flow keeps your totals accurate and customers confident. It also helps you avoid refunds caused by wrong tax charges. A clean setup supports stable reporting and smoother accounting later.
If you want taxes set up correctly without any confusion, WooHelpDesk can help. We can review your WooCommerce tax settings, add accurate tax rules, and test your checkout. We also fix issues like missing taxes, wrong rates, and shipping tax problems. Contact WooHelpDesk for expert WooCommerce tax configuration and complete checkout verification.