How To Set Up GST & Sales Tax in WooCommerce (Step-by-Step Guide)
Table of Contents
- Introduction
- Role of Sales Tax or GST In WooCommerce for Online Stores
- Before You Start: Collect These Details First to Avoid Wrong Tax Charges
- How To Set Up GST & Sales Tax in WooCommerce Correctly
- Test Your Tax Setup Before Going Live to Avoid Checkout Surprises
- Common WooCommerce Tax Mistakes and Simple Fixes
- Conclusion
Introduction
Taxes can feel confusing for new store owners. But WooCommerce makes tax setup manageable. You only need the right details and settings. This guide explains how to add sales tax in WooCommerce clearly. It also explains how to set up GST in WooCommerce properly. You will learn the key purpose of taxes in checkout. You will also understand what taxes change in orders.
Good tax setup helps avoid price mistakes later. It also keeps your checkout clear and trusted. Many buyers want to see tax lines clearly shown. WooCommerce can display tax in simple ways. You can also choose itemized tax display. That helps customers understand their total amount.
Once you know the basics, setup becomes fast. This guide keeps steps simple and easy to follow. By the end, you will know the right direction. You will also know how to configure tax in WooCommerce correctly.
Role of Sales Tax or GST In WooCommerce for Online Stores
Charges the Correct Tax Automatically at Checkout
WooCommerce can calculate tax during checkout in real time. This keeps totals accurate for each customer address. It also reduces manual work during order processing. When you learn how to add sales tax in WooCommerce, tax becomes consistent. When you learn how to set up GST in WooCommerce, GST applies correctly. This helps avoid wrong charges and customer complaints later.
Keeps Order Totals and Invoices Clean and Professional
Taxes add a clear breakdown to every WooCommerce order. Customers can see product price and tax separately. This looks professional and reduces confusion during payment. It also helps when customers request invoices for records. If you how to configure tax in WooCommerce correctly, invoices stay accurate. Your store looks more trusted and well managed.
Supports Accurate Tax Reporting for Accounting and Filing
WooCommerce stores tax data inside each completed order. You can view tax totals through WooCommerce tax reports. This helps during monthly bookkeeping and yearly filing work. It also supports quick checks during audits or reviews. When you how to add GST in WooCommerce, reports become easier. You spend less time matching numbers in spreadsheets later.
Builds Customer Trust With Clear Tax Breakdown
Many customers want full price clarity before payment. Hidden charges often increase cart abandonment rates. Tax lines give clarity and reduce surprise at checkout. This improves trust and makes buyers more confident. Proper tax setup shows your store follows standard rules. That helps your store look reliable and secure.
Helps Prevent Undercharging or Overcharging Customers
Wrong tax settings can cause lost profit or legal issues. Undercharging may create unpaid tax liability later. Overcharging may cause refunds and customer frustration. Correct tax rules keep your store safer long term. That is why how to add sales tax in WooCommerce matters. That is why how to set up GST in WooCommerce matters too.
Makes Multi-Region Selling Easier With Better Tax Control
Many stores sell across states or different GST regions. WooCommerce supports region-based tax rules and rates. You can apply tax based on shipping destination rules. You can also handle different rates for different areas. This is useful for growing stores with wider reach. With the right setup, scaling becomes easier and safer.
Before You Start: Collect These Details First to Avoid Wrong Tax Charges
Setting taxes becomes easy when you prepare first. A small mistake can create wrong totals at checkout. This section helps you collect key details early. It saves time when you set up tax rules. It also reduces confusion in later steps. Use this checklist before you start WooCommerce tax settings. It will support how to configure tax in WooCommerce correctly.
Confirm Your Store Address and Business Location
Your store address decides the base tax behavior. WooCommerce uses it for default tax calculations. Add the correct country, state, and postal code. Also check your business city and region. A wrong address can change your tax rate. This is important for how to add sales tax in WooCommerce.
Know Where You Must Collect Tax or GST
You may not need to charge tax everywhere. Tax rules depend on your selling locations and laws. For sales tax, confirm states where you must collect tax. For GST, confirm the region where GST applies. Keep a clear list of required locations. This improves how to set up GST in WooCommerce accuracy.
Keep Your Tax Registration Details Ready
If you are registered, keep your tax number ready. This includes GSTIN, VAT ID, or local tax ID. You may need it for invoices and business proof. Some plugins also ask for registration details. Keep these details stored safely and accessible. This makes tax setup faster and smoother.
Decide If You Charge Tax on Shipping
Some regions require shipping tax on certain goods. Some regions do not tax shipping charges at all. You must confirm your local shipping tax rule. Also confirm if handling fees are taxable. This setting affects cart totals and customer trust. It matters for how to add GST in WooCommerce properly.
Choose If Product Prices Include Tax or Exclude Tax
Some stores show prices with tax already included. Some stores add tax at checkout for transparency. WooCommerce supports both pricing styles for taxes. Decide this early to avoid price display issues. Also match this with your customer expectations. This setting impacts how to configure tax in WooCommerce.
List the Product Types You Sell in Your Store
Tax rules differ for physical and digital products. Some services have special tax rules in many regions. Subscription products may also have tax handling needs. Create a simple list of your product types. This helps you plan tax classes later. It also helps avoid wrong tax applications.
Note Any Special Tax Rates You Must Apply
Some products have reduced tax rates in many regions. Some items may be zero-rated or tax-exempt. Examples can include books, food, or medical items. Your region decides which items qualify for special rates. Write down which products need special tax treatment. This supports how to add sales tax in WooCommerce correctly.
Make a Simple Tax Map for Your Store
Create a basic map of where you sell and charge tax. Add regions, rates, and product types in one place. This helps you stay organized during tax setup steps. It also helps when you expand to new locations. Good planning reduces errors and saves time later. Now you are ready to set up tax settings next.
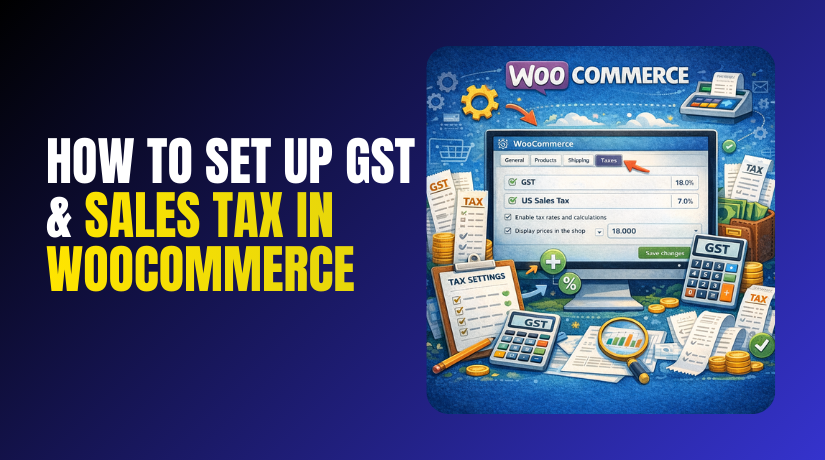
How To Set Up GST & Sales Tax in WooCommerce Correctly
Step 1: Turn On Taxes in WooCommerce Settings
- Go to WordPress Dashboard and open WooCommerce → Settings.
- Click General and find the Enable taxes
- Tick the checkbox, then click Save changes at bottom.
- Open settings again and confirm the Tax tab appears.
- This is the first step for how to configure tax in WooCommerce.
Step 2: Confirm Your Store Address and Basic Tax Location
- Go to WooCommerce → Settings → General
- Check Store address, City, State, and Postcode
- Make sure the country and state match your business location.
- Wrong address can apply wrong tax rules to customers.
- Correct address supports how to set up GST in WooCommerce.
Step 3: Choose How WooCommerce Calculates Tax for Customers
- Go to WooCommerce → Settings → Tax.
- Open Tax options section at the top.
- Select Calculate tax based on customer shipping address.
- Use billing address only if your local rules require it.
- This helps how to add sales tax in WooCommerce
Step 4: Set How Prices and Tax Display on Your Store
- In Tax options, choose if prices include tax or not.
- Select Prices entered with tax for tax-inclusive pricing needs.
- Select Prices entered without tax for USA style pricing.
- Choose how prices display in shop pages and product pages.
- Choose how prices display in cart and checkout pages.
- Pick Itemized tax display when multiple taxes can apply.
- Pick As a single total for simpler tax display needs.
- Save changes after updating these display settings.
Step 5: Add a Standard Tax Rate for Sales Tax or GST
- Go to WooCommerce → Settings → Tax → Standard rates.
- Click Insert row to add a new tax rate.
- Add the Country code where the tax should apply.
- Add the State code if the tax is state based.
- Leave state blank if the rate is countrywide.
- Enter the tax percentage in Rate %
- Add a clear name like GST or Sales Tax.
- Tick Shipping only if shipping must be taxed locally.
- Click Save changes to store the new tax rate.
- This is the core of how to add GST in WooCommerce.
Step 6: Add Postcode or ZIP Rules for Better Accuracy
- Stay inside the Standard rates tax table section.
- Add ZIP codes if your tax changes by local areas.
- Use ranges when your region supports ZIP range rules.
- Keep one rule per line to avoid import mistakes.
- Save changes after adding postcode or ZIP rules.
Step 7: Import Tax Rates with CSV to Save Time
- Use this when you have many tax rate rows.
- Click Import CSV inside the tax rates screen.
- Prepare a CSV using the same columns shown in table.
- Upload the file and confirm rows appear correctly.
- Save changes to apply imported tax rates everywhere.
- This speeds up how to configure tax in WooCommerce.
Step 8: Create Tax Classes for Reduced or Zero Tax Products


- Go to WooCommerce → Settings → Tax → Tax options.
- Find Additional tax classes and add names line by line.
- Add classes like Reduced Rate and Zero Rate.
- Save changes and open the new tax class tabs.
- Add the correct rates inside each new class table.
- This helps when some items use different tax rules.
Step 9: Assign the Right Tax Class to Each Product
- Open any product in Products → All Products
- Scroll to Product data and open the Tax
- Set Tax status to taxable for normal products.
- Select Tax class as Standard, Reduced, or Zero.
- Update the product to save the tax class changes.
- This improves how to add sales tax in WooCommerce
Step 10: Use Automatic Tax Tools If You Sell Many Regions
- Automatic tax reduces manual rate updates for large stores.
- It helps when rates change often across states or cities.
- It can support how to set up GST in WooCommerce
- Enable the tool, then review tax display settings again.
- Always test checkout after enabling any automatic tax tool.
Test Your Tax Setup Before Going Live to Avoid Checkout Surprises
Create Two Simple Test Products for Clear Tax Checks
Create one taxable product with the Standard tax class. Create one zero-rate or exempt product for comparison. This makes testing faster and more accurate.
Test Tax Using an Incognito Window for Clean Results
Open your store in an incognito browser window. This avoids cached values and old cart data. It gives you a fresh checkout every time.
Test With a Real Shipping Address From Your Main Region
Add the taxable product to your cart and checkout. Enter a real test address in your tax region. Confirm the tax line appears and looks correct.
Change the Address to Confirm Destination-Based Tax Works
Change the state or region in the checkout address. Watch if the tax amount updates with the new location. This confirms rules work for different areas.
Test Tax for Zero-Rate or Exempt Products
Add your zero-rate product to the cart and checkout. Confirm tax stays zero for that product line. This prevents wrong charges for special items.
Test Shipping Tax Rules If You Charge Shipping
Add a shipping method with a shipping fee. Check if shipping tax is added as expected. This step supports how to configure tax in WooCommerce correctly.
Test Coupons and Discounts With Taxes
Apply a coupon and watch the tax totals again. Confirm taxes adjust after discounts are applied. This avoids wrong totals during promotions and sales.
Place a Full Test Order and Review Admin Order Details
Place a test order using a dummy payment method. Open the order inside WooCommerce admin for review. Check tax name, rate, and totals are correct.
Check Order Emails and Invoice Views for Clear Tax Lines
Open the order confirmation email and invoice view. Confirm tax details show clearly and look professional. This helps with buyer trust and accounting records.
Common WooCommerce Tax Mistakes and Simple Fixes
Taxes Not Showing at Checkout
Check the “Enable taxes” option in WooCommerce settings. Confirm the product tax status is set to “Taxable.” Also ensure the customer address is not empty.
Wrong Tax Rate for State or Postcode
Review your tax rate table row details carefully. Check country, state code, and postcode range settings. One wrong field can apply the wrong rule.
Shipping Tax Missing or Incorrect
Check the “Shipping” checkbox in your tax rate. Review the “Shipping tax class” setting under Tax options. Make sure it matches your intended shipping tax rule.
Tax Looks Doubled or Too High
Check if “Compound” tax is enabled by mistake. Compound taxes should only be used when required. Disable it and test again with the same address.
Prices Look Wrong in Shop or Cart
Check whether prices are entered with tax included. Match shop display settings with your price entry method. Mixed settings often cause confusing totals for buyers.
Tax Changes After Updates or Cache Clears
Clear cache plugins and hosting cache if available. Test again in an incognito window for accuracy. Caching can show old tax totals to customers.
Checkout Plugin or Theme Conflict
Temporarily disable extra checkout or pricing plugins. Test the checkout again after each plugin change. Re-enable plugins one by one to find conflicts.
Automatic Tax Tool Not Applying Rates
Confirm the tax service connection is active and verified. Check if the service supports your store region. Test again after reconnecting and saving settings.
Conclusion
WooCommerce tax setup becomes easy with the right process. Collect details first and configure settings carefully. Add rates and classes only where they are needed. Always test using real address examples before going live. Small tests prevent big checkout issues later. Review your rates often if rules change in your region. If your store grows, consider automatic tax solutions too. If you need help, WooHelpDesk can support you fast. We can assist with tax rules, setup, and testing steps. This keeps your checkout smooth and your orders accurate.
Need expert help with WooCommerce setup or fixes? Visit WooHelpDesk for fast, reliable support that keeps your store secure, smooth, and ready to sell.