How to Remove Tags from a WordPress Site
Table of Contents
- Introduction
- Let’s start by understanding how tags work in WordPress
- How Tags Become Cluttered or Misused Over Time
- Reasons to Remove or Clean Up Tags from a WordPress Site
- Methods: How to Remove Tags from a WordPress Site
- How to Remove Tags from WooCommerce Products
- Conclusion
Introduction
Tags are a common part of any WordPress website. They help group content by similar topics. When used well, they support navigation and SEO. But too many tags can harm your site.
Over time, tags can pile up. You may forget to use them properly. Sometimes, you might use duplicate tags or ones with no posts. Both consumers and search engines become confused and overwhelmed by this.
If you’re experiencing this problem, it’s time to delete any unnecessary tags from WordPress. They can be cleaned up to improve SEO and performance. For WooCommerce or blog sites, this is even more important.
There are many ways to delete tags WordPress no longer uses. It can be done manually, with a plugin, or even by executing database queries.. You can also bulk delete tags WordPress in just a few steps.
Some users also want to remove tag from WordPress posts completely. Others might want to disable tag archives WordPress to stop search engines from indexing them. This helps avoid duplicate content issues.
Also, if you’re focusing on URLs, you may want to remove tag base WordPress adds to tag links. This makes your site URLs cleaner and more SEO-friendly.
Some users just want to hide tags on WordPress posts without deleting them. This keeps the content clean but preserves tag data in the backend.
You will be guided through each of these options in this guide.. You’ll learn safe and smart ways to manage tags. This post will assist you in streamlining your tag system, regardless of your level of experience.
Let’s start by understanding how tags work in WordPress.
Understanding WordPress Tags
When you create posts on a WordPress website, you’ve probably noticed tags and categories. Both are ways to organize content, but they work differently. Let’s find out how.
Difference Between Tags and Categories
Categories are used for broad grouping. They define the main topic of your content. Think of them like the table of contents in a book. Each post needs at least one category.
Tags describe specific details in your post. They act like keywords that highlight the smaller topics you’ve discussed. For example, a post in the category “Digital Marketing” might have tags like “Google Ads,” “Email Campaigns,” or “Lead Generation.”
Unlike categories, tags are optional. You can use as many as you want. But using too many or poorly thought-out tags can lead to confusion — for users and search engines.
Where Tags Are Used
Tags are most often used in WordPress blog posts. They help group related posts together. This improves navigation and keeps content organized.
Tags also appear in custom post types. For example, event posts or portfolios can use tags. Developers can enable or disable tags based on the post type.
WooCommerce products use tags for filtering and search. These product tags are helpful for customers. They can click tags to find similar items.
Each tag creates its own archive page. This shows all posts using that tag. If misused, these pages can harm SEO.
Some themes show tags below every post. You can hide tags on WordPress posts if needed. This keeps your site cleaner and more focused.
You might also want to disable tag archives WordPress creates. This stops search engines from indexing low-value pages.
If you’re not using tags wisely, clean them up. You can easily remove tags WordPress added to posts. For many unused ones, simply bulk delete tags WordPress no longer needs.
For a clean URL structure, you may also remove tag base WordPress includes in links. This creates shorter, SEO-friendly URLs.
Tags are powerful when used correctly. But when overused, they cause clutter.
How Tags Become Cluttered or Misused Over Time
Tags are helpful when used correctly. But over time, they become messy.
Many site owners add tags without a clear plan or structure. Writers often create new tags for each post they write.
This leads to too many tags with little or no reuse. A tag used only once doesn’t help organize content.
Sometimes, tags are created with different spellings or formats. This creates duplicates like “ecommerce” and “e-commerce” meaning the same thing.
Old tags that no longer match current topics often stay active. They serve no purpose and make your content feel outdated.
Tags can also be used too broadly or too narrowly. If every post has its own unique tags, there’s no real grouping.
Some tags remain in the system even after their related content is deleted. These unused tags add clutter to your database.
Tags are also misused as substitutes for categories. This creates overlap and confusion in site structure.
Visitors may see a long list of unclear or random tags. This hurts their experience and makes navigation harder.
Over time, this clutter affects performance and search engine visibility. It’s important to audit and clean tags regularly.
By keeping tags organized and relevant, you maintain a cleaner, faster, and more useful website.
Reasons to Remove or Clean Up Tags from a WordPress Site
- Improve Search Engine Visibility
Tags with low content create weak archive pages. Cleaning them promotes better indexing, less thin material, and a better understanding of your site by search engines, all of which contribute to improved SEO performance.
- Enhance User Navigation
Users rely on tags to find related content. Irrelevant or unused tags lead to poor navigation. Clean, well-organized tags offer a smoother browsing experience across your posts or products.
- Boost Site Speed and Performance
Too many unused tags slow down your WordPress database. Removing them reduces server load, speeds up admin tasks, and improves performance for both users and site administrators.
- Maintain a Clean Backend
A cluttered tag list confuses writers and editors. Fewer, focused tags make content management easier and prevent duplicate or unnecessary tag creation during new content uploads or edits.
- Support Better Internal Linking
Tags help link related content together. But irrelevant or rarely used tags disrupt internal connections. Removing them keeps your internal structure strong and supports better link equity across pages.
- Align with Content Strategy
As your site evolves, so should your tags. Old tags may no longer reflect your goals or audience. Cleaning up ensures your taxonomy matches your current branding and topics.
Methods: How to Remove Tags from a WordPress Site
In WordPress, there are multiple methods for getting rid of unnecessary tags. You can choose manual steps, use plugins, or make code changes. Each method depends on your skill level and needs.
-
Remove Tags Manually from the WordPress Dashboard
Manual tag removal is safe, simple, and ideal for beginners or small sites. Follow these updated steps to clean up your tags directly in WordPress.
Step 1: Log In to Your WordPress Admin Panel
Open your browser and visit your login page (e.g., yoursite.com/wp-admin).
Enter your username and password to access your WordPress dashboard.
This is where you control your site’s content and settings.
Step 2: Navigate to the Tags Section
In the left-hand menu, hover over Posts and click Tags.You will be taken to the Tags screen, where all tags are listed.This includes tag names, slugs, descriptions, and the number of posts using them.
Step 3: Review All Tags in Use
Scan through the list of tags.
Focus on tags with a “0” post count — they’re not used.
Also look for similar or duplicate tags (e.g., “shop” vs. “Shop”).
Decide which tags are worth keeping and which ones to remove.
Step 4: Delete Tags One by One
To delete a single tag:
- Hover over the tag name.
- Click the red Delete link under the tag.
- WordPress will remove the tag from your database immediately.
- It will no longer appear on any posts.
Step 5: Bulk Delete Multiple Tags at Once
To delete many tags together:
- Check the box next to each tag you want to remove.
- Scroll to the top and open the Bulk Actions dropdown.
- Select Delete from the list.
- Click the Apply button to remove all selected tags.
This saves time and works well during site cleanups or audits.
Step 6: Confirm That Tags Are Removed
Refresh the Tags page to make sure they are gone.
You can also visit your posts to confirm the tags no longer appear.
If needed, reassign better tags that match your content strategy.
-
Use a Plugin for Bulk Tag Management
This method is perfect if you have too many tags. A plugin makes it faster to find, filter, and delete tags in bulk—without touching the database manually.
Step 1: Log in to Your WordPress Admin Dashboard
Open your browser and go to your WordPress admin login page. Enter your username and password, then click Log In.
Step 2: Go to the Plugin Installation Page
From the left menu, click Plugins > Add New. You will be taken to the WordPress plugin directory.
Step 3: Search for a Tag Management Plugin
In the search bar, type Bulk Delete or WP Bulk Term Remover. These plugins are trusted and updated regularly for bulk actions.
Step 4: Install and Activate the Plugin
Click the Install Now button next to your chosen plugin. Once installed, click the Activate button to enable the plugin.
Step 5: Open the Plugin’s Settings Panel


Go to Tools > Bulk Delete or check the new menu entry created. Each plugin may name the settings page slightly differently.
Step 6: Choose What Tags You Want to Remove
Select the option to delete unused tags or tags with no posts. Some plugins allow deletion by tag name, post count, or date created.
Step 7: Preview and Confirm Your Selections
Review the list of tags that match your filter.Make sure you don’t remove any tags that are still in use.
Step 8: Click Delete to Complete the Cleanup
After reviewing, click Delete Selected Tags or Bulk Delete Now. The plugin will remove all chosen tags from your WordPress database.
-
Remove Tags from Database (Advanced)
This method is for experienced users comfortable working in phpMyAdmin or directly with the WordPress database. It allows for quick and deep cleanup but must be handled with care.
Important Note Before You Begin
This method directly edits your database. Mistakes can break your site.
Always take a full backup before making any changes.
Step 1: Log in to Your Hosting Control Panel
Open your hosting account and go to cPanel or similar dashboard.
Look for the phpMyAdmin tool under the Database section.
Step 2: Open phpMyAdmin
Click on phpMyAdmin to launch the database manager.
You will see a list of all databases connected to your site.
Step 3: Select Your WordPress Database
Click on your WordPress database from the left sidebar.
The name usually includes “wp” but may vary based on setup.
Step 4: Locate the Tags Table
Find the table named wp_terms (or your prefix + _terms).
This table stores all categories, tags, and custom taxonomies.
Step 5: Identify Tags You Want to Remove
Click Browse to view the tag entries.
Look for tag names you want to delete from the list.
Note the term_id of each unwanted tag for the next step.
Step 6: Run SQL Query to Remove Tags
Click the SQL tab at the top of phpMyAdmin.
Paste this query (change ID1, ID2 to your actual term IDs):
DELETE FROM wp_terms WHERE term_id IN (ID1, ID2);
DELETE FROM wp_term_taxonomy WHERE term_id IN (ID1, ID2);
DELETE FROM wp_term_relationships WHERE term_taxonomy_id IN (
SELECT term_taxonomy_id FROM wp_term_taxonomy WHERE term_id IN (ID1, ID2)
);
Step 7: Click “Go” to Run the Query
Click the Go button to execute the SQL command.
This will completely remove selected tags from your database.
Step 8: Check WordPress to Confirm Changes
Return to your WordPress dashboard and go to Posts > Tags.The deleted tags should no longer appear in the list. Double-check your posts to ensure everything works correctly.
-
Remove Tags from Theme Templates
If you want to hide tags from visitors but not delete them, you can remove tag output from your theme templates. This keeps your backend data intact while keeping your front-end clean.
Step 1: Log in to Your WordPress Admin Panel
Open your WordPress login page and enter your credentials. Click Log In to access your dashboard.
Step 2: Open the Theme File Editor
In the left menu, go to Appearance > Theme File Editor. A warning may appear—click “I understand” to continue.
⚠️ Tip: If using a block theme (FSE), edit templates in Appearance > Editor.
Step 3: Locate the Single Post Template
In the right sidebar, find and click single.php or content-single.php. This file controls how single blog posts appear on your site.
Step 4: Search for the Tag Display Code
Look for code that displays tags, usually like this
the_tags();
It may also look like:
echo get_the_tag_list();
Or be wrapped in <div class=”tags”>…</div> structure.
Step 5: Remove or Comment Out the Code
To remove it safely, comment it out instead of deleting:
<!– <?php the_tags(); ?> →
Or use PHP comment style:
<?php // the_tags(); ?>
This prevents tags from showing on the front-end but keeps them saved.
Step 6: Update the File
Scroll down and click the blue Update File button. WordPress will save the changes to your theme file.
Step 7: Visit a Post and Check the Changes
Go to a blog post on your website.Confirm that the tags are no longer visible under the content.Your tags are now hidden from users but still available in admin.
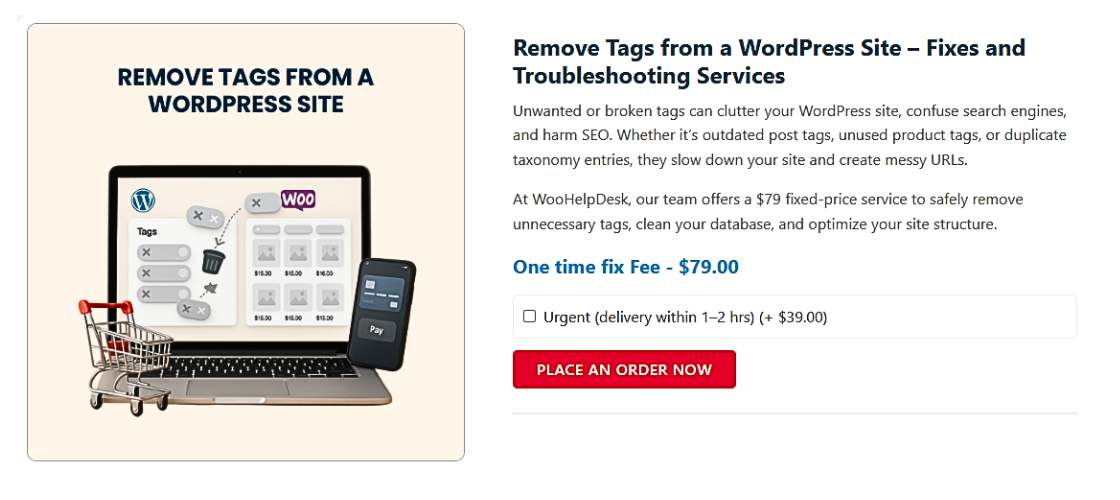
How to Remove Tags from WooCommerce Products
WooCommerce uses product tags just like blog post tags. They’re helpful for sorting and filtering products. But over time, they can become cluttered or outdated.
Cleaning them improves store organization, product SEO, and performance. Below are simple methods to manage and remove WooCommerce product tags.
- Remove Tags from a Single Product
- Go to your dashboard and click Products > All Products.
- Edit the product where you want to remove tags.
- In the Product Tags box on the right, click the “x” beside a tag.
- Click Update to save the product without that tag.
This removes tags from that product only—not from your database.
- Bulk Remove Tags from Multiple Products
- Go to Products > All Products.
- Use the checkboxes to select multiple products.
- Choose Edit from the Bulk Actions dropdown, then click Apply.
- In the bulk edit panel, find the Tags
- Remove the tags listed or leave it empty to clear all.
- Click Update to apply changes across selected products.
Cleaning up tags from a variety of products can be done quickly using this method.
- Delete Tags from WooCommerce Tag List
- Go to Products > Tags in your dashboard.
- You’ll see all product tags listed.
- Hover over a tag and click Delete to remove it.
- Use checkboxes to select and bulk delete tags if needed.
- Deleted tags will be removed from the tag list and products.
Conclusion
Tags help organize content in WordPress, but unmanaged tags cause clutter, confusion, and SEO issues. Over time, they pile up, creating duplicate or unused entries that slow your site and weaken structure.
This guide covered everything—from manual tag removal and bulk actions with plugins to advanced database edits and WooCommerce tag cleanup.
Whether you’re a beginner or a developer, managing tags properly improves navigation, site speed, and user experience. Regular audits and cleanups are key to maintaining a clean, efficient website. Keep your WordPress website optimized and well-organized by selecting the approach that best suits your level of expertise.