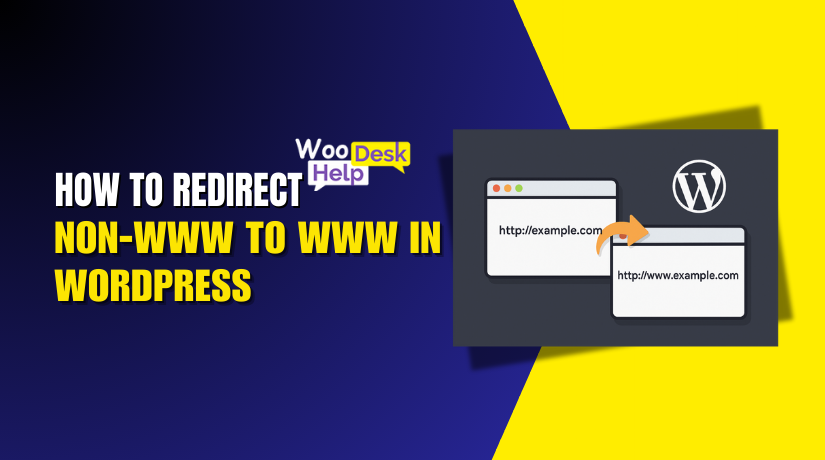
How to Redirect non-WWW to WWW in WordPress
Table of Contents
- Introduction
- Why www vs non-www Matters
- Preparation – Backup & Planning
- Proven Methods to Redirect non-WWW to WWW in WordPress
- Verify Your WordPress Redirect from non-WWW to WWW
- Common Mistakes to Avoid
- Conclusion
Introduction
When you create a WordPress website, you can choose how the URL looks. Some websites start with “www”, while others skip it. For example:
- www.woohelpdesk.com
- woohelpdesk.com
Both can load your website, but search engines treat them as two versions. If you don’t set a clear preference, it can lead to SEO problems.
Let’s say your homepage loads on both versions. Google might think you have duplicate content. This hurts your search rankings over time. Also, visitors may see different URLs in search results. This creates confusion and inconsistency.
That’s why it’s important to redirect non-WWW to WWW. This ensures that anyone visiting example.com gets sent to www.example.com. It tells search engines and users, “This is the correct version.”
Why www vs non-www Matters
Many people think www is old-fashioned. But it still has technical benefits, especially for large websites. It allows better control of cookies and subdomains. More importantly, it gives you a clean, consistent brand online.
Search engines don’t care if you choose www or non-www. But they do care if your site loads on both. That’s called duplicate indexing, and it splits your SEO strength.
To avoid this, you need to choose one version. In this guide, we’ll focus on redirecting non-WWW to WWW. This means every visitor, no matter what they type, ends up on the www version.
SEO Benefits of Redirecting
Redirecting non-WWW to WWW has several SEO advantages:
- It prevents duplicate content issues
- It consolidates backlinks and traffic to one URL
- It improves crawl efficiency for search engines
- It helps build domain authority
These small steps make a big difference in your overall SEO.
Better User Experience
Visitors trust sites that look consistent. Seeing both example.com and www.example.com might confuse users. Redirecting to one version keeps things clean and professional.
It also helps with analytics and tracking. You’ll avoid data split between two domains.
Preparation – Backup & Planning
Before changing how your WordPress site handles redirects, take time to prepare. Redirects may seem simple, but one small mistake can cause a full site outage. Planning ahead helps you stay safe and avoid panic.
Why You Should Always Backup First
Your website holds valuable data. That includes content, design, SEO settings, and user data. When working with redirects, especially at the server level, mistakes can cause major problems. You might get locked out or your site may not load.
If you have a backup, you can:
- Restore the site if anything breaks
- Undo mistakes without losing data
- Avoid downtime and client complaints
A proper backup includes:
- Your full website files (themes, plugins, media uploads)
- The WordPress database (posts, settings, users)
How to Create a Backup Easily
You can create a backup using reliable WordPress plugins. These tools are easy to install and don’t need coding:
- UpdraftPlus – Offers cloud backups to Google Drive, Dropbox, and more
- BlogVault – Premium tool with staging, real-time backups, and easy restore
- Jetpack Backup – Set it and forget it. Great for beginners
Once installed, these plugins let you schedule or download backups. Store backups somewhere safe—cloud or offline.
Decide Which Version You Want: WWW or non-WWW
Before redirecting, choose your preferred domain version. In this guide, we’re using www. But the choice is yours. What matters is that you stay consistent.
Make sure your chosen version is:
- Used in WordPress settings
- Set up in hosting settings
- Verified in Google Search Console
This helps avoid SEO conflicts later.
Avoid Redirect Loops
Redirect loops happen when two or more redirects keep triggering each other. This causes the browser to reload repeatedly and eventually fail. You’ll see an error like “Too many redirects.”
To avoid this:
- Use only one redirect method
- Don’t combine plugin, .htaccess, or server settings
- Clear your browser and WordPress cache after changes
Proven Methods to Redirect non-WWW to WWW in WordPress
There are several ways to redirect non-WWW to WWW in WordPress. Each method works slightly differently depending on your hosting setup and skill level.

Let’s explore these methods step by step. Follow only one method to avoid redirect loops.
- Change Site URL in WordPress General Settings
This method updates your WordPress site address but doesn’t set a redirect.
Steps:
- Login to your WordPress dashboard.
- Go to Settings > General.
- Look for two fields:
- WordPress Address (URL)
- Site Address (URL)
- Update both fields to use www version.
Example: https://www.yourdomain.com - Scroll down and click Save Changes.
Your site will log you out and reload with the new address.
This change only affects how WordPress loads URLs. It does not redirect non-WWW to WWW. You’ll still need another method below to set a proper redirect.
Use this to keep your WordPress settings consistent.
- Add 301 Redirect in .htaccess File (Apache Servers)
This is the most effective method for sites using Apache hosting.
Steps:
- Access your site’s root folder using FTP or File Manager.
- Locate the file named .htaccess.
- Download a backup copy before editing.
- Open the file and add this code at the top:
RewriteEngine On
RewriteCond %{HTTP_HOST} ^yourdomain\.com [NC]
RewriteRule ^(.*)$ http://www.yourdomain.com/$1 [L,R=301]
- Replace yourdomain.com with your actual domain name.
- Save the file and upload it if needed.
Now all visitors who type the non-WWW version will be redirected to the WWW version using a 301 redirect.
This is a permanent redirect and great for SEO.
Benefits:
- Fast and server-level
- Ideal for long-term redirects
- Google recognizes 301 redirects for link value
- Use a WordPress Redirection Plugin
If you’re not comfortable editing server files, use a plugin.
Recommended Plugins:
- Redirection – Free and powerful
- All in One SEO – Premium plugin with redirect support
- Yoast SEO Premium – Includes redirect manager
Steps (using Redirection plugin):
- Install the Redirection plugin from the WordPress Plugins area.
- Activate the plugin.
- Go to Tools > Redirection.
- Click Add New Redirect.
- Set your Source URL:
/ (this applies to homepage) - Set Target URL:
https://www.yourdomain.com/ - Choose 301 Permanent as the redirect type.
- Click Add Redirect.
This method works well but may be slightly slower than server redirects. It loads after WordPress is already running.
Best for beginners or shared hosting users.
- Update Home and Site URL in wp-config.php
This method hardcodes your website address inside your WordPress configuration file. It doesn’t perform a redirect but ensures WordPress loads the correct version.
Steps:
- Open your site’s root folder using FTP or File Manager.
- Locate the file named wp-config.php.
- Download a backup before editing.
- Open the file and look for a spot above this line:
/* That’s all, stop editing! Happy publishing. */ - Add the following code:
define(‘WP_HOME’,’https://www.yourdomain.com’);
define(‘WP_SITEURL’,’https://www.yourdomain.com’);
- Save and upload the file.
This prevents WordPress from using the non-WWW version in links or dashboard URLs.
Note: This does not redirect visitors. Use with another redirect method.
- Set Permanent Redirect in cPanel Redirect Tool
If you use cPanel hosting, this is a quick and easy method.


Steps:
- Login to your cPanel account.
- Find the Redirects option under the Domains section.
- Choose 301 Permanent as the redirect type.
- In the dropdown, select your non-WWW domain.
- In the “Redirects to” field, enter your www version, like https://www.yourdomain.com.
- Choose Only redirect with www if available.
- Check the box for Wild Card Redirect.
- Click Add.
This will create a rule that redirects all traffic from non-WWW to WWW.
Best for users on shared hosting or those without FTP access.
- Configure Redirect via Cloudflare Page Rules
If your site uses Cloudflare CDN, you can use its Page Rules feature.
Steps:
- Login to your Cloudflare dashboard.
- Select your website.
- Go to the Rules section and choose Page Rules.
- Click Create Page Rule.
- Under the “If the URL matches” box, enter:
http://yourdomain.com/* - Choose Forwarding URL as the setting.
- Select 301 – Permanent Redirect.
- In the destination box, enter:
https://www.yourdomain.com/$1 - Click Save and Deploy.
Now, any visitor using the non-WWW version will be redirected to WWW before your server even loads.
Benefits:
- Fast DNS-level redirect
- Works even if your hosting server is down
- Great for performance and security
Free Cloudflare accounts include up to 3 Page Rules.
- Update Nginx Server Block for WWW Redirect
This method is for websites hosted on Nginx servers. You need root or SSH access to edit server files.
Steps:
- Connect to your server using SSH.
- Open the Nginx config file for your site.
Usually located at: /etc/nginx/sites-available/yourdomain - Add the following server block at the top:
server {
listen 80;
server_name yourdomain.com;
return 301 http://www.yourdomain.com$request_uri;
}
- Save the file.
- Restart Nginx using the command:
sudo systemctl restart nginx
This method is very fast and efficient, as it works at the web server level.
Warning: Only use this if you are confident with server management.
- Set Preferred Domain in Google Search Console
This step doesn’t create a redirect but helps with SEO. It tells Google which domain version to prioritize in search results.
Steps:
- Visit Google Search Console
- Add both versions of your domain (www and non-www)
- Verify ownership of both properties
- Set the preferred domain as the www version
- Submit a sitemap for the www version
This helps Google index only one version of your content.
Note: This does not perform a redirect. It only affects how your site appears in search.
Which Method Should You Use?
Now that you know all the methods, it’s time to choose. Each method has a purpose and works for different users. You don’t need to apply them all. In fact, doing so may create redirect loops or conflicts.
For Beginners
If you’re new to WordPress, use a plugin or cPanel.
- A redirection plugin is easy to install and manage.
- The cPanel redirect tool is user-friendly and requires no coding.
These options are great for small websites or blogs. They provide enough control without technical setup.
For Shared Hosting Users
Most shared hosting uses Apache servers. If that’s your case, editing the .htaccess file is ideal. It gives you a direct and fast 301 redirect.
- Make sure to back up the file before editing.
- One small error can crash your site.
This method is great for SEO and very efficient.
For Advanced Users
If you manage a VPS or cloud server, go with Nginx. This server-level redirect is the fastest option. It’s highly efficient but requires server access and SSH skills.
Alternatively, Cloudflare users can use Page Rules. It’s fast, and works at the DNS level. This means it redirects traffic even before it hits your server.
Everyone Should Use This
No matter your skill level, set a preferred domain in Google Search Console. This doesn’t redirect traffic but helps with indexing. It tells Google which version of your site to focus on.
Final Advice
Choose just one redirect method for best results. Don’t combine multiple solutions. Pick the one that matches your hosting and technical comfort.
Verify Your WordPress Redirect from non-WWW to WWW
Once you set up your redirect, you must test it properly. Testing ensures everything works and avoids hurting your SEO. It also helps you fix errors before your visitors see them.
You can test redirects using simple tools and browser options. Here are some easy ways:
- Use Online Redirect Checkers
These tools show you if the redirect is working. They also tell you what type of redirect is in place.
Popular tools:
- https://www.redirect-checker.org
- https://httpstatus.io
Just enter your non-WWW URL and check if it redirects to www version.
- Use Browser Developer Tools
Open your site in Google Chrome or Firefox:
- Press F12 or right-click > Inspect
- Go to the Network tab
- Reload the page and check the status code
You should see a 301 redirect from non-WWW to WWW.
- Try Manually in the Browser
Open your browser and type http://yourdomain.com. If it changes to https://www.yourdomain.com, the redirect is working.
Test different pages too:
- Homepage
- Blog posts
- Product pages
Make sure all versions redirect correctly.
Common Mistakes to Avoid
Setting up redirects may seem simple, but small mistakes can cause big issues. These issues may affect your website’s SEO, speed, and user experience. Here are the most common mistakes to watch out for—and how to avoid them.
- Using Multiple Redirect Methods Together
Some users try to set up redirects using several methods at once. For example, they add rules in .htaccess, use a plugin, and also enable Cloudflare rules. This can cause conflicts or redirect loops. Stick to one method to avoid problems. - Creating Redirect Loops
A redirect loop happens when one URL keeps redirecting back to itself. Visitors will see an error like “Too many redirects.” This usually happens when two systems try to redirect the same URL. Always test your changes right after applying them. - Forgetting to Update SSL for the WWW Version
If your SSL certificate only covers the non-WWW version, the www version might show a security warning. This can scare users away and harm trust. Make sure your SSL covers both www and non-www versions. - Leaving Old Links in Sitemap and Internal Pages
If your sitemap or internal links still use the non-WWW version, Google may index both. This splits your SEO ranking between two versions. After the redirect, update your sitemap and resubmit it in Google Search Console. - Not Clearing Cache After Making Changes
Caches store the old version of your site. If you test a redirect while the cache is active, you may not see the change. Clear your browser cache, plugin cache, and server cache after every update.
Conclusion
Redirects may seem straightforward, but even a minor error can cause significant issues. Many WordPress users struggle with redirect loops, broken SSL, or mixed domain URLs. These problems can confuse visitors and even lower your Google rankings.
If you’re dealing with any of these challenges, or just want it done right, we’re here to help. At WooHelpDesk.com, we provide expert WordPress support for all technical needs—including redirect setup, SEO troubleshooting, and server configurations.
Our team ensures your redirect is smooth, safe, and SEO-friendly.
Need fast help? Call us now at +1 888 602 0119 (US & Canada)
Or visit WooHelpDesk.com to get started.
Let experts handle the hard part while you focus on growing your site.