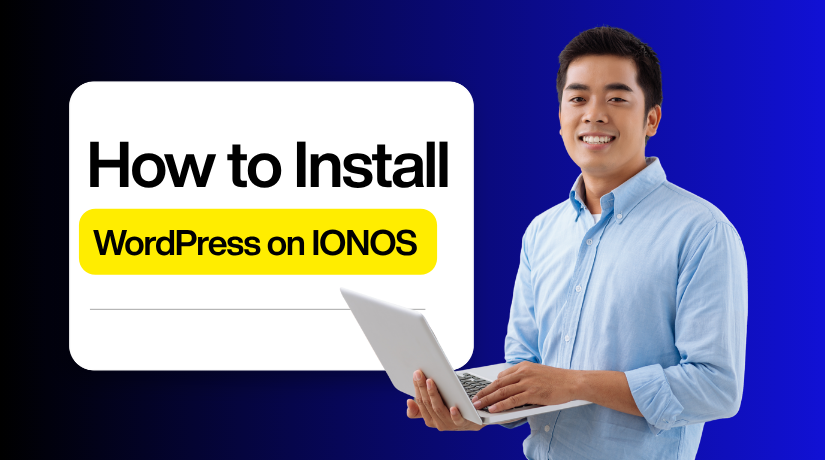
How to Quickly Install WordPress On IONOS and Launch Your Website
Table of Contents
- Introduction
- Get Ready Before Installing WordPress on IONOS
- Install WordPress On IONOS Using Click & Build
- How to Launch Your Website After Installing WordPress on IONOS
- Conclusion
Introduction
Building a website is now quick and easy for everyone. Complex tools or knowledge of coding are not necessary to get started. A professional website may be quickly created by anyone using WordPress and IONOS hosting.
IONOS is one of the most trusted and secure hosti ng providers. It offers fast performance, strong uptime, and a simple setup process. When used in conjunction with WordPress, it offers you complete control over your content and style. They work together to create the ideal option for novices and small enterprises.
Installing WordPress on IONOS is simple and beginner-friendly. Using the Click and Build feature, you can set up WordPress easily. There is no need to edit files or manage databases manually. The entire process is automatic, making installation smooth and time-saving.
This tutorial will walk you through the process of installing WordPress on IONOS. You will learn to prepare your hosting account, install WordPress, and launch your site successfully. Whether you plan to build a blog, portfolio, or business website, IONOS makes everything simple and quick.
Upon completion, you will understand how to install WordPress on IONOS. You can then launch a fast, secure, and easy-to-manage website confidently. Start your journey today with IONOS and WordPress to go online with ease.
Get Ready Before Installing WordPress on IONOS
Prepare Before Installing WordPress on IONOS
Before you start the IONOS WordPress installation, prepare everything in advance. A few simple steps will save time and ensure a smooth setup. This preparation also helps prevent errors during installation. Let’s check what you need before starting the process.
Have an Active IONOS Hosting Plan
To install WordPress on IONOS, you must have an active hosting plan. IONOS offers hosting packages for beginners, bloggers, and small businesses. Each plan includes free SSL, storage, and a domain name. Select a plan based on your needs and financial constraints. Make sure your plan is active by logging in if you already have hosting. An active strategy is necessary for the installation to begin.
Register or Connect a Domain Name
Your domain name is the address of your website, such as yourbusiness.com. The first year of a domain is free with the majority of IONOS hosting packages. Connect your IONOS account to your existing device, if you have one. Select “Connect Domain” under Domains & SSL. Complete the process by following the easy instructions. Following installation, your website will go live once connected.
Access Your IONOS Account Credentials
Before setup, make sure you can log in to your IONOS account. To gain access, you will need your password and email address. If you forgot them, use the password recovery option. Installation goes more smoothly if you have your login information handy. When utilising the IONOS Click & Build tool, you will require them.
Check Domain and DNS Settings
If your domain is hosted somewhere else, check your DNS settings. Make sure they point to IONOS servers before installation. This step helps your site load correctly after setup. Wrong DNS records can delay launch or show “Site Not Found” errors. You can confirm DNS records with your registrar or IONOS support. Once verified, you can continue the installation confidently.
Choose Between Managed and Standard WordPress
IONOS offers two installation types — Managed and Standard WordPress. Managed WordPress is ideal for beginners as it updates automatically. It also includes backups and better security options. WordPress standard gives you more flexibility and control. For experienced users who want complete control over settings, it is ideal. Decide which one best suits your project objectives and skill set.
Prepare an Admin Email and Strong Password
Website security starts with a valid admin email and strong password. Use a real email address to get important notifications. Make a secure password with a combination of special symbols, numbers, and characters. To be safe, steer clear of basic or everyday terms. After installation, your website is protected by a strong password.
Ensure Stable Internet and Browser Access
A stable internet connection prevents installation errors and interruptions. For setup, use contemporary browsers like Chrome, Edge, or Firefox. Stay away from outdated browsers that may cause incompatibilities. A steady internet connection guarantees a smooth and speedy operation.
Optional: Back Up Any Existing Website Data
If your IONOS account already hosts a website, back it up first. This step prevents data loss during installation. You can use the IONOS Backup tool or download files through FTP. After backup, proceed safely with the new installation.
Install WordPress On IONOS Using Click & Build
With Click & Build, you can install web apps very easily. It lets you manage sites directly from your IONOS account. You can set up blogs, shops, or CMS platforms quickly. All tasks are done in your webspace with a few clicks. The new system adds automatic setup and HTTPS configuration. Your website is ready to use right after installation.
Set Up and Install WordPress on IONOS Hosting (Step By Step)
- Log in to your IONOS account.
- From the top bar, choose Menu → Websites & Stores.
- On the Websites & Stores overview page, click Create new website or store (typically found in the top right).
- On the “Create new project” screen, choose the tile for Popular open source solutions (or the CMS/shop system you prefer).
- The Click & Build Overview page opens, displaying a list of available applications.
- Locate the WordPress tile and click Install to begin the installation.
- Select Manage WordPress yourself when prompted.
- The Set up new web project page will appear.
- Enter a name for your project in the Project Name field, then click Create Project to continue.
- Enter a username and password to create your admin account. Click Next to continue.
- Choose the domain you want to connect to your WordPress site. Click Next
- If you don’t have a domain, use a temporary system domain. You can link your own domain later.
- Check your details, then click Install WordPress to start the setup.
After installation, you’ll see a new WordPress project tile in your IONOS account under the Websites & Stores section. This tile lets you manage and edit your new WordPress website easily. Click on the WordPress project tile to open your site settings. Next, select Edit Website to start customizing your design and content. Your admin area will be accessible after you are taken to the WordPress login page.
Enter the password and username you created during installation to log in. Once logged in, the WordPress Dashboard will appear. Plugins, themes, articles, and pages may all be managed from this location. Use the Dashboard menu to upload media, change your website layout, or install useful plugins. You can also update site settings and monitor performance directly from this area.
Don’t forget to upgrade your plugins and WordPress version. Regular updates improve security, speed, and overall website performance.
How to Launch Your Website After Installing WordPress on IONOS
The next step is to prepare your website for visitors. IONOS makes this process simple and easy for beginners. You can quickly turn your setup into a live website. Follow the steps below to make your site look professional. Your website will load fast and work well on all devices.
Preview Your Website


After you install WordPress on IONOS, always start by previewing your website. This aids in locating any style or design problems prior to the launch of your website. Check whether all pages, menus, and links are working properly. Verify the text’s alignment and the way the photos display. IONOS offers a simple and safe way to preview your website before going live. You may correct any problems you find right from the WordPress dashboard.
Choose and Activate a Theme
Your website’s theme dictates its appearance and feel. Go to Appearance → Themes → Add New in your WordPress dashboard. Browse through the available free and premium themes. Choose a mobile-friendly option that aligns with your business style. Click Install and then Activate to apply it. Most themes allow you to customize colors, fonts, and layouts without coding. A simple, contemporary layout not only draws users in but also enhances their perusing experience.
Install Important Plugins
Plugins improve the performance and usability of your website. After completing the ionos install wordpress process, go to Plugins → Add New in your dashboard. Search for essential plugins such as Yoast SEO for better search rankings. WP Super Cache for faster loading. Wordfence Security for protection against malware. Elementor for easy drag-and-drop page building. A site that has too many plugins installed may become sluggish. IONOS supports thousands of secure WordPress plugins that integrate perfectly with your hosting environment.
Create Essential Pages
Verify that you have created the essential pages that every website needs before publishing it. These include a Home page to introduce your brand. An About page to share your story. A Services or Products page to describe your offerings, and a Contact page so visitors can reach you. To create a page, go to Pages → Add New in your WordPress dashboard, add your content, and click Publish. Keep your content short, clear, and engaging. Add images and contact details where relevant, and don’t forget to include a Privacy Policy and Terms page if your site collects user data.
Activate SSL Security
One of the most crucial aspects of website management is security. IONOS provides a free SSL certificate with most hosting plans, which keeps your site and visitors safe. To activate SSL, log in to your IONOS account, open the domain settings, and enable the SSL option. Once it’s active, your site will use https:// instead of http://, and visitors will see a padlock icon in the browser. An SSL-secured site looks more trustworthy and also ranks higher on Google. Make sure your SSL is properly configured before launching your site.
Optimize for Speed and Mobile Devices
A speedy website enhances user experience and aids in search engine optimisation. IONOS already provides solid performance with SSD storage and optimized servers, but you can make it even better. Use caching plugins like WP Super Cache or W3 Total Cache to improve speed. Compress large images before uploading them, and avoid using too many heavy scripts or animations. Always test your site using Google PageSpeed Insights to identify performance issues. Additionally, since more than 60% of users read on mobile devices, make sure your website appears good on these screens. Fast loading times and responsive design significantly impact engagement and conversions.
Review SEO Settings
Before launching, take a few minutes to check your SEO settings. Go to Settings → General in WordPress and update your site title and tagline to include relevant keywords. Then visit Settings → Permalinks and choose the Post Name structure for clean URLs. Install and set up Yoast SEO to add meta titles and descriptions for your pages. You can also connect your website to Google Search Console to monitor search performance and index your pages faster. IONOS supports easy integration with popular SEO tools, helping your site gain visibility on Google.
Publish and Go Live
When your website is prepared, you can formally launch it. Click Publish in WordPress to make your website live for everyone to see. IONOS automatically connects your domain with your hosting plan, so your site will go live within minutes. Visit your domain in the browser to confirm it’s loading properly. If it doesn’t appear immediately, allow a few hours for domain propagation. Once your website is operational, promote it using email newsletters, company directories, and social media. Congratulations — you’ve successfully completed your install wordpress ionos setup and launched your website.
Conclusion
The last step in setting up your IONOS is now complete. You have a functioning website that can easily expand online. You learned how to install WordPress on IONOS in simple steps. You also customized your theme, added security, and improved your site’s visibility.
IONOS gives you fast speed, strong uptime, and reliable customer support always. Keep your website updated to stay safe and maintain smooth performance. Add new content often to engage your visitors and build more trust. Optimize for speed and SEO to reach more people online.
Now you can confidently build, protect, and grow your website with IONOS and WordPress.