Introduction
Installing WordPress on Bluehost WP Hosting is a straightforward and efficient process that can get your website up and running quickly. Bluehost offers one-click WordPress integration, making it the ideal platform for both beginners and experienced users. Whether you’re launching a personal blog, a business portfolio, or an e-commerce store, WordPress provides the flexibility to customize your site to meet your needs. Bluehost’s user-friendly dashboard and seamless setup process ensure that you can get started without any hassle. In this guide, we’ll walk you through the steps of installing WordPress on Bluehost, configuring your website, and publishing it for the world to see. With the right setup, your WordPress site can be live in no time.
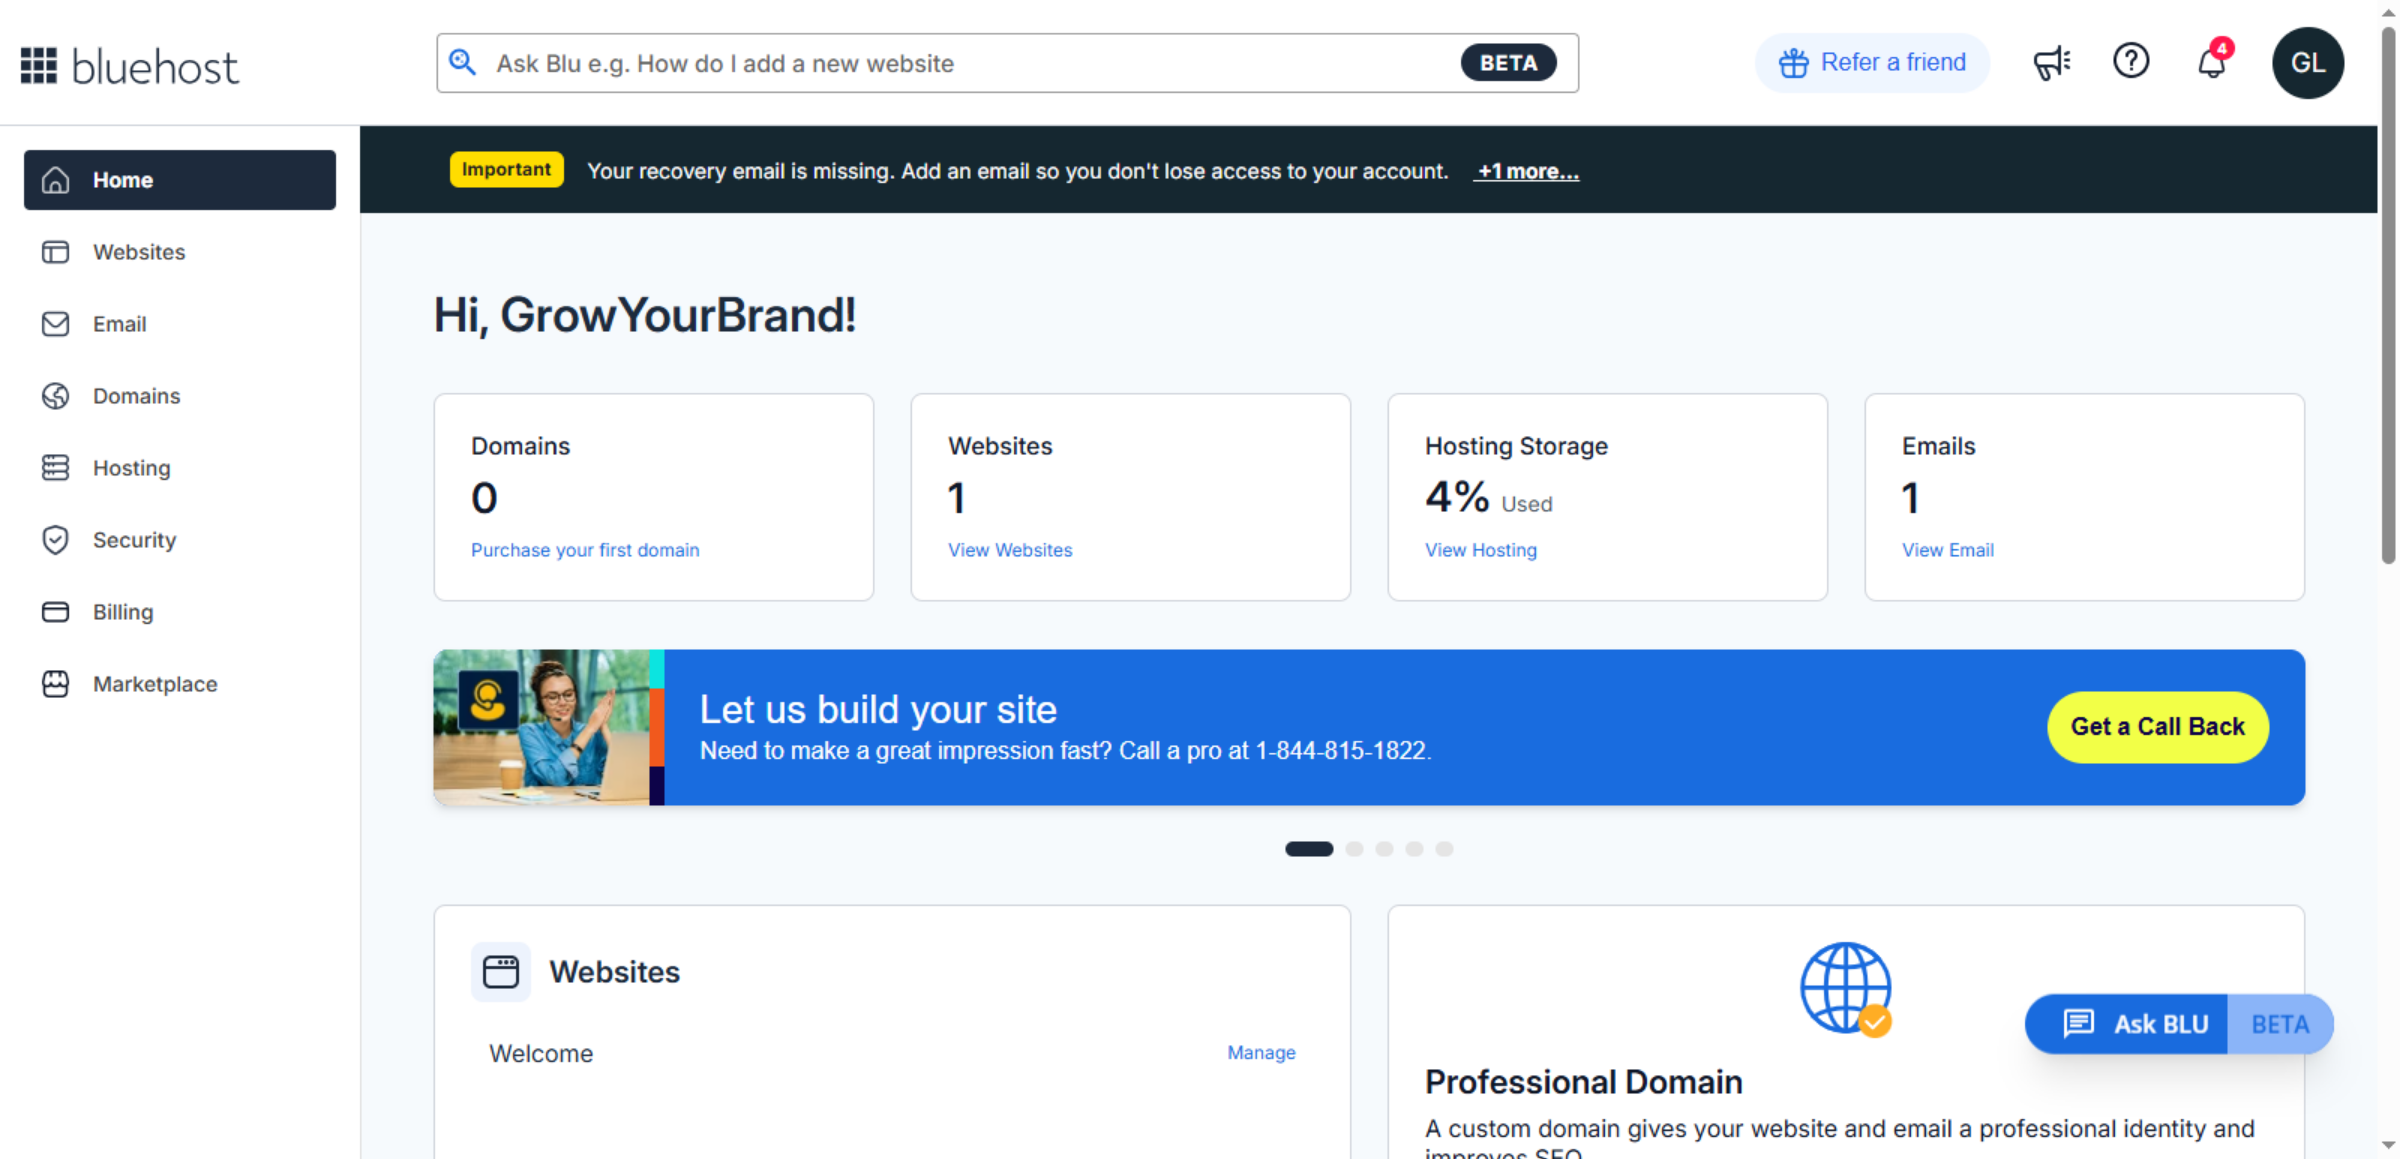
1. Access the Bluehost Hosting Dashboard
This is the main dashboard of Bluehost, where you manage websites, domains, emails, and hosting services. From here, you can start installing WordPress.
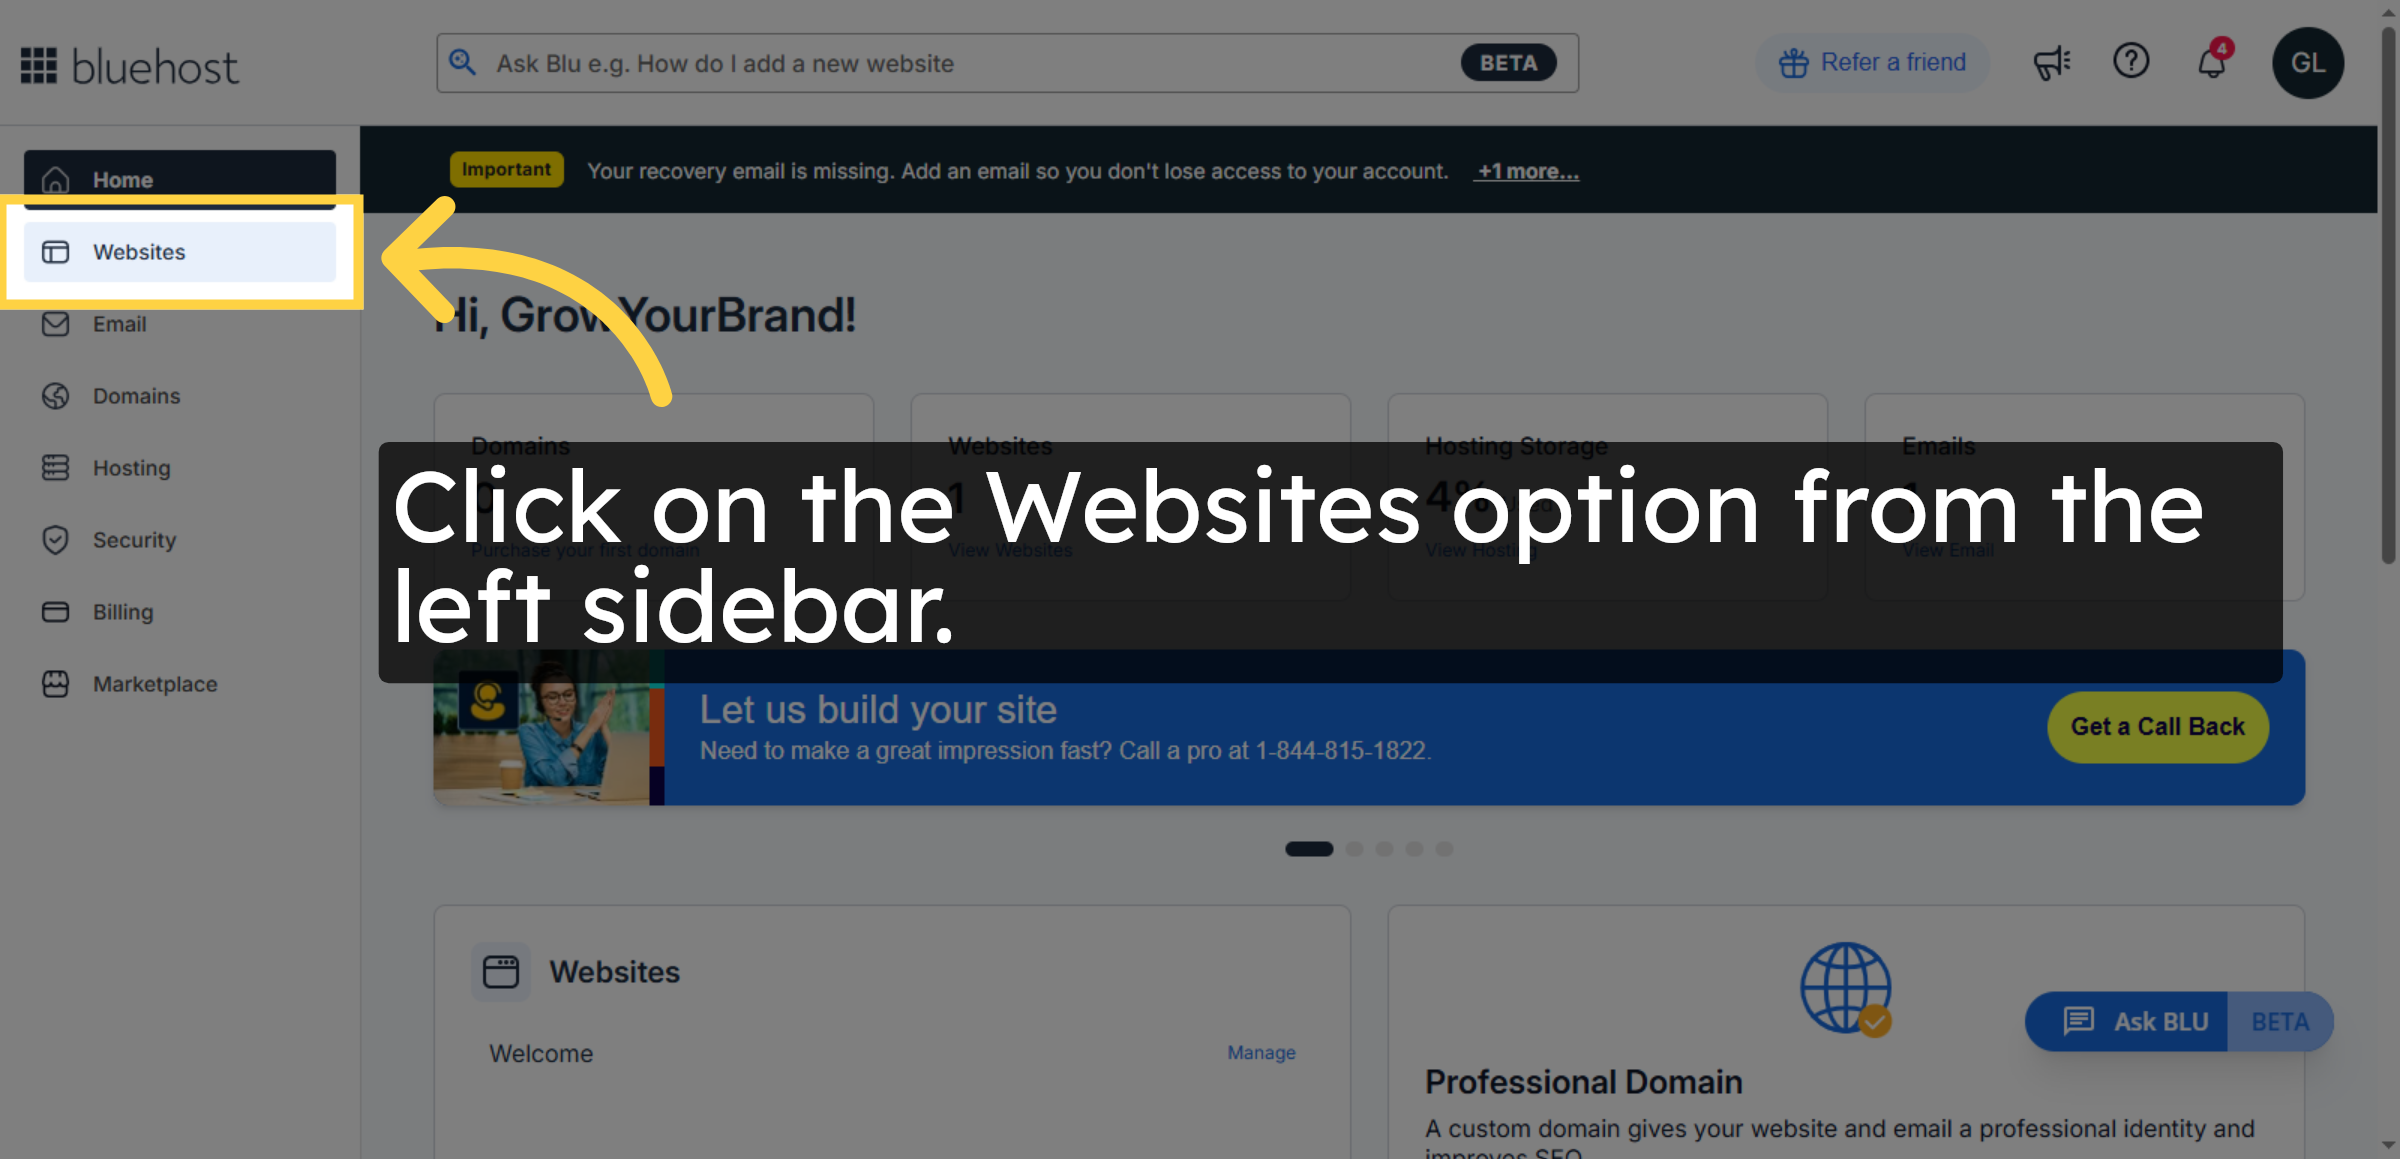
2. Navigate to the Websites Section
The Websites section in the Bluehost dashboard allows you to manage existing websites and initiate the WordPress installation process for a new site.
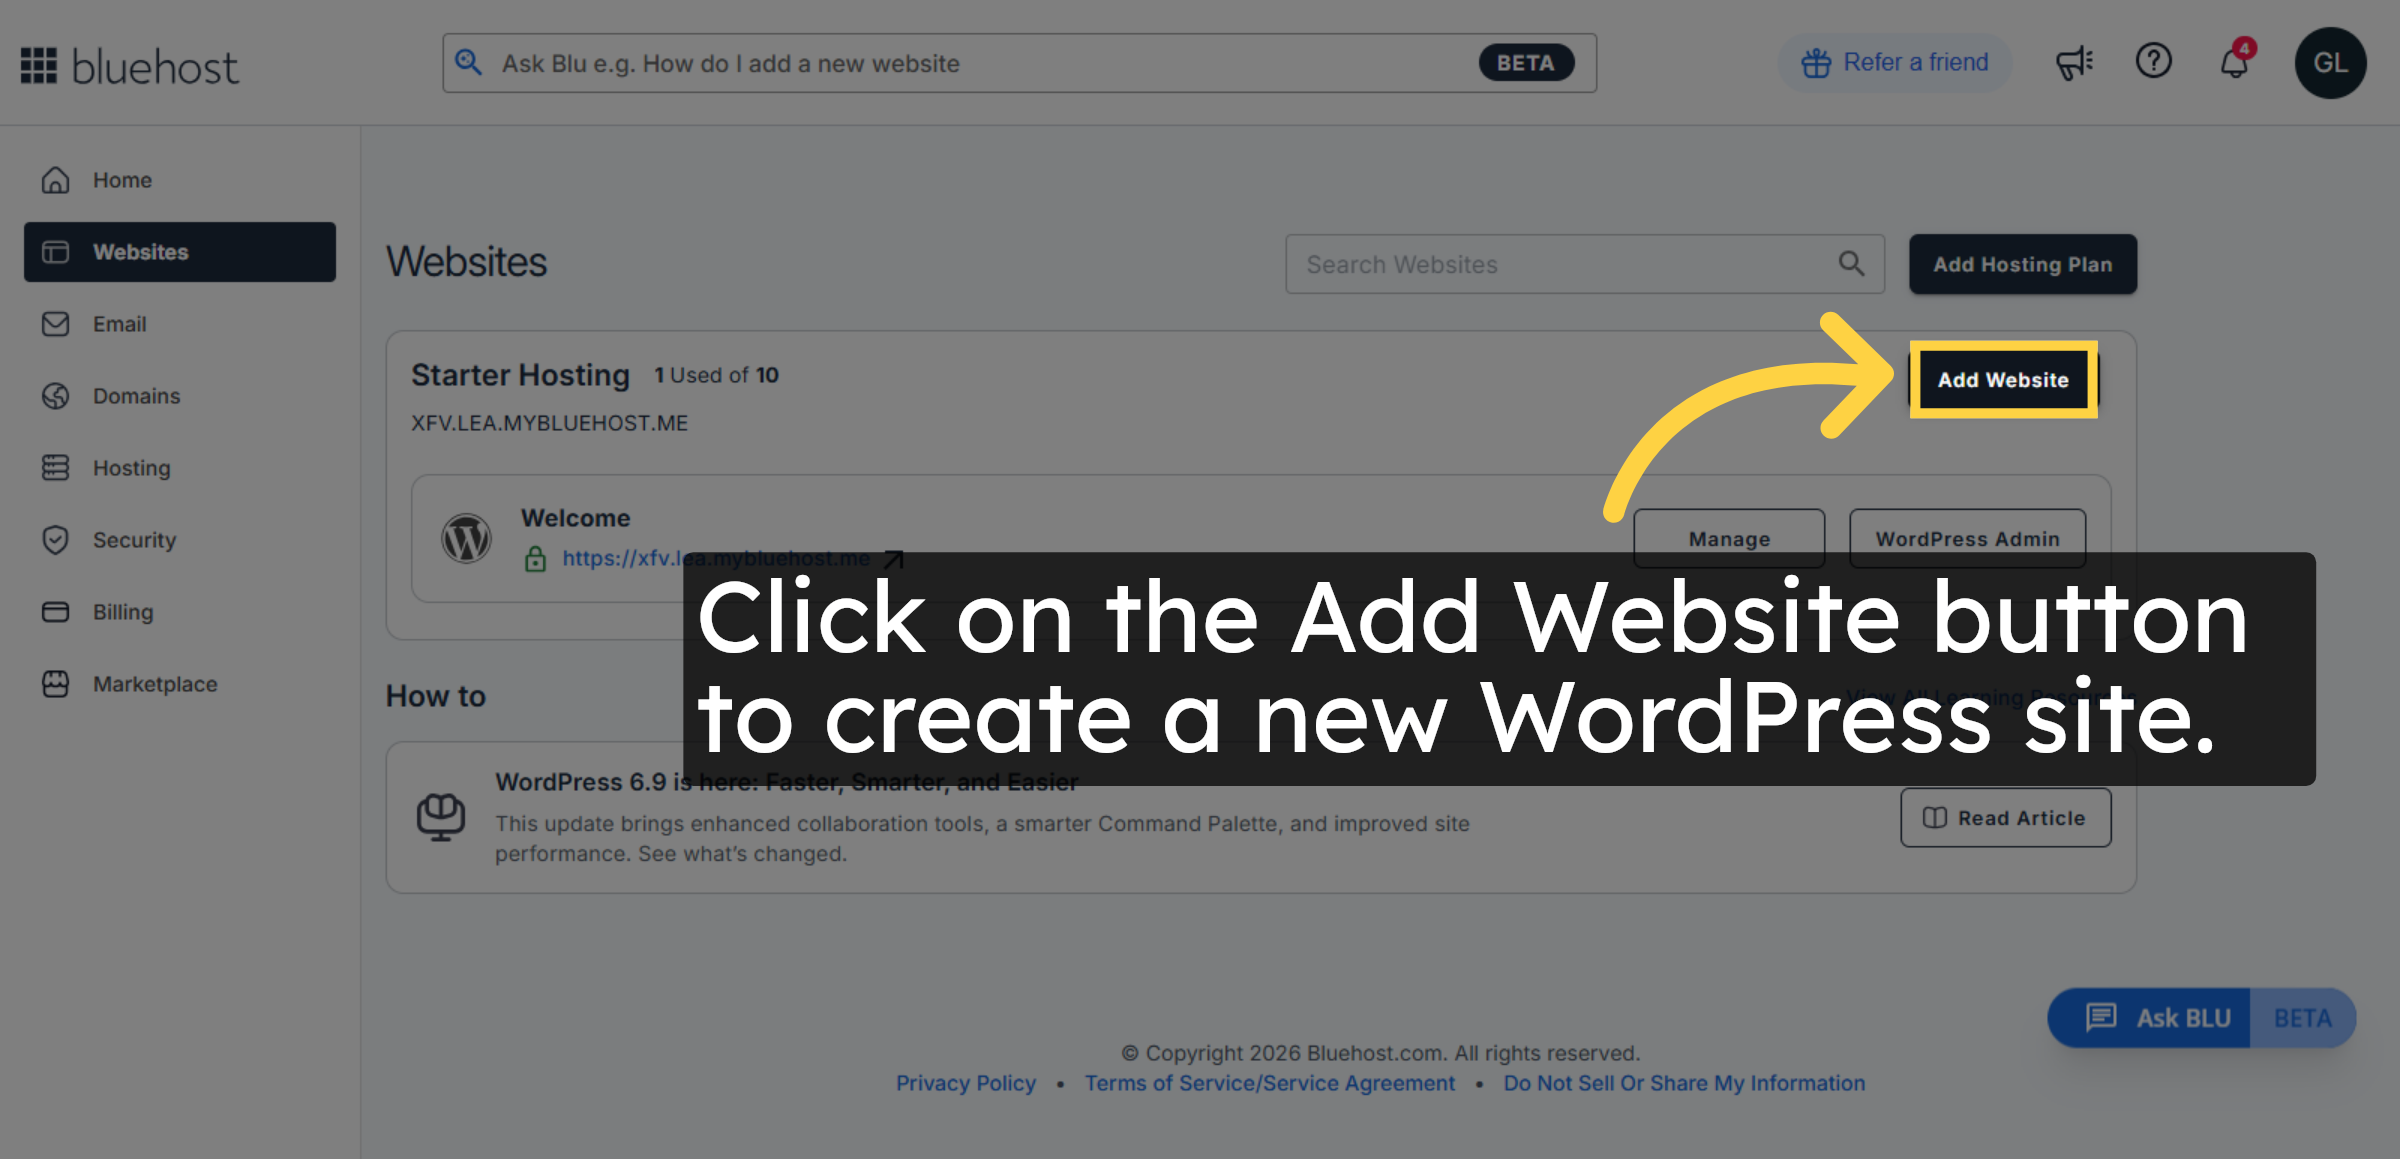
3. Add a New Website
This screen allows you to create a new website on Bluehost. Clicking Add Website starts the WordPress installation process.
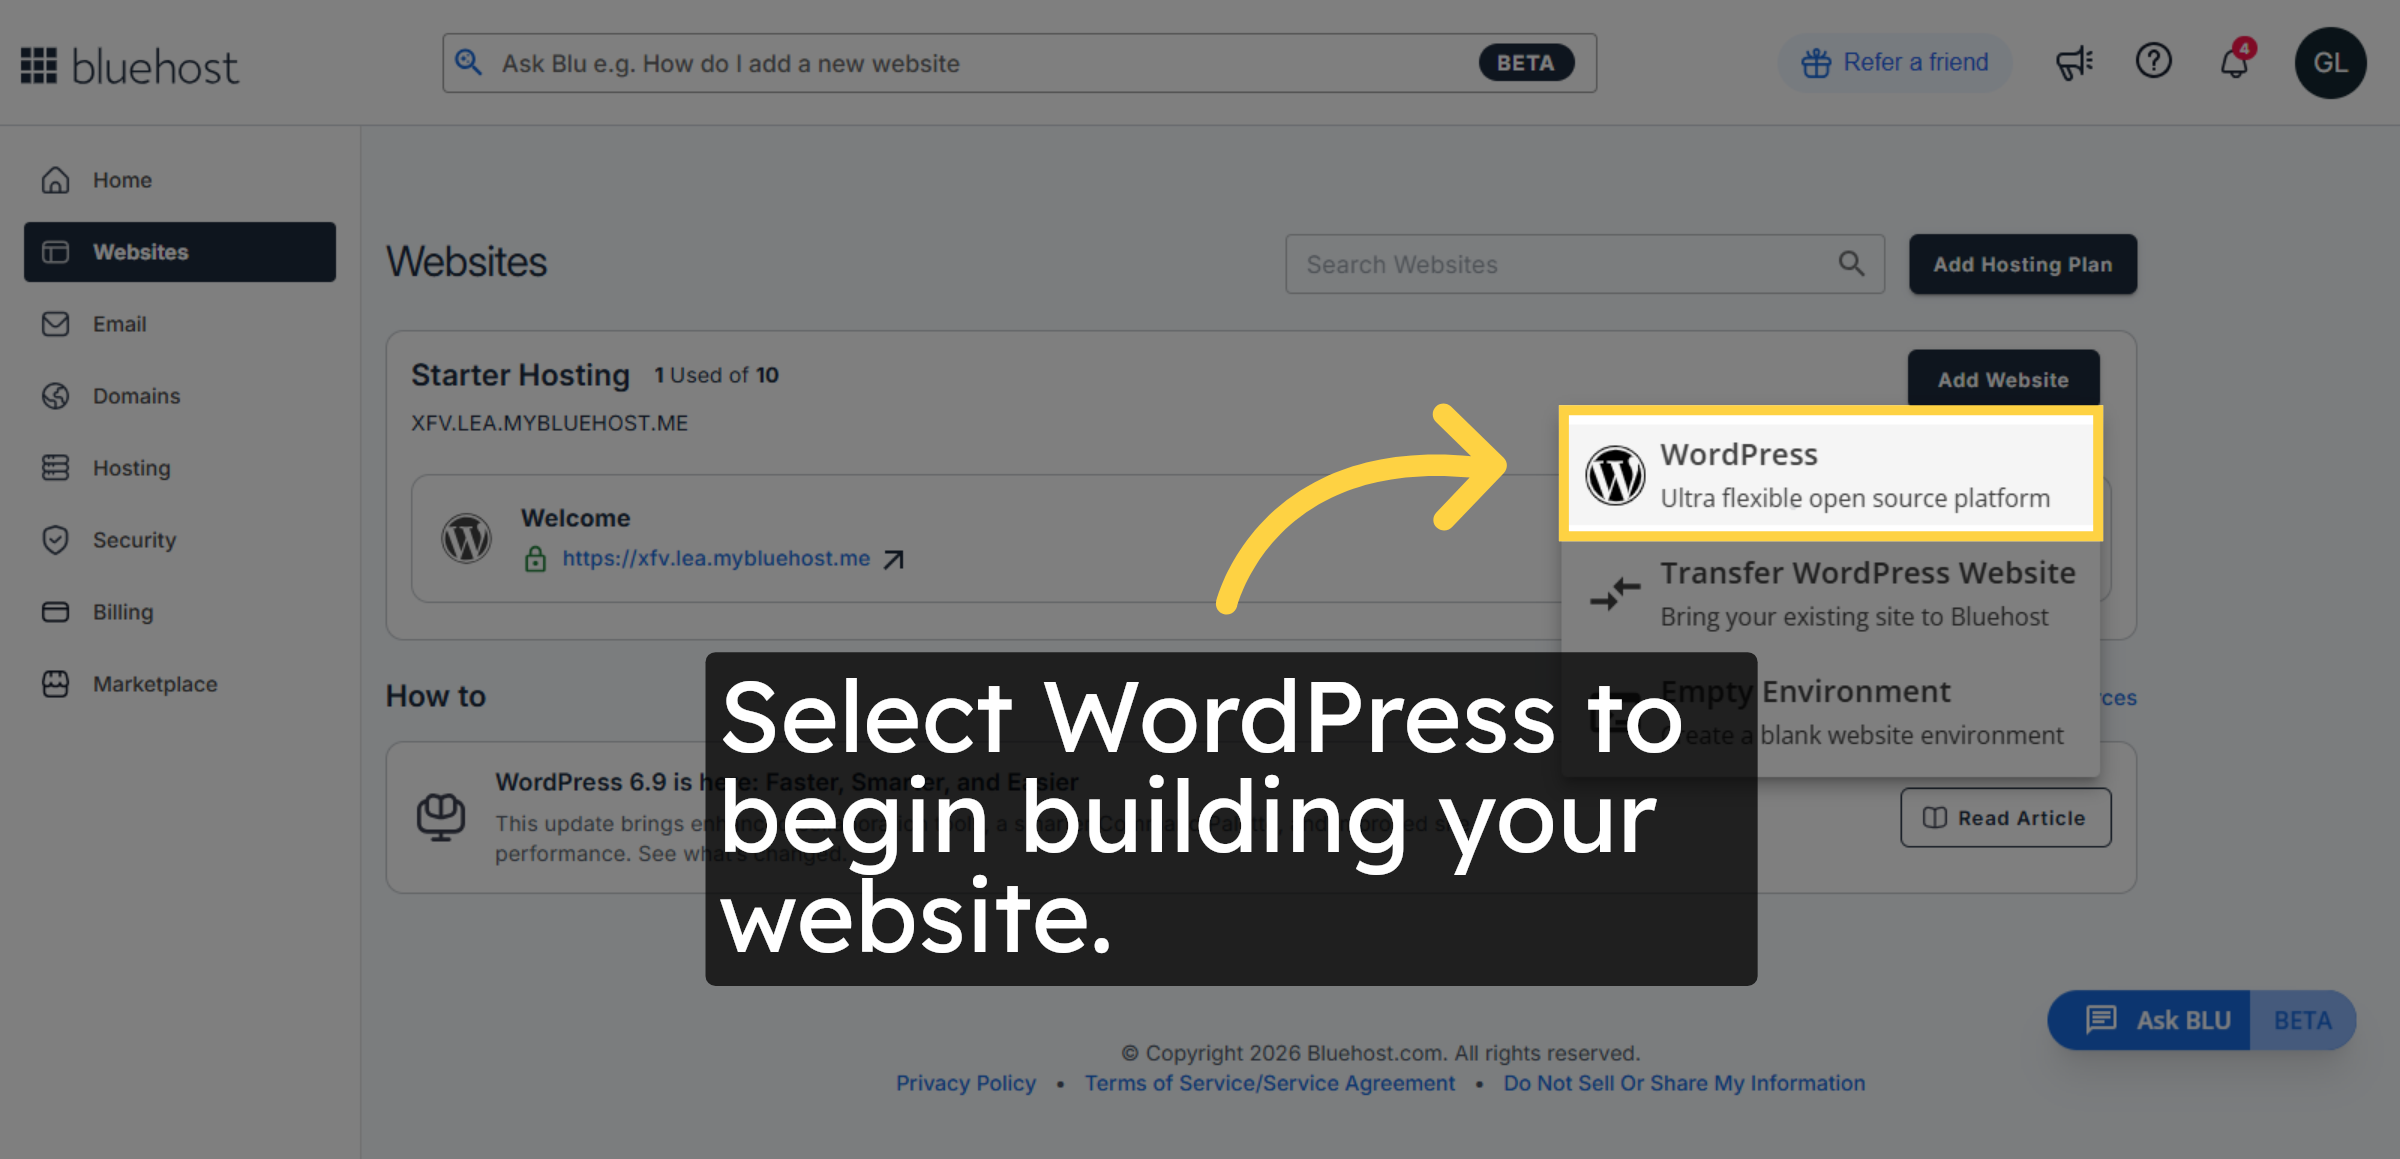
4. Select WordPress Platform
WordPress is a powerful, open-source content management system. Bluehost offers built-in WordPress integration for quick and secure website setup.
5. Installing WordPress
Switch to the hosting application to continue the WordPress installation process.

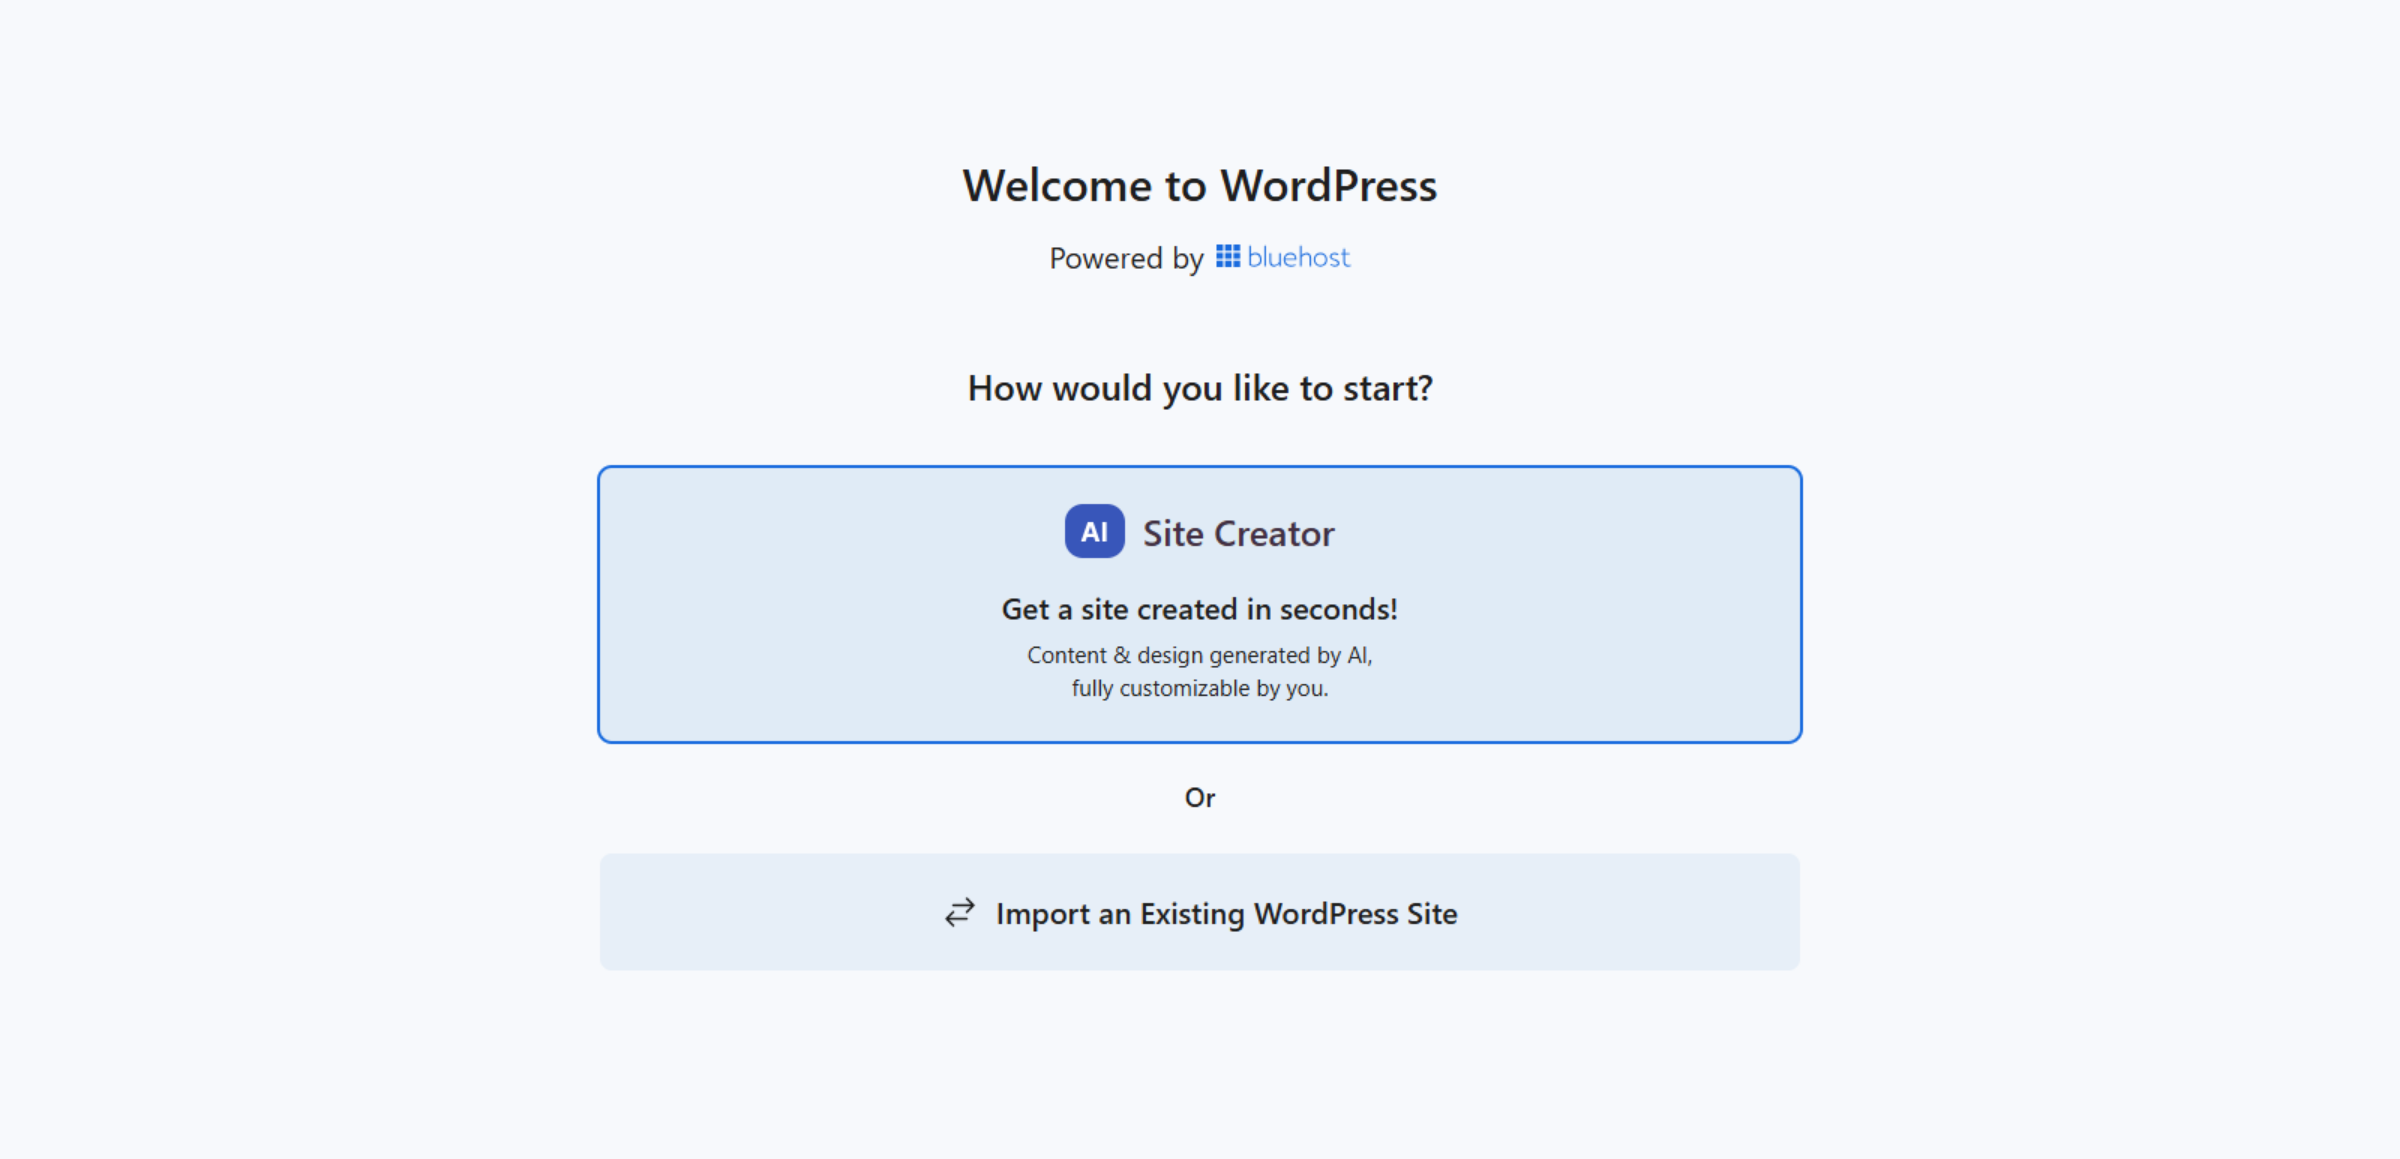
6. Choose AI Site Creator
Switch to the WordPress onboarding screen to configure your new site.
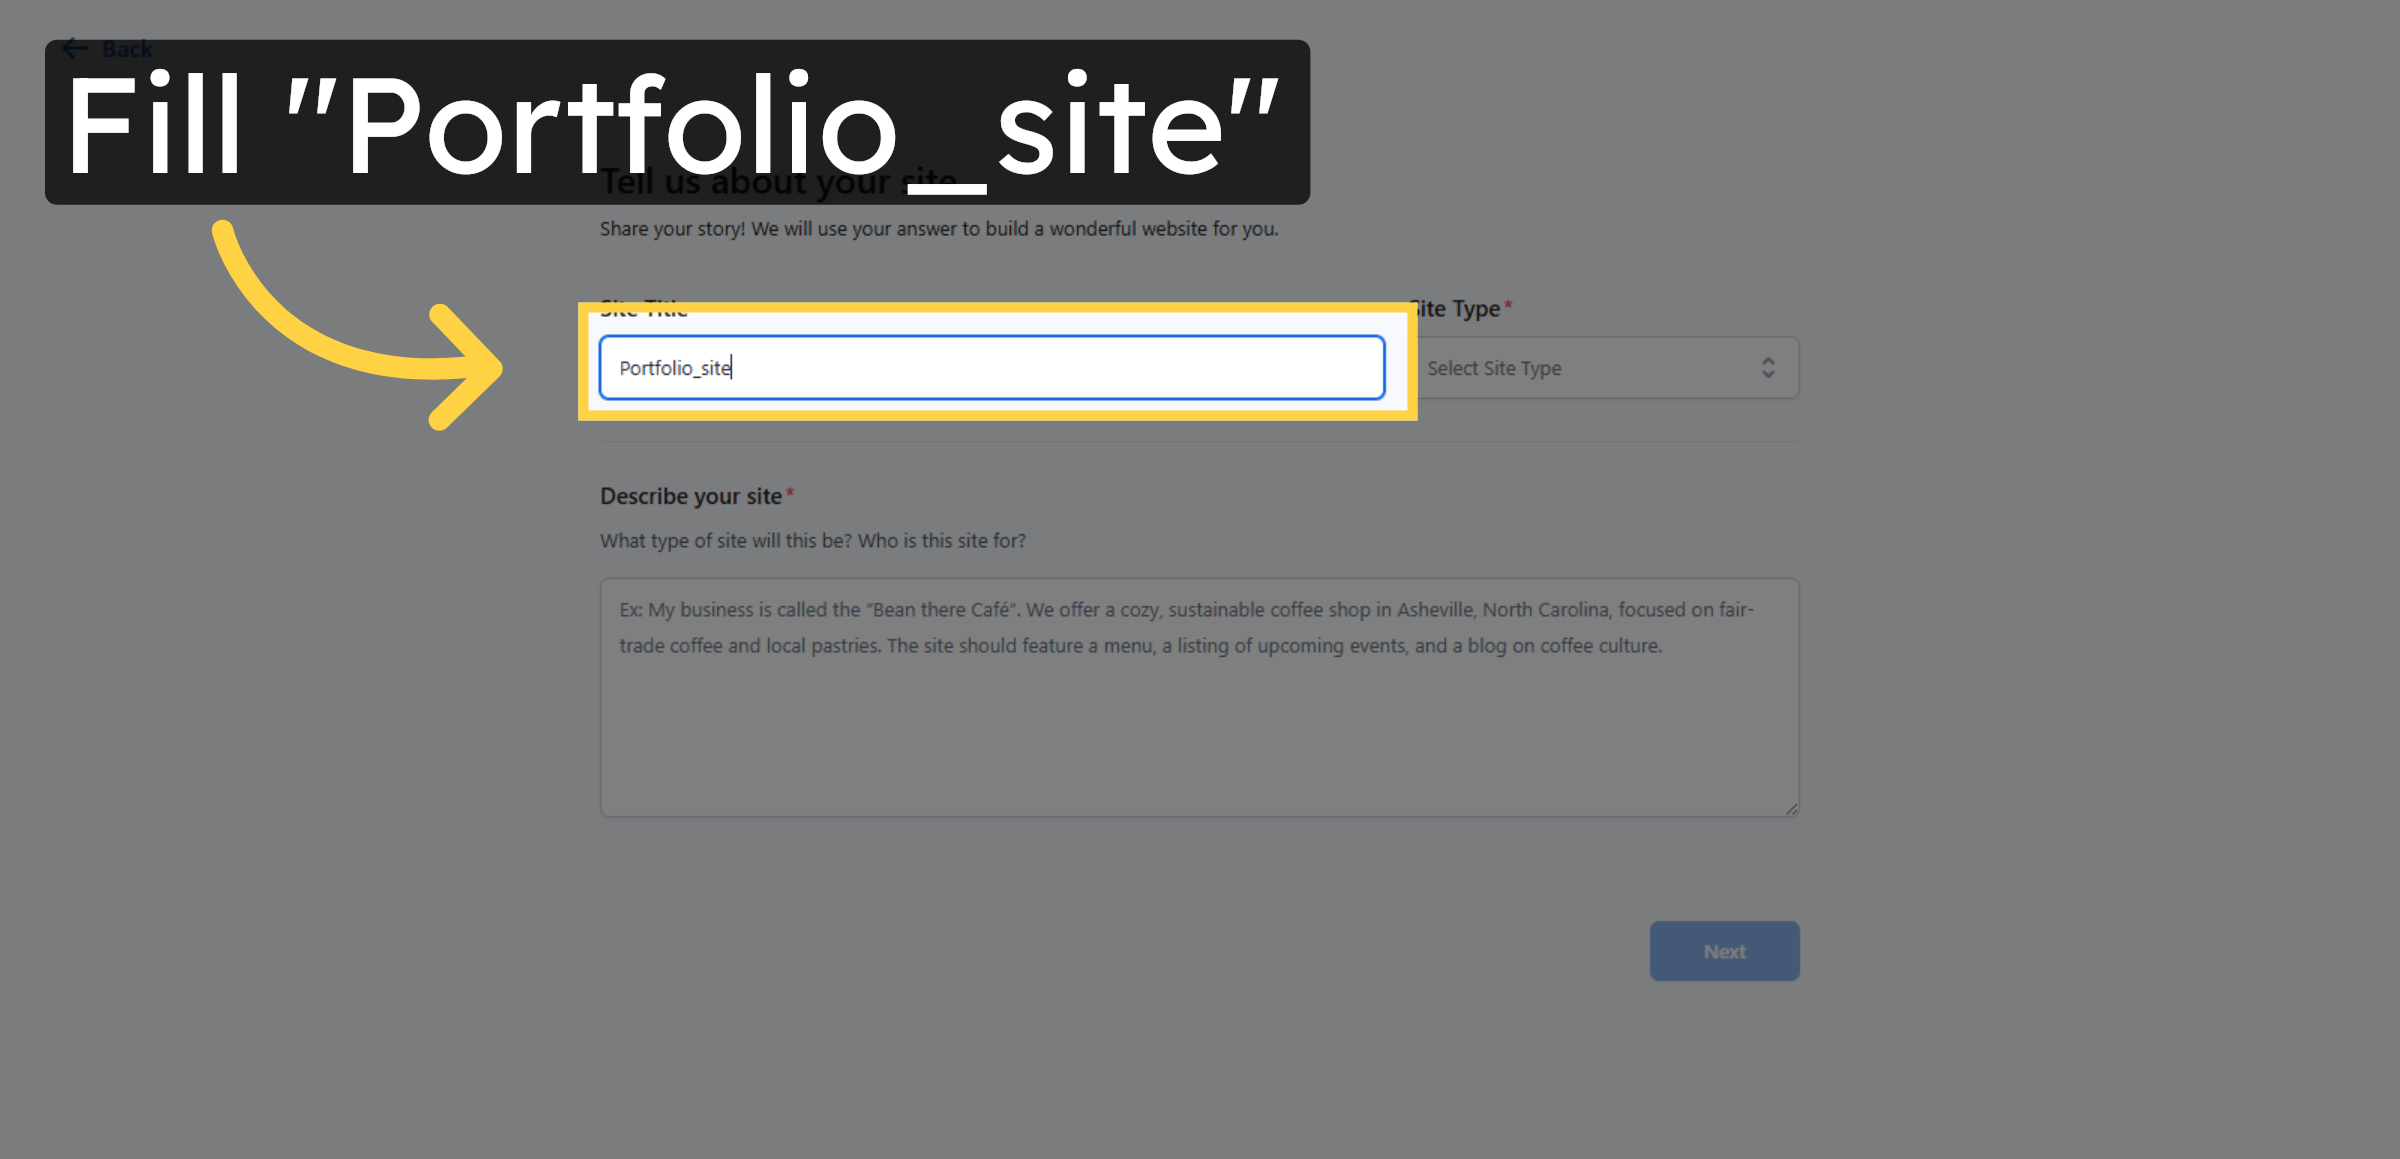
7. Enter Site Title
Enter your site title to identify your website, such as Portfolio_site.
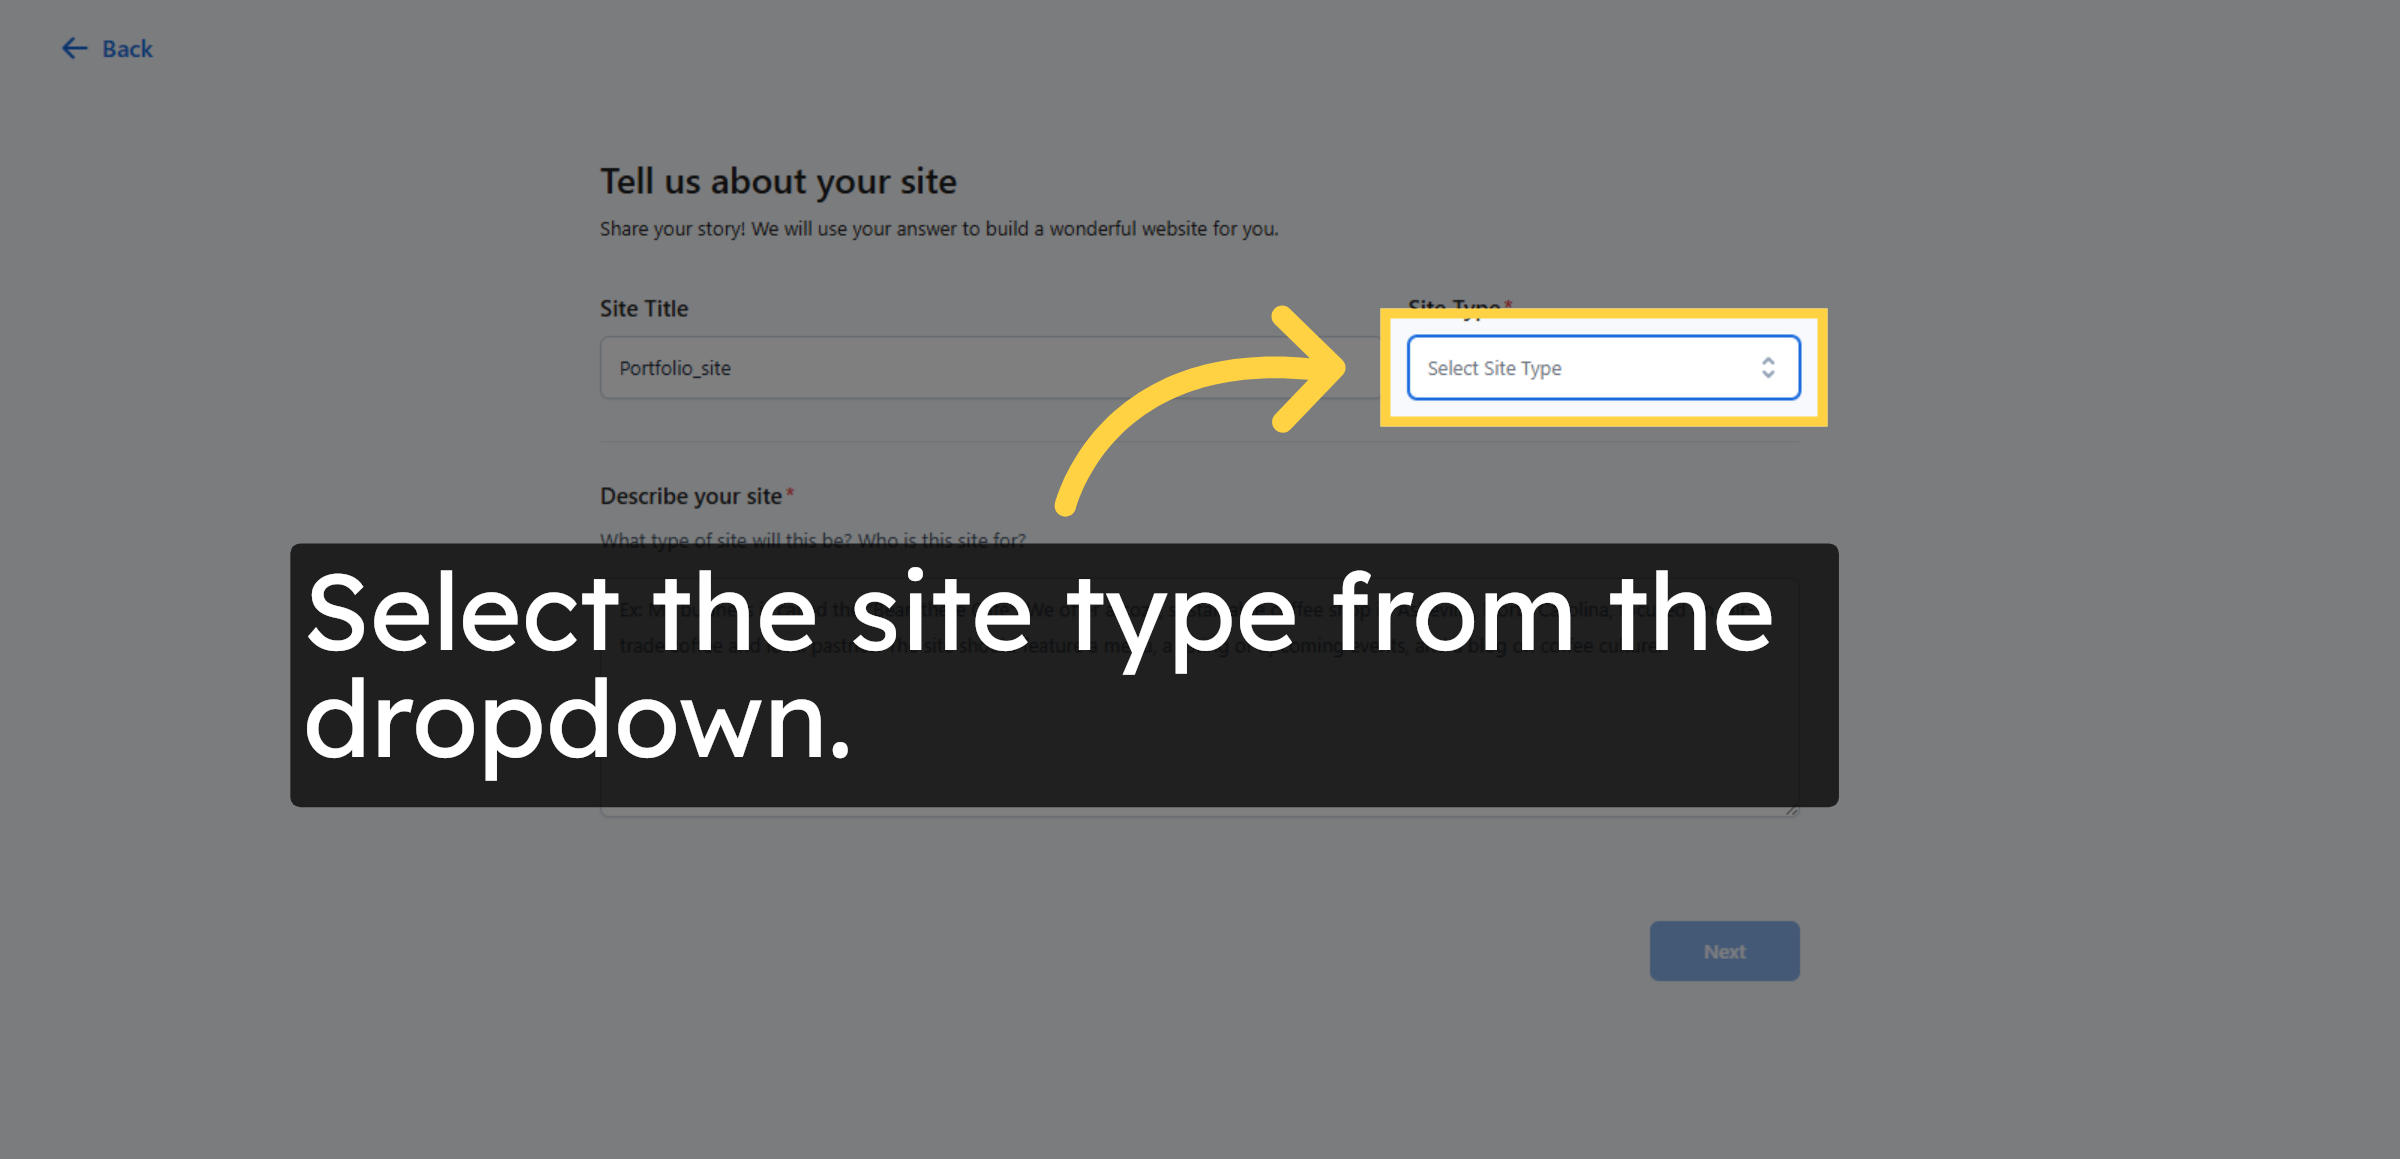
8. Select Site Type
Selecting the site type helps WordPress configure the website layout and features based on your needs.
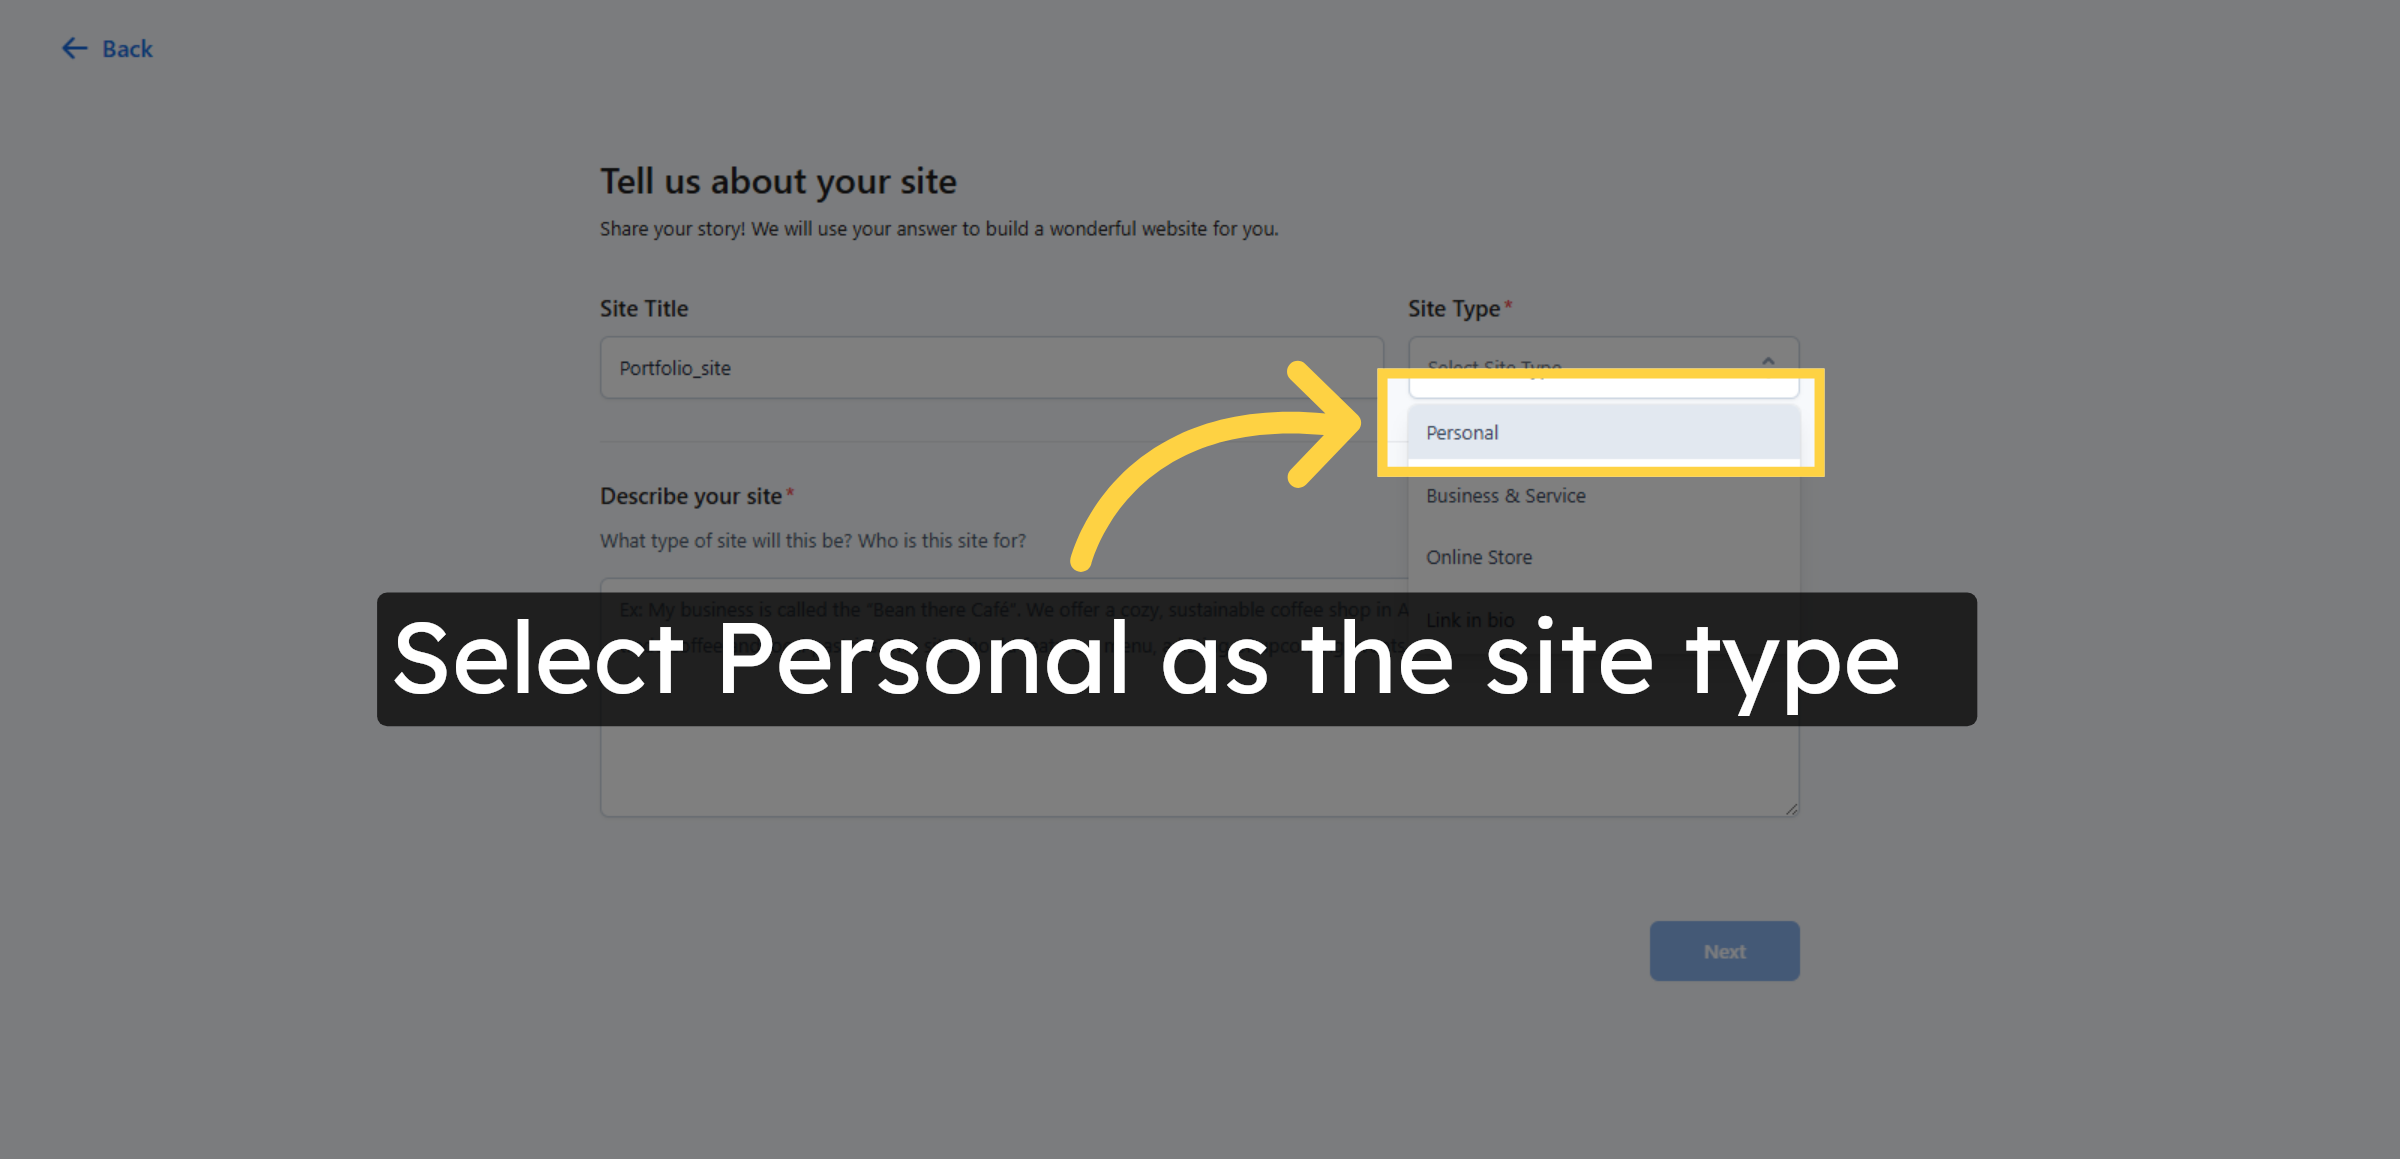
9. Choose Personal Site Type
Selecting Personal configures the website for individual use, such as a portfolio, resume, or personal brand site.
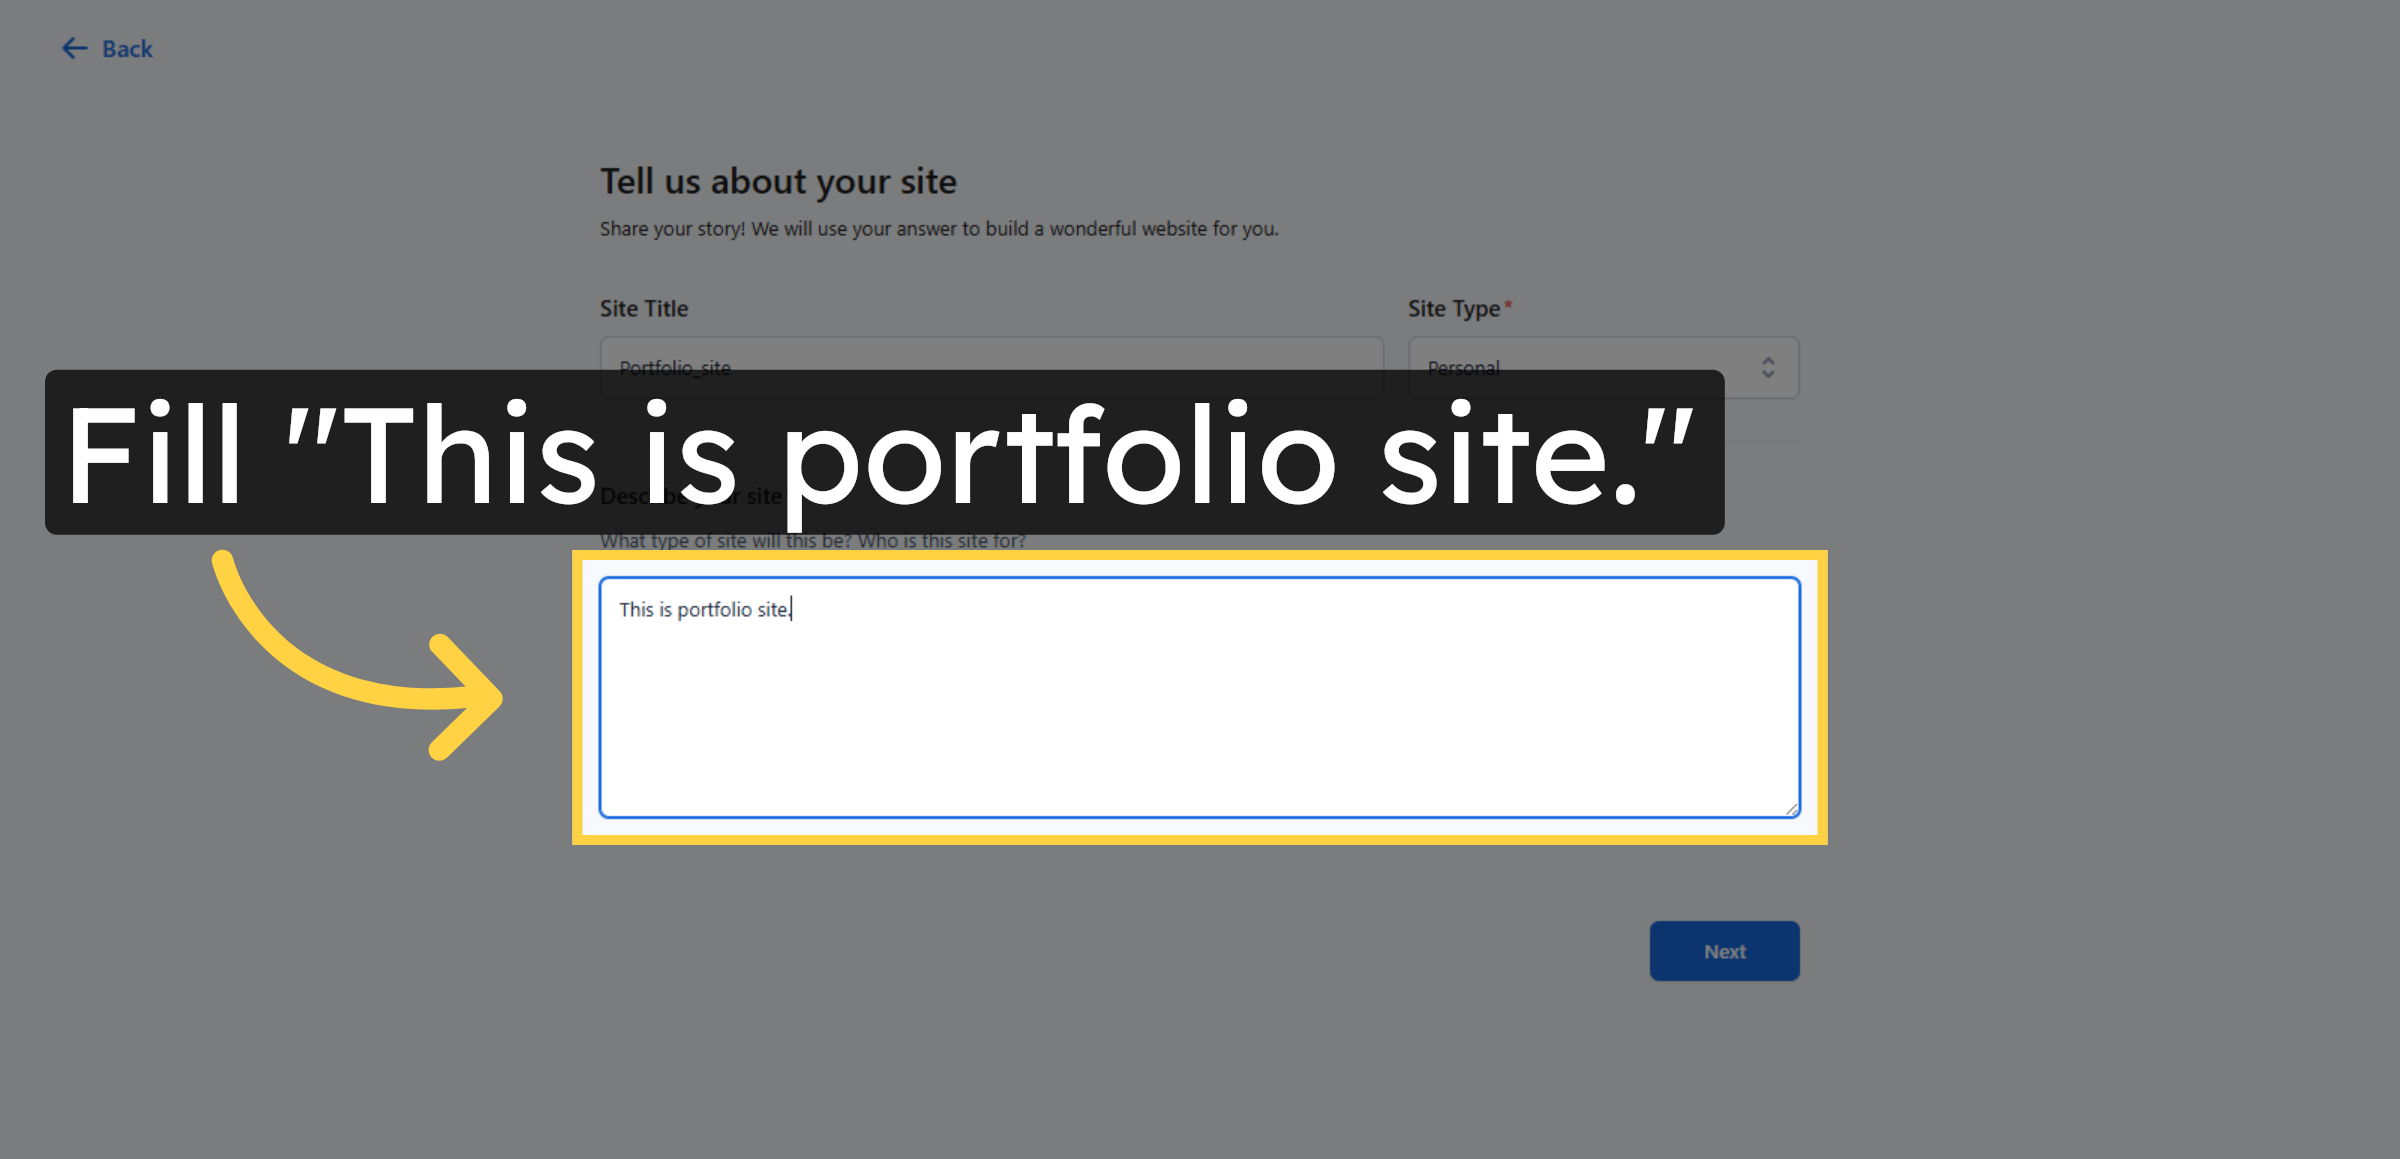
10. Enter Website Description
This field helps WordPress understand the purpose of your website and tailor the initial layout and content accordingly.
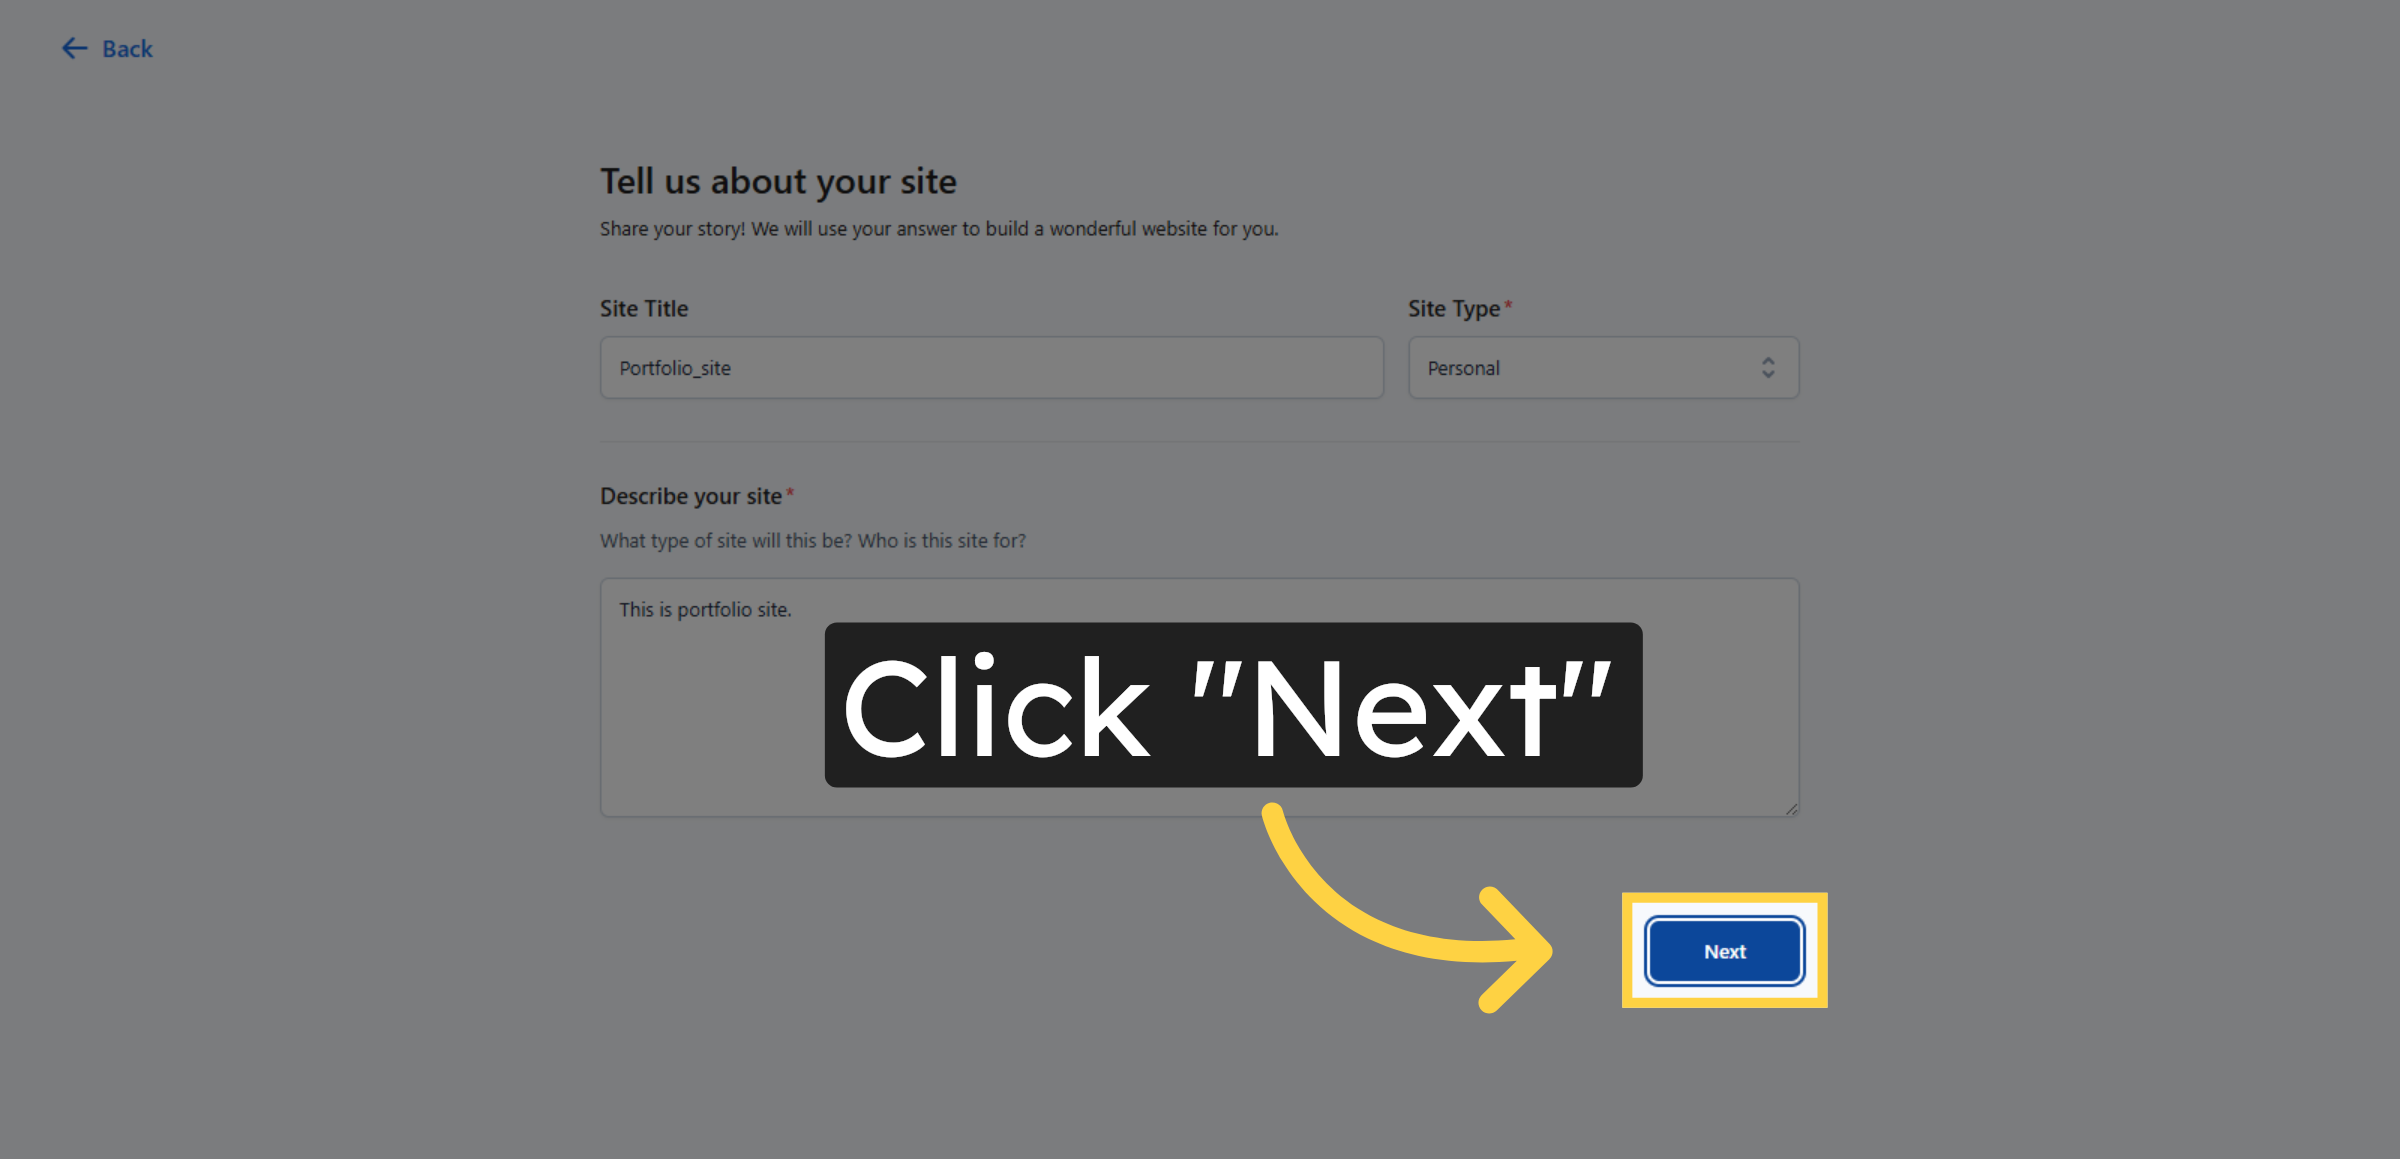
11. Proceed to Next Step
Click the Next button to continue with the WordPress setup process.
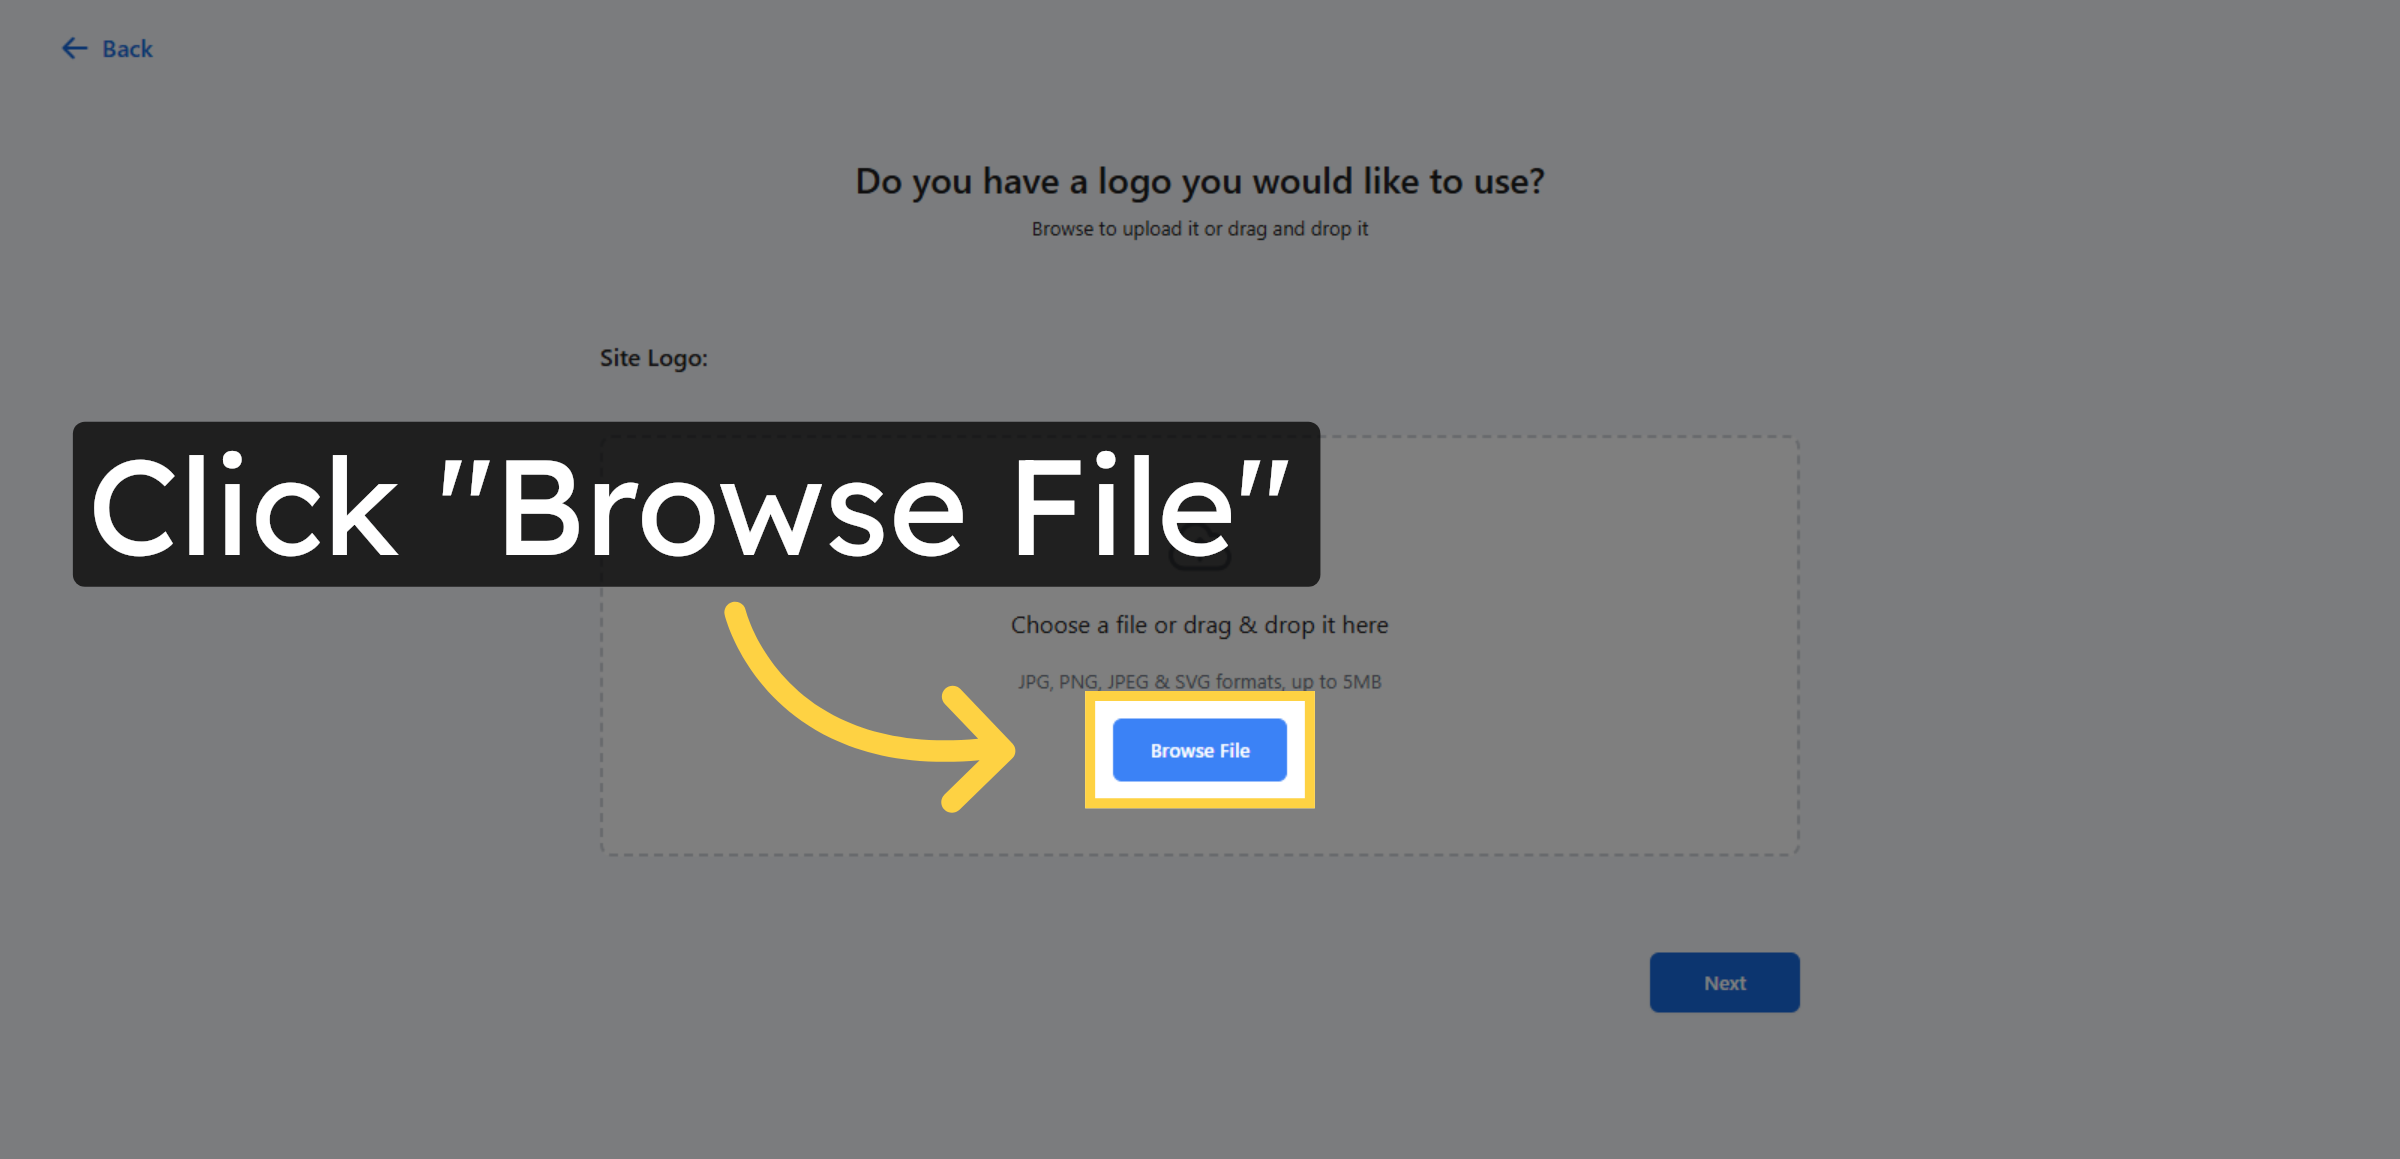
12. Upload Site Logo
Uploading a logo helps personalize your website and establish a clear visual identity from the start.
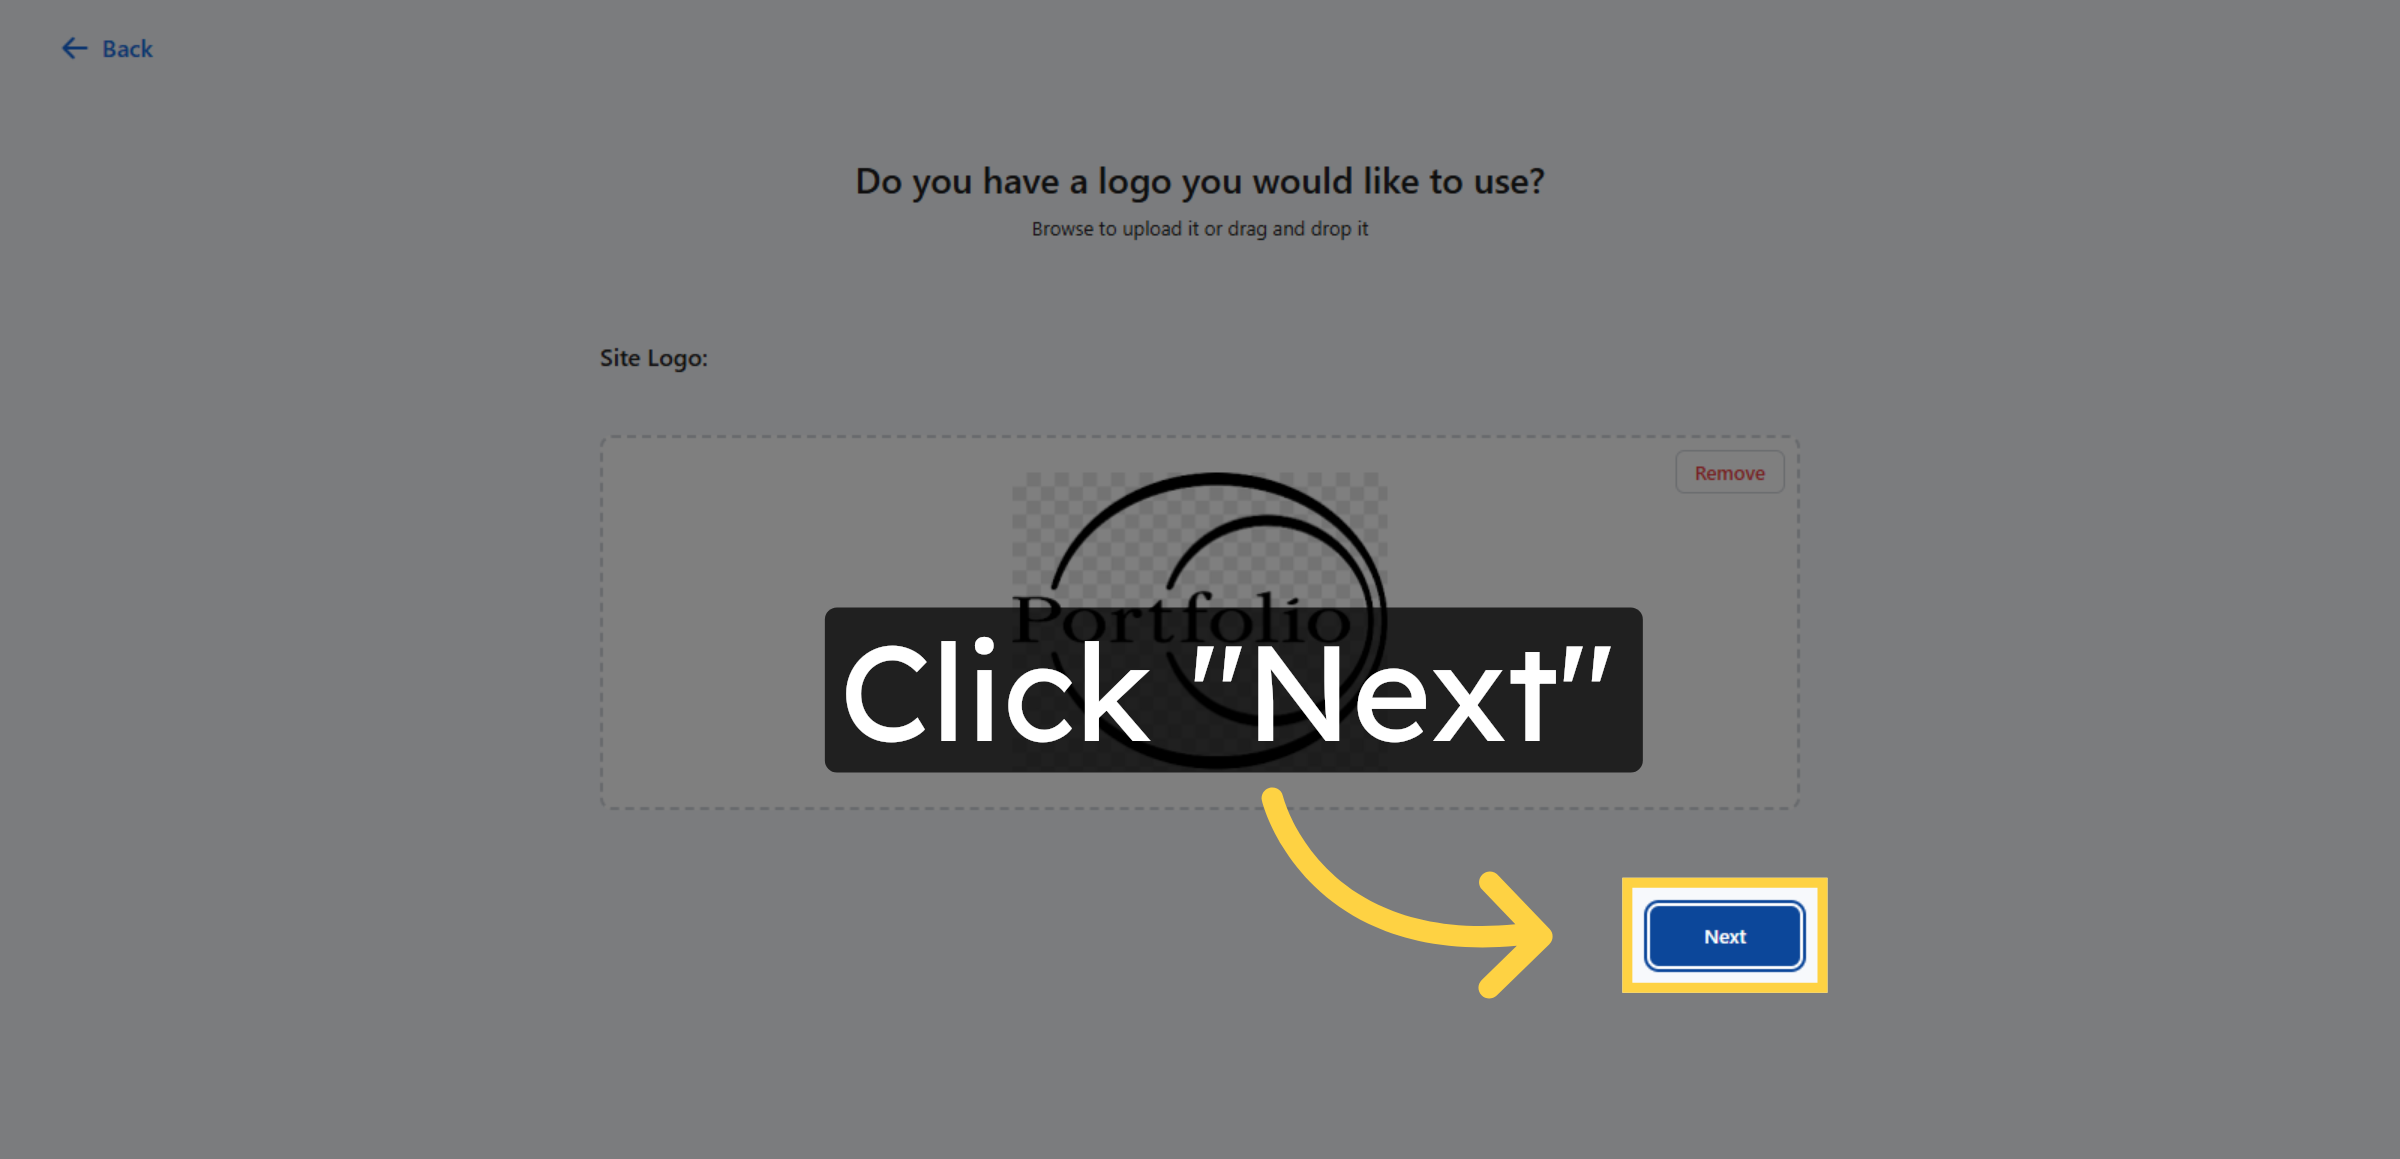
13. Continue Setup
Click Next to proceed after uploading your site logo.
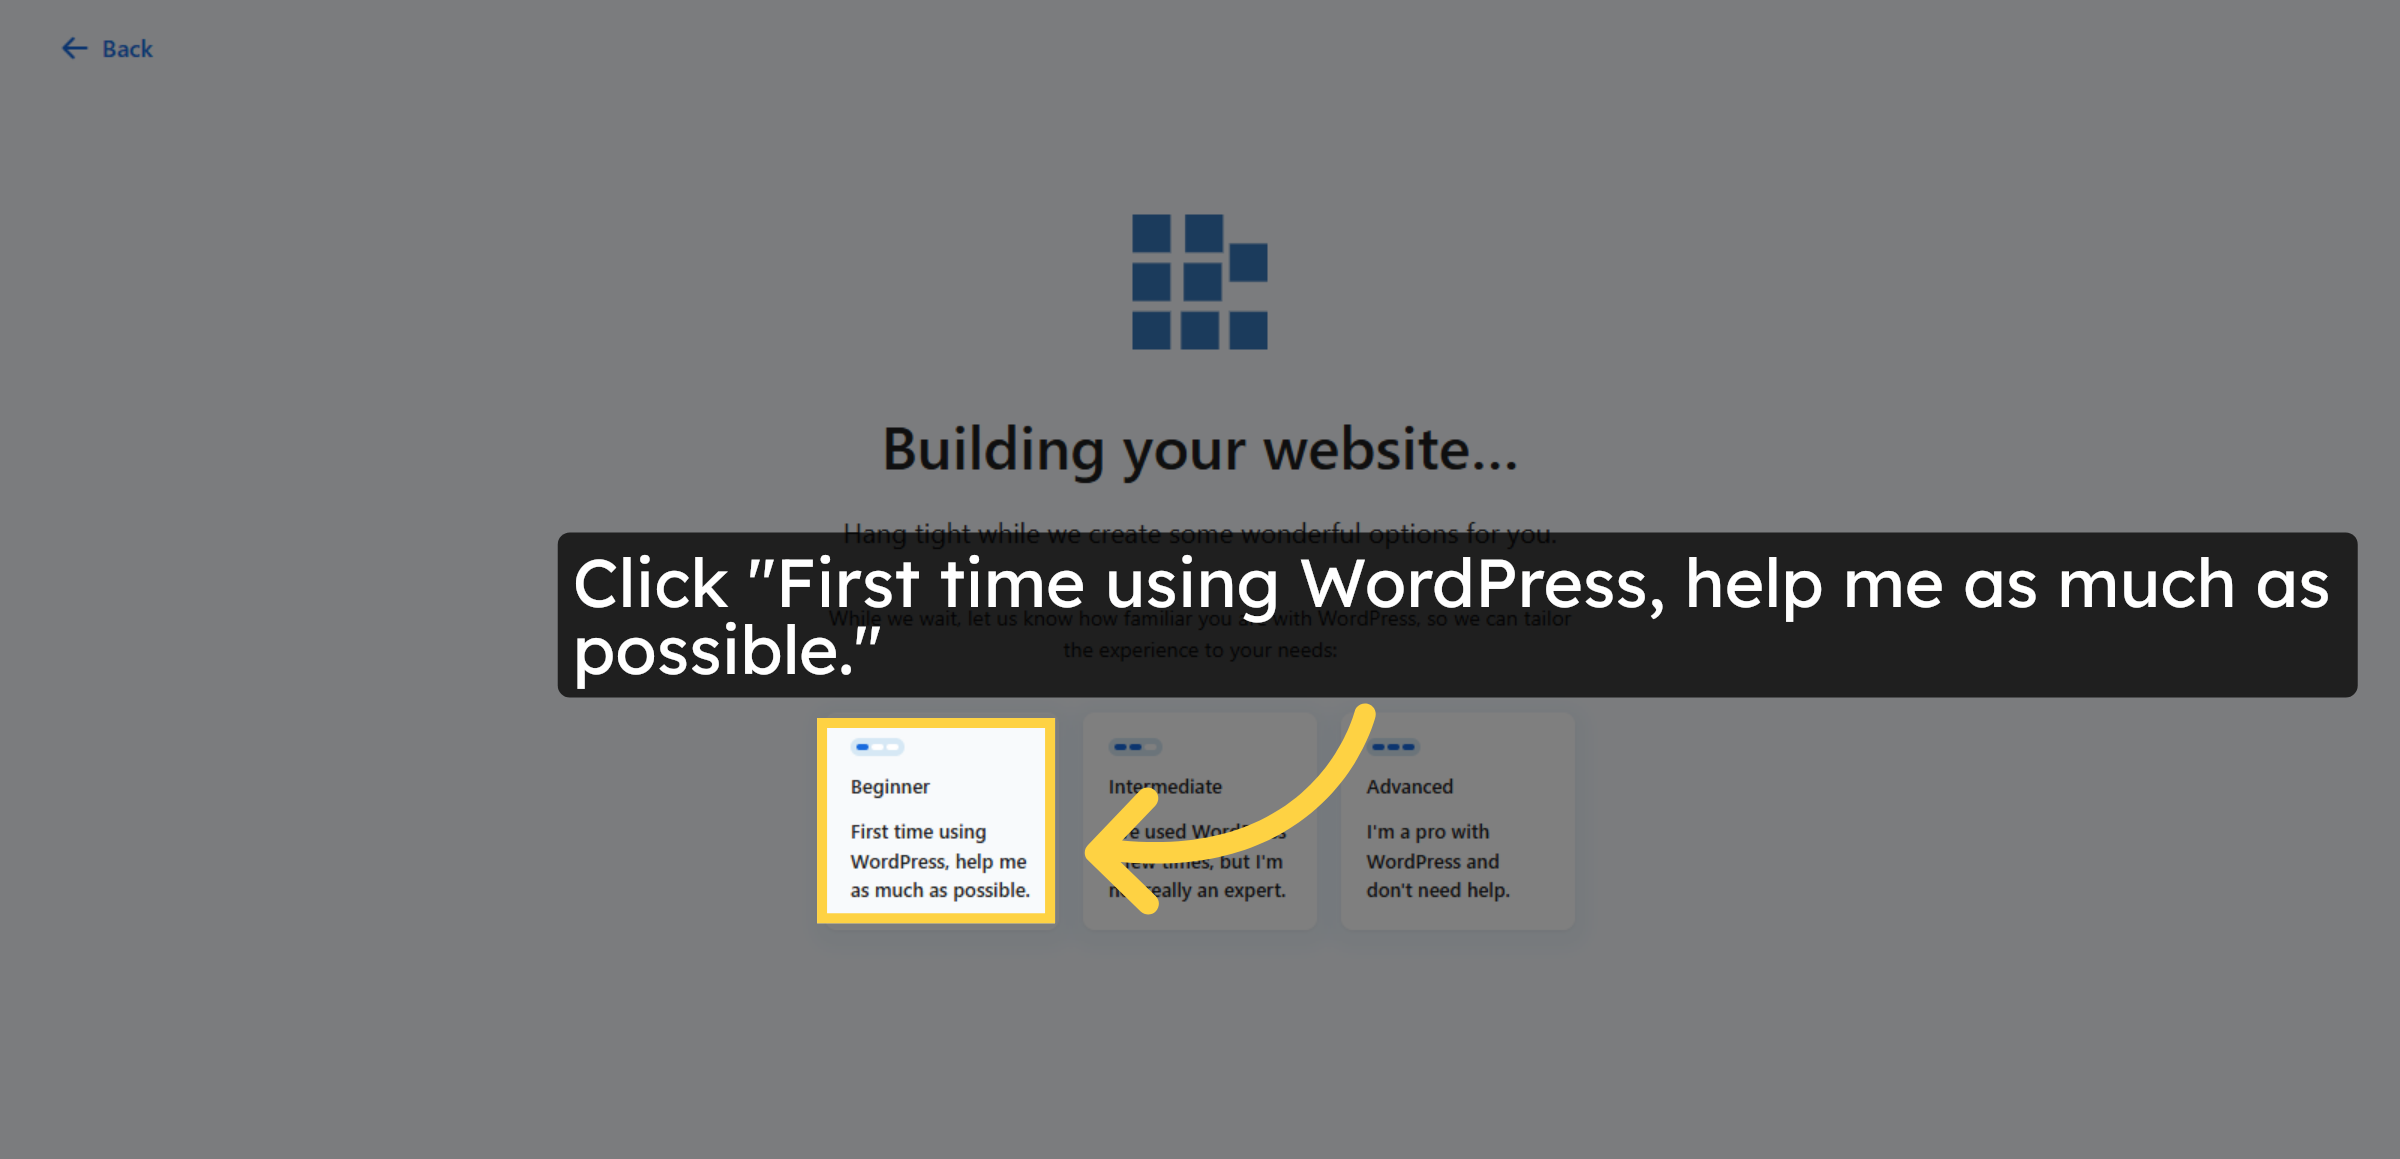
14. Select Help Preference
Click First time using WordPress, help me as much as possible to enable guided assistance.
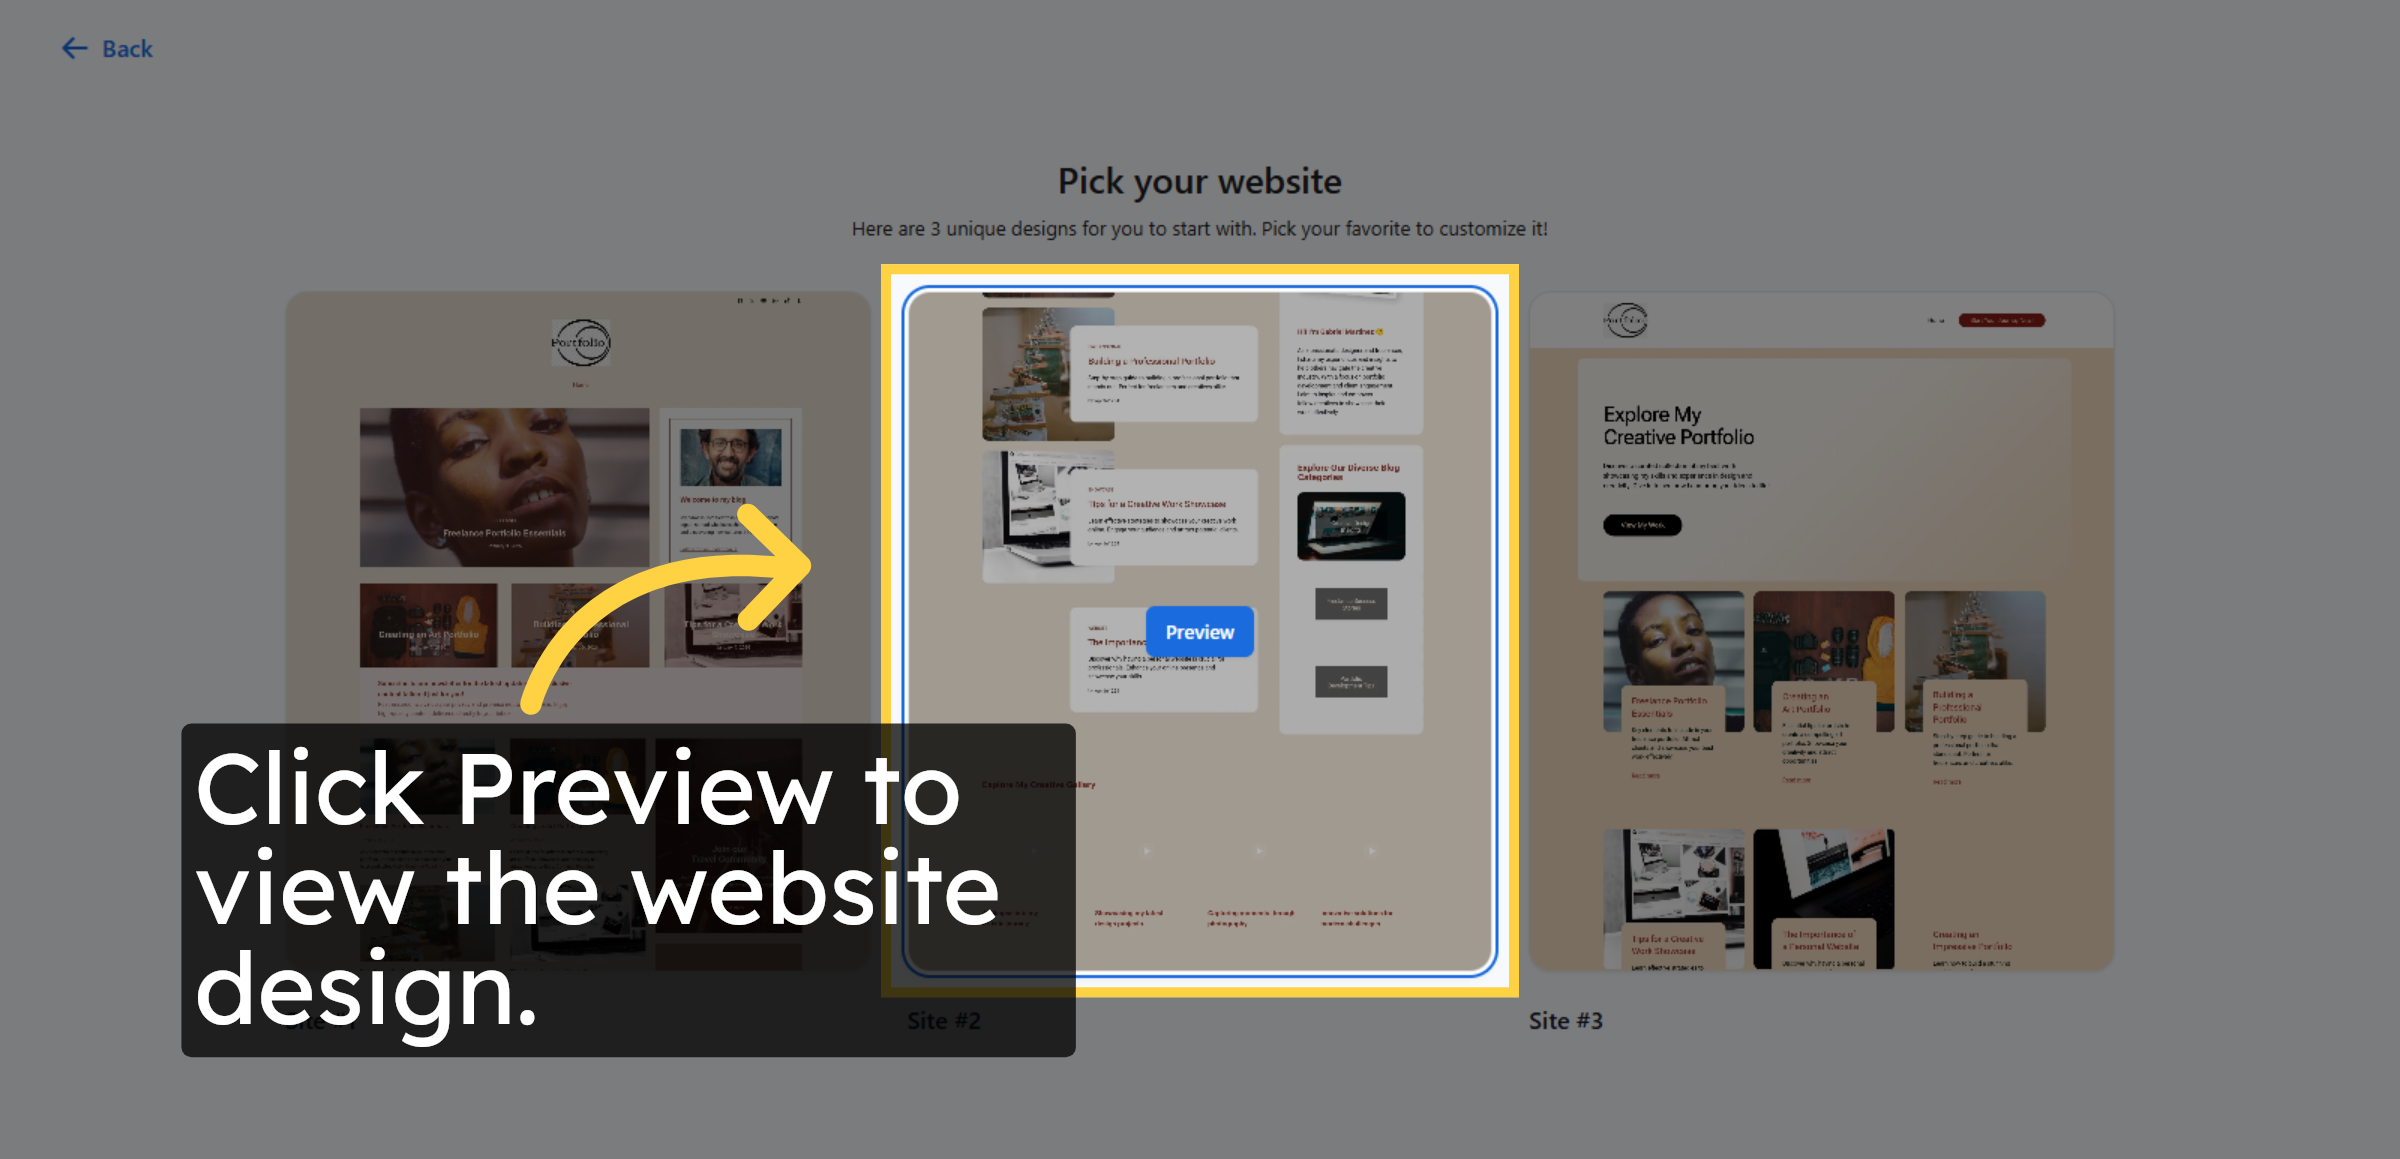
15. Preview Website Design
Previewing a design allows you to review the layout and appearance before selecting it for your website.
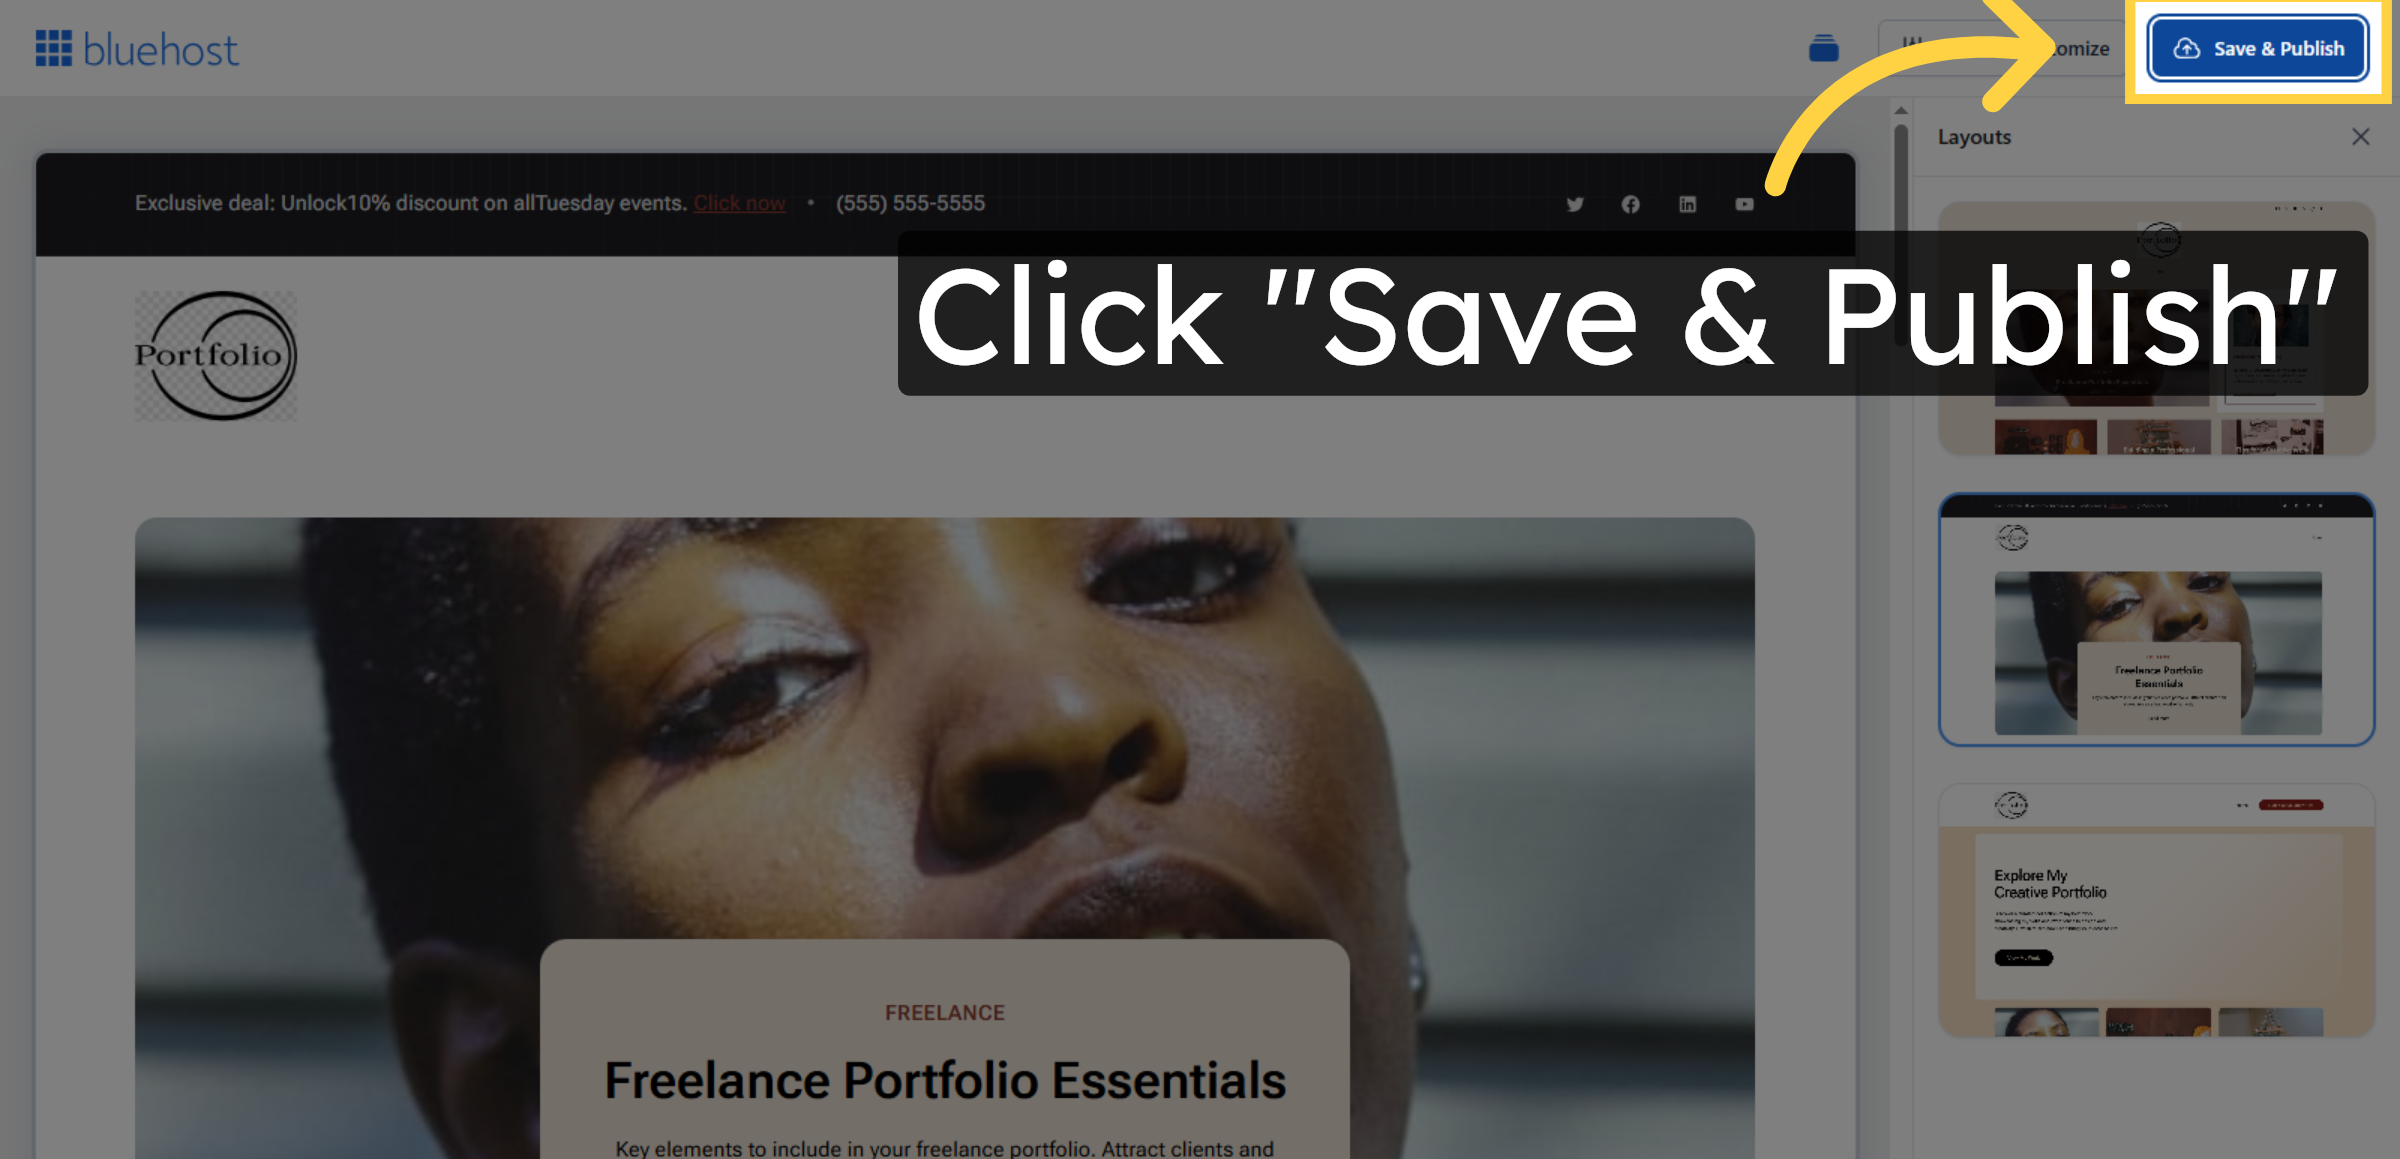
16. Save and Publish Site
Click Save & Publish to make your WordPress site live and accessible.
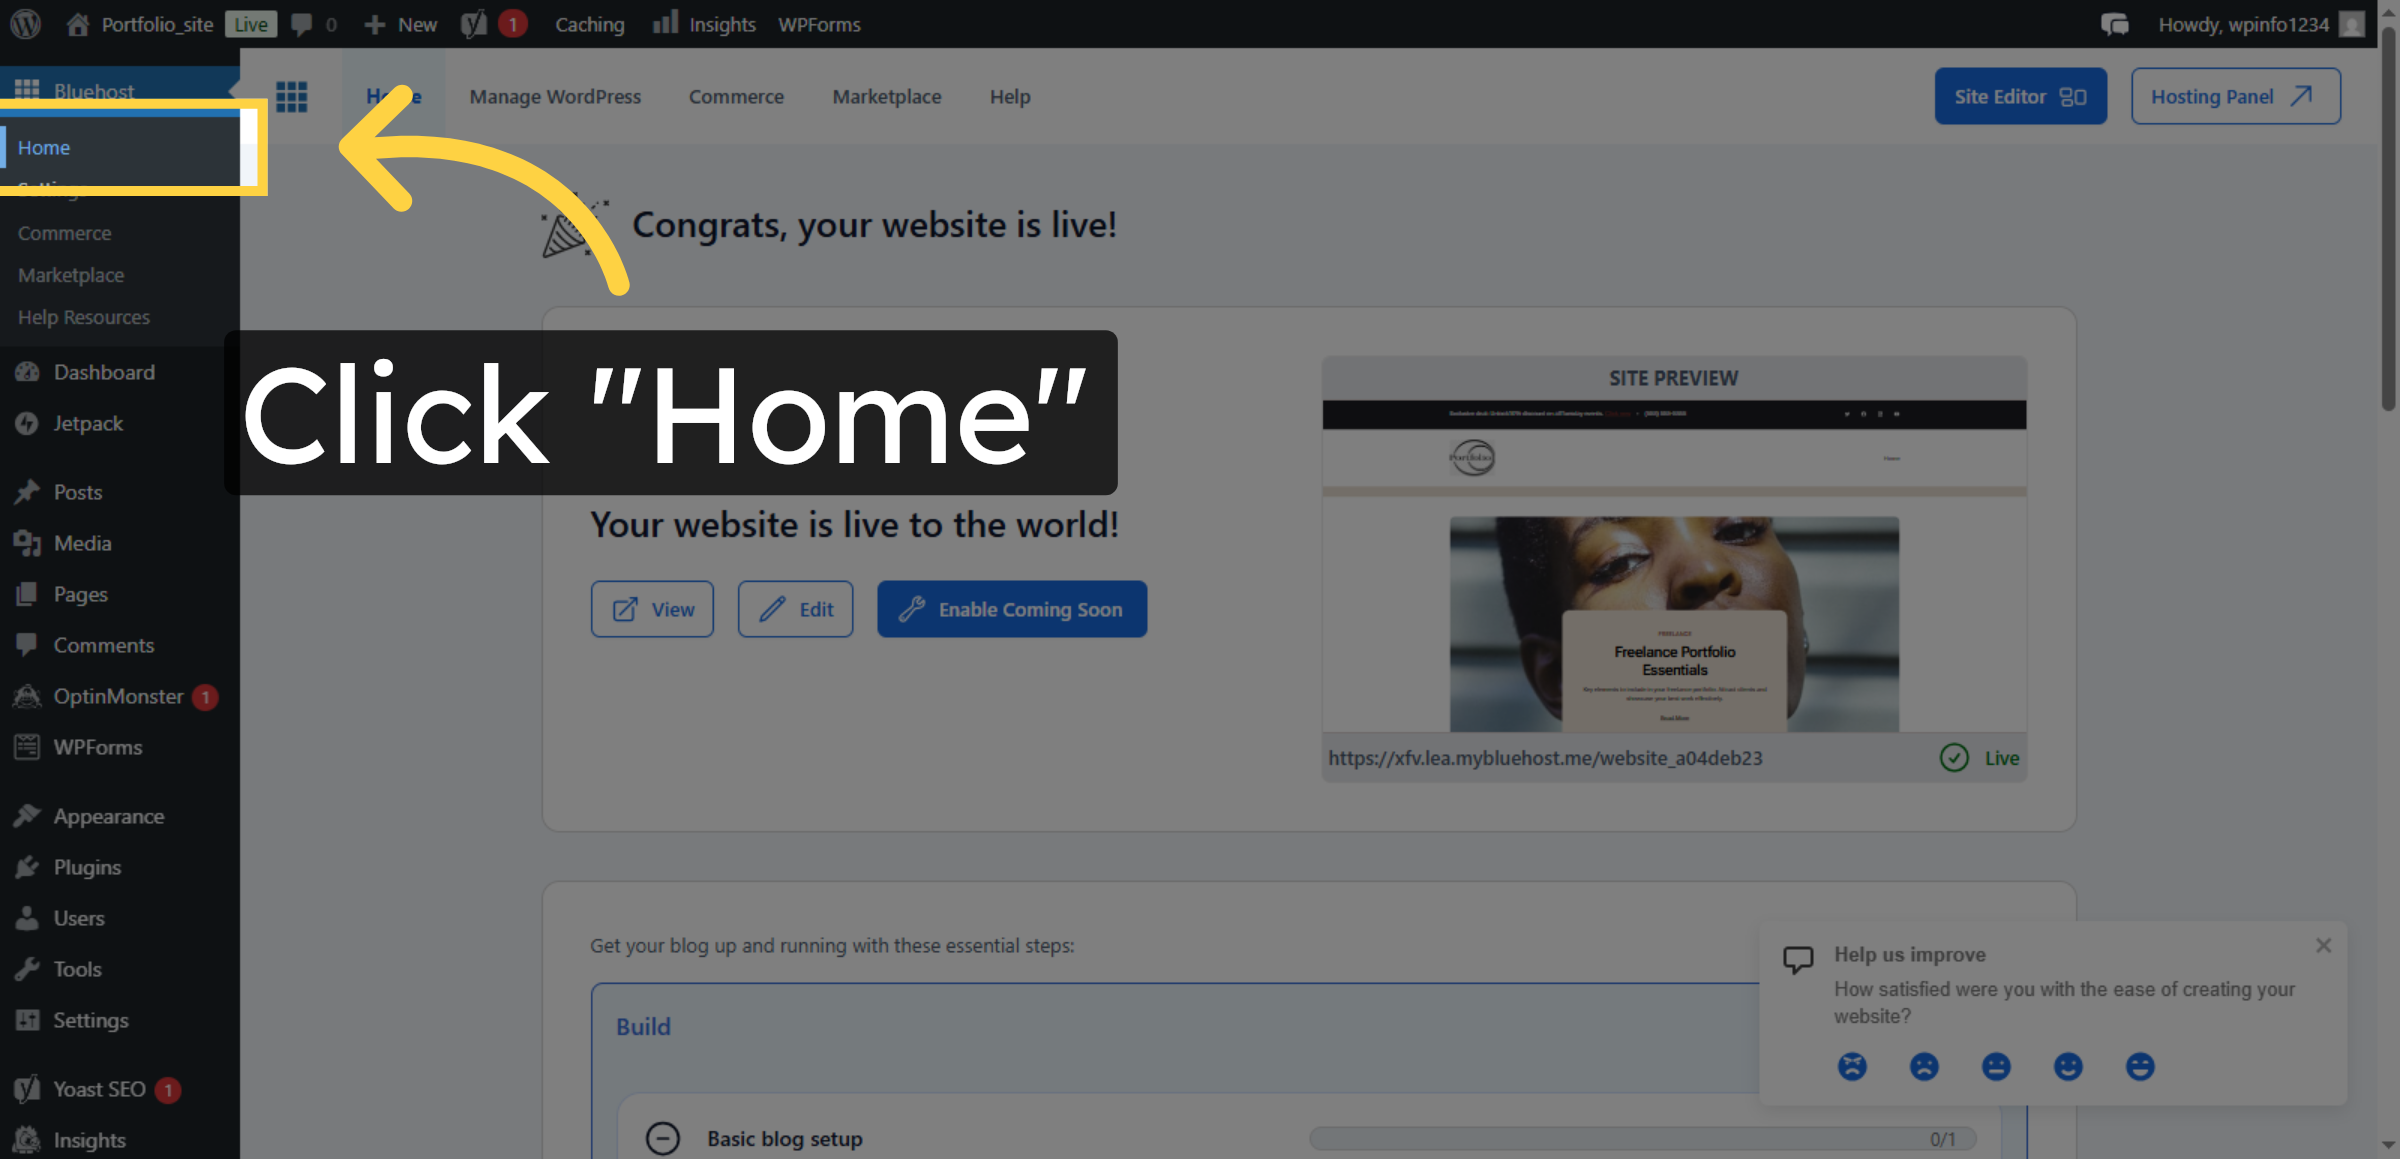
17. Access WordPress Dashboard Home
After publishing, the WordPress dashboard confirms that your website is live and allows you to manage all site settings and content.
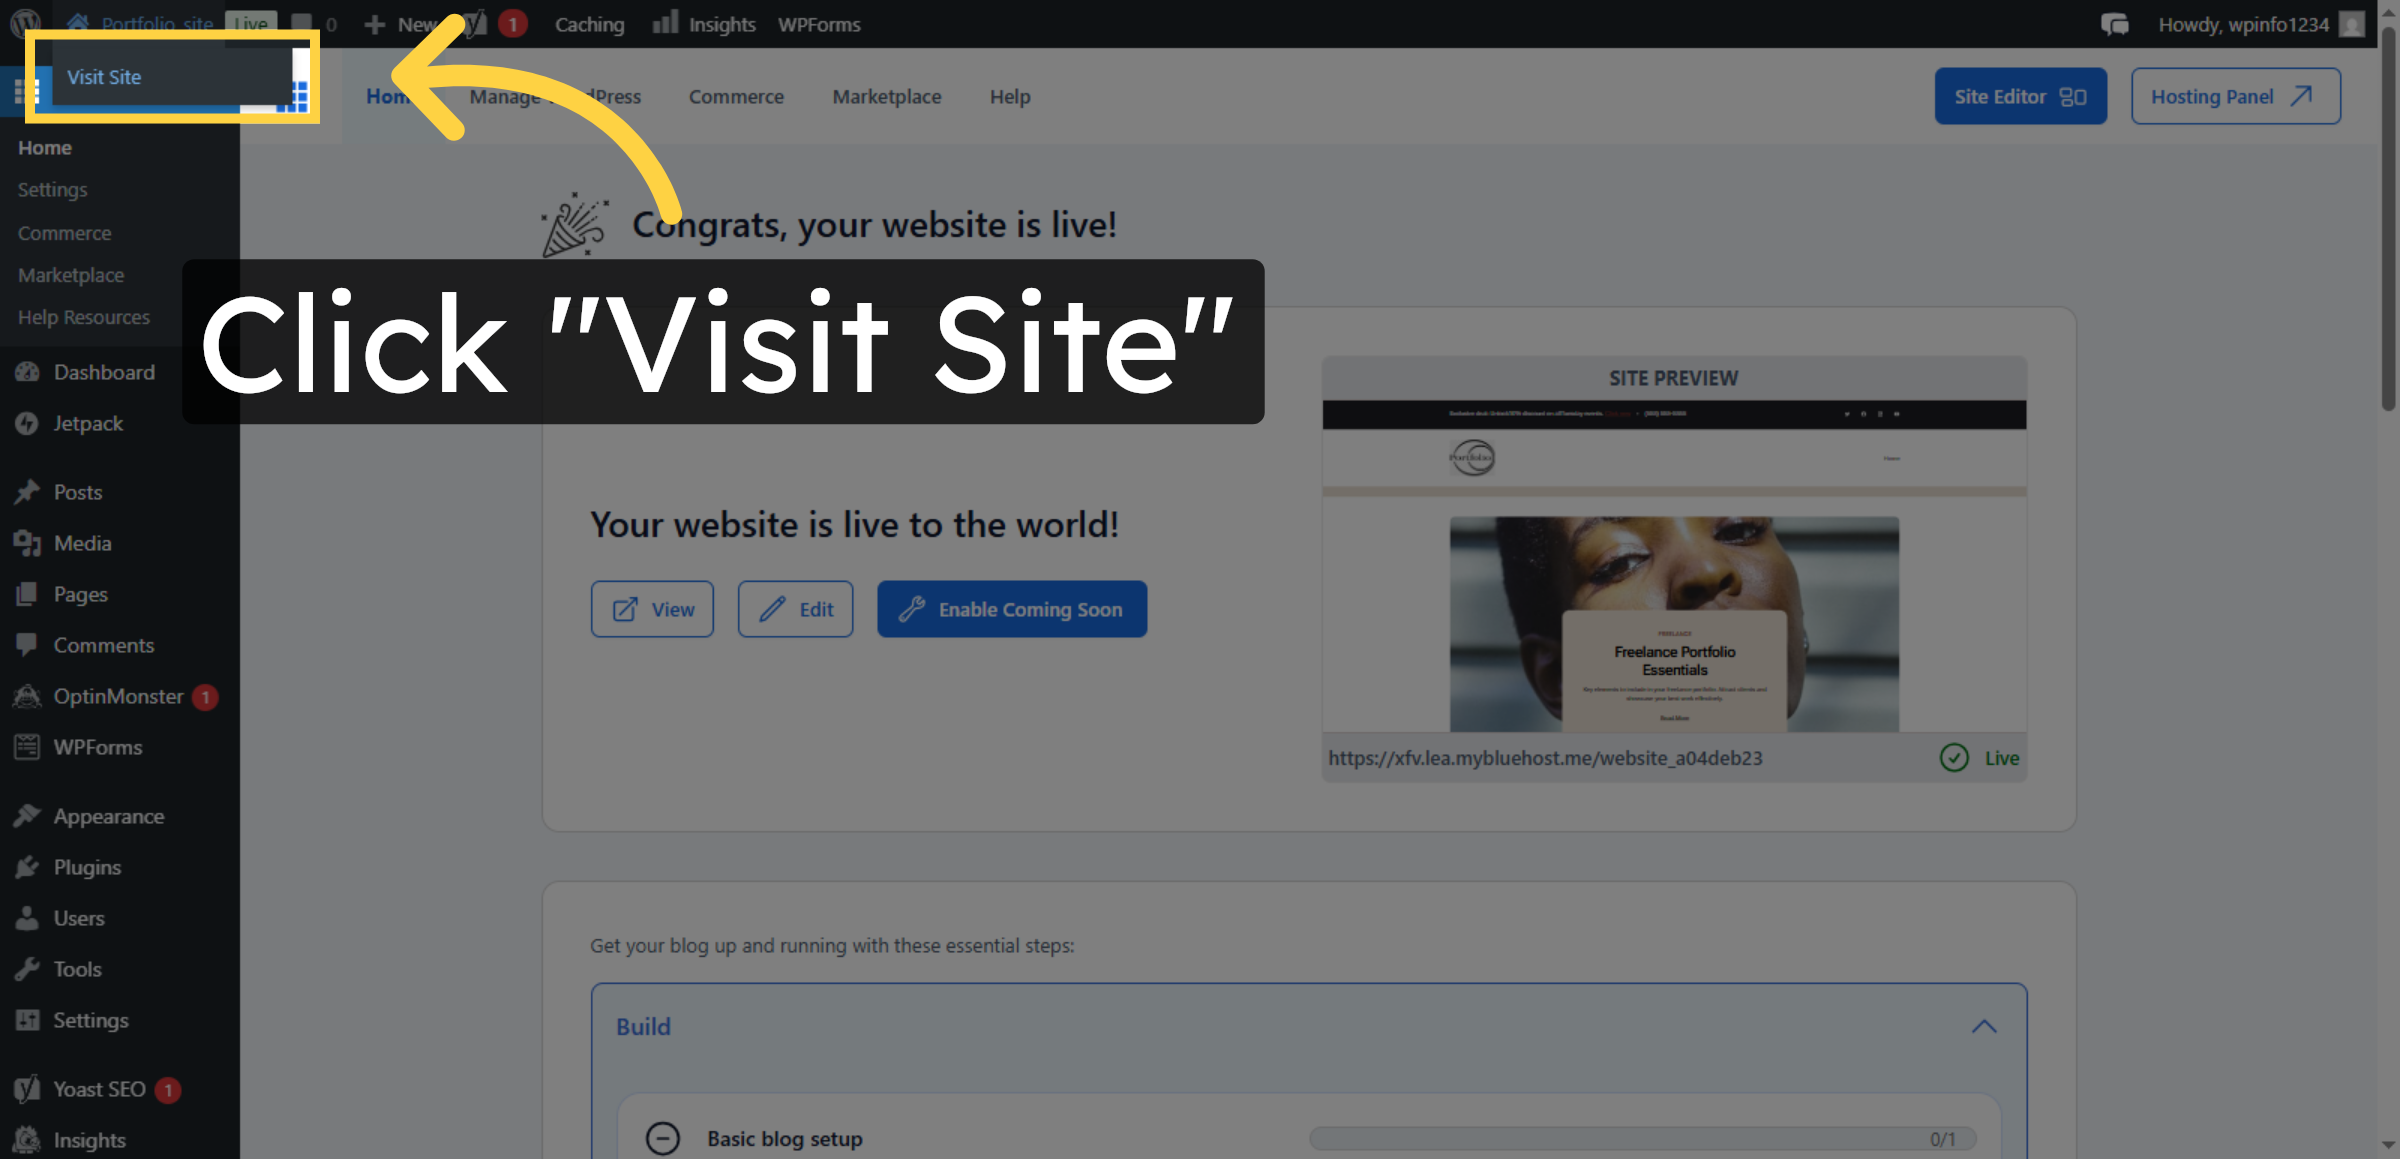
18. Visit Published Site
Click Visit Site to open your newly published WordPress website.
19. View Live Website
This screen confirms that your WordPress website has been successfully published.

You have successfully installed and configured WordPress on Bluehost WP hosting. Your site is now live, personalized, and ready for content updates. For more information, explore related articles on site customization and management.
Conclusion
Congratulations! You’ve successfully installed WordPress on Bluehost WP Hosting and launched your website. Now, your site is ready to be customized, updated, and filled with engaging content. If you need assistance with further customization, troubleshooting, or any WordPress-related support, feel free to reach out to us. At WooHelpDesk, we provide expert WordPress support to ensure your website runs smoothly.
For help and support, call us toll-free at +1 888 602 0119 (US & Canada). Let us help you make your website even better!