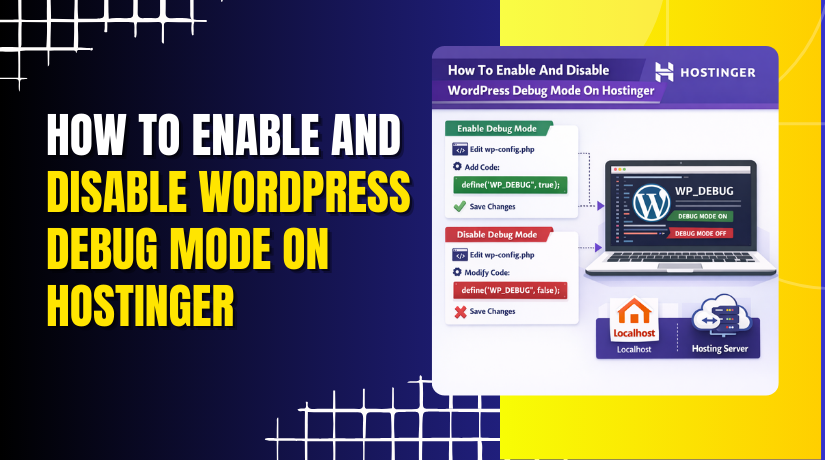
How To Enable And Disable WordPress Debug Mode On Hostinger
Introduction
Enabling or disabling WordPress debug mode is an essential step when troubleshooting errors, warnings, or unexpected behaviour on your website. Debug mode allows you to identify PHP issues, plugin conflicts, and theme-related errors that may not be visible on the frontend. On Hostinger, you can easily manage WordPress debug settings by editing the wp-config.php file through the built-in File Manager. In this guide, you’ll learn how to access your website files, modify the debug configuration, and safely enable or disable debug mode as needed. Following these steps helps diagnose issues efficiently while maintaining control over your WordPress hosting environment.
1. Login to your Hostinger’s Account.
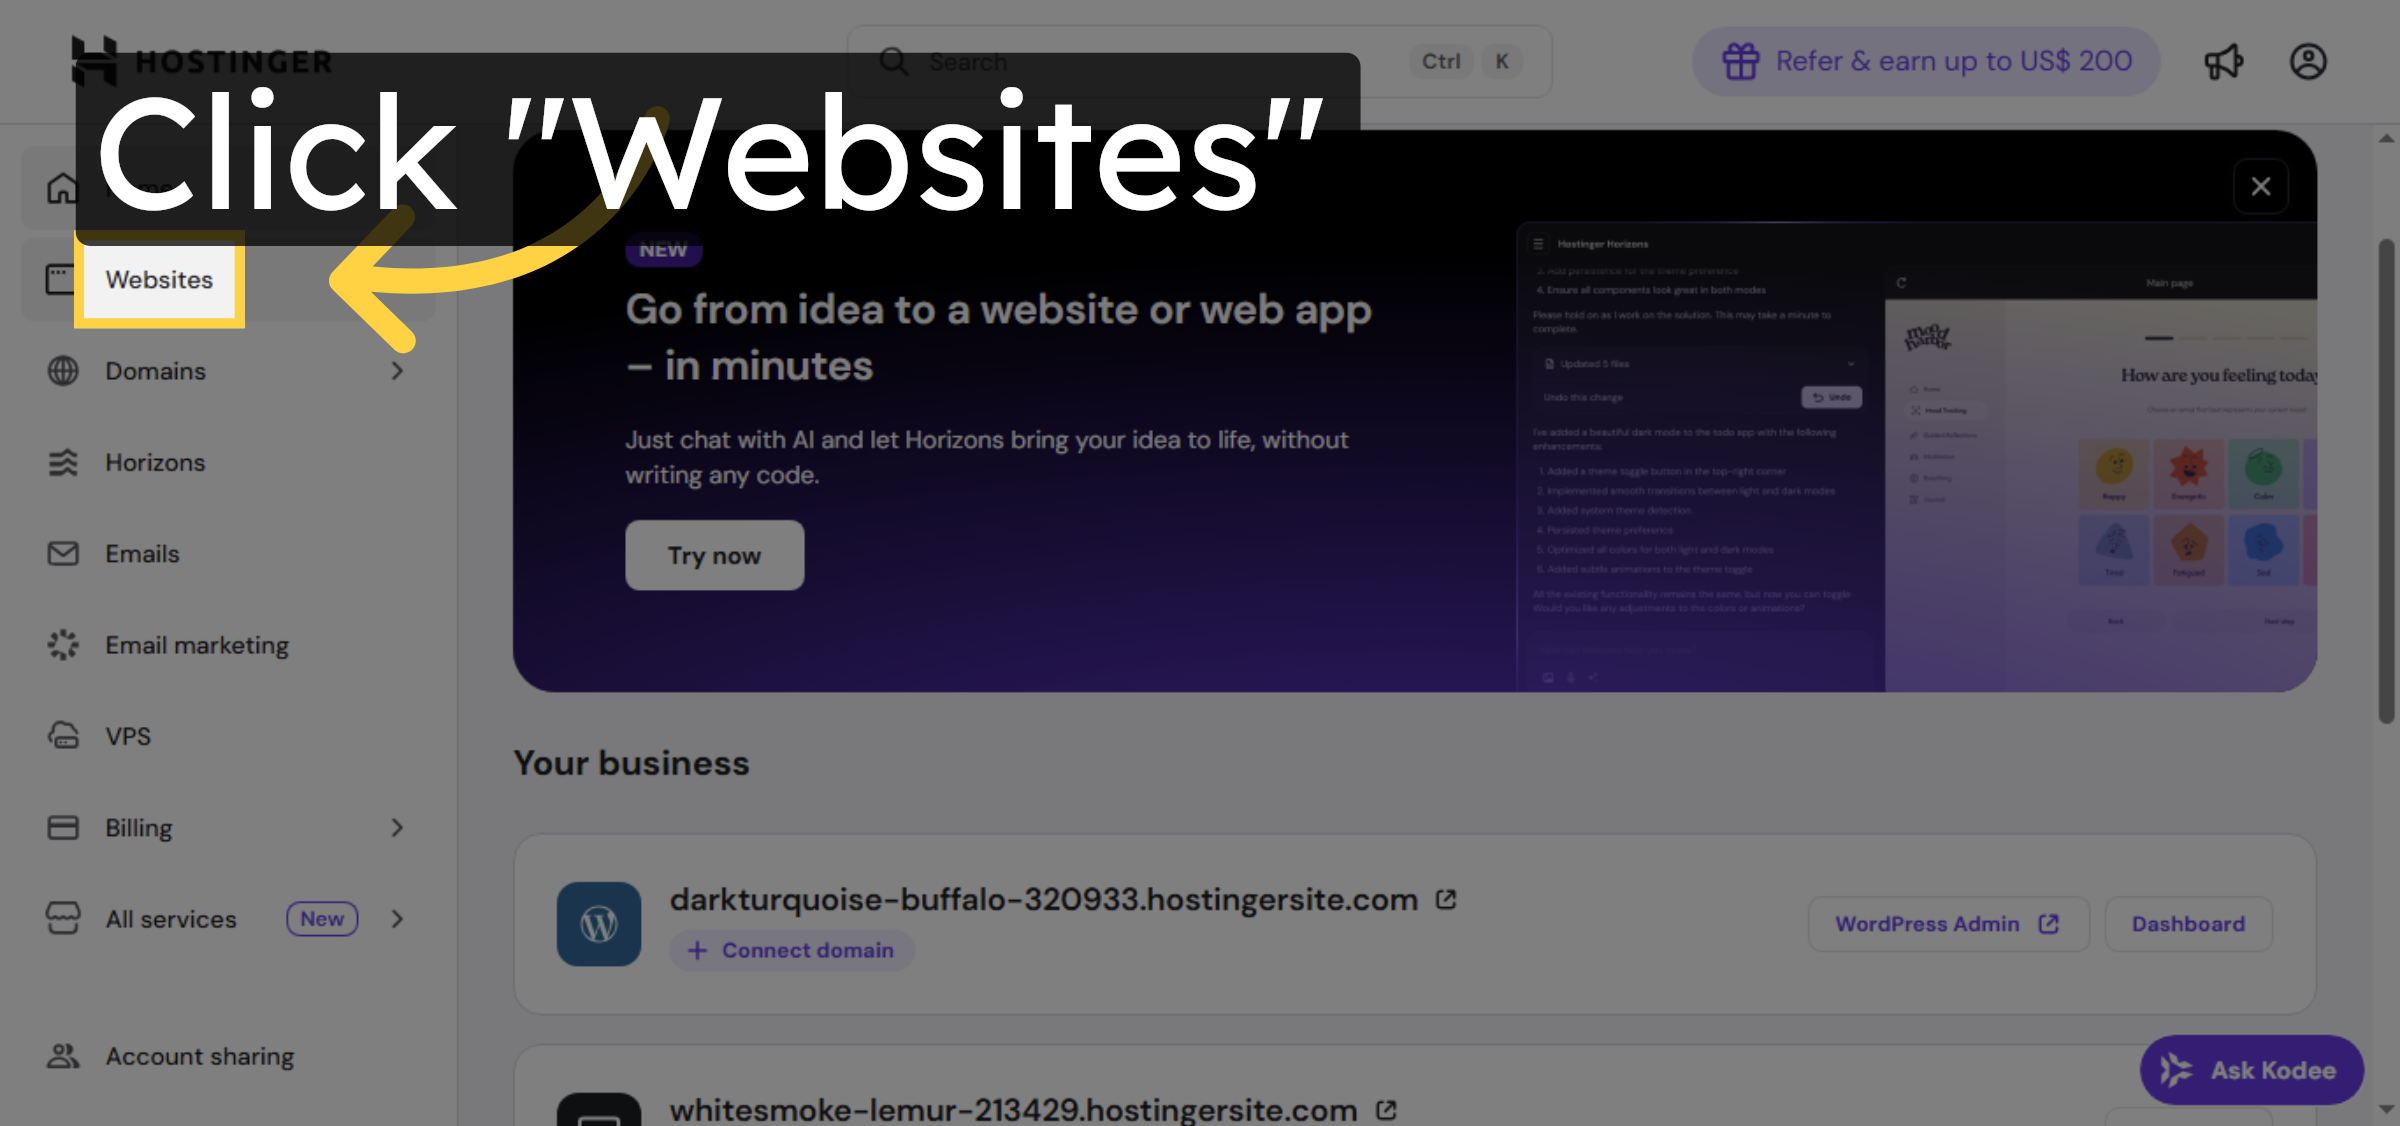
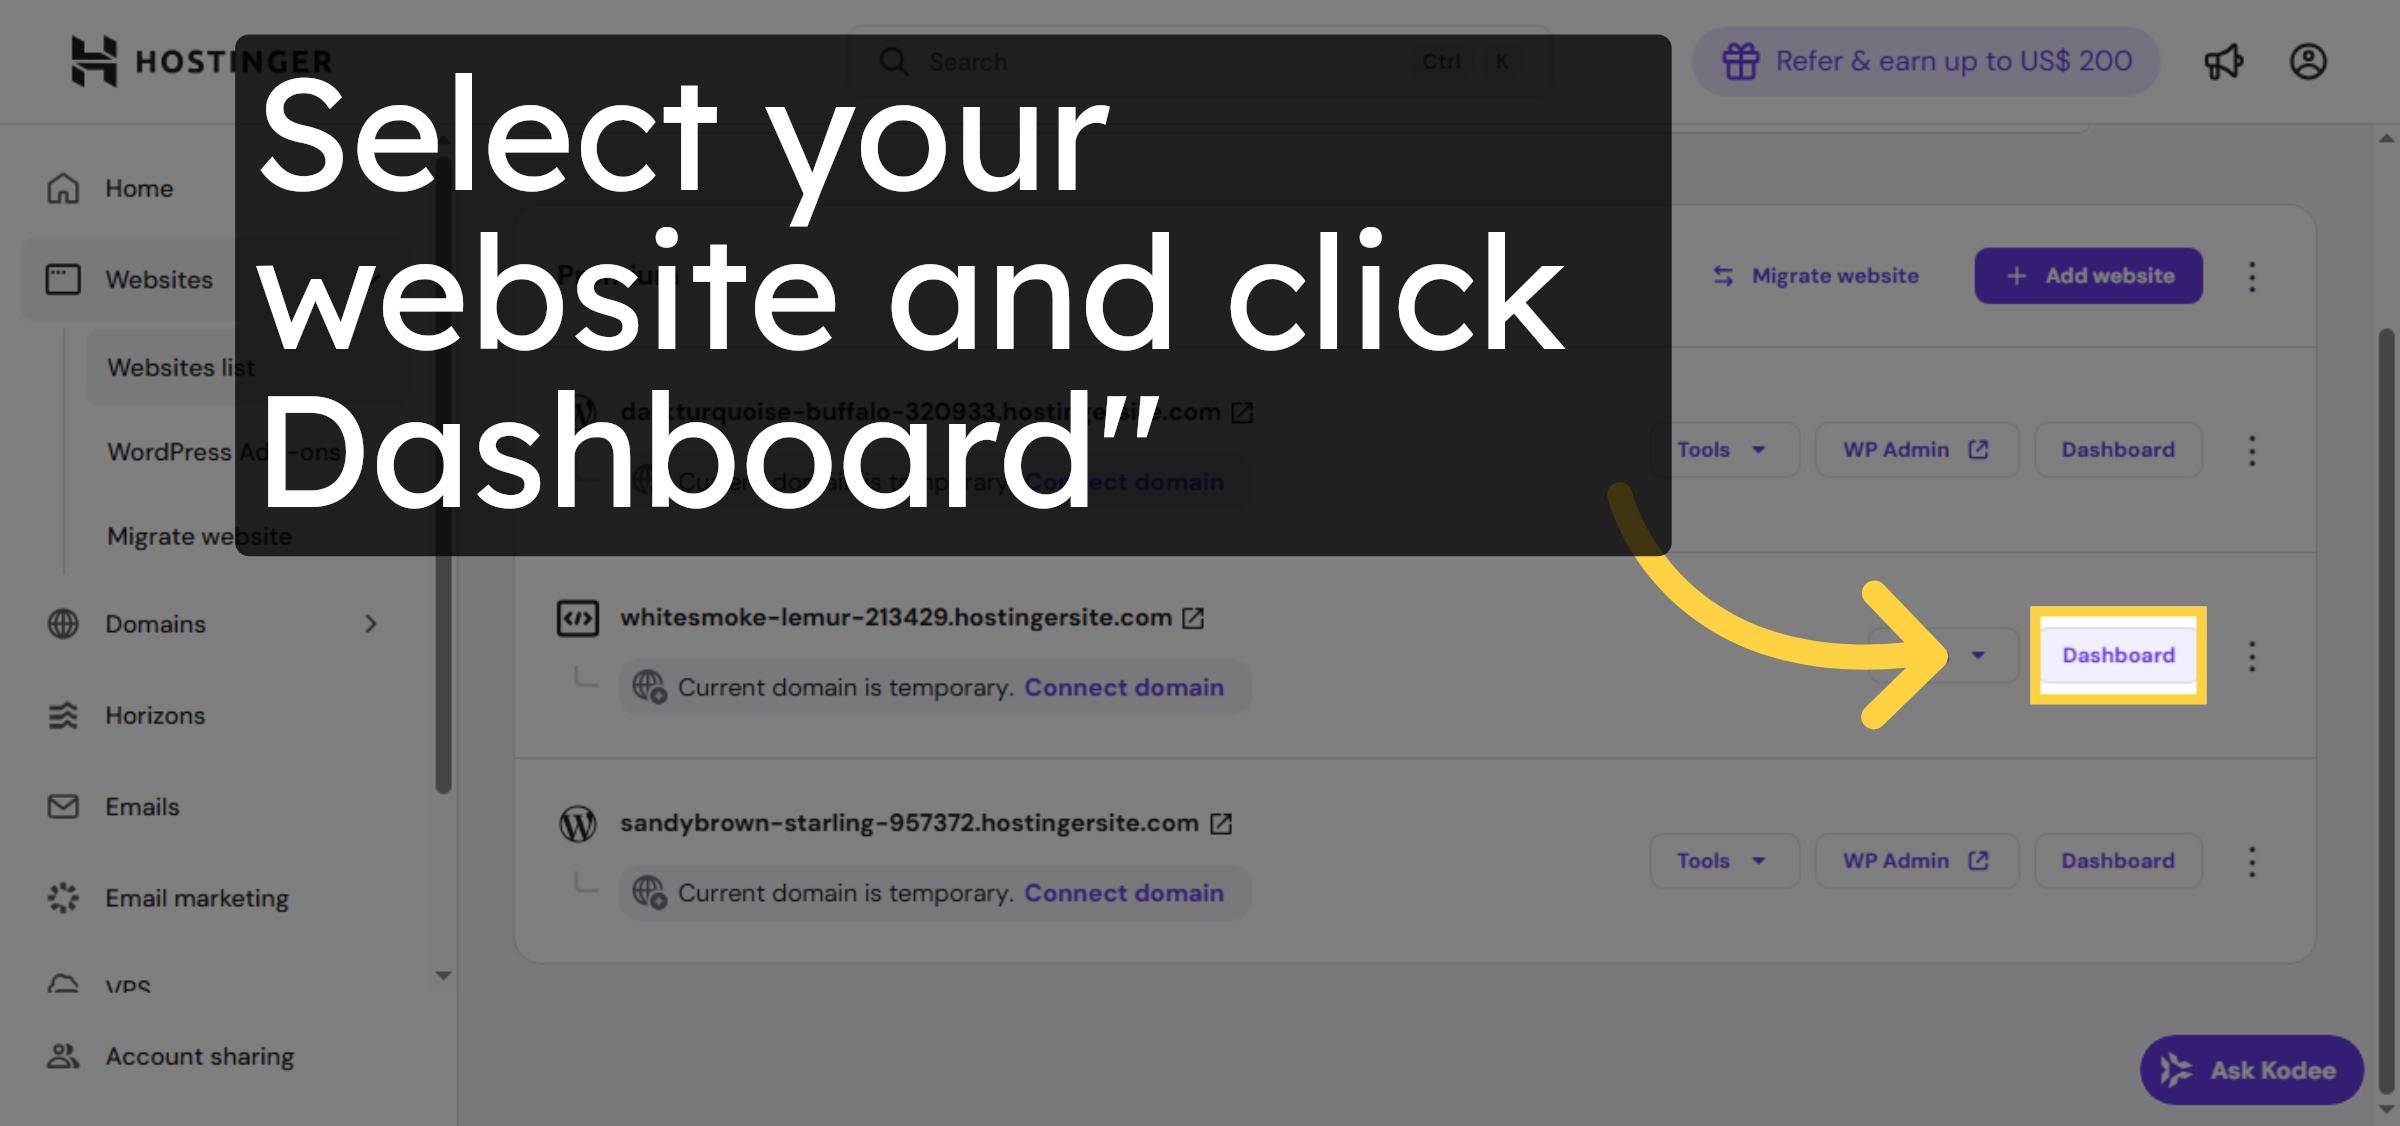
2. Open Website Dashboard
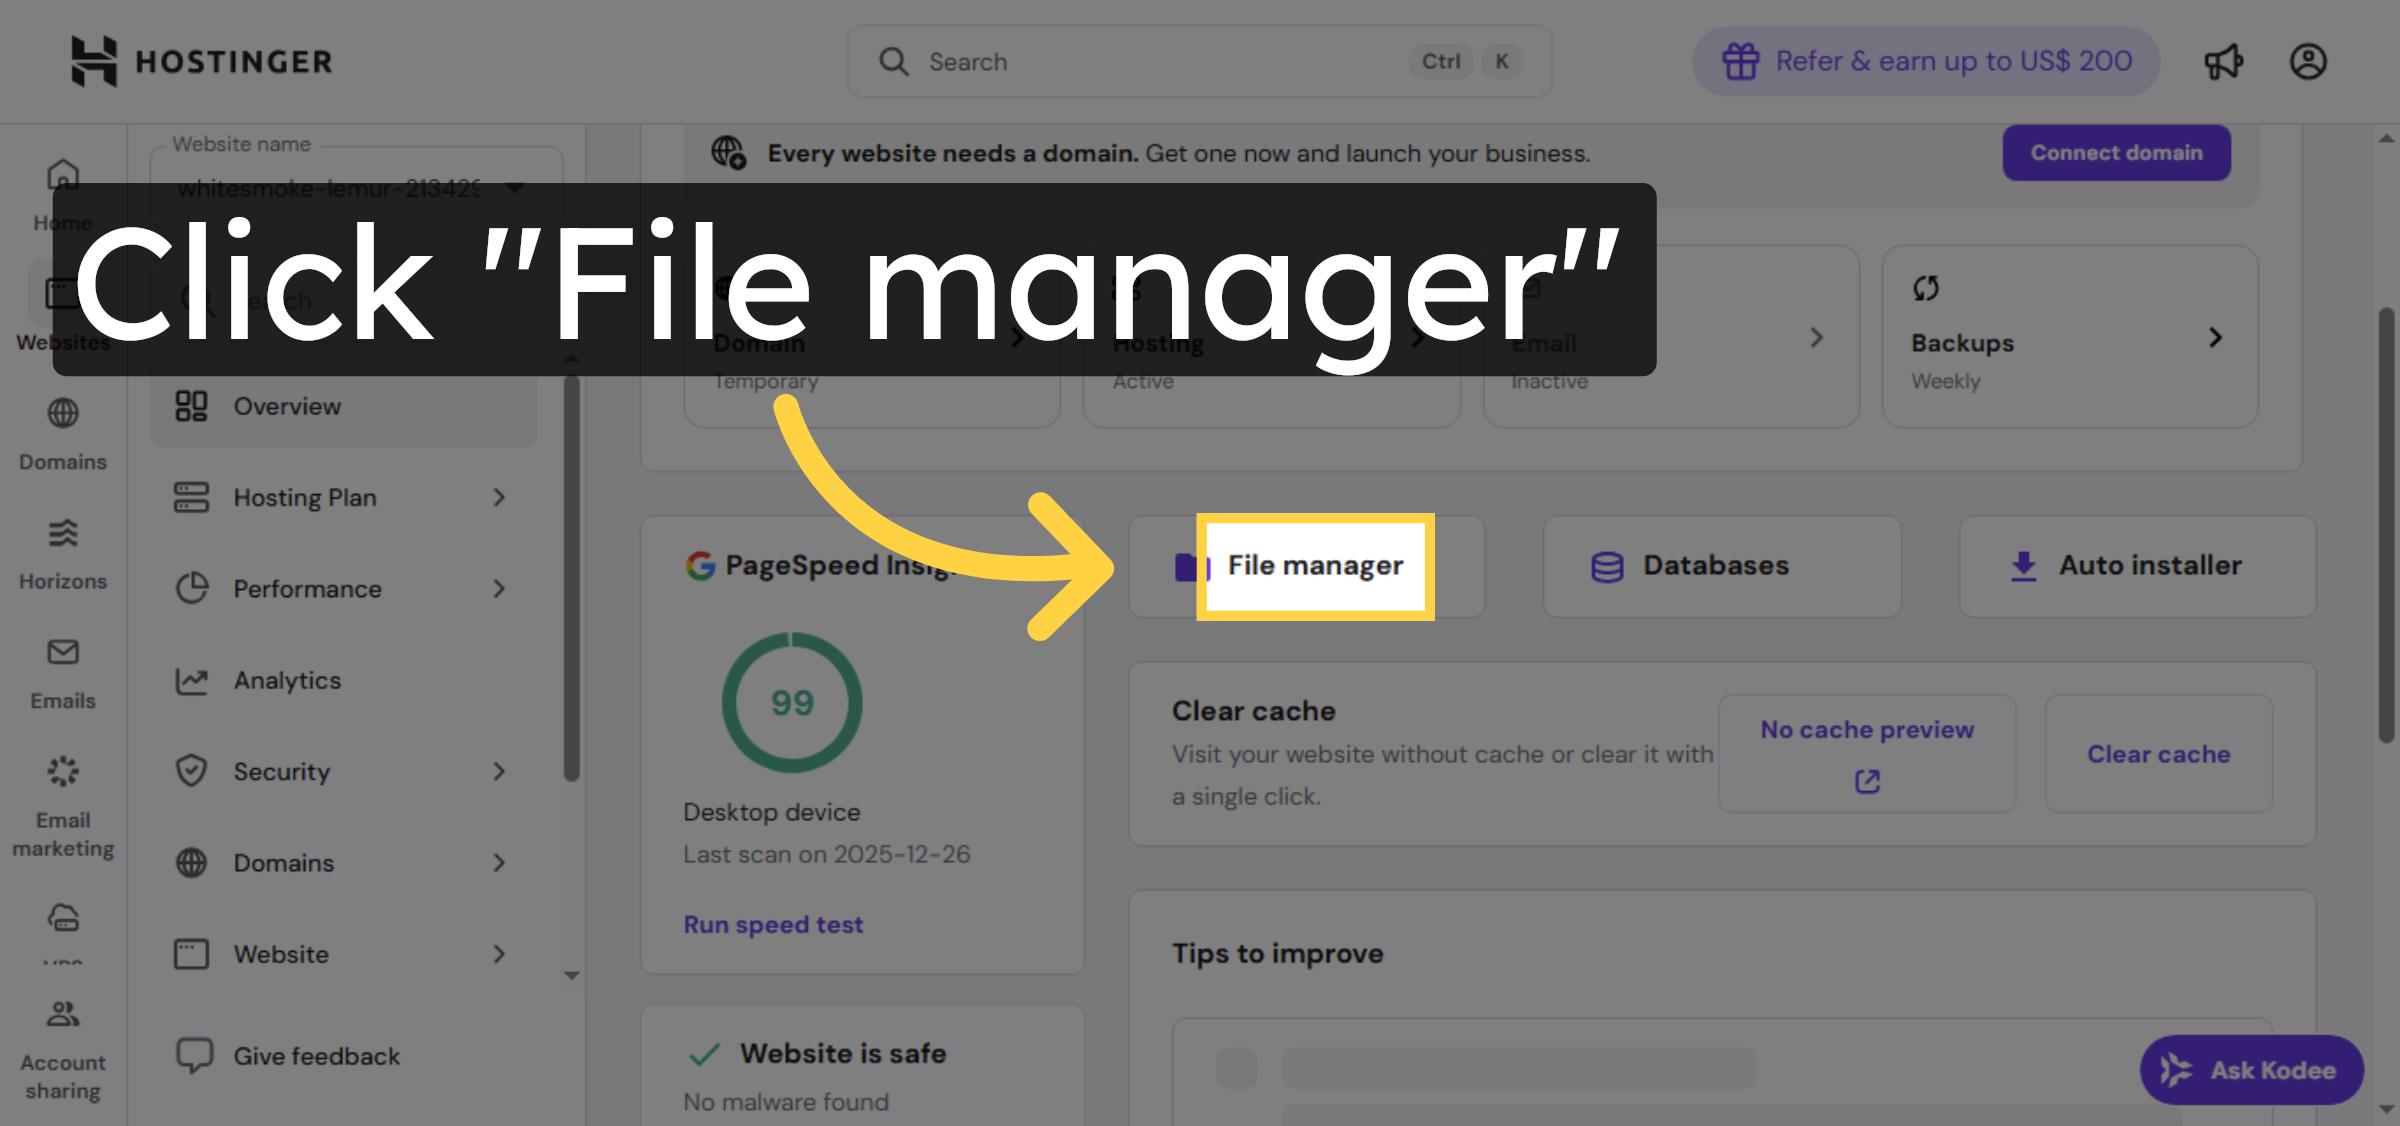
3. Access File Manager
4. Open Public HTML Folder

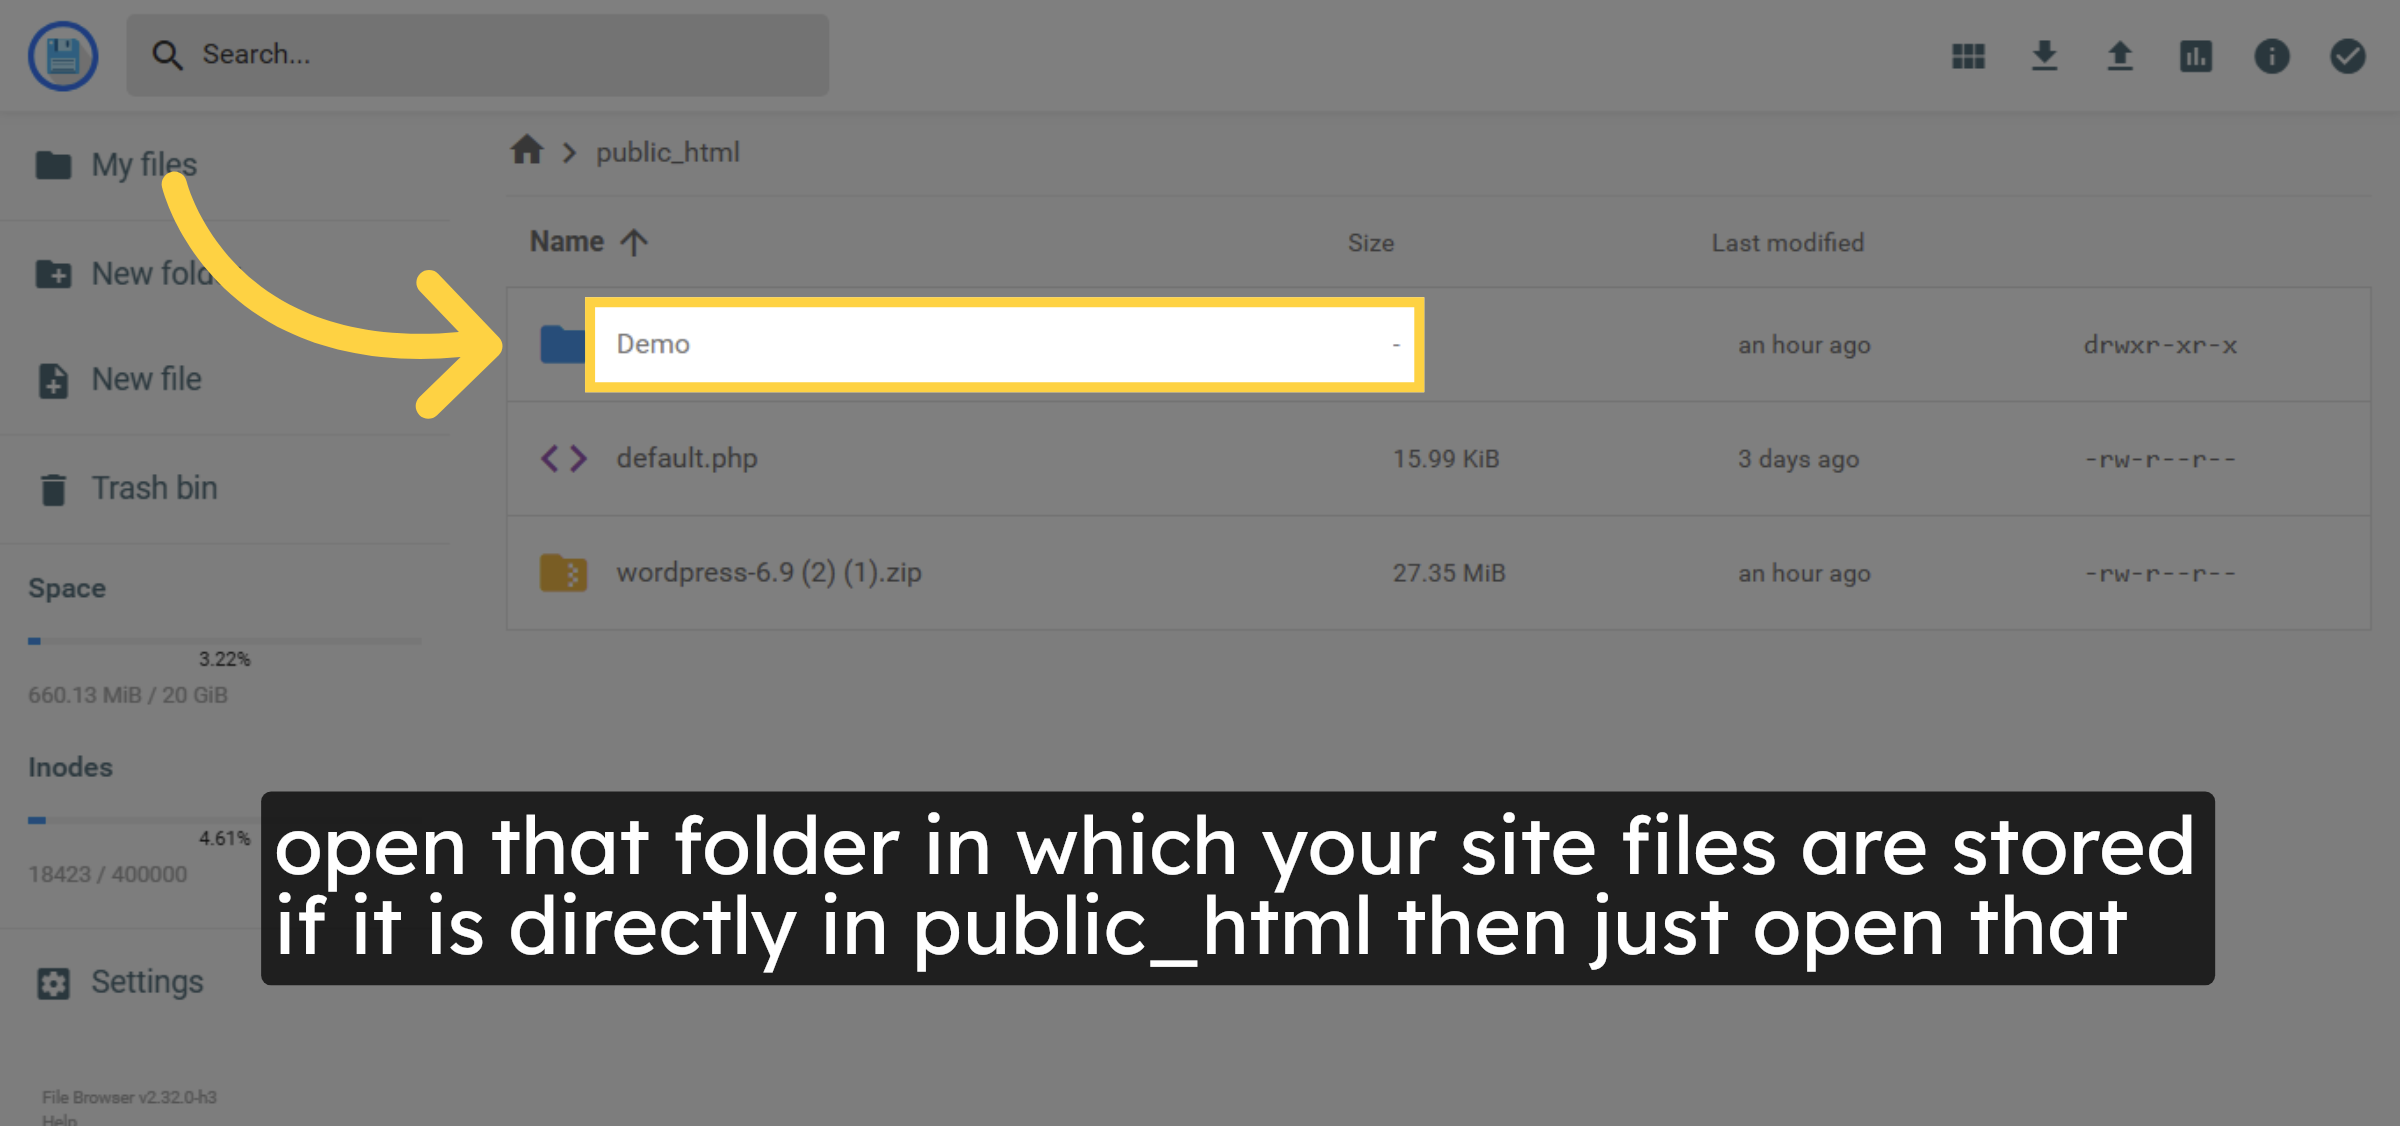
5. open folder in which your website files are located.
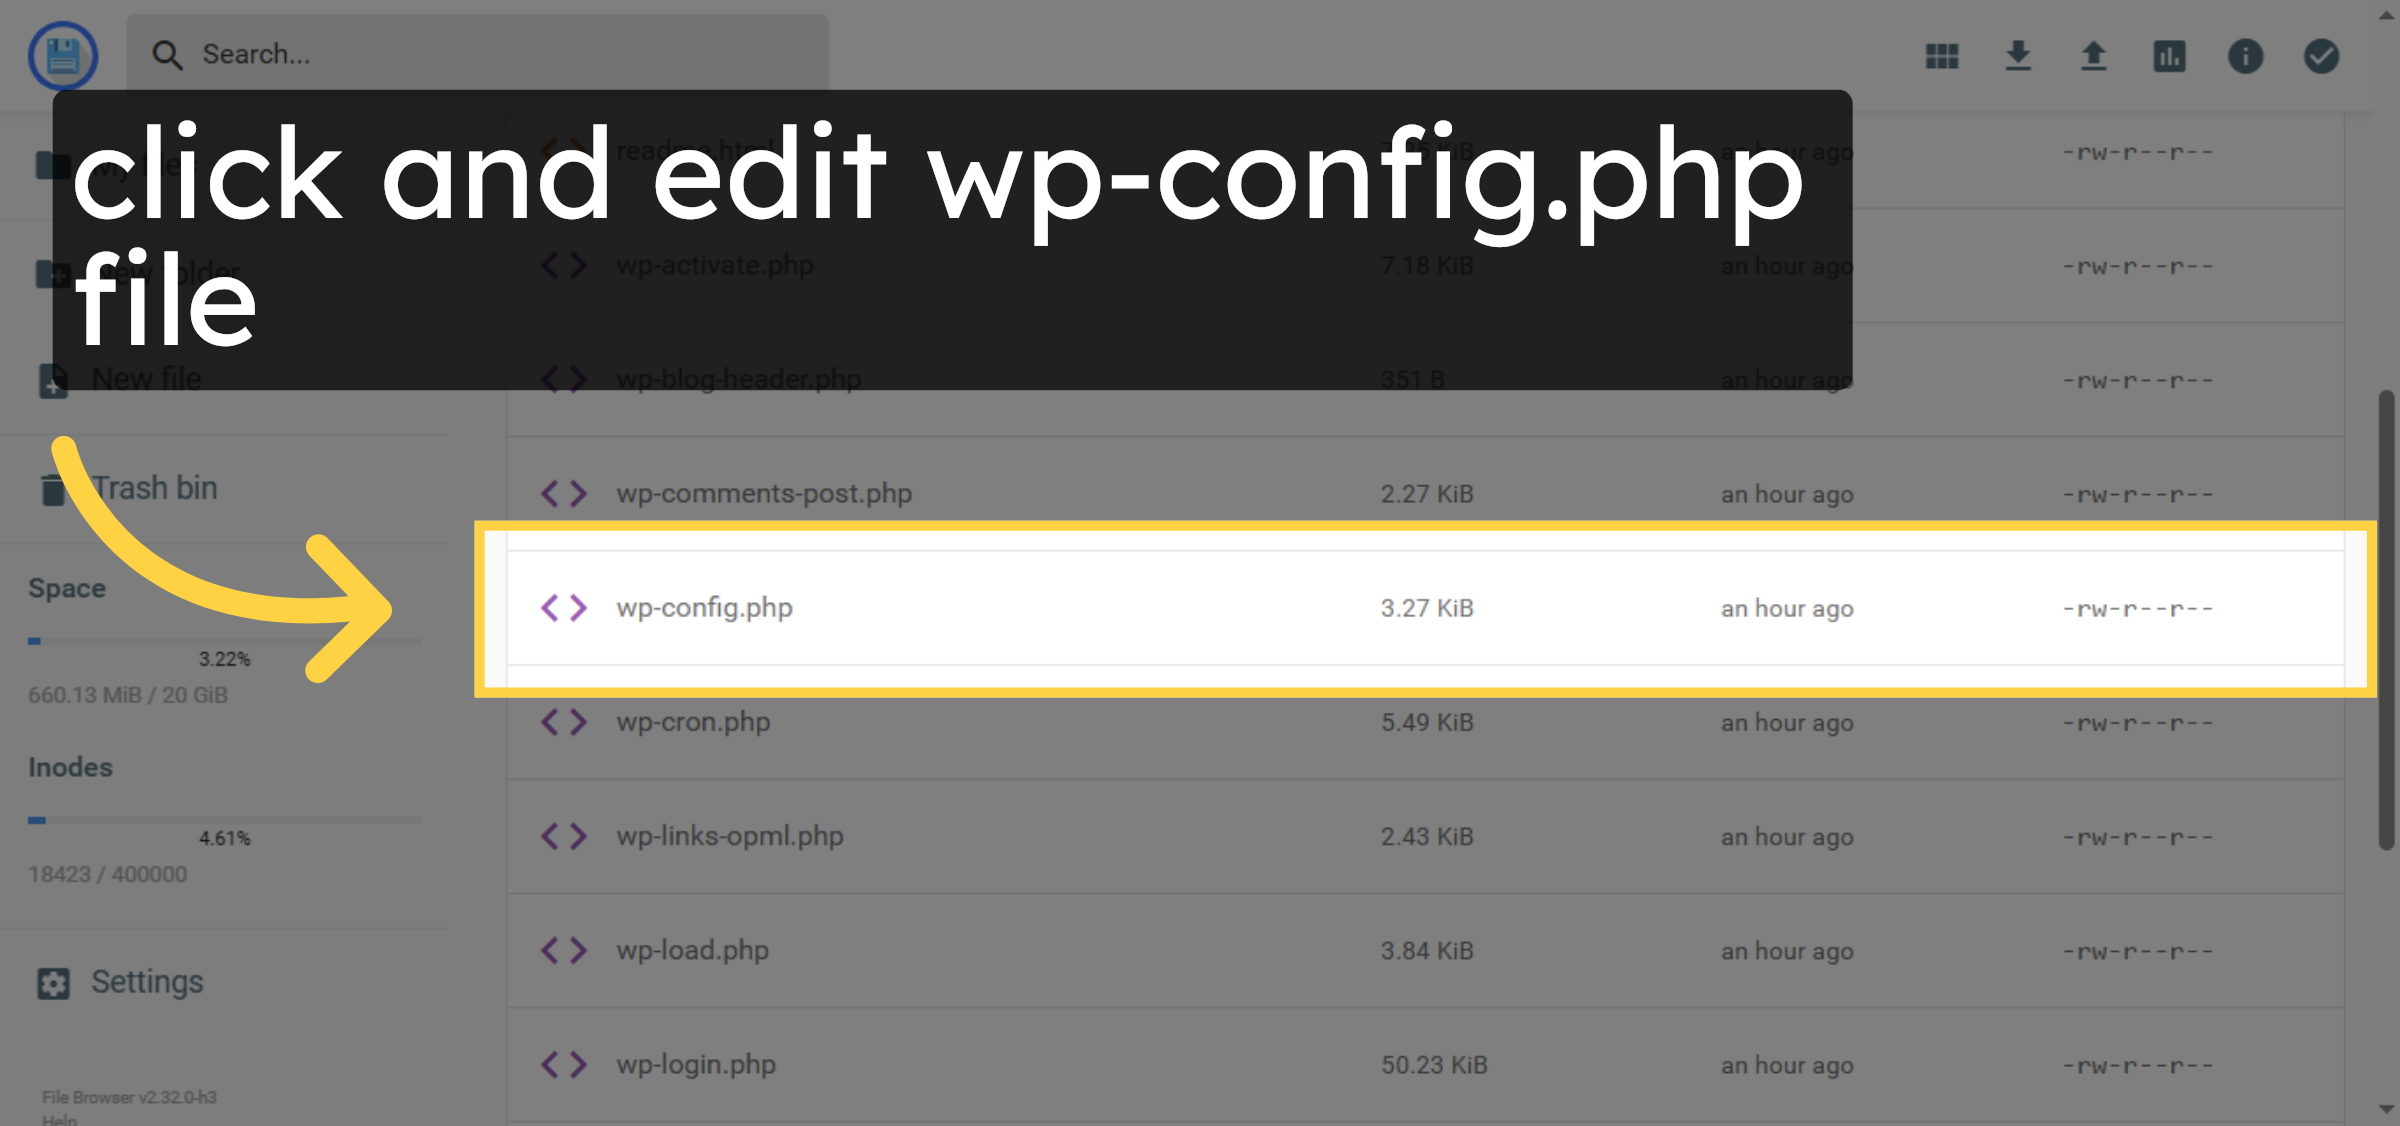
6. Select wp-config.php File for editing
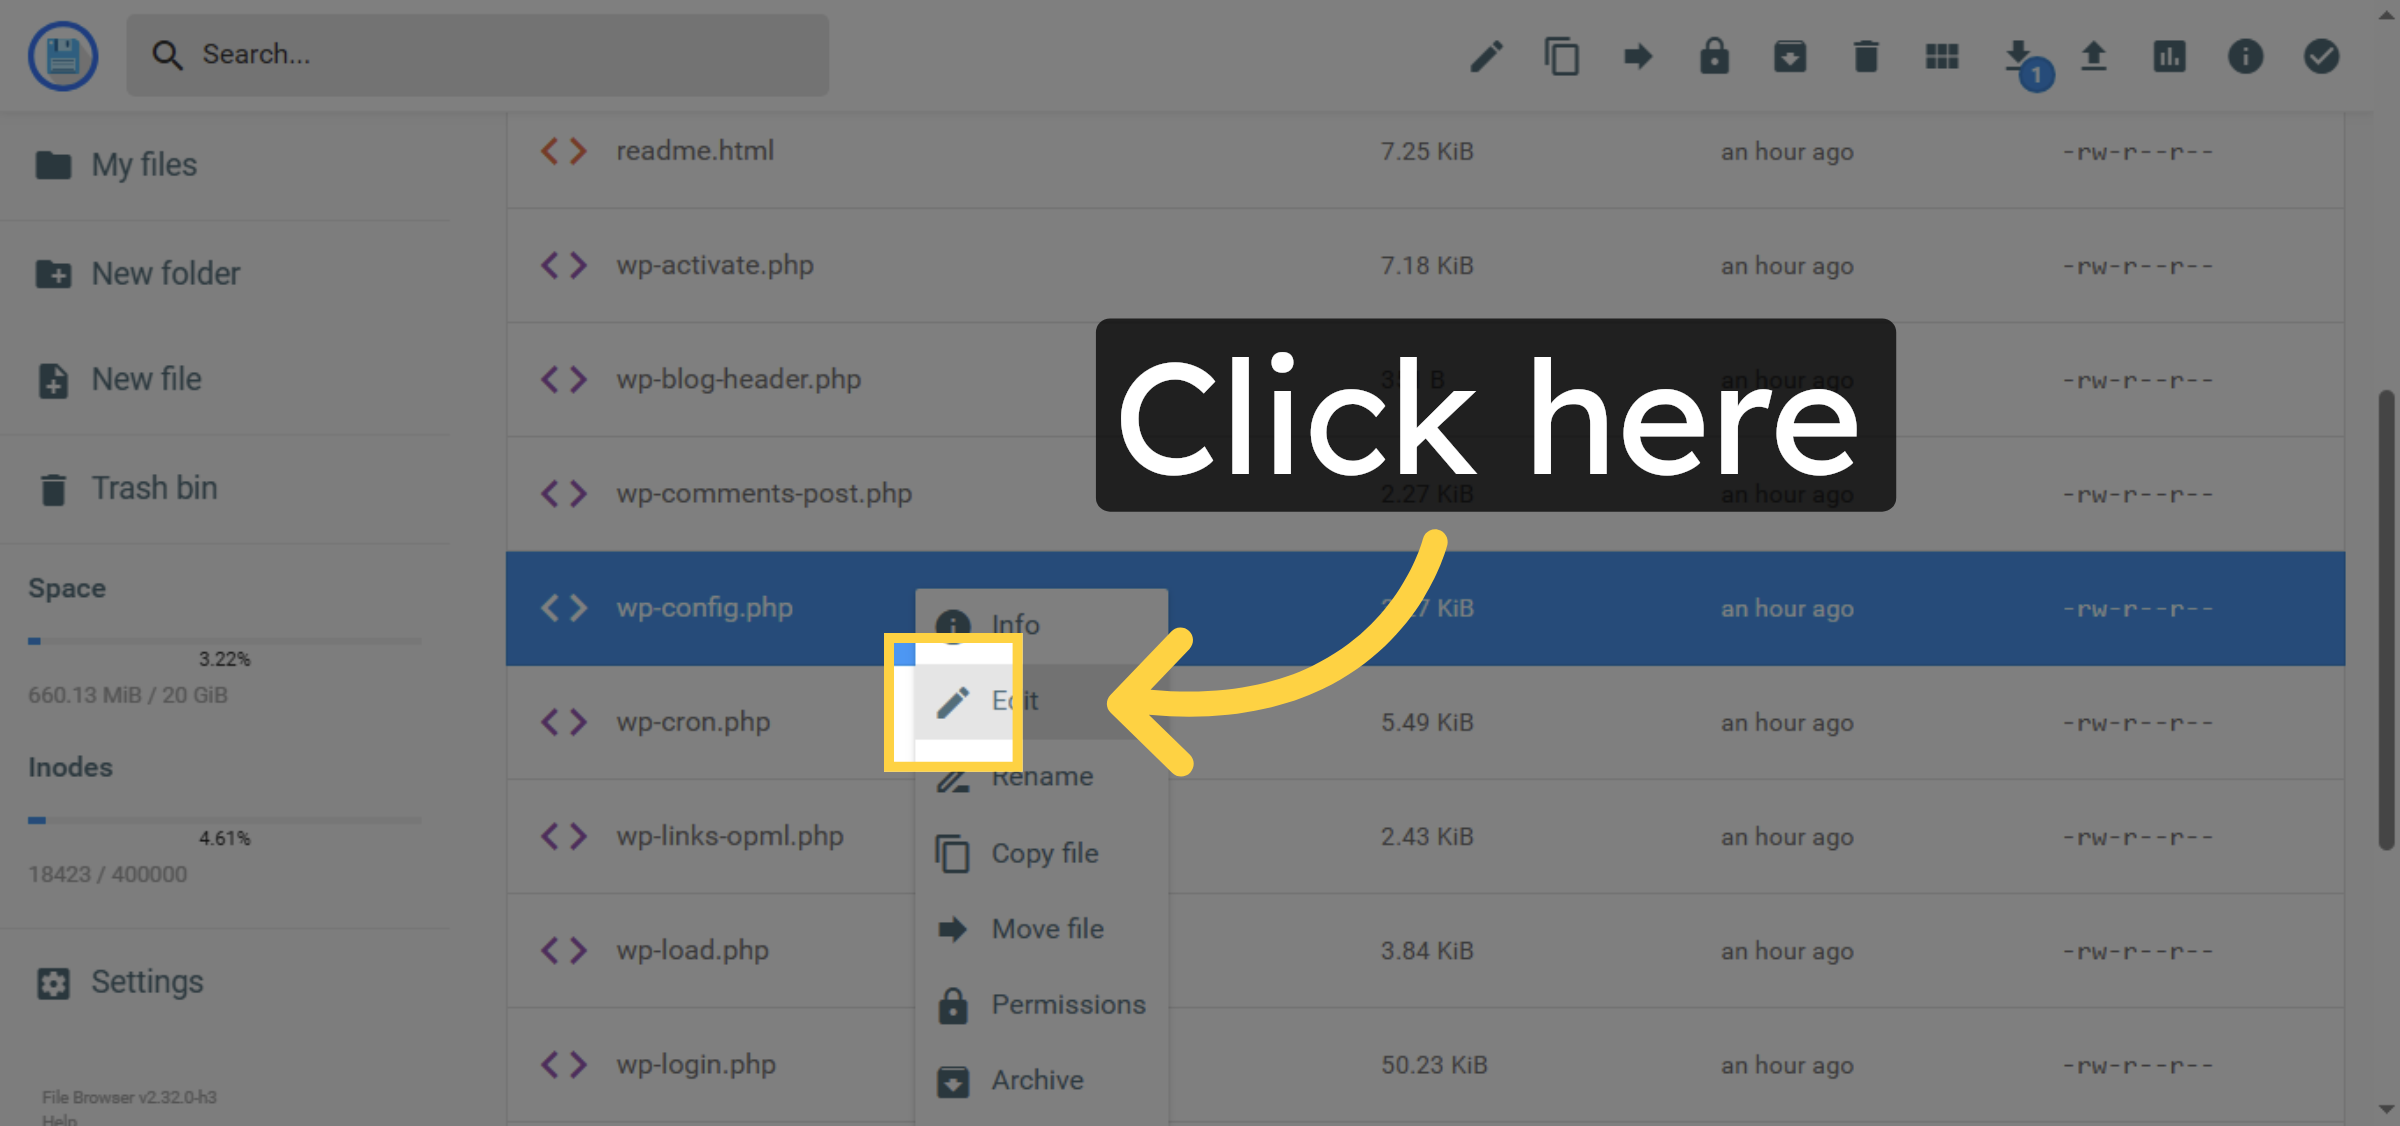
7. Open File Editor


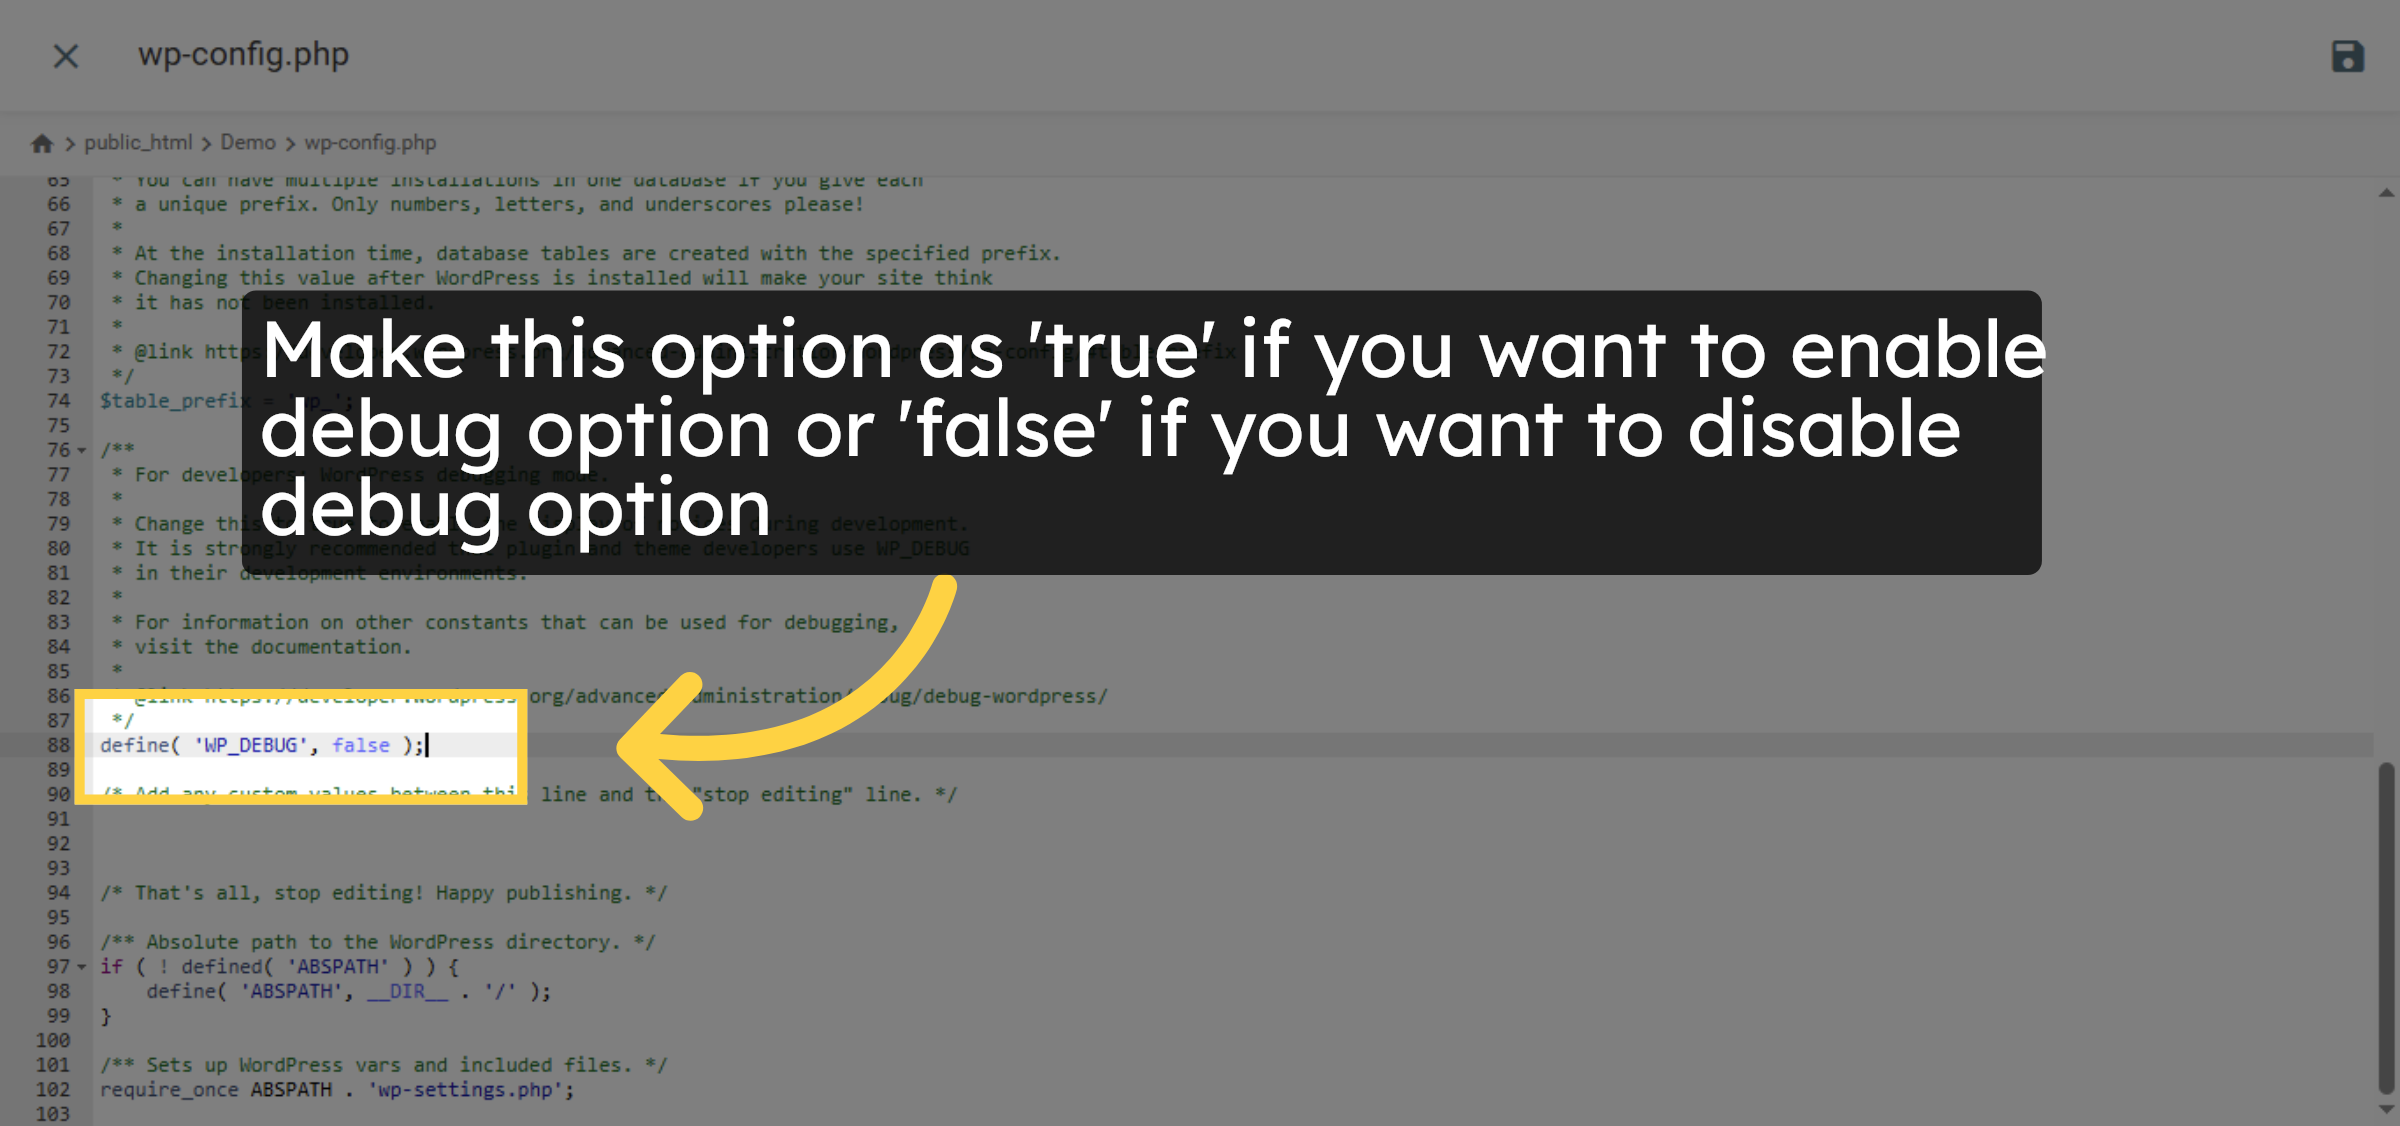
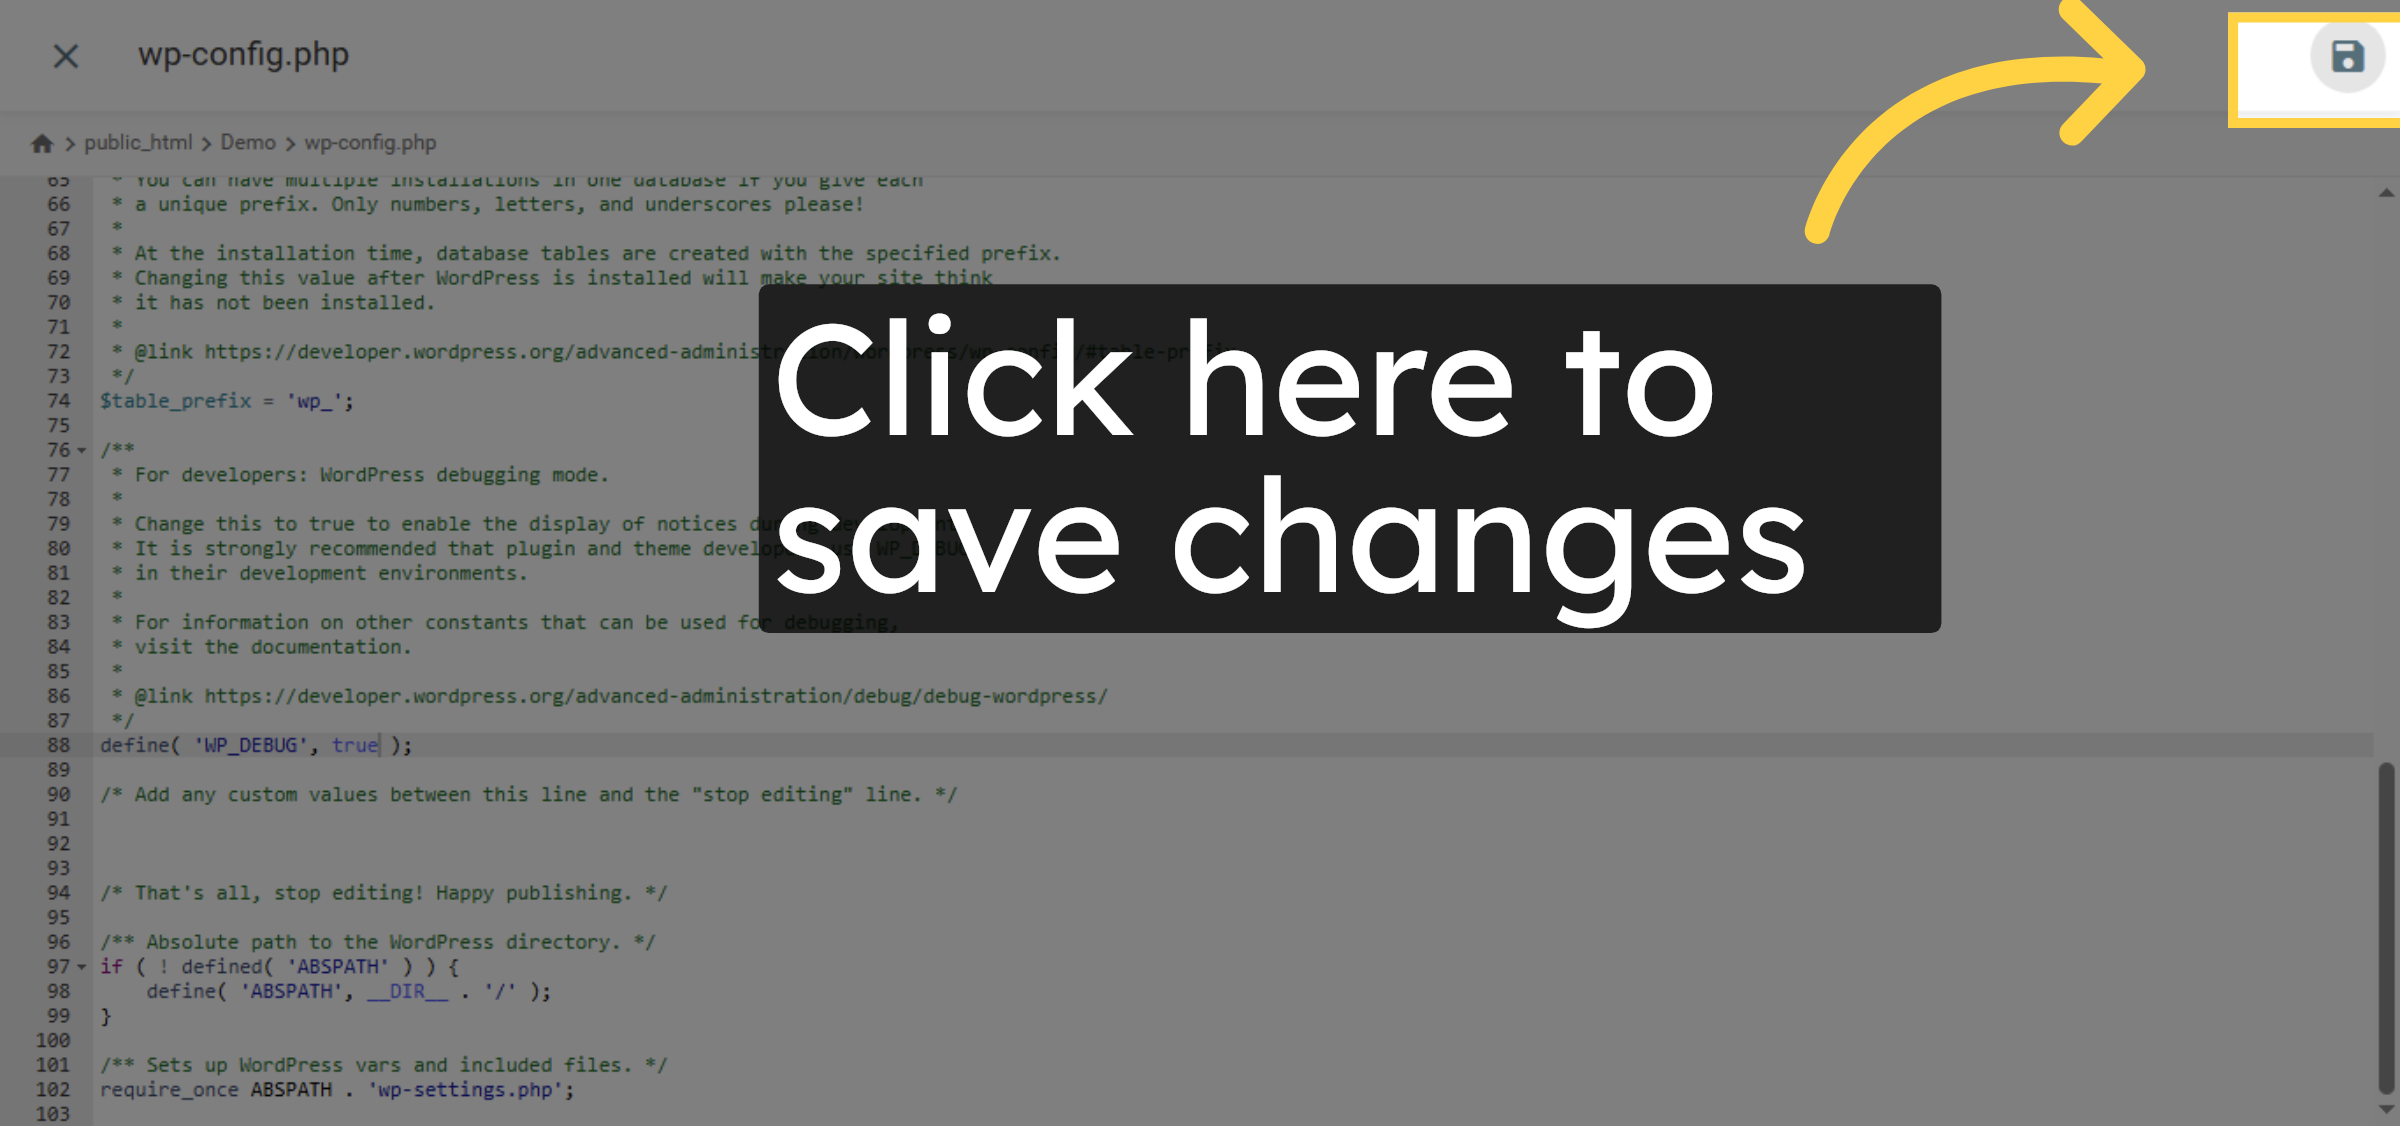
8. Change Debug option.
9. Save File Changes
10. Close File Editor

Conclusion
By following the steps outlined in this guide, you can successfully enable or disable WordPress debug mode on Hostinger by editing the wp-config.php file. Proper use of debug mode helps identify errors quickly and resolve issues related to plugins, themes, or PHP configuration. Remember to disable debug mode after troubleshooting to maintain website security and performance.
Visit: https://www.woohelpdesk.com
Call Us Toll-Free: +1 888 602 0119 (US & Canada)
Get professional support for WordPress configuration, hosting management, performance optimization, and troubleshooting.


