How to Edit Pages with Visual Composer in WordPress: Step-by-Step Guide
Table of Contents
- Introduction
- What Is a Visual Composer in WordPress and Why Does It Matters?
- Things to Check Before You Start Editing with Visual Composer in WordPress
- How to Edit Pages with Visual Composer in WordPress (Detailed Guide)
- Common Problems While Editing with Visual Composer in WordPress
- Conclusion
Introduction
If you want quick page edits, Visual Composer helps a lot. It works like a WordPress page builder for visual editing. You can drag blocks and adjust page sections fast. This Visual Composer tutorial will guide you step by step. You will learn how to open the editor correctly. You will also learn how to change text and images safely.
This guide suits beginners and busy site owners too. You do not need coding knowledge for most changes. You only need WordPress login access and page permission. Many users want to Edit with Visual Composer without breaking layouts. This guide shows a safe and simple editing method. You will also understand which editor your website uses.
What Is a Visual Composer in WordPress and Why Does It Matters?
Visual Composer in WordPress is a visual page editing tool. It lets you build pages using ready content elements. You can add rows, columns, and styled blocks easily. This is why it is called a WordPress page builder. Many themes support it for fast page design. You can edit pages without touching theme files. The Visual Composer WordPress editor works using drag and drop. You select an element and change its settings quickly. You can edit headings, paragraphs, buttons, and images easily. You can also adjust spacing and section backgrounds easily. This makes editing faster than the classic editor.
Things to Check Before You Start Editing with Visual Composer in WordPress
Before you Edit with Visual Composer, do a few quick checks. These steps prevent layout issues and lost changes later. They also help the Visual Composer WordPress editor load smoothly. Most problems happen when basic setup is not ready. This section keeps your editing safe and stress free. Follow each check in order for best results.
Confirm You Have the Right Login Access and Role Permissions
First, log in to your WordPress dashboard properly. Your user role must allow page editing access. Admin and Editor roles usually have full editing rights. If you are an Author, options may be limited. Open Pages and try to edit the required page. If you cannot edit, ask the admin to update permissions. Without correct rights, the editor buttons may not appear. This is common with a WordPress page builder setup. Proper access ensures you can Edit with Visual Composer smoothly.
Take a Quick Backup Before You Make Any Page Changes
Always take a backup before editing a live page. A backup helps you restore the page if something breaks. Use a backup plugin or your hosting backup option. If your host offers daily backups, confirm it is enabled. For major changes, use a staging site if possible. A staging site lets you test edits without risk. This is a smart step in any Visual Composer tutorial. Backup protection keeps your design and content safe.
Check Theme and Plugin Compatibility Before Editing
Sometimes the theme affects how Visual Composer works. If the theme is outdated, layout issues may appear. Also, some plugins may conflict with your builder editor. Security, cache, and optimization plugins can block scripts. If the editor loads slowly, a plugin conflict is possible. Update the theme and plugins if updates are available. Do updates carefully and avoid skipping many versions. Compatibility helps the Visual Composer in WordPress experience stay stable. It also keeps your WordPress page builder tools working correctly.
Check Cache Settings So You Can See Changes Correctly
Cache can hide new changes after you update a page. You may edit correctly, but the old page still appears. Clear your WordPress cache plugin after publishing updates. Clear your browser cache if the page still looks unchanged. If you use Cloudflare or a CDN, purge that cache too. Some hosts also run server cache in the background. Clear that cache from the hosting panel if available. This step is important when you Edit with Visual Composer often. It ensures your saved edits show on the live website quickly.
Do Quick Performance Checks for Smooth Editor Loading
A slow site can make the builder editor load badly. Low PHP memory can cause editor screens to fail. If possible, check your PHP memory limit in hosting. Also check your PHP version is supported by your setup. Avoid heavy editing when the server is under load. Close extra browser tabs to reduce local slowdowns. If the editor still struggles, disable minify temporarily. Then reload the Visual Composer WordPress editor again. These checks make How to use Visual Composer much easier. They also reduce common errors during page editing.
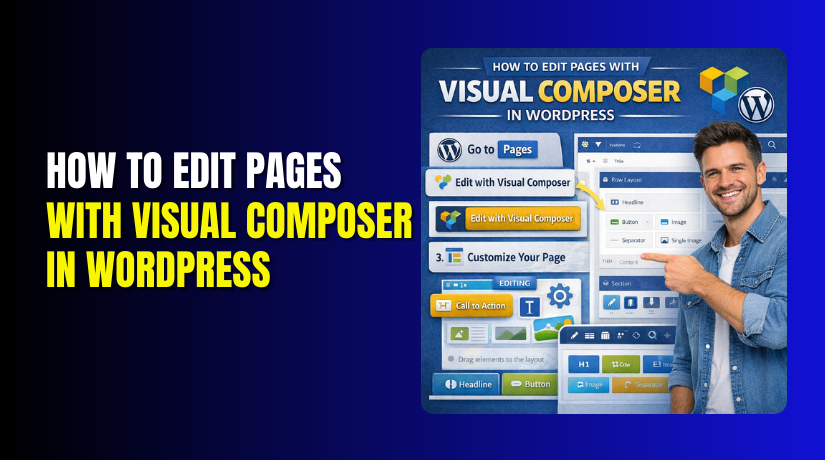
How to Edit Pages with Visual Composer in WordPress (Detailed Guide)
This section shows how to use Visual Composer the right way. You will edit content safely using the Visual Composer WordPress editor. Follow these steps in the same order for best results.
Step 1: Open the page in Visual Composer in WordPress
- Log in to your WordPress dashboard with your account.
- Go to Pages > All Pages from the left menu.
- Find the page you want to edit from the list.
- Click Edit under the page title to open it.
- Click Edit with Visual Composer to launch the builder.
Step 2: Understand the Visual Composer WordPress editor screen
- Look for rows that control full width page sections.
- Notice columns that split sections into content areas.
- Find elements like text, image, button, and icon blocks.
- Use drag and drop to move blocks into new positions.
- Use duplicate and delete icons for fast page changes.
Step 3: Edit text, headings, and buttons
- Click the text block you want to change on the page.
- Replace old text with your updated content carefully.
- Click save inside the element to keep changes safe.
- Click heading blocks to update titles and subheadings.
- Click button blocks to update label text and links.
Step 4: Edit images, backgrounds, and media


- Click the image element and open its settings panel.
- Select a new image from the media library list.
- Add alt text for better SEO and accessibility.
- Open row settings to change background color or image.
- Save settings and check the section layout again.
Step 5: Add new sections and new elements
- Click Add Element to insert a new block.
- Search and add text, image, button, icon, or divider.
- Click Add Row to create a brand new page section.
- Choose one, two, or three column layout for rows.
- Drag elements into columns to build the new section.
Step 6: Fix spacing, columns, and layout
- Open row settings to adjust padding and margin values.
- Reduce spacing if there are big gaps on the page.
- Increase spacing if content looks too tight and crowded.
- Adjust column widths if sections look unbalanced.
- Keep spacing consistent across the full page layout.
Step 7: Check mobile view and responsive layout
- Switch to mobile view inside the builder settings.
- Check text size, spacing, and button tap area.
- Stack columns if side by side content looks cramped.
- Hide heavy sections on mobile if they slow down pages.
- Save changes after each mobile layout improvement.
Step 8: Save, preview, and publish changes
- Click Save to store changes in the builder.
- Click Preview to review the page before publishing.
- Click Update to publish changes on the live site.
- Clear plugin cache so changes show on the front end.
- Clear browser or CDN cache if changes still look old.
- This final step helps when you edit with Visual Composer often.
Always preview your page before publishing changes. Make small edits first, then update step by step. Clear cache if changes do not appear instantly. If the editor fails or the layout breaks, restore from a backup.
Common Problems While Editing with Visual Composer in WordPress
Even a good WordPress page builder can show problems sometimes. Most issues come from cache, conflicts, or permission limits. Use the fixes below to solve issues step by step. These steps work for the Visual Composer WordPress editor in most sites.
“Edit with Visual Composer” Button Not Showing on the Page Screen
This usually happens when the plugin is not active. Go to Plugins > Installed Plugins and check status. If Visual Composer is inactive, click Activate and reload pages. Sometimes the site uses WPBakery instead of Visual Composer. In that case, you will see WPBakery editor buttons instead. Another common reason is limited user role permissions. Ask the admin to give Editor or Admin access. Also check if you are editing a page or a custom post. Some builders are enabled only for specific content types. After changes, refresh the page edit screen and check again.
Visual Composer Website Builder Editor Not Loading or Stuck
A stuck editor usually points to cache or plugin conflicts. First, clear your WordPress cache plugin and browser cache. Then disable minify options in cache or speed plugins. Minify can block builder scripts and break loading screens. Next, test by disabling other plugins one by one. Start with security, optimization, and addon plugins first. If the editor loads after disabling one plugin, you found a conflict. Also check your hosting PHP memory limit if pages are heavy. Low memory can crash builder screens during loading. If your host supports it, increase memory and reload again. This helps when you follow any Visual Composer tutorial steps.
Changes Not Showing on Live Site After You Update the Page
This is usually a cache problem, not a saving issue. Clear cache from your caching plugin after every update. Clear browser cache or open the page in an incognito tab. If you use Cloudflare, purge cache from the Cloudflare dashboard. Some hosts also use server cache that must be cleared. Check your hosting panel for cache purge buttons. Also confirm you updated the correct page and not a duplicate. Sometimes a page uses a template built in another location. Check the page URL and match it with the correct page title. Once caches clear, your edits should display normally. This is common when you Edit with Visual Composer often.
Layout Breaks After Editing a Section or Moving Elements
Layout breaks often happen when rows and columns get mixed. Undo the last move if the editor supports that action. If not, use WordPress revisions to restore the last good version. Open row settings and check column structure carefully. Make sure each element sits inside the correct column container. Many breaks come from wrong padding and margin values. Reset padding to default if the section looks stretched. Remove negative margins if content overlaps other sections. Also check responsive settings that hide items on some screens. After fixing structure, preview the page before publishing updates. This keeps your Visual Composer in WordPress layout clean.
Shortcodes Showing Instead of the Page Builder Design
Shortcodes appear when the builder content does not render. This can happen if the builder plugin got deactivated. Go to plugins and confirm it is active and updated. Do not switch editors and save without checking the layout first. Switching to the classic editor can expose builder shortcodes on the page. If shortcodes already show, open the page using the builder editor again. Then click update to re-render the layout properly. If the builder was removed, restore it from a backup quickly. This protects your page design and saves your content structure. It also keeps the Visual Composer website builder output stable.
Conclusion
Now you know how to use Visual Composer for safe page edits. You also learned how to fix common builder editing problems. Always take a backup before making major design changes. Always check mobile view before you publish updates live. Clear cache after updates so changes show without confusion. If Visual Composer still fails, it may need deeper checks. For quick and reliable help, contact WooHelpDesk today. Our team can fix builder issues and restore broken layouts fast.