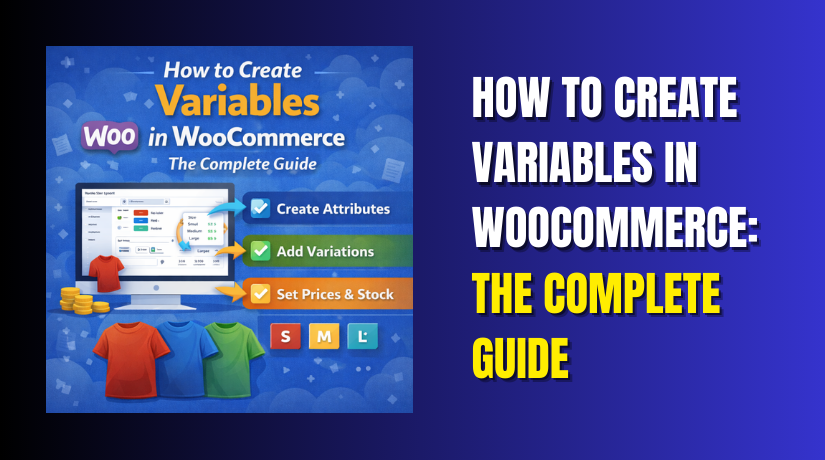
How to Create Variables in WooCommerce: The Complete Guide
Table of Contents
- Introduction
- What are Variables in WooCommerce?
- What are Key Features, Pros and Cons of Variables in WooCommerce?
- How to Create Variables in WooCommerce?
- How to Add Variables in WooCommerce?
- Final Verdict
Introduction
Selling products online often means offering choices. Customers want different sizes. Different colors. Different materials.
Managing all these options separately creates catalog chaos. You would need dozens of product pages for one t-shirt. Inventory tracking becomes impossible. Customer experience suffers.
WooCommerce solves this with variables. Variable products let you offer multiple options within a single product listing. A single shirt page can offer small, medium, and large sizes in red, blue, and green. Customers choose their combination. You manage everything in one place.
Variables are one of WooCommerce’s most powerful features. They simplify your catalog. They improve customer experience. They boost sales by showing all options together.
But creating variables confuses many store owners. The terminology is confusing. Attributes versus variations. Global versus custom. The steps seem overwhelming.
This guide ends that confusion forever. You will learn exactly what variables are. You will understand their key features and benefits. You will follow step-by-step instructions to create your first variable product. You will master advanced techniques like bulk editing and swatches.
By the end, you will confidently create variable products for any product type. Your catalog will be organized. Your customers will find what they want. Your sales will grow.
What are Variables in WooCommerce?
Variables, officially called variable products, are a product type that lets you offer multiple versions of the same item within one listing. Each version is called a variation.
A variable product serves as a container for multiple variations. The container itself cannot be purchased. Customers actually buy the variations inside.
Think of a variable product as a parent folder. The variations are the individual files inside. Customers browse the folder and choose which file they want.
For a t-shirt, the variable product is “Classic Cotton Tee.” The variations are “Small Red,” “Medium Blue,” “Large Green,” and all other size-color combinations. Each variation has its own price, SKU, stock level, and image.
How Variables Work?
- Variable products rely on attributes. Attributes define the options customers can choose. Size is an attribute. Color is an attribute. Each attribute has terms like Small, Medium, Large or Red, Blue, Green.
- When you combine attributes, WooCommerce generates variations. A shirt with three sizes and three colors creates nine variations automatically.
- Each variation functions independently. You set its price separately. You track its inventory separately. You upload its own image if needed. When customers select options, they see the correct price, stock status, and image for that combination.
When to Use Variables?
Variables are essential whenever customers must choose between options before purchasing. Common use cases include:
- Clothing with sizes and colors
- Electronics with different configurations
- Furniture with fabric and color options
- Food products with size and flavor choices
- Subscriptions with plan and billing options
If different versions have different prices, SKUs, or inventory levels, you need variable products.
What are Key Features, Pros and Cons of Variables in WooCommerce?
Understanding variable products fully requires examining their features, advantages, and limitations.
Key Features of Variable Products
- Attribute-Based Variation System: Variables rely on attributes to define available options. You create attributes like size or color. Each attribute contains terms like small, medium, large or red, blue, green.
- Automatic Variation Generation: WooCommerce can generate all possible attribute combinations automatically. For two attributes with three terms each, the system creates nine variations instantly.
- Individual Variation Pricing: Each variation can have its own regular price and sale price. Small sizes might cost less than extra-large. Premium colors might carry surcharges.
- Per-Variation SKU Management: Every variation receives its own SKU for inventory tracking. This enables precise stock control across your entire product range.
- Variation-Specific Images: Upload different images for each variation. When customers select “Red,” they see the red product. Select “Blue,” the image changes. This visual feedback reduces uncertainty and returns.
- Stock Management Per Variation: Track inventory separately for each variation. Know exactly how many small red shirts versus medium blue shirts you have.
- Variation Weight and Dimensions: Set different shipping weights for different variations. Hardcover books weigh more than paperbacks. This ensures accurate shipping calculations.
- Downloadable and Virtual Variations: Mark specific variations as downloadable for digital products or virtual for services. One product can combine physical and digital variations.
- Default Variation Selection: Set a default variation that pre-selects on page load. Customers see a choice already made, reducing decision friction.
- Bulk Editing Capabilities: Update multiple variations simultaneously. Set all prices to the same value. Apply the same image to all variations of a specific color.
Pros of Variable Products
- Simplified Catalog Management: One product page replaces dozens of individual listings. Your product list stays clean and organized. Customers navigate one page instead of hunting through multiple.
- Better Customer Experience: Shoppers explore all options without leaving the page. They compare choices side by side. Dynamic updates show exactly what they are selecting.
- Precise Inventory Control: Track stock at the variation level. Never oversell a specific size or color while others remain in stock. This precision reduces customer disappointment.
- Enhanced Merchandising Opportunities: Feature variable products in category pages. Customers see the main product and can explore variations after clicking. This maintains catalog visibility while offering depth.
- Improved Site Performance: One variable product loads faster than dozens of individual simple products. Fewer database queries, less page weight, better user experience.
- Flexible Pricing Strategies: Charge more for premium variations. Offer sales on specific combinations. Clear excess inventory of particular sizes without discounting everything.
- SEO Benefits: Consolidate product authority into one page. All reviews and backlinks point to a single URL. This strengthens search rankings for your core product.
- Cross-Selling Within the Product: Show related variations naturally. Customers considering one option see others alongside, encouraging larger purchases.
- Easy Duplication for Similar Products: Create one variable product, then duplicate it for similar items. Adjust attributes and variations as needed. This saves time across your catalog.
- Plugin Ecosystem Support: Dozens of plugins enhance variable products with swatches, bulk order forms, and advanced pricing. The ecosystem is mature and reliable.
Cons of Variable Products
- Complexity for Beginners: Setting up attributes correctly requires understanding. New users often confuse attributes with variations. Mistakes require rework.
- Performance Issues with Too Many Variations: WooCommerce preloads variation data for up to 30 variations by default. Beyond that, each customer click triggers a server request. This creates noticeable delays.
- Variation Explosion Risk: Products with three attributes each having five terms create 125 variations. This database bloat slows everything. Admin screens become sluggish. Page load times suffer.
- Limited Default Display Options: WooCommerce shows variations as dropdowns by default. This works but lacks visual appeal. Swatches require additional plugins.
- No Support for Complex Option Logic: Native variations cannot show or hide options based on previous selections. Conditional logic requires add-on plugins.
- Inventory Management Complexity: With hundreds of variations, updating stock becomes tedious. Bulk editing helps but does not eliminate the workload.
- Price Display Limitations: Category pages show “From $X” when variations have different prices. This is legally required but can confuse customers who expect the lowest price.
- Theme Compatibility Concerns: Some themes handle variations poorly. Testing required to ensure dropdowns, swatches, and dynamic updates work correctly.
- Variation Threshold Issues: Stores exceeding the 30-variation threshold face performance degradation without custom coding. Raising the limit requires developer intervention.
- CSV Import Complexity: Importing variable products via CSV requires perfect formatting. One wrong SKU reference breaks entire product families.
How to Create Variables in WooCommerce?
Creating variable products involves several steps. Follow this comprehensive guide carefully.
Step 1: Create Global Attributes
WordPress Dashboard → Products → Attributes
- Click on Products in your left admin menu
- Click on Attributes at the top of the Products page
- Enter a name for your first attribute (e.g., “Size”)
- Enter a slug (e.g., “size”) – lowercase with hyphens
- Choose how to sort terms: Default, Name, or Custom ordering
- Click “Add attribute”
- Now click “Configure terms” next to your new attribute
- Add each option as a separate term:
- Enter term name (e.g., “Small”)
- Enter slug (e.g., “small”)
- Add description (optional)
- Click “Add new”
- Repeat for Medium, Large, and any other sizes
- Click back to Attributes and repeat for Color attribute
Step 2: Add a New Variable Product
WordPress Dashboard → Products → Add New
- Click “Add New” at the top of the Products page
- Enter your product name (e.g., “Classic Cotton T-Shirt”)
- Write your product description in the editor
- Scroll down to the Product Data metabox
- Click the dropdown menu that says “Simple product”
- Select “Variable product” from the dropdown
Step 3: Add Attributes to Your Product


Product Edit Screen → Product Data → Attributes Tab
- Click on the “Attributes” tab in the Product Data section
- In the “Add existing” dropdown, select your Size attribute
- Click “Add”
- The attribute appears with a list of all size terms
- Check the boxes for sizes you offer (Small, Medium, Large)
- Check the box “Used for variations”
- Click “Save attributes” at the bottom
- Repeat the process for Color attribute
- Select Red, Blue, Green from the terms
- Check “Used for variations”
- Click “Save attributes” again
Step 4: Generate Variations
Product Edit Screen → Product Data → Variations Tab
- Click on the “Variations” tab in the Product Data section
- Click the dropdown menu that says “Add variation”
- Select “Create variations from all attributes”
- Click the “Go” button
- WooCommerce processes and generates all combinations
- A success message appears with the number of variations created
Step 5: Configure Each Variation
Variations Tab → Individual Variation Rows
- Click on the first variation row to expand it
- You will see fields for this specific variation :
- Regular Price: Enter the price (required)
- Sale Price: Enter sale price if applicable
- SKU: Enter unique SKU for this variation
- Stock Status: Choose In stock or Out of stock
- Manage Stock: Check to track inventory
- Stock Quantity: Enter number available
- Allow Backorders: Choose Yes/No
- Image: Click to add variation-specific image
- Weight: Enter if different from main product
- Dimensions: Enter if different from main product
- Downloadable: Check for digital variations
- Virtual: Check for service variations
- Configure all settings for this variation
- Click “Save changes” at the bottom
- Repeat for every variation
Step 6: Use Bulk Edit for Efficiency
Variations Tab → Bulk Actions Dropdown
- Select all variations using the checkbox at the top
- Click the “Bulk actions” dropdown
- Choose “Edit”
- A popup appears with fields to set
- Enter values that apply to all selected variations:
- Set regular price to $19.99
- Set stock status to In stock
- Set manage stock to Yes
- Click “Update”
- All selected variations receive these settings
- Fine-tune individual variations as needed
Step 7: Set Default Variation
Variations Tab → Default Form Values
- Above the variations list, find “Default Form Values”
- You will see dropdowns for each attribute
- Select your most popular combination:
- Size: Medium
- Color: Blue
- This variation pre-selects when customers load the page
- The Add to Cart button is enabled immediately
- Click “Save changes” at the bottom
Step 8: Publish Your Product
- Review all settings one final time
- Click the blue “Publish” button
- Wait for confirmation message
- Click “View product” to see your live variable product
How to Add Variables in WooCommerce?
Once your variable product is created, you may need to add more variations later. Here are several methods.
Method 1: Add Individual Variations Manually
Product Edit Screen → Variations Tab
- Edit your existing variable product
- Scroll to the Variations tab
- Click the dropdown menu that says “Add variation”
- Select “Add variation manually”
- Click “Go”
- A new empty variation row appears
- Click to expand the variation
- Select the attribute values from dropdowns:
- Choose Size: Small
- Choose Color: Red
- Set price, SKU, stock, and image
- Click “Save changes”
Method 2: Generate Additional Variations from New Attributes
Product Edit Screen → Attributes Tab → Variations Tab
- Go to the Attributes tab
- Add your new attribute (e.g., “Material”)
- Add terms (e.g., “Cotton, Polyester”)
- Check “Used for variations”
- Click “Save attributes”
- Go to the Variations tab
- Click “Add variation” dropdown
- Select “Create variations from all attributes”
- Click “Go”
- WooCommerce generates all new combinations
- Configure pricing and stock for new variations
Method 3: Bulk Add Variations via CSV Import
WordPress Dashboard → Tools → Import → WooCommerce Products
- Prepare your CSV file with variation rows
- Ensure correct format :
- Type column: “variation” for each variation
- SKU column: Unique SKU for each variation
- Post_parent column: Parent product SKU or ID
- Attribute columns: attribute_pa_size, attribute_pa_color
- Regular price column: Price for each variation
- Stock column: Quantity for each variation
- Navigate to Tools → Import
- Click “Run Importer” under WooCommerce Products
- Upload your CSV file
- Map columns to WooCommerce fields
- Click “Run the importer”
- Verify new variations appear in your product
Method 4: Use Bulk Edit Plugins
WordPress Dashboard → Products → Bulk Edit with Plugin
- Install and activate Admin Columns Pro
- Go to Products list view
- Use smart filtering to find target products
- Select products needing new variations
- Click bulk edit in attribute column
- Add new attributes or values
- Save changes
- Variations generate automatically
Final Verdict
Variables in WooCommerce transform how you sell products with options. They consolidate your catalog. They improve customer experience. They give you precise control over pricing and inventory.
Creating variable products follows a clear sequence. First, create attributes globally. Second, create your variable product. Third, add attributes and mark them for variations. Fourth, generate variations. Fifth, configure each variation with price, SKU, and stock. Sixth, set default variations to enable Add to Cart immediately.
The benefits far outweigh the initial complexity. One product page replaces dozens of simple product listings. Customers compare options side by side without navigating away. Inventory tracking becomes precise at the variation level. Sales increase when customers find exactly what they want.
But variables have limitations. Products over 30 variations face performance issues. CSV imports require perfect formatting. Swatches need additional plugins. Consider these factors when planning your catalog.
For most stores, the 30-variation threshold works well. Most products don’t need more combinations. If you do need more, developer solutions exist.
The smartest approach is to master variable products completely. Use global attributes for consistency. Generate variations efficiently. Configure prices and stock carefully. Test thoroughly before launching.
Your customers will appreciate seeing all options in one place. Your catalog will stay organized. Your sales will grow as customers find exactly what they want. Start creating your first variable product today. Follow the steps in this guide. Your store will never be the same.
Have questions before starting with WooCommerce & WordPress? Get support here at WooHelpDesk.