How To Create And Manage Subdomains And Install WordPress On Hostinger
3 mins read

How To Create And Manage Subdomains And Install WordPress On Hostinger

Introduction

Creating a subdomain and installing WordPress on it is a great way to launch a separate website, test new features, or build a staging environment without affecting your main domain. Hostinger makes this process simple by providing an intuitive dashboard where you can manage domains, create subdomains, and install WordPress using the built-in Auto Installer. With just a few steps, you can set up a fully functional WordPress site on a subdomain and start customizing it right away. In this guide, you’ll learn how to create a subdomain in Hostinger, verify its directory, and install WordPress specifically on that subdomain. This approach is ideal for developers, bloggers, and website owners who want better organization, flexibility, and control over multiple WordPress installations within a single hosting account.
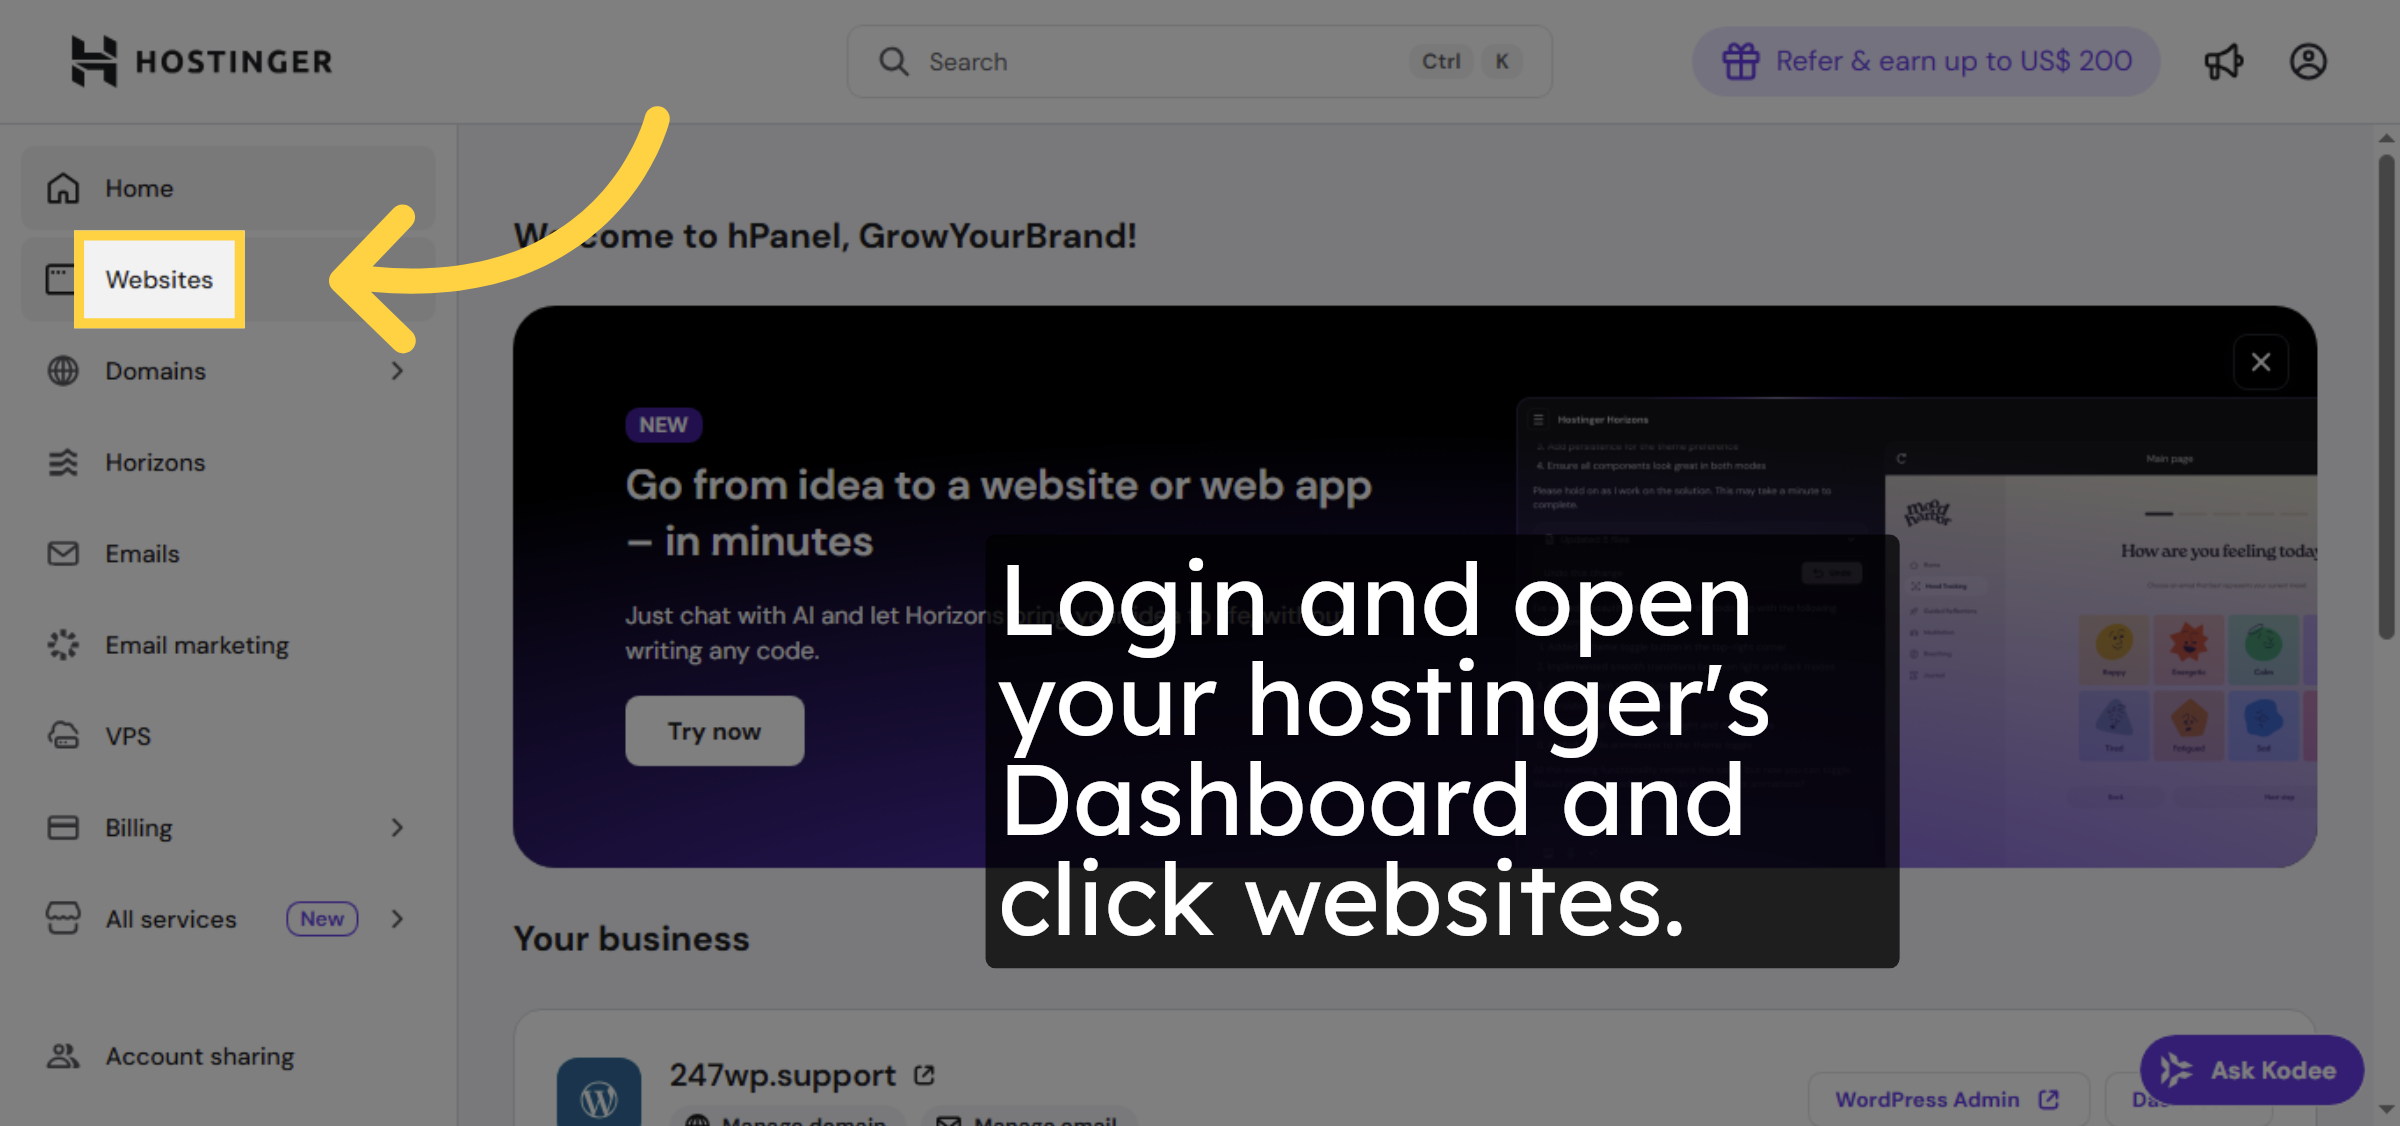
1. Open hostinger

Login and open your hostinger’s Dashboard and click websites.

open hostinger

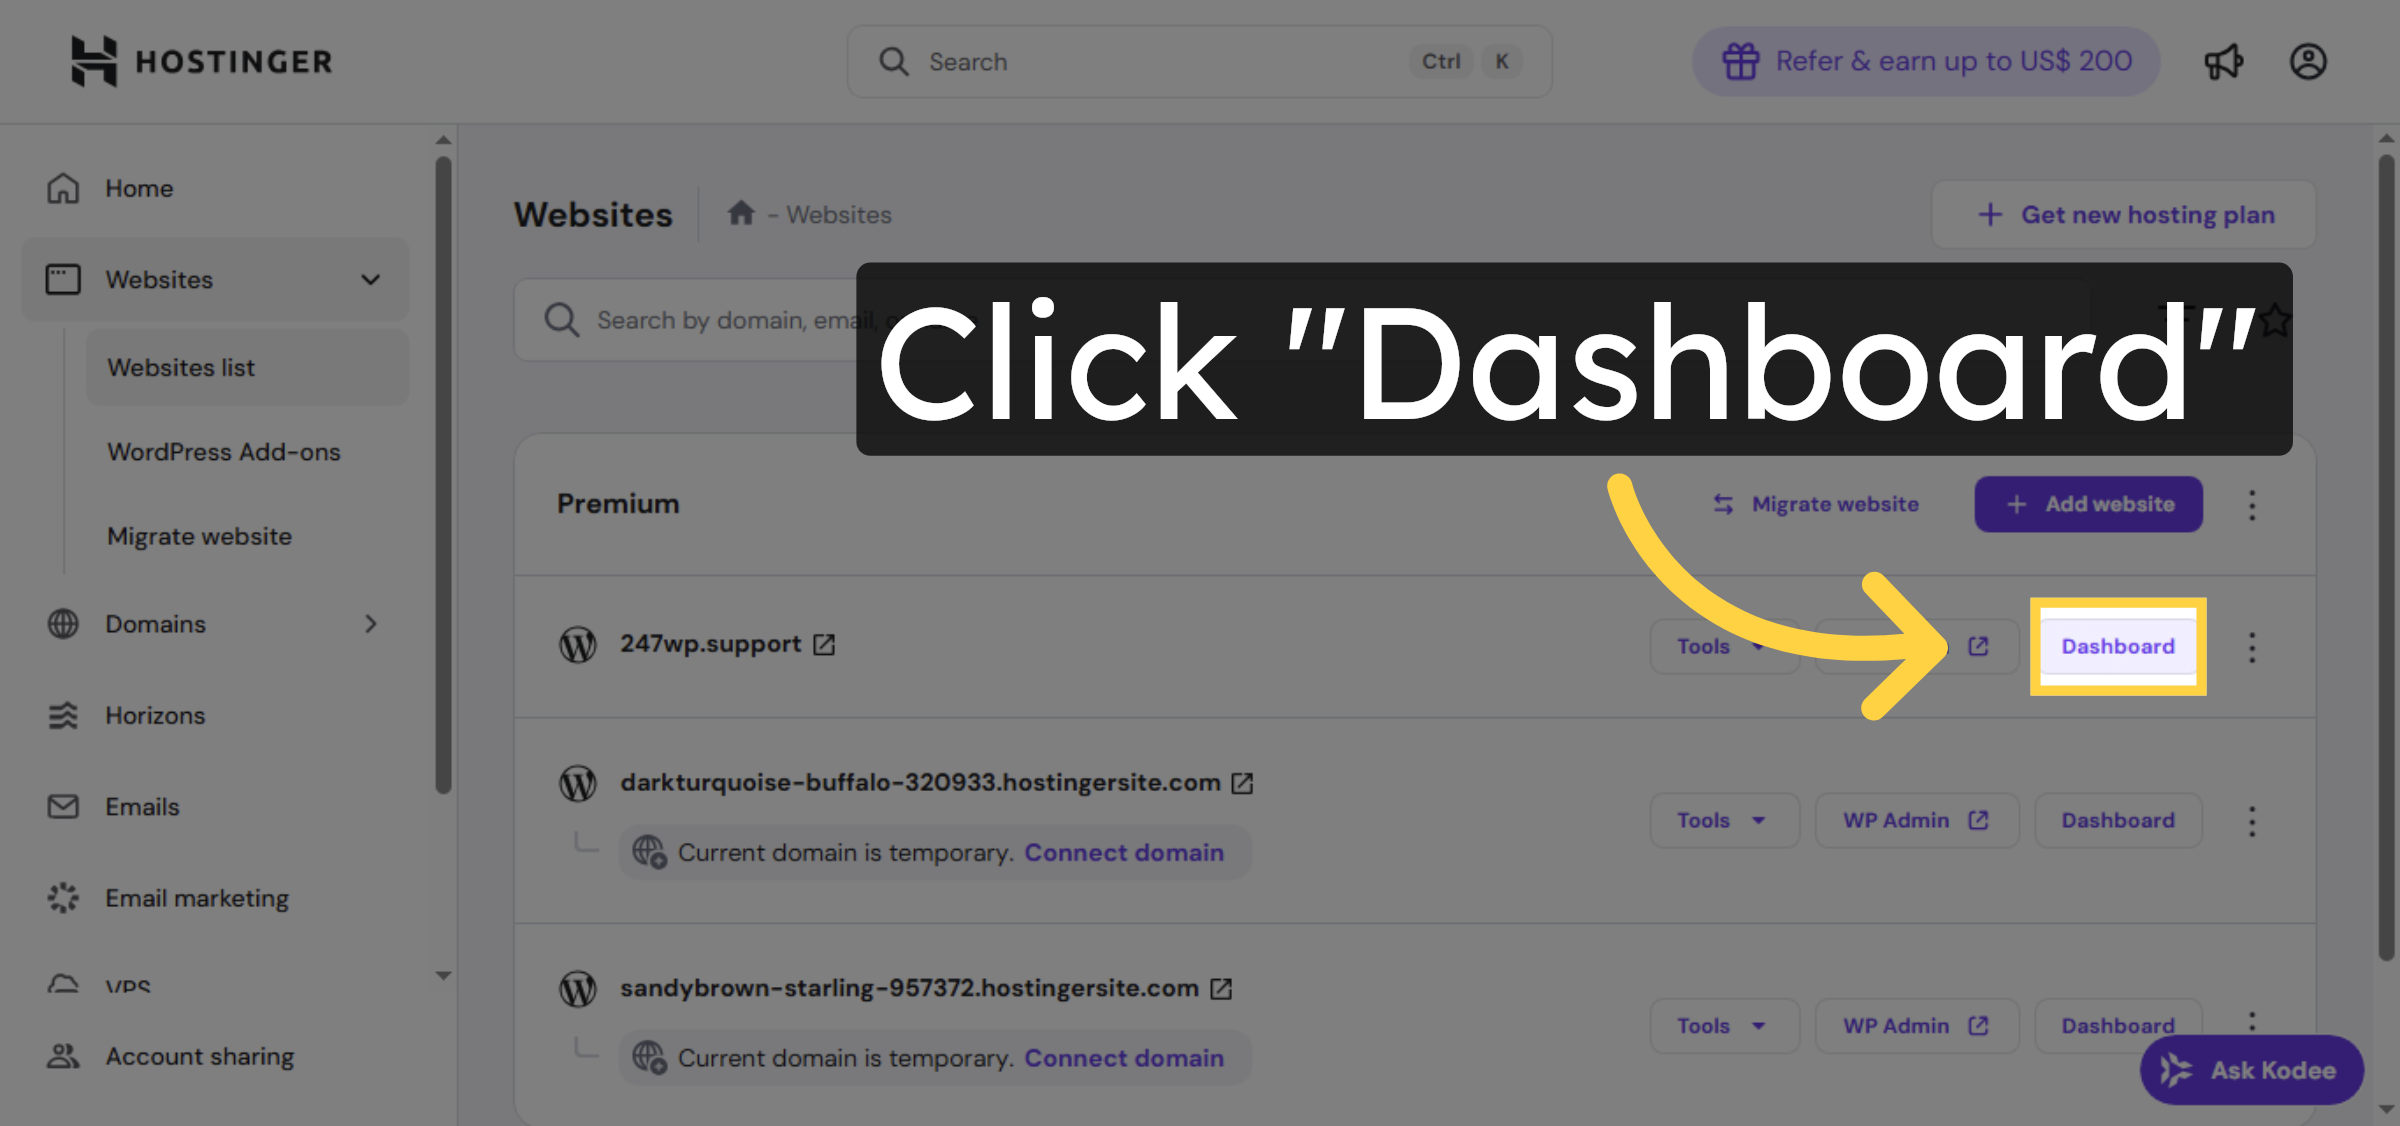
2. Open Website Dashboard

Choose your domain and open dashboard for subdomain creation.

Open Website Dashboard

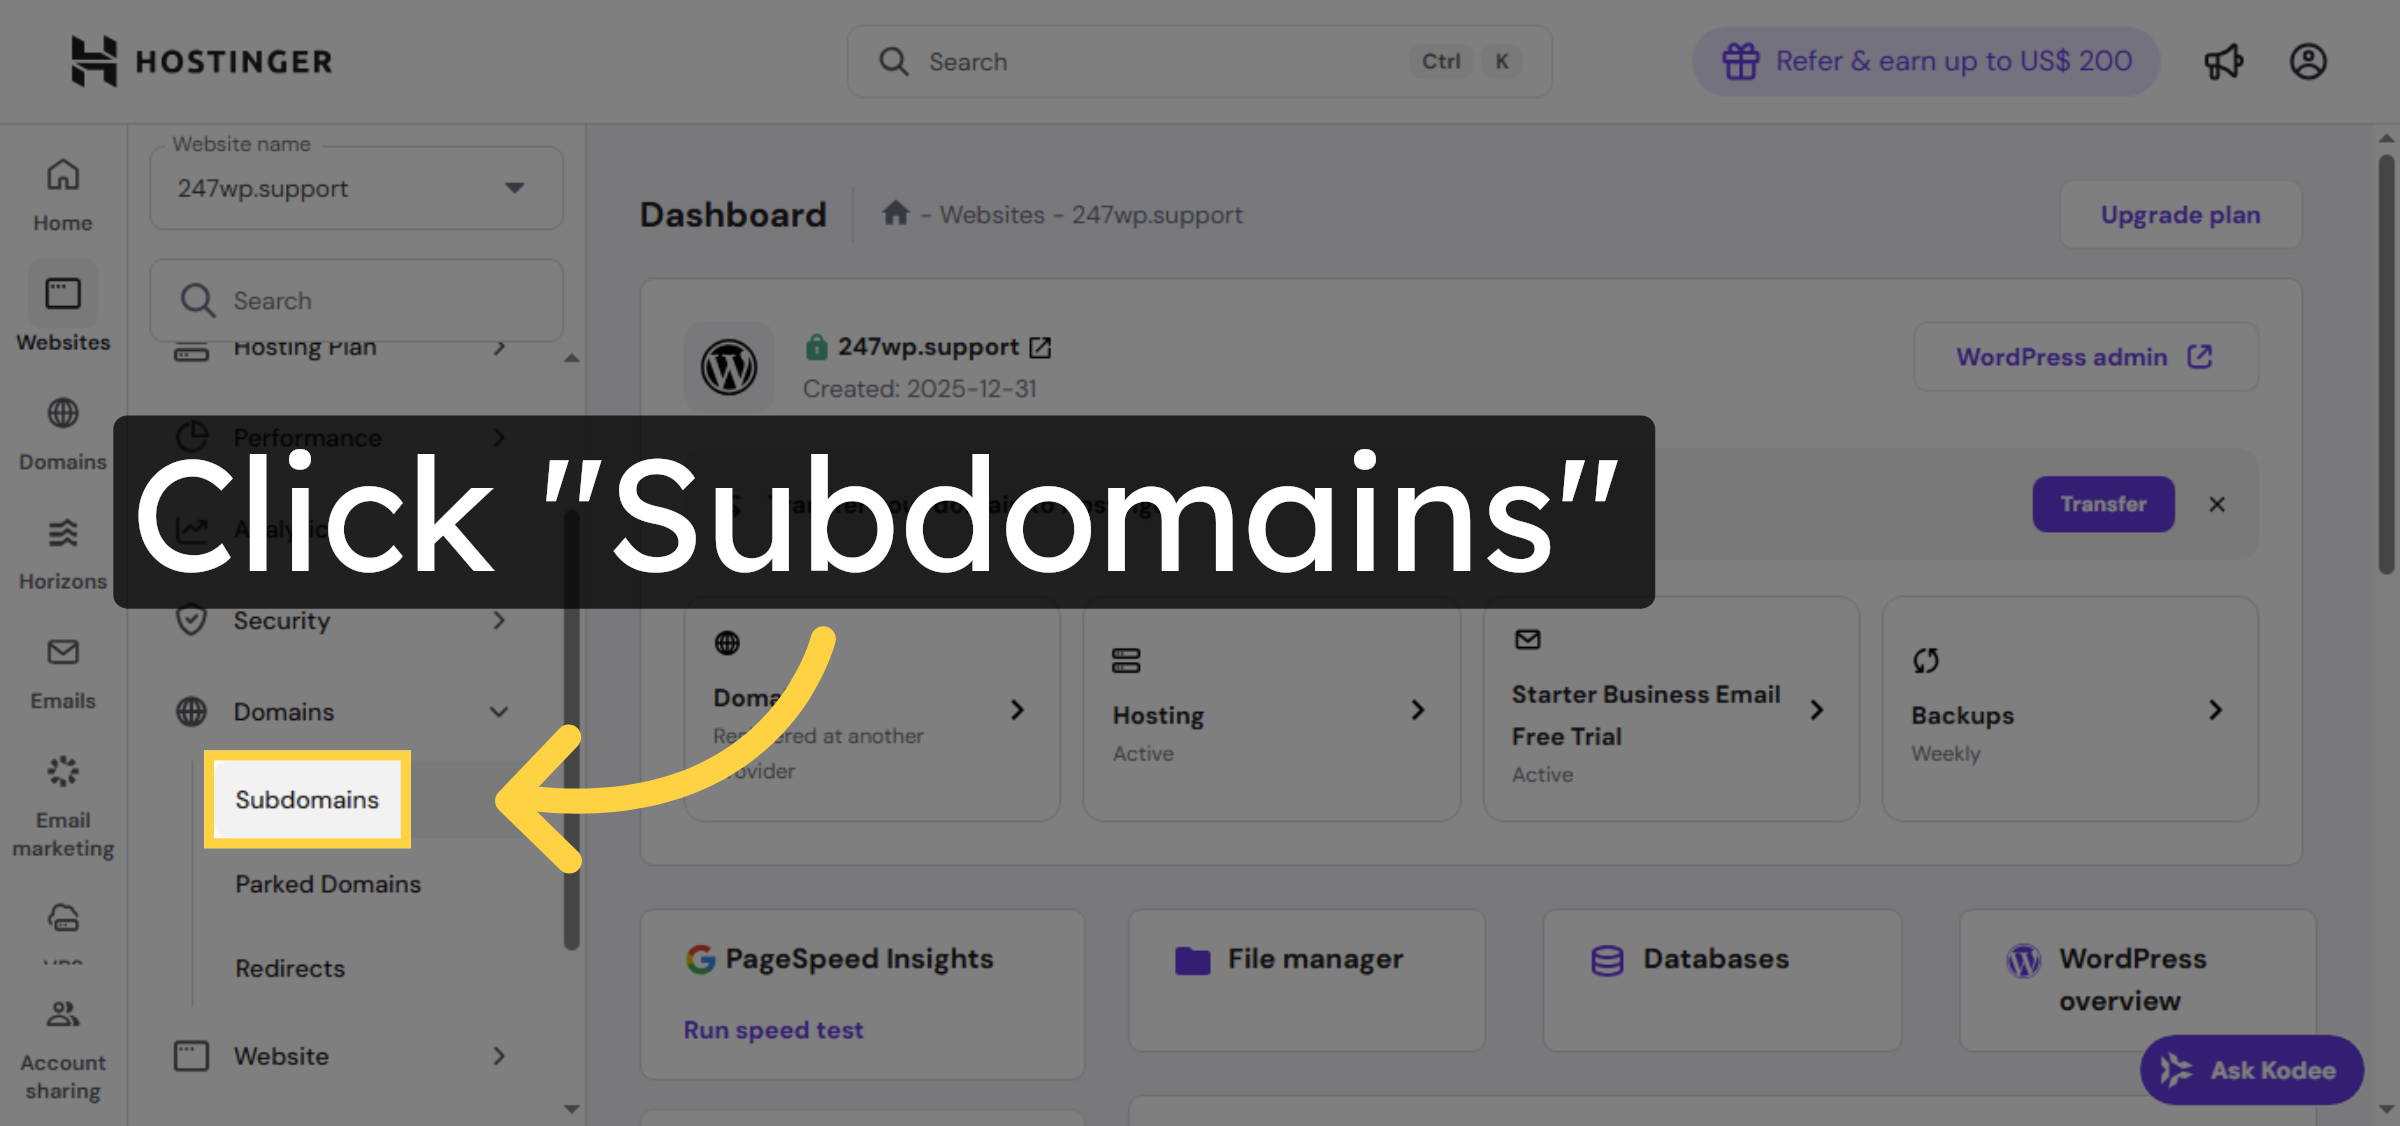
3. Access Domains Section

Click Domains to view and manage your domain settings.

Access Domains Section

4. Select Subdomains Option

Click Subdomains to manage existing subdomains or create new ones.

Select Subdomains Option

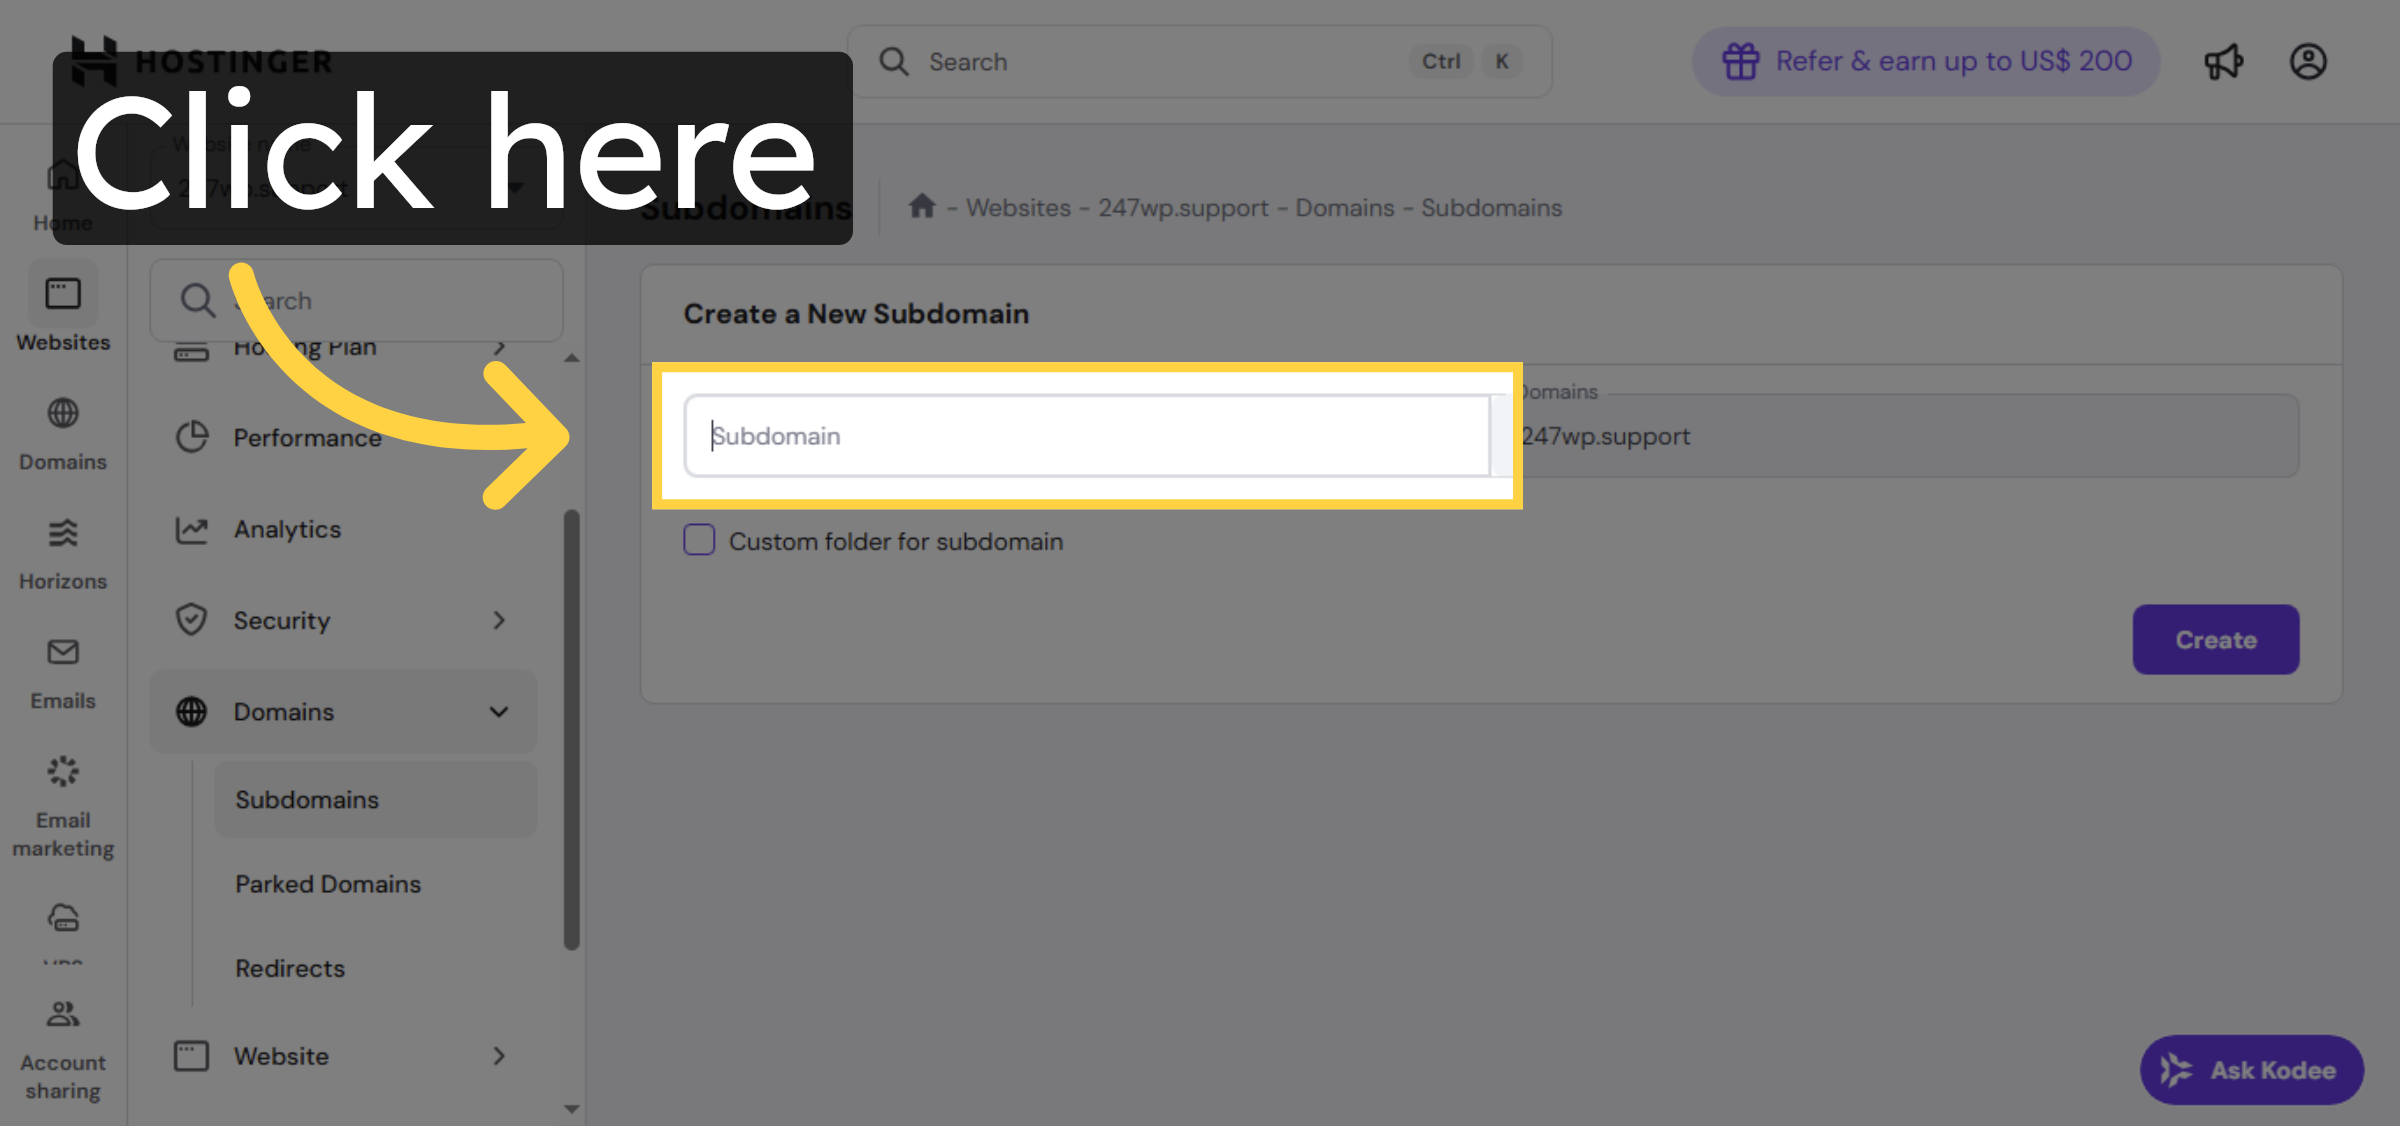
5. Initiate Subdomain Creation

Click the area to start creating a new subdomain.

Initiate Subdomain Creation

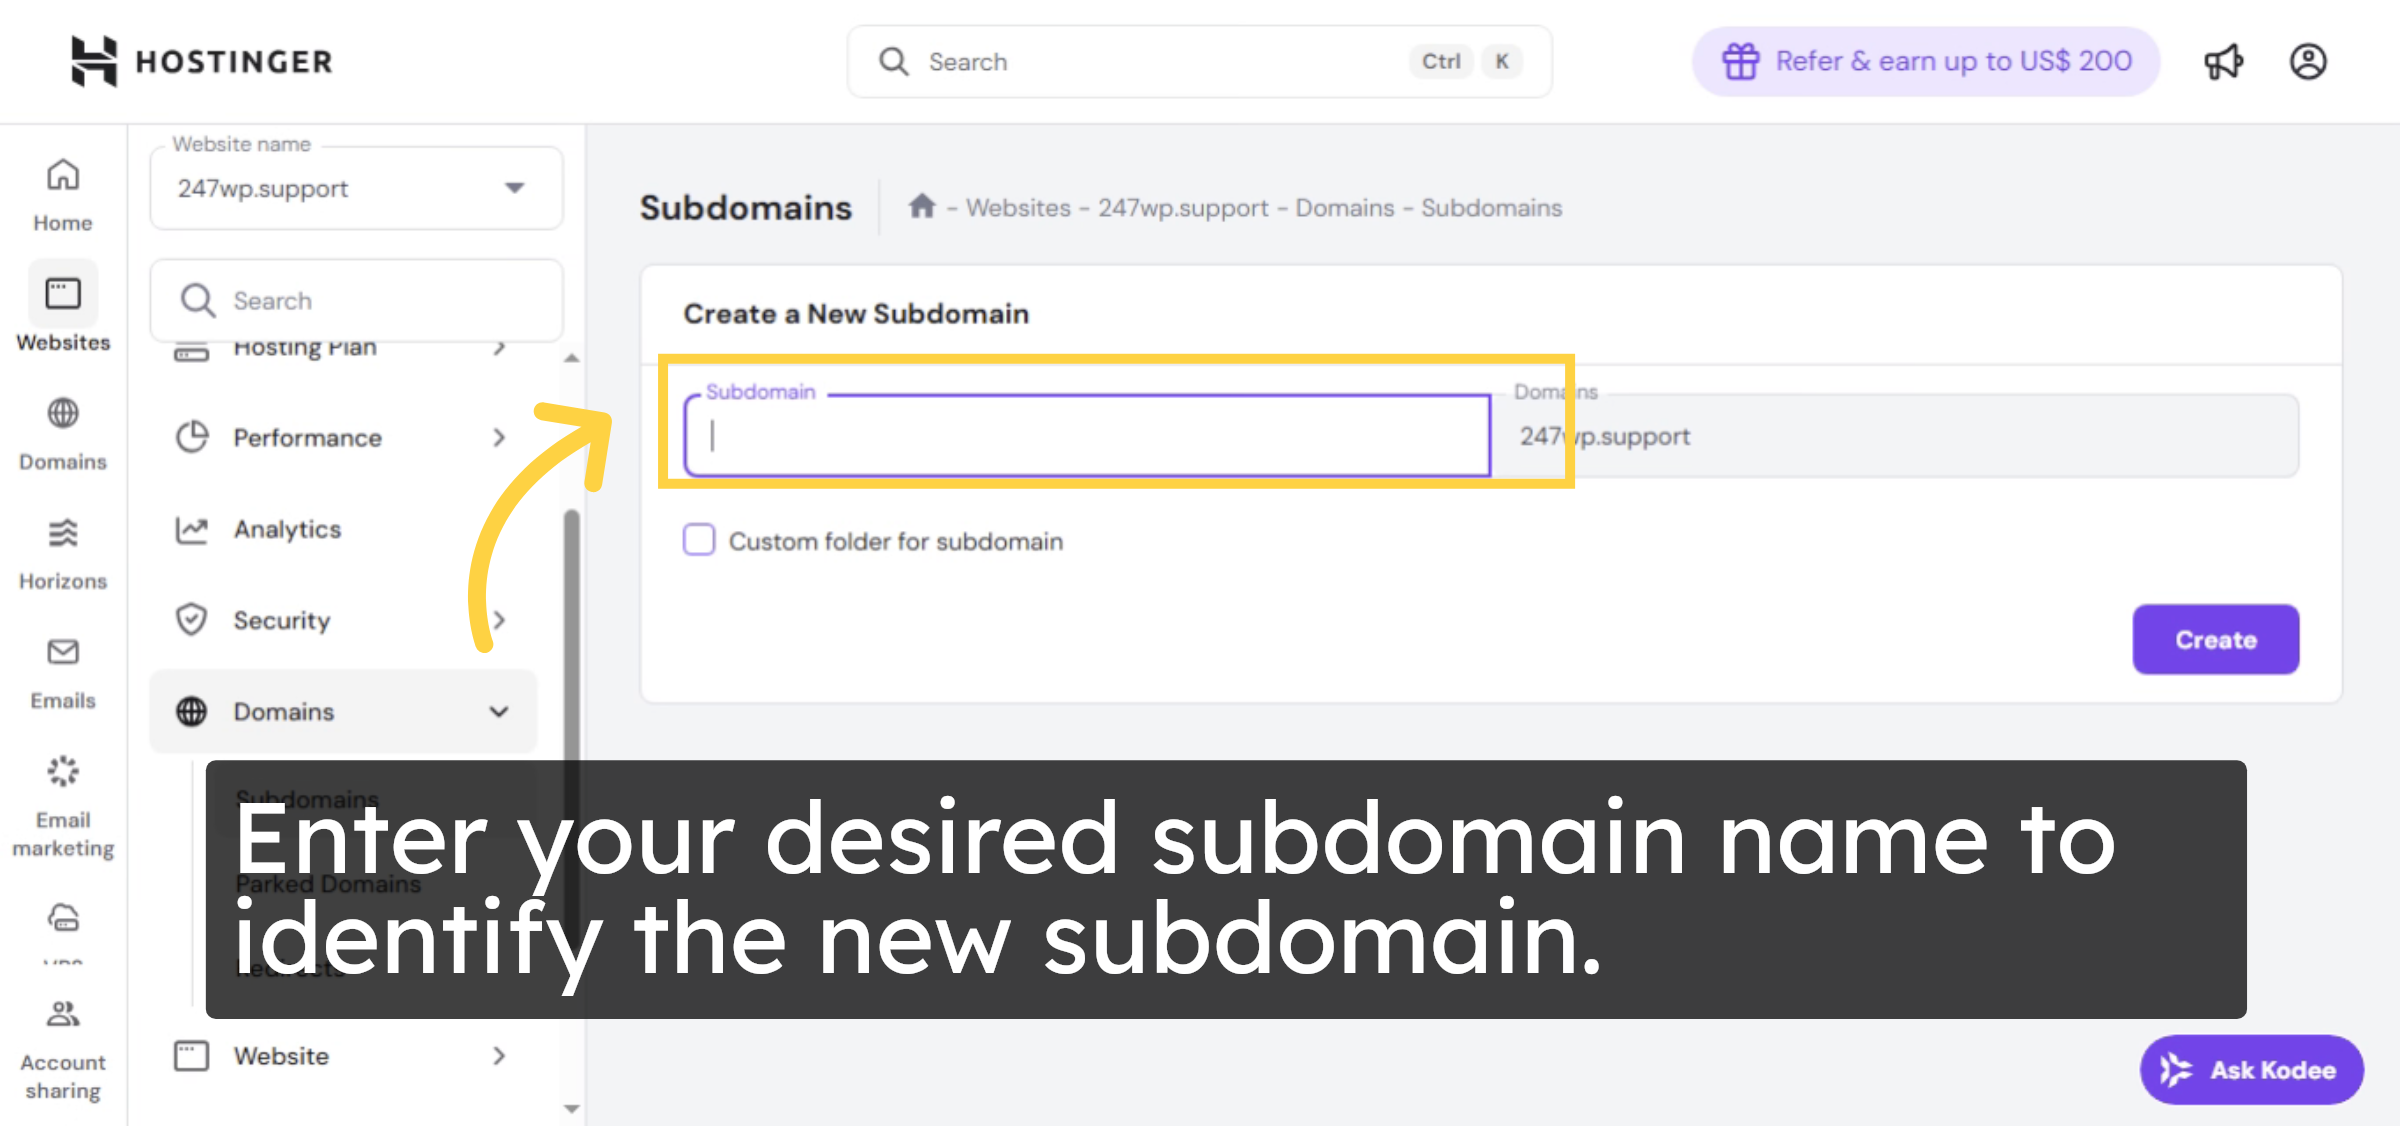
6. Enter Subdomain Name
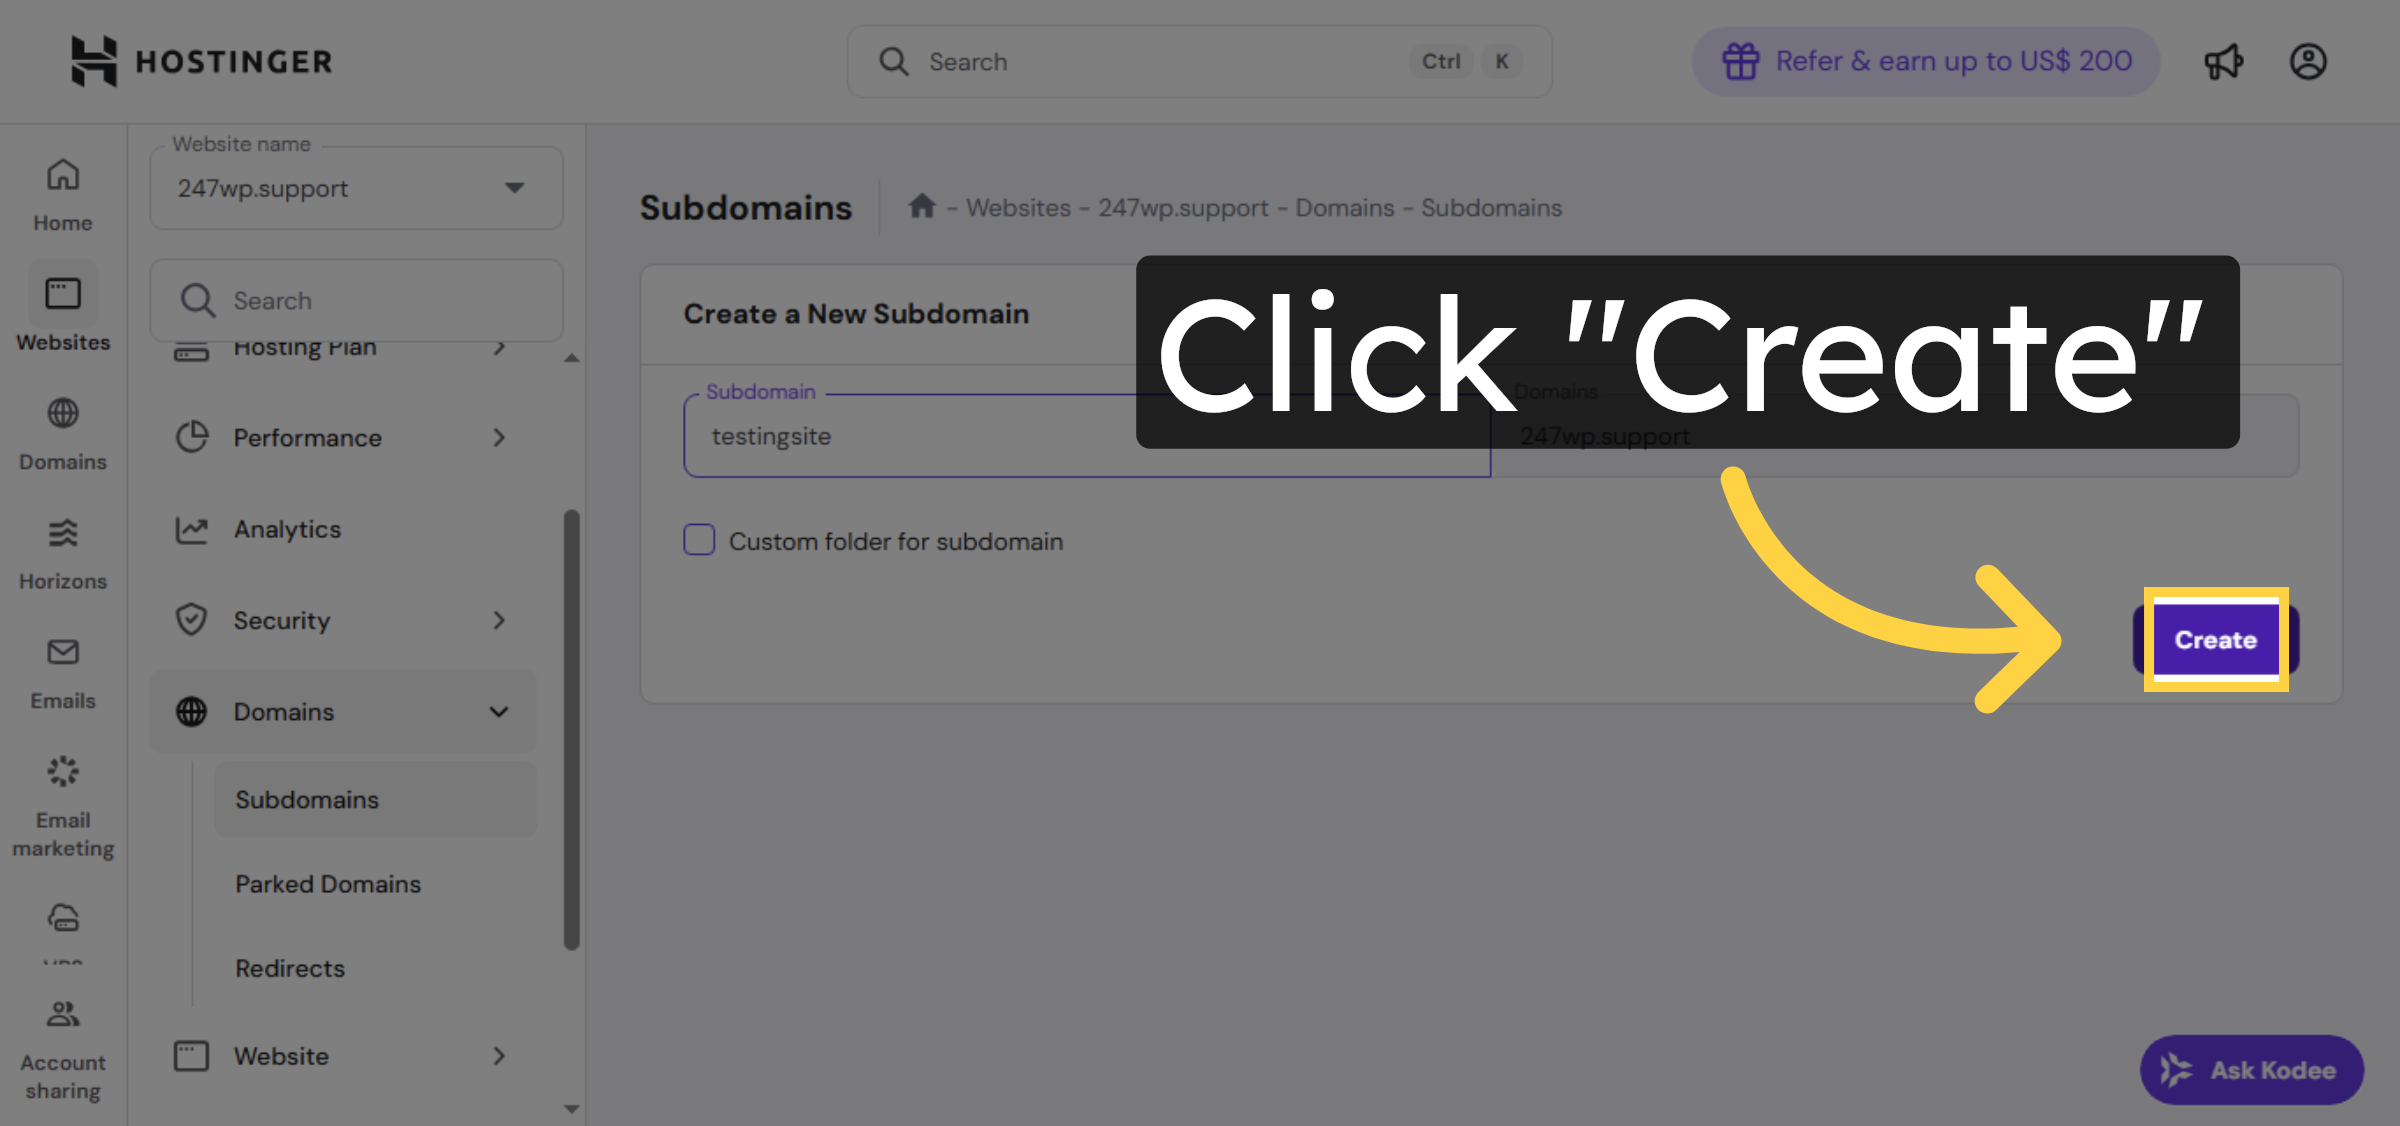
Enter your desired subdomain name to identify the new subdomain.

Enter Subdomain Name

7. Create Subdomain

Click Create to add the new subdomain to your domain.

Create Subdomain

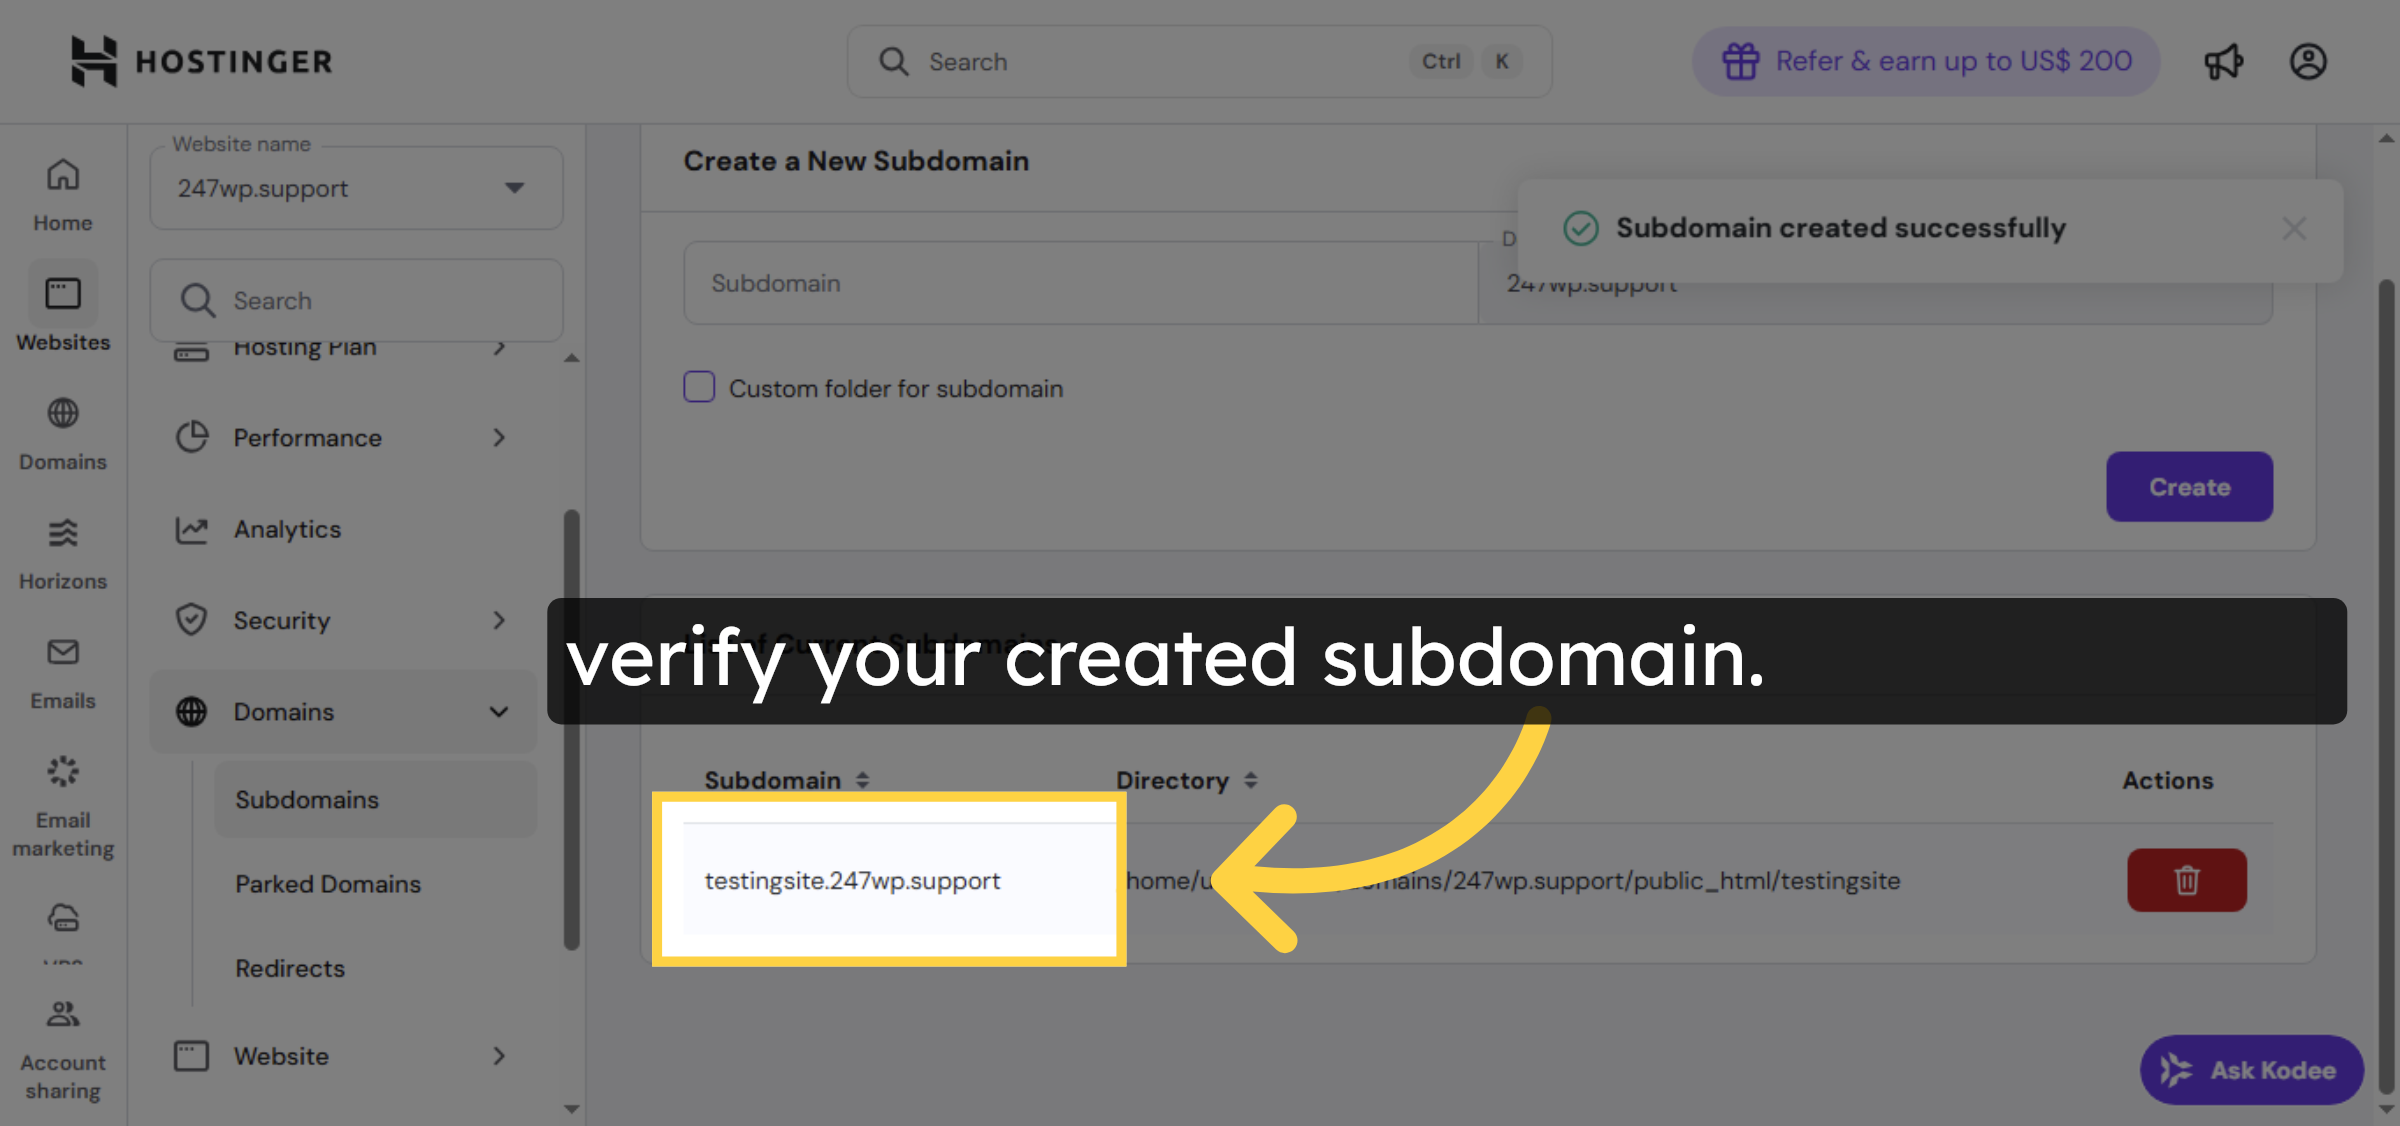
8. Select Created Subdomain

verify your created subdomain.

Select Created Subdomain

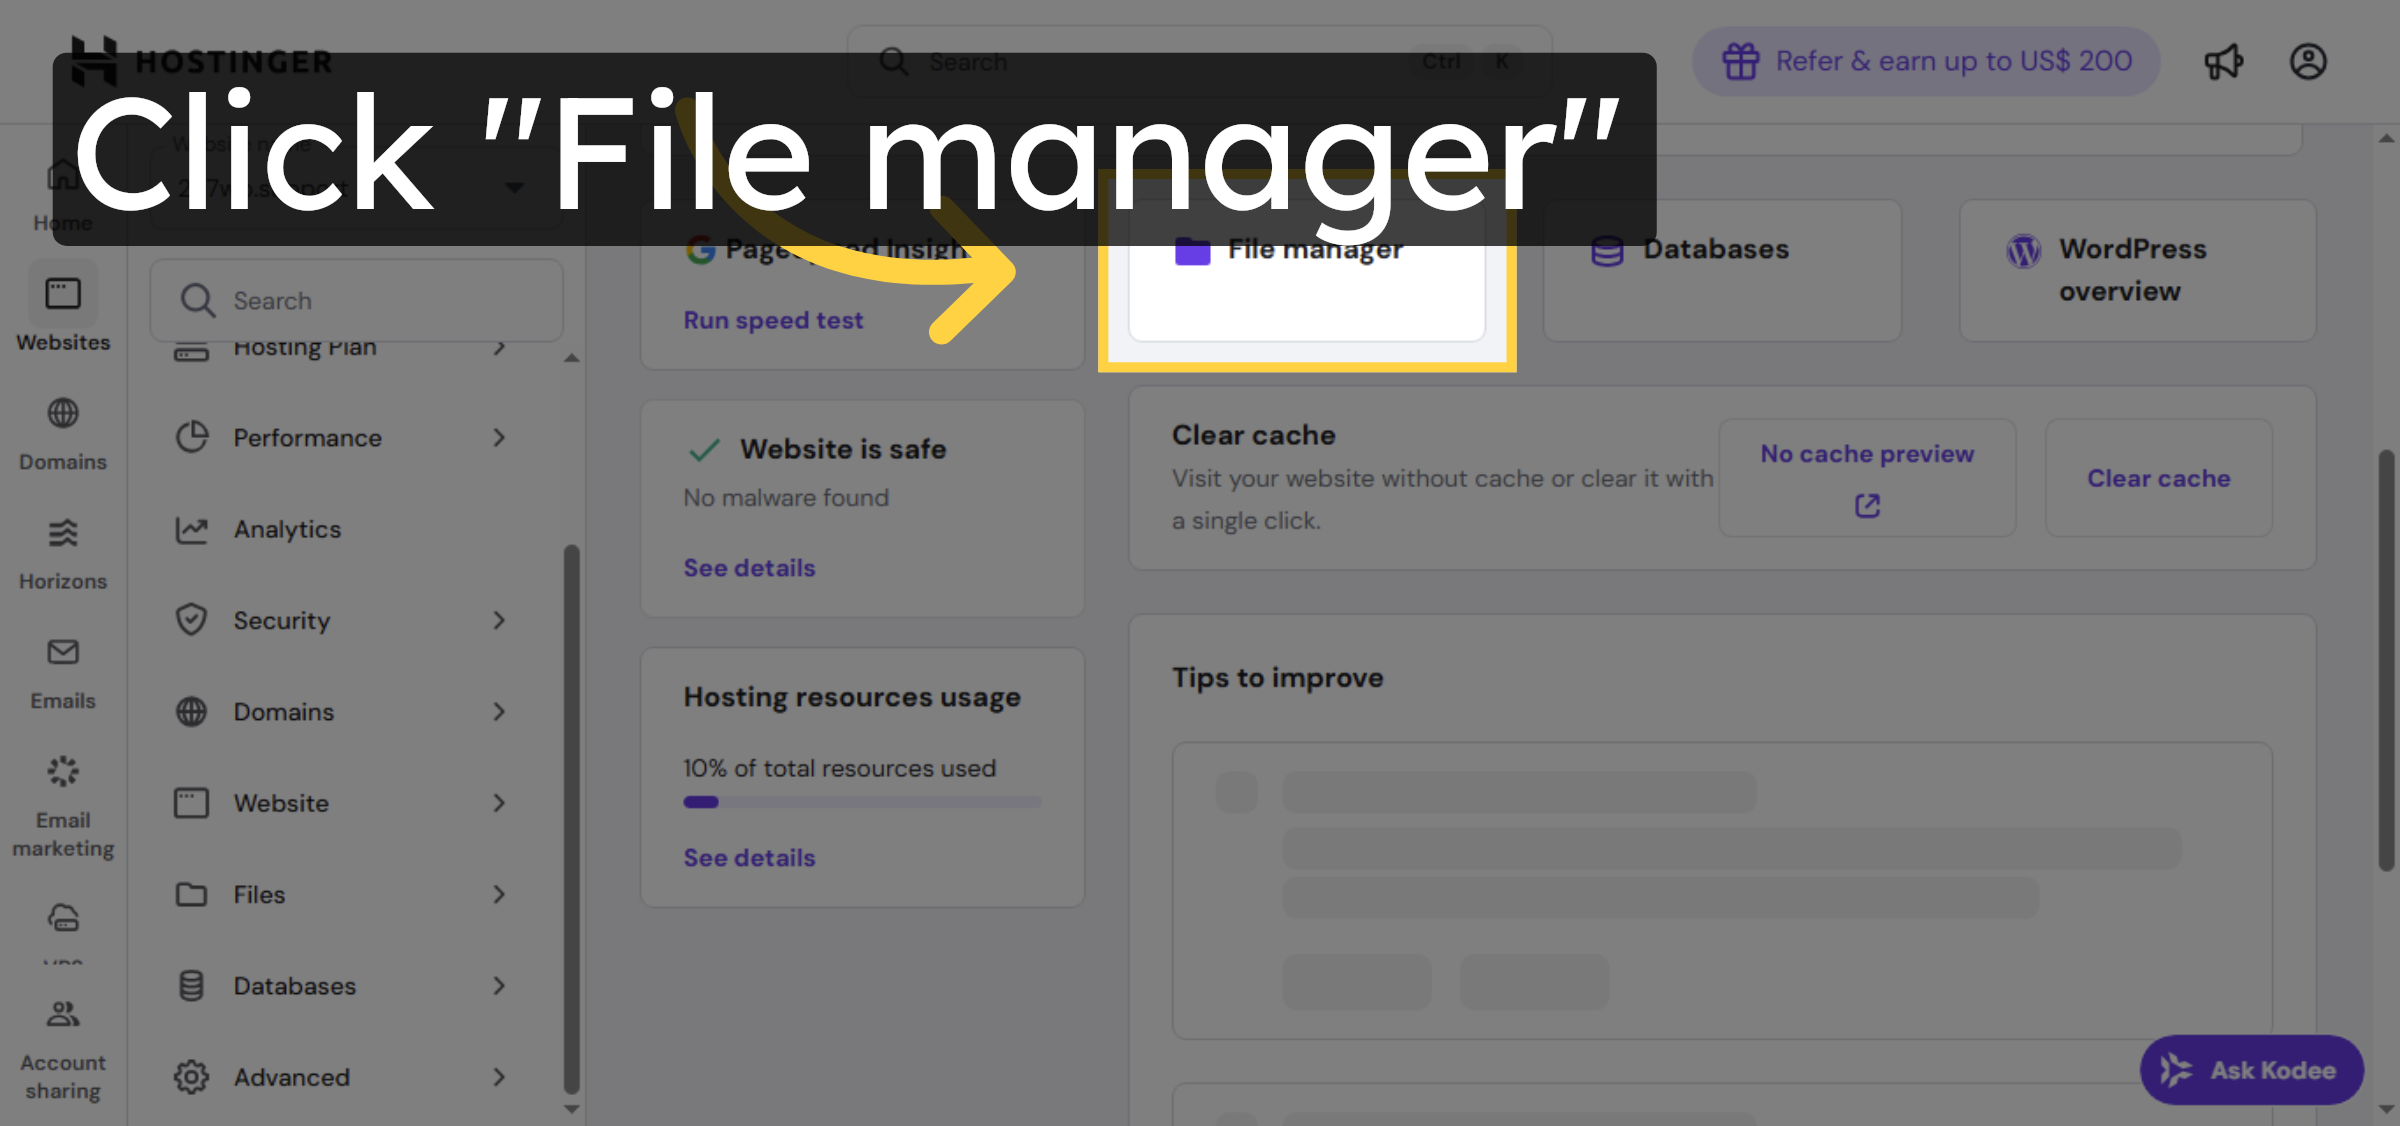
9. Open File Manager

Click File manager to access the file system for your subdomain.

Open File Manager

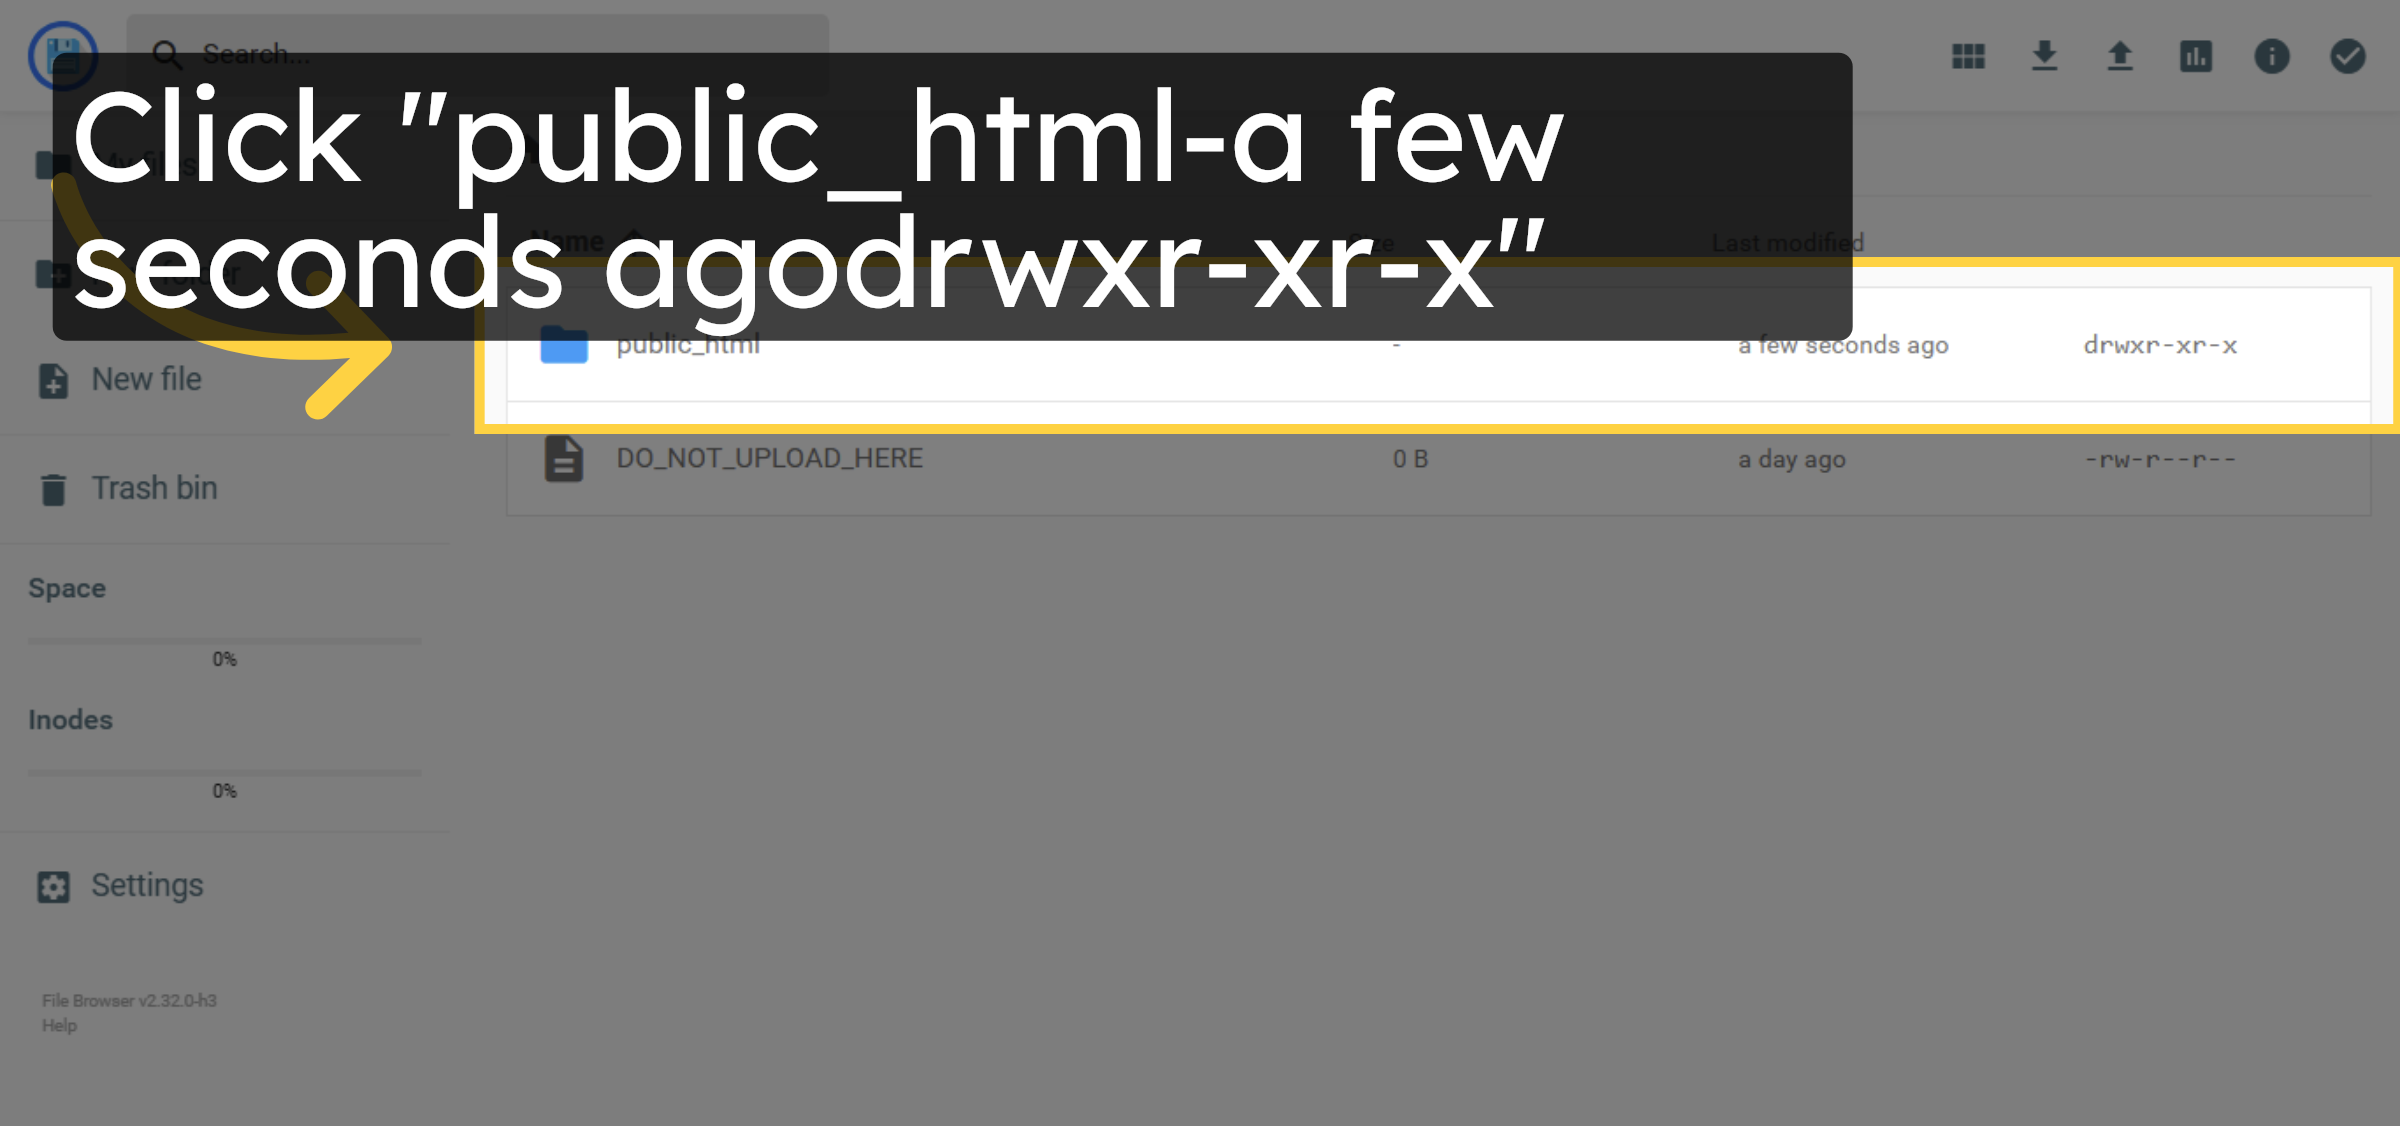
10. Open Public HTML Folder

Click the public_html folder to access the root directory for your website files.

Open Public HTML Folder

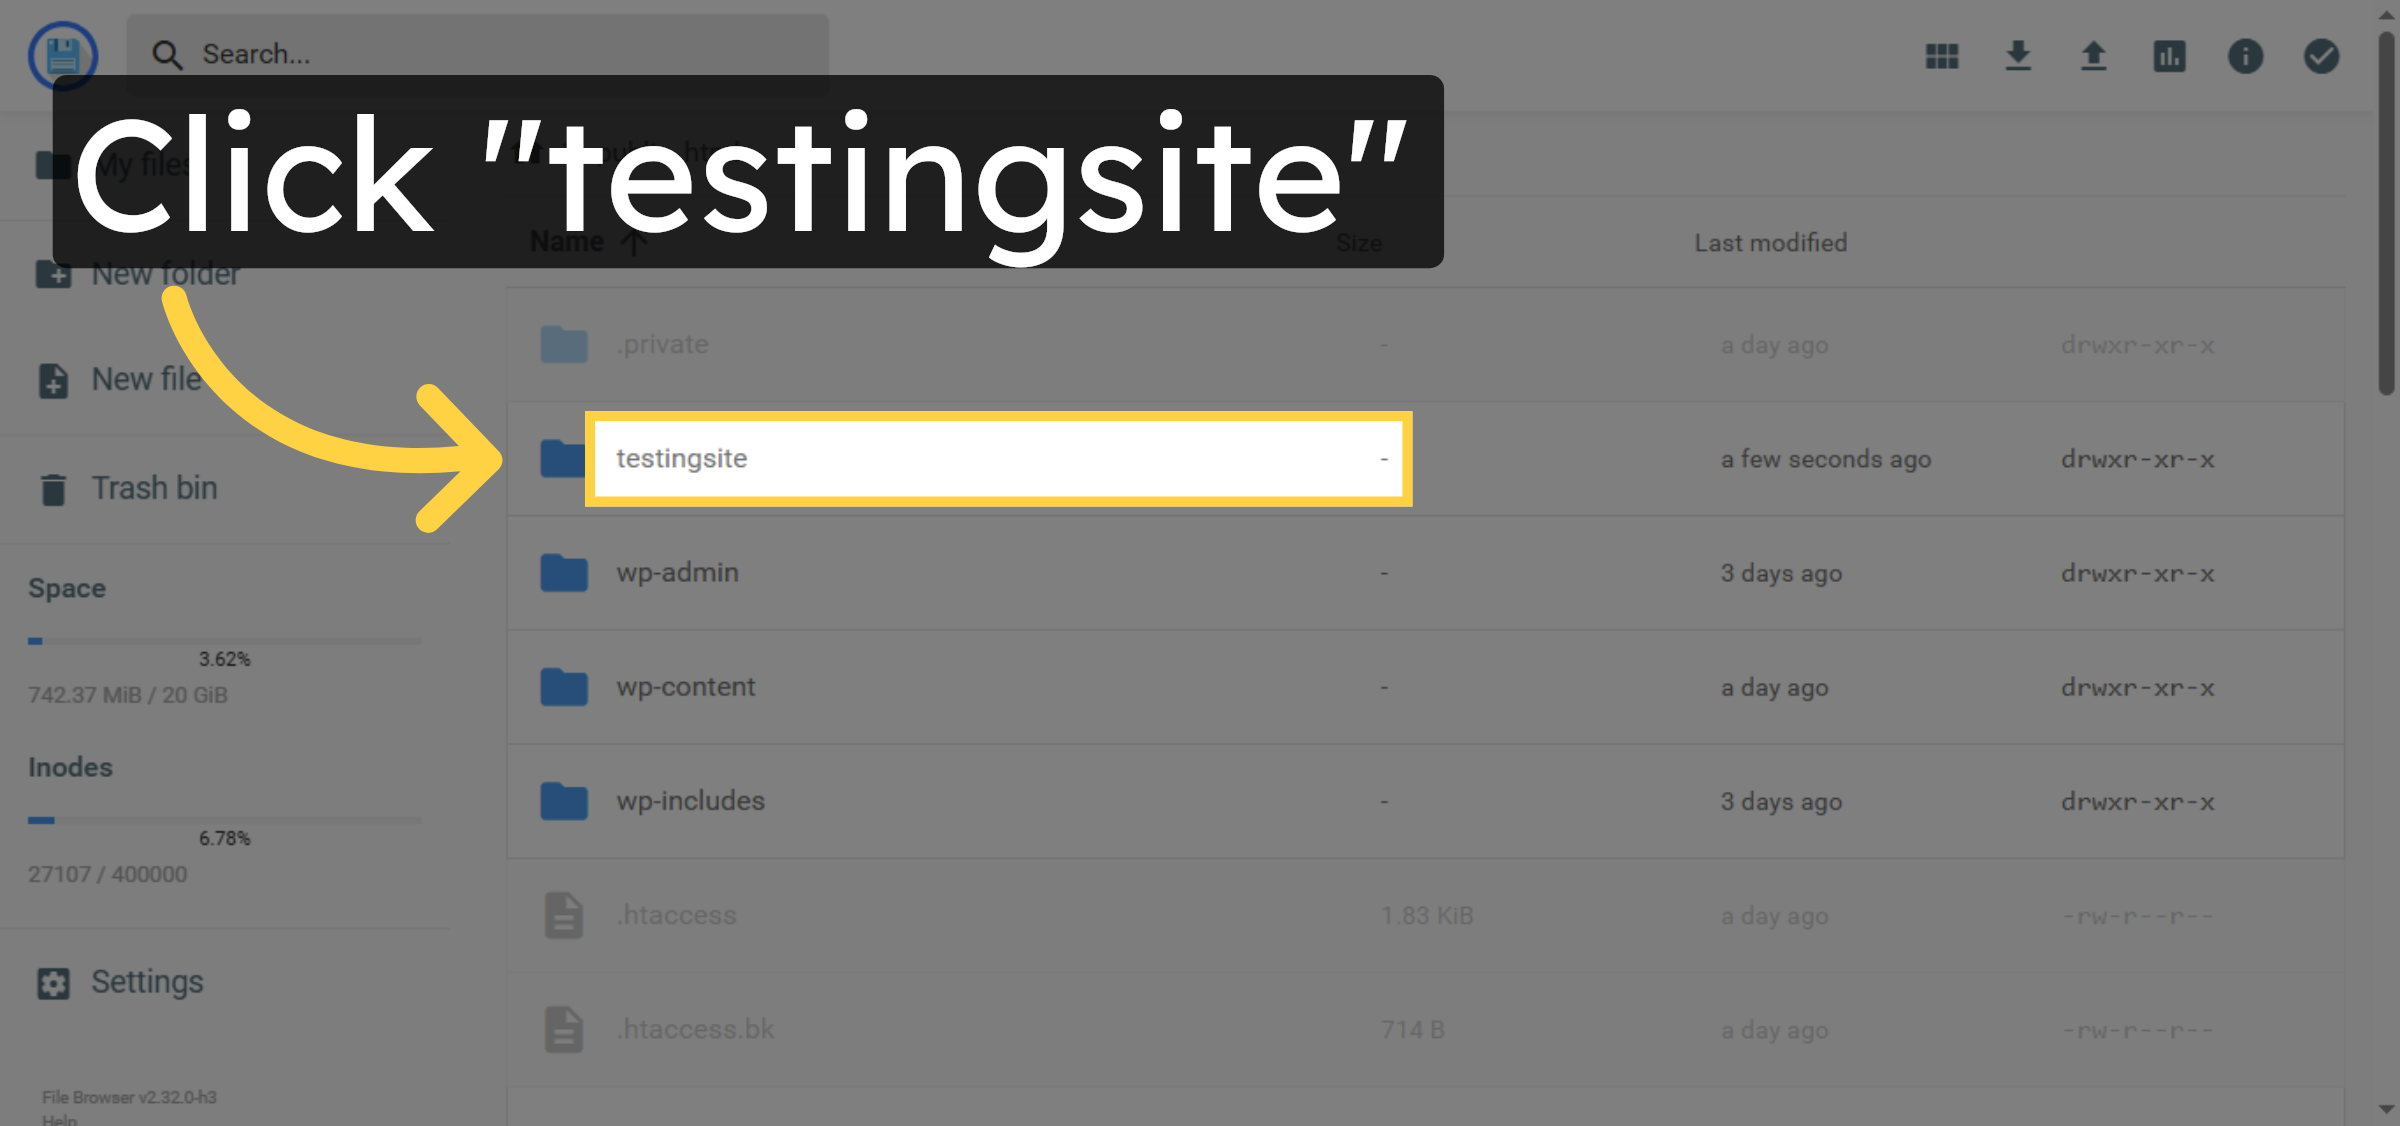
11. verify your subdomain folder

verify your subdomain folder

verify your subdomain folder

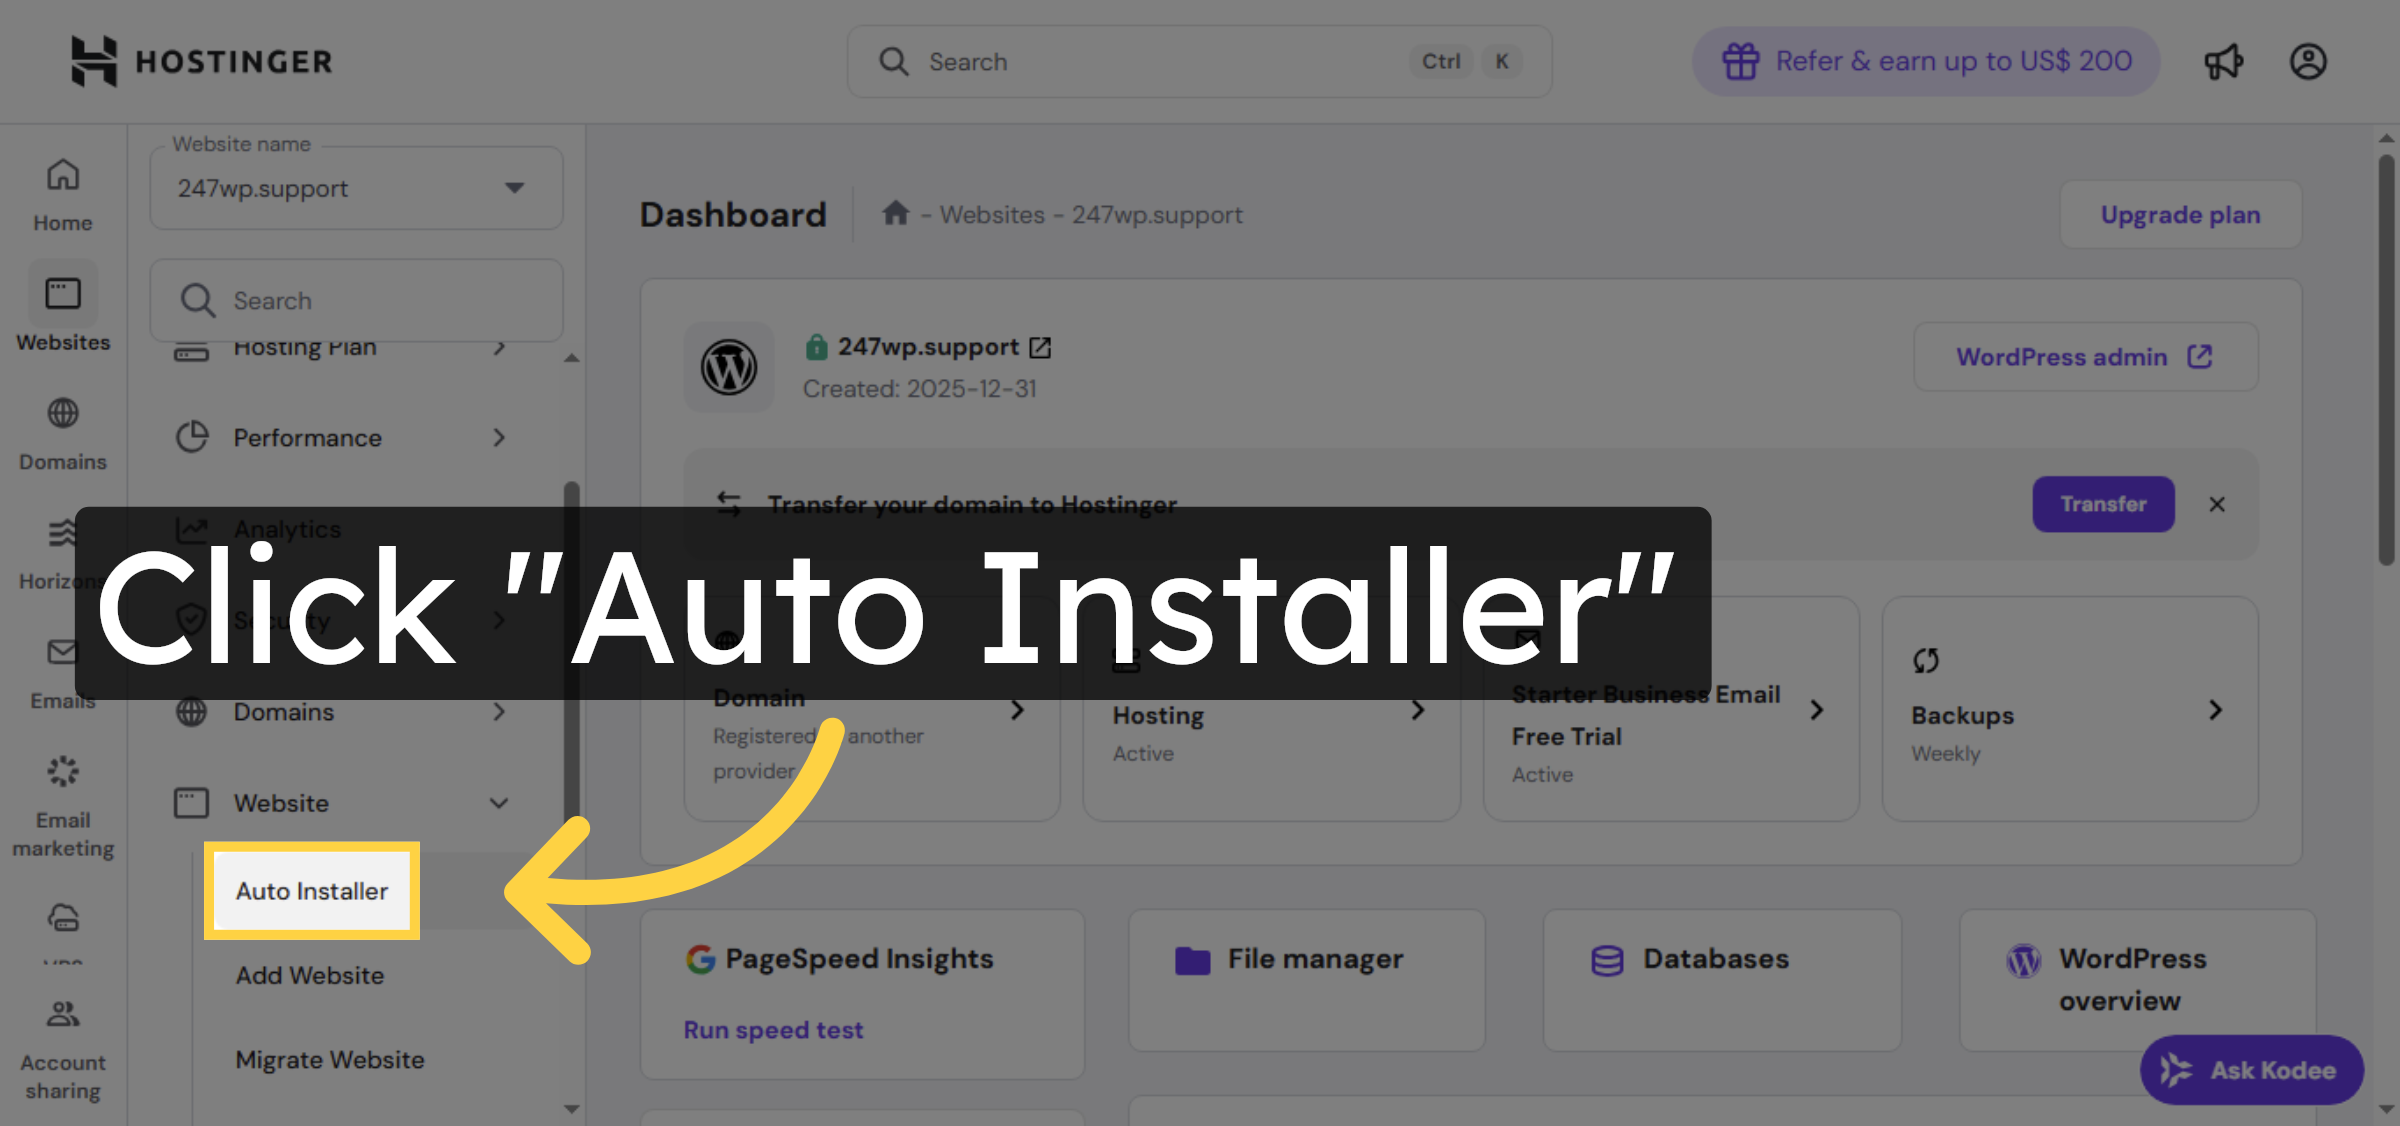
12. Navigate To Website Section

Return to Hostinger Panel and Click Website to access website-related tools and options.

Navigate To Website Section

13. Open Auto Installer

Click Auto Installer to begin installing applications like WordPress.

Open Auto Installer

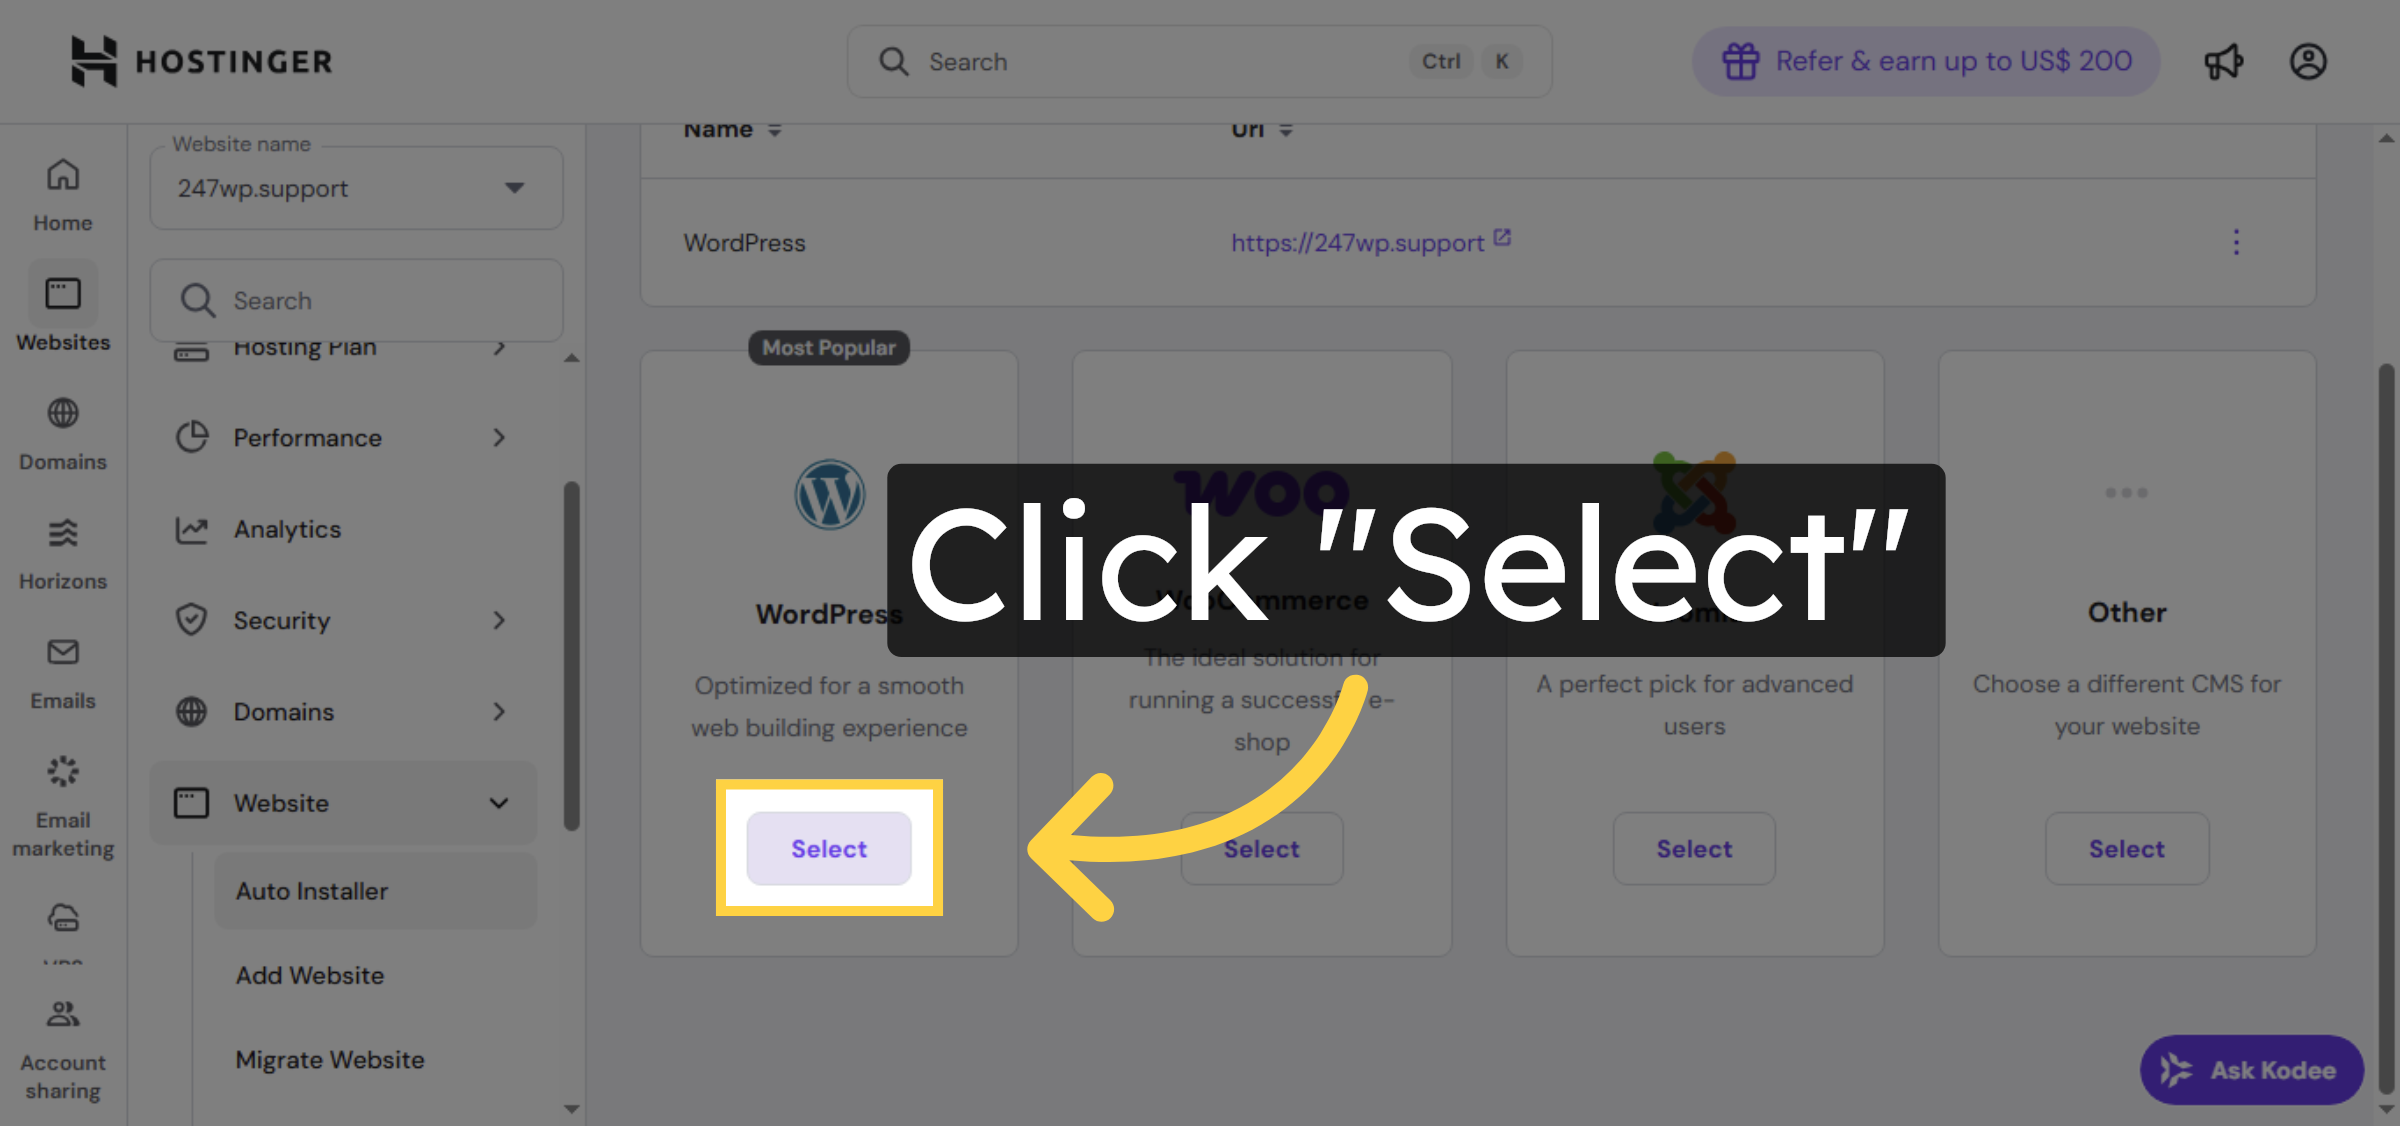
14. Confirm WordPress Selection

Click Select to confirm WordPress as the application to install.

Confirm WordPress Selection

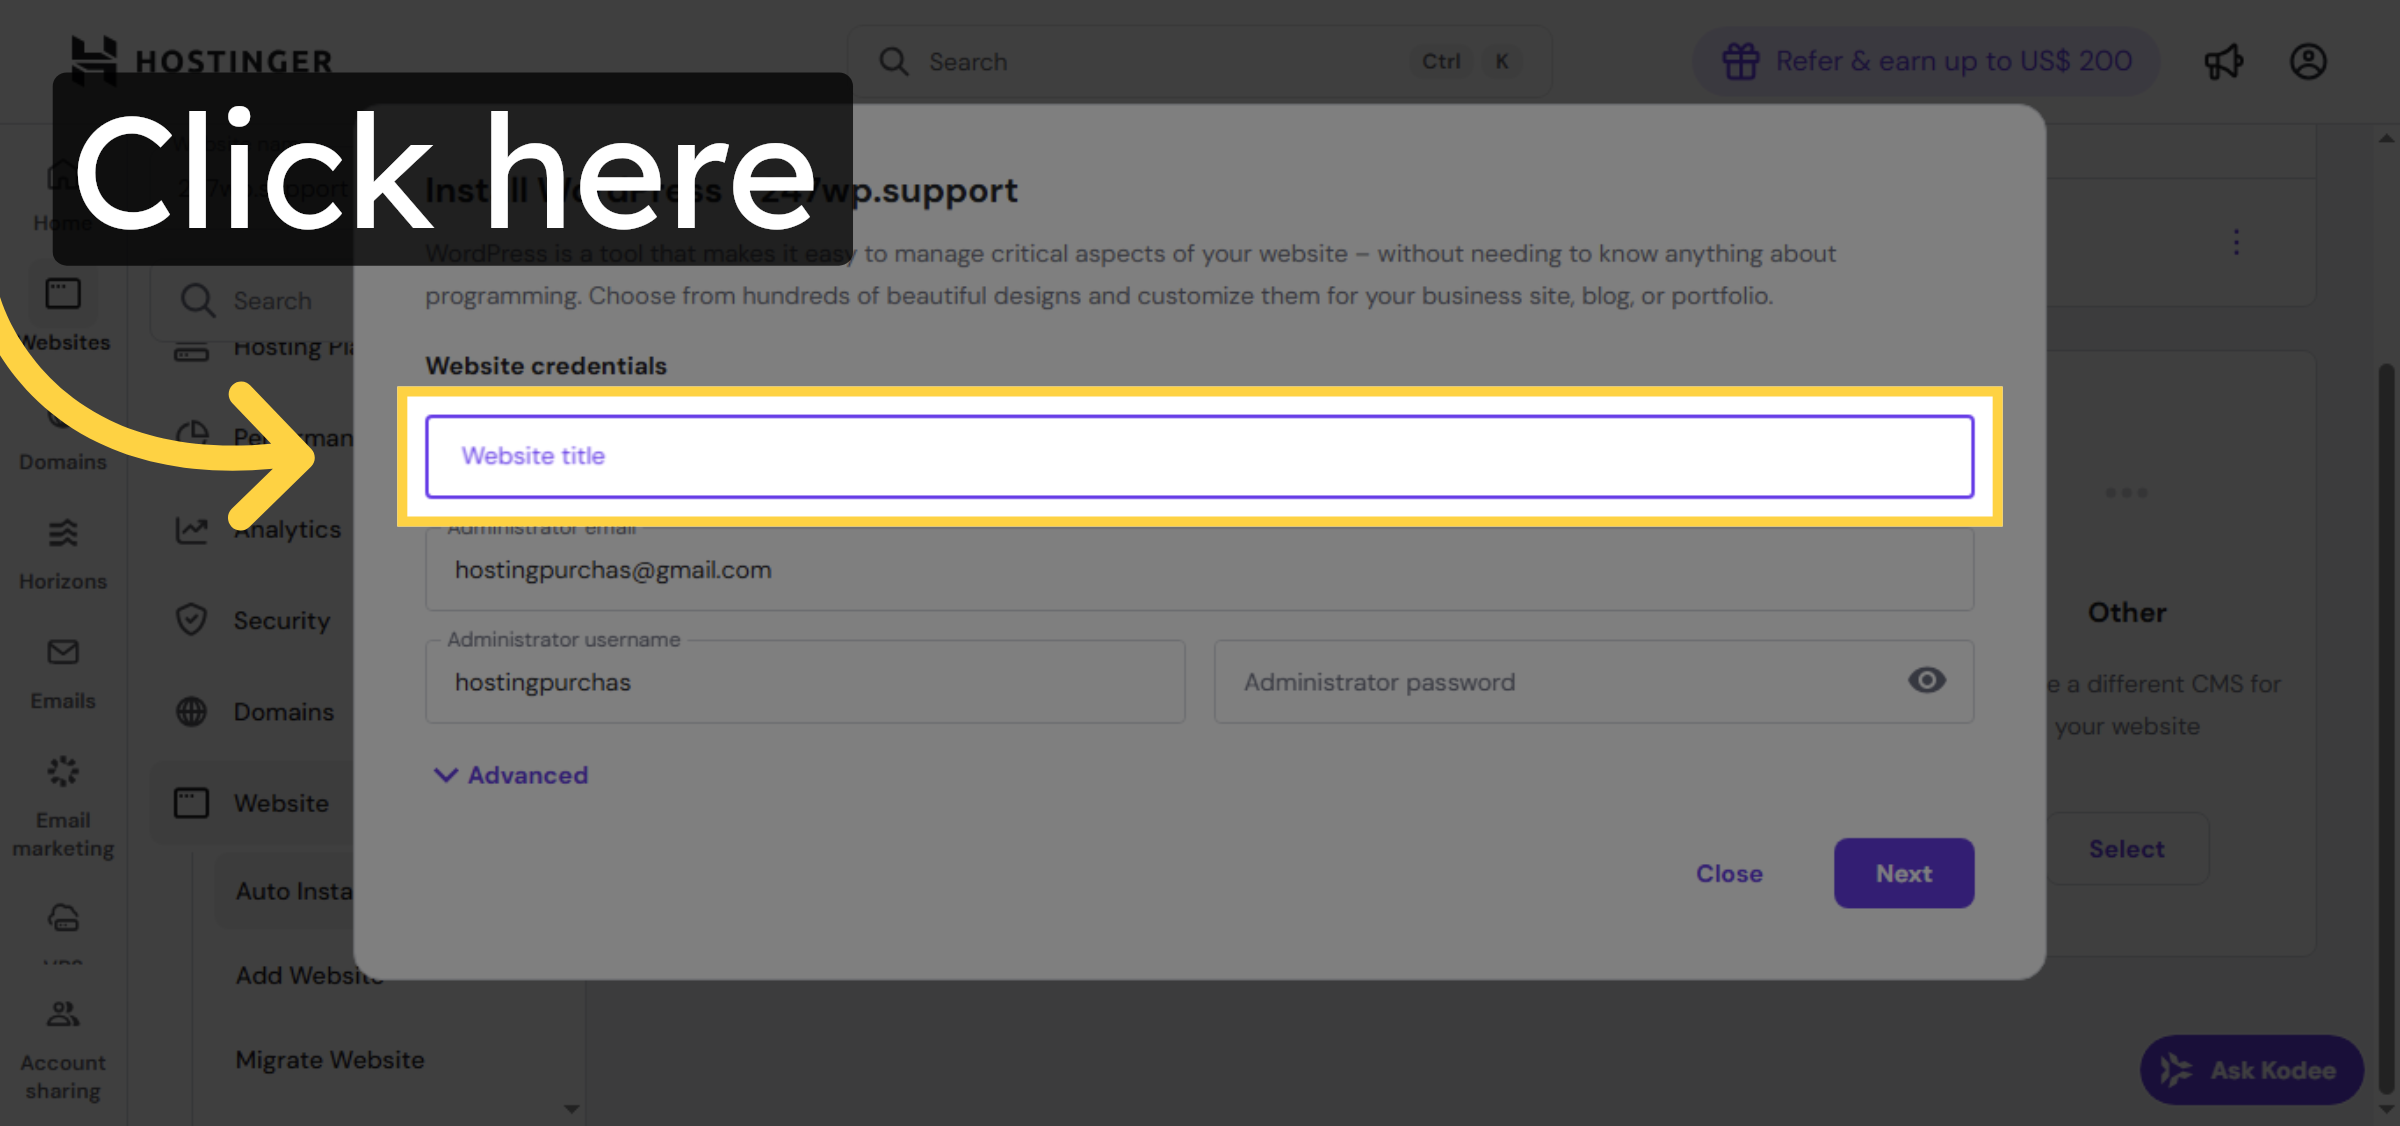
15. Enter website Title

Enter Website Title.

Enter website Title

Ad Banner

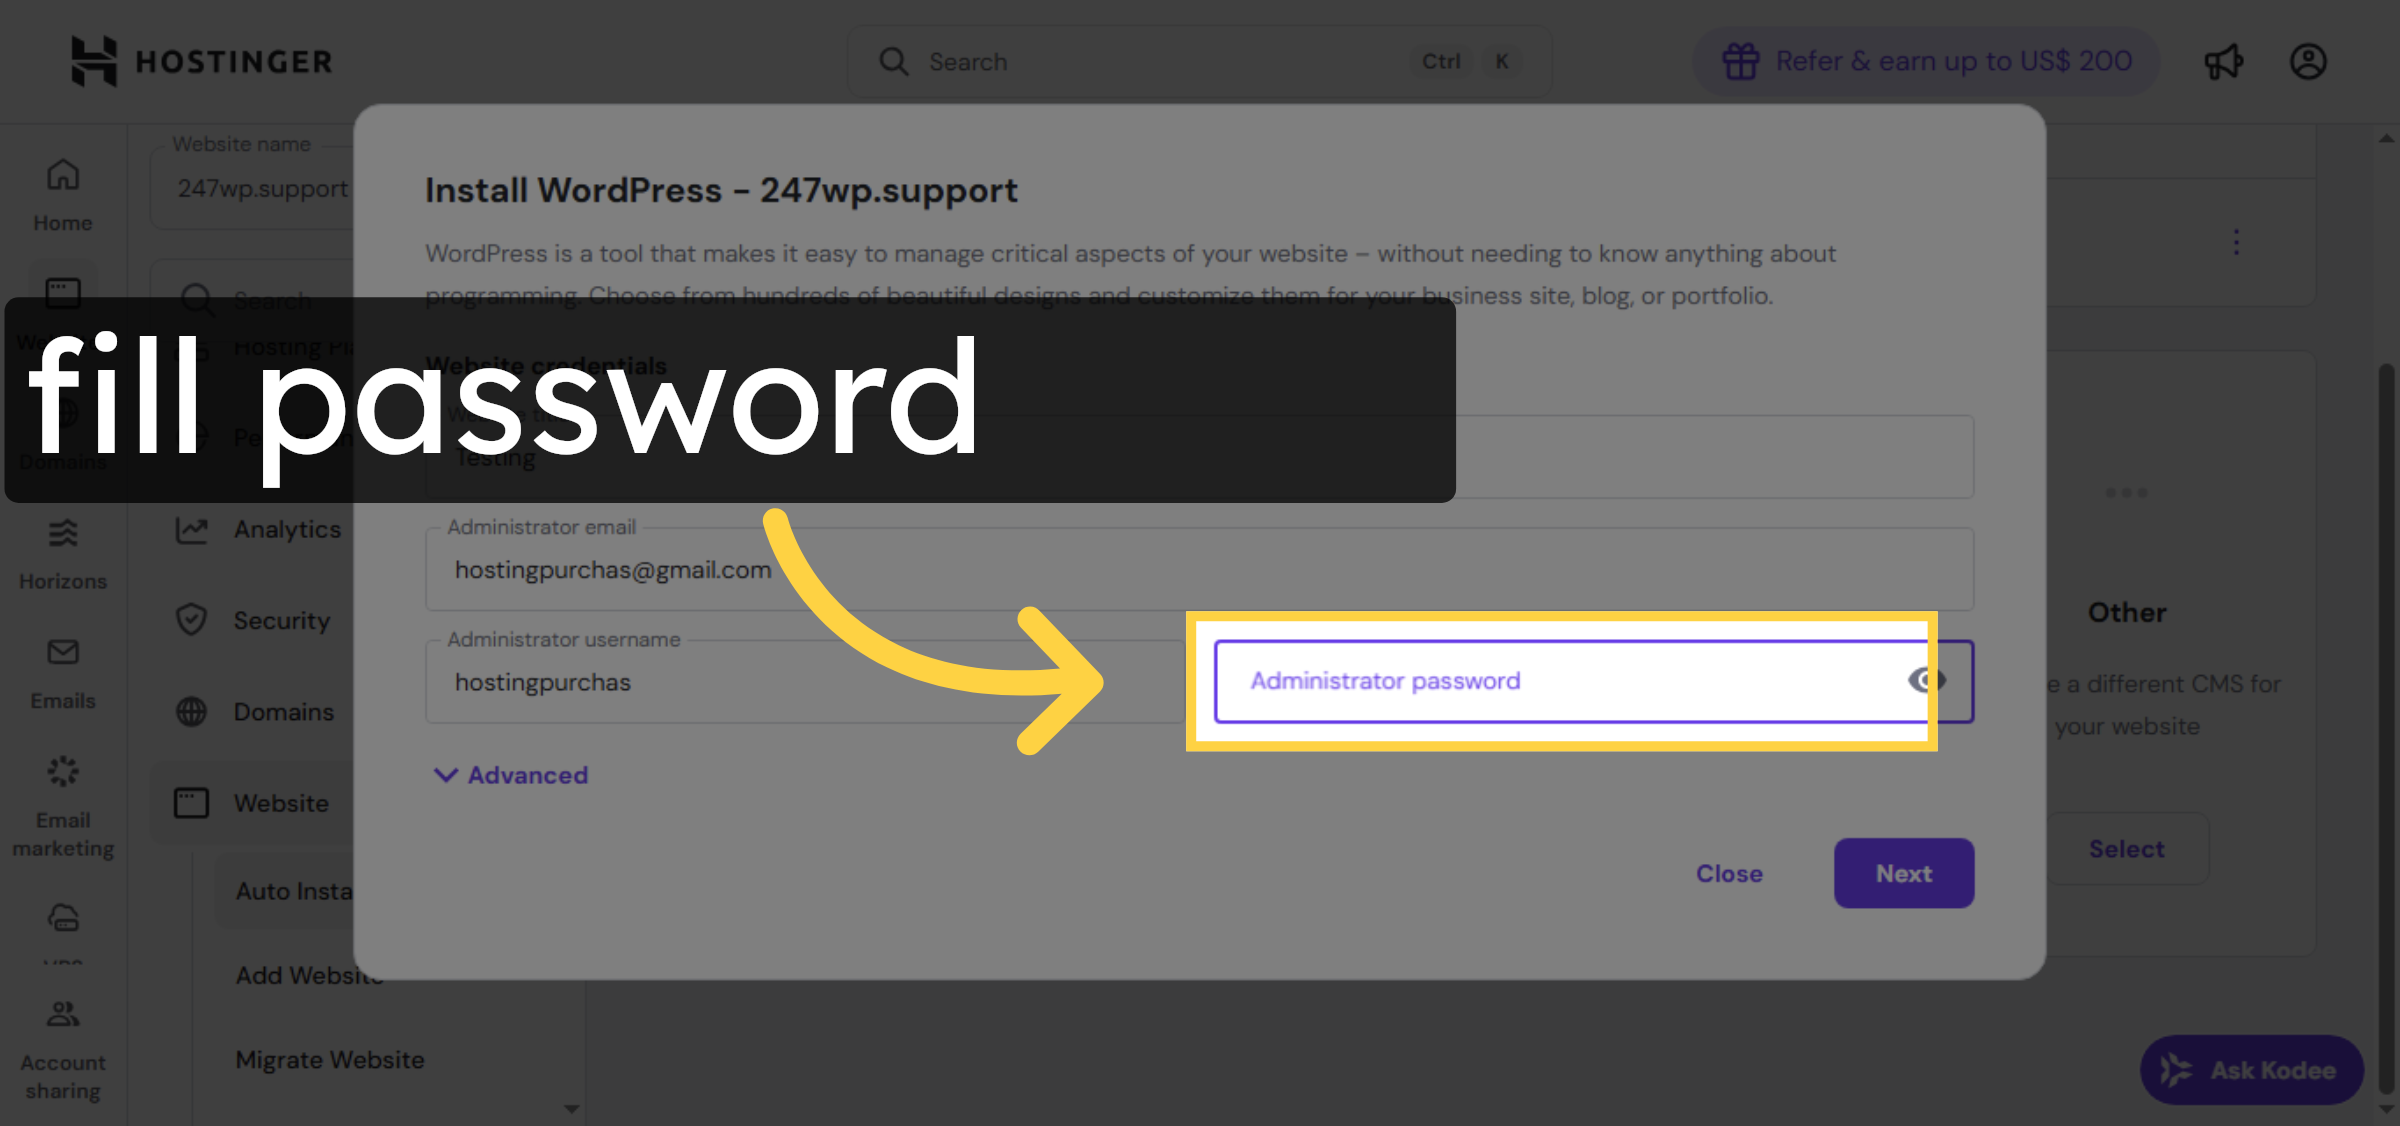
16. Click Password Field

Click the password field to set your WordPress admin password.

Click Password Field

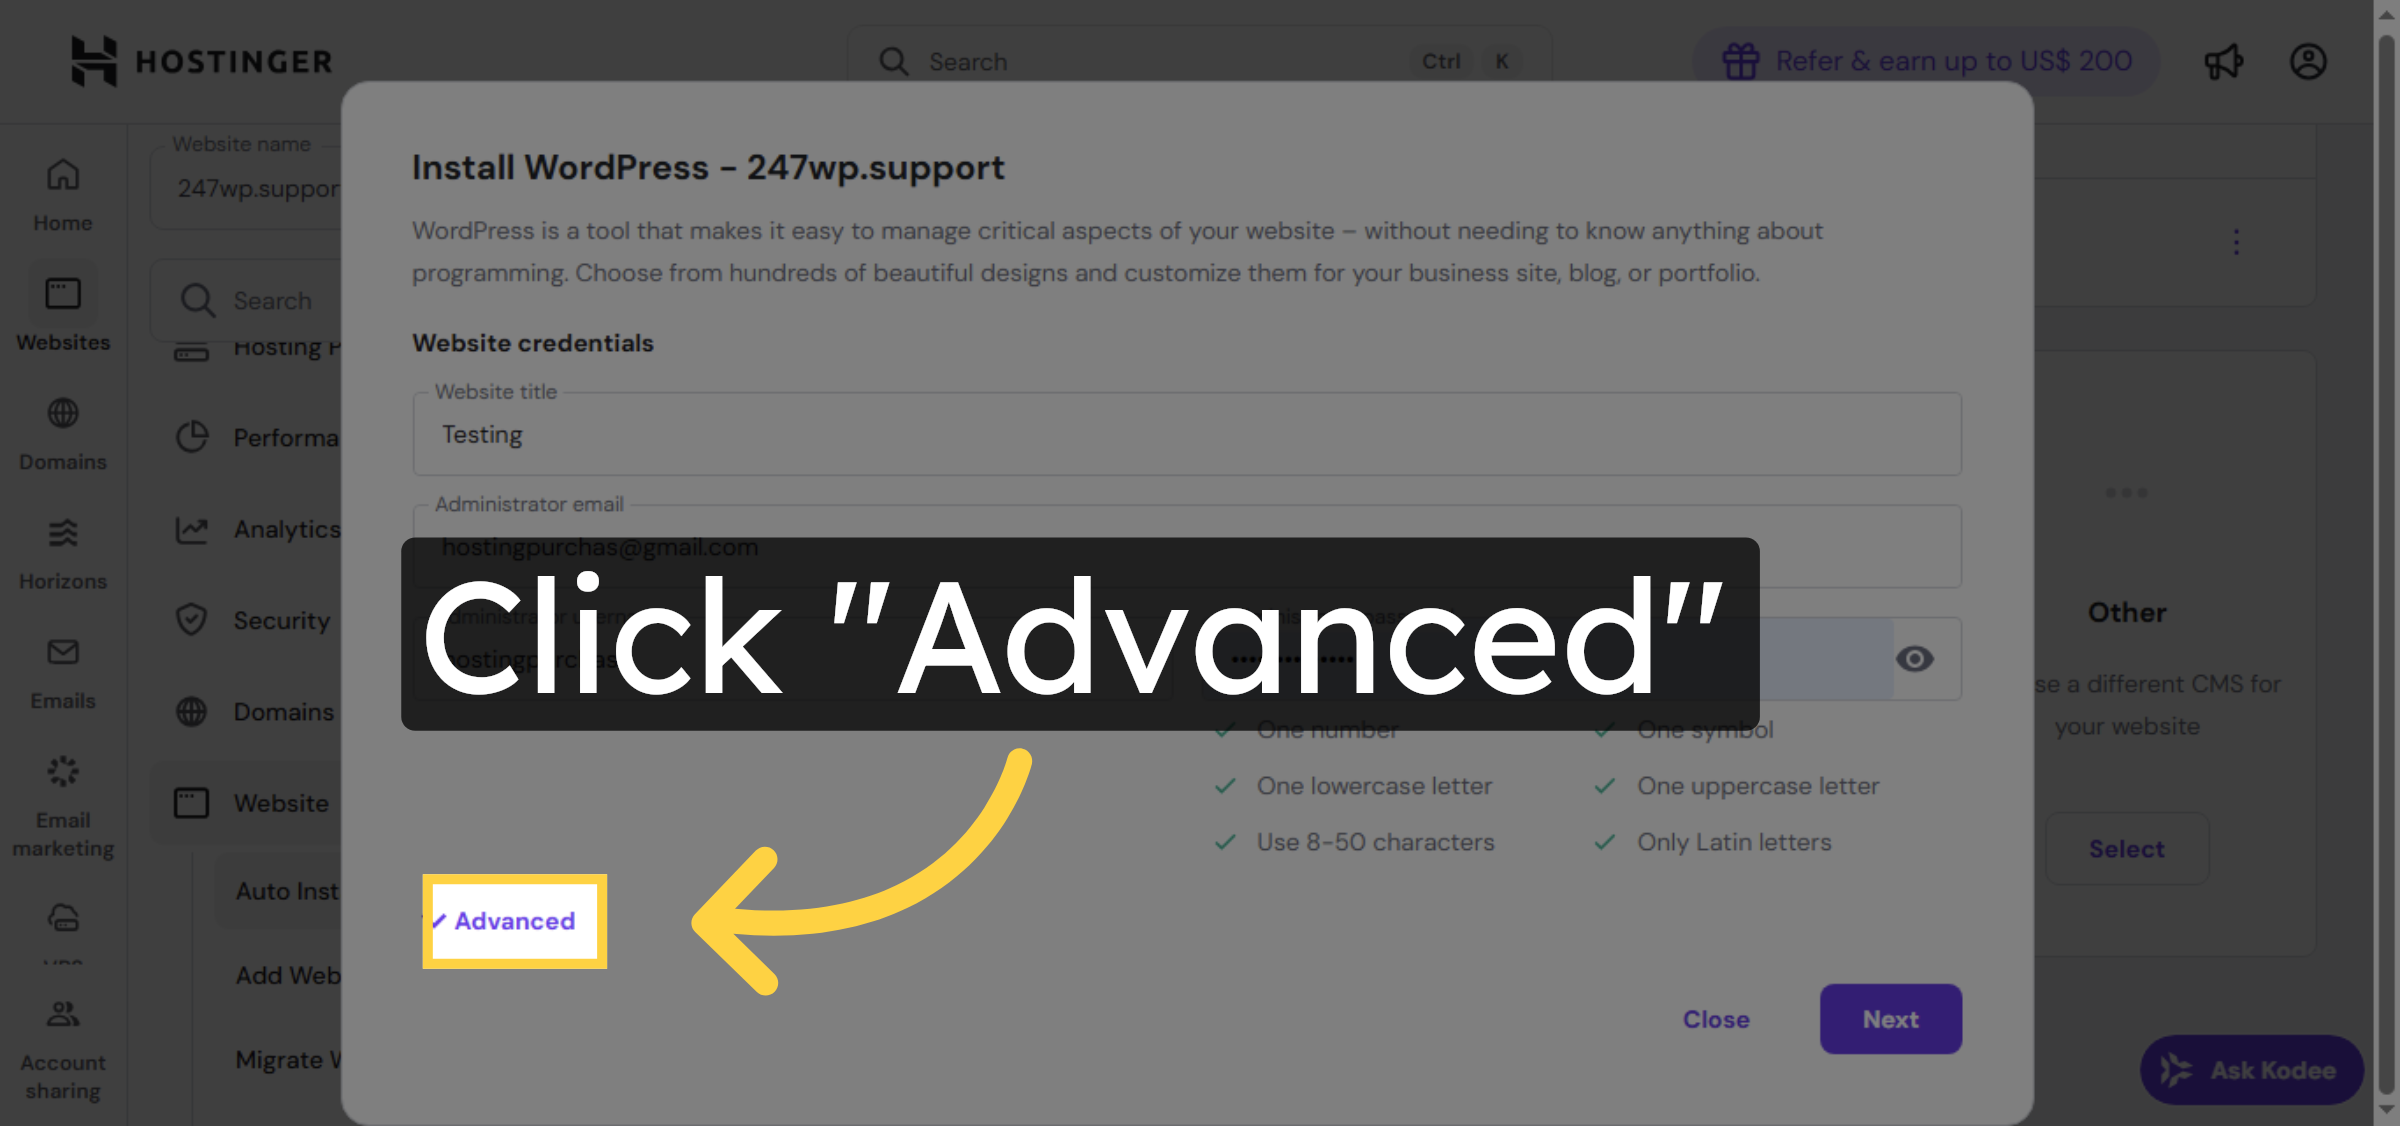
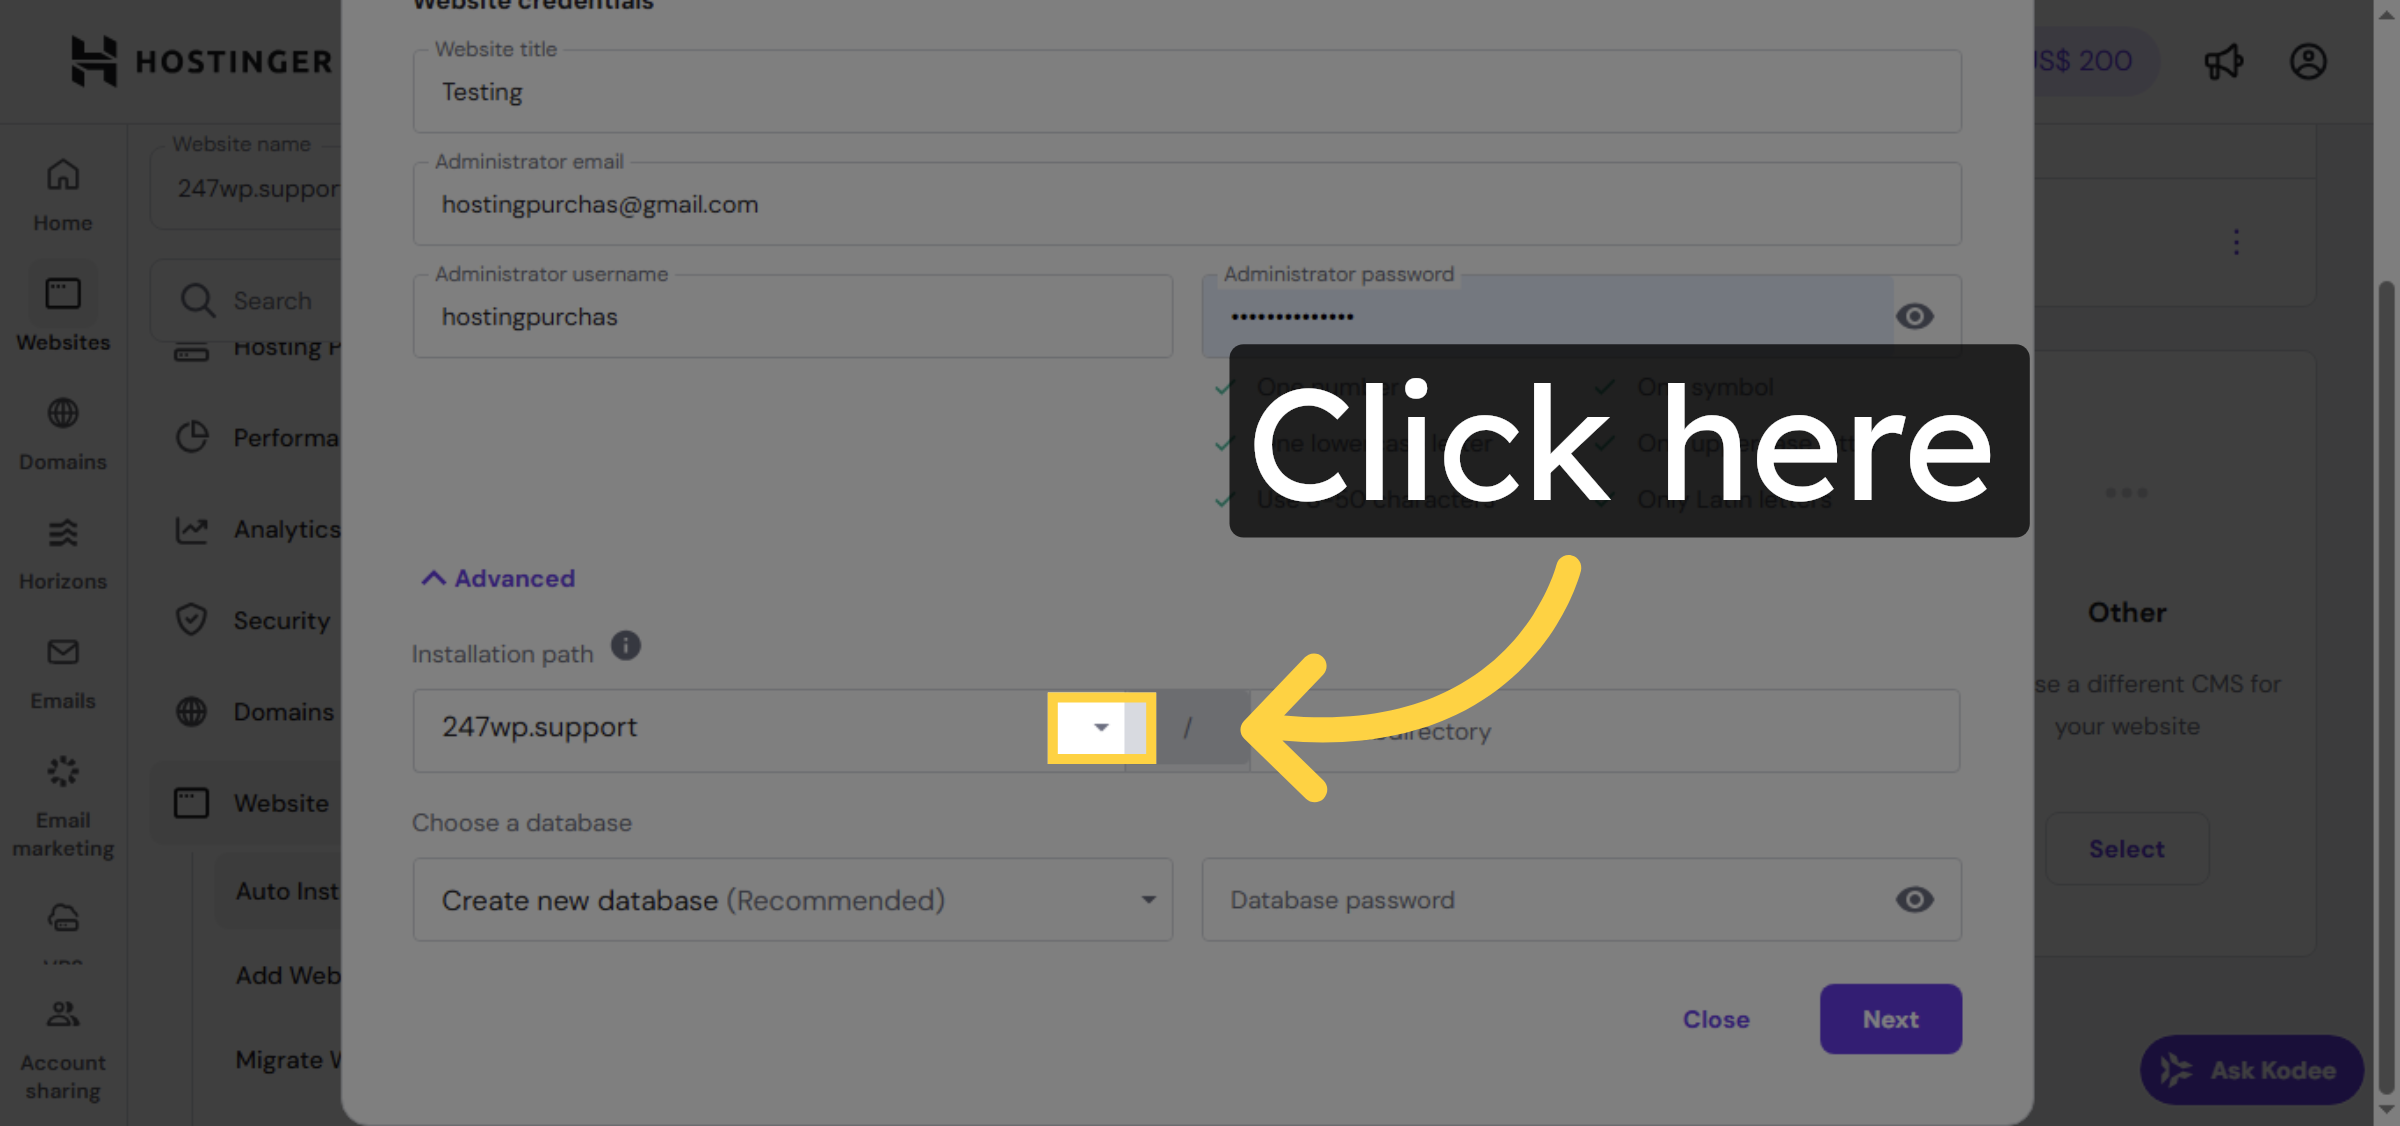
17. Open Advanced Settings

Click Advanced to access additional installation options.

Open Advanced Settings

18. Select Installation Directory

Click the area to specify the directory for WordPress installation.

Select Installation Directory

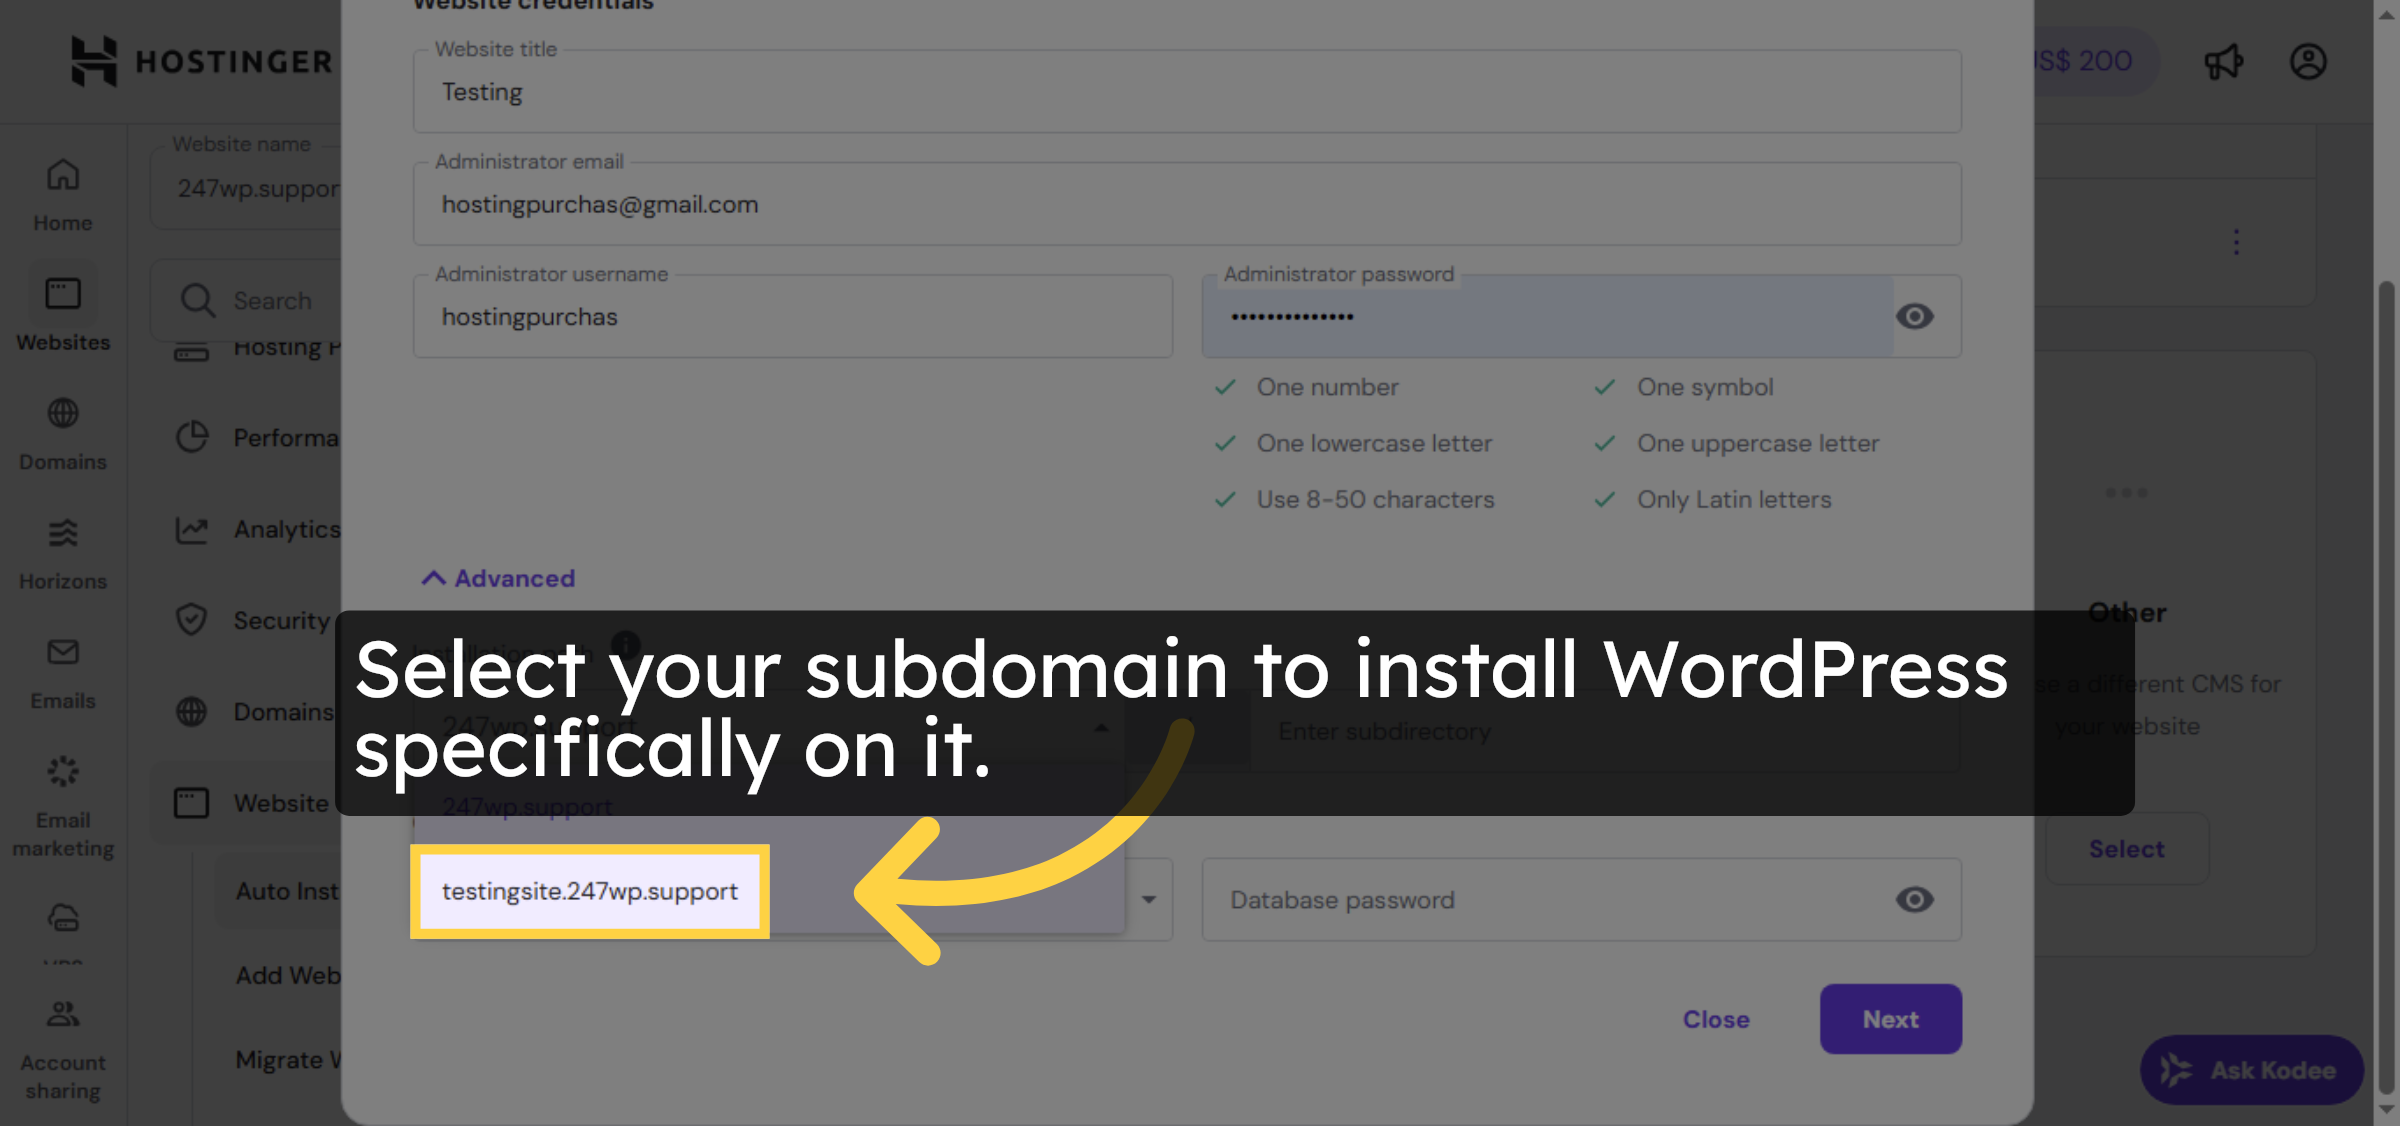
19. Choose Subdomain Directory

Select your subdomain to install WordPress specifically on it.

Choose Subdomain Directory

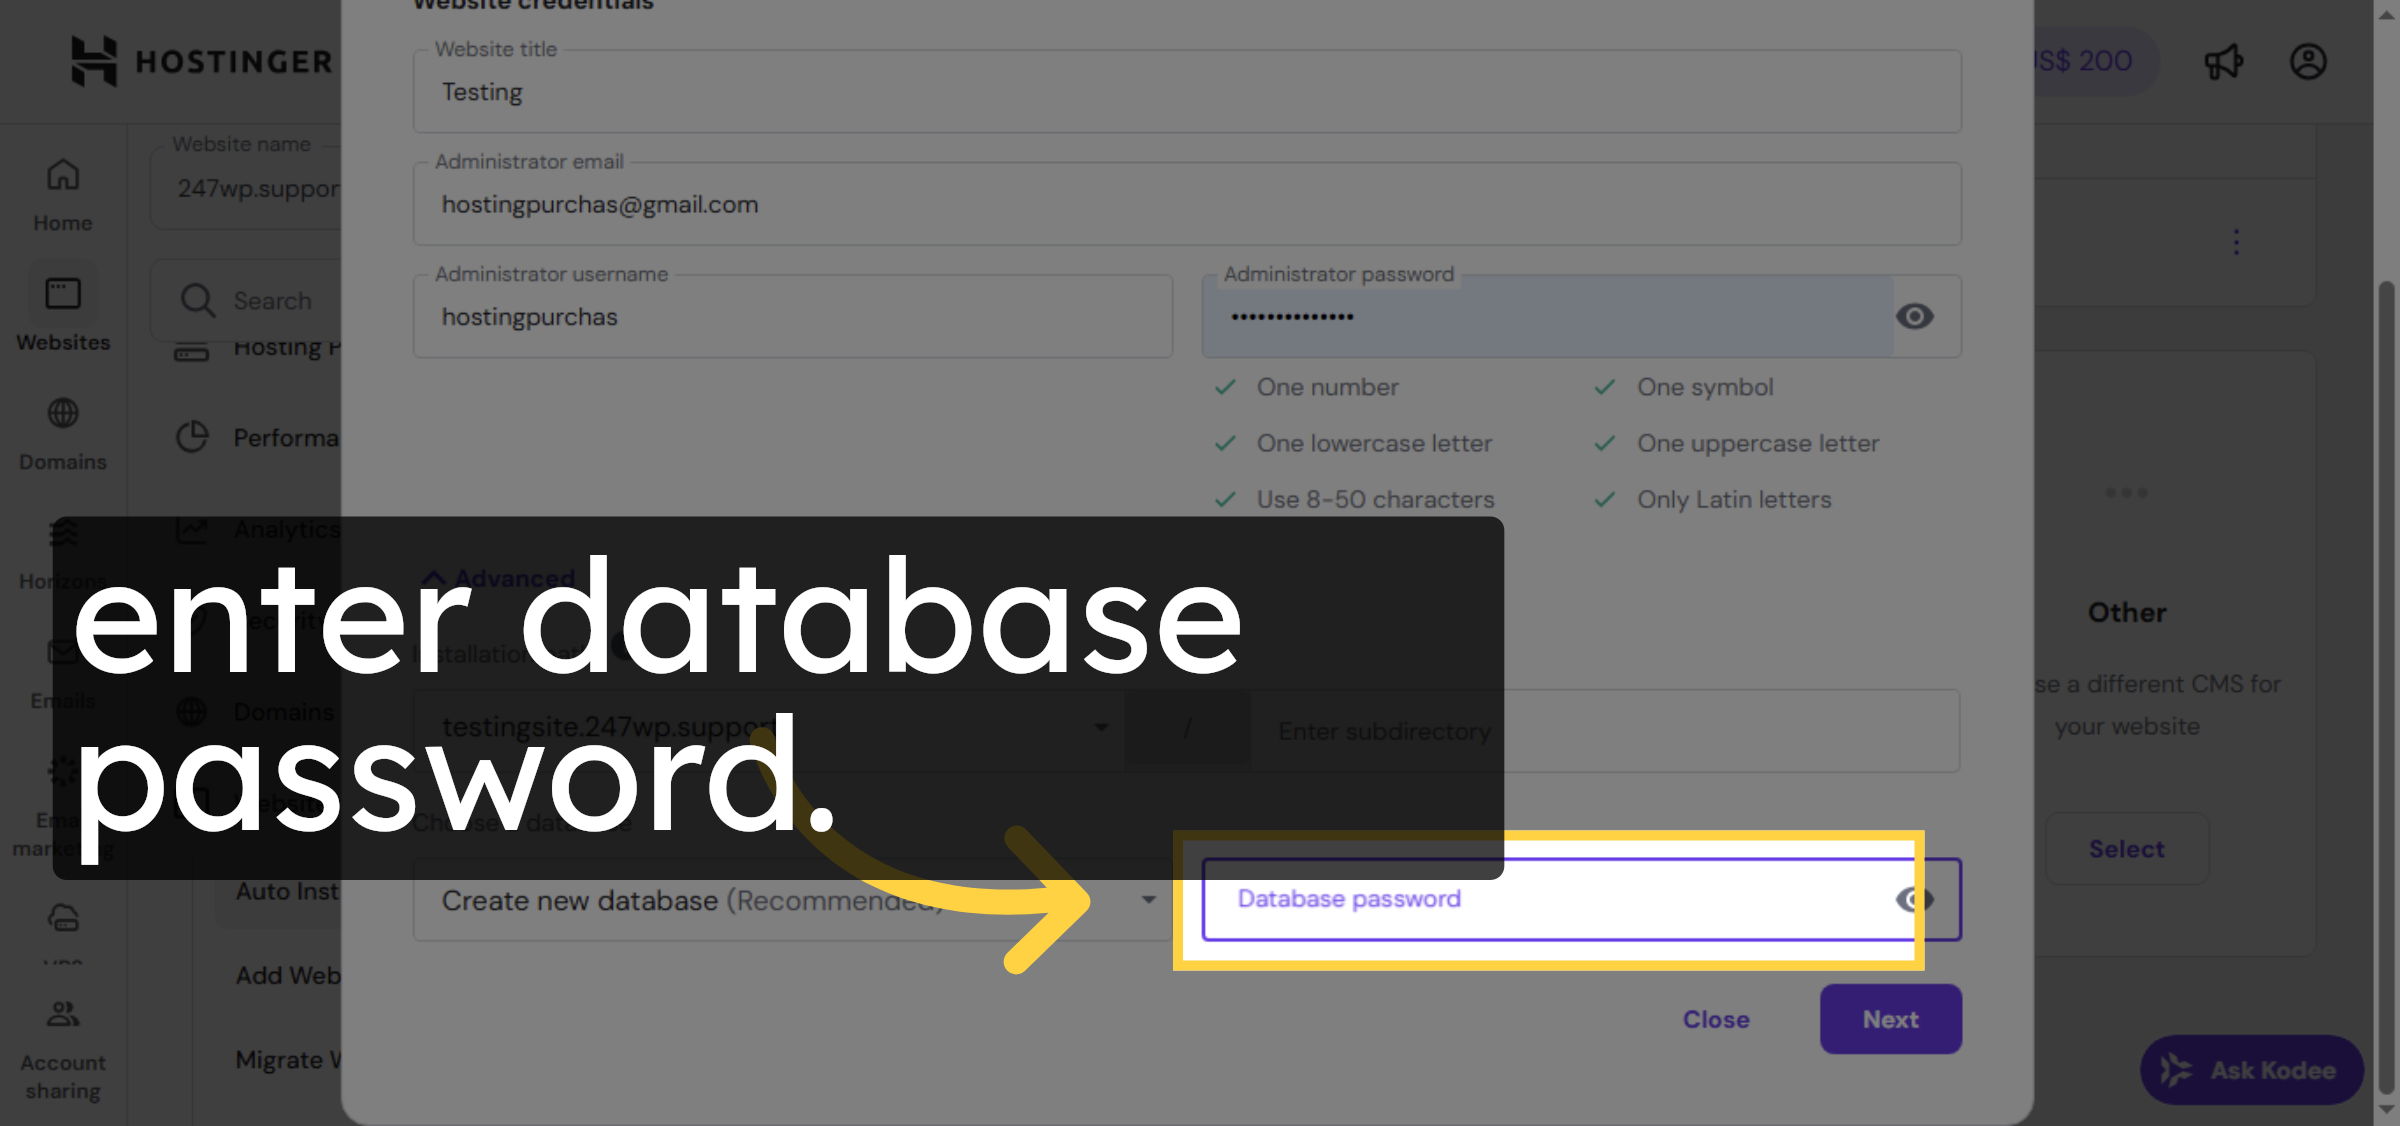
20. Click Password Field Again

Click the password field again to confirm your admin password.

Click Password Field Again

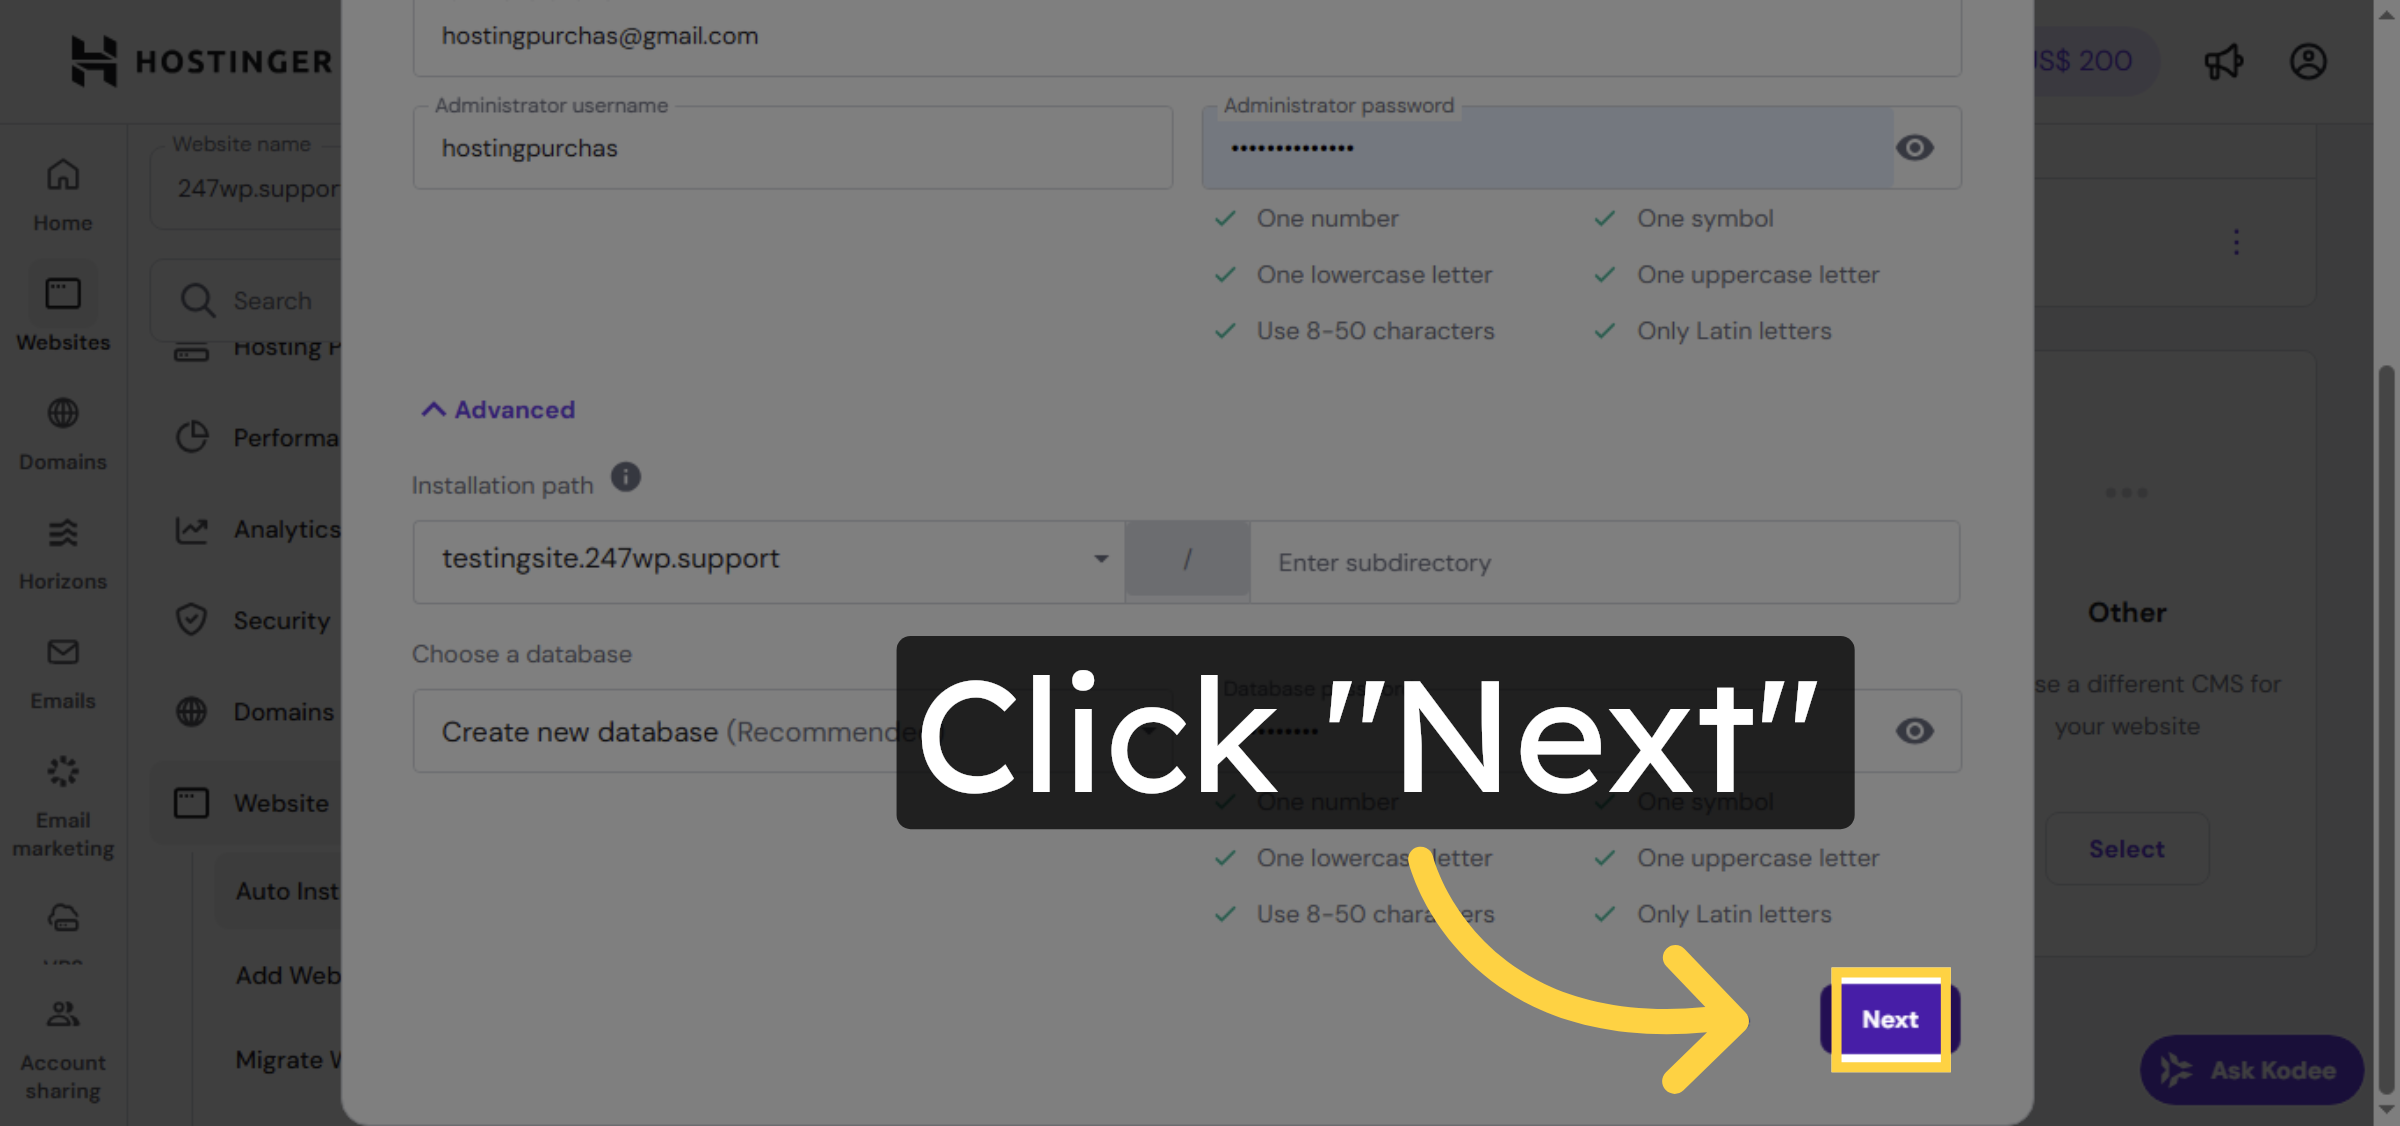
21. Proceed To Next Step

Click Next to continue with the WordPress installation process.

Proceed To Next Step

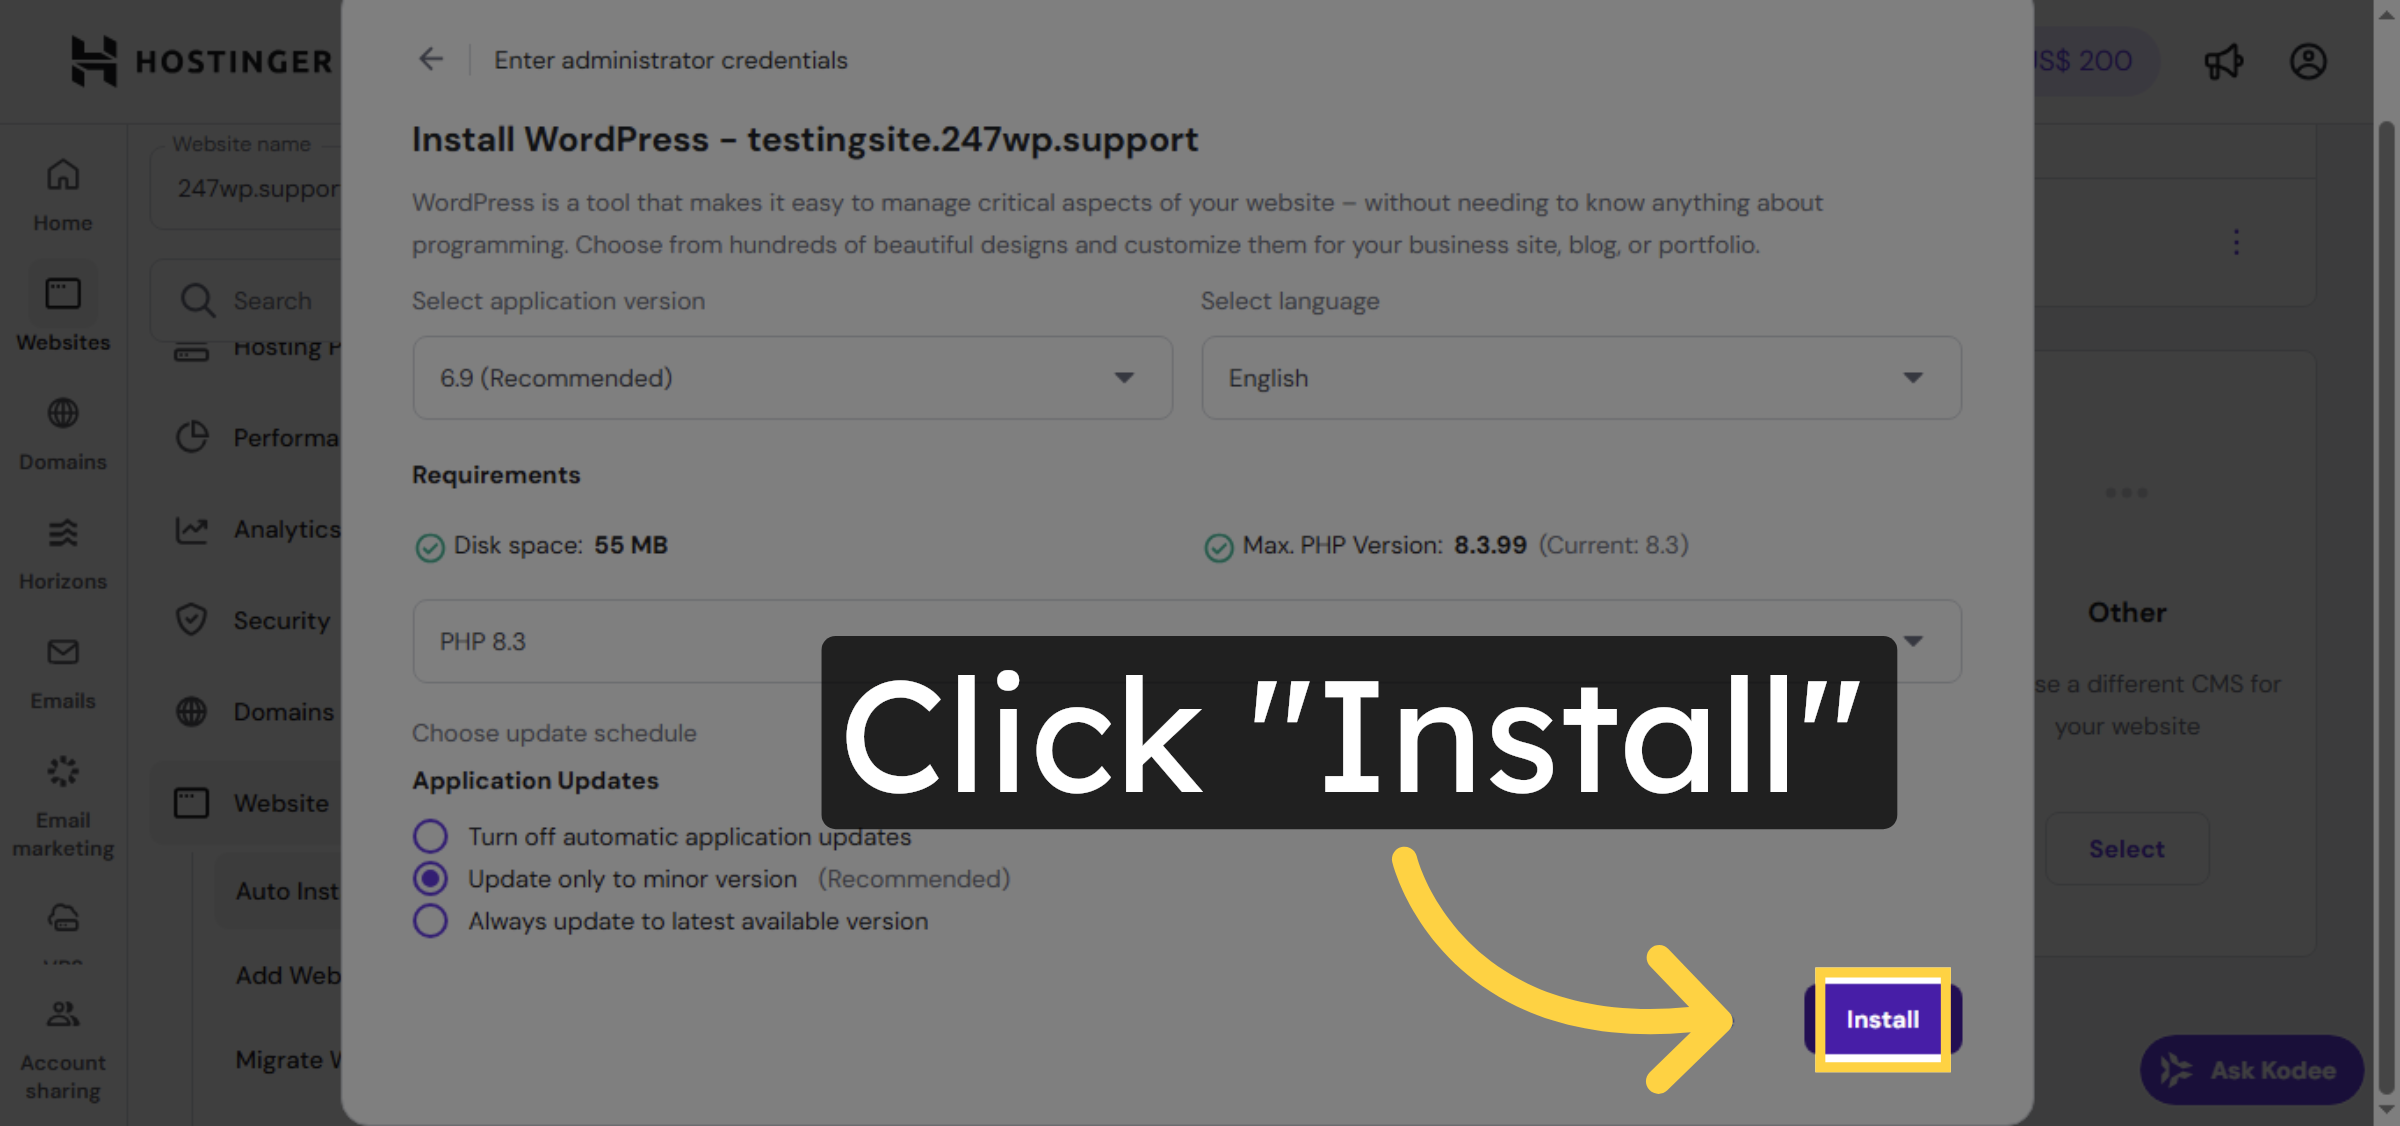
22. Start WordPress Installation

Click Install to begin installing WordPress on your subdomain.

Start WordPress Installation

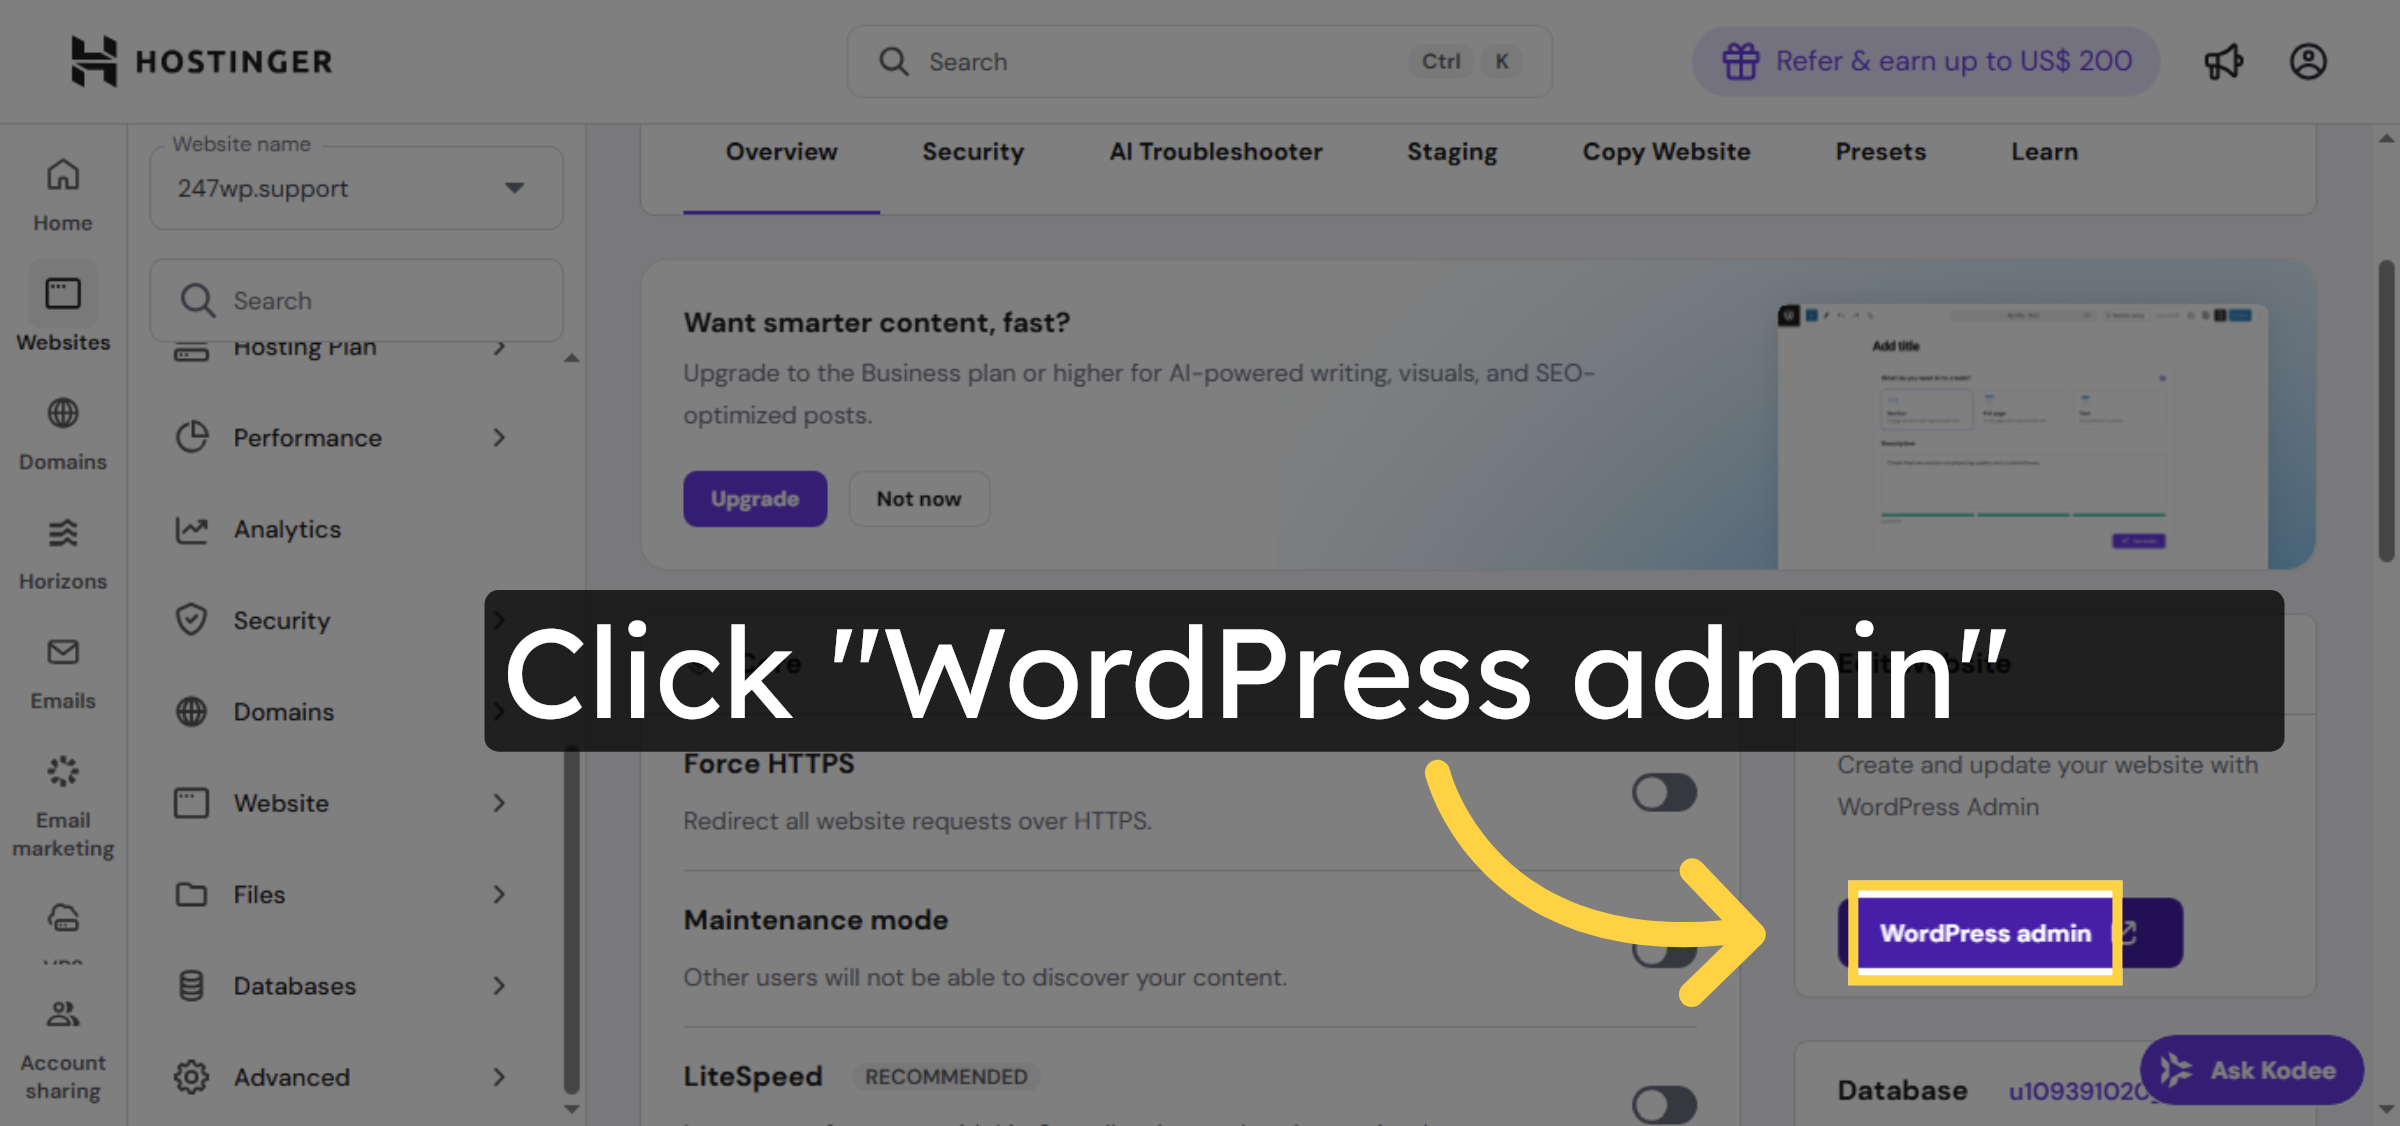
23. Access WordPress Admin

Click WordPress admin to open the admin dashboard of your new site.

Access WordPress Admin

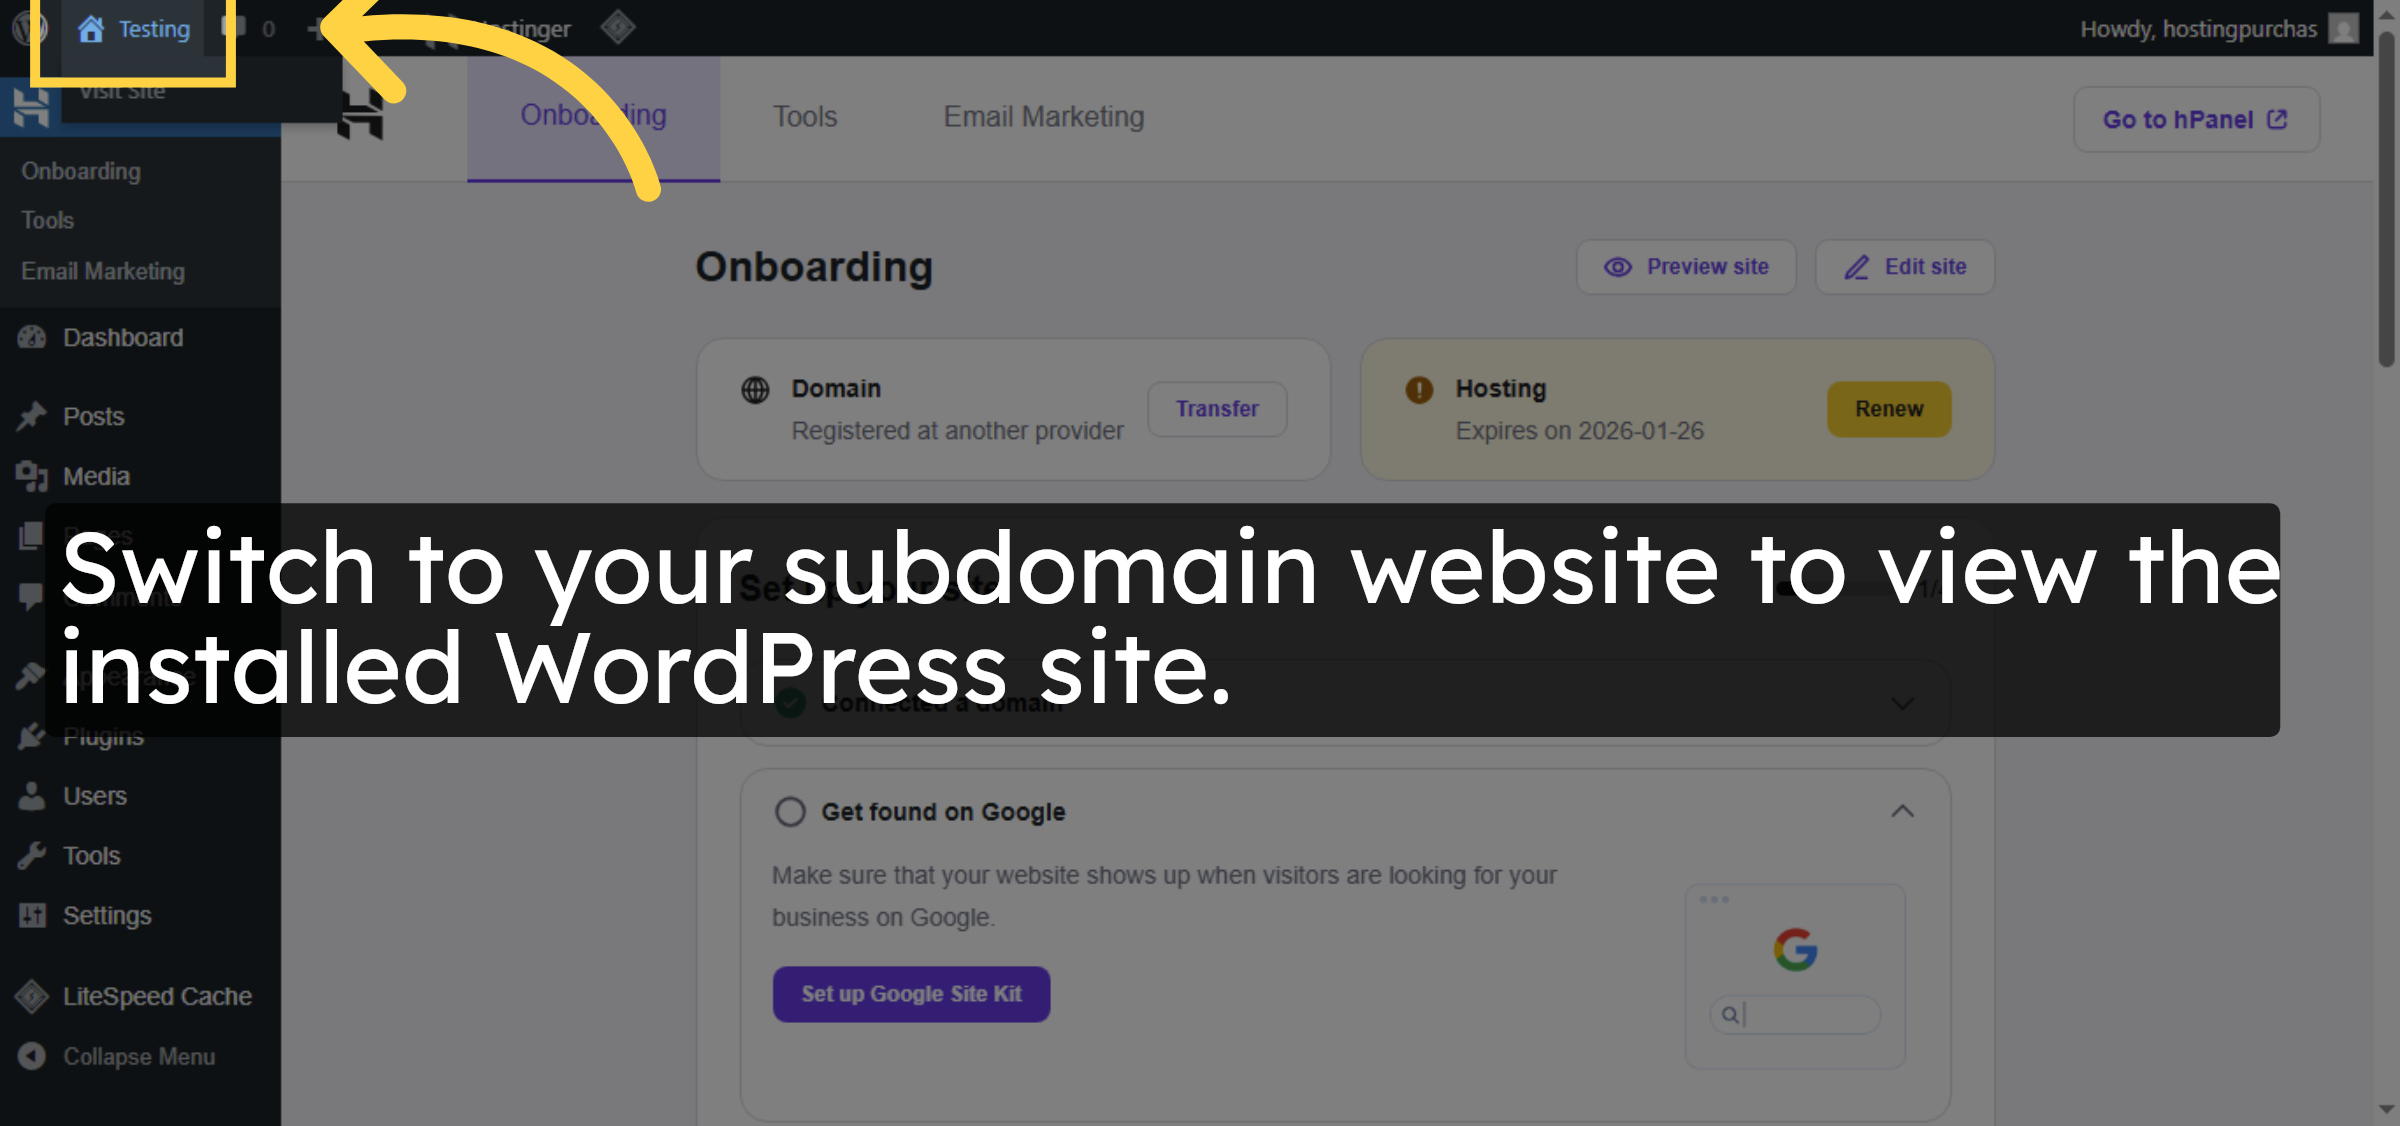
24. Open Website Title

Click the website title to access the main page of your WordPress site.

Open Website Title

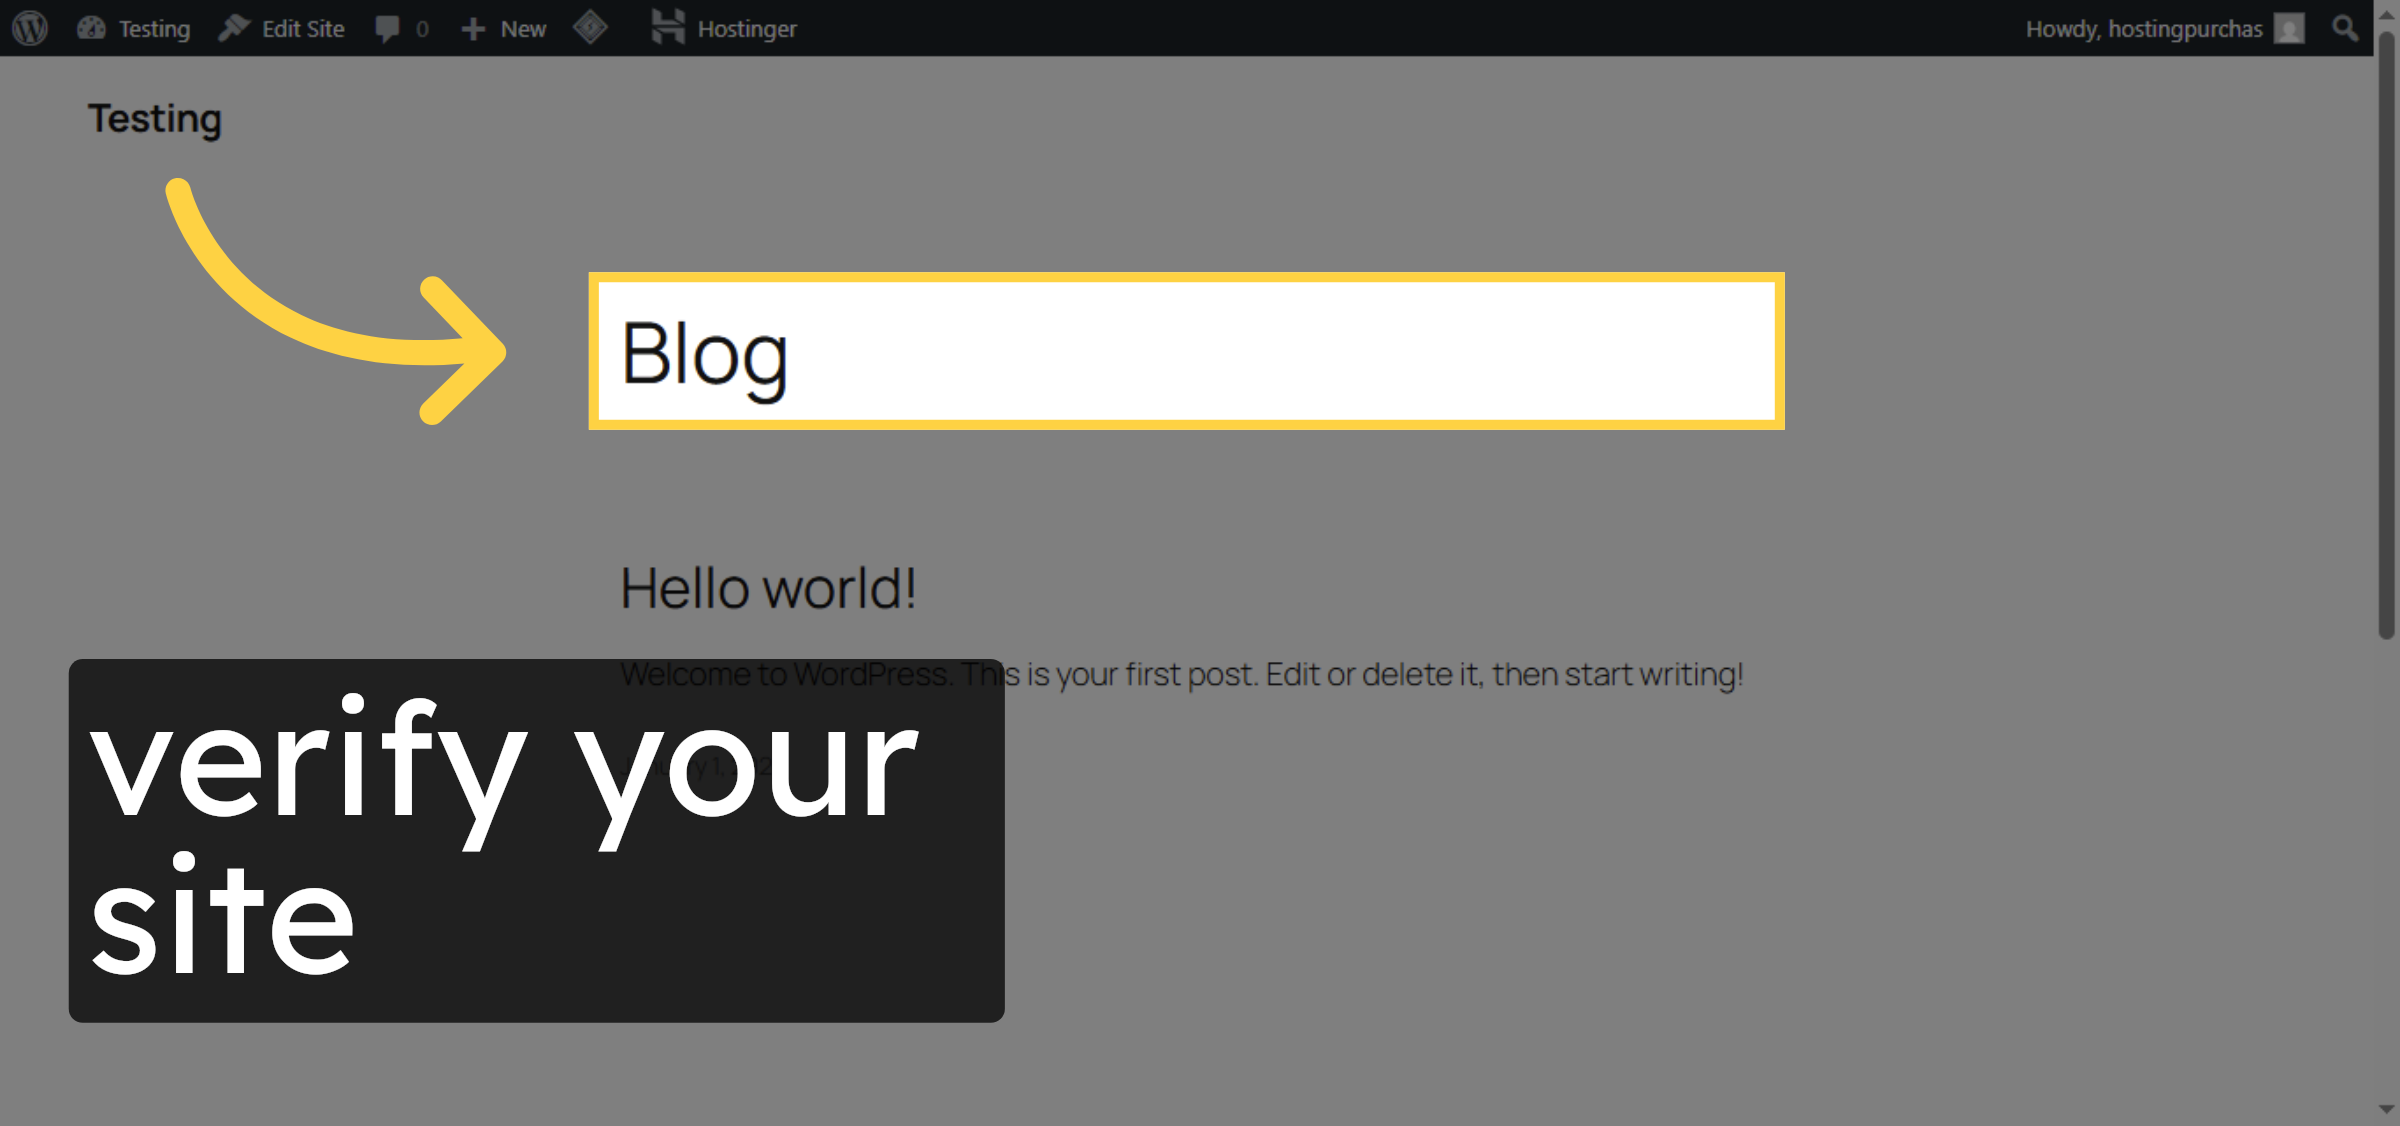
25. verify your website

now you can modify your site

verify your website

Conclusion

By following the steps outlined in this guide, you can successfully create a subdomain on Hostinger and install WordPress on it using the Auto Installer. Installing WordPress on a subdomain allows you to manage separate projects, test changes safely, and organize your websites more effectively. This method ensures a smooth setup process while maintaining full control over your hosting environment.

Visit: https://www.woohelpdesk.com
Call Us Toll-Free: +1 888 602 0119 (US & Canada)
Get professional support for WordPress configuration, hosting management, performance optimization, and troubleshooting.


Leave a Reply

Your email address will not be published. Required fields are marked *

Leave a Reply

Your email address will not be published. Required fields are marked *