Introduction
Creating a WordPress website on a subdomain in Bluehost allows you to organize content efficiently, test new ideas, or launch separate sections such as blogs, stores, or landing pages without affecting your main website. This guide provides a complete step-by-step walkthrough for setting up WordPress on a Bluehost subdomain using cPanel. It covers the entire process, including creating a subdomain, uploading and extracting WordPress files, moving them to the correct root directory, setting up a MySQL database, and completing the WordPress installation wizard. By following these steps carefully, you ensure that your subdomain is properly configured, securely connected to a database, and ready for customization. This manual approach gives you greater control over file structure, database settings, and overall site configuration, making it ideal for users who want flexibility and a deeper understanding of how WordPress works within the Bluehost hosting environment.
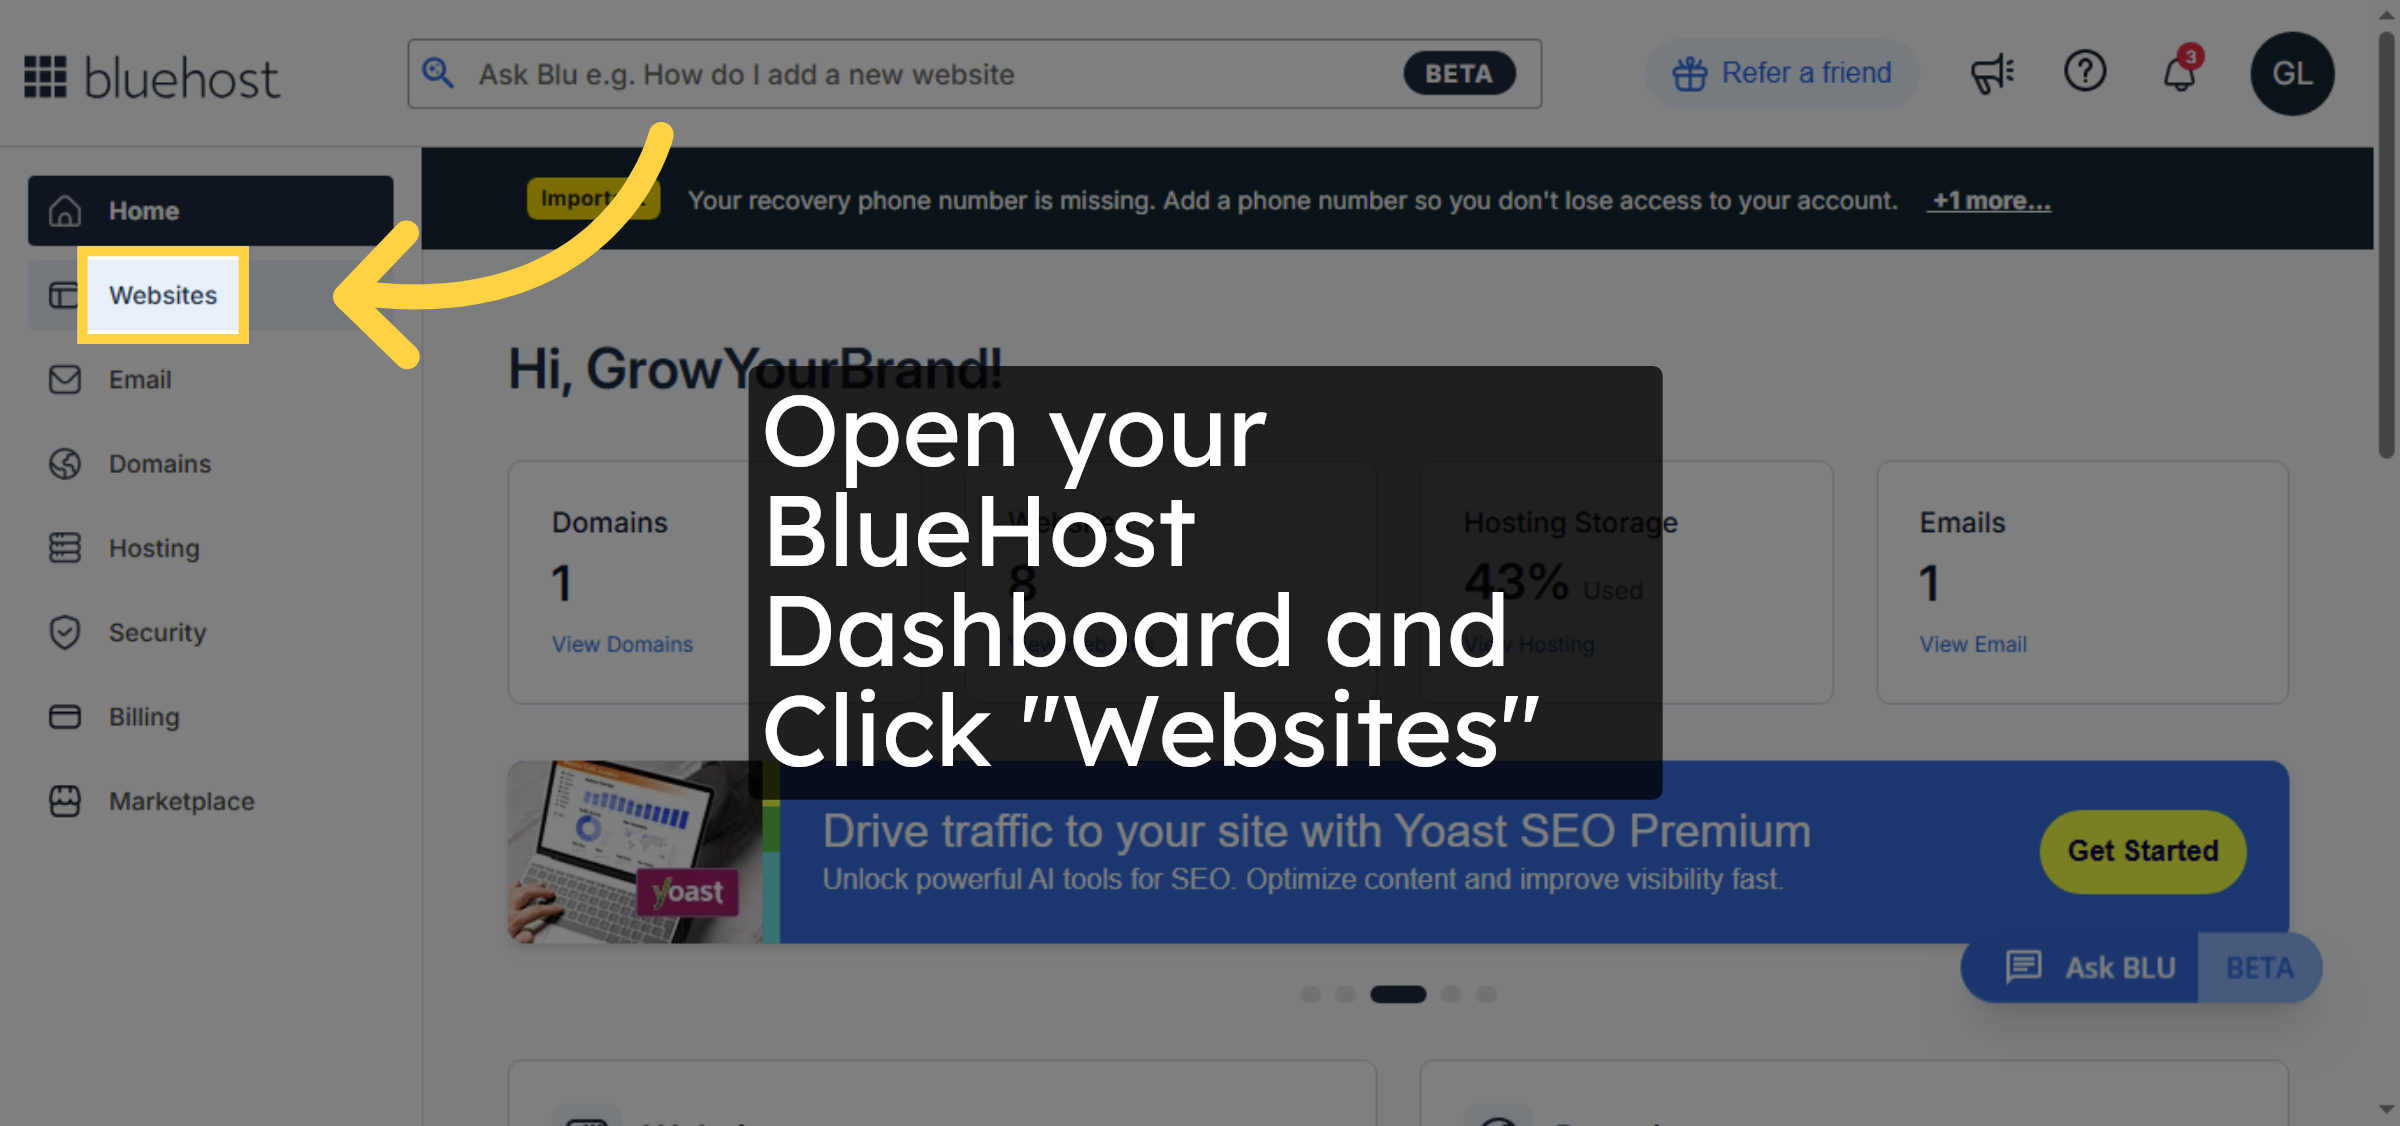
1. Click Websites Tab
Click the Websites tab in your Bluehost account dashboard to access your website management options.
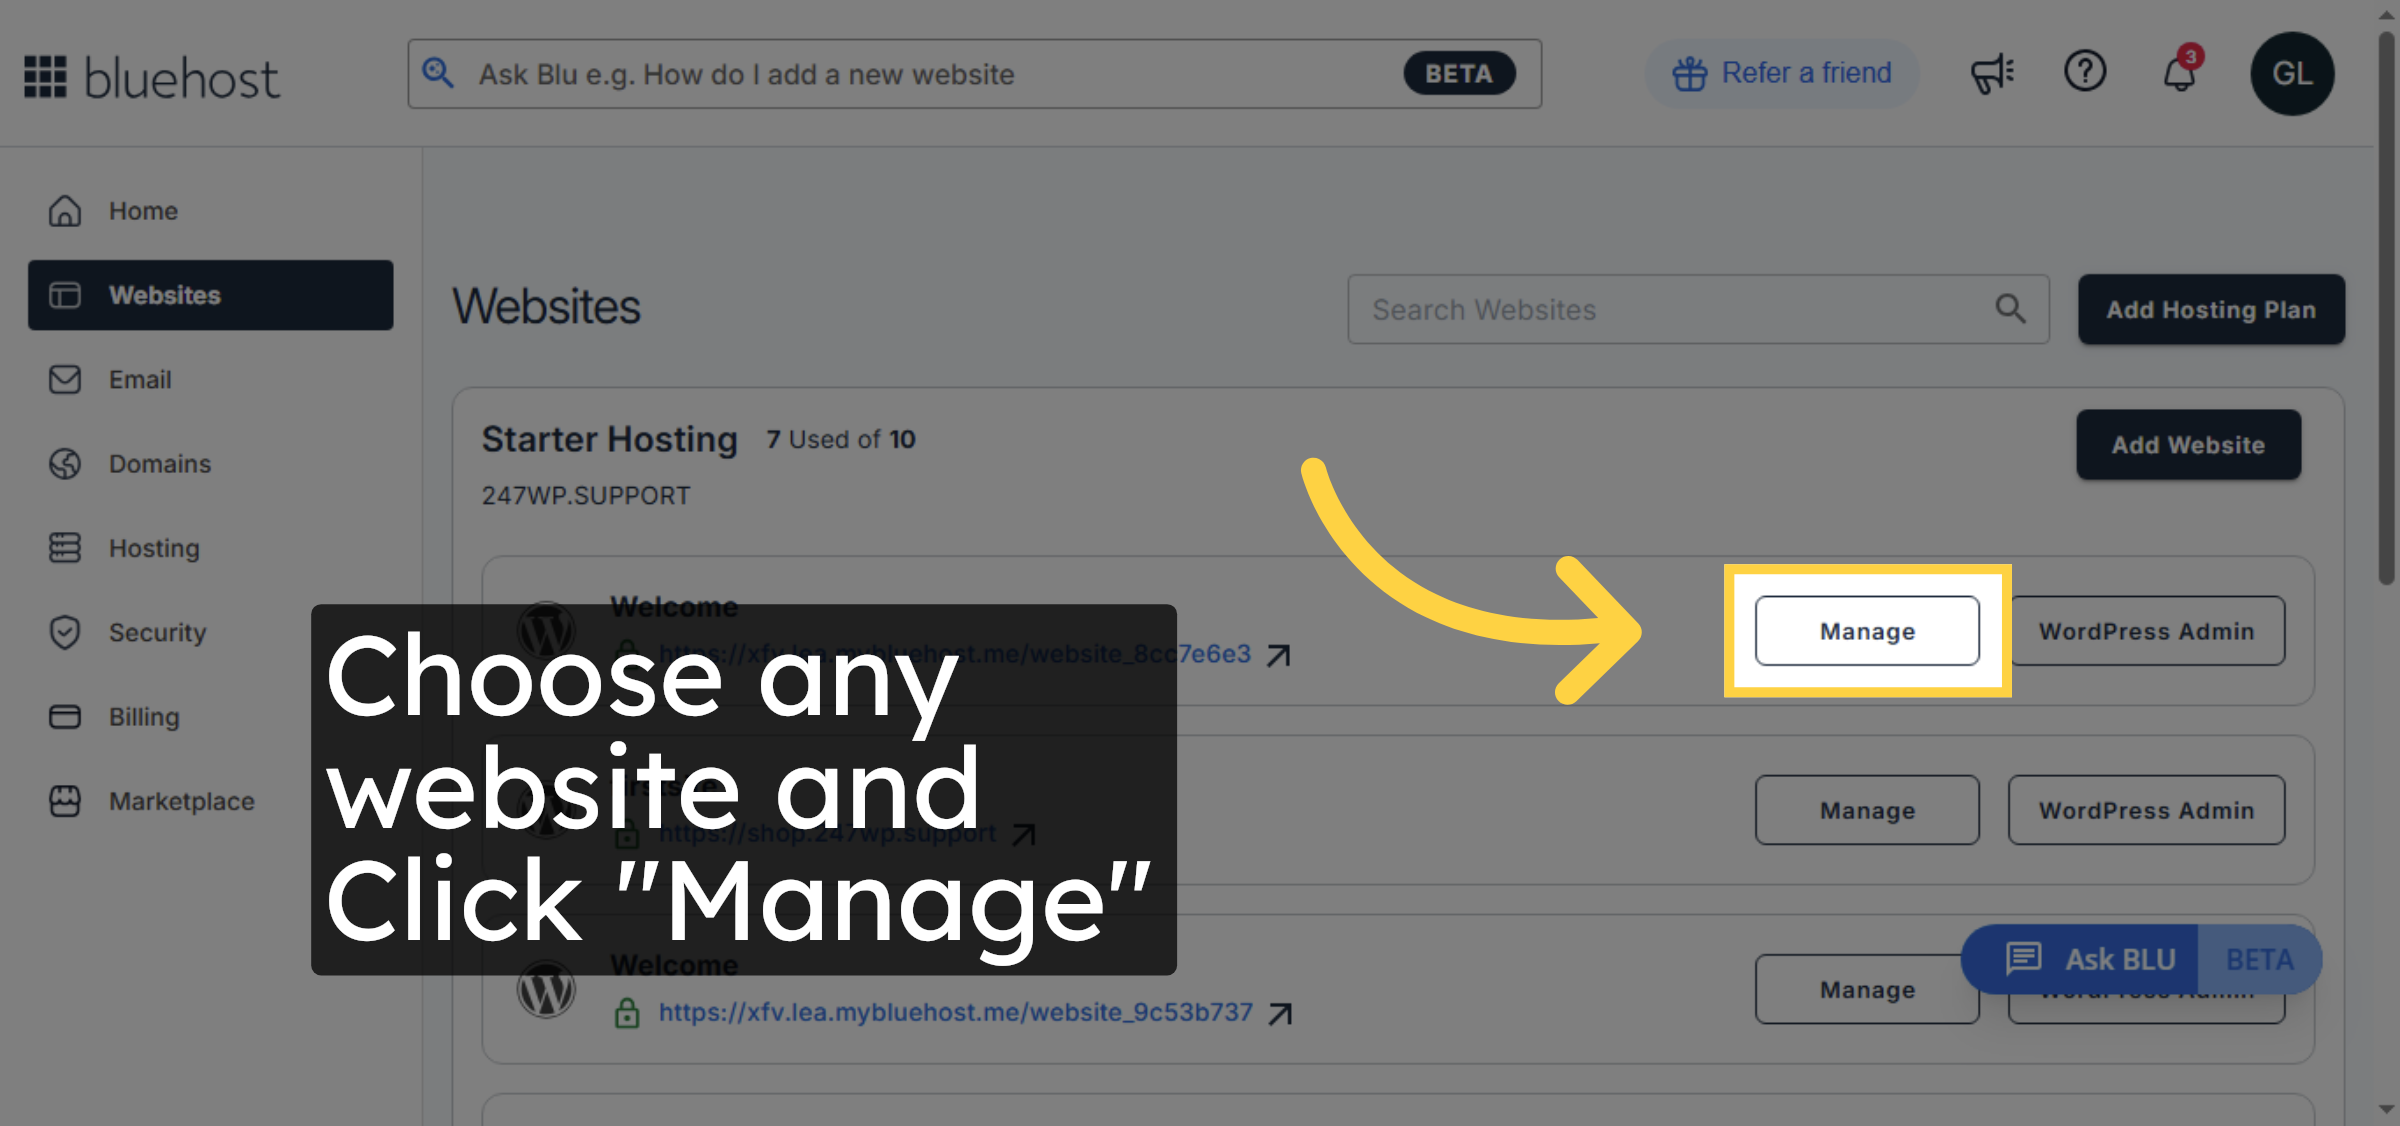
2. Click Manage Button
Click the Manage button next to the website you want to configure to open its settings.
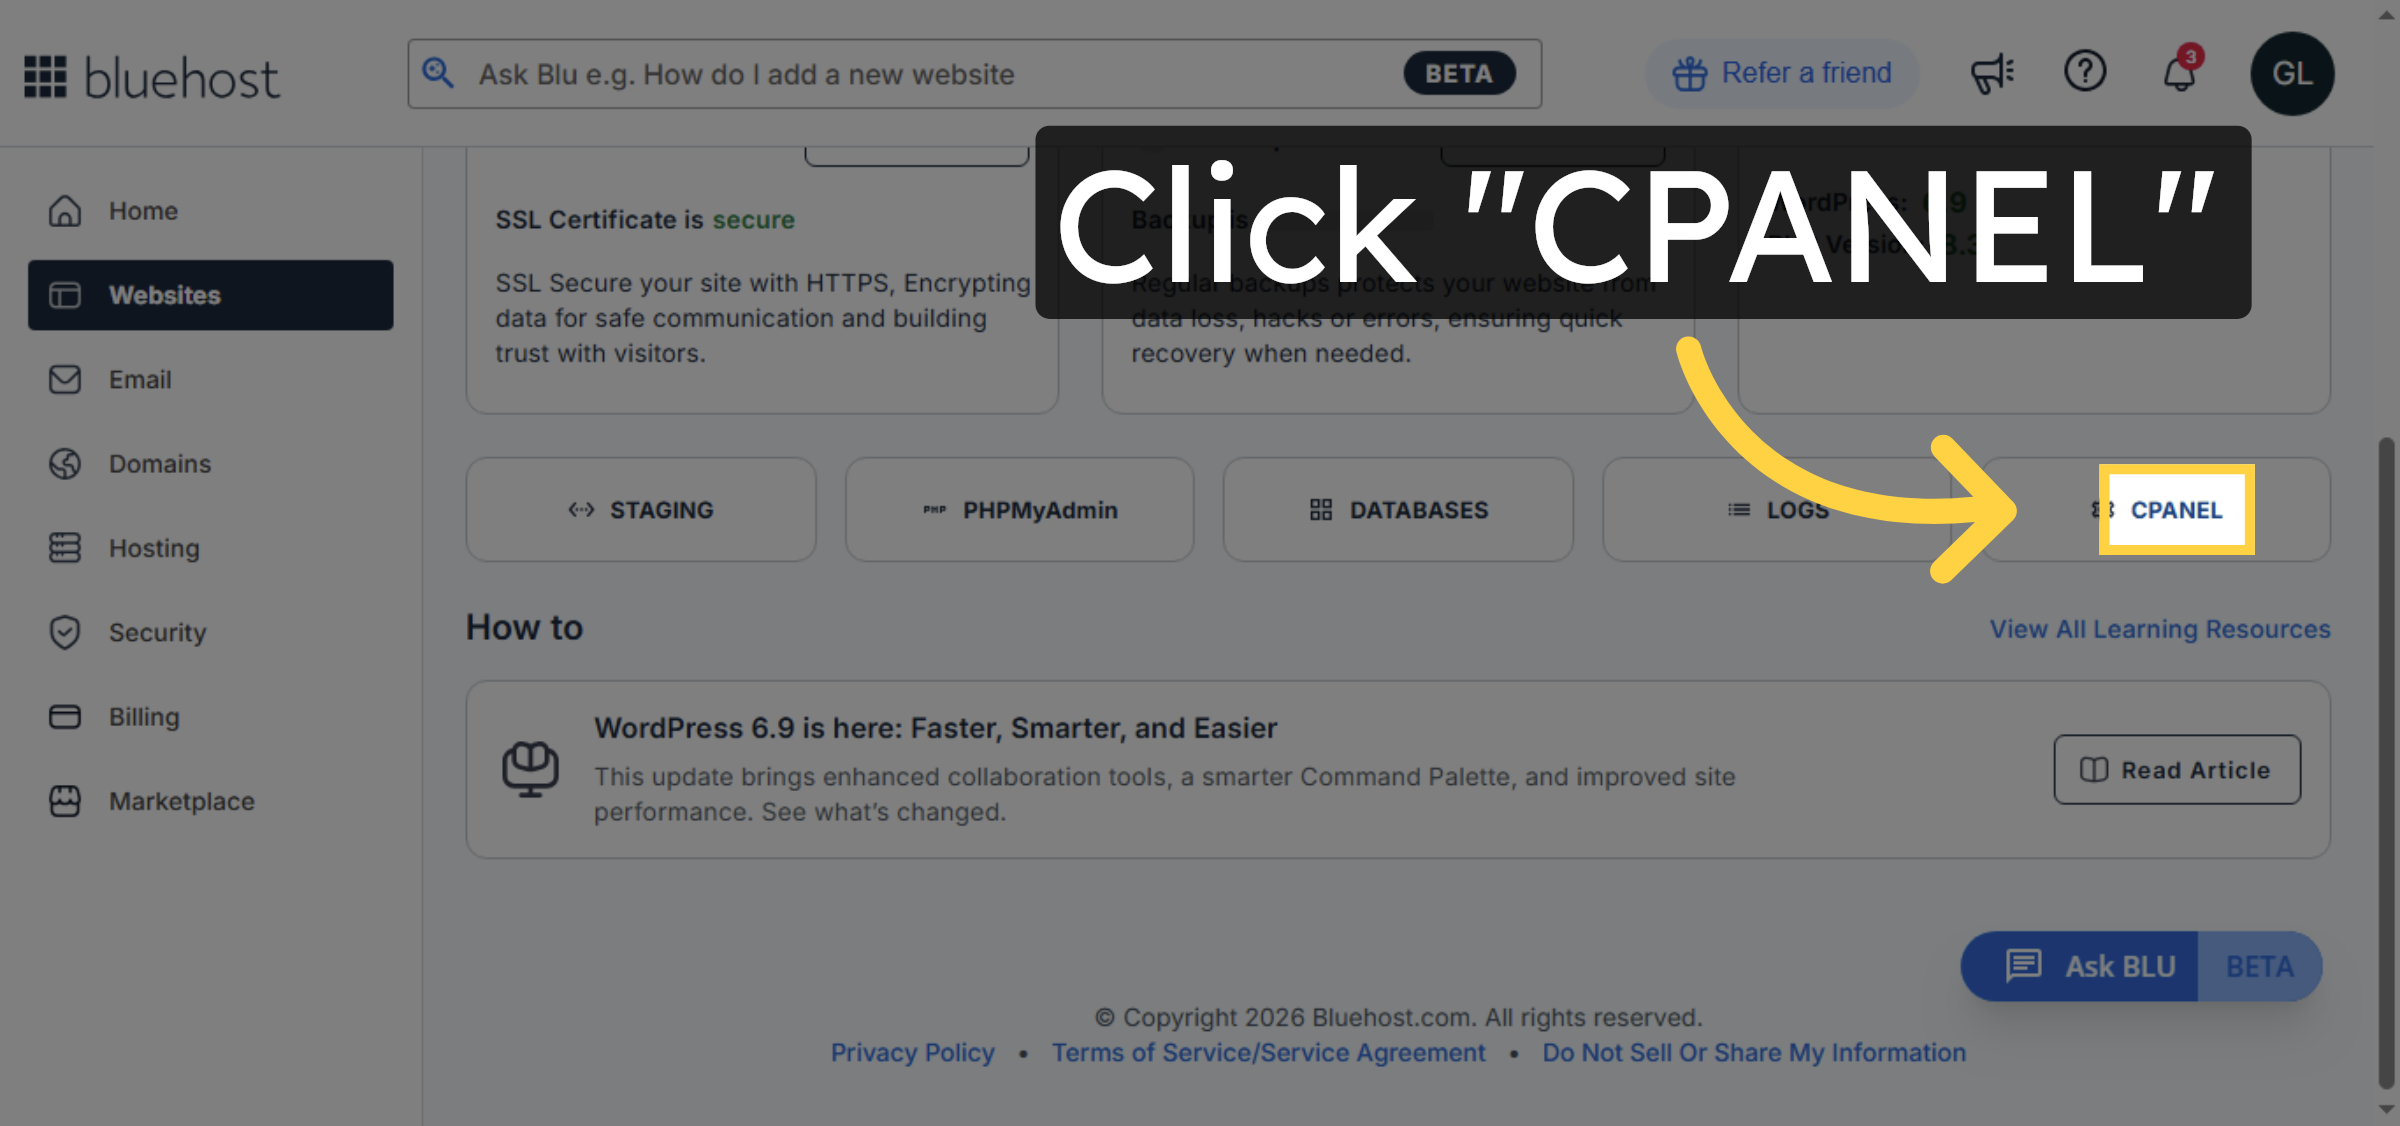
3. Access cPanel
Click the CPANEL option to open the control panel for advanced website management.
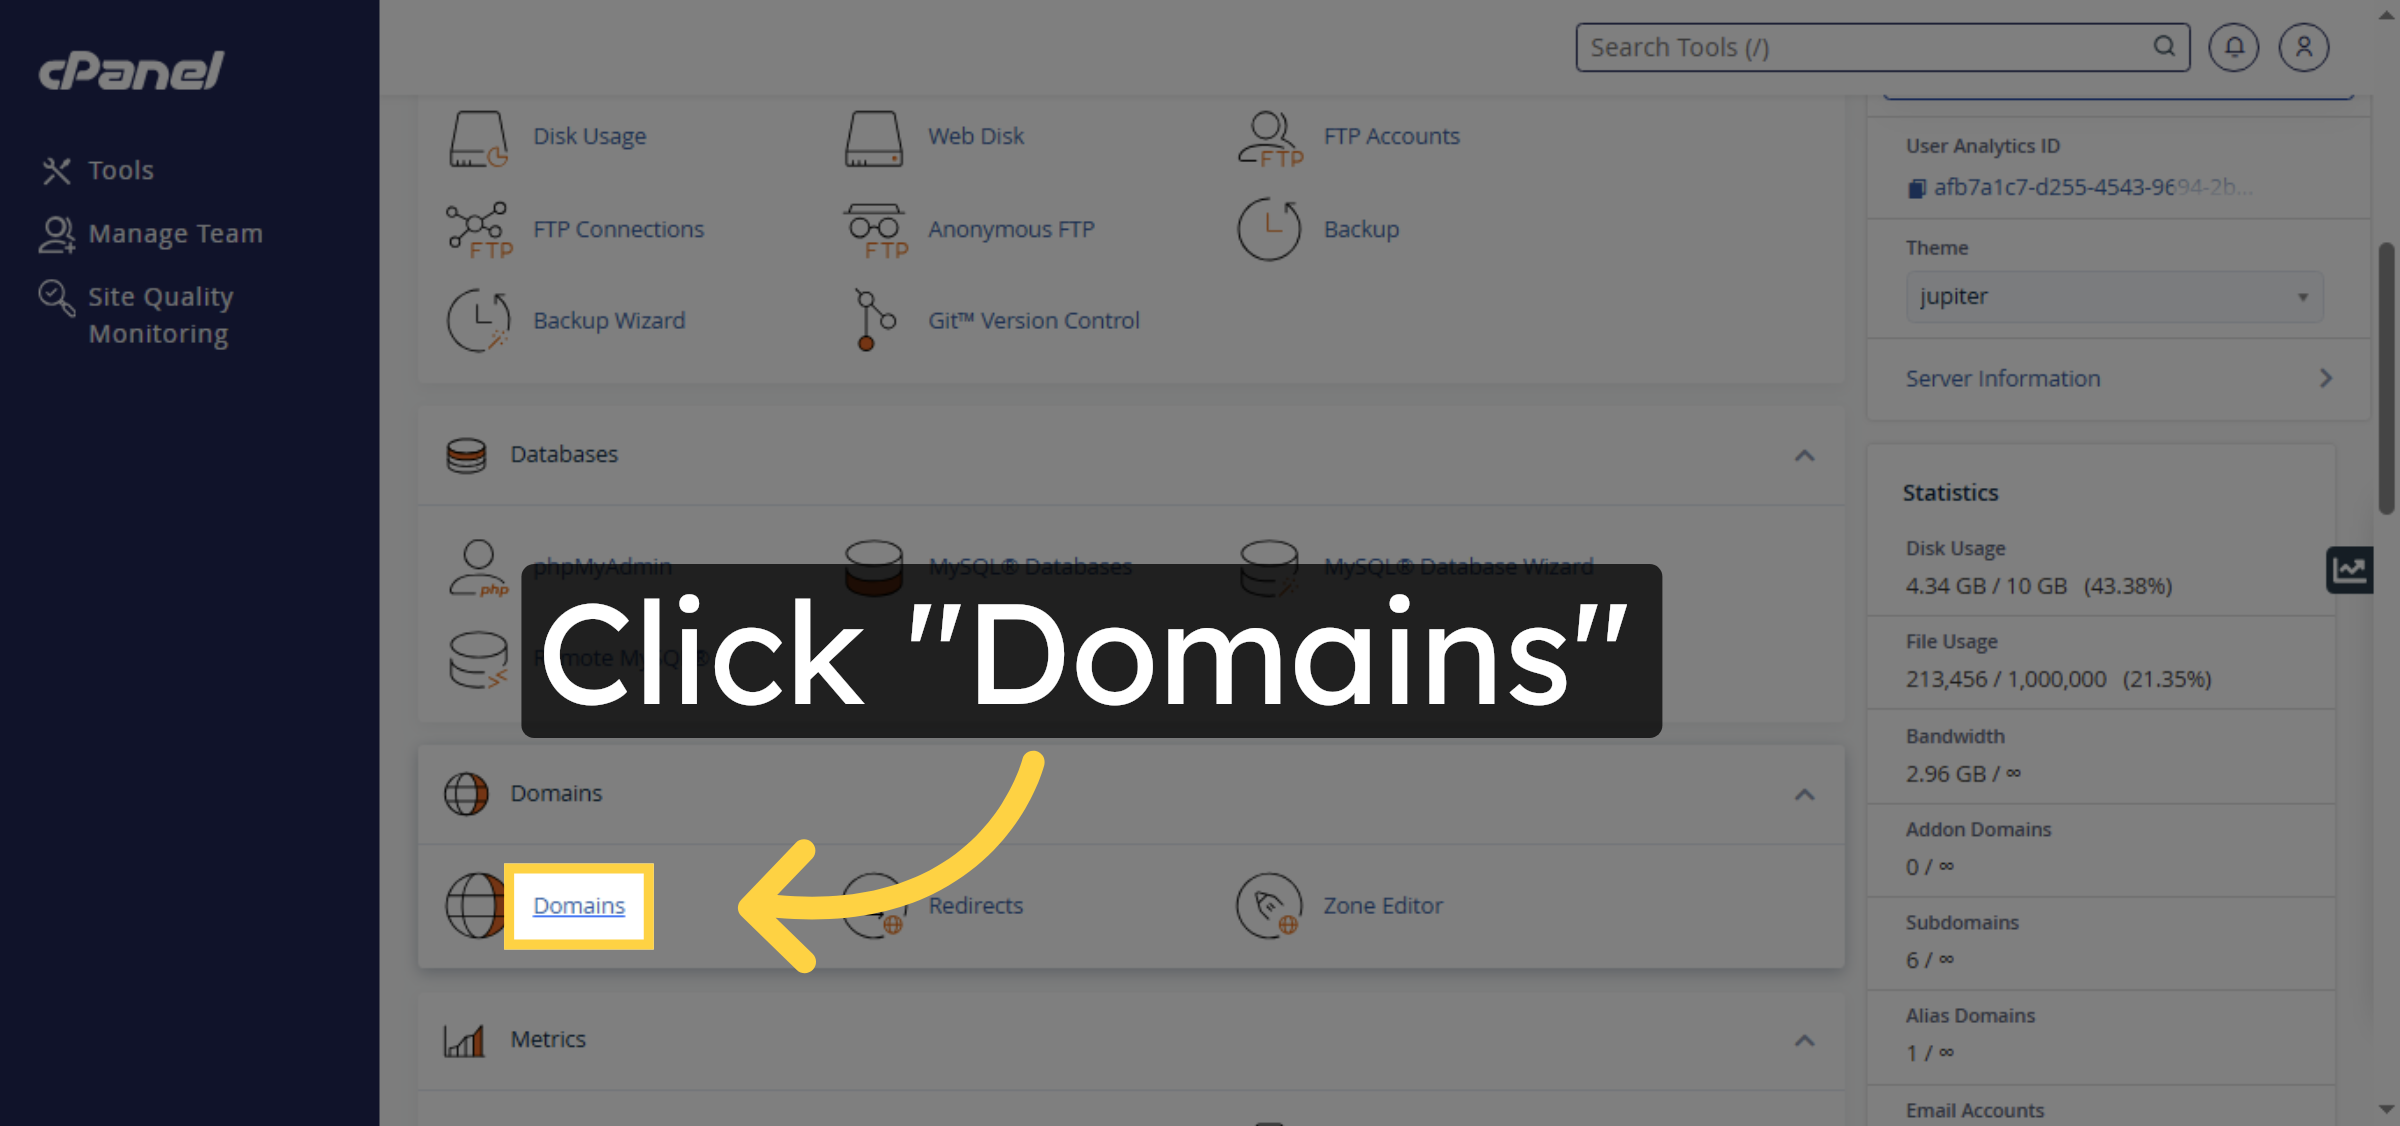
4. Open Domains Section
Click the Domains section within cPanel to manage your domain names and subdomains.
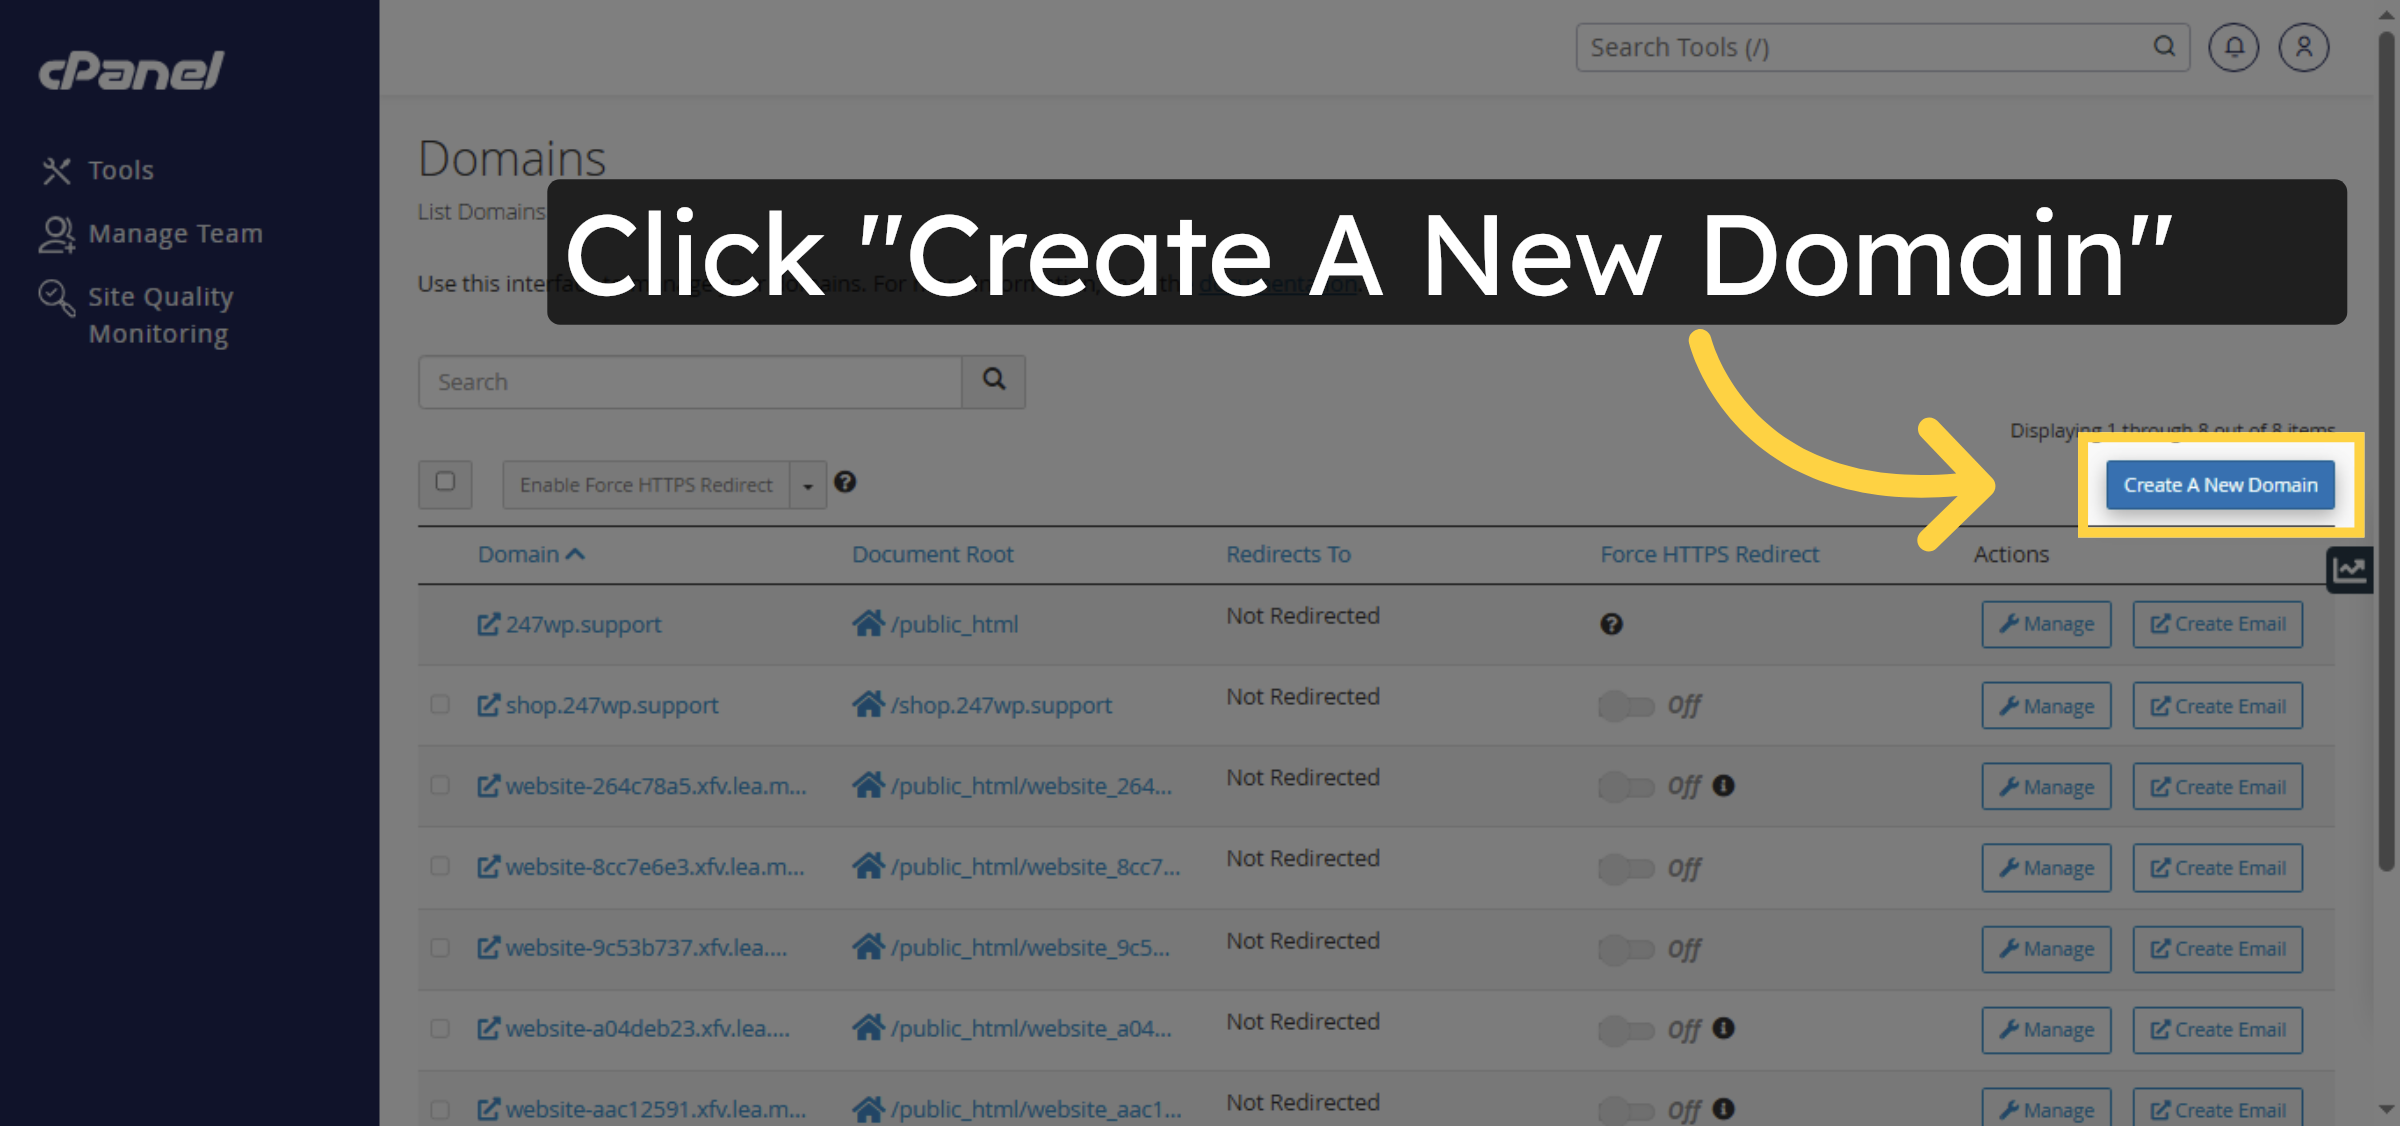
5. Create New Domain
Click Create A New Domain to start adding a new subdomain to your hosting account.
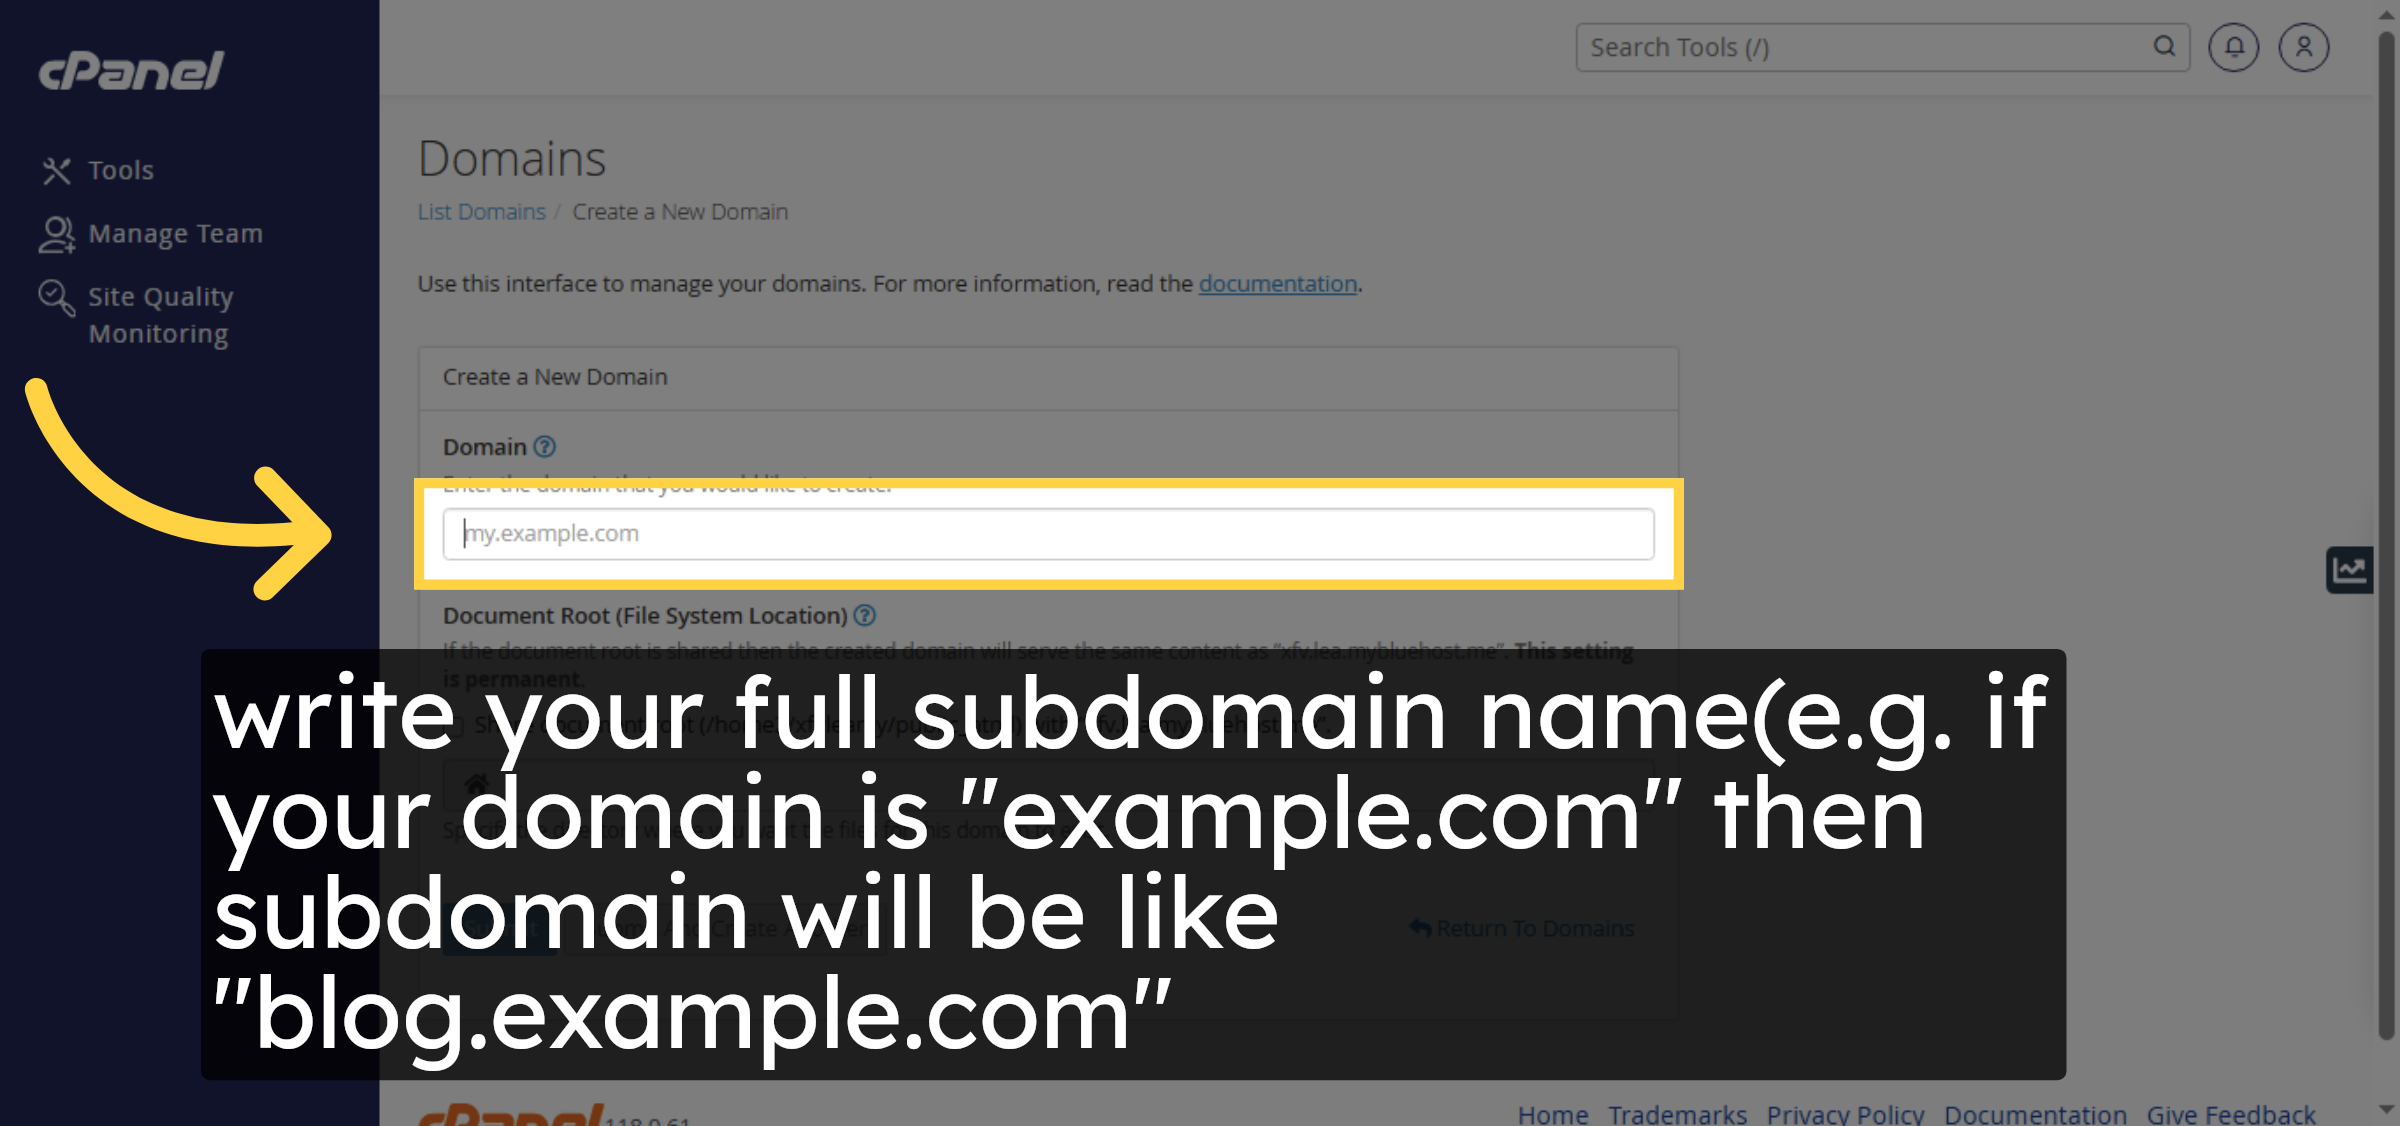
6. Enter Subdomain Name
write your full subdomain name(e.g. if your domain is “example.com” then subdomain will be like “blog.example.com”
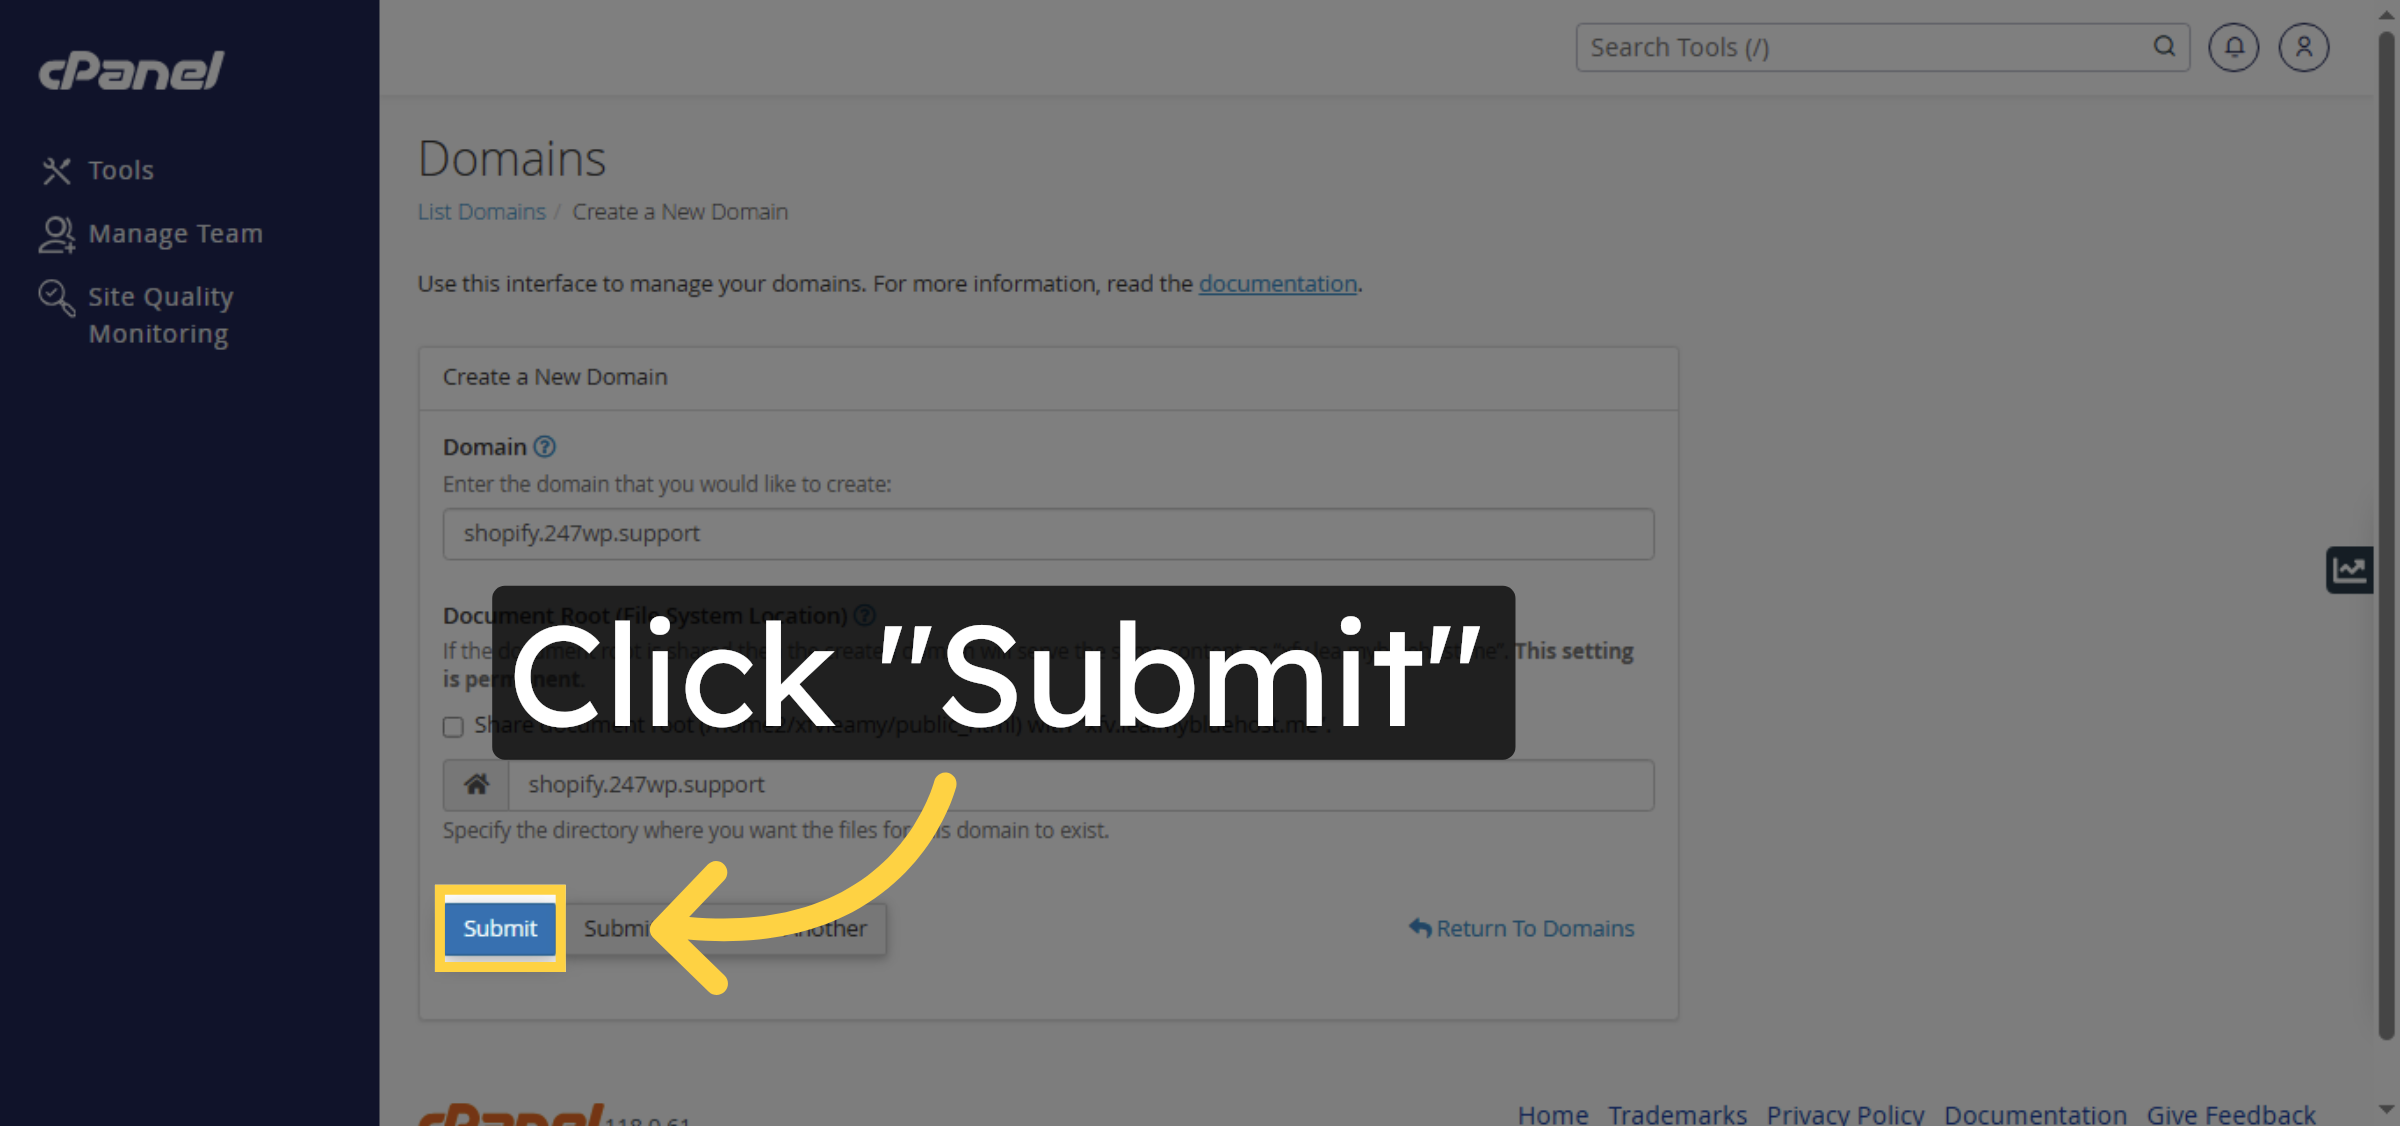
7. Submit New Domain
Click Submit to create the new subdomain with the specified name.
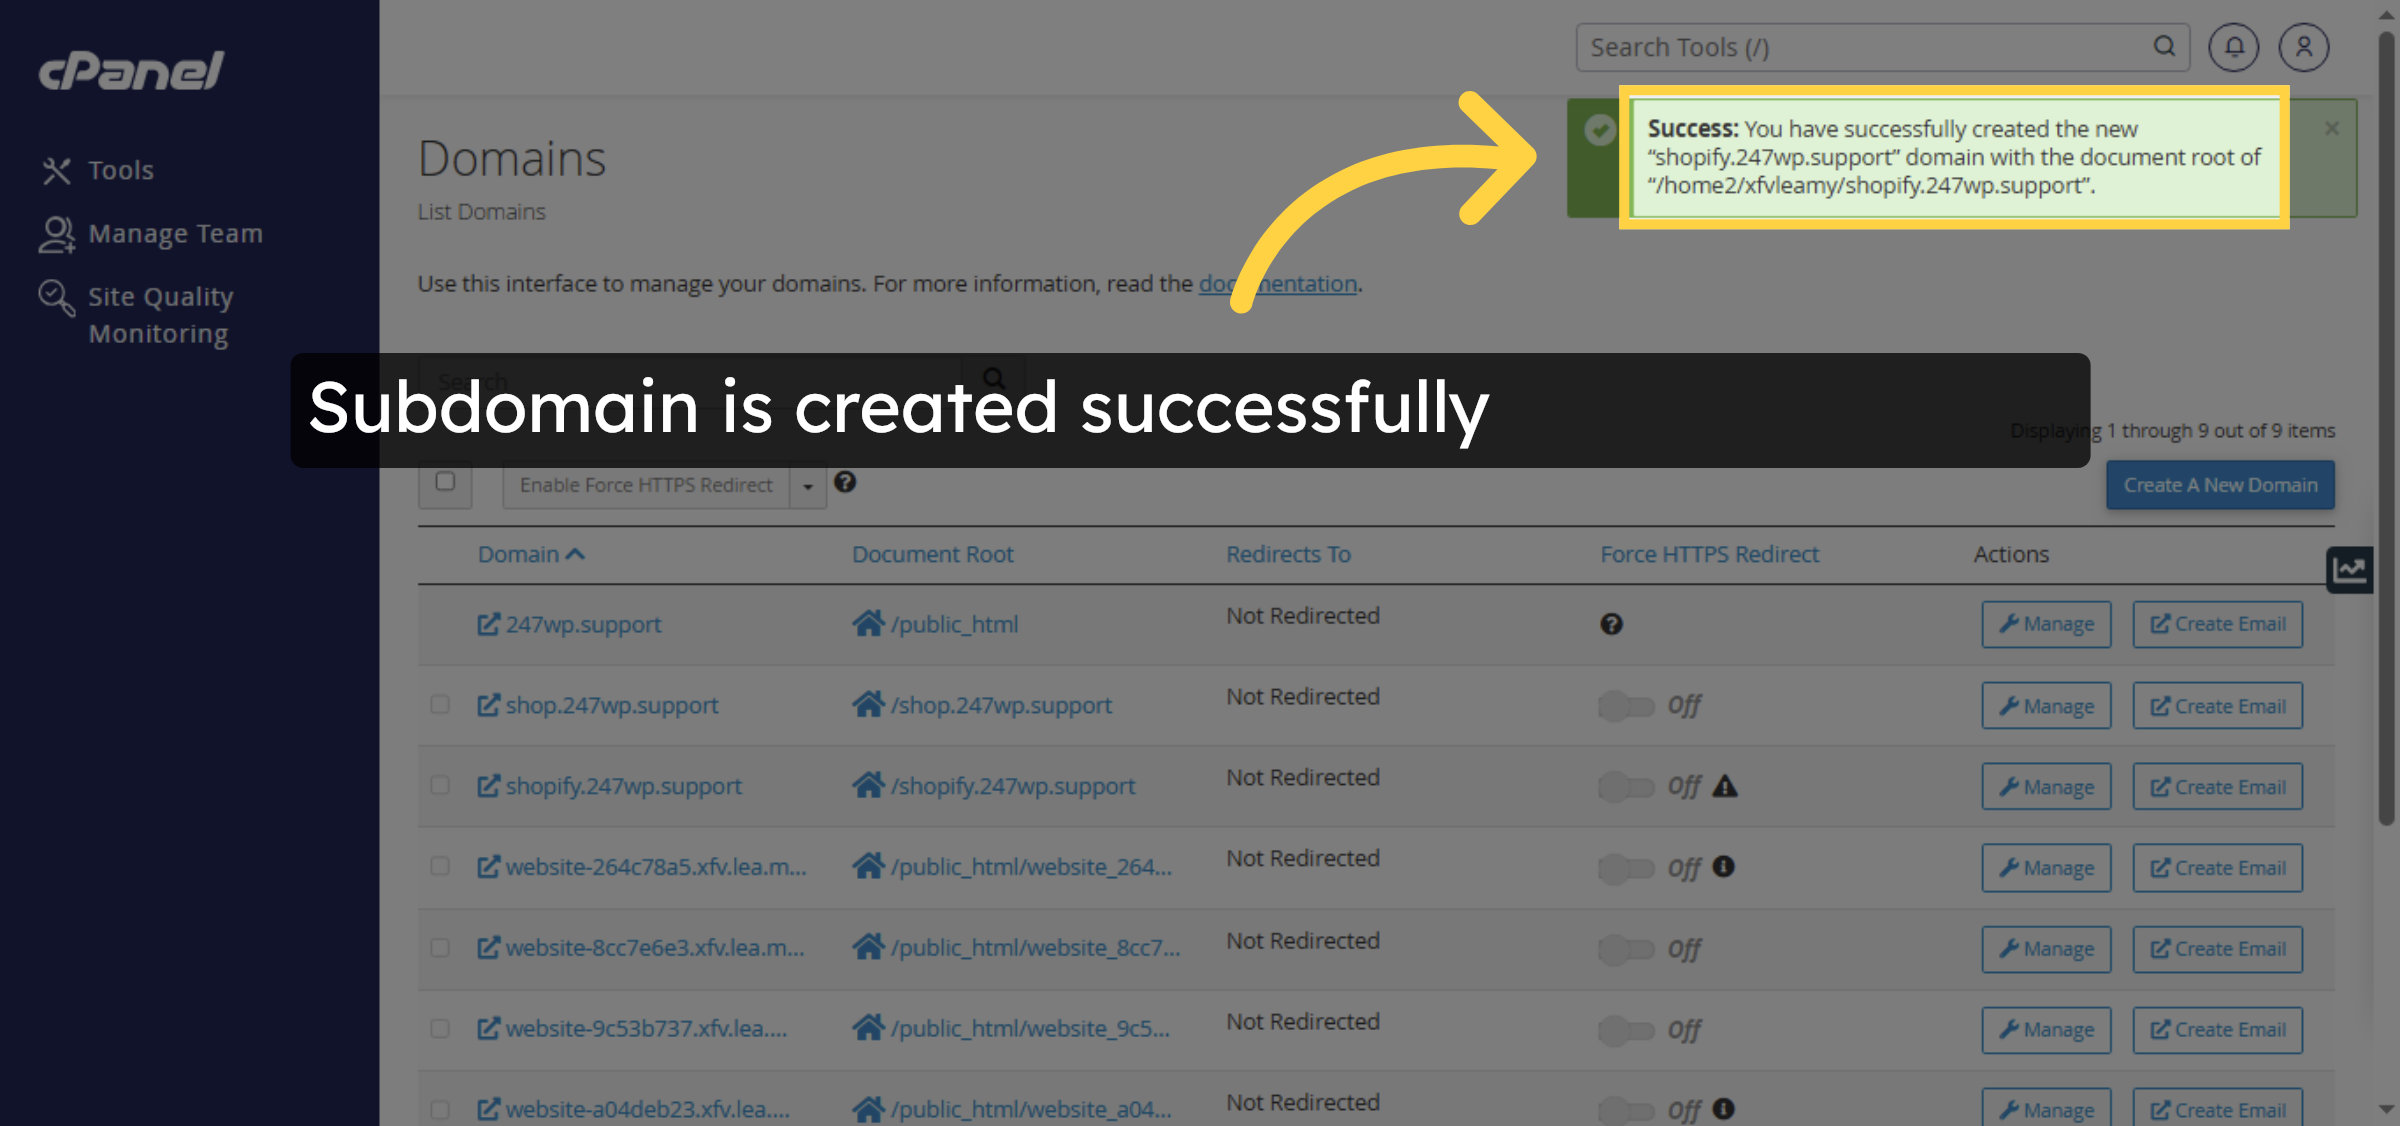
8. Confirm Domain Creation
You have successfully created the new subdomain with its document root directory set up.
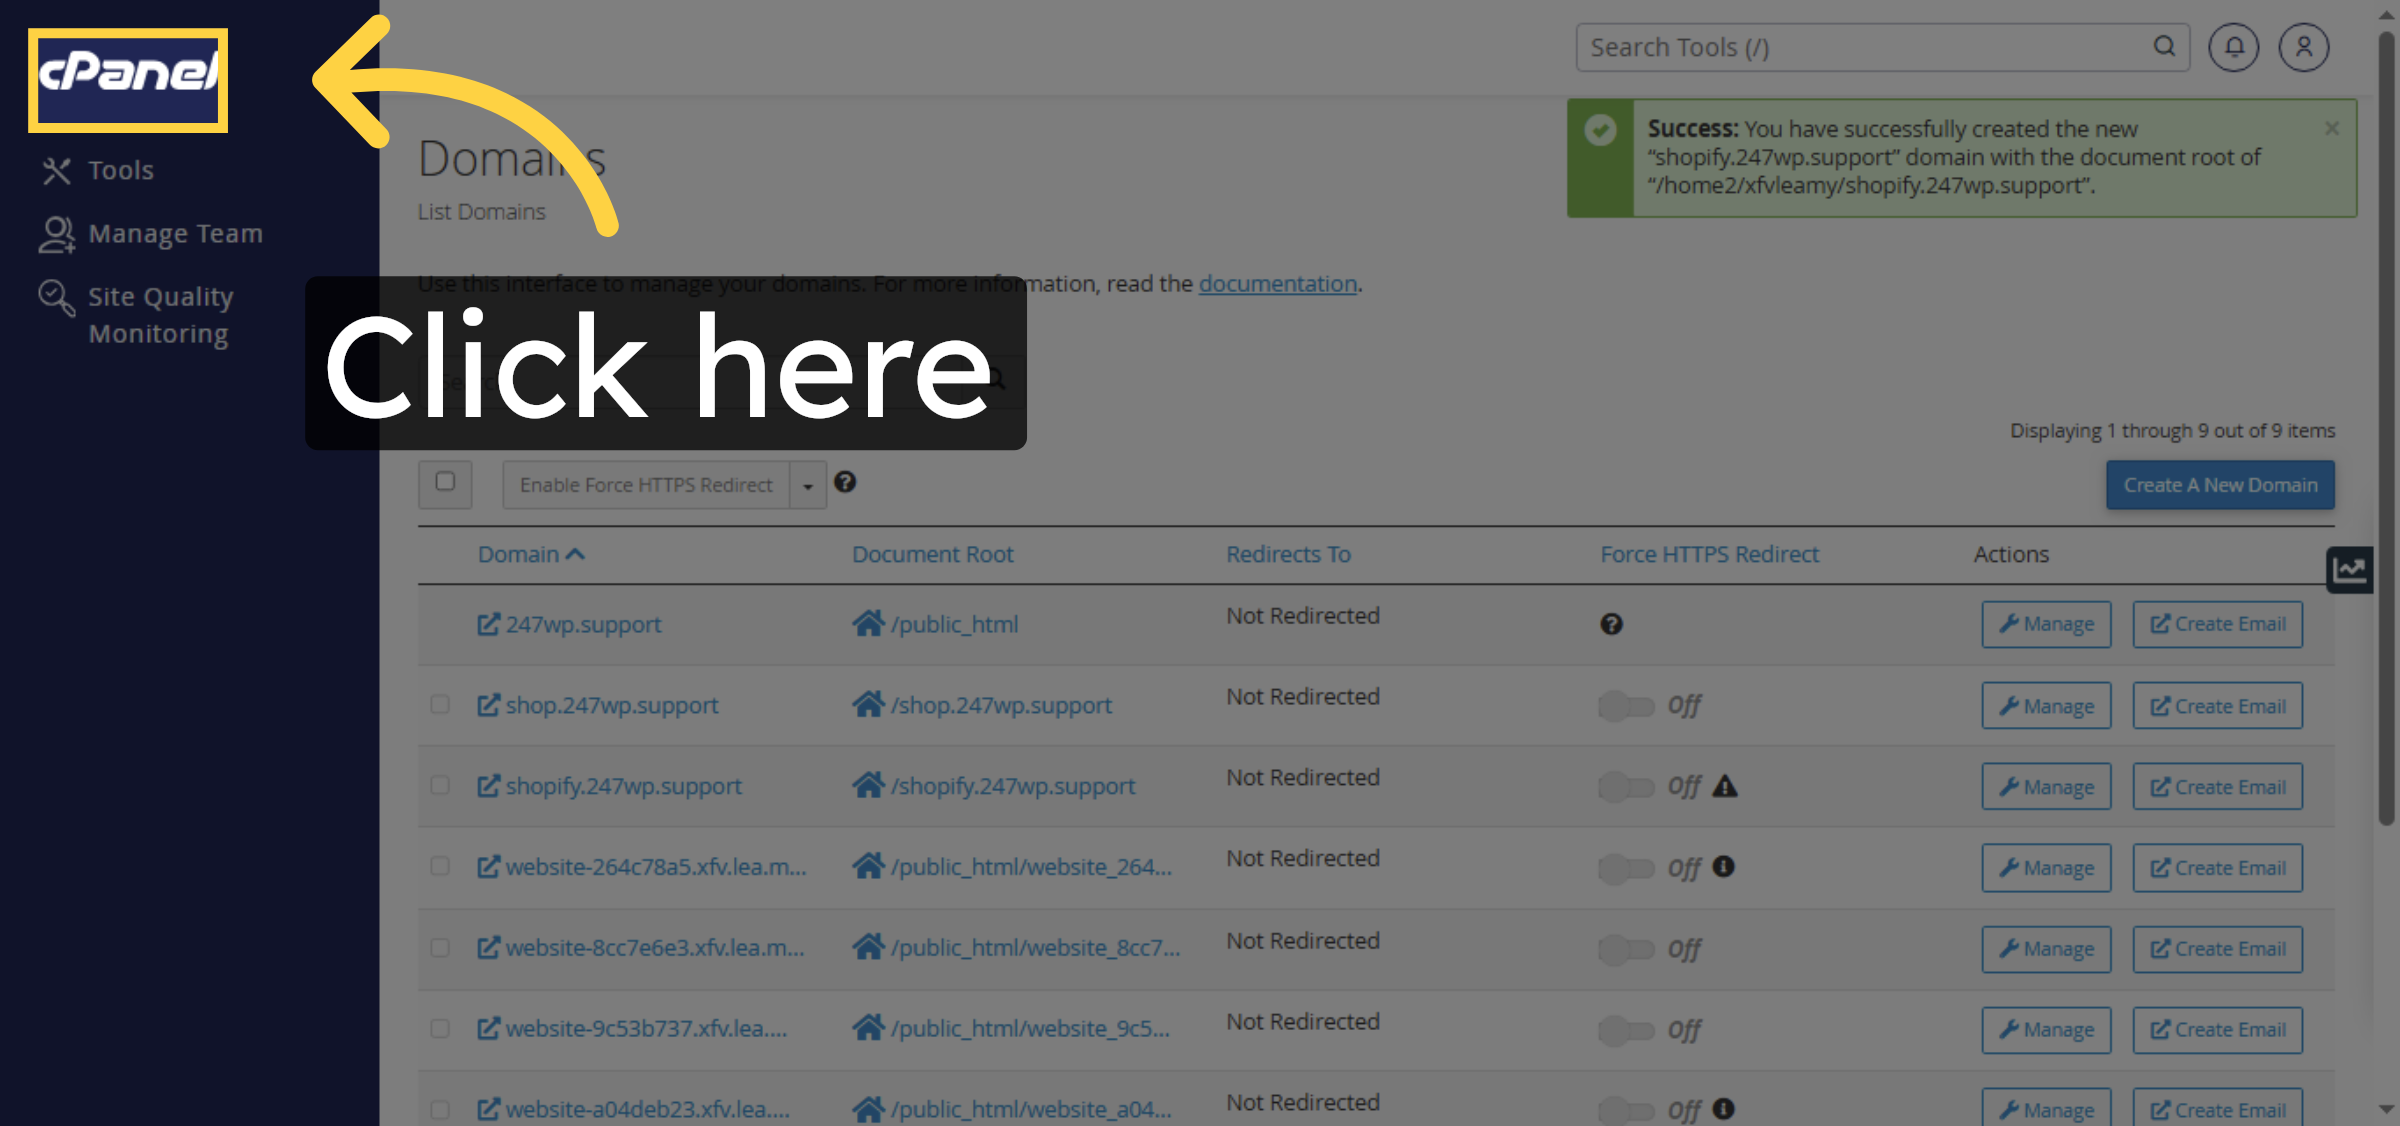
9. Proceed To File Manager
Click here to continue to the File Manager where you will upload WordPress files.
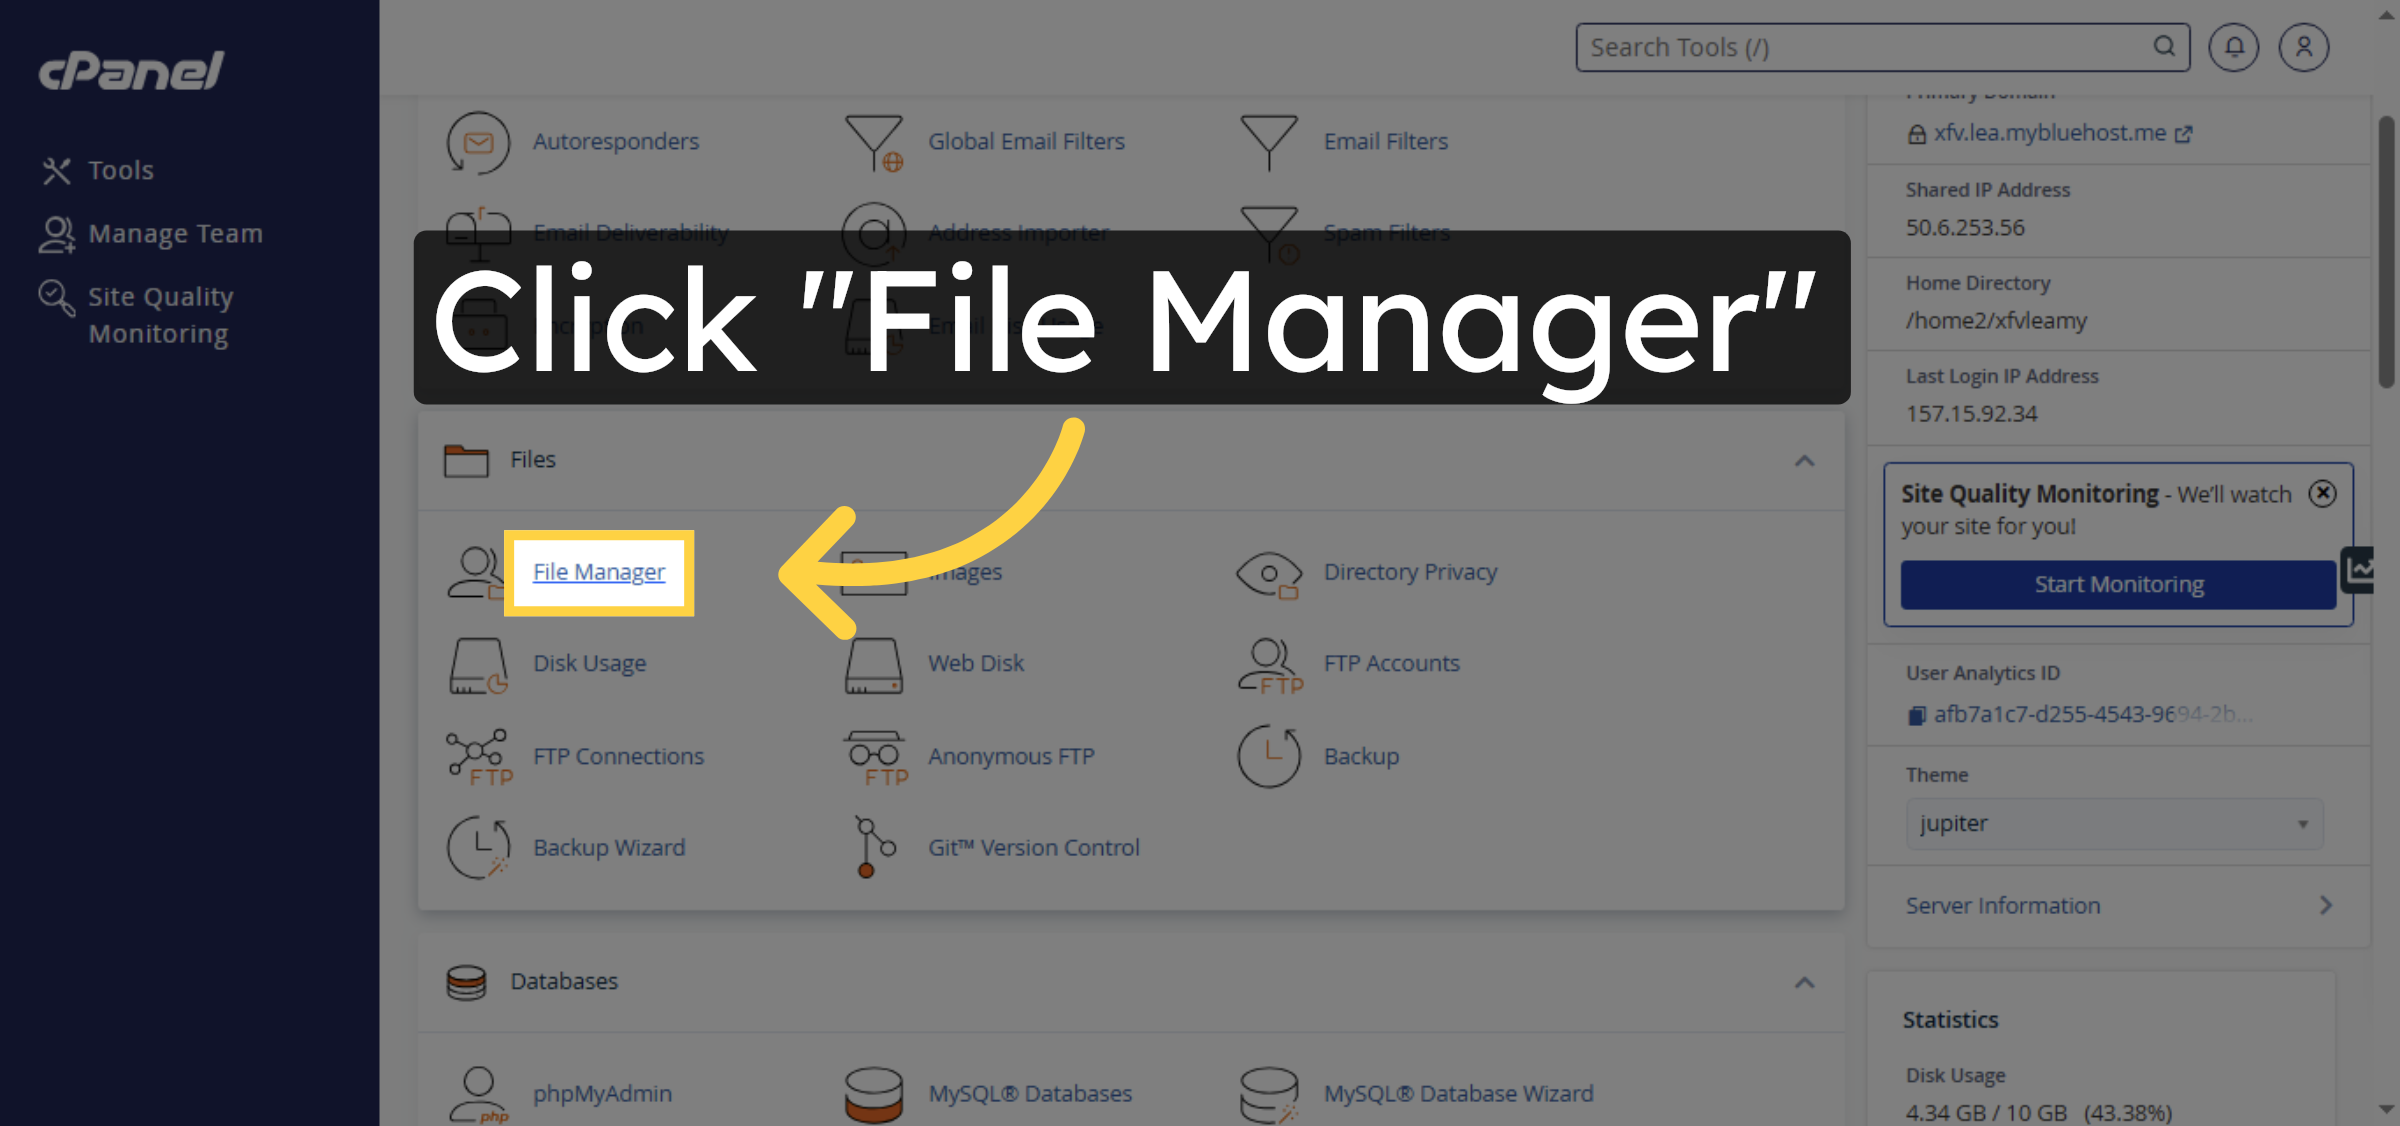
10. Open File Manager
Click File Manager in cPanel to access your website’s file system.
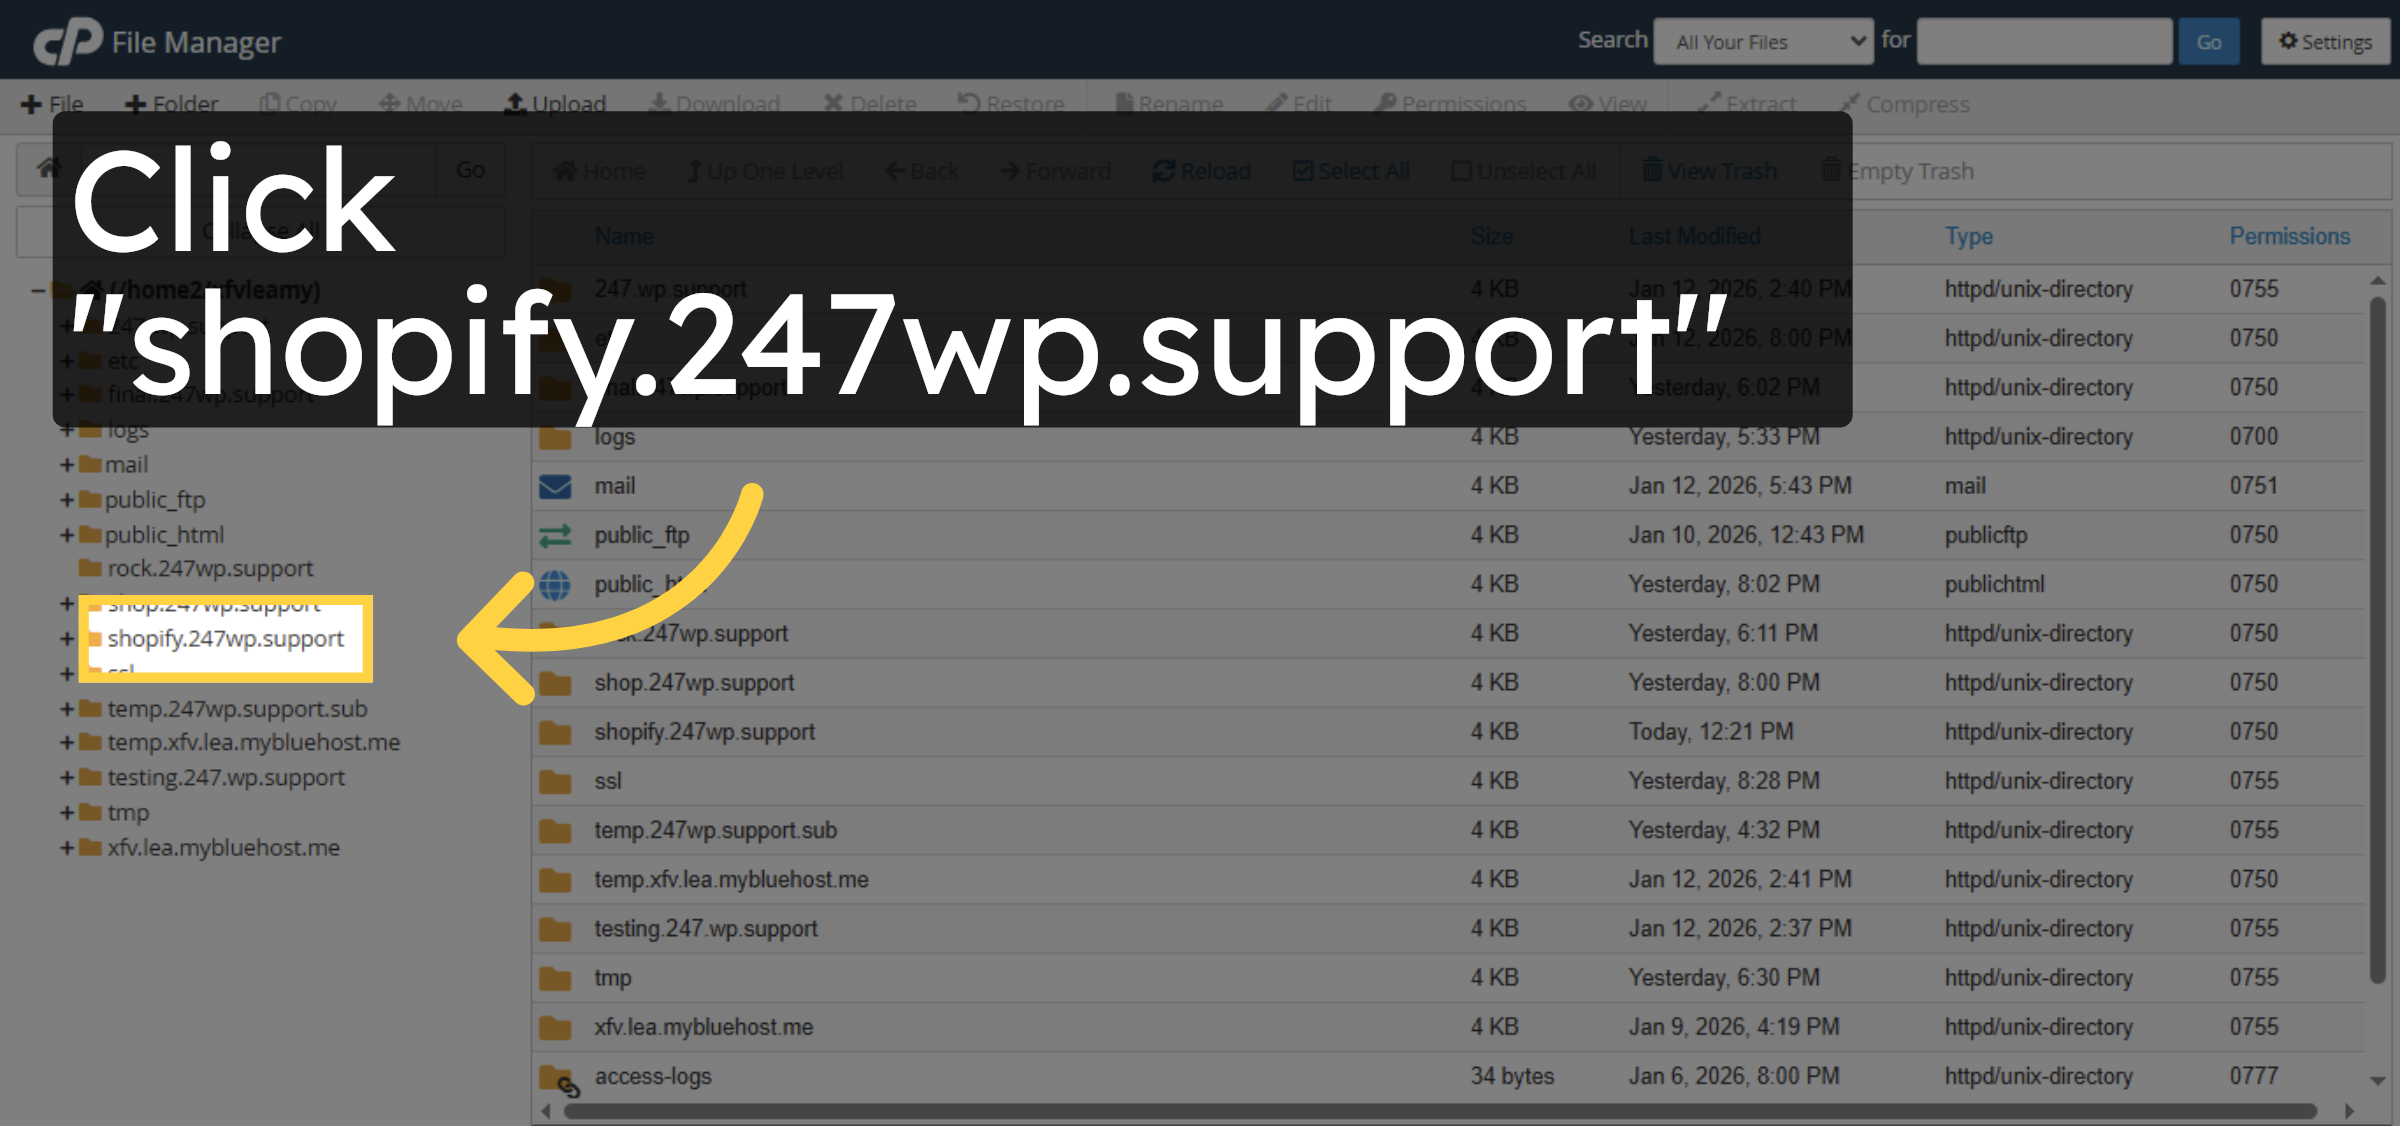
11. Select Subdomain Folder
Click the folder named after your subdomain to open its root directory.
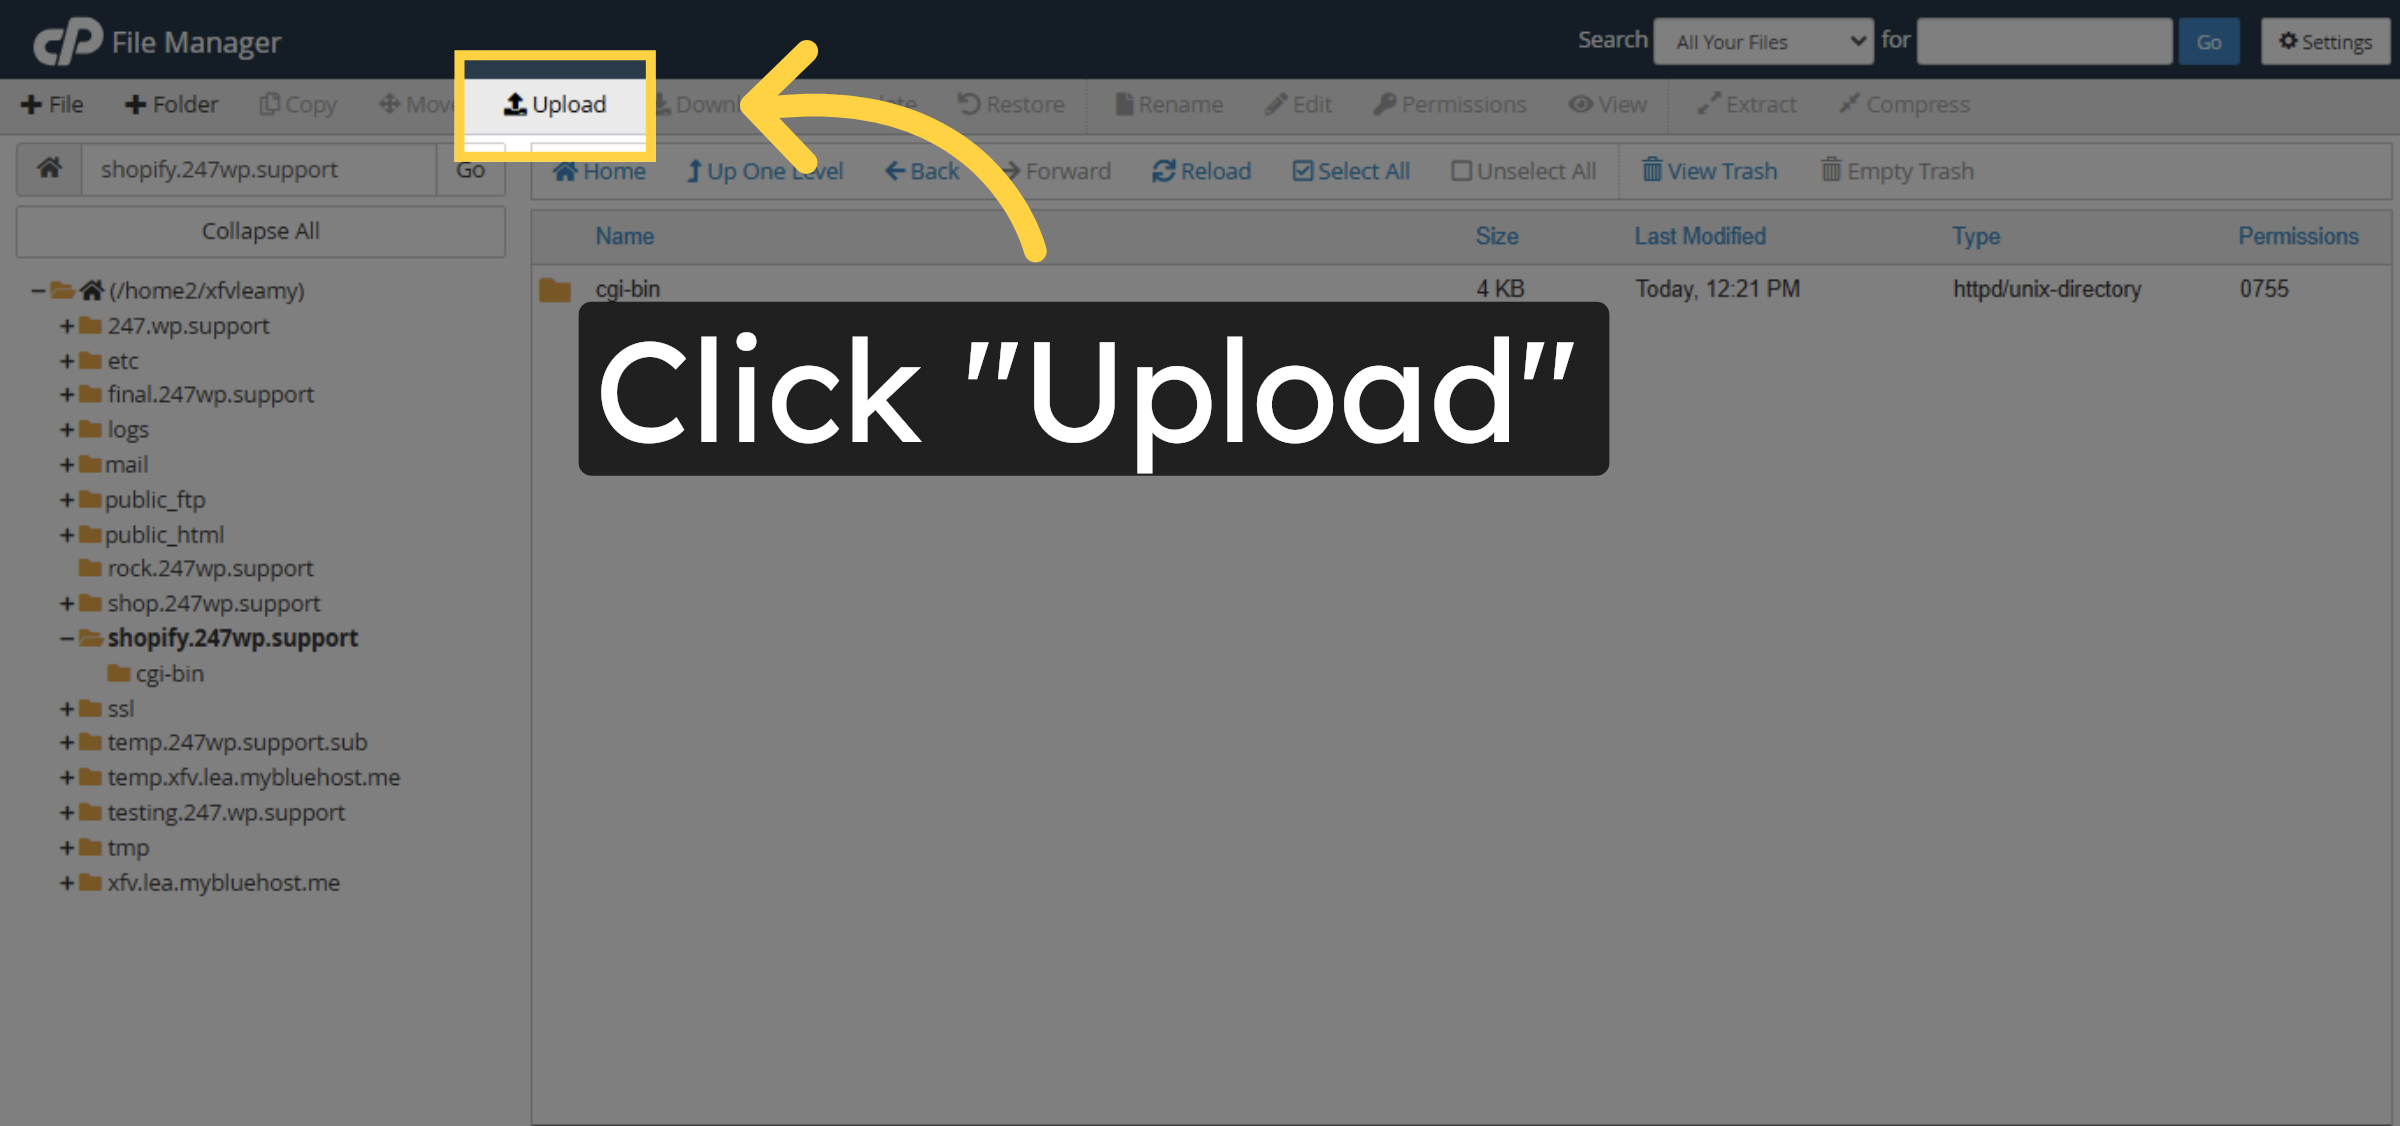
12. Start File Upload
Click Upload to begin uploading WordPress installation files to the subdomain folder.
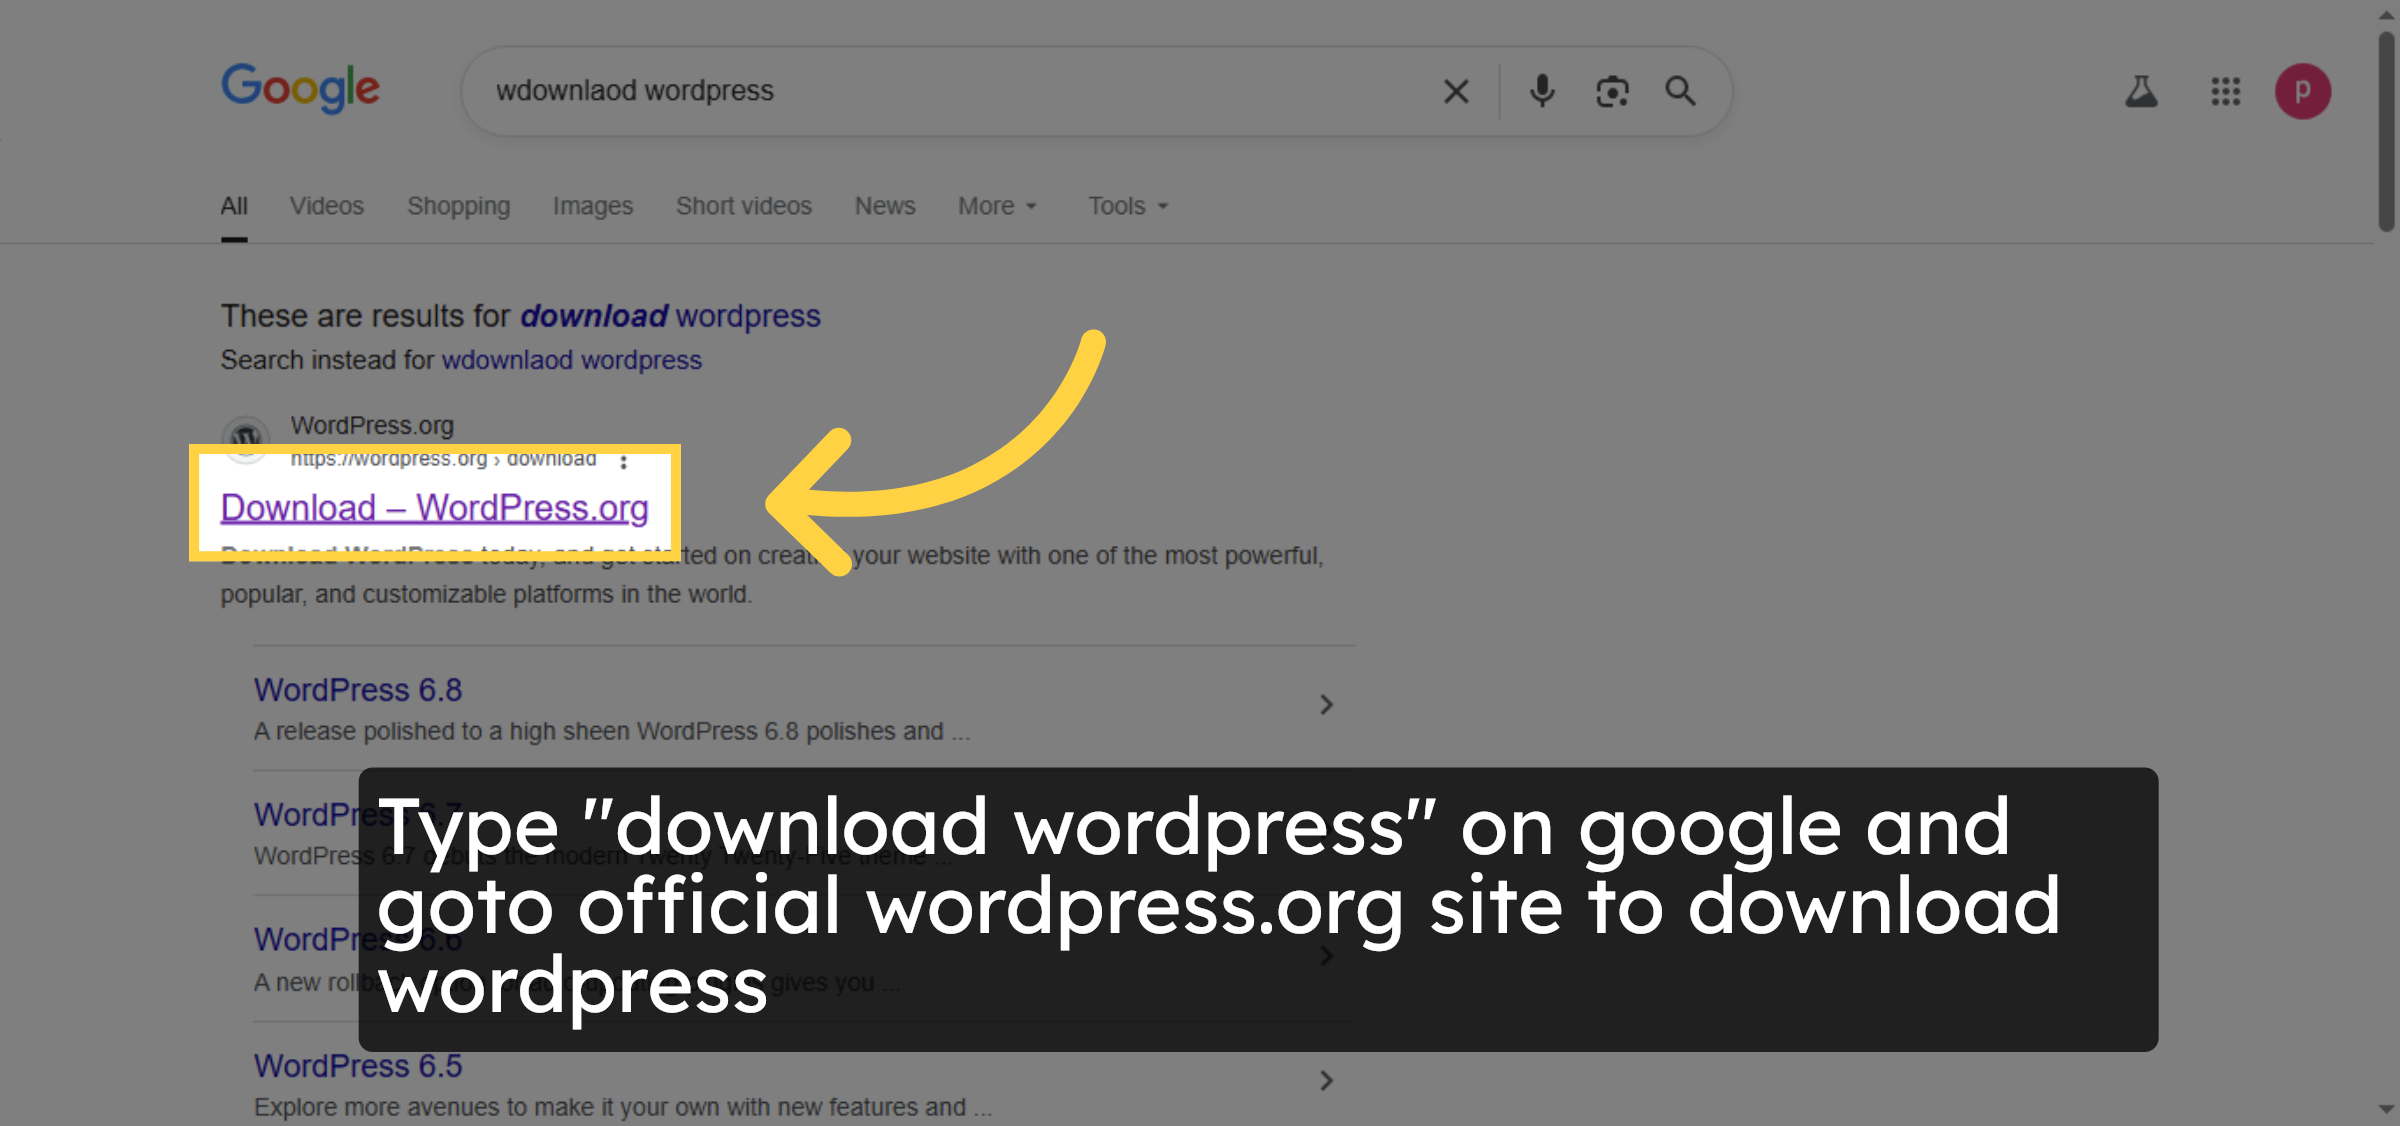
13. Access WordPress Download
Type “download wordpress” on google and goto official wordpress.org site to download wordpress
14. Download WordPress Package
Click Download WordPress 6.9 to download the latest WordPress installation zip file.

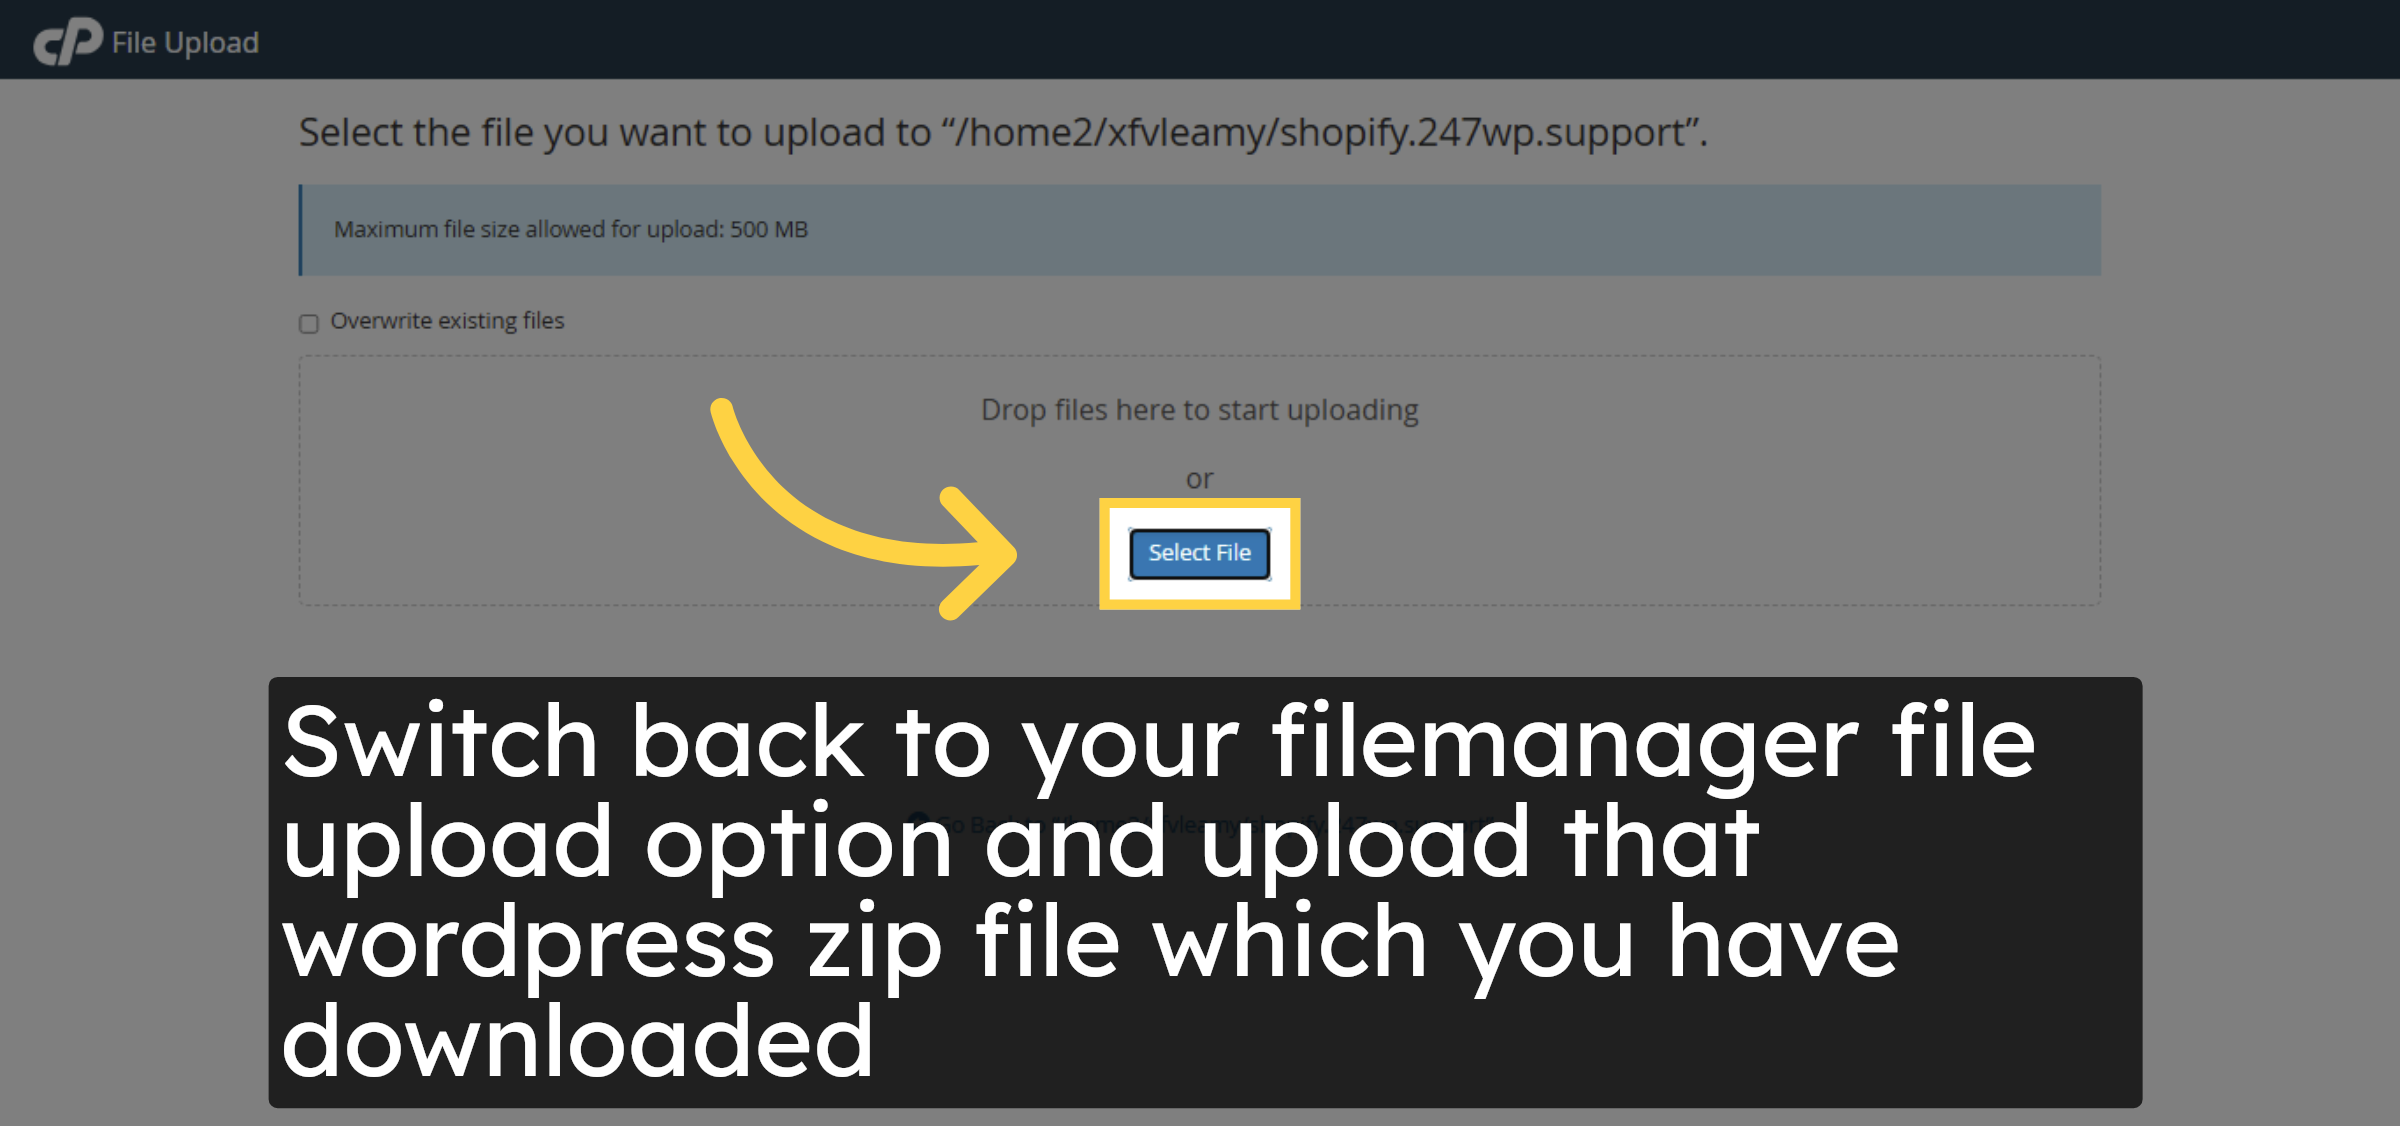
15. Select File To Upload
Click Select File to browse your computer and choose the WordPress zip file for upload.
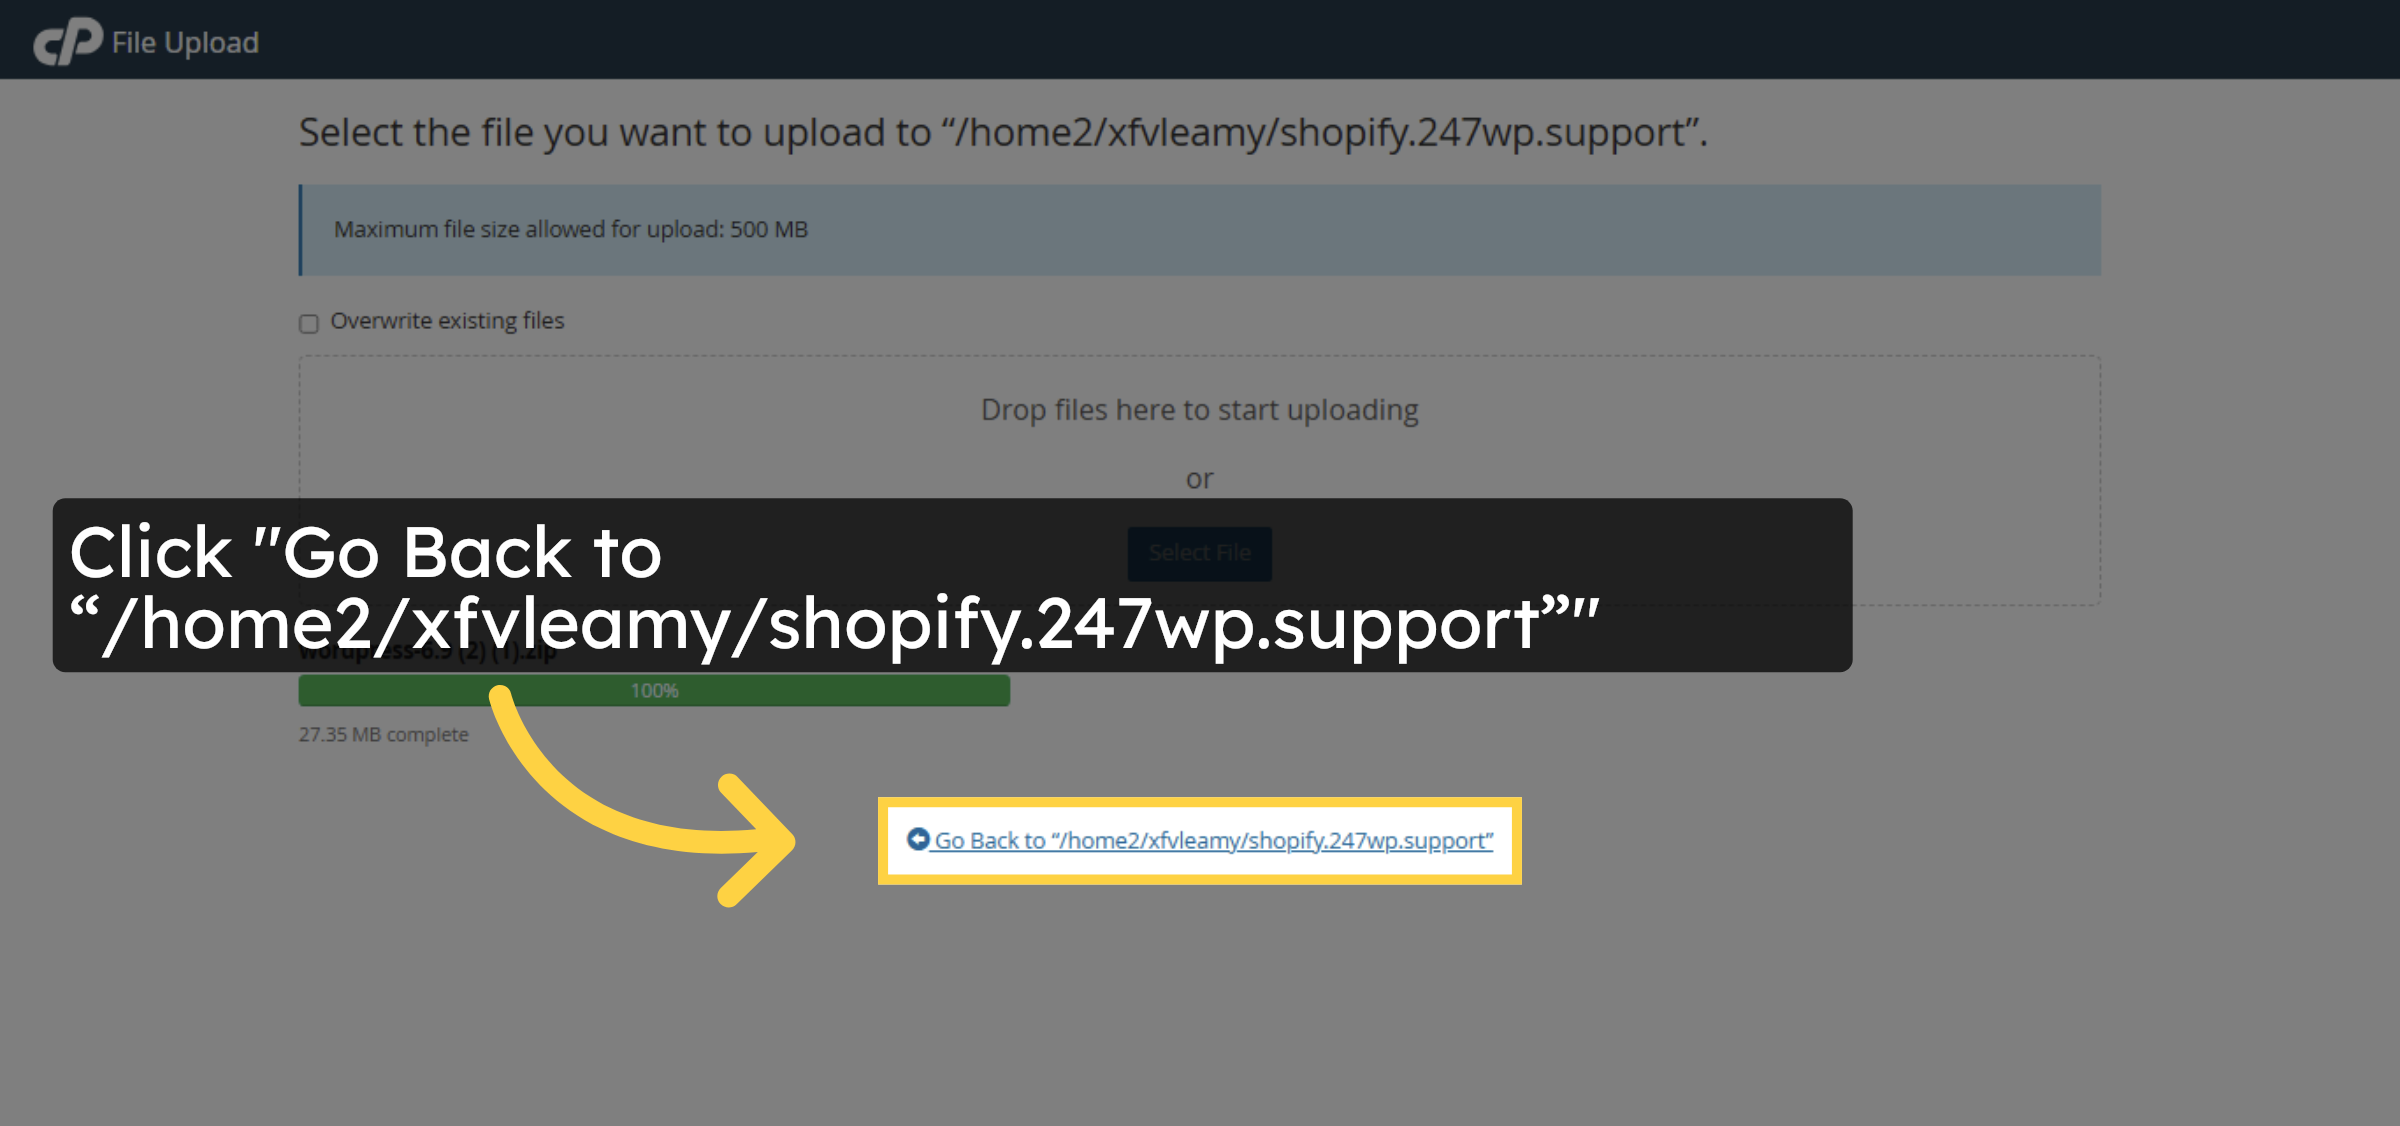
16. Return To Subdomain Folder
Click Go Back to the subdomain folder to view the uploaded WordPress zip file.
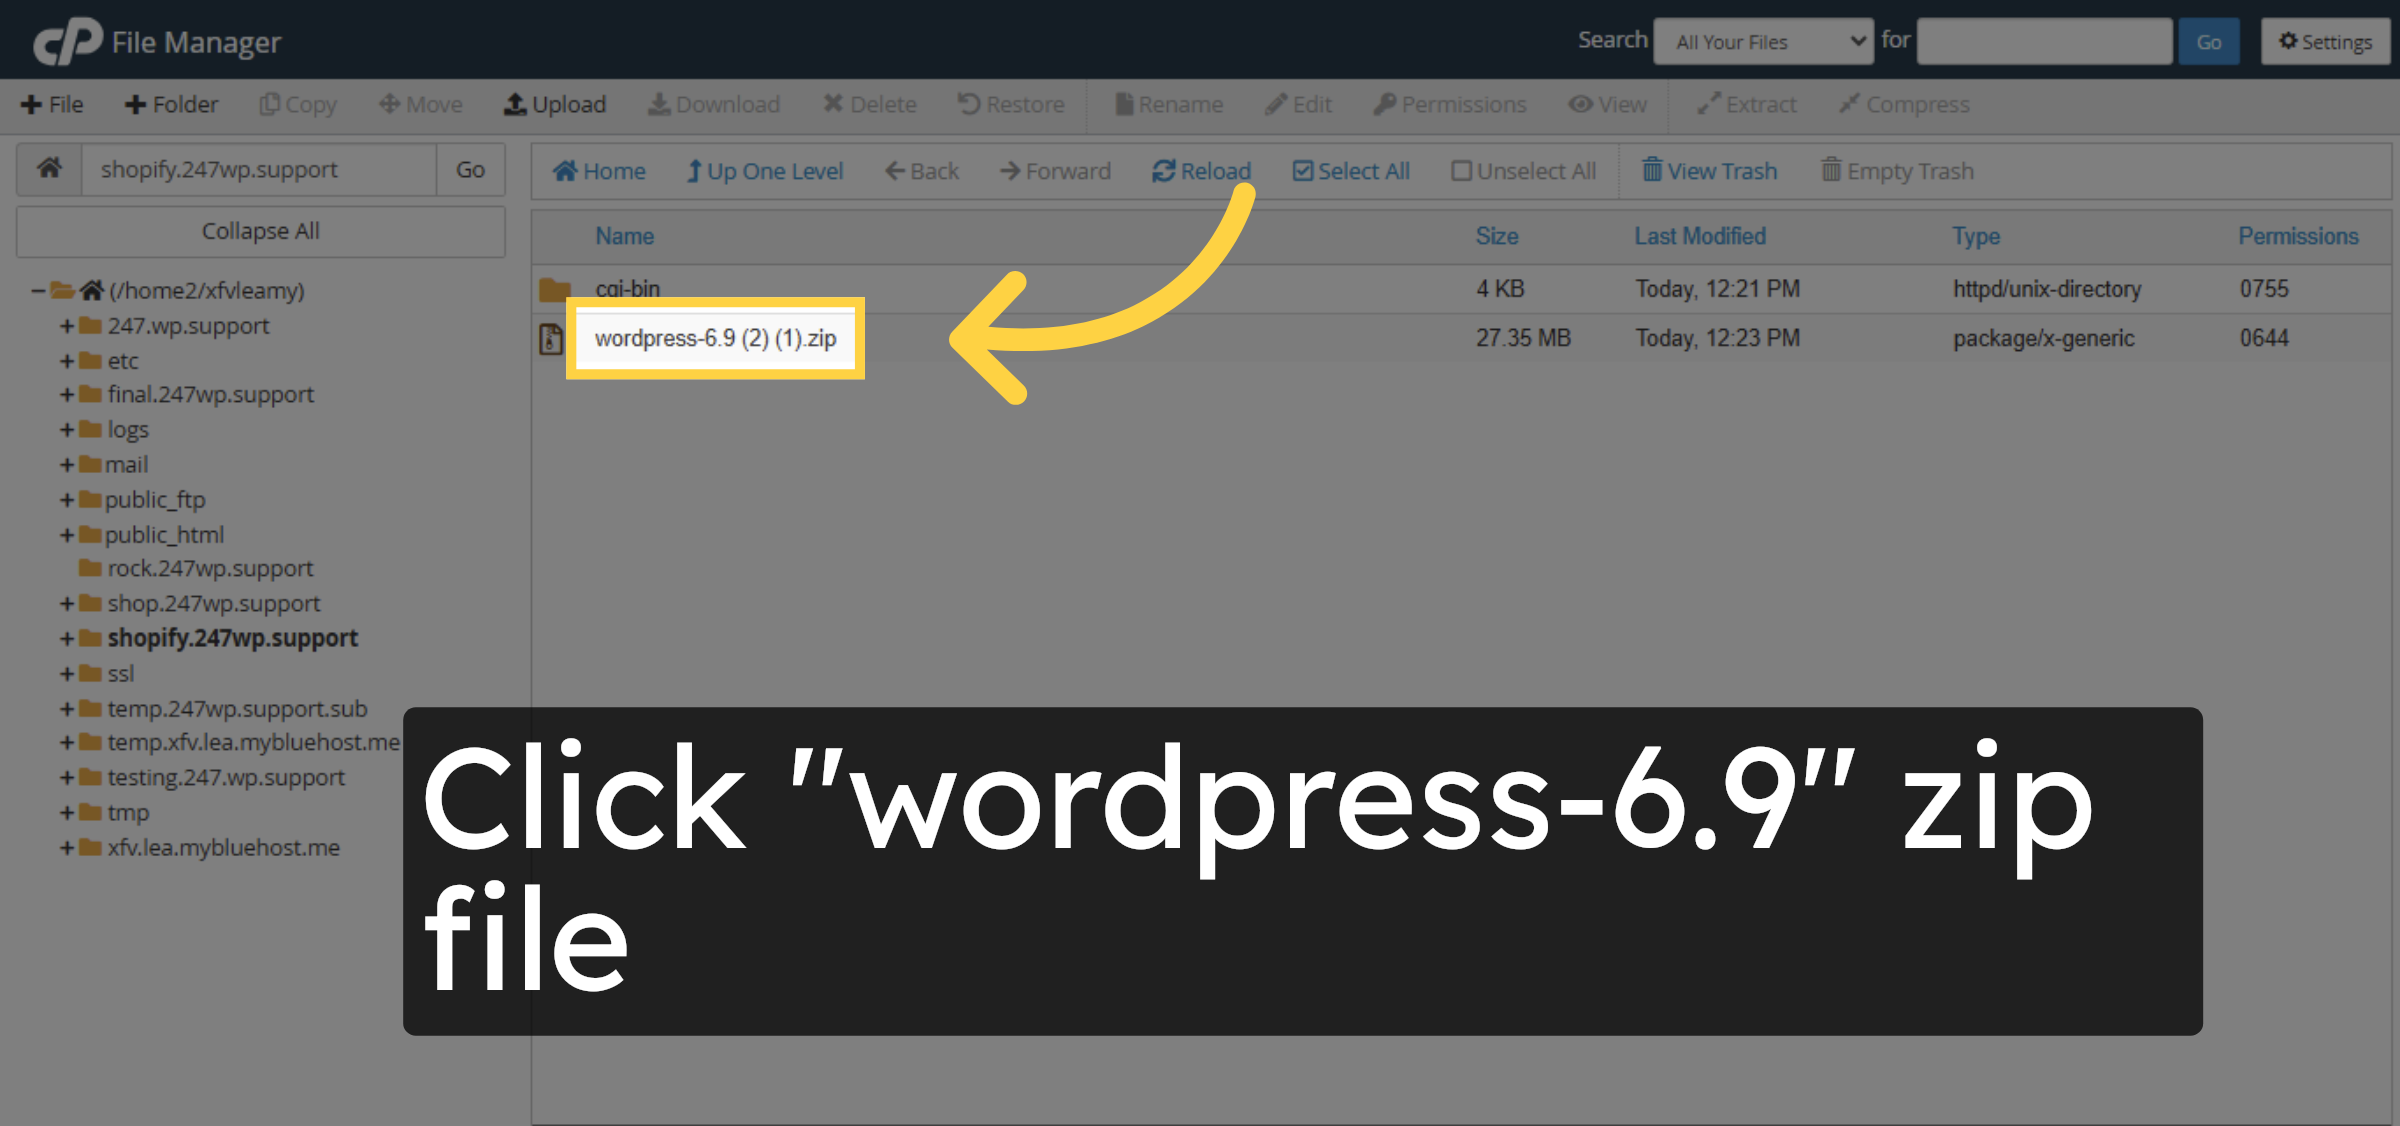
17. Select WordPress Zip
Click the WordPress zip file you just uploaded to prepare for extraction.
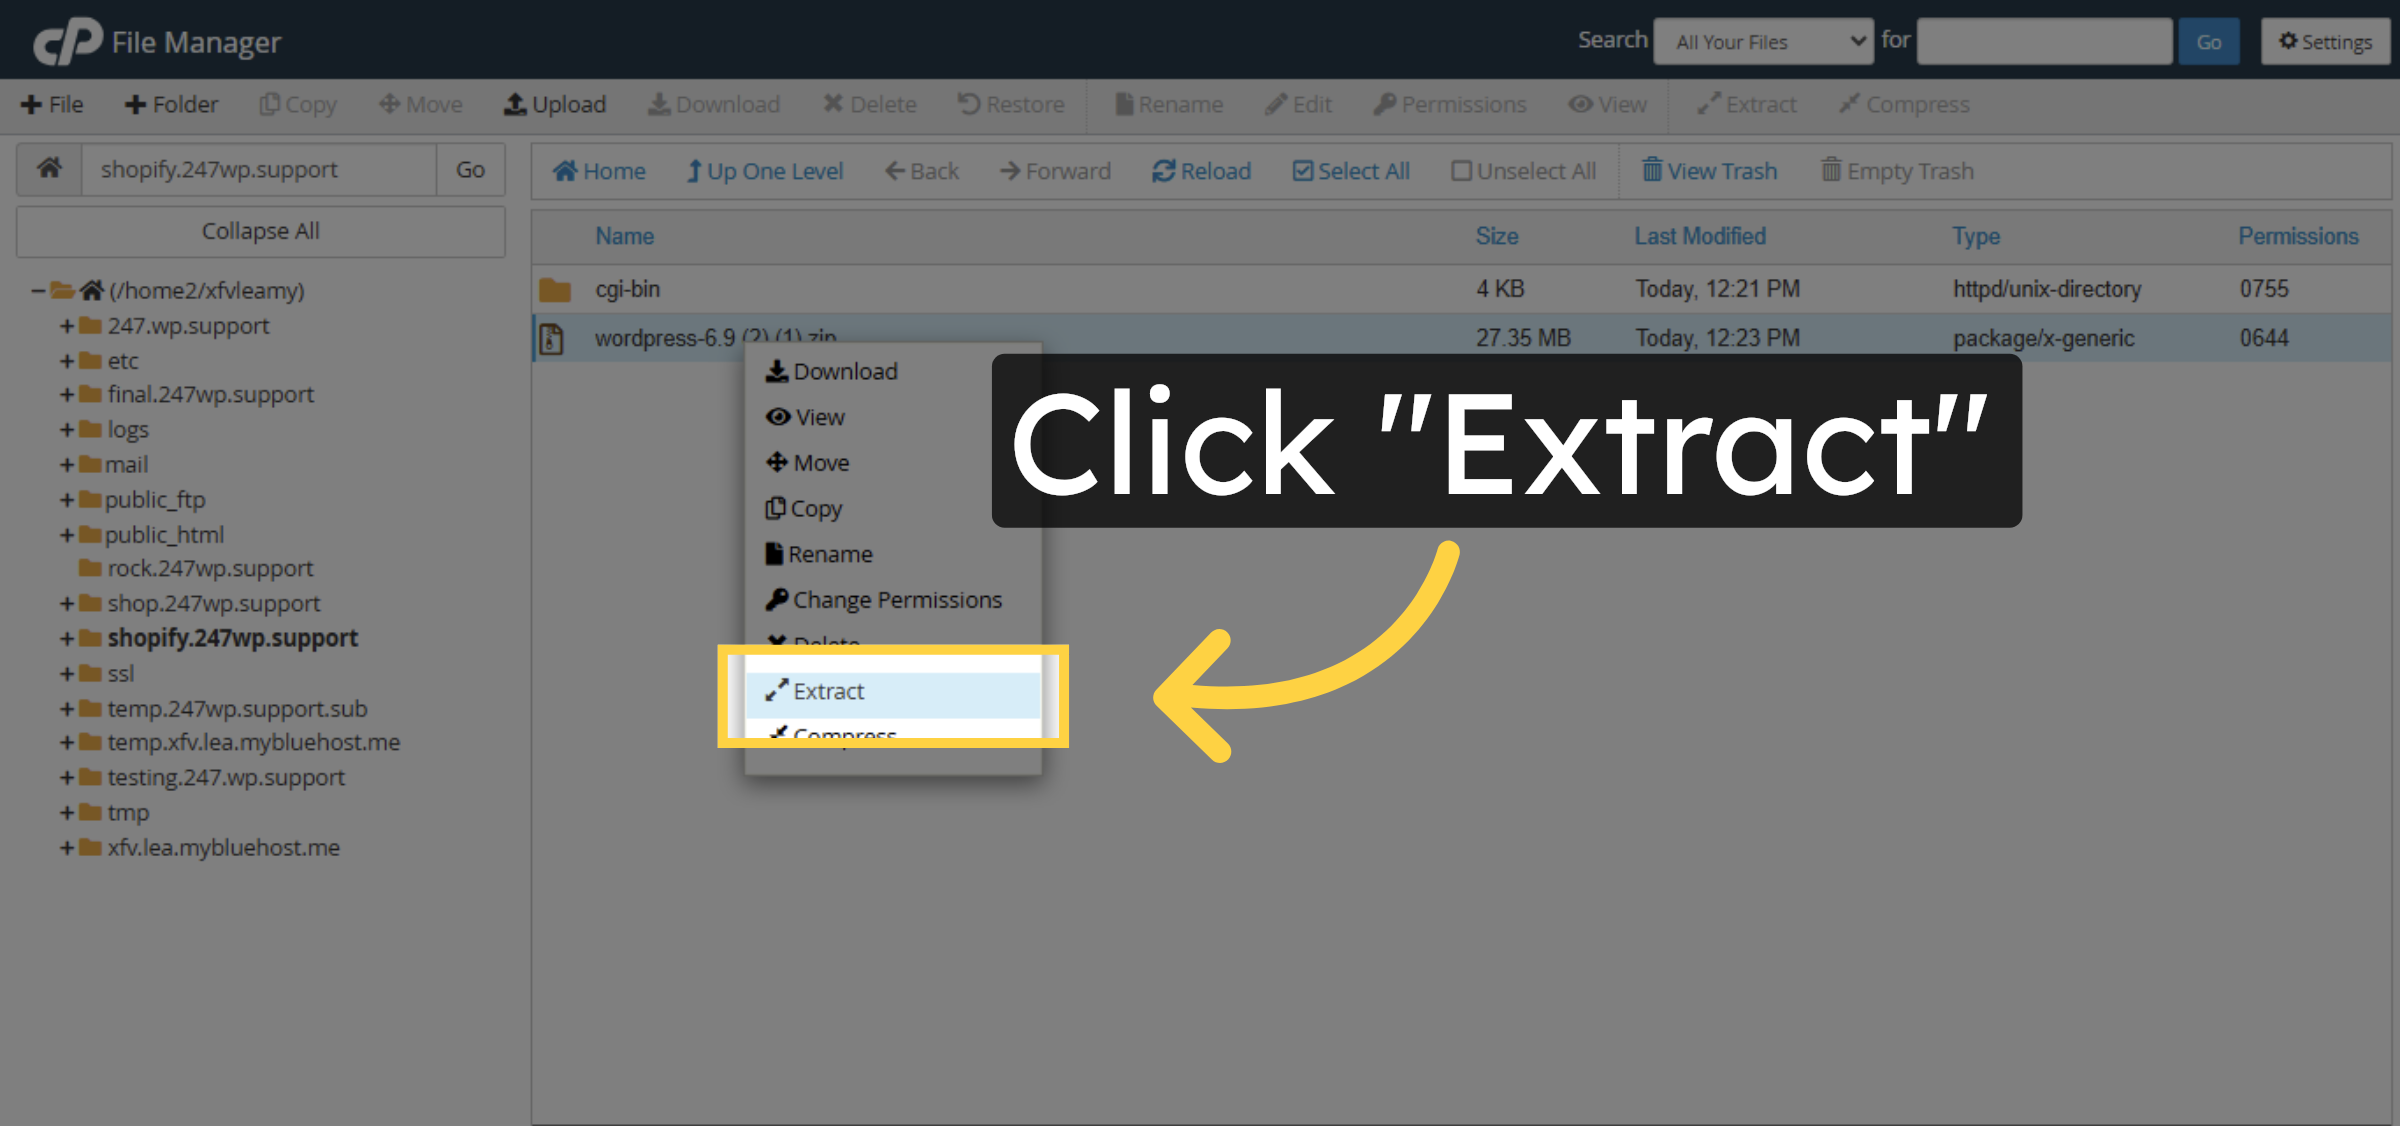
18. Extract WordPress Files
Click Extract to unzip the WordPress installation files into the subdomain directory.
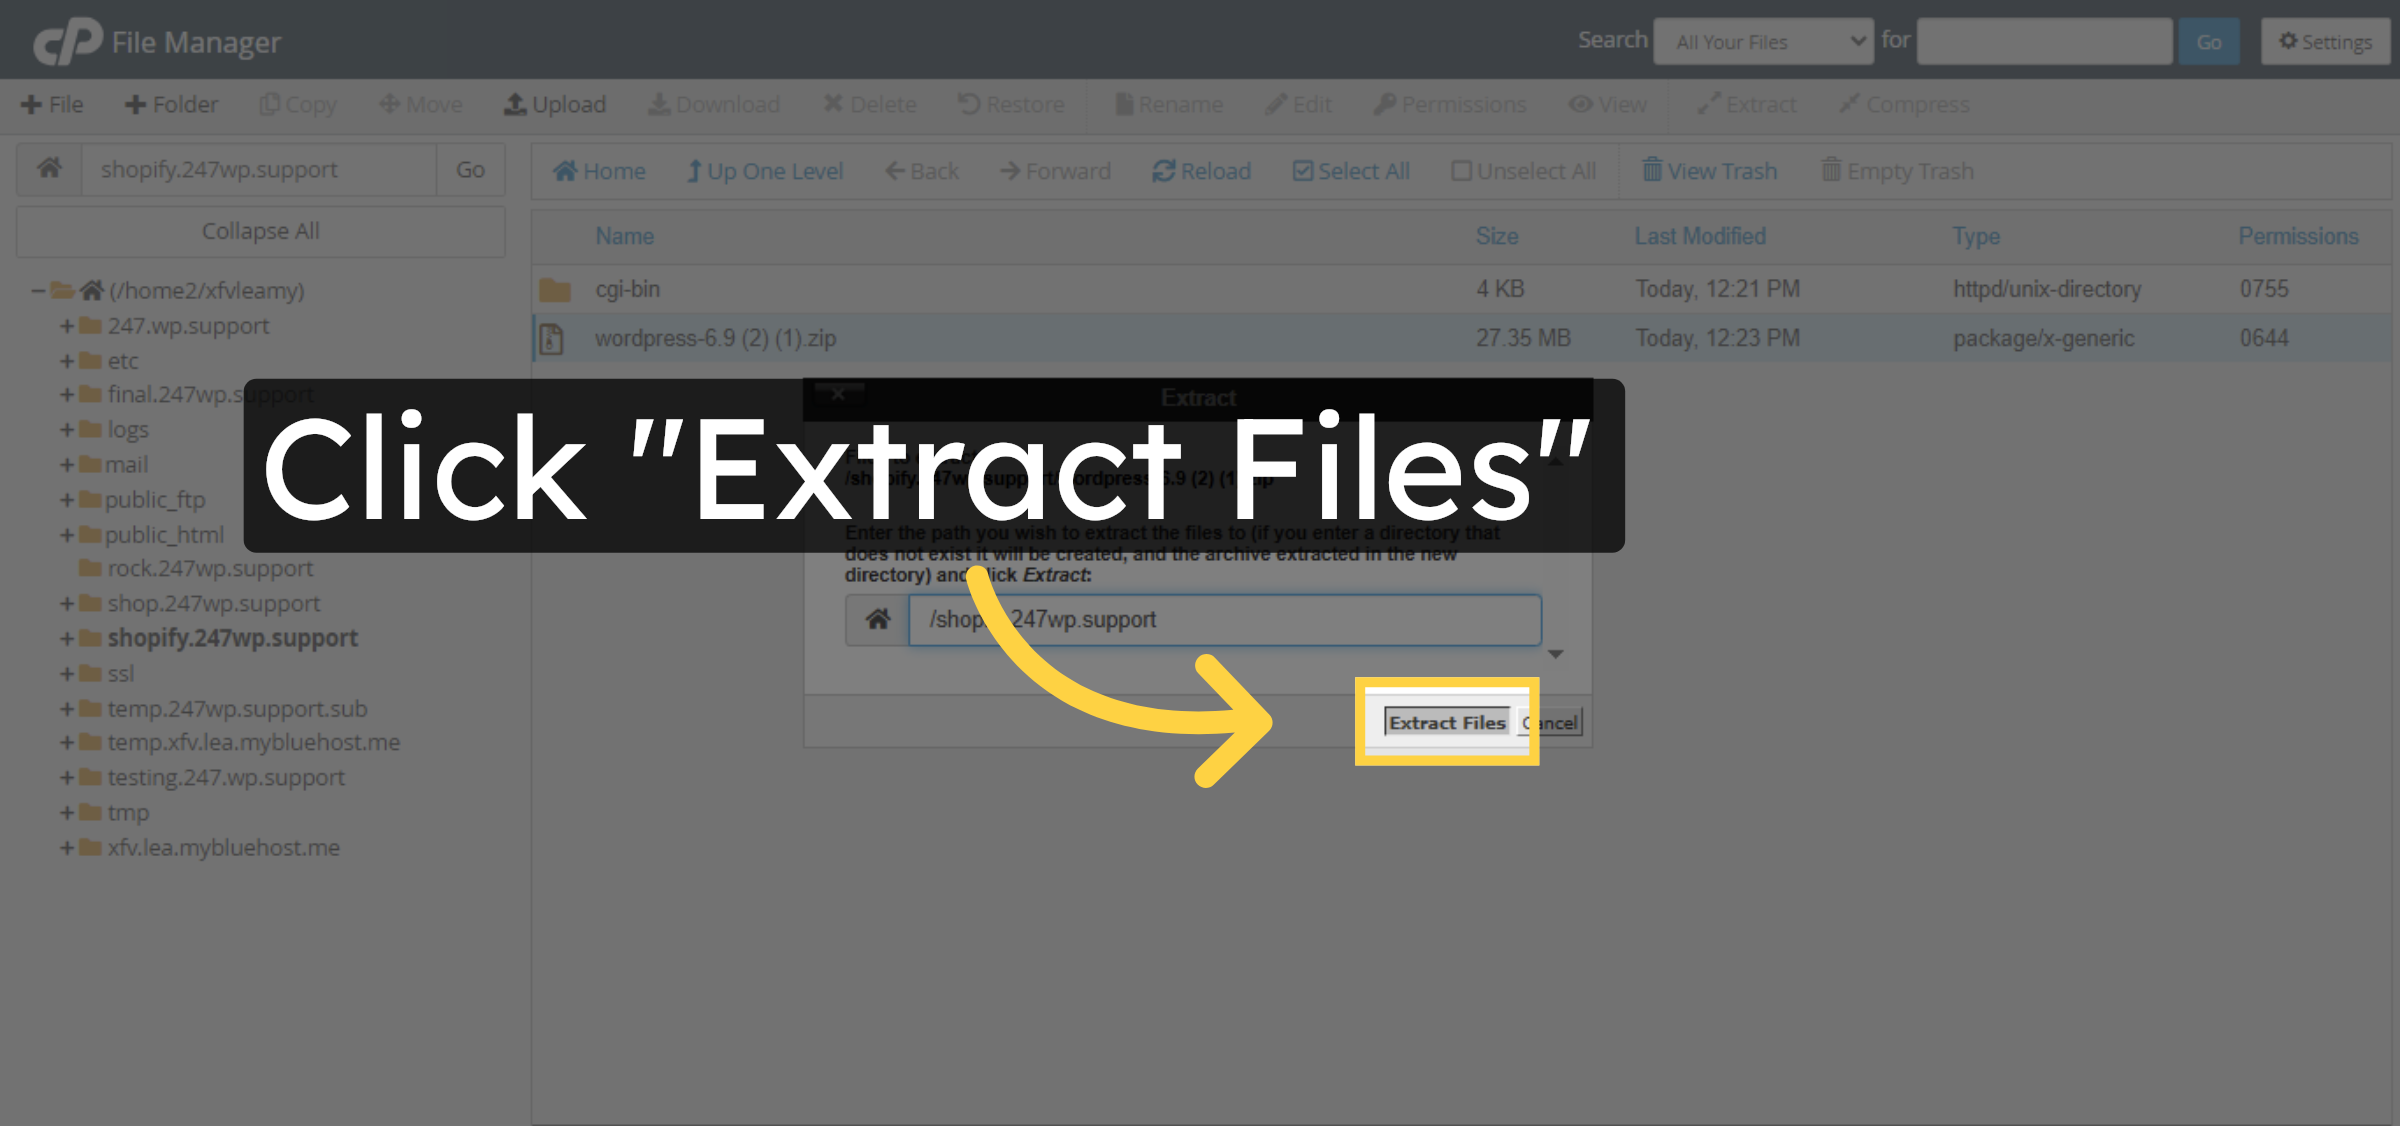
19. Confirm Extraction
Click Extract Files to confirm and complete the extraction process.
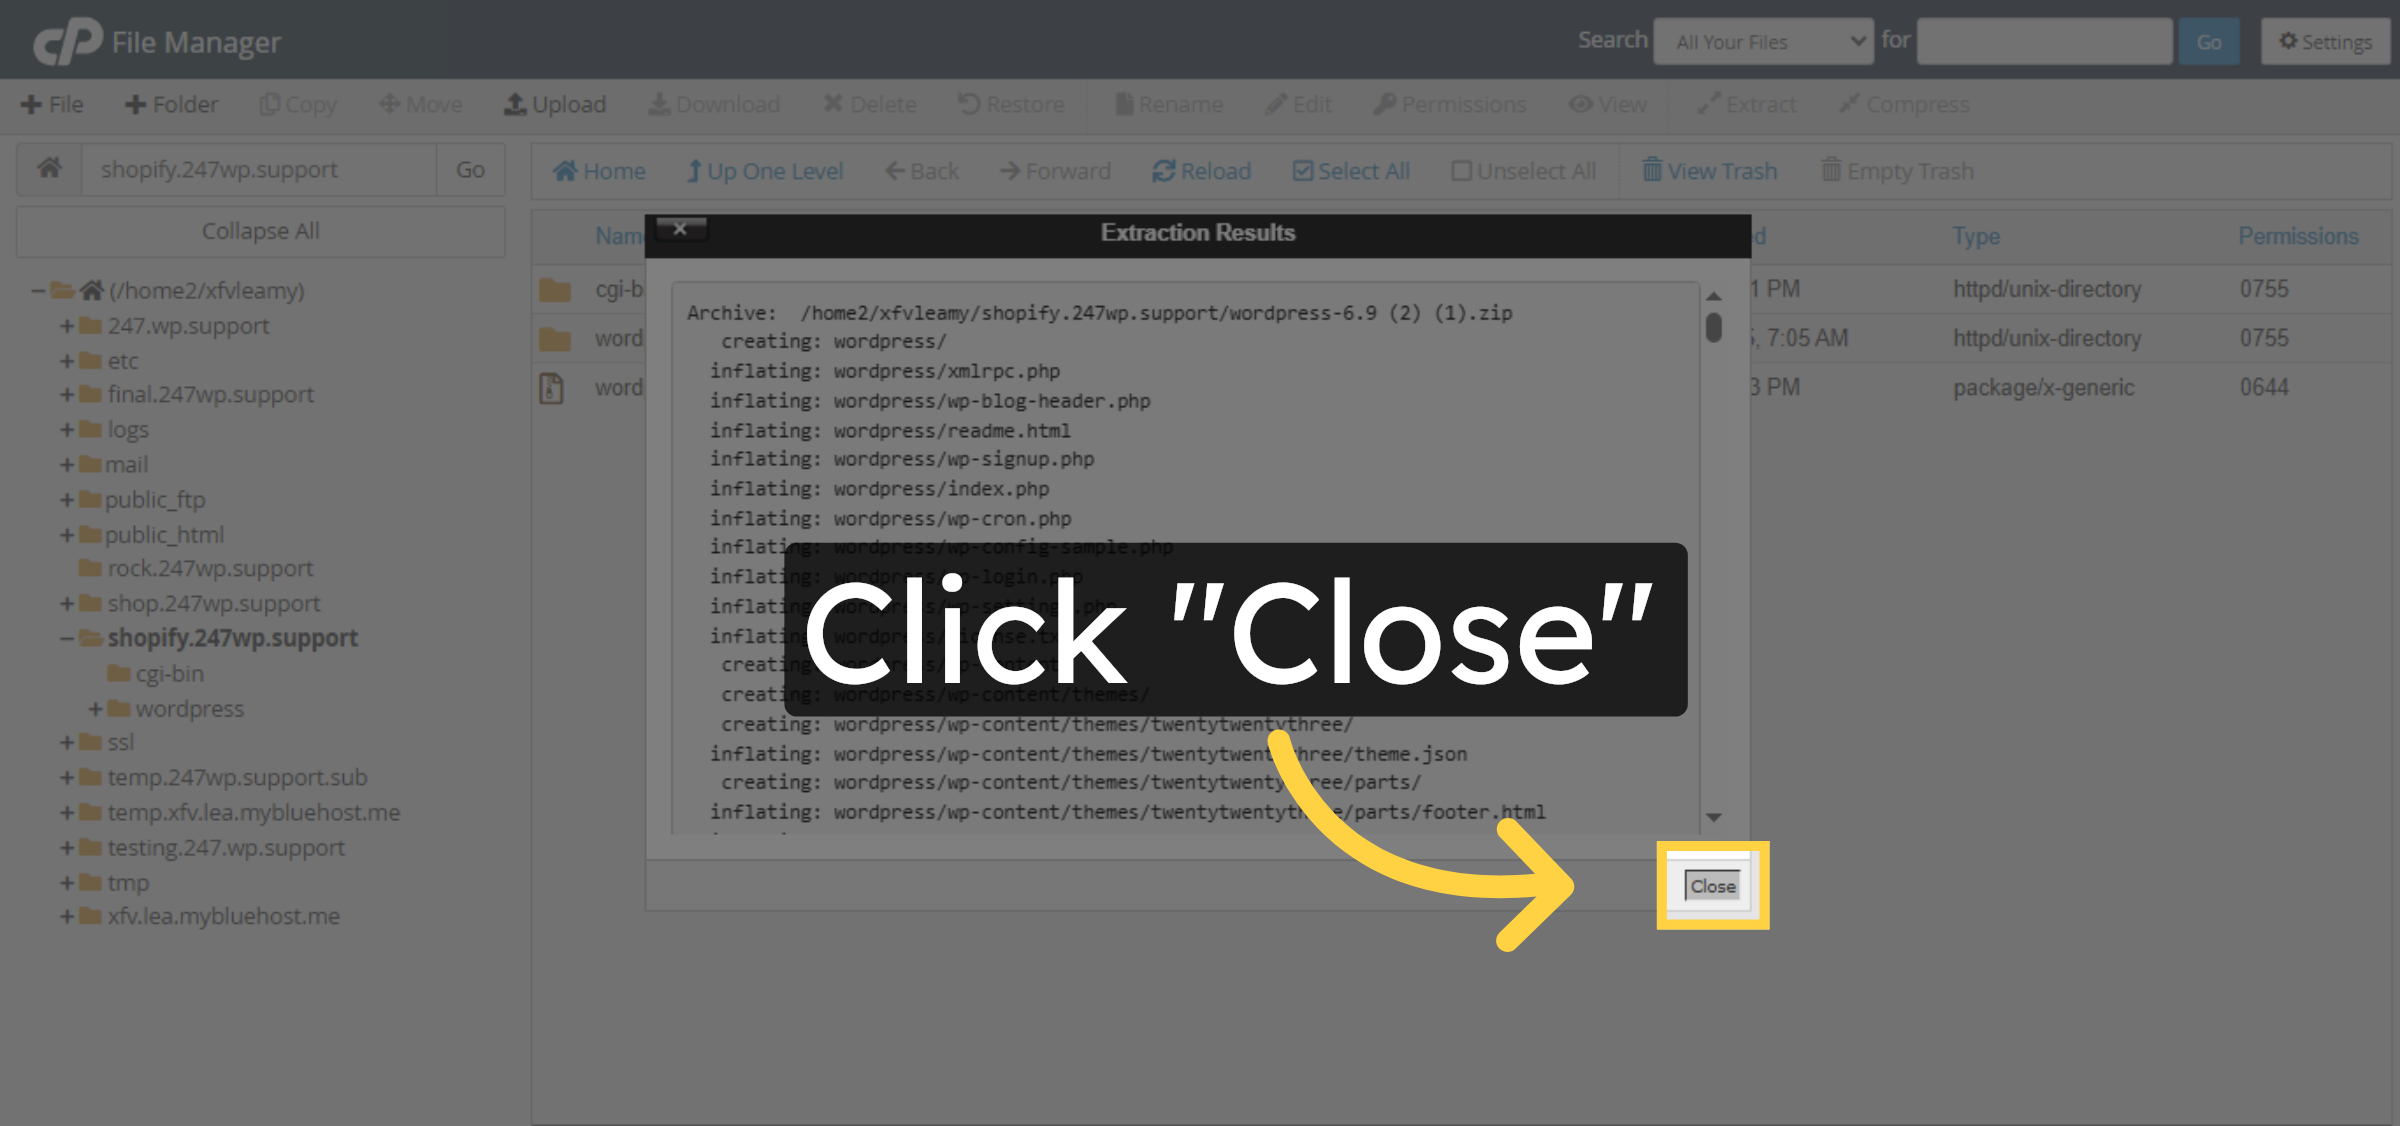
20. Close Extraction Window
Click Close to finish the extraction and return to the file list.
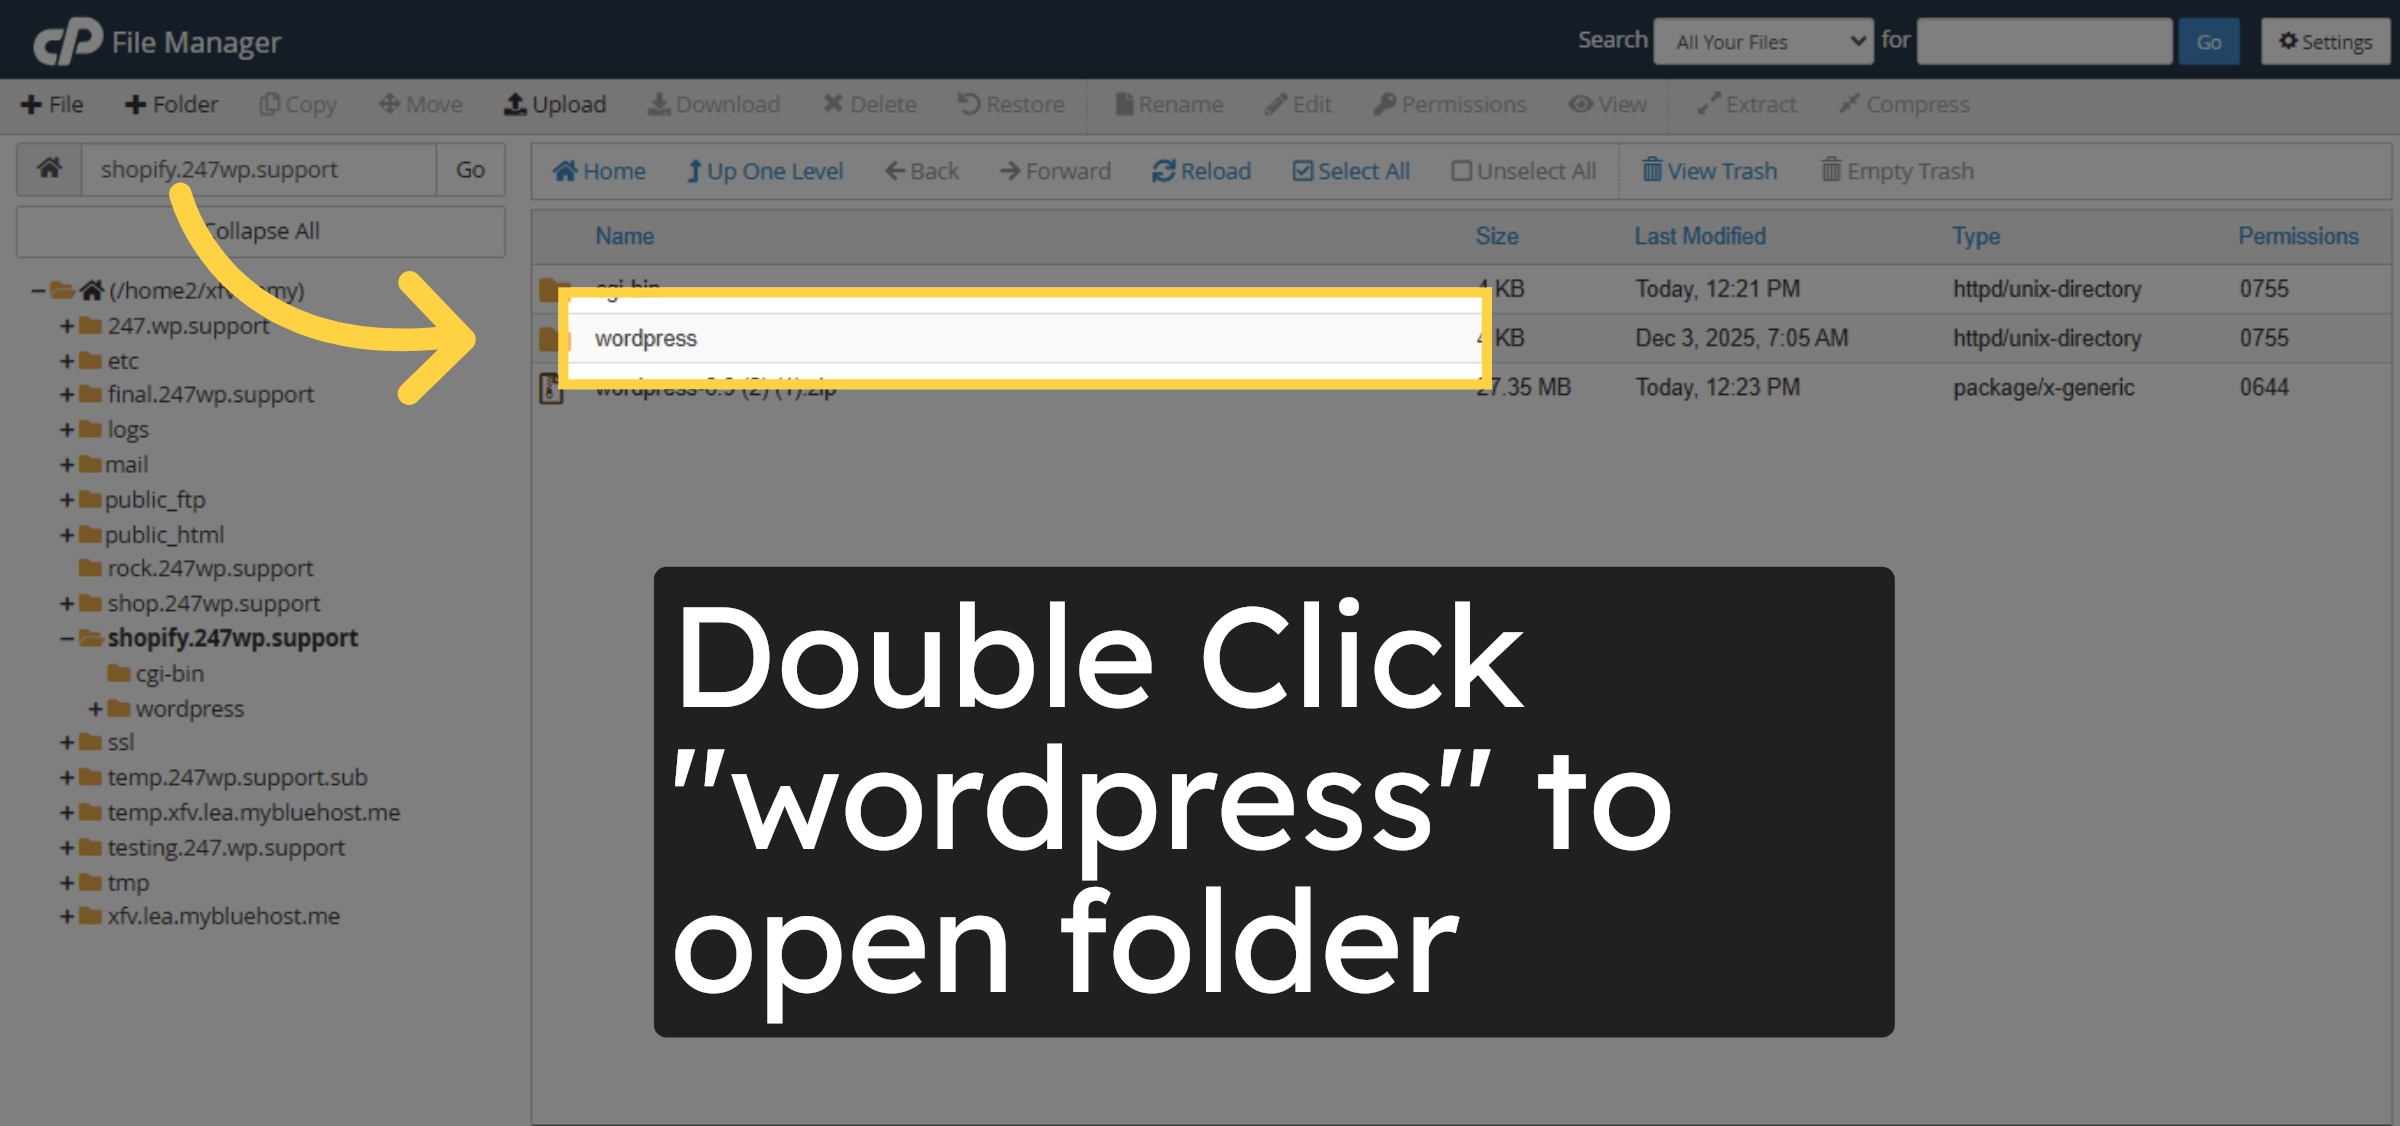
21. Open WordPress Folder
Click the wordpress folder created by the extraction to access its contents.
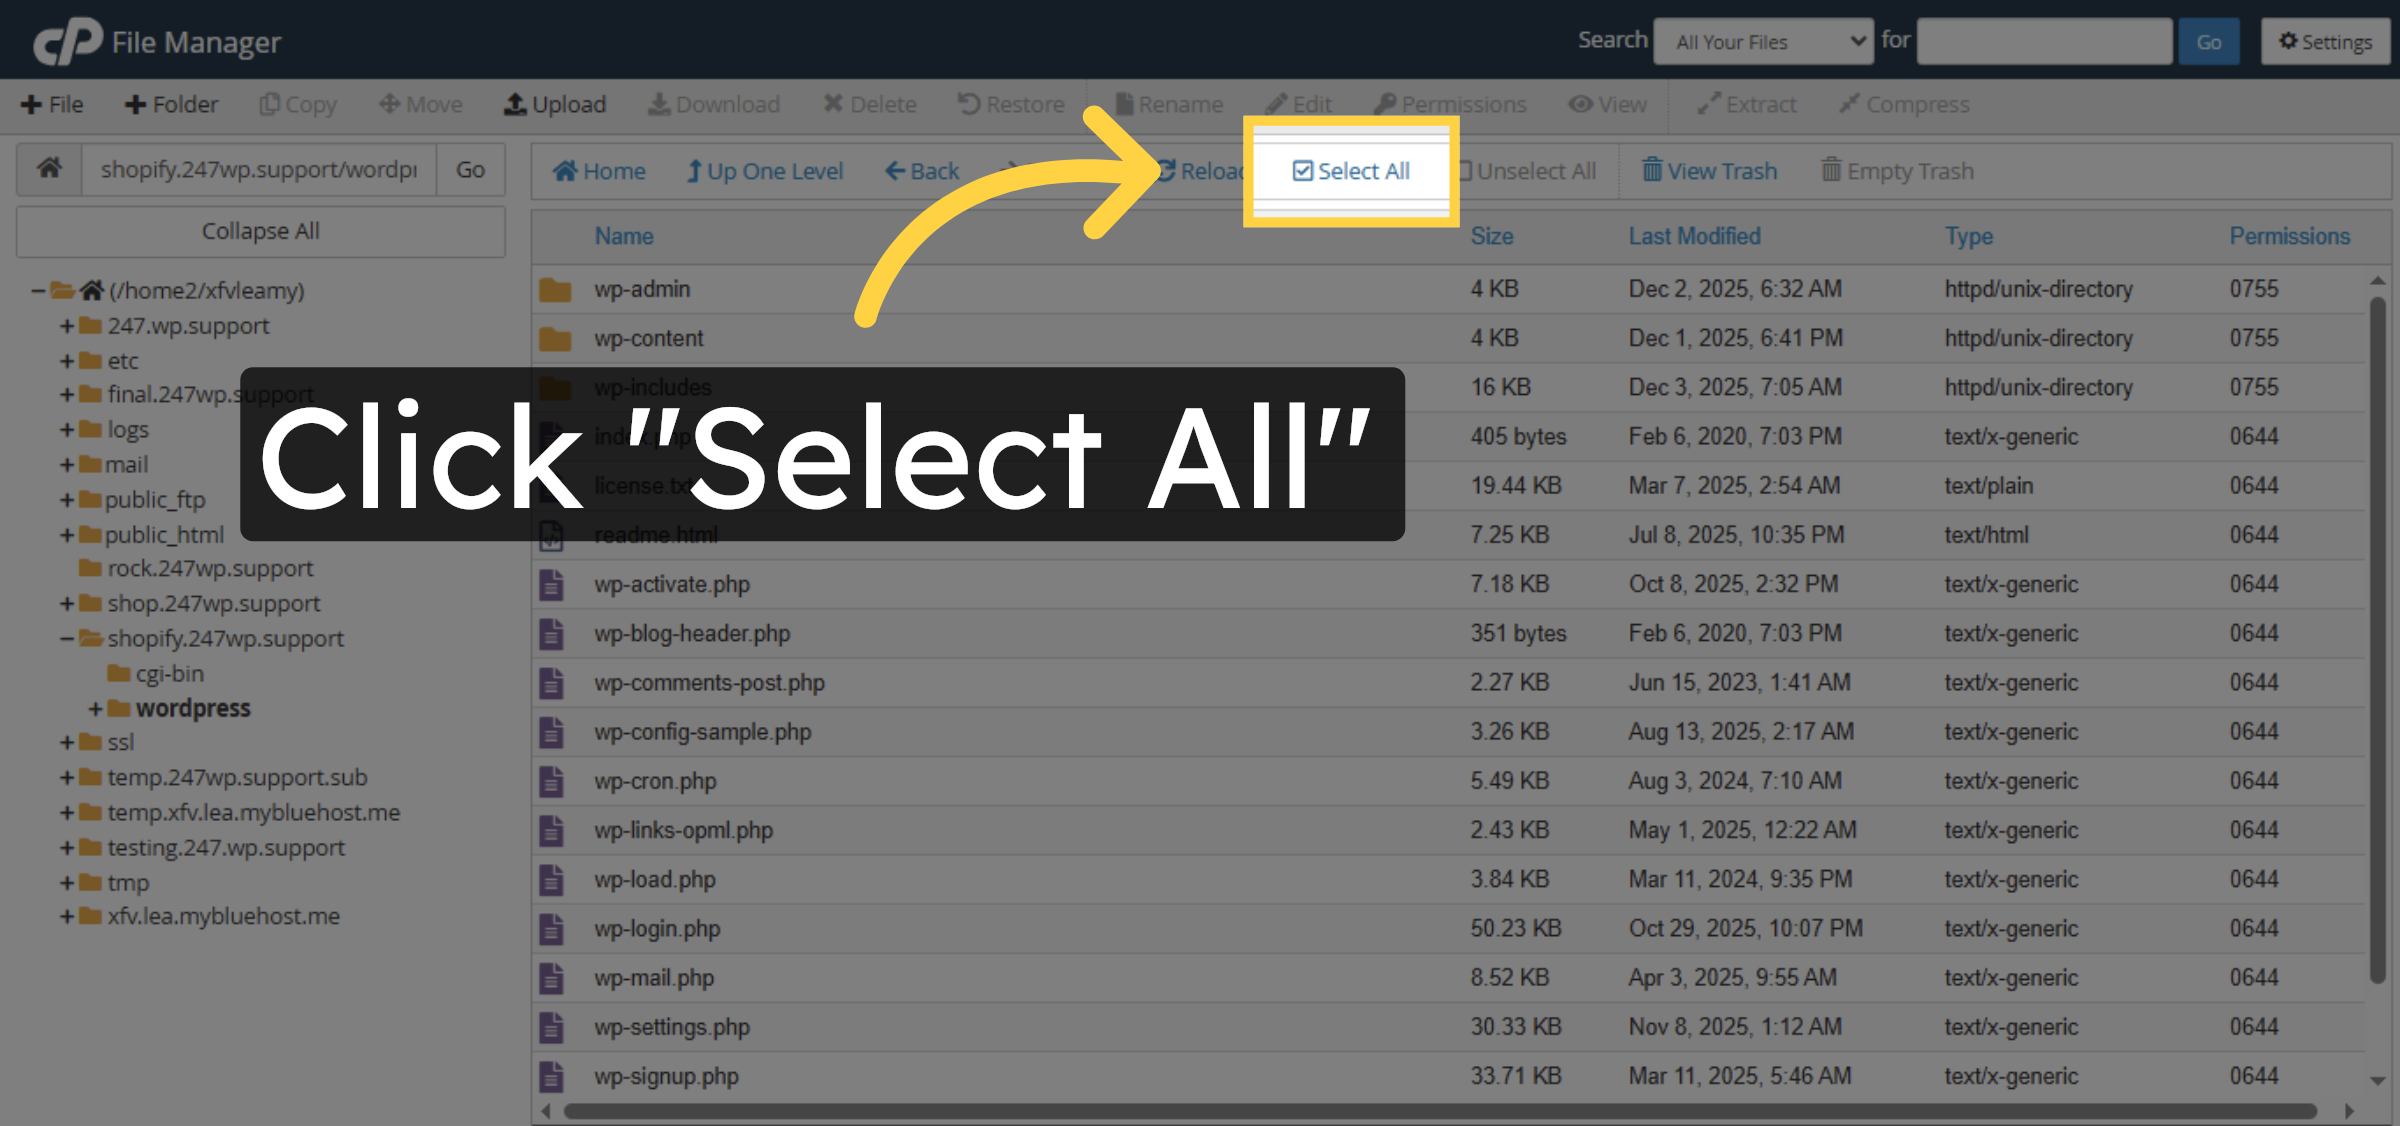
22. Select All WordPress Files
Click Select All to highlight all files and folders inside the wordpress directory.
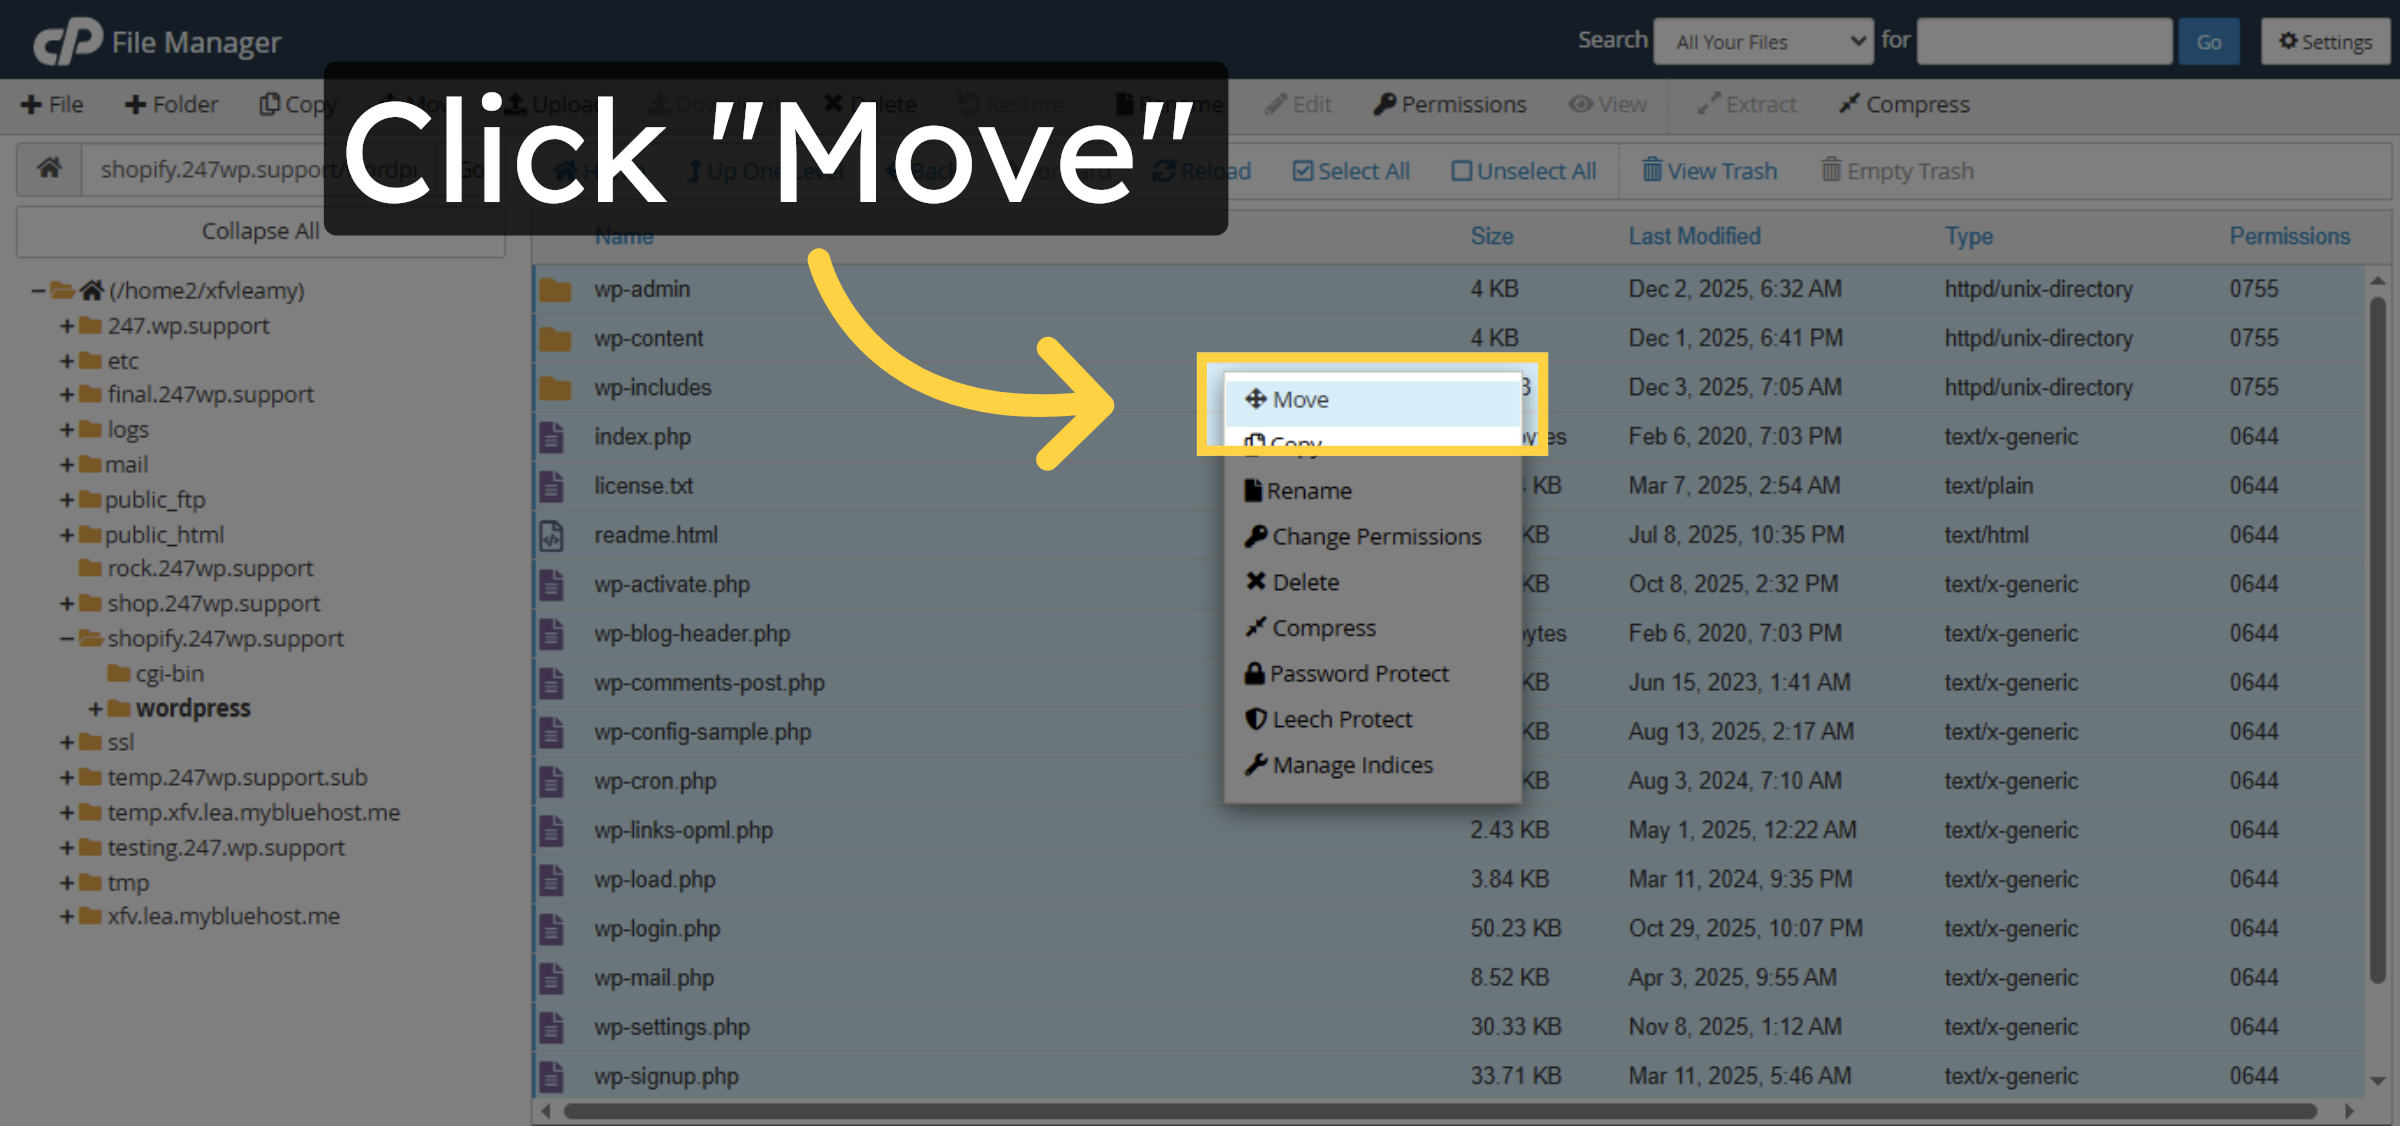
23. Move WordPress Files
Click Move to relocate the WordPress files from the subfolder to the root directory.
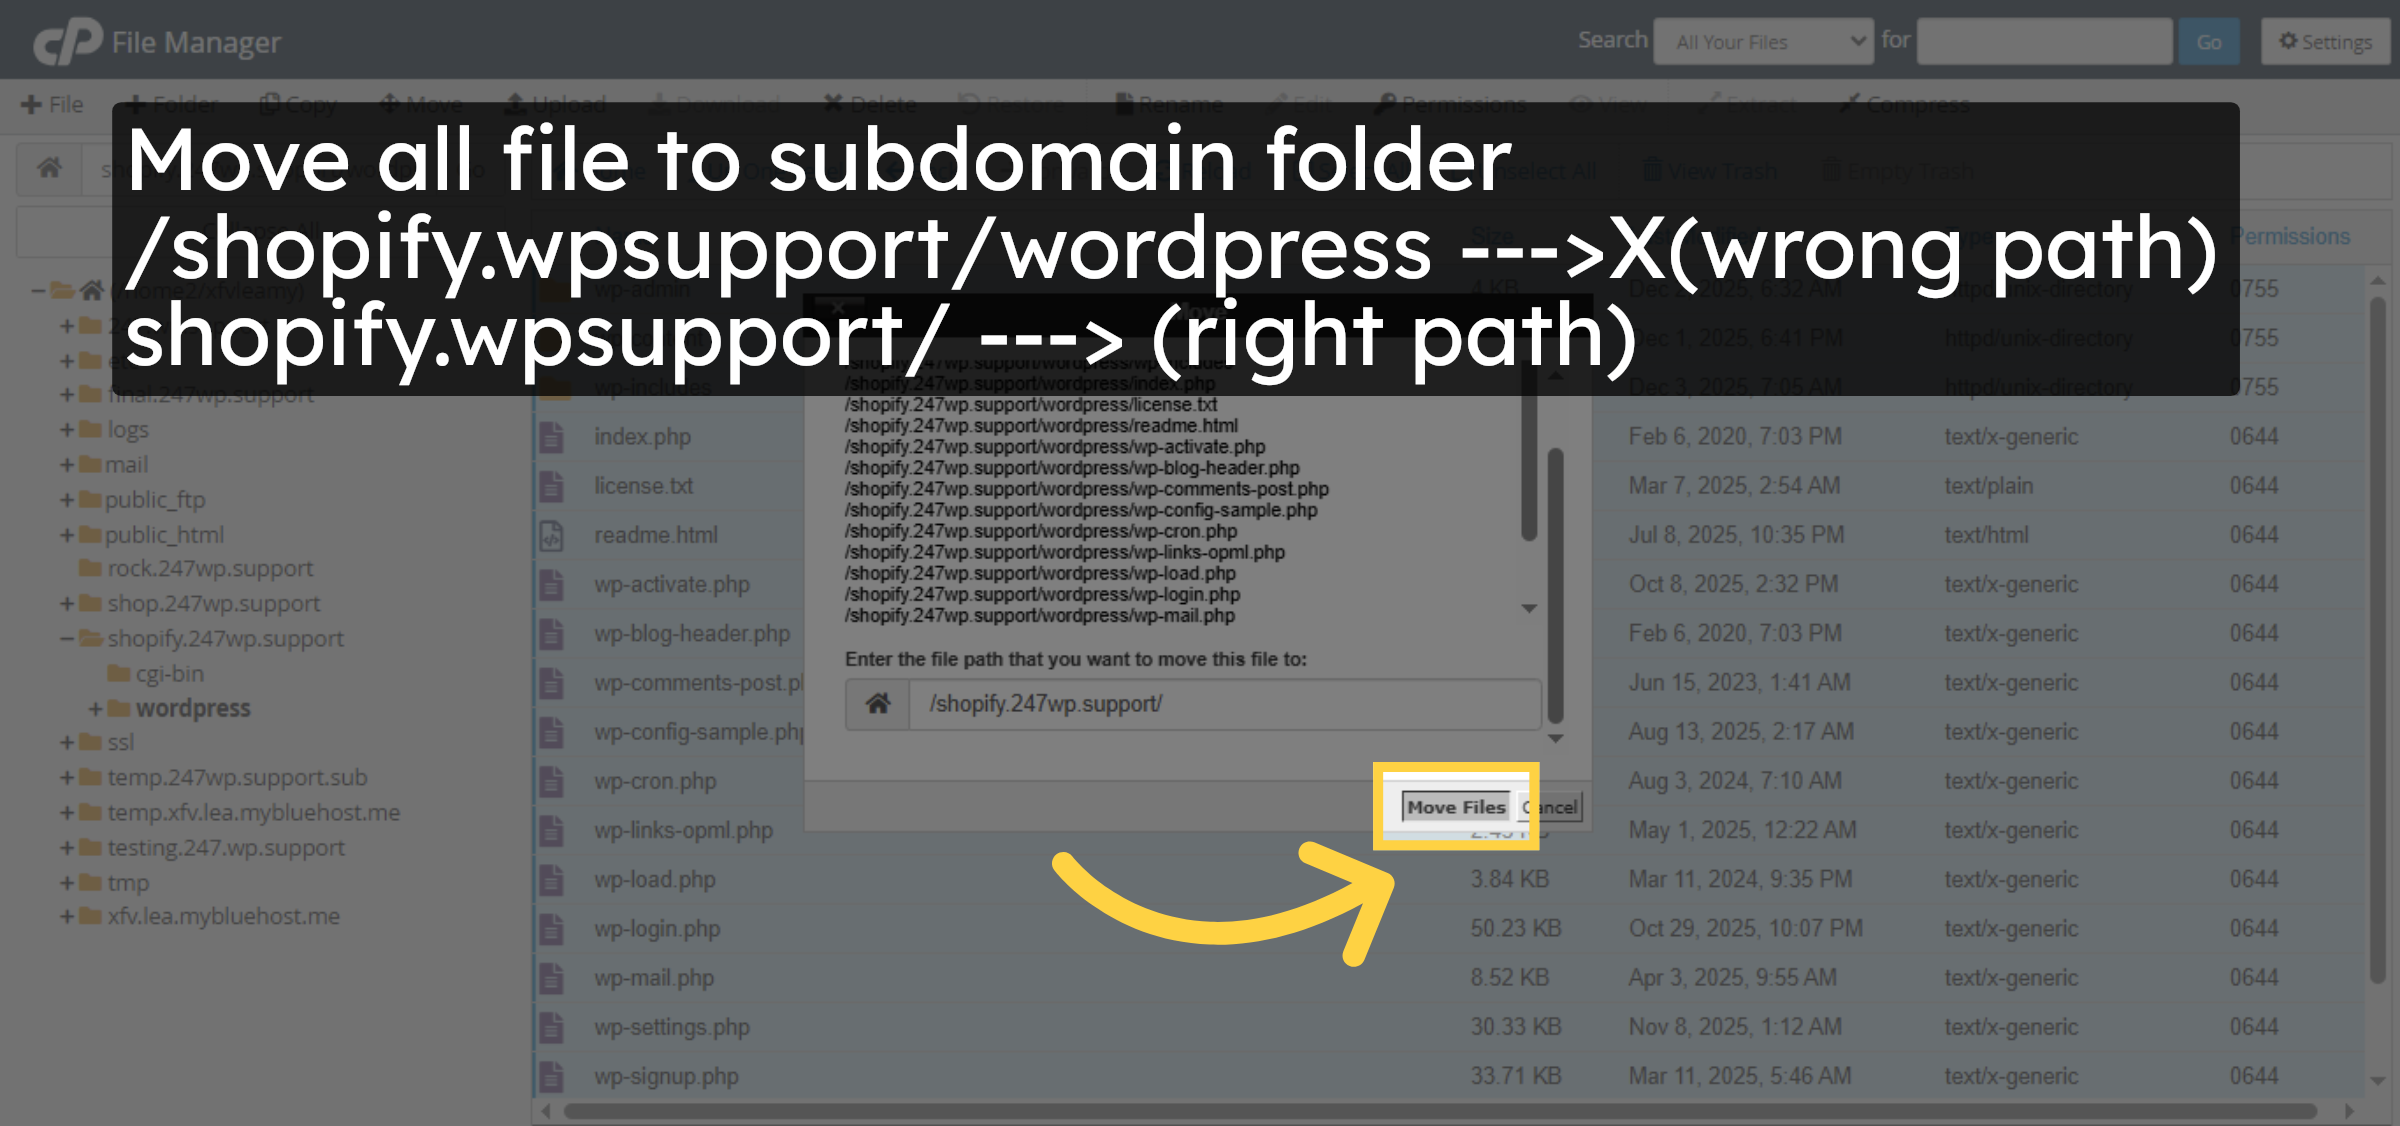
24. Confirm File Move
Click Move Files to complete moving all WordPress files to the subdomain root.
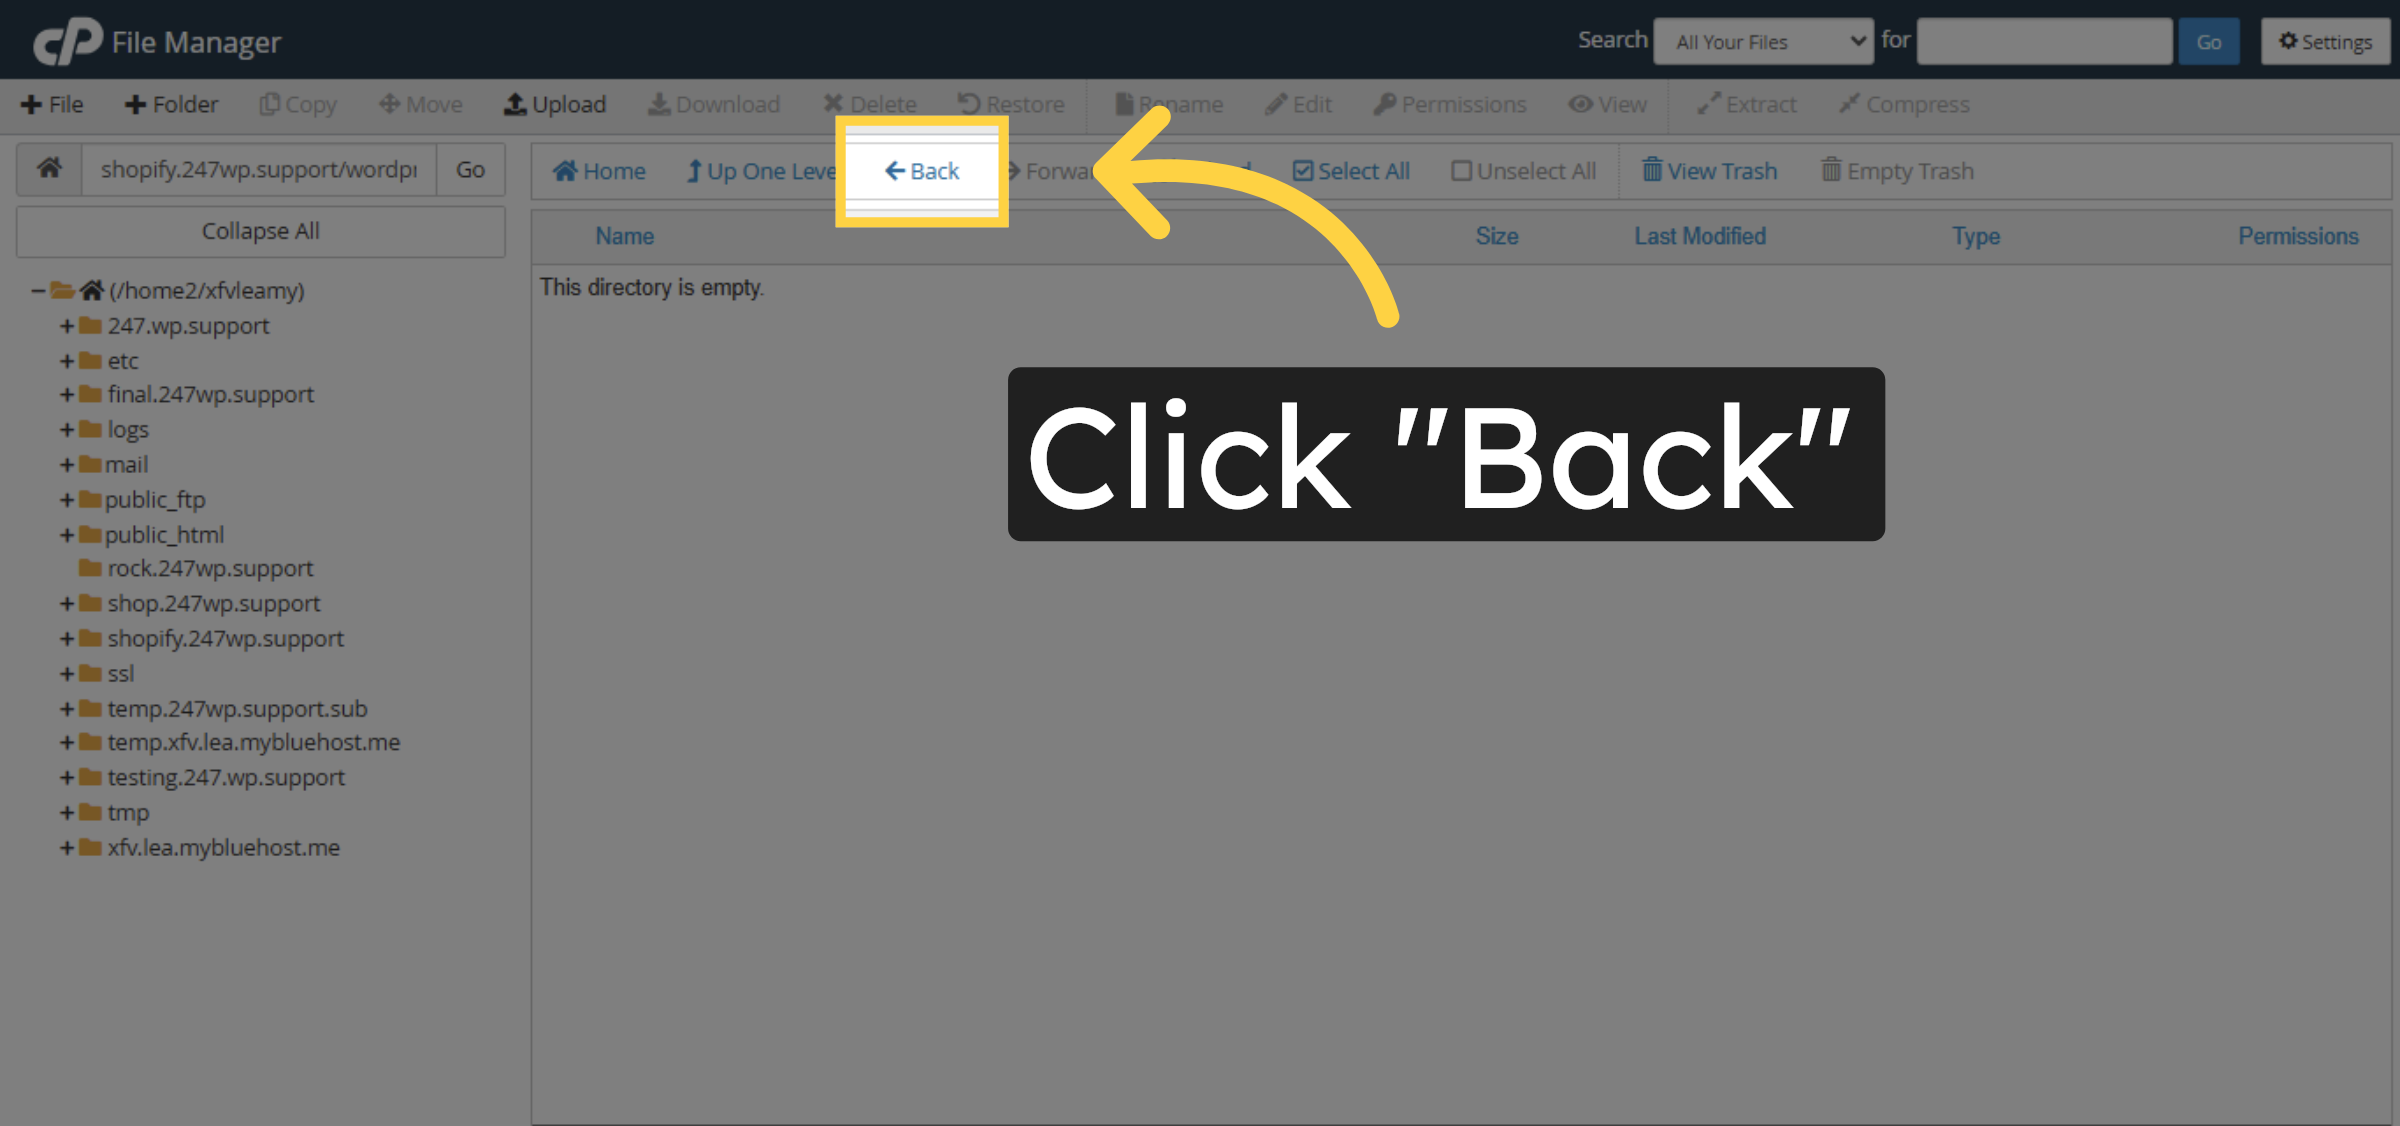
25. Return To Root Directory
Click Back to go back to the subdomain root directory after moving files.
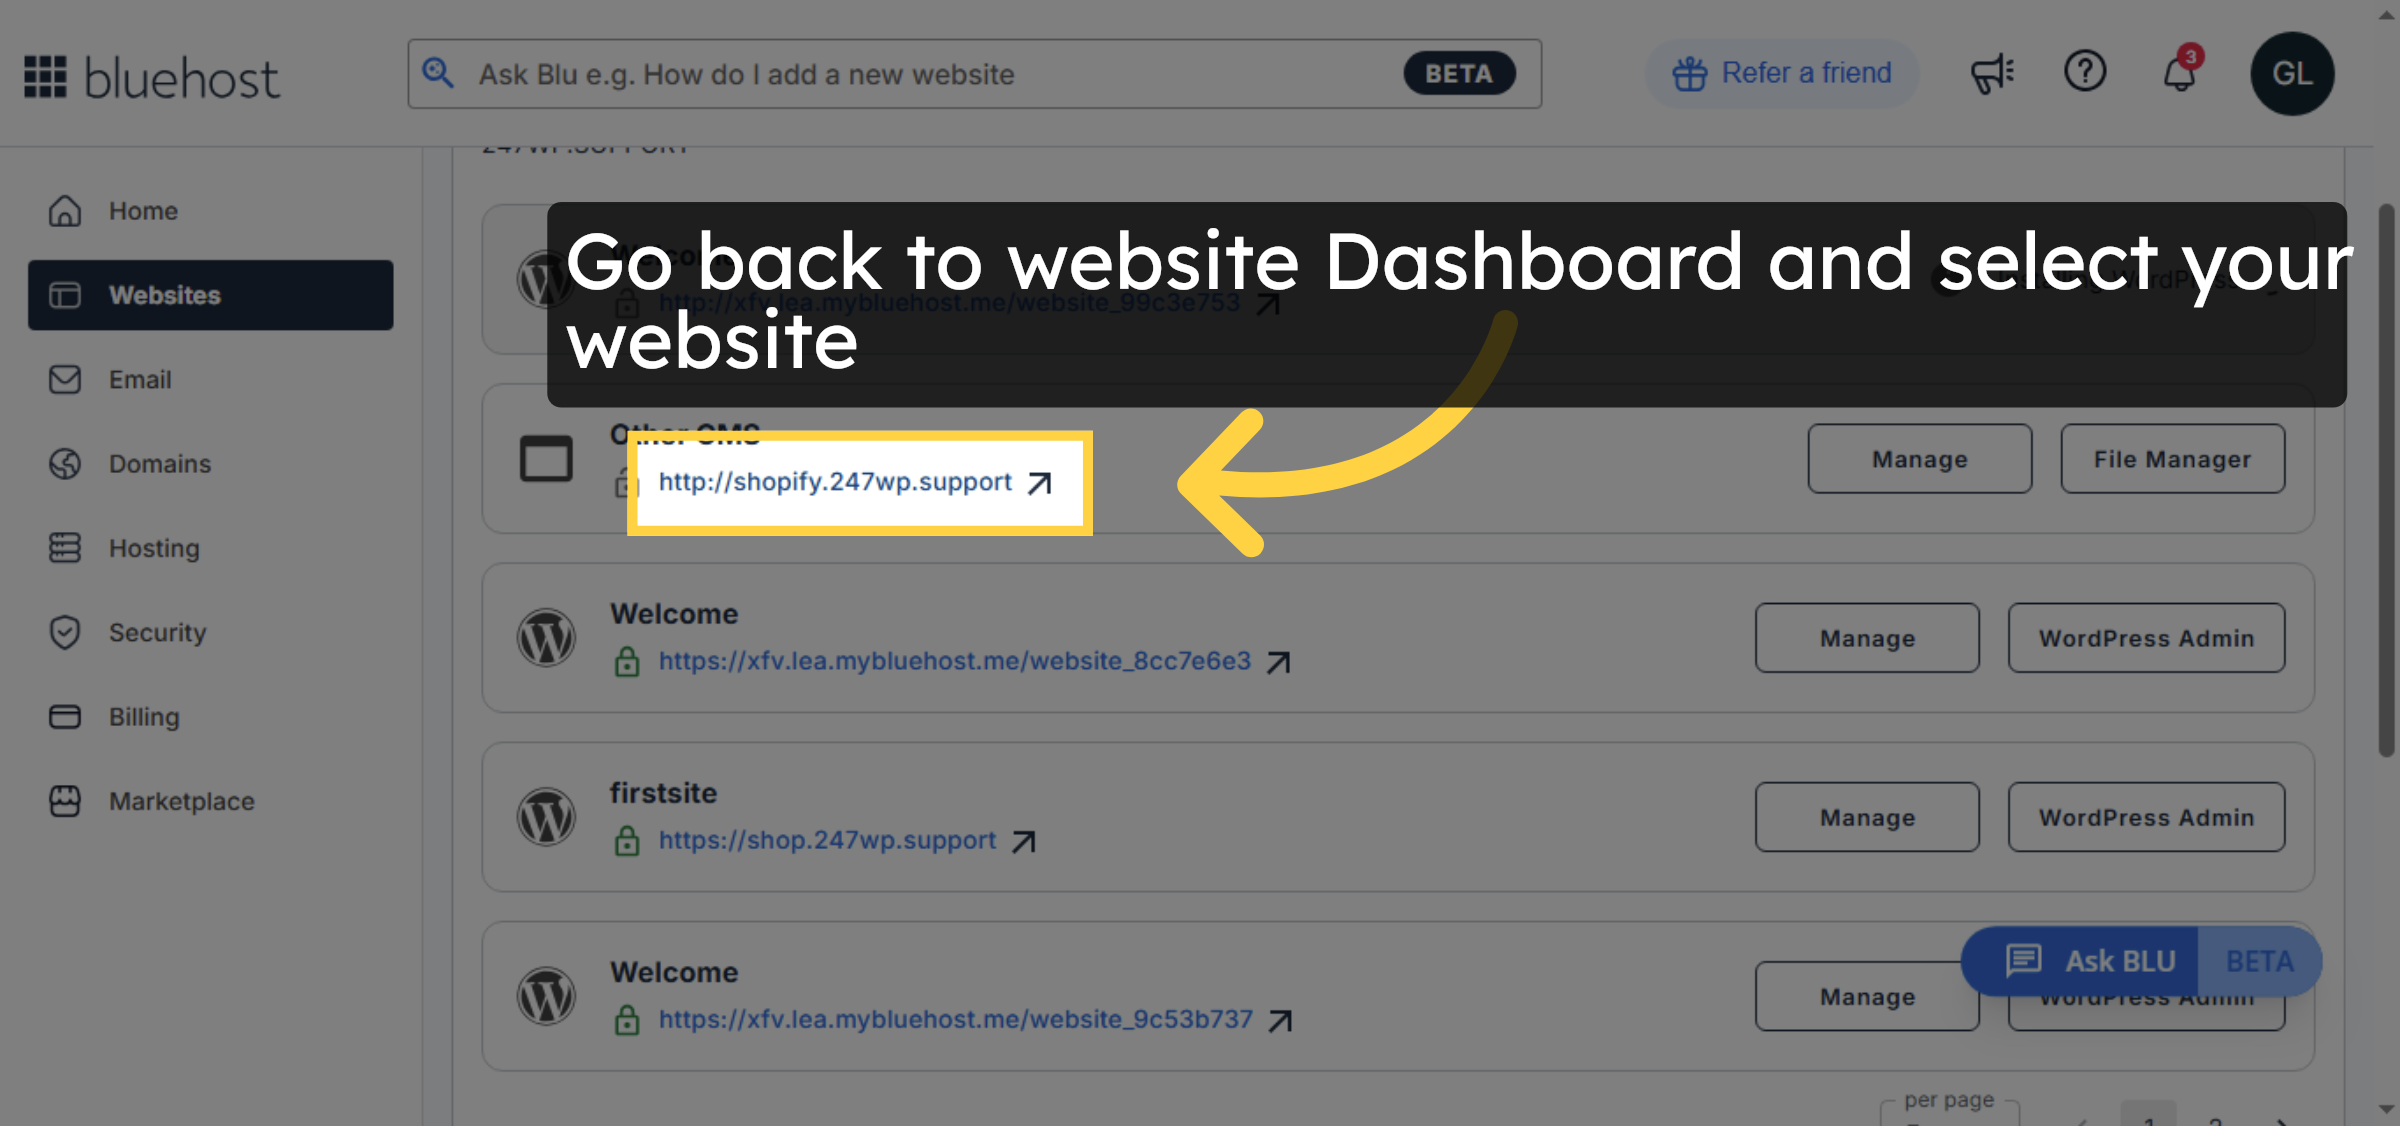
26. Open Subdomain URL Again
Go back to website Dashboard and select your website
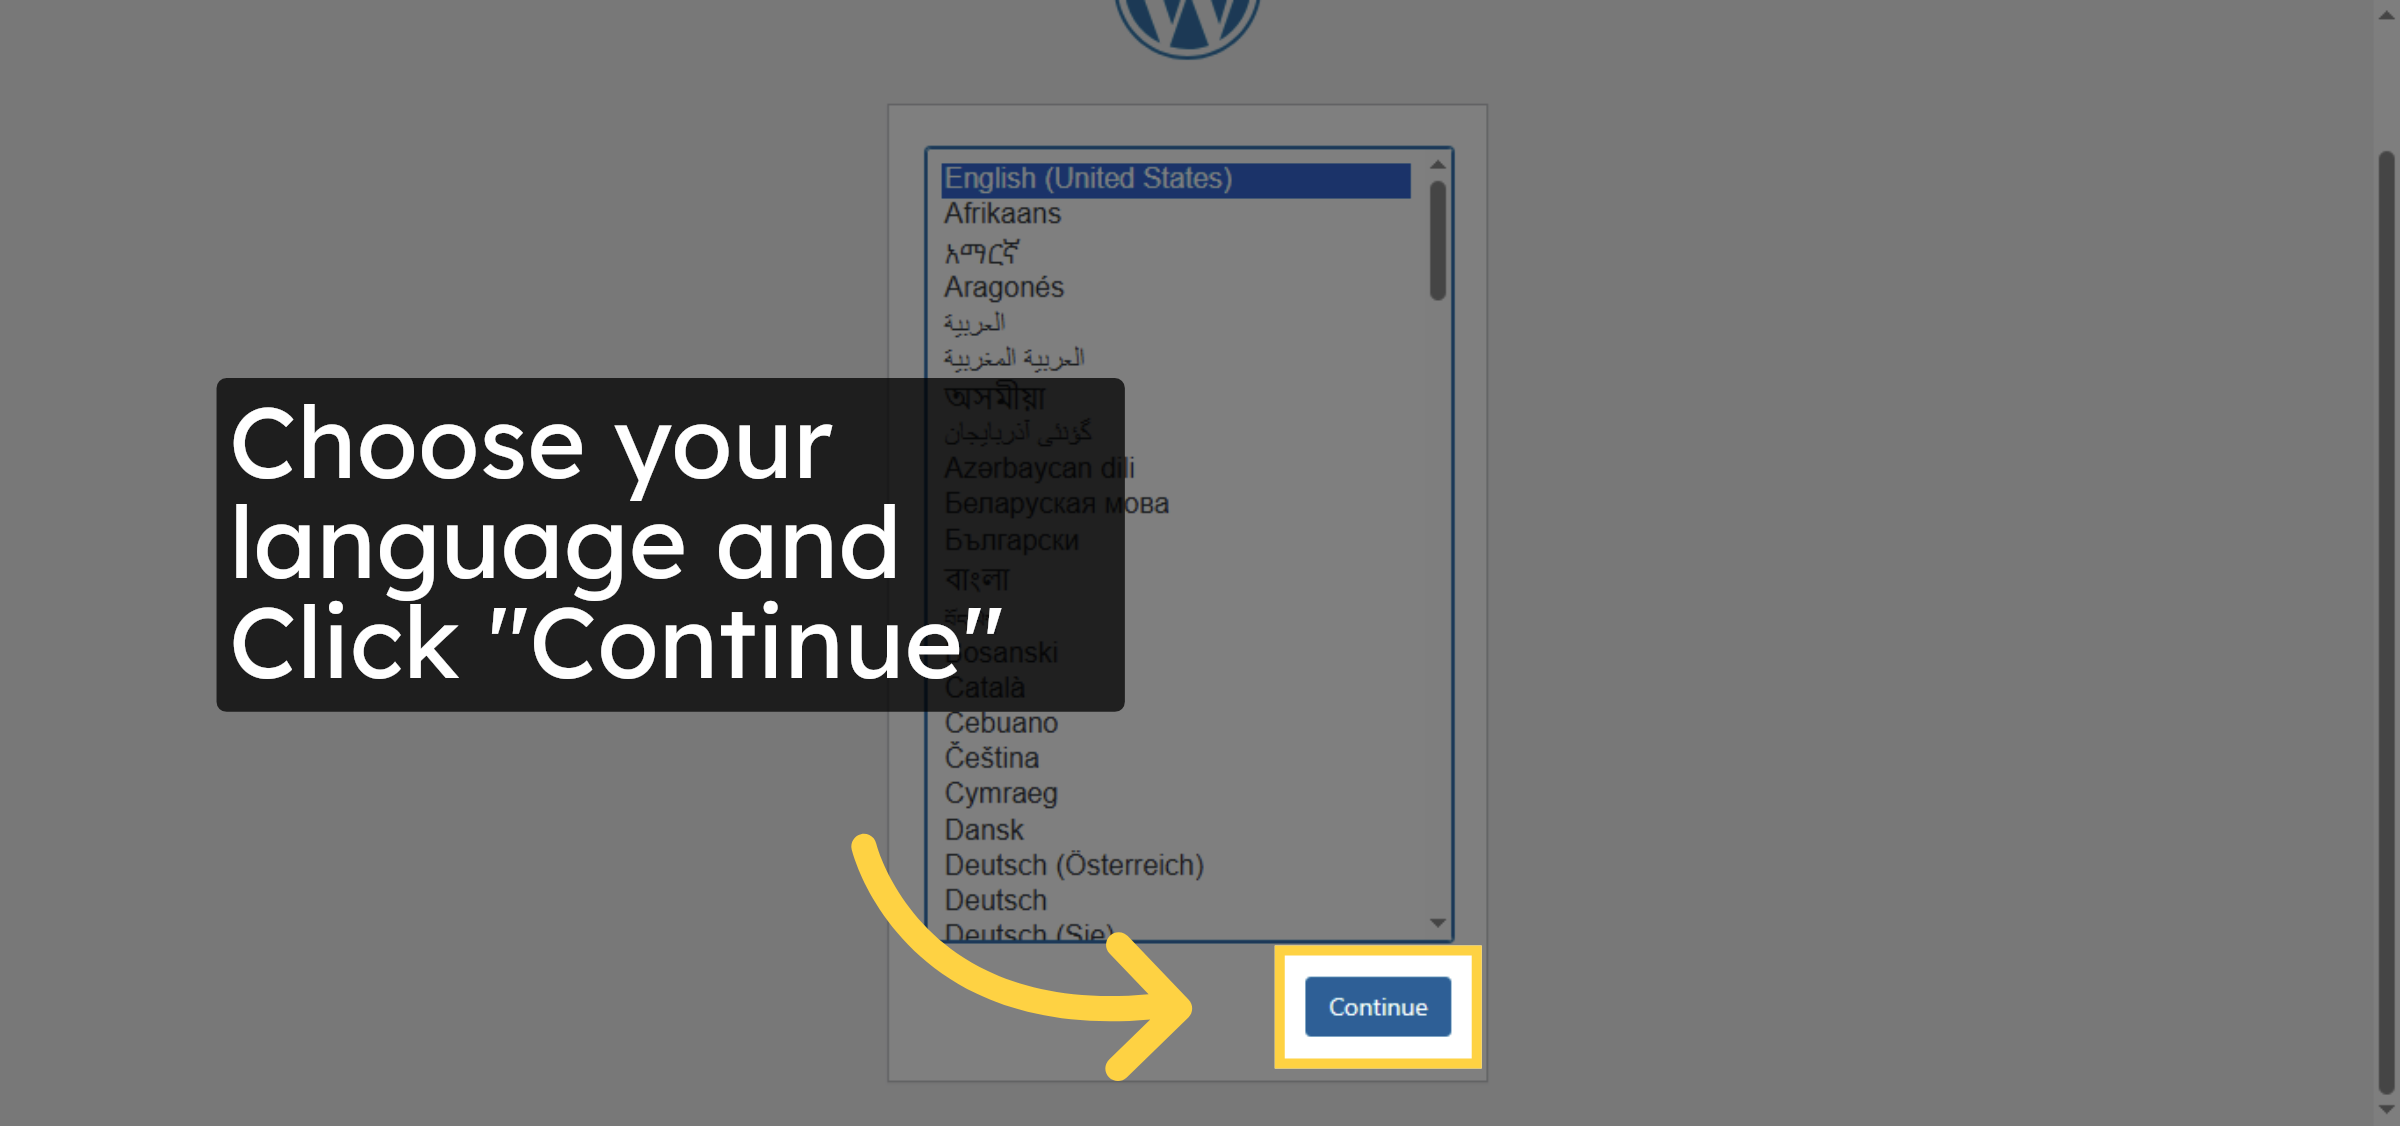
27. Continue Setup
Choose your language and Click “Continue”
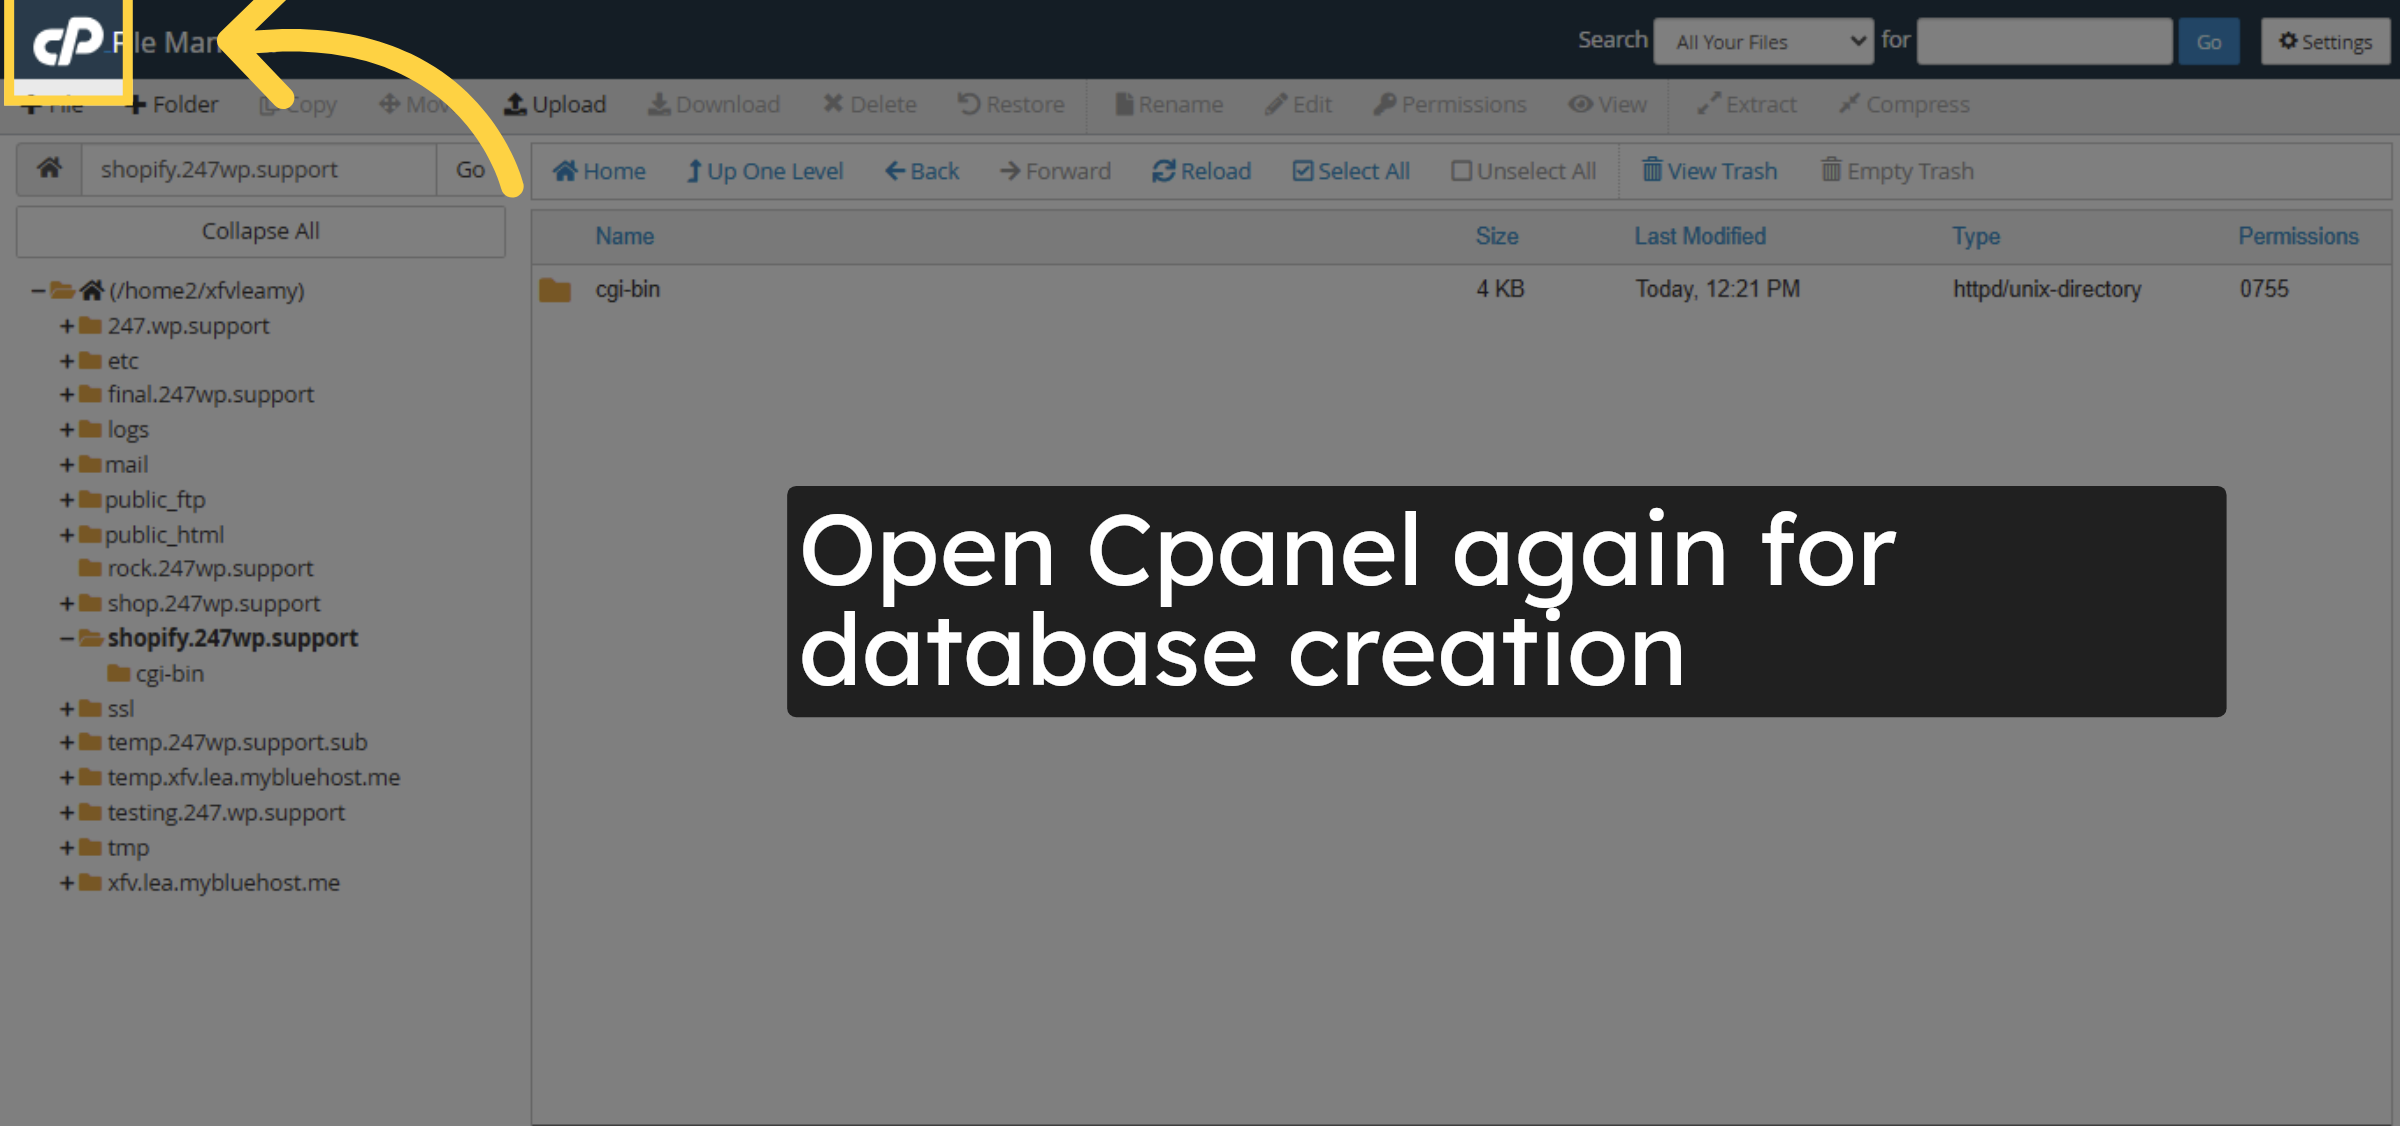
28. Click Here To Proceed
Open Cpanel again for database creation
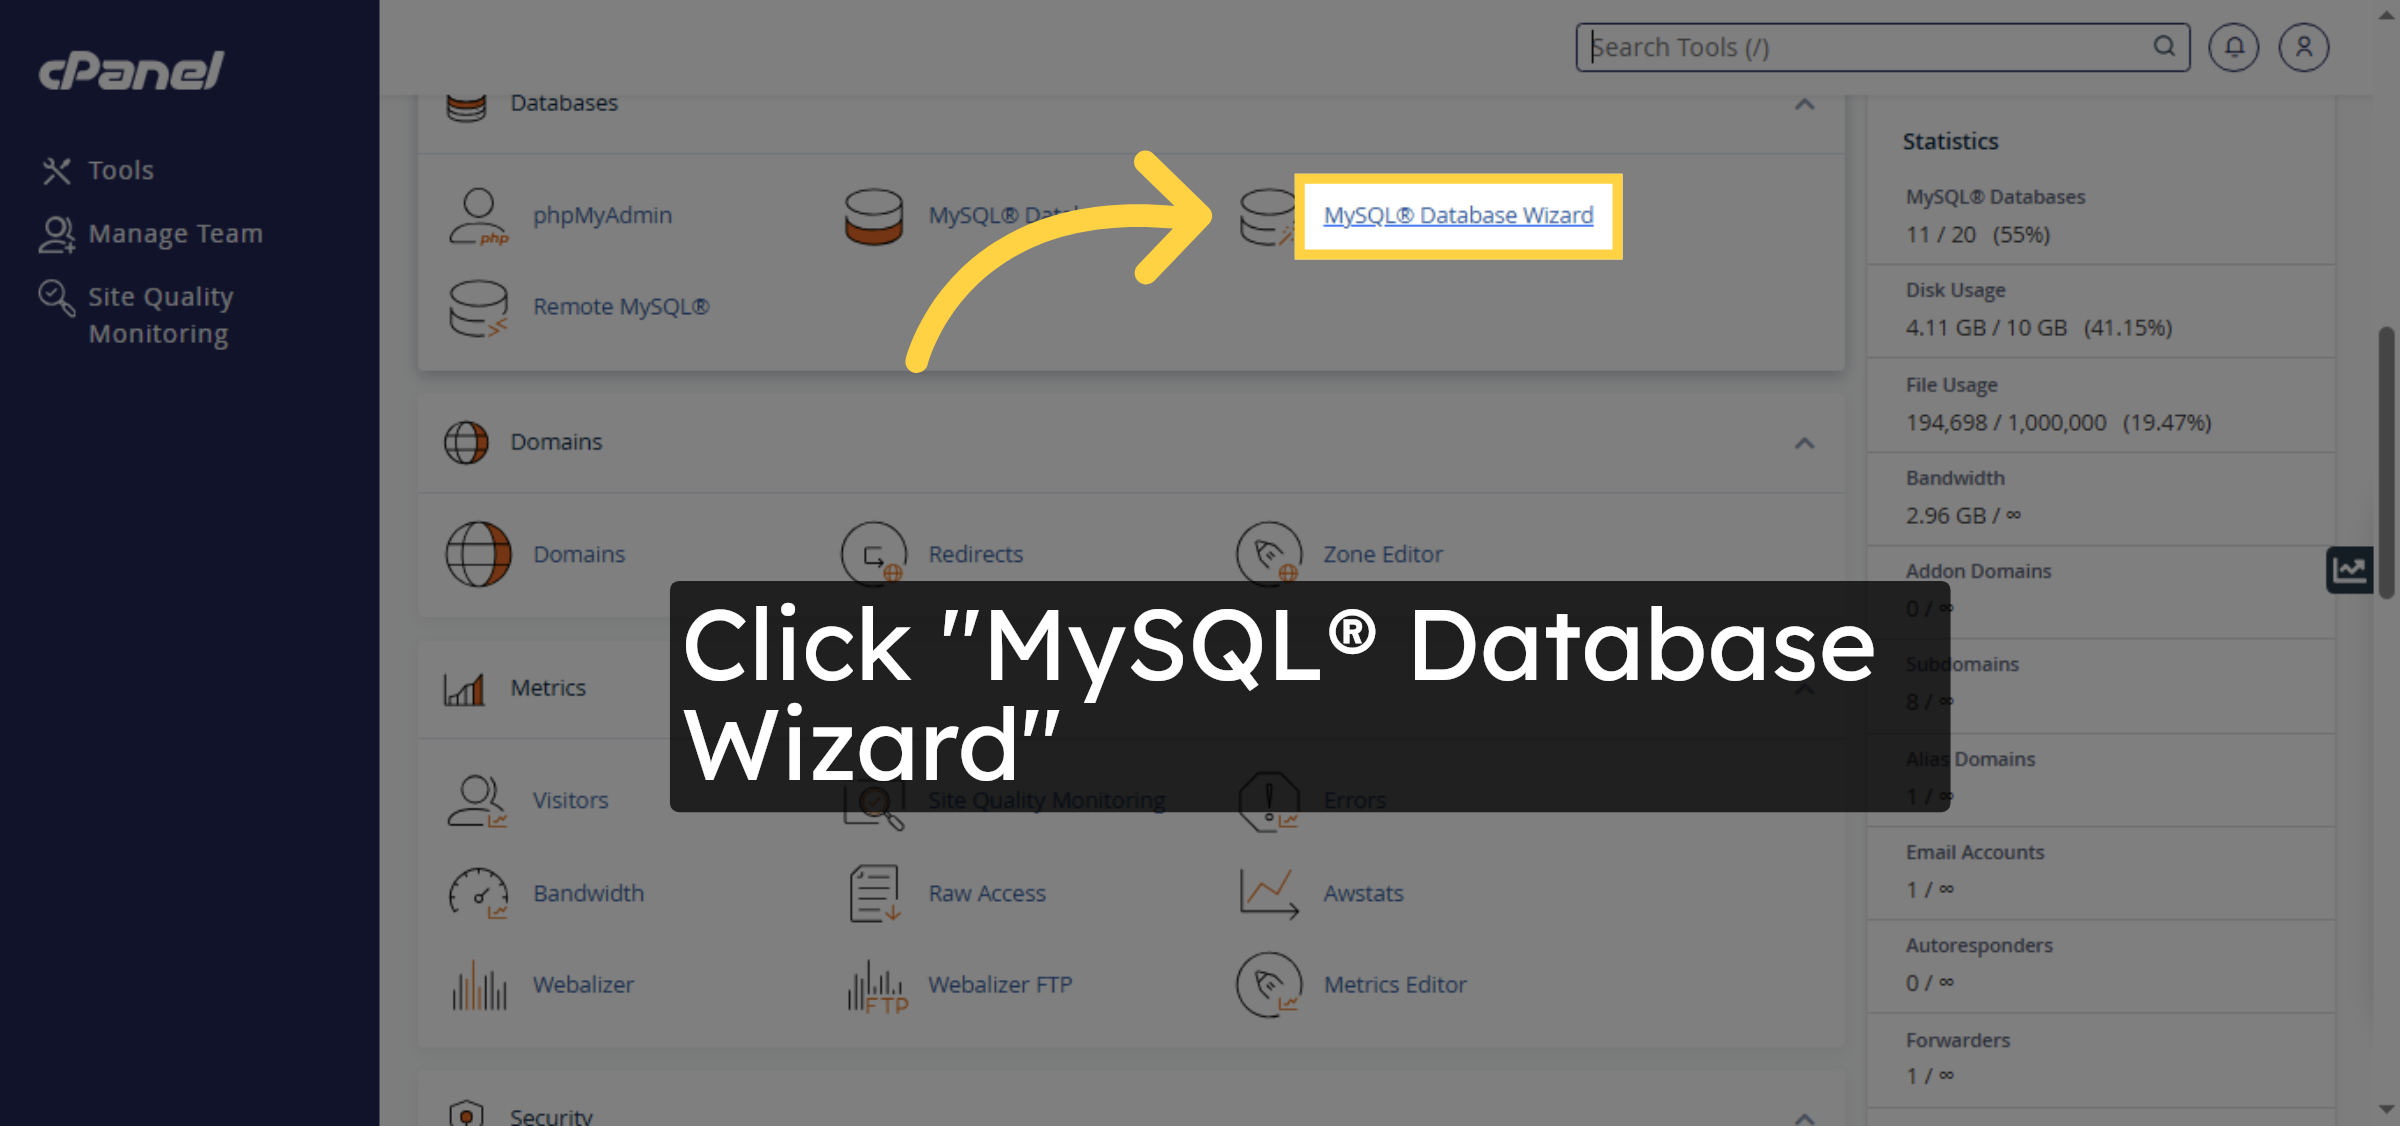
29. Open MySQL Database Wizard
Click MySQL® Database Wizard to create a new database for WordPress.
30. Proceed To Next Step
Give Any name to your database and click next

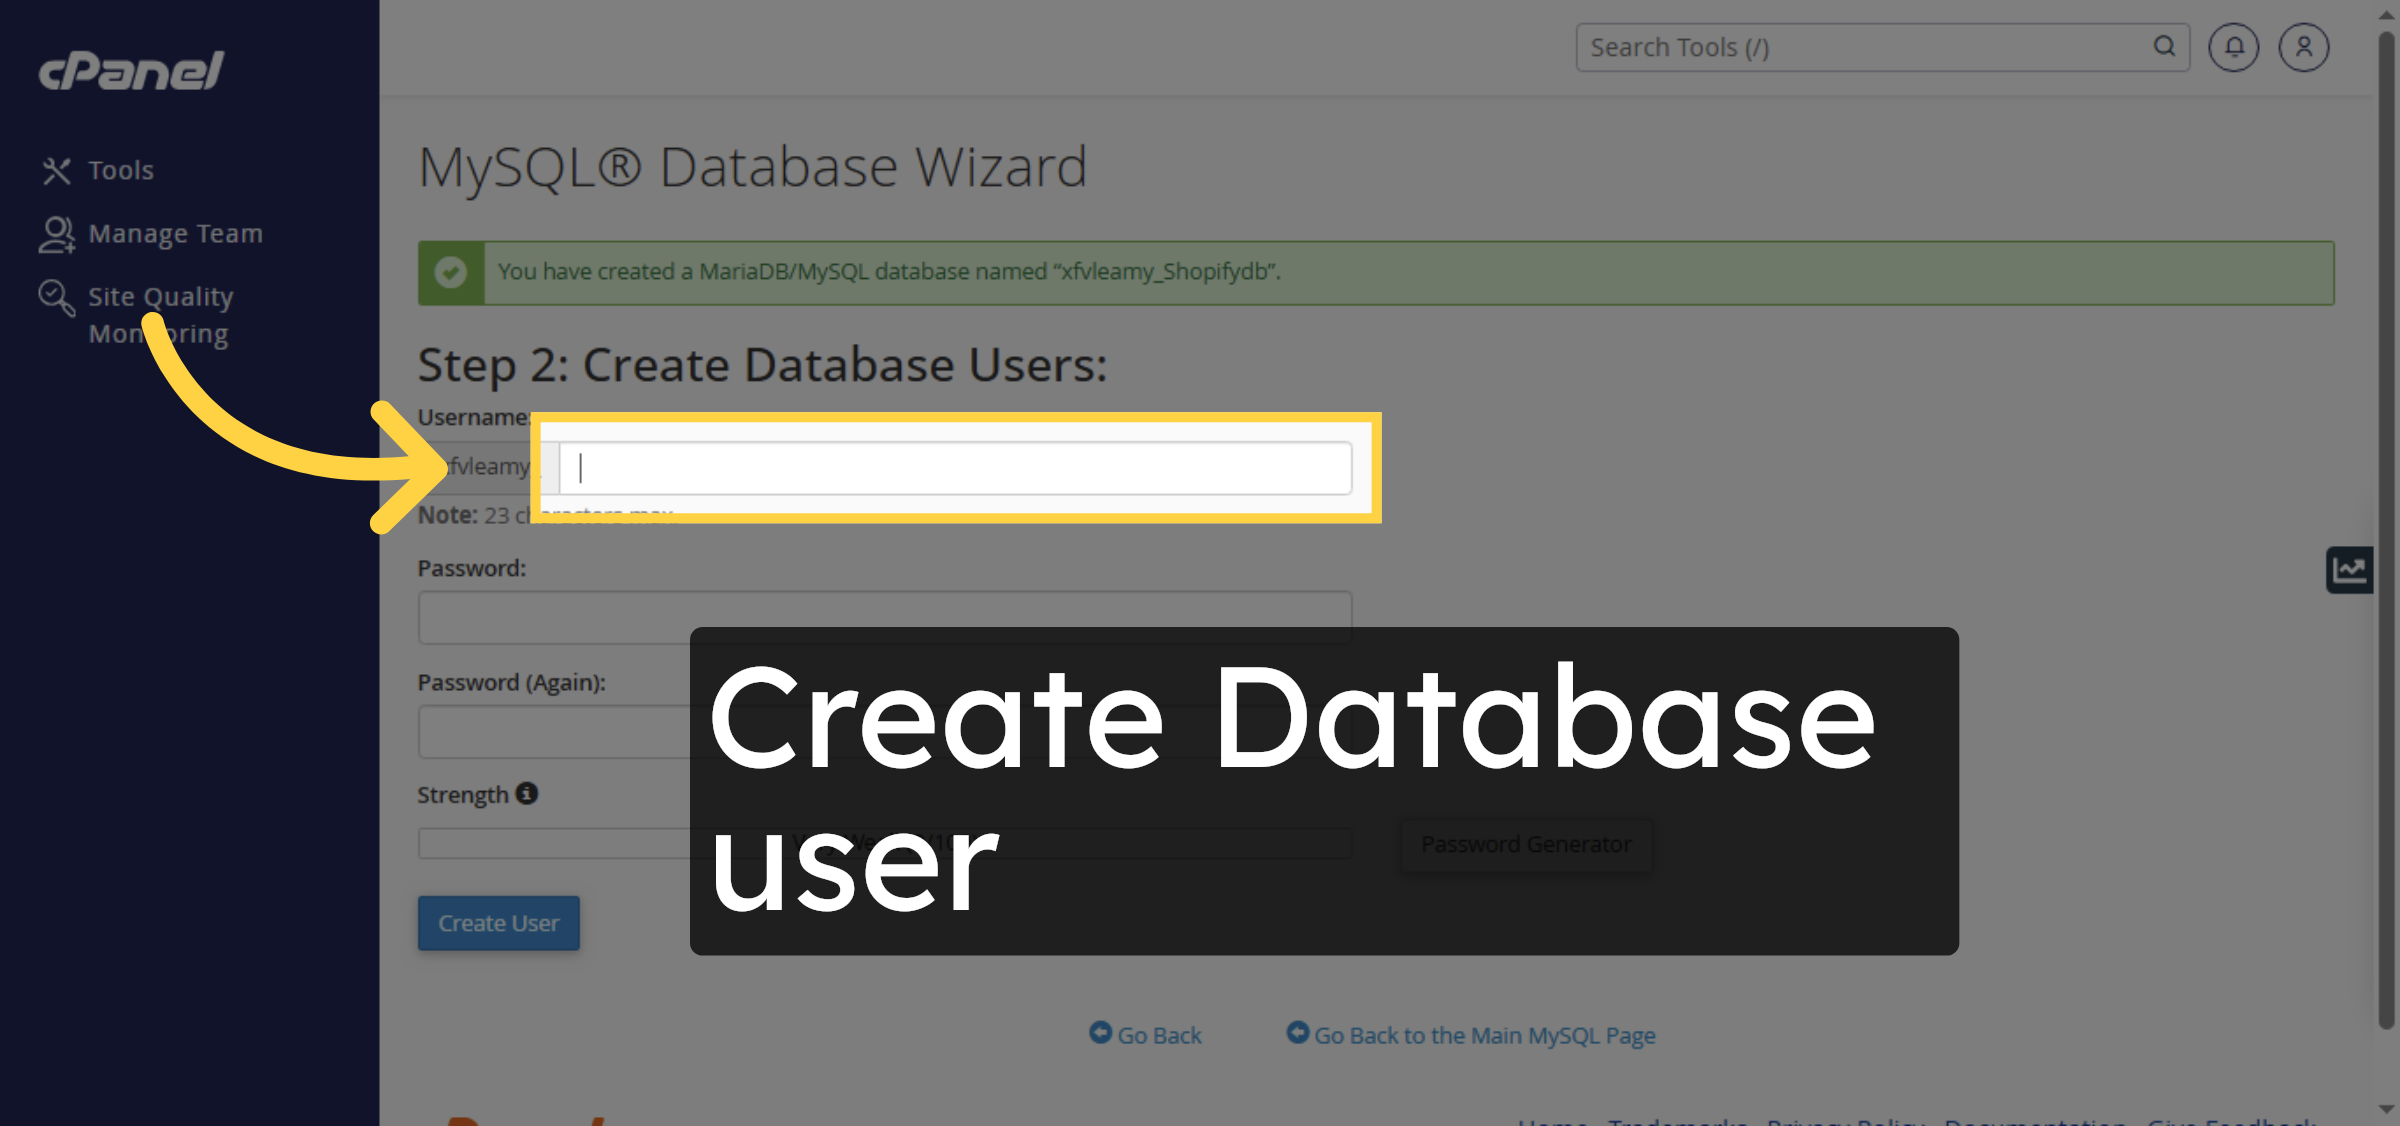
31. Enter Database Username
Click the Username field and enter a username for the new database user.
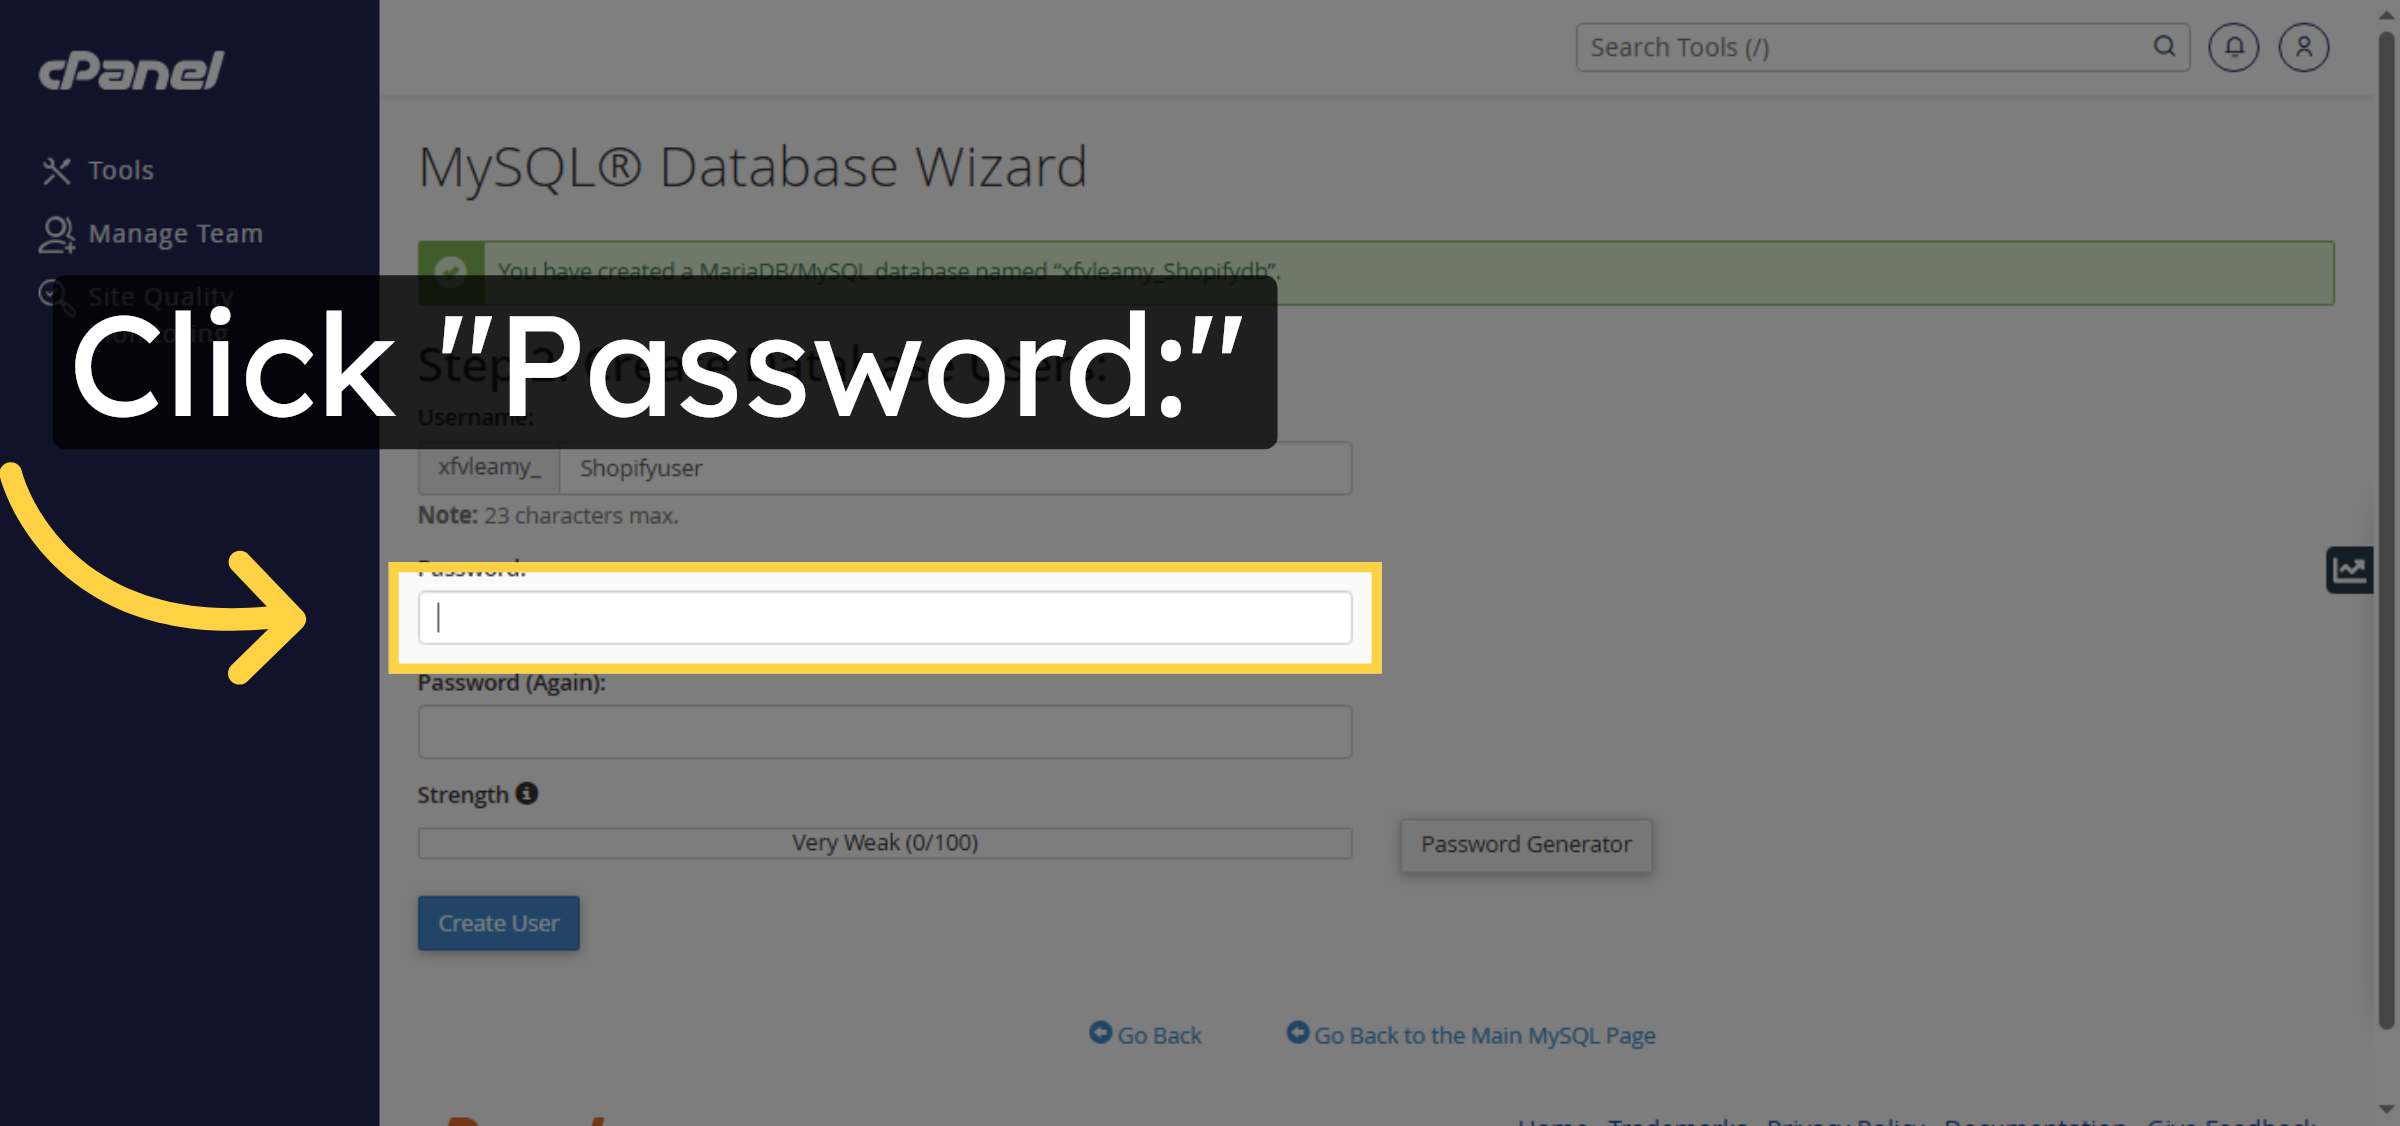
32. Enter Database Password
Click the Password field and enter a secure password for the database user.
33. Create Database User
Click Create User to add the new user to the database.

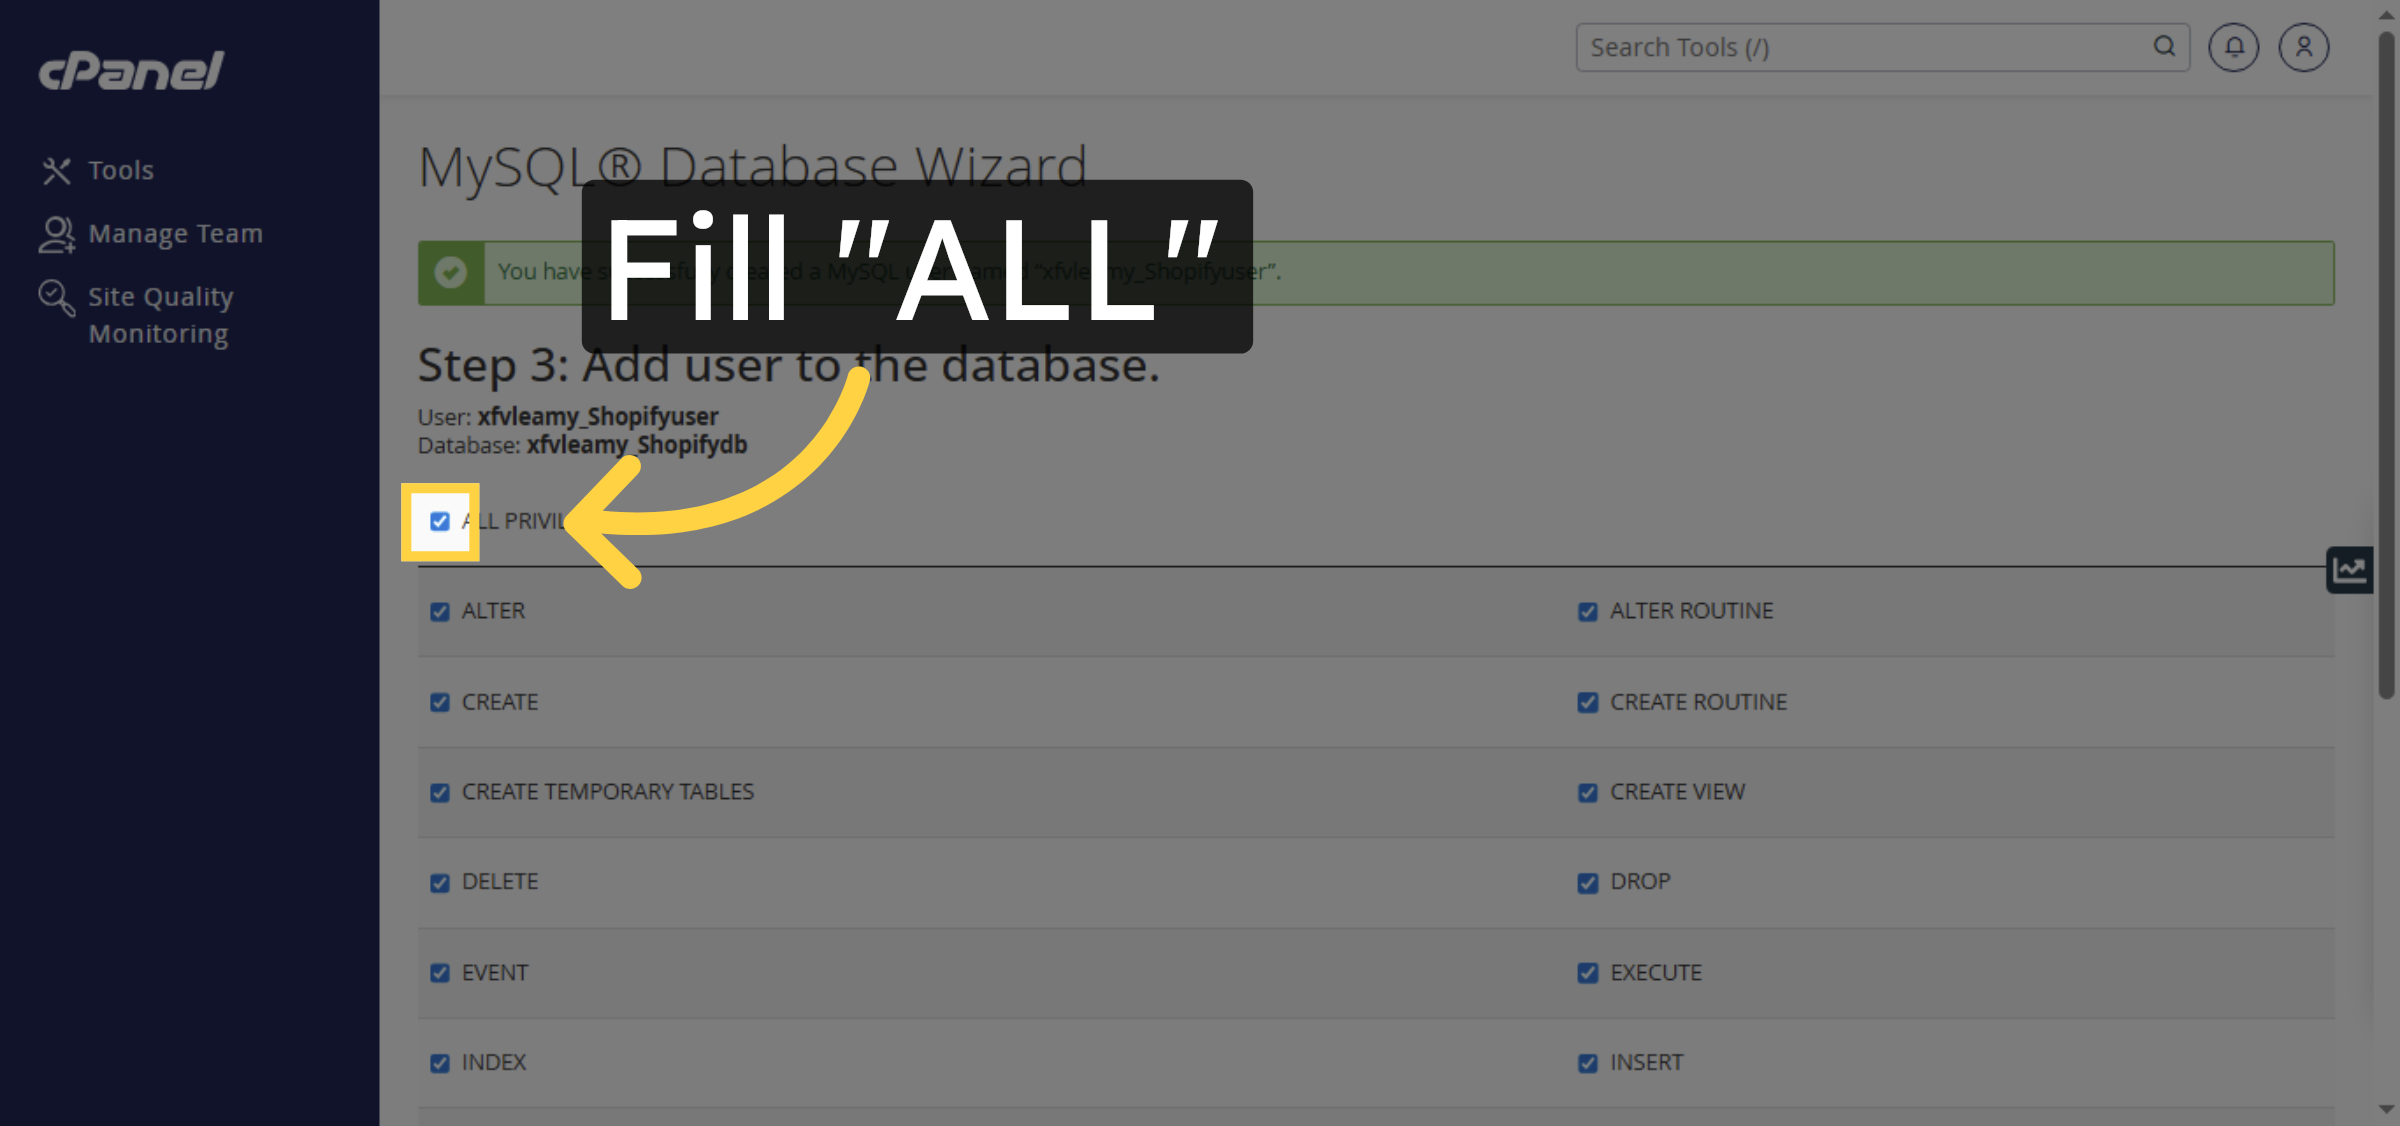
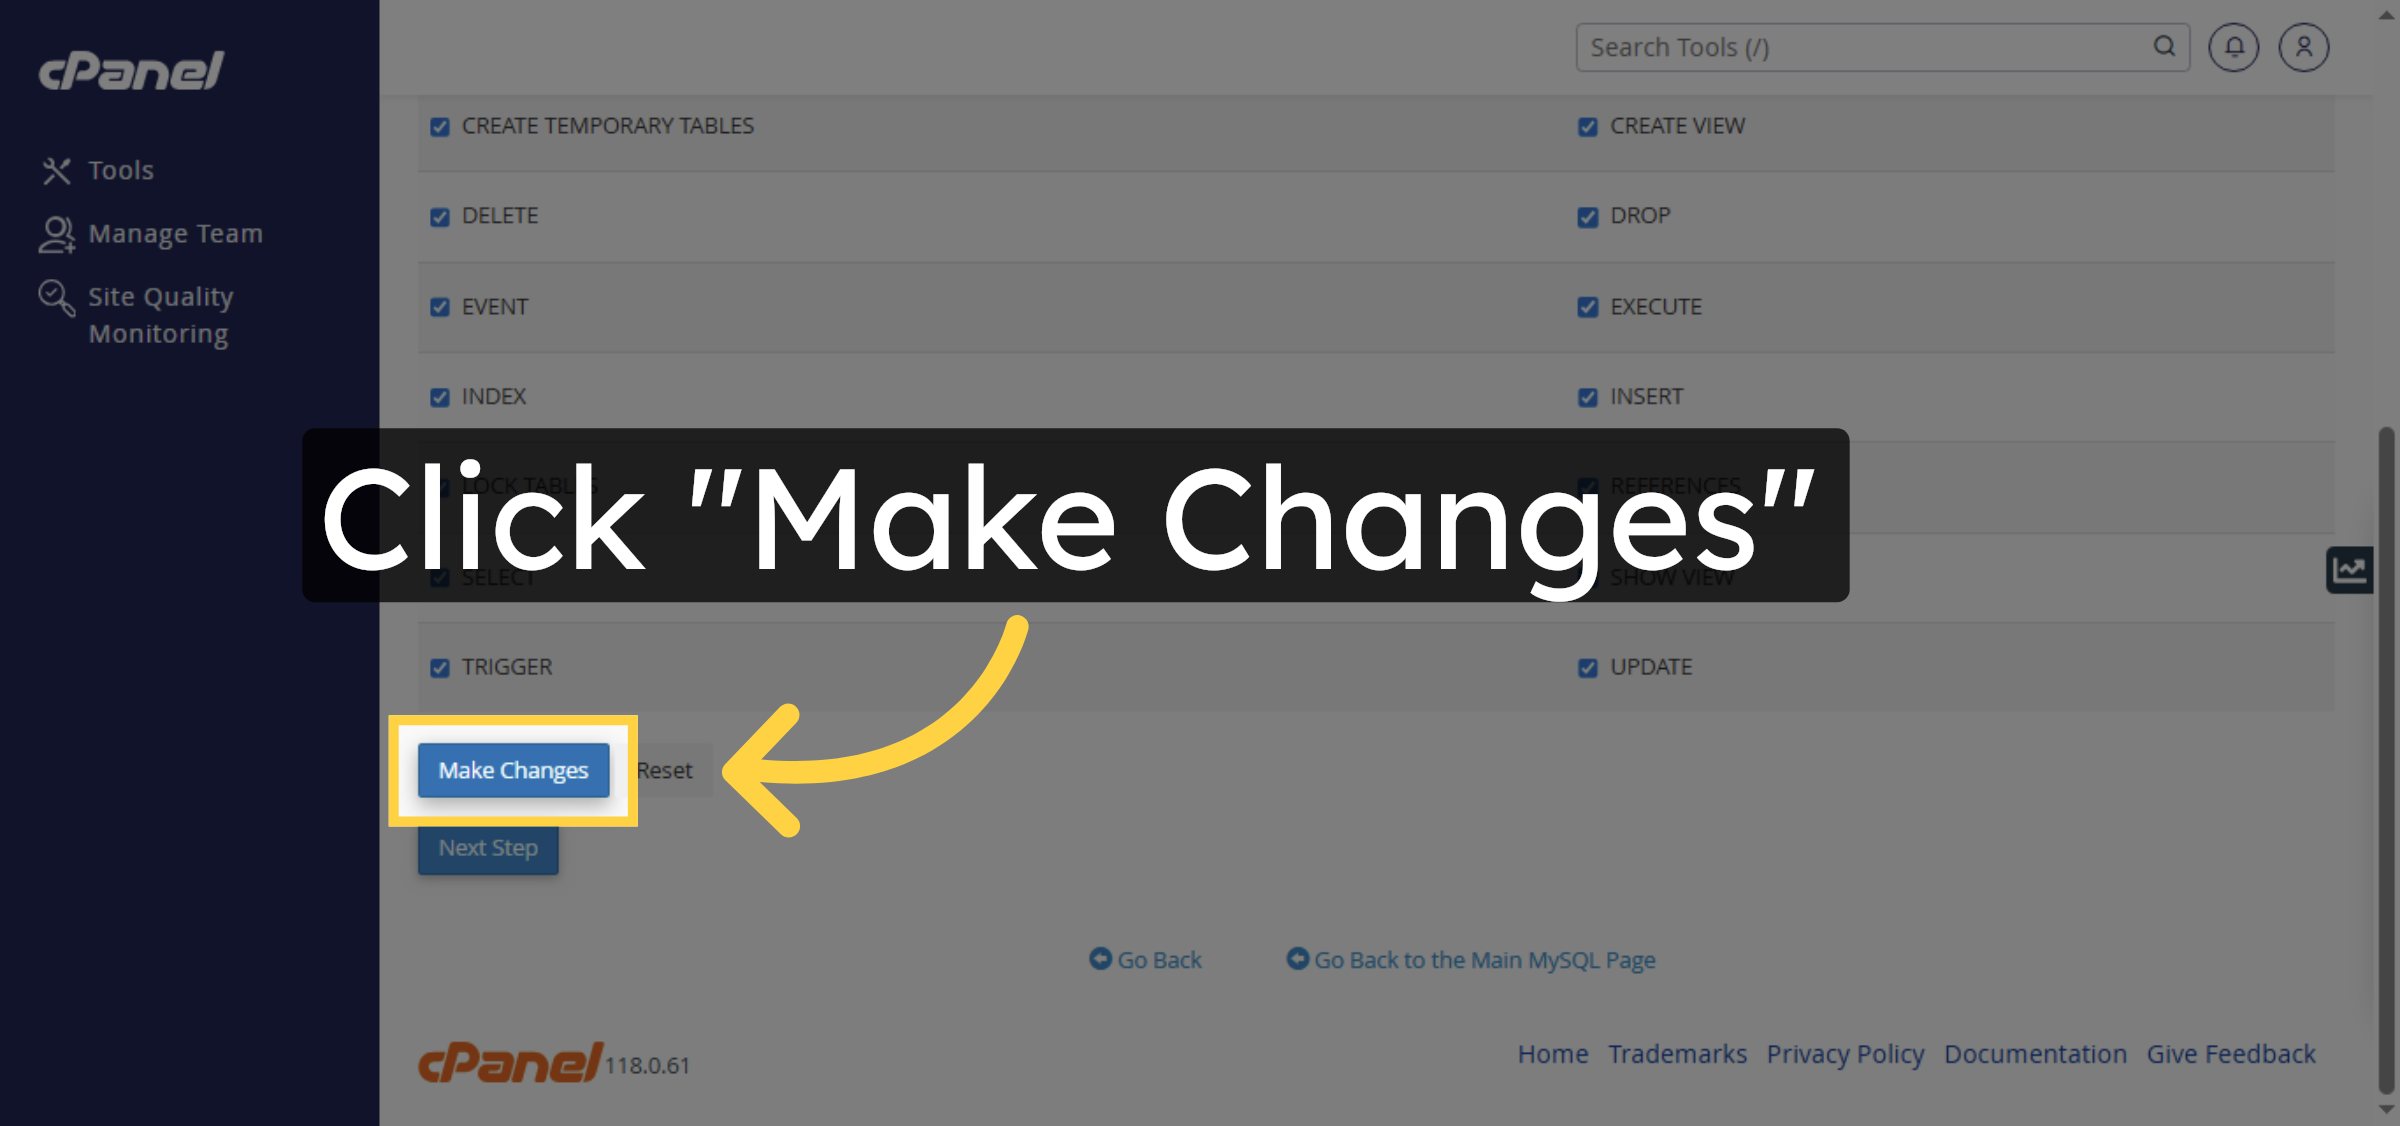
34. Confirm Privileges Selection
Fill ALL to ensure the user has all necessary database privileges.
35. Save Privilege Changes
Click Make Changes to apply the privilege settings to the database user.
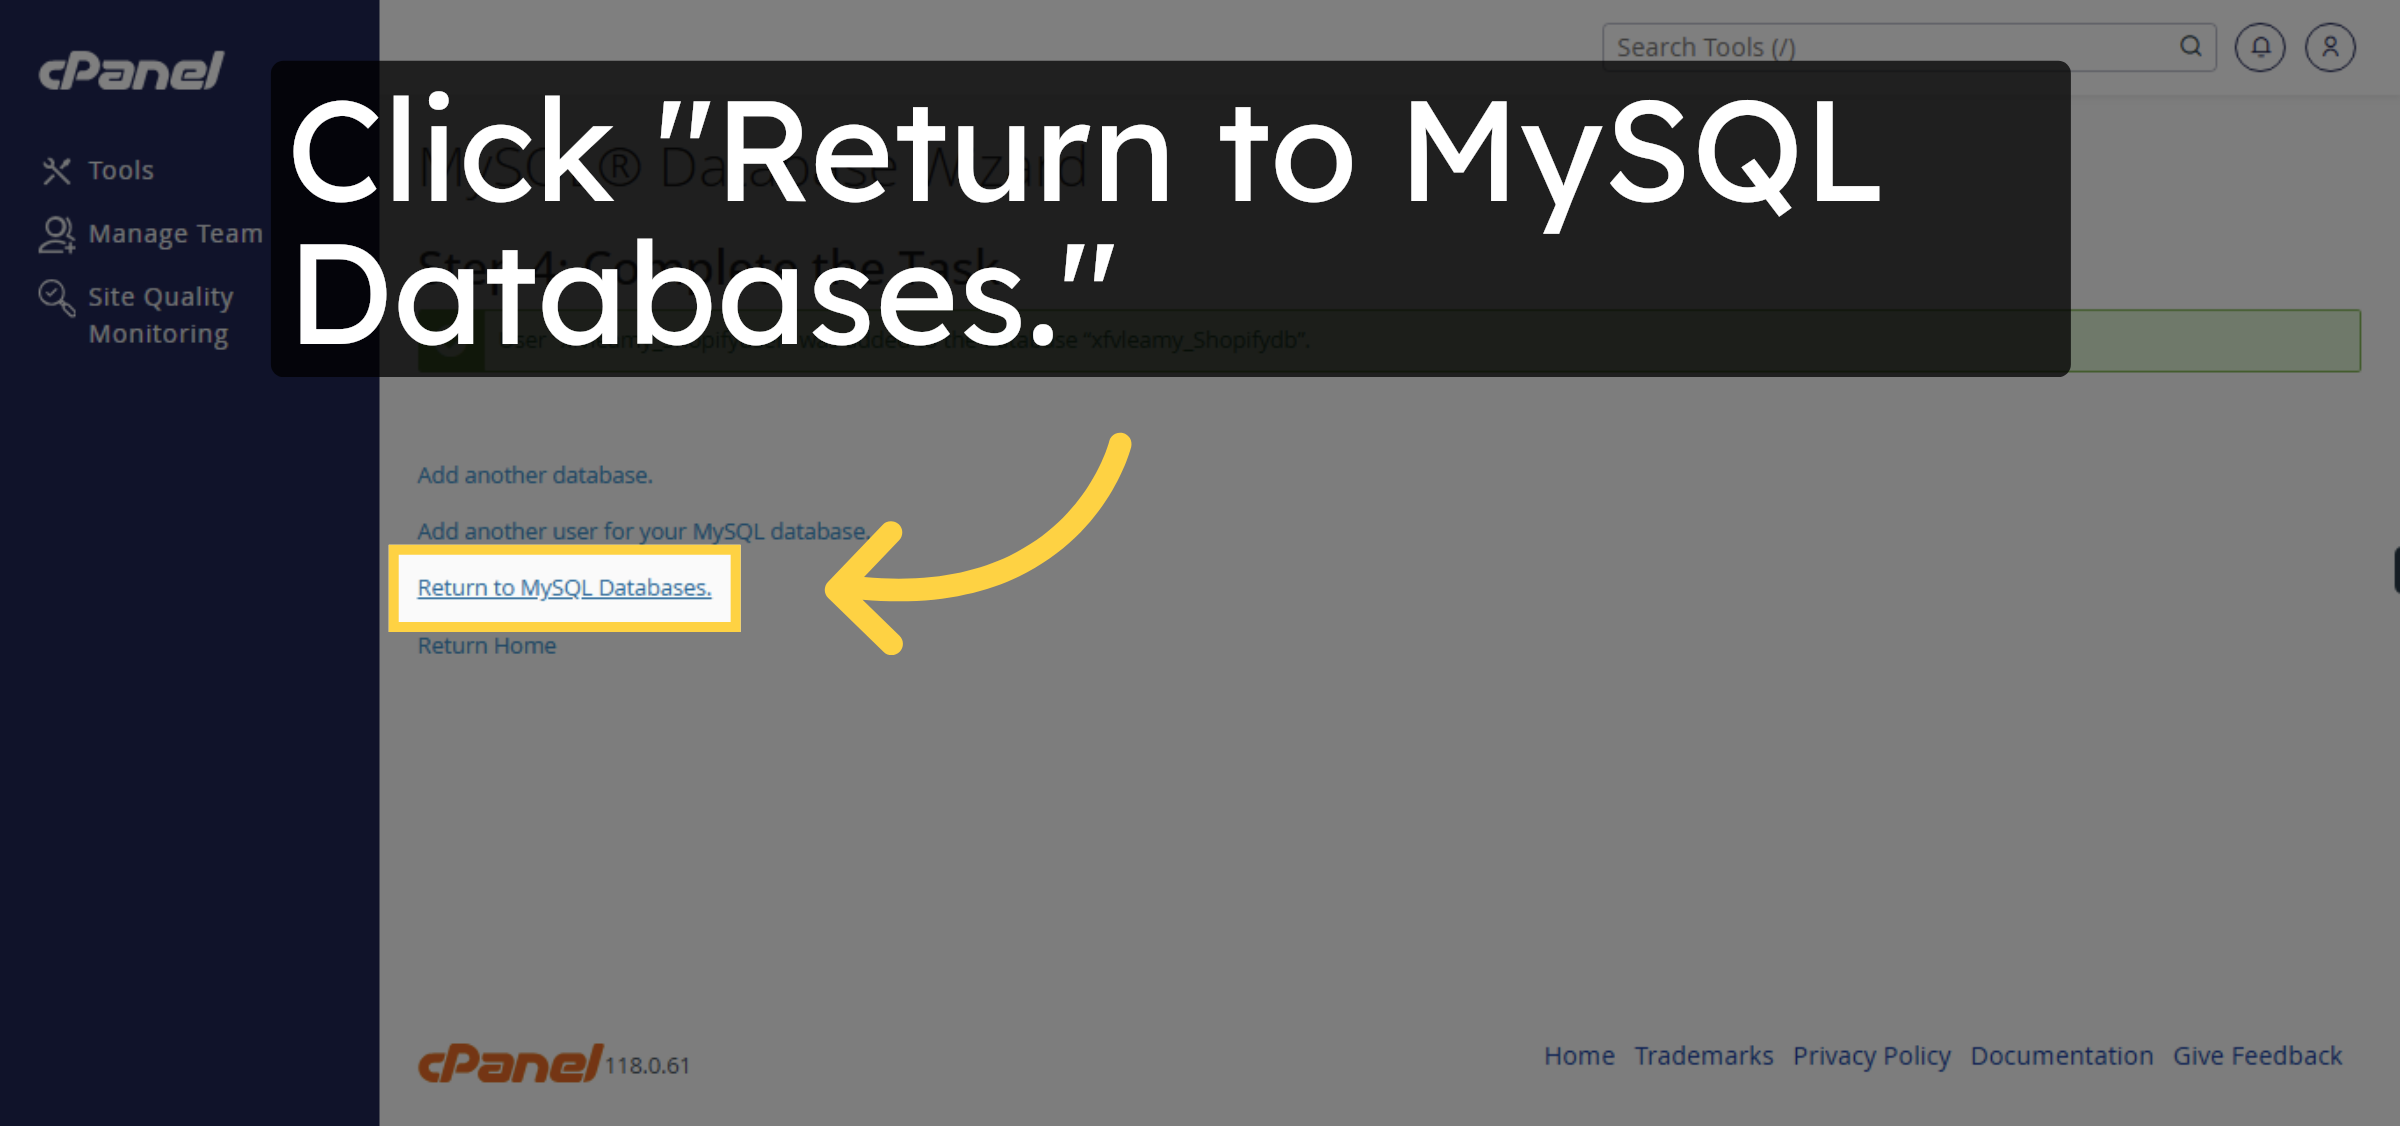
36. Return To Database List
Click Return to MySQL Databases to view your database and users.
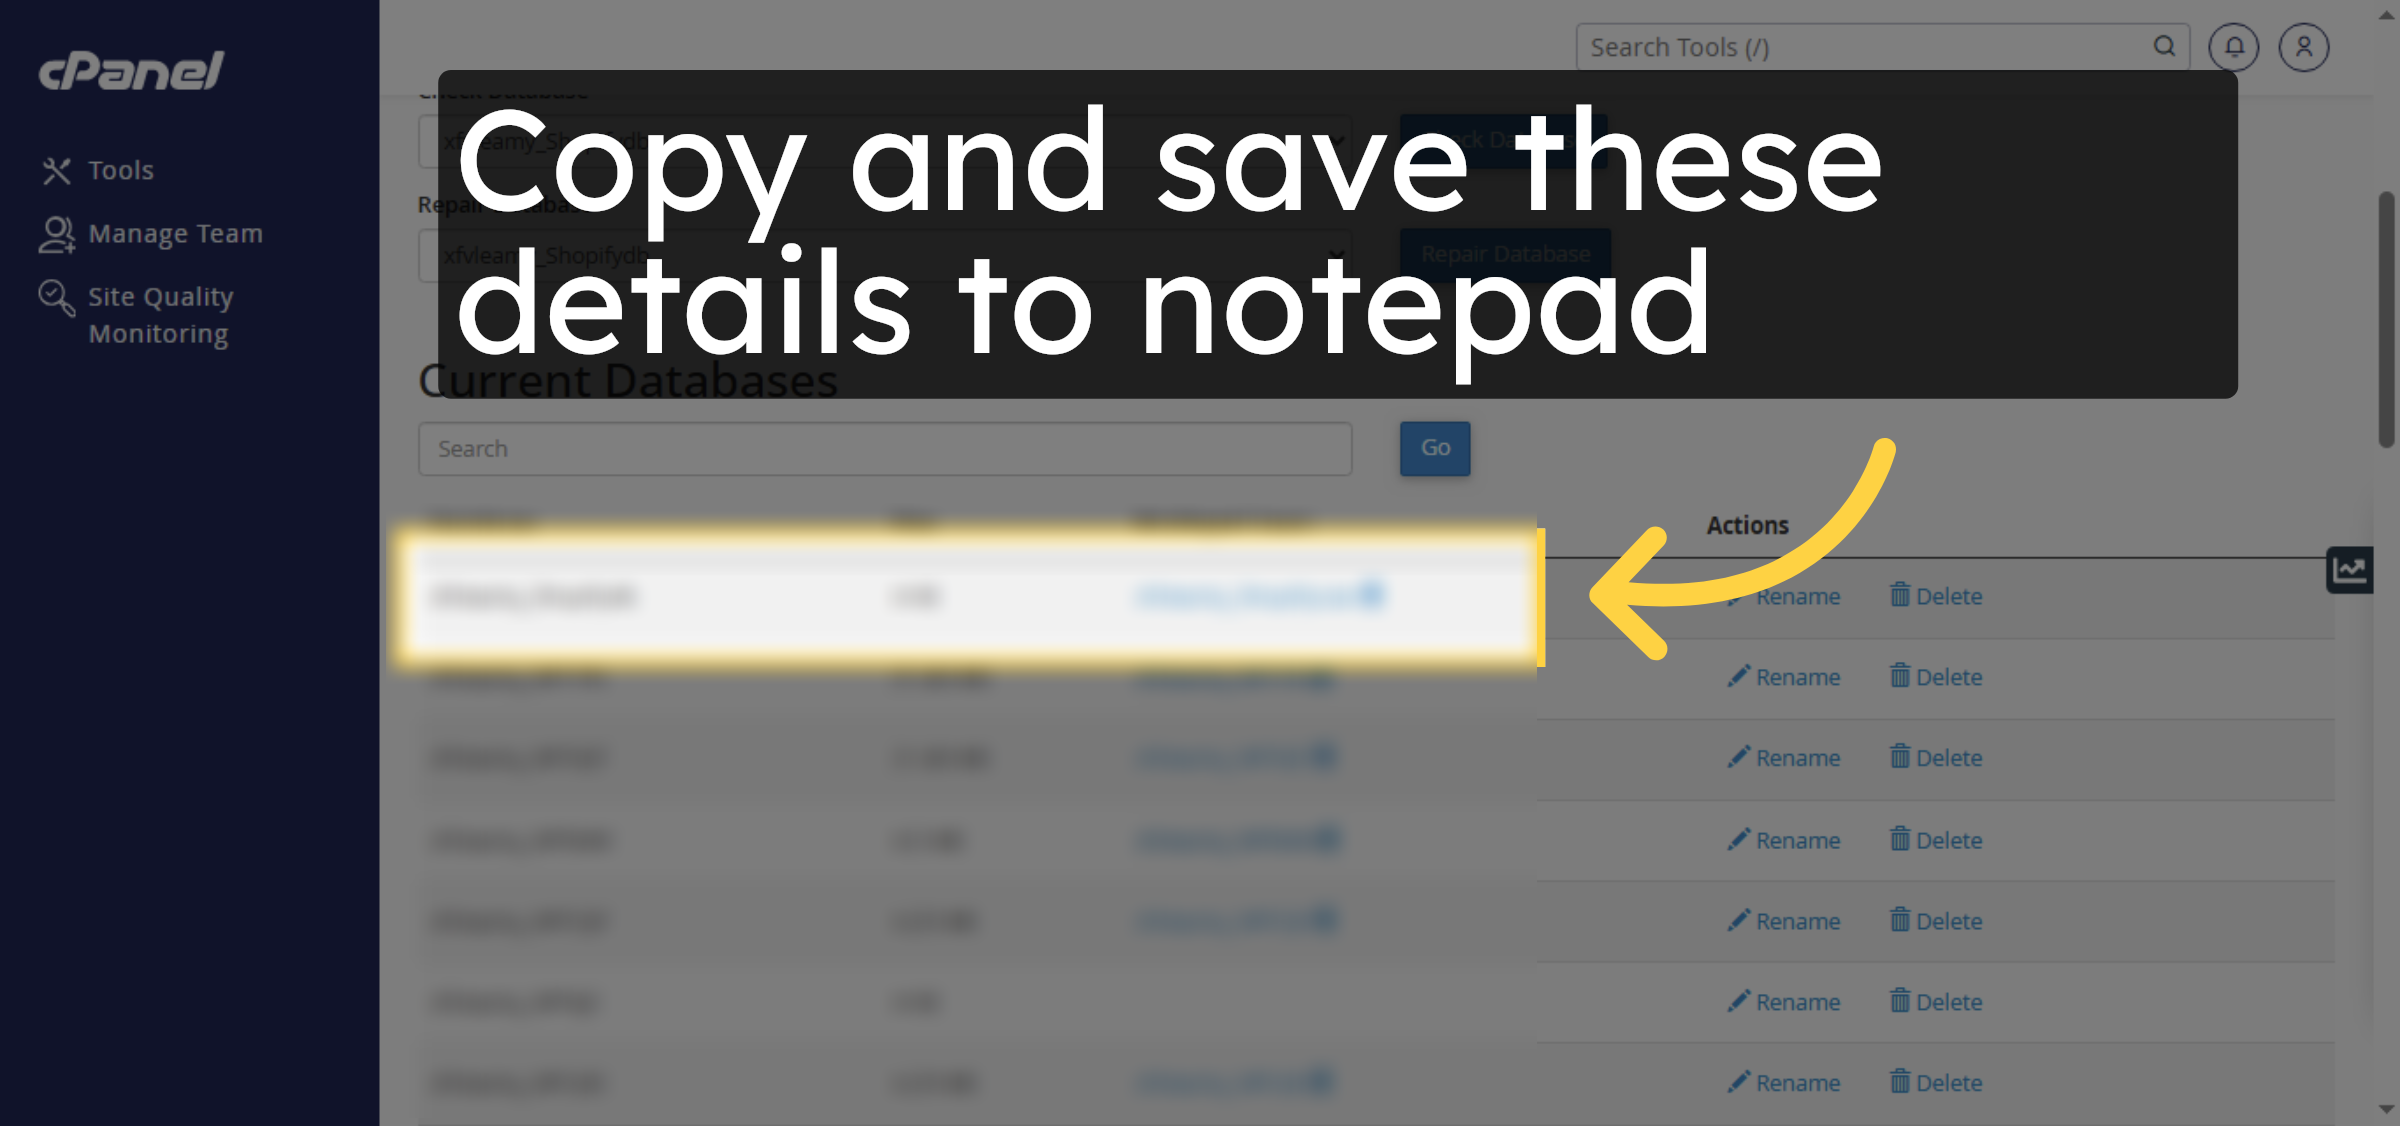
37. Save credentials
Copy and save these details to notepad
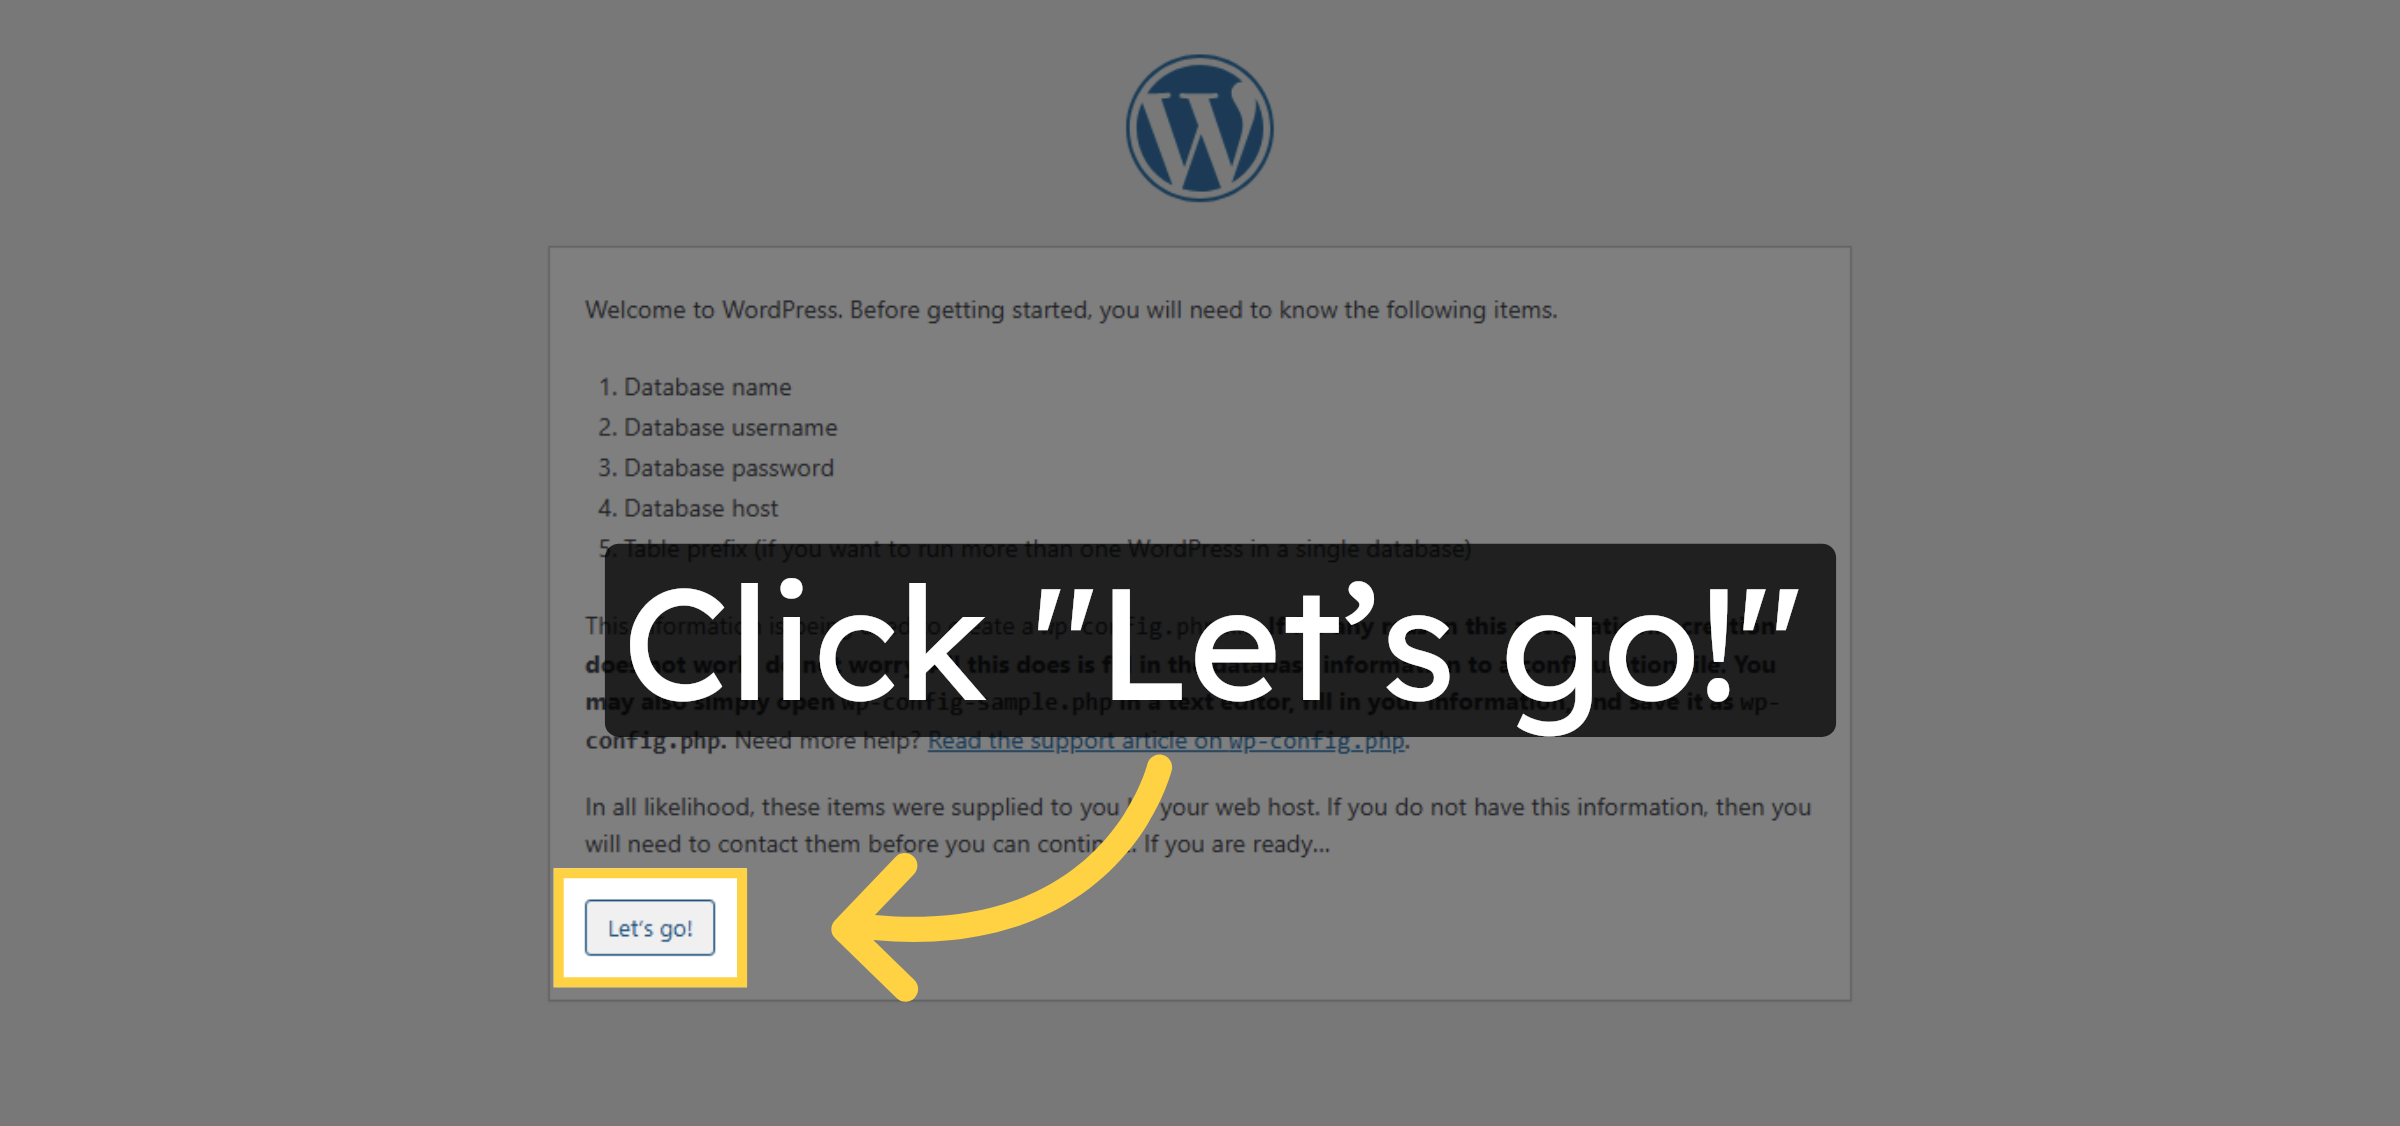
38. Start WordPress Setup
Click Let’s go! to begin entering your database connection details.
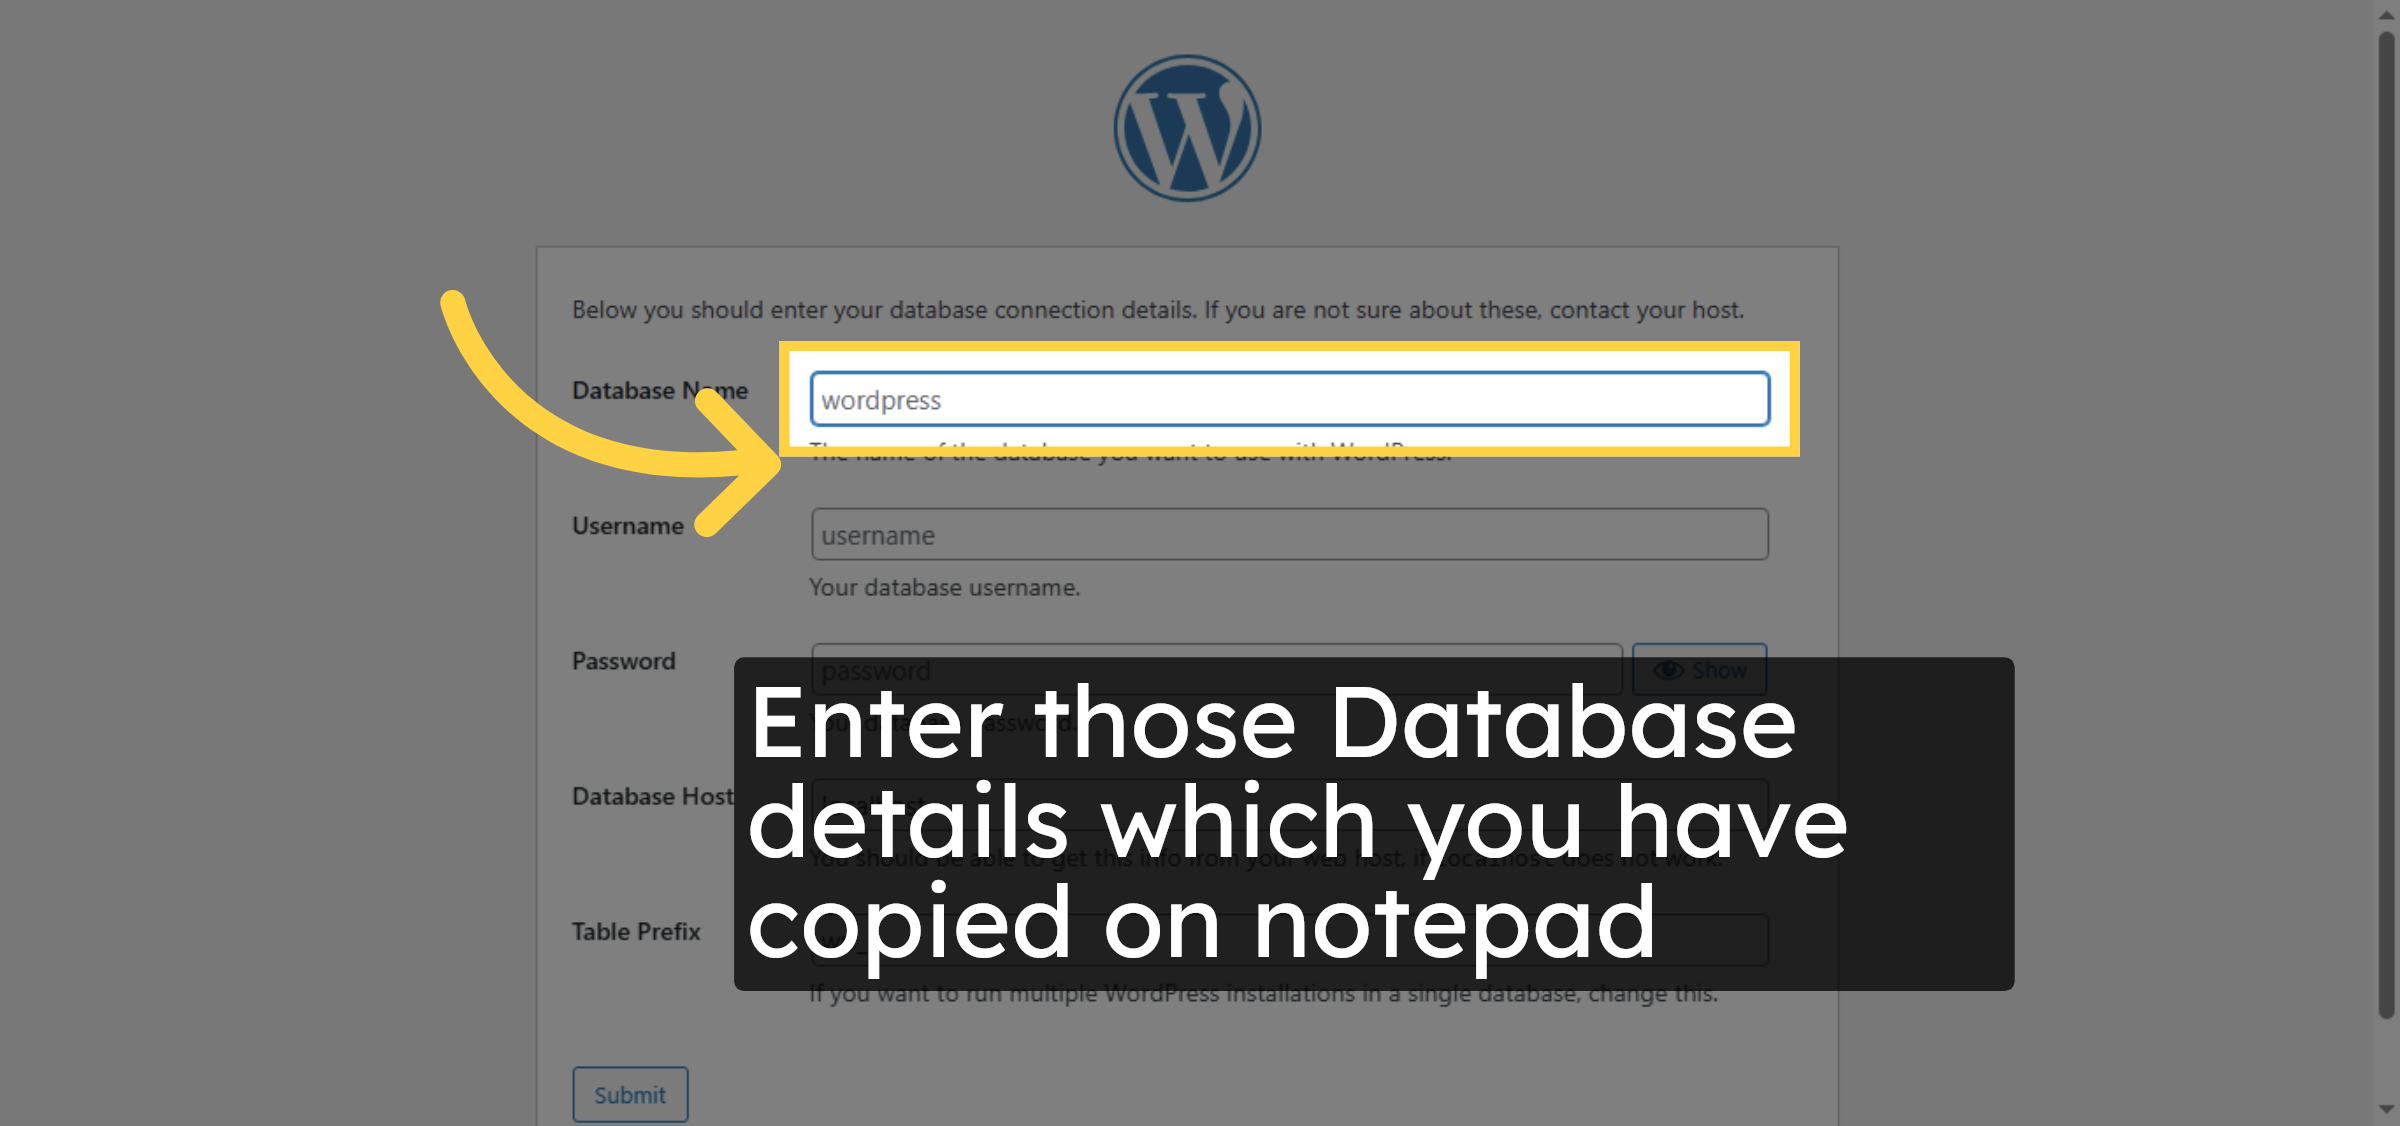
39. Enter Database Name
Enter those Database details which you have copied on notepad
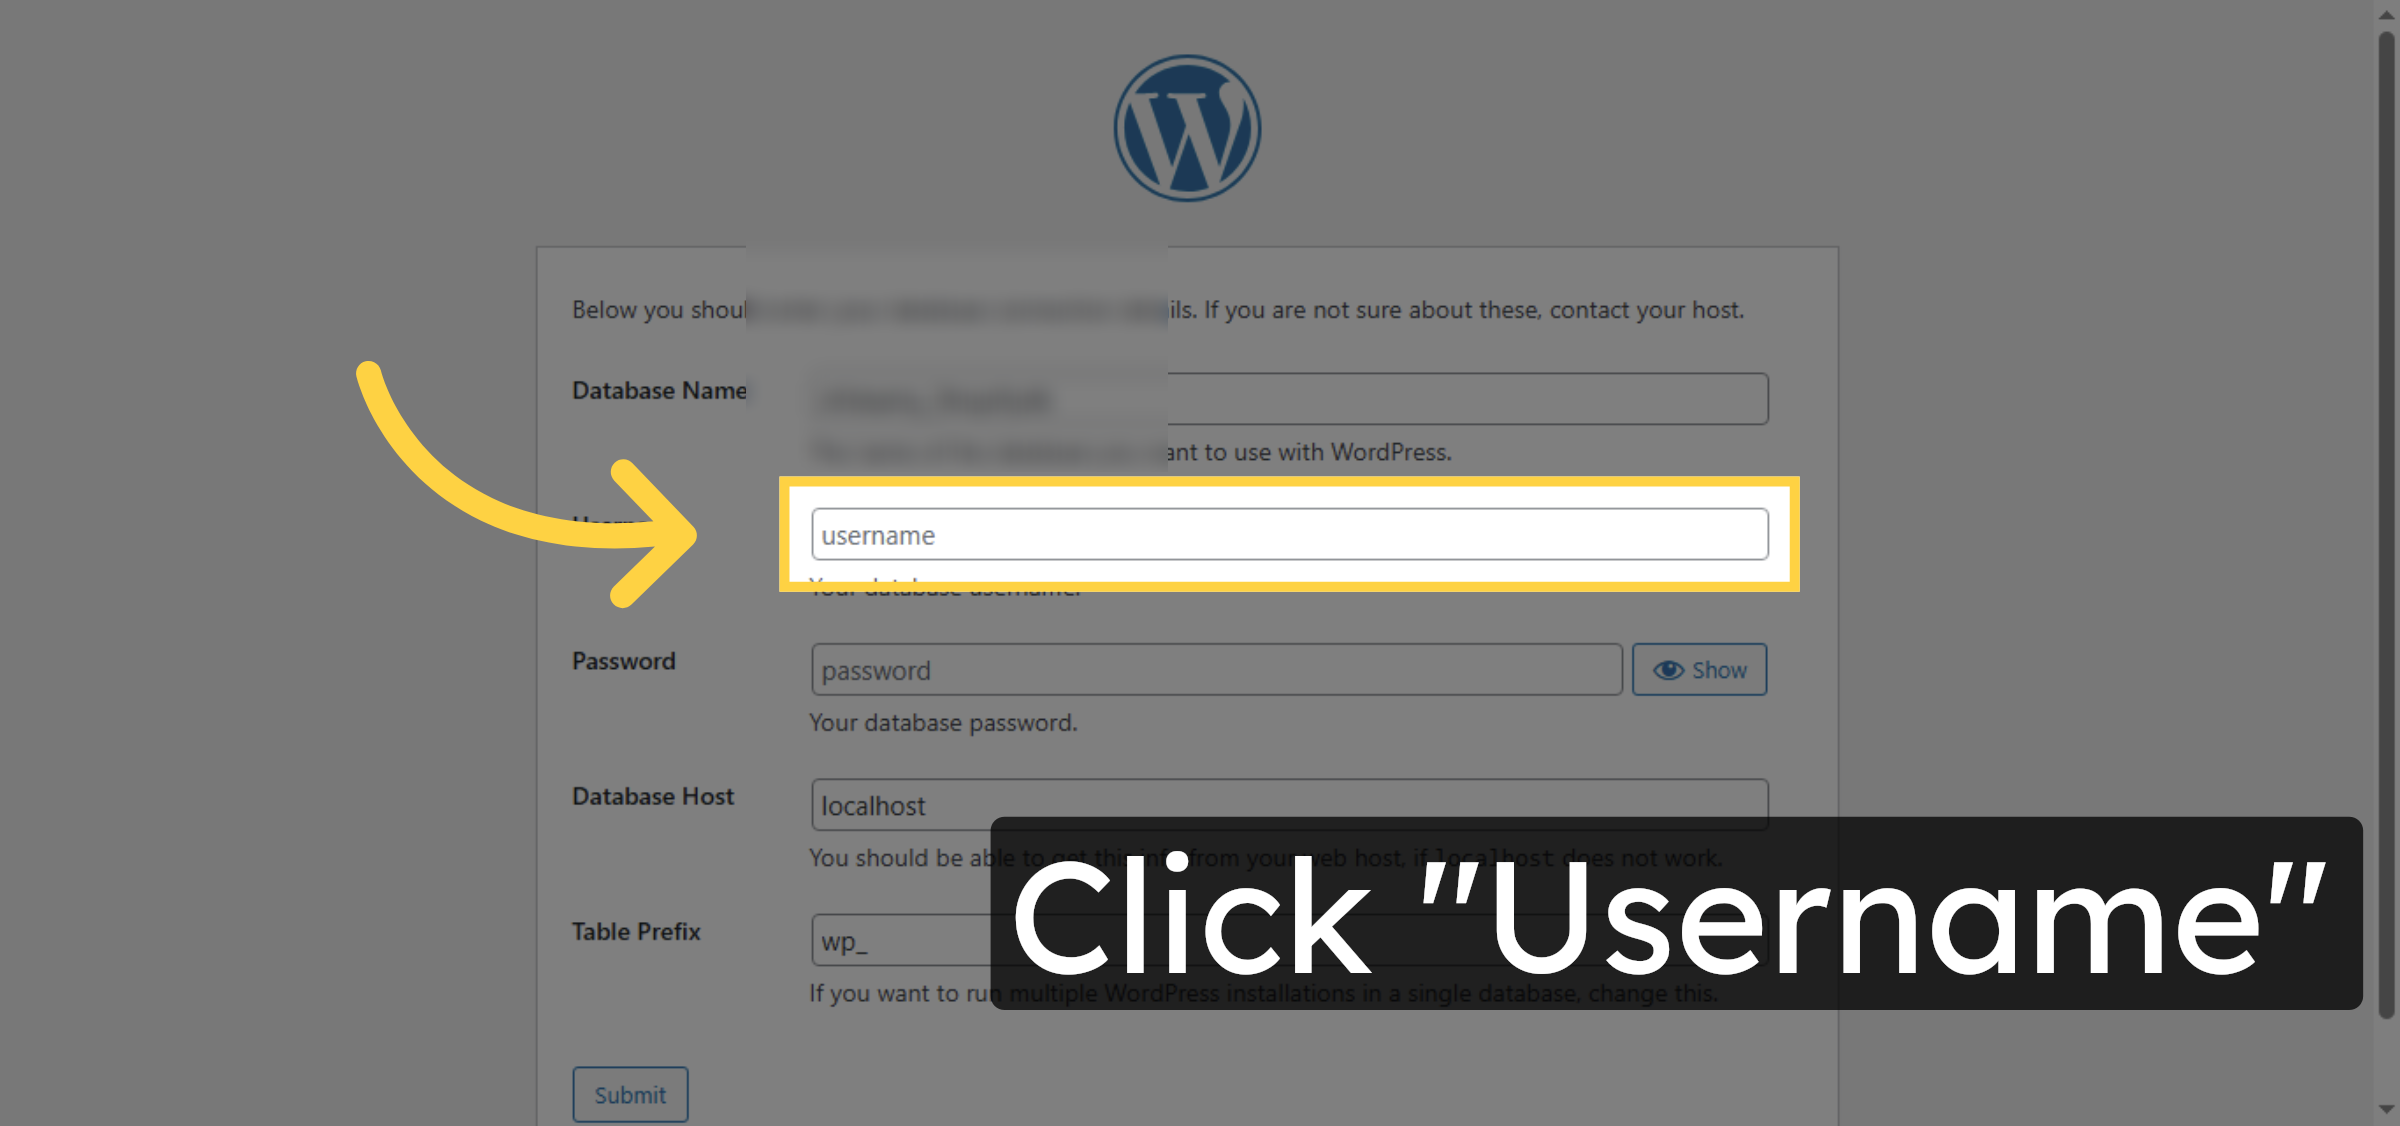
40. Enter Database Username
Click the Username field and enter the database user name you created.
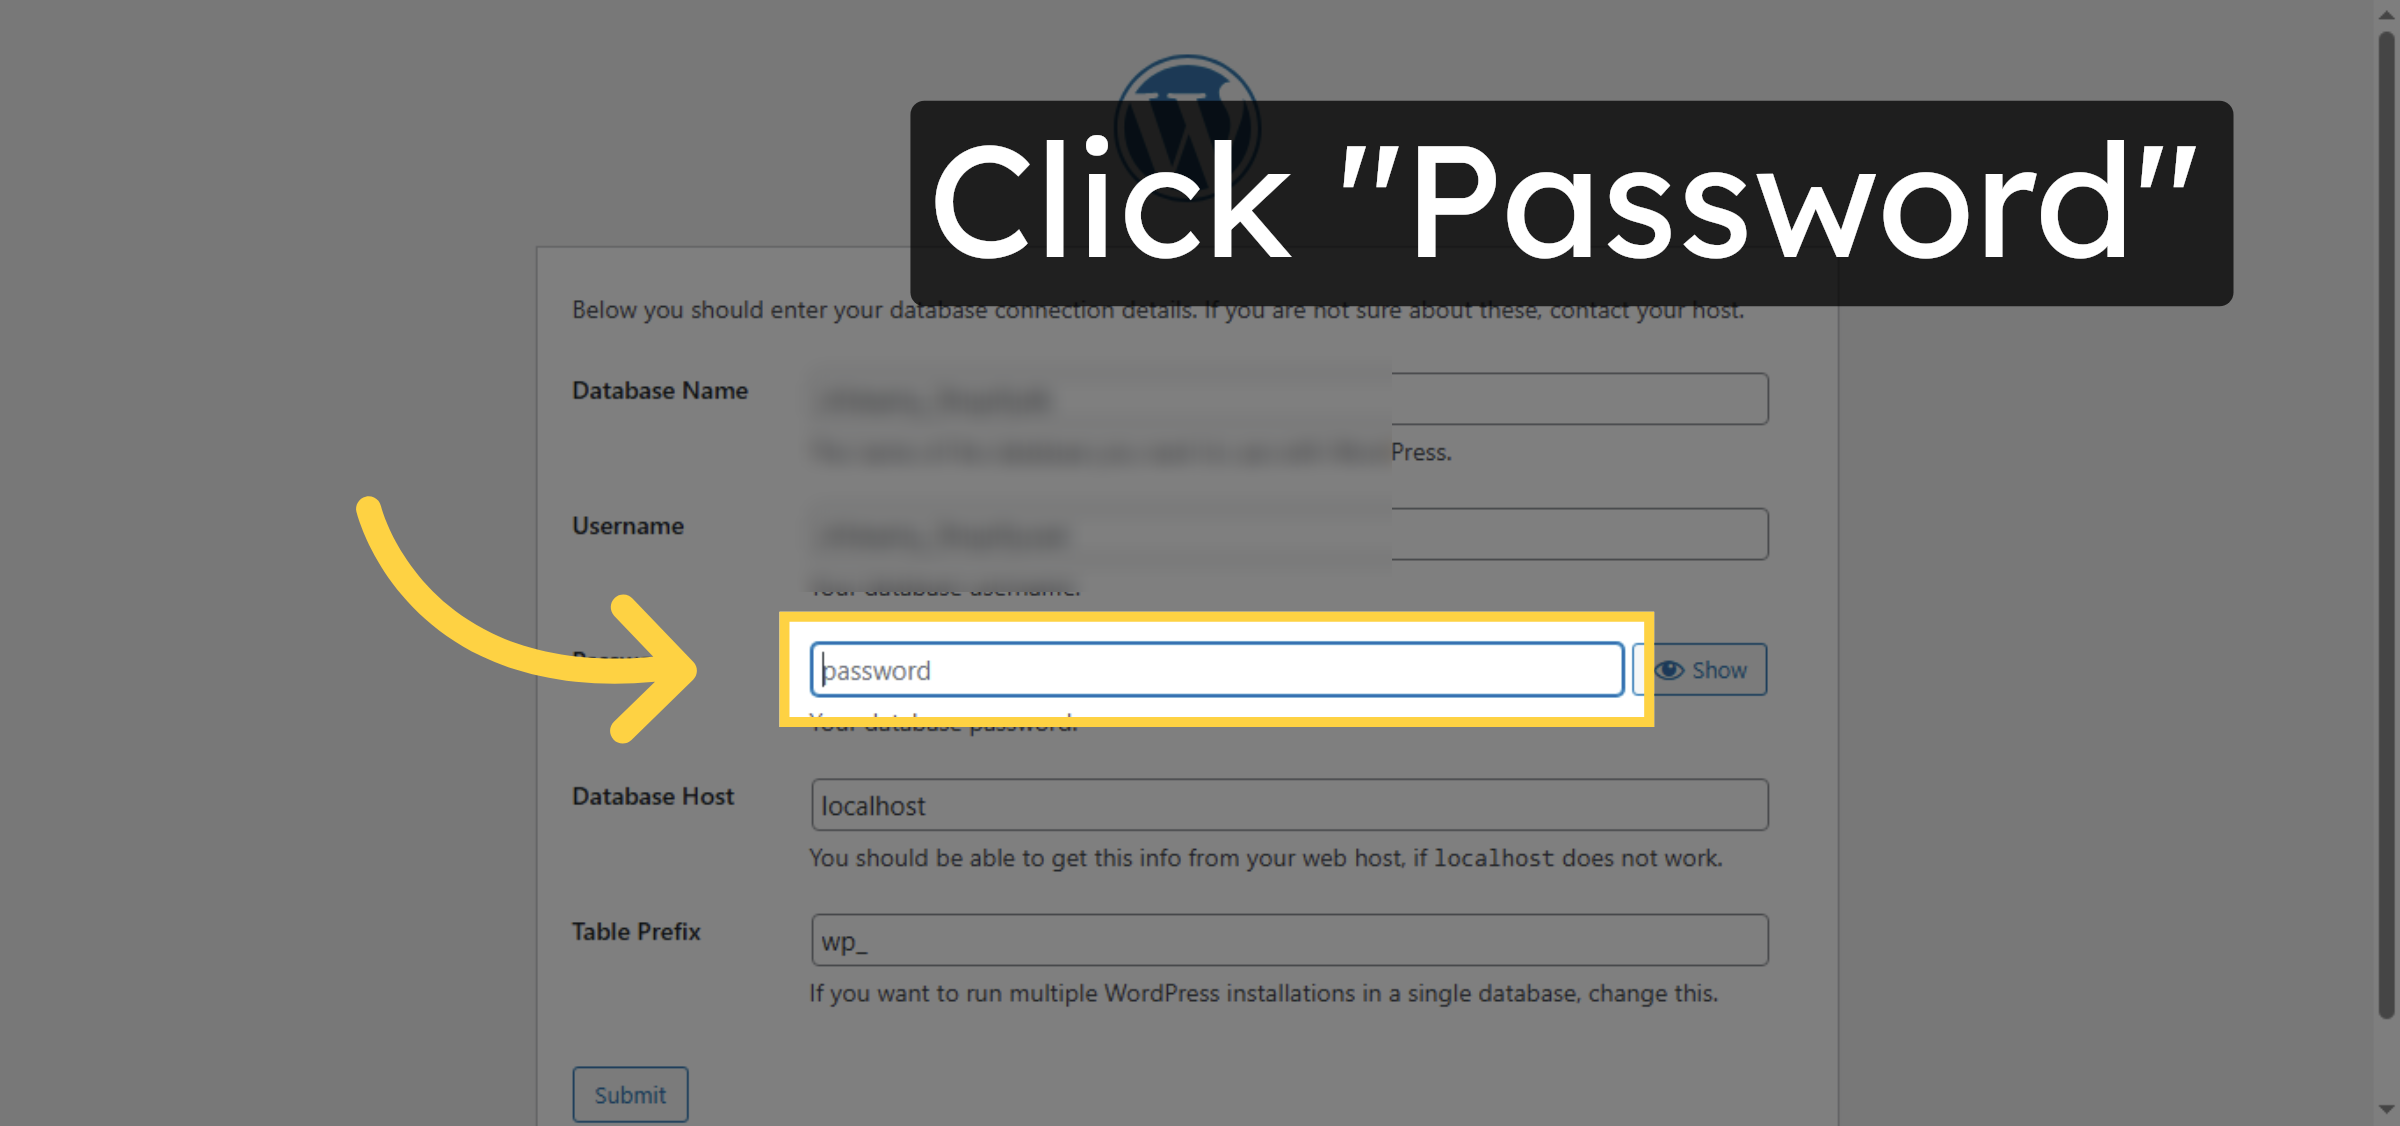
41. Enter Database Password
Click the Password field and enter the password for your database user.
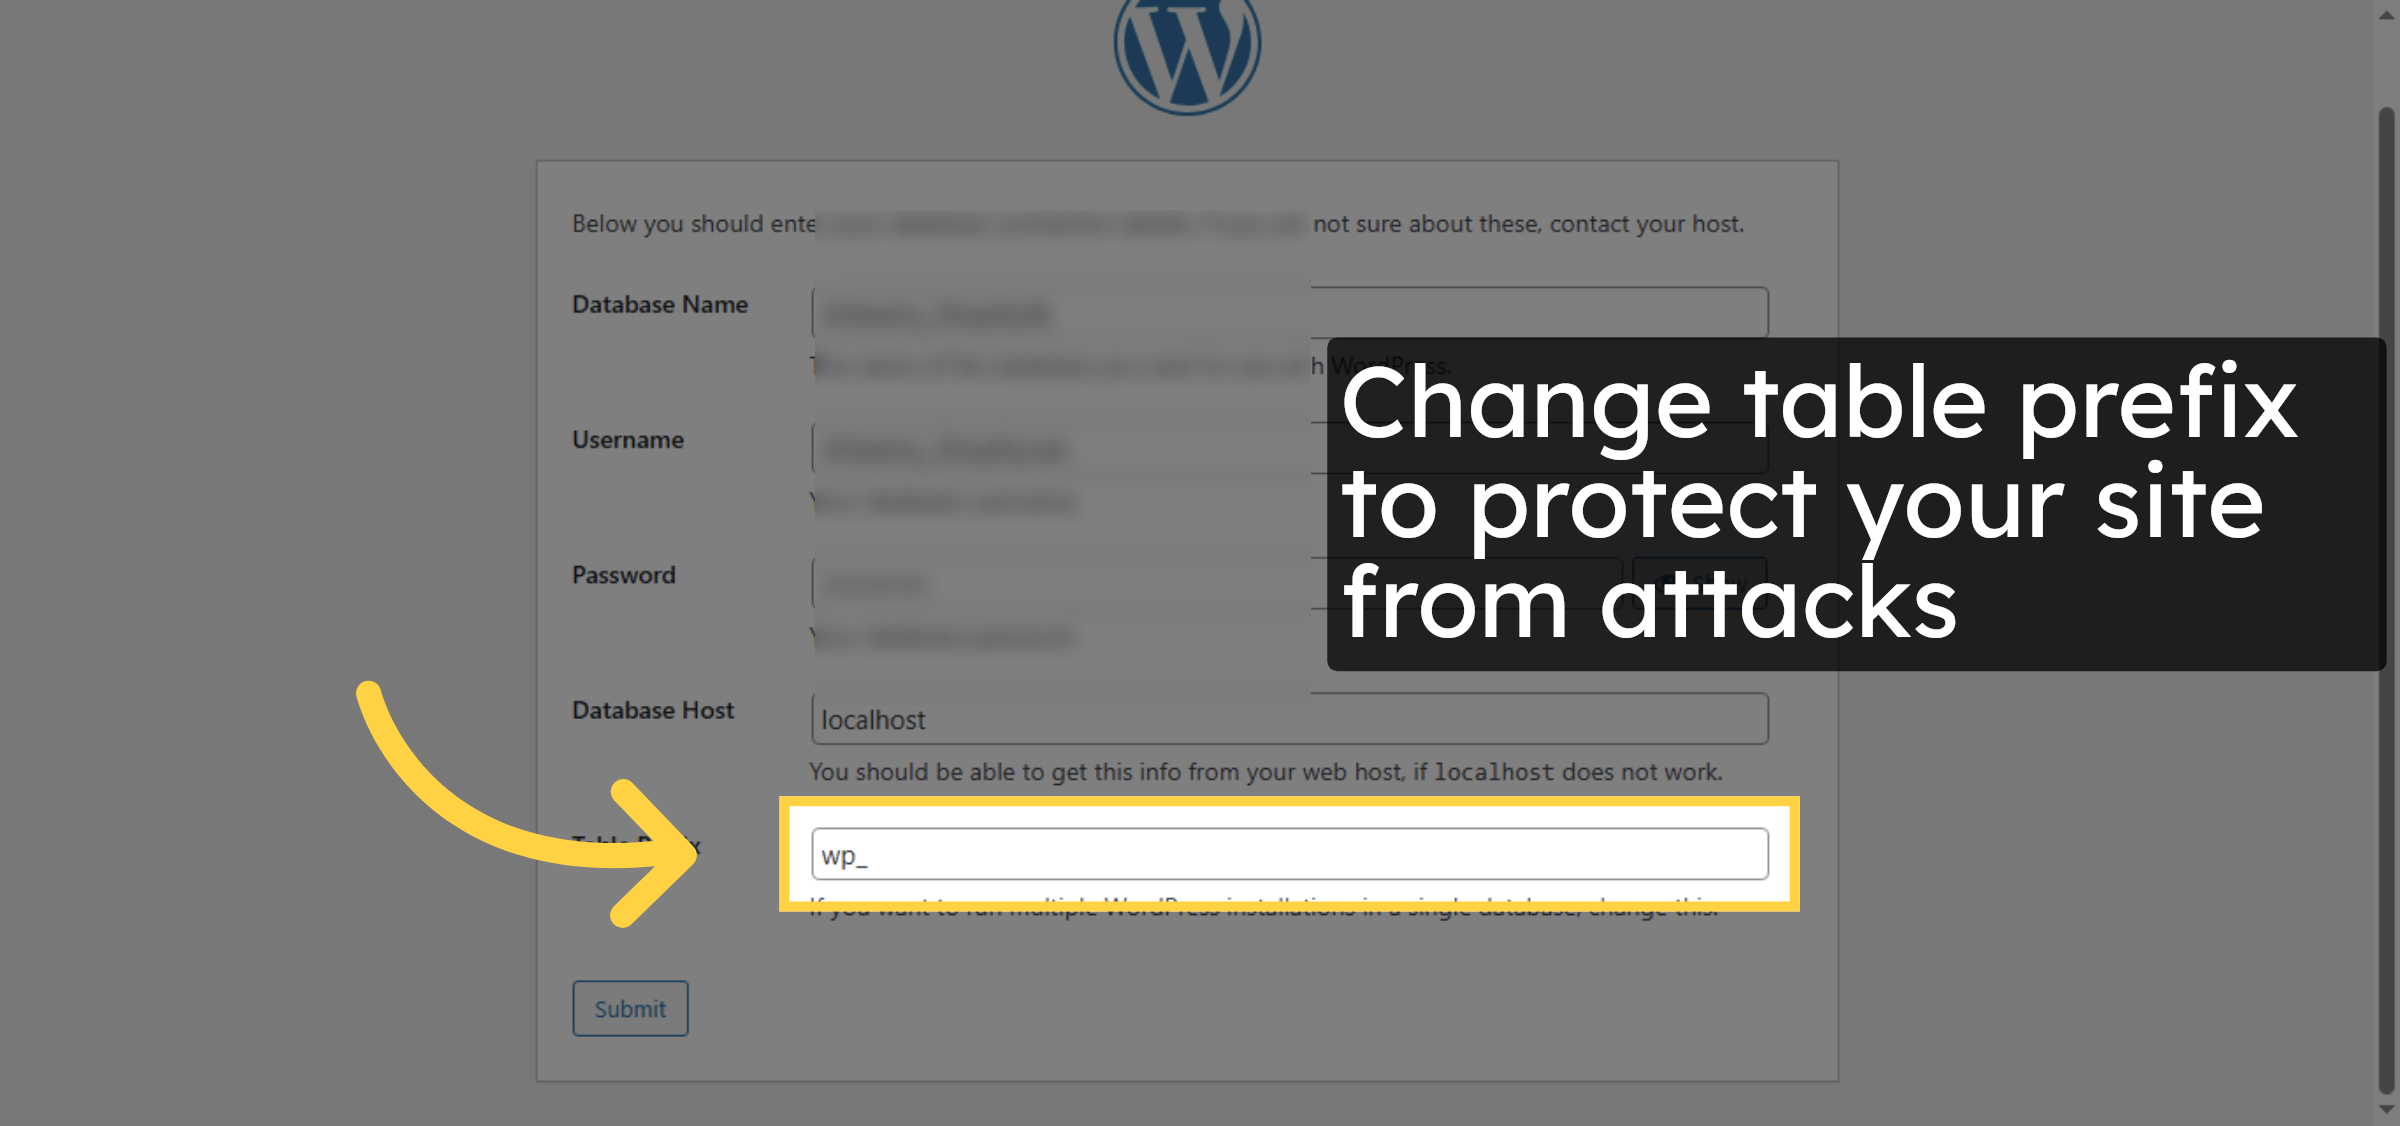
42. Set Table Prefix
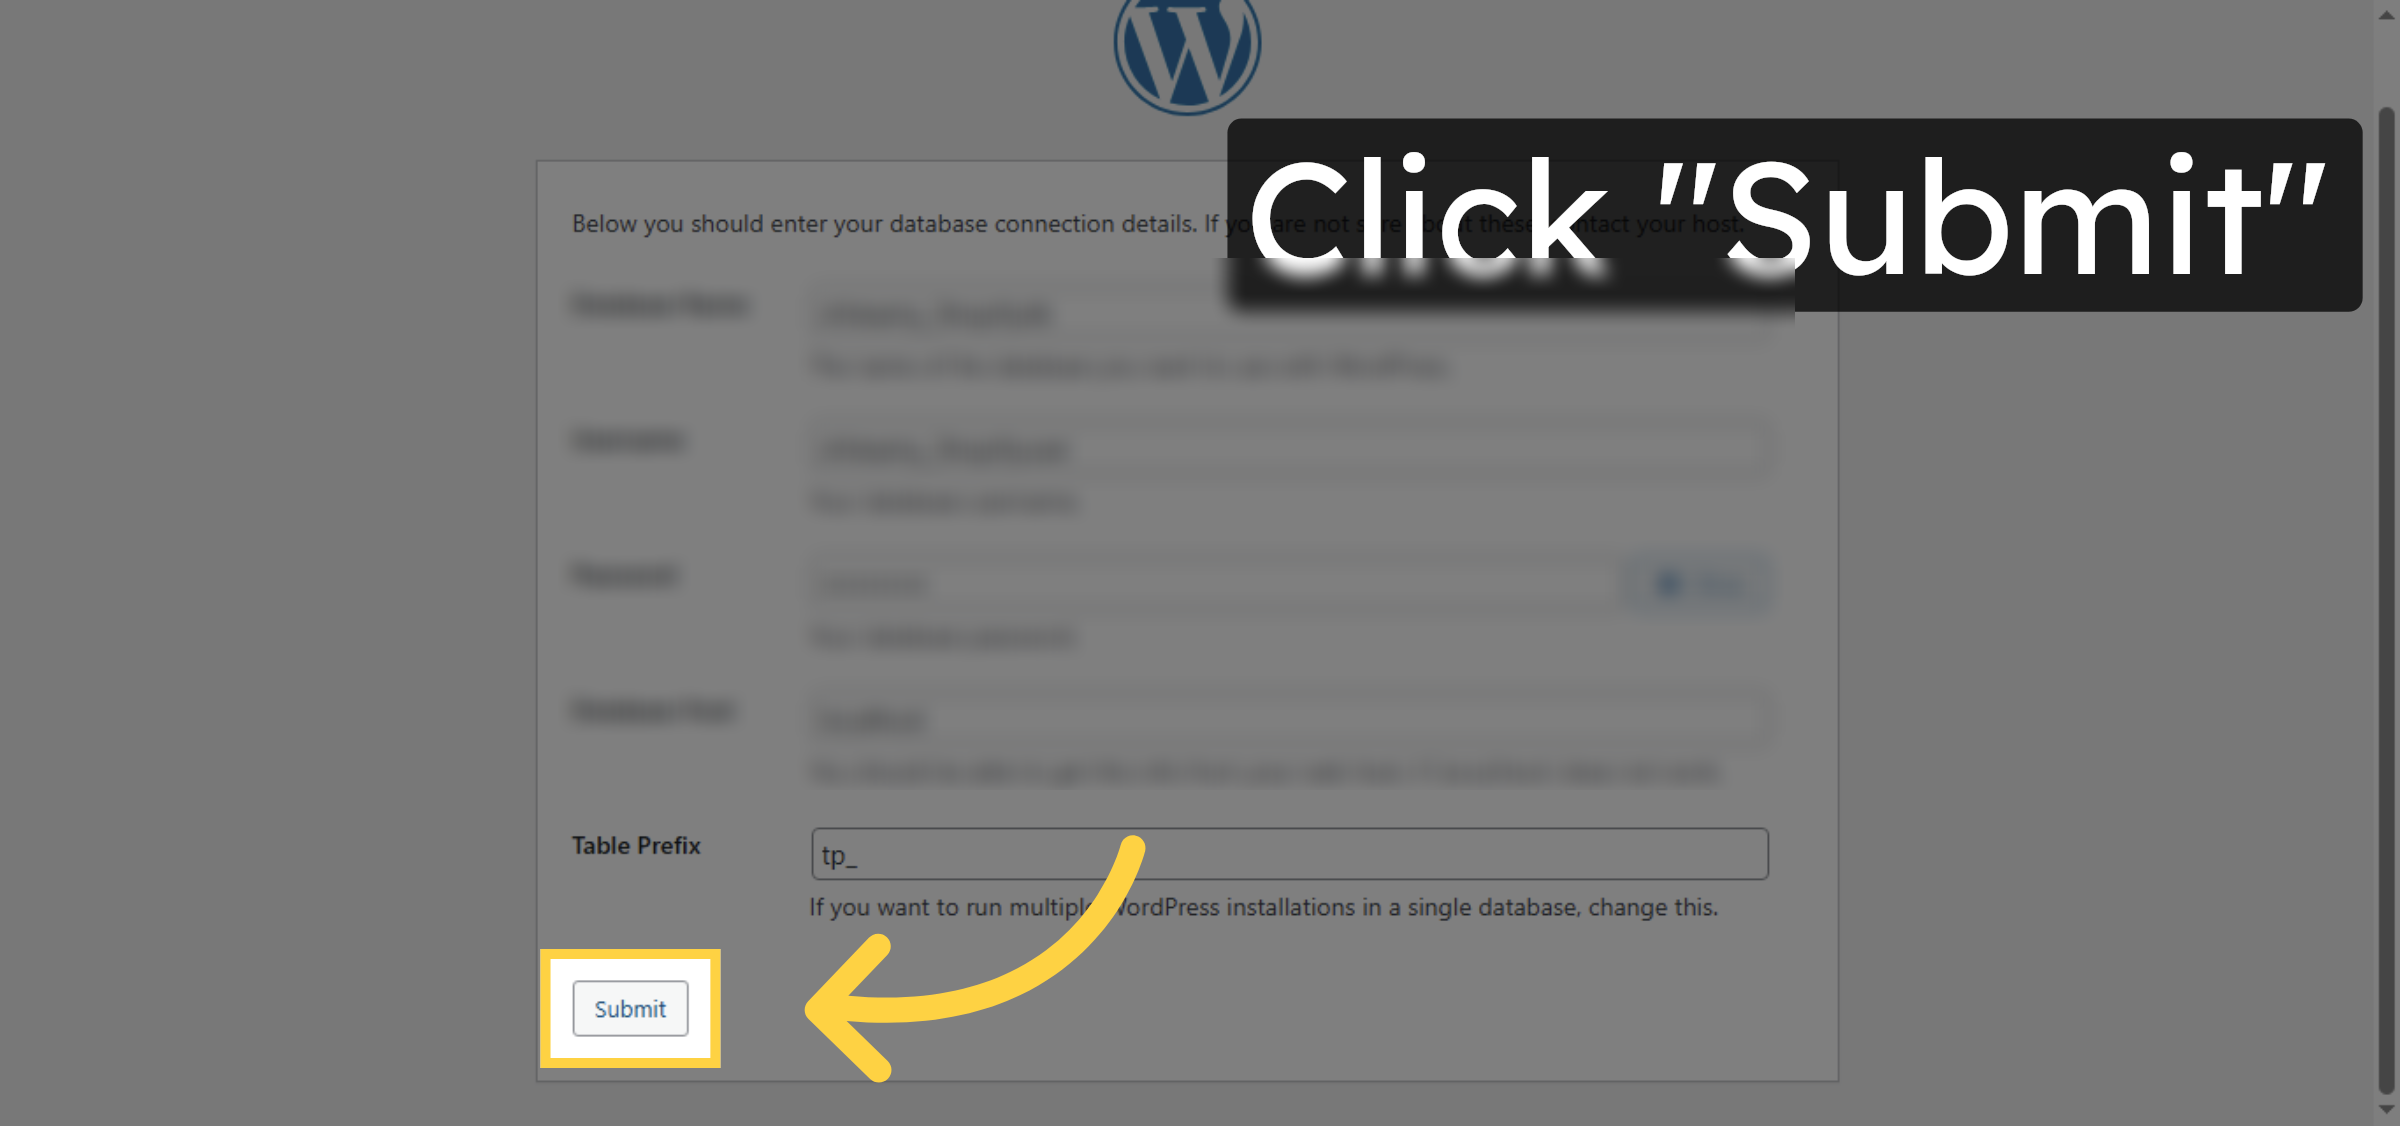
Click the Table Prefix field to specify a prefix for your WordPress database tables.
43. Submit Database Info
Click Submit to save your database connection settings and continue.
44. Run WordPress Installation
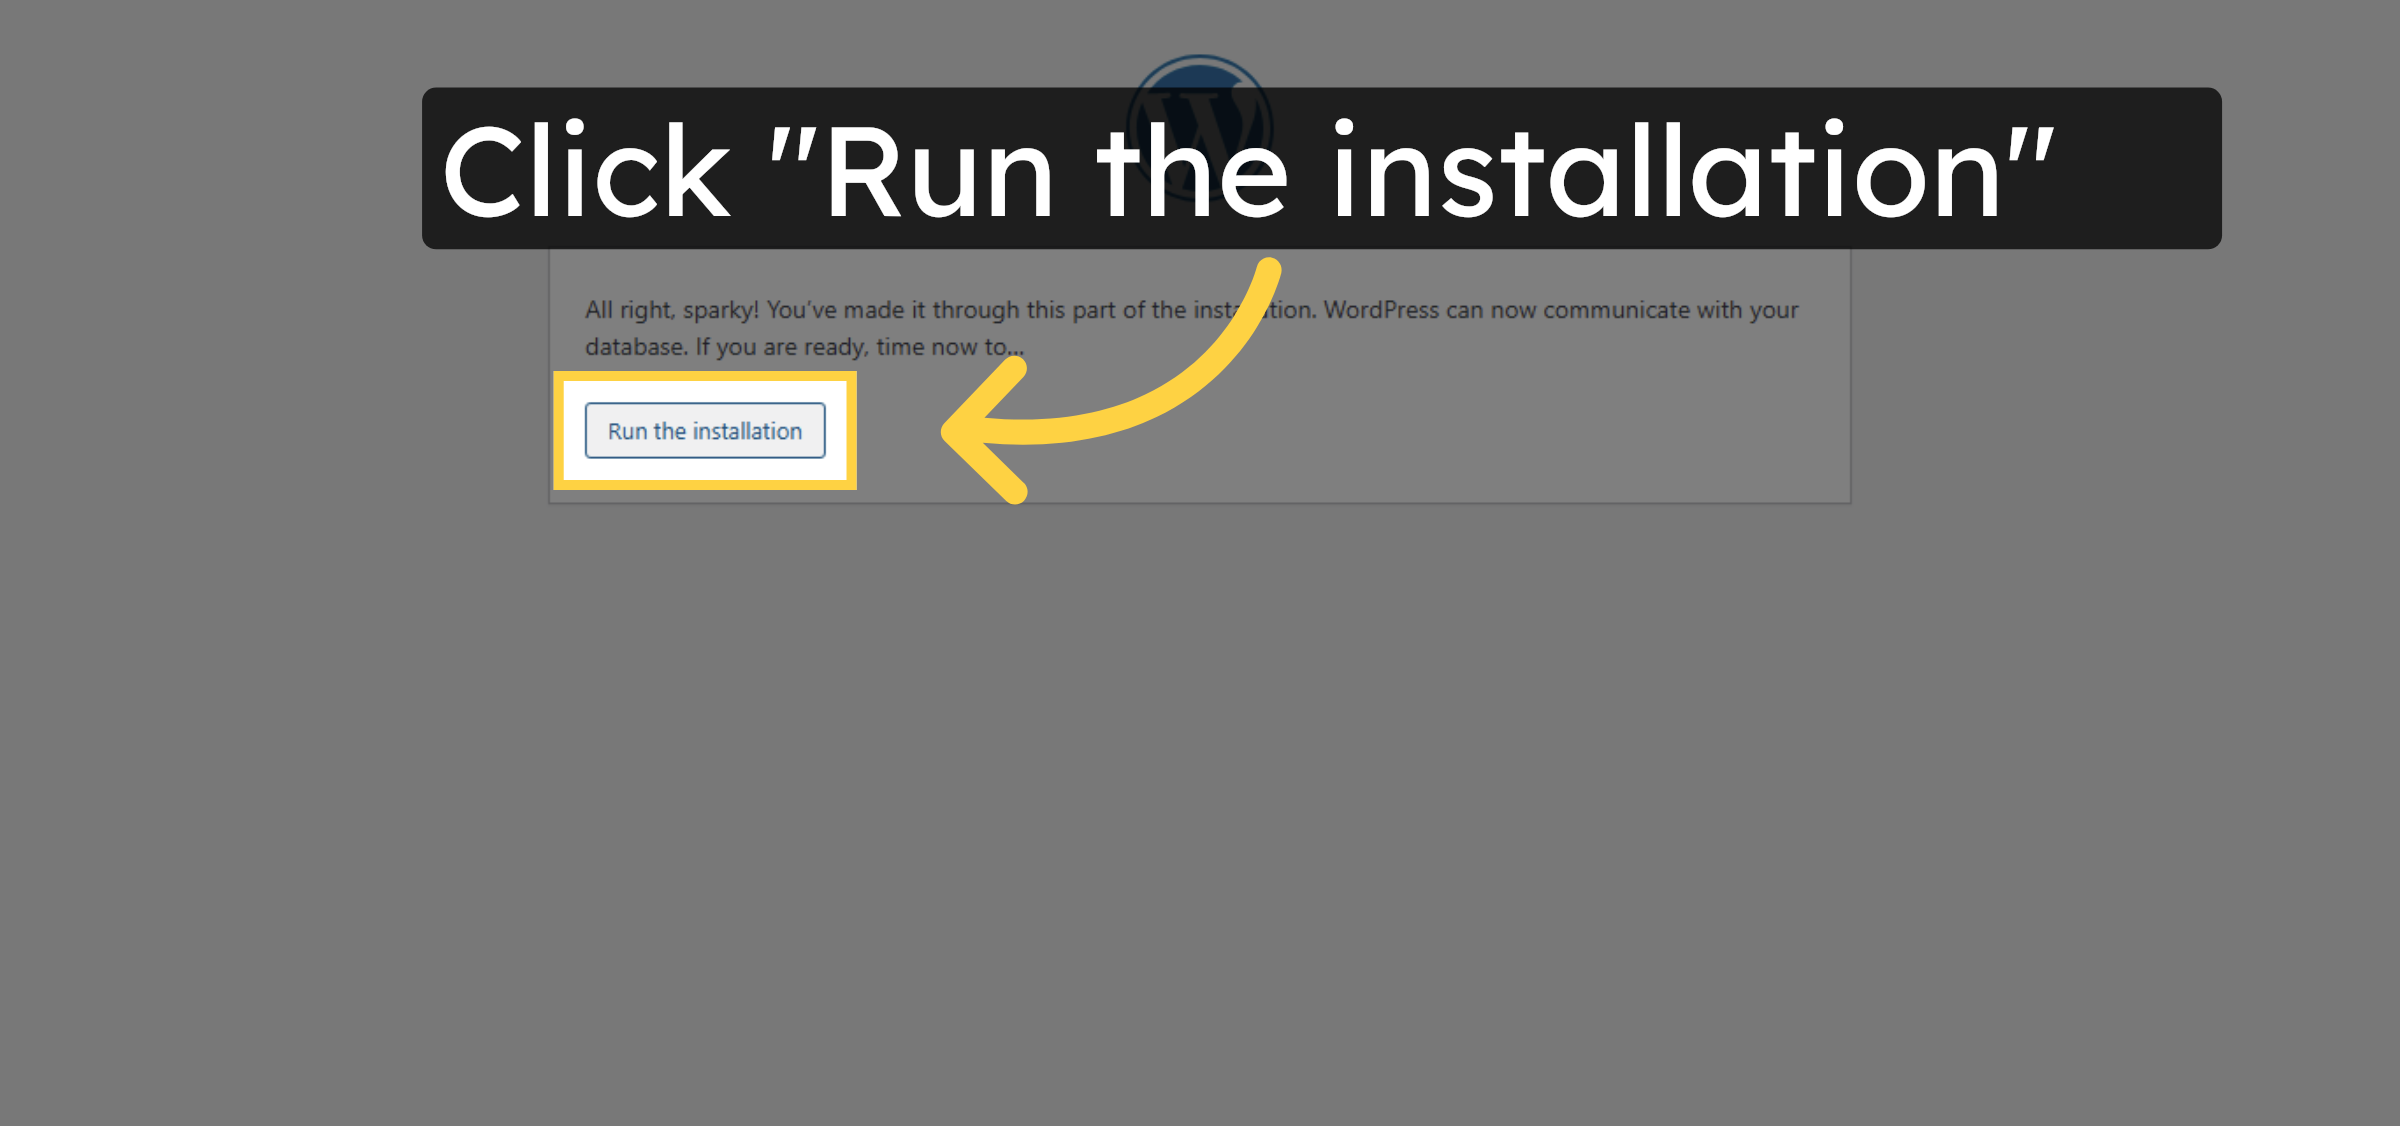
Click Run the installation to start installing WordPress on your subdomain.
45. Enter Site Title
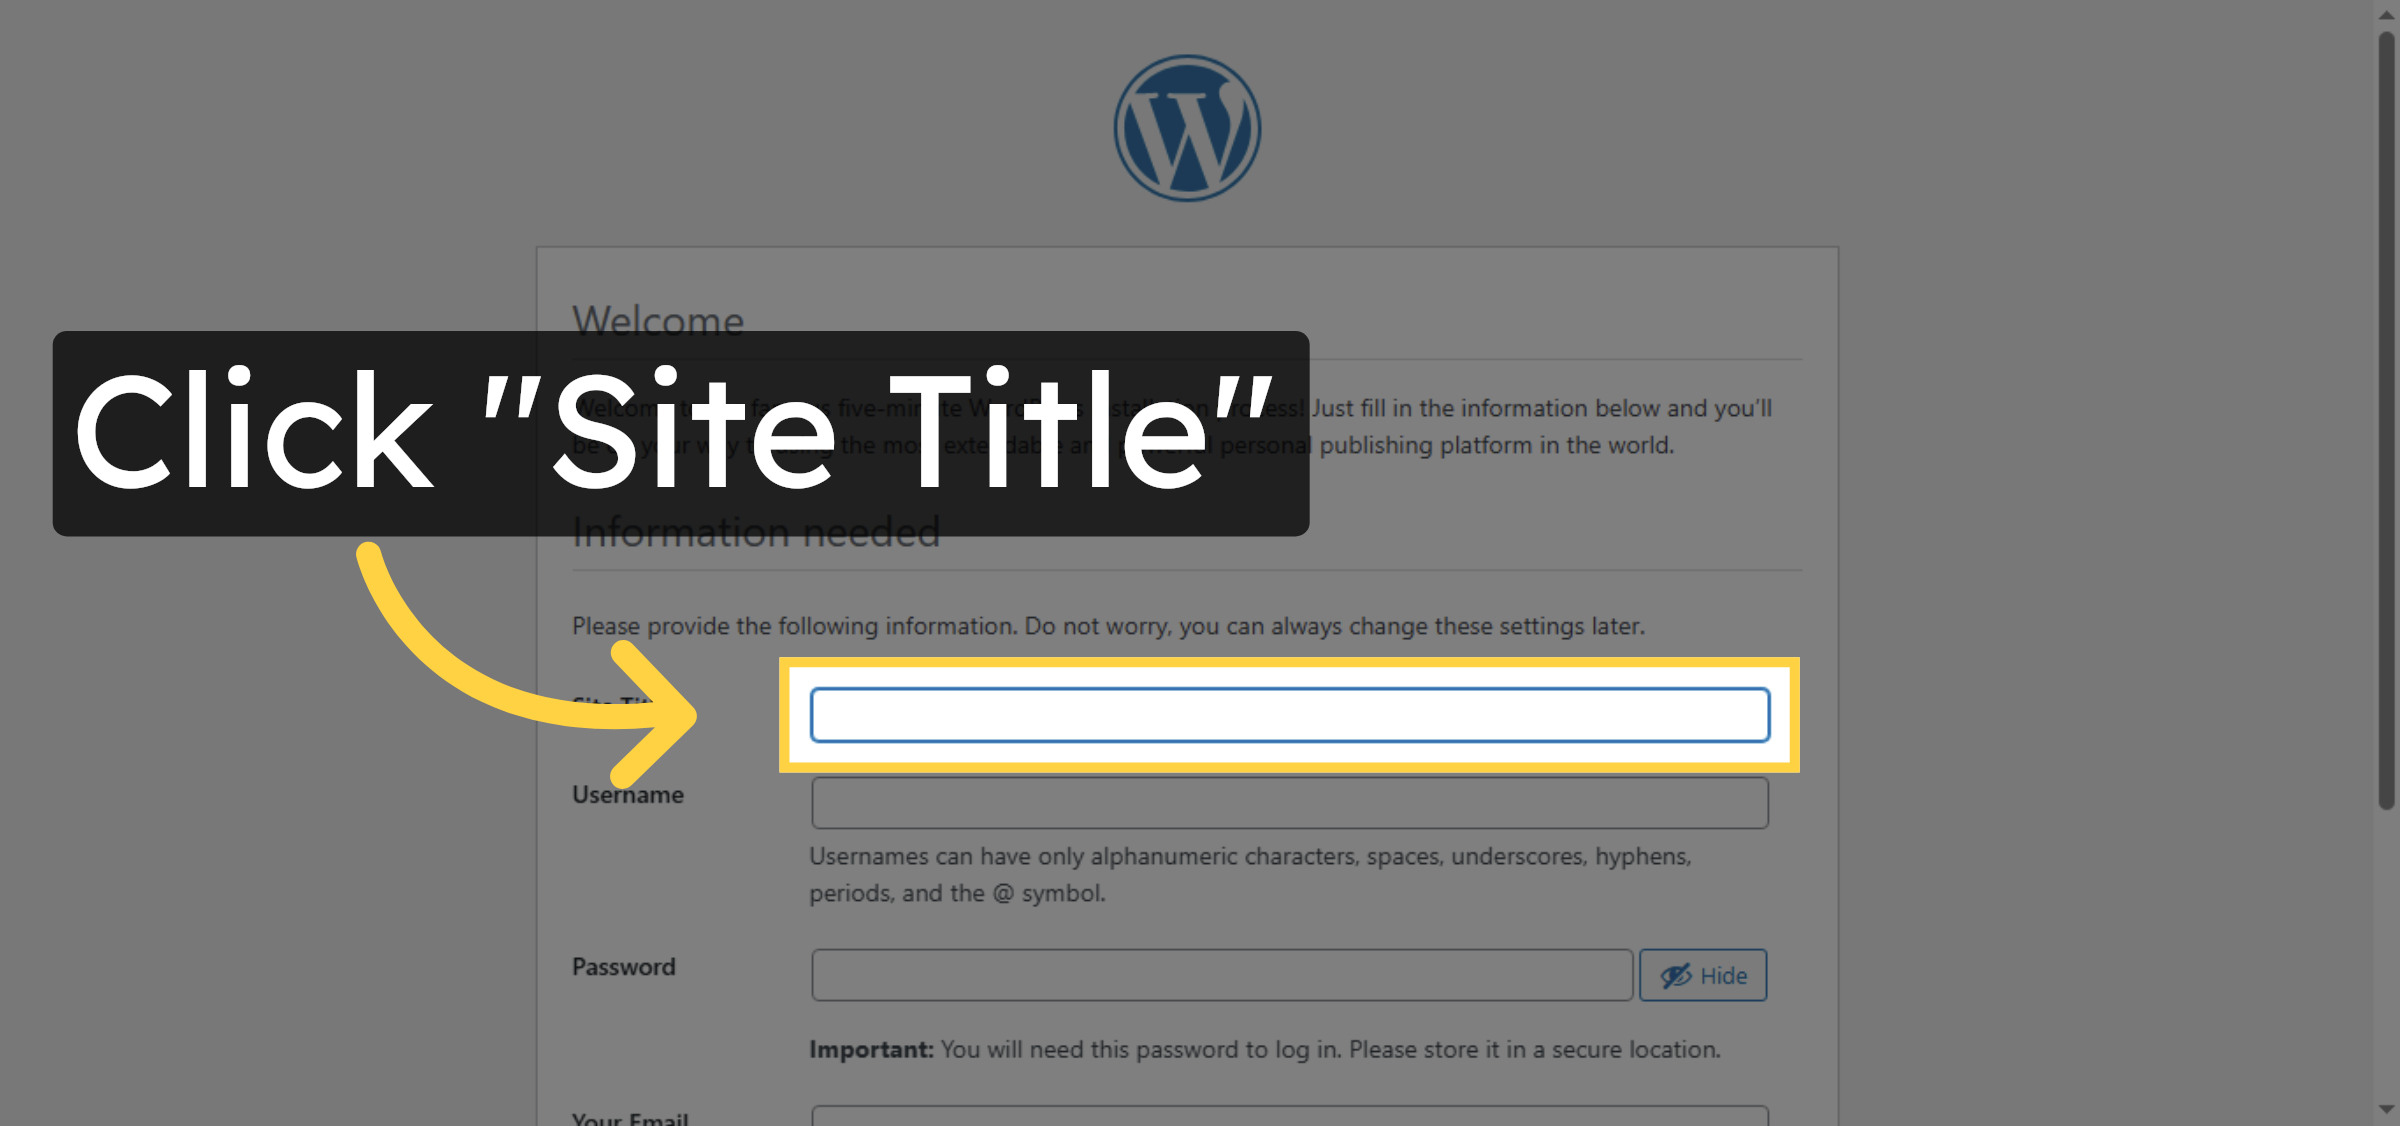
Click the Site Title field and enter the name for your WordPress site.
46. Enter Admin Username
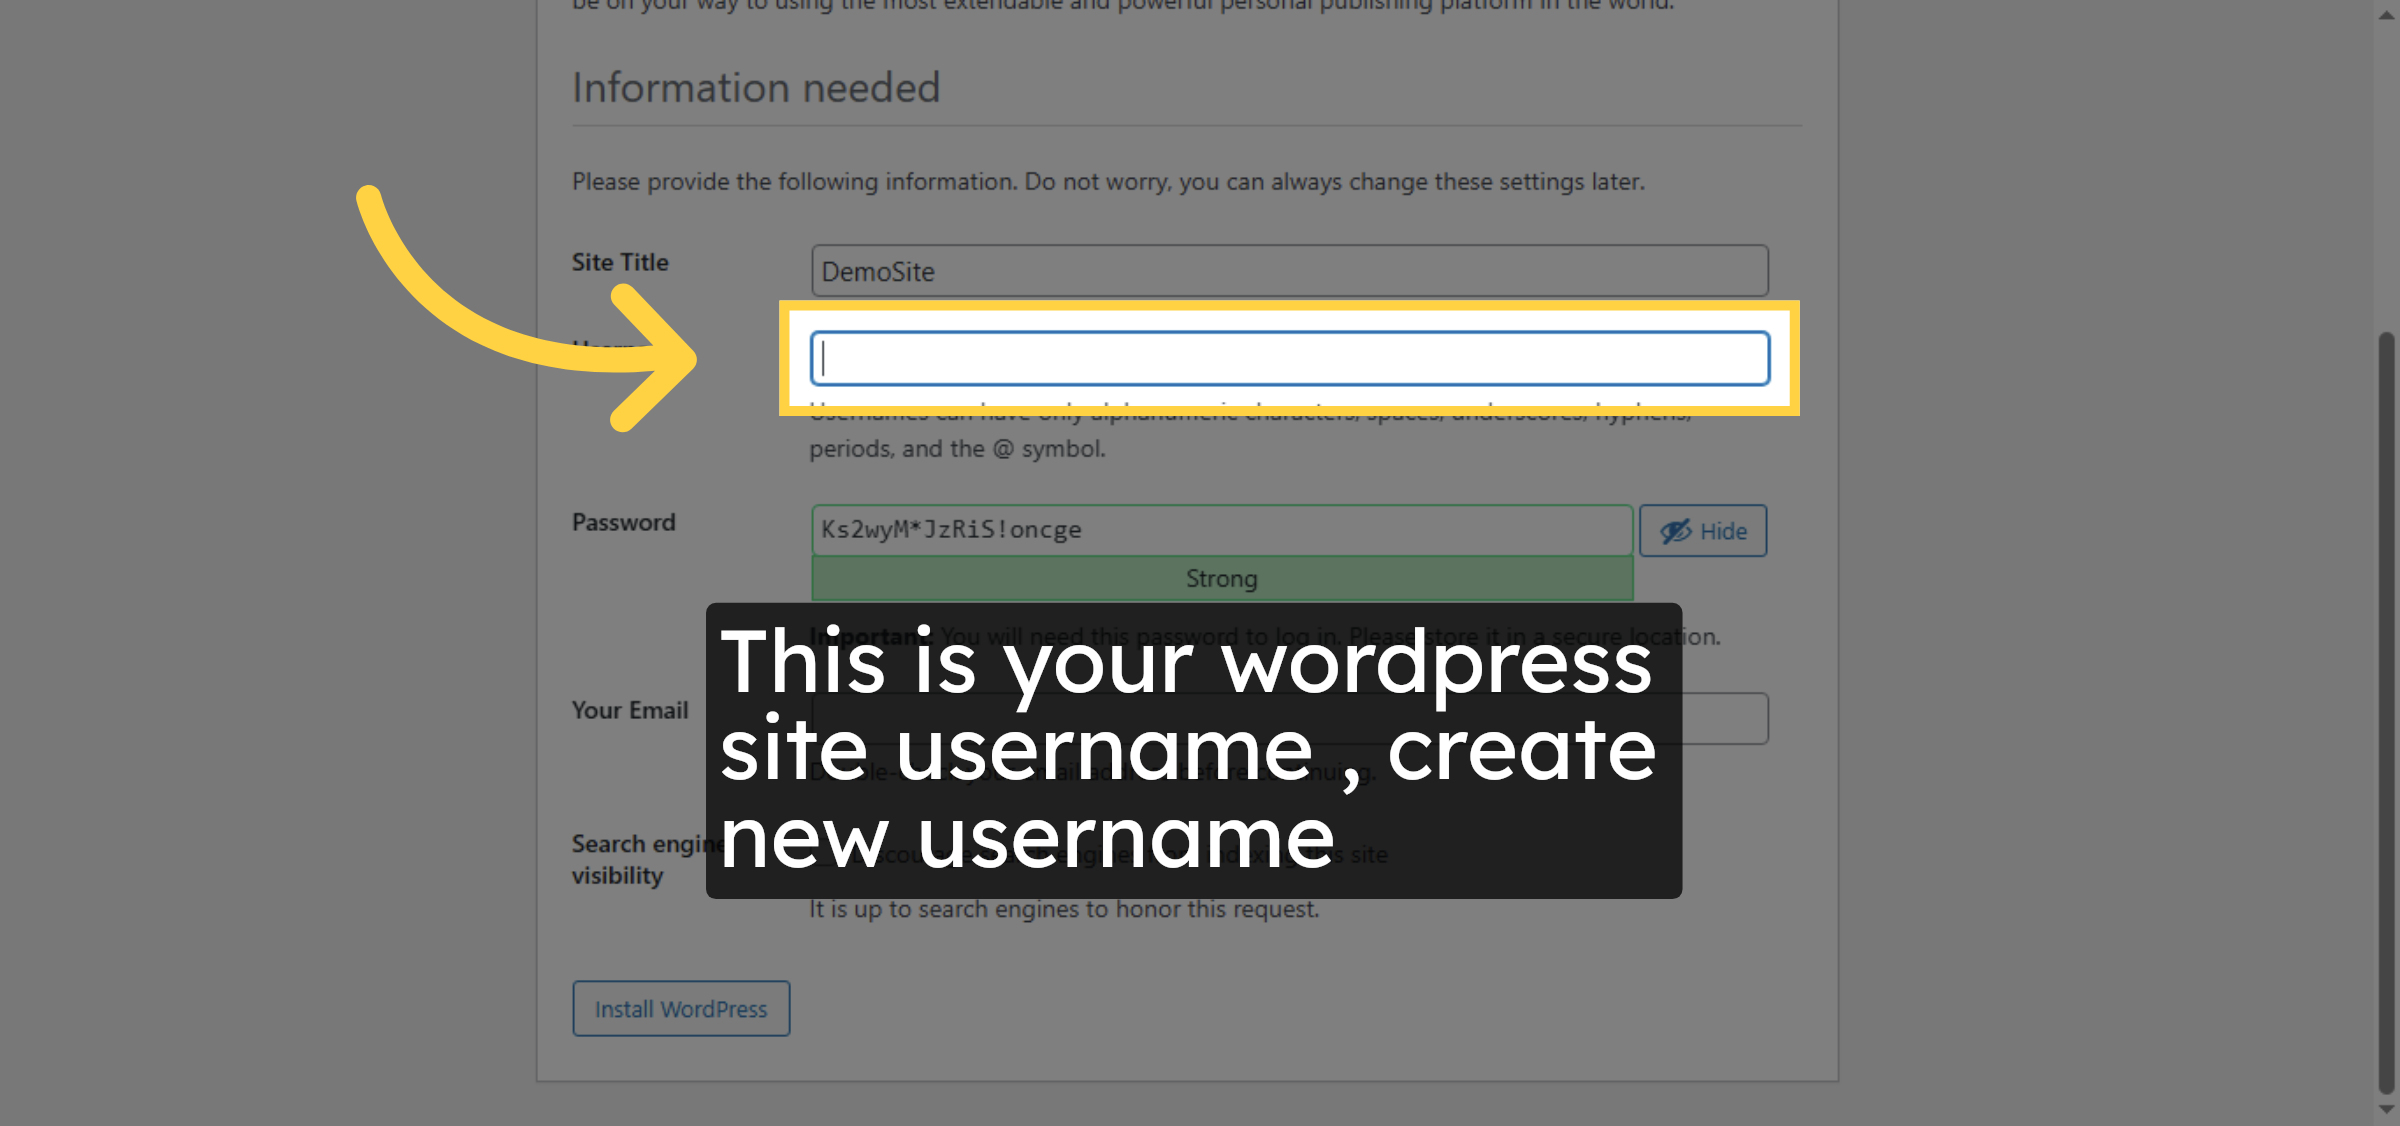
Click the Username field and enter the administrator username for WordPress.
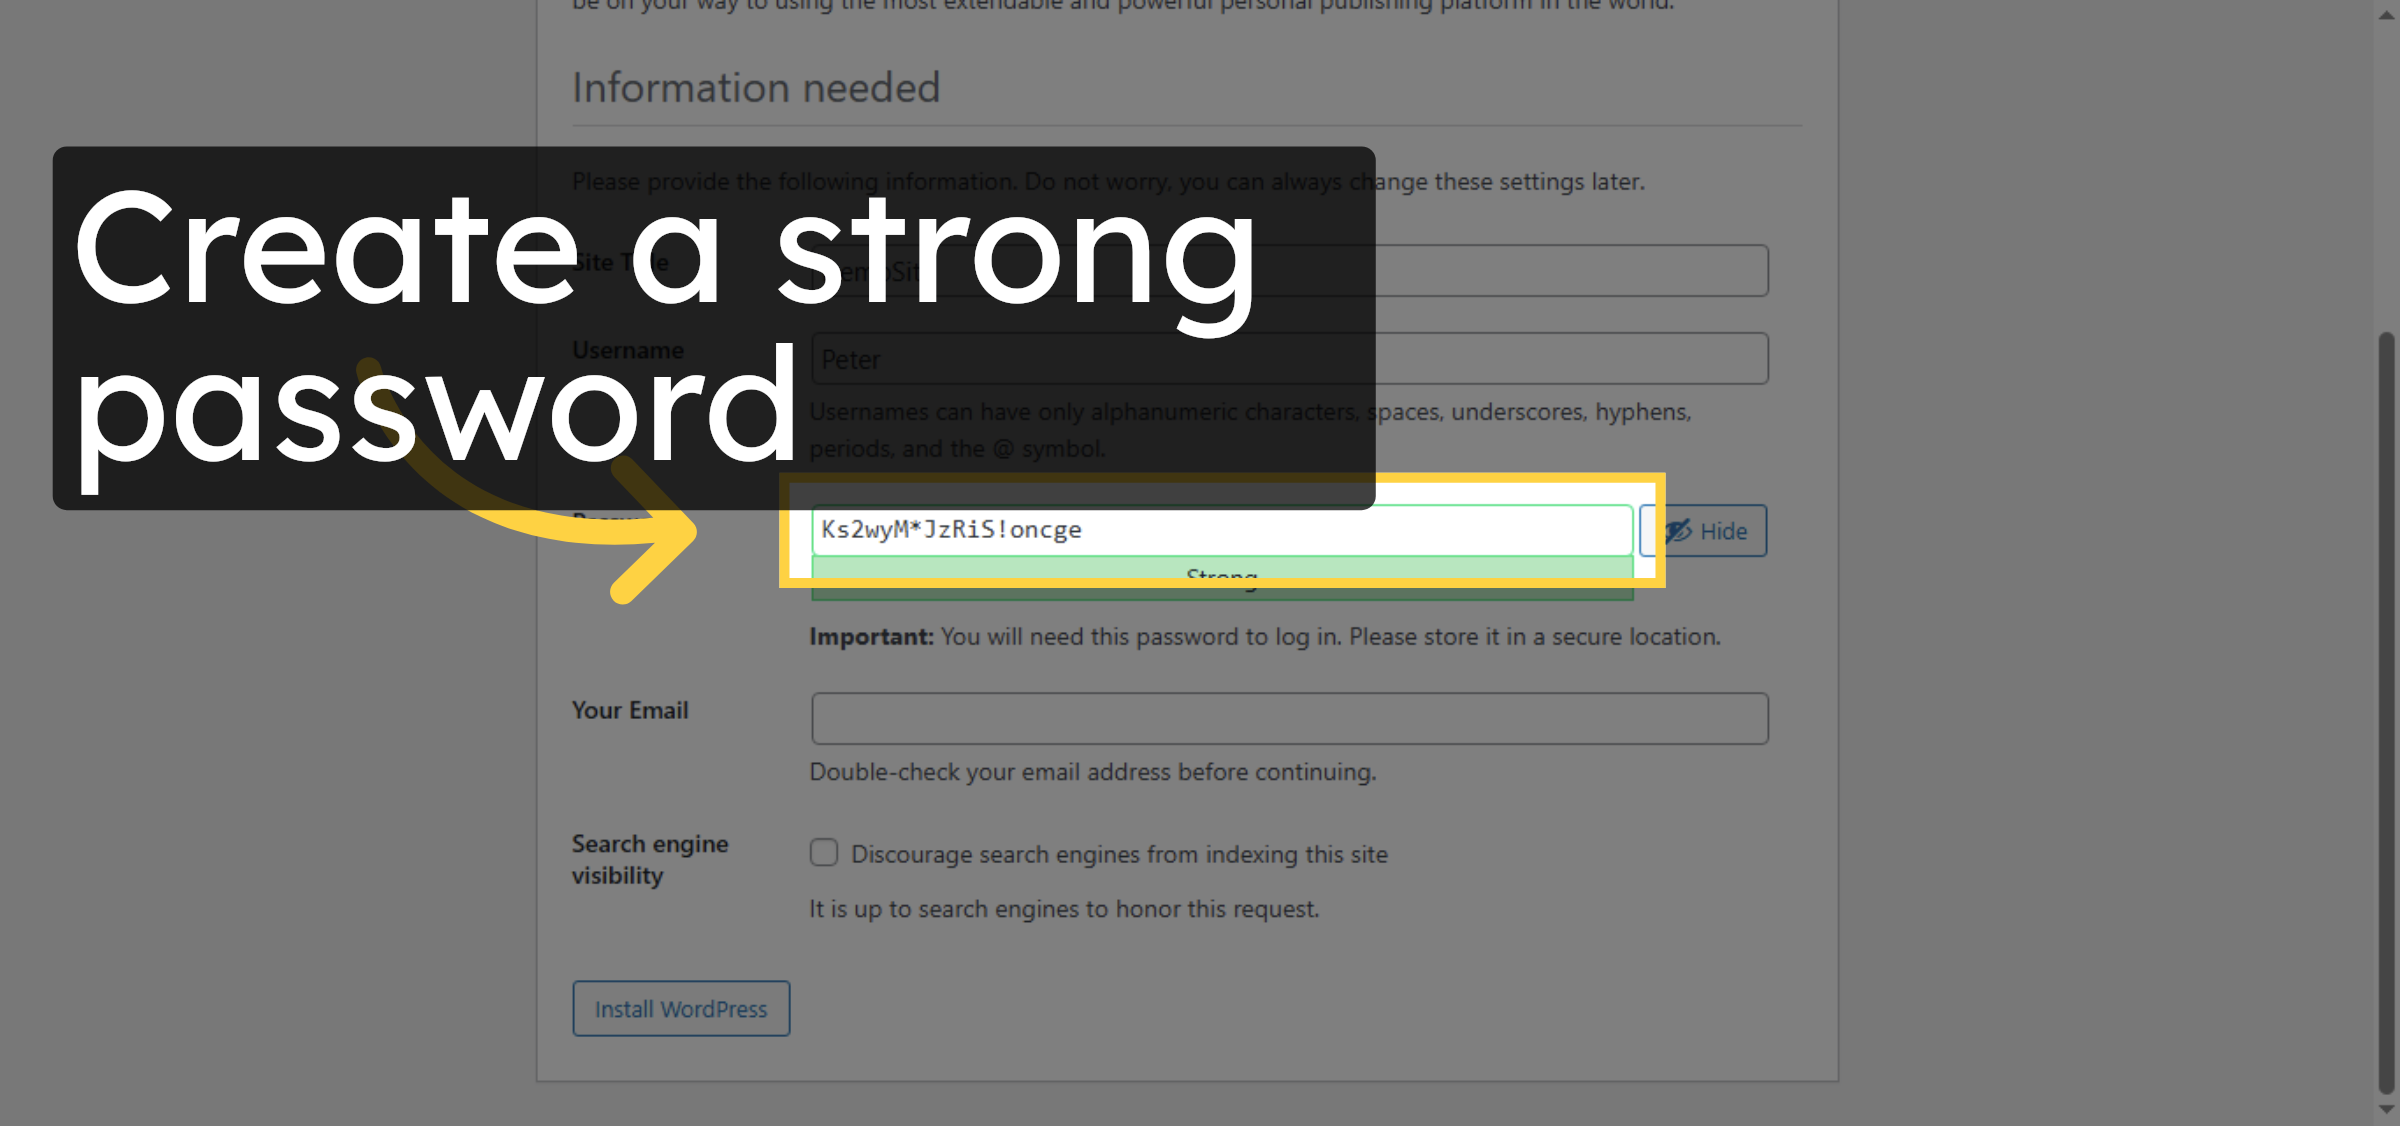
47. Enter Admin Password
Click the Password field and enter a secure password for the admin account.
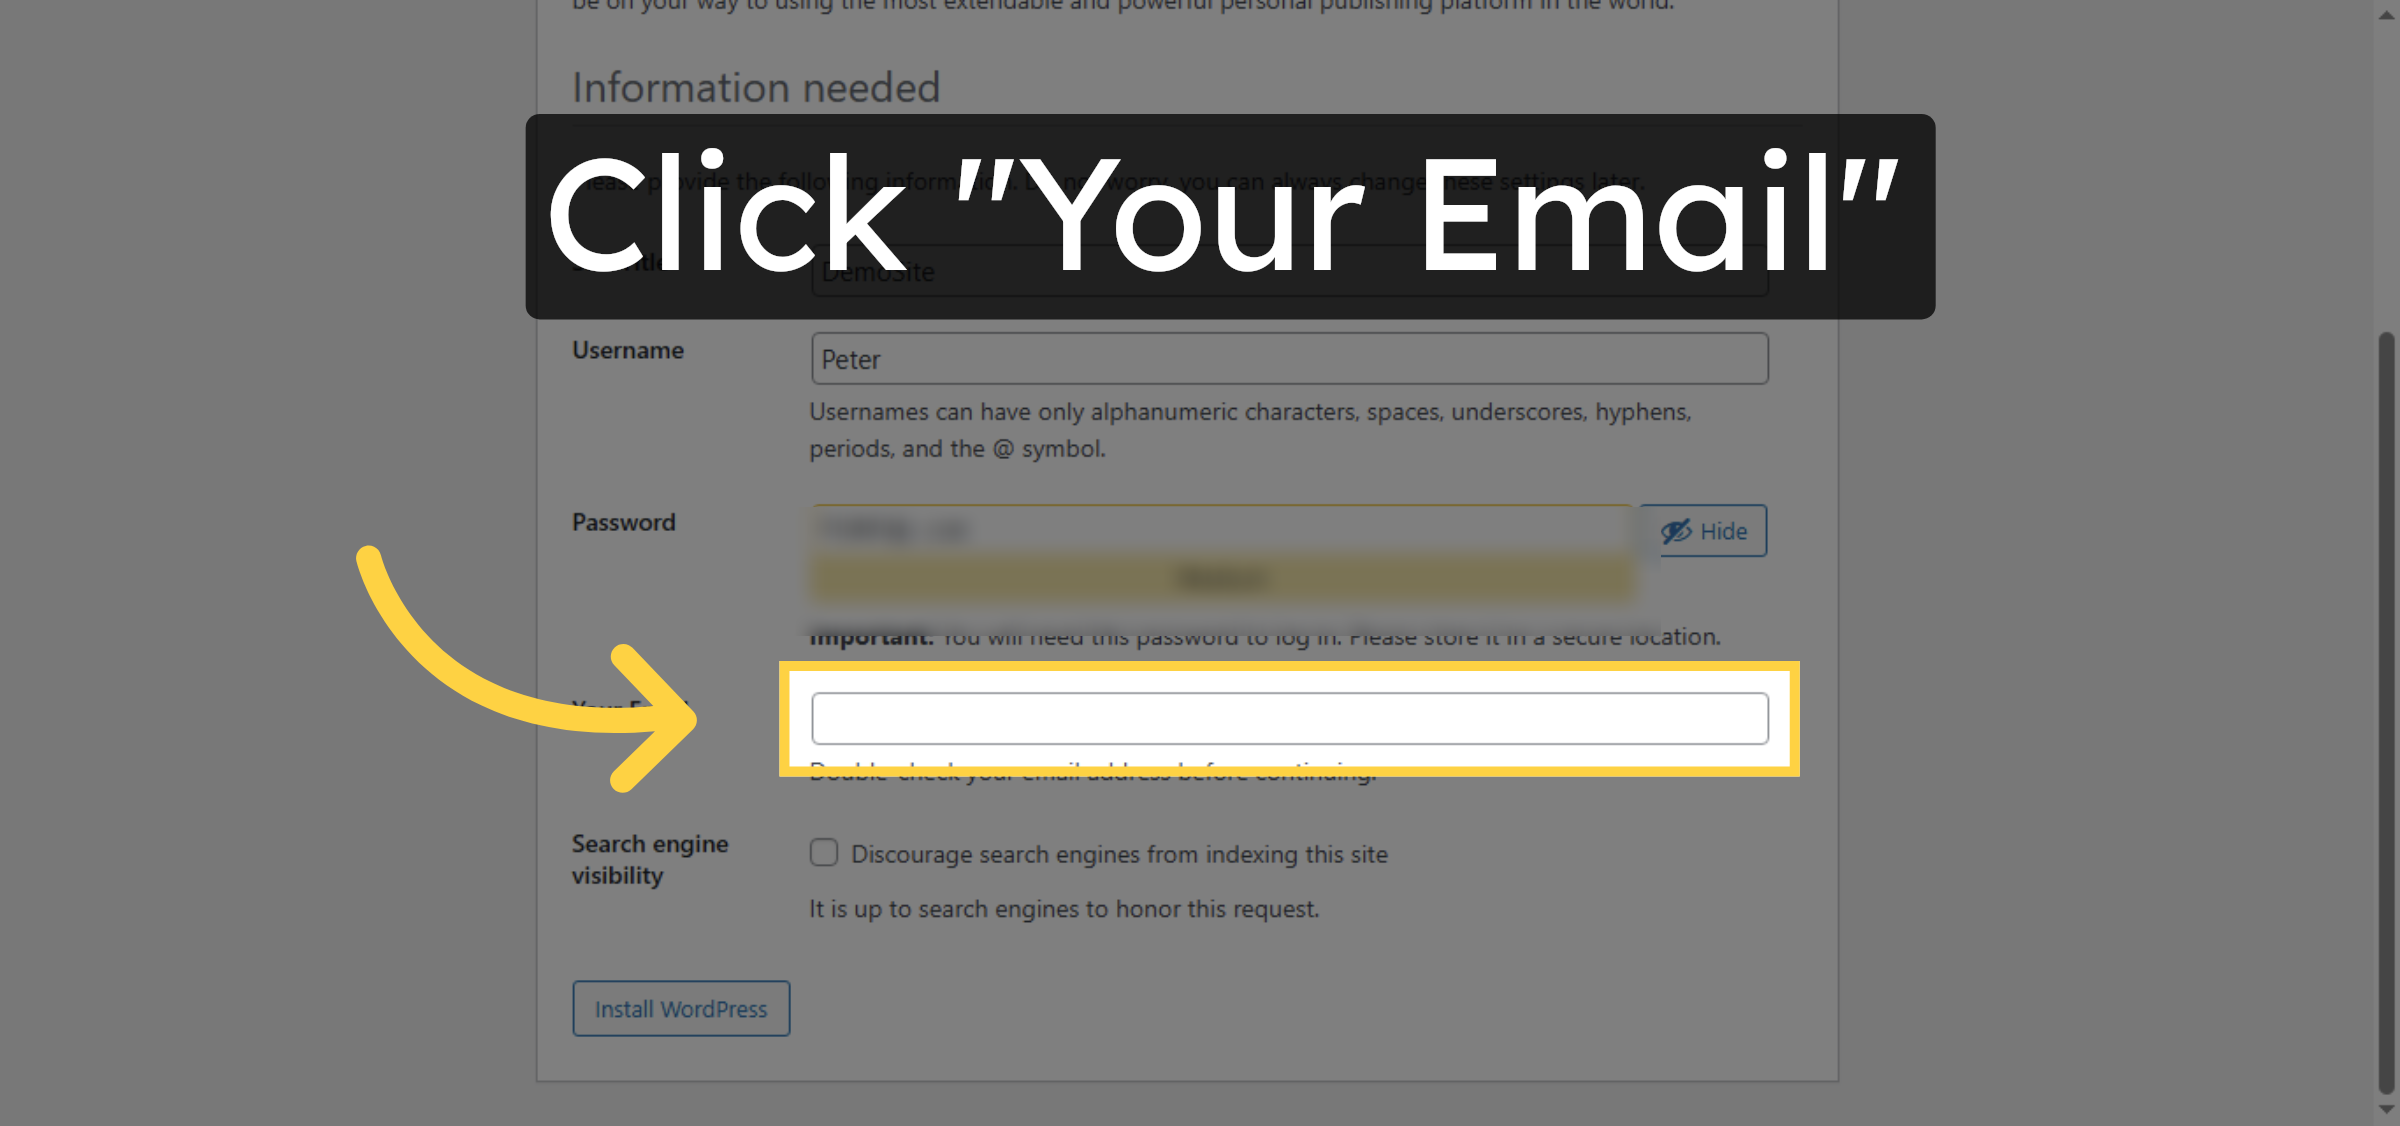
48. Enter Admin Email
Click the Your Email field and enter your email address for site administration.
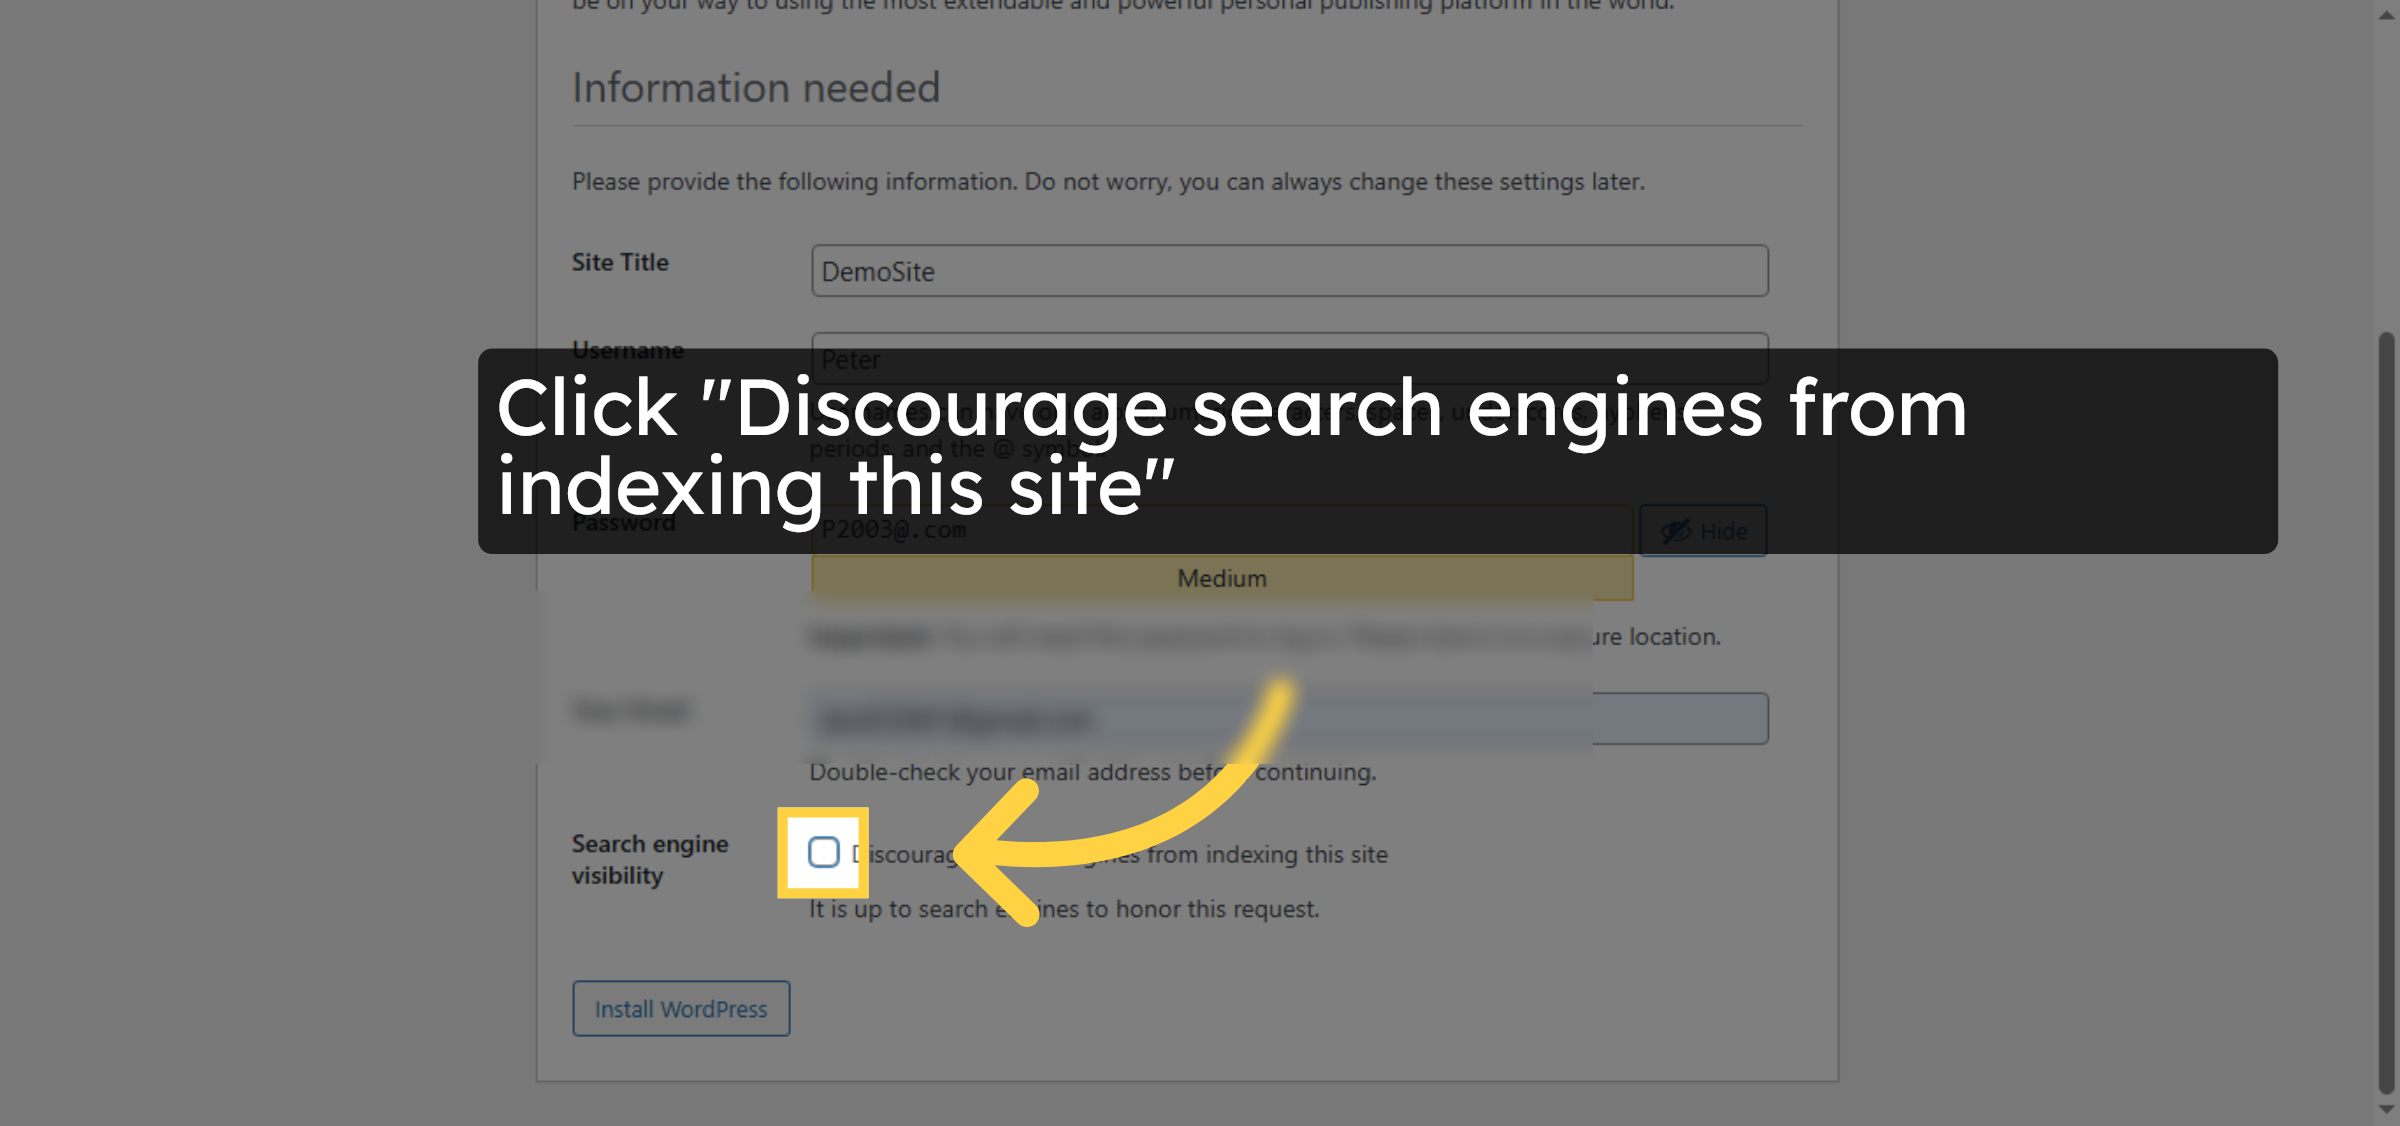
49. Set Search Engine Preference
Click Discourage search engines from indexing this site to control visibility.
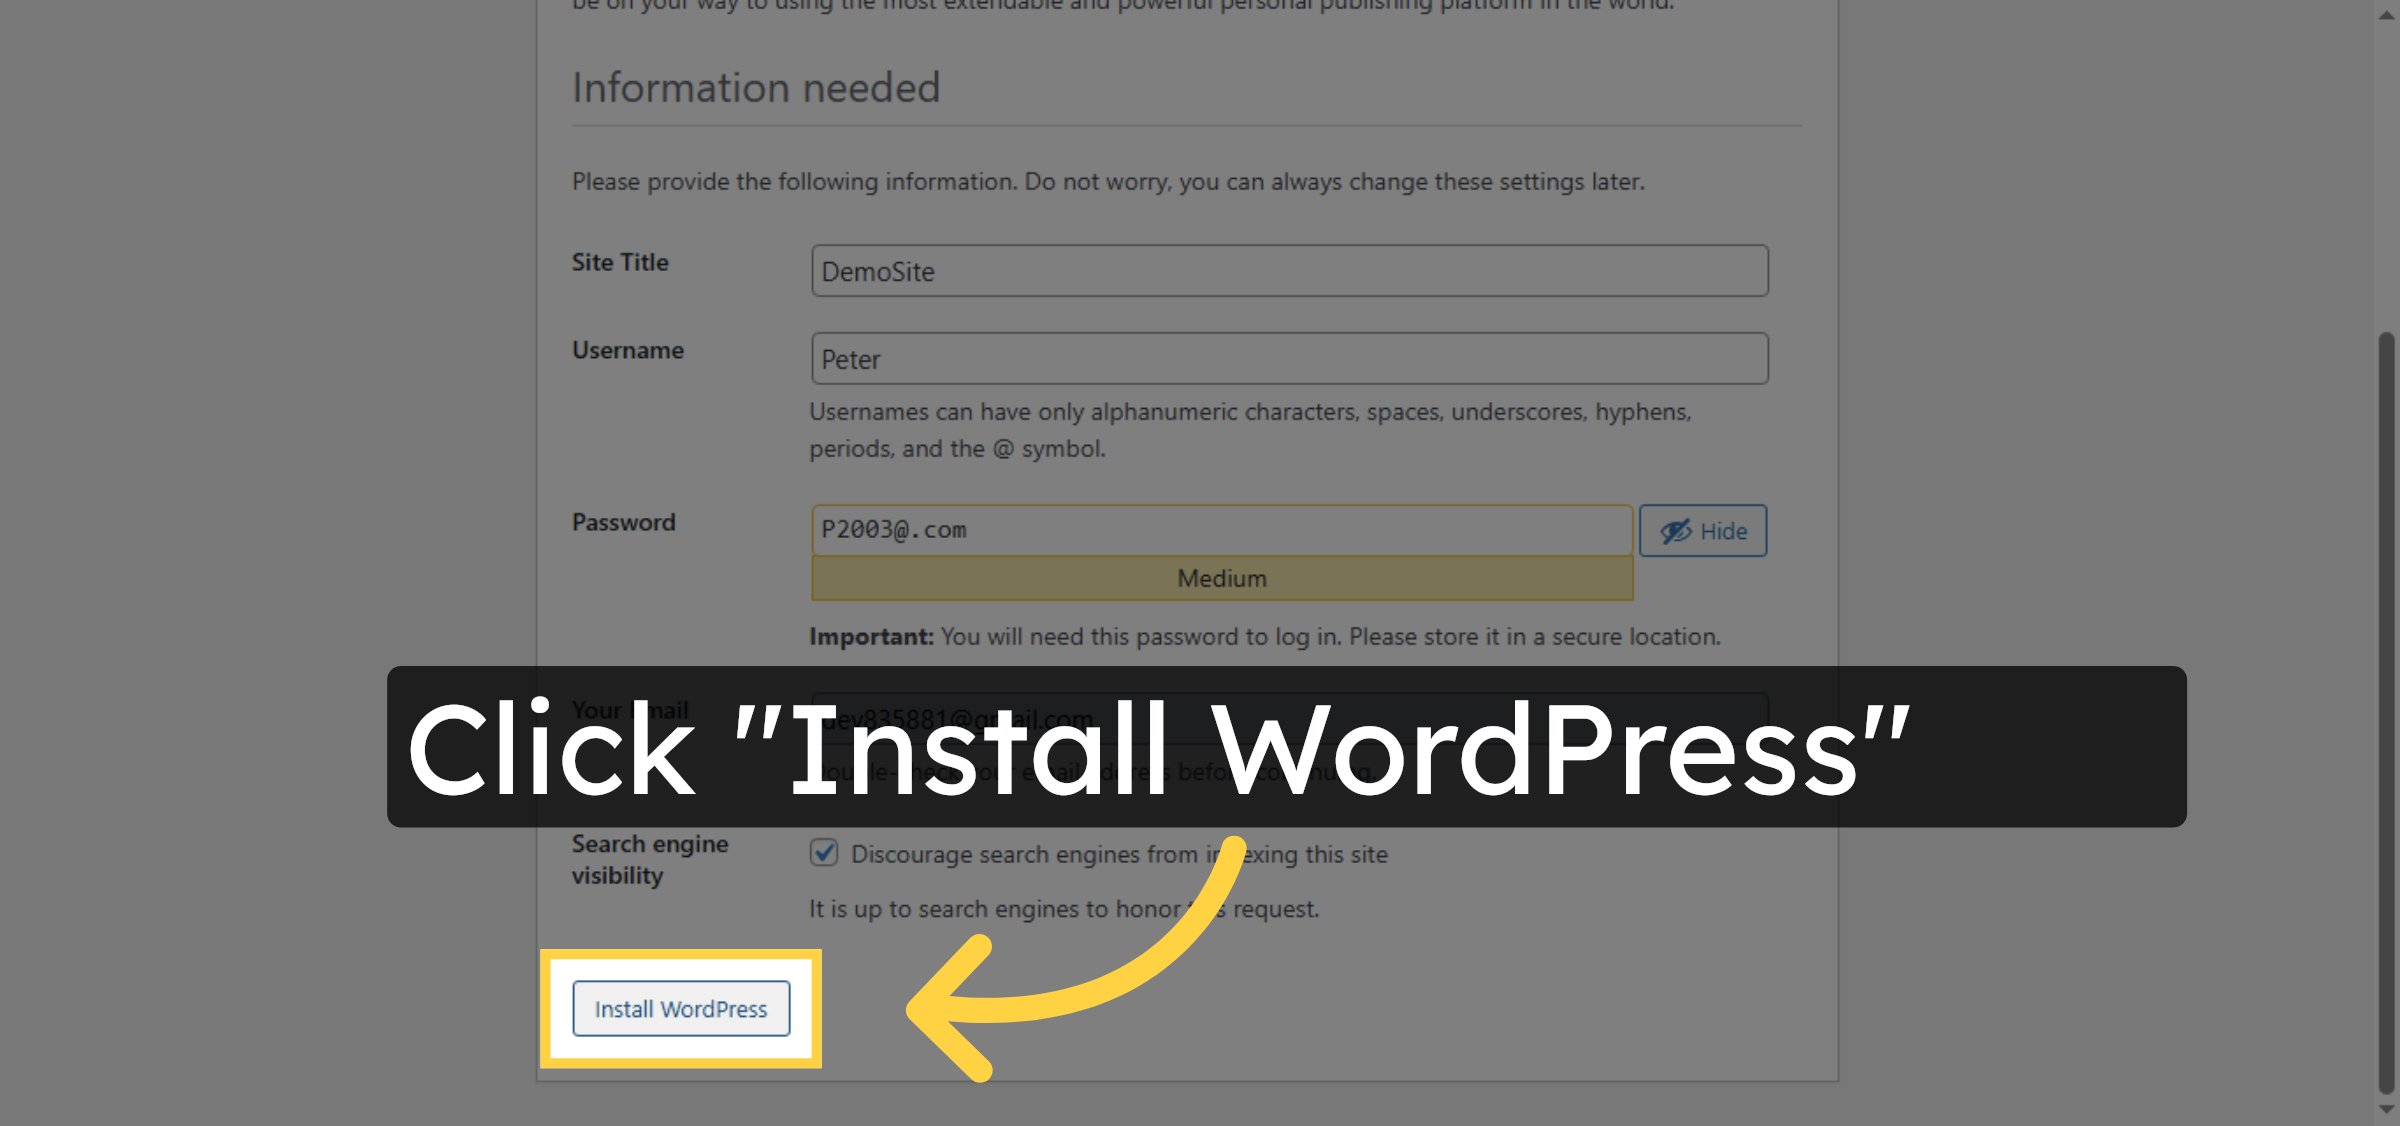
50. Install WordPress
Click Install WordPress to complete the installation process on your subdomain.
51. Access Login Page
Click Log In to go to the WordPress admin login page.

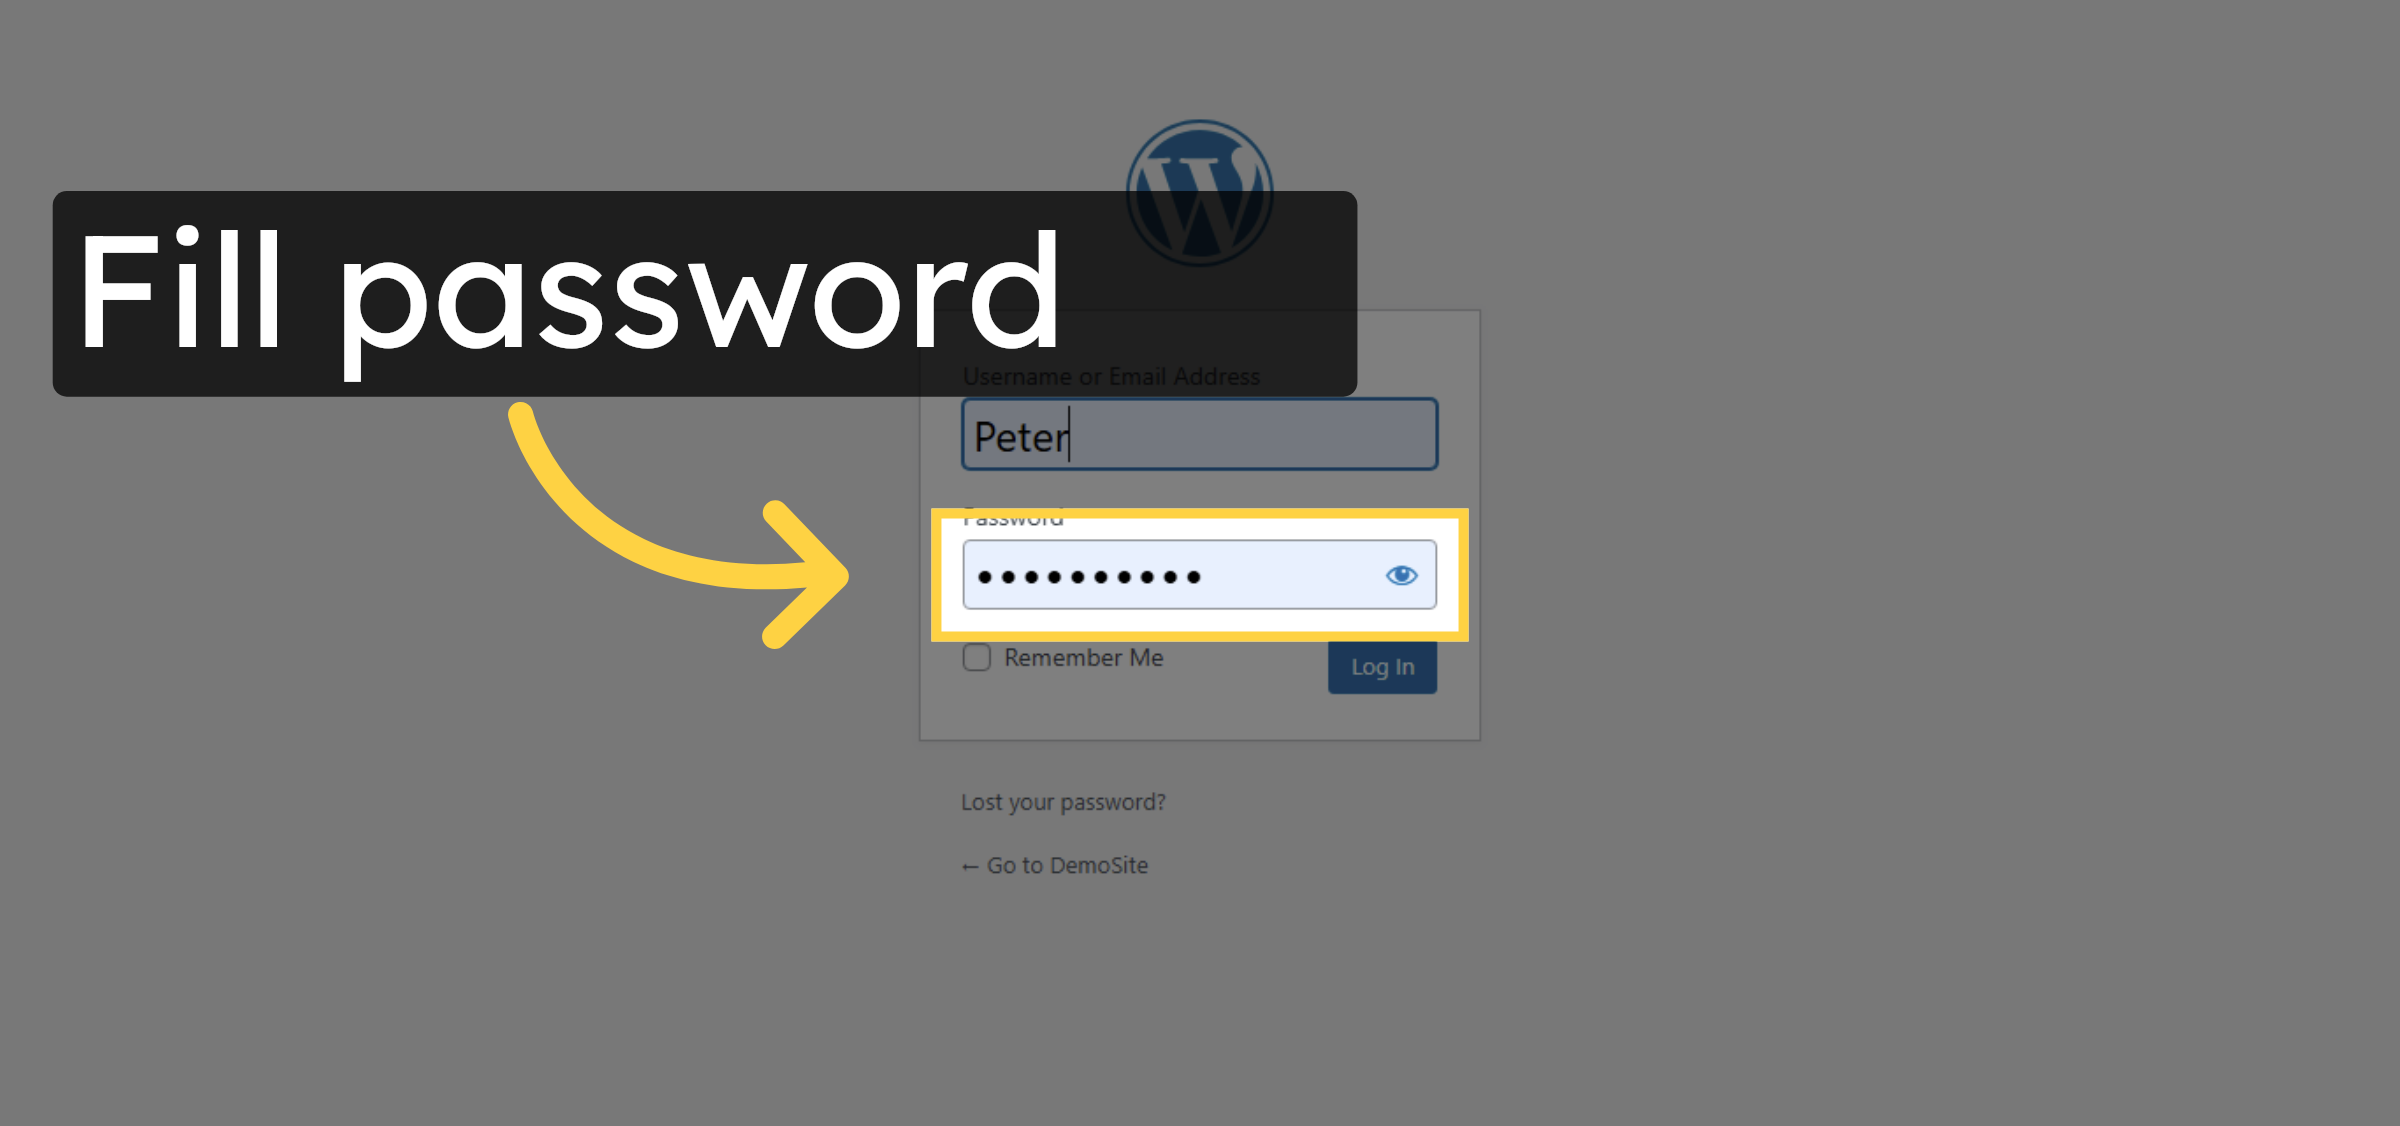
52. Enter Admin Password
Fill your admin password to authenticate and access the WordPress dashboard.
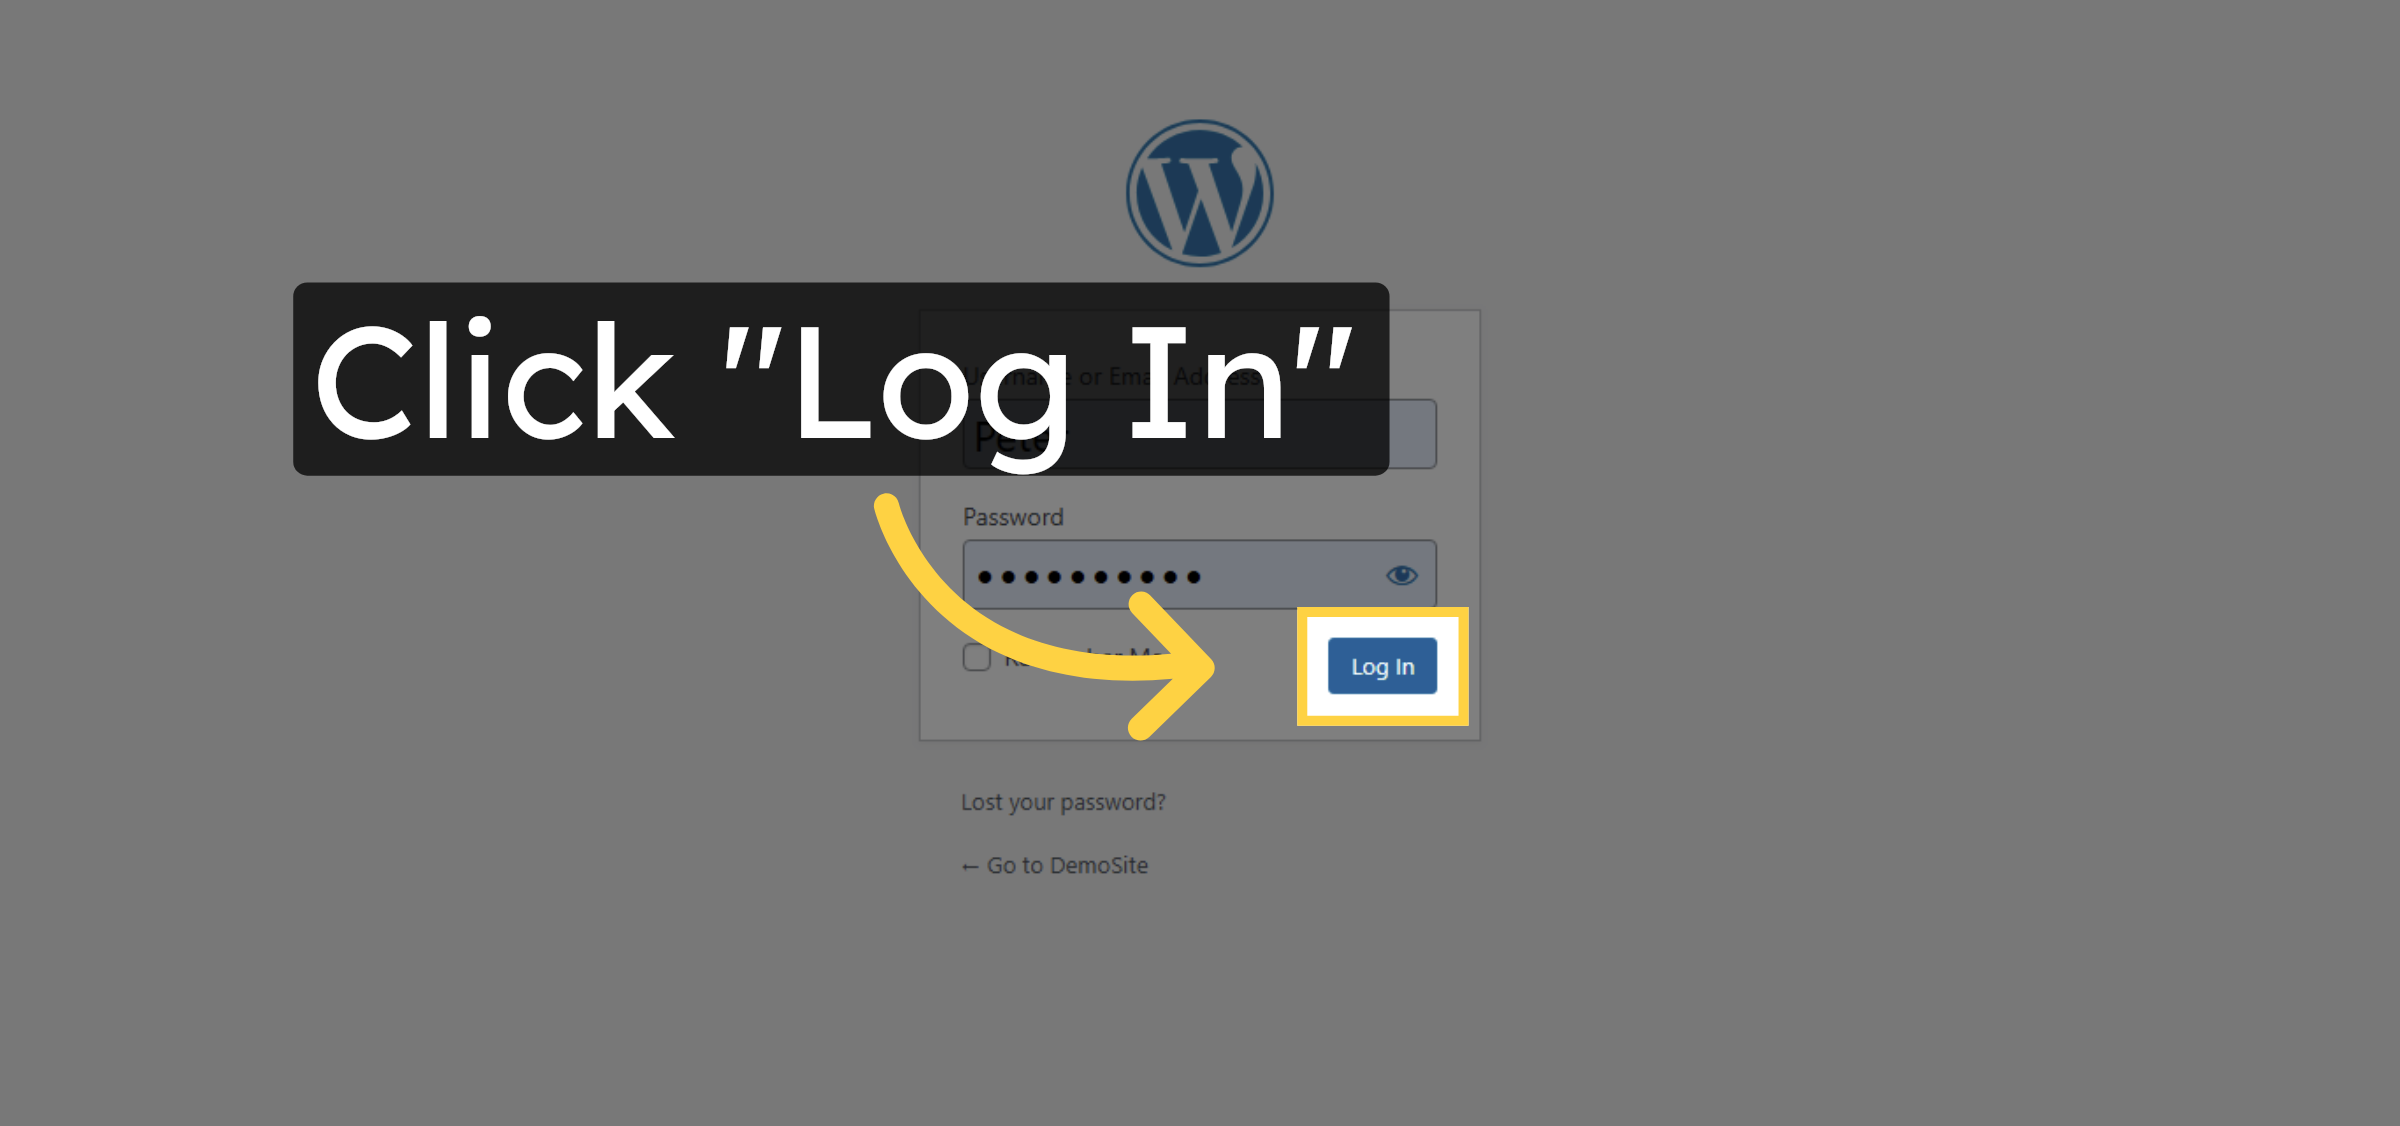
53. Submit Login
Click Log In to enter the WordPress admin area.
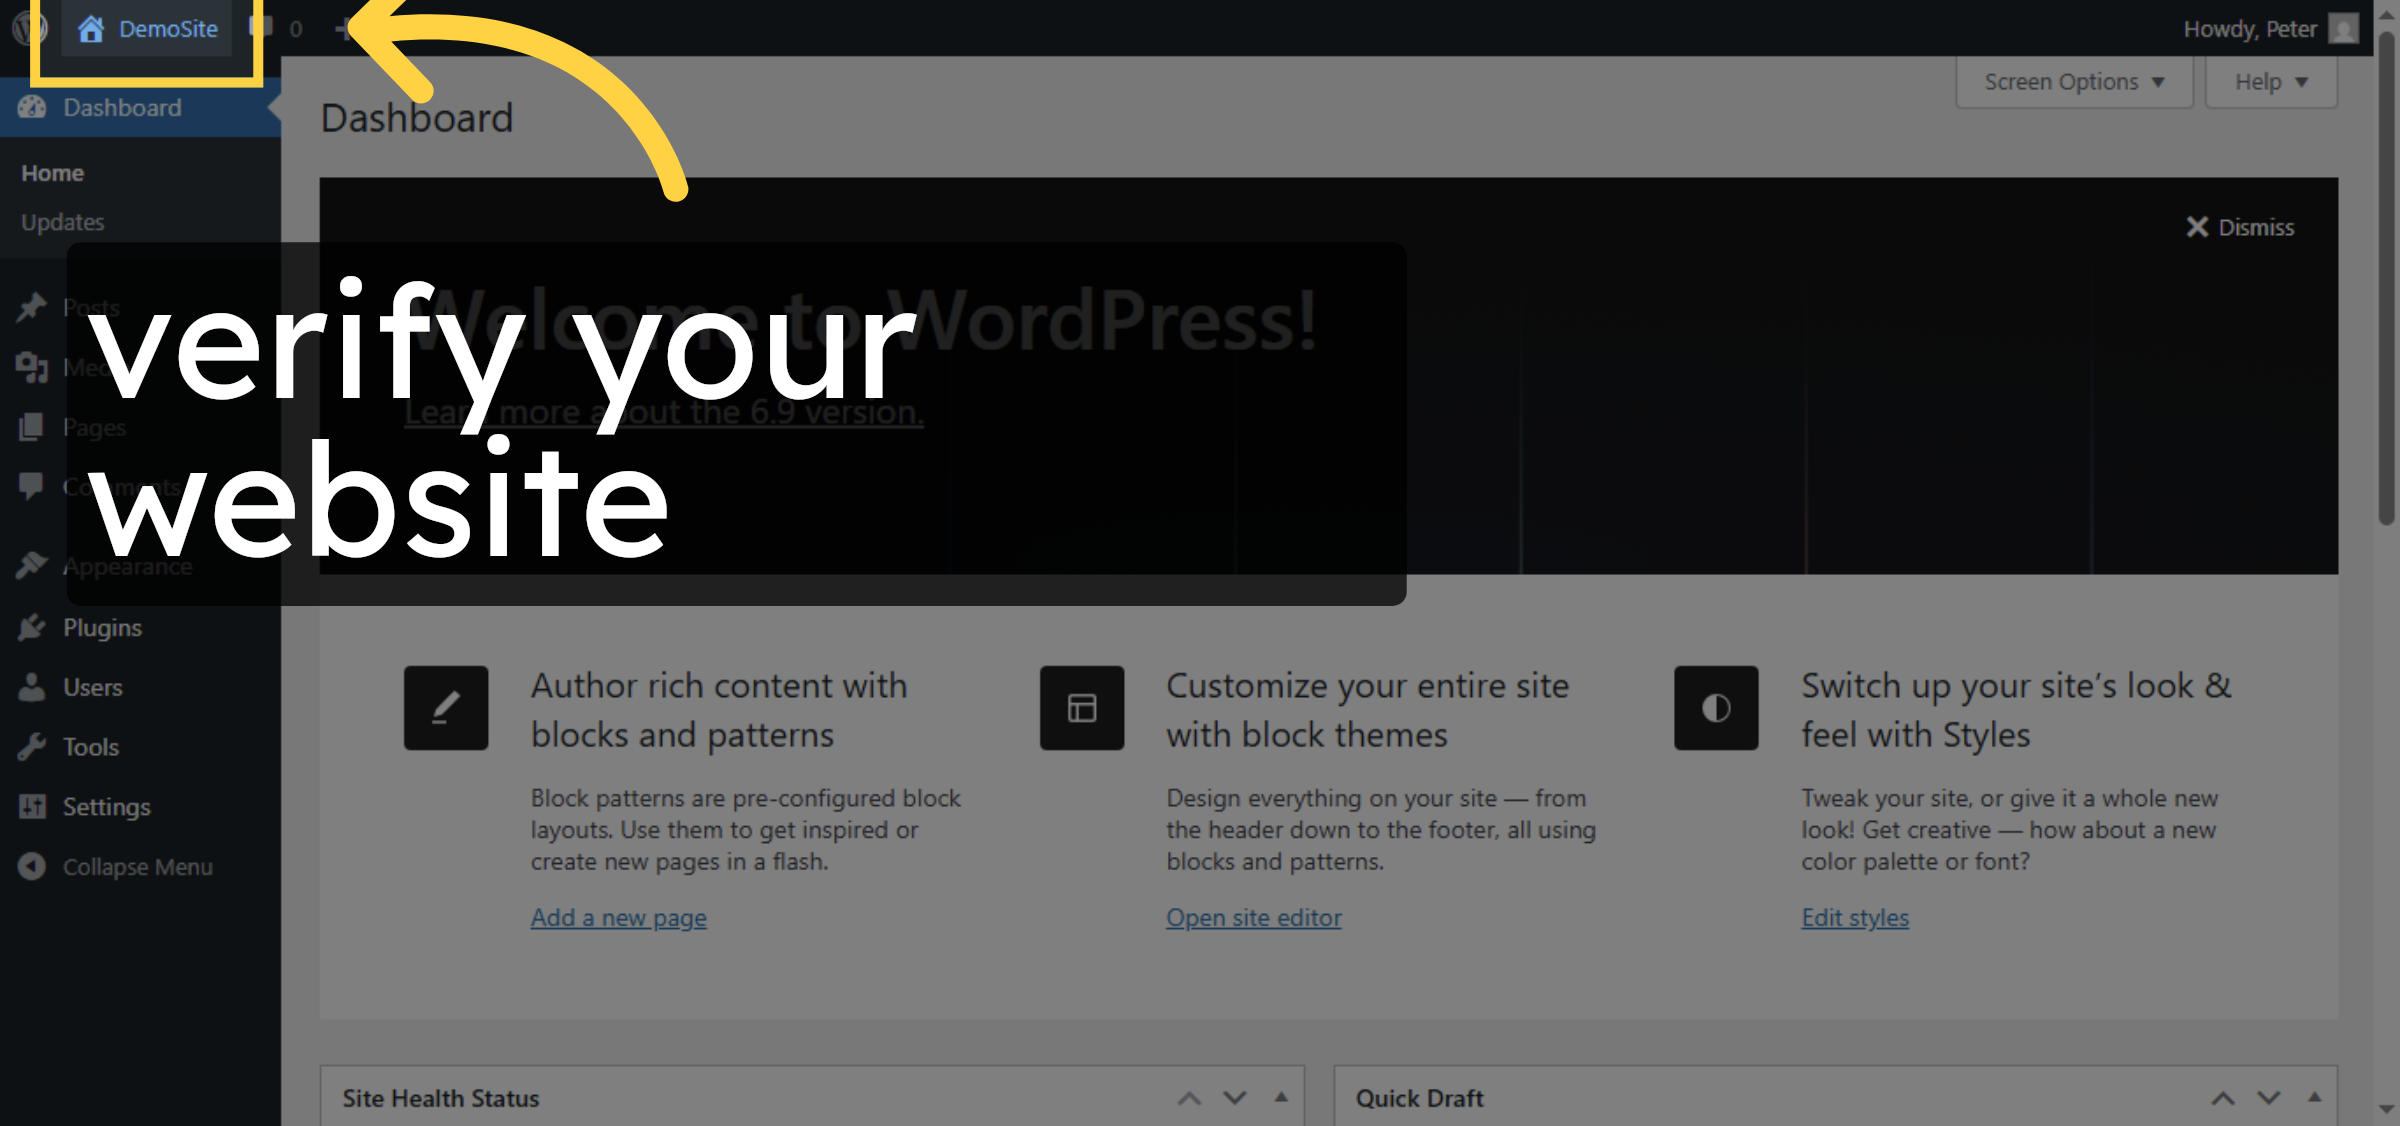
54. Open WordPress Dashboard
verify your website
55. Customization
Customize your site

Conclusion
By following the steps outlined in this guide, you have successfully installed WordPress on a subdomain using Bluehost cPanel. From creating the subdomain and managing files to configuring the database and completing the WordPress setup, each step ensures a stable and secure installation. Your subdomain is now ready for customization, content creation, and further development, providing a flexible solution for expanding your online presence.
-
Visit: https://www.woohelpdesk.com
-
Call Us Toll-Free: +1 888 602 0119 (US & Canada)
-
Get professional support for WordPress subdomain setup, Bluehost configuration, database management, troubleshooting, and WooCommerce solutions